



Standing in front of a mirror with a heap of bobby pins and a hot curling wand can feel incredibly daunting when you only have thirty minutes before a date. We have all been there. You want to look put-together, but you also want your hair to look touchable, soft, and completely effortless. That is where bridesmaid hairstyles come in. Historically, wedding hair has leaned toward stiff, over-sprayed structures built to survive windstorms and dance floors. But when you strip away the rigid layers of extra-firm hairspray, these techniques provide the perfect blueprint for romantic styling.
Learning how to style your own bridesmaid hair for date night gives you that perfect middle ground between high-effort elegance and casual beauty. These styles are designed to hold their shape throughout an evening while maintaining a soft, romantic feel. You do not need a professional stylist or a drawer full of expensive hot tools to pull these off. With a few basic techniques, some reliable pins, and a little patience, you can create gorgeous looks right in your own bathroom.
The secret to transitioning these styles from a formal aisle to a cozy dinner booth lies in the prep work and the finish. Instead of aiming for plaster-like perfection, you want to embrace a bit of natural movement. A stray curl framing your cheek or a slightly loose loop in a braid is not a mistake — it is actually what makes the style feel intimate and personal.
Let us look at twenty-five gorgeous, doable bridesmaid hairstyles that you can easily adapt for your next night out.
Preparing Your Canvas for Styling Success
Before picking up a single bobby pin, you need to set up your hair for success. Clean, slippery hair is actually the enemy of a long-lasting updo. If you have ever tried to pin freshly washed and conditioned hair, you know how quickly the pins slide right out.
For the best results, start with hair that was washed the day before. This gives your natural oils a chance to provide some built-in grip. If your hair is clean or naturally very fine, you can recreate this grip by spraying a dry texturizing spray or dry shampoo through your roots and mid-lengths. This adds the friction your pins need to hold onto.
You will also want to gather a few essential tools:
- Standard bobby pins that match your hair color
- U-shaped hairpins (these are wider and perfect for securing buns without squishing them)
- Small, clear elastic hair ties
- A 1-inch or 1.25-inch curling iron or wand
- A boar-bristle brush for smoothing sections
- A lightweight, flexible-hold hairspray
1. The Romantic Low Textured Chignon
This style sits low at the nape of your neck, offering a classic silhouette that looks intricate but relies on a simple three-step tucking method. It keeps your hair completely off your neck, making it ideal for warmer evenings or dinners where you want to show off a beautiful neckline.
Why the Textured Chignon Works
The magic of this look lies in its structural stability. Because it is anchored close to the base of the skull, it does not pull or sag as the night goes on. By twisting the side sections before securing them, you create natural valleys and ridges that make the hair look thick and voluminous.
Step-by-Step Assembly
- Start by gathering your hair into a low, loose ponytail at the nape of your neck, leaving out two-inch sections of hair on either side of your face.
- Create a small pocket of space just above your ponytail elastic, and loop the ponytail up and down through that pocket to create a simple topsy-tail.
- Roll the remaining length of the ponytail upward toward the elastic, securing the rolled hair inside the pocket with three to four U-shaped hairpins.
- Twist the left face-framing section backward, drape it across the top of your rolled bun, pin it in place, and repeat with the right side.
Pro tip: Pull a few tiny strands of hair free right in front of your ears and use a warm curling iron to give them a gentle, lazy bend.
2. The Half-Up Dutch Crown Braid
Crown braids can seem intimidating, but creating a half-up version simplifies the process significantly because you do not have to worry about tucking away the heavy ends of your hair. This style acts like a natural headband, keeping hair out of your eyes while letting the rest of your length flow freely.
Unlike a standard French braid where you cross strands over each other, a Dutch braid requires you to cross the strands under the middle section. This simple change makes the braid pop up on top of your head, creating a beautiful 3D effect that looks like a woven crown.
Once the braid is pinned, use your thumb and forefinger to gently pinch and pull outward on each loop of the braid. This technique, called pancaking, instantly doubles the visual width of your braid and gives it a relaxed, bohemian vibe that is perfect for a casual evening out.
3. Glossy Hollywood Waves
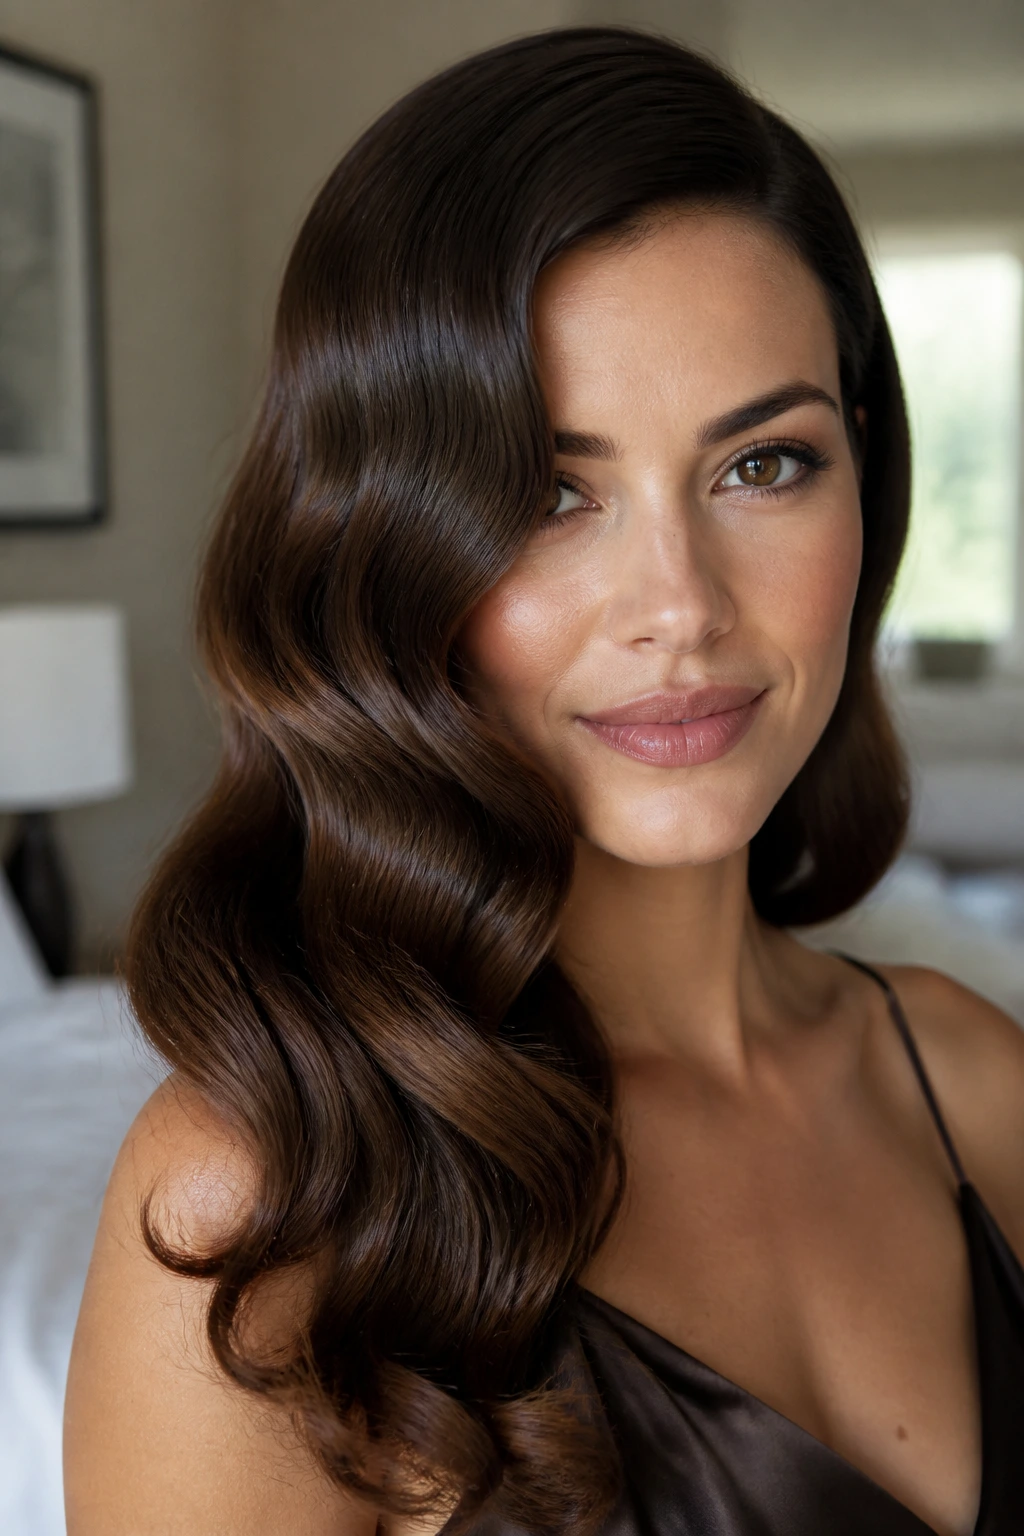
This style is pure vintage romance. It features uniform, sculptural waves that sweep across your face, offering a high-polish look that pairs beautifully with a simple slip dress.
How do you get Hollywood waves without looking like you stepped out of a period drama?
The key is the direction of your curls. To get that cohesive, uniform wave, you must curl every single section of your hair in the exact same direction — either all toward your face or all away from it. If you curl them in alternating directions, the curls will bounce off each other and create a modern, beachy texture instead of a vintage wave.
Step-by-Step Styling Directions
First, apply a generous mist of heat protectant to your dry hair. Use your curling iron vertically, wrapping 1-inch sections of hair around the barrel in the same direction, starting from the front and working your way to the back. Once your entire head is curled and completely cool — do not touch them while they are still warm — mist a boar-bristle brush with a flexible hairspray and gently brush through the curls from root to tip. The individual curls will magically merge into one continuous, glossy wave.
4. The Bubble Ponytail with Velvet Ribbon
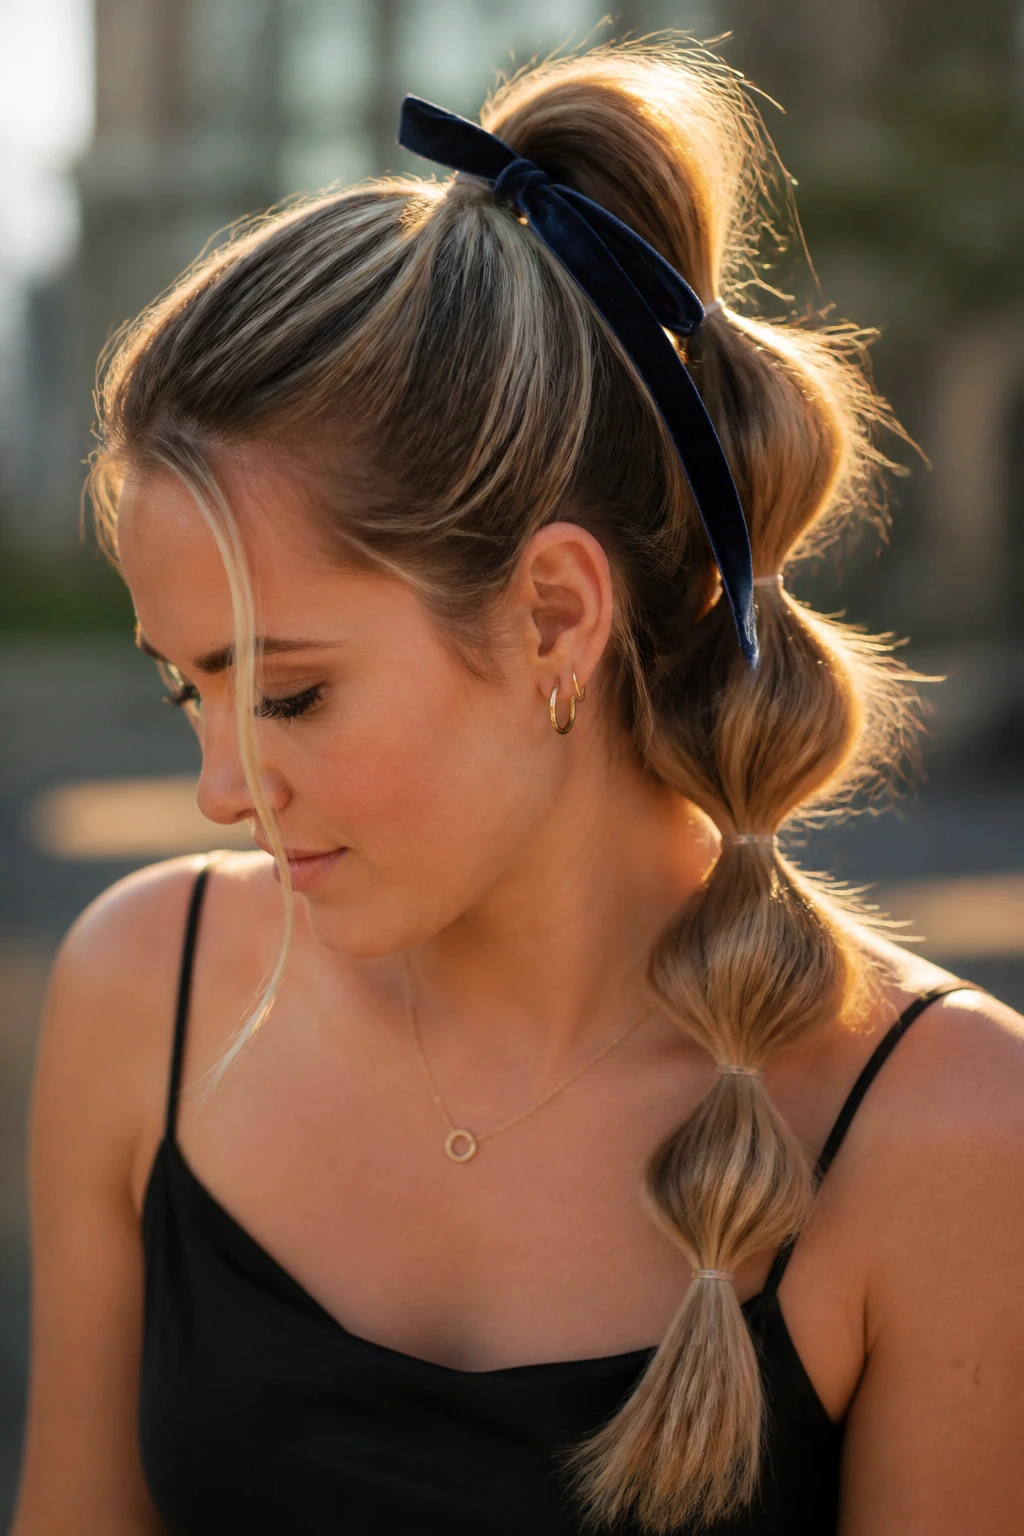
High-energy dates like arcade bars, outdoor walks, or concerts call for a style that is completely secure but still has tons of personality. This playful twist on a classic ponytail is incredibly sturdy and requires zero braiding skills.
The secret here is using clear elastics to section off the hair, then pulling the hair between those elastics outward to create rounded “bubbles.”
- Gather your hair into a high, smooth ponytail and secure it with a sturdy elastic.
- Tie another clear elastic about three inches down the length of the ponytail.
- Gently pull the hair between the two elastics outward to create a rounded bubble shape.
- Repeat this process down the length of your ponytail, leaving about two inches of hair free at the very bottom.
- Tie a thin, dark velvet ribbon over the top elastic to cover the structural hair tie.
This look works best on medium to thick hair, but if your hair is fine, you can pancake the bubbles extra wide to create the illusion of thick, full hair.
5. The Deconstructed French Twist
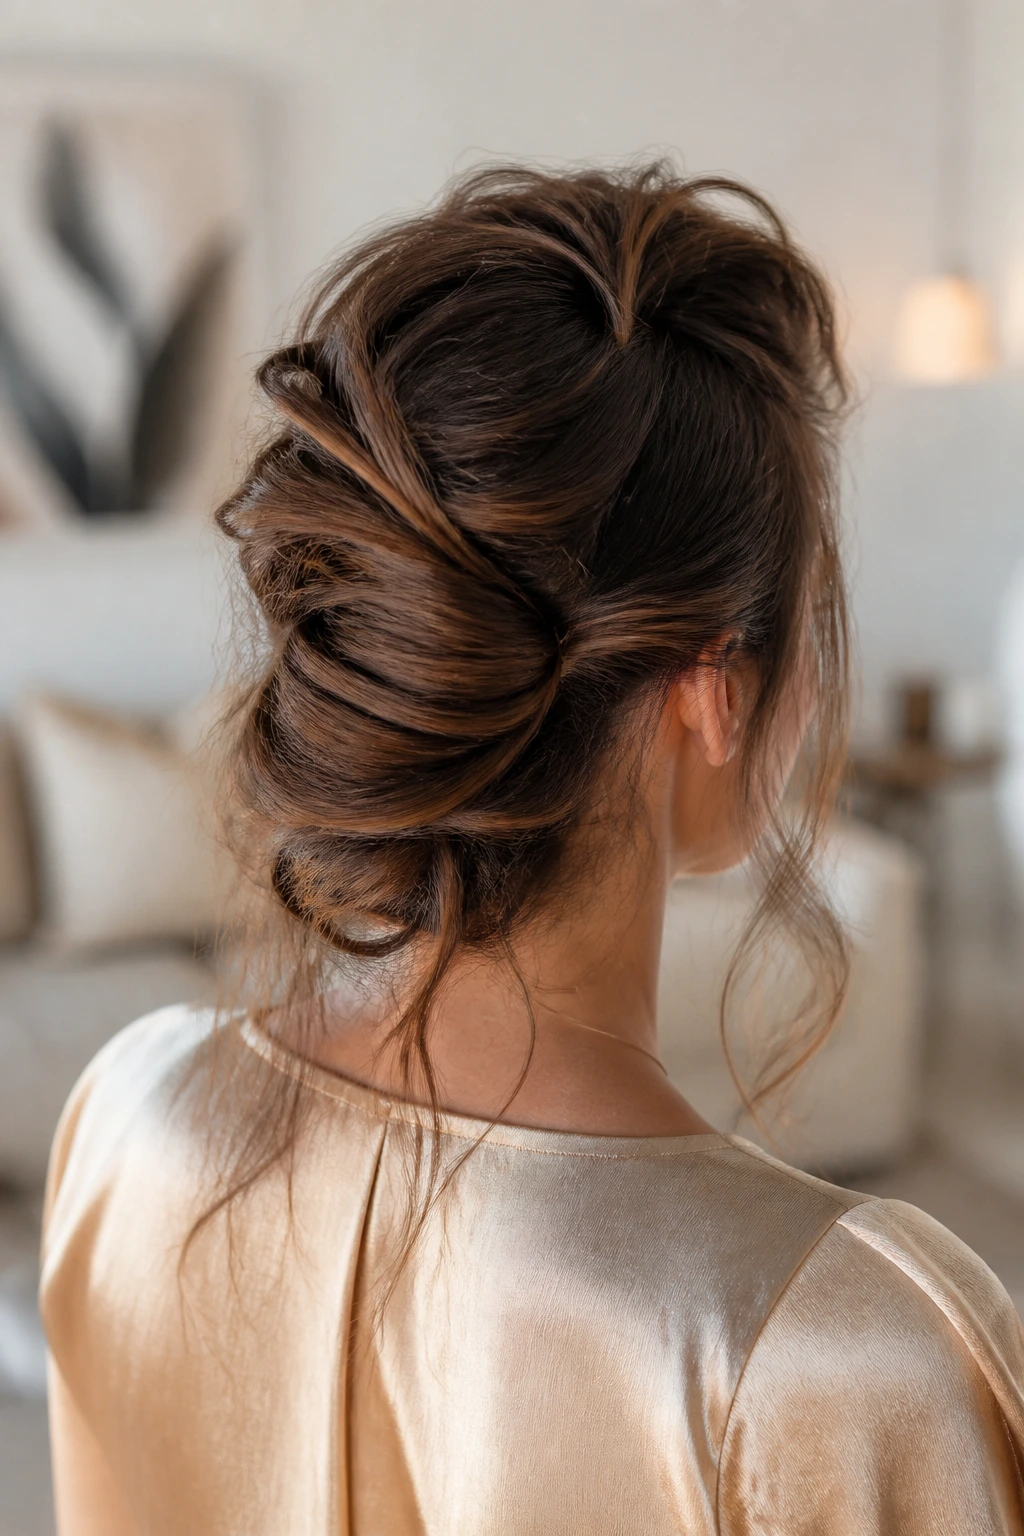
The French twist of the past was often shellacked into a perfect, seam-free cone. This updated version embraces flyaways, loose ends, and a slightly messy texture that feels incredibly modern and effortless.
To build this look, start by misting dry shampoo through your roots to add volume. Gather your hair behind your head as if you were making a low ponytail, but instead of securing it, twist the length of your hair tightly upward against the back of your head. Secure the twist along its seam using four or five large bobby pins, letting the very ends of your hair spill out over the top of the twist in a messy cascade.
This style is wonderful because it looks incredibly elegant from the back but remains soft and casual from the front. If your hair is naturally wavy, do not straighten it beforehand; the natural texture will help lock the twist in place and keep the pins from sliding out.
6. The Sleek High Pony with Wrapped Base
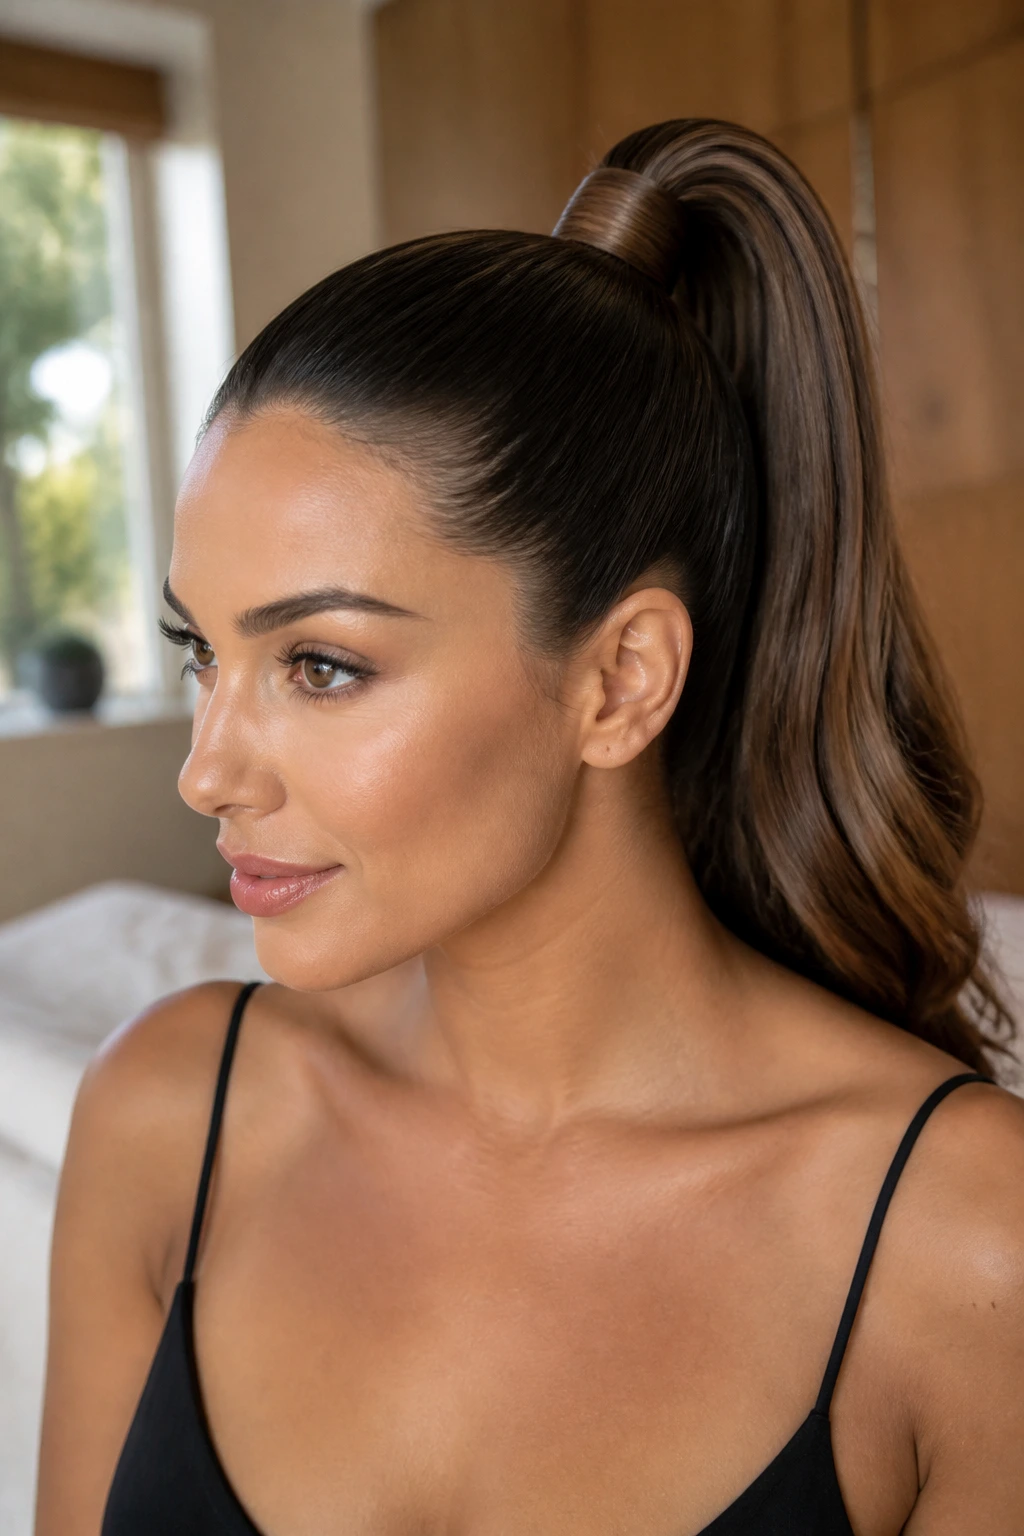
An athletic, high ponytail is great, but wrapping the base with hair changes the vibe completely. It hides the elastic and adds a clean finish that looks incredibly chic and intentional.
Unlike a messy, lived-in ponytail, this style relies on a smooth, clean foundation. Use a fine-tooth comb and a small amount of styling cream or hair wax to slick back your hair, gathering it just above the crown of your head. Secure it tightly with a strong elastic band that can support the weight of your hair without slipping.
This look is best for straight or smoothed hair, as it highlights the clean lines of your jaw and neck. Once the ponytail is secure, take a thin half-inch section of hair from the underside of the pony, spray it with hairspray, and wrap it tightly around the elastic until the band is completely hidden, securing the end underneath with a small bobby pin.
7. The Messy Boho Side Fishtail Braid
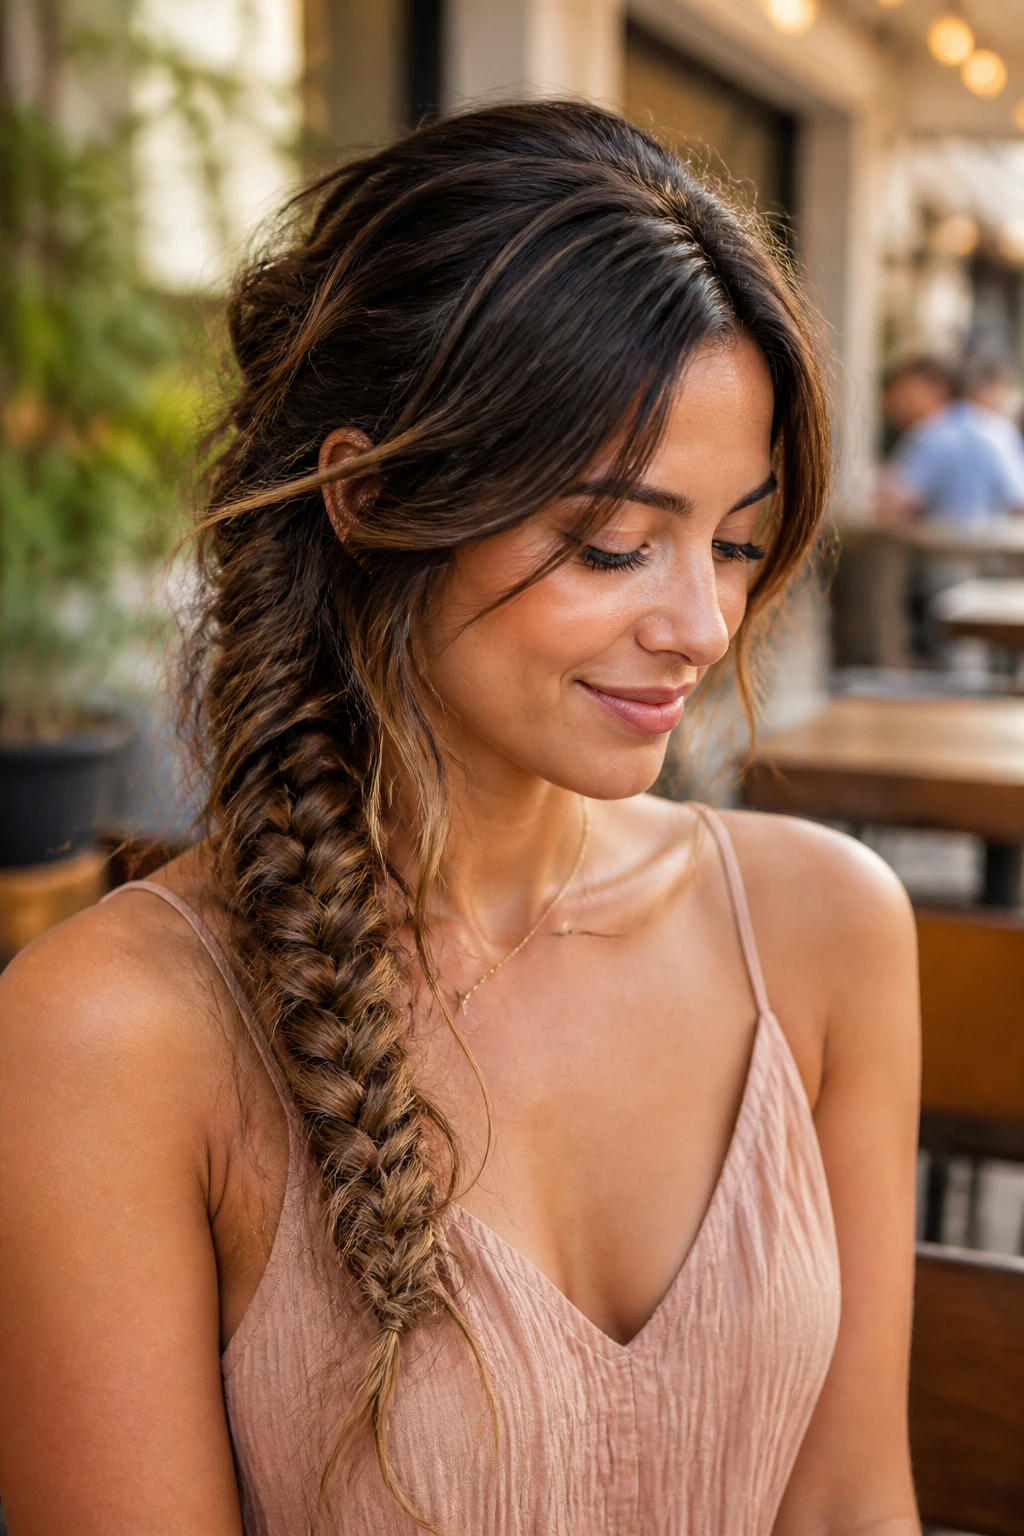
The fishtail braid has an intricate, woven look that seems like it takes hours, but it actually only uses two strands of hair instead of the classic three.
Mastering the Two-Strand Weave
The trick to a beautiful fishtail is taking very small pieces of hair from the outside of each strand and crossing them over to the inside of the opposite strand. The smaller your sections, the more detailed and beautiful the braid will look.
Styling Steps
- Pull all of your hair over one shoulder and split it into two equal sections.
- Take a tiny sliver of hair from the outer edge of the left section and cross it over to join the right section.
- Take a tiny sliver of hair from the outer edge of the right section and cross it over to join the left section.
- Repeat this process all the way down to the ends and secure with a clear elastic.
Pro tip: Once the braid is secured, use your fingers to gently pull the braid apart starting from the bottom and working your way up to create a loose, lived-in texture.
8. The Triple Twist Half-Updo
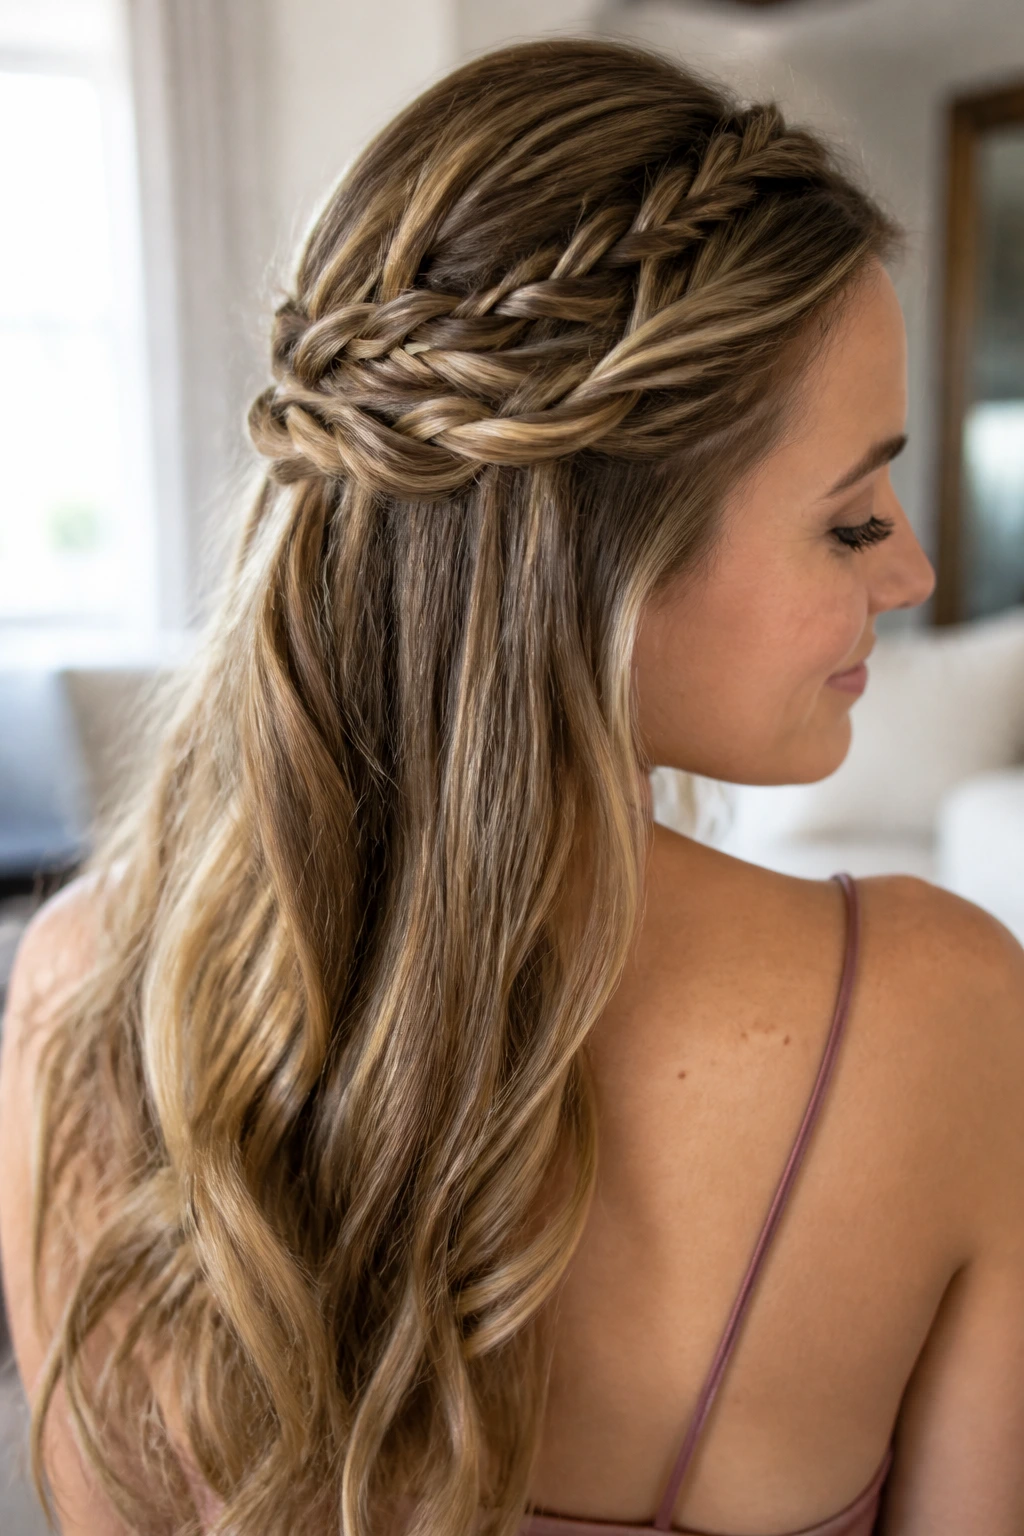
This style is perfect for those who want their hair down but need it kept back from their face. It uses three twisted sections on each side of the head, which are joined together in the back to create a beautiful, layered crown effect.
You do not need perfect parting lines for this style; in fact, slightly irregular sections look more organic and romantic. Simply section off three half-inch pieces of hair on the left side of your head, twist each one tightly backward, and pin them temporarily in the center of your head. Repeat this on the right side, then tie the matching twists together in pairs using small, clear elastics.
The result is a gorgeous, woven pattern that mimics the look of an intricate braid but requires nothing more than simple twisting. It is a fantastic option for fine hair, as the twists add physical bulk and structure to the sides of your head.
9. The Curly Pineappled Updo
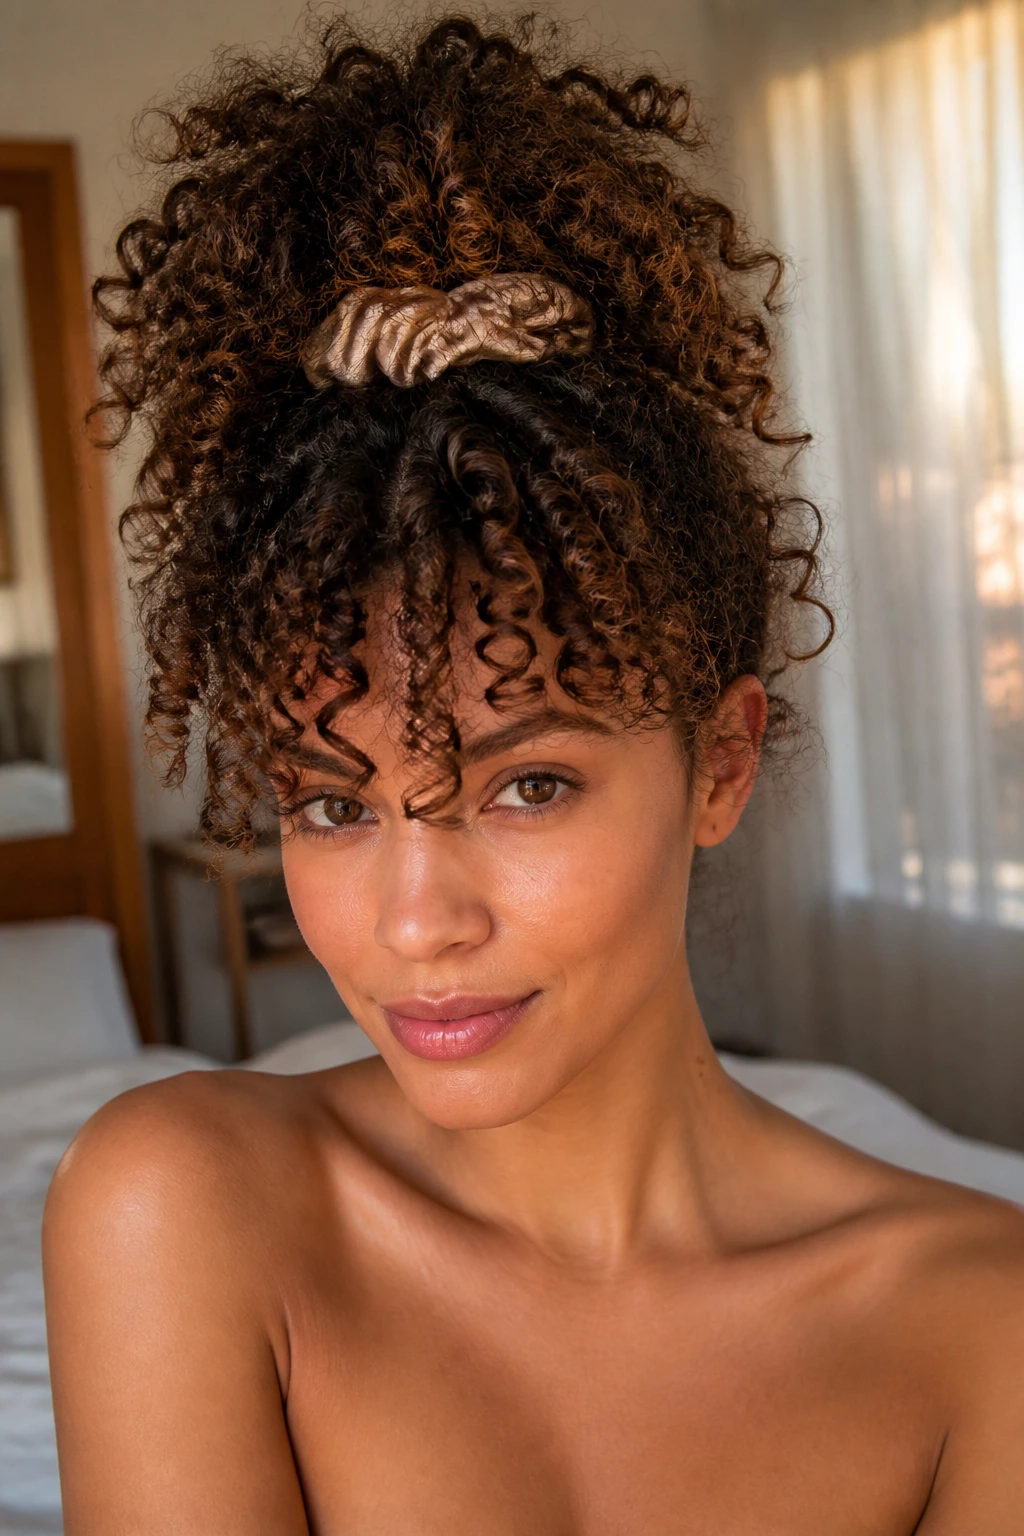
For those with natural curls or coils, the “pineapple” is a classic way to protect curls at night — but with a few simple tweaks, it becomes an incredibly gorgeous, high-volume updo for a date night.
How do you preserve your natural curl pattern while keeping your hair up?
The key is to avoid stretching or crushing the curls with tight hair ties. Instead of a traditional elastic, use a soft silk scrunchie or a long, adjustable hair band that can hold the hair in place without compressing the root volume.
How to Style It
Flip your head upside down and gently gather all of your curls at the very top of your head, right near your forehead. Wrap your silk scrunchie around the base just once — do not double-loop it, as this will crush the curls. Let your curls cascade forward over your forehead like a natural fringe, and use a few U-shaped pins to secure any loose curls at the back of your head.
10. The Smooth Low Braid-Wrapped Bun
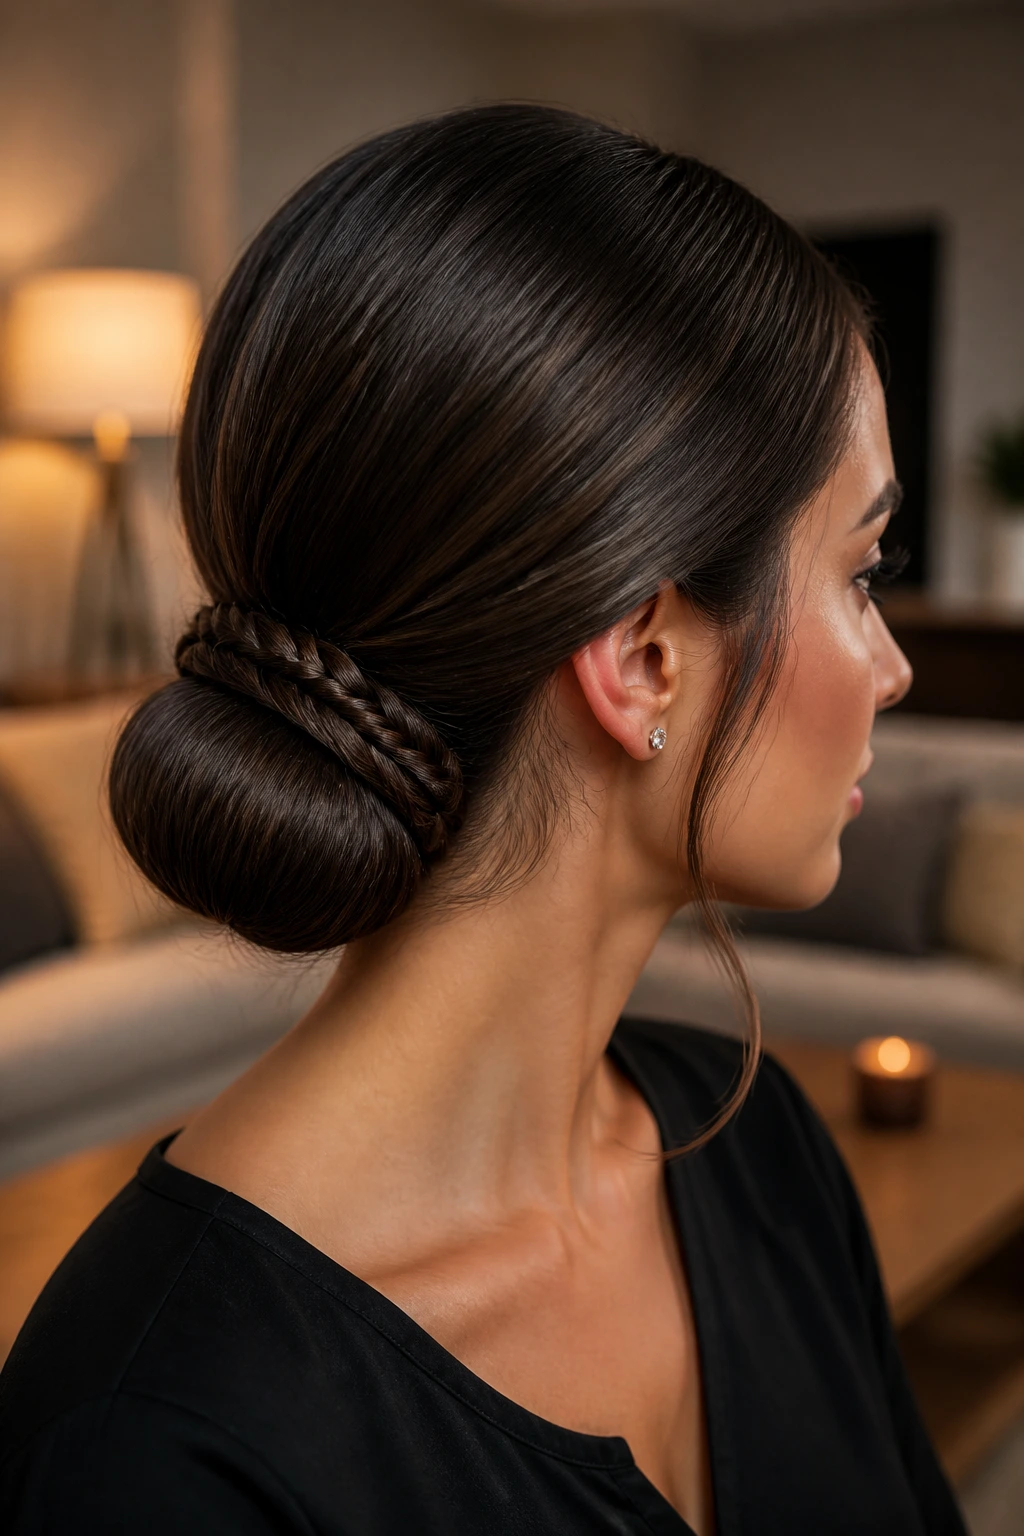
If you love the security of a bun but want something a bit more interesting than a basic knot, wrapping the base of your bun with a simple braid is an incredibly easy way to elevate your look.
This style works beautifully on medium to long hair.
- Start by dividing your hair into two sections: a large section that makes up about eighty percent of your hair, and a small section at the nape of your neck.
- Secure the large section into a low, smooth bun using your favorite bun maker or by twisting it into a classic coil.
- Braid the remaining small section of hair into a simple three-strand braid and secure the end with a clear elastic.
- Wrap the braid around the base of your bun, tucking the end of the braid underneath the bun and pinning it securely in place.
The braid acts like a decorative frame for your bun, hiding any stray bobby pins and giving the style a clean, finished look.
11. The Vintage Faux Bob
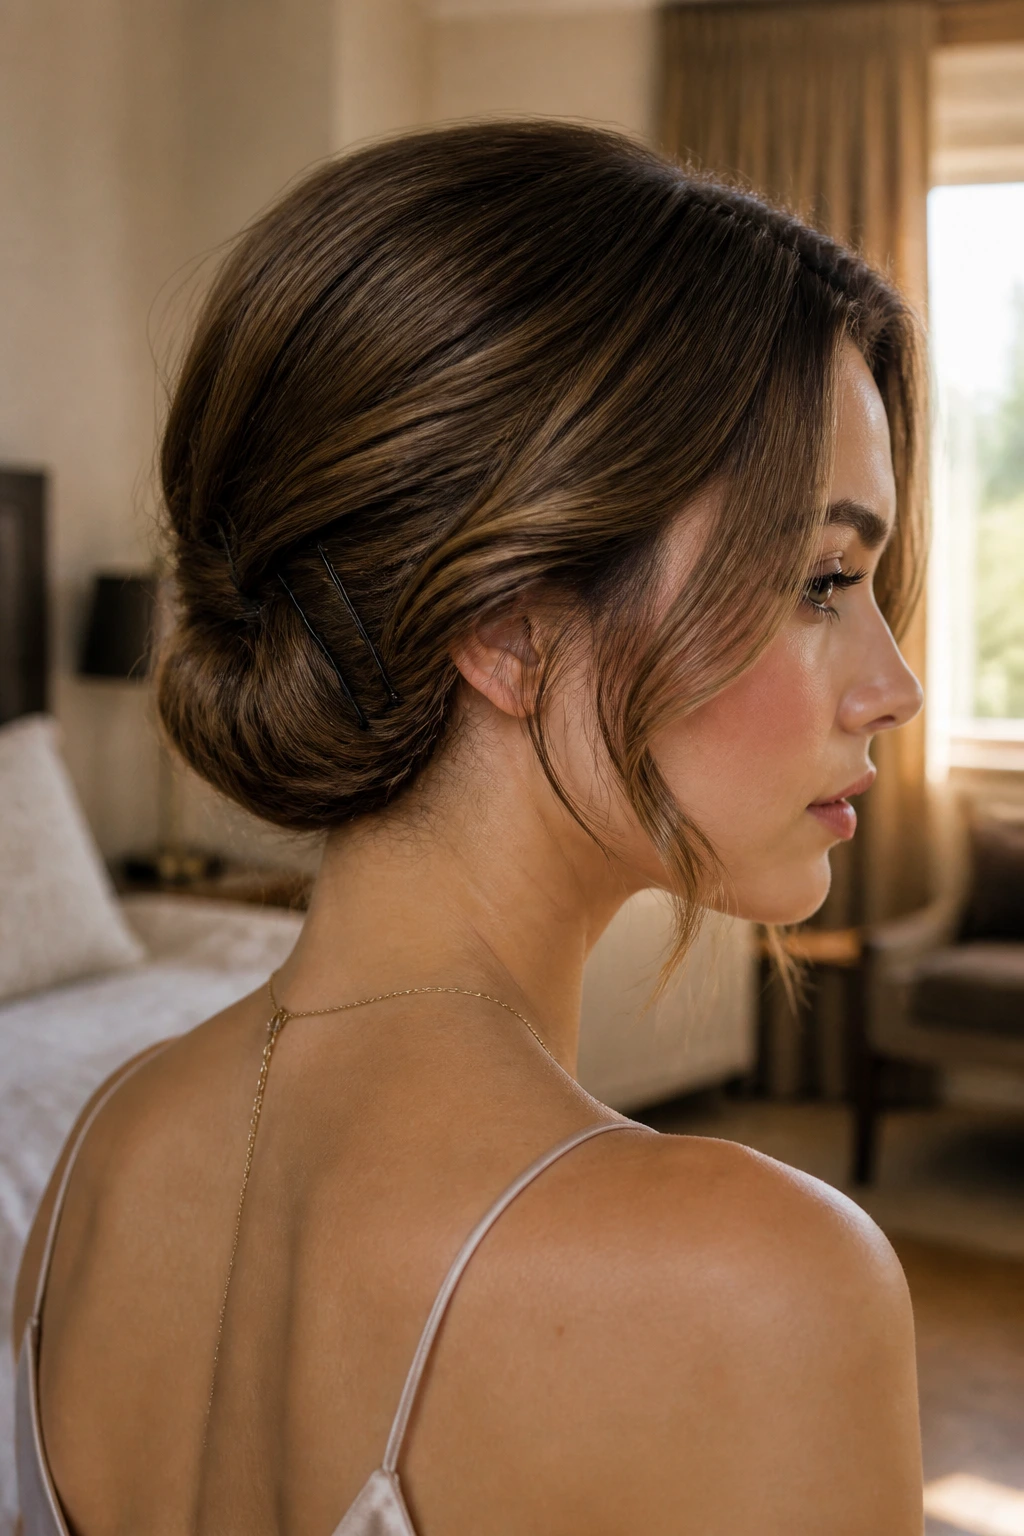
If you have ever wondered what you would look like with short hair but are not ready to commit to a haircut, this vintage-inspired style is the perfect solution. It tucks long hair up and under itself to create the illusion of a chic, chin-length bob.
To build this look, start by curling your hair with a 1-inch barrel to add bounce and volume. Next, gather your hair into a very loose, low ponytail, sliding the hair tie down until it sits about two inches from the ends of your hair.
Now, roll the ponytail upward and inward toward the nape of your neck, tucking the rolled hair underneath itself until the hair tie is resting against your scalp. Secure the roll tightly to your head using large bobby pins placed vertically along the base of your neck. Gently pull a few pieces of hair forward to soften the look around your ears.
This style has an incredible retro charm that looks wonderful with a statement earring. Because the hair is rolled up, it creates a beautiful, rounded shape at the back of your head that looks incredibly thick and full, even if your hair is naturally on the thinner side.
12. The Double Rope Twist Half-Up
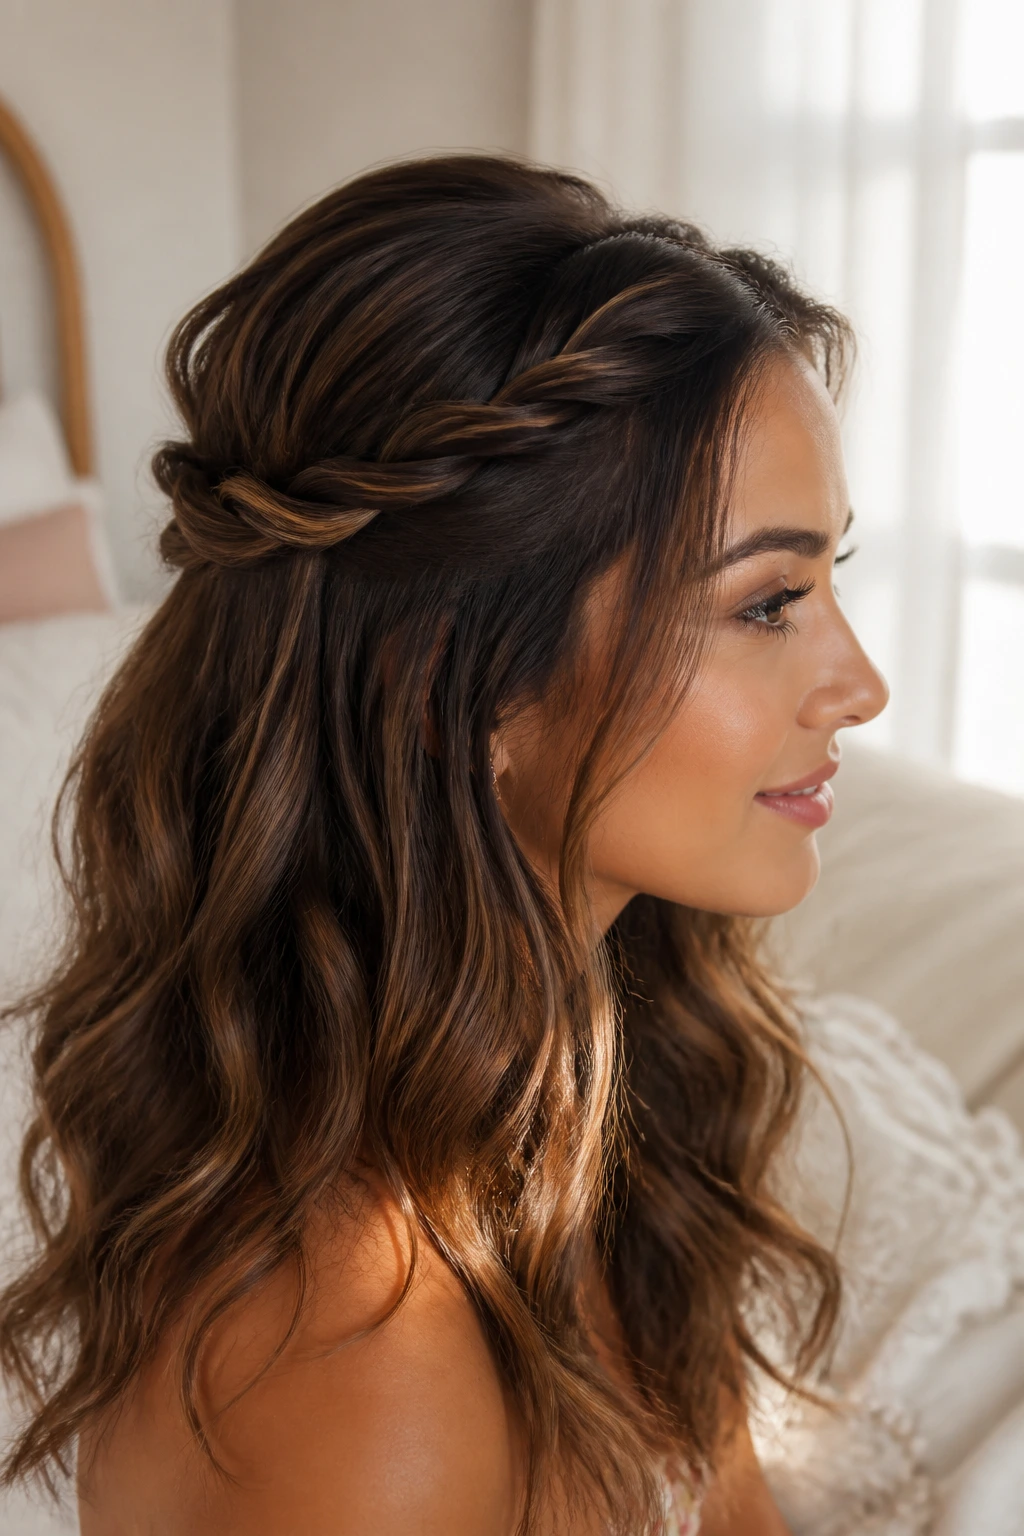
Rope twists are a fantastic alternative to traditional braids. They are incredibly fast to do, look highly polished, and have a unique spiraled texture that catches the light beautifully.
Unlike a three-strand braid, a rope twist only uses two strands of hair.
- Take two equal sections of hair from the temple of your head.
- Twist each individual strand to the right.
- Cross the right strand over the left strand to the left.
- Repeat this process down the length of the hair, making sure to twist each strand individually to the right before crossing them to the left.
The secret to a rope twist that does not immediately unravel is twisting the individual strands in one direction, but crossing them over each other in the opposite direction. This opposing tension locks the twist in place, ensuring your style stays perfect from your first drink to the end of the night.
13. The Airy Side-Swept Chignon
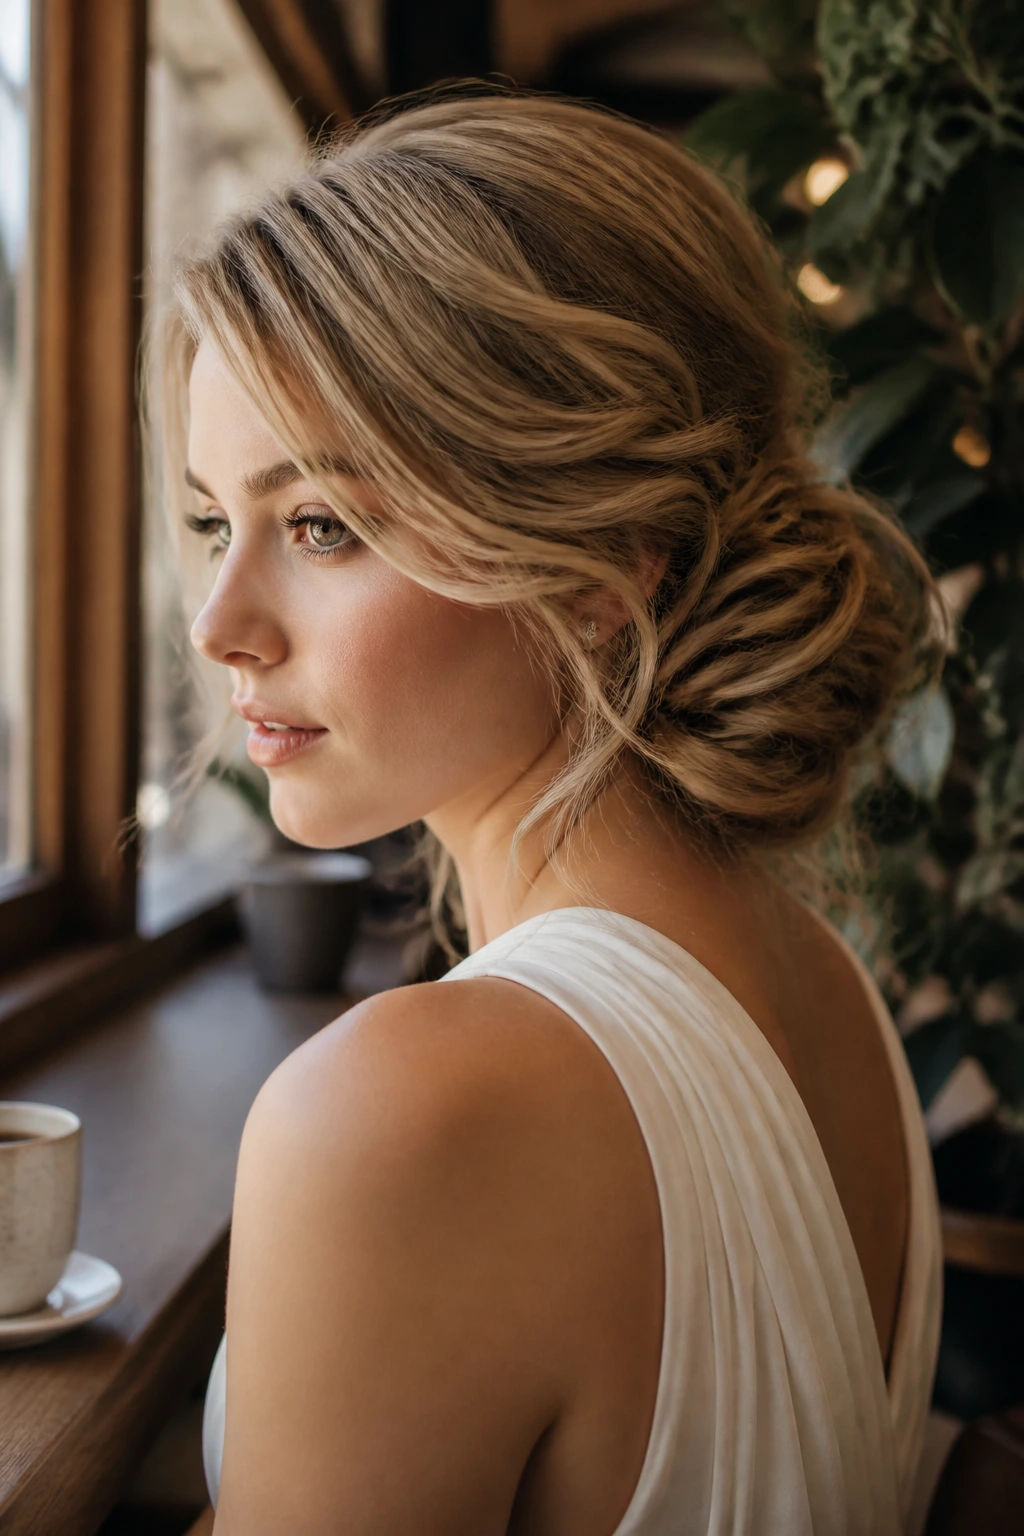
This asymmetrical style sweeps all of your hair to one side of your neck, creating a beautiful, soft frame for your jawline and collarbone. It is a highly romantic look that feels wonderfully soft and touchable.
The Power of Asymmetry
An asymmetrical hairstyle naturally draws the eye across your face, highlighting your cheekbones and neck. By placing the bulk of the detail on one side, you create a look that is visually interesting from every angle.
Quick Styling Steps
- Part your hair on the opposite side of where you want your chignon to sit.
- Sweep all of your hair over your shoulder, gathering it loosely behind your ear.
- Twist the hair into a loose, flat roll, securing it to the scalp with U-shaped pins as you go.
- Let the ends of your hair curl naturally around the bottom of the twist.
Pro tip: Use a silk ribbon tied around the base of the twist to add a soft, feminine detail that keeps the style in place.
14. The Tousled Crown Braid Accent
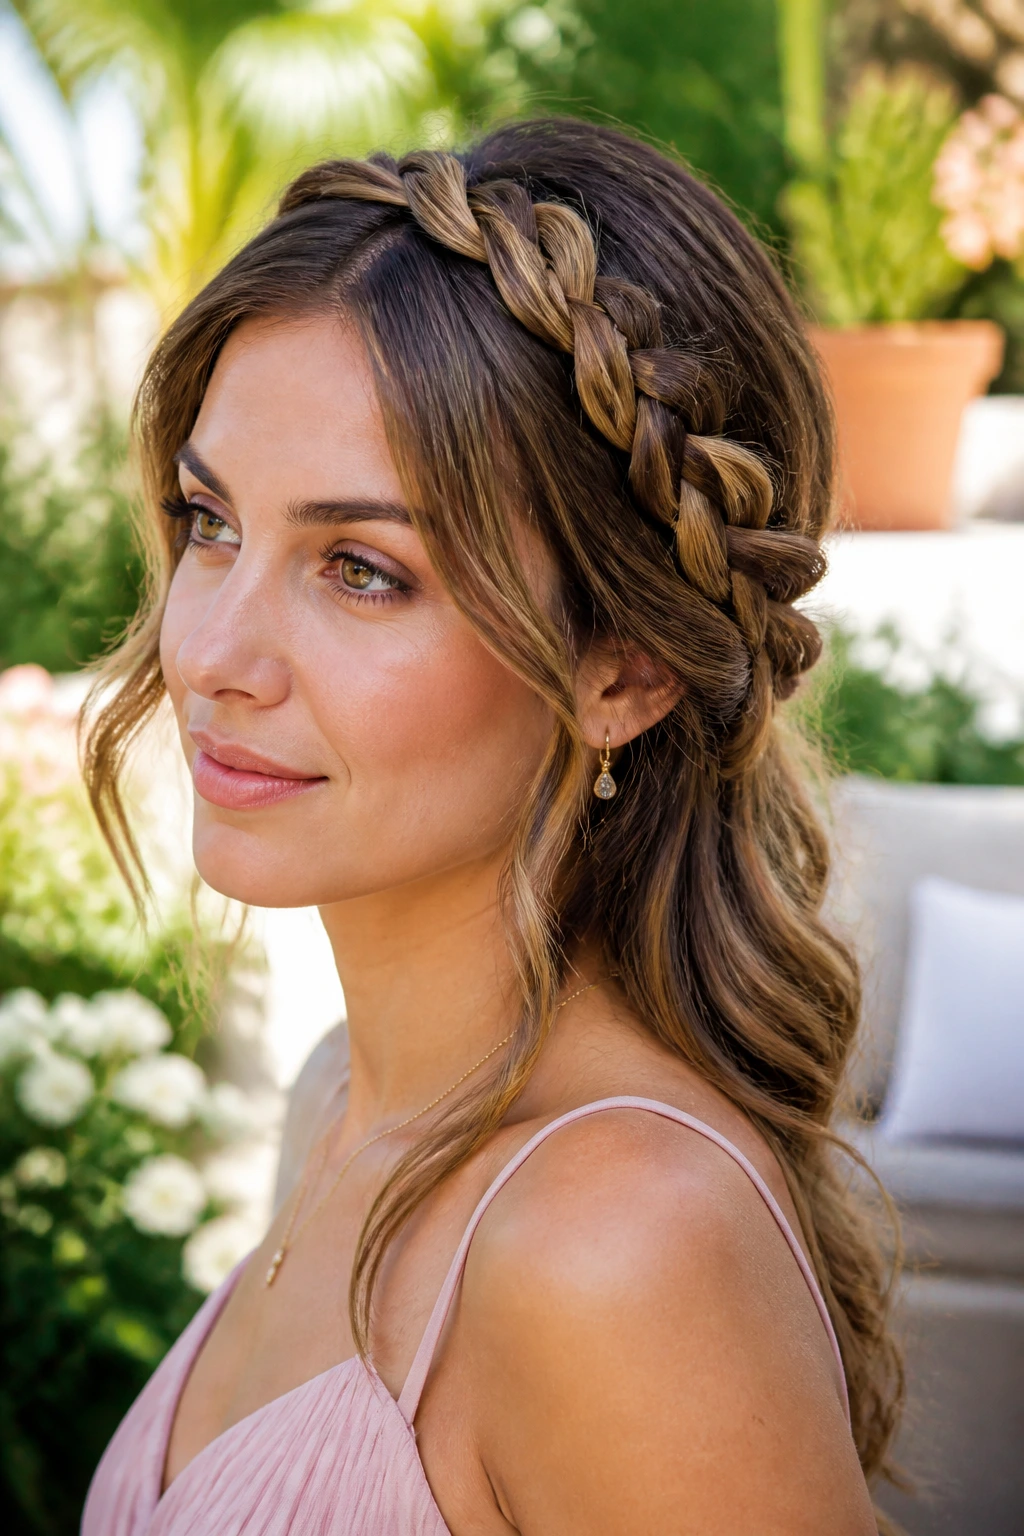
If you want the look of a crown braid but do not want to braid your entire head, this accent style is a fantastic option. It features a single, thick braid on one side of your head that blends seamlessly into the rest of your loose, textured hair.
This style is incredibly easy to customize based on your parting preference. Simply create a deep side part, and gather a two-inch section of hair along the heavier side of the part. Braid this section down toward your ear, pulling the loops of the braid outward as you go to make it look thick and pancake-flat, then pin the end of the braid underneath your loose hair.
This accent braid acts like a beautiful, natural hair accessory. It adds a touch of bohemian detail to a simple down-do, making it look like you spent hours on your hair when it actually only took a few minutes.
15. The Knotted Low Ponytail
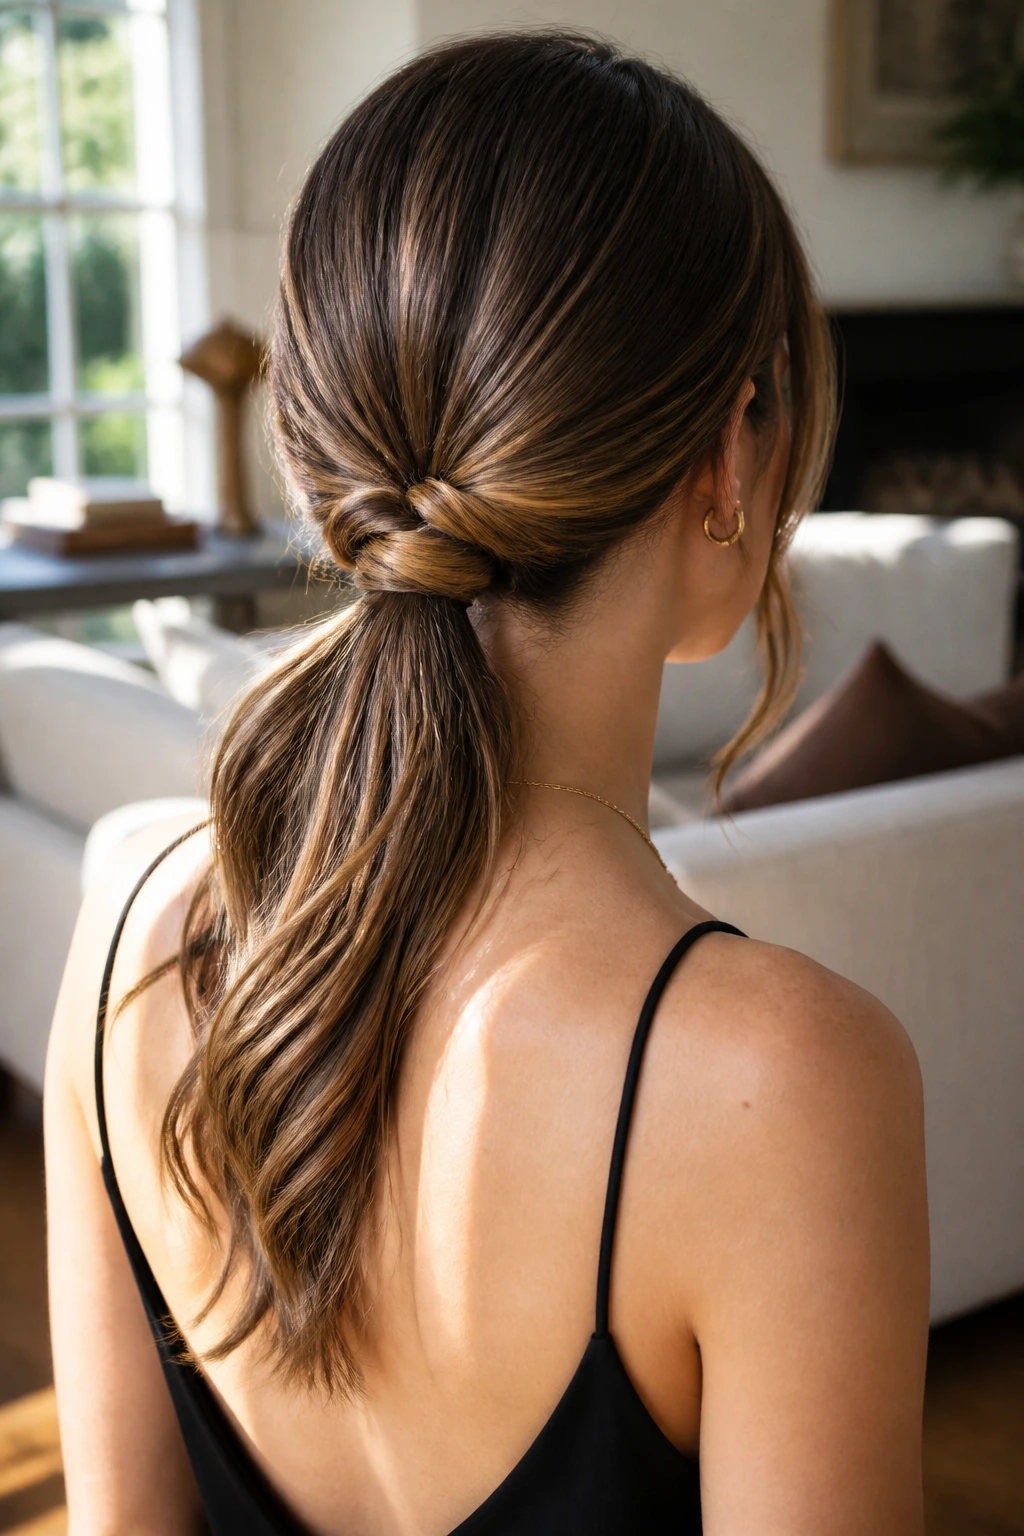
This style replaces your traditional hair tie with a physical knot made from your own hair. It is a clean, minimal look that feels incredibly modern and works wonderfully for a casual dinner date.
To create this look, split your hair into three sections: a large middle section and two smaller side sections. Tie the large middle section into a low ponytail with a clear elastic.
Now, take the two side sections, cross them over the top of the ponytail elastic, and literally tie them into a single, basic knot — just like you would start tying a pair of shoelaces. Tuck the loose ends of the knotted pieces underneath the ponytail and secure them with a bobby pin.
This simple knot completely hides your hair tie and adds an architectural detail that looks highly professional. It is a great option for straight, smooth hair, as the clean lines of the knot are highlighted by the smooth texture of the hair.
16. The Sleek Center-Parted Low Bun
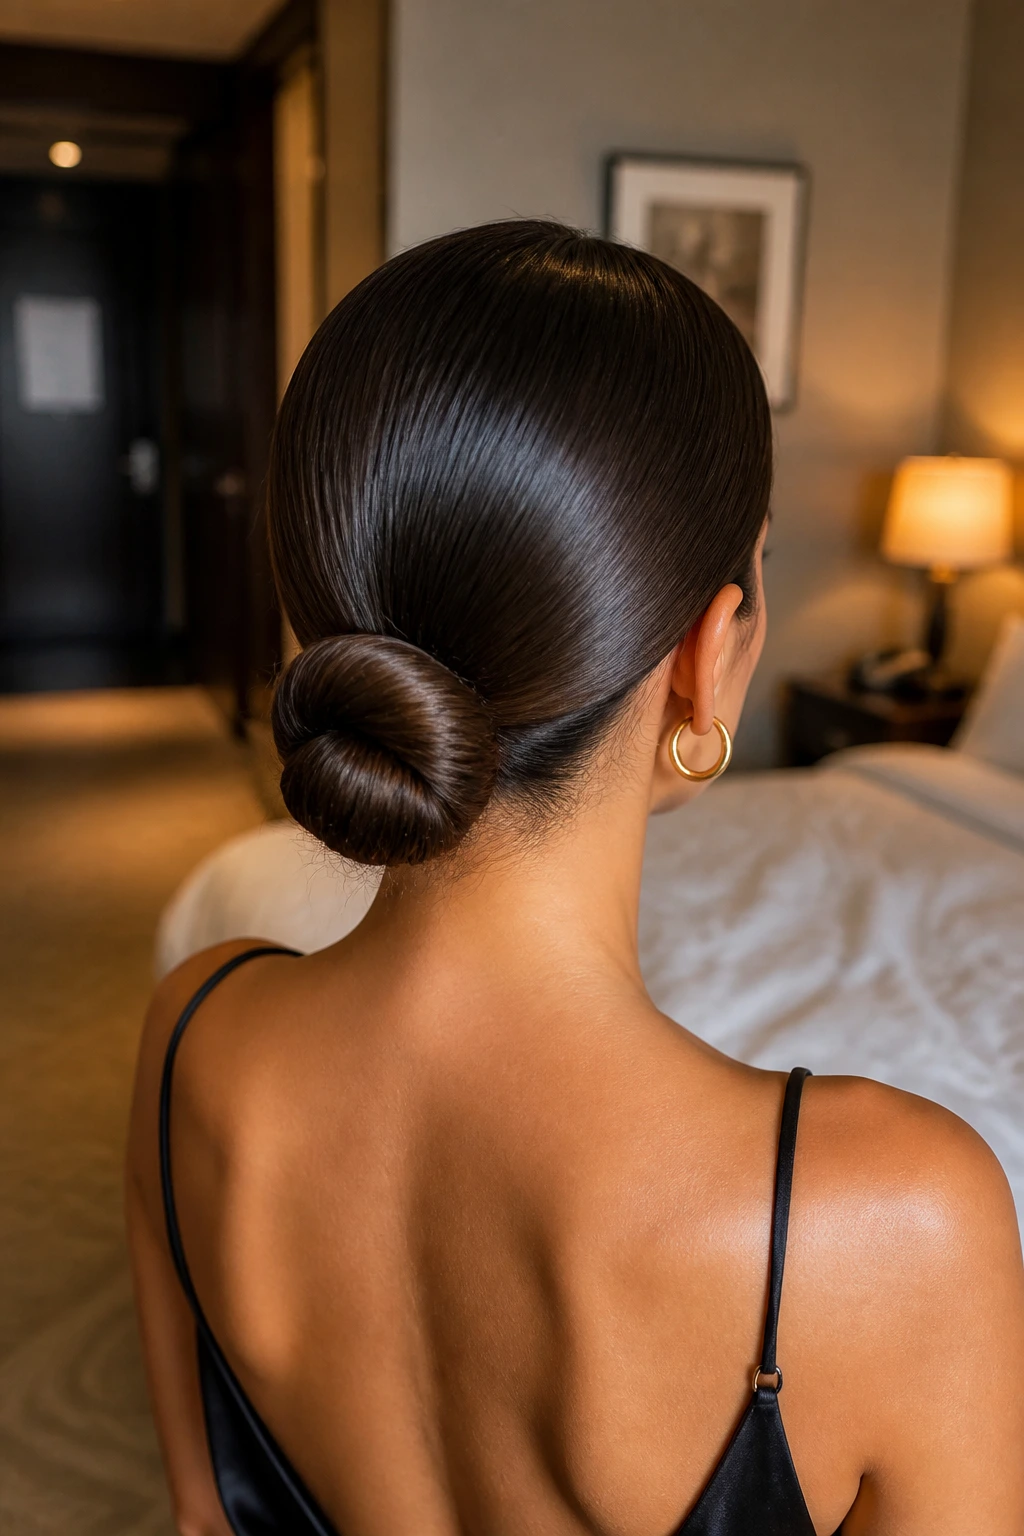
This style is clean, modern, and incredibly elegant. It features a sharp center part and hair that is smoothed flat against the head, ending in a neat, compact bun at the very base of your neck.
To achieve this high-shine finish, start by creating a perfectly straight center part using a rat-tail comb.
- Apply a dime-sized amount of hair oil or smoothing serum from your roots to your mid-lengths.
- Use a soft boar-bristle brush to smooth your hair down and back toward the nape of your neck.
- Secure your hair into a low, tight ponytail.
- Twist the ponytail tightly into a compact rope, wrap it around the elastic, and secure with bobby pins.
This style is incredibly durable and holds its shape perfectly, making it an excellent option for windy evenings or rainy nights when you do not want to worry about frizz or flyaways.
17. The Twisted Halo Half-Up Style
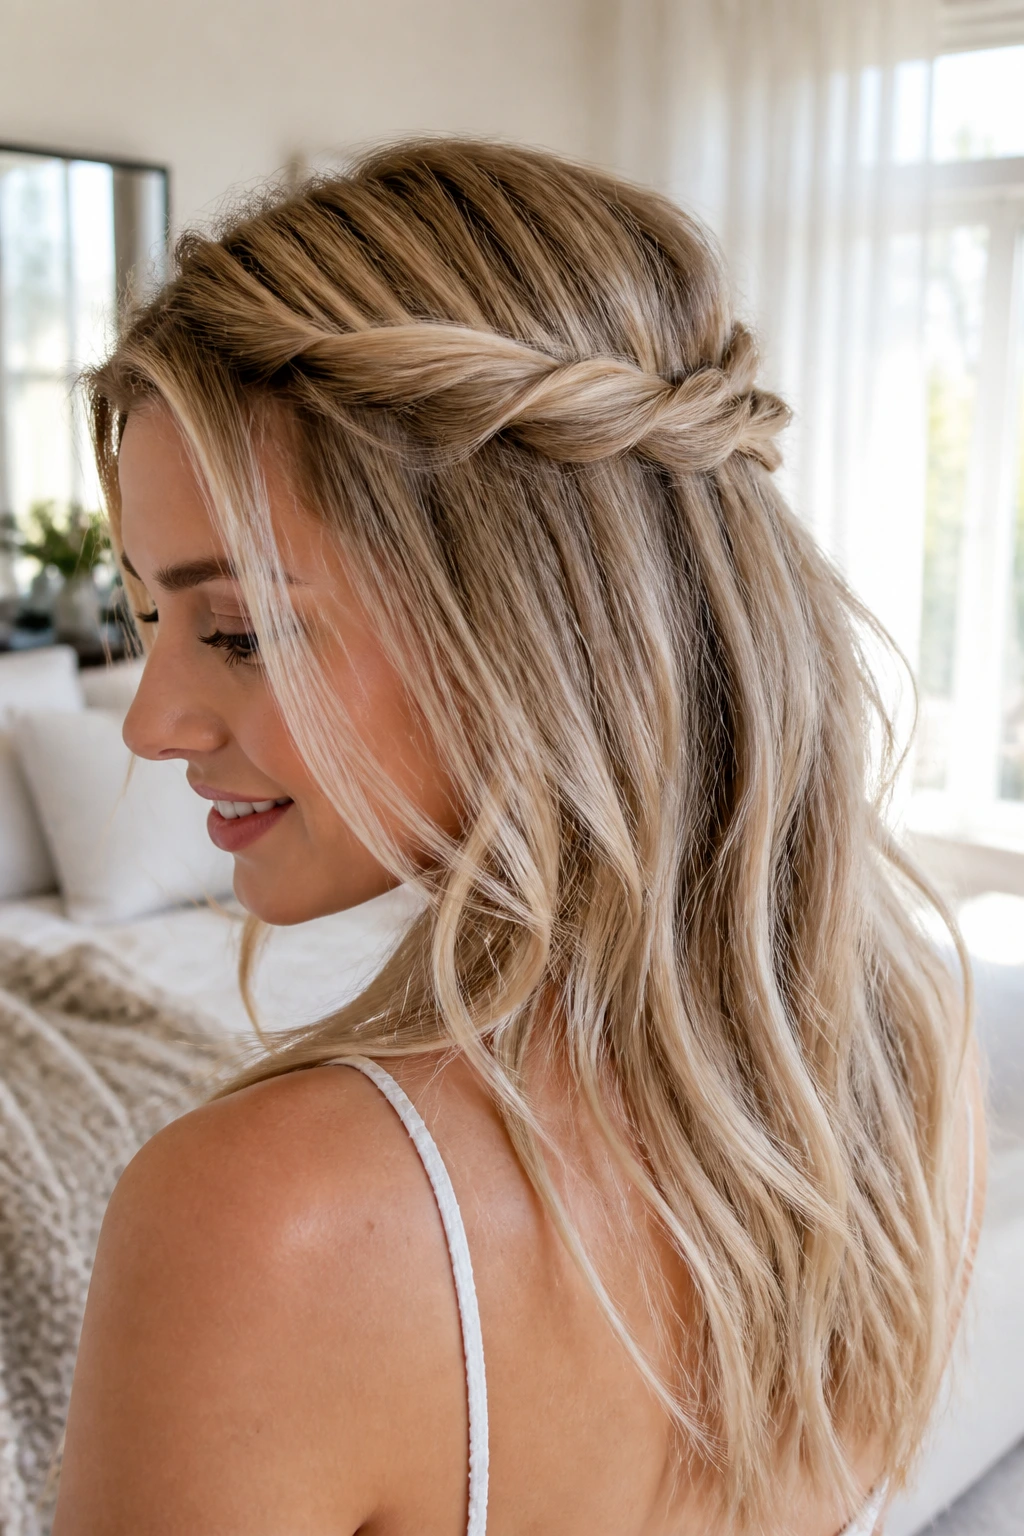
This dreamy, romantic style uses two twisted sections of hair that meet in the back of your head to create a beautiful, halo-like frame. It is an incredibly soft look that works beautifully on wavy or curly hair.
Start by taking a two-inch section of hair from above your left ear and twisting it loosely backward, securing it temporarily with a clip. Repeat this on the right side.
Bring both twists together at the back of your head and secure them with a small, clear elastic. To make the halo look seamless, create a small opening just above the elastic and flip the ponytail up and through that opening, pulling it tight to lock the twists together.
This style is incredibly quick to do but looks wonderfully detailed. The flipped section creates a beautiful, natural knot that holds the twists in place without the need for visible bobby pins, giving the style a clean, seamless finish.
18. The Voluminous Messy Topknot
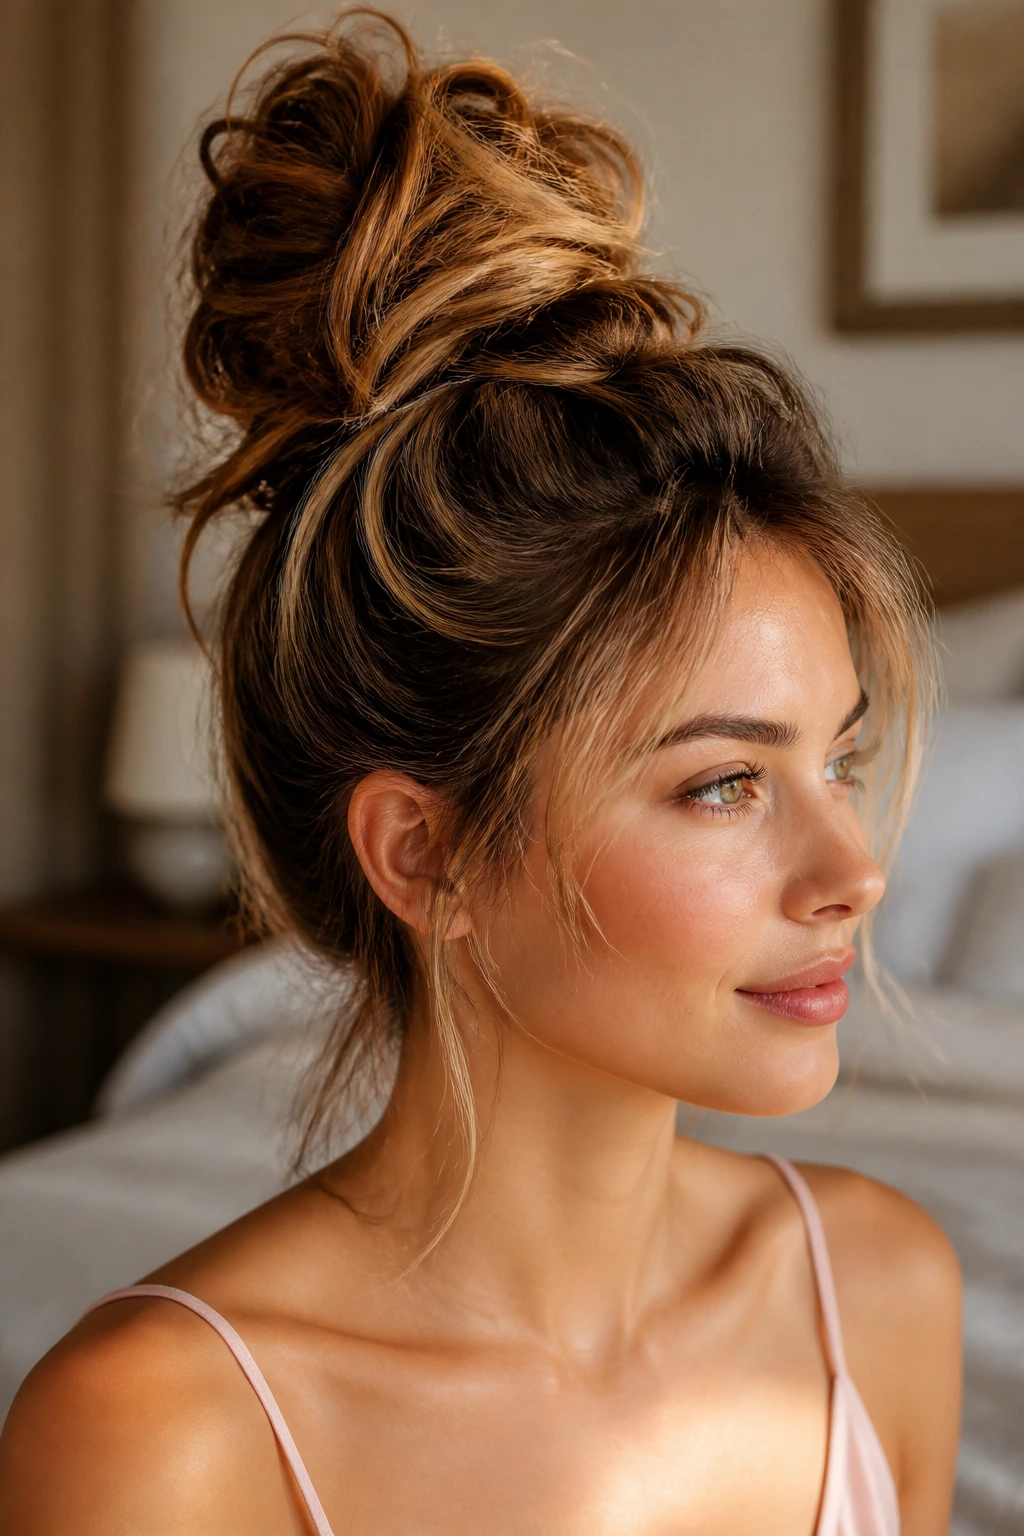
A topknot is a classic staple, but this date-night version is all about volume, height, and soft, touchable texture. It sits right on top of your head, offering a playful, high-energy silhouette that looks incredibly chic.
Unlike a flat, utilitarian workout bun, this topknot relies on height and texture.
- Flip your head upside down and gather your hair into a high ponytail on the very crown of your head, securing it with a strong elastic.
- Backcomb the ponytail gently to add volume and texture.
- Wrap the teased hair loosely around the base of your elastic to create a large, airy bun.
- Secure the bun with U-shaped hairpins, letting a few wispy pieces fall free around your ears.
This style is fantastic for showing off your neck and shoulders, making it a wonderful option for pairing with an off-the-shoulder top or a beautiful knit sweater.
19. The Retro Side Sweep with Bobby Pin Accent
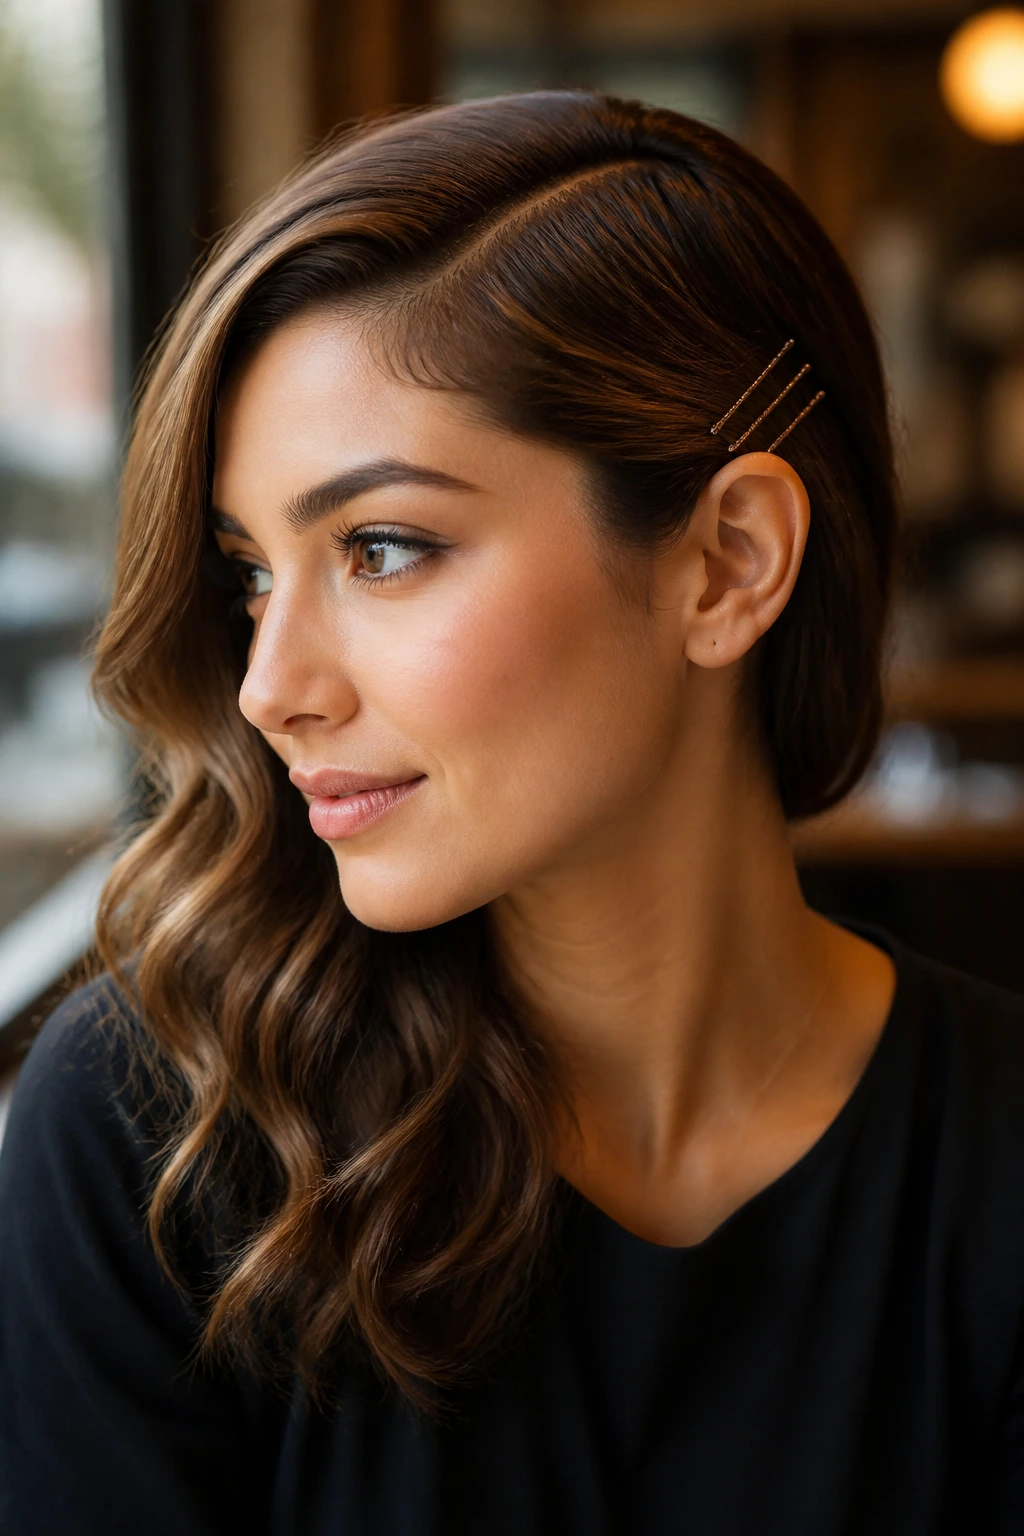
This style uses exposed bobby pins as a graphic, decorative element. By pinning one side of your hair back behind your ear, you create a beautiful asymmetrical silhouette that looks incredibly modern and stylish.
The Art of Decorative Pinning
Instead of trying to hide your bobby pins, this style puts them on full display. By using pins in a contrasting color — like gold pins on dark hair or black pins on blonde hair — you can create beautiful geometric patterns like chevron shapes or parallel lines.
Quick Styling Steps
- Create a deep side part in your hair.
- Smooth the hair on the shallower side of the part back behind your ear, pulling it tight against your scalp.
- Place three bobby pins horizontally in a neat, parallel row just behind your ear to lock the hair in place.
- Let the remaining hair on the opposite side flow free in soft, romantic waves.
Pro tip: Spray your bobby pins with dry shampoo or hairspray before inserting them to give them extra grip and prevent them from sliding out of smooth hair.
20. The Scarf-Woven Dutch Braid
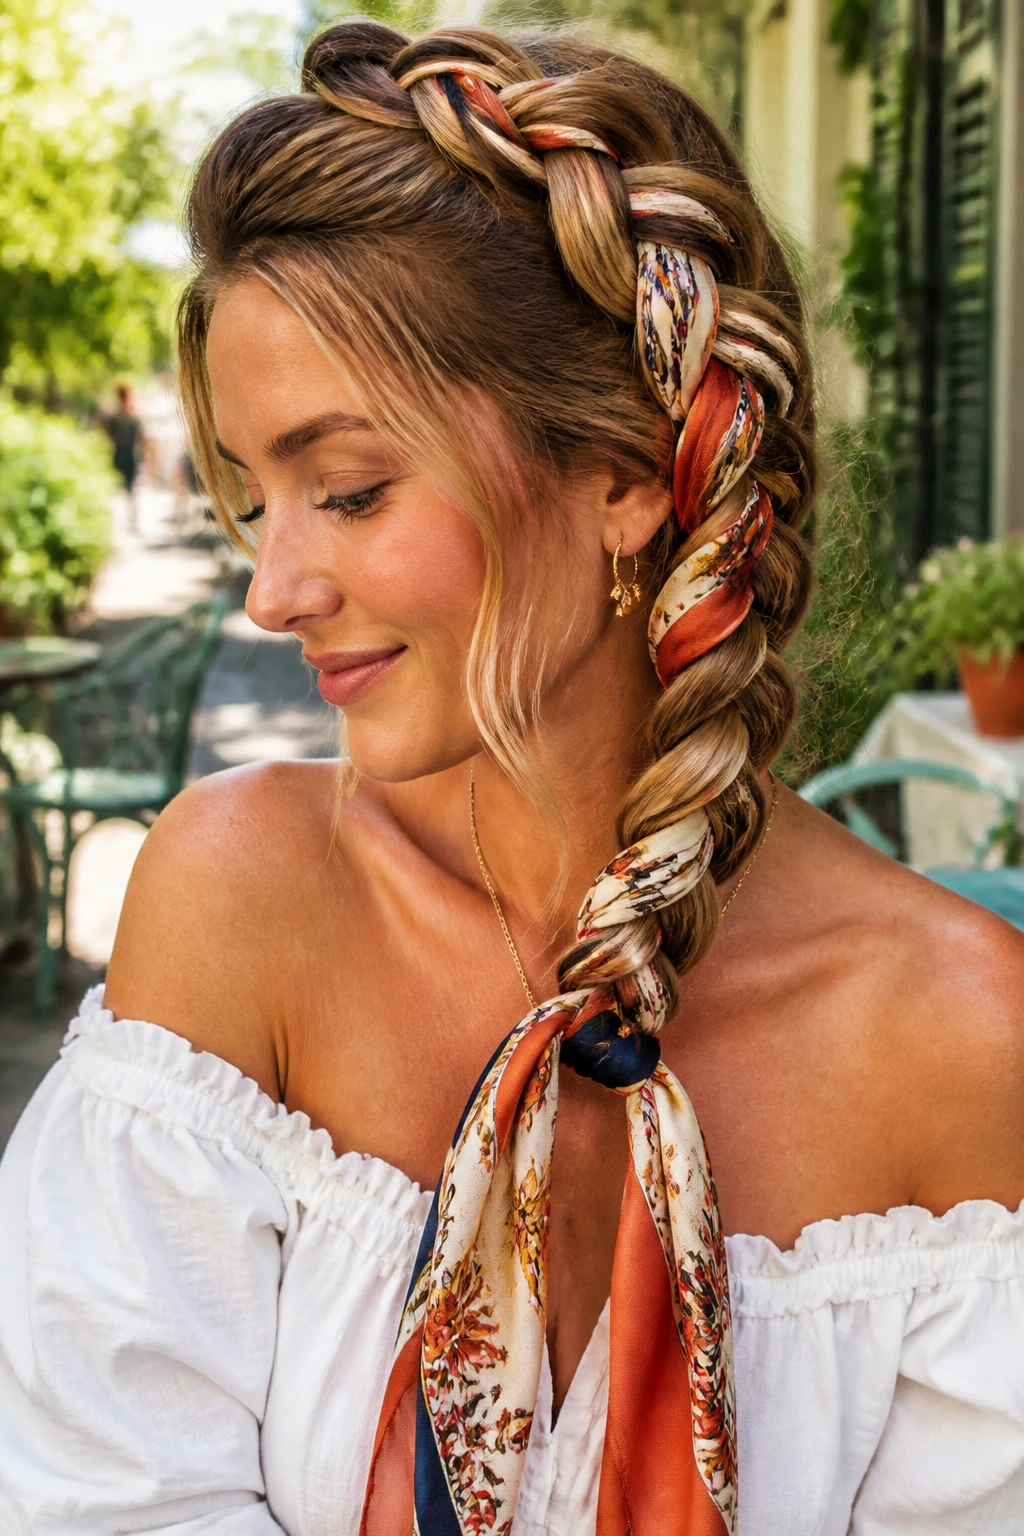
Adding a simple silk scarf to a classic Dutch braid is an incredibly easy way to add color, texture, and visual interest to your style. The scarf is woven directly into the braid, acting as one of the three strands of hair.
To create this look, tie a long, thin silk scarf around a small section of hair at the crown of your head, letting the two ends of the scarf hang down. Split your hair into three sections as if you were starting a standard Dutch braid, and merge the two ends of the scarf into two of those sections.
Braid your hair as normal, crossing the sections under the middle strand. The scarf will weave naturally through the braid, creating beautiful pops of pattern and color throughout the style.
This look is incredibly charming and perfect for casual, daytime dates or outdoor dinners. It adds an instant touch of personal style to a simple braid, making it look like you put a lot of effort into your look.
21. The Soft Gibson Girl Roll
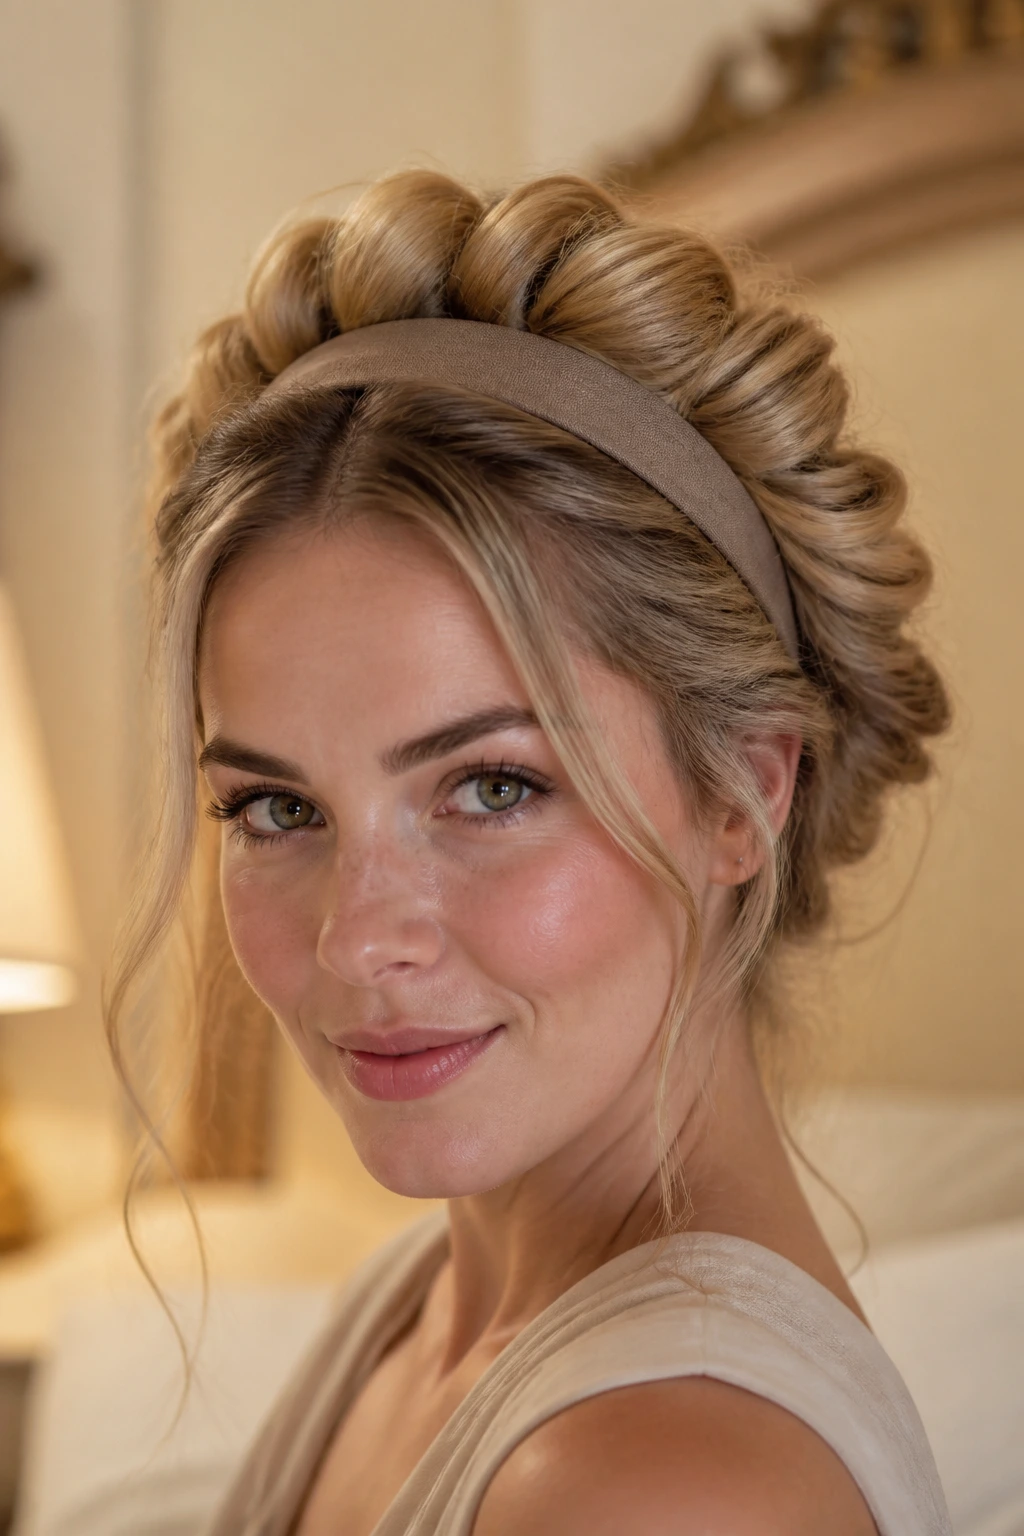
This vintage style dates back to the early twentieth century, but its soft, cloud-like volume feels incredibly romantic and modern. It features hair that is rolled upward and inward along a stretchy headband to create a beautiful, continuous halo of hair.
To build this look, start by placing a thin, stretchy elastic headband over your hair, letting it sit like a crown on top of your head.
Starting from the front, take a two-inch section of hair, wrap it up and over the headband, and tuck it down behind the elastic. Repeat this process around your entire head, moving from the front to the back, until all of your hair is tucked into the headband to create a continuous, rolled frame.
The Gibson Girl roll is incredibly comfortable to wear and holds its shape perfectly throughout the evening. Because the headband does all the structural work, you do not need to worry about bobby pins poking your scalp, making it a fantastic option for a long night of dining and dancing.
22. The Waterfall Braid with Soft Curls
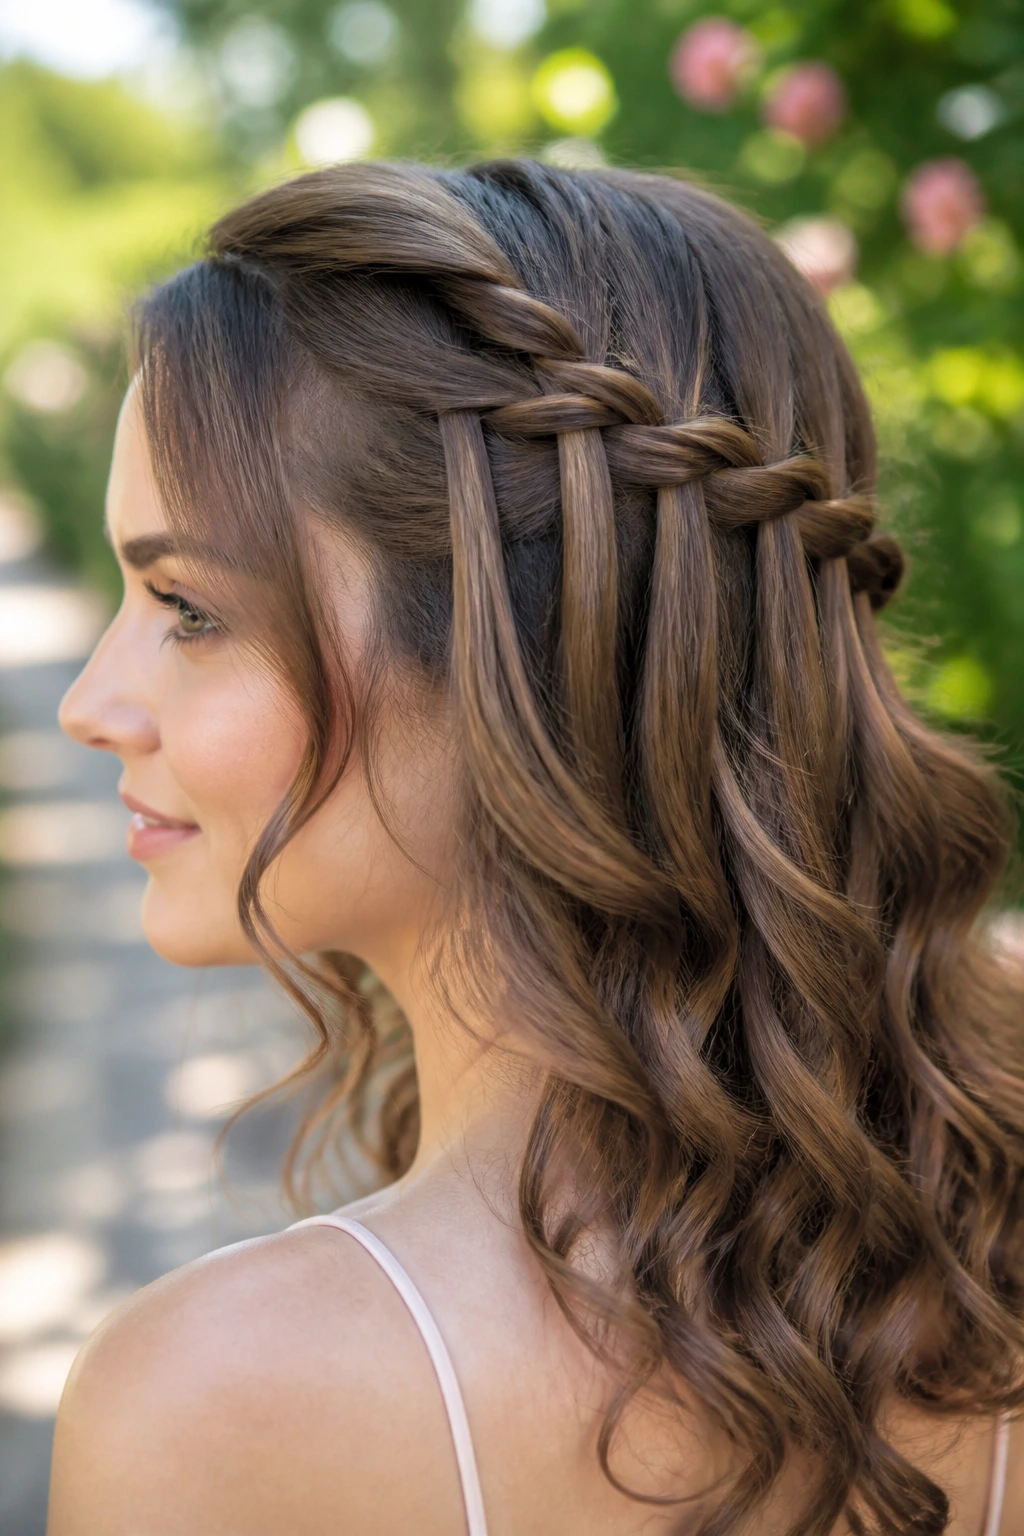
The waterfall braid is a beautiful, airy style that lets your hair flow free while adding an intricate, woven detail across the back of your head. It features a horizontal braid where strands of hair are dropped through the weave, creating a gorgeous “waterfall” effect.
This style works beautifully on wavy or curled hair.
- Start a standard three-strand braid at your temple.
- As you cross the top strand over the middle strand, let it drop completely, leaving it hanging loose.
- Pick up a new section of hair from right behind the dropped strand to act as your new third strand.
- Repeat this process across the back of your head, dropping the top strand each time and replacing it with a new section.
The dropped strands fall through the braid like water, creating a beautiful, fluid pattern that looks incredibly romantic. It is a fantastic option for showcasing beautiful highlight work or dimensional color in your hair.
23. The Braided Faux Hawk Updo
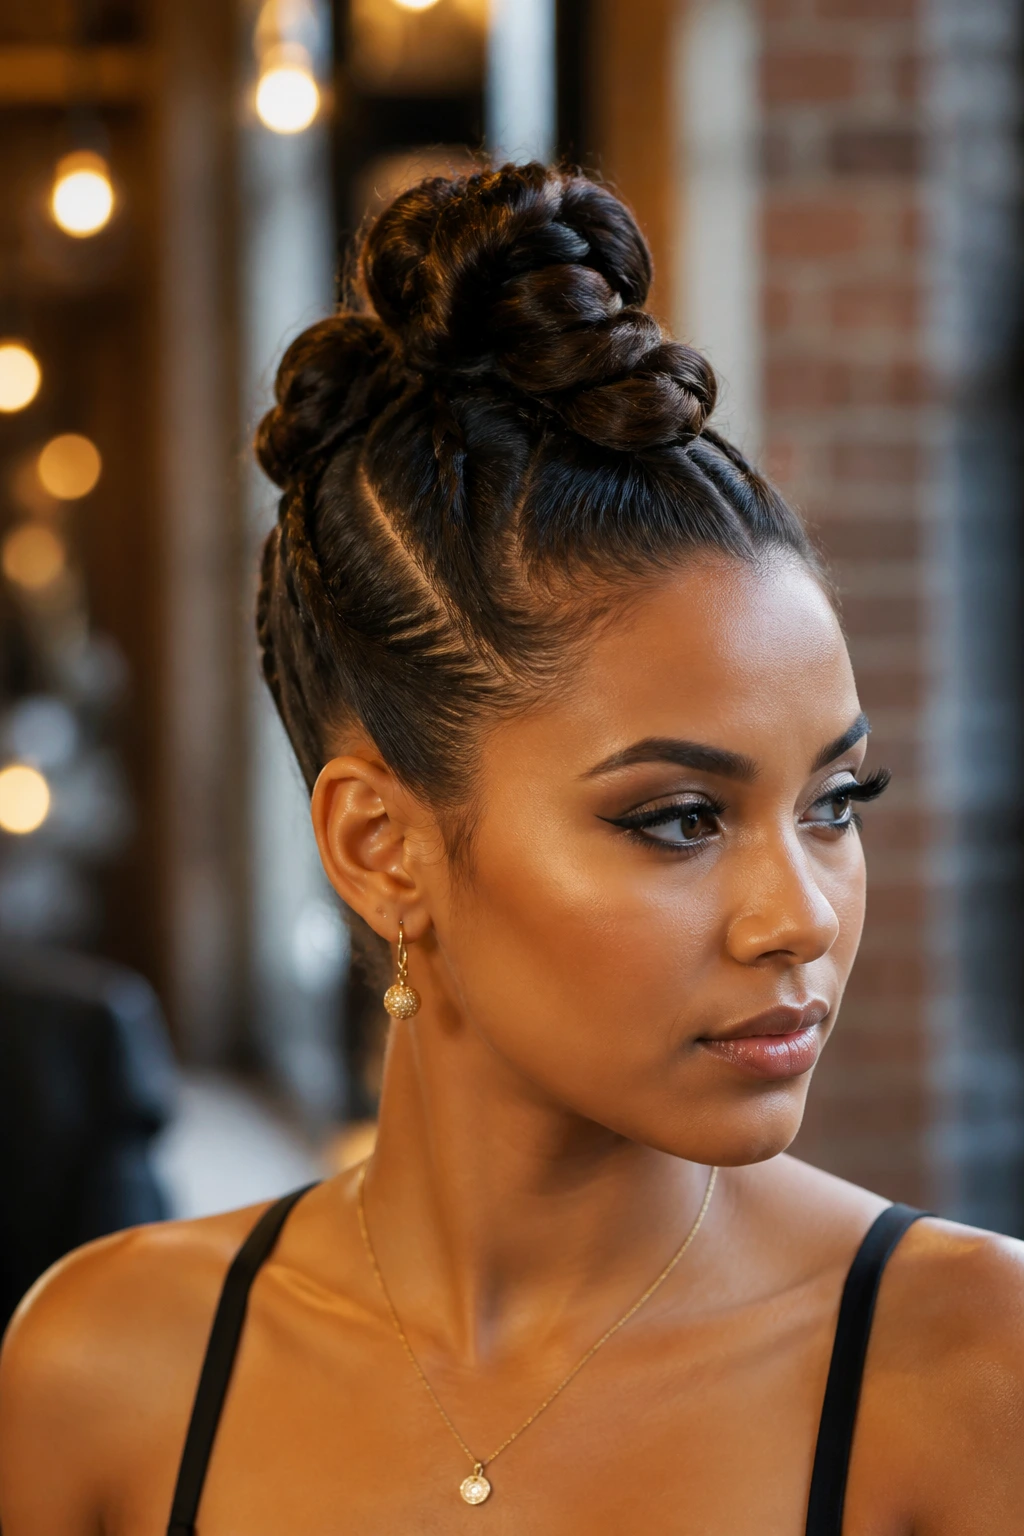
For those who want a style with a bit of edge, this braided updo mimics the bold silhouette of a mohawk while maintaining a soft, romantic texture. It features three stacked buns or braids along the center of your head, creating a beautiful, high-volume look.
To create this look, divide your hair vertically into three equal sections down the center of your head: a top section, a middle section, and a bottom section.
Braid each individual section into a simple three-strand braid, pulling the loops of the braids outward to make them look thick and full. Roll each braid up into a compact bun and secure them with bobby pins along the center line of your head.
This style has an incredible sculptural quality that looks wonderful from the profile. It is a highly creative updo that keeps your hair completely off your face and neck, making it a fantastic choice for showing off a bold makeup look or a statement outfit.
24. The Polished Loop Bun
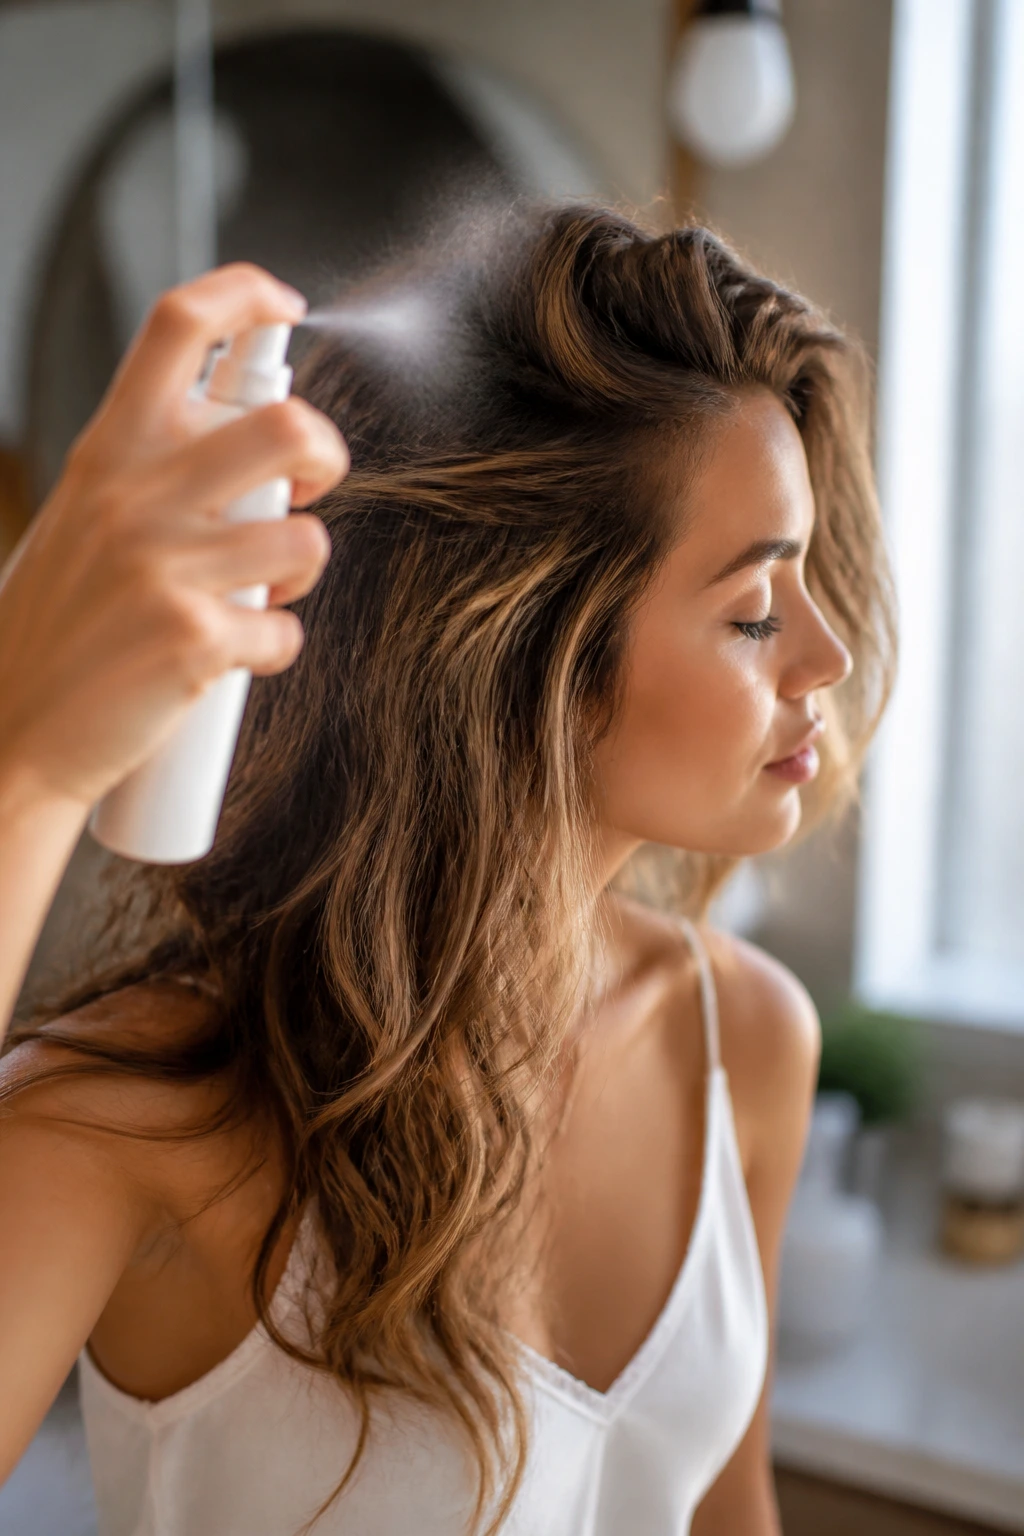
This minimalist style is a chic, modern take on a classic bun. It features a simple loop of hair secured with a single, elegant accessory, offering a high-polish look that takes less than two minutes to complete.
Unlike a messy bun where the ends of the hair are tucked away, this style leaves the ends free, pointing downward for a clean, architectural finish.
Simply gather your hair into a low ponytail, but on the final wrap of your elastic, do not pull your hair all the way through. Leave it halfway in the elastic to create a clean, rounded loop of hair. Use a small amount of hair wax to smooth down any flyaways along the crown of your head.
This look is incredibly fast to do but looks wonderfully intentional. By leaving the ends of your hair free, you add a modern, graphic detail to a classic silhouette, making it a great option for a sleek, contemporary outfit.
25. The Whispy Romantic Tendril Bun
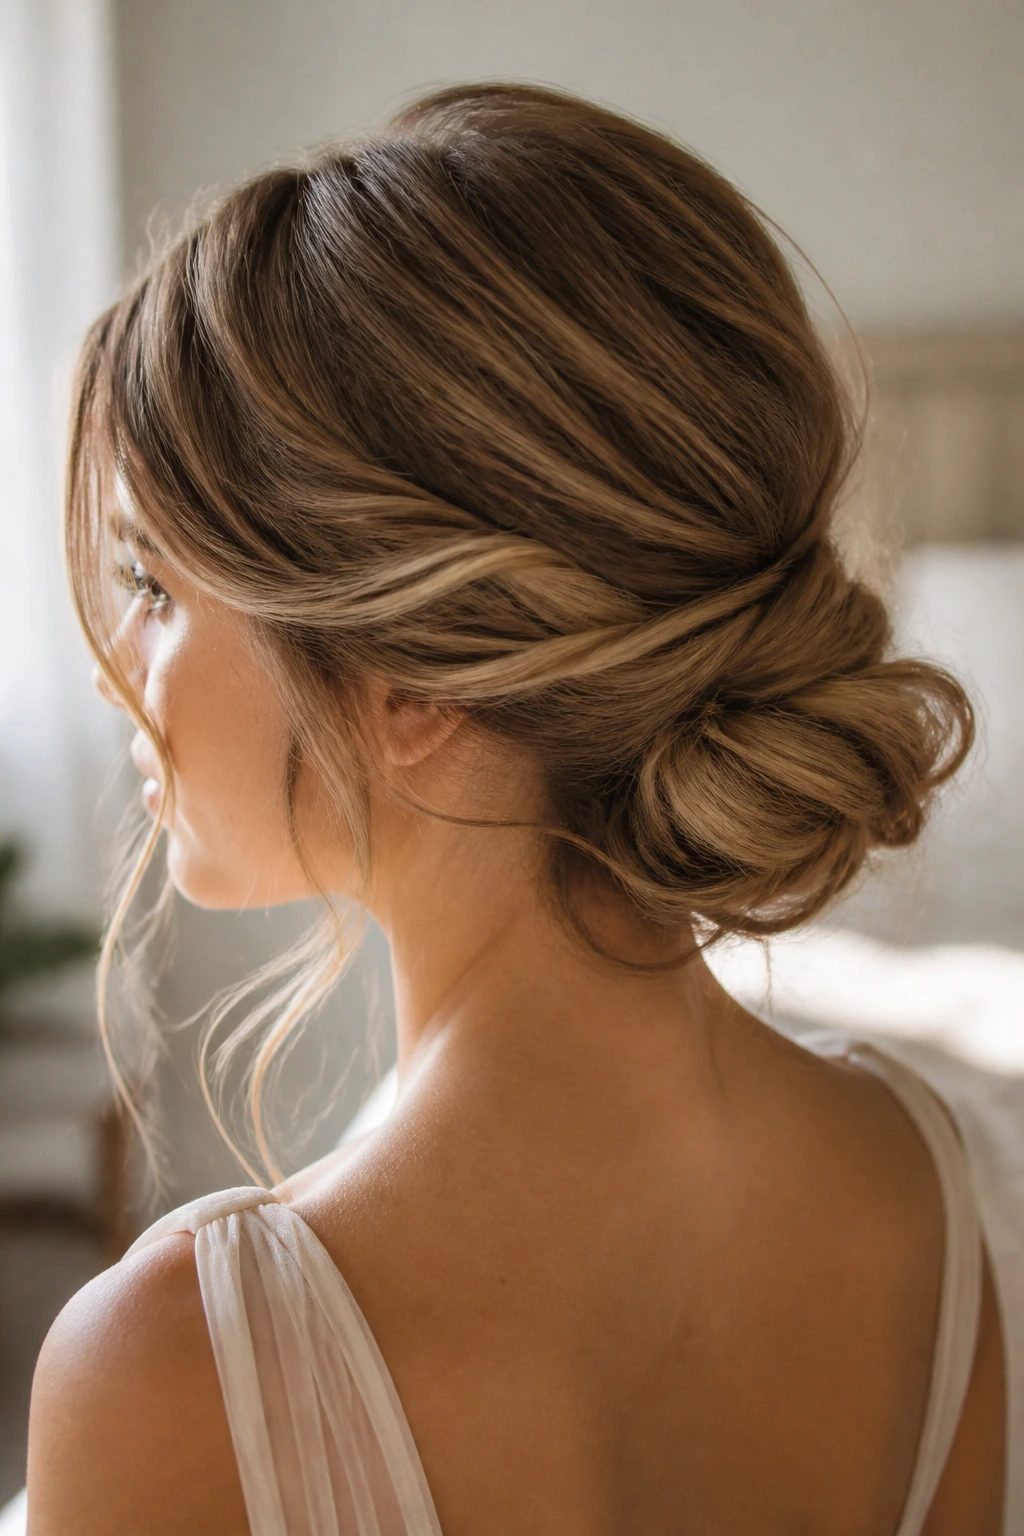
This style is the ultimate expression of soft, romantic hair. It features a loose, textured bun at the nape of your neck, surrounded by a cloud of wispy, face-framing tendrils that soften your features and catch the light beautifully.
The Beauty of Wispy Tendrils
The key to this style is the deliberate placement of your loose pieces. Instead of pulling random chunks of hair free, look for the natural hair density around your temples, ears, and the base of your neck.
Step-by-Step Styling
- Curl your hair with a 1.25-inch wand to add soft, loose waves.
- Pull a few soft strands of hair free around your face, temples, and ears.
- Gather the rest of your hair into a very loose, low ponytail and twist it into a flat, casual bun, securing it with a few open hairpins.
- Use your fingers to gently pinch and pull the hair at the crown of your head upward to add height and texture.
Pro tip: Mist the loose tendrils with a lightweight, flexible hairspray to keep them from blowing into your face during dinner.
The Bottom Line
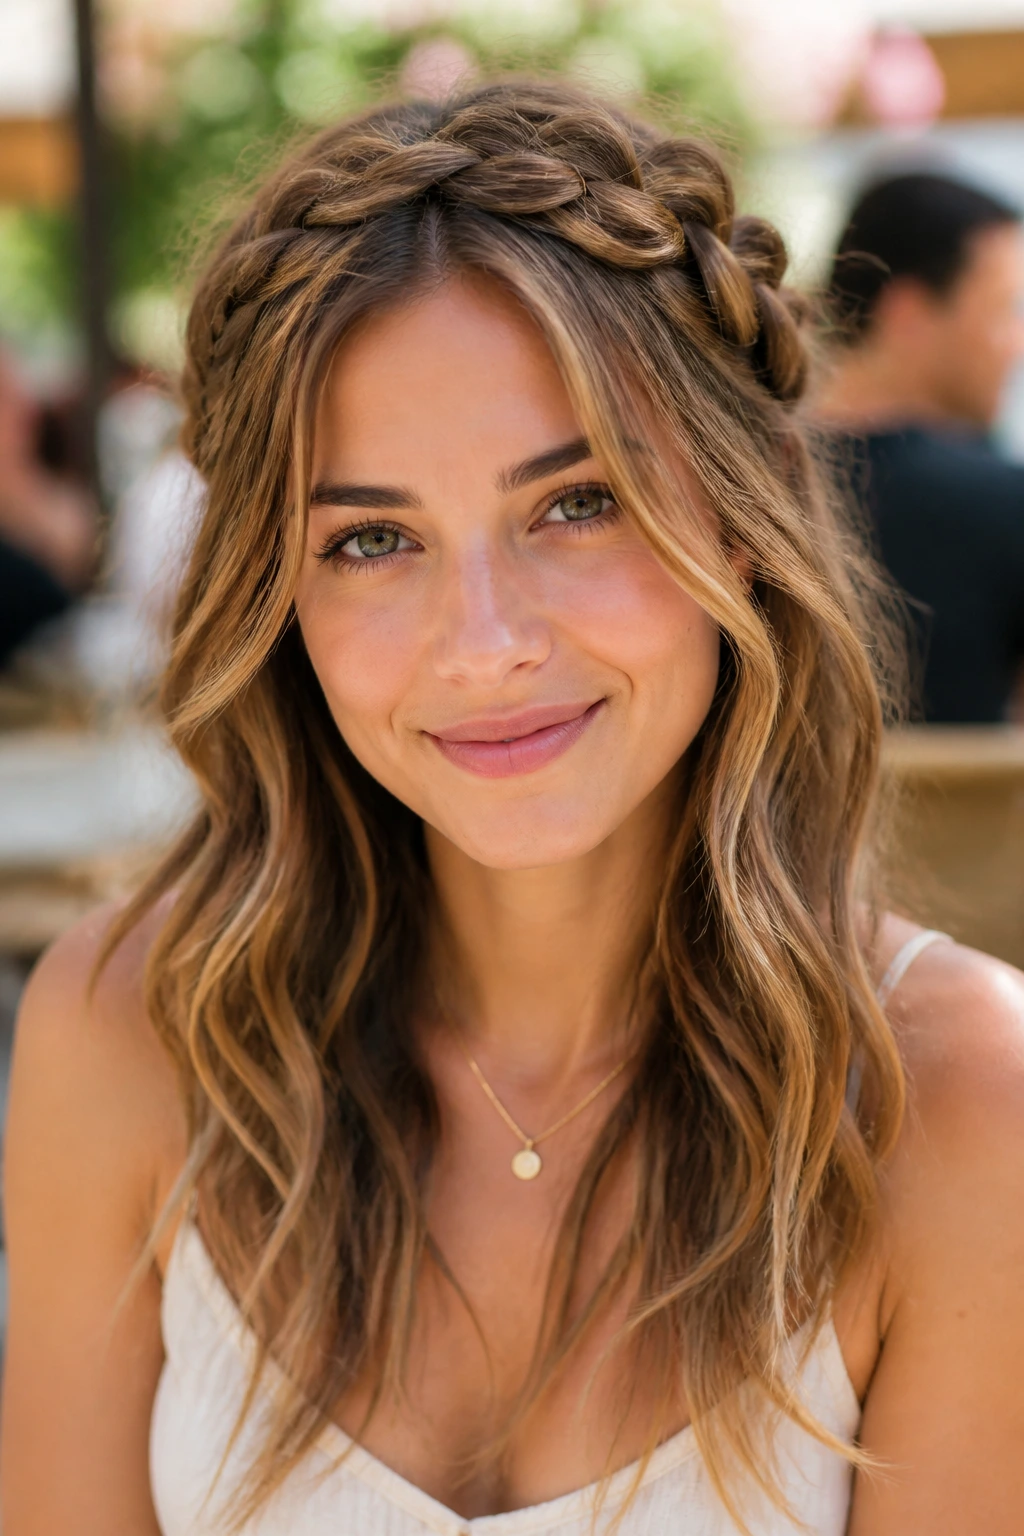
Style your hair with confidence and remember that perfection is not the goal. The most attractive part of any date-night hairstyle is how comfortable you feel wearing it. If a strand slips out of your braid or a curl drops over your forehead, embrace it. That soft, lived-in quality is exactly what makes these styles so incredibly romantic and appealing. Choose a style that matches your plans for the night, take your time with the prep work, and enjoy your evening.
