



You wake up, glance in the mirror, and there it is. Your hair looks like a static cloud, floating several inches off your scalp, refusing to lay flat. On high-humidity days, trying to force your hair into submission with a flat iron is a losing battle. The second you step outside, the damp air defeats your best efforts. Instead of fighting your hair texture, the real trick is choosing smart, protective shapes that work with your natural volume.
Finding frizz free hairstyles for frizzy hair is not about erasing your texture. It is about steering that volume into clean, intentional shapes that look polished all day. Frizz is simply dry hair searching for moisture in the air. When dry cuticles lift to absorb dampness, they swell and separate. By securing your strands in strategic patterns, you trap moisture, keep cuticles flat, and use the natural body of your hair to your advantage.
The secret lies in tension, placement, and preparation. When you secure your hair with the right balance of tightness and slack, flyaways blend into the design instead of sticking out like antenna wires. Some styles lock down the canopy of your head while letting the ends bounce free. Other options tuck everything away completely, giving your hair a break from friction and weather.
Let us look at how you can transform your morning routine. By shifting your approach from styling against your hair to styling with it, you can walk out the door with confidence, no matter what the humidity index says.
How Frizz Happens at the Molecular Level
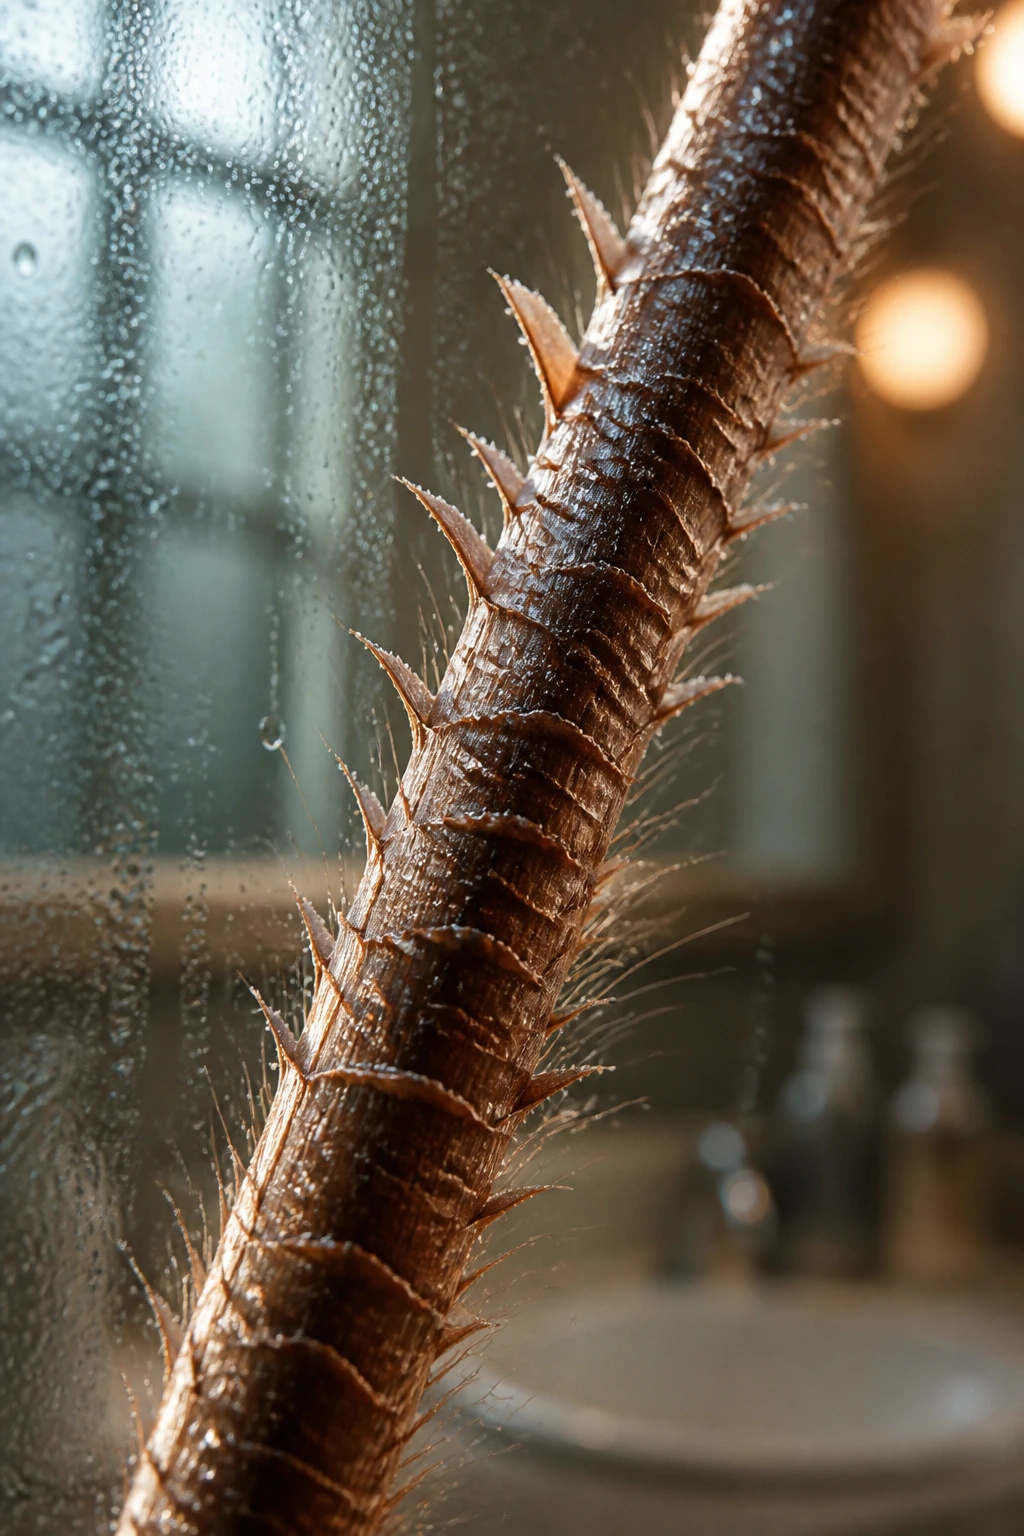
Hair swell is a physical reaction to your environment. Each strand of hair is covered in tiny, overlapping shingles called cuticles. In healthy, smooth hair, these shingles lie flat, sealing in moisture and reflecting light. When your hair is dry, damaged, or naturally porous, those cuticles lift up.
Once the cuticle layer is raised, moisture from the air enters the inner shaft of the hair, known as the cortex. The cortex contains hydrogen bonds, which are highly sensitive to water. When humid air enters the shaft, new hydrogen bonds form, causing the protein chains inside to fold back on themselves. This physical change makes the outer layer swell, causing the hair to bend, kink, and lift away from the surrounding strands.
This explains why humid weather instantly changes your hair shape. It also explains why thick, coarse, and curly textures are more prone to swelling. These hair types naturally have a more open cuticle structure, making them highly receptive to airborne moisture. To keep your hair smooth, you must create a barrier that stops this water absorption.
The Prep Routine That Outsmarts Humidity
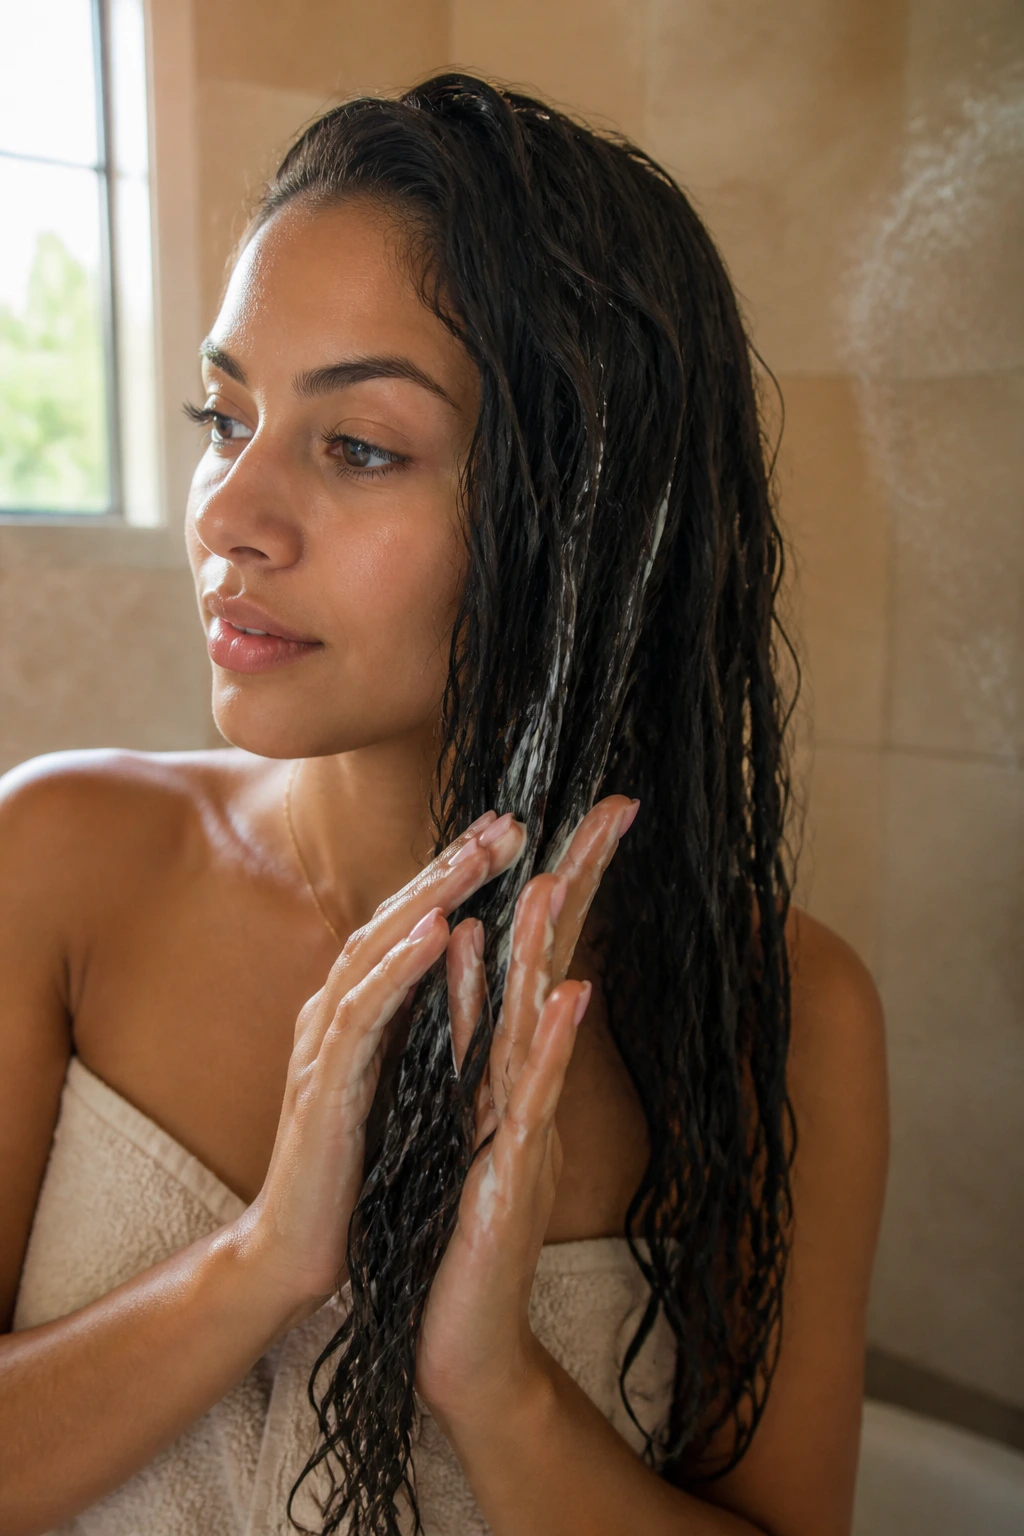
A great style starts in the shower. If you apply styling products to dry or damp hair without a protective base, your hair will swell at the first sign of rain. The foundation of a long-lasting style is a thorough washing and sealing routine.
Start with a sulfate-free shampoo. Sulfates strip away natural oils, leaving the cuticle wide open and desperate for moisture. Follow with a rich conditioner, focusing on the mid-lengths to the ends. While the conditioner is still in your hair, use a wide-tooth comb to detangle gently from the bottom up.
Always rinse with cool water. Cold water helps seal the cuticle shingles back down before you even step out of the shower.
Once you are out, do not rub your hair with a standard terry cloth towel. The tiny loops on regular towels act like sandpaper, roughing up the cuticle and creating instant frizz. Instead, gently squeeze excess water out with a microfiber towel or an old cotton t-shirt.
Apply your leave-in conditioner or styling cream while your hair is still soaking wet. This locks in the water molecules already inside the hair shaft. Finish with a lightweight oil, such as jojoba or argan oil, to seal the deal. This oil layer acts as a waterproof shield, preventing atmospheric moisture from penetrating your hair throughout the day.
1. The Triple-Twist Low Crown
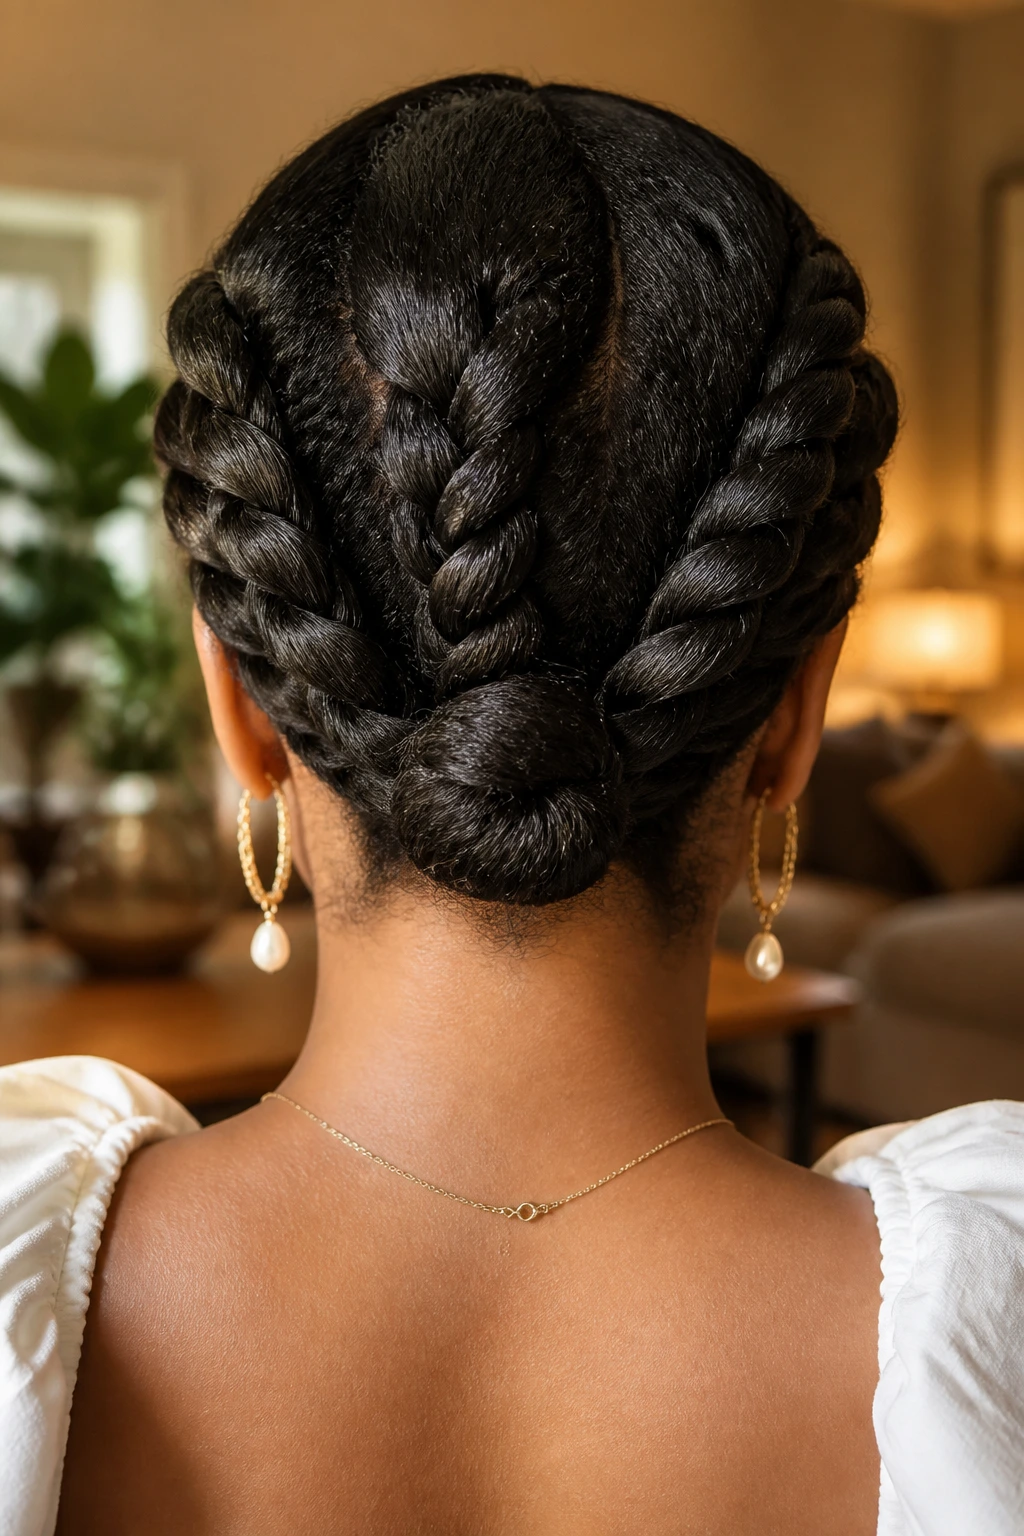
This style gathers your hair into three neat, rolled sections along the back of your head. It is perfect for those days when your hair feels puffy near the roots but you still want an elegant, low-profile look. By twisting the hair tightly against the scalp, you compress the areas most prone to puffing up, while creating a beautiful, woven texture at the nape of your neck.
Why Twisting Tames Fluff
When you twist hair, you force the individual strands to wrap around each other. This physical pressure keeps the hair cuticle flat and prevents individual flyaways from escaping the bunch.
Step-by-Step Twisting Guide
- Divide your hair into three equal vertical sections at the back of your head.
- Take the left section and twist it tightly inward toward your neck, securing it temporarily with a clip.
- Repeat the inward twist with the right section, securing it as well.
- Twist the center section downward, then gather all three twisted ends together at the nape.
- Roll the combined ends into a compact bun and secure with four to six heavy-duty bobby pins.
Pro tip: Spritz your fingers with a light hair oil before twisting to seal down flyaways as you work.
2. Sleek Bubble Ponytail
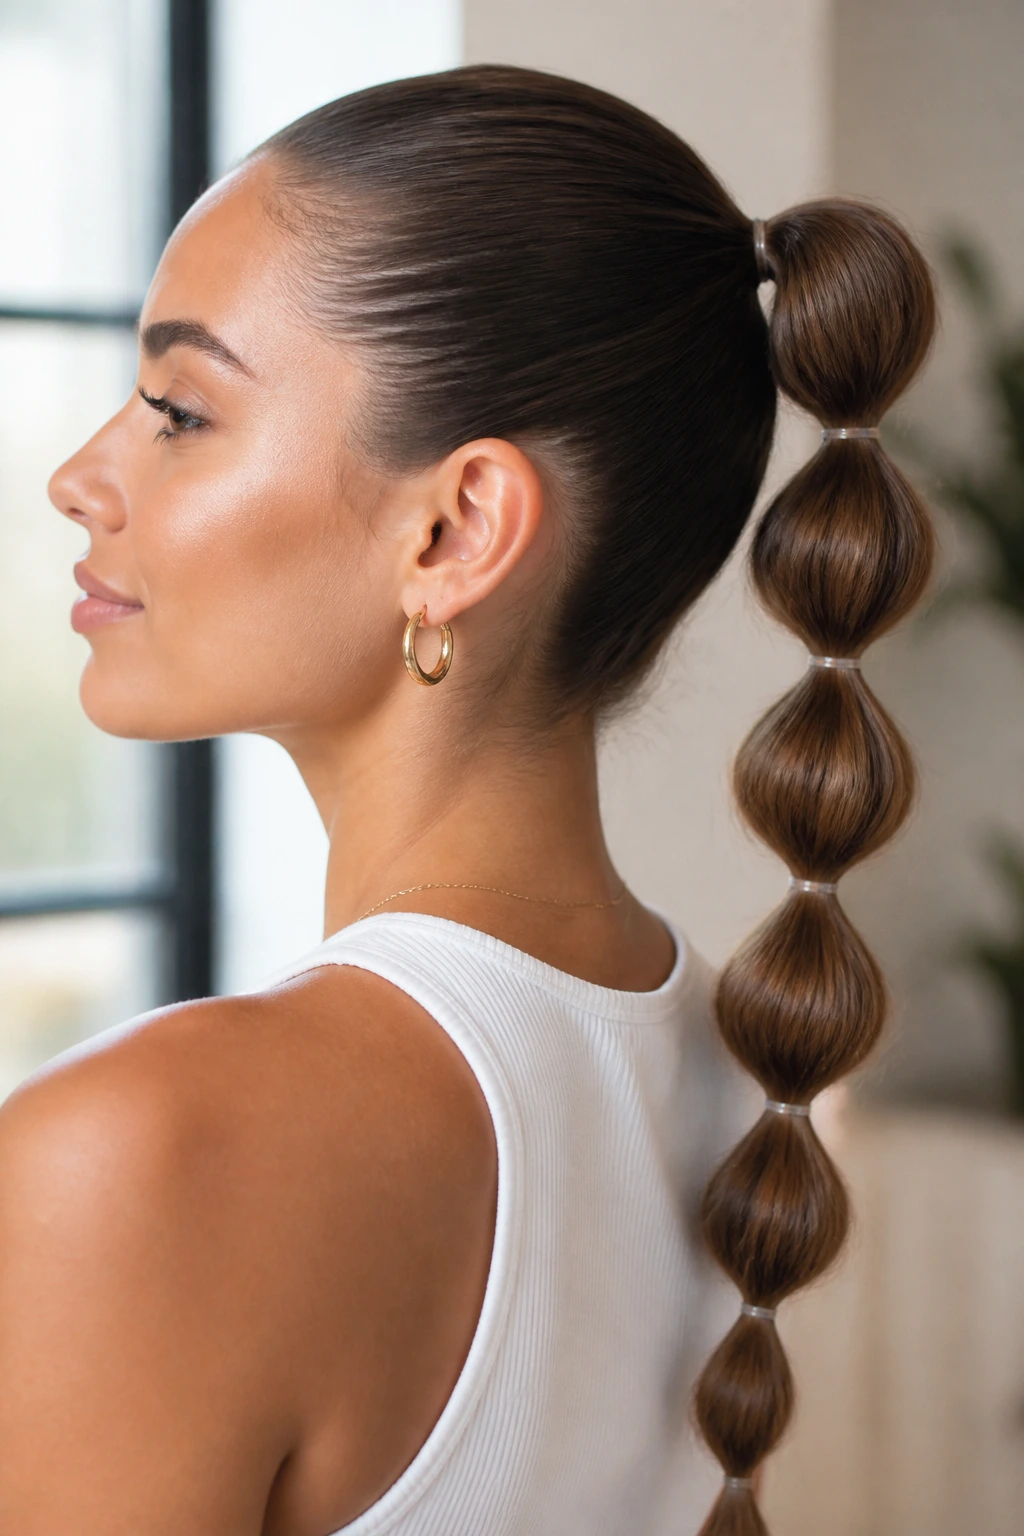
Many people find that a standard ponytail still allows the length of their hair to puff up in damp weather. The bubble ponytail solves this by adding multiple securing points along the length of the shaft. It turns potentially frizzy volume into clean, rounded shapes that look modern and sharp.
You do not need perfectly straight hair for this style to work. In fact, having textured, voluminous hair is a major benefit here, as it gives the “bubbles” their full, rounded shape.
Start by smoothing your hair back into a clean high ponytail using a firm-hold gel and a boar bristle brush. Once the base is secure, tie another elastic band about two to three inches down the length of the ponytail. Gently tug at the outer edges of this new section to pull the hair outward, creating a rounded bubble. Repeat this process down the entire length of your ponytail, leaving about two inches free at the bottom.
This style works best with clear elastic bands or bands that match your hair color closely. It keeps your hair completely contained, meaning you will not have to worry about friction from your collar or coat roughing up your strands during the day.
3. High Pineapple Bun with a Silk Scarf
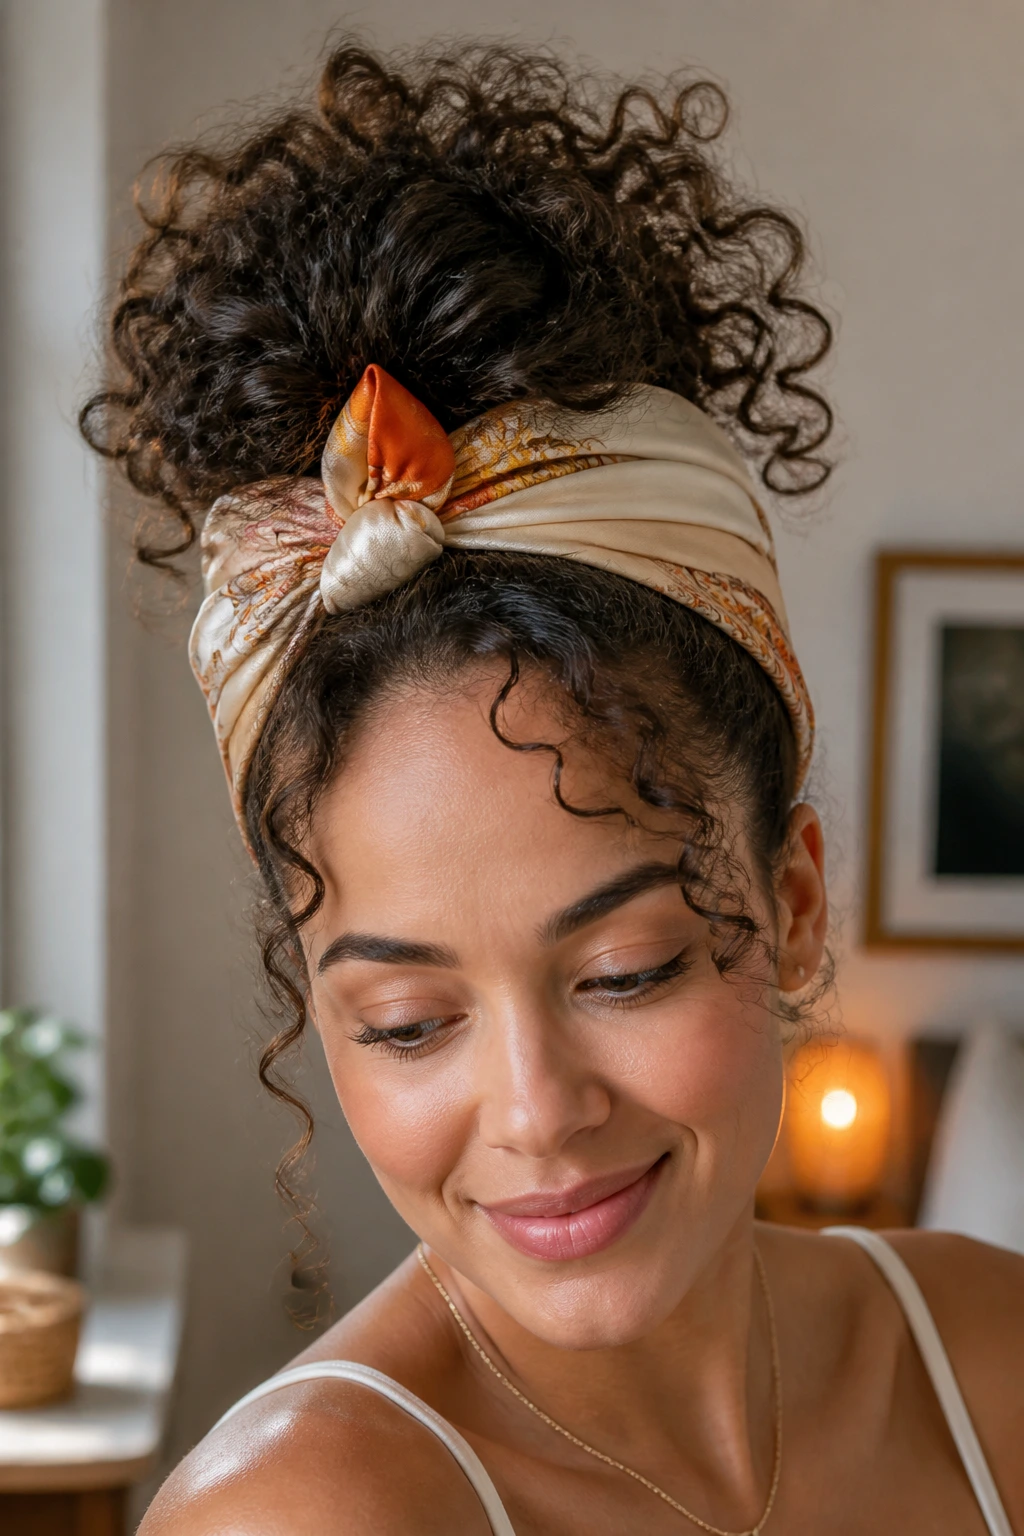
What do you do when your natural curls are bouncing but the canopy of your hair is starting to look fuzzy? The pineapple bun is the classic answer. This style pulls your hair upward, placing your curls on top of your head while keeping the sides and back smooth.
Why Does the Pineapple Work?
By keeping your curls gathered at the very top of your head, you prevent them from rubbing against your shoulders or back. This minimizes friction, which is one of the main causes of cuticle damage and frizz.
Styling with a Silk Scarf
- Apply a dollop of alcohol-free styling gel to your hairline, smoothing it upward with your palms.
- Gather your hair into a loose ponytail at the very front of your crown, using a soft silk scrunchie to secure it without pulling too tight.
- Let your curls tumble forward over your forehead like a faux fringe.
- Fold a square silk scarf diagonally into a band, wrap it around the back of your head, and tie it in a neat knot at the front.
This approach gives you a beautiful contrast between the sleek, wrapped fabric and the voluminous, bouncy curls on top.
4. Double Dutch Braids into Messy Buns
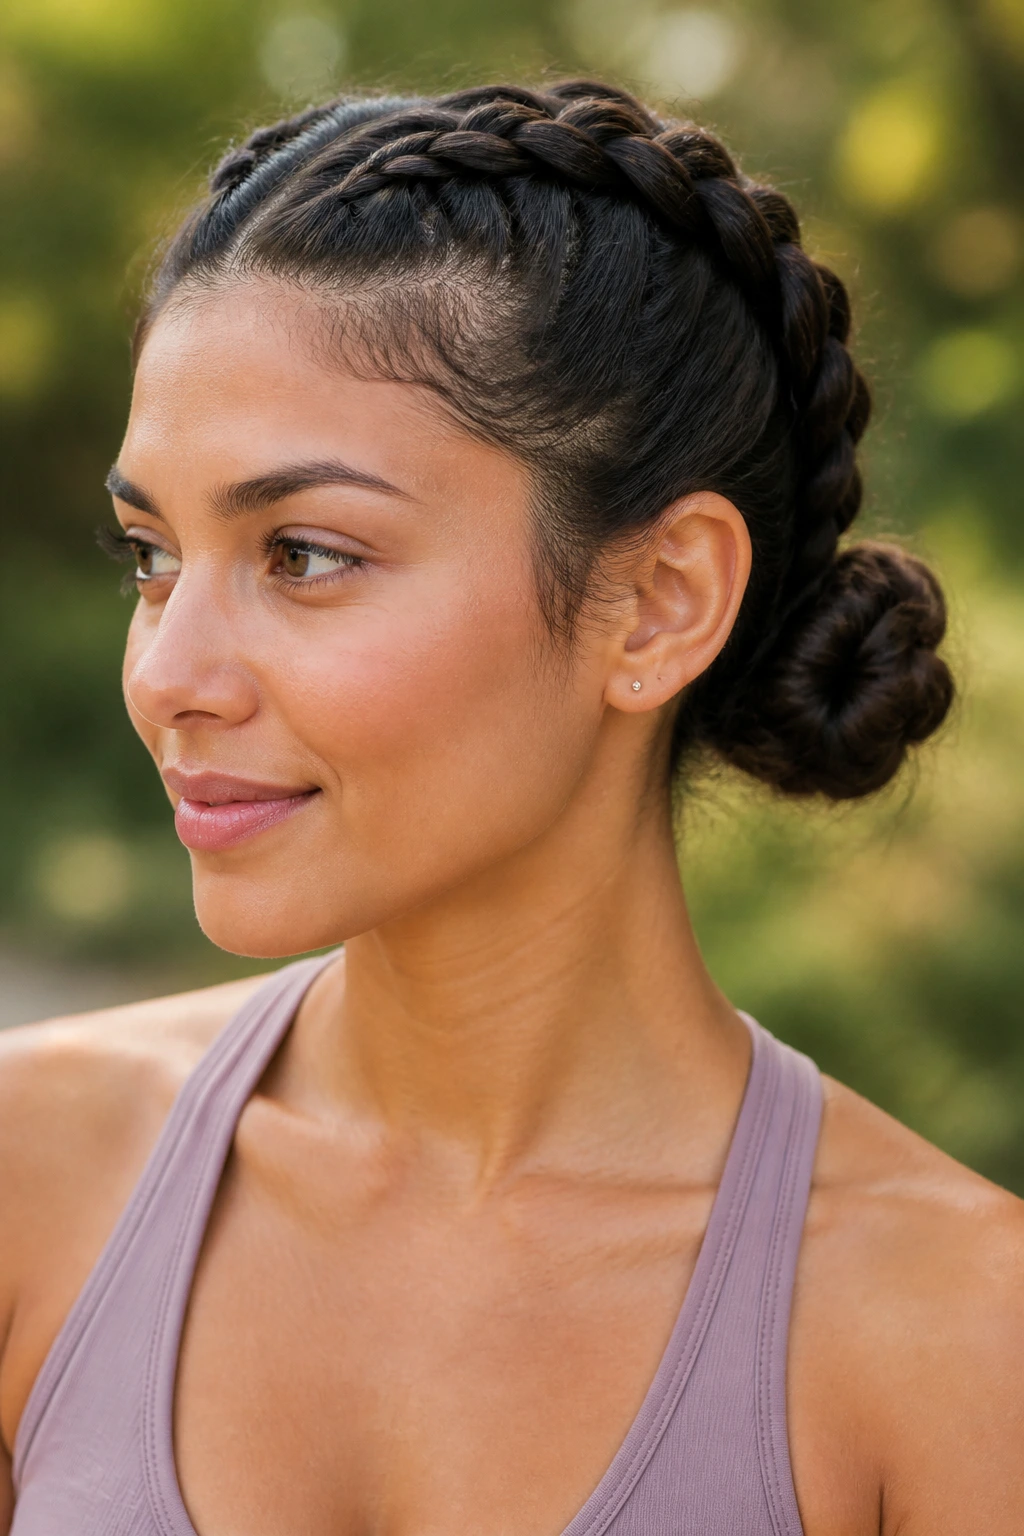
When you need a style that will survive a workout, a rainy day, or a humid commute, double Dutch braids are your best option. Unlike French braids, which lay flat, Dutch braids are crossed under rather than over, making the braid stand out on top of the hair. This creates a gorgeous, three-dimensional look that handles natural volume beautifully.
If you struggle with flyaways along your part line, Dutch braids are incredibly forgiving. They weave those loose hairs directly into the braid structure, holding them secure.
Start by parting your hair down the middle from your forehead to the nape of your neck. Secure one side with a clip so it stays out of your way. On the active side, take a small section of hair at the front hairline and divide it into three parts. Cross the left strand under the center, then the right strand under the center, adding small sections of loose hair with each pass. Braid all the way down to the nape of your neck, then twist the remaining length into a small bun. Repeat on the other side.
The resulting look is secure, stylish, and completely immune to wind and humidity. It is an excellent choice for outdoor activities where you want to look put-together without touching up your hair.
5. Half-Up Top Knot with Soft Face-Framing Tendrils
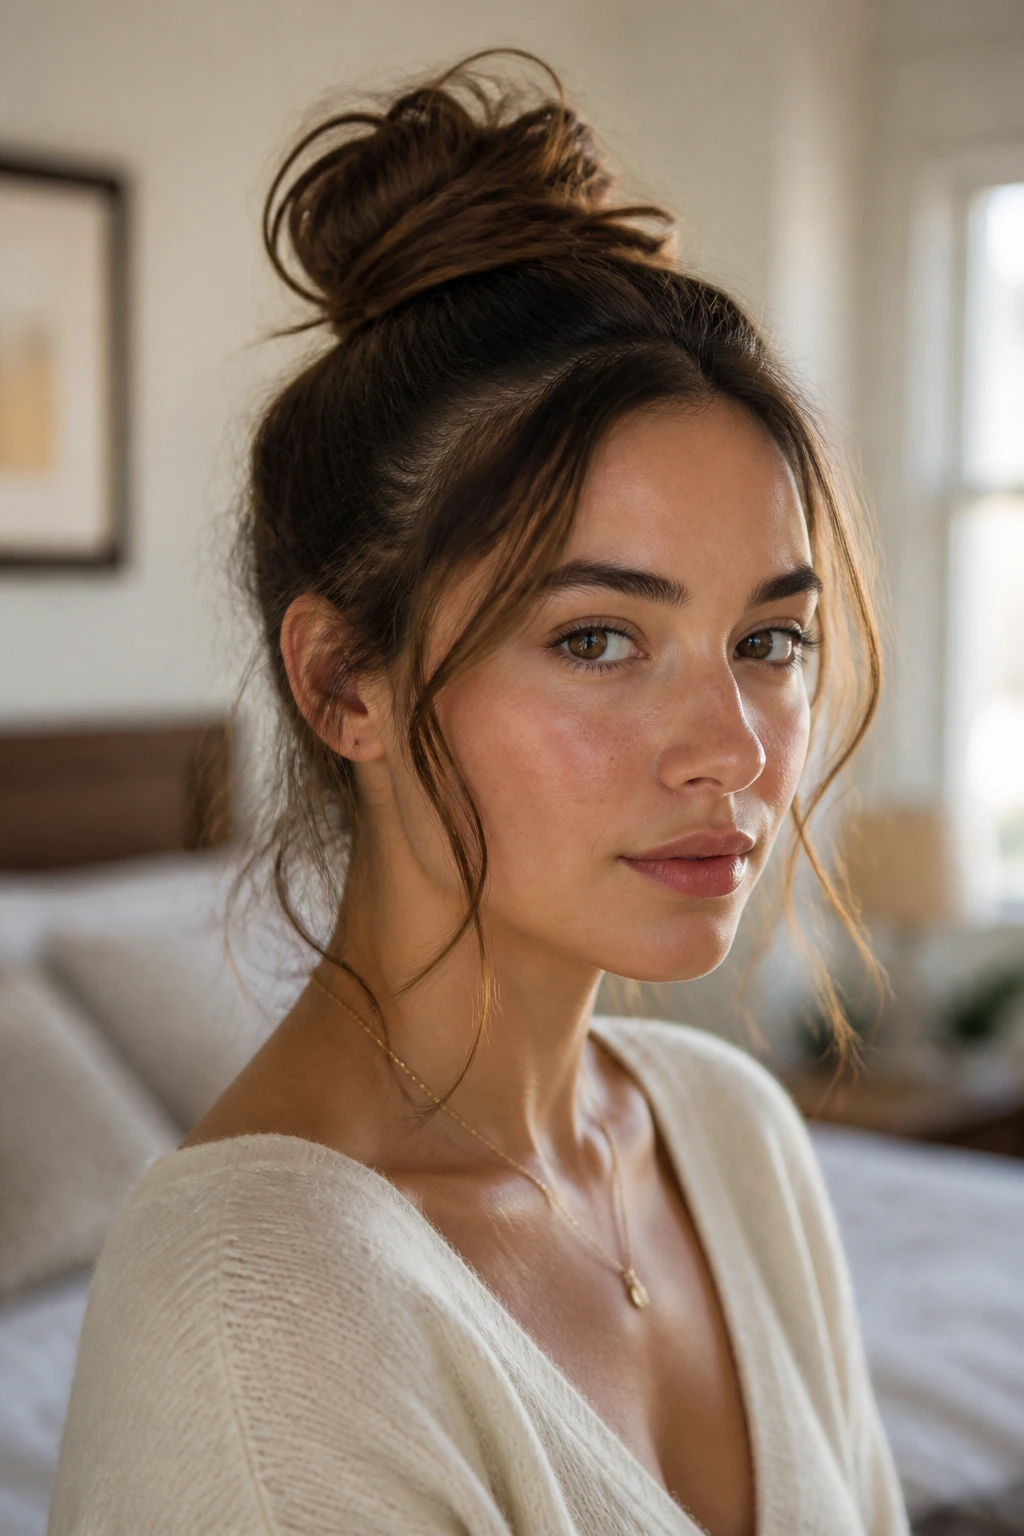
Sometimes you want the freedom of wearing your hair down, but you need to keep the crown under control. The half-up top knot gives you the best of both worlds. It targets the canopy of your head—the area most exposed to the elements—and pins it into a neat knot, while letting your natural texture flow underneath.
This style is incredibly versatile. It works on fresh hair, day-three hair, or when you are stretching your wash day a bit further. By parting your hair from the tops of your ears up to your crown, you isolate the section that usually gets the most frizzy. Twist this top section into a tight rope, coil it around its base on top of your head, and secure it with a U-shaped hair pin.
To make the style feel soft and effortless, pull a few delicate strands loose around your ears and temples. Rub a drop of light hair oil between your fingertips and gently smooth these face-framing pieces to give them definition without making them look greasy.
6. The Wet-Look Slicked-Back Low Bun
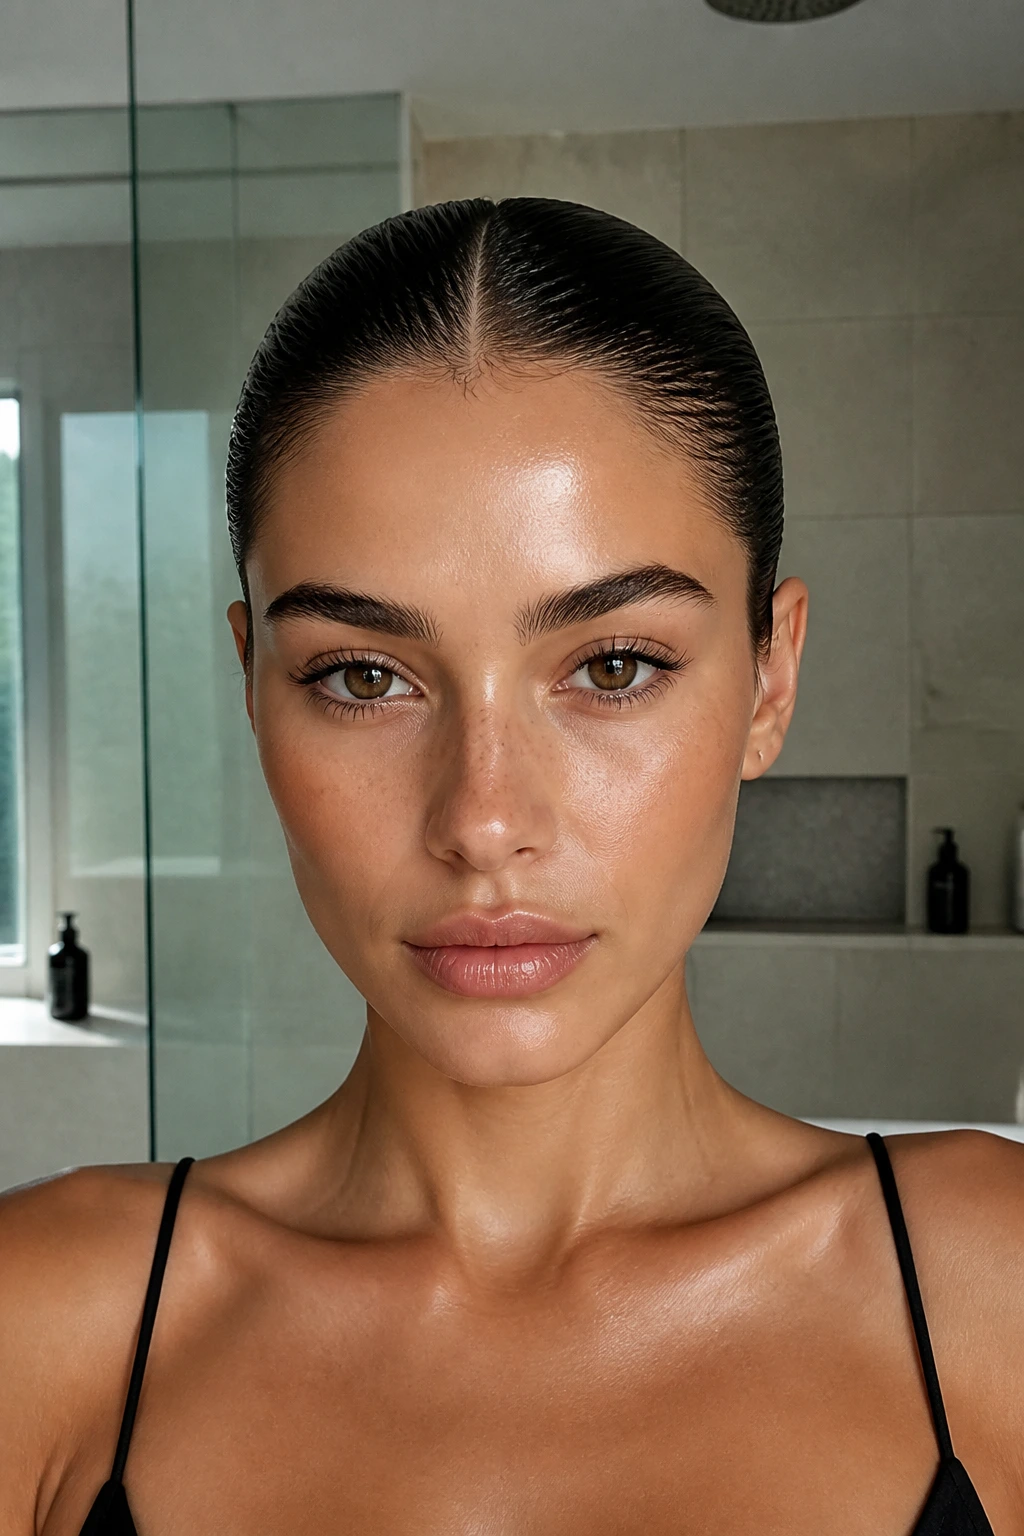
For those days when you want a highly polished, high-fashion look, the wet-look low bun is unmatched. It embraces moisture instead of running from it, using heavy-hold gel to create a sleek, reflective surface that blocks out humidity entirely.
Compared to dry, fluffy styles, this wet-look bun is incredibly durable. It is the ultimate shield against rainy weather because your hair is already styled to look wet and glossy.
This style is best suited for anyone looking to create a sharp, elegant silhouette. You will need a generous amount of water-soluble styling gel, a fine-tooth comb, and a firm elastic band.
Apply the gel to damp hair from your roots to the mid-shaft. Use your comb to slick the hair straight back, or create a sharp center part before combing it down toward the nape of your neck. Secure the hair into a tight, low ponytail. Twist the tail into a neat, compact coil, wrapping it tightly around the elastic band and securing it with hair pins. Finish with a glossing spray to keep that high-shine finish looking fresh all day.
7. Side-Swept Fishtail Braid
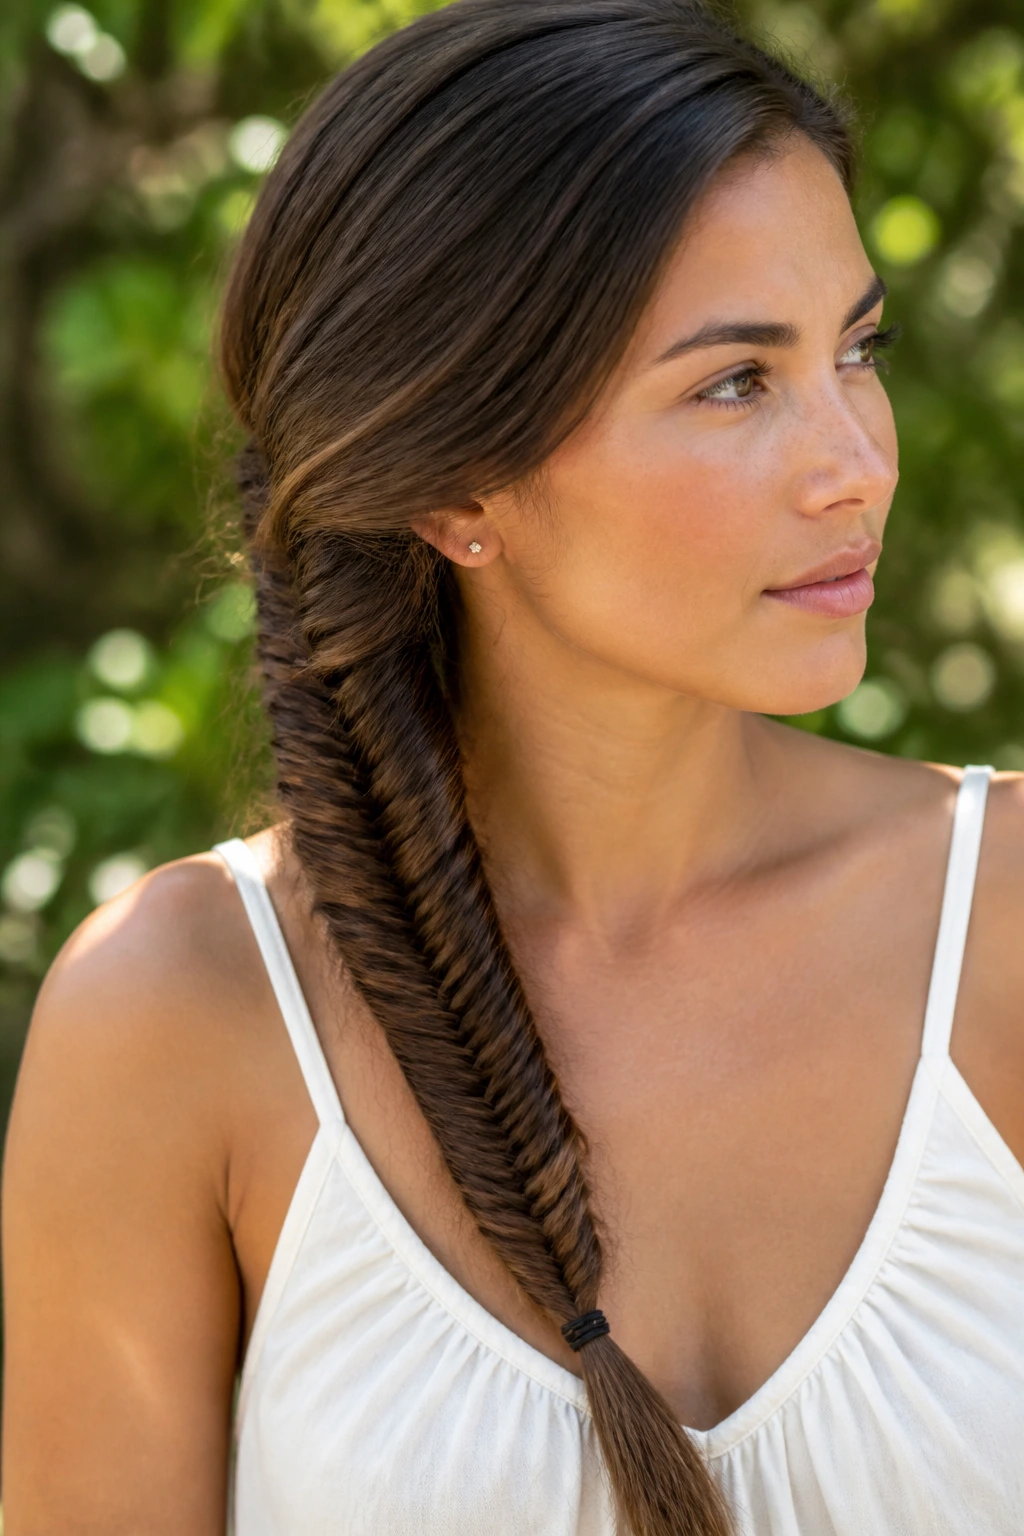
The fishtail braid looks intricate, but it is actually one of the simplest styles to master once you get the rhythm down. It uses two main sections of hair instead of three, weaving small outer strands across each other to create a woven pattern. This tight weave is excellent for keeping thick, frizzy hair compressed and neat.
The Physics of the Fishtail
Because a fishtail braid uses many small, overlapping strands, it exerts constant, even pressure across the entire length of the braid. This even distribution of tension holds shorter layers and flyaways in place far better than a standard three-strand braid.
How to Weave a Sleek Fishtail
- Sweep all of your hair over one shoulder and split it into two equal sections.
- Take a thin strand of hair from the outer edge of the left section and cross it over to the inside of the right section.
- Take a thin strand from the outer edge of the right section and cross it over to the inside of the left section.
- Repeat this alternating pattern, pulling the strands tight after each cross.
- Secure the end with a small elastic, then gently pinch the edges of the braid to widen it slightly for a fuller look.
Pro tip: For a clean finish, wrap a small strand of hair around the bottom elastic band and pin it behind the braid to hide the rubber band.
8. Flat Twist-Out with a Deep Side Part
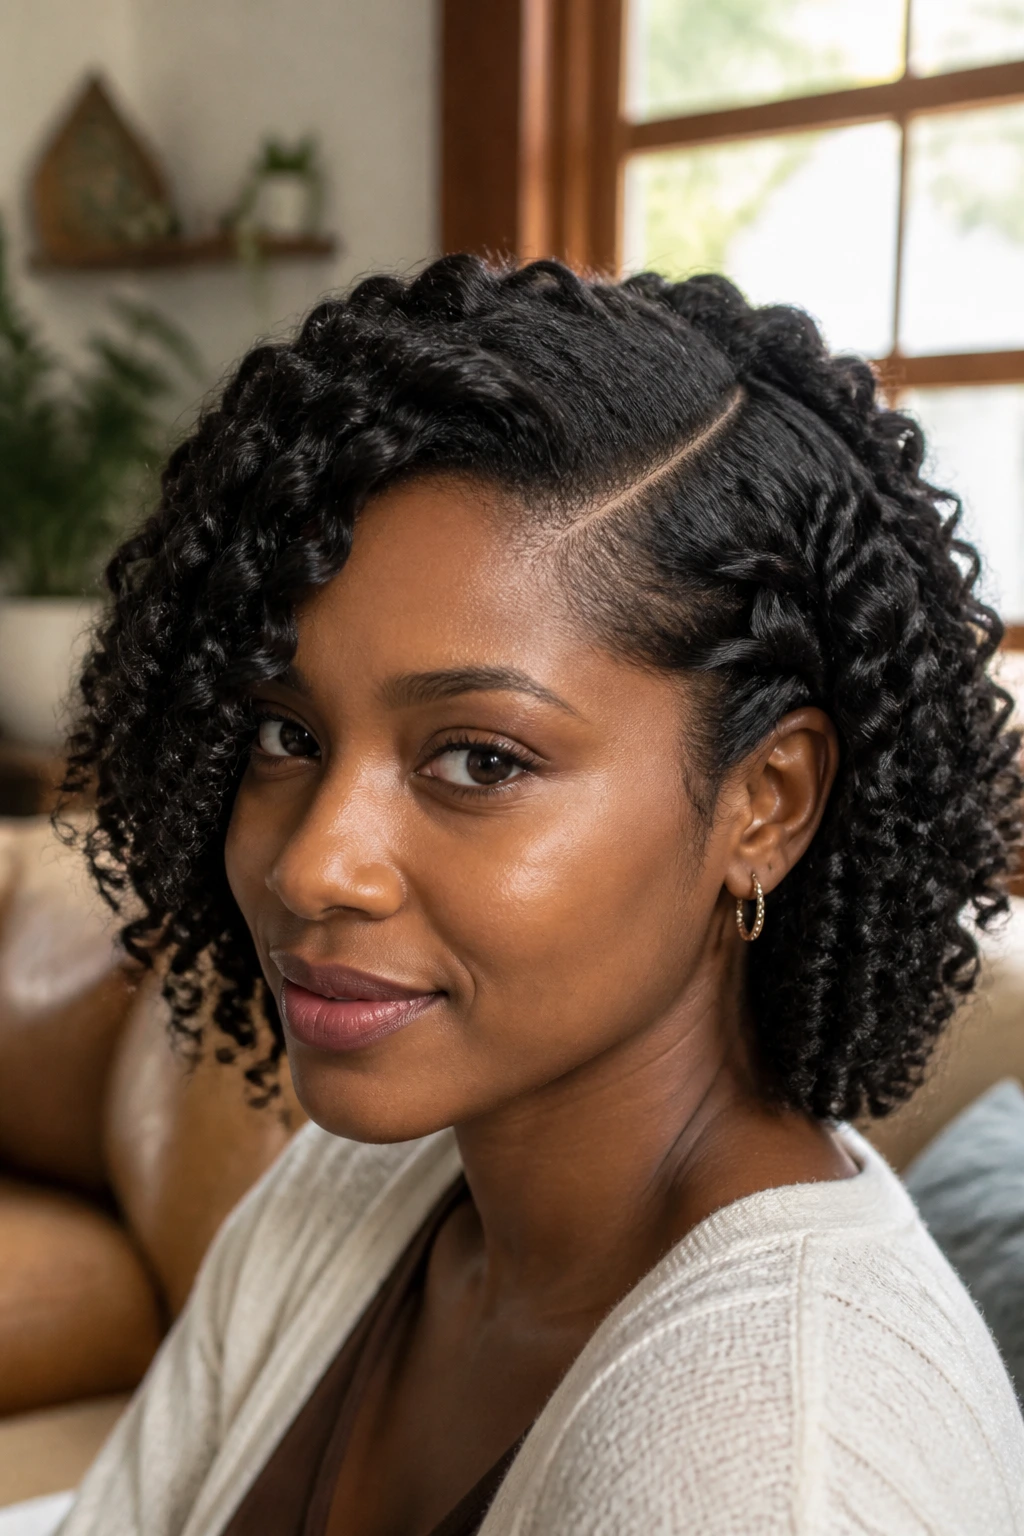
If you want to wear your natural curls loose but need a way to control puffiness at the roots, a flat twist-out is a fantastic option. It involves parting your hair into sections, twisting them flat against your scalp, and then unraveling them once they are fully dry. The result is beautiful, defined waves that resist frizzing because they have been set in a structured shape.
This technique is highly popular because it stretches the curl pattern, reducing shrinkage and making your hair less likely to tangle.
Start by parting your damp hair with a deep side part. Apply a moisturizing styling cream throughout your hair. Take a small section near the part, split it in two, and begin twisting them around each other, adding more hair as you move down your scalp, similar to flat braiding. Continue this process across your entire head, letting the twists dry completely. Once dry, coat your hands in a little jojoba oil and gently unravel the twists, separating them to create soft, voluminous waves.
9. Crown Braid with Textured Flyaways
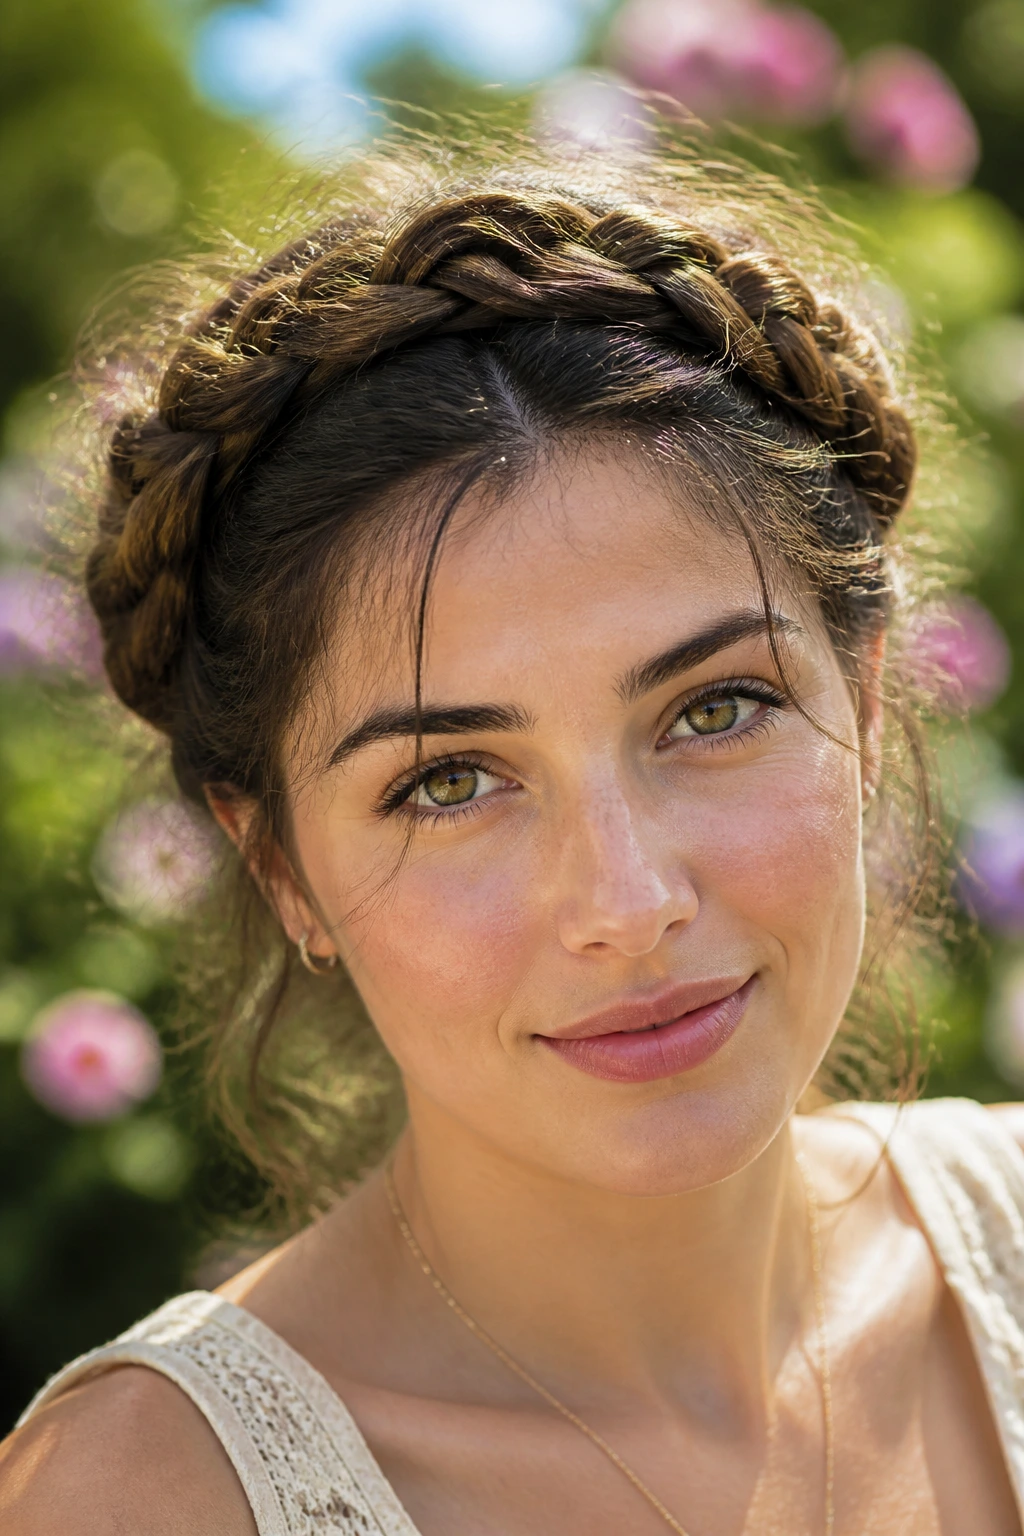
The crown braid is a timeless style that wraps around your head like a tiara. It is an excellent choice for hot, humid weather because it lifts your hair completely off your neck and shoulders, keeping you cool and preventing sweat from ruining your hair.
Embracing Soft Texture
While some crown braids are styled to be perfectly smooth, letting your natural texture show makes this style look romantic and soft. Shorter pieces that escape the braid can simply be tucked back in or left to curl softly.
Securing Your Crown
- Part your hair down the center and create two low braids behind your ears.
- Take the left braid, lift it up over the top of your head, and pin it flat against your scalp near your right ear.
- Take the right braid, cross it over the first braid on top of your head, and pin it near your left ear.
- Tuck the loose ends of both braids underneath each other to hide them, securing the entire structure with U-shaped pins.
This distributes the weight of your hair evenly across your head, making it incredibly comfortable to wear for long periods.
10. The Voluminous Messy Shag with a Headband
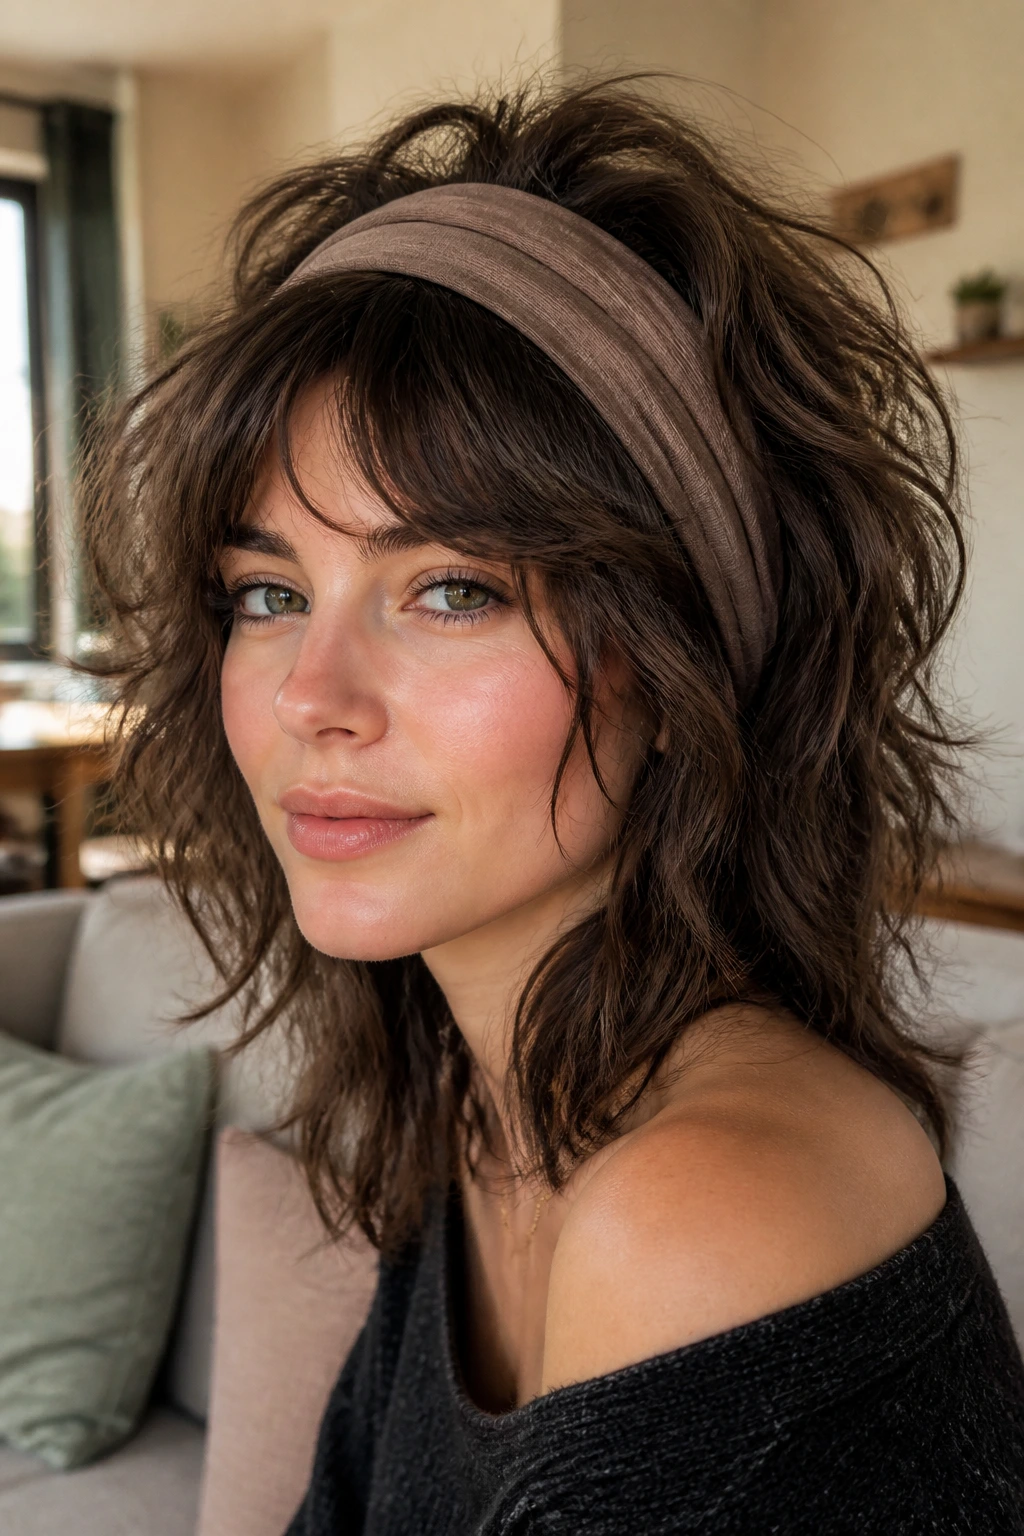
If your hair naturally has a lot of texture, why not show it off? The shag style embraces volume, using a wide fabric headband to keep the hair near your face flat and controlled while letting the rest of your hair bounce freely.
This approach is highly effective because it focuses control where it matters most: around your face. Flyaways around your forehead and temples are held back by the band, while the length of your hair is allowed to be as big and textured as it wants to be.
Use a leave-in conditioner to add moisture to your hair, then diffuse or air-dry it. Slide a wide, breathable fabric headband onto your head, pulling it back about an inch from your hairline. Use your fingers to fluff the hair behind the band, adding volume at the crown. This creates a beautiful, retro-inspired silhouette that looks deliberate and stylish, turning your natural frizz into gorgeous, touchable volume.
11. Sleek High Ponytail with a Wrapped Base
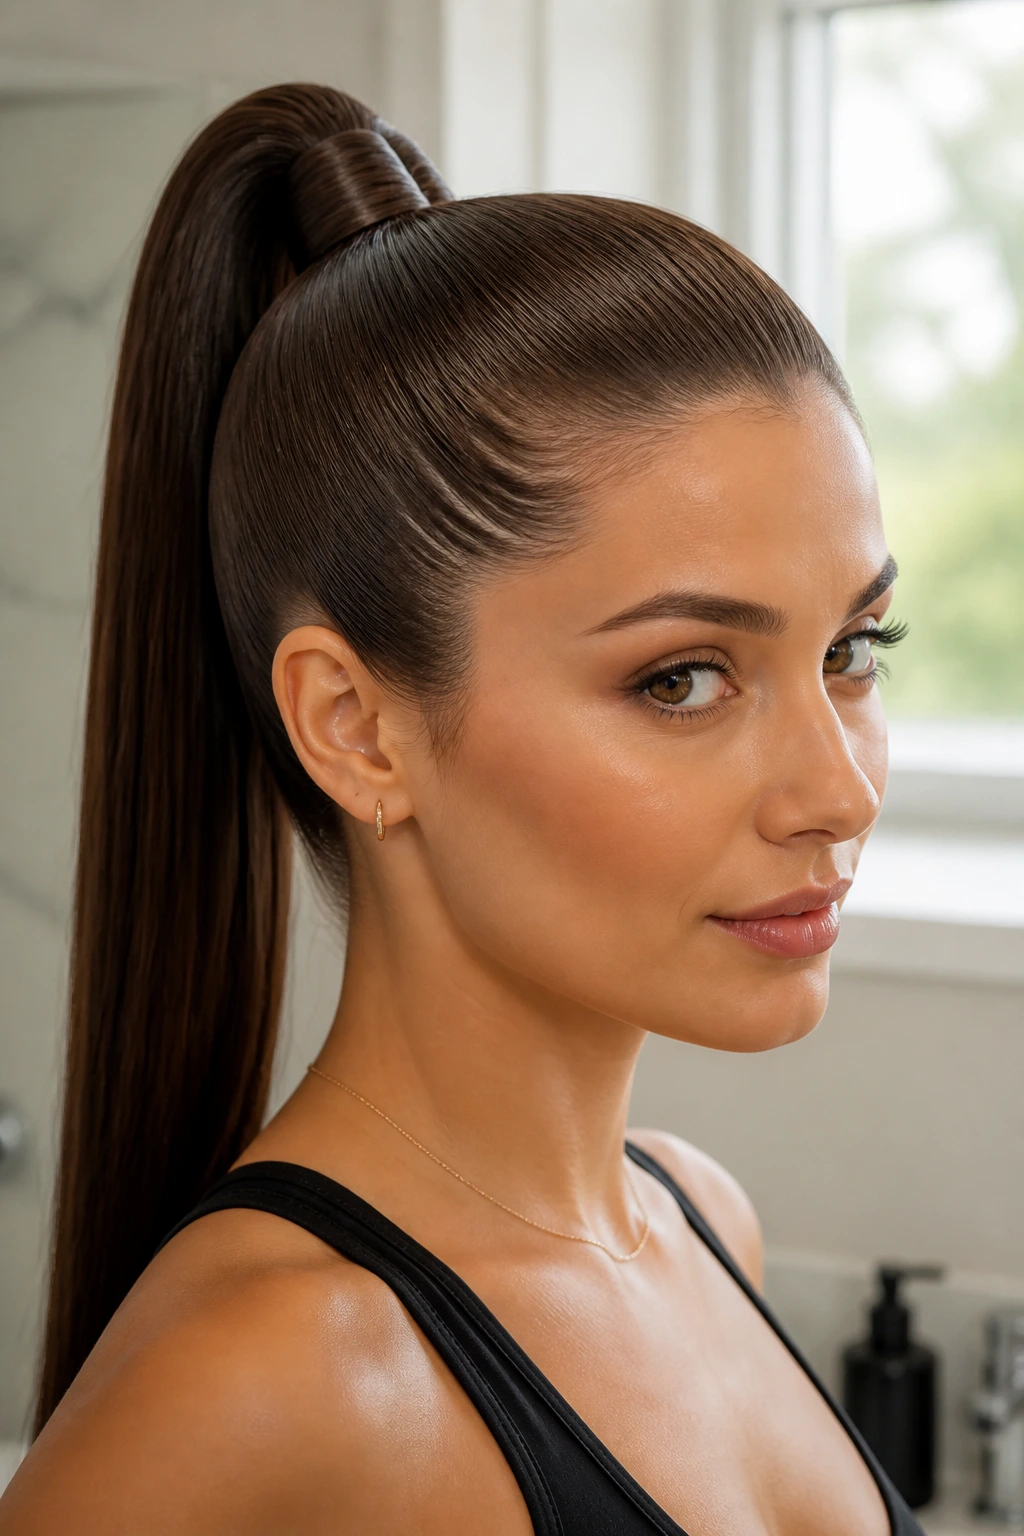
A high ponytail is a classic, but a frizzy texture can sometimes make the base look bumpy. By using a small portion of your hair to wrap around the elastic band, you hide the hair tie and add a polished detail that elevates the entire look.
The wrapped base acts as a physical anchor. It squeezes the thickest part of the ponytail close to your head, preventing the weight of your hair from pulling the elastic downward during the day.
To achieve this, apply a firm-hold smoothing cream to your roots. Use a close-bristled brush to smooth your hair upward toward your crown, keeping your chin lifted to avoid bagginess at the nape of your neck. Secure the hair tightly with a strong elastic. Take a half-inch section of hair from the underside of the ponytail, wrap it smoothly around the elastic band until it is hidden, and secure the end with a small bobby pin pushed straight down into the base of the ponytail.
This style keeps your hair securely lifted, showing off your bone structure and keeping your neck cool in warm weather.
12. French Roll with Modern Textured Ends
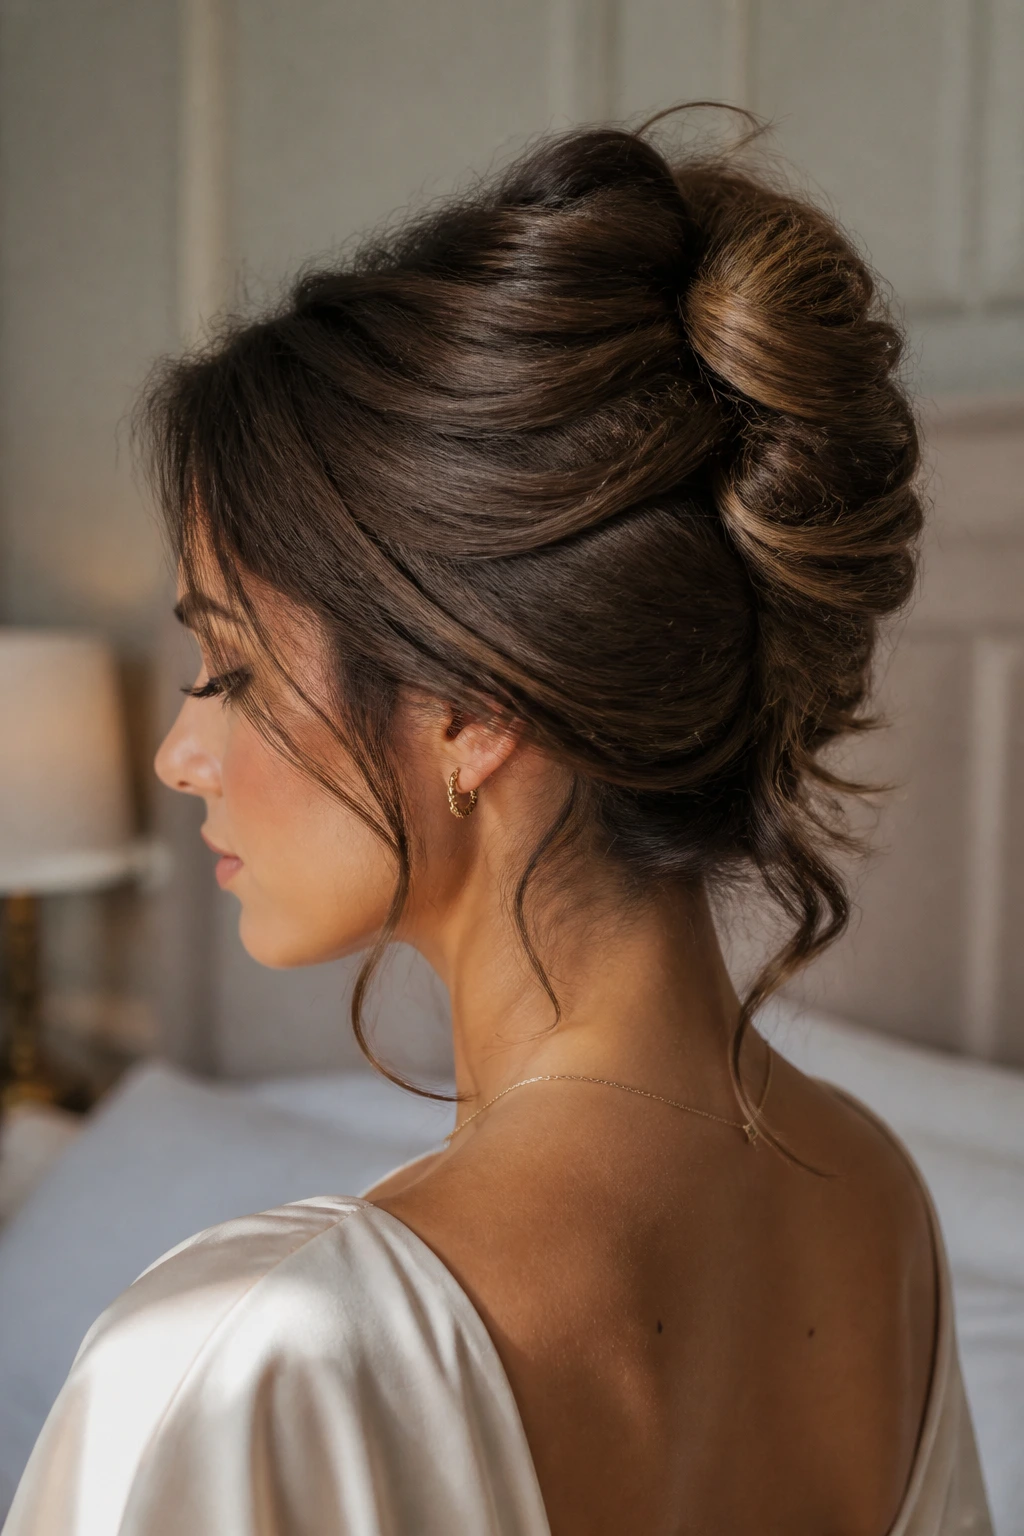
The French roll is traditionally seen as a formal, smooth style, but a modern update allows you to use your natural hair texture to make it feel fresh and relaxed. By twisting the hair upward and leaving the ends free, you create a beautiful play of texture on top of a classic shape.
This style is exceptionally good at hiding frizz because the main body of the hair is tucked neatly inside the roll, protected from friction.
This look works best on hair with some natural grip or texture, as it helps hold the pins in place without slipping.
To style, sweep all of your hair to one side of your head and secure it vertically down the center with a row of bobby pins, crisscrossing them for extra grip. Gather your hair, twist it upward in the opposite direction of the pins, and tuck the roll inward over the pins. Secure the roll with large hair pins inserted along the seam. Let the ends of your hair spill out of the top of the roll, using a touch of hair cream to shape them into soft, bouncy curls or waves.
13. Space Buns with Braided Accents
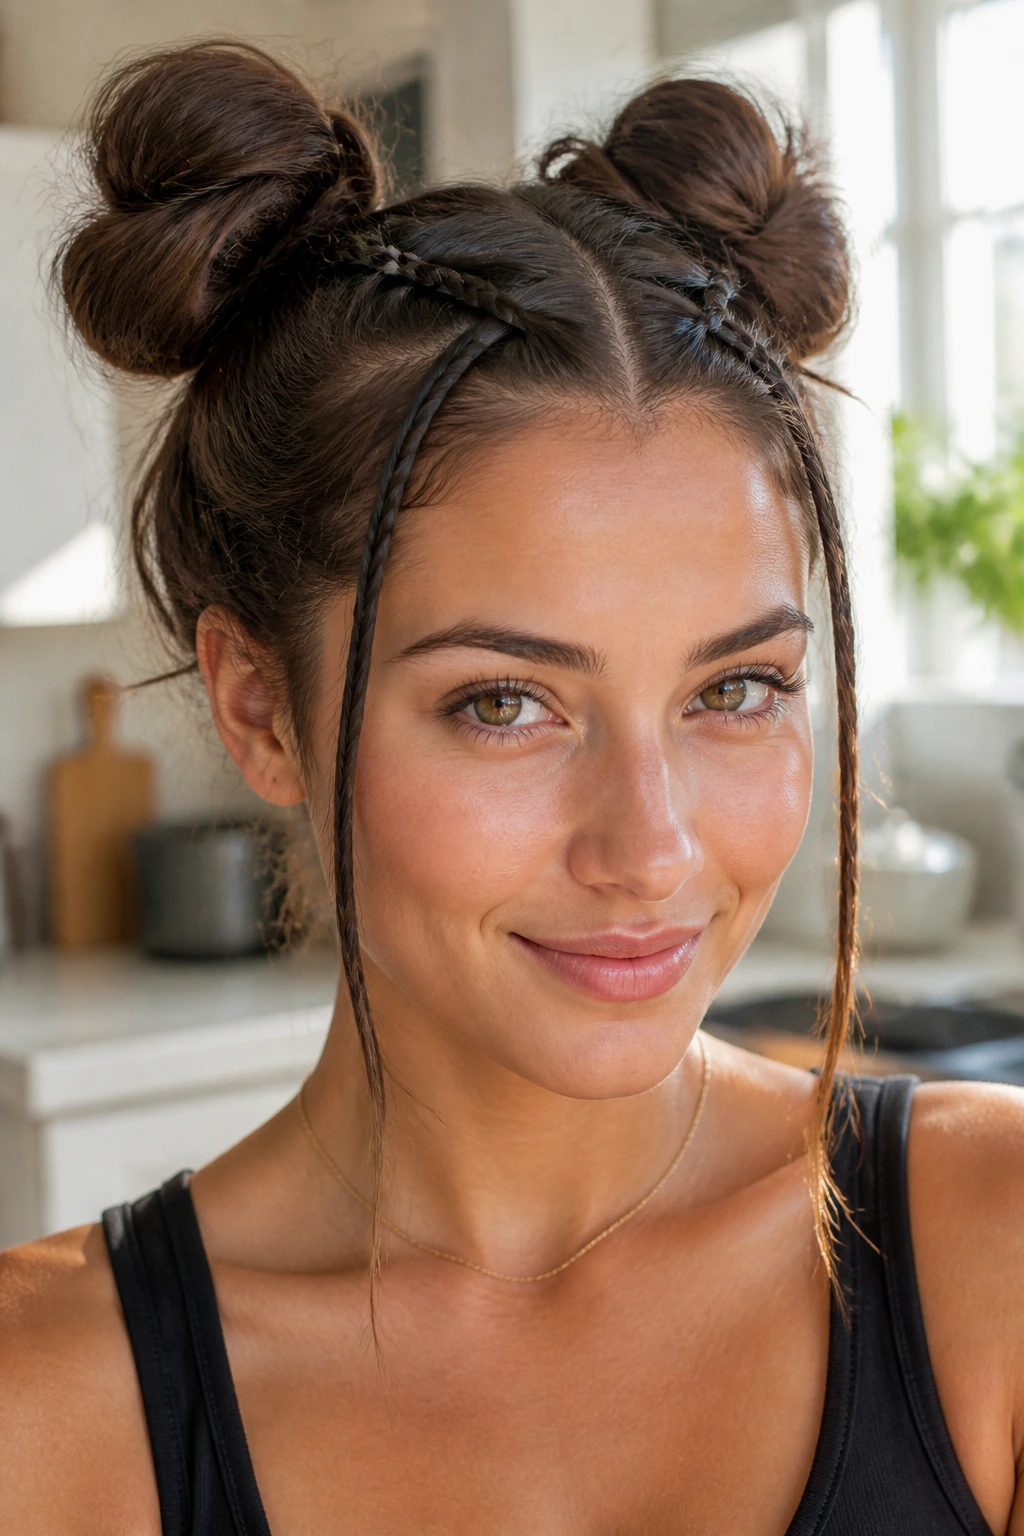
Space buns are playful, youthful, and incredibly effective at keeping thick, frizzy hair under control. By splitting your hair into two high buns, you distribute the weight of your hair, making it much easier to secure than a single large bun.
Adding Braids for Extra Hold
Adding a small braid to the front of each bun helps control the hair along your temples, which is often the first place frizz starts to show when humidity levels rise.
How to Style Space Buns
- Part your hair down the center and create two high ponytails on either side of your head.
- Take a small half-inch section of hair from the front of each ponytail, braid it tightly, and secure with a small clear band.
- Twist the main body of each ponytail into a rope, wrap it around the base to form a bun, and pin it in place.
- Wrap the small braided accent around the base of each bun, securing it with a bobby pin.
This combination of smooth braids and textured buns creates a beautiful contrast that looks highly detailed and fun.
14. Classic Halo Braid
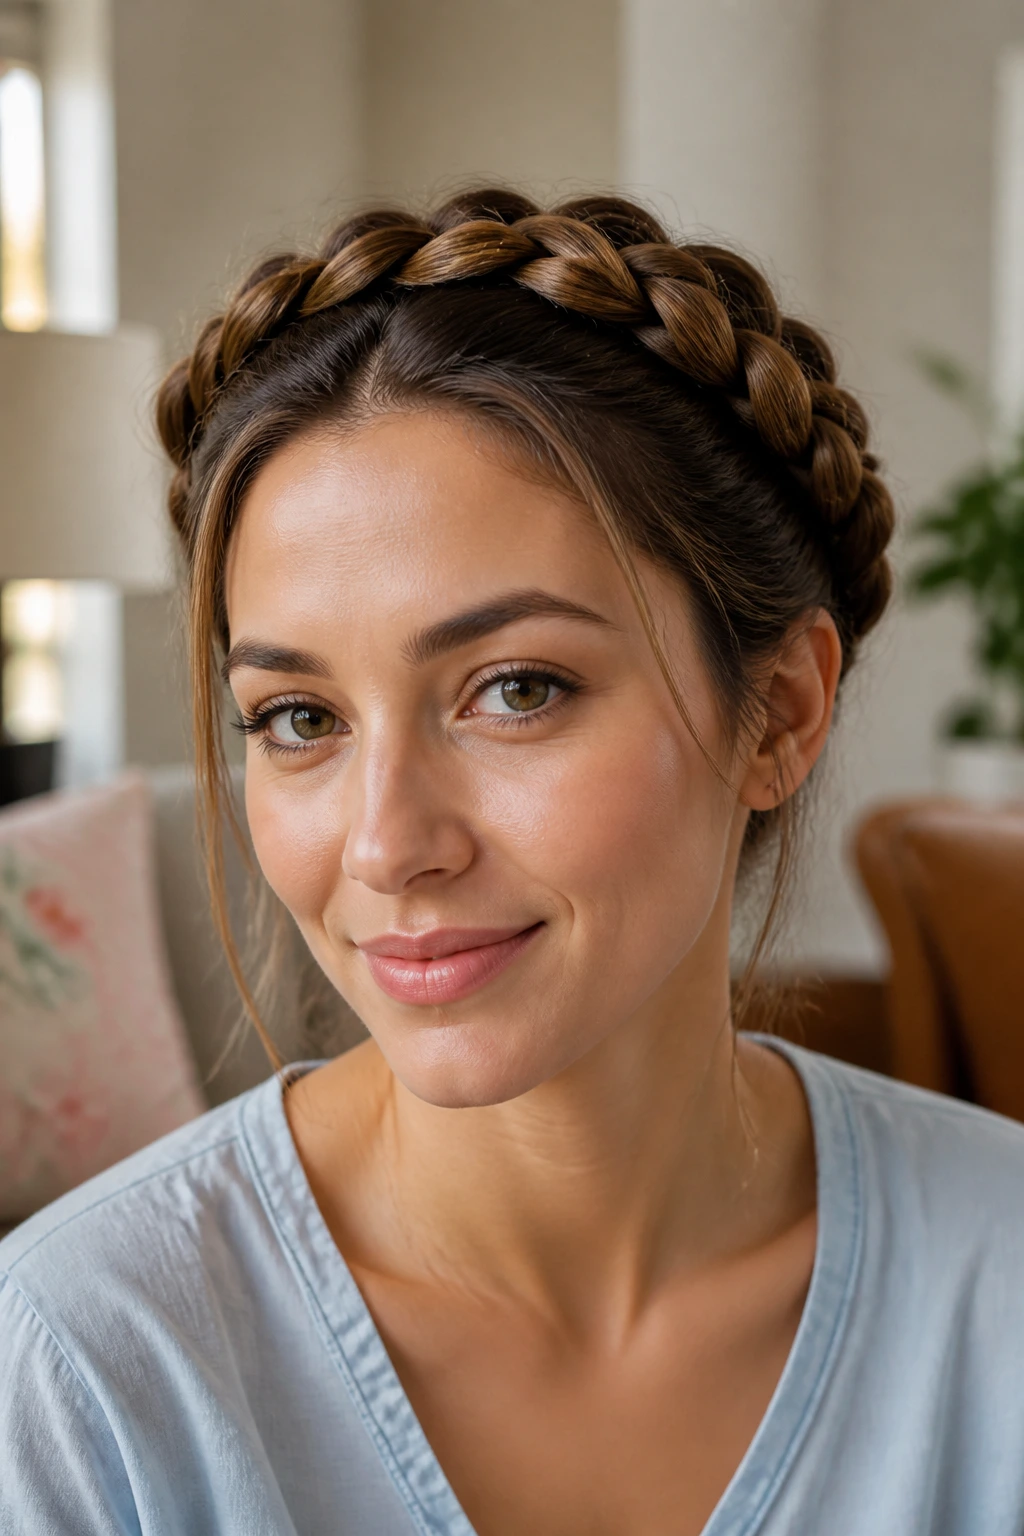
The halo braid is a beautiful, secure style that wraps a single braid entirely around the perimeter of your head. It is a fantastic option for those with long, thick hair who want a style that will stay secure for days at a time.
Because the braid is secured flat against your head, there is very little movement, which prevents the friction that leads to frizz.
Start by parting your hair down the middle. Begin a Dutch braid at the nape of your neck on one side, working your way upward toward your ear, across your forehead, and down the other side of your head. Keep the braid tight and close to your hairline to ensure it stays secure. Once you reach the starting point, tuck the remaining loose ends under the beginning of the braid and pin them flat. This creates a seamless, continuous circle of hair that looks elegant and keeps your hair completely protected from the elements.
15. Twisted Chignon with a Claw Clip
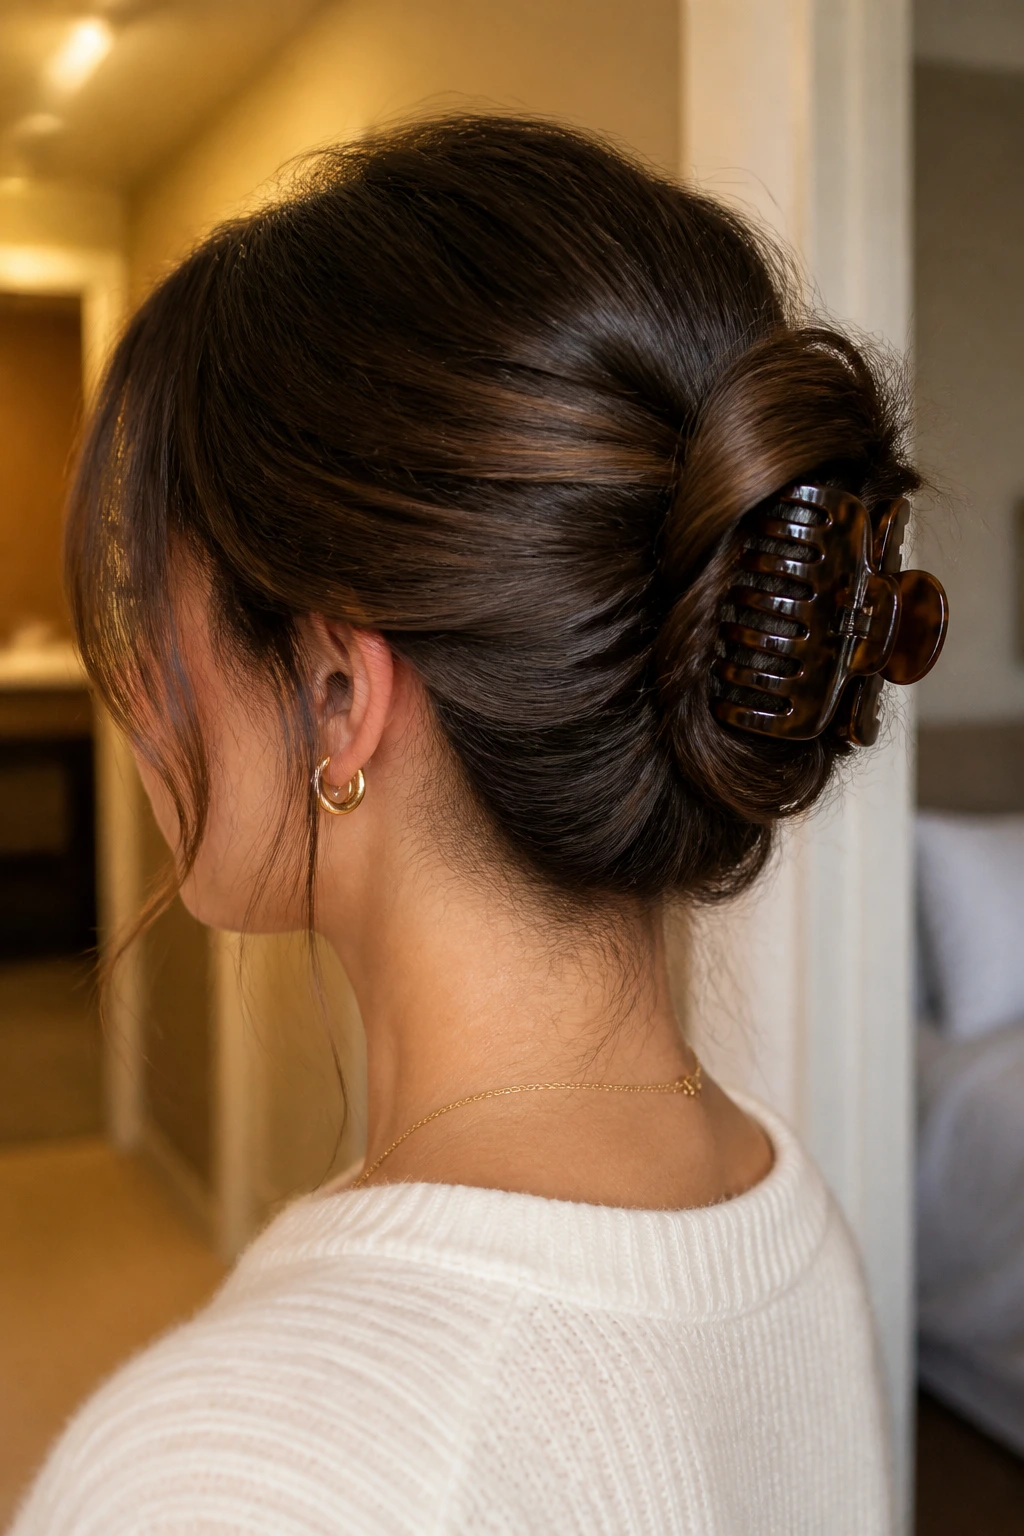
When you are short on time but still want to look chic, a twisted chignon held in place with a sturdy claw clip is your best friend. This style takes seconds to create and can be easily adjusted throughout the day.
The Claw Clip Advantage
Unlike elastic bands, which can squeeze and stress your hair shaft, claw clips hold your hair with even, gentle pressure. This reduces the risk of hair breakage, which often presents itself as short, frizzy flyaways along your crown.
Styling the Quick Chignon
- Gather your hair into a low ponytail at the nape of your neck using your hands.
- Twist the hair tightly into a rope, pointing the end upward toward the sky.
- Fold the twisted length down on itself to form a neat vertical loop against the back of your head.
- Clip the loop securely to your scalp using a large claw clip with strong teeth.
Let a few soft pieces tumble out of the top of the clip to give the style a relaxed, effortless feel.
16. Half-Up Bobby Pin Chevron Pattern
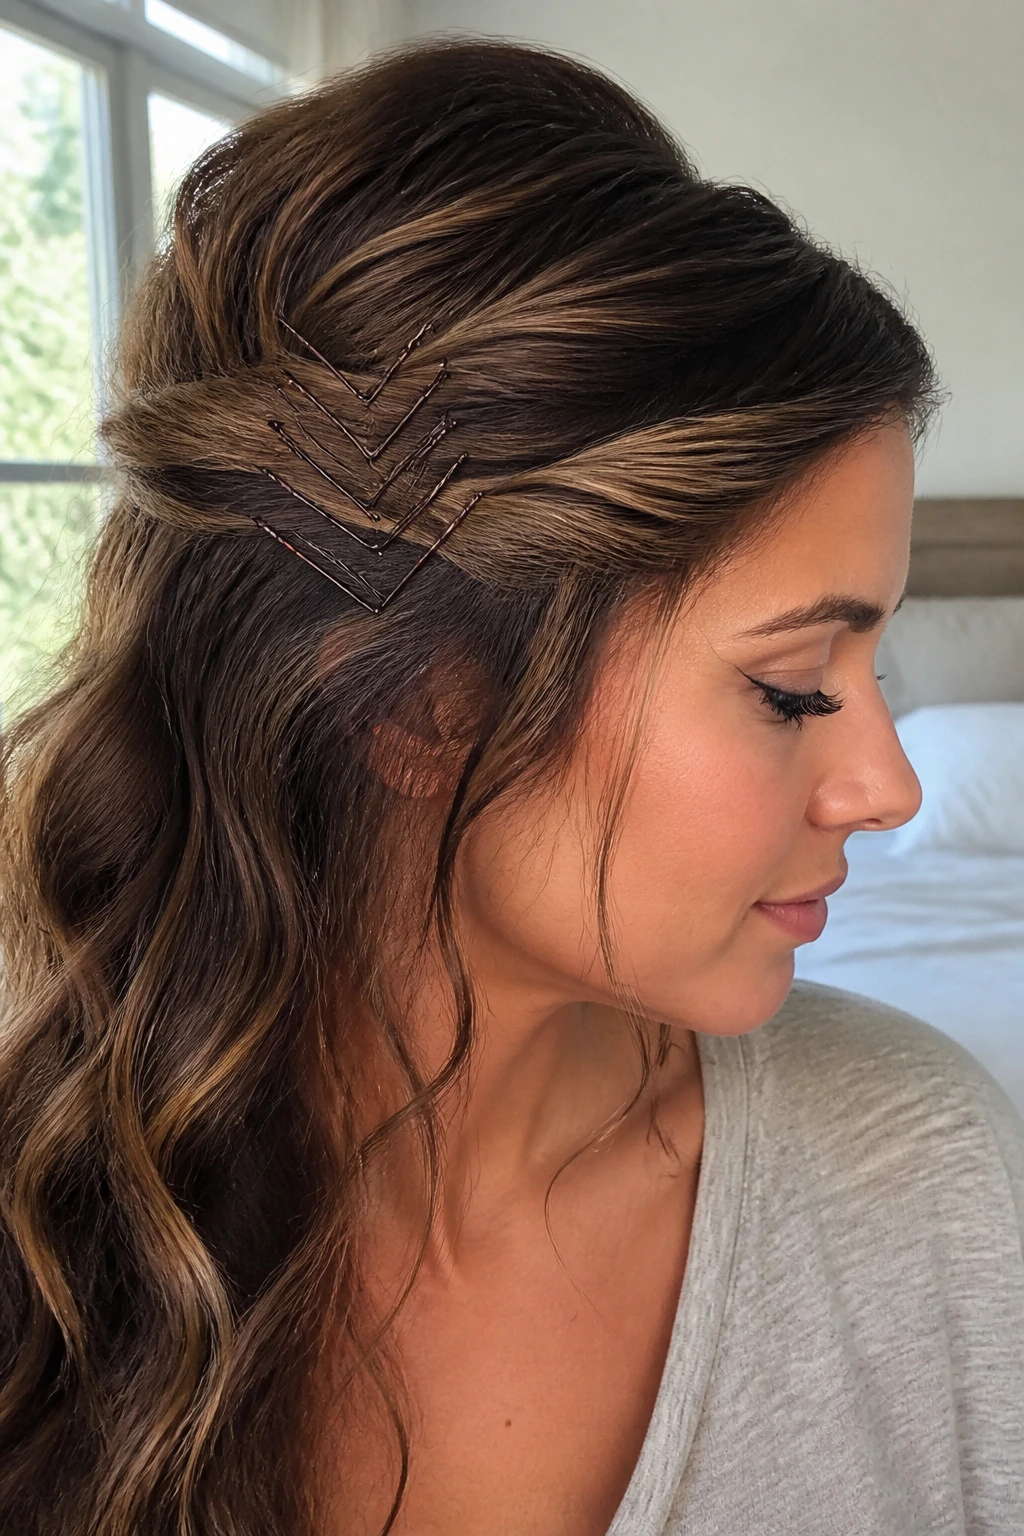
If you want a simple way to keep the hair out of your eyes while making a style statement, using bobby pins as a decorative element is a brilliant solution. By pinning your hair back in a geometric chevron pattern, you turn basic hair pins into beautiful accessories.
This style is perfect for shorter hair lengths, such as bobs or lobs, where braiding or gathering the hair into a bun might be difficult.
To create this look, take a two-inch section of hair from the left side of your temple and smooth it back toward the center of your head. Slide a bobby pin horizontally over the section to hold it in place. Take a matching section from the right side, cross it over the first section, and secure it with a bobby pin pointing downward at an angle. Slide another pin upward at an angle to meet the first, forming a neat arrow or “V” shape.
Repeat this pattern with two more pins directly below the first set to create a double chevron design. This holds your hair firmly in place while adding a sharp, modern detail to your look.
17. The Low Rope Braid
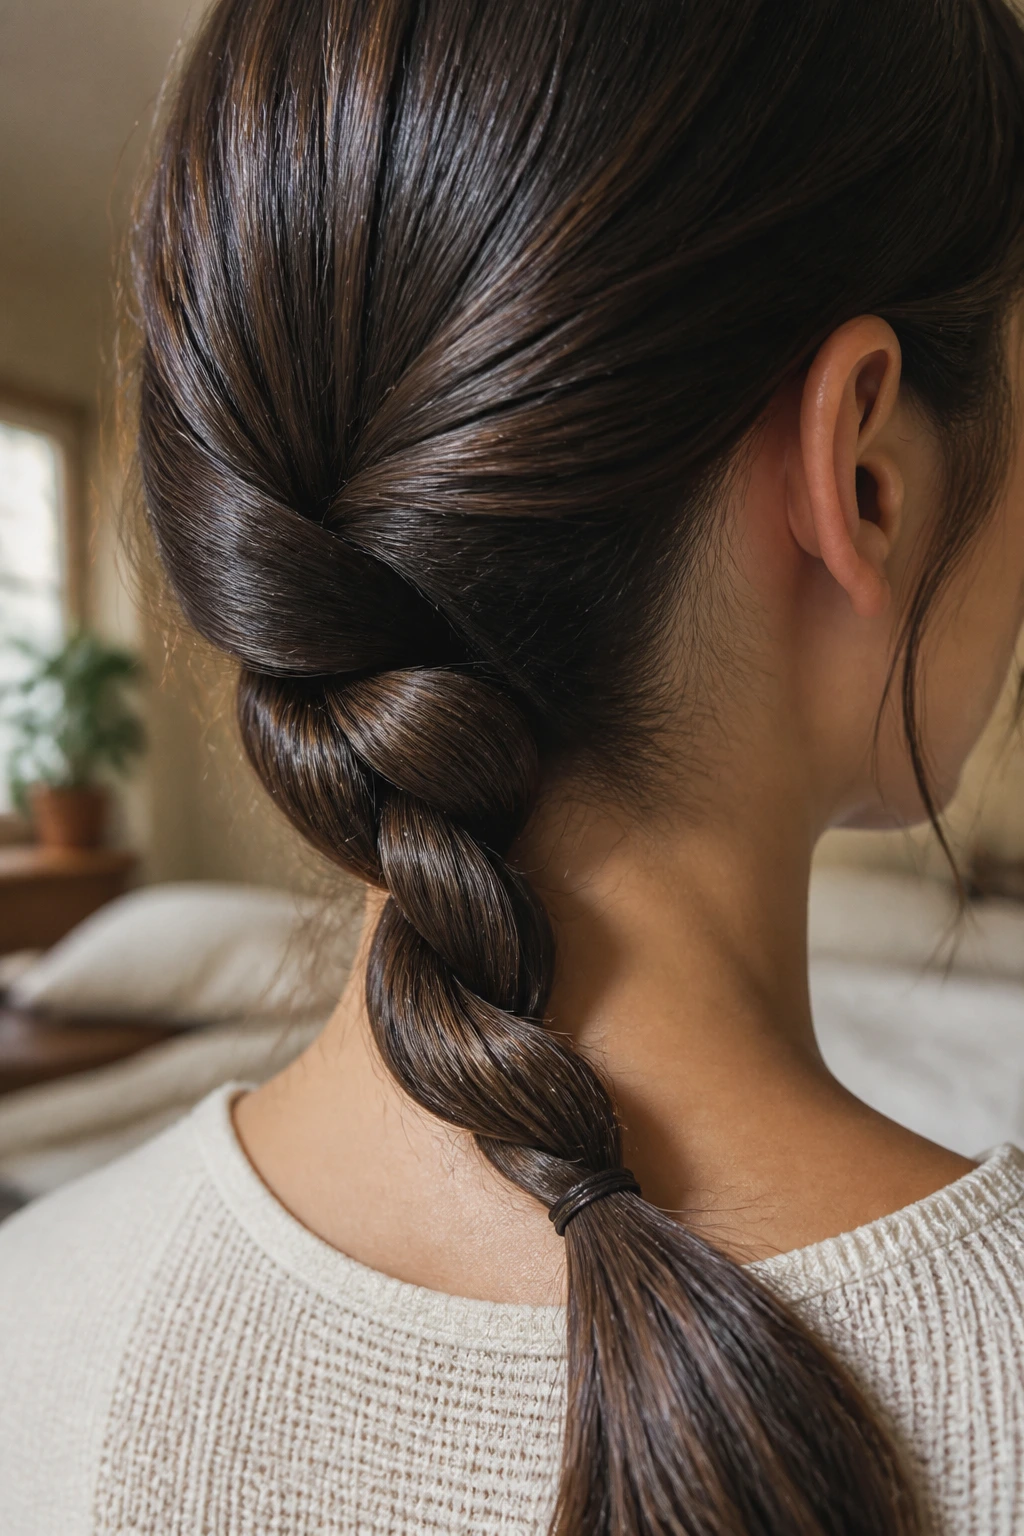
A rope braid uses two twisted sections of hair wrapped around each other to create a thick, cord-like effect. It is a fantastic alternative to a standard three-strand braid, offering a unique texture that works beautifully on voluminous hair.
Because you are twisting each section before wrapping them together, you double the tension on the hair shaft, which keeps the cuticle closed and highly resistant to swelling in damp weather.
To style, smooth your hair back into a low ponytail at the nape of your neck. Split the ponytail into two equal sections. Twist both sections individually in a clockwise direction, then wrap the two twisted sections around each other in a counter-clockwise direction.
Securing the end with a small elastic band completes the look. The opposing directions of the twists lock the braid in place, preventing it from unraveling and keeping your hair looking neat and sleek all day.
18. Voluminous Puff with Defined Edges
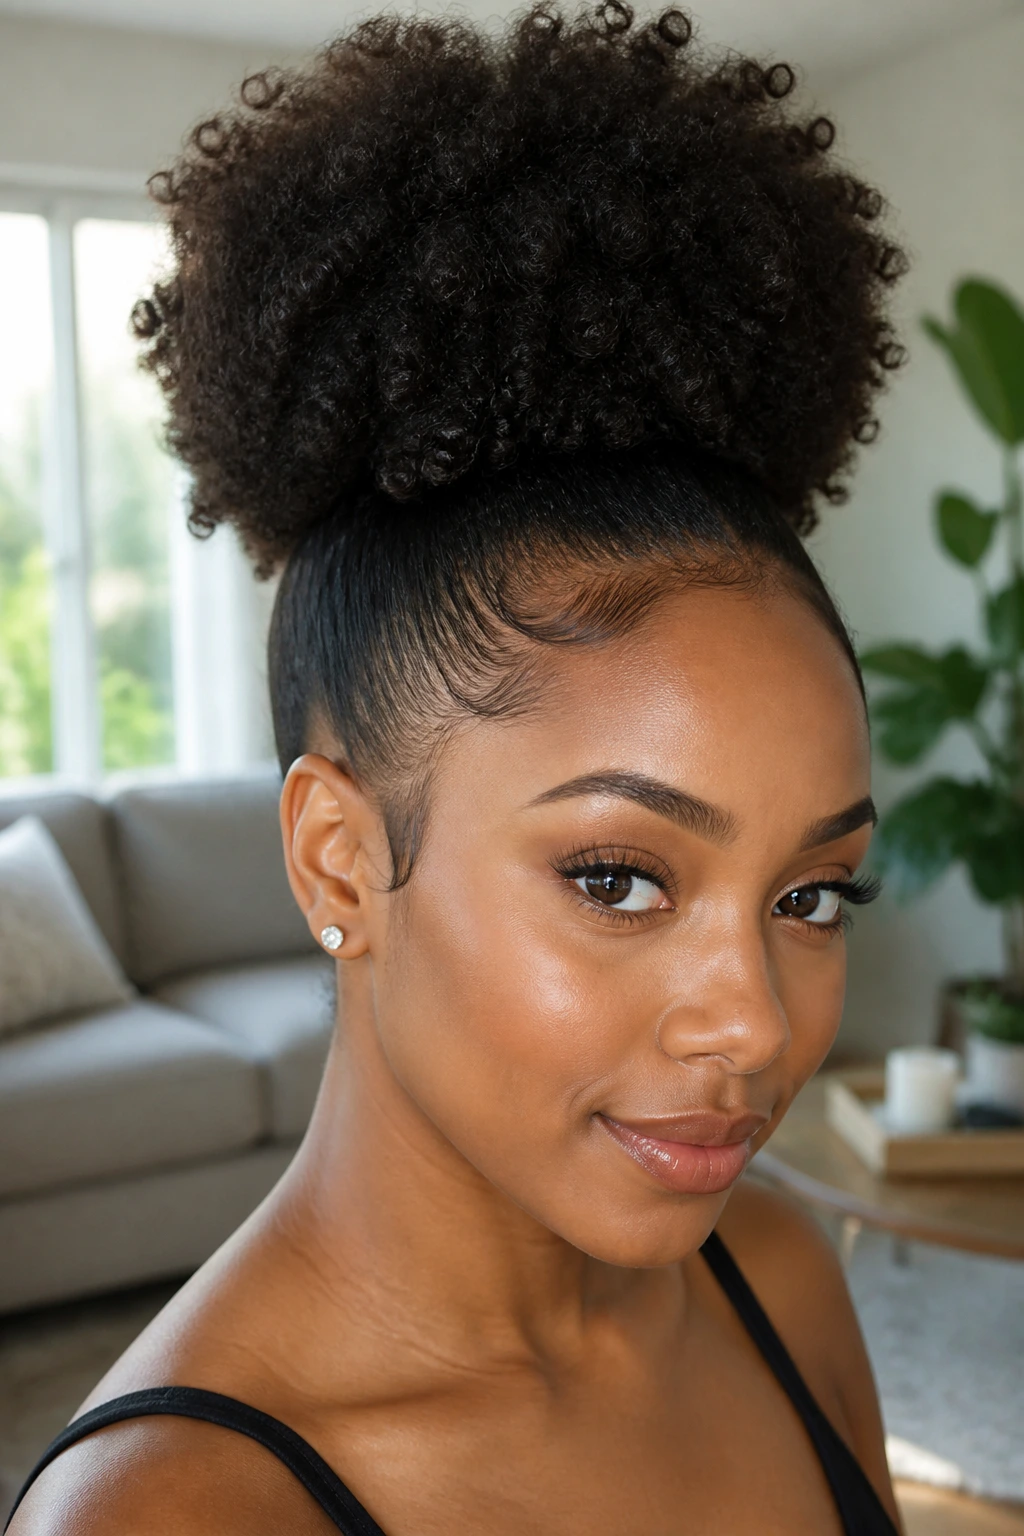
For those with curly or coily hair, a high puff is the ultimate way to celebrate your hair’s natural volume while keeping your hairline neat and sleek. It uses a strong headband or hair tie to pull the hair back, letting the length of your hair explode into a gorgeous, cloud-like puff on top of your head.
This style relies on the contrast between a very smooth hairline and a highly textured, voluminous puff.
Start by applying a firm-hold edge control gel to your hairline, using a soft-bristle brush to smooth the edges down flat. Take a long satin hair tie or a shoestring, wrap it around the back of your head, and pull the ends forward, sliding the band upward to gather your hair on top of your head. Secure the band once you reach your desired height. Use your fingers to gently fluff and shape the puff, ensuring it looks balanced and full.
This style is incredibly comfortable to wear, protects your hair from daily wear and tear, and always looks stunningly deliberate.
Essential Tools for Managing Frizzy Textures
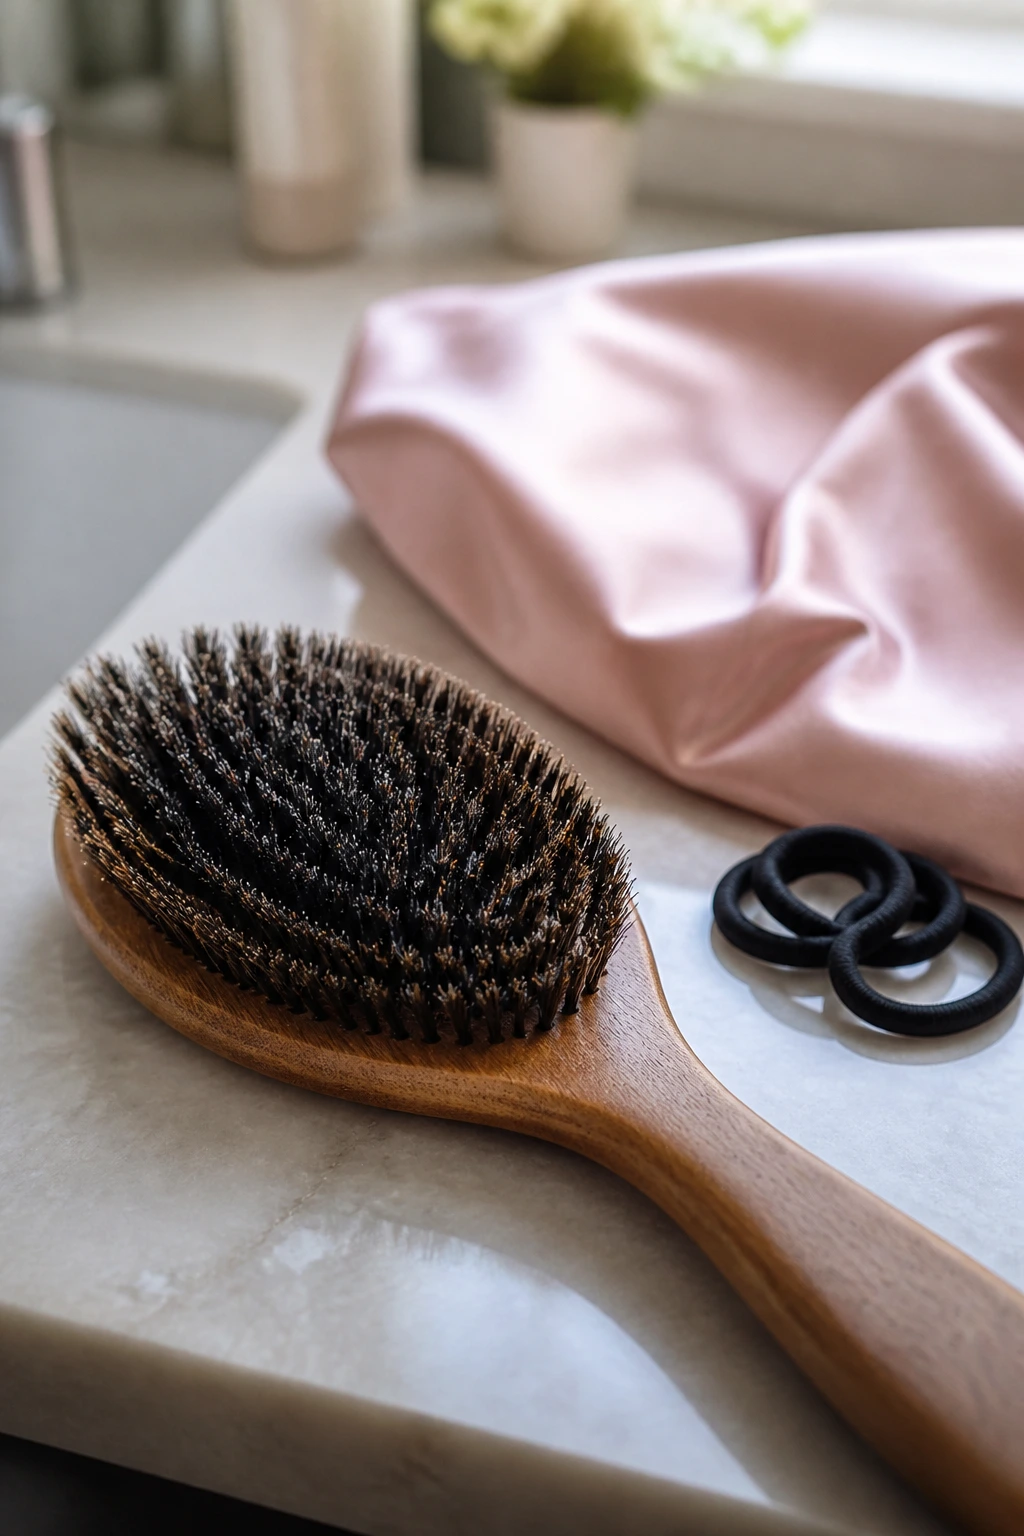
While choosing the right hairstyle is key, having the right tools in your bathroom makes the styling process much easier. Investing in a few high-quality basics can completely transform how your hair behaves.
A boar bristle brush is essential for creating sleek styles. The dense, natural bristles glide over your hair, distributing your scalp’s natural oils down the length of the shaft, which helps naturally smooth down the cuticle.
Seamless elastic bands are another must-have. Regular hair ties often have a small metal joiner that can snag and break your hair, leading to tiny, frizzy flyaways. Look for bands made from soft microfiber or silicone, which hold your hair securely without causing damage.
Finally, consider sleeping on a silk or satin pillowcase. Cotton pillowcases absorb moisture from your hair while you sleep, leaving it dry and frizzy by morning. Silk and satin allow your hair to slide smoothly across the surface, reducing friction and preserving your style for the next day.
The Bottom Line
Taming frizz is not about forcing your hair to do something it does not want to do. It is about understanding how your hair responds to its environment and choosing styles that work with that response. By using smart preparation, protective shapes, and the right tools, you can turn your hair’s natural volume into a beautiful asset rather than a daily struggle.
Embrace the texture you have. Whether you choose a sleek, polished low bun for a formal event or a voluminous high puff for a casual day out, these styles prove that you do not need flat hair to look incredibly put-together. With a little practice, you can step out into any weather with confidence, knowing your style is built to last.
