When the humidity climbs and the thermometer hits the triple digits, your hair often feels less like an accessory and more like a heavy, suffocating wool sweater. For those of us with straighter, finer, or more silk-like hair textures, finding a protective style that actually stays put can feel like a fool’s errand. We have all been there—trying a braid, only to have the layers slip out within two hours, leaving us with a frizzy, tangled mess by noon. That is where cornrows come into play, offering a structured, sleek, and refreshingly cool alternative that keeps your strands tucked away while looking sharp.
Despite common misconceptions, cornrows are not exclusive to specific hair types. When approached with the right technique, product, and tension management, they can be a fantastic way to manage straight or fine hair during the warmest months. The key lies in understanding how to grip the hair without causing undue stress to the follicles. This guide isn’t about rushing into a style that will pull at your hairline; it is about finding durable, stylish, and practical looks that actually hold up through beach days, outdoor festivals, and long, sweltering commutes.
Whether you are looking for something subtle to pull your bangs back or a full-head design that mimics the intricacy of art, the options are vast. We are going to walk through 22 distinct styles, focusing on how each one functions, why it works, and exactly what you need to keep it looking fresh. Let’s stop fighting the frizz and start working with it.
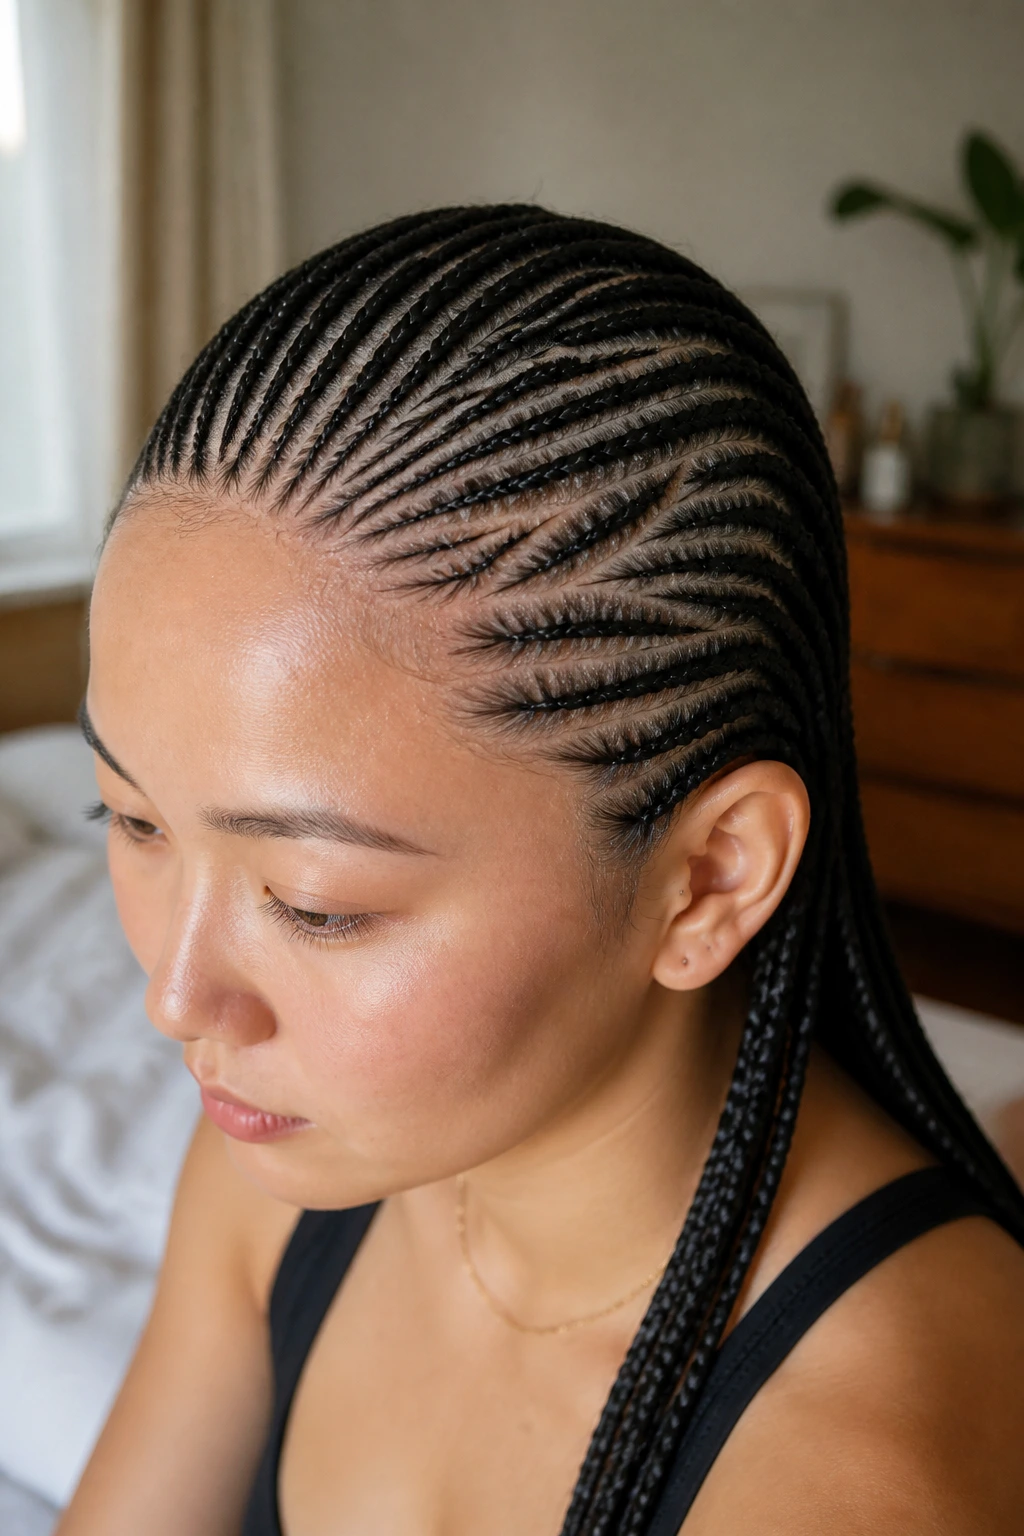
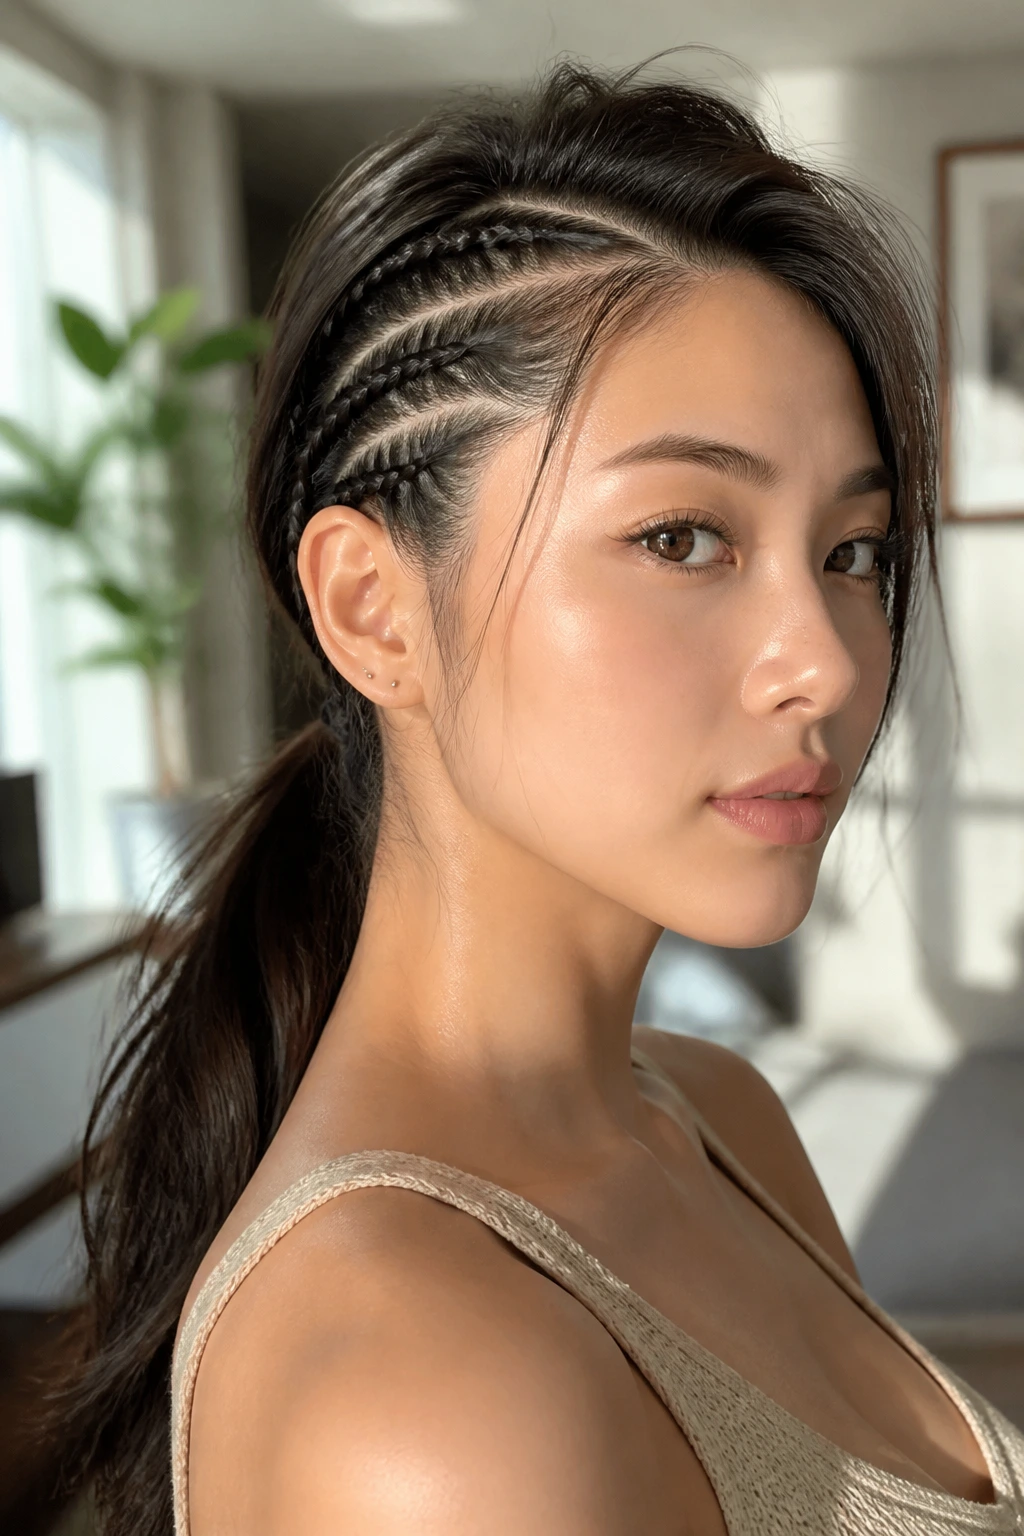
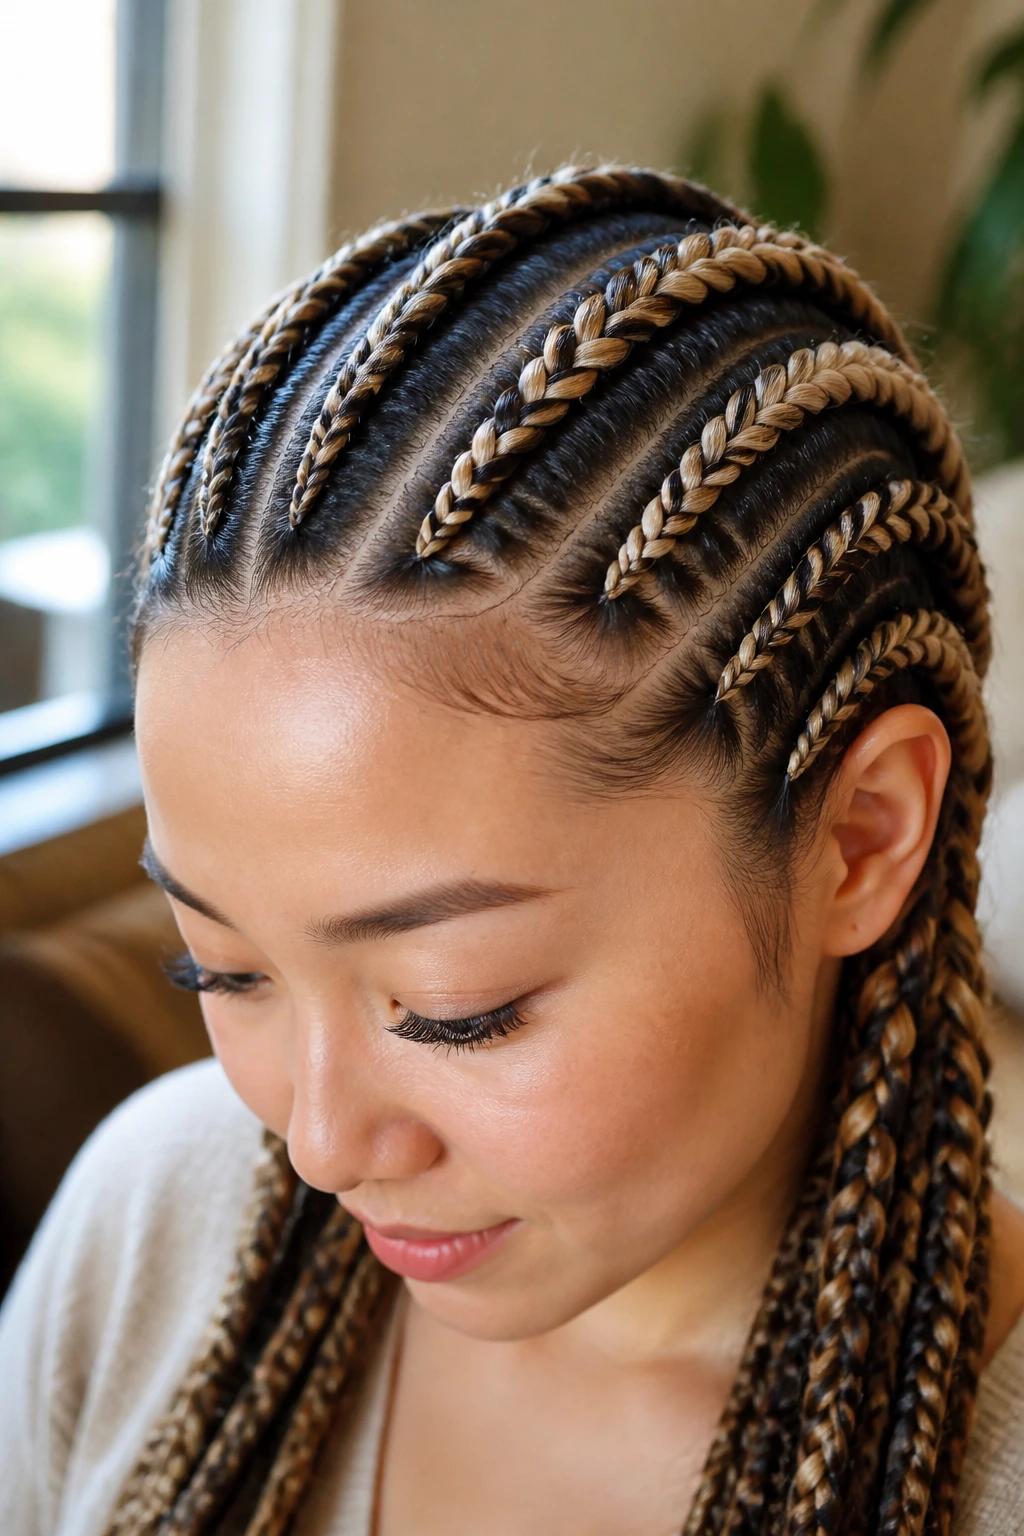
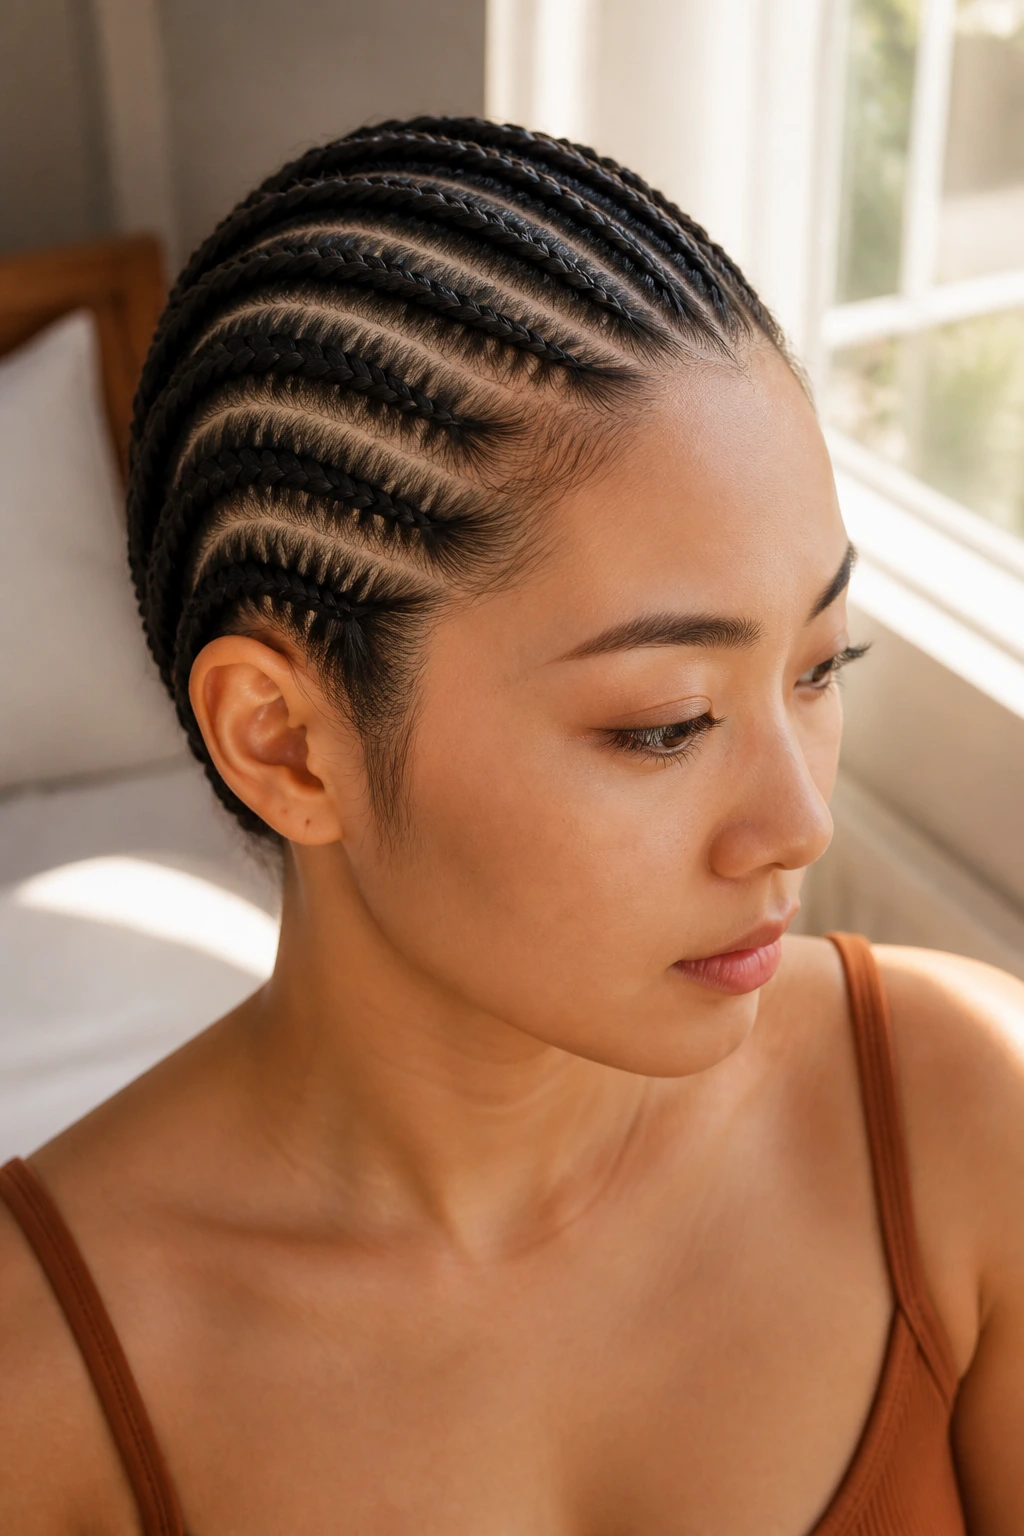
1. Classic Straight-Back Cornrows
Sometimes, the simplest path is the most effective. These rows run from your hairline directly to the nape of your neck, creating a clean, professional aesthetic that is as functional as it is polished. This style is the foundation for almost every other look on this list, making it a mandatory skill to master or explain to your stylist.
Why They Work for Finer Textures
Because straight-back rows offer the least amount of tension at the roots, they are the healthiest choice for hair that might be prone to breakage. The weight is distributed evenly across your scalp, which prevents that pulling sensation often felt with more complex, intersecting designs.
Styling Tips for Longevity
- Use a lightweight pomade or a gripping wax to smooth down flyaways as you braid.
- Avoid heavy gels that can cause flaking after a day in the sun.
- Secure the ends with clear, snag-free elastic bands to ensure they stay tight during high-activity days.
Pro tip: If your hair is very fine, start each braid with a tiny section of hair and gradually “feed in” more as you go to build a consistent size from front to back.
2. Zig-Zag Parting Rows
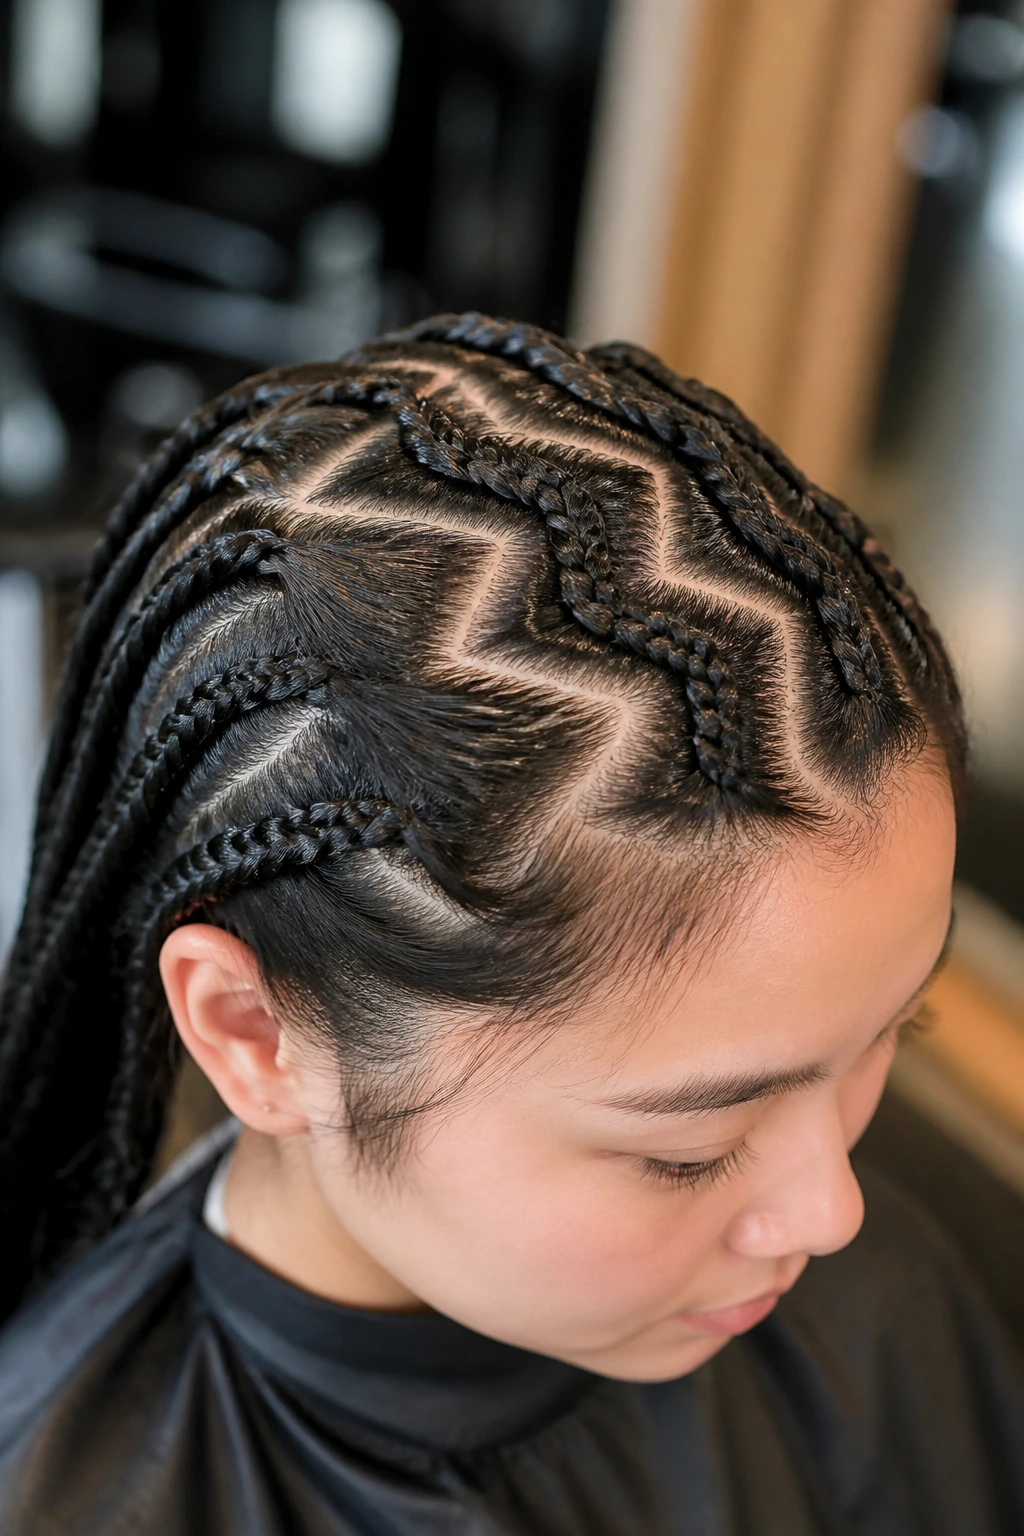
If the classic straight line feels too severe, the zig-zag is your best friend. By shifting the parting technique to a creative, angular path, you instantly add visual interest without needing to change the braid structure itself. This is a subtle way to elevate a standard protective style into something that looks custom-designed.
How the Geometry Helps
The sharp angles of a zig-zag part actually help create a bit of extra volume at the base of each braid. When the hair is pulled at different angles during the sectioning process, it tends to lift away from the scalp slightly, providing a fuller appearance that is especially beneficial if your hair is on the thinner side.
Making the Parting Crisp
- Use a metal-tail rat-tail comb to ensure the lines are perfectly straight; a plastic comb will drag and create frizz.
- Apply a tiny bit of setting spray to the teeth of the comb before making your next line to keep the surrounding hair held back.
3. Side-Swept Goddess Braids
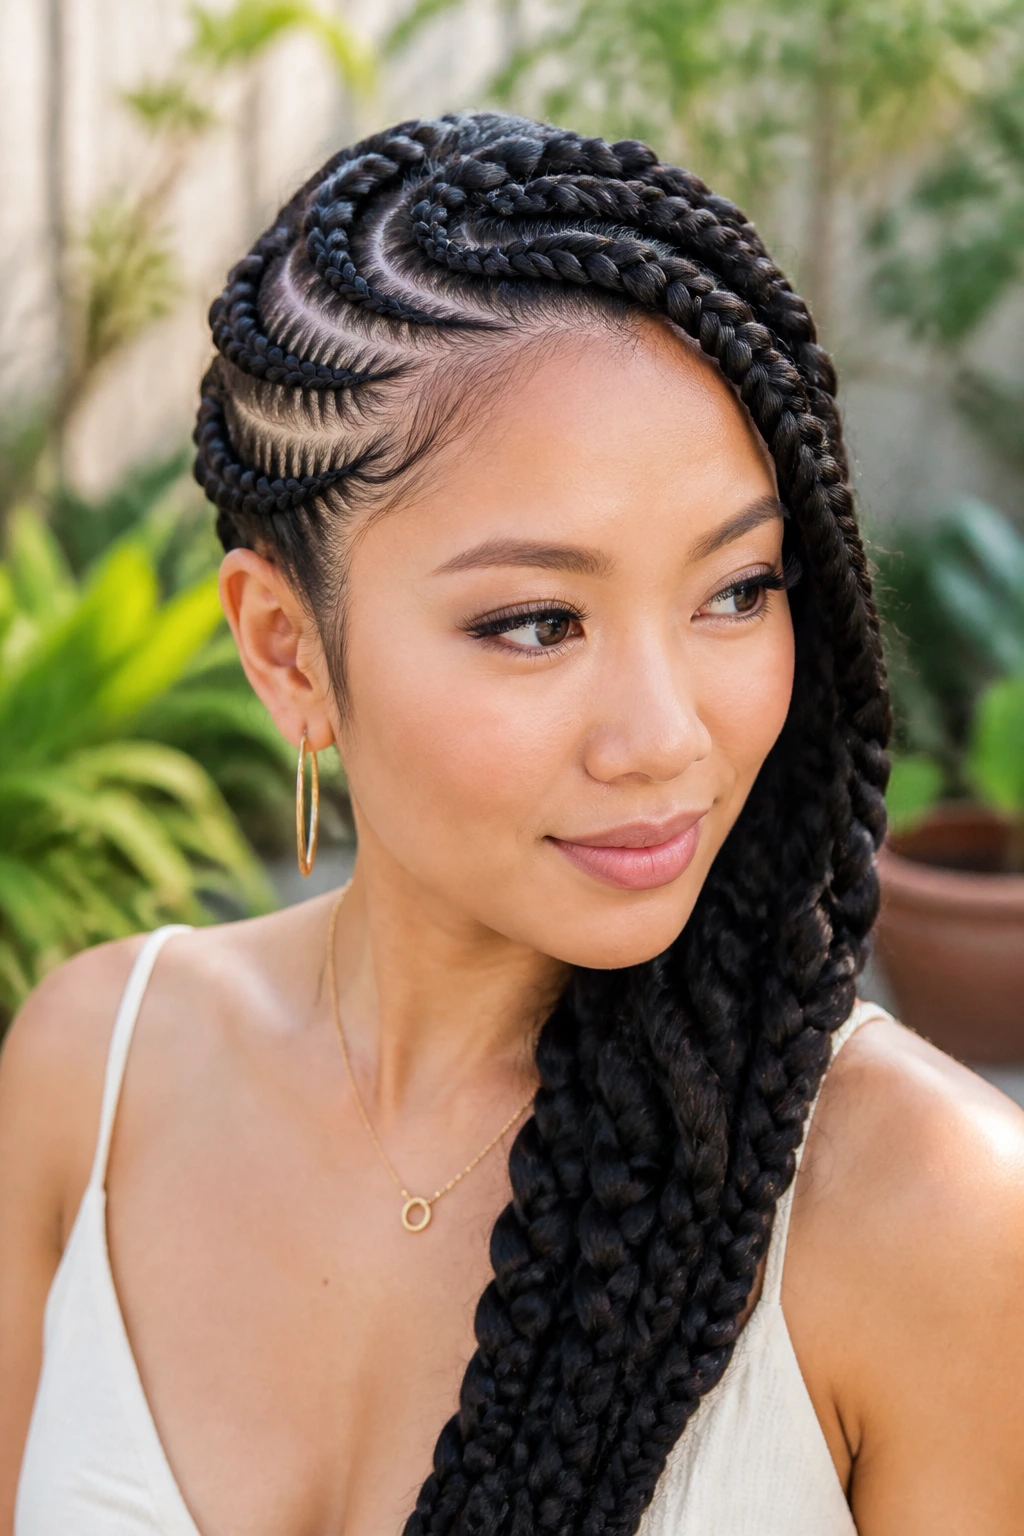
These are larger, looser versions of traditional cornrows that sweep dramatically across the head. They offer a more romantic, soft aesthetic compared to the tight, athletic look of standard rows. This style is particularly flattering for round or square face shapes, as the diagonal movement adds a slimming, elongated effect.
Achieving the “Goddess” Look
The magic here is in the tension. You aren’t aiming for the ultra-tight grip required for micro-braids. Instead, you want the braid to sit loosely against the head, which mimics the look of a crown. If your hair is too slippery, consider using a texturizing spray on your damp hair before you begin to give the strands enough “grit” to hold onto each other.
When to Choose This Style
This is an ideal look for a summer wedding or an outdoor dinner party where you want your hair to look styled rather than just protected. It transitions perfectly from day to night without needing touch-ups.
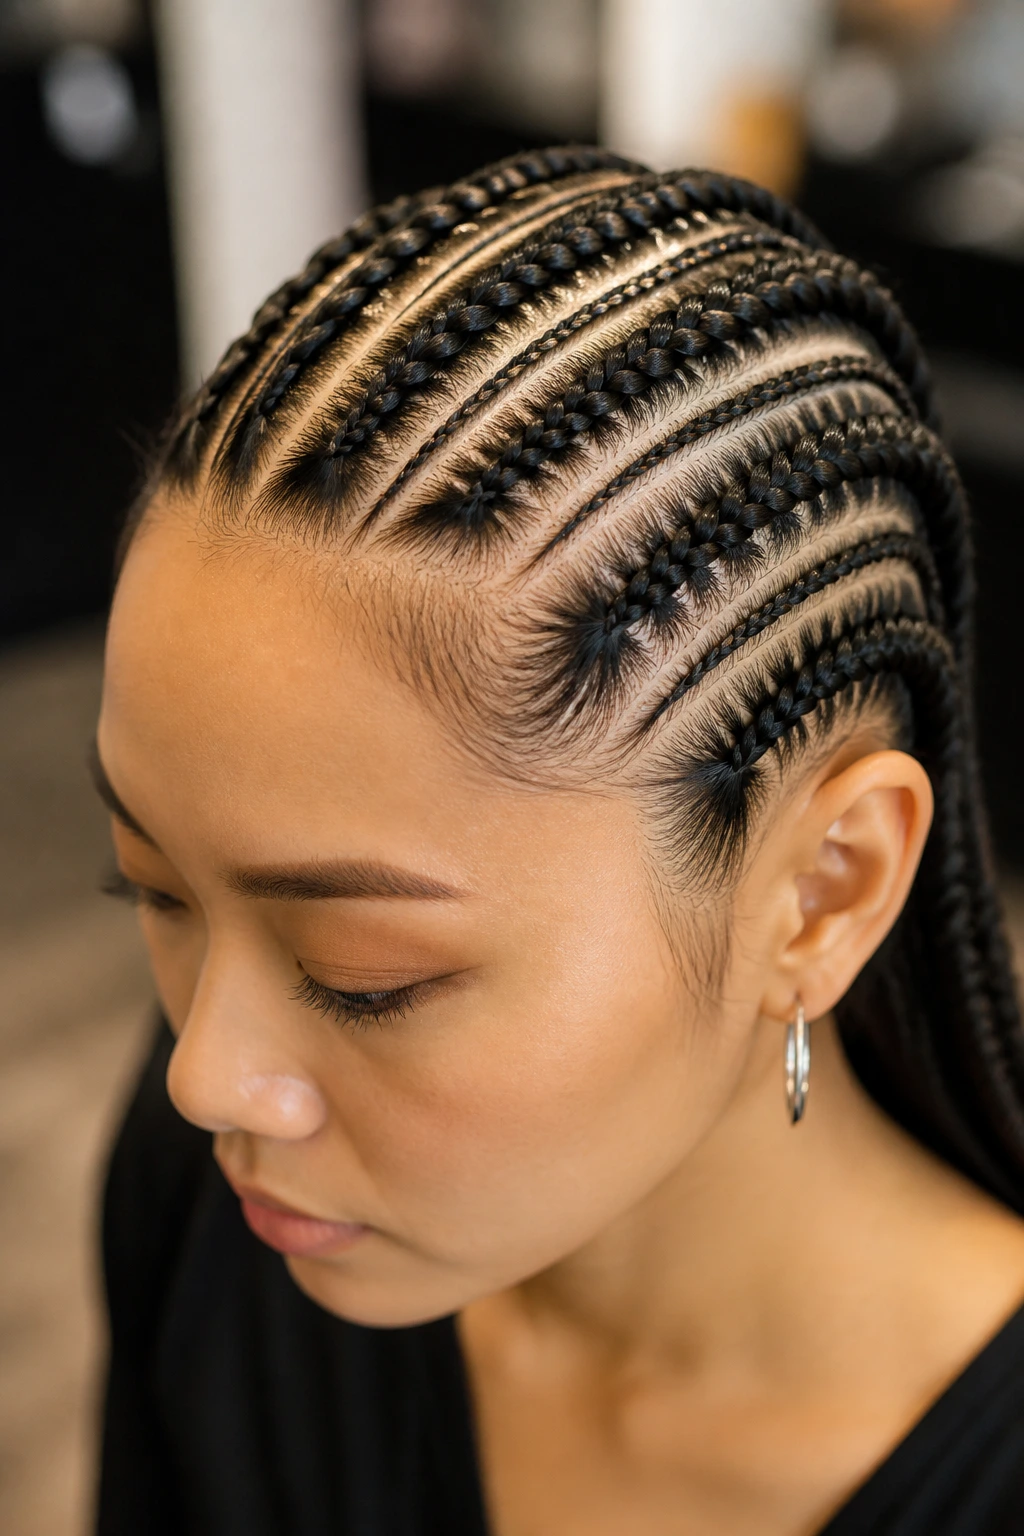
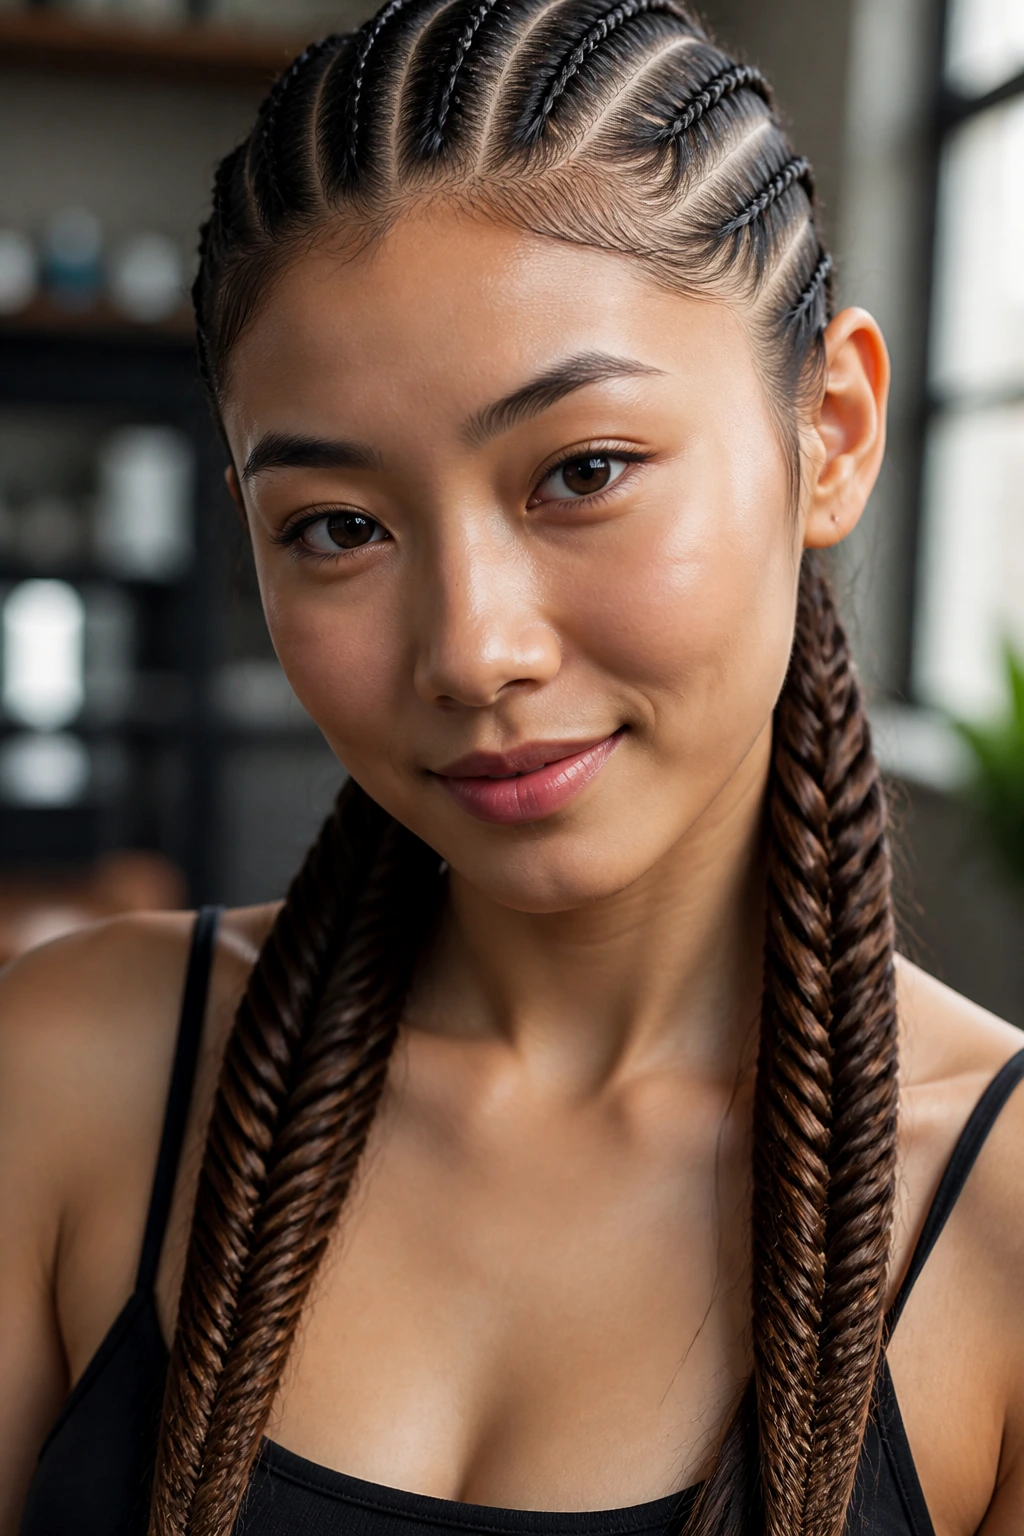
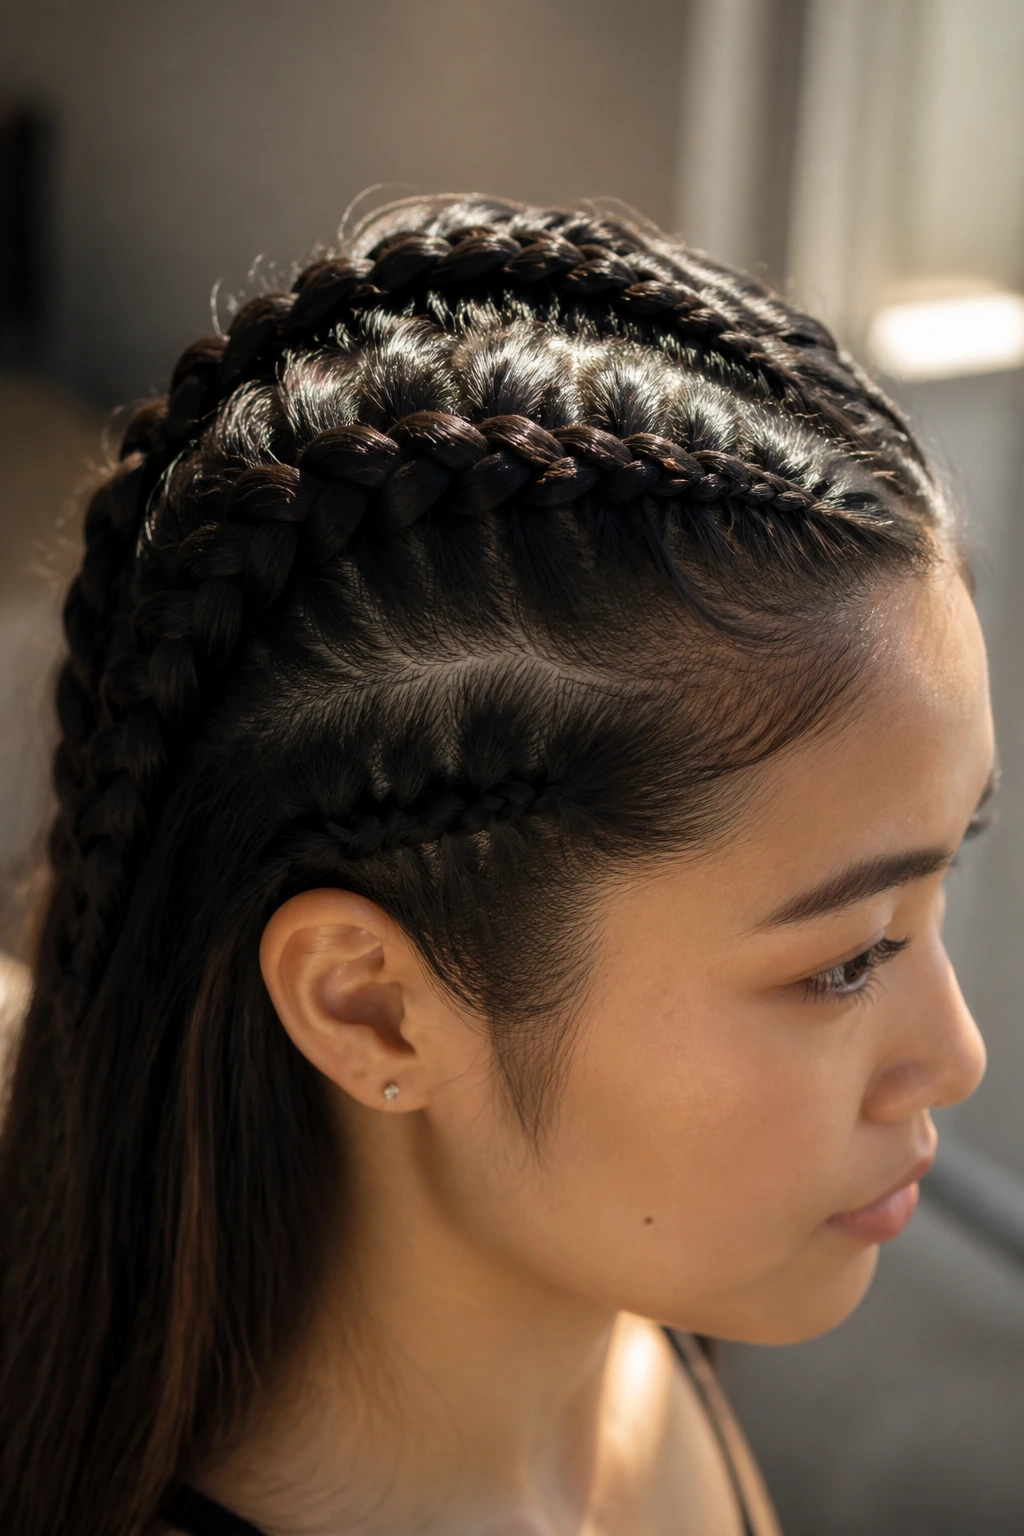
4. Double-Up Feed-In Braids
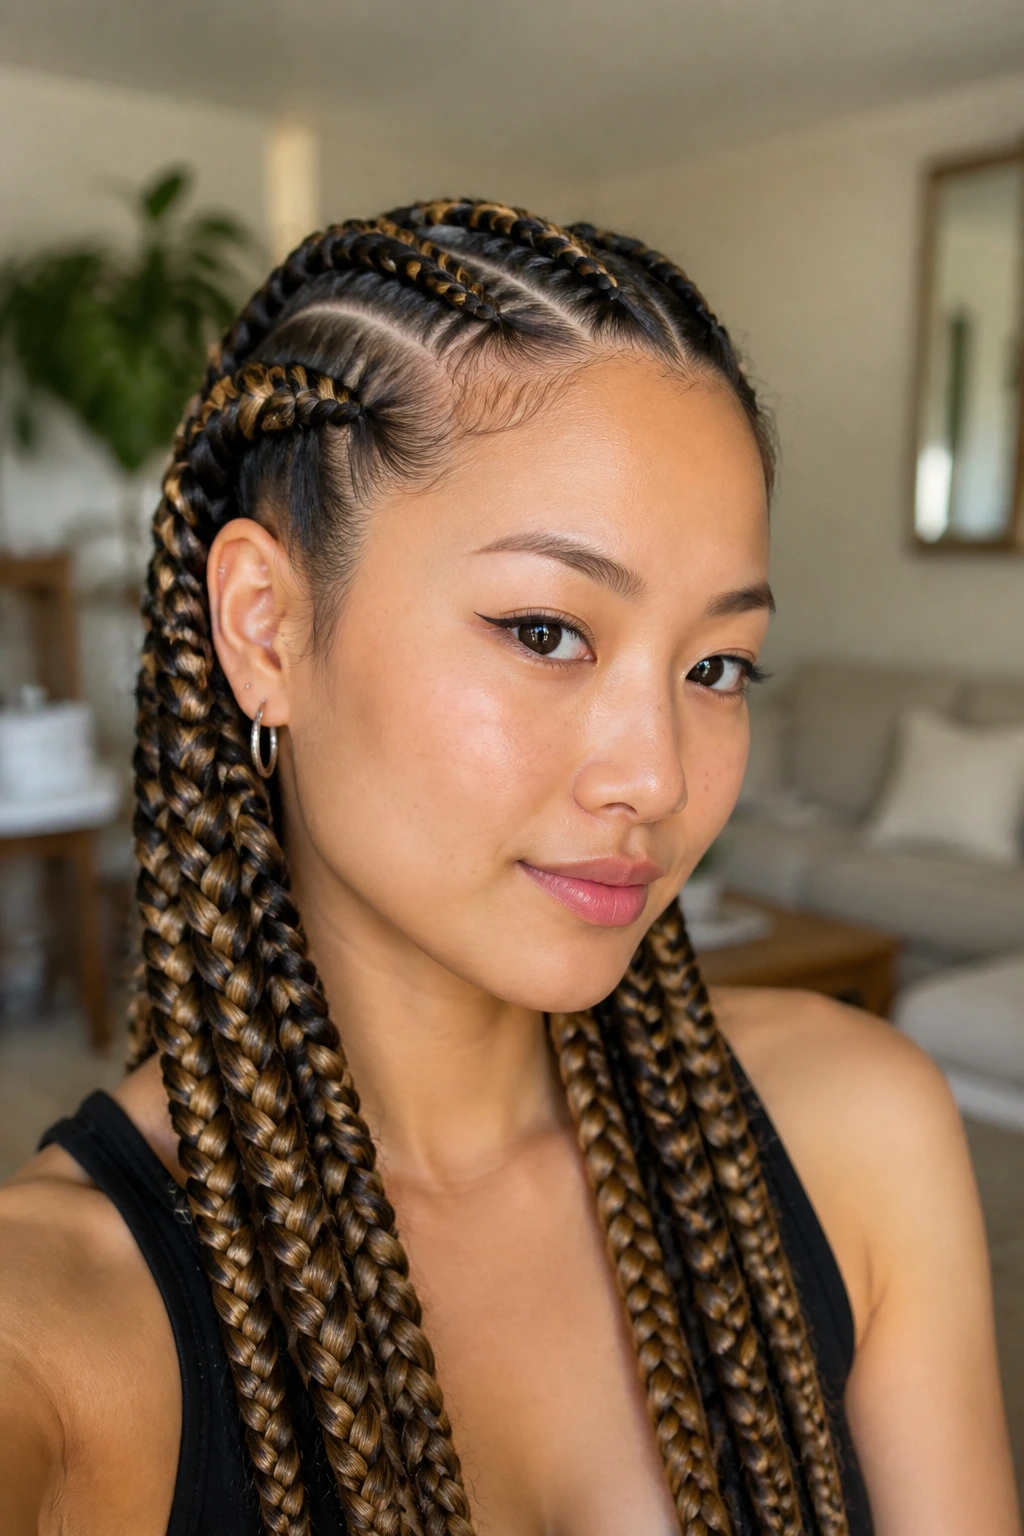
If you find that single braids look too sparse on your head, the feed-in method is the solution. This technique involves starting with a small braid and gradually adding in tiny pieces of extension hair—or just more of your own hair if you have thick density—to make the braid grow in thickness as it travels back.
The Secret to Natural Looking Ends
When you feed in hair properly, the transition is invisible. For those with Asian hair, which is often very straight and uniform in color, finding extension hair that matches your exact shade is vital. Don’t be afraid to mix two slightly different shades of hair extensions to create a multi-dimensional, natural-looking highlight effect.
Maintaining the Style
- Protect the braids while you sleep with a silk or satin scarf.
- If you notice the roots getting fuzzy, use a small toothbrush and a tiny bit of edge-control gel to smooth them back into place.
5. Crown Braid Cornrows
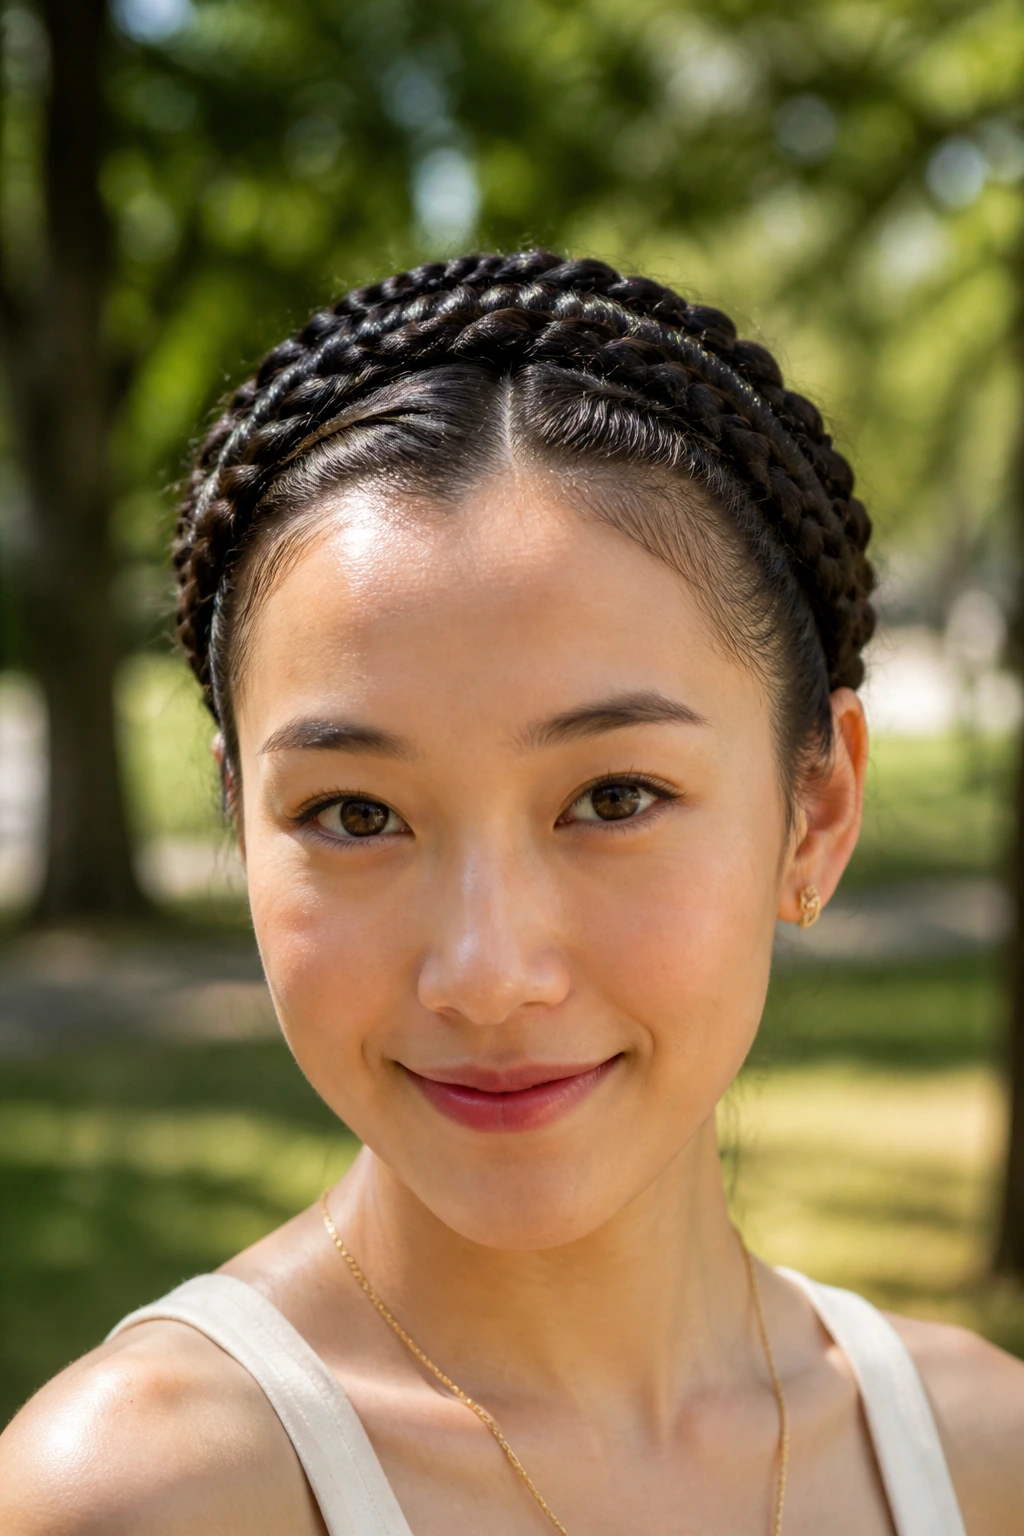
Think of this as a halo that wraps around your head. Instead of heading straight back, these rows follow the curve of your hairline, eventually meeting in the back or feeding into a single, long braid that hangs down. It is essentially a wearable crown that keeps your face completely clear for those hot, humid afternoons.
Why It’s Great for Activity
Because the braids are anchored around the perimeter of your head, they are incredibly stable. You could go for a hike, bike ride, or even jump into a pool, and these braids are going to stay locked in position. It’s the ultimate “set it and forget it” summer style.
Styling Considerations
- Keep the braids tight at the nape of the neck to prevent them from drooping over time.
- If you have shorter layers around your face, use a few hidden bobby pins to tuck them into the braids rather than trying to force them into the tight tension of the cornrow.
6. Half-Up, Half-Down Rows
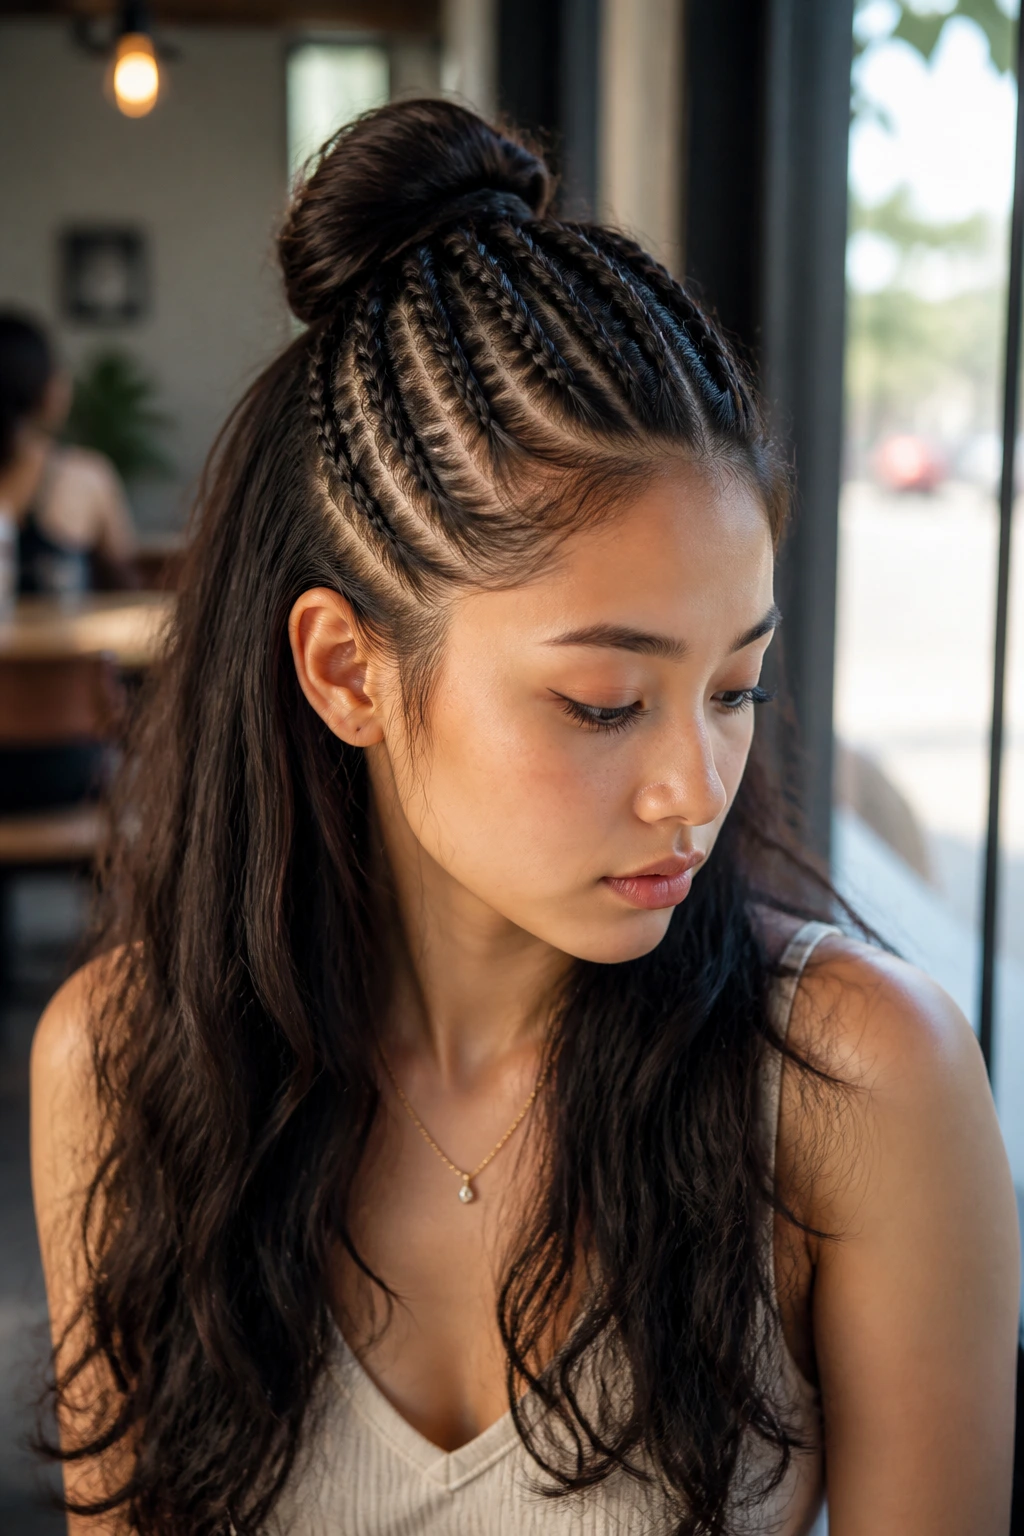
This is the perfect compromise for someone who isn’t ready to commit to having every single strand of hair braided down to the scalp. You braid the top half of your head into cornrows—using either straight-backs or an intricate design—and leave the bottom section loose or in a ponytail.
Mixing Textures
This style allows you to experiment with your natural hair texture on the bottom while benefiting from the control of cornrows on top. You can leave the bottom loose and wavy, or even add a few loose beach waves with a curling iron to contrast the sharp lines of the braids above.
A Tip on Tension
Make sure the braids stop exactly where the hair naturally parts for the half-up section. If you go too far down, you’ll end up with awkward bumps when you try to let the rest of your hair hang down.
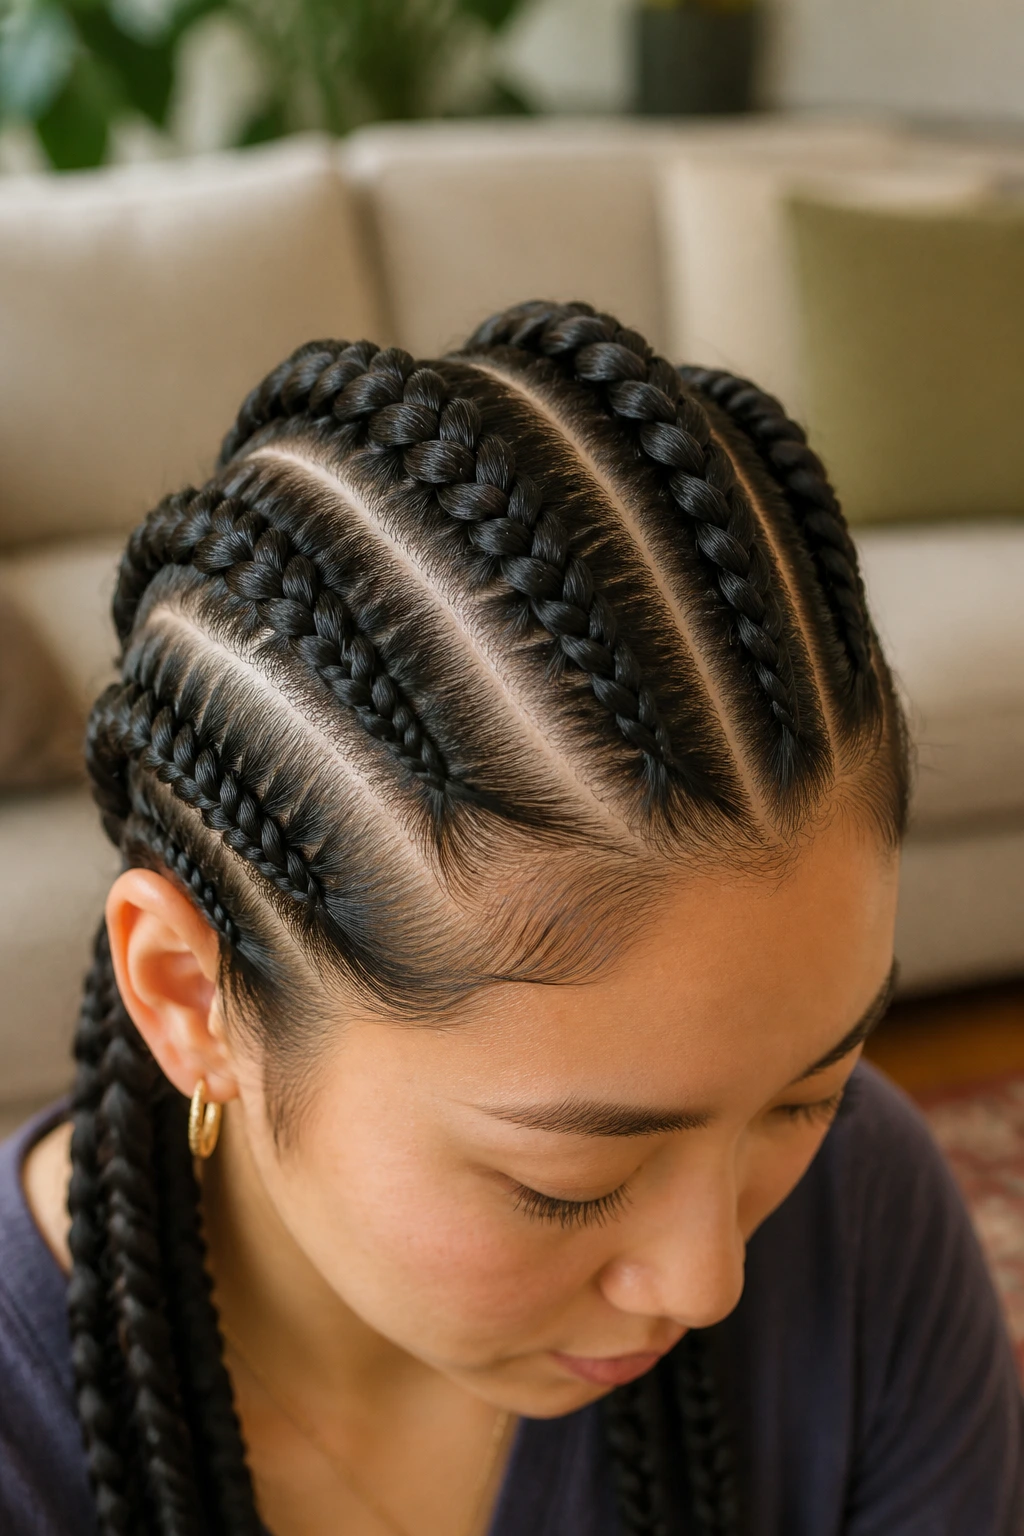
7. Mini Micro-Cornrows
For the truly detail-oriented, micro-cornrows are about precision. These are extremely small, tight braids that allow for highly complex patterns—think diamonds, starbursts, or waves—across the scalp. They take significantly longer to install, but the end result is a high-fashion look that lasts longer than larger, looser braids.
Why Small Matters
Because each braid uses such a tiny amount of hair, the tension is spread across hundreds of micro-sections. This is actually a very secure way to braid finer hair because there is less “weight” pulling on any single follicle. If you find your braids usually slide out, go smaller.
Pre-Braid Prep
- Clean hair is non-negotiable here. Use a clarifying shampoo to remove all product buildup so the hair isn’t slippery.
- Do not use conditioner on the day of the braid; it leaves a coating that makes it nearly impossible for the braids to stay tight.
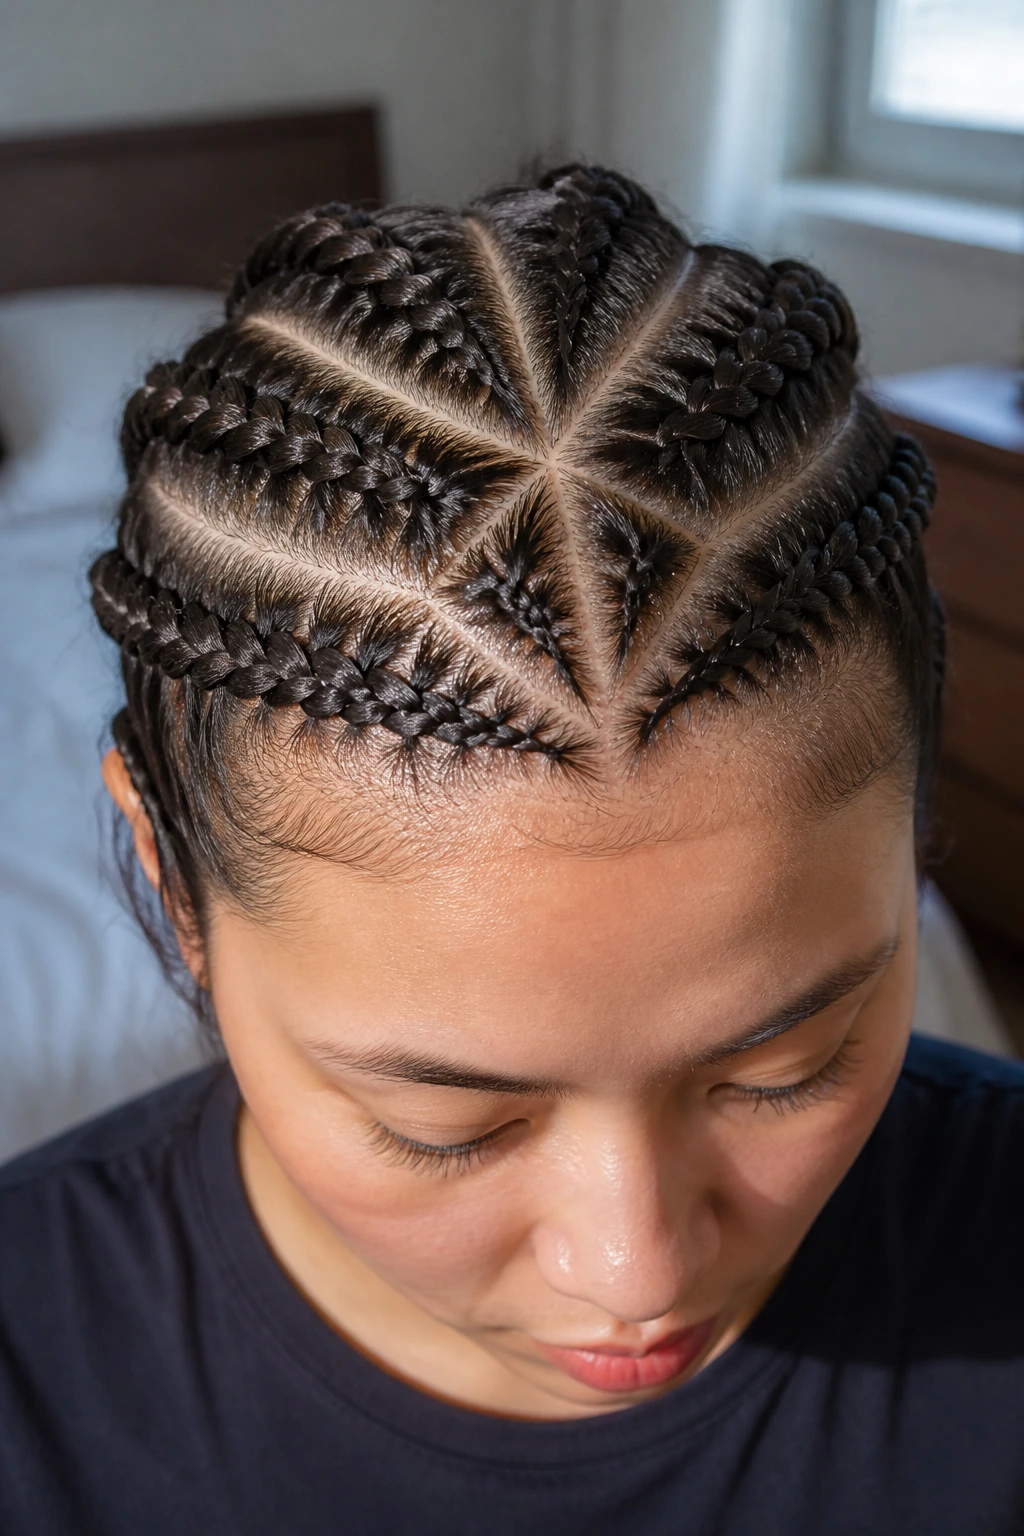
8. High-Contrast Pattern Rows
This style uses a mixture of sizes—alternating between very thick, chunky braids and tiny, thin braids in between. The contrast in volume creates a visual rhythm that is much more interesting than rows of uniform size. It is a bold, artistic choice that really highlights the pattern of the cornrows.
Creating the Contrast
- Start with a clear plan on paper if you are doing this yourself. Sketch the pattern before you pick up the comb.
- Use the thick braids to “frame” the section, and use the tiny braids as accents in the gaps. This creates a balanced, professional look.
9. Braided Space Buns
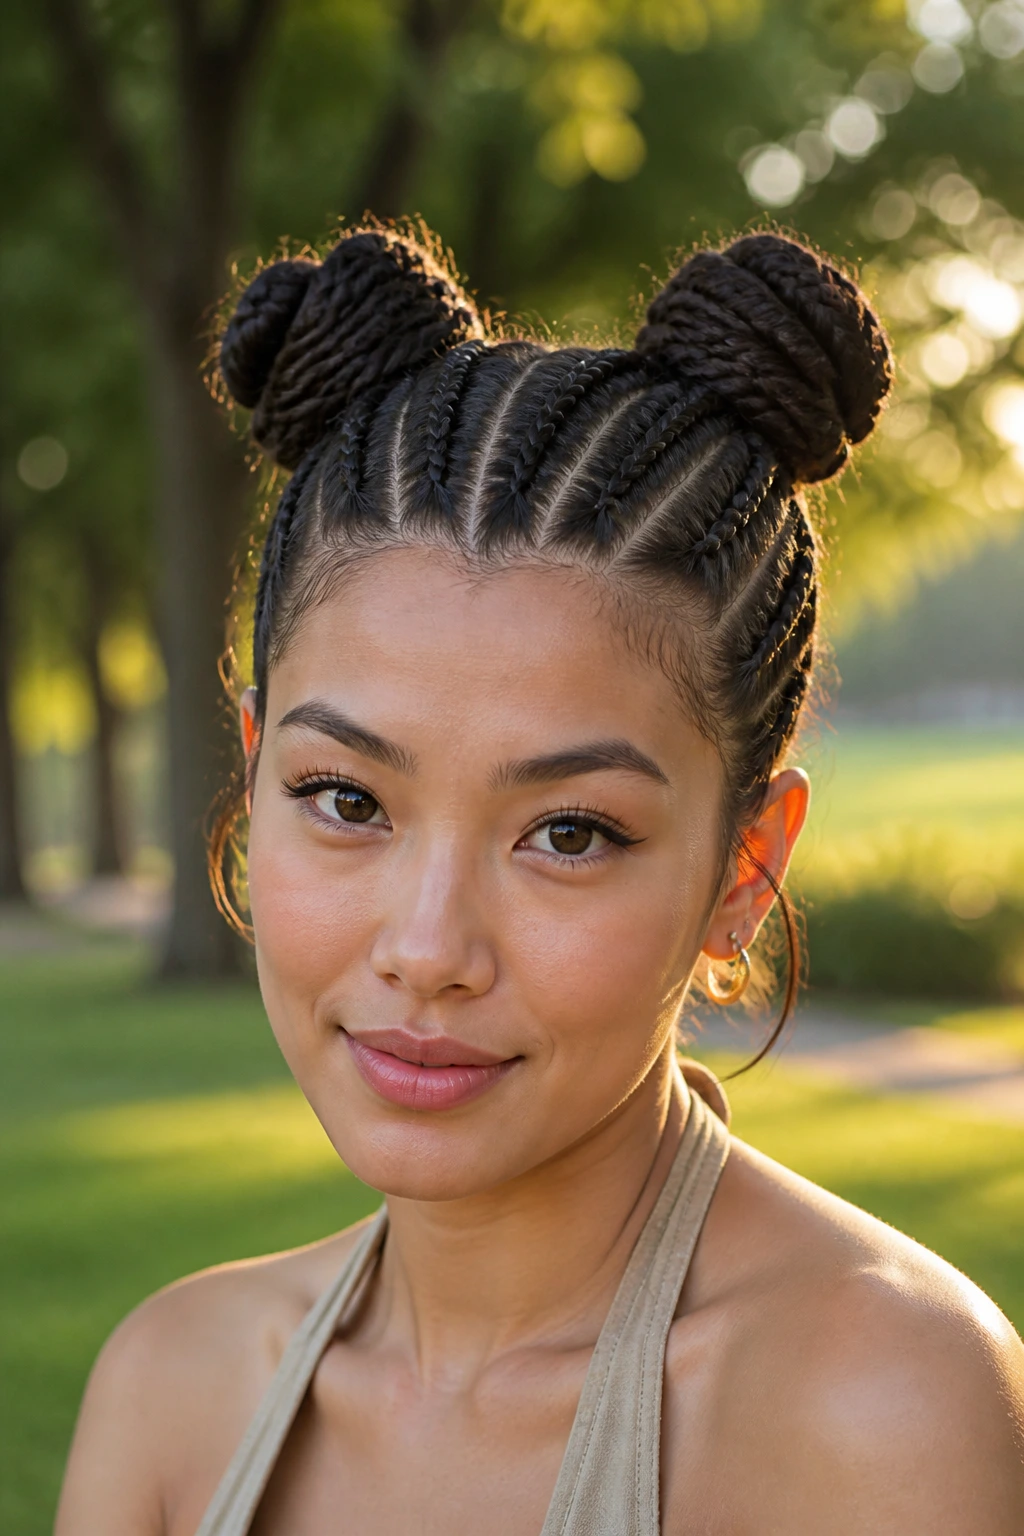
Start with cornrows that lead from the hairline up toward the crown of your head, and then gather the ends of those braids into two high buns. It is a playful, youthful look that works incredibly well for music festivals or weekend getaways where you want to look fun but stay practical.
The Buns
If your own hair isn’t long enough to form full buns, use “donut” fillers or synthetic hair extensions to create the volume. Wrapping the braids around the base of the bun creates a seamless finish that looks very intentional.
Avoiding Damage
Do not secure the buns with tight rubber bands that pull at your scalp. Use soft, velvet-covered scrunchies or even fabric ties to keep the weight of the bun from pulling on the root of your braids.
10. The Ponytail Braid
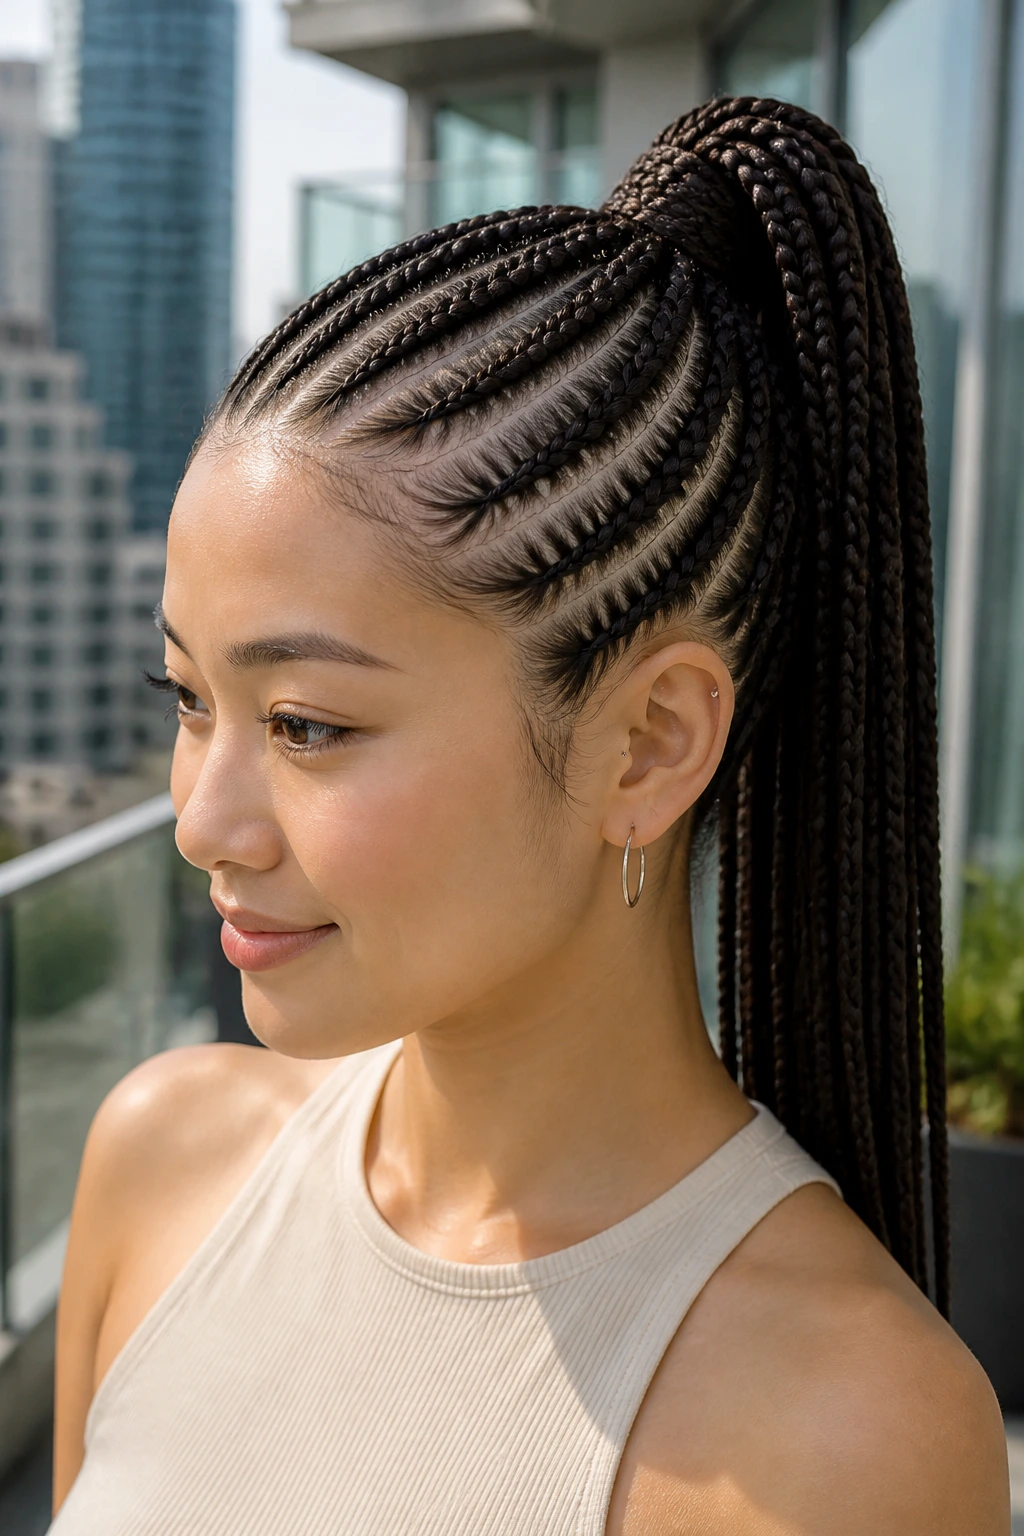
Imagine all your cornrows—no matter what pattern they start with—feeding into one central point at the crown of your head, culminating in a high, slick ponytail. This is the ultimate summer power look. It keeps all the hair off your neck, ensuring you stay cool even in the heat.
Ensuring a Smooth Base
The key to a great high ponytail is a smooth transition from the scalp to the elastic. Use a good-quality, non-snag hair tie, and then take one small strand of the hair and wrap it around the base of the ponytail to hide the elastic. It makes the whole look appear polished rather than just “tossed up.”
11. Embellished Rows
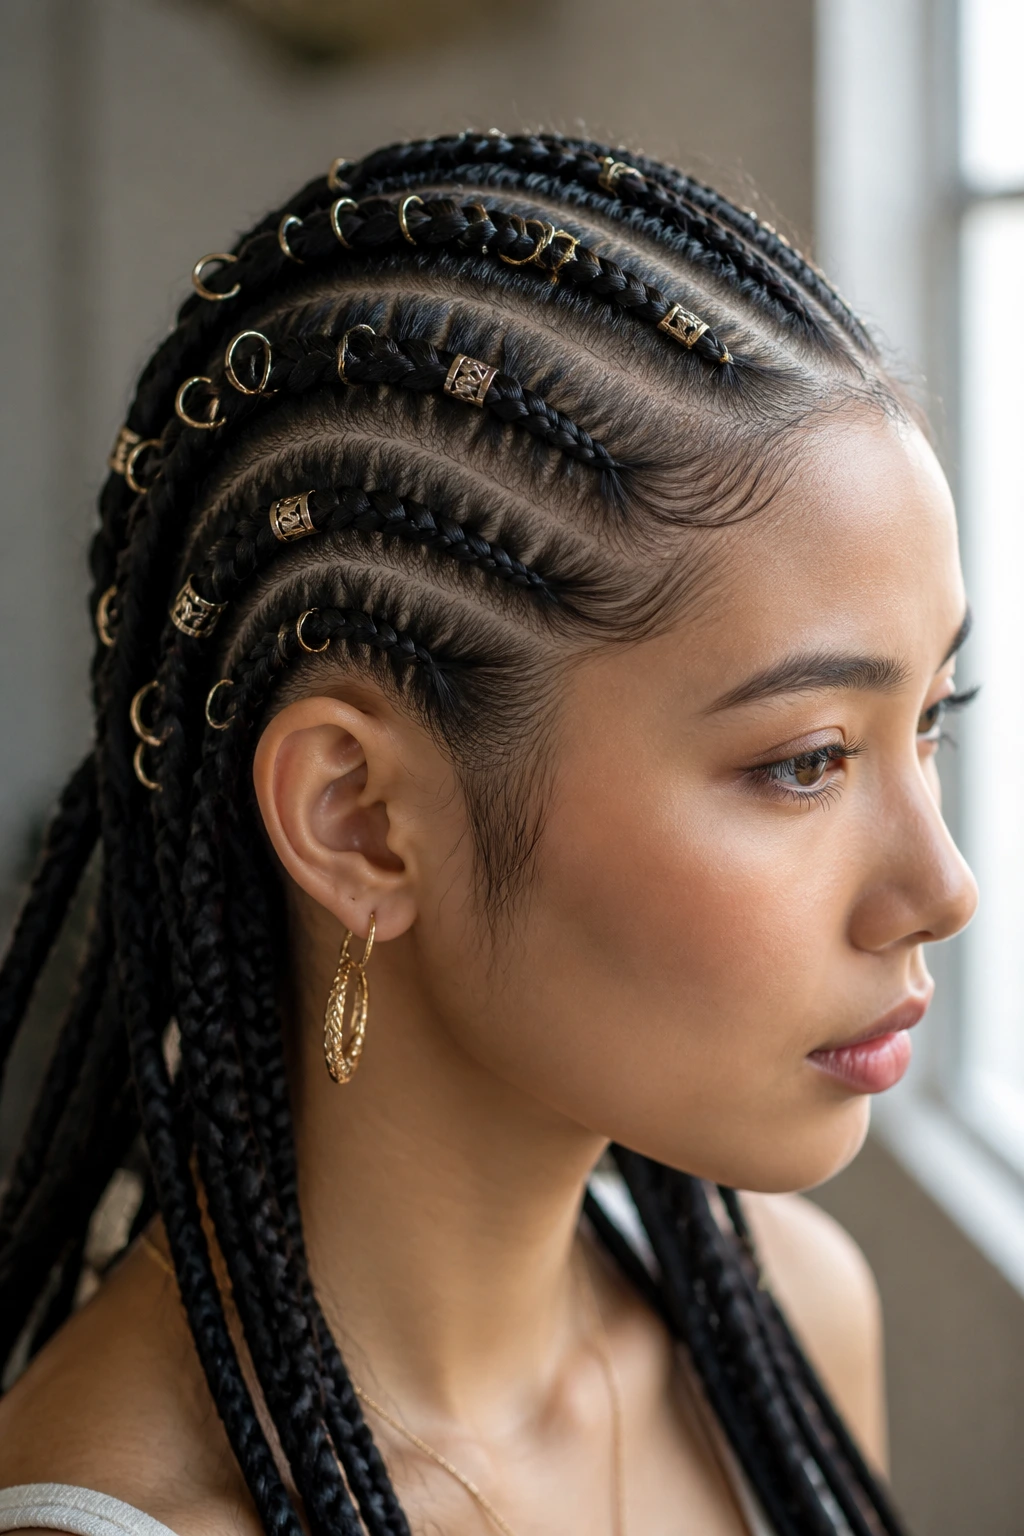
Cornrows are a blank canvas. If you find the look a bit too plain, add some character with small metal rings, beads, or even gold or silver cuffs. These accessories can be clipped onto the braids at intervals, instantly turning a functional style into a jewelry-focused fashion statement.
Placement Rules
- Space them out evenly. Too many in one area will make the hair heavy and prone to sagging.
- Avoid plastic beads if you are going to be in the sun all day; they can heat up or crack. Opt for metallic or wooden pieces instead.
12. Mohawk Cornrows
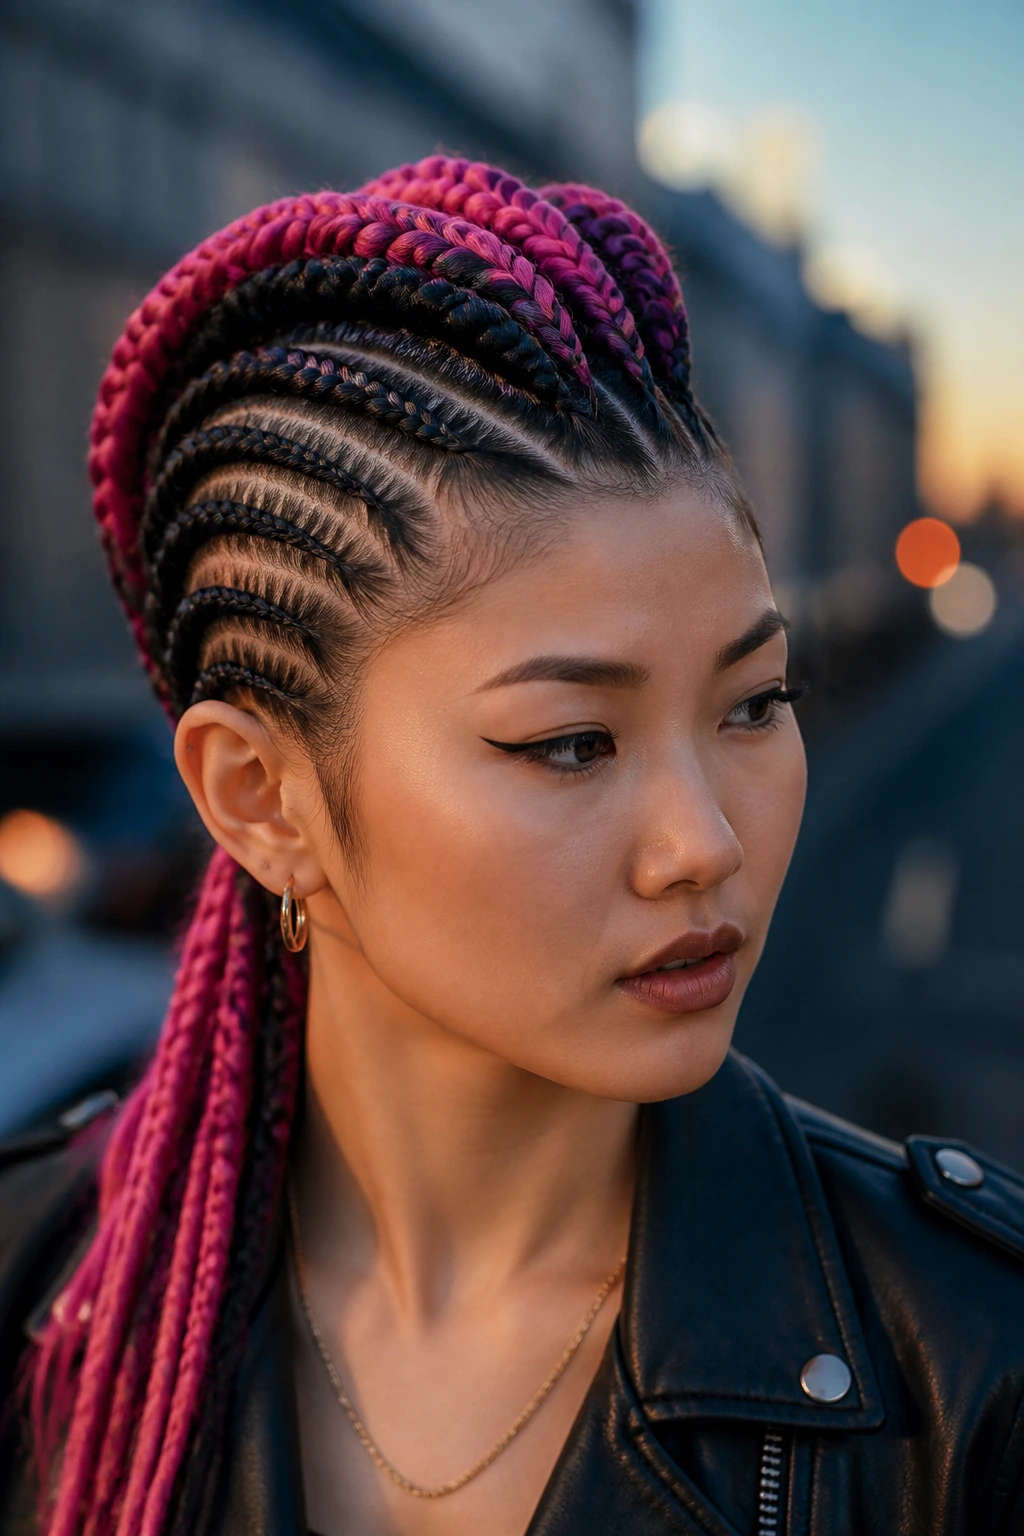
By braiding the sides of your head tightly toward the center, you create the illusion of a mohawk without ever needing to shave your hair. It is edgy, sharp, and very modern. This is a great way to showcase a bold hair color if you happen to have one, as the focused center section highlights the hues.
Why This Style Works
It focuses the bulk of the hair in the center, which creates volume and height at the crown. For those with naturally flat hair, this style provides an instant lift that you just cannot get with a down-style.
13. Criss-Cross Patterned Rows
This is where technique meets art. Instead of rows that run parallel, these braids cross over each other at various points. It creates a lattice effect across the scalp that looks incredibly complicated but is manageable if you tackle it in sections.
Working in Quadrants
Do not try to do this all at once. Divide your hair into four clear quadrants—front-left, front-right, back-left, back-right—and complete the cross-over pattern in one quadrant before moving on. This keeps your partings straight and your tension consistent throughout the entire head.
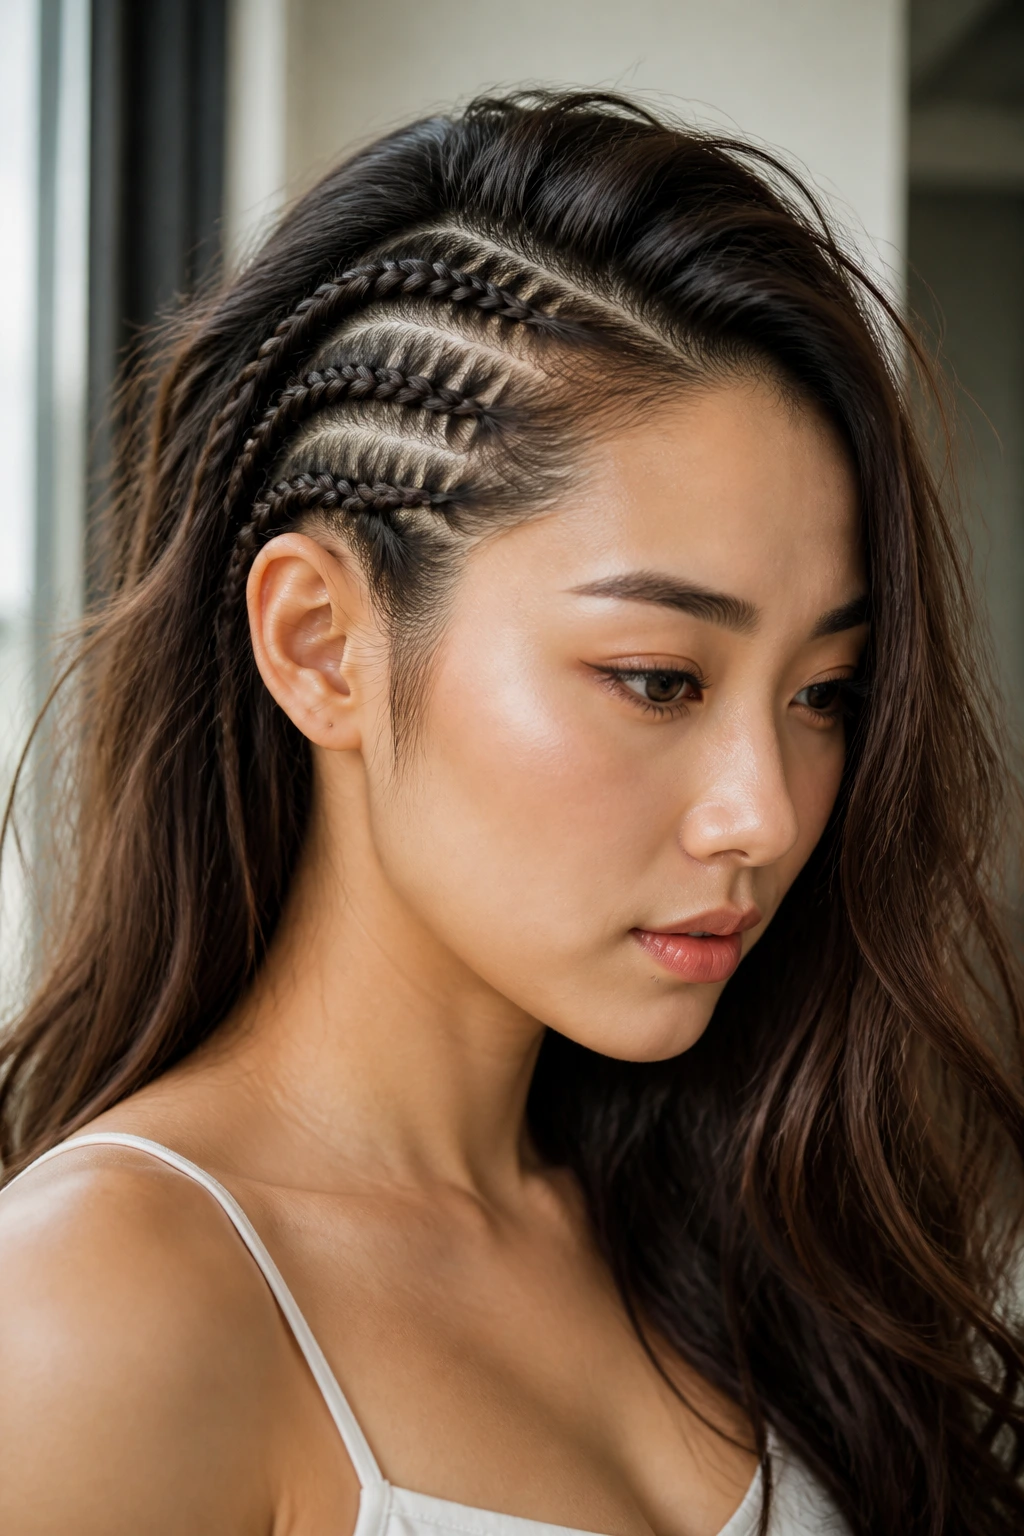
14. Hidden-Braid Ponytail
Instead of full-head cornrows, try this: braid only the sides into tight rows and leave the top and back loose, then gather it all into a low ponytail. The braids act as a decorative frame for your face, while the rest of your hair remains free to move and flow in the wind.
Why It’s Unique
It provides the structure you need at the temples and around the ears (where sweat usually accumulates), but keeps your hair from feeling too stiff. It is the perfect blend of a structured look and a relaxed vibe.
15. The “Snake” Braid

This style features a single, winding cornrow that travels from one side of your head to the other in an S-pattern. It is a singular, continuous braid that is much more interesting than a straight line. Because it is just one main braid, it is also a bit easier to maintain for beginners.
Managing the Turns
When you reach the “curve” of the snake, make sure you aren’t pulling too hard at the corners. This is where hair is most likely to break. Use a little bit of extra product at those turns to ensure the hair stays smooth without needing excessive tension to keep it in place.
16. Chunky, Oversized Rows
Thick, heavy cornrows are a great way to protect your hair if you have a lot of volume to manage. By creating fewer, larger braids, you minimize the amount of time you spend under the dryer or styling in the morning. These rows look relaxed and approachable.
The Visual Weight
Because the braids are thick, they have a lot of presence. This style is best suited for those with thicker hair density. If your hair is very fine, these thick braids might look loose too quickly; consider using a small amount of extension hair to bolster the thickness of your natural strands.
17. Fishtail Cornrows
Once you have the cornrow base, you can end the braid in a fishtail plait rather than a traditional three-strand braid. It gives the tail of the braid a delicate, intricate look that feels much more sophisticated than a standard end.
Finishing the Braid
The fishtail takes time, so be prepared for a longer styling session. It is worth it, however, for the texture it adds. Use a tiny bit of dry shampoo on the tail if your hair is very slippery; it will give the fishtail “grip” so the pattern doesn’t just slide loose.
18. Wrapped Cornrows
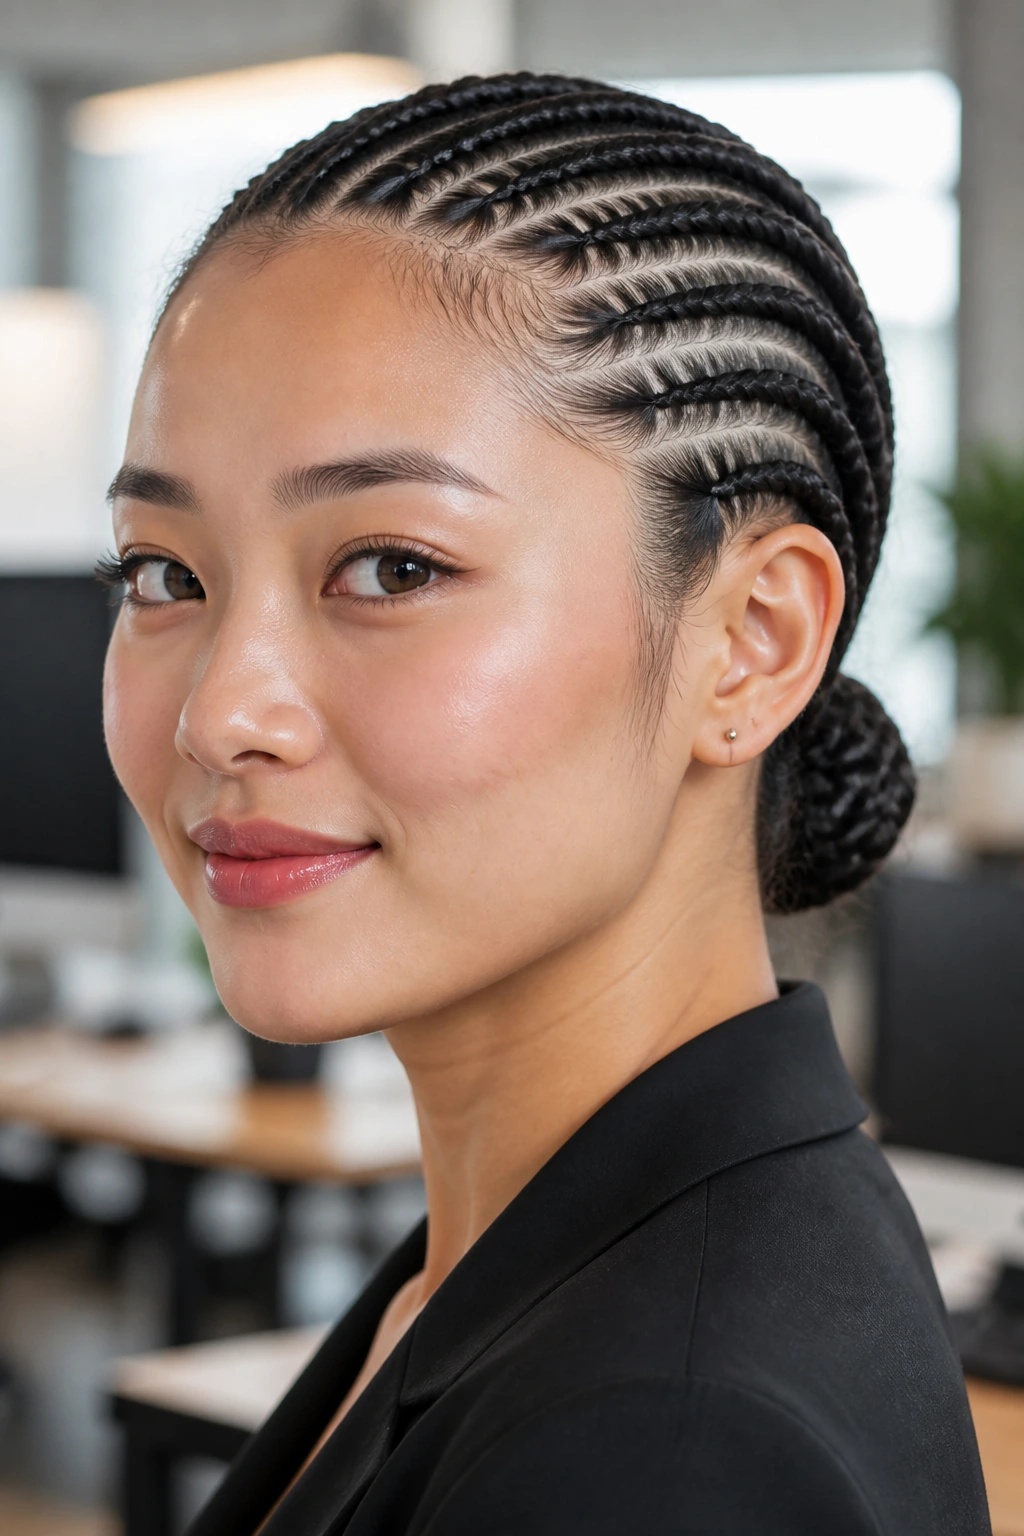
Start with a traditional row, but instead of braiding it all the way to the ends, stop at the nape of the neck and wrap the remaining length around a small bun or into a low, sleek knot. This is the ultimate “office-appropriate” cornrow style.
Why It’s Professional
It looks neat, tucked, and tidy. You won’t have long braids dangling down your back, which can sometimes look unprofessional in high-stakes environments. It keeps the hair close to the head, creating a streamlined, minimalist profile.
19. Two-Tone Braided Rows
If you have highlights or a balayage effect, cornrows are the best way to show it off. The way the hair twists while braiding forces the different colors to intermingle, creating a beautiful, ribbon-like effect along the length of each row.
Highlighting the Colors
If you don’t have natural highlights, you can achieve this effect by adding colored extensions. Using a shade that is slightly lighter than your natural hair color will add instant depth and make the cornrow pattern pop far more than it would on a single-toned head of hair.
20. The “Under-Braid”
This involves braiding the hair underneath rather than over. This is often called “Dutch” braiding in a cornrow context. The result is a braid that sits “on top” of the scalp, looking raised and bold. This is a much sturdier way to braid for those with fine or slippery hair.
The Mechanics of the Lift
Because the braid is raised, it creates a much stronger structure. It is less likely to flatten out against your head during the day. It’s also easier to “pancake” (gently tugging on the edges of the braid) to make the rows look wider and more voluminous.
21. Asymmetrical Parting
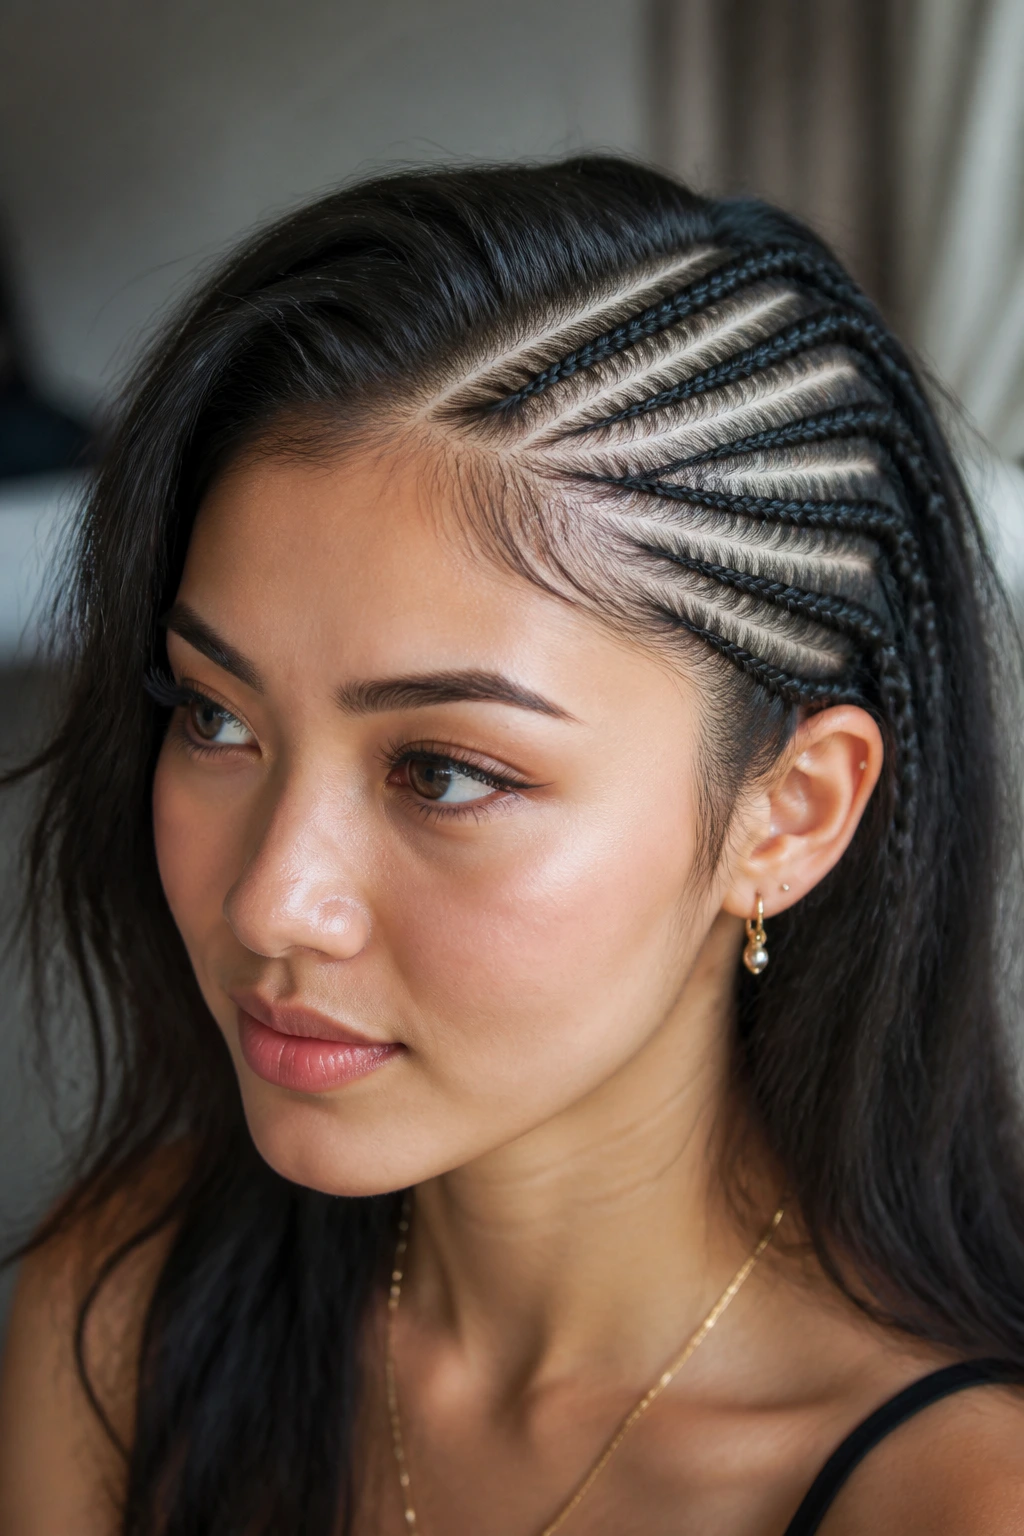
Instead of parting down the center, try a deep side part and let the cornrows radiate from that line. This creates a sweeping, dramatic effect that frames the face in a very flattering way. It is a simple shift in parting that changes the entire geometry of the style.
Face-Framing Effects
A deep side part helps to break up the symmetry of the face. If you feel like your face shape is too round, this parting style is perfect for adding a bit of edge and lengthening the appearance of your features.
22. Minimalist Single-Side Rows
Not ready for a full head of braids? Just do two or three rows on one side of your head. It gives you a subtle “undercut” look without cutting a single hair. This is perfect for when you want to show off your earrings or just need to keep your bangs off your forehead.
The “Undercut” Vibe
It is trendy, low-maintenance, and easy to do in under ten minutes. It provides just enough structure to keep your hair from being unruly, without the commitment of braiding your whole head. It’s the ultimate entry-level cornrow look.
Final Thoughts
Summer hair should be about freedom, not frustration. Whether you go for the precision of micro-cornrows or the ease of thick, straight-back rows, the most important element is how you protect your scalp throughout the process. Always listen to your hair; if a braid feels like it is pulling too hard, it probably is. Loosen it, readjust, or try a different pattern.
Remember that hydration doesn’t stop just because your hair is in braids. A light scalp oil—something like jojoba or almond oil—will keep your skin from getting itchy, while a simple spray bottle with water and a tiny bit of leave-in conditioner can keep the braided strands looking fresh for days. Find a style that makes you feel confident and comfortable, and enjoy the relief of having your hair perfectly managed all season long.