The world of braiding is more than just a functional way to manage hair; it is a profound expression of heritage, artistry, and self-care that has anchored black culture for generations. When you sit down in the chair—or pull up a YouTube tutorial on your phone—you aren’t just looking for a way to hide or protect your natural texture. You are looking for a transformation. From the intricate geometry of a feed-in cornrow to the whimsical, oversized volume of a goddess braid, the sheer versatility of black hair remains a constant source of wonder.
Finding the right visual guide can be the difference between a style that looks effortless and one that feels like a struggle. We have all been there—pausing a video every five seconds, rewinding, trying to figure out how the stylist’s fingers actually moved to secure that knot. It takes patience to master these techniques, but once you have the muscle memory down, your hands start to know exactly where to go. This collection of approaches to braiding is designed to help you navigate everything from protective styles that last weeks to quick, weekend-ready updos.
Before you start, make sure your toolkit is ready. You need more than just your hands; you need a sharp-edged rat-tail comb for clean parts, a reliable edge control that doesn’t flake, and enough high-quality synthetic hair to match your texture. Whether you are aiming for a classic look or something that pushes the boundaries of modern styling, these methods offer a pathway to perfecting your craft. Let’s look at the styles that define current preferences and timeless tradition.
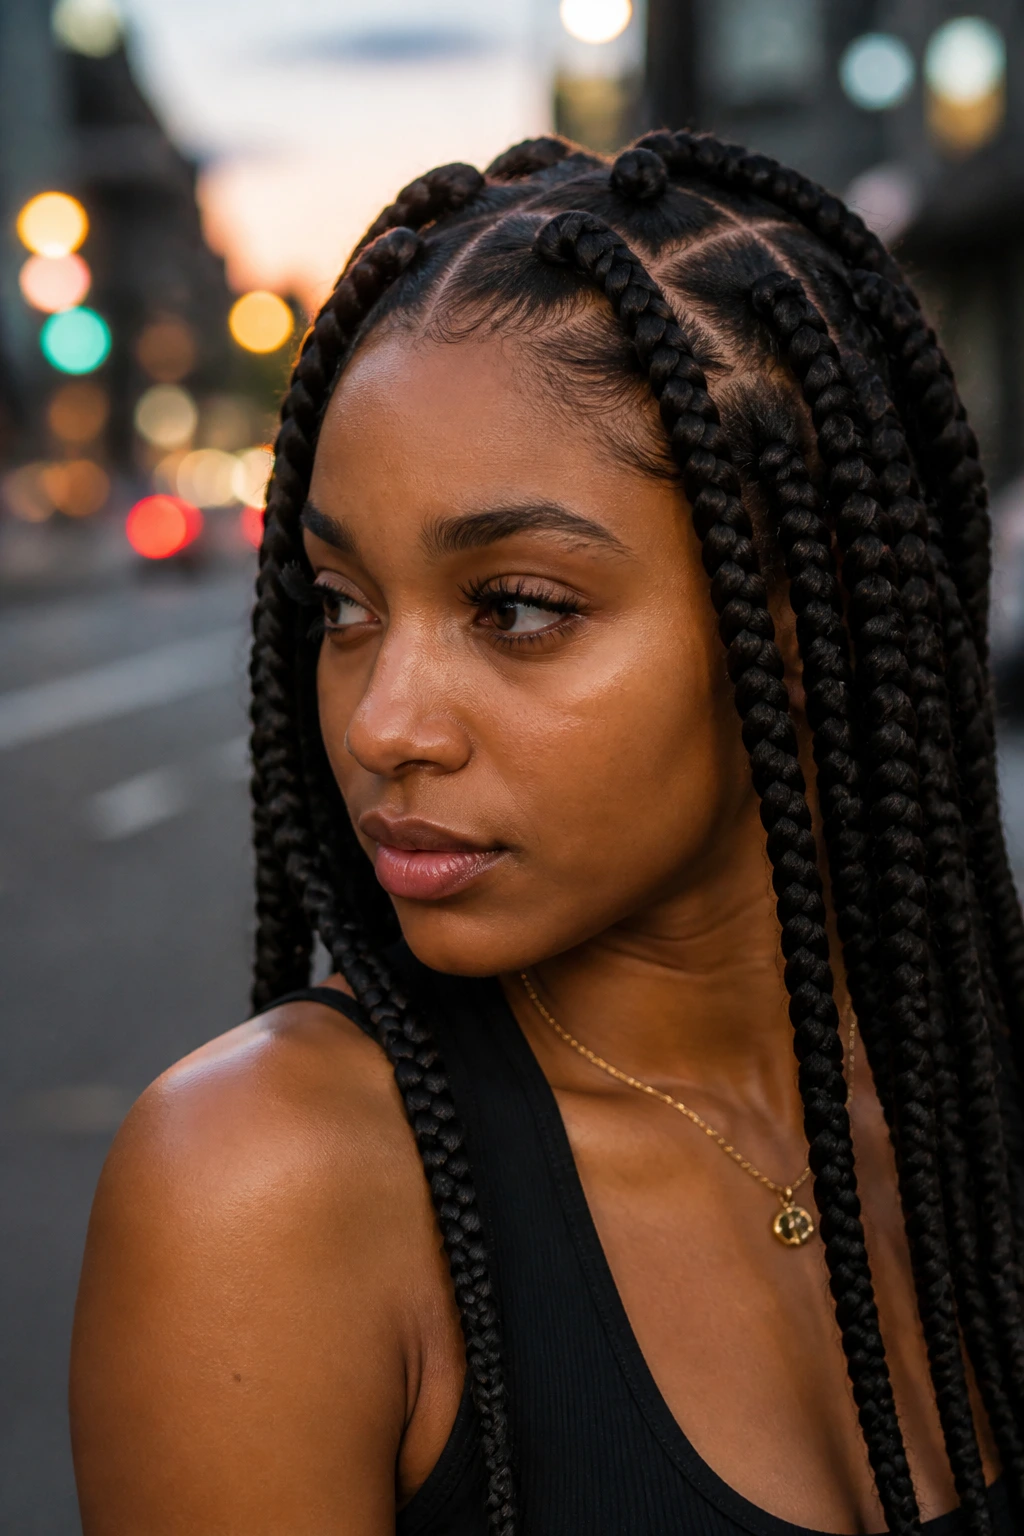
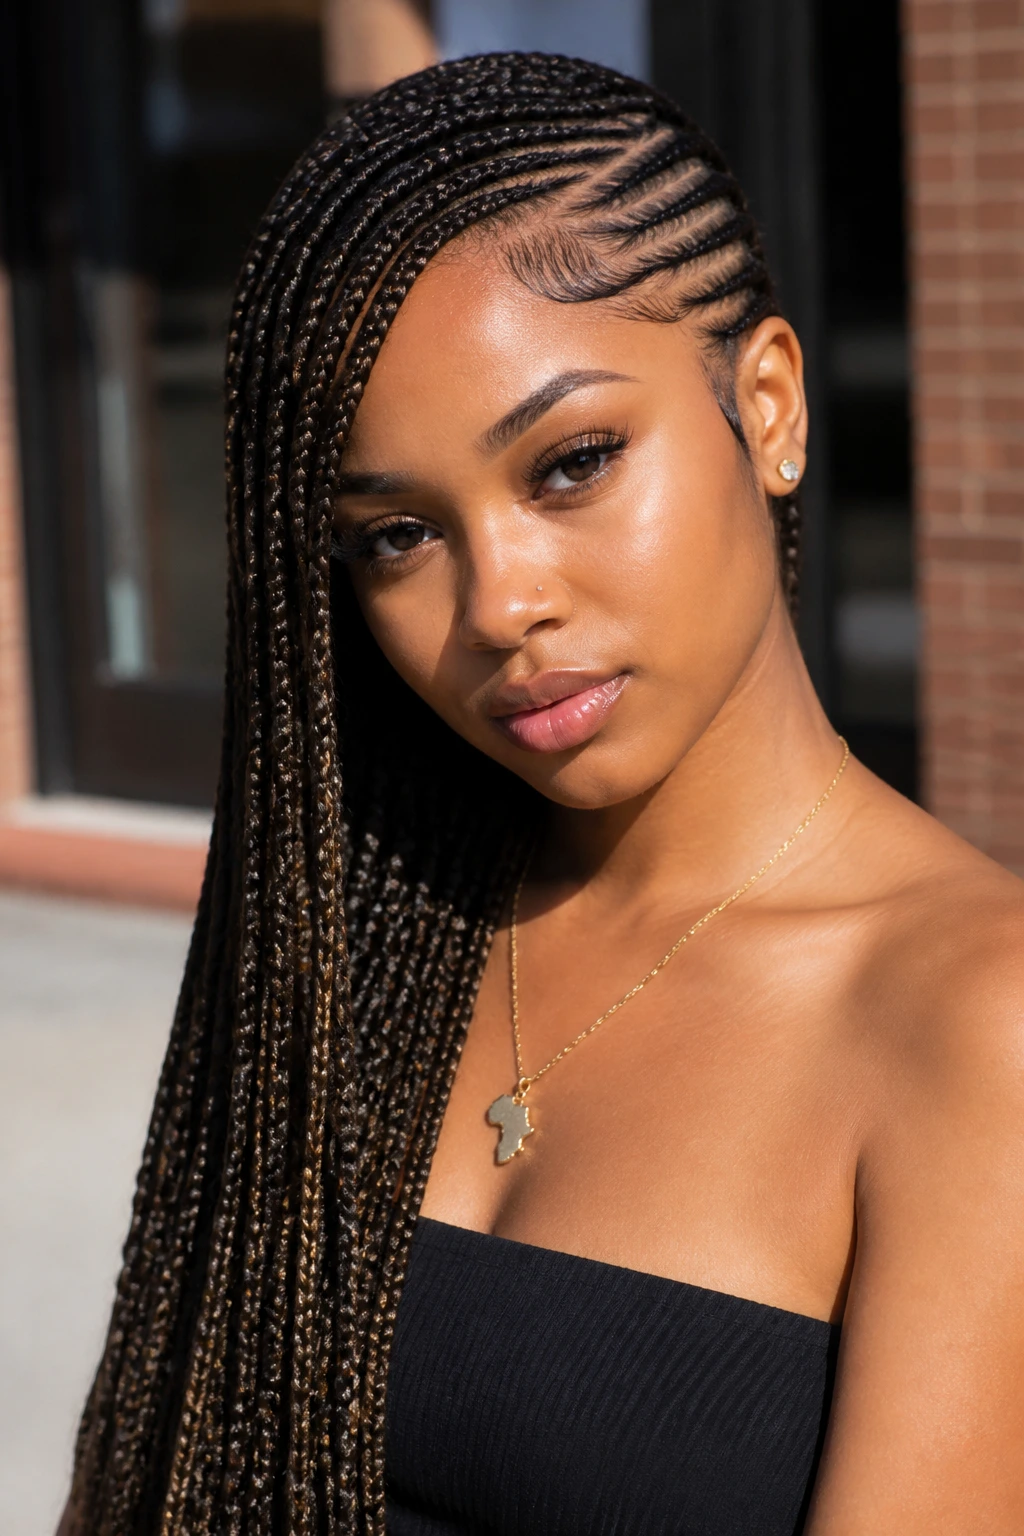
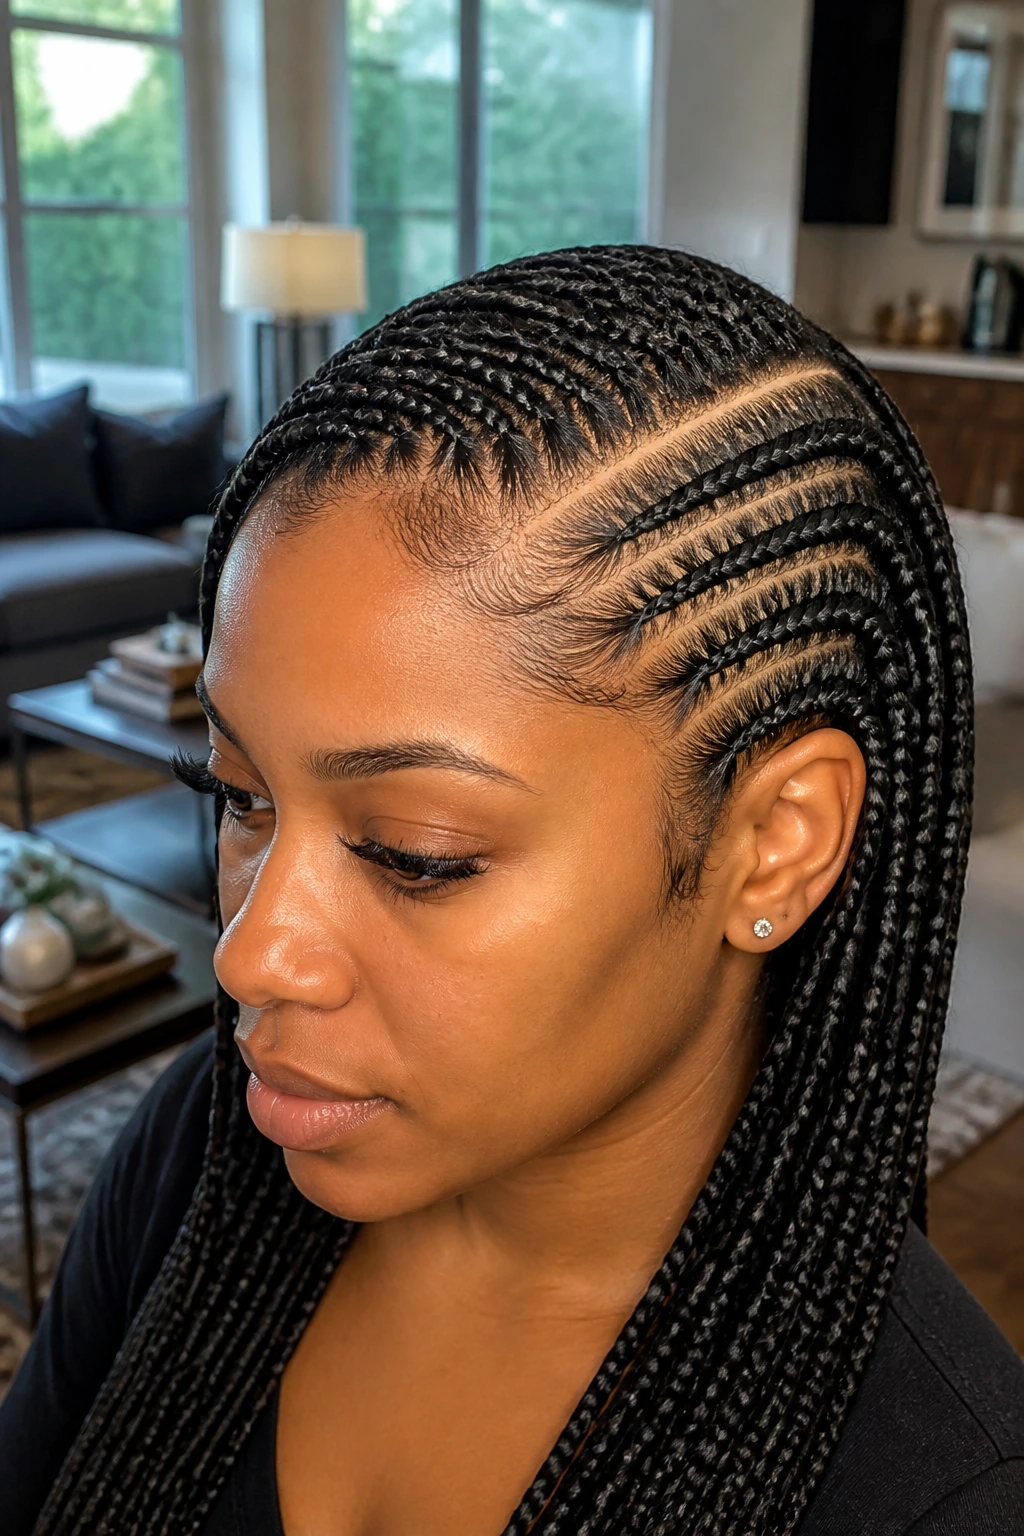
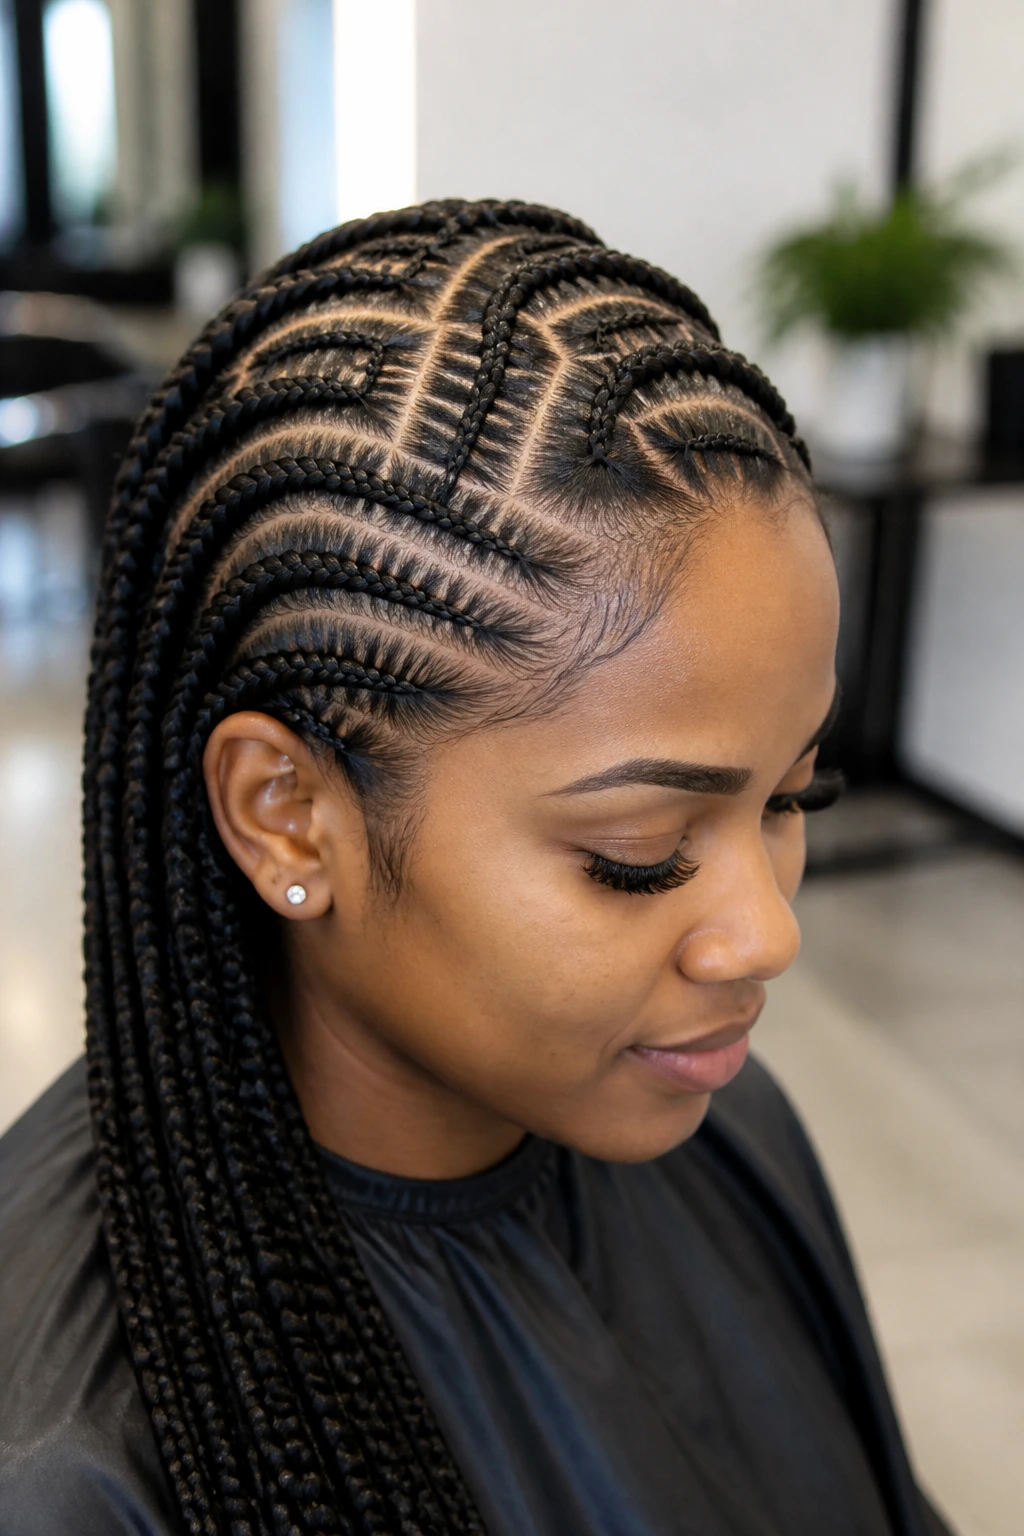
1. Classic Straight-Back Feed-In Cornrows
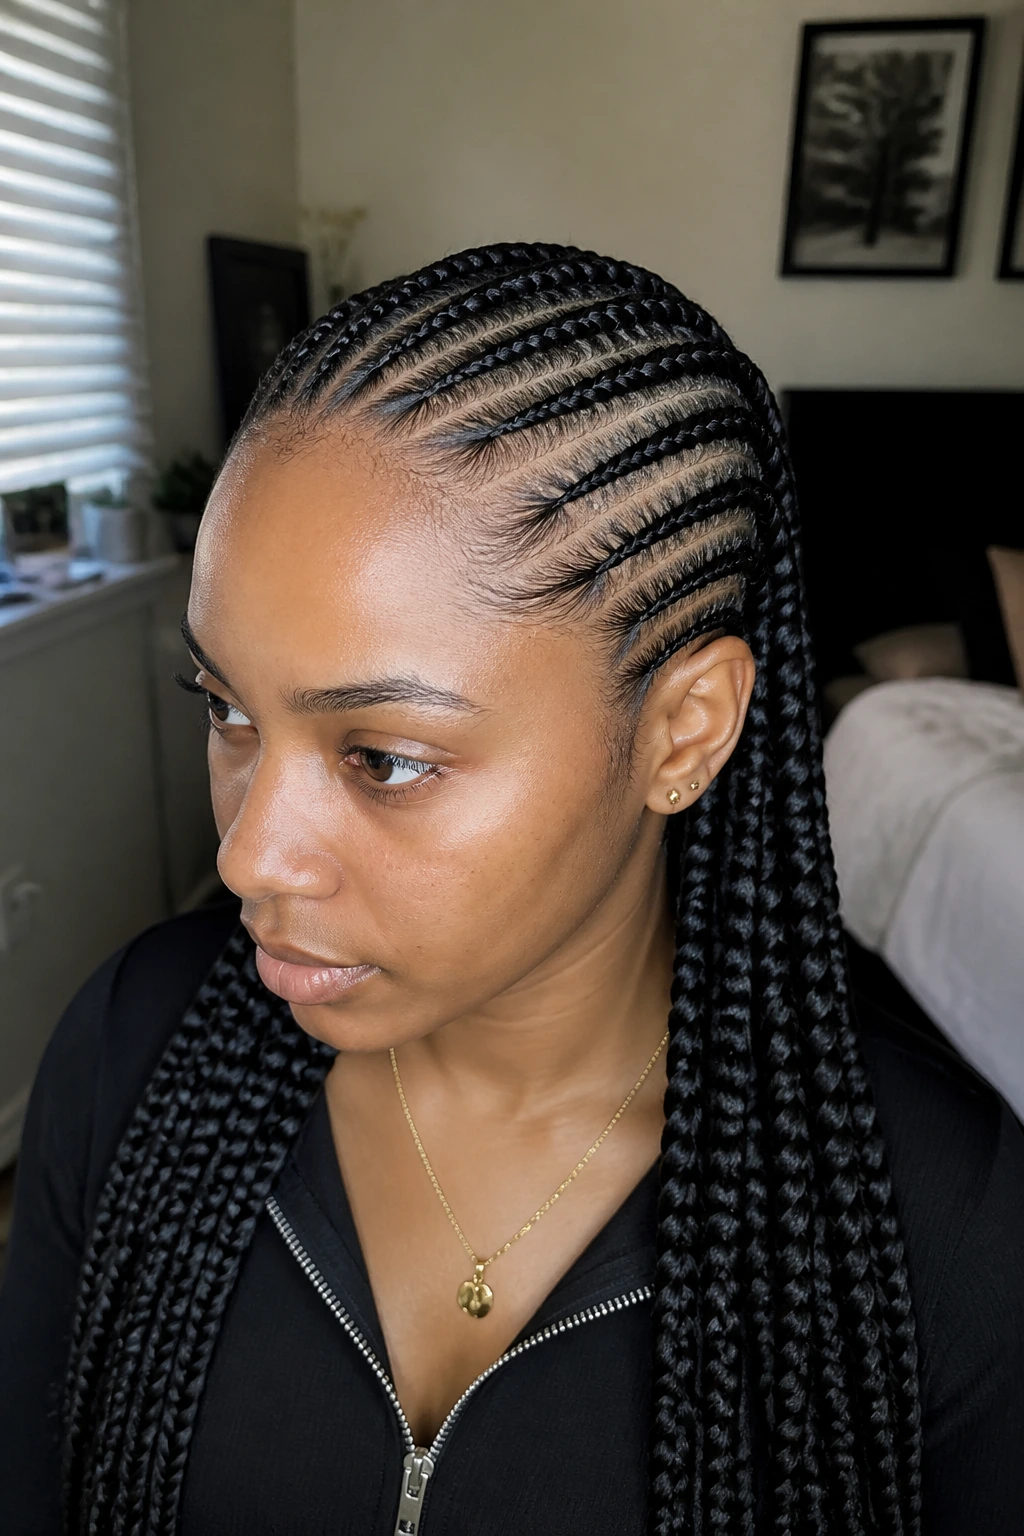
Feed-in cornrows have changed the game by creating a seamless, natural-looking hairline. Instead of starting with a bulky knot, this technique introduces braiding hair gradually, allowing the braid to grow in thickness as it moves away from your forehead. This is the ultimate protective style, keeping your natural hair tucked away while looking polished enough for a formal event or casual day out.
Why This Style Remains Essential
The primary draw is the lack of tension at the roots. By “feeding in” the hair, you avoid the heavy, pulling sensation that often leads to thinning edges. Most stylists recommend using a lightweight gel to grip the roots before adding the extension, which ensures the braid lays flat against your scalp from the very first inch.
How to Execute the Feed-In
- Start with freshly washed, detangled hair.
- Part your hair into clean, straight lines using a metal-tail comb.
- Use a small amount of pomade or edge control to smooth the section before you begin your first three-strand stitch.
- Add small pinches of braiding hair under your natural hair every two or three stitches to build the braid’s volume slowly. Pro tip: If you are a beginner, try working with pre-stretched hair to reduce the amount of prep time and keep your workspace tidy.
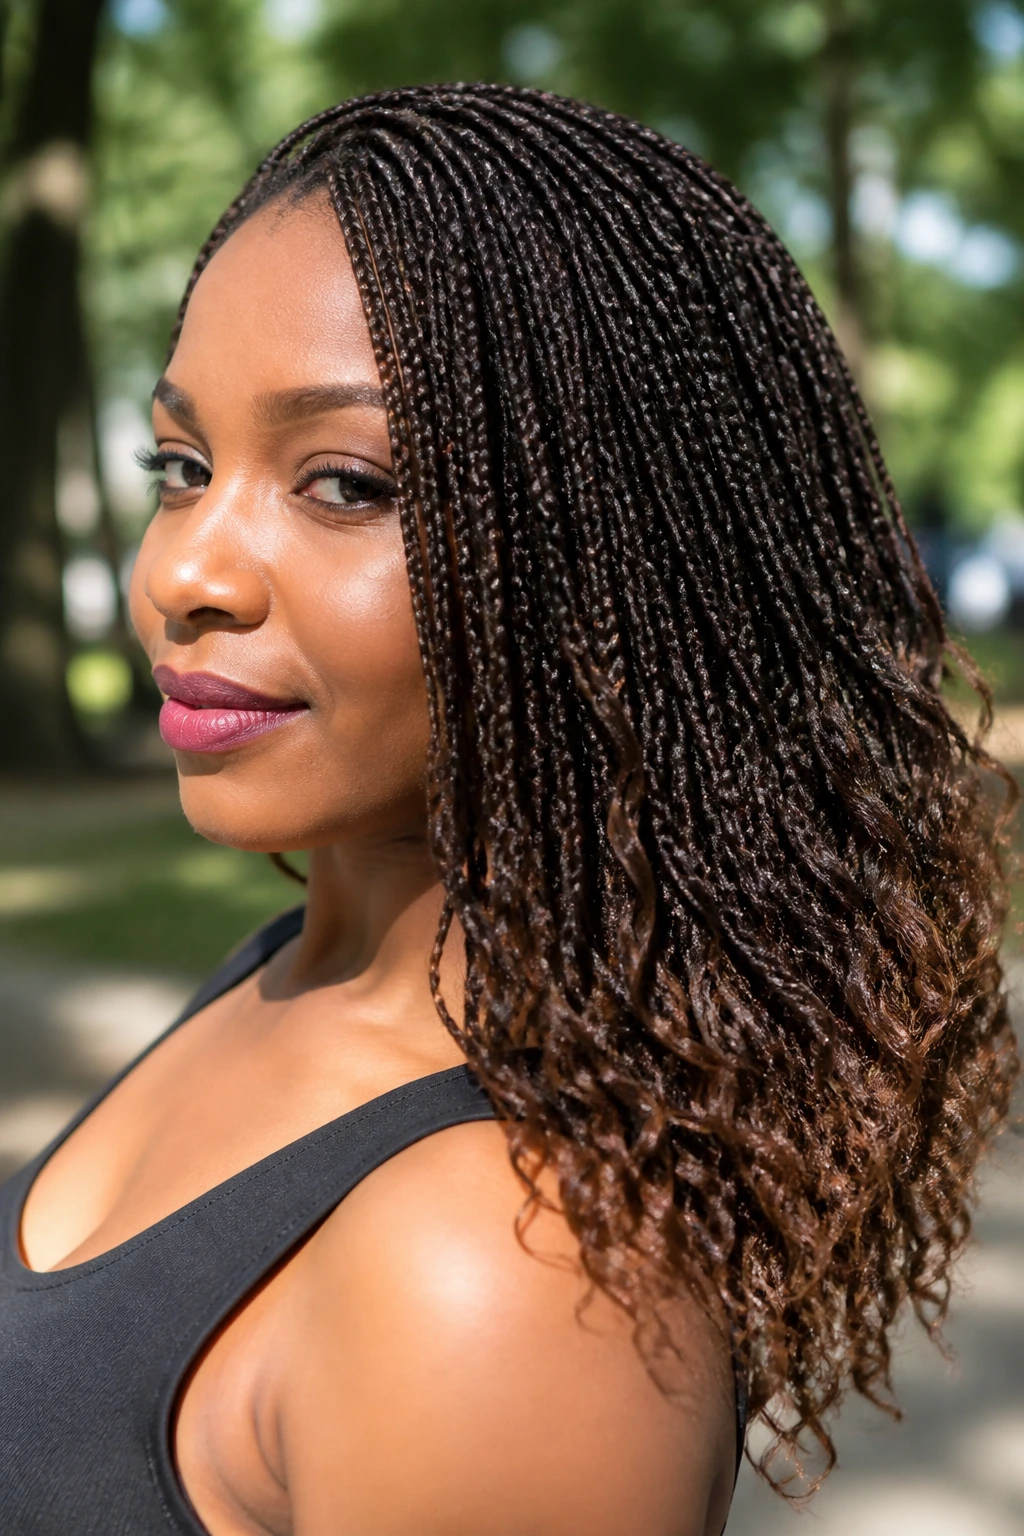
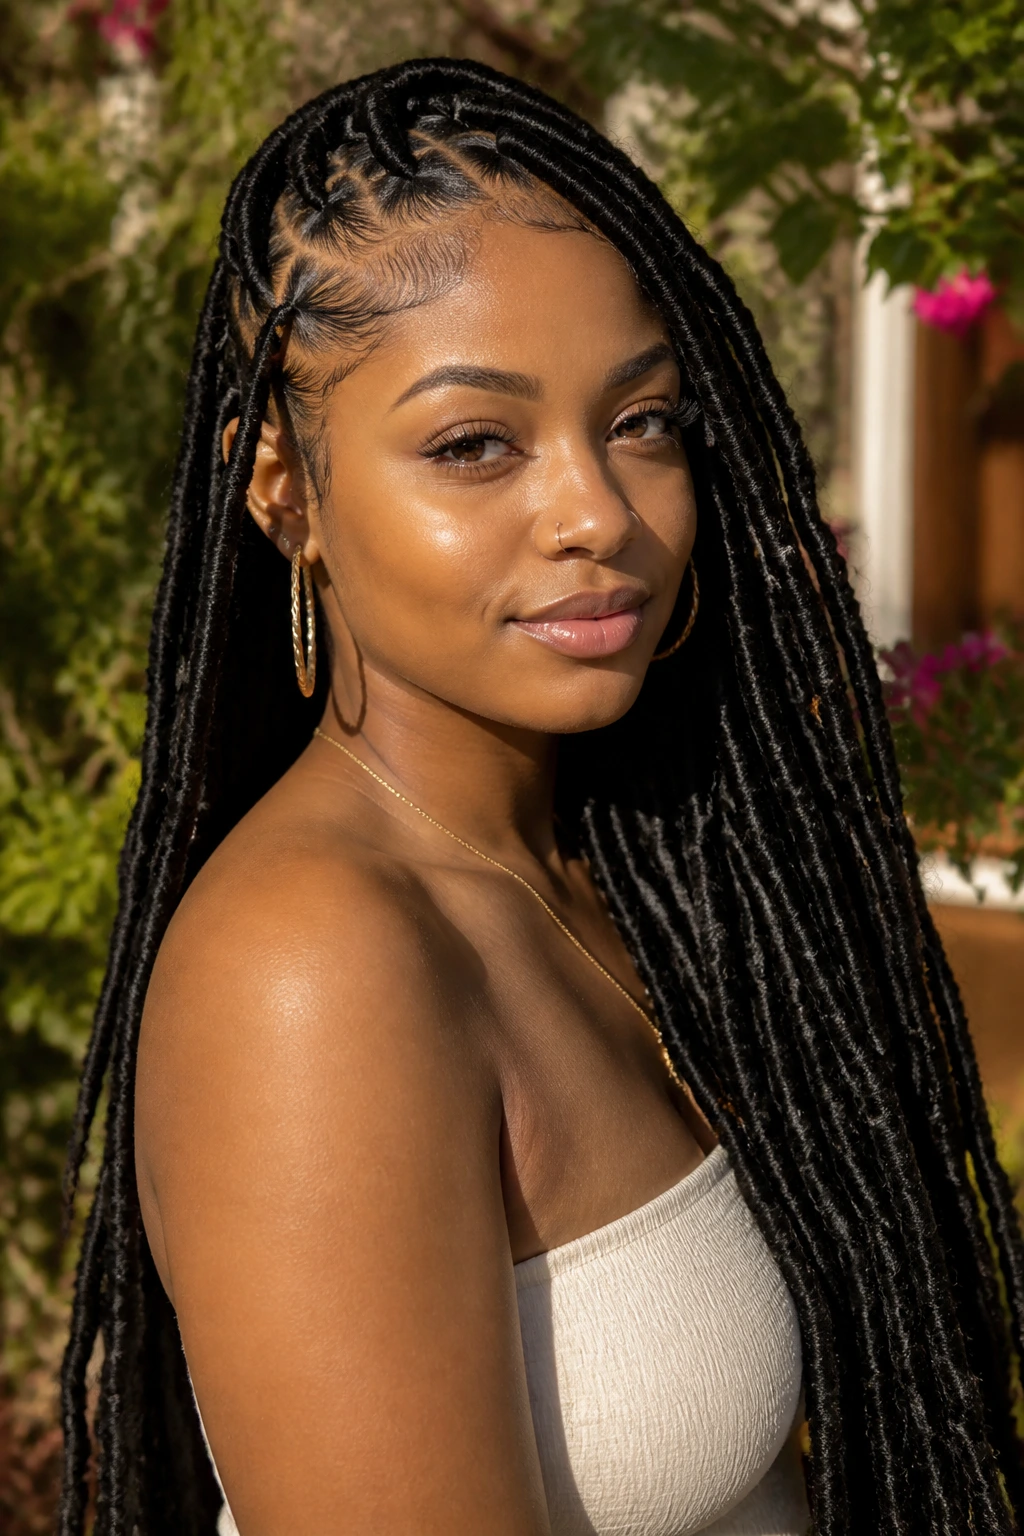
2. Goddess Box Braids with Curly Ends
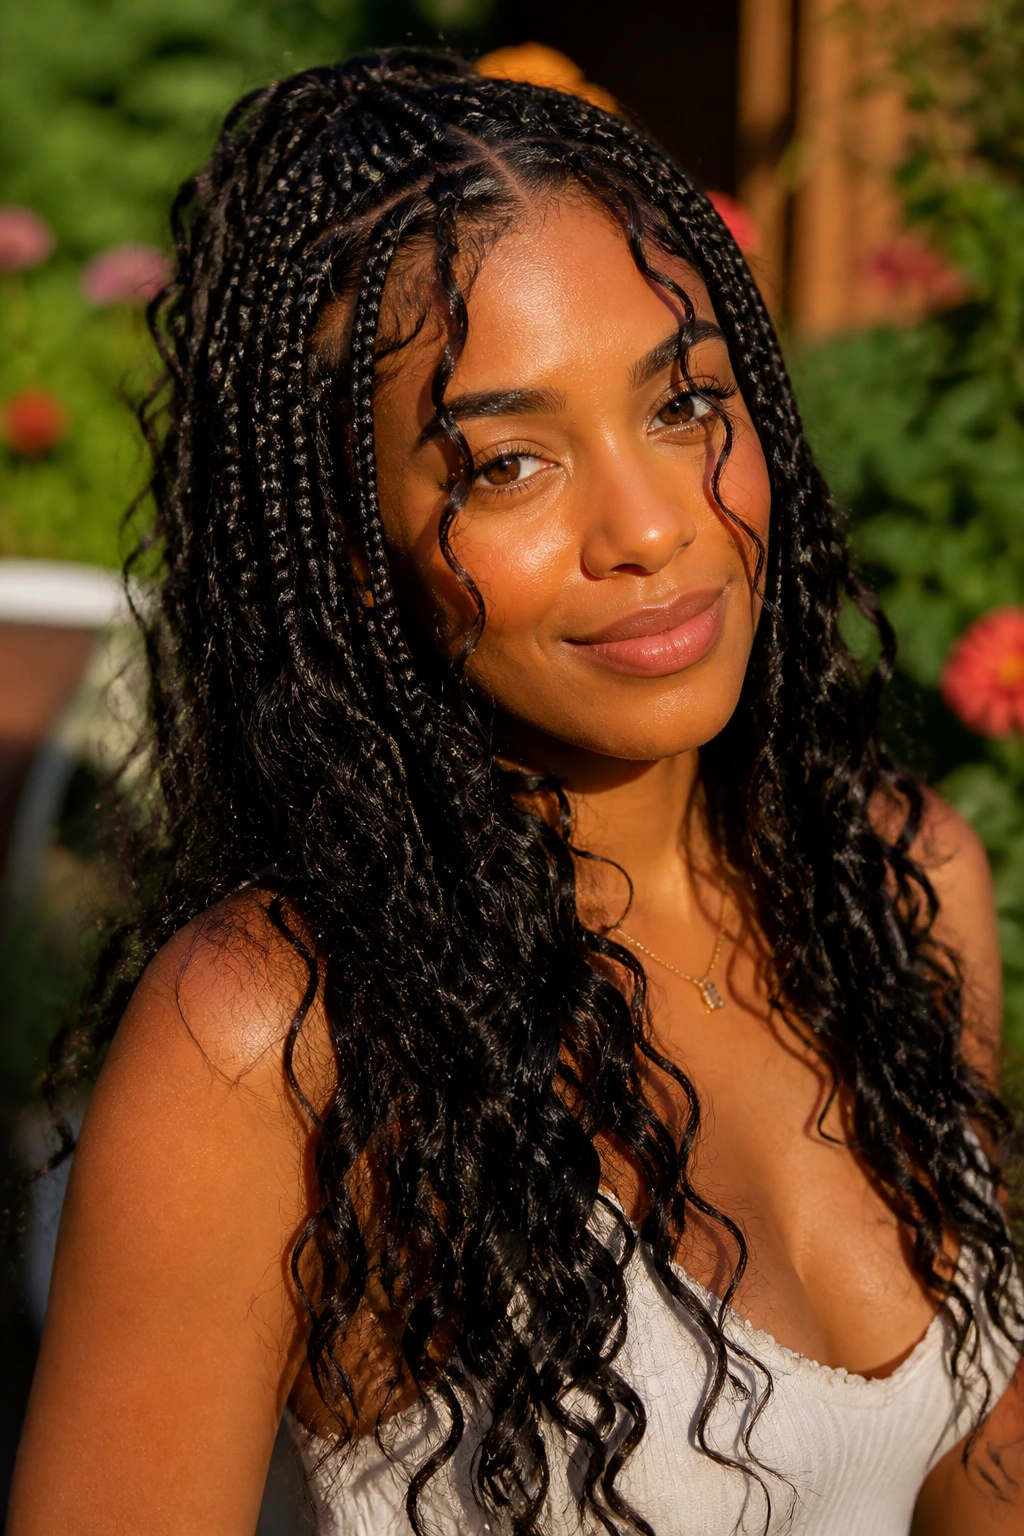
There is something undeniably romantic about box braids that finish in loose, flowing curls. These aren’t your standard, stiff braids. By leaving a portion of the braiding hair loose at the ends—or incorporating human hair curls throughout the length of the braid—you achieve a soft, boho aesthetic that frames the face beautifully.
The Secret to Longevity
One common issue with bohemian styles is the tangling of the loose hair. To keep the curls looking fresh, you should carry a small spray bottle filled with a mix of water and a light leave-in conditioner. Spritzing the ends daily prevents the synthetic fibers from matting, which is crucial if you want to keep this style for more than two weeks.
Essential Styling Elements
- Divide the scalp into neat, medium-sized squares.
- Braid the hair down to the desired length, leaving out sections of hair to create the “goddess” curl effect.
- Use a small crochet hook or simply knot the loose hair into the braid to ensure it stays secure.
- Seal the ends of the braids with hot water, taking care to avoid the loose curls during the dipping process.
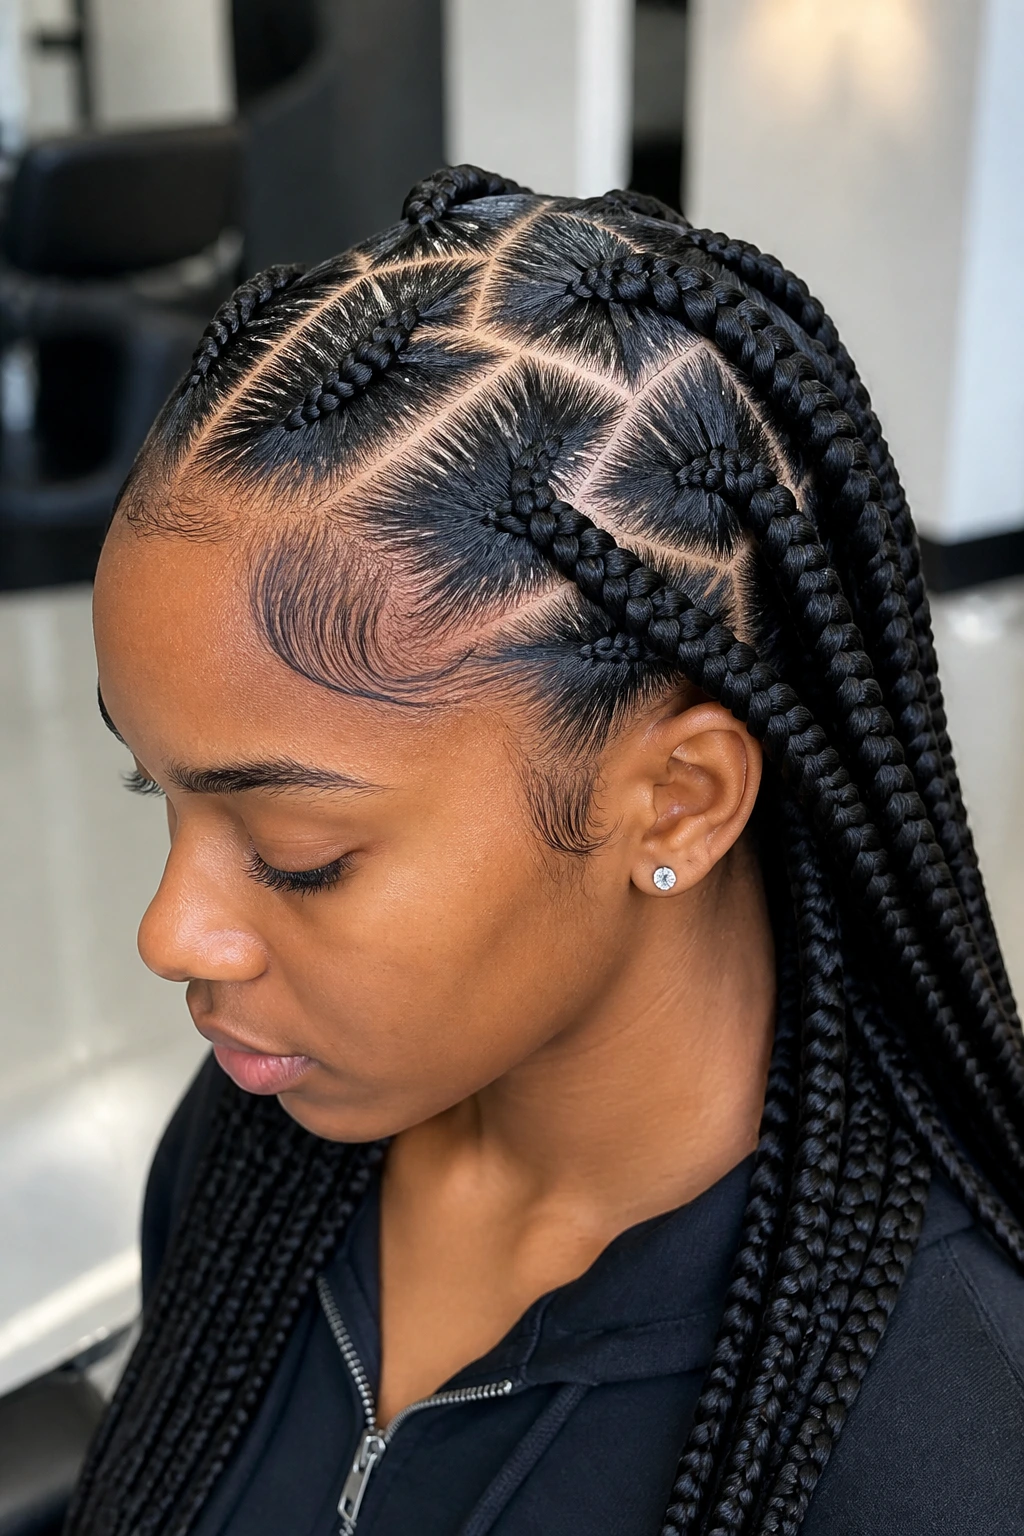
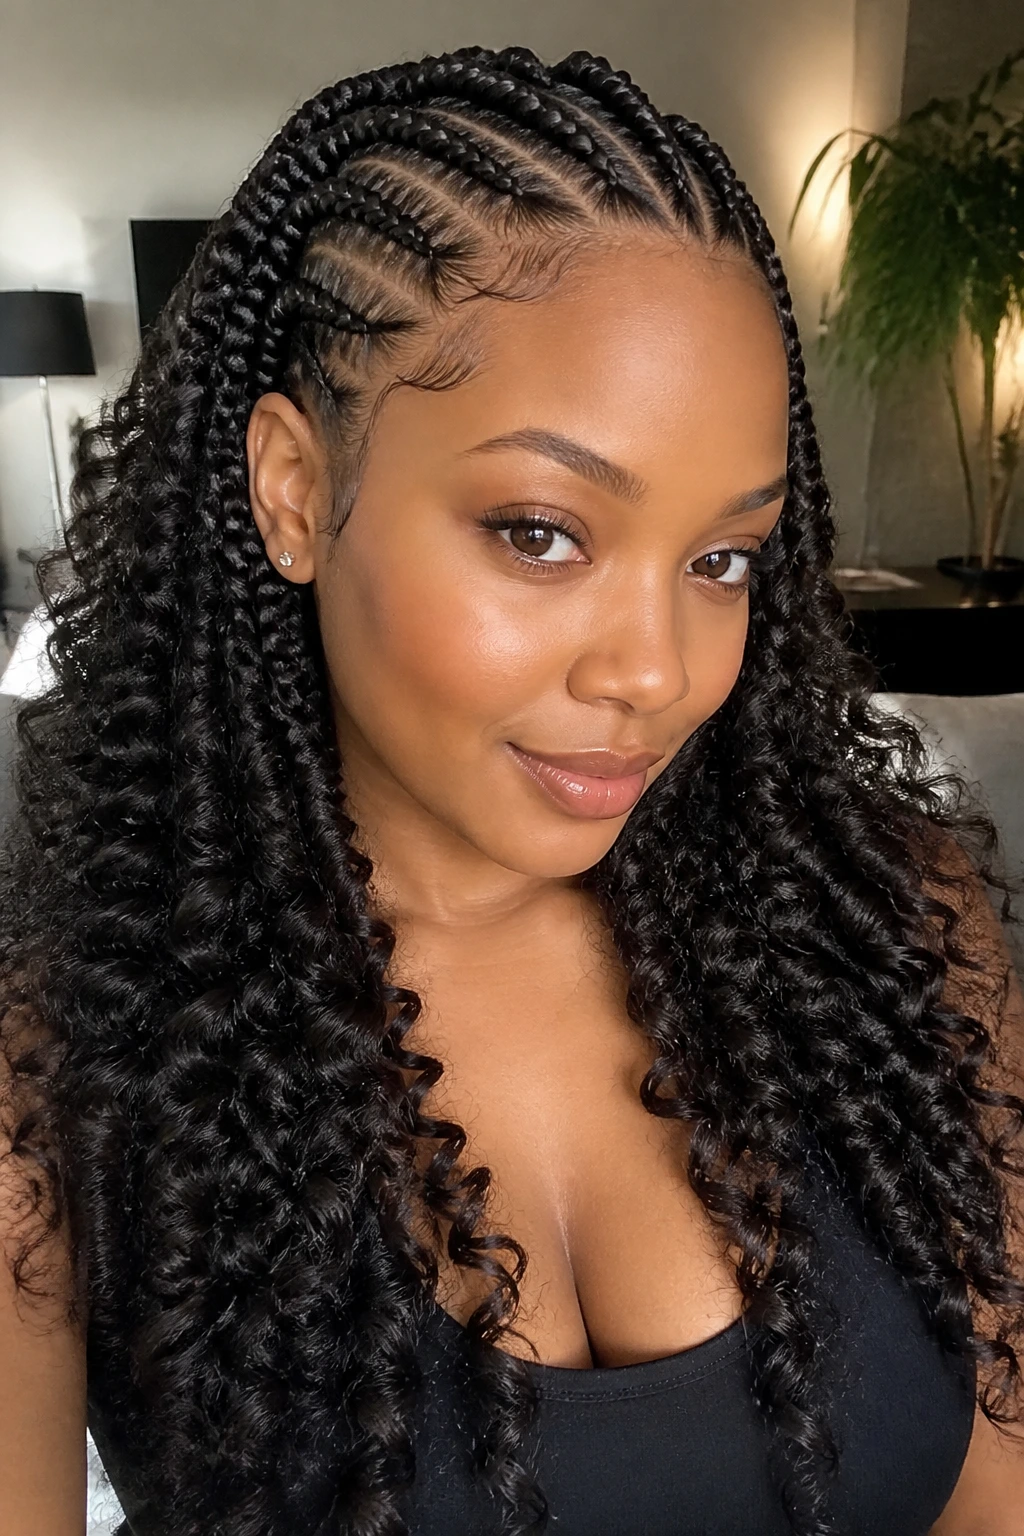
3. Stitch Braids for Precision and Depth
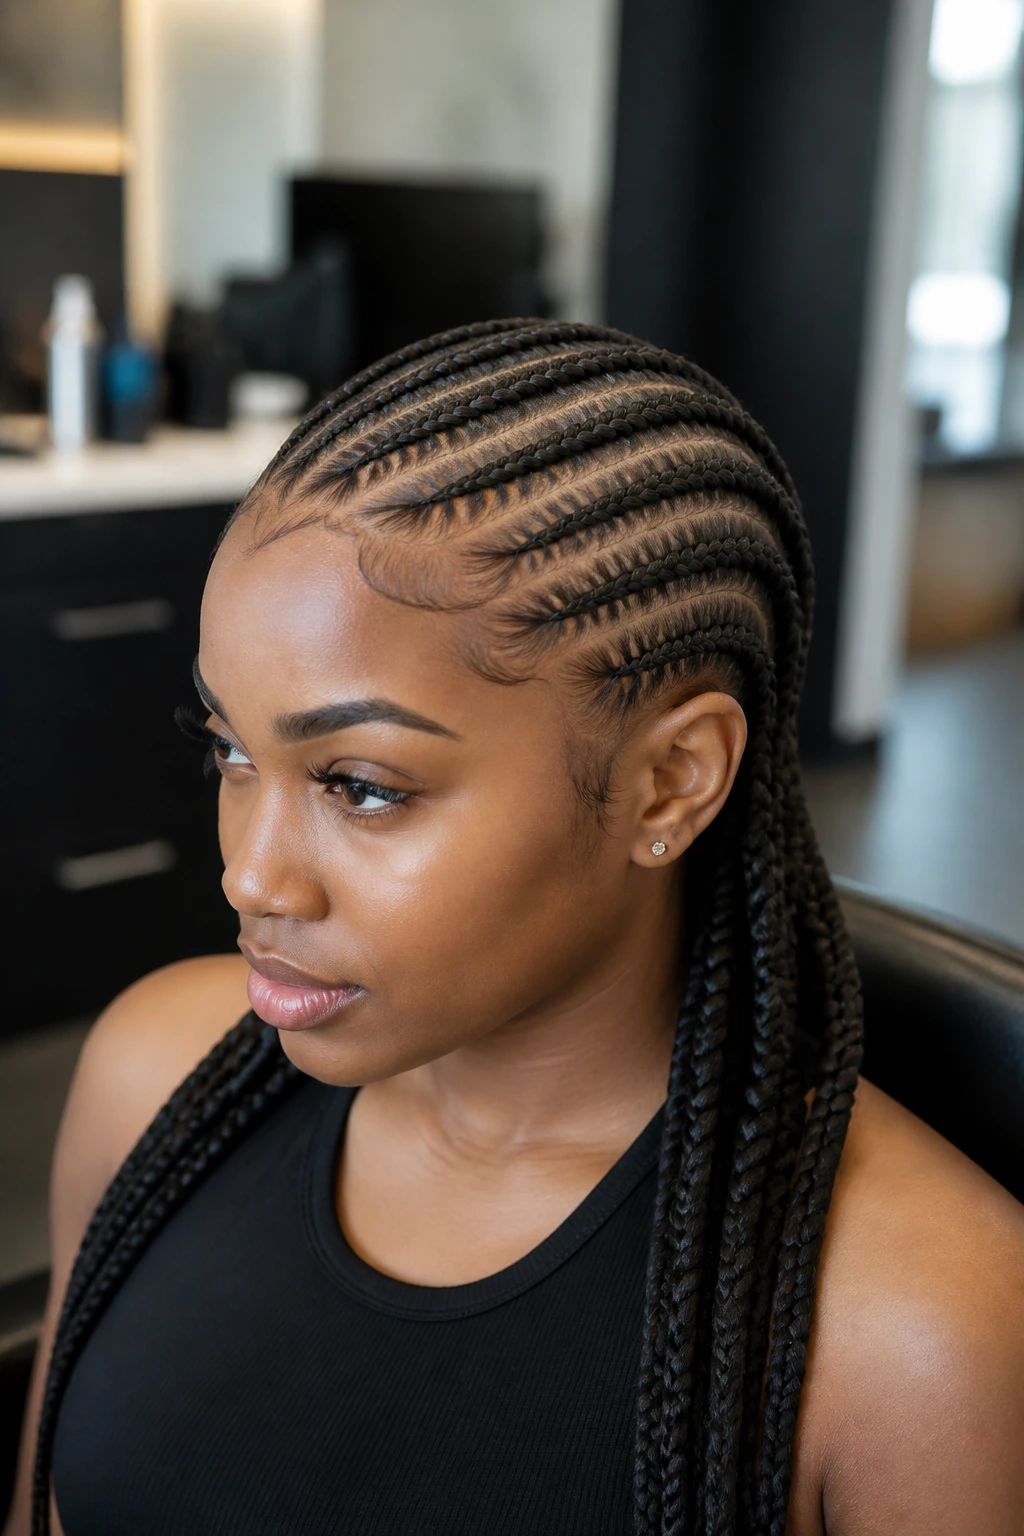
Stitch braids are characterized by the horizontal “stitches” visible along the length of each cornrow. This style creates a clean, graphic look that stands out because of its extreme neatness. It requires a steady hand and a good grip, as you are essentially using your pinky finger or the tail of your comb to create those sharp, defined lines.
Anatomy of the Stitch
The look comes down to how you part and how you grab. By using your nail to “slice” the hair into even segments, you get that perfectly spaced effect. It is a labor-intensive process, but the final result offers a professional finish that is hard to replicate with other techniques.
Tips for Better Parting
- Always use a mirror to check the back of your head as you work.
- Keep a small bottle of parting oil or grease to keep your parts hydrated and visible.
- If your lines start to drift, don’t be afraid to go back and re-part before you start the braiding process.
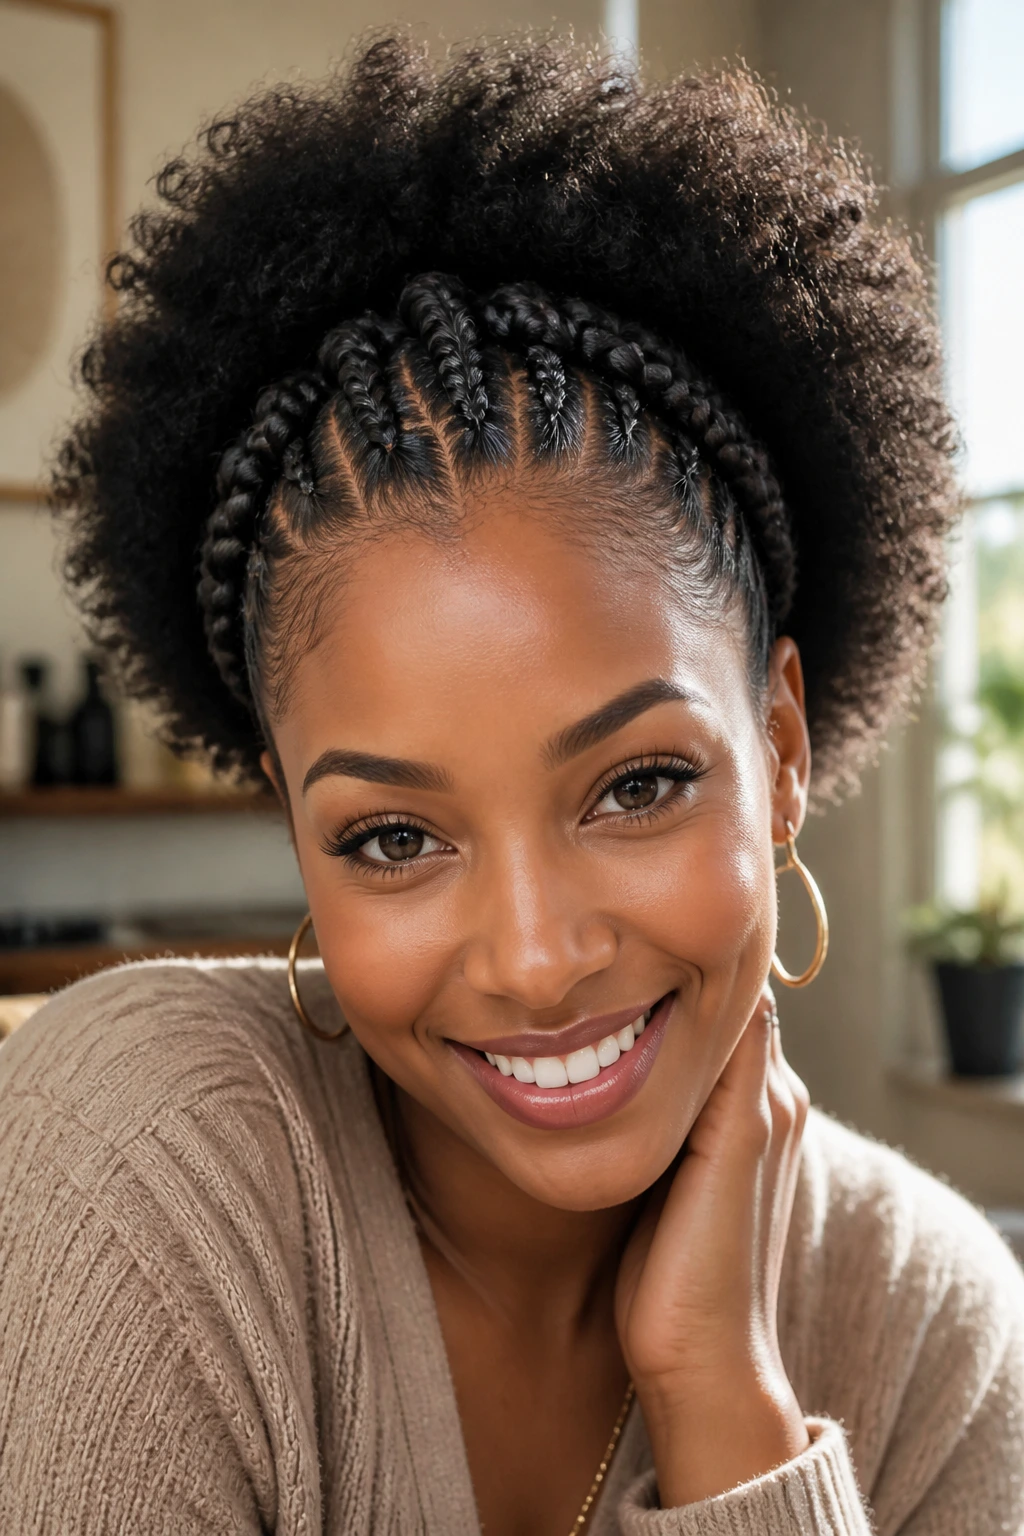
4. Tribal Fulani-Inspired Braids
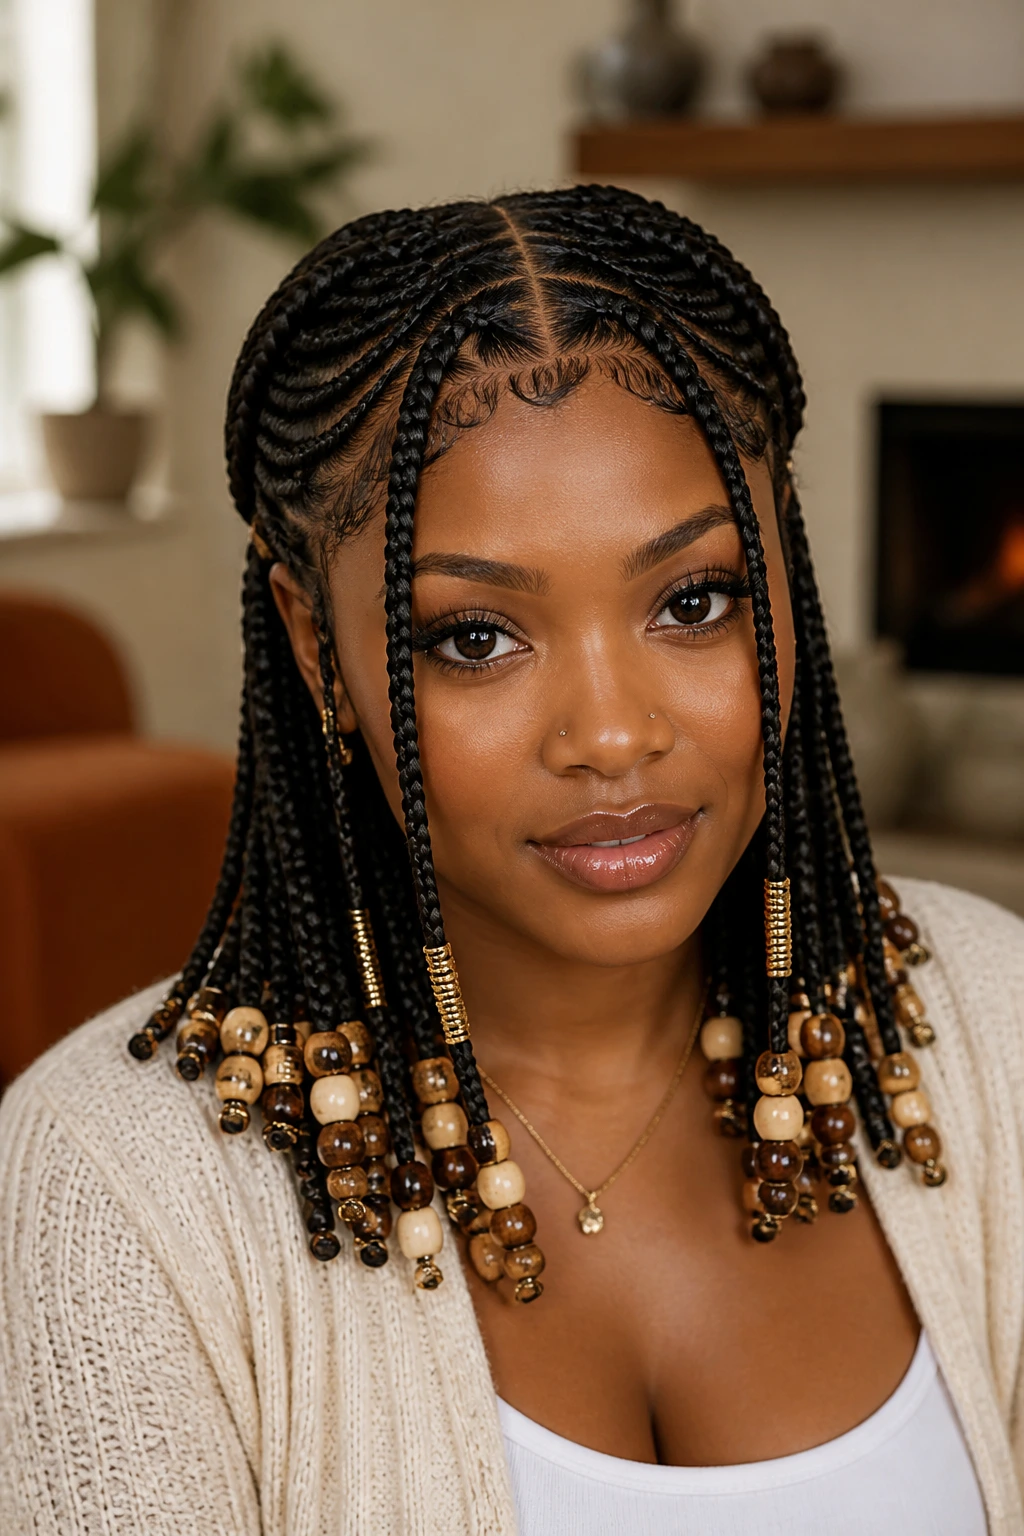
Fulani braids have a distinct structure, often featuring a center part, a braid running along the hairline, and decorative beads placed strategically at the ends. They represent a cultural bridge, honoring traditional patterns while allowing for modern color and accessory experimentation.
Styling with Accessories
The gold cuffs and wooden beads are the stars here. When placing your beads, choose a size that fits the thickness of your braid securely. If the braid is too thin, wrap a small piece of hair around the base before sliding the bead on, then secure it with a tiny rubber band so it does not slide off throughout the day.
Why This Style Works
It is a low-tension style that emphasizes the face. Because the braids are often kept in a more natural, flexible arrangement, they are less likely to cause scalp fatigue compared to tight, full-head box braids. This makes them a favorite for those who value both style and comfort.
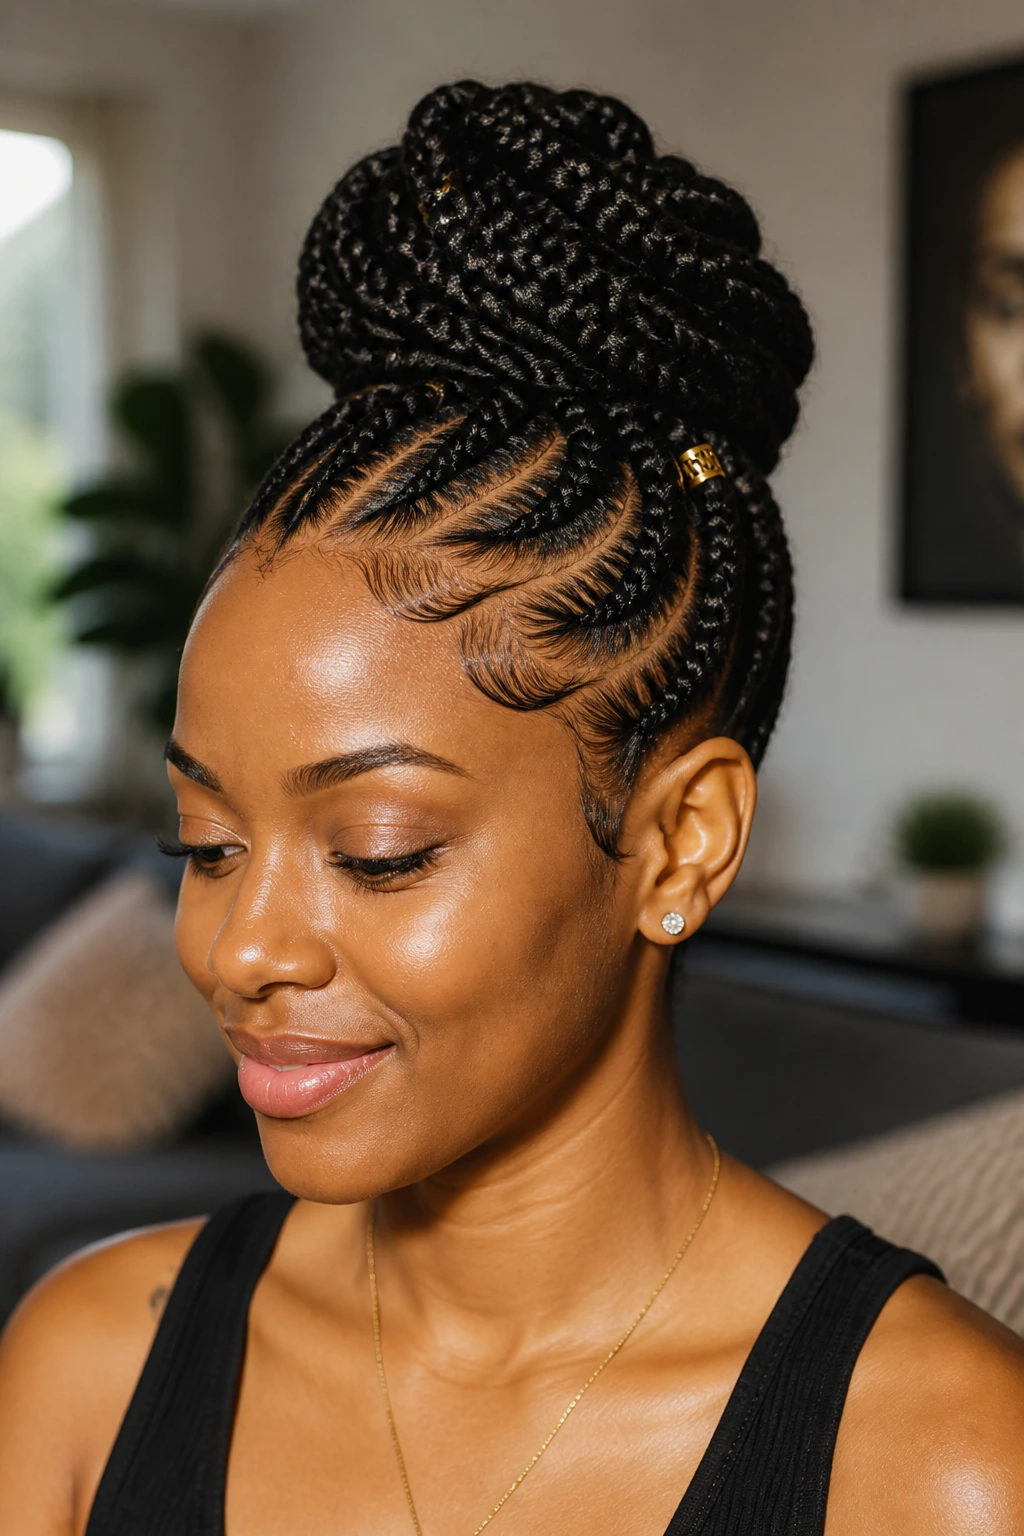
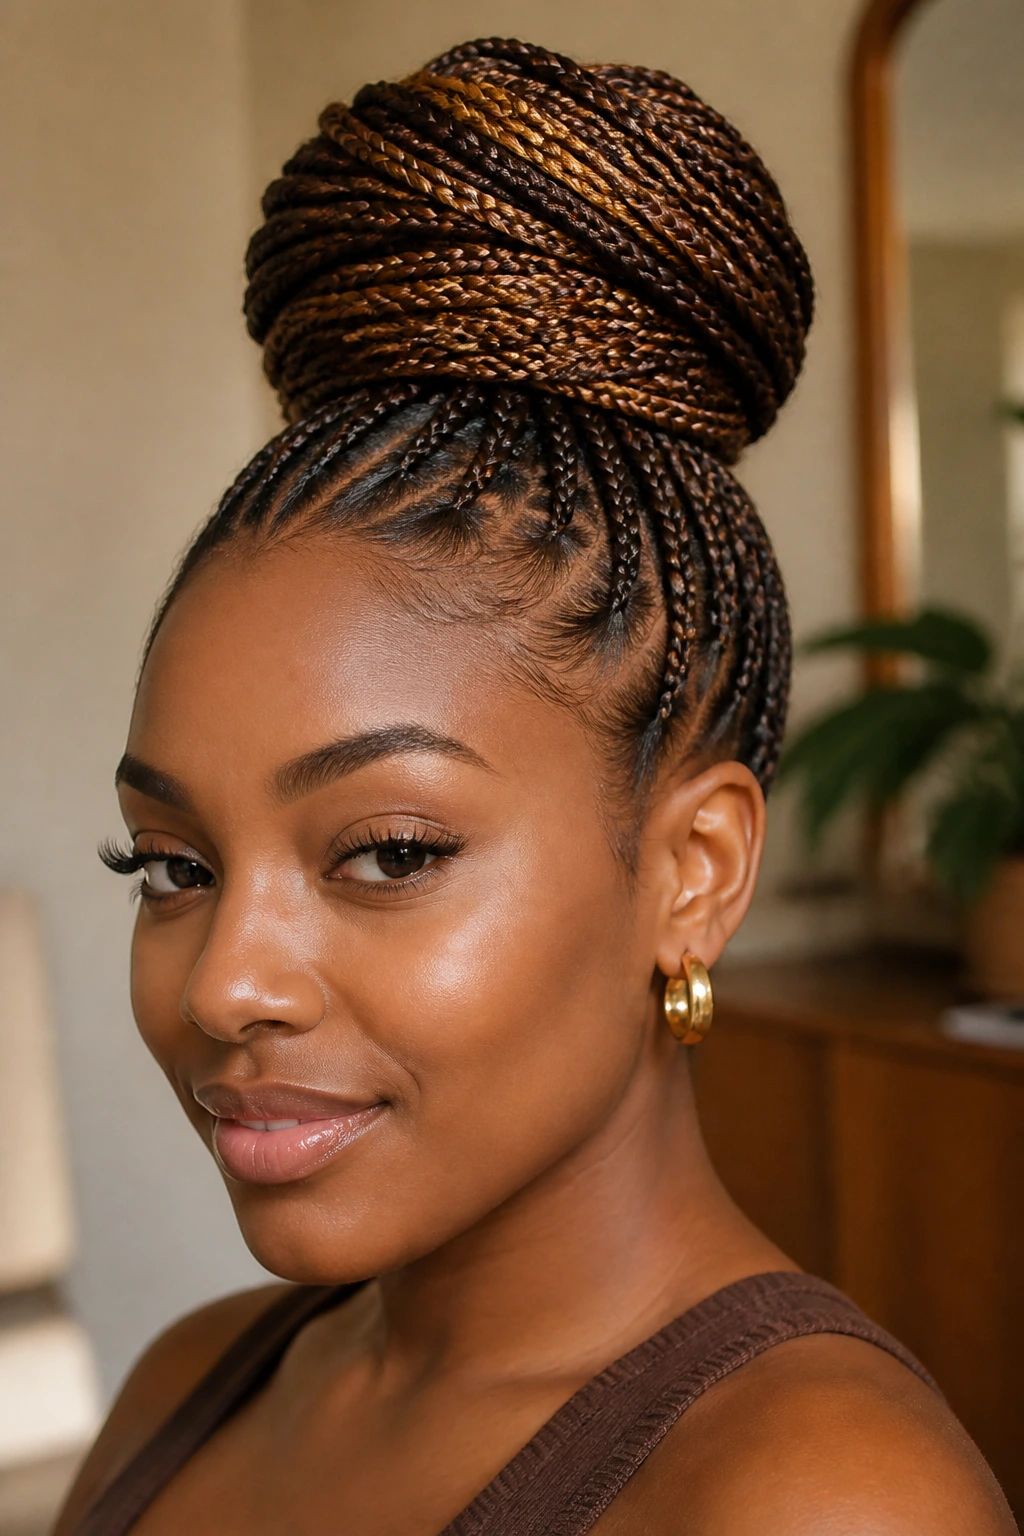
5. Jumbo Knotless Braids
Knotless braids have become the standard for a reason. By starting with your natural hair and gradually weaving in the extensions, you eliminate the painful, heavy knot at the base of the scalp. The jumbo variation is especially popular because it cuts down your time in the chair significantly.
Speed and Efficiency
Because the sections are larger, you are doing fewer braids, which means you can finish a full head in a fraction of the time. This is perfect for a quick weekend protective style that doesn’t require a ten-hour commitment.
Maintenance Notes
- Jumbo braids can get fuzzy faster than smaller braids, so be sure to wrap your hair in a satin scarf every single night.
- Use a light mousse to lay down any stray flyaways around your hairline.
- Avoid heavy oils, as they can cause the braids to slide out or become too greasy, leading to irritation.
6. Half-Up, Half-Down Bohemian Buns

Combining cornrows in the front with flowing box braids or individual plaits in the back creates a sophisticated look that is perfect for any occasion. The half-up, half-down style allows you to gather the front into one or two buns, while letting the rest of your hair hang loose and free.
How to Construct the Bun
- Gather the front section, ensuring you have enough braids to create a stable anchor.
- Twist the hair into a bun and secure it with a large hair pin rather than a tight elastic, which can put unnecessary pressure on your scalp.
- You can leave a few “tendril” braids out around your face for a softer, more ethereal vibe.
7. Natural Hair Cornrowed Updos
Sometimes, the best styles involve no extensions at all. Working with your natural hair—especially if you have a healthy, thick texture—allows you to create beautiful, intricate updos that celebrate your real hair. These styles are lightweight, breathable, and incredibly versatile.
Prepping Your Natural Hair
- Deep condition your hair before styling to ensure it is as flexible as possible.
- Use a thick butter or a medium-hold gel to lock in moisture and provide the necessary grip for your braids.
- Braid your hair while it is slightly damp; as it dries, it will tighten and hold the style longer.
8. Micro Braids with Textured Tips
Micro braids are a commitment, but the payoff is a look that mimics the density and movement of natural hair. By keeping the braids very small and thin, you gain the ability to style your hair just like you would with a loose texture.
Managing the Volume
Since micro braids are so dense, they can get very heavy. Always communicate with your stylist about the weight of the hair you are using. Synthetic hair that is too heavy can cause neck strain, so opt for pre-stretched, lightweight fibers whenever possible.
Styling Ideas
- Wear them in a high ponytail to keep them off your neck.
- Use a gold thread to wrap a few select braids, adding a touch of metallic shine that elevates the look.
9. Criss-Cross Feed-In Braids
This is a high-skill technique that involves braiding hair in diagonal patterns that cross over one another. It creates a stunning geometric effect that is perfect for anyone looking to make a bold statement. The key is in the parting; you must be precise with your diagonals to ensure the cross-over looks intentional rather than chaotic.
The Logic of the Crossing
To get the criss-cross, you will work in small, angled sections. Braid one side, then cross the next section over it, tucking the ends neatly so they blend into the next braid. It requires patience and frequent mirror checks, but the visual impact is worth the effort.
10. Lemonade Braids (Side-Swept Cornrows)
Made famous by their signature side-swept look, these braids are sleek, long, and incredibly chic. The style involves braiding all of the hair toward one side of the head, creating a cascading effect that looks especially beautiful in longer lengths.
Why They Are So Popular
The side-sweep is universally flattering. It accentuates the jawline and creates a dramatic silhouette that works well with everything from oversized earrings to simple studs. Because the hair is pulled to one side, it is also a very manageable style for daily wear.
11. Goddess Locs or Faux Locs
While technically a protective style involving wrapping, many “loc” styles start with a braid base. Faux locs offer the look of permanent locs without the long-term commitment. They are beautiful, protective, and have a wonderfully rustic, natural feel.
Choosing Your Wrapping Hair
- The type of hair you use to wrap the loc matters.
- Synthetic braiding hair with a matte finish looks more natural than shiny, plastic-feeling hair.
- Make sure to seal your locs with a little bit of hair glue or a small lighter at the ends to prevent unraveling.
12. Mohawk Braid Styles

Mohawk braids are for those who aren’t afraid to stand out. By cornrowing the sides of your head toward the center and creating a large, voluminous braid or a series of buns down the middle, you create a fierce, edgy look that remains protective and practical.
Customizing the Volume
- You can make the “mohawk” section as large or as small as you like.
- Use curly synthetic hair in the center to add extra volume and texture.
- Play with colors—bright reds, deep blues, or honey blondes can make this style look even more dynamic.
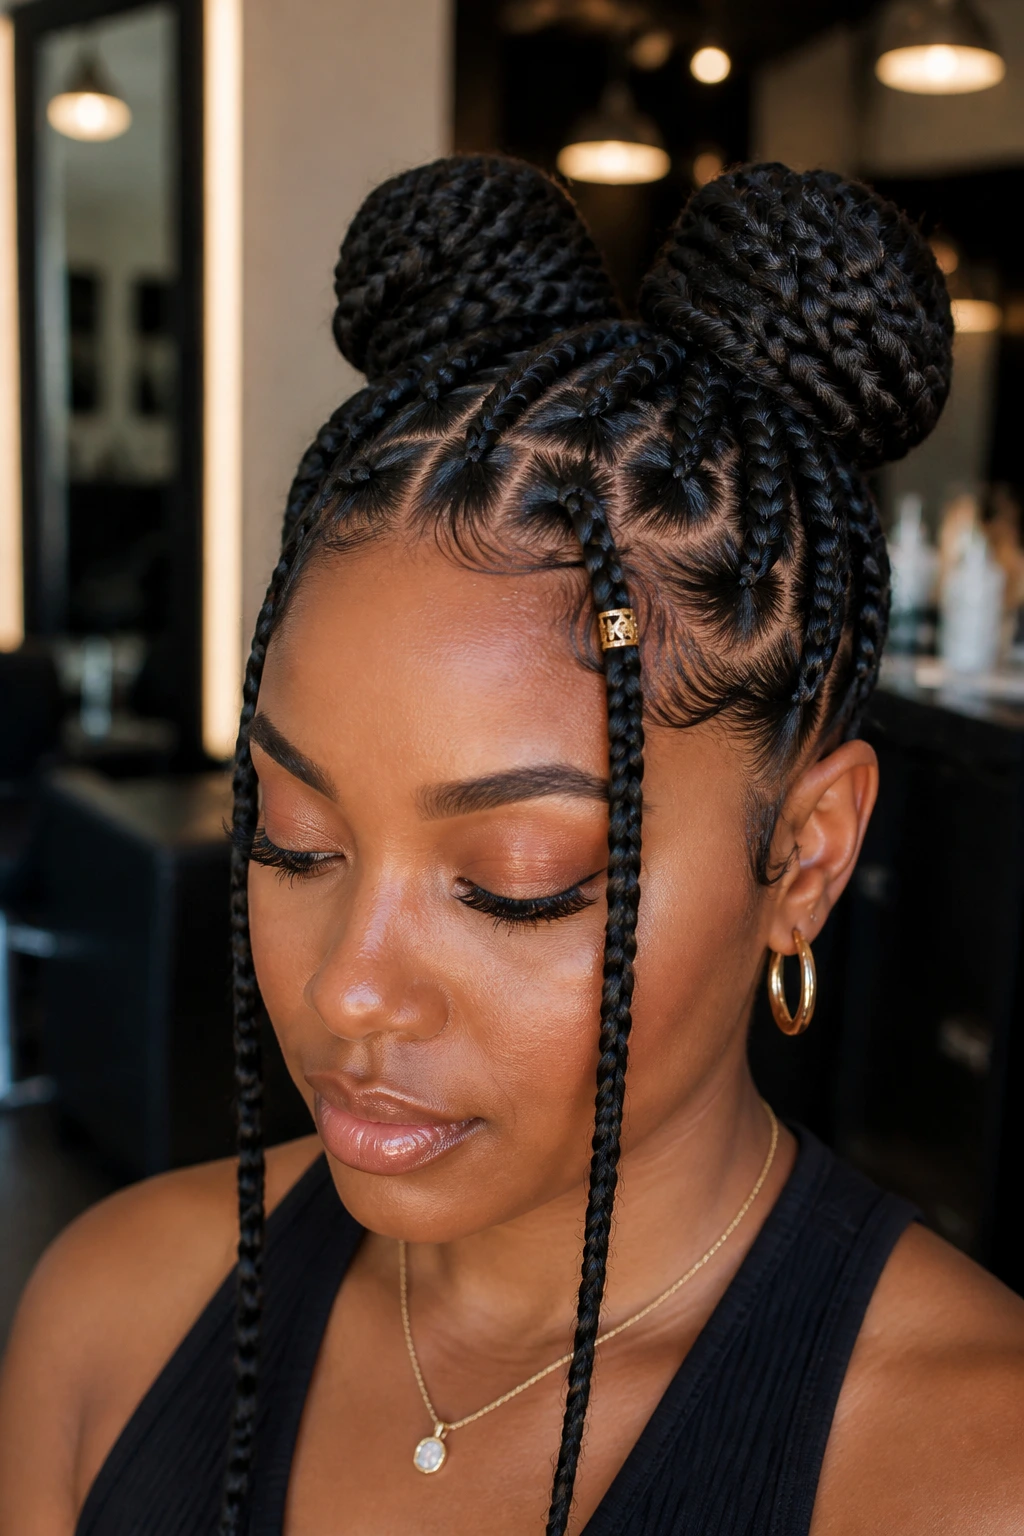
13. Double-Bun Braided Pigtails
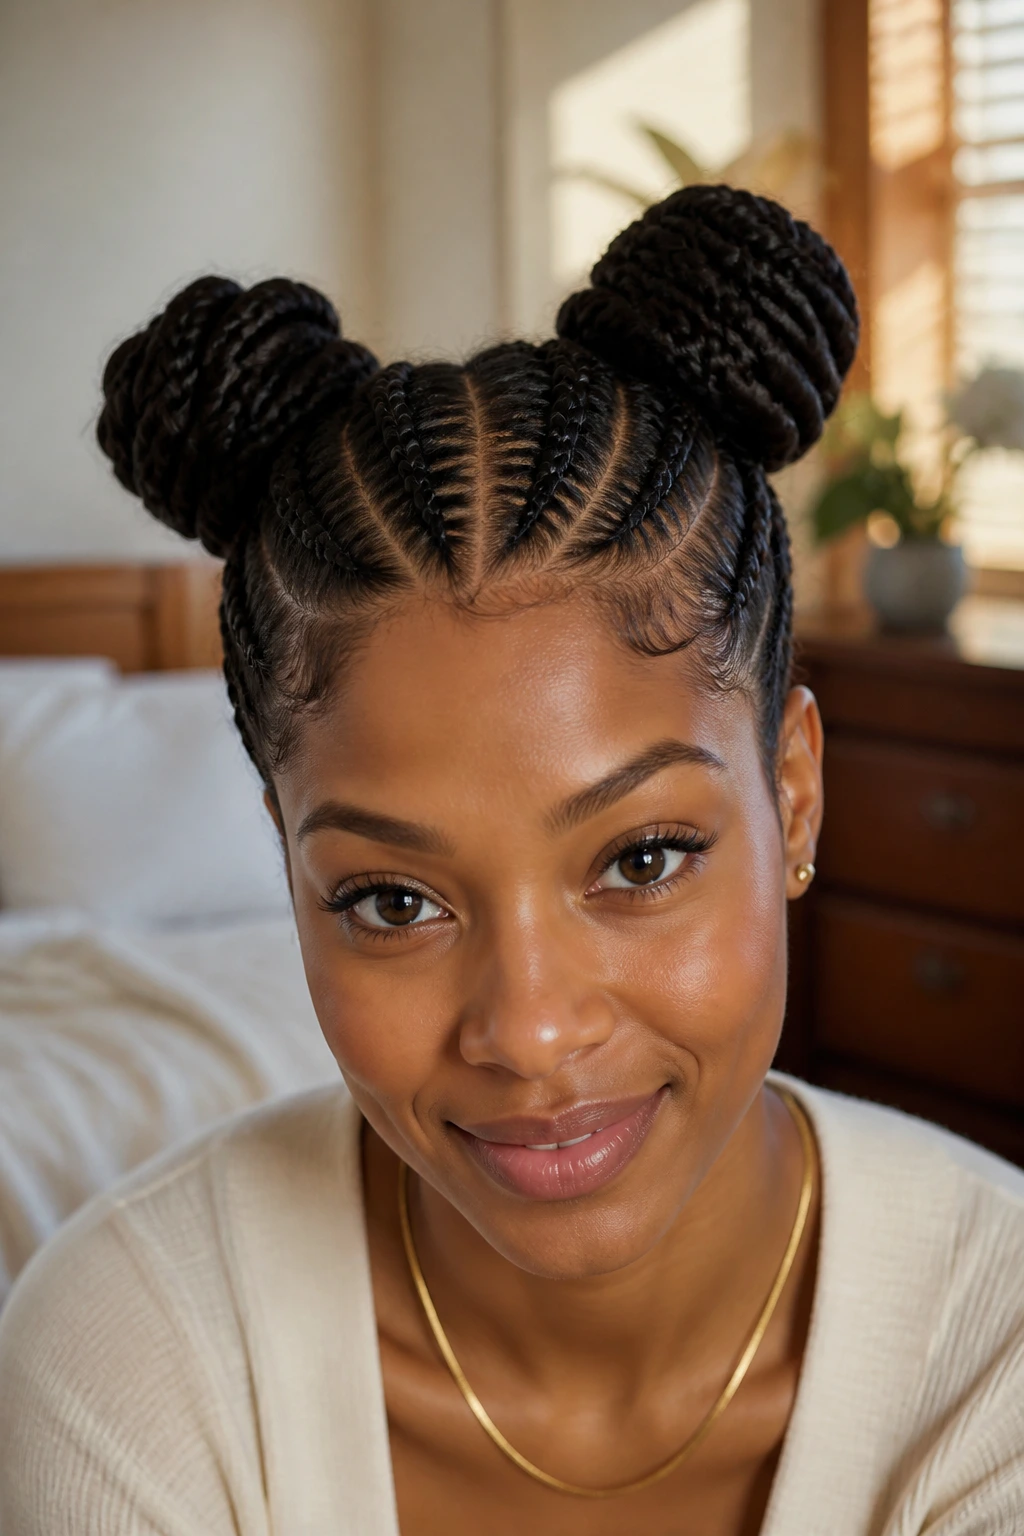
This playful style is perfect for more casual settings. It features two clean cornrows running from the front to the back, ending in two large, wrapped buns at the crown of the head. It is a youthful, fun look that is remarkably easy to maintain.
How to Keep It Neat
- Use a fine-tooth comb to ensure your parts are laser-straight.
- When wrapping your buns, use bobby pins that match your hair color to hide them completely.
- If you want a more elevated look, wrap one or two braids around the base of the bun to create a “crown” effect.
14. Beaded Braided Ponytail
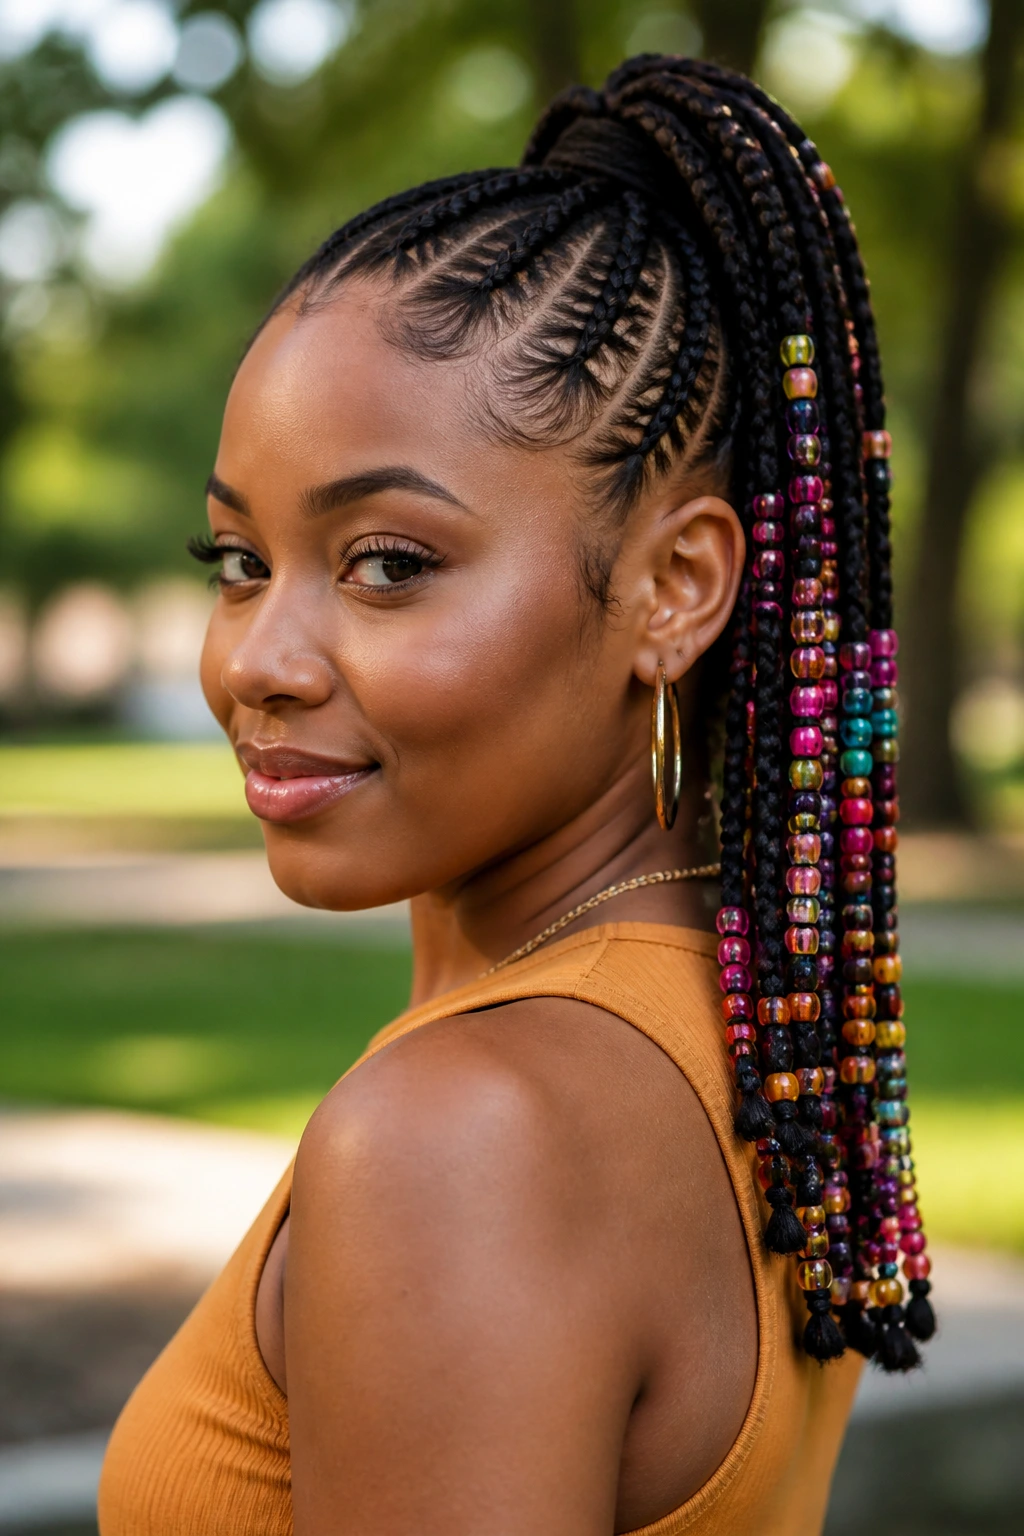
Sometimes all you need is a simple, high-braided ponytail decorated with a variety of colorful beads. This is a classic style that allows for immense creativity. You can use wood, glass, or plastic beads, and you can mix and match colors to reflect your personal style.
The Importance of Secure Ends
- When using heavy beads, the end of the braid must be secure.
- Use a small rubber band to knot the hair at the end of the bead, which stops the weight of the bead from pulling the hair out of the braid.
- Do not overload one braid with too many beads, as this can cause the hair to droop.
15. The Wrapped High Bun
A high bun created from a series of individual braids is the definition of effortless sophistication. Once you have installed your braids, simply gather them all into a high ponytail, then twist the length of the braids around the base to form a large, elegant bun.
Why It’s Versatile
You can wear this to a wedding, an office meeting, or a gym session. It is the perfect “all-purpose” style. To switch it up, you can add a silk scarf around the base of the bun, which adds a pop of color and keeps the edges of the braids looking smooth.
16. Chunky Two-Strand Twists
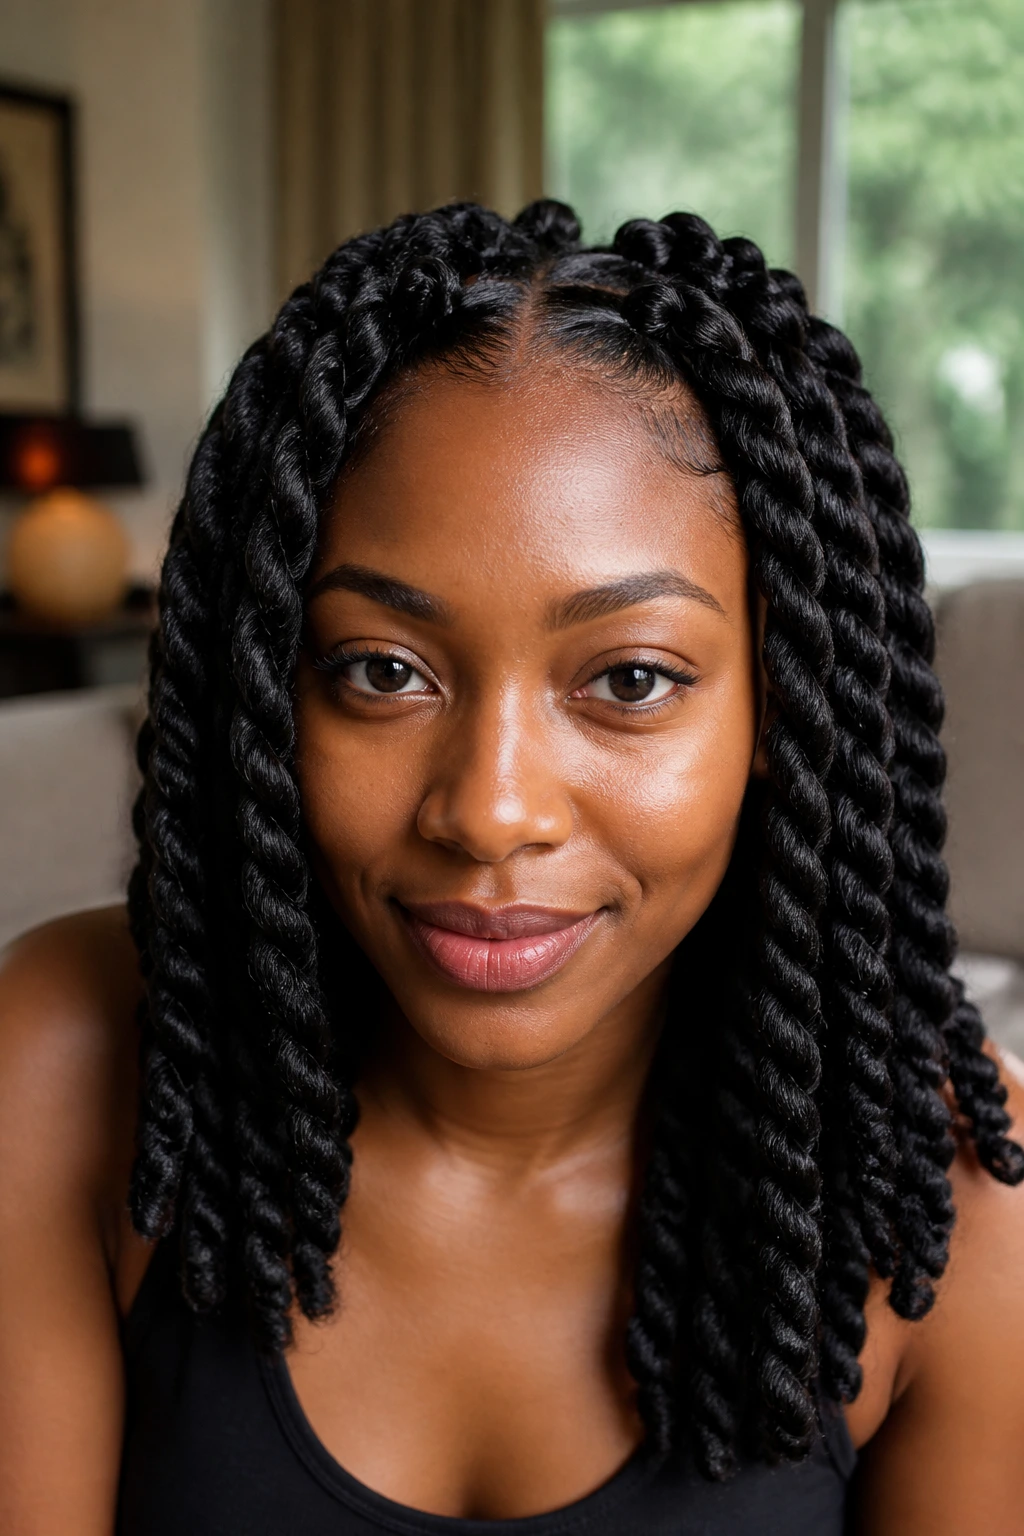
While these aren’t traditional braids, they are a staple in the protective styling world. Chunky twists are faster to install than braids and offer a more natural, bohemian texture. They are perfect for people who want a low-maintenance, easy-to-style look.
Maintaining the Twist
- Twists have a tendency to get frizzy.
- Using a small amount of locking gel on the length of the twist before you start will keep them looking neat for much longer.
- When they do start to get fuzzy, you can just re-twist the individual strands, which is a great way to “refresh” the style without redoing your whole head.
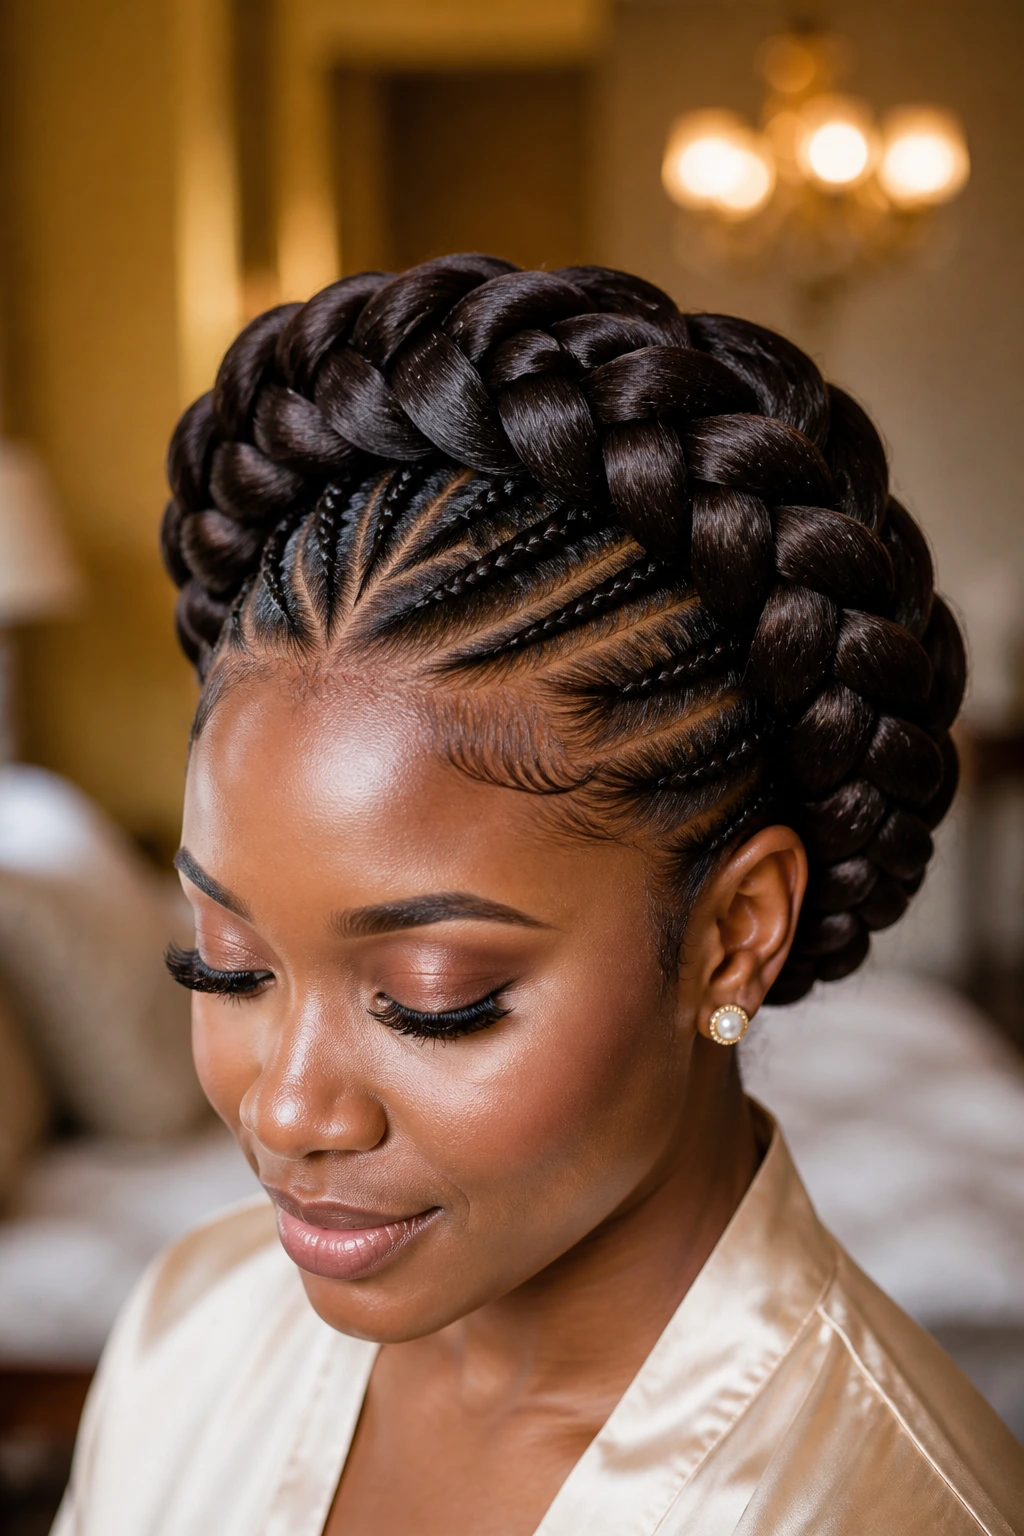
17. The Sleek Crown Braid
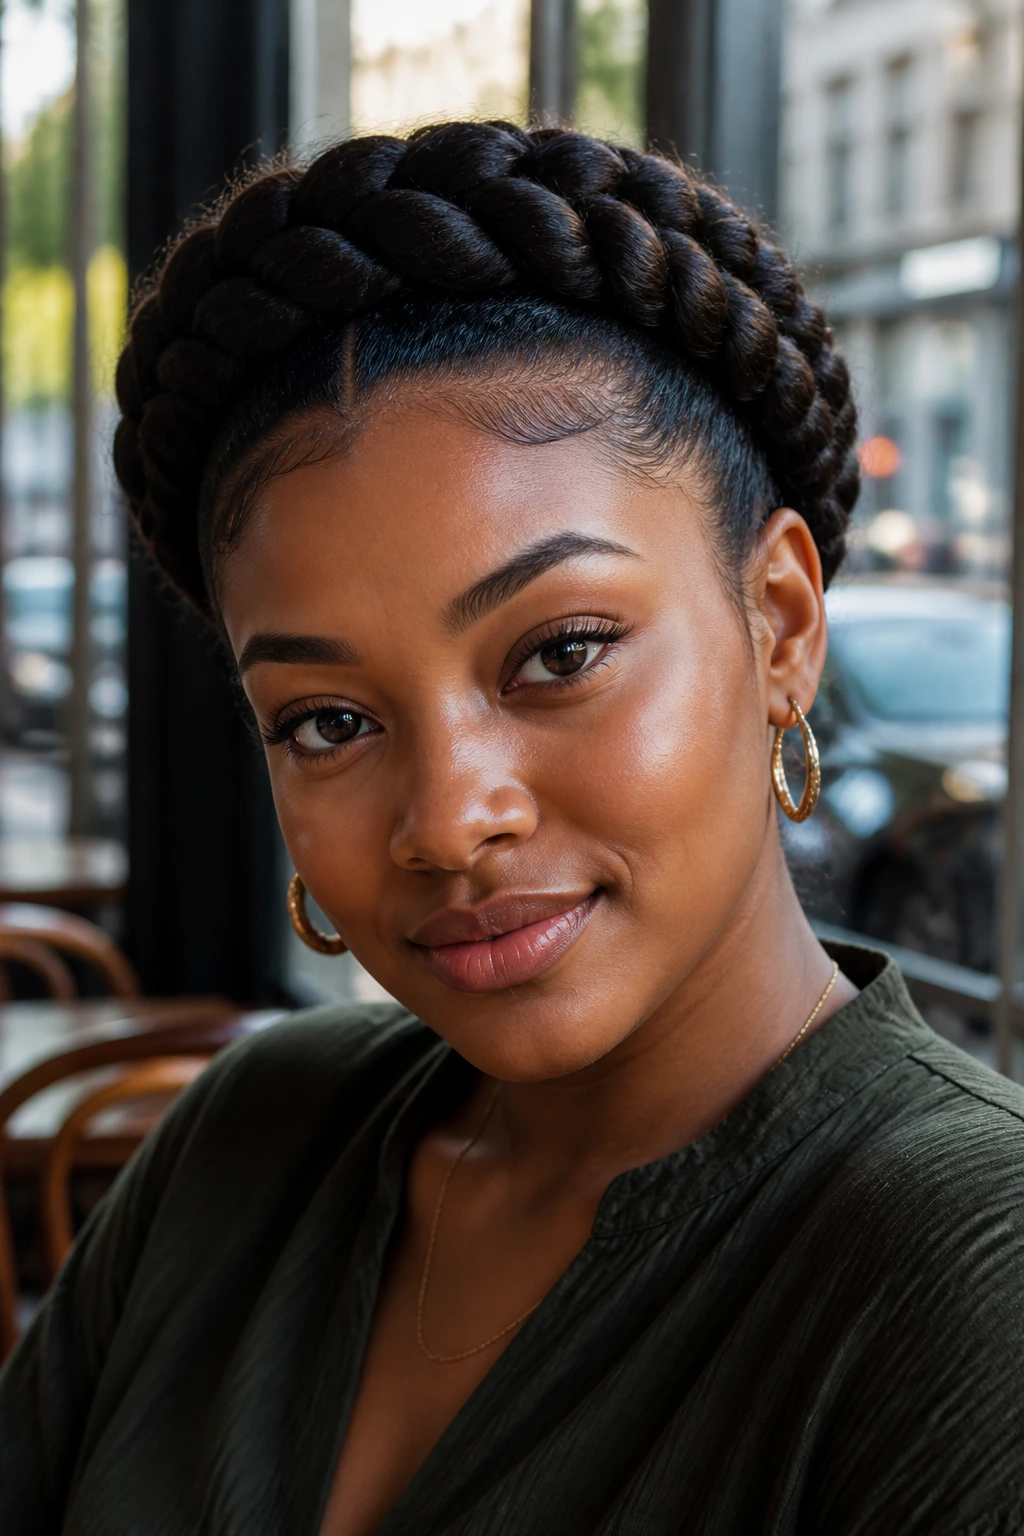
A crown braid—where the hair is braided around the perimeter of the head—is elegant and timeless. Whether you are using your own hair or extensions, this style creates a beautiful “halo” effect that frames the face and keeps hair away from the neck.
Techniques for the Crown
- If your hair isn’t long enough to complete the full circle, you can create two separate braids starting at the ears and pinning them together at the crown.
- Use a small, decorative pin at the point where the braids meet to hide the ends.
18. Braided Bobs
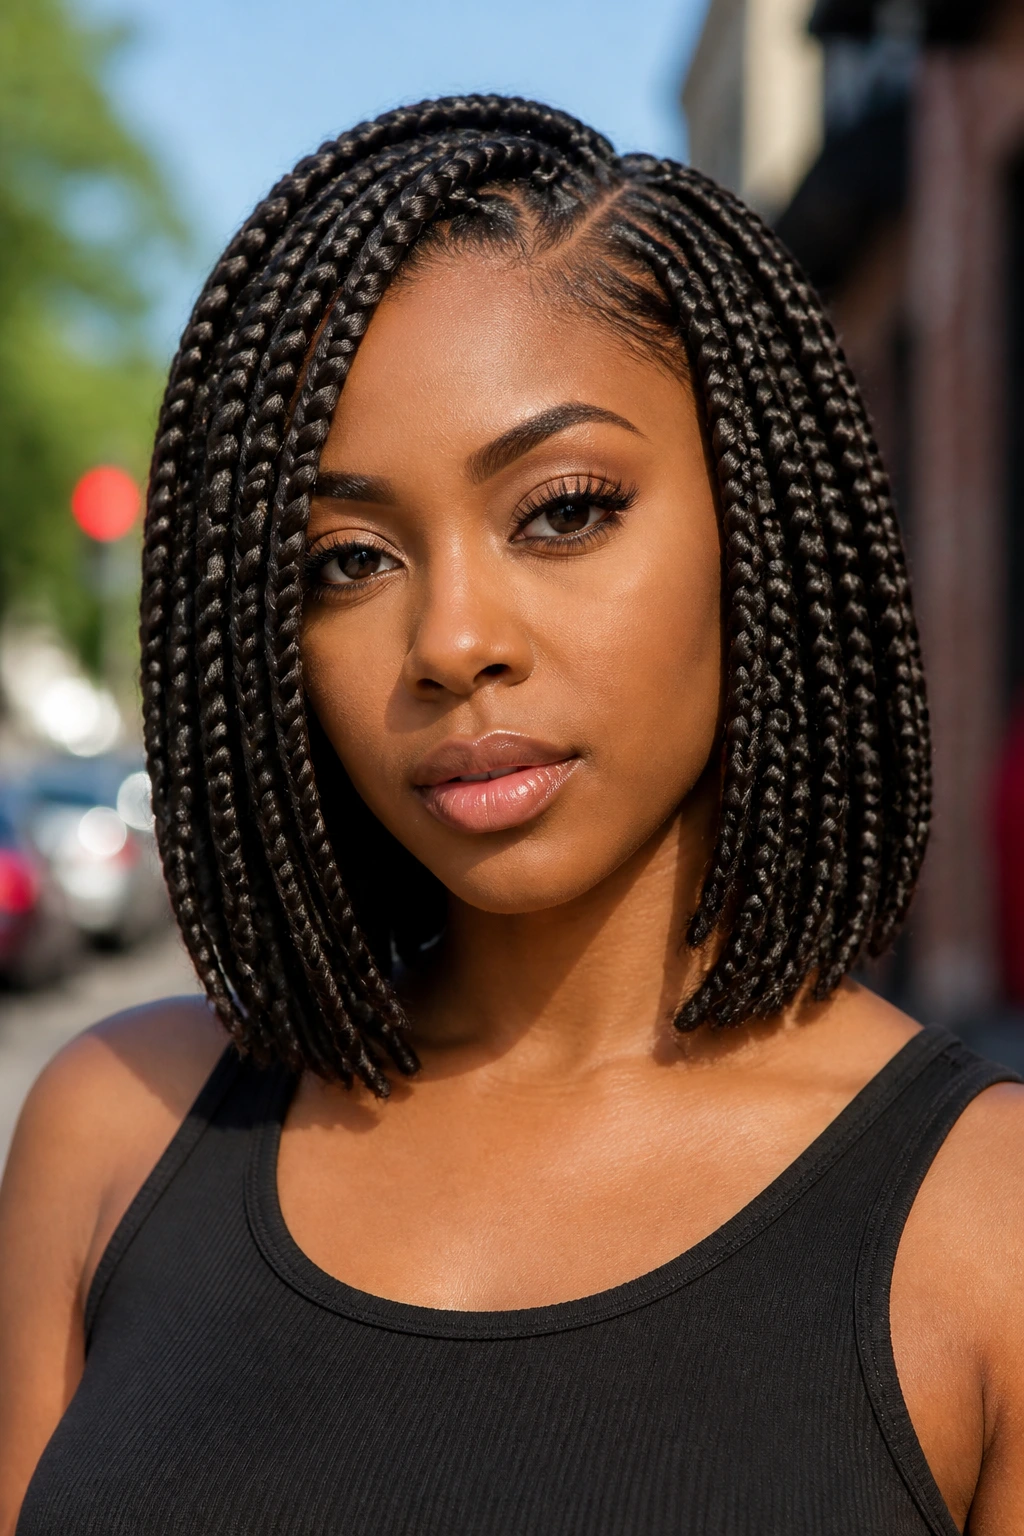
A blunt, shoulder-length bob created with braids is a classic, sharp look. By cutting the braiding hair at a specific length and burning or dipping the ends to seal them, you achieve a clean, modern aesthetic that feels very high-fashion.
Why This Works for Everyone
The bob is a universally flattering length. It’s light, it doesn’t get in your way, and it’s a great way to try out a shorter look without actually cutting your own hair. Ensure your stylist measures the hair precisely so that the ends hang perfectly even.
19. Ombré or Multi-Colored Braids
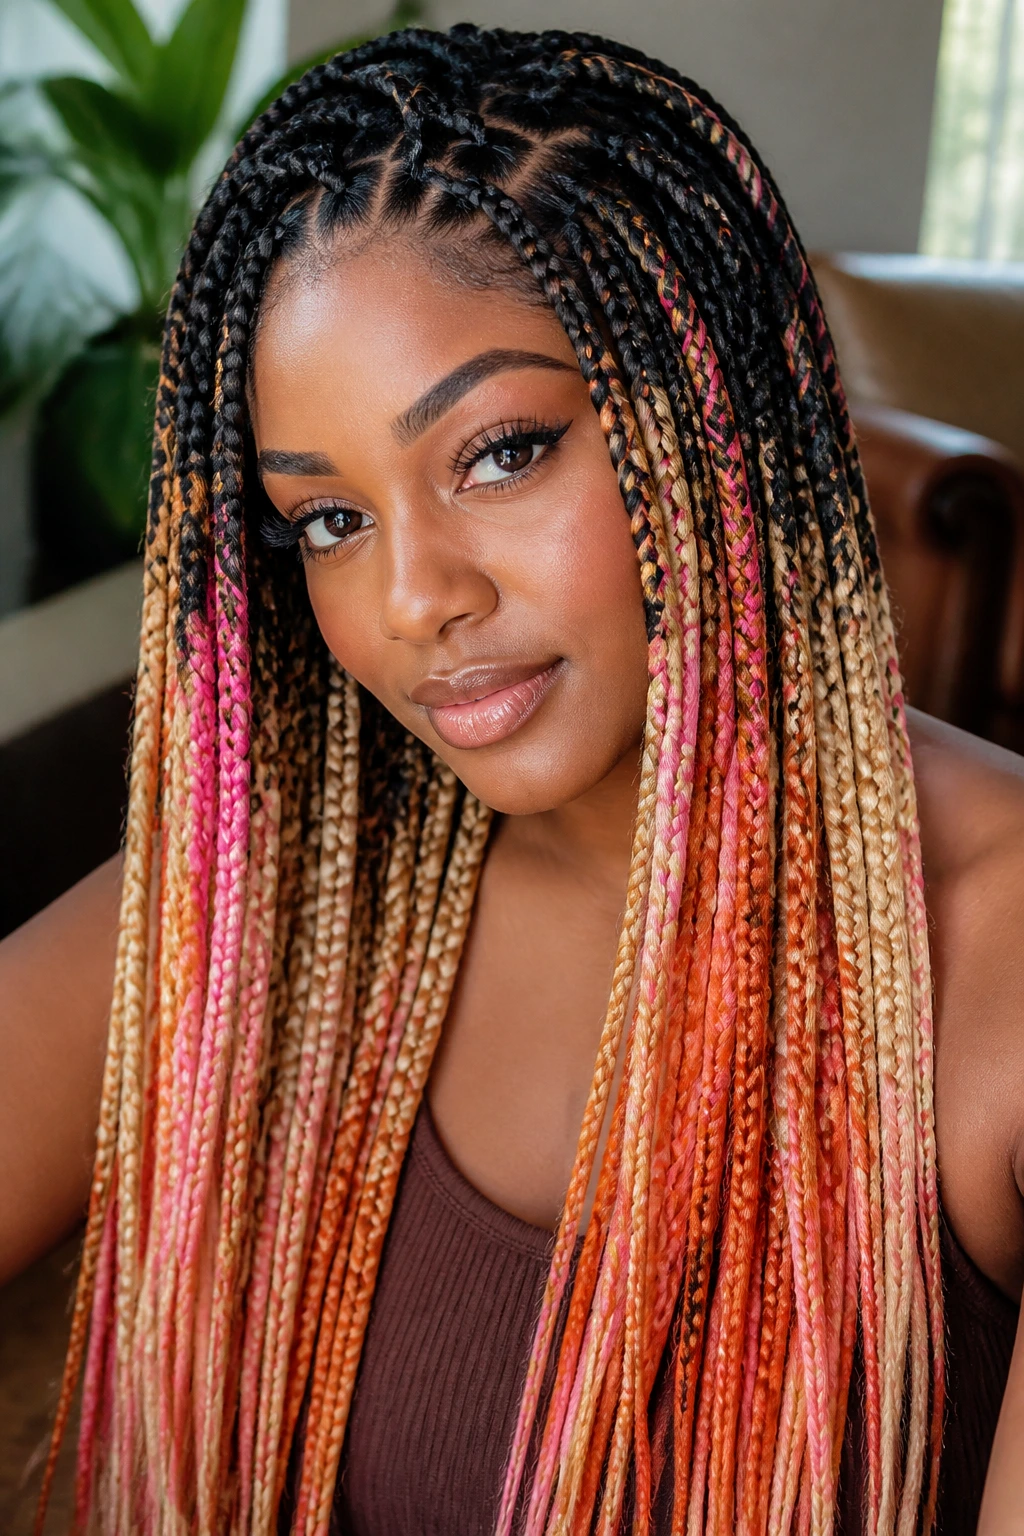
Braiding is the perfect opportunity to experiment with color. By choosing hair that transitions from a natural black to honey blonde, copper, or even neon pink, you can completely change your aesthetic without using harsh chemical dyes on your natural hair.
Choosing Your Palette
- Stick to colors that complement your skin tone.
- Warm tones like copper and chestnut look beautiful against deep, rich skin tones.
- If you want a more subtle look, opt for a dark brown or a subtle honey ombré, which provides depth without being too loud.
20. Invisible Root Braids

Also known as “knotless” extensions at the very edge of the hairline, this technique hides the fact that you are wearing extensions. It involves braiding your own hair for the first two inches before incorporating the extensions, making the braid look like it is growing directly from your scalp.
The Skill Factor
This is a more advanced technique that requires practice. You need to be very careful with the tension; if you pull too hard while adding the hair, you risk causing breakage. Always work with small, thin sections of hair to ensure the transition is as smooth as possible.
21. Halo Braids with Added Volume
Taking the crown braid and making it “bigger” by pulling at the loops (a process called “pancaking”) creates a massive, fluffy halo that looks incredibly intricate. This is a perfect look for special events or photoshoots.
The Pancaking Technique
- Once the braid is secure, take each loop and gently pull it outward.
- This adds volume and softness to the braid, making it look much wider than a standard cornrow.
- Be gentle—you don’t want to pull the entire braid loose!
22. Braided Headbands
You can cornrow the front section of your hair from ear to ear, creating a “headband” effect, while leaving the rest of your hair in an afro or a high puff. This is a great way to keep your hair out of your face while still showing off your natural length.
Why It’s a Great Bridge Style
This style is ideal for the transition period between deep conditioning treatments. It allows you to style your hair quickly while keeping the front section protected and neat.
23. Curly-End Goddess Cornrows
By cornrowing the scalp but leaving the ends of each braid loose and curly, you achieve a look that combines the neatness of cornrows with the fun, bouncy energy of curls. This is an excellent way to add movement to a style that is typically very static.
Selecting the Right Curls
- Use a high-quality synthetic curling hair that is designed to stay curly even when dipped in hot water.
- If the curls lose their shape after a week, you can wrap them around small flexi-rods at night to re-set the curl pattern.
24. Side-Part Feed-In Braids
Changing the part can change the entire look. A deep side part with feed-in braids creates a sophisticated, dramatic appearance that is perfect for professional settings or elegant dinners.
Achieving the Perfect Part
- Use a comb with a very sharp metal tail.
- Start your part at the highest point of your eyebrow and pull back diagonally for the most flattering silhouette.
- Keep the roots laid with a light gel to ensure the part remains sharp throughout the day.
25. The High-Volume Ponytail Braid
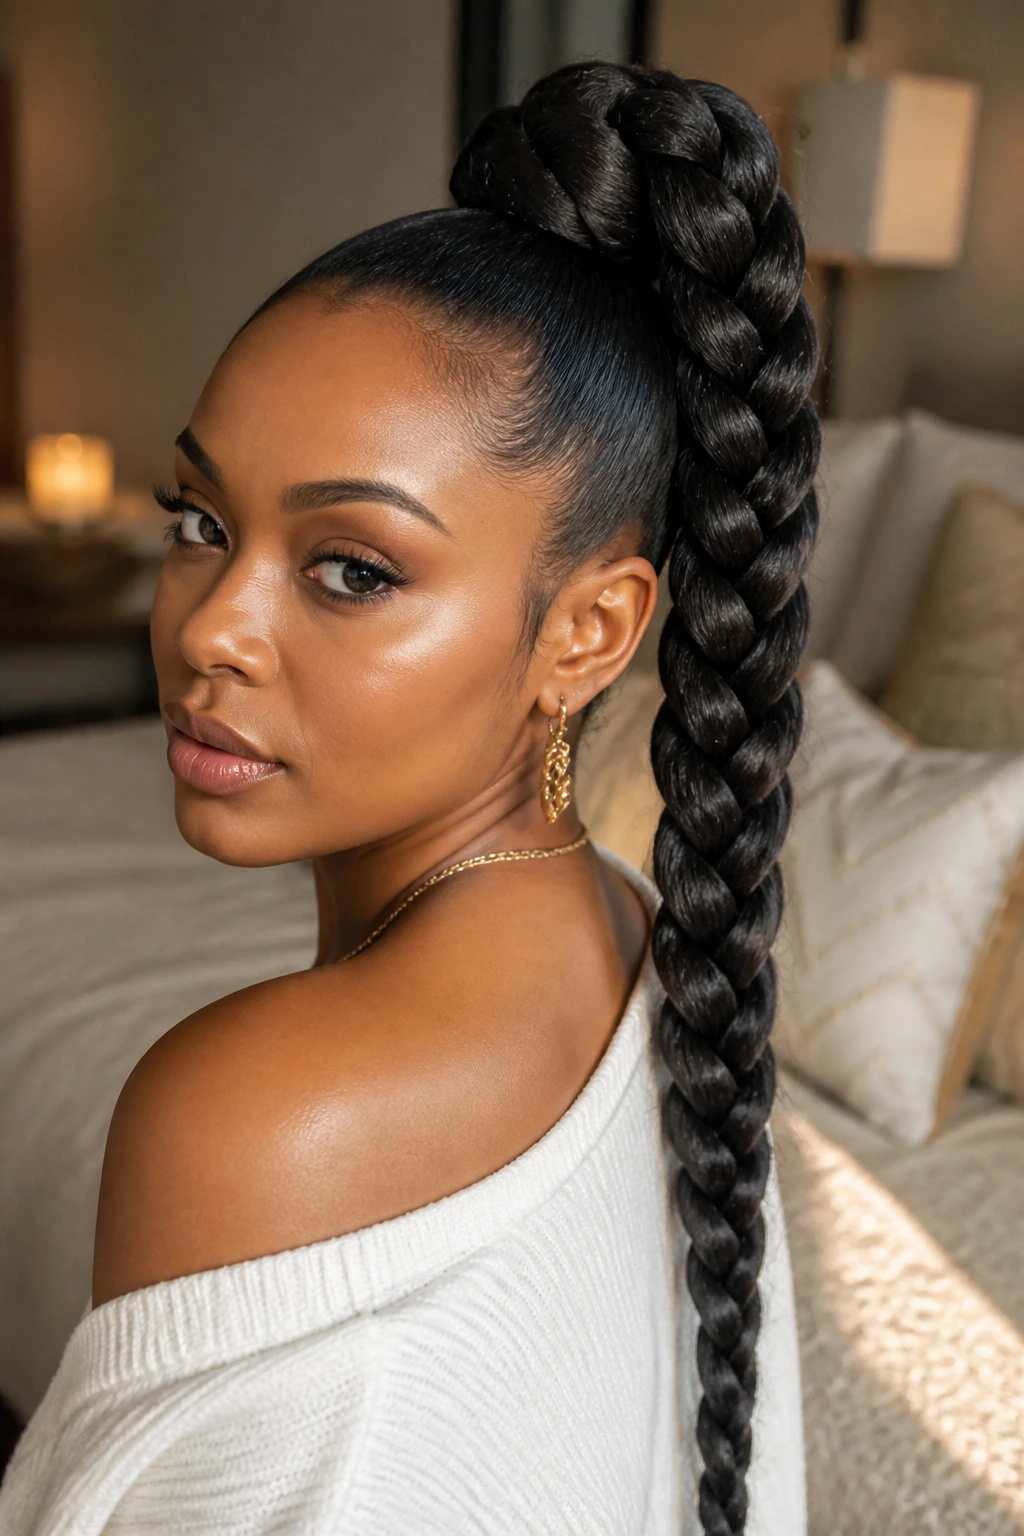
Instead of individual braids, imagine a giant, single braid pulled into a high ponytail. This involves cornrowing the hair back into a single point, then using hair extensions to create one massive, thick braid that hangs down your back.
The Anchor Point
- The strength of this style depends on the ponytail anchor.
- Use a thick, fabric-covered elastic band to avoid breakage.
- Wrap a small piece of hair around the elastic to cover it, which gives the style a more polished, professional finish.
26. Braided Buns with Accessories
Sometimes, adding a bit of flair makes all the difference. Small metallic rings, gold threads, or even tiny shells woven into your braids can transform a basic style into a piece of art.
Where to Place Accessories
- Don’t overdo it—pick one or two braids to accent.
- Focus on the braids that frame your face, as these are the most visible.
- Always use high-quality metal accessories to ensure they don’t tarnish or snag on your natural hair.
27. The Messy Bohemian Updo
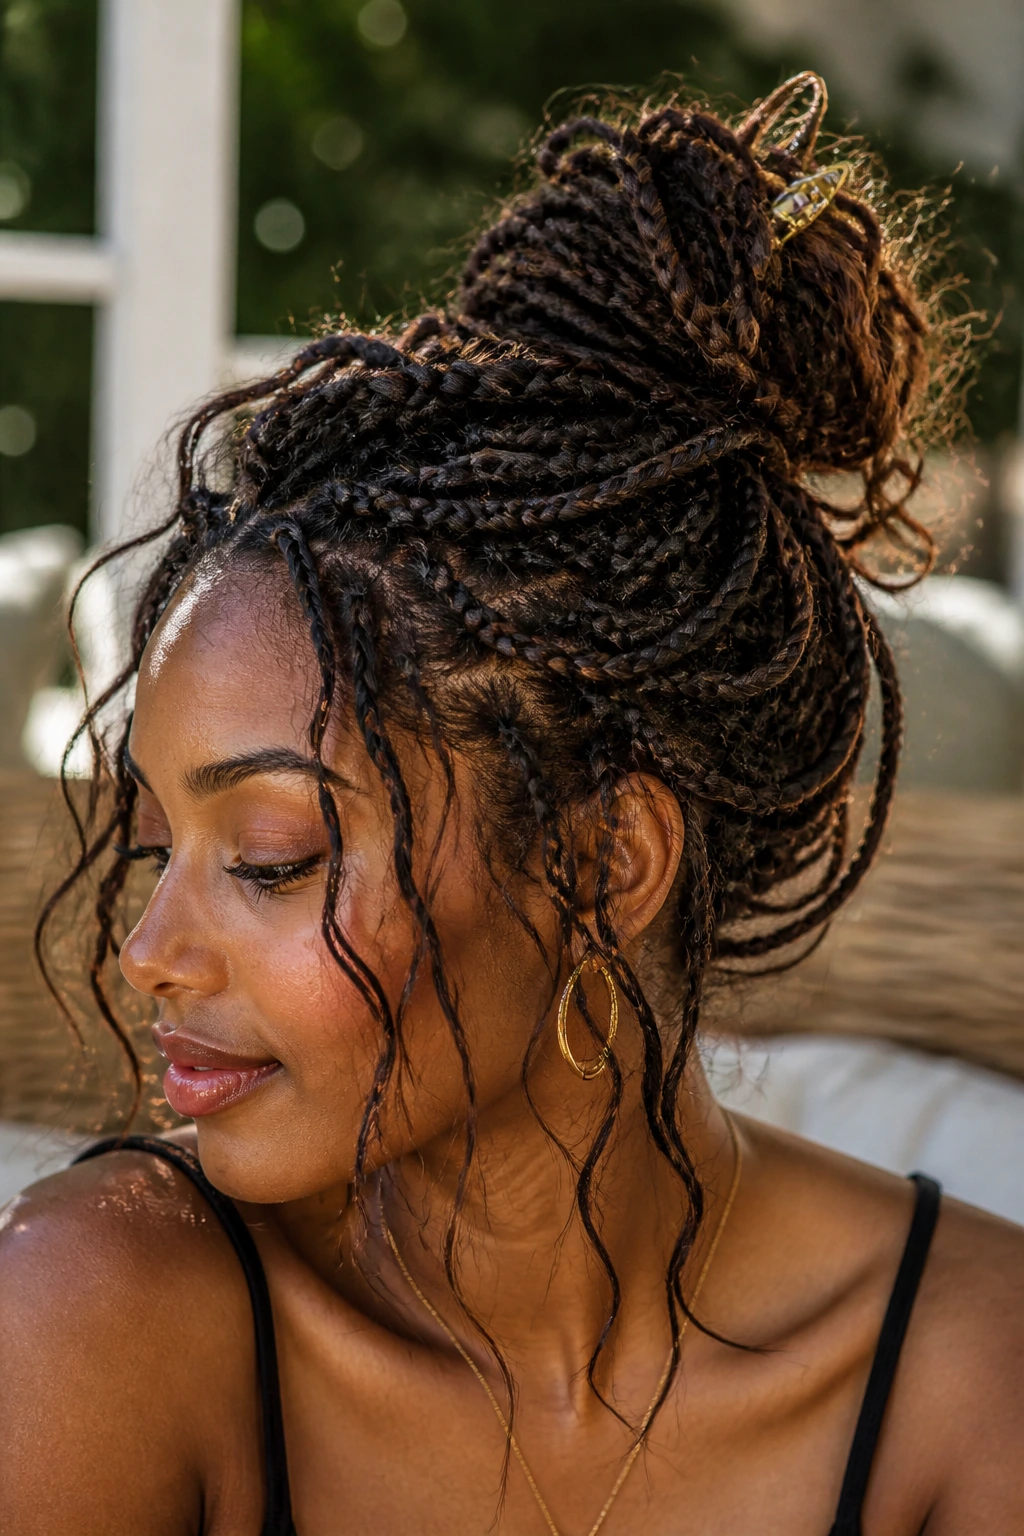
If you aren’t a fan of perfectly neat styles, the messy updo is for you. This style embraces frizz and stray ends as part of the charm. It looks best with box braids or twists that have been in for a few weeks, giving them a lived-in, soft quality.
Creating the “Messy” Look
- Pull the braids up loosely.
- Secure them with large hairpins rather than tight elastics.
- Leave out a few pieces around the nape of your neck and the temples to create a soft, face-framing effect.
28. Patterned Scalp Braids
For those who want something truly unique, scalp patterns are the way to go. From zig-zags to concentric circles, the hair is braided in shapes that follow the contours of the head. This is the ultimate expression of the braider’s artistry.
Understanding the Geometry
- Scalp patterns require a high level of planning.
- Draw your design on paper first if you are doing it yourself, or show your braider a very clear photo.
- Keep in mind that some patterns create more tension than others, so discuss comfort before you start.
The Bottom Line
Braiding is a journey that starts with the right technique and ends with a style that makes you feel confident and seen. There is no right or wrong way to explore these looks, provided you prioritize the health of your scalp and your natural hair. Whether you are a fan of the sleek, precise look of feed-in braids or the soft, romantic feel of goddess locs, the most important element is that the style makes you feel like the best version of yourself. Take your time, experiment with different textures and colors, and never underestimate the power of a well-parted, perfectly executed braid. Your hair is your canvas—have fun with it.