The beauty of a French braid lies in its ability to look polished, intricate, and entirely put-together while being one of the most reliable styles for hair that has hit that tricky medium length. When your hair falls somewhere between your chin and your collarbone, you are in the “sweet spot” for styling. It is long enough to gather into a proper plait but light enough that you won’t have to deal with the heavy, wrist-straining drag of waist-length hair. Many people assume they need an arm’s length of hair to master the classic,, but once you understand how to pick up those small sections at the scalp, you realize that medium-length hair actually holds these braids better than longer, heavier textures that tend to slip out.
The secret to success with medium hair is preparation. If your hair is freshly washed and slippery, it will fight your fingers every step of the way. A little bit of texture spray or dry shampoo, massaged into the roots and through the lengths, creates the “grip” you need to keep your sections from sliding apart. You are not just braiding; you are building a structure. By starting with a bit of grit, you ensure that each crossover stays tight and defined. Forget the idea that you need a tutorial to be perfect—the most effortless-looking braids are often the ones where you let your fingers find their own rhythm.
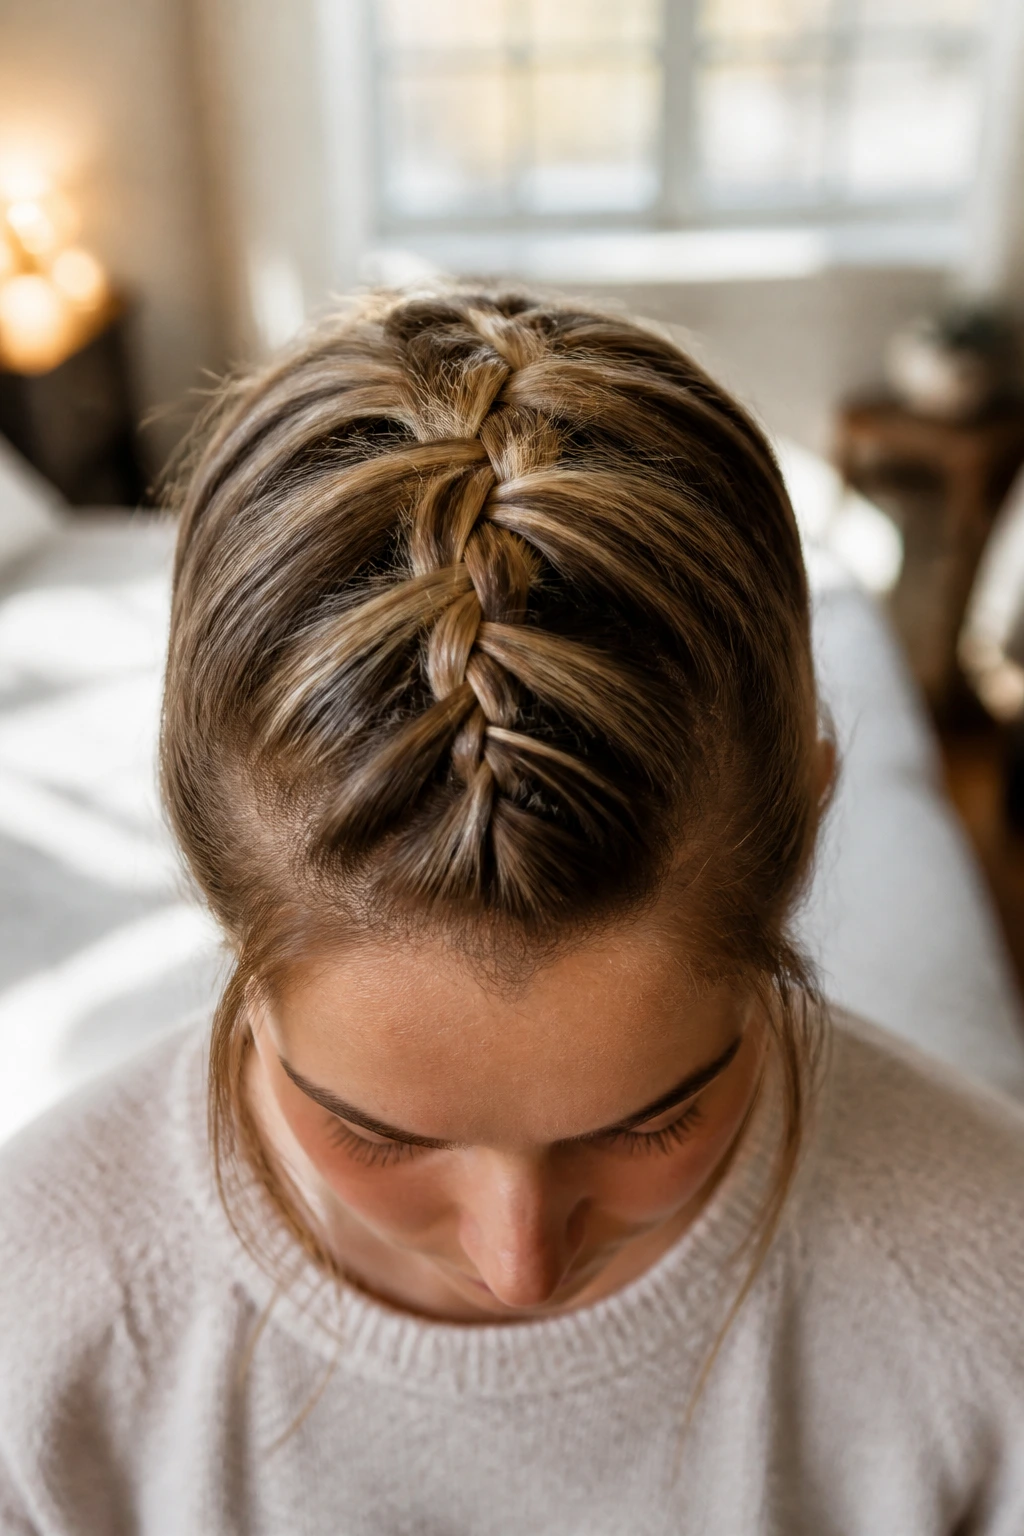
1. The Classic Center French Braid
The foundation of every style on this list, the classic center braid is the bread and butter of your repertoire. It sits directly at the crown, pulling hair back from your forehead and creating a clean, symmetrical look that works for a gym session or a morning meeting.
How to Master the Tension
Consistency is your best friend here. If you pull too tight at the front but leave it loose at the back, the braid will sag or bunch up by the nape of the neck. Aim for even tension as you pull each side strand into the center.
- Start with a triangular section at the very front of the hairline.
- Divide it into three equal pieces.
- Cross the right over the center, then the left over the center.
- With each subsequent crossover, add a small, equal amount of hair from the corresponding side. Pro Tip: If your arms get tired, look down toward your chest. This naturally keeps your hands close to your head and prevents the braid from becoming loose or uneven.
2. Double French Braid Pigtails
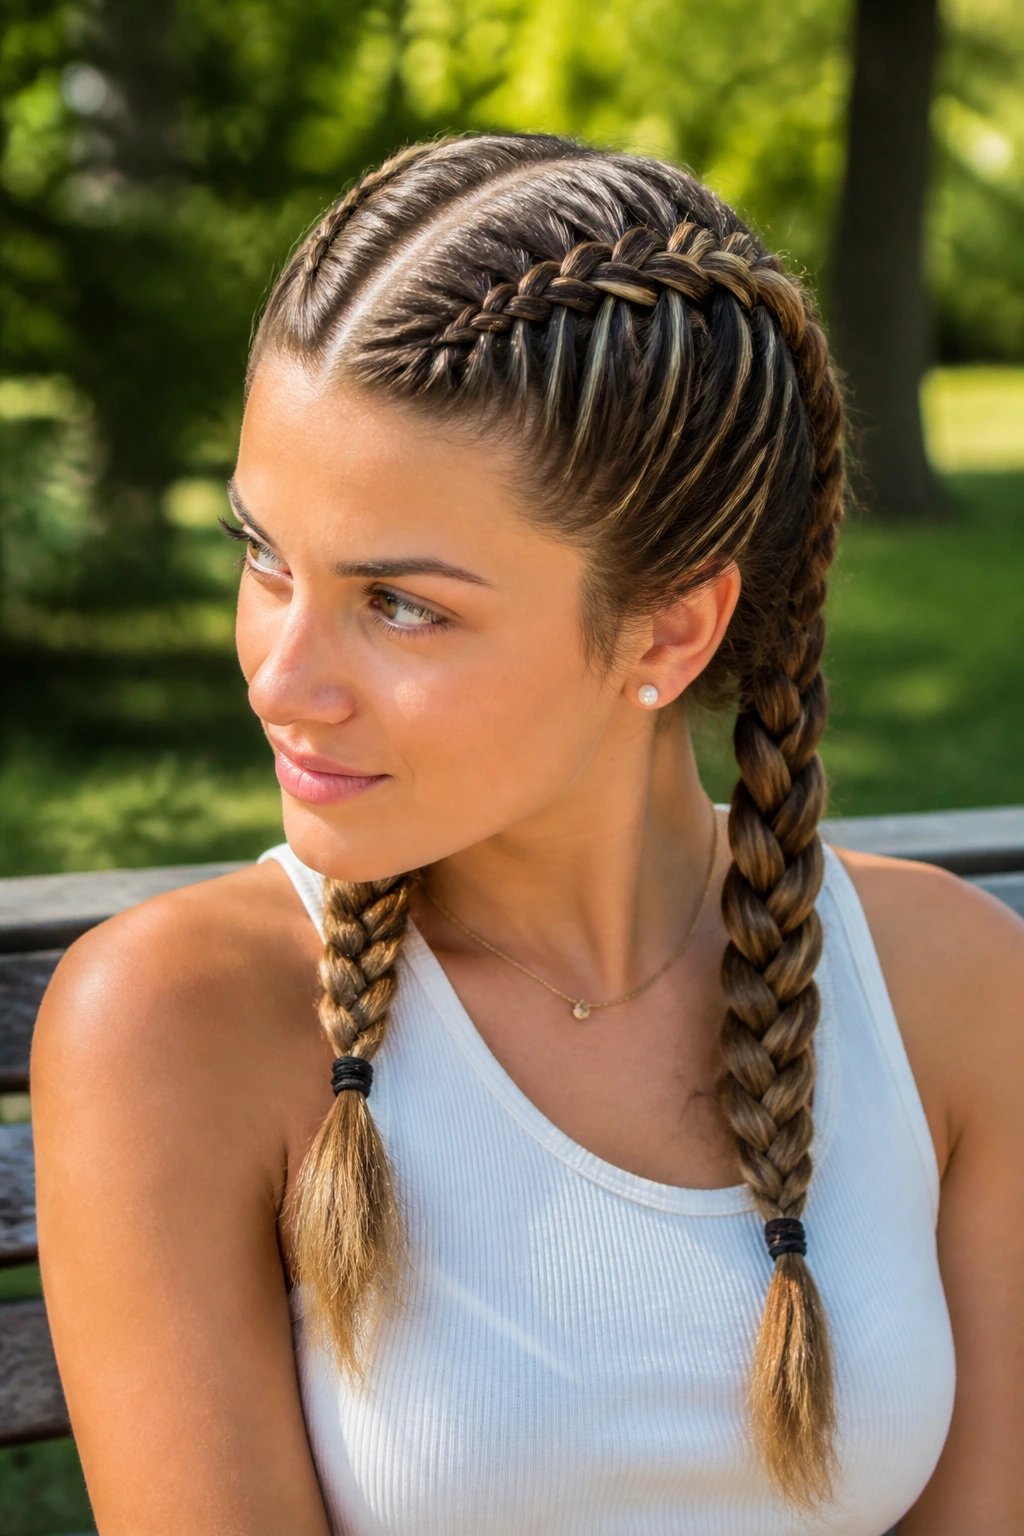
Splitting your hair into two sections is often easier than managing a single, thick braid at the back of your head. It distributes the weight evenly and makes the process feel much faster, especially when you are working with shorter, shoulder-grazing layers.
Managing Your Sections
Use the tail of a rattail comb to create a perfectly straight part down the center of your scalp. Secure one side with a clip while you work on the other to ensure no loose hairs cross the divide. This keeps your lines sharp and your final result looking intentional.
- Section the hair into two even halves, left and right.
- Secure the right side with a claw clip to keep it out of the way.
- Braid the left side, following the same French technique: cross, add hair, pull tight.
- Repeat on the right side, ensuring you start at the same point near the forehead.
- Secure both ends with clear, snag-free elastic bands.
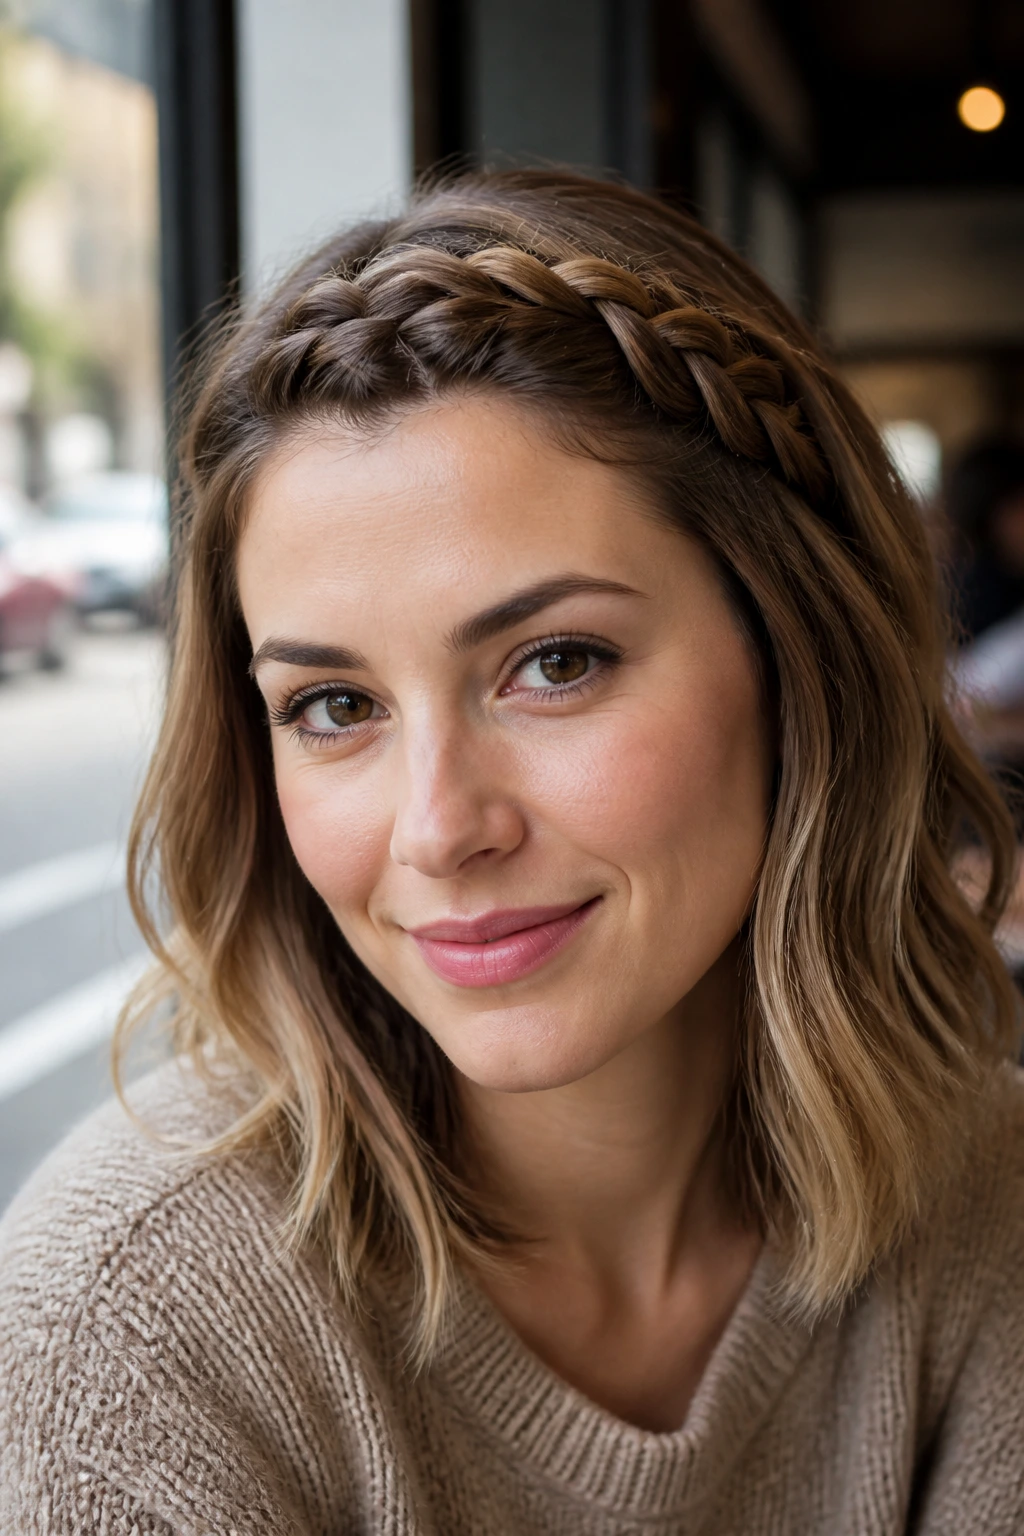
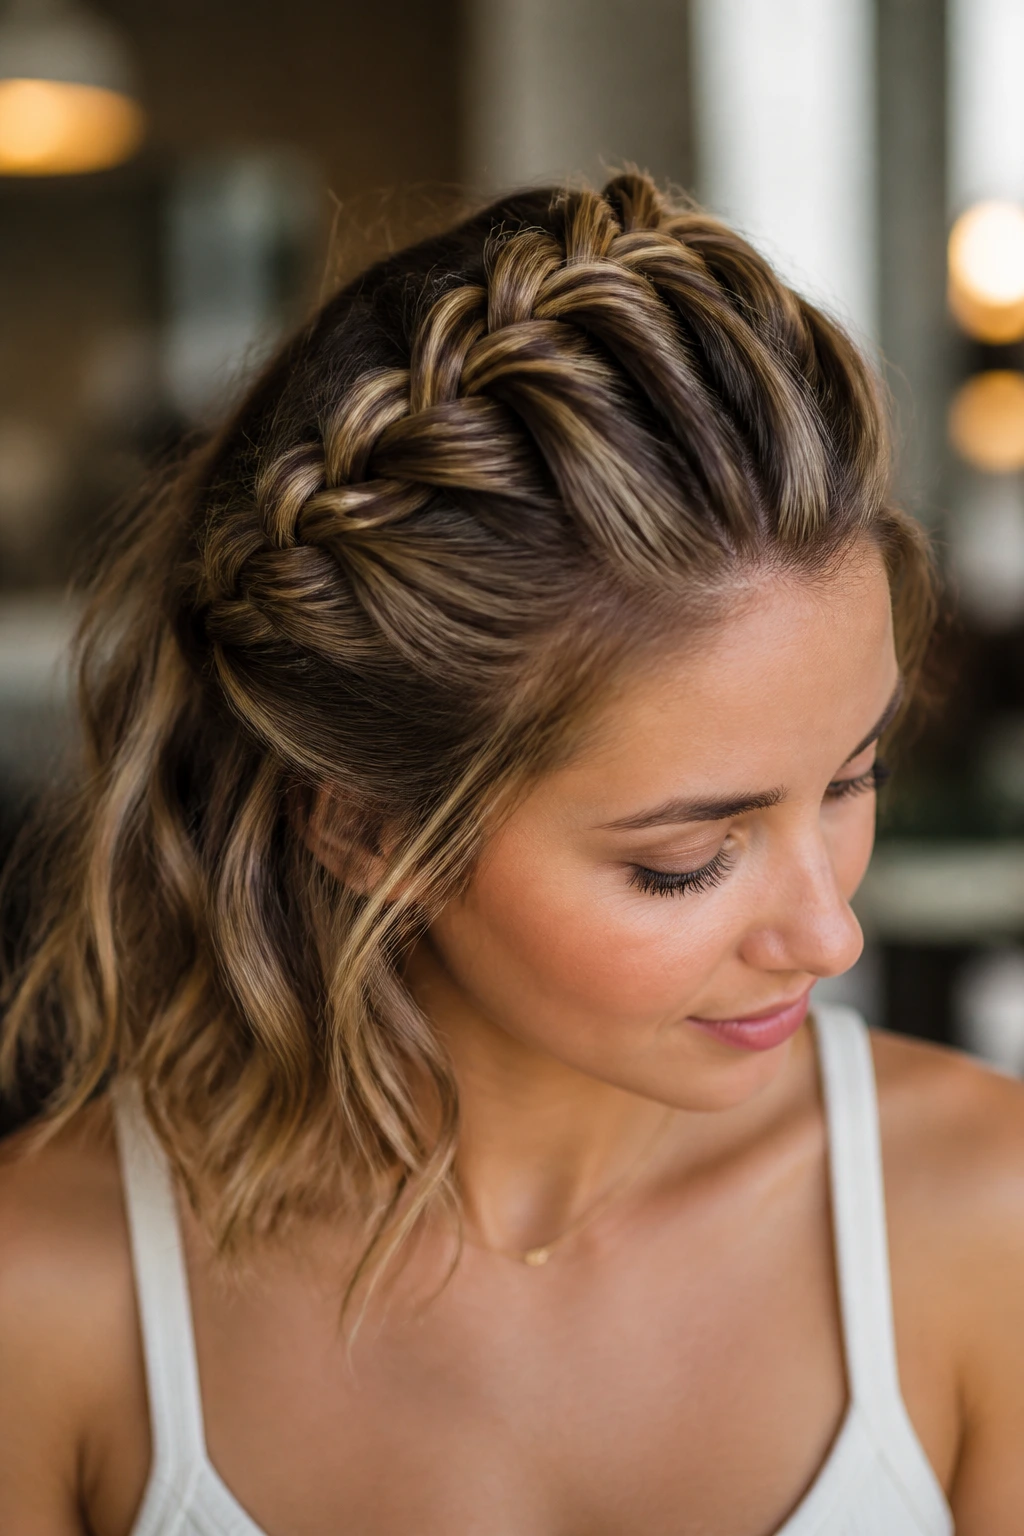
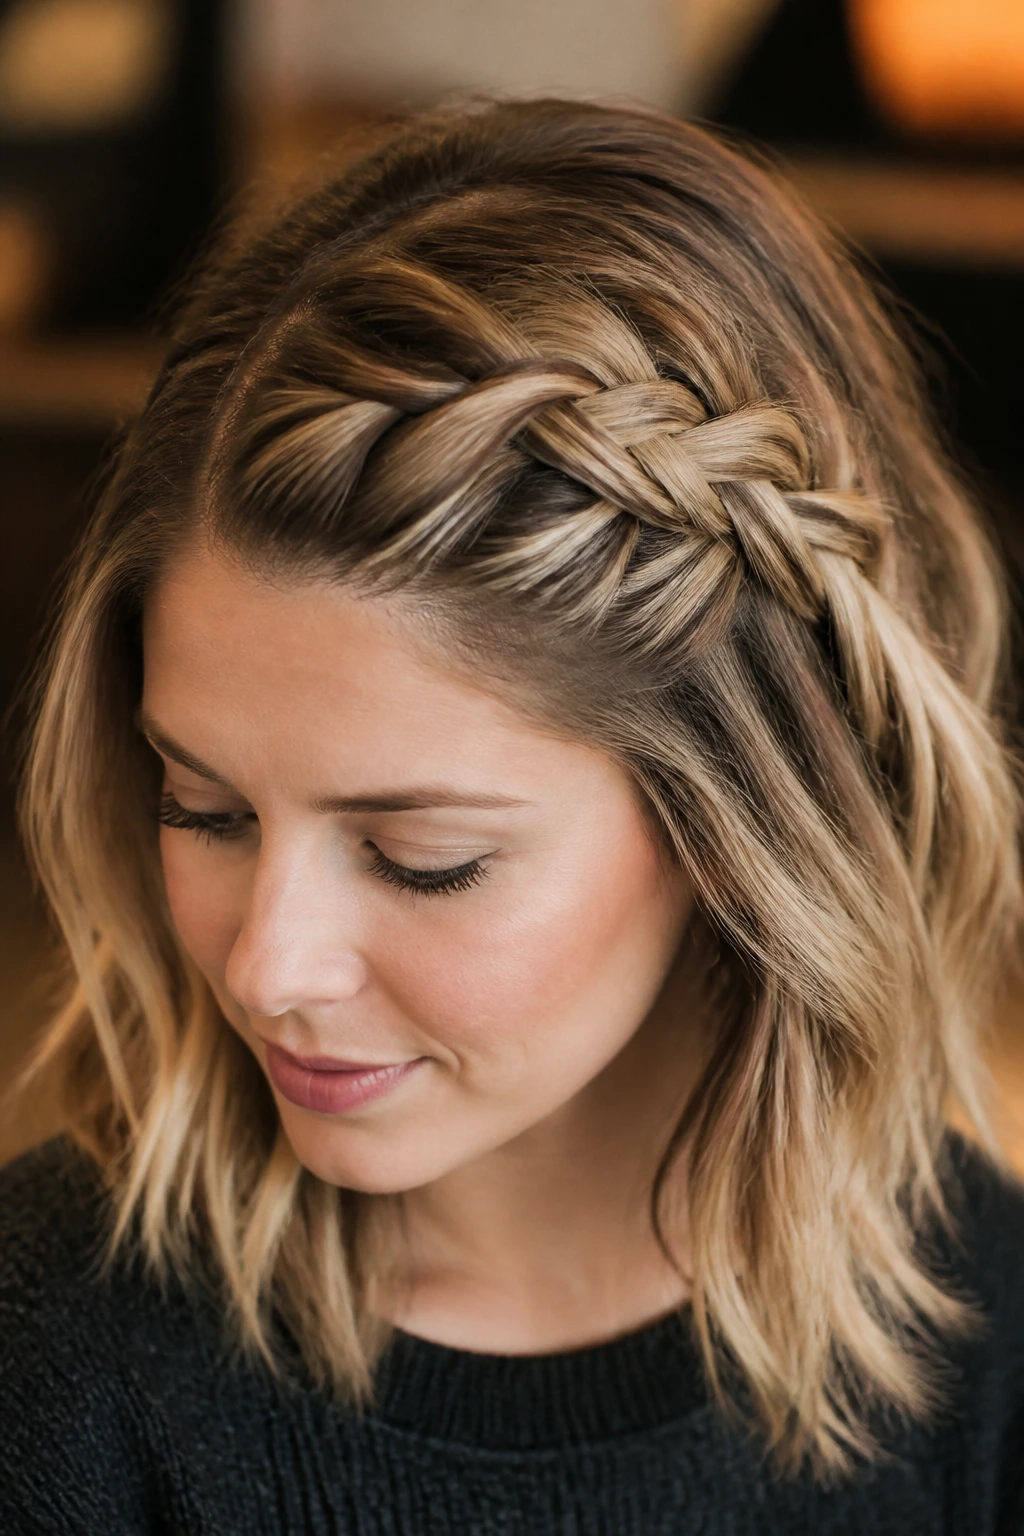
3. The Half-Up French Braid Crown
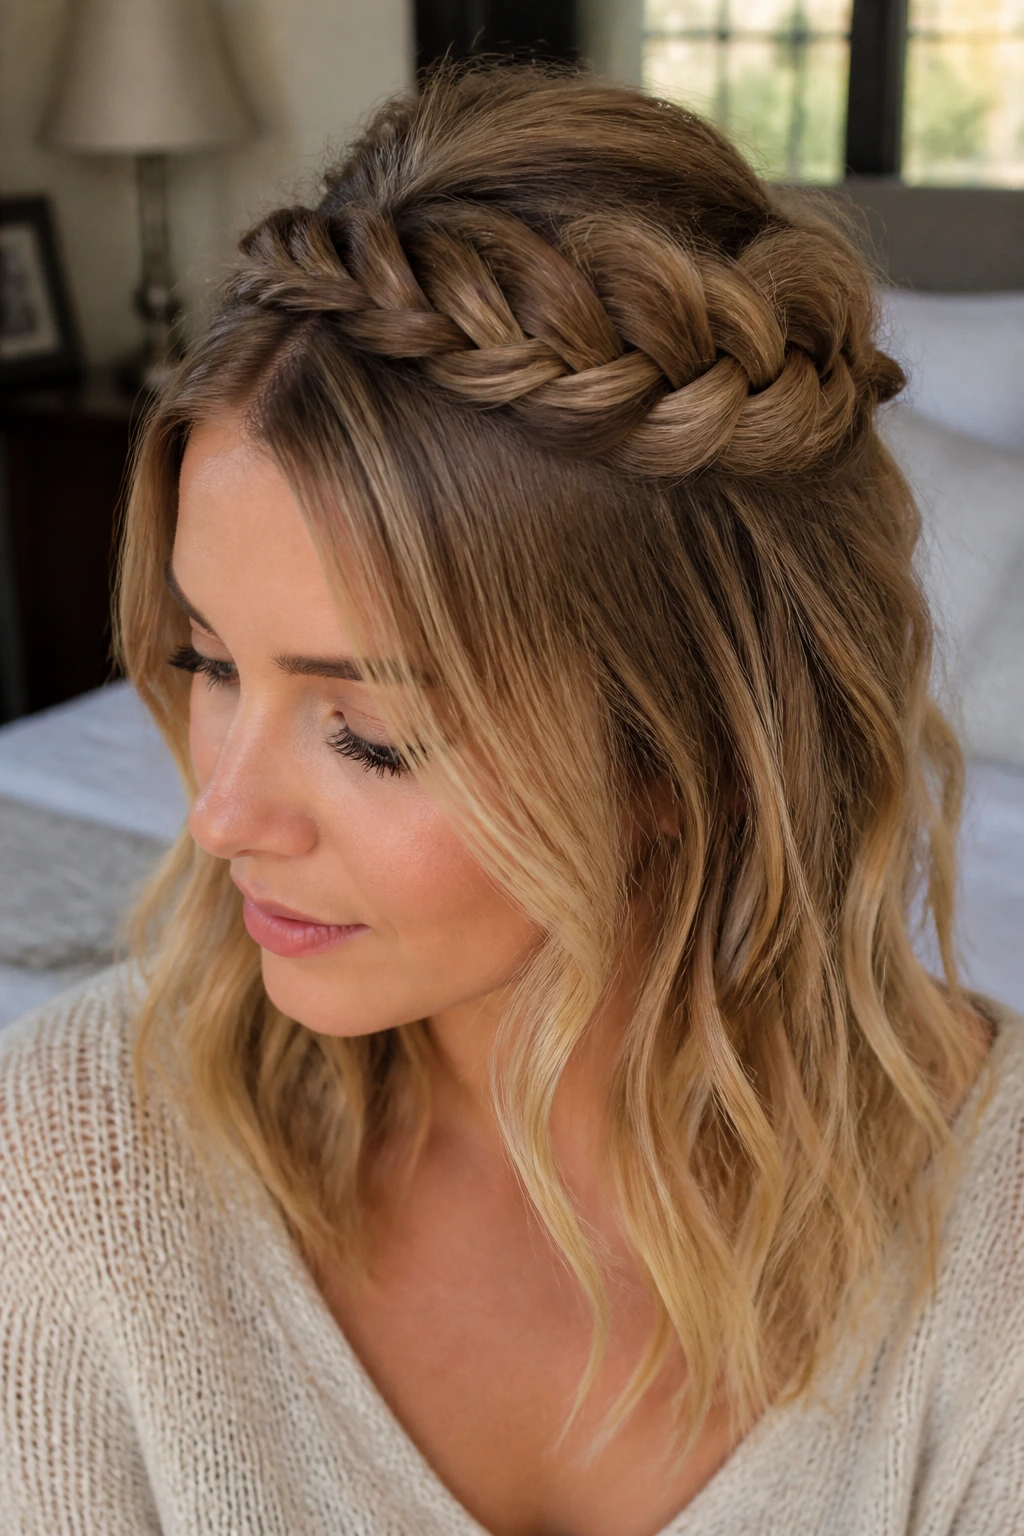
When you want to keep hair out of your face but prefer the loose, flowy look of a down-do, this style is the ultimate middle ground. It uses the French technique only on the top section of your head, letting the rest of your hair hang free.
Creating the Right Volume
Before you start, tease the hair at the crown of your head just a little. A quick backcomb at the roots gives you the base you need to avoid a flat, “limp” look.
- Gather a section of hair from temple to temple.
- Begin your French braid, ensuring you incorporate hair from the sides as you move toward the back of the head.
- Stop when you reach the crown, rather than continuing all the way to the ends.
- Secure with a small elastic, then use a bobby pin to tuck the tail underneath the braid to hide the band.
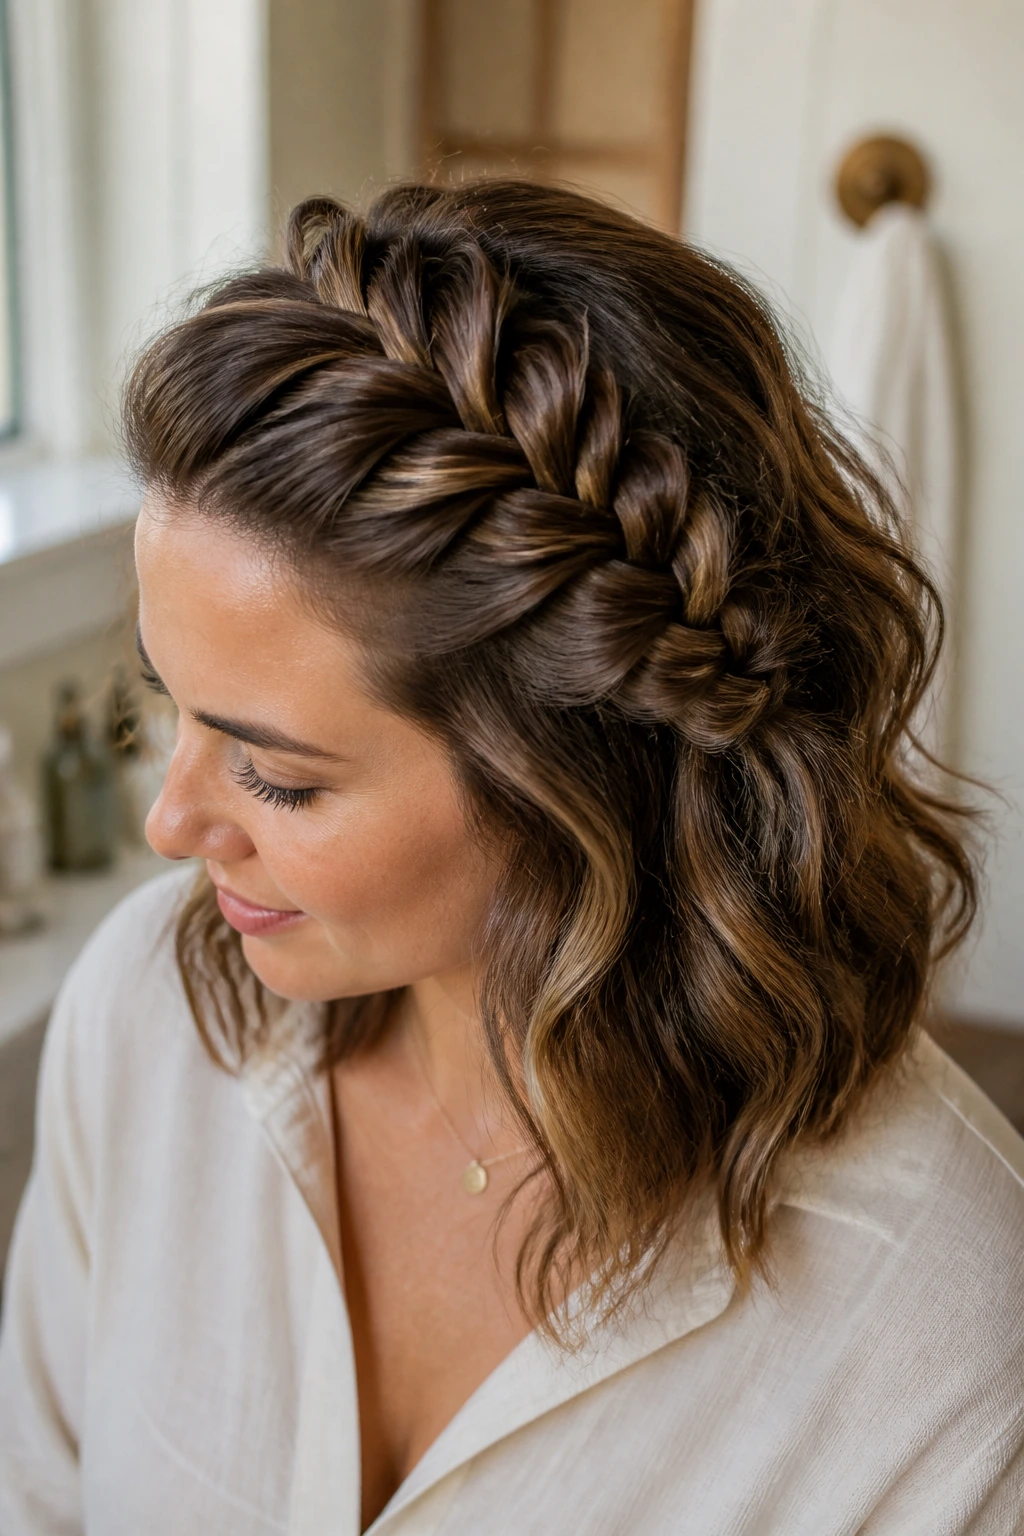
4. The Messy Boho Side Braid
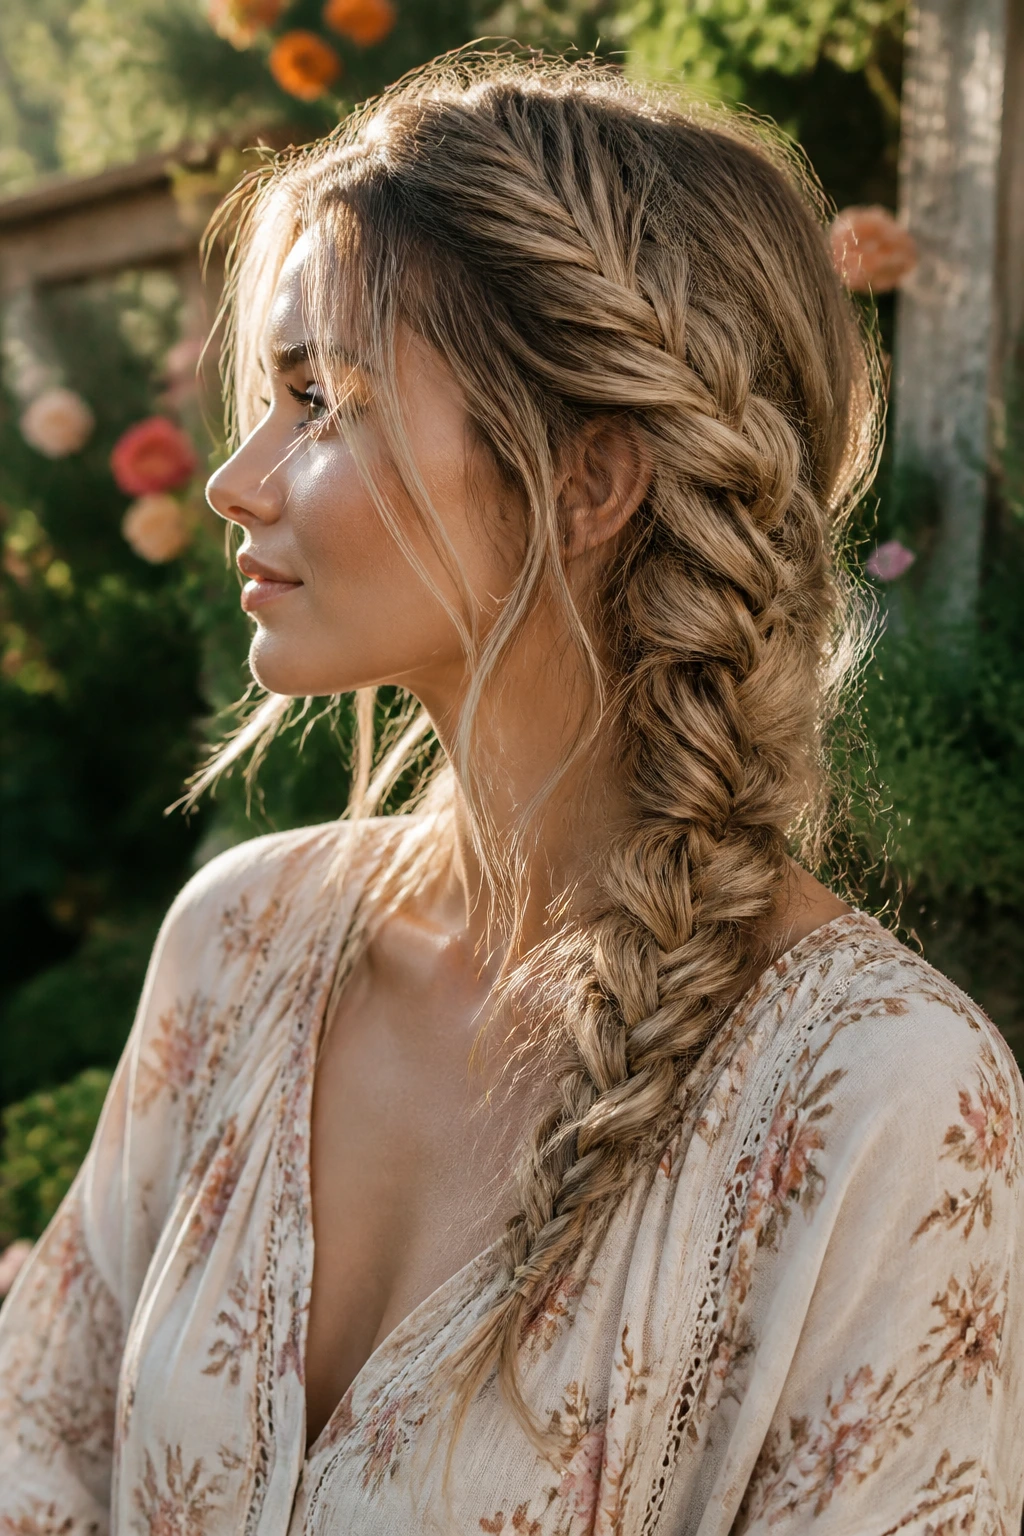
This style is all about embracing the imperfections of medium hair. If you have layers, they might poke out of the braid as you work, and that is actually a good thing. It adds to the relaxed, “lived-in” aesthetic that defines boho-chic styling.
The Art of “Pancaking”
Once the braid is secured at the bottom, don’t just leave it tight. Use your thumb and forefinger to gently tug at the outer loops of the braid. This is called pancaking, and it’s how you get that thick, voluminous, red-carpet-braid effect without needing extensions.
- Braid your hair to the side, starting near one ear and working diagonally toward the opposite shoulder.
- Leave the front sections of your hair loose to frame your face.
- Once finished, pancake the braid starting from the bottom and working your way up to the top.
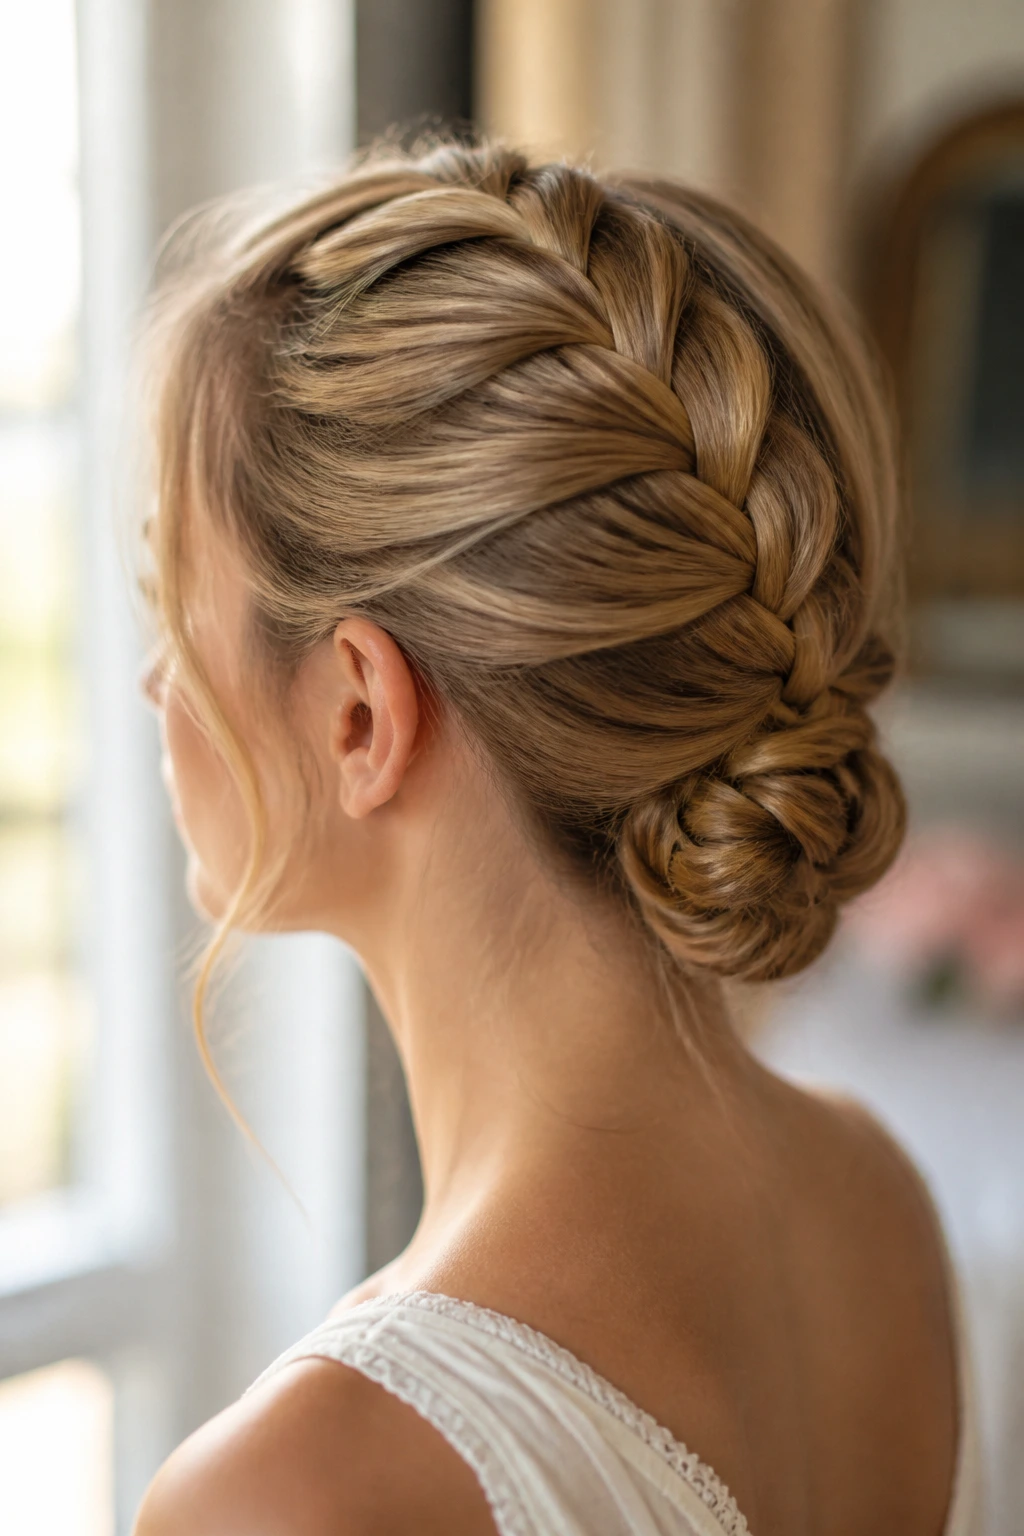
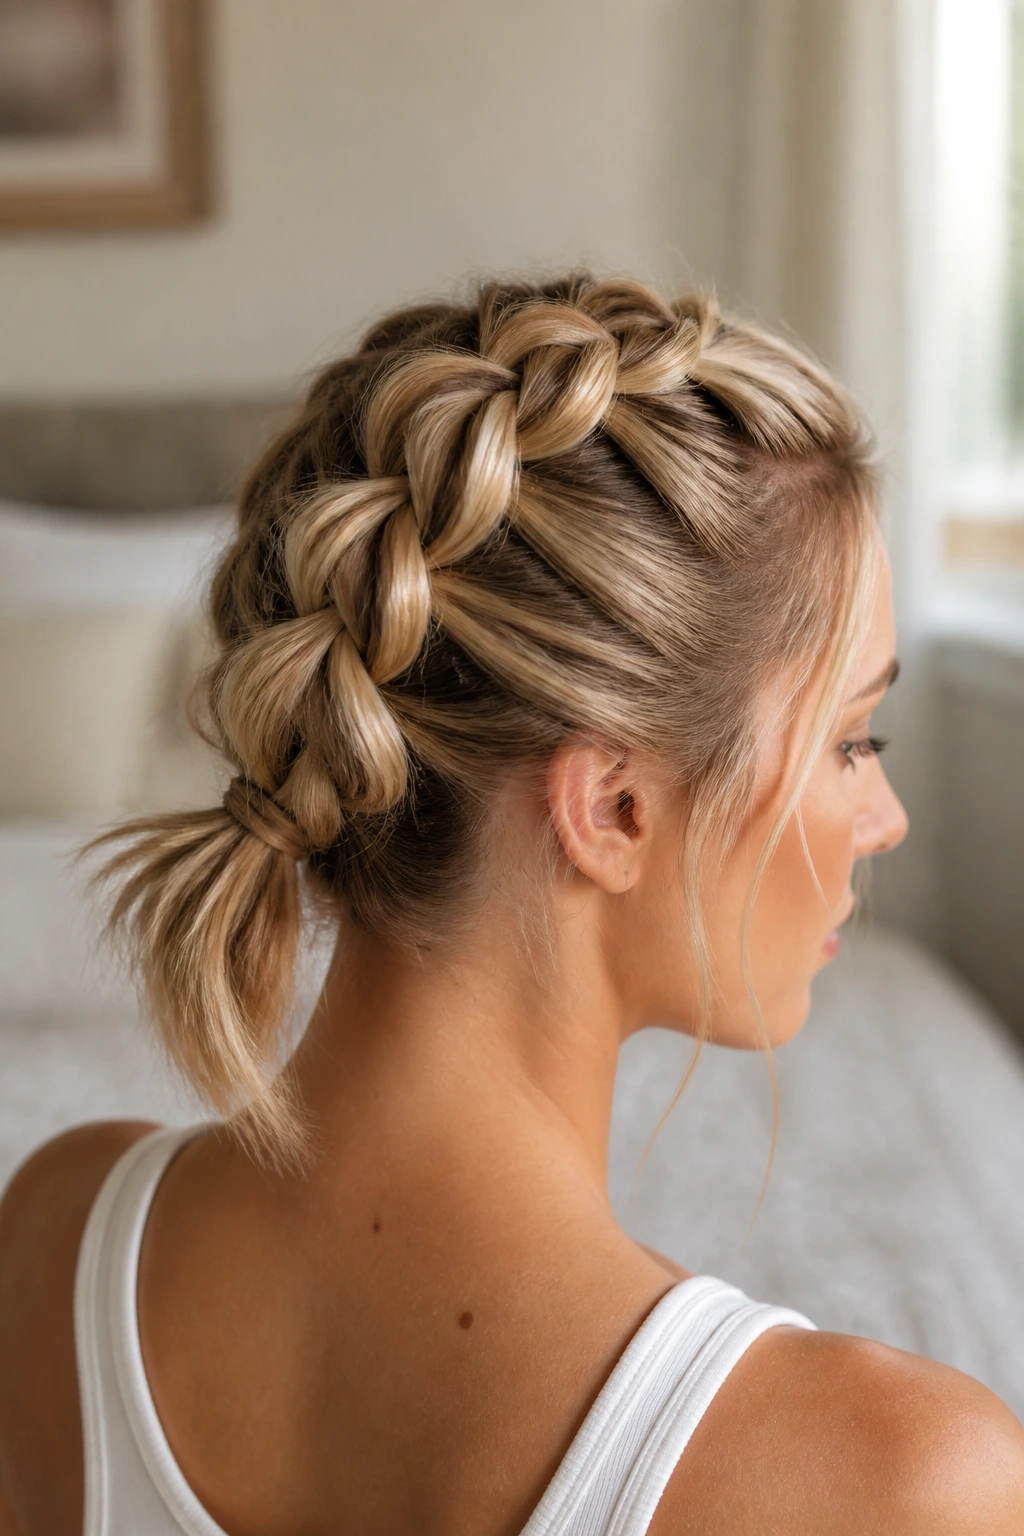
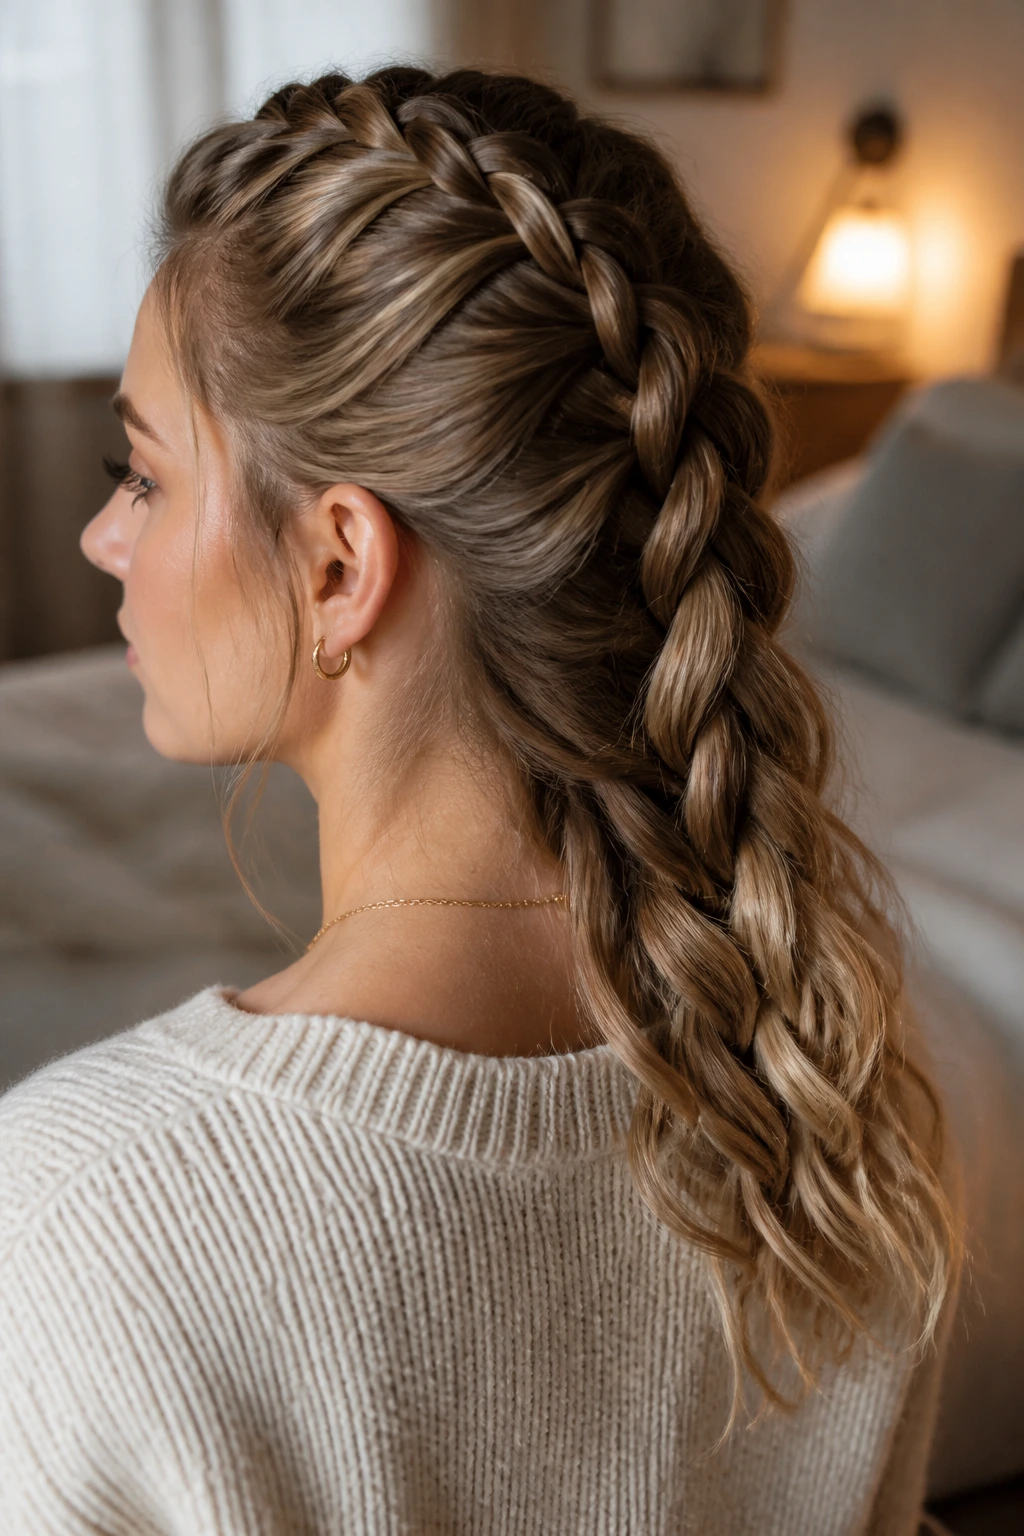
5. French Braid into a Low Bun
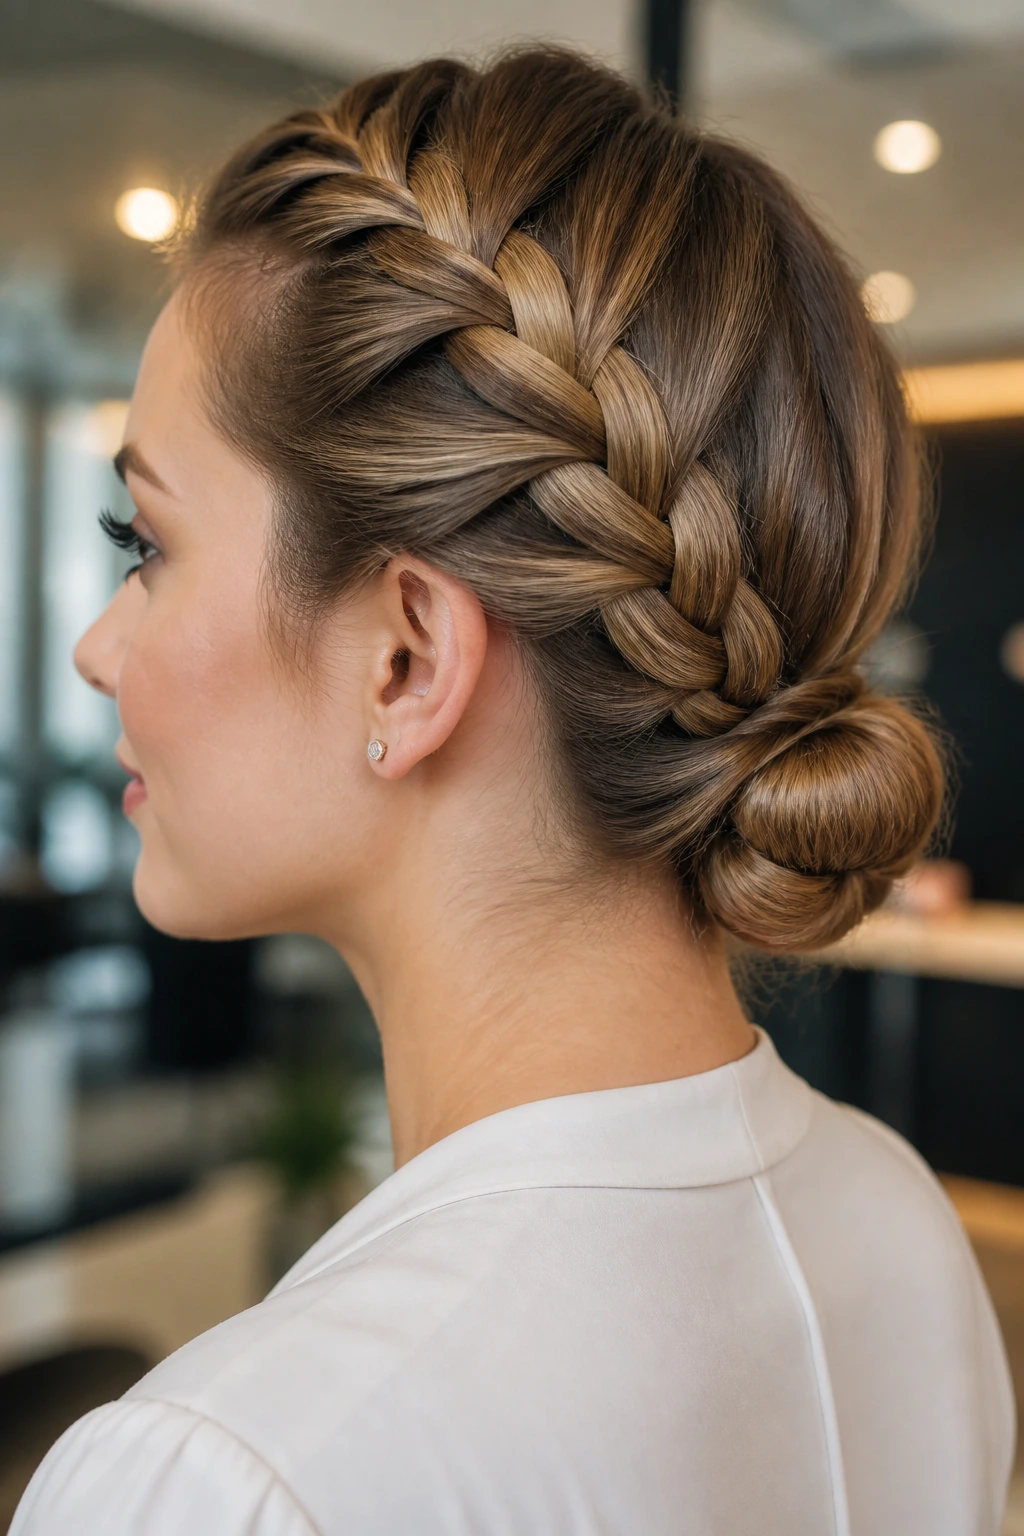
For professional settings or humid days, combining a braid with a bun is a lifesaver. You get the security of the French braid at the scalp, and the neatness of a bun to corral the ends of your medium hair, which can sometimes be hard to tuck away.
Getting the Bun Tight
After you have French braided all the way down to the nape of your neck, gather the remaining tail into a ponytail. Twist the tail into a coil around the base, and use a few U-shaped pins—not just standard bobby pins—to secure the bun. U-pins lock the hair into place without flattening the shape.
6. The Headband French Braid
This is a brilliant trick for growing out bangs or just managing those stubborn front layers that refuse to stay behind your ears. It acts as a natural, hair-made accessory that keeps your style functional and elegant.
The Pivot Point
The key is to start the braid right at the hairline. If you start too far back, you will have a gap between your forehead and the braid.
- Start at the temple on one side of your head.
- French braid horizontally across your forehead toward the other ear.
- As you reach the opposite side, pin the braid behind your ear.
- Let the rest of your hair flow naturally or secure it in a low ponytail.
7. The Inverted (Dutch) French Braid
Technically, this is a Dutch braid, but most people think of it as a French braid “inside out.” By crossing the strands under instead of over, the braid stands out on top of your head rather than blending in. This is visually stunning for medium hair because it adds significant depth.
Why It Stands Out
Because the center strand is raised, this style captures light differently. It is perfect for photography. When braiding, focus on pulling your hands toward your face. The “under” motion feels counterintuitive for the first few minutes, but your muscles will adapt quickly.
8. French Braid with a Scarf
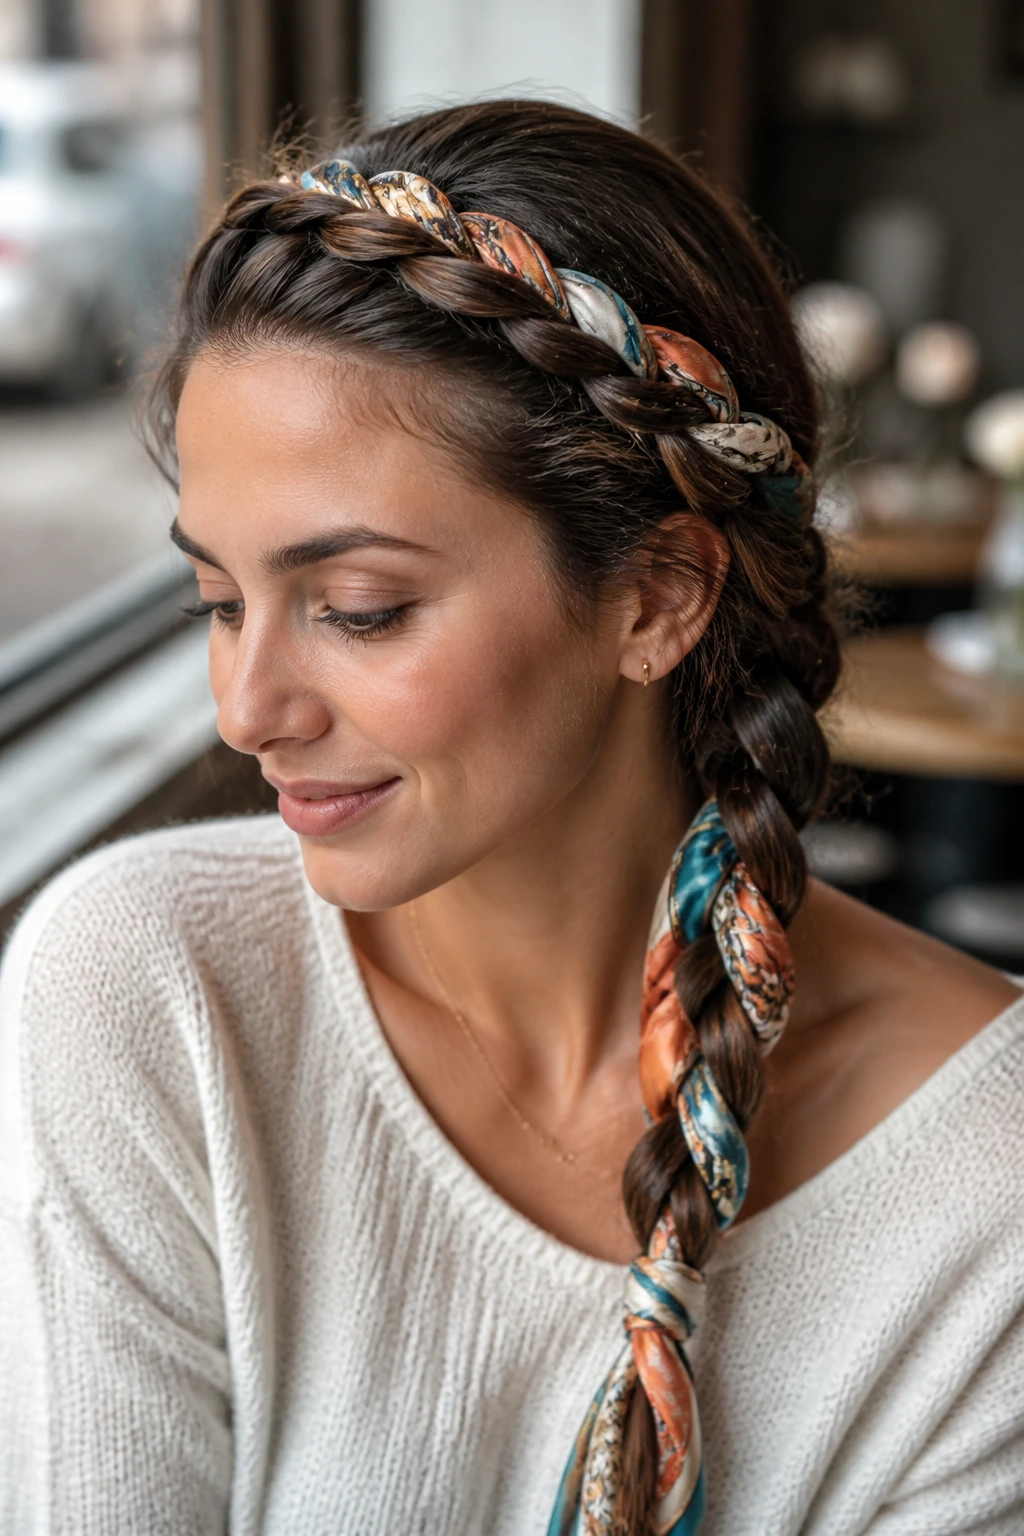
If your medium hair is feeling a bit thin or you want to add a pop of color, incorporating a lightweight silk scarf into your braid is the fastest way to add volume and flair.
Threading the Scarf
- Tie the scarf around the first section of your hair at the hairline.
- Treat the two ends of the scarf as two of your three “strands” while you braid.
- As you perform the French braid, the scarf will naturally weave through the plait, creating a thick, colorful accent that hides any gaps.
9. The Waterfall French Braid
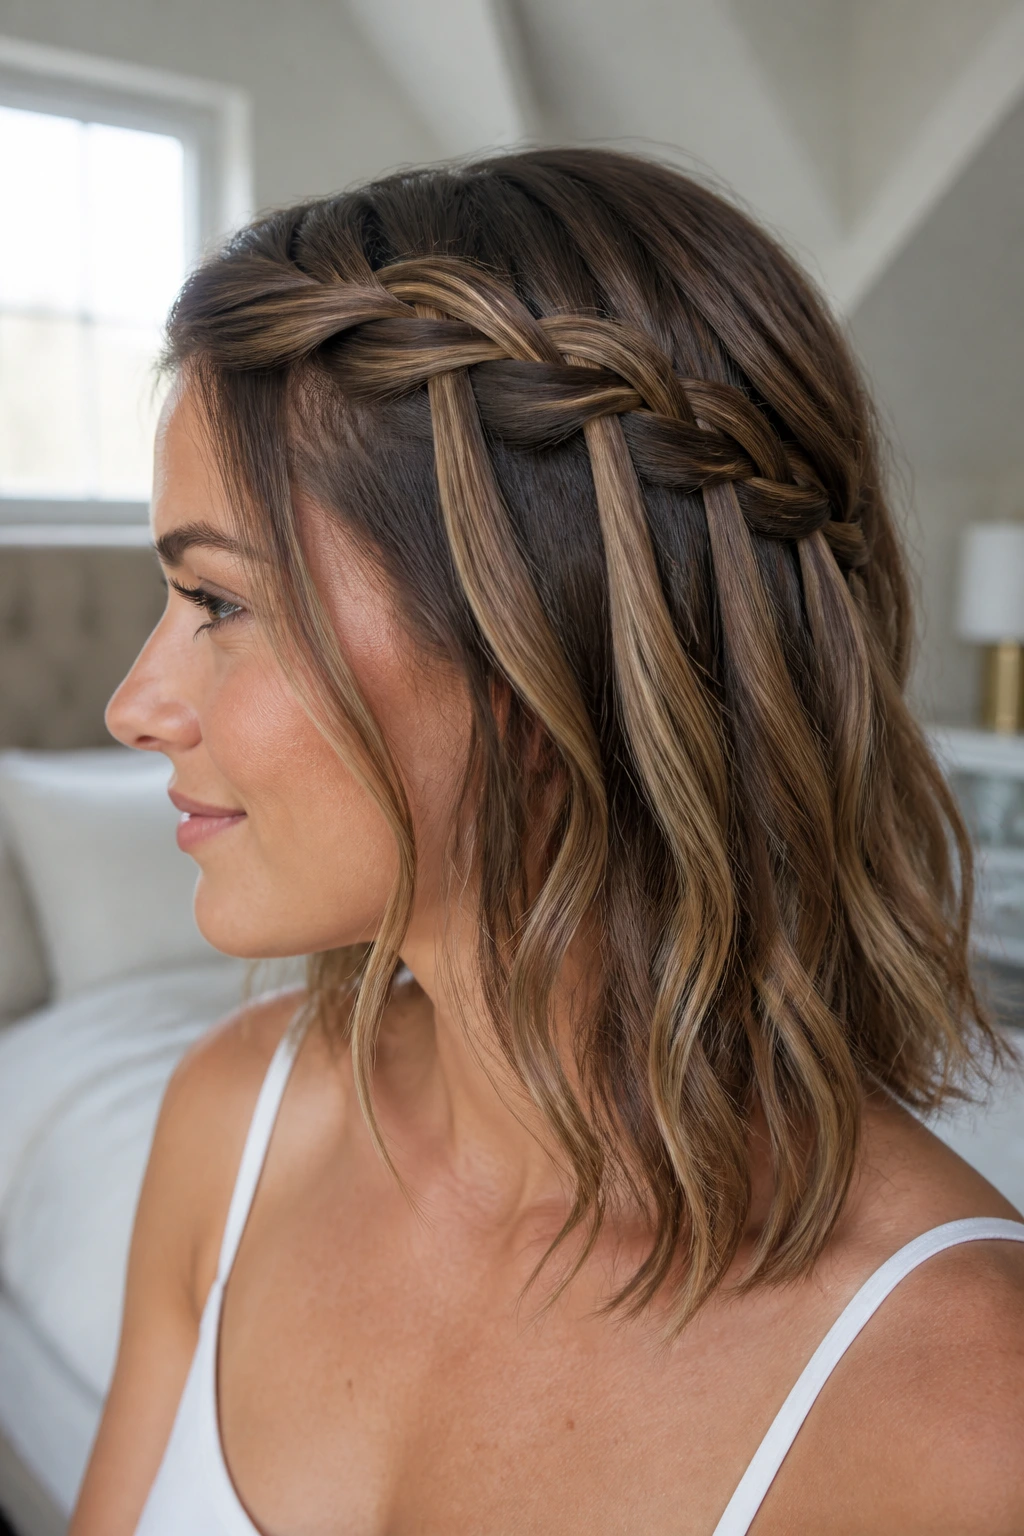
This style is for when you want to look like you spent an hour on your hair, even if you did it in ten minutes. It’s a hybrid where you drop one of the three strands of your French braid with every crossover, letting it fall naturally while continuing the braid across your head.
The Catch
The hardest part is remembering to let the strand drop. Keep a mirror handy for the first few tries. Once you get the “drop and pick up” rhythm, it becomes muscle memory. This is especially effective on medium-length hair because the shorter strands don’t tangle as easily when they fall.
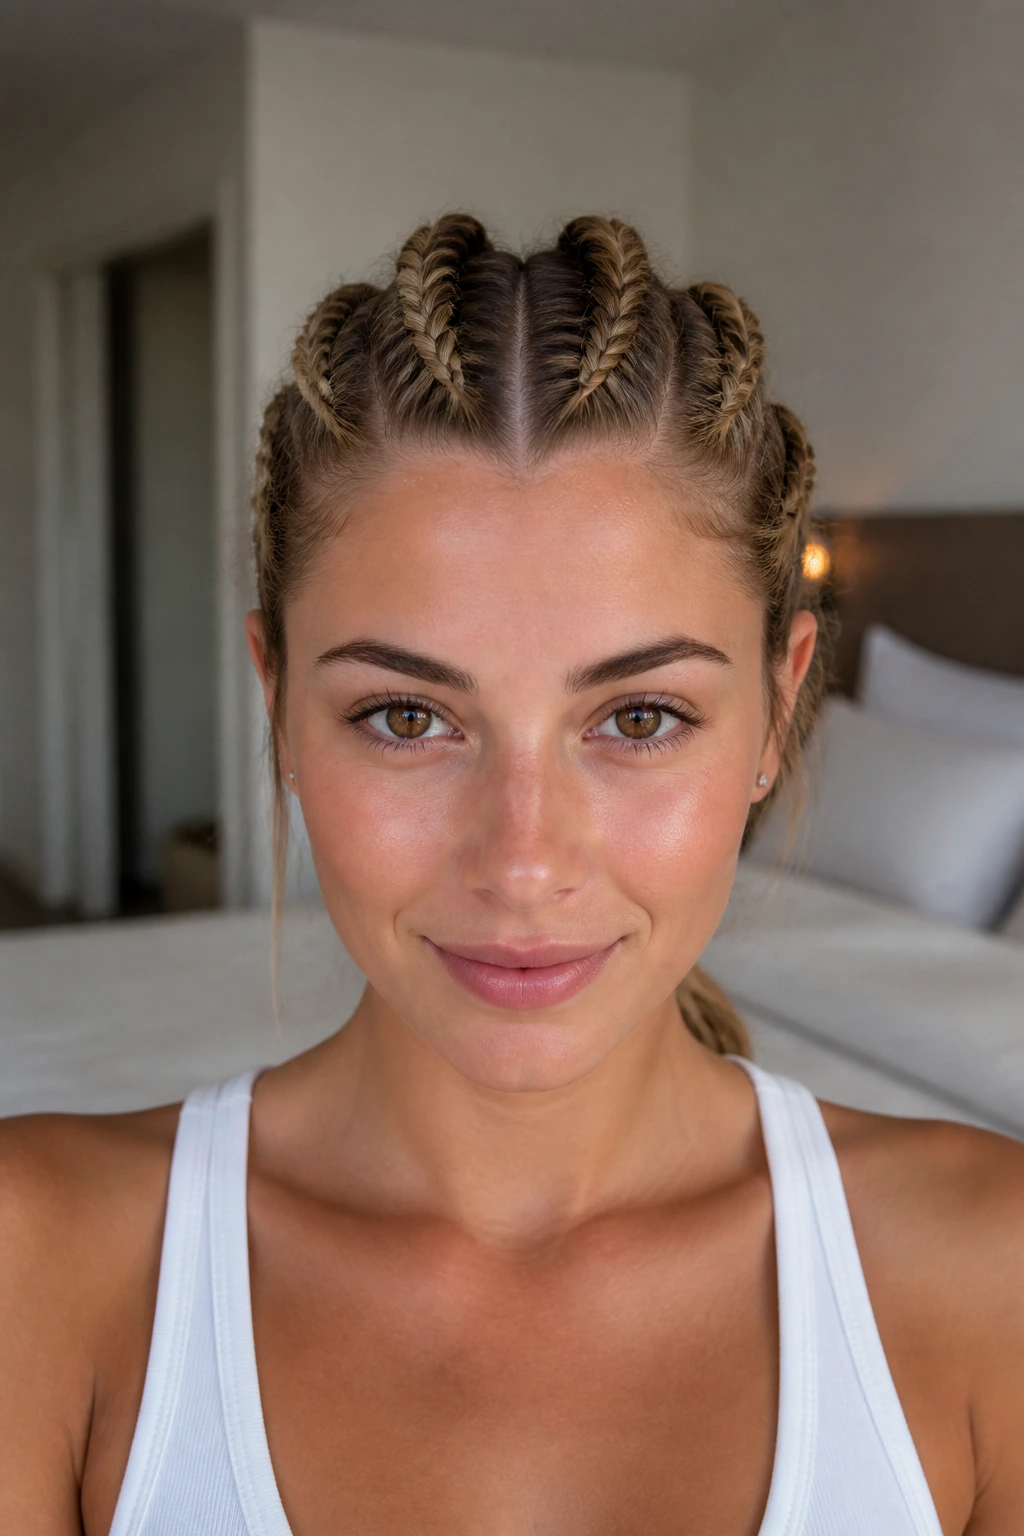
10. The Double-Braided Mohawk
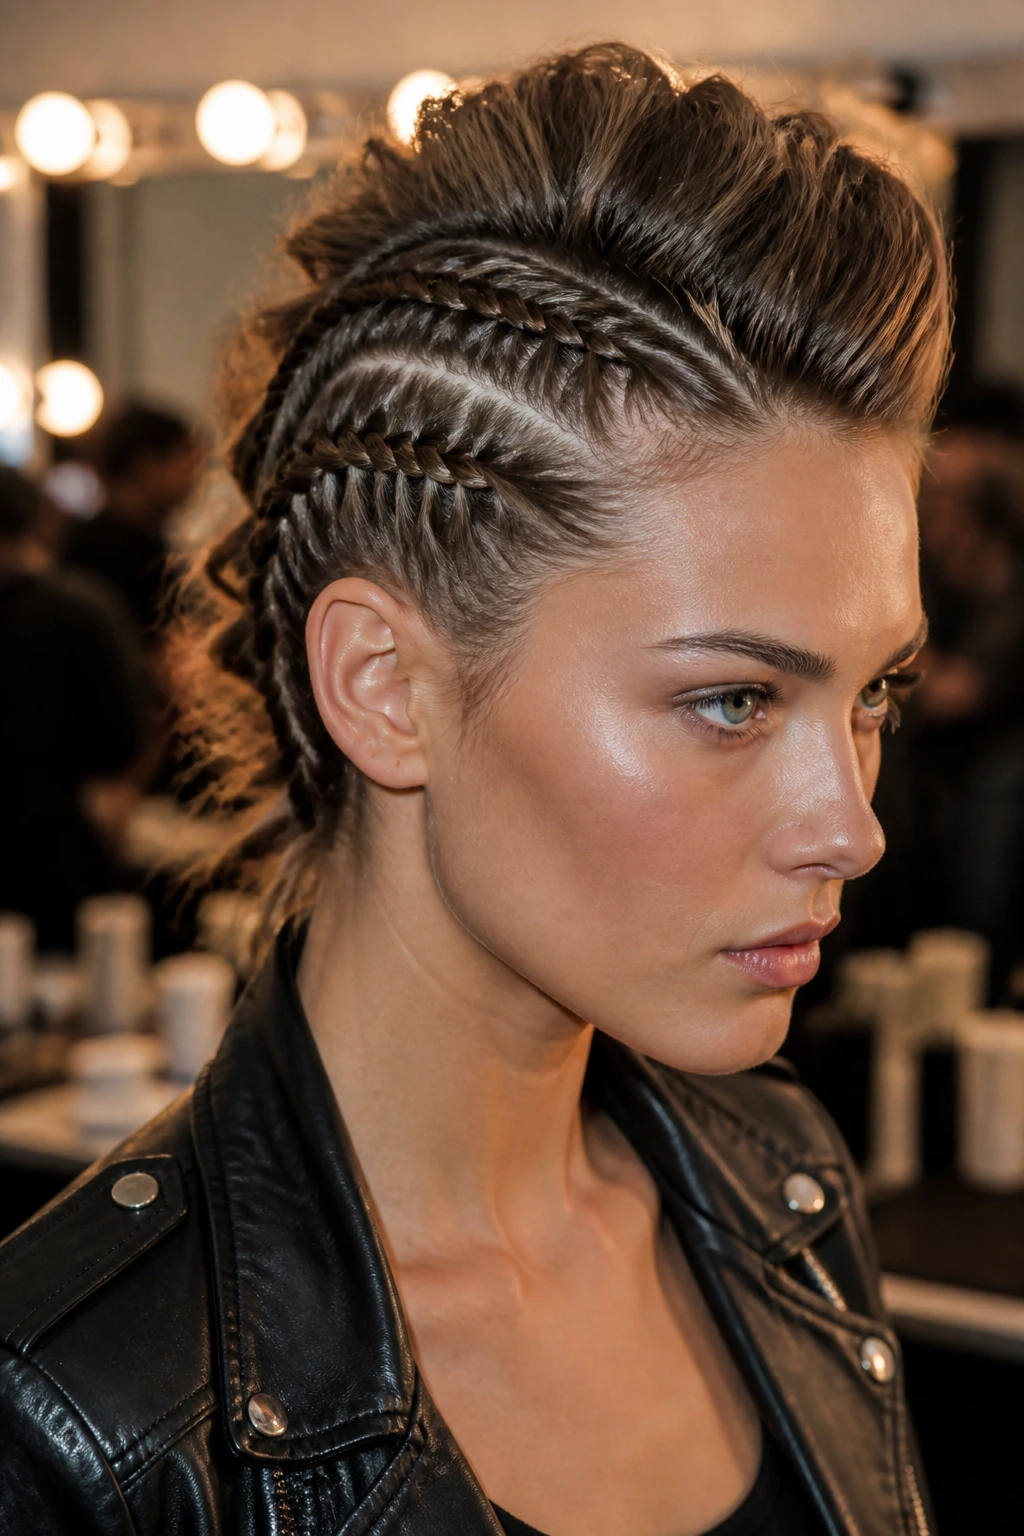
This is an edgy, bold look that works incredibly well for medium hair. By creating two tight French braids on either side of the center and leaving the middle section free, you get a faux-hawk effect without needing to shave any hair.
Contrast is Key
- Create two vertical parts to isolate the center section.
- Clip the center section out of the way.
- Braid the side sections into tight, flat French braids heading toward the back of the head.
- Release the center section and give it some height with a bit of hairspray or dry shampoo.
11. The French Braid Ponytail
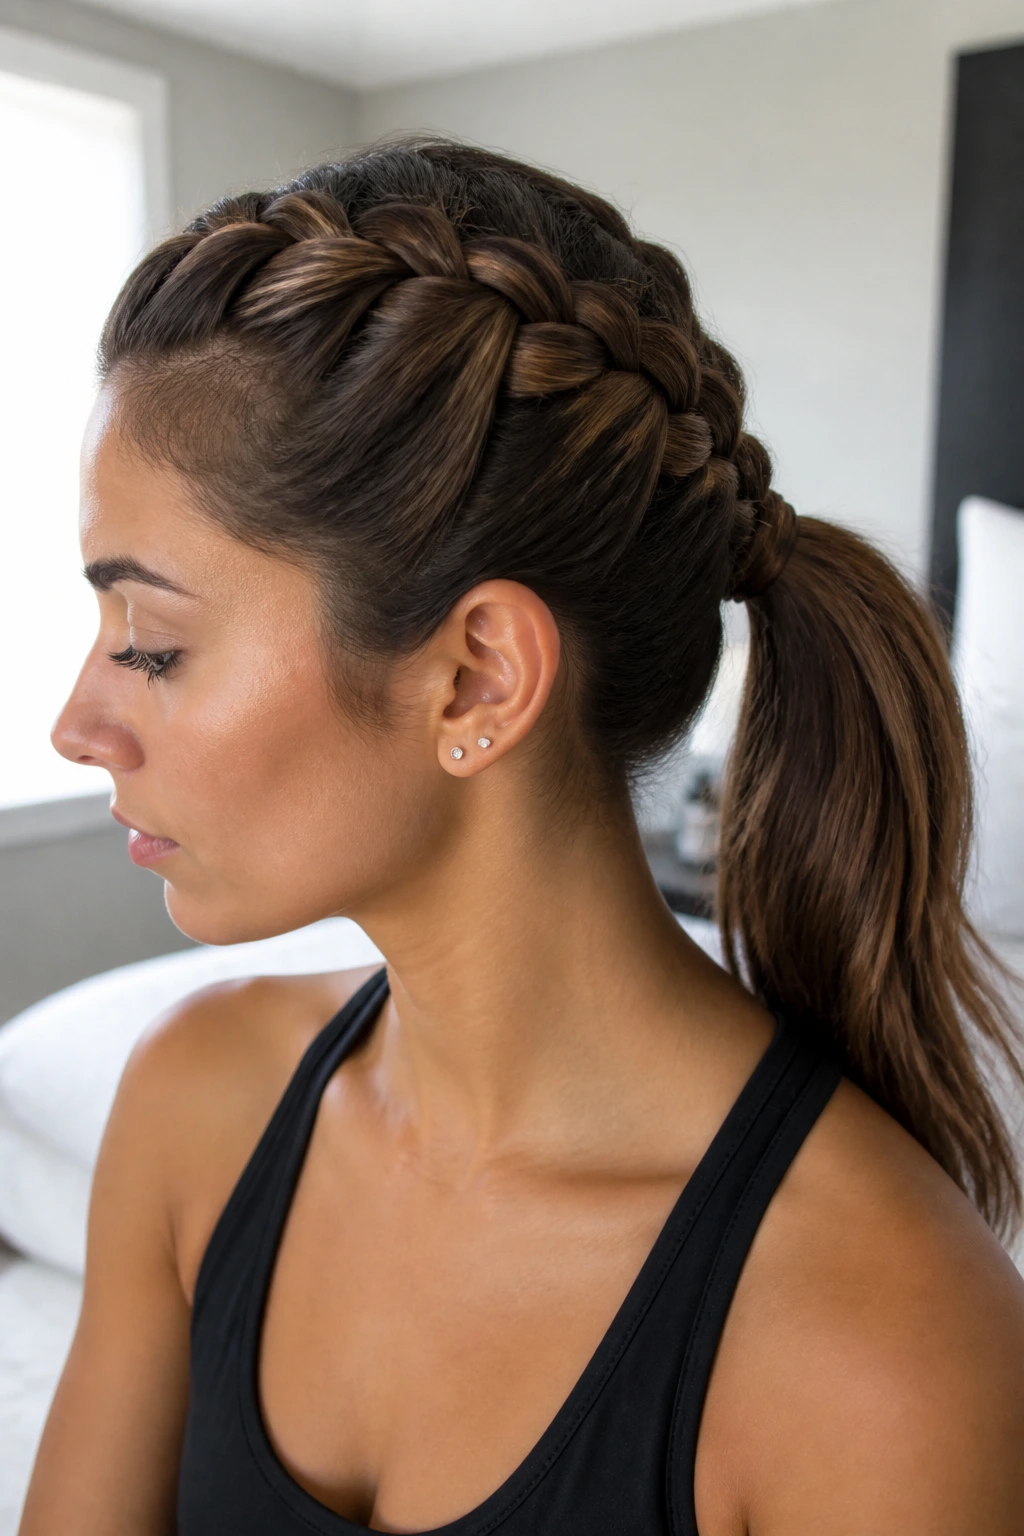
A classic ponytail can feel boring after a while. By adding a small French braid at the front that leads directly into the elastic, you transform a standard gym look into something far more sophisticated.
Tapering the Braid
Start the braid thick at the hairline and stop adding hair once you reach the crown. Finish the last two inches as a regular braid, then pull it back and incorporate it into the ponytail. This creates a “transition” effect that looks very polished.
12. Fishtail-French Hybrid
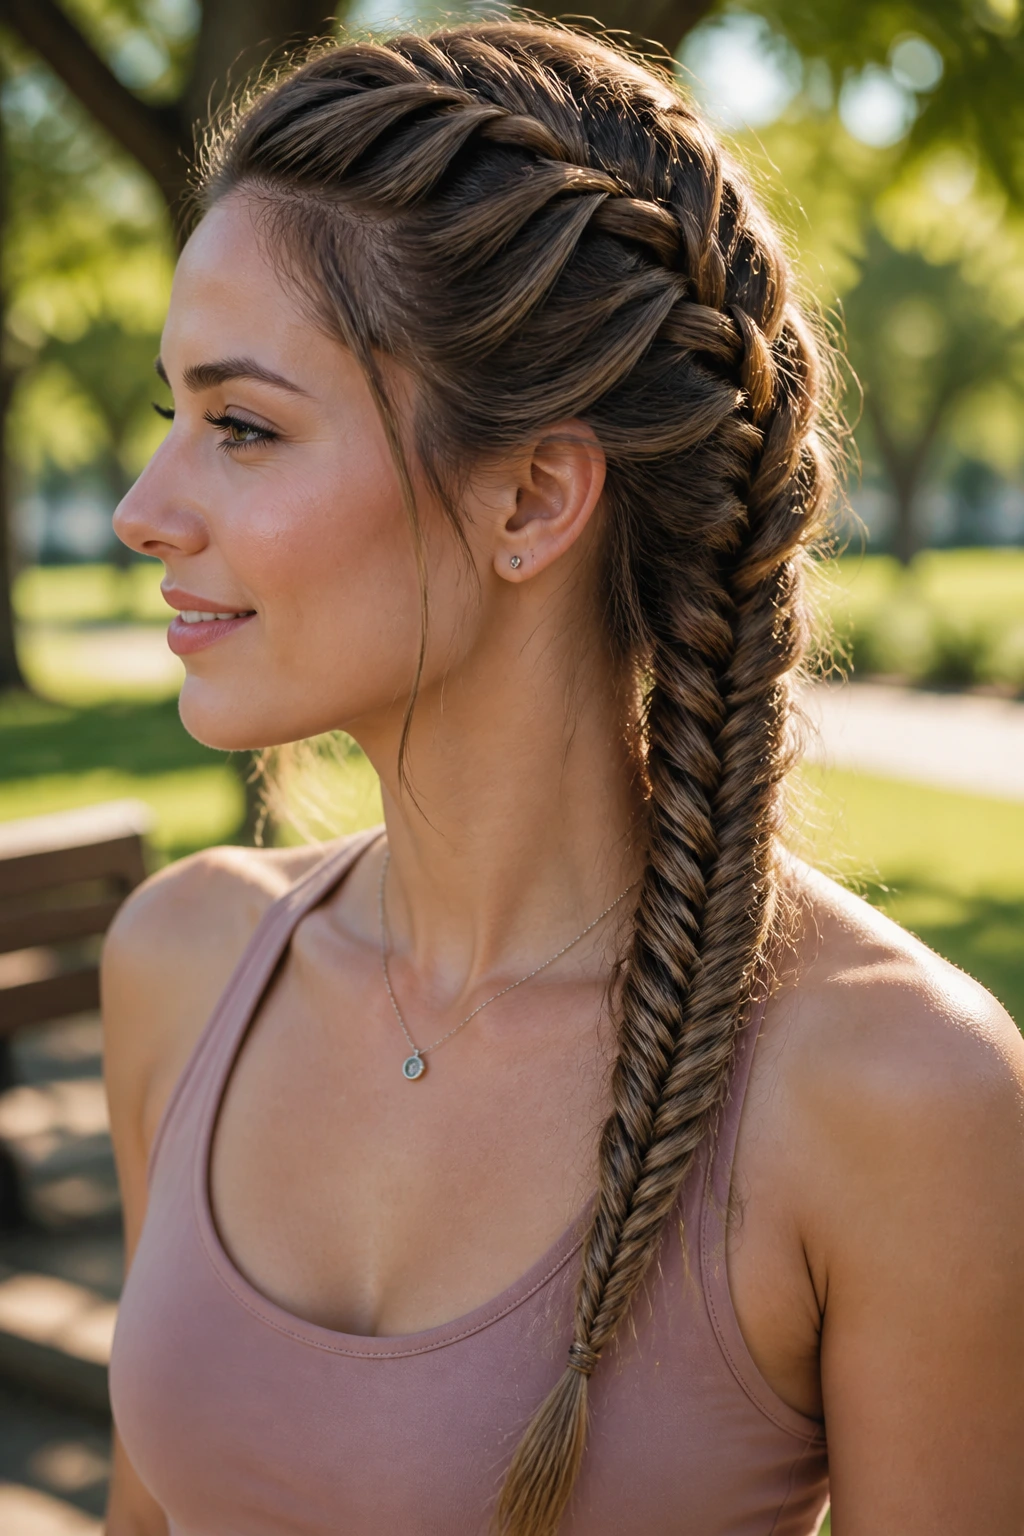
Combine the tight structure of a French braid with the intricate look of a fishtail. You start the French braid at the top to secure the roots, and then switch to a fishtail pattern halfway down.
Why It Works
Fishtails can be difficult to start at the scalp, but by using the French technique for the first three inches, you give yourself a stable base. This makes the whole process much easier to manage for hair that isn’t excessively long.
13. The Twisted French Braid
Instead of standard cross-overs, twist each section of hair before you add it into the braid. This creates a rope-like texture that looks much more detailed than a standard plait.
The Texture Factor
This works exceptionally well on hair with a bit of wave. If your hair is stick-straight, add a quick spritz of sea salt spray before you start. The extra friction makes the twists hold their shape much better.
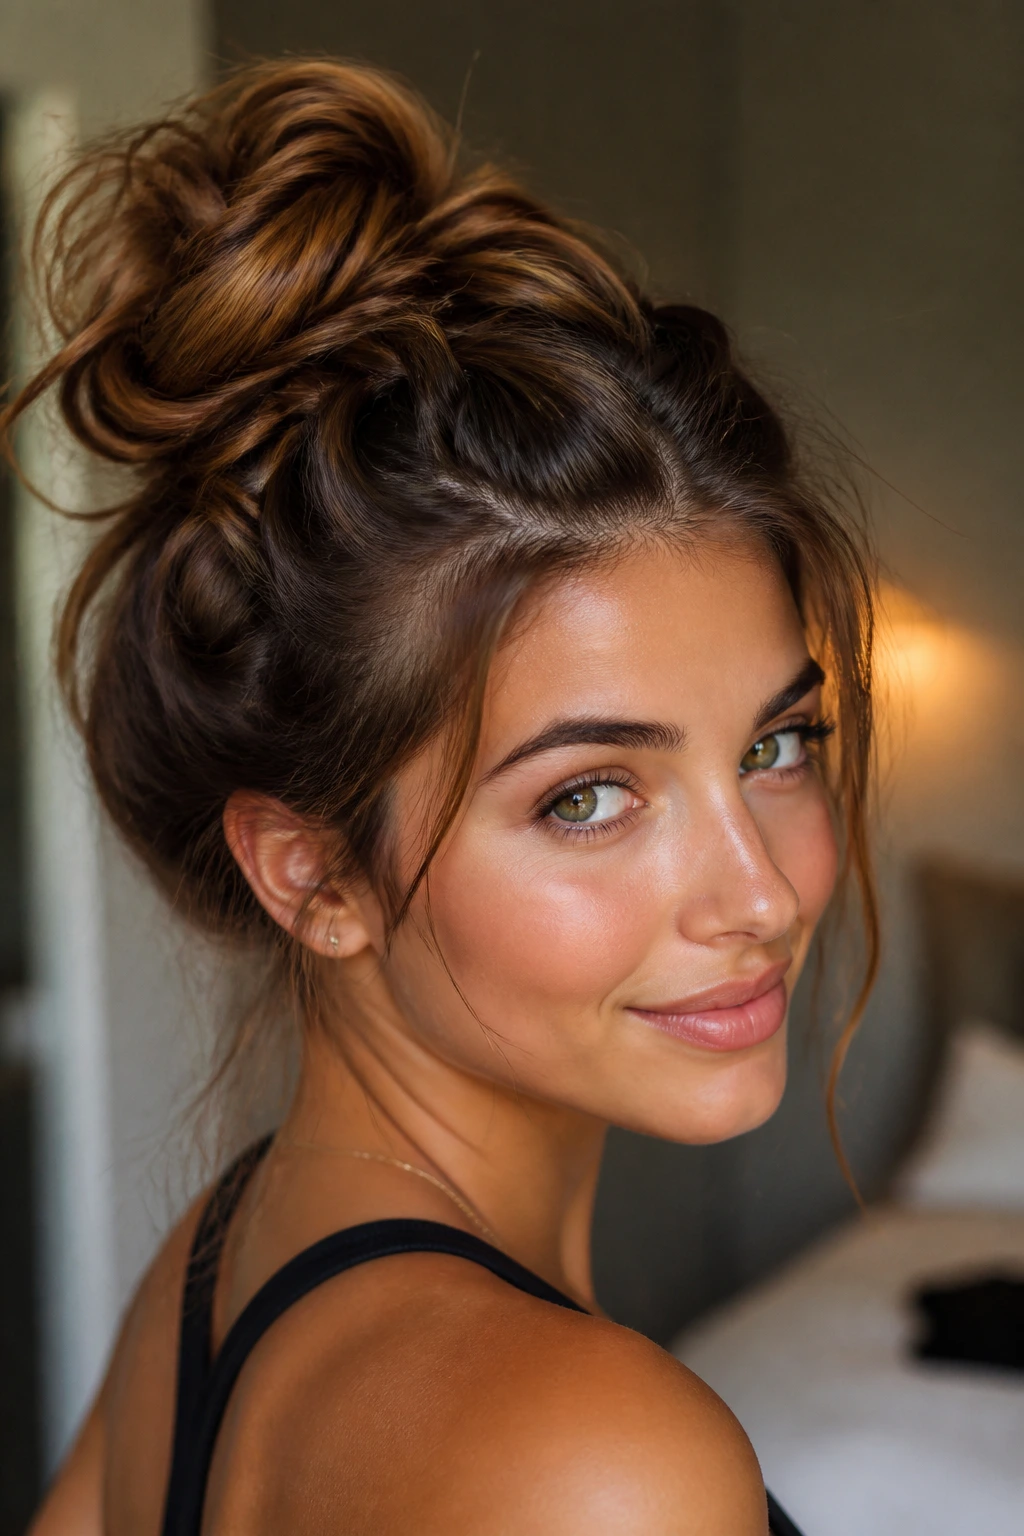
14. French Braid and Top Knot
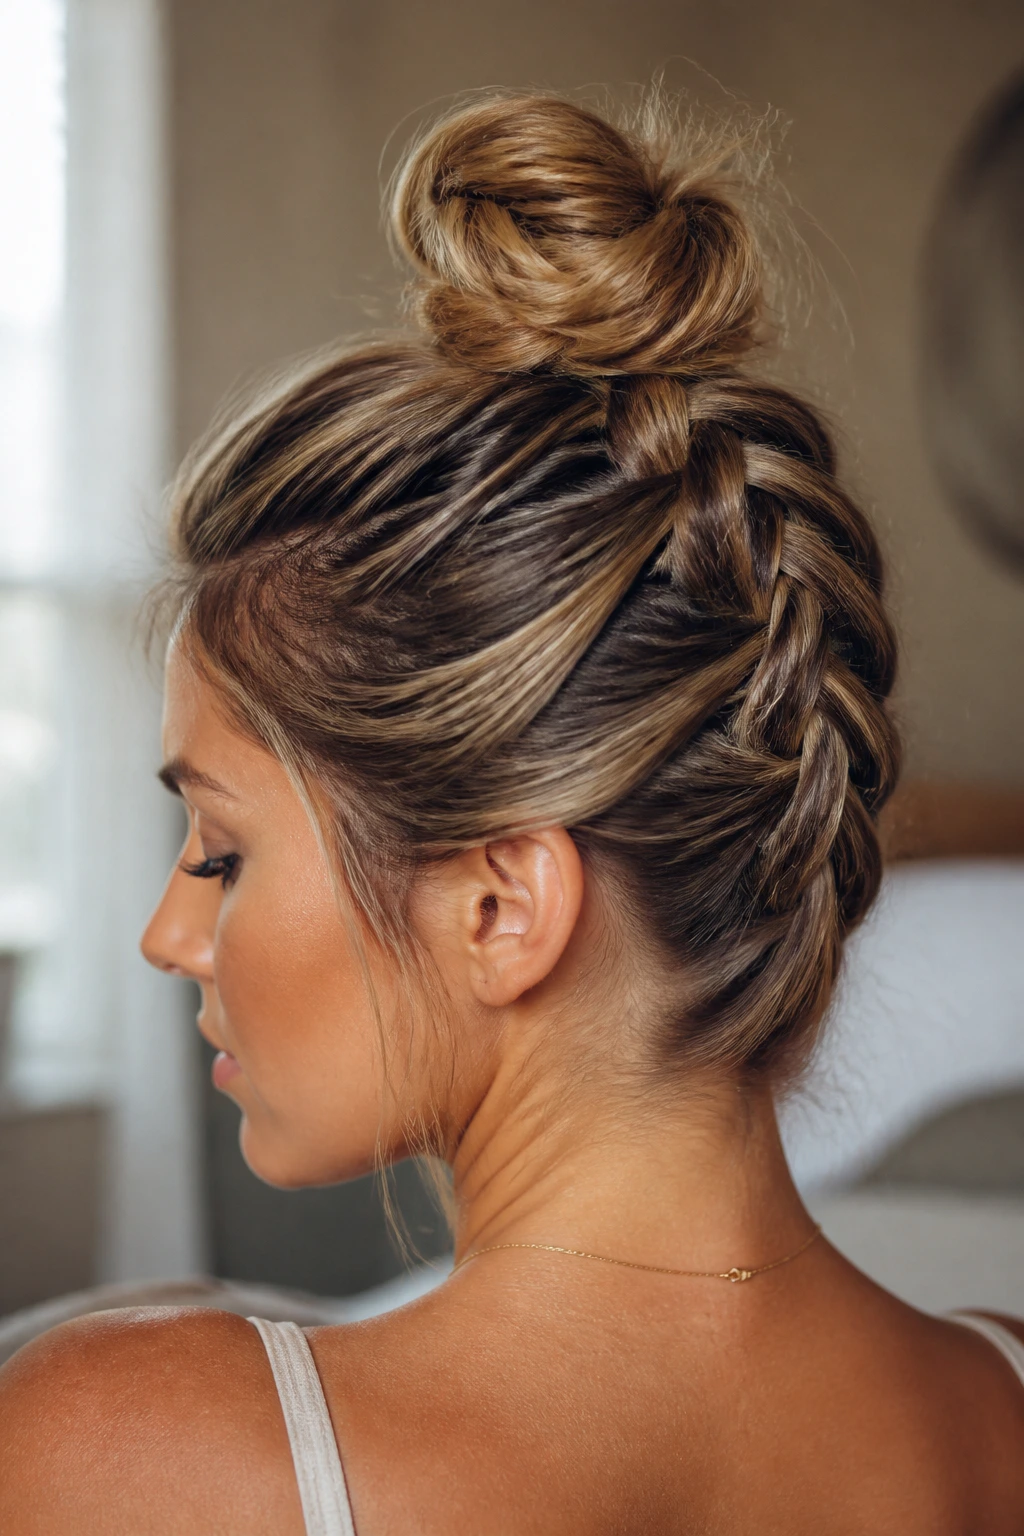
Take the French braid and run it up from the nape of your neck to the crown of your head. Once you reach the top, gather all your hair and the remaining braid into a high, messy top knot.
The Gravity Trick
Flip your head upside down to start the braid. It feels strange, but it is the only way to get the tension right from the nape to the crown. Once you reach the top, the hair will naturally want to fall into a bun.
15. The Triple-Threat Braid
Sometimes one braid isn’t enough. By creating three small French braids across the front of your hairline and joining them into one large, loose braid at the back, you create a complex, multi-layered design.
Staying Symmetrical
Make sure your parts are perfectly parallel. Use a mirror to check the back of your head as you work. This style is all about geometry—the cleaner the parts, the better the end result.
16. The French Braid Chignon
Similar to a bun, a chignon sits lower and flatter against the neck. This is a classic wedding or formal event style that is remarkably easy to execute on medium hair.
Pinning Technique
After braiding, roll the ends inward toward the nape of the neck. Use wide, flat bobby pins to secure the roll. Because your hair isn’t excessively long, the roll won’t be bulky, which keeps the chignon looking chic and understated.
17. The Side-Swept French Braid
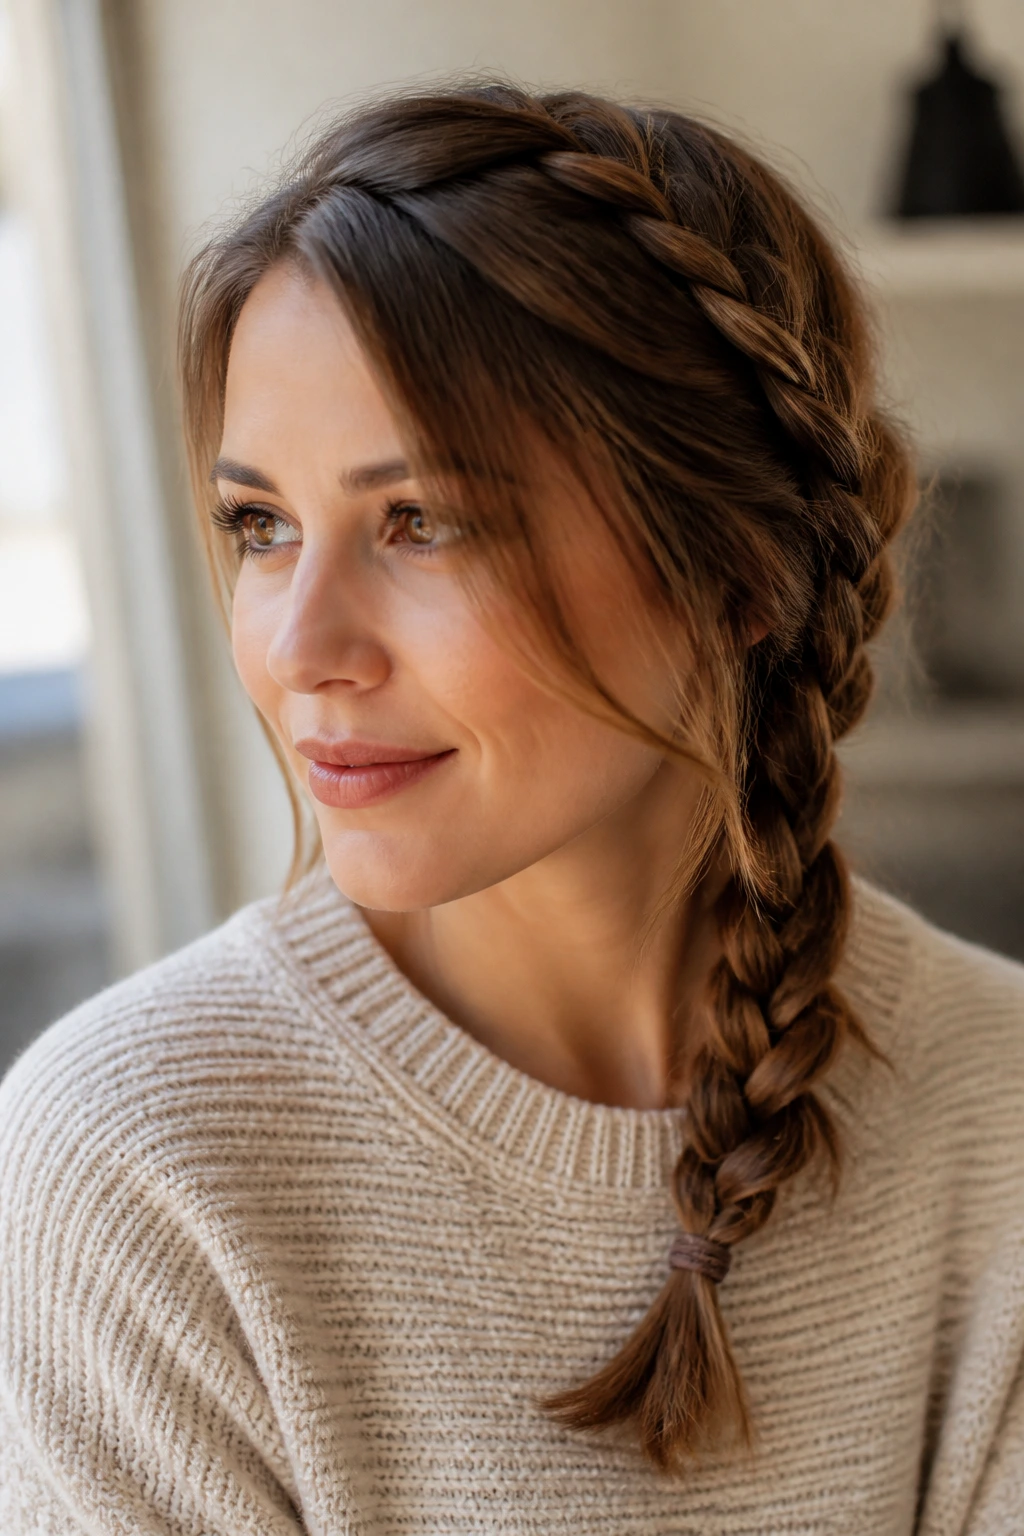
Instead of braiding straight back, guide your hands toward one shoulder from the moment you start. This brings the braid over your shoulder, which is much easier to manage than having it bounce around behind your back.
Managing Layers
If you have layers, they will naturally want to escape. Don’t fight them. Let the shortest face-framing layers fall out completely. It makes the look feel softer and more intentional.
18. French Braid with Ribbon
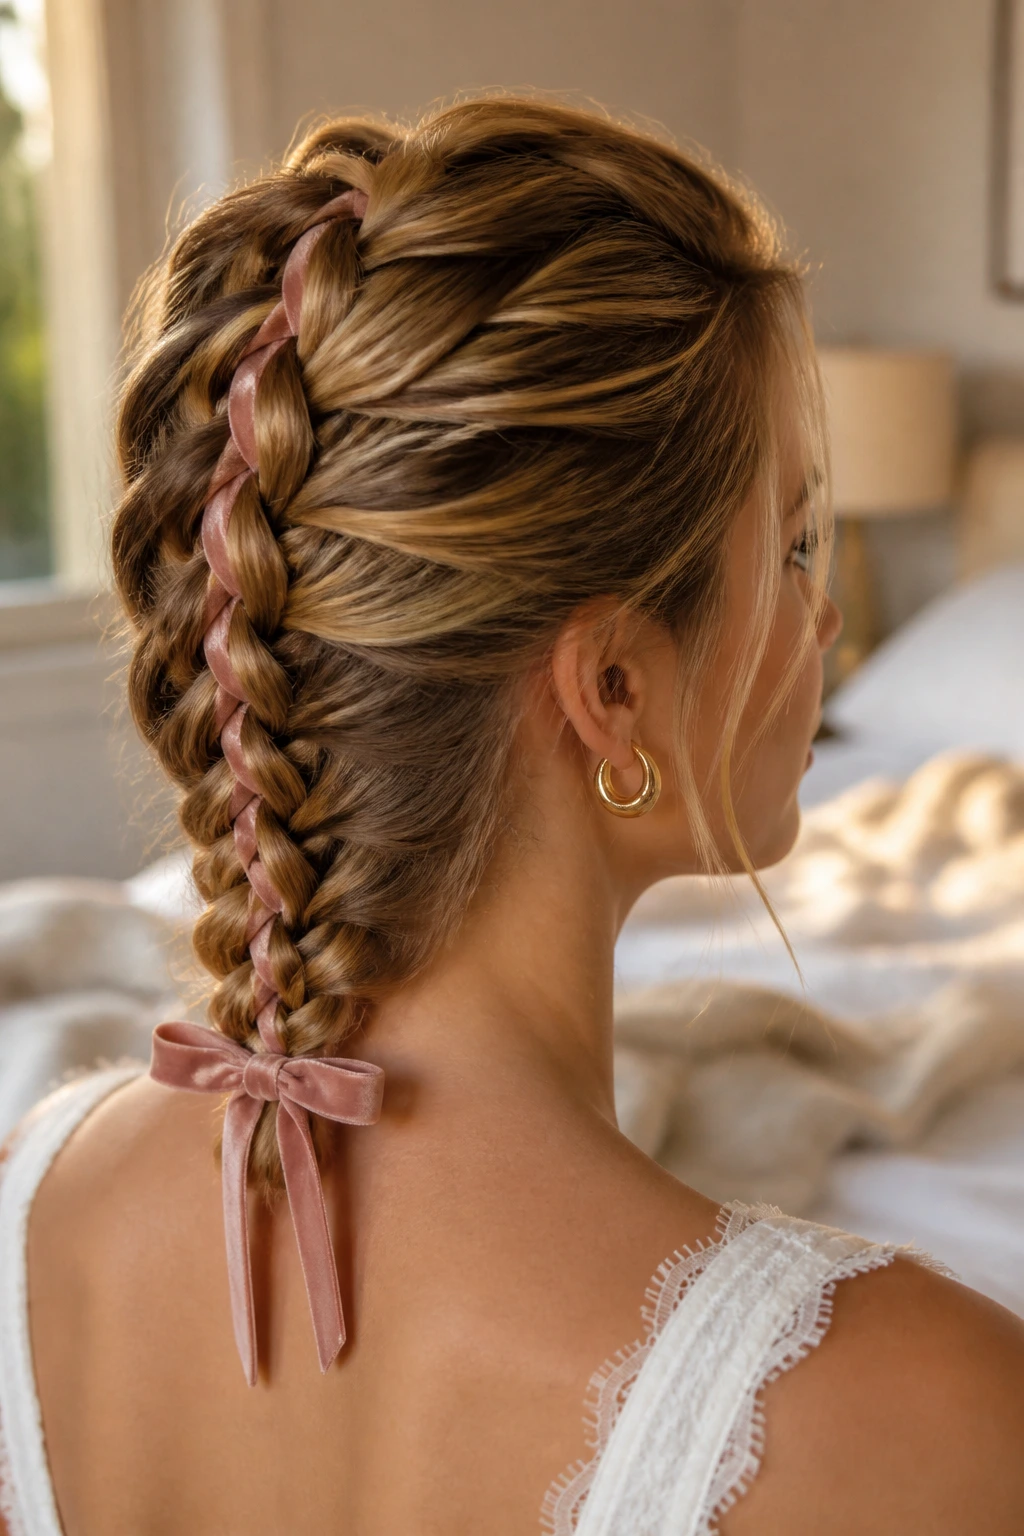
Similar to the scarf, but much thinner and more delicate. A velvet or satin ribbon adds a luxury feel to your hair.
The Ribbon Anchor
- Fold the ribbon in half and secure it to the center strand of your first three pieces.
- Braid as normal.
- When finished, tie the ends of the ribbon into a small bow at the base of the braid.
19. The “Pull-Through” French Faux-Braid
Technically, this isn’t a braid at all, but a series of small ponytails pulled through one another. It mimics the look of a thick French braid but is much easier for beginners who struggle with the “cross-over” technique.
Why Beginners Love It
You don’t need to coordinate three different strands of hair. You only need to manage one ponytail at a time, flipping it through the center of the previous one. It creates a stunning, voluminous look that stays put all day.
20. The Bohemian Crown Braid
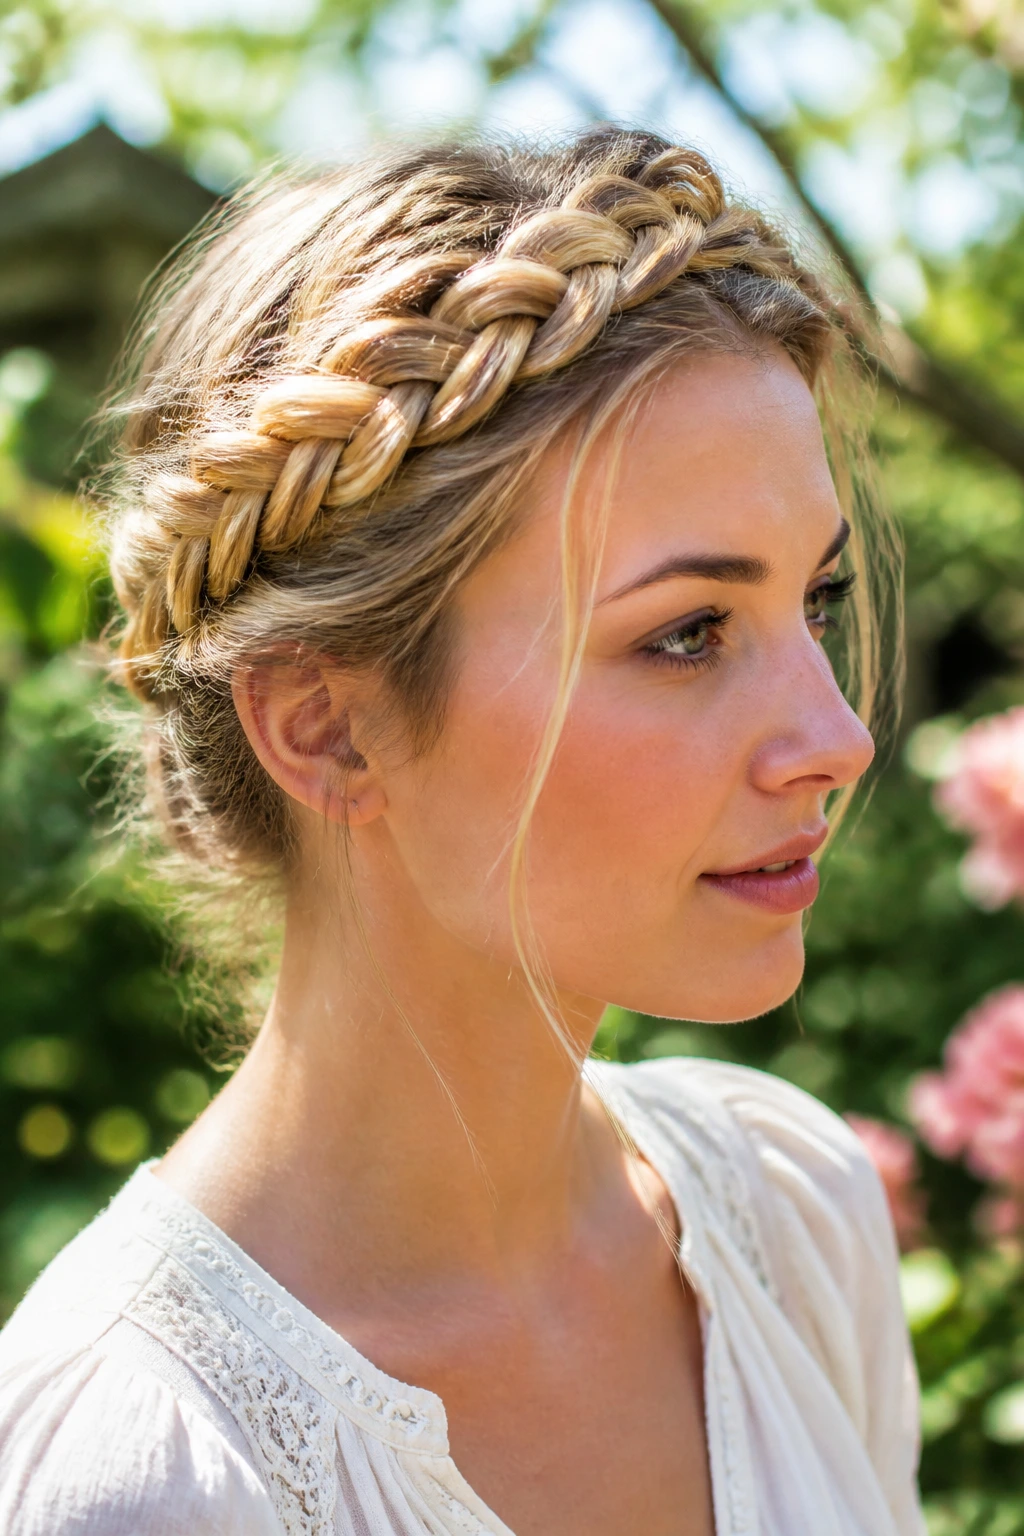
This style wraps the French braid all the way around your head. On medium hair, this often requires you to meet in the middle and pin the ends together, rather than continuing the braid in a full circle.
Hiding the Ends
The trick to a seamless look is to pin the ends of both braids under each other at the back of the head. It creates the illusion of a continuous, endless braid.
21. Micro-French Braid Accents

Instead of braiding all your hair, use the French technique to make two tiny, tight braids on either side of a middle part. Leave the rest of your hair in loose waves.
Balance
Use the smallest possible sections for these braids. They should be no wider than a pencil. This gives a subtle, viking-inspired look that is very popular for music festivals or casual weekends.
22. The French Braid Pigtail Buns (Space Buns)
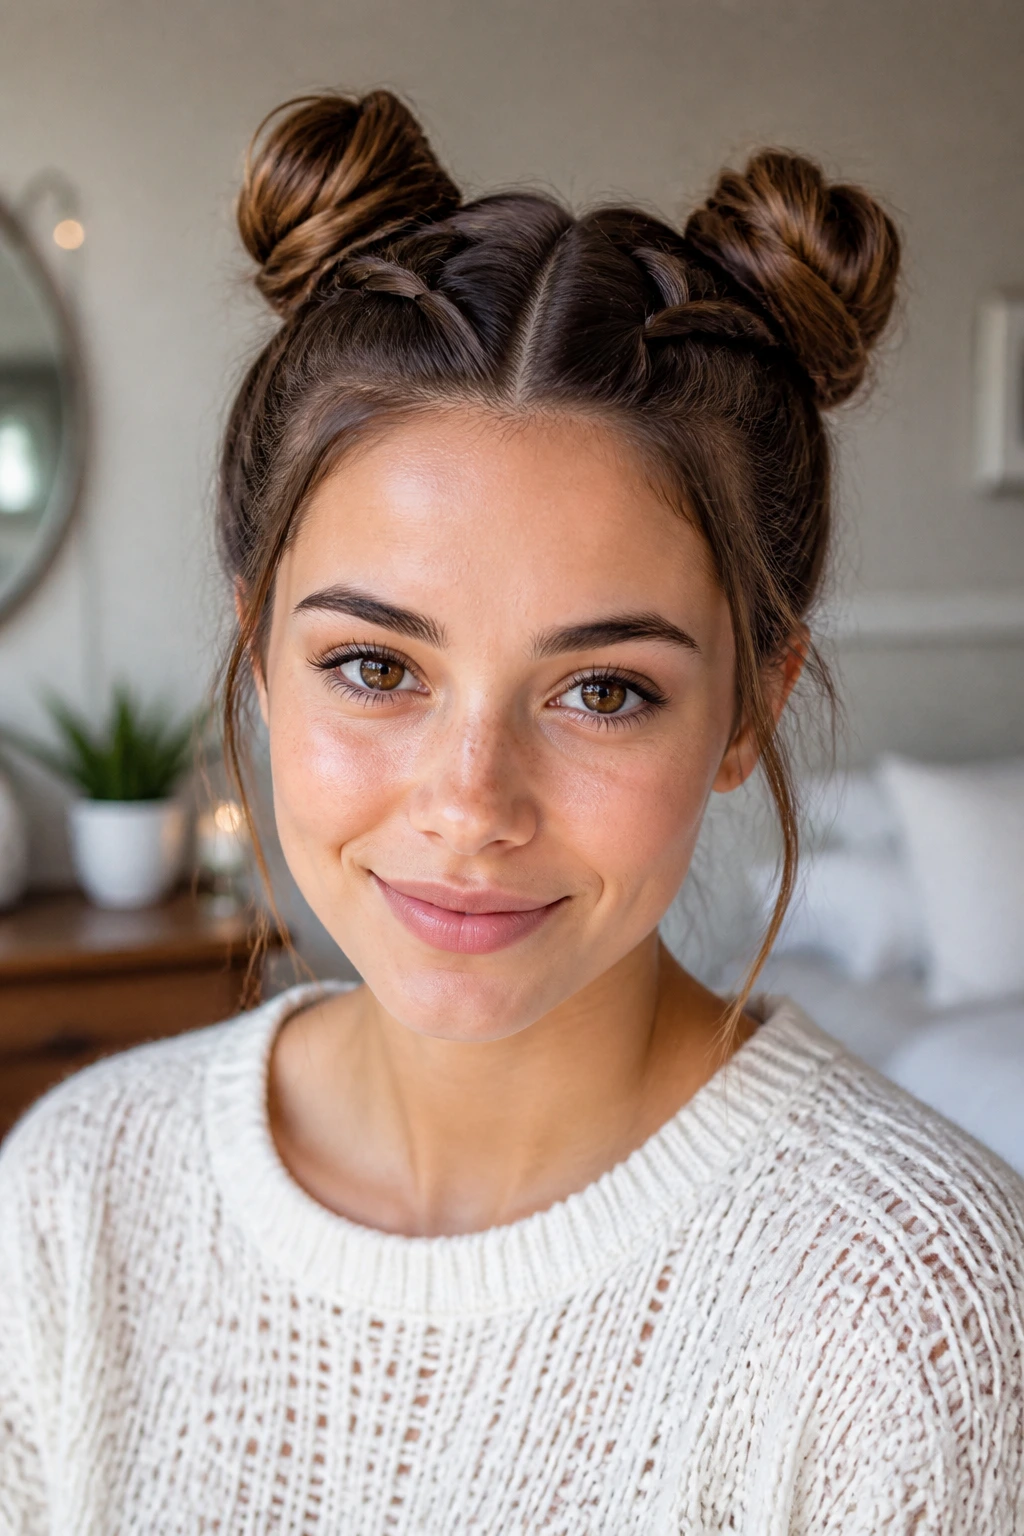
Take your pigtails and roll them into two tight buns at the top of your head. It’s fun, youthful, and keeps your hair completely out of your face for high-energy activities.
The Base
Make sure your French braids start near the forehead so that the buns sit far forward on the head. If they sit too far back, you’ll look like you have two knobs on the back of your skull—which is fine, but not the look we are aiming for here.
23. French Braid with Glitter Parting
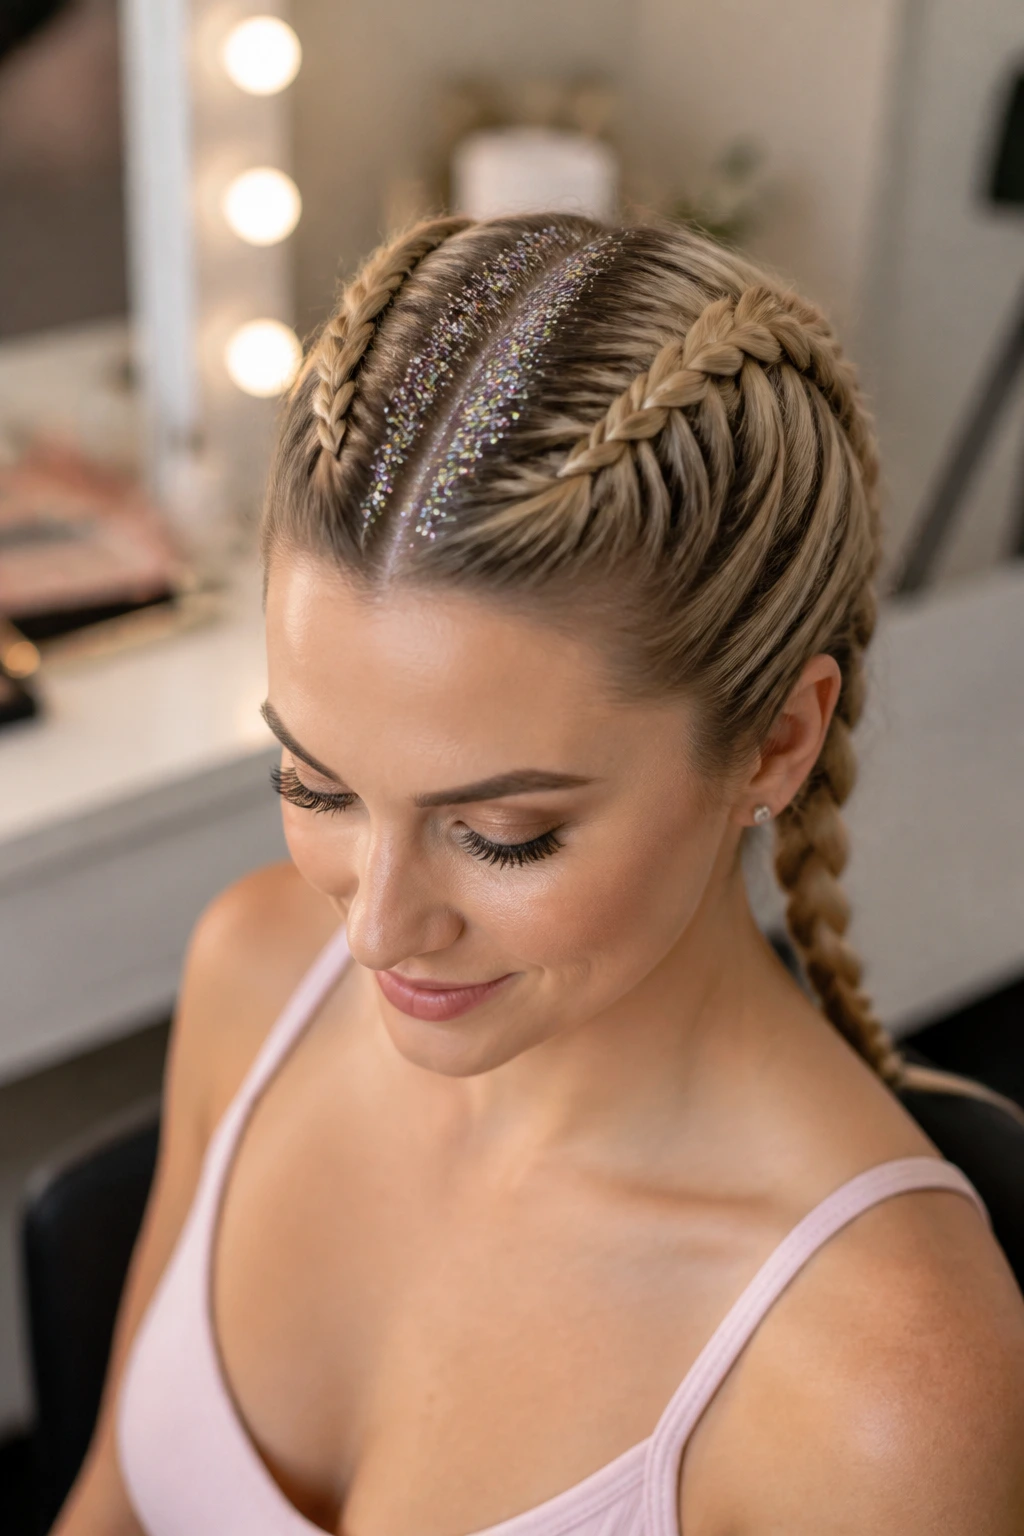
Use a little bit of hair-safe glitter gel along the part line of your French braids. It’s a bold, artistic touch that turns a simple hairstyle into a statement look.
Cleanliness
Apply the glitter with a small makeup brush to keep it contained strictly to the part. You don’t want it migrating into the hair strands, as it can make them feel stiff and difficult to braid.
24. The Tight-to-Loose Transition
Start with a very tight French braid at the scalp, but as you move toward the ends, purposefully loosen your grip. This creates a beautiful, tapered look that is wider at the bottom than the top.
The Gradient Effect
The key is to increase the looseness gradually. Don’t go from tight to loose in one step. Make each cross-over just a millimeter looser than the one before it.
25. French Braid with Bobby Pin Design
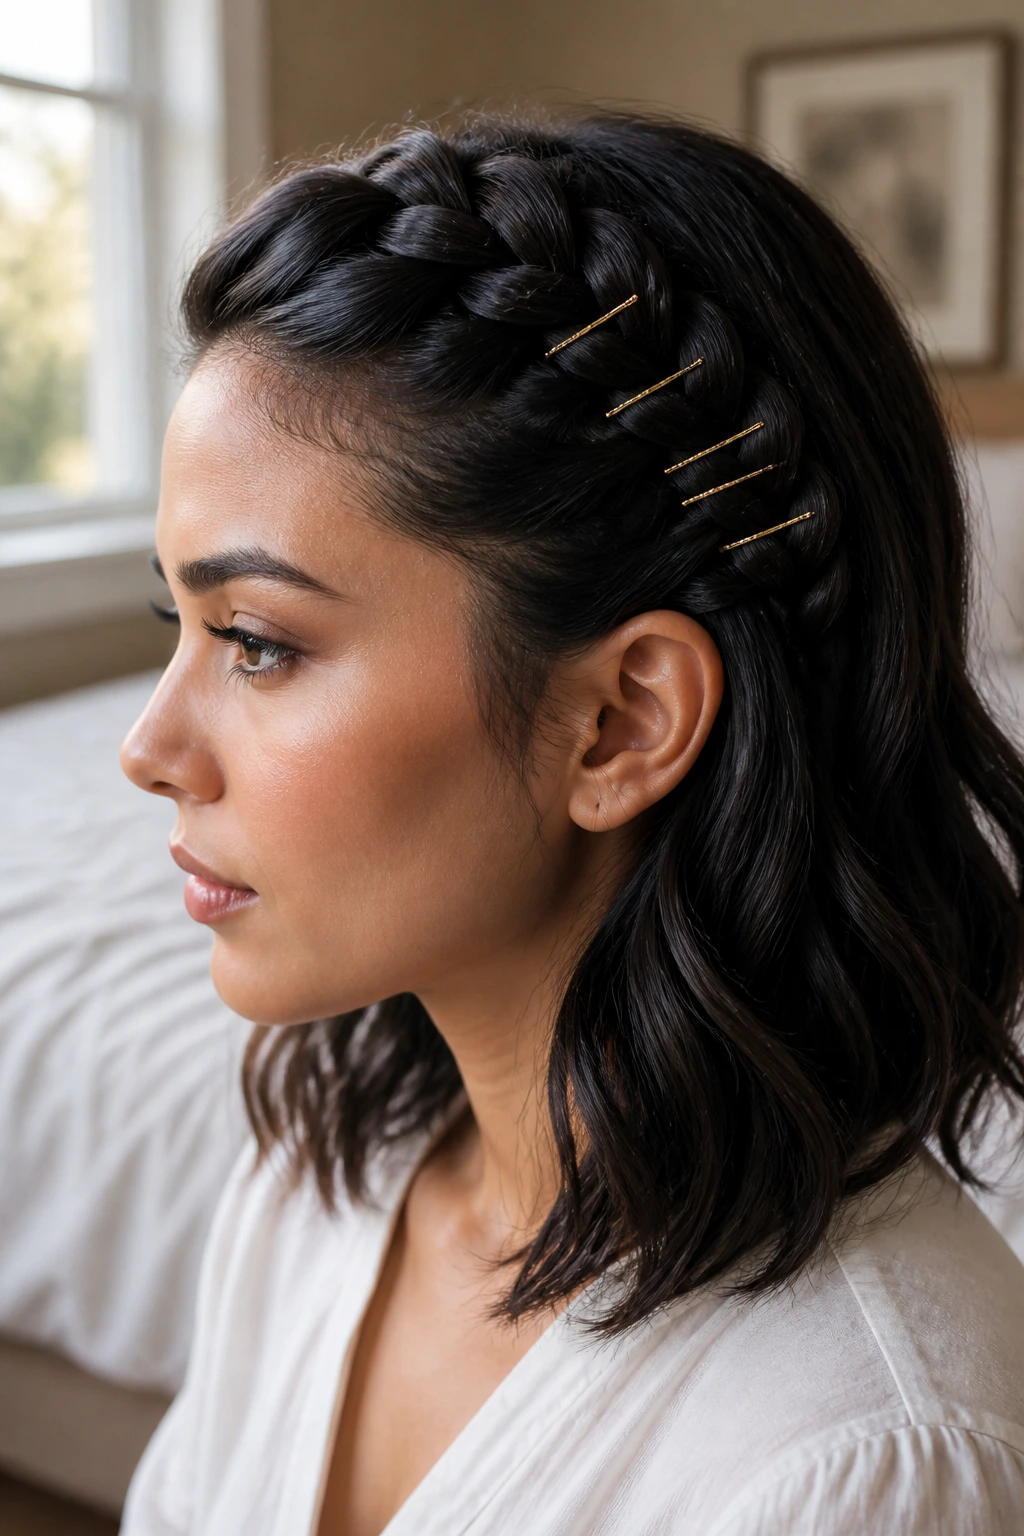
Use bobby pins not just for security, but for decoration. A row of gold or silver bobby pins along the side of a French braid adds a metallic, structural element that looks great against darker hair.
Placement
Insert the pins in a pattern—either parallel or criss-crossed—directly into the outer loops of the braid. This gives the braid extra hold while acting as jewelry for your hair.
26. The Deep-Part French Braid
Switch your part from the center to a deep side part before beginning your French braid. It creates a sweep of hair across the forehead that is incredibly flattering for round or square face shapes.
The Sweep
Because you have a deep side, one side of the braid will be much “heavier” with hair than the other. Use this to your advantage—the side with more hair will look more dramatic, while the other side stays sleek and tight.
27. The Messy Bun-Braid Combo
Similar to the chignon, but much higher and looser. Let the French braid be messy—the more flyaways, the better. Gather everything into a high bun that feels like it might fall out (but won’t, thanks to the sturdy braid base).
The “I Woke Up Like This” Aesthetic
Pull a few strands out near your ears and temples. This softens the face and makes the high-maintenance effort of a French braid look completely relaxed and accidental.
28. French Braid with Headscarf Wrap
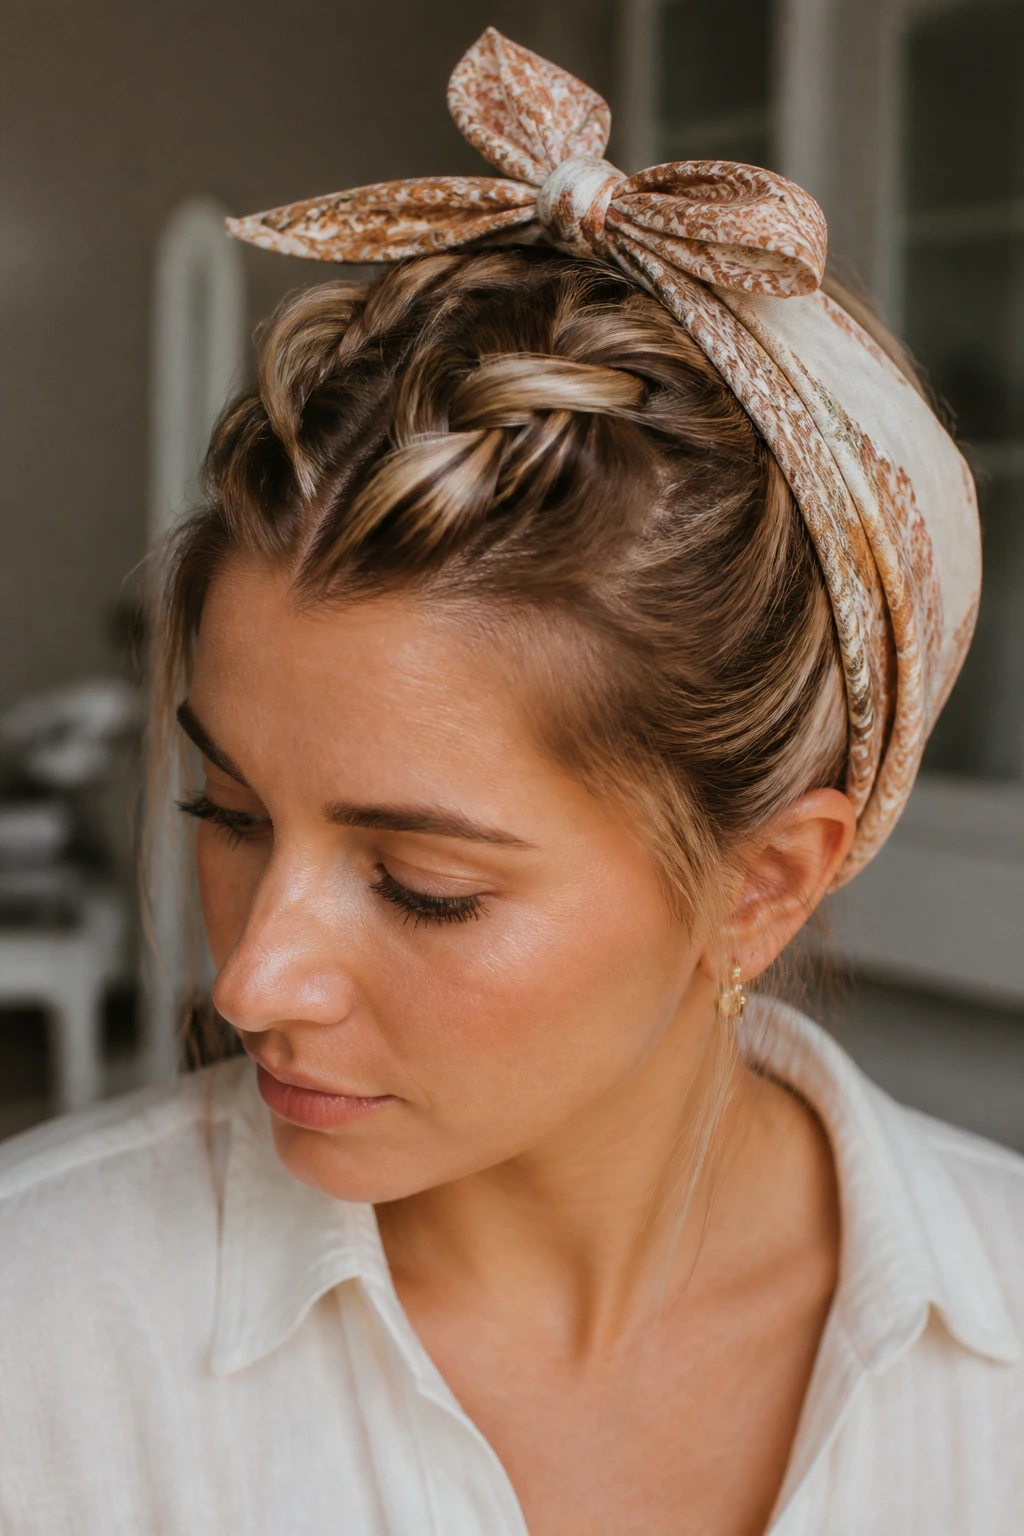
This is the ultimate style for those days when your hair isn’t quite doing what you want it to. French braid the front, then wrap a scarf around your head at the nape of the neck and tie it at the top.
The Hidden Braid
You don’t need a perfect braid for this. The scarf will cover the middle section, meaning you only really need to focus on getting the hairline sections neat and tidy. It’s the ultimate cheat-code for a bad hair day.
Final Thoughts
French braiding is a skill that lives in your fingers, not your head. You might feel clumsy during your first few attempts, but repetition is the only real path to mastery. Do not get discouraged if your first few braids end up uneven or if your arms feel like lead after five minutes—every stylist you admire started with that same feeling.
The beauty of these styles on medium hair is that you have constant room to experiment without the exhaustion that comes with managing extreme length. Take these techniques, mix them together, and don’t be afraid of the mess. Sometimes, the stray hairs and the slightly uneven loops are exactly what make a hairstyle look human, approachable, and uniquely yours. Focus on the tension at the roots, keep your sections clean, and enjoy the process of turning your hair into something functional and beautiful.