Fine, fragile hair can feel like a high-stakes balancing act. One day you want length, the next you want volume, and the day after that you just want to stop worrying about breakage. When your strands are on the thinner side, the traditional approach to styling often leads to more damage than style—pulling, tugging, and excessive heat are basically the enemies of anyone trying to maintain hair health. Protective braiding, however, shifts the narrative. Instead of viewing your hair as something that needs to be constantly managed, you create a structure that allows your ends to rest, protected from friction against pillowcases, sweaters, and the daily wear-and-tear of life.
The secret to braiding fine hair isn’t just about the technique; it is about the tension. Too much pulling, and you risk traction alopecia or unnecessary thinning around the hairline. Too little, and the style slips out by noon. You are looking for a Goldilocks zone—enough grip to hold the style, but loose enough that your scalp feels like it is breathing. Whether your hair is stick-straight or has a slight, ethereal wave, these styles are designed to offer protection without the heavy, sagging weight that often causes breakage in finer textures.
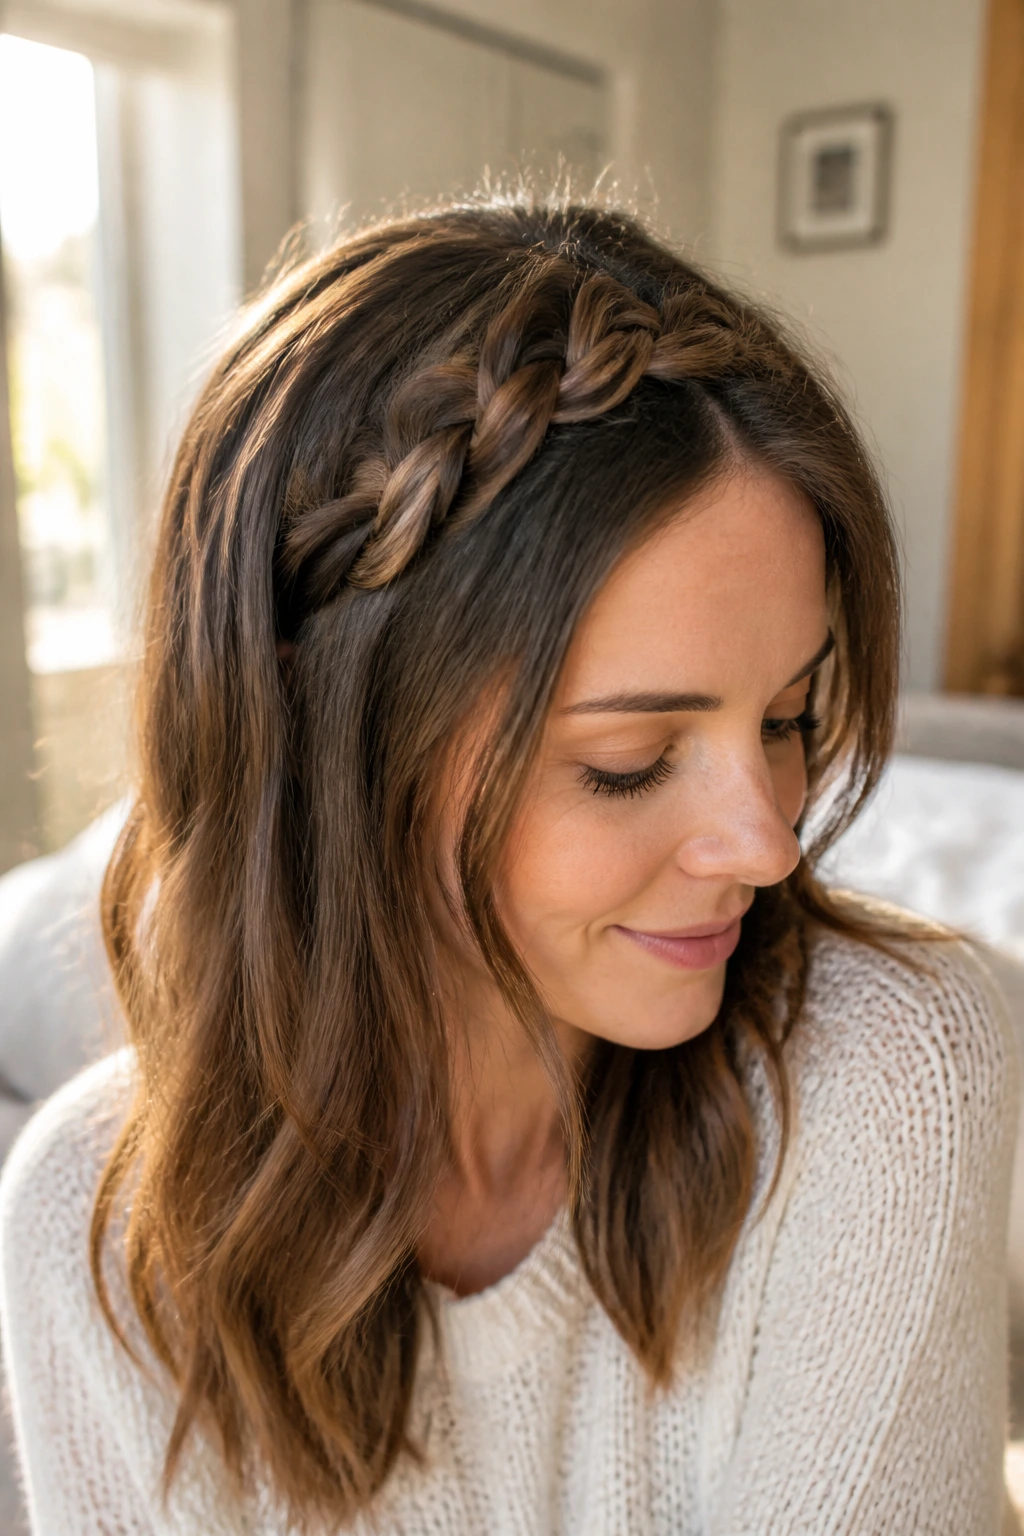
1. The Loose French Braid Headband
For those days when you want your hair out of your face but don’t want the tension of a slicked-back ponytail, the French braid headband is a lifesaver. You start at one temple, French braiding along the hairline toward the other side, incorporating small sections of hair as you go.
Why It Works for Fine Strands
Because you are only gathering a small amount of hair at a time, you avoid the dreaded “scalp cleavage” that can happen when you try to do a full-head style. The tension is distributed along the hairline rather than pulling from the roots of the entire head.
Styling Tips for Maximum Volume
- Spray a little dry shampoo at the roots before you begin to give your hair extra grip.
- Use a clear, snag-free elastic at the end of the braid.
- Gently pull on the “loops” of the braid once you are finished—this technique, often called “pancaking,” makes your hair look twice as thick as it actually is.
2. Low-Tension Side Fishtail
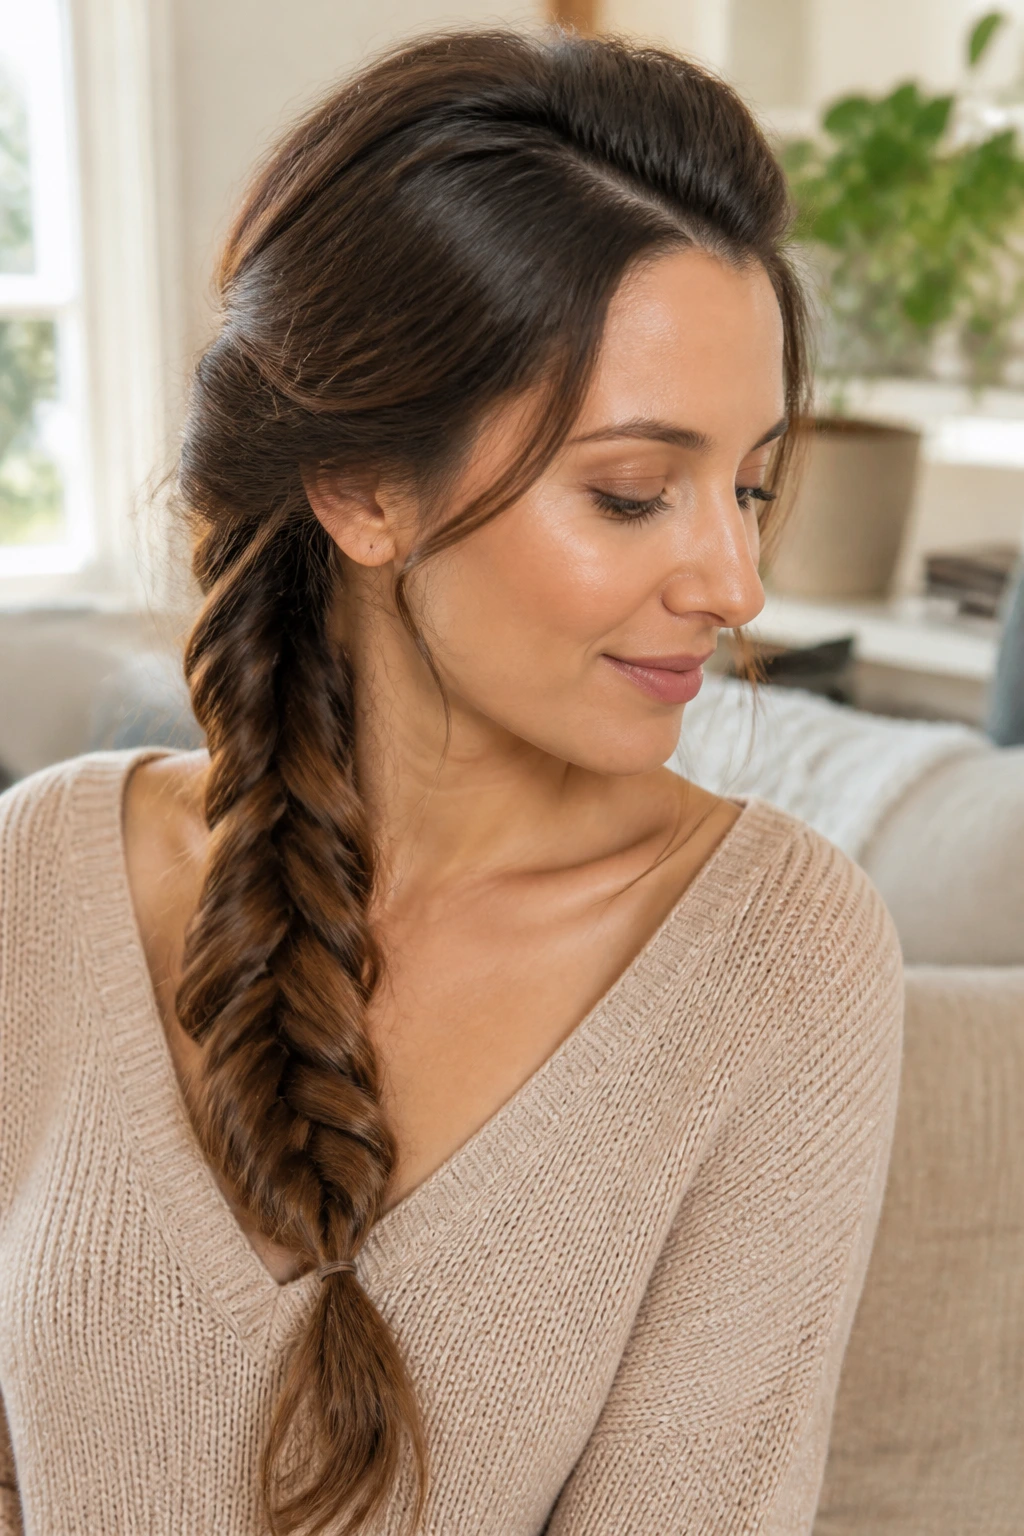
The fishtail braid looks intricate, but it is surprisingly gentle on fine hair because it doesn’t require the sharp, repetitive pulling that a standard three-strand braid does. By working with only two sections, you minimize the friction caused by interlocking strands.
The Mechanism of the Fishtail
You divide your hair into two main sections. Take a tiny strand from the outside of one section, cross it over to the inside of the other, and repeat. This creates a tight, rope-like appearance that holds its shape even if you don’t pull it very tight.
Making It Look Fuller
- Avoid over-tightening: If you pull too hard, you’ll end up with a tiny, stringy braid.
- The “fluff” factor: Once you reach the end, take the outer edges of the braid and pull them outward slightly. It’s a game-changer for fine hair that lacks natural density.
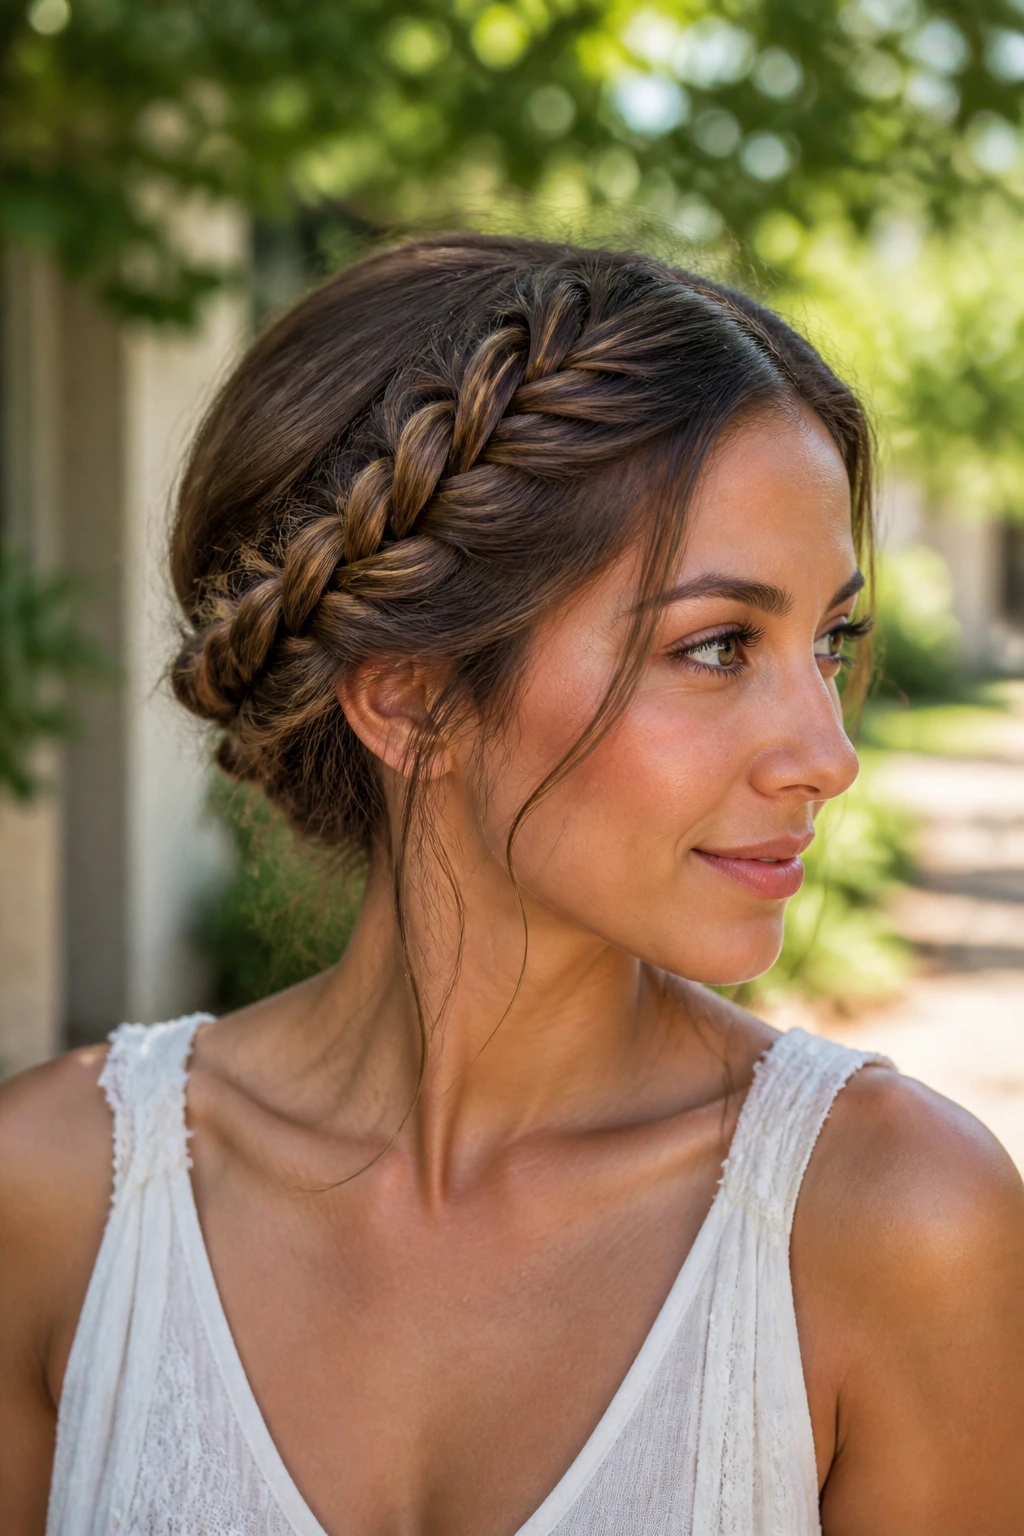
3. The Wrapped Crown Braid
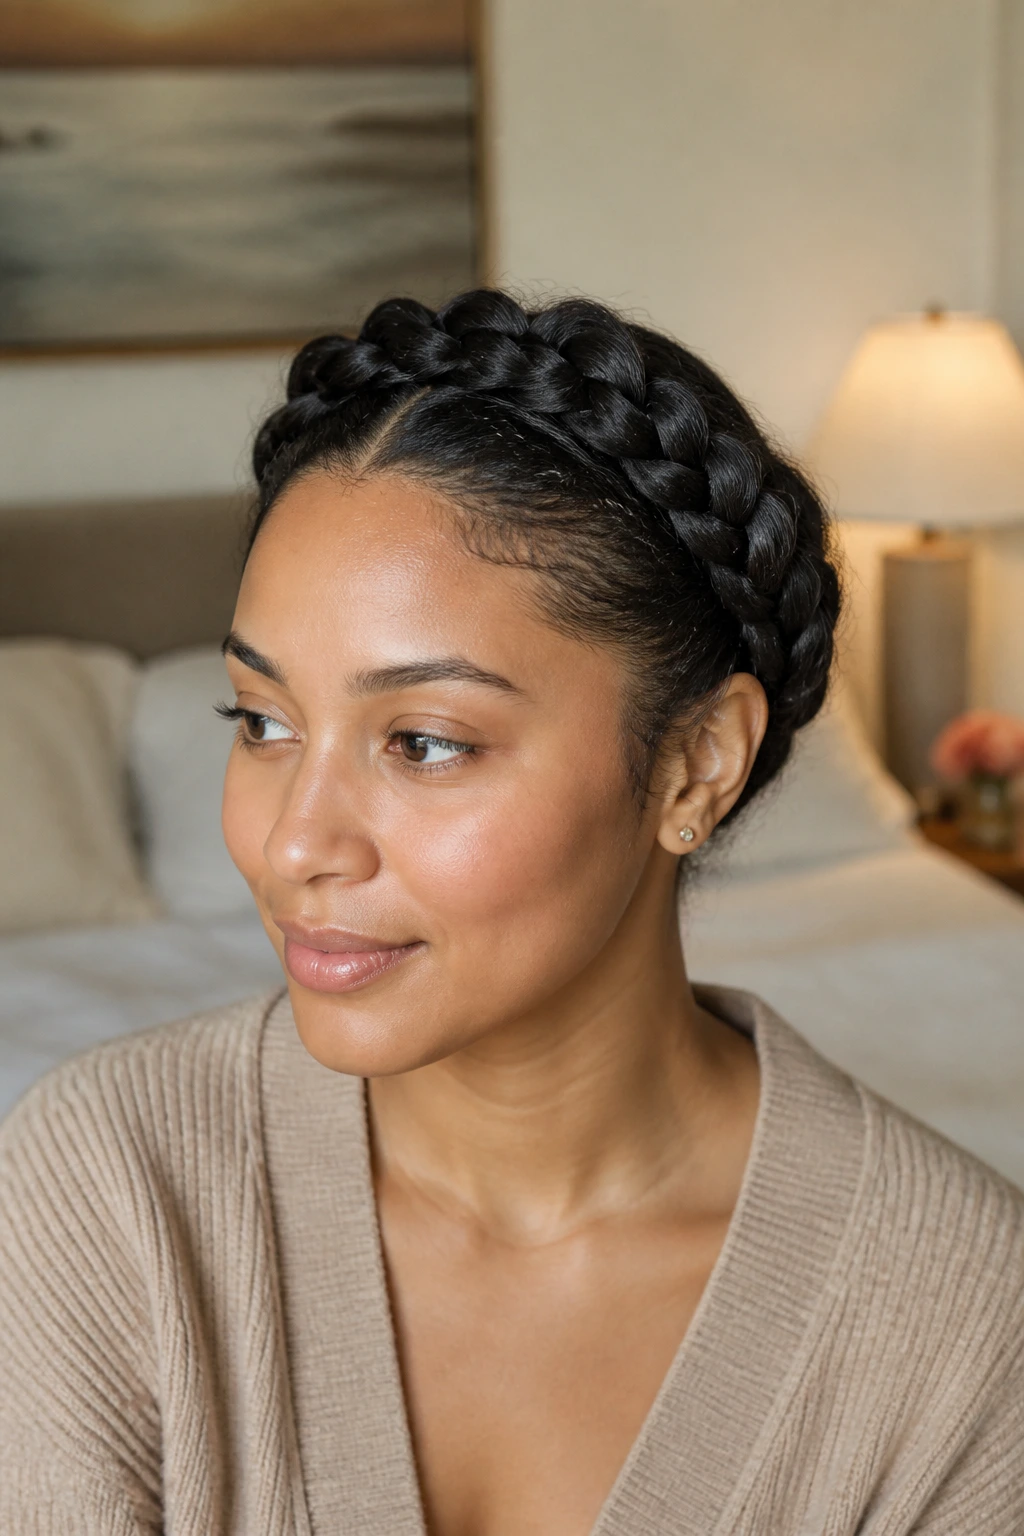
If you have a bit of length and want to keep your ends completely tucked away, the crown braid is the ultimate protective style. It keeps the fragile ends of your hair—the oldest and weakest part—hidden from the air and clothing friction.
Why This Style Protects Your Ends
Your ends are essentially buried within the braid structure. This prevents them from snapping off when they rub against your scarf or coat collar throughout the day. It is essentially a “set it and forget it” style for busy weeks.
Execution Technique
- Create two simple three-strand braids starting from behind your ears.
- Take the right braid, wrap it over the top of your head, and pin it near the left ear.
- Repeat with the left braid, tucking the end under the first braid.
- Use U-shaped pins instead of bobby pins; they hold hair more securely without causing as much mechanical breakage.
4. The Half-Up Dutch Braid
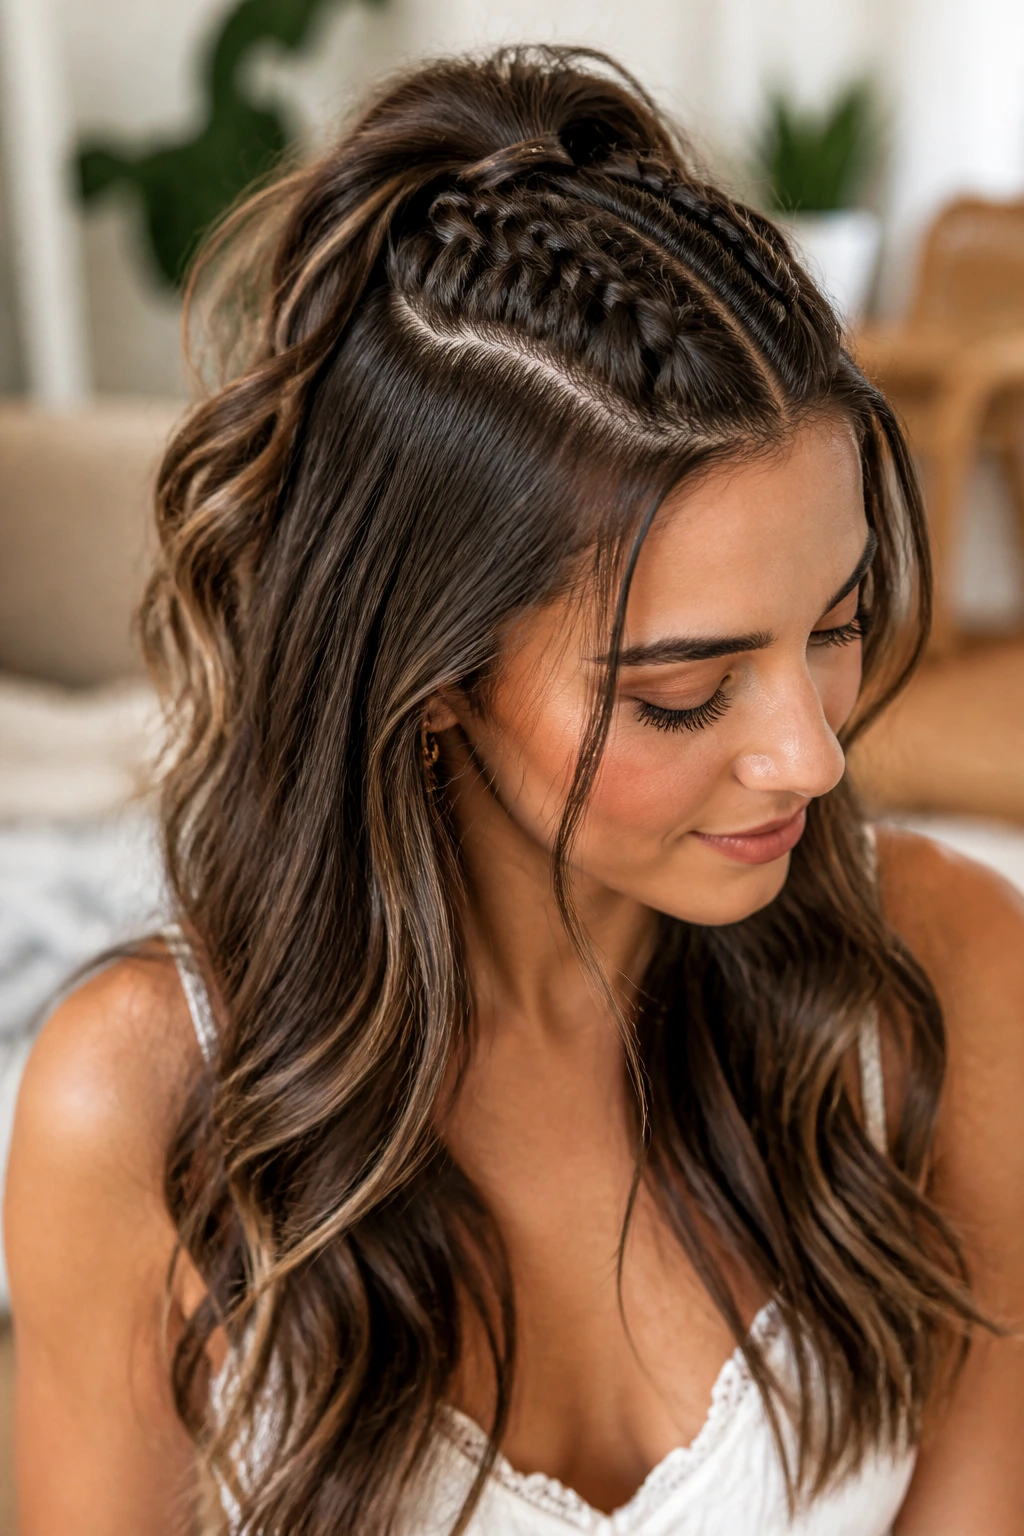
Dutch braids are “inside-out” French braids, which pop out from the surface of the hair. When you only do this on the top half of your head, you get the benefit of a protective style while keeping the rest of your hair flowing naturally.
How to Prevent Scalp Tension
Fine hair often reacts poorly to the heavy tension required for full-head braids. By splitting your hair into two sections, you reduce the strain on the follicles significantly.
Adding Aesthetic Value
- Leave a few face-framing pieces out to soften the look.
- Use a silk or satin hair tie for the half-up section to ensure the elastic doesn’t snag or pull at your delicate strands.
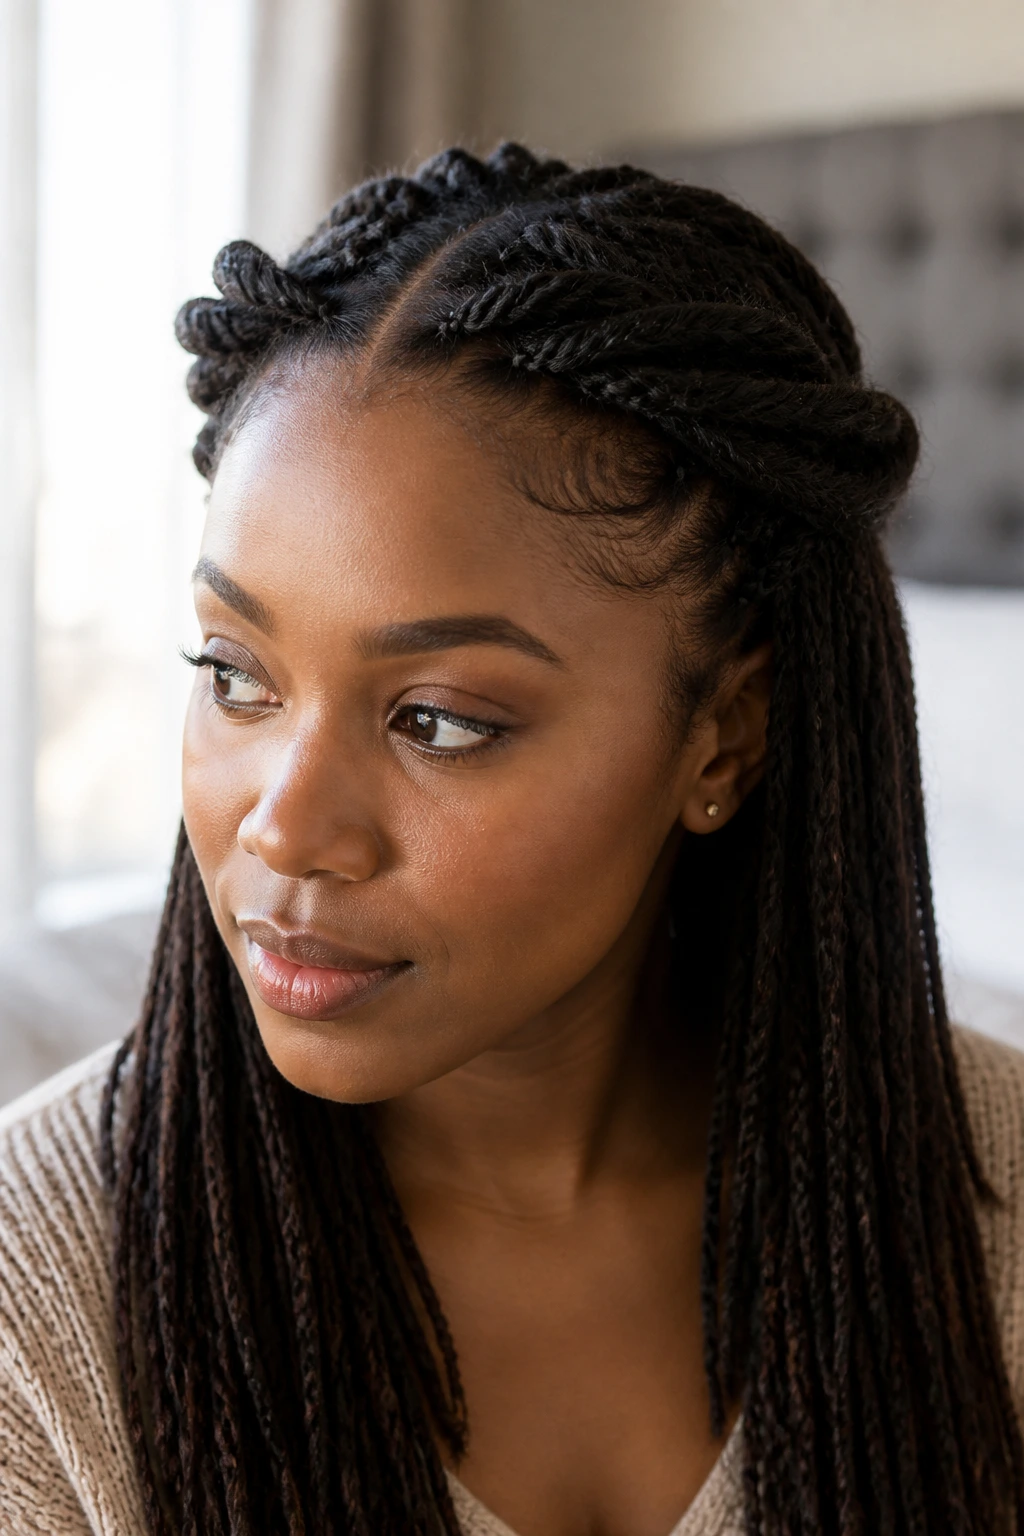
5. Twin Rope Twists
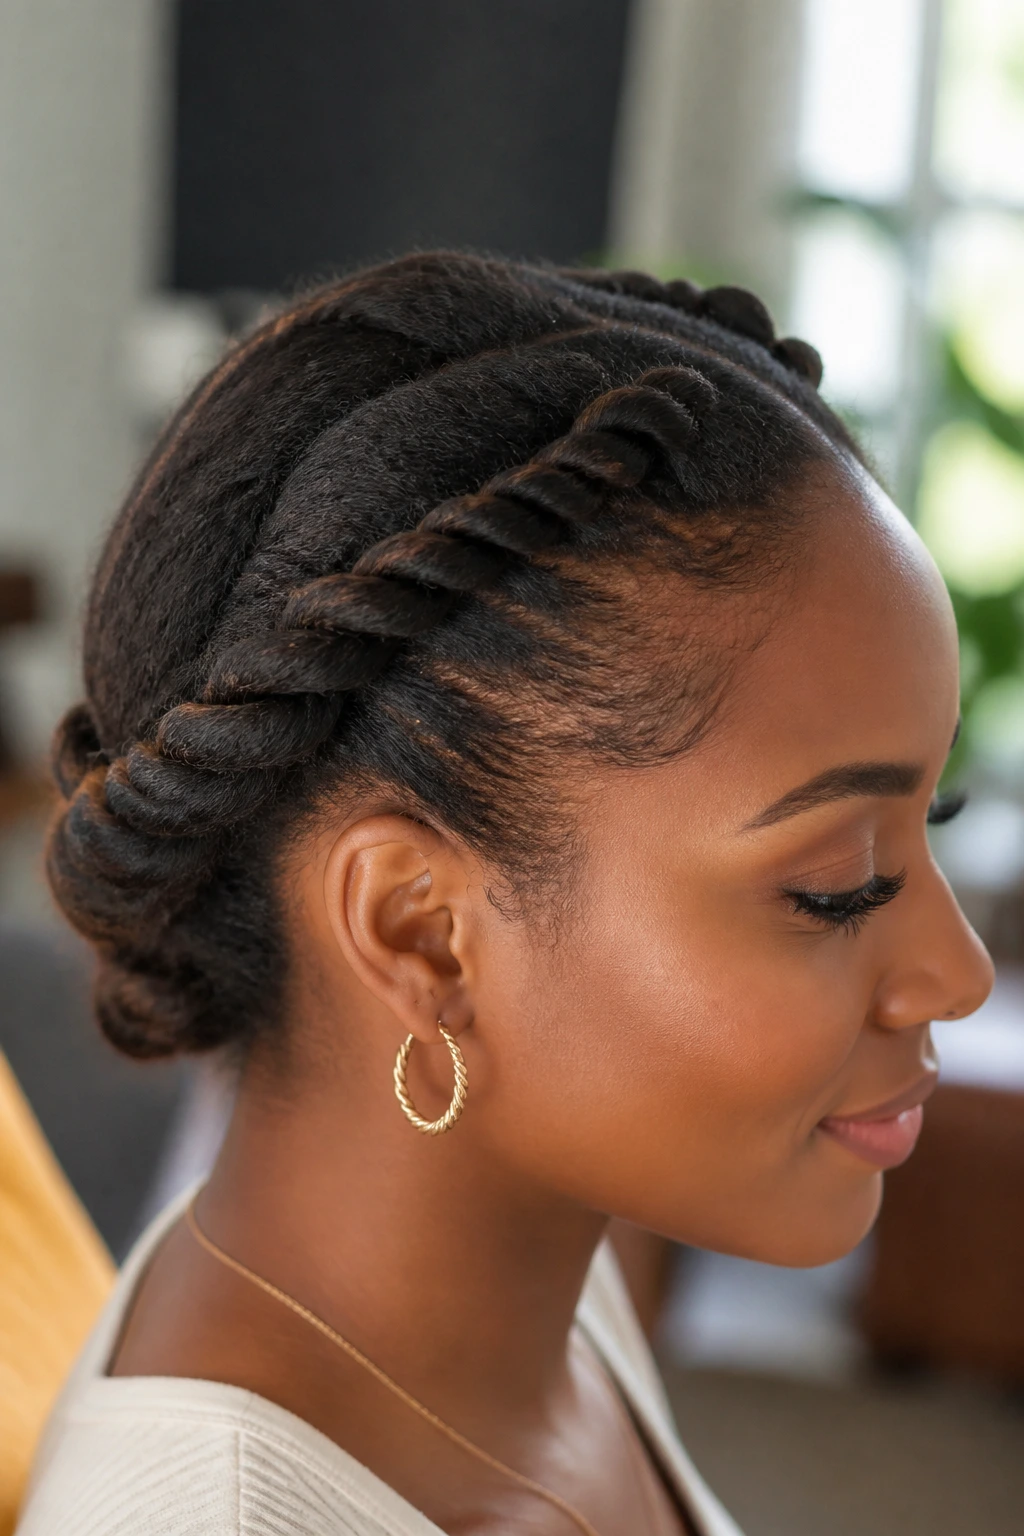
Rope twists are not technically braids in the three-strand sense, but they provide the same level of protection with half the effort. They look incredibly chic, almost like a twisted rope effect, and they are perfect for those who struggle with braiding mechanics.
The Mechanics of the Twist
Divide your hair into two sections. Twist each section individually in the same direction, then wrap those two sections around each other in the opposite direction. It sounds like a tongue twister, but it creates a secure, long-lasting hold.
Handling Fine Texture
Because you are twisting the hair, it automatically creates a thicker appearance than a flat braid would. If your hair is prone to frizz, use a tiny drop of lightweight hair oil on your palms before twisting to keep everything smooth.
6. The Tucked-In Bubble Braid
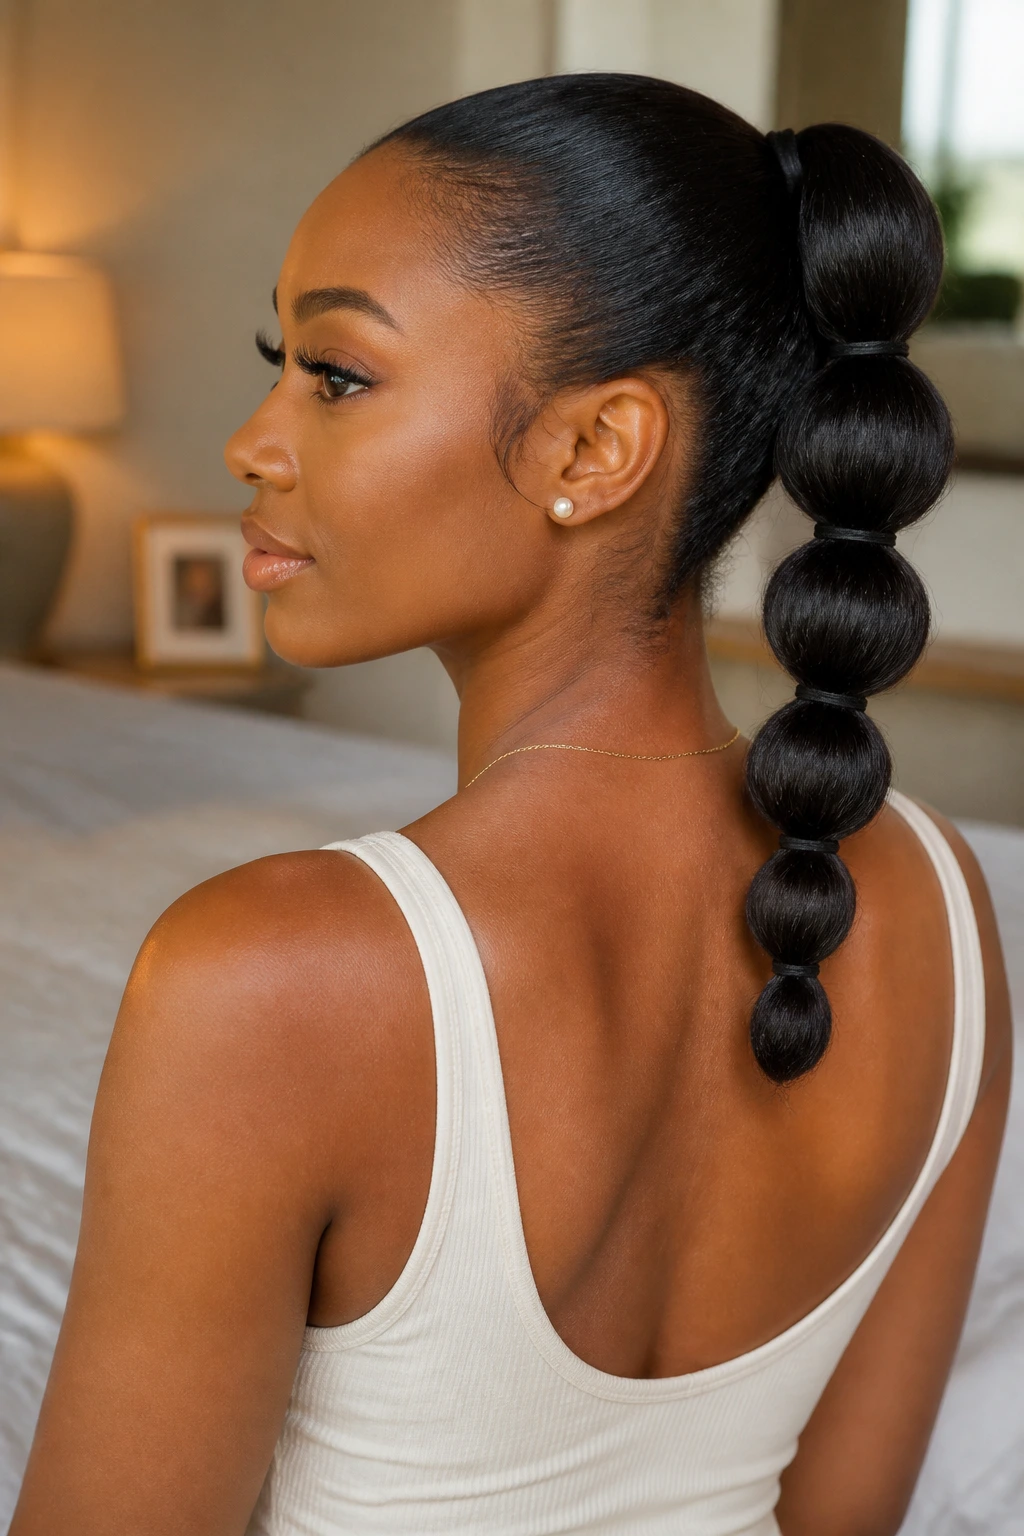
Bubble braids aren’t technically braids, but they serve the same protective function without the repetitive interlacing that can damage fine hair. You simply secure your hair with elastics at intervals and “puff” the hair between them.
Why This is Less Damaging
There is zero mechanical manipulation of the hair strands. No weaving, no friction. You are simply creating segments. This is ideal for those days when your hair is feeling particularly fragile or prone to knotting.
Best Practices
- Use only silk-covered elastics; avoid rubber or cheap plastic bands at all costs.
- Always add a little hair serum to your ends before starting to prevent them from drying out while they are contained in the segments.
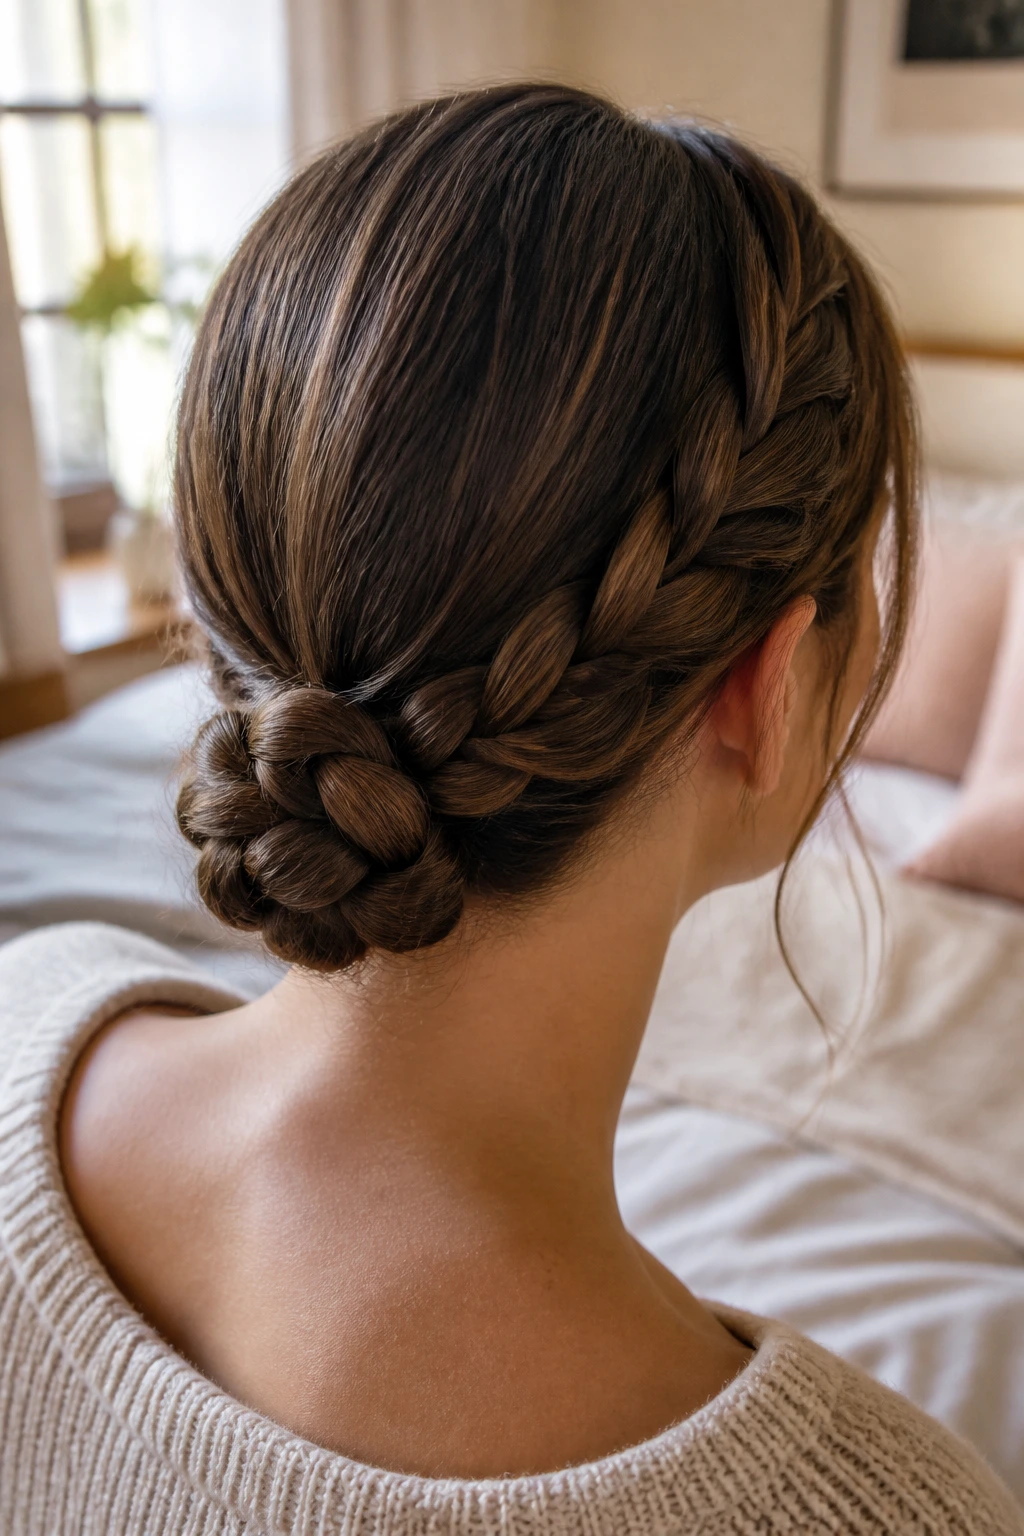
7. The Low Messy Bun with Braided Base
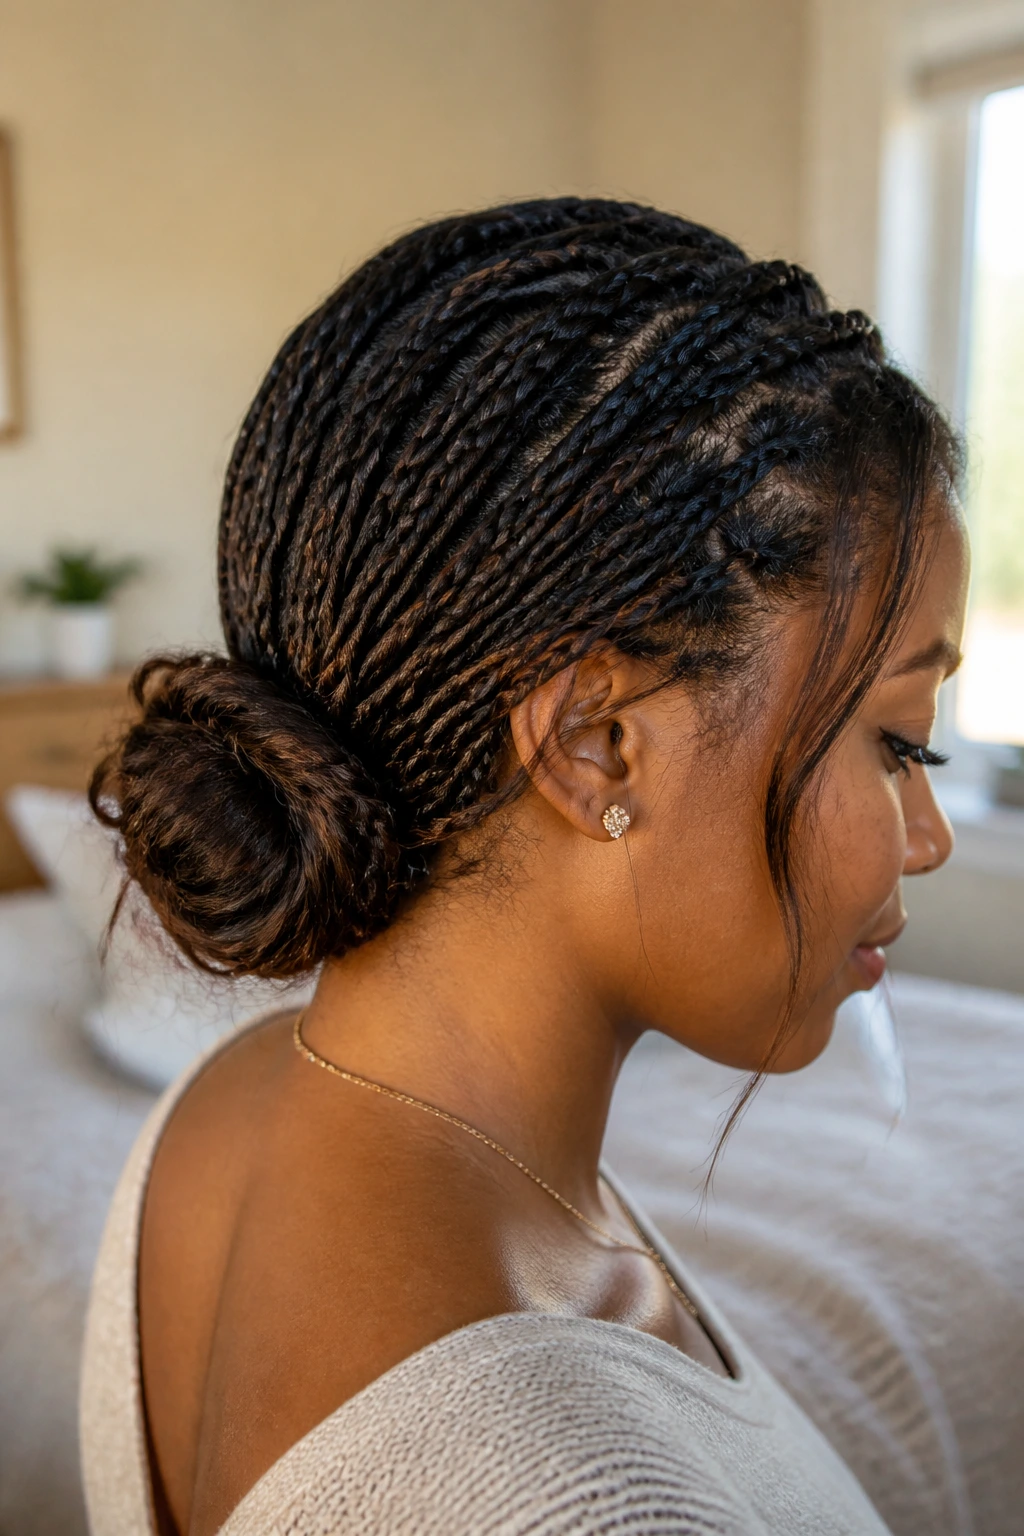
Sometimes the best way to protect your hair is to combine styles. Start by braiding a small section of hair at the nape of your neck, then incorporate that into a low, loose bun.
The Benefit of the Braided Anchor
A simple elastic bun can slide around and pull at your roots. A braided anchor provides a solid base that holds the weight of the bun without needing to pull the hair back so tightly that your hairline is affected.
Pro-Tip for Longevity
- Make sure your bun is positioned low to avoid any pulling on the crown of your head.
- Use a scrunchie over the base to act as a cushion between your hair and the point of tension.
8. The Accented Side Braid
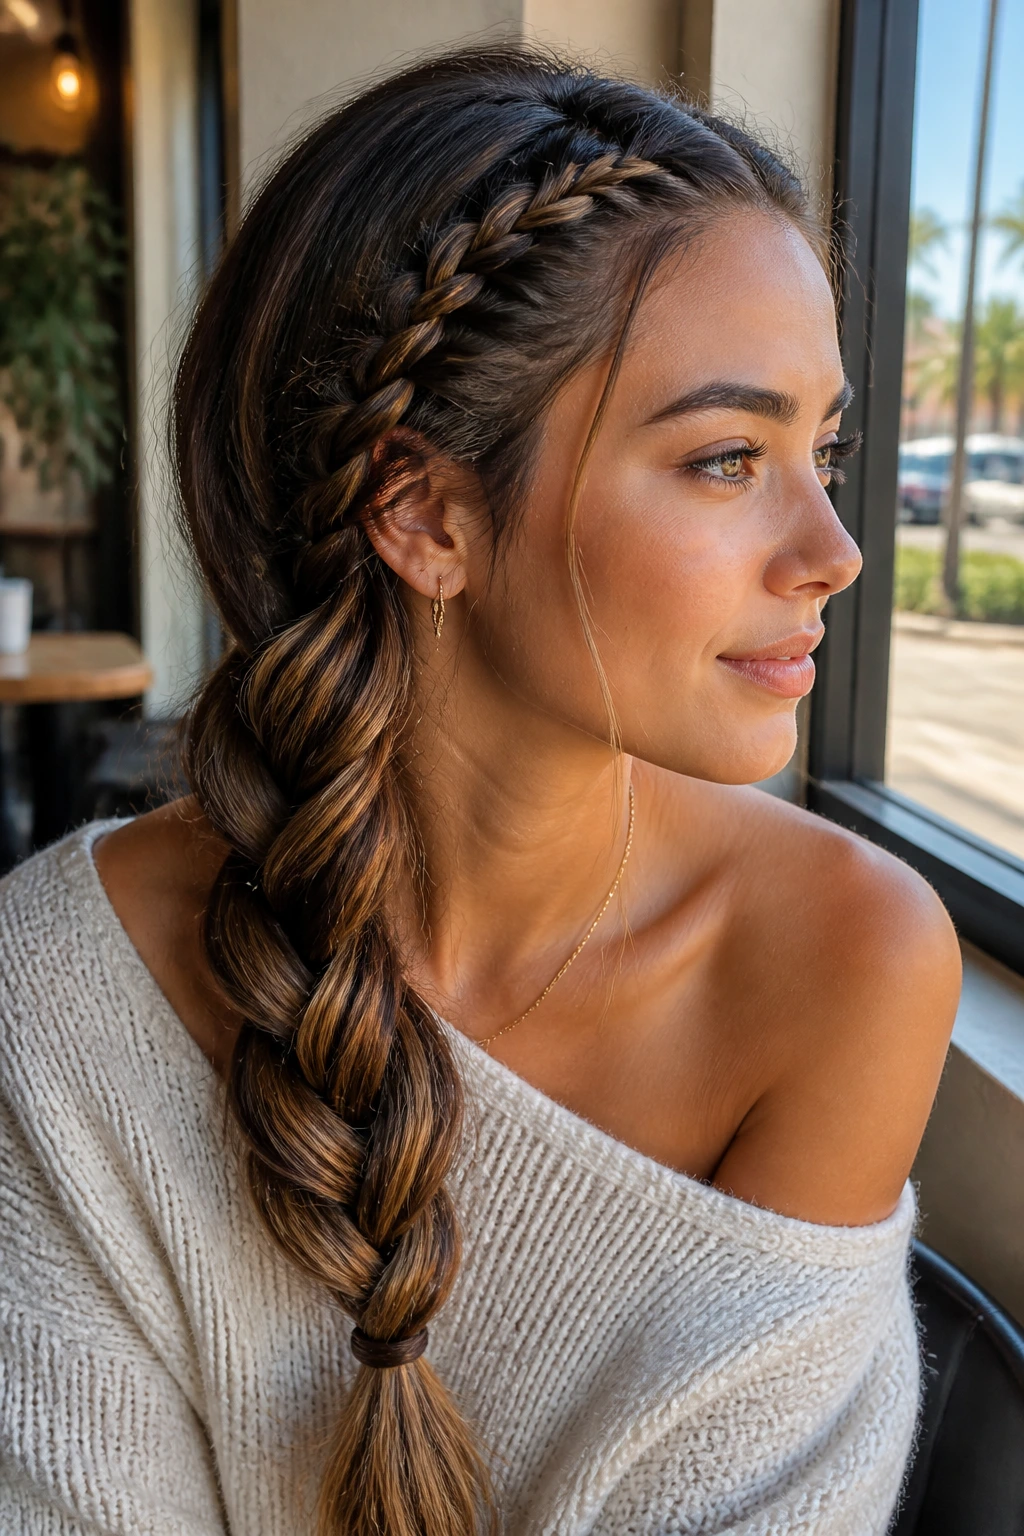
This style is for when you want the visual interest of a braid without the full-head commitment. You take a section from your hairline, braid it back, and then incorporate it into a larger, loose braid at the side.
Why It’s Great for Beginners
You don’t need expert-level skills to pull this off. Since you are only braiding a small amount of hair, it’s much easier to control the tension and keep it comfortable throughout the day.
Styling Versatility
- This works exceptionally well for second-day hair.
- The braid acts as a natural accessory, eliminating the need for clips or pins that might damage your hair.
9. The Waterfall Braid

Waterfall braids are ethereal and beautiful, but they can be tricky with fine hair because they require dropping strands. To make this work for you, you need to ensure the base braid is tight enough to hold, but not so tight that it strains the hair.
The Secret to “Fine” Success
Focus on using a “lace braid” technique, where you only add hair from the top section into the braid, rather than from both sides. This significantly lightens the load on your scalp.
Visual Impact
- Since fine hair can sometimes look flat, the “cascading” effect of the waterfall braid adds a false sense of depth and movement.
- Use a light-hold texturizing spray before you start to make the hair easier to manage and less prone to sliding out.
10. The Milkmaid Braid (Loose Version)
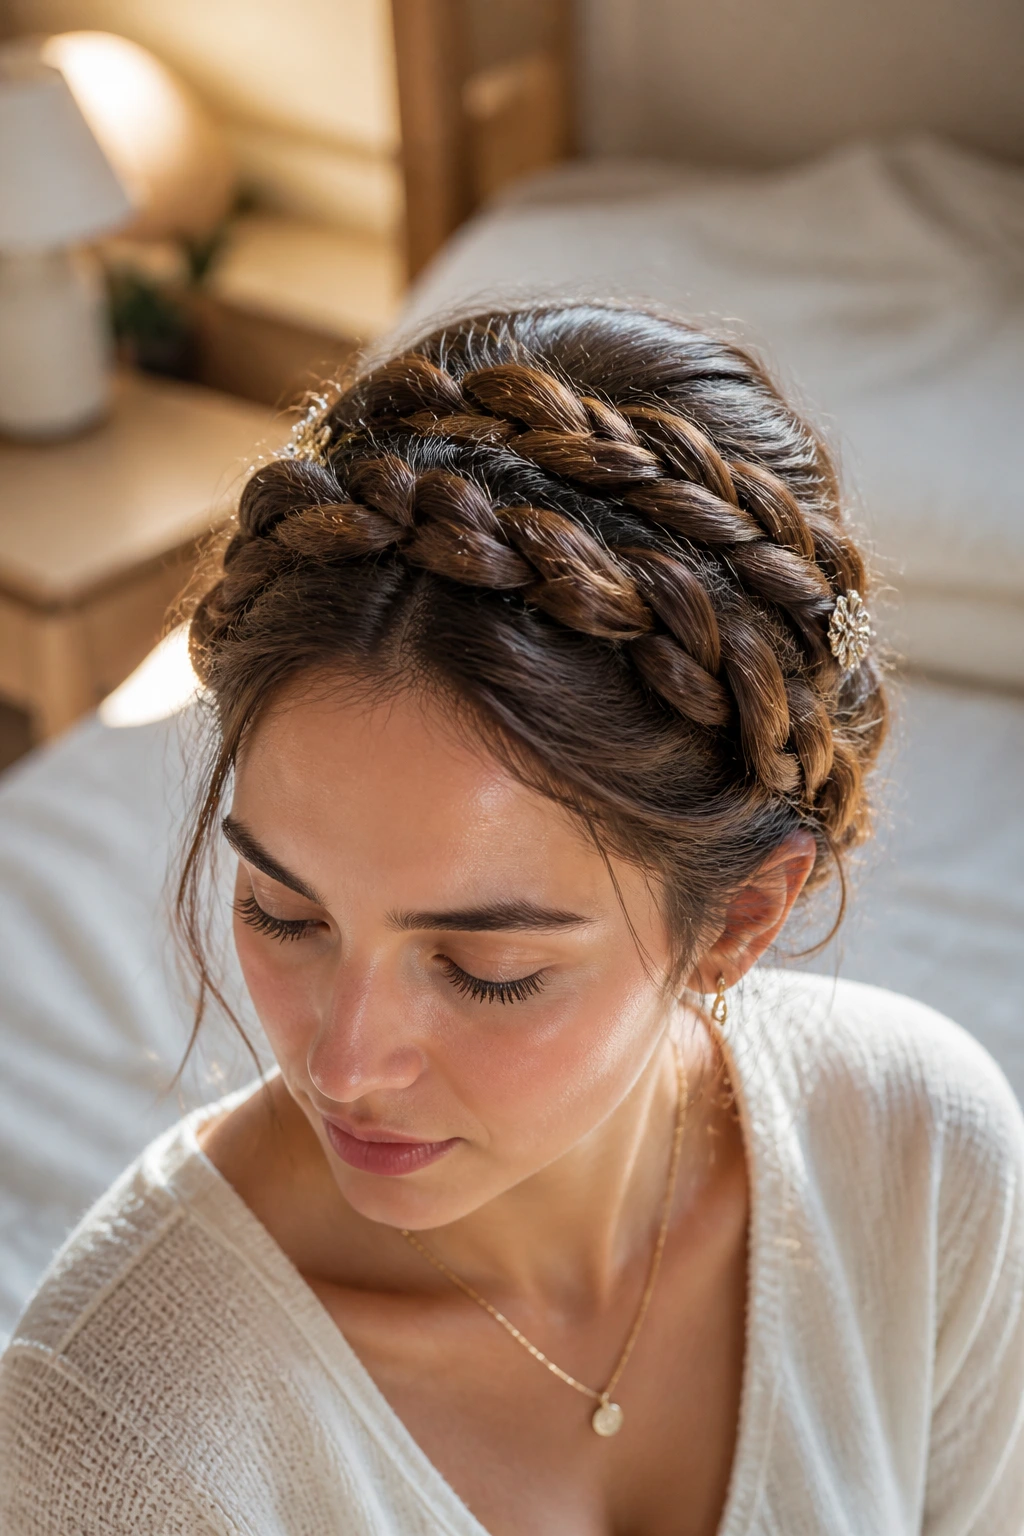
The milkmaid braid is a classic, but the “fine hair” version involves a much looser, more relaxed approach. You create two low braids and pin them over the top, but you stop before you get too close to the front hairline.
Balancing Volume and Security
- Start your braids further back near the nape of your neck.
- Use small, clear elastic bands to secure the ends tightly so they don’t unravel while you are pinning them.
Pinning Secrets
- Instead of using a dozen bobby pins that can tear through your hair, use one or two large, decorative hair combs to secure the braids. They hold more hair with less mechanical effort.
11. The Dutch Pigtails
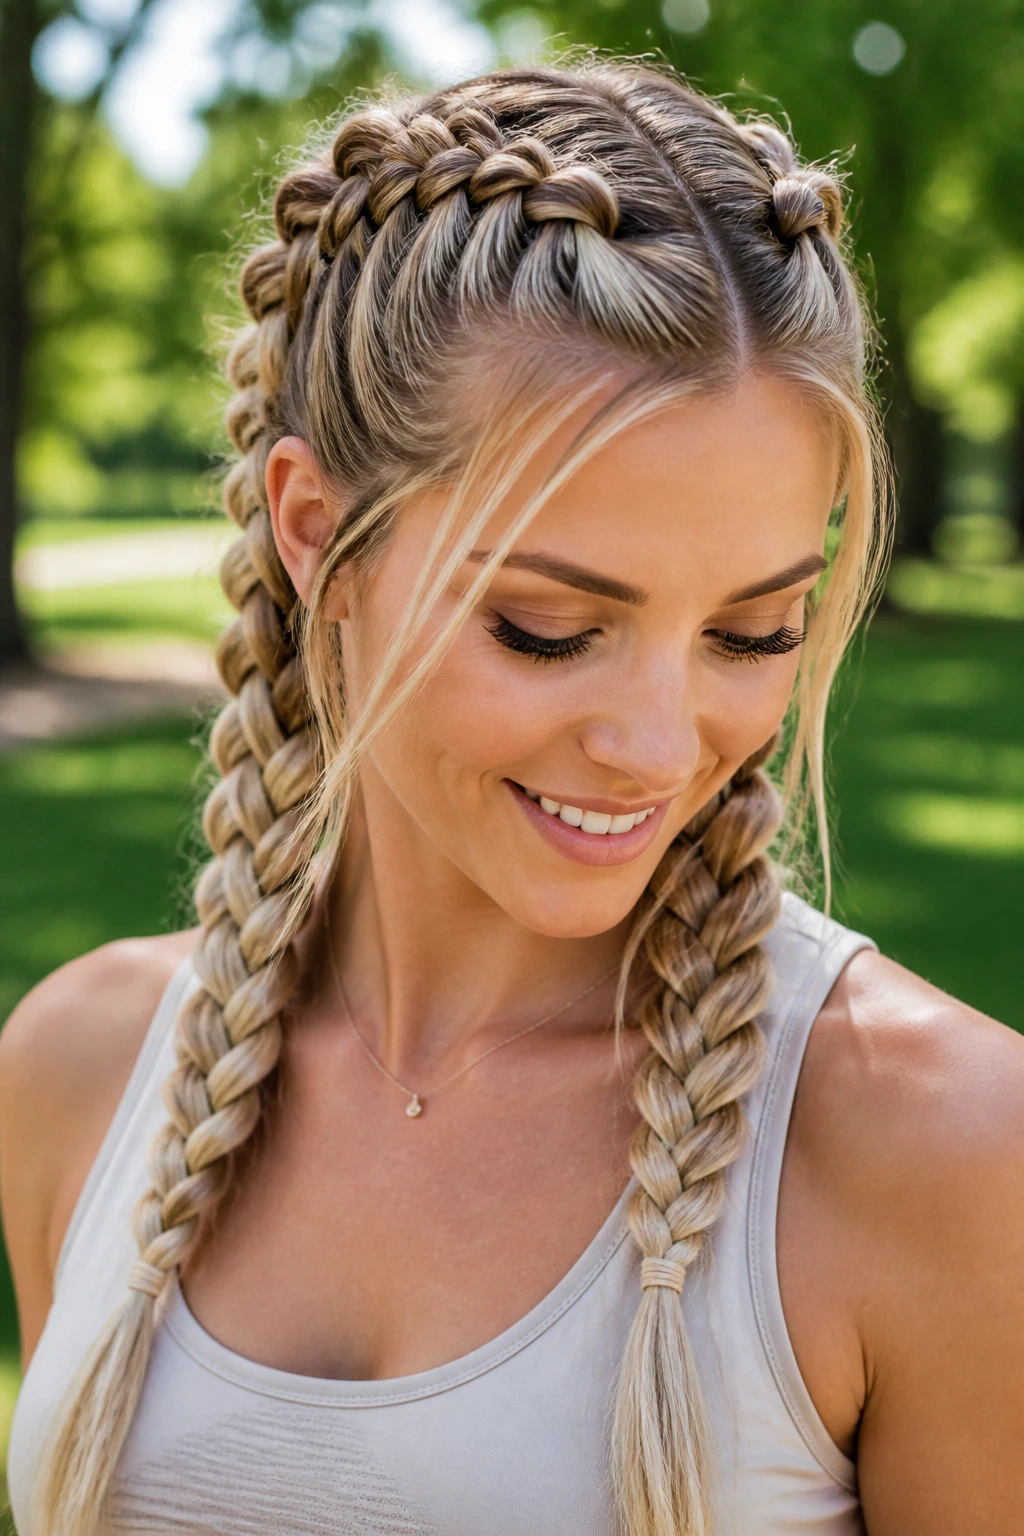
Dutch pigtails are the quintessential protective style. They keep your hair divided into two equal parts, which makes the whole head easier to manage and keeps the hair away from your neck, preventing tangles from sweaters or scarves.
Managing Fine Texture
If your hair is very fine, these can look a bit sparse. The trick is to “pancake” the braids aggressively. Because you have two distinct braids, you can really puff them out to create the illusion of thick, voluminous hair.
Scalp Sensitivity
- Avoid starting your braids right at the forehead.
- Leave an inch or two of hair out at the front and braid it in halfway through the process to reduce the pull on your sensitive hairline.
12. The Braided Ponytail Wrap
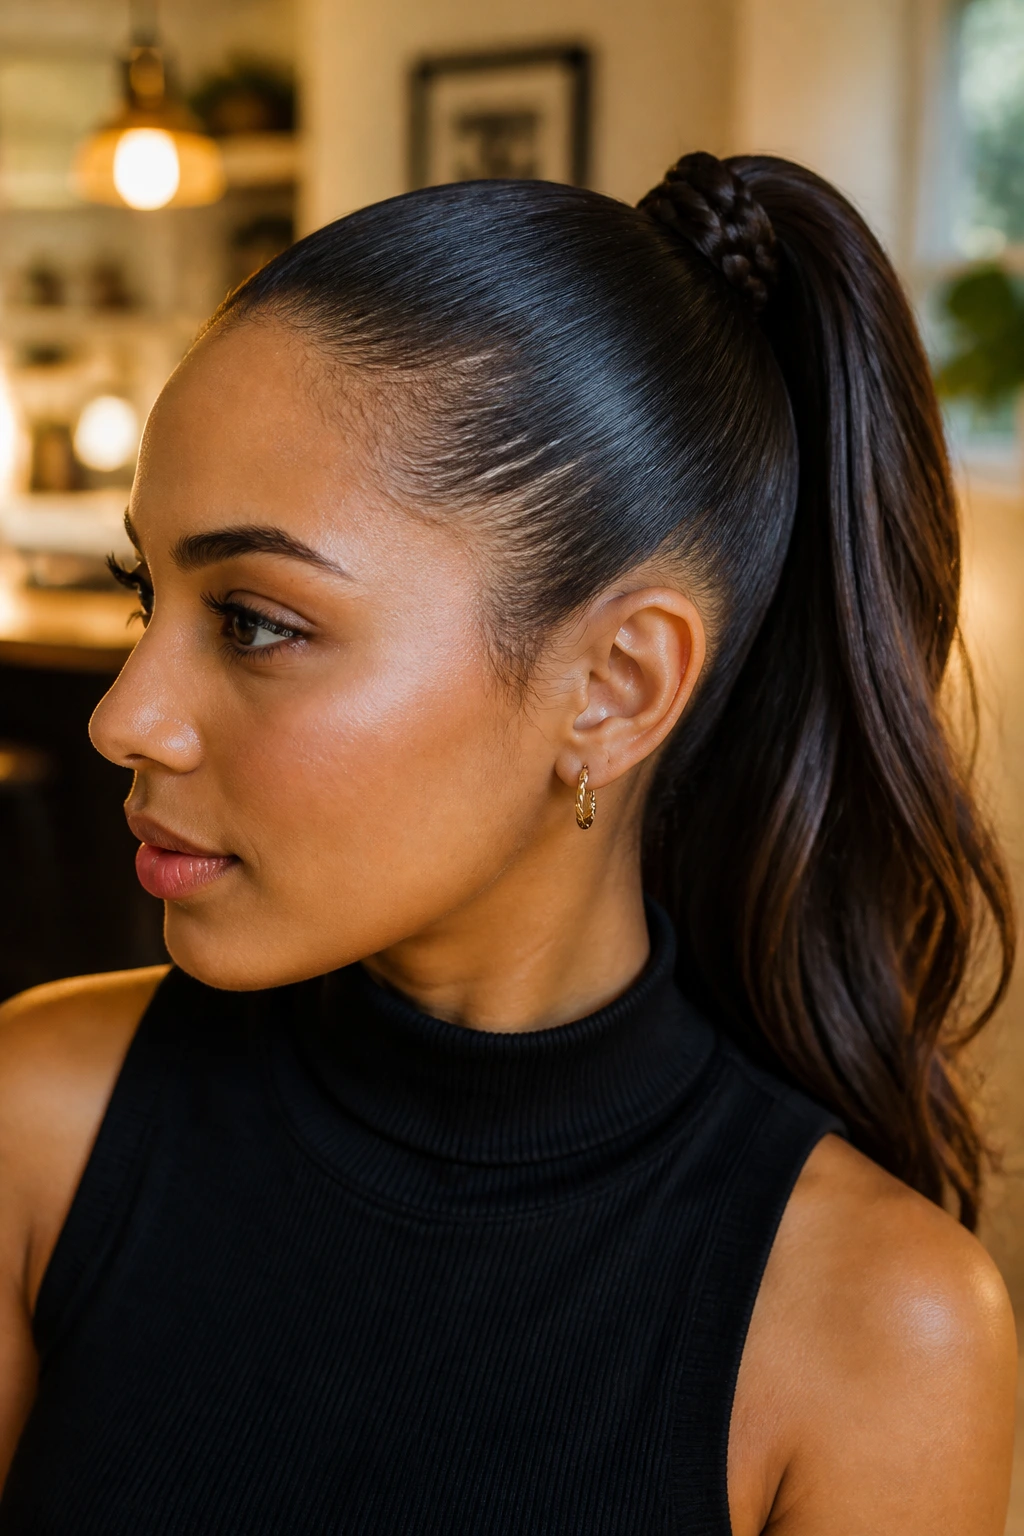
Sometimes you just want a ponytail, but you want to protect your hair from the friction of an elastic. You can do this by taking a small section of hair from the underside of the ponytail, braiding it, and wrapping it around the base to cover the hair tie.
The Hidden Benefit
The braid acts as a buffer between the elastic and your hair. It also adds a touch of professional styling that makes a simple ponytail look like a deliberate, sophisticated choice.
Maintenance
- If your hair is very slippery, use a tiny amount of pomade on the braid before wrapping it to ensure it stays in place without needing a thousand bobby pins.
13. The “Crown” Twist
If the full crown braid is too much work, the “crown twist” is your best friend. You take two front sections, twist them loosely, and pin them toward the back.
Why Twisting Wins
Twisting is generally kinder to the cuticle than braiding, especially if your hair is prone to breakage. It requires no interlacing, just a gentle rotational movement that doesn’t stress the individual strands.
The Aesthetic
- This look is incredibly romantic and works well for special occasions.
- It keeps the front of your hair entirely out of your face, which is perfect for anyone trying to grow out bangs.
14. The Loose Side-Part Braid
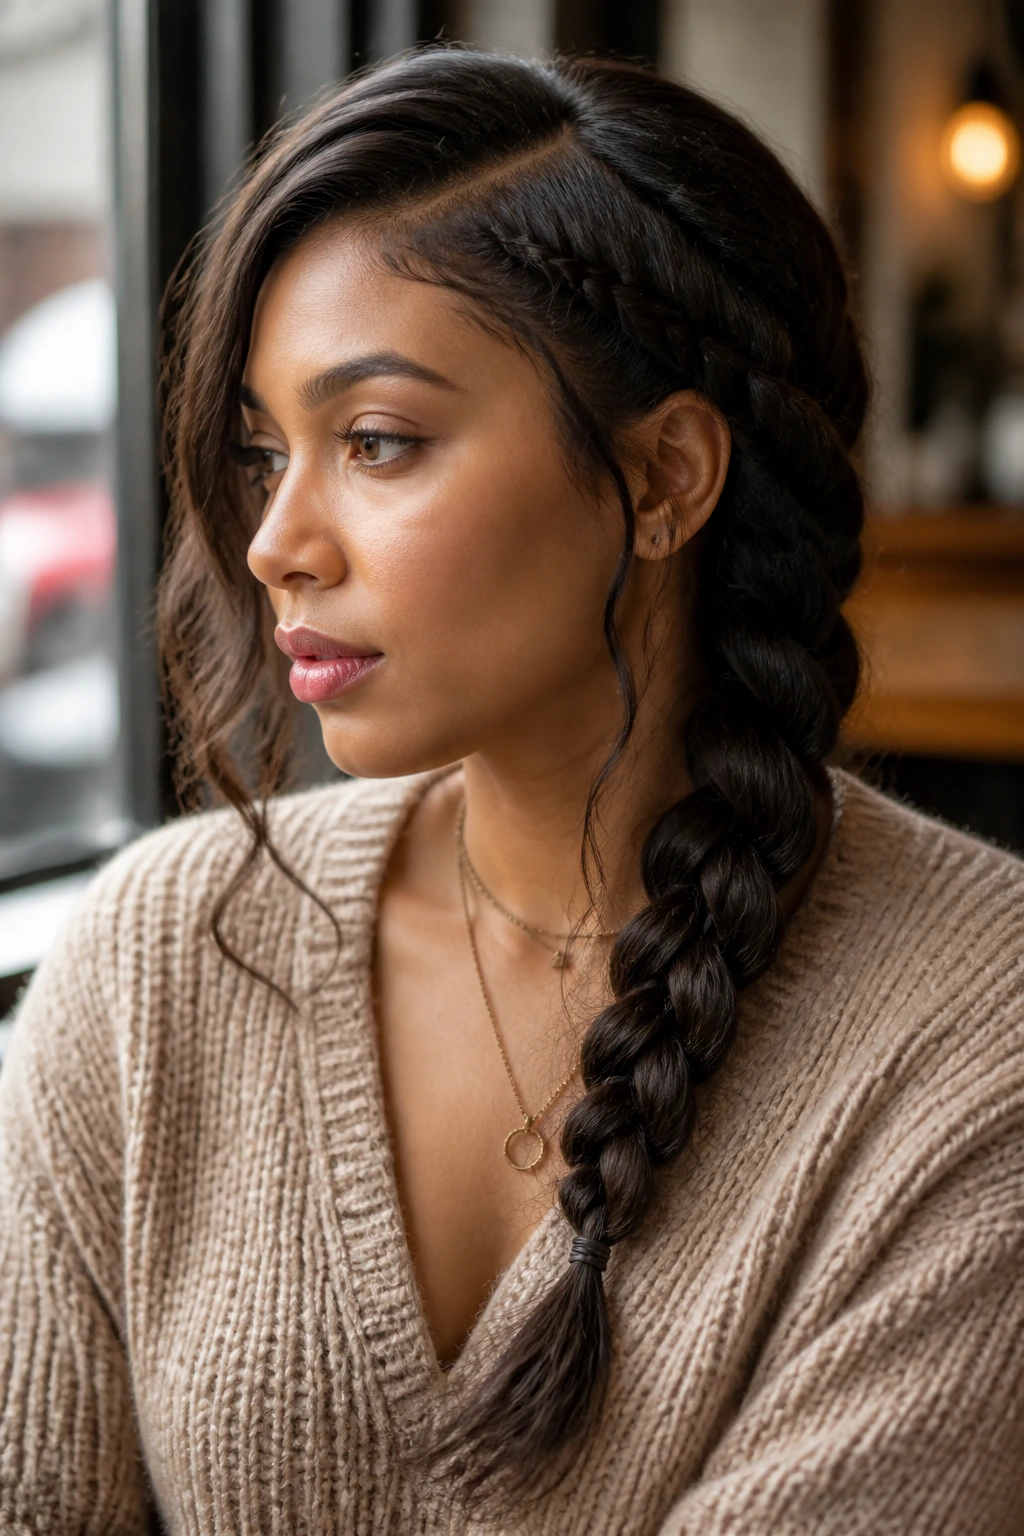
A deep side part followed by a single, loose braid is a simple way to protect your hair without needing to do anything complicated at the back of your head.
The Illusion of Density
A side part automatically makes fine hair look like it has more volume at the roots. When you combine that with a loose, side-swept braid, the focus is entirely on the style rather than the hair density.
Styling Tip
- Braid the hair loosely starting at the shoulder rather than the root to avoid any tugging on the scalp.
- Let the braid fall over your shoulder; it prevents the hair from rubbing against your back throughout the day.
15. The Triple-Twist Headband

This is a variation of the classic headband style. You create three small twists along the hairline and pin them behind your ear. It mimics the look of a braided crown but is much gentler on the roots.
Why Three Twists?
Dividing the hair into three smaller sections is easier to manage than one big section. It also allows you to pin each one individually, so if one starts to loosen, your whole style doesn’t unravel.
Comfort Check
- Because you are using small twists, you can position them so they aren’t pulling directly on your temple, which is a common site for hair thinning.
16. The Low Braided Knot
If you love the look of a bun but hate the tension it puts on your hair, try a braided knot. Braid your hair into a simple three-strand braid, then loosely coil it into a knot at the nape of your neck.
Protection from Breakage
Your ends are entirely contained within the knot. The braid structure holds the hair together, meaning you don’t need a super-tight elastic to keep the bun in place.
Best Hair Types
- This works well for those with shoulder-length or longer hair.
- If your ends are dry, apply a leave-in conditioner to them before braiding to ensure they stay hydrated while tucked away.
17. The Scarf-Integrated Braid
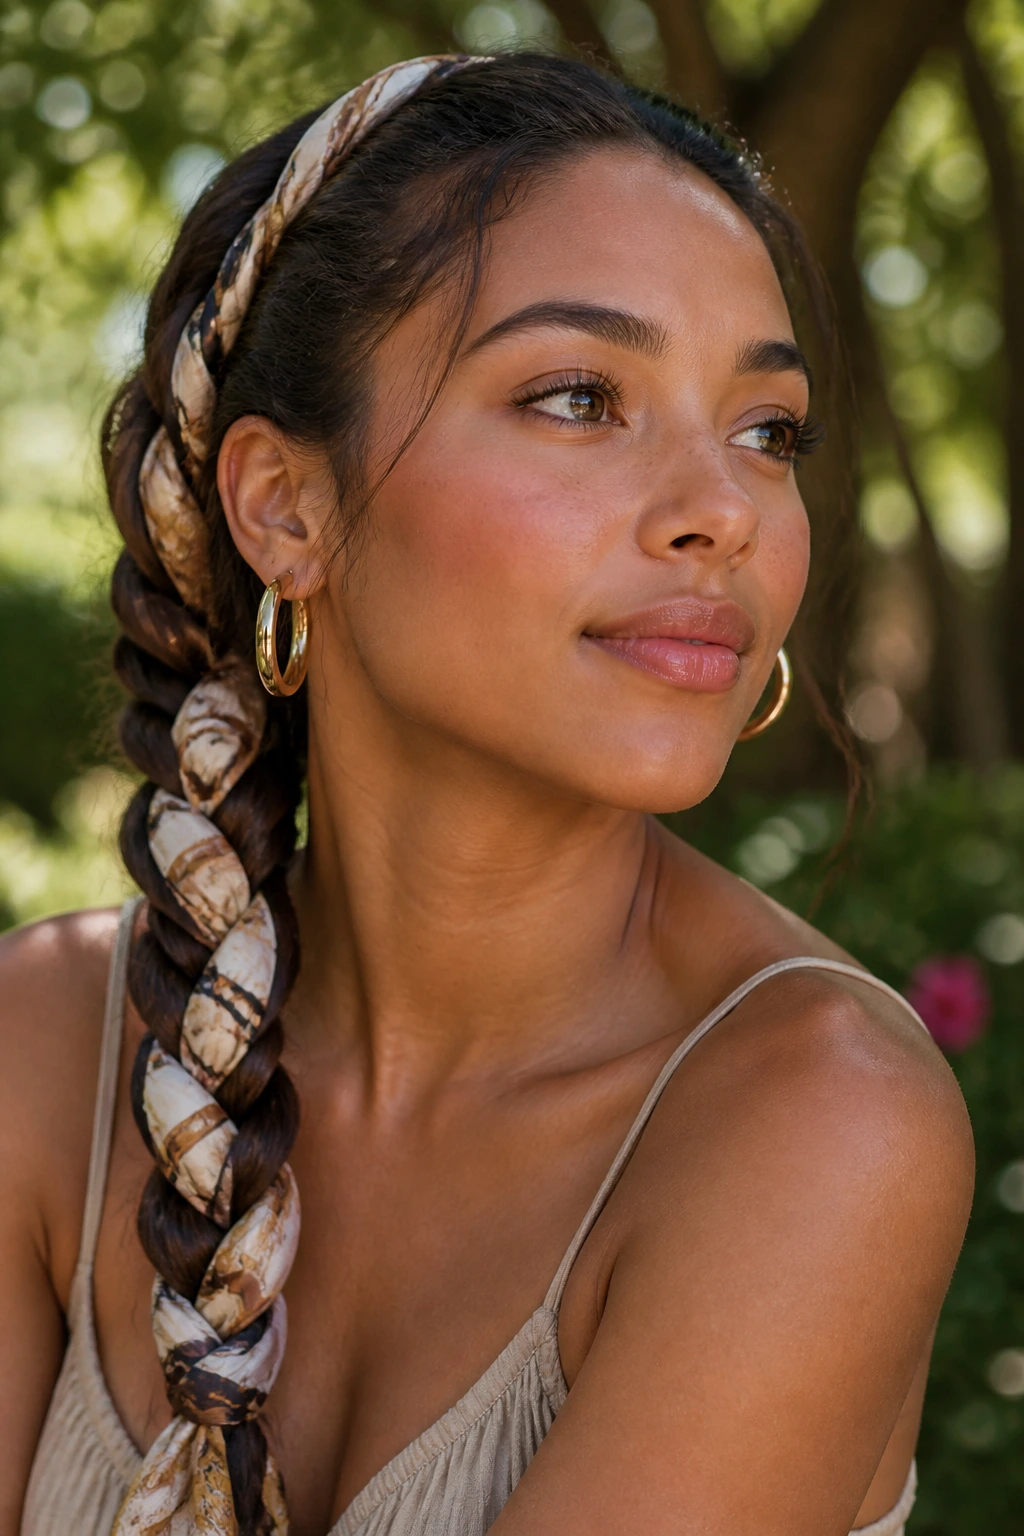
Take a thin, silk scarf and braid it into your hair. The scarf acts as an additional strand, adding thickness to your braid while also protecting your natural hair from the friction of the braid itself.
The “Volume” Hack
This is arguably the best way to make fine hair look thick. The scarf fills in the gaps that your natural hair cannot, creating a braid that looks substantial and healthy.
Silk vs. Cotton
- Always choose silk or satin. Cotton absorbs moisture and can dry out your hair over the course of a long day.
18. The Loose “Milkmaid” Side Braid
Finally, the modified side braid. You take two side sections, braid them loosely, and pin them together at the back. It’s an effortless, soft look that is incredibly gentle on your hair.
Why This Style Succeeds
By working with two smaller braids, you ensure that no single section of hair is bearing too much weight. It is symmetrical, balanced, and puts virtually zero strain on your roots.
Final Thoughts on Fine Hair Maintenance
- Use a silk pillowcase to protect your hair at night, even if you are wearing a protective style.
- When you take your braids out, don’t just rip them apart. Use your fingers to gently undo the braid, starting from the bottom and working your way up to minimize snapping.
Final Thoughts
Protecting fine hair isn’t about hiding it away; it’s about giving it the structure it needs to thrive without the stress of daily manipulation. You’ll find that as you integrate these styles into your routine, the frequency of split ends and breakage decreases significantly. Because you are reducing the mechanical friction that your fine strands endure, your hair has the space to grow longer and stronger over time. The key is to listen to your scalp—if a style feels tight, it is too tight. Your hair should feel secure, not strained. By choosing styles that distribute tension and prioritize the health of your ends, you are doing more than just styling your hair—you are investing in its long-term integrity. Take your time with these techniques, be gentle during the removal process, and enjoy the peace of mind that comes with knowing your hair is well-protected.