Medium hair sits in that sweet, often-frustrating middle ground where it is too long to be a true bob but not quite long enough for the massive, cascading Rapunzel braids that dominate social media feeds. It is the goldilocks length—versatile enough to be styled up, down, or back, yet prone to losing volume or unraveling if you try to force it into styles meant for waist-length hair. If you have spent hours watching tutorials only to find that your ends are poking out of a Dutch braid or your ponytail is too thin to support a complex plait, you know exactly the struggle I am talking about.
The secret to mastering braids at this length isn’t about having more hair; it is about choosing styles that leverage your length as an advantage. Shorter, medium-length hair holds texture better, stays secure with fewer pins, and takes half the time to style. Whether you are dealing with layers that want to escape or blunt ends that give your braids a clean, modern finish, these styles are designed to make your hair look intentional and polished.
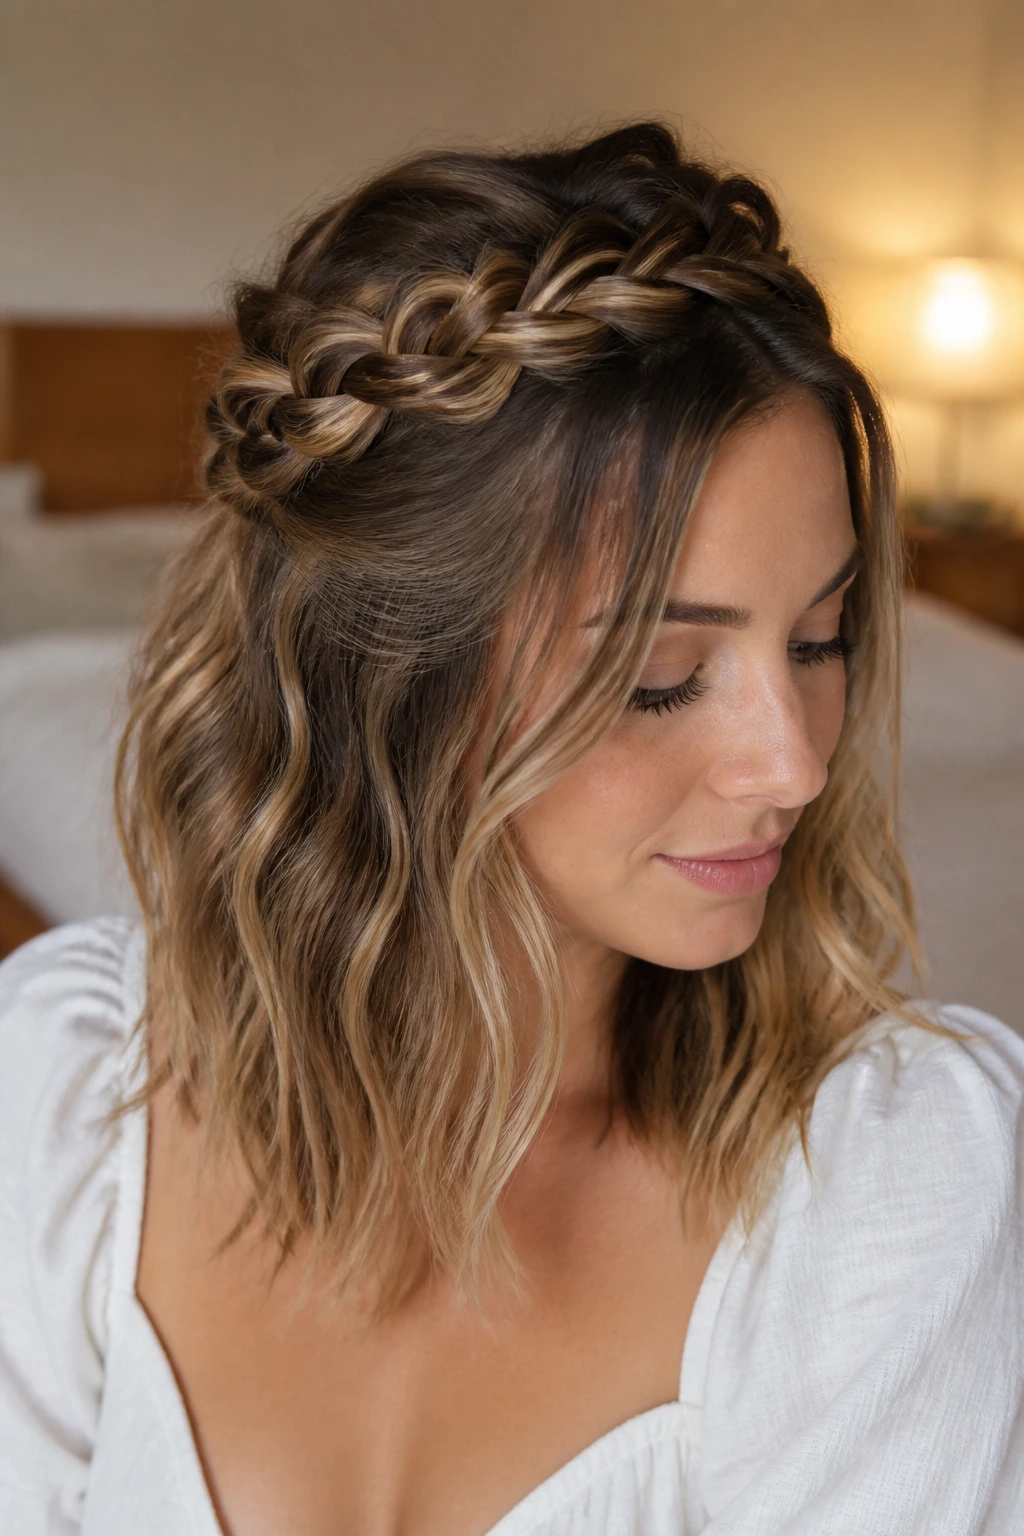
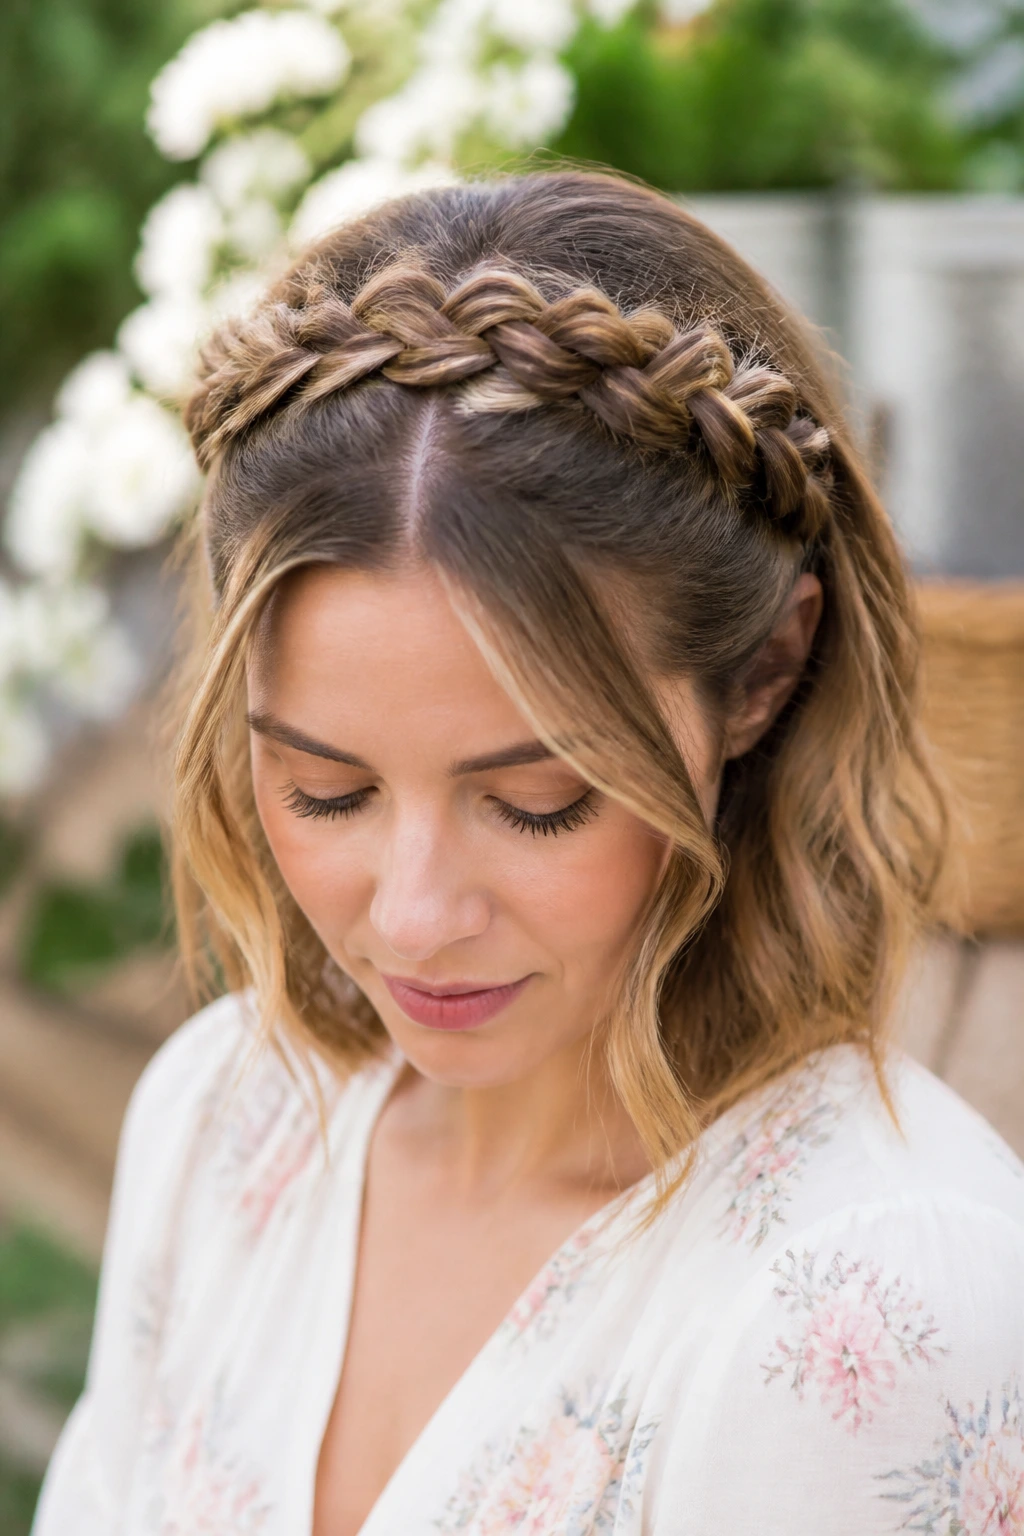
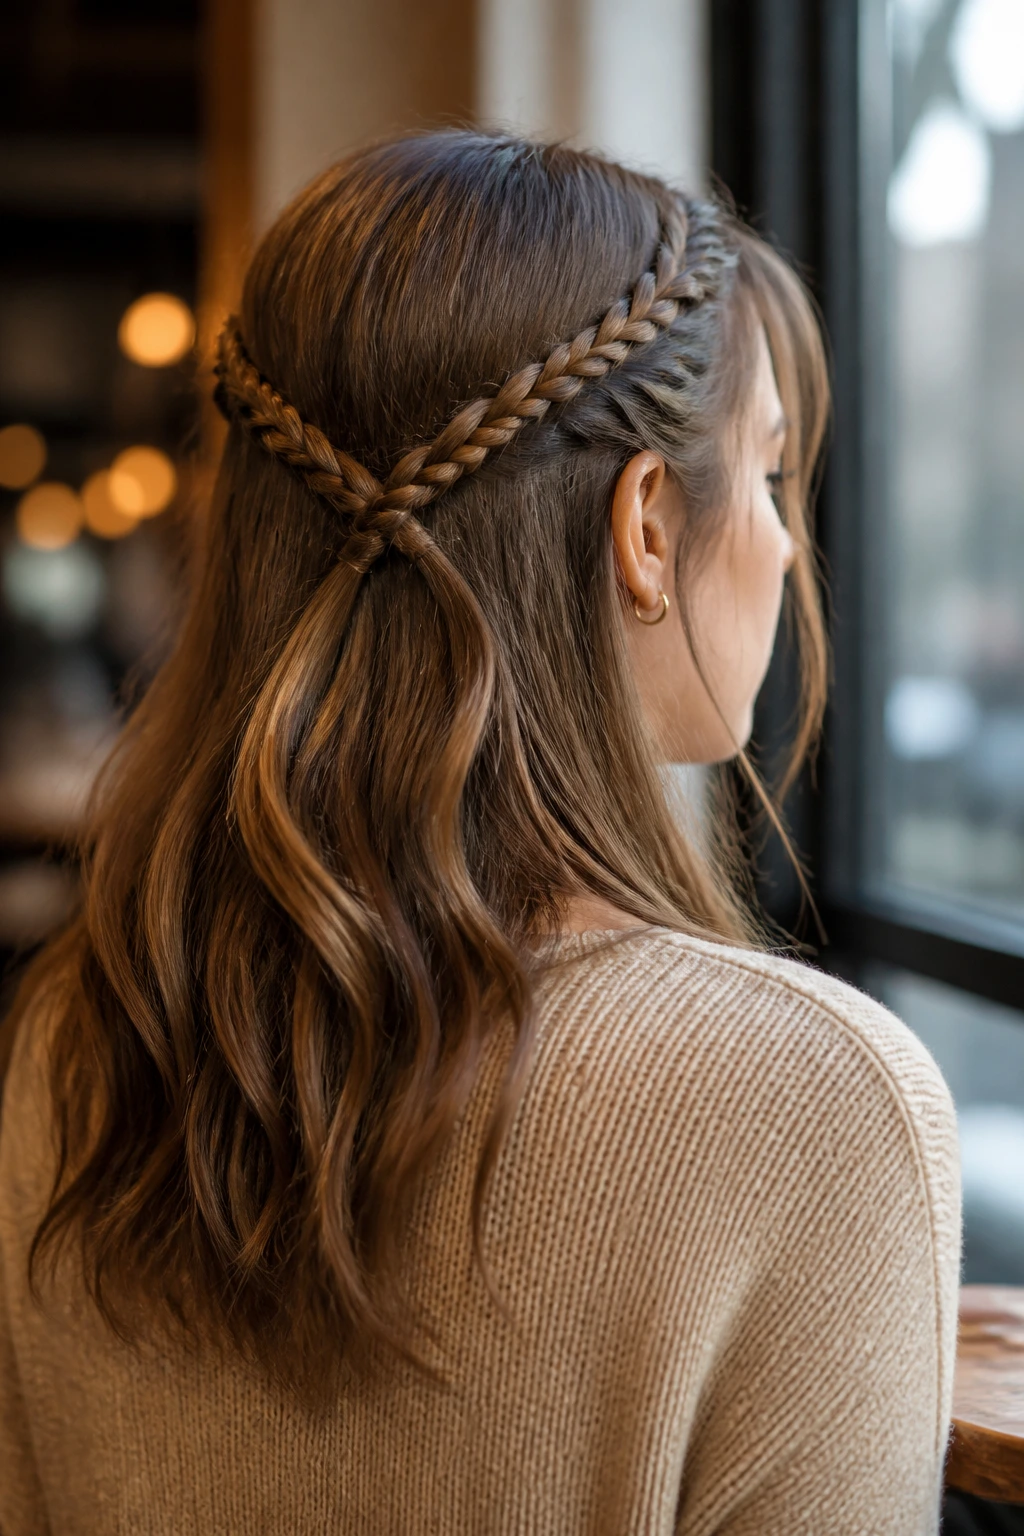
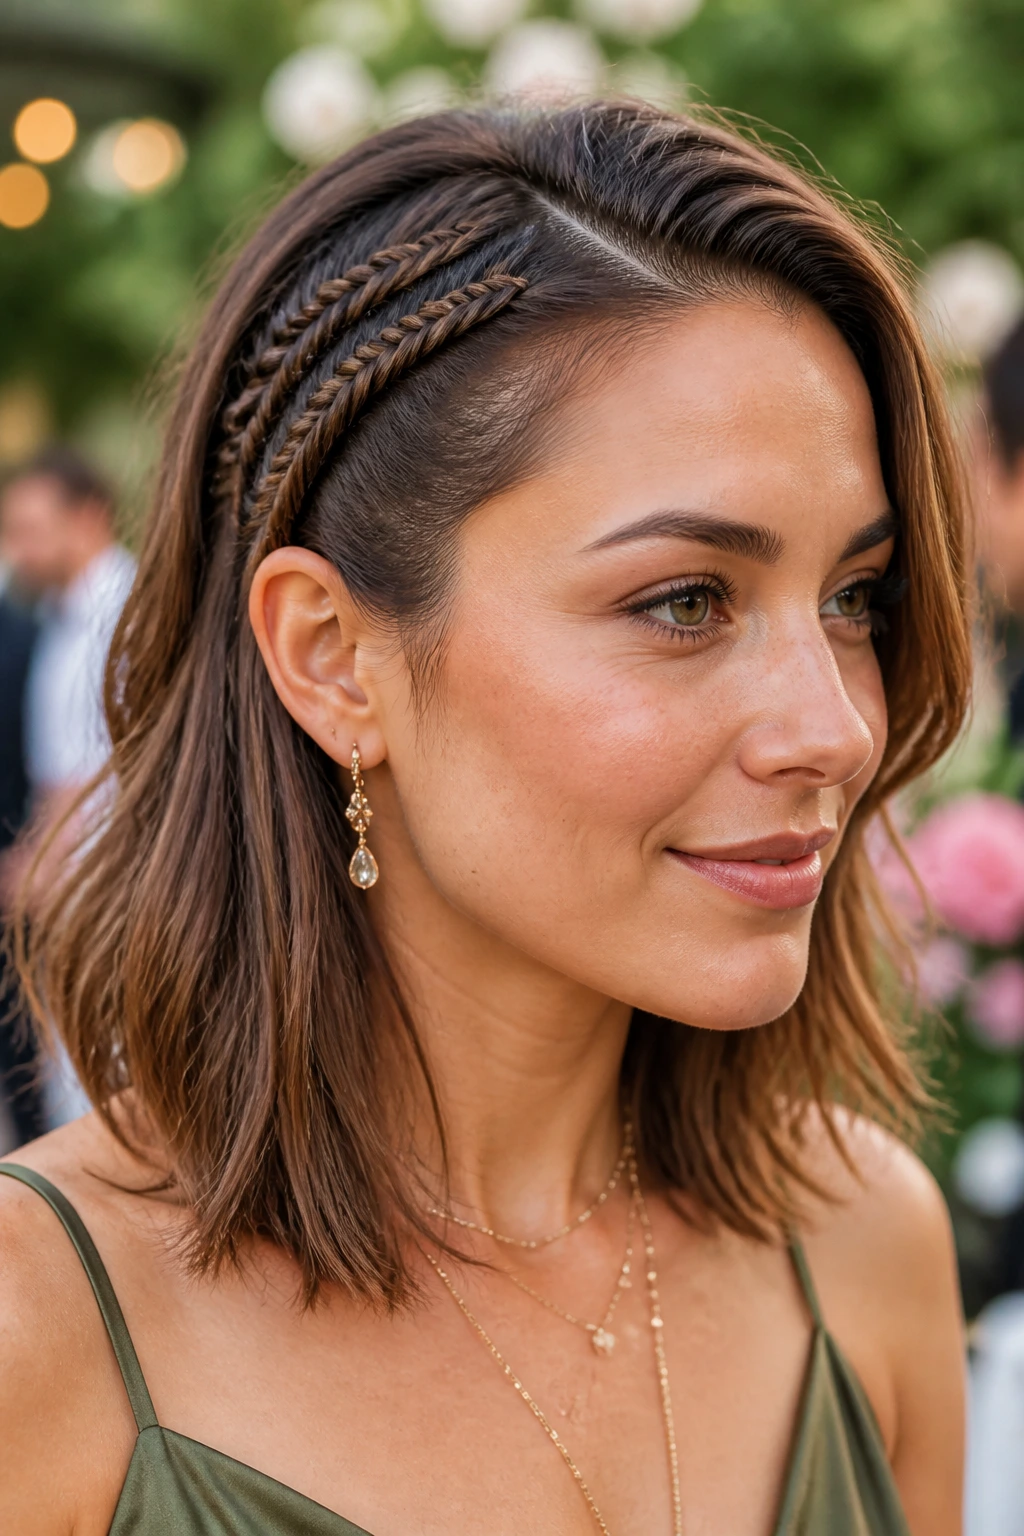
1. The Half-Up Bohemian Crown
This style is the ultimate savior for second-day hair that has lost its bounce but still has some grit. By braiding only the top section, you keep the length around your shoulders while getting the hair out of your eyes in a way that feels soft and romantic. Use a three-strand braid, but pull the loops outward—a technique known as “pancaking”—to create the illusion of density.
Why It Works for Medium Lengths
Medium hair lacks the weight to pull down a full-head crown, meaning your braid will stay exactly where you place it. You do not need to worry about the braid sagging or losing its shape by midday.
Styling Strategy
- Start by gathering hair from your temples to the crown.
- Braid loosely and secure with a small, clear elastic.
- Gently tug on the edges of each loop, starting from the bottom and working up, to make the braid look twice as thick.
- Pin the end of the braid underneath the top layer of hair to hide the elastic for a seamless look.
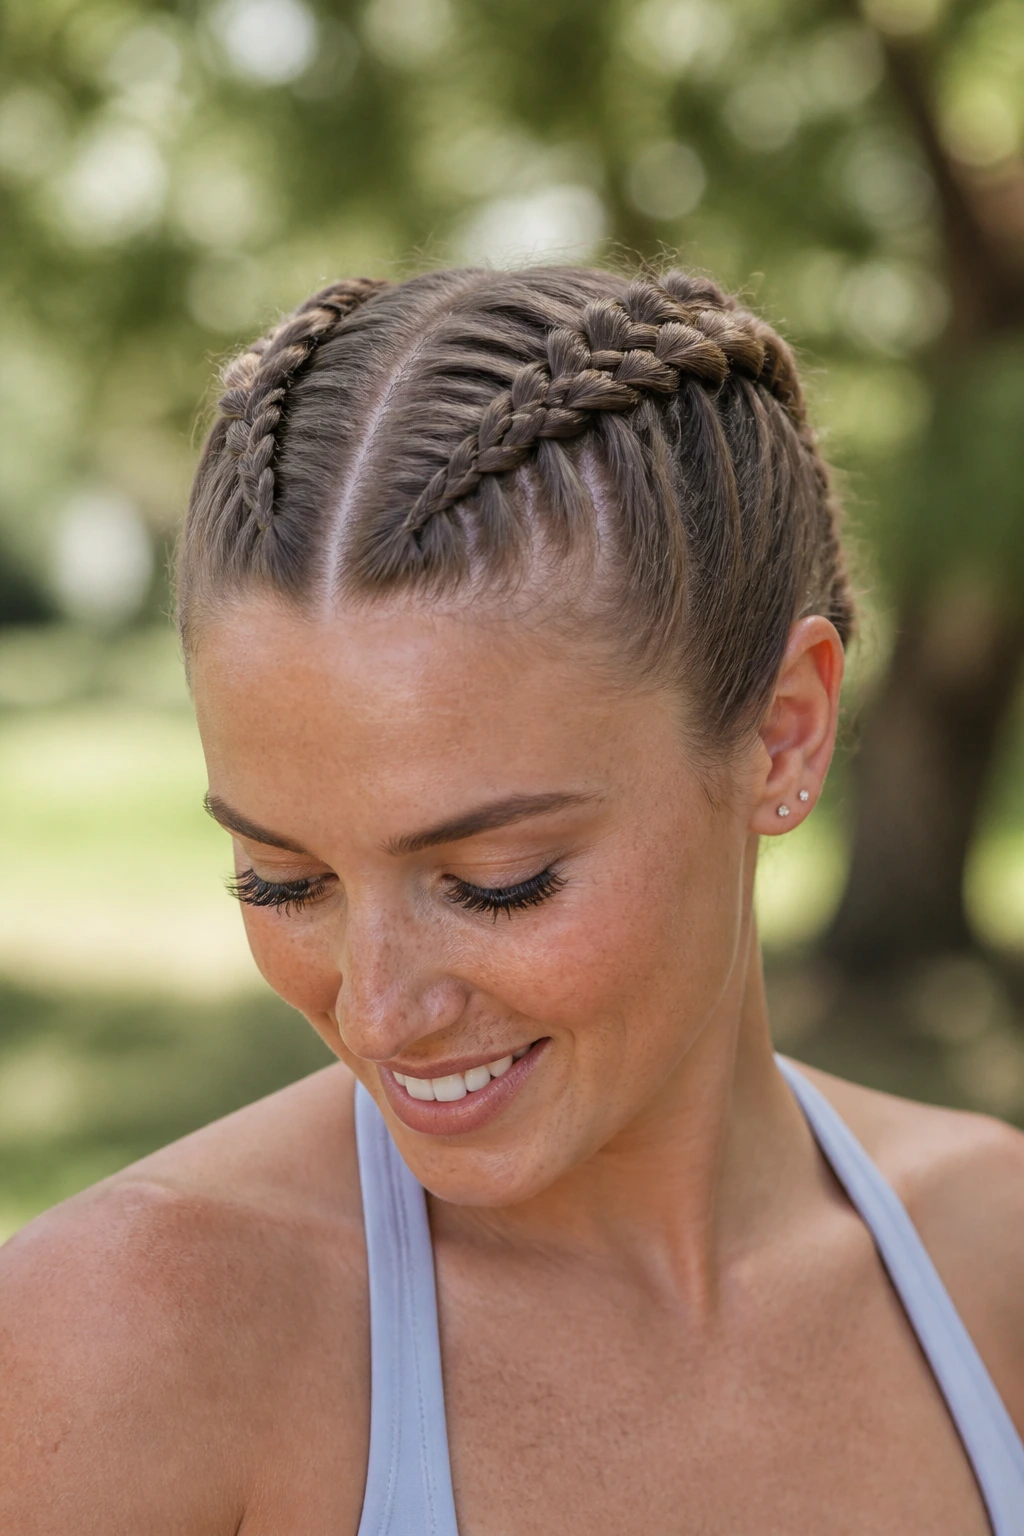
2. Double Dutch Pigtails
Pigtails often get a bad rap for looking juvenile, but when styled tightly with a clean center part, they are practical, athletic, and surprisingly chic. For medium hair, these braids are perfect because they capture all those shorter layers that usually fall out of a high ponytail.
The Anatomy of the Perfect Dutch Braid
Unlike French braids where you cross strands over, Dutch braids involve crossing strands under. This pops the braid out so it sits on top of your head rather than sinking into your scalp.
Pro Technique for Secure Holds
- Use a texturizing spray before you start; this provides the grip needed to catch shorter, layered strands.
- If your hair is very slippery, a light dusting of root powder along the part line keeps the braid tight against the scalp.
- Finish with a medium-hold hairspray to keep flyaways at bay.
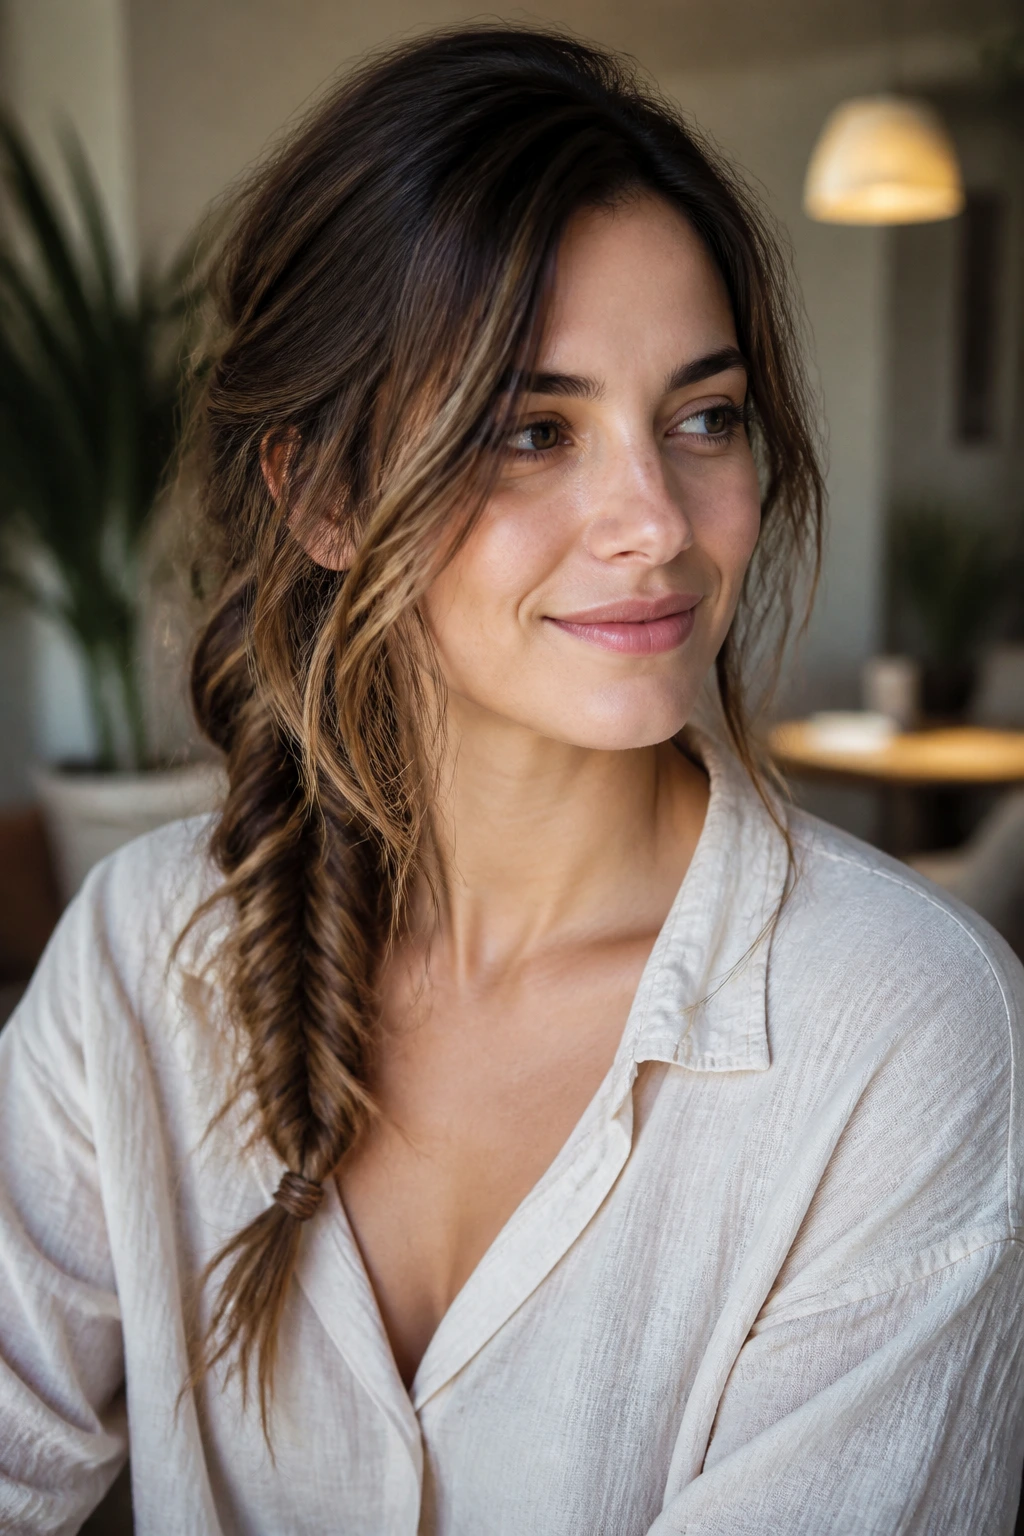
3. The Messy Side-Swept Fishtail
Fishtail braids can be tedious, but on medium hair, you only need to work through about 8 to 10 inches of length. This makes the style manageable and prevents arm fatigue. The result is a sophisticated, intricate look that defies the casual nature of a standard braid.
Mastering the Fishtail Technique
- Divide your hair into two even sections.
- Take a tiny piece from the outside of the right section and cross it over to the left.
- Repeat on the other side.
- Keep the pieces small—this is the most critical rule—to ensure the iconic “fishbone” pattern is visible.
Elevating the Look
Don’t worry if the braid is not perfect. In fact, you should pull it apart slightly once you secure the end. This adds a “lived-in” vibe that looks like you spent twenty minutes on your hair when it actually took less than ten.
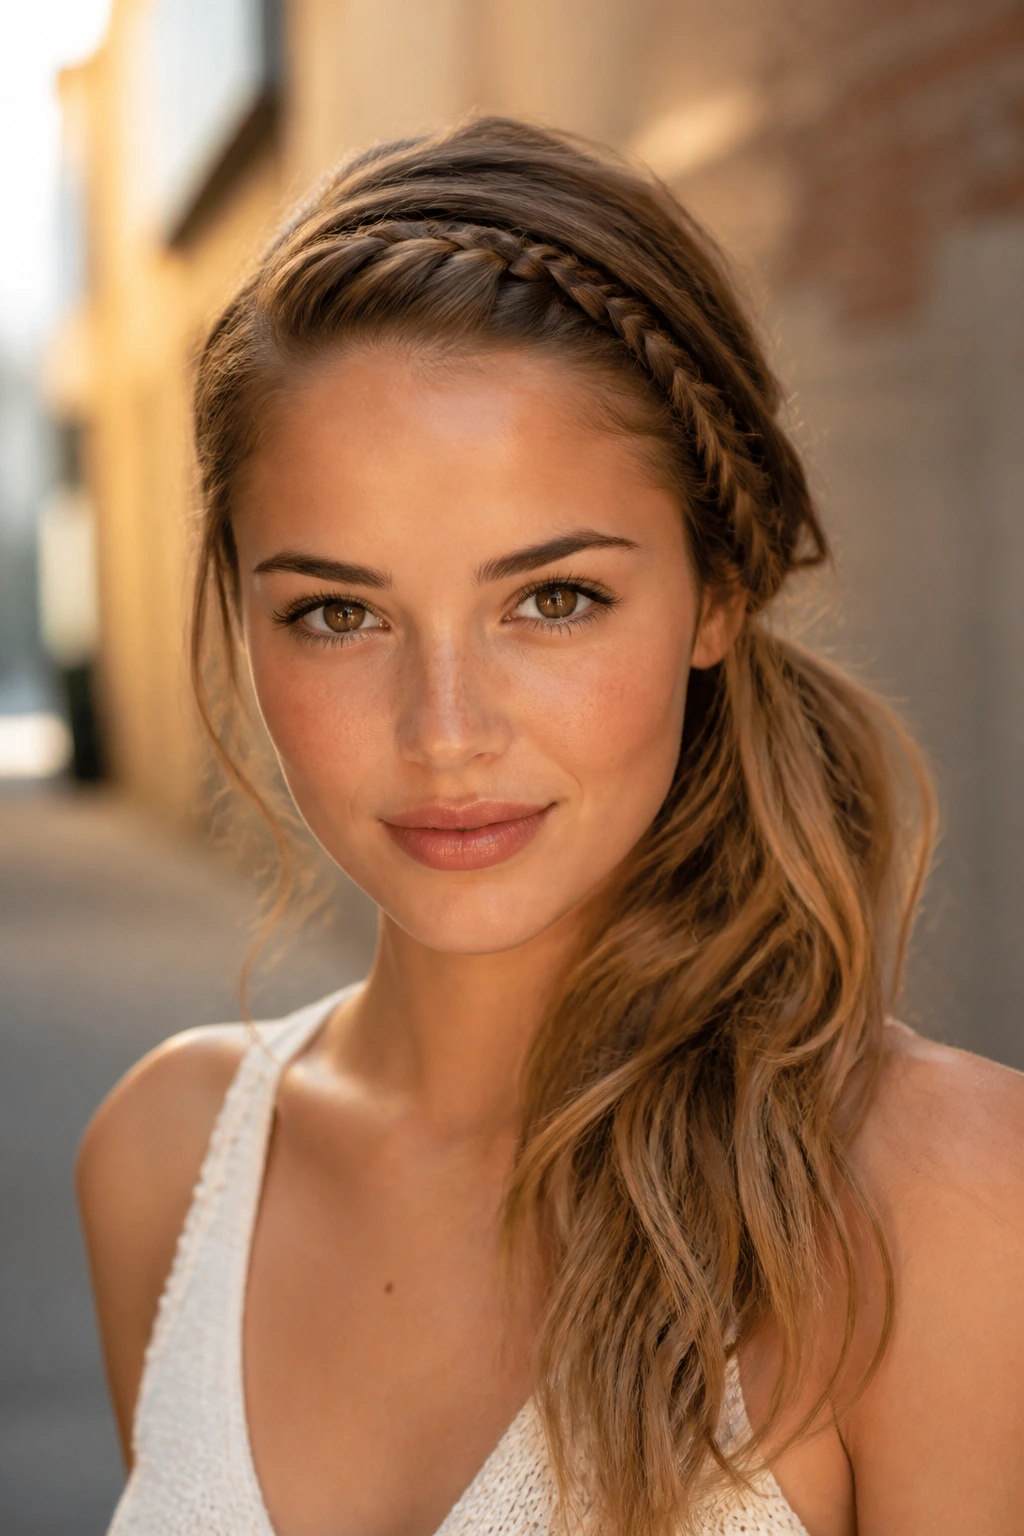
4. Single Accent Braid in a Loose Pony
If you are running out the door, this is the quickest way to add personality to a basic ponytail. You don’t need to braid all your hair—just one section near the temple—to change the entire aesthetic of your style. It takes thirty seconds and adds a level of detail that looks well-thought-out.
Where to Place the Accent
Try braiding a one-inch section starting right at your hairline. Incorporate it into your ponytail elastic for a polished finish, or wrap it around the base of the ponytail to cover the hair tie entirely.
Versatility Tips
- Keep the rest of your hair in loose waves to complement the tight tension of the accent braid.
- Use a decorative metal cuff on the end of the small braid to give it weight and a bit of polish.
- If you have bangs or shorter face-framing pieces, leave them out to keep the look soft.
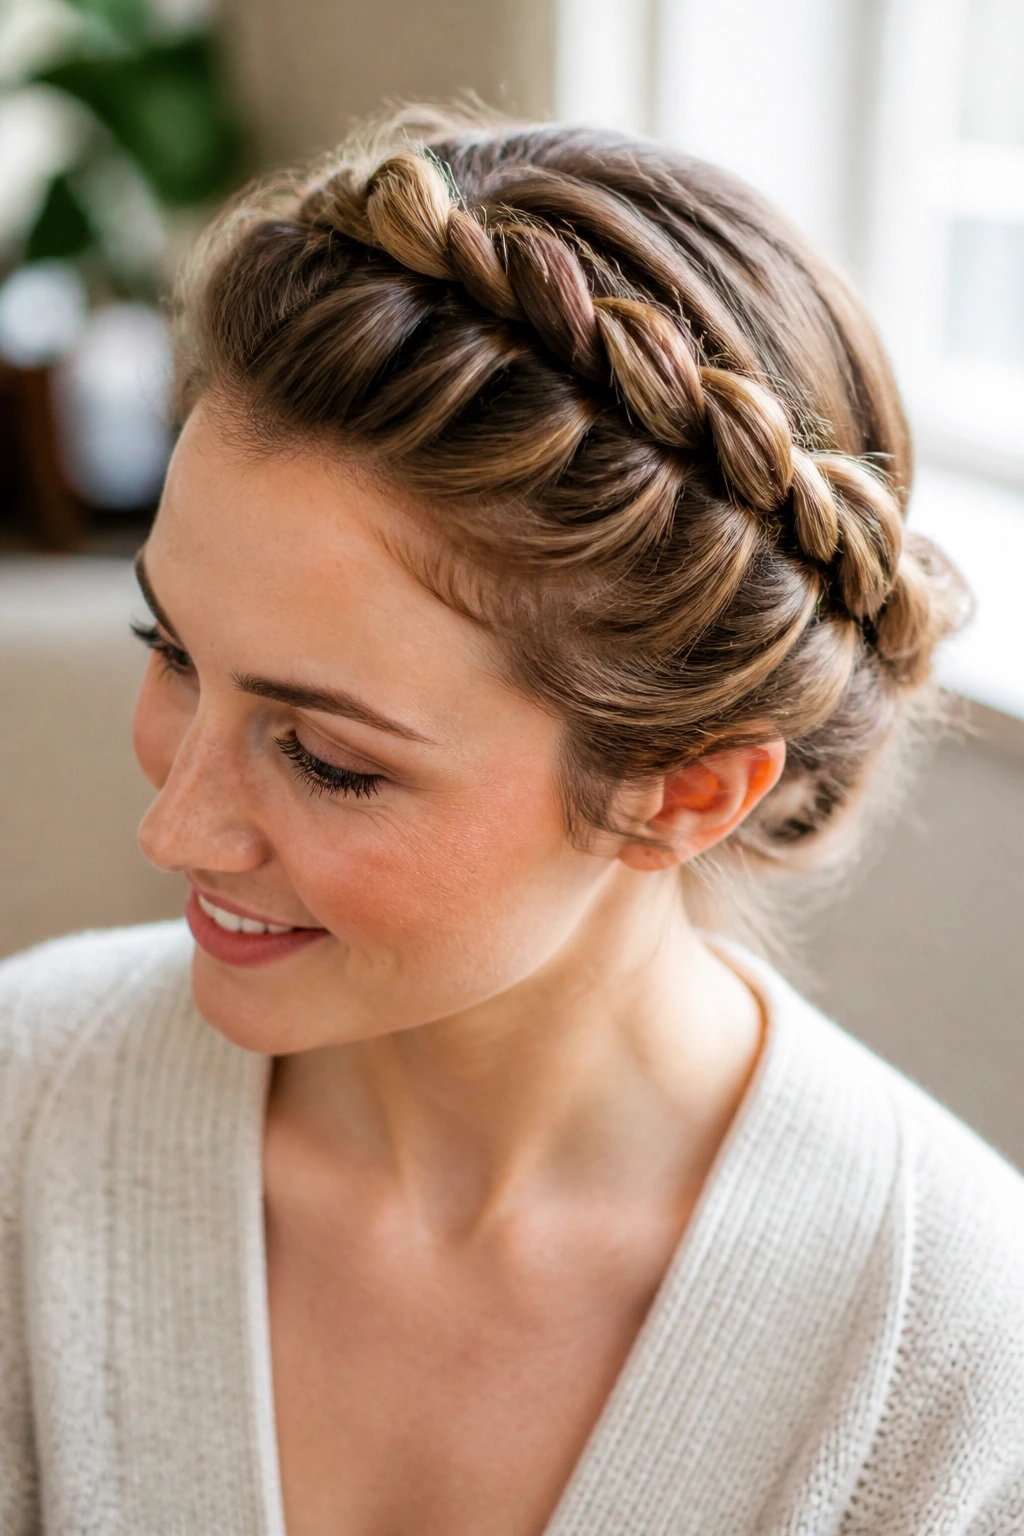
5. The Milkmaid Braid Headband
This is a sophisticated updo that relies on two simple braids meeting at the top of the head. For medium hair, you might not have enough length to wrap a braid all the way around, so the “faux” version is your best friend. Create two pigtail braids and pin them over the top of your head like a crown.
Dealing with Shorter Lengths
- If your ends don’t reach the other side, simply tuck them behind your ears or pin them deep into the braid on the opposite side.
- Use bobby pins that match your hair color to hide the ends effectively.
- This style looks best when you pull a few wispy hairs loose around the temples.
6. Pull-Through Braid
The pull-through isn’t technically a braid, but it mimics the look of a voluminous, thick plait. It is a series of tiny ponytails looped through each other. On medium hair, this style is a game-changer because you can create immense volume that a standard three-strand braid simply cannot achieve.
Why This Style Dominates
- You gain control over each section individually.
- It is easier to fix if a strand slips out.
- The elastic-based structure keeps the style secure even if you are active.
How to Get the Look
Use clear mini elastics to create a ponytail, then another one a few inches down. Split the first ponytail, pull the second one through the gap, and repeat. Once finished, pull the sides of each “bubble” out to make it look like a seamless, braided masterpiece.
7. The Wrapped Top Knot with Braided Base
Take your standard bun to the next level by braiding a section at the nape of your neck and bringing it up into your top knot. This adds a surprising element of design to an otherwise simple, everyday hairstyle.
Execution Details
- Flip your head upside down and create an inverted French braid starting from the nape.
- When you reach the crown, gather the rest of your hair into a high ponytail.
- Twist the hair into a messy bun and secure it with pins.
- You now have a hidden detail that adds visual interest to a style usually kept plain.
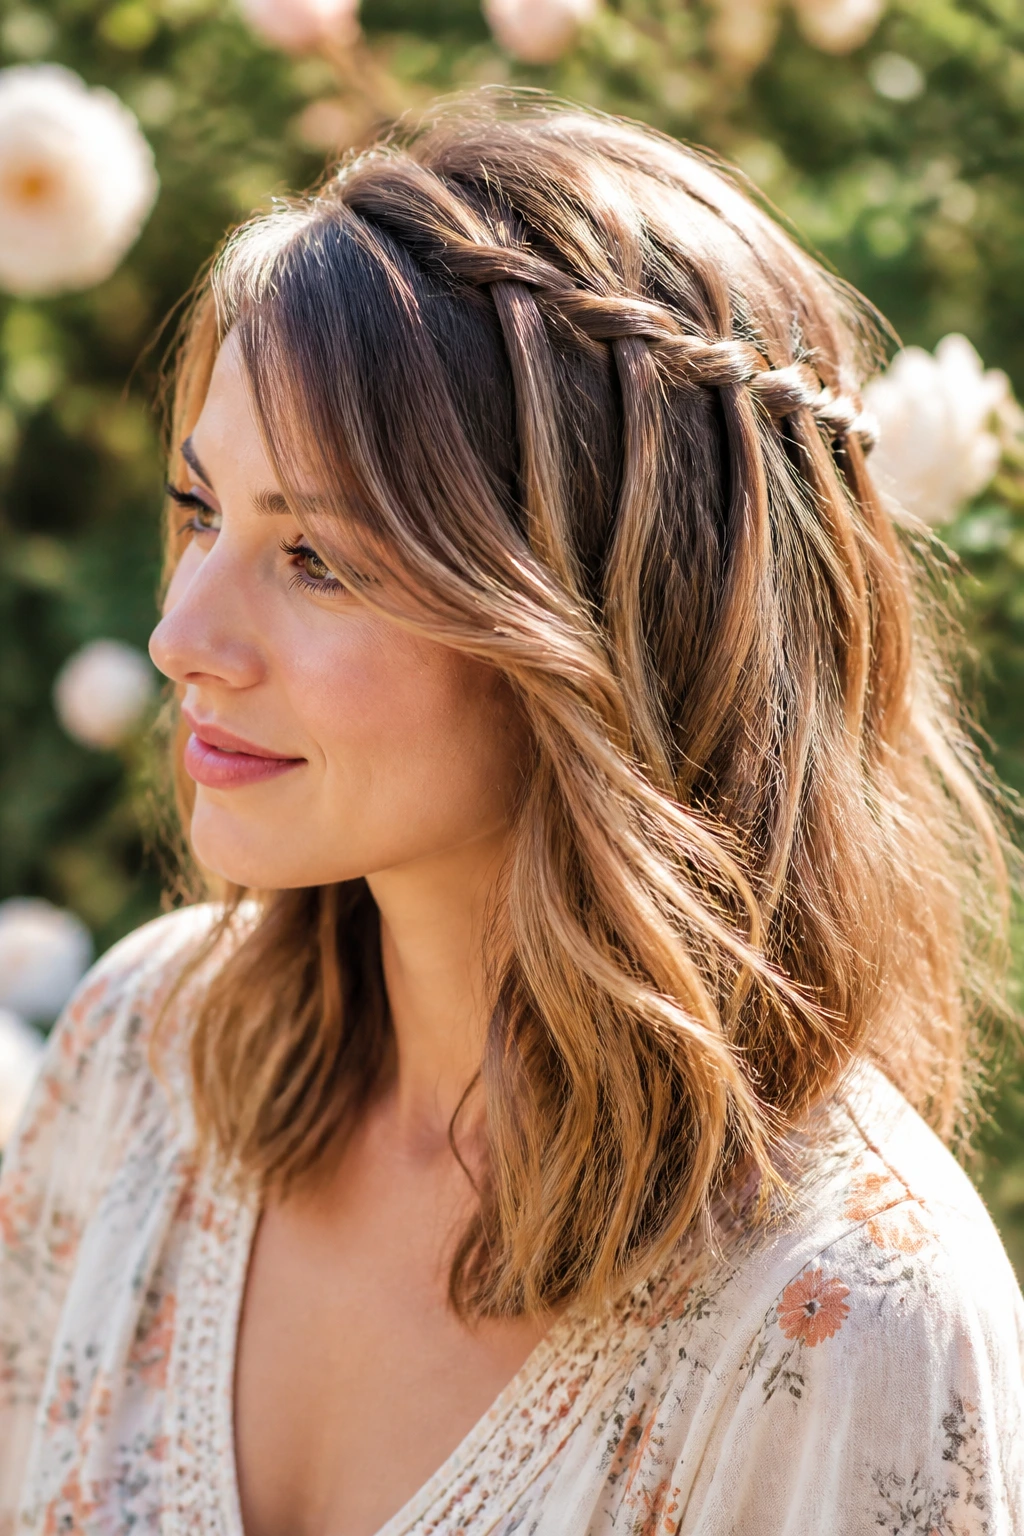
8. Waterfall Braid for Loose Hair
This is the quintessential “I just woke up like this” style. It allows you to wear your hair down while still incorporating a braid that keeps your hair out of your face. It looks complex, but once you understand the drop-strand technique, it is incredibly fast.
The Mechanics
Instead of incorporating hair into your braid, you drop the bottom strand and pick up a new one from underneath. This creates the “waterfall” effect of strands cascading down through the braid.
Perfecting the Flow
- Keep the braid loose to maintain the soft texture of your hair.
- This style works best on medium hair because the “waterfall” strands won’t get tangled with the rest of your loose hair.
- It is a perfect choice for weddings or formal events where you want to keep your length visible.
9. Rope Braid Ponytail
A rope braid—or twist braid—is faster than a three-strand braid and offers a sleek, modern aesthetic. By twisting two sections of hair in the same direction and then wrapping them around each other in the opposite direction, you create a seamless, rope-like effect.
When to Use This Style
This style is ideal for professional settings. It looks clean, structured, and intentional. Because medium hair is not overly heavy, the rope twist will hold its shape perfectly without needing excessive product.
The Secret to Longevity
- Apply a tiny bit of pomade to your palms before twisting to keep flyaways smoothed down.
- Secure the end with a tiny elastic.
- Avoid pulling this braid apart too much; the beauty of a rope braid lies in its definition.
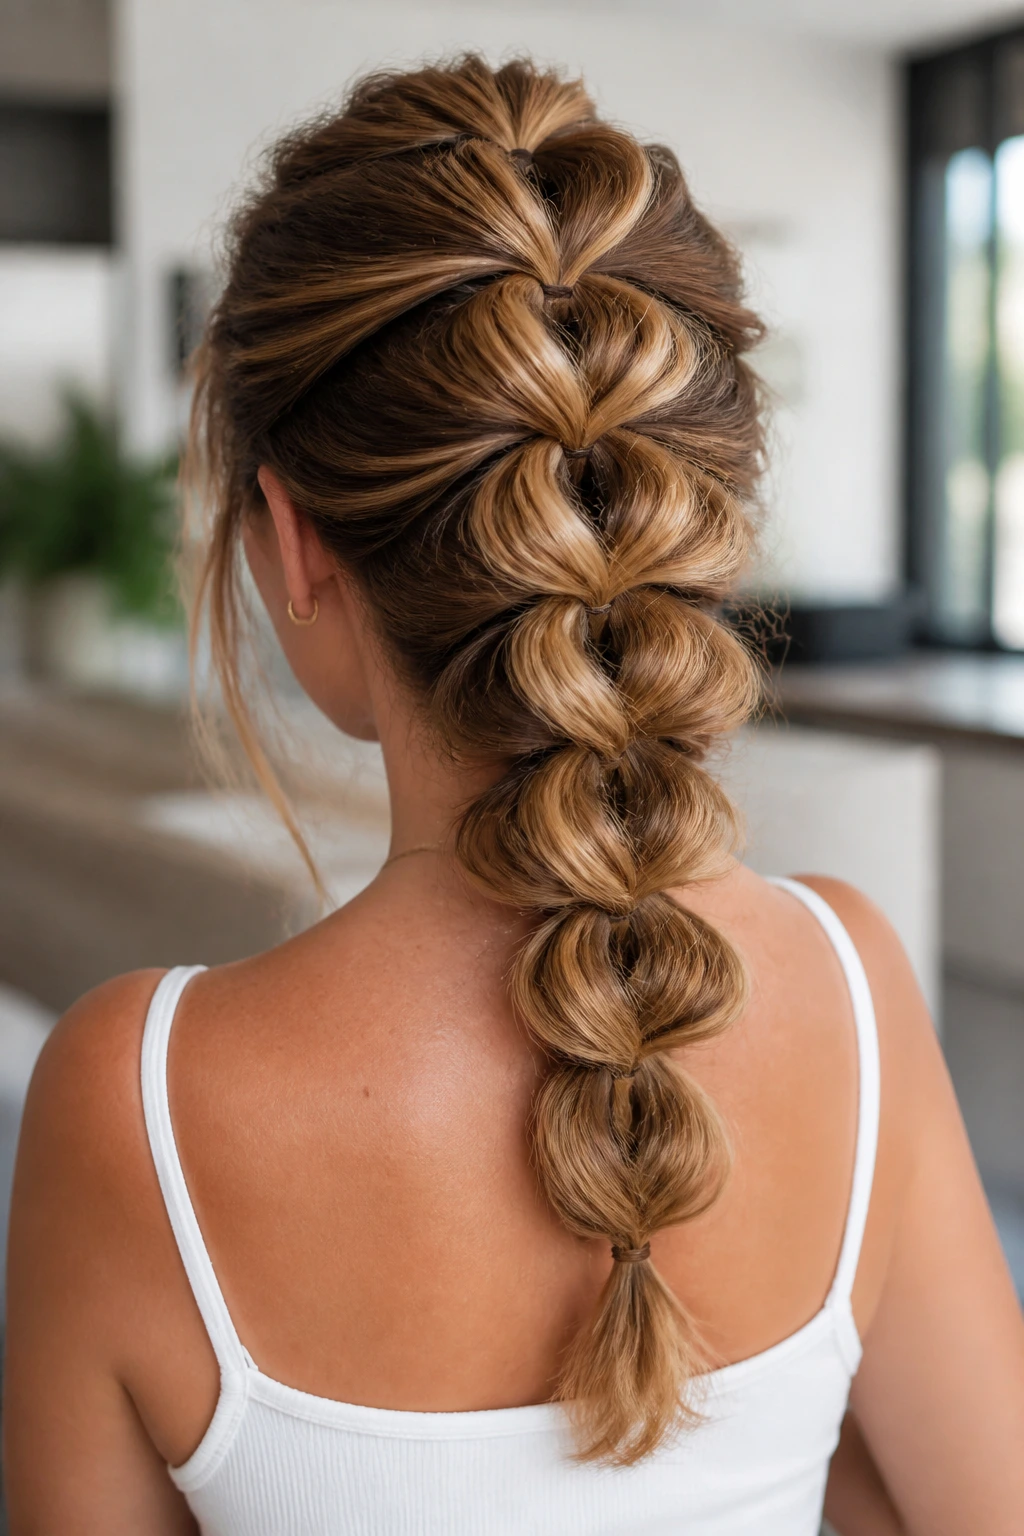
10. The Bubble Braid
If you can make a ponytail, you can make a bubble braid. It is arguably the easiest, most modern take on braided styles. Use small elastics at two-inch intervals down your ponytail, and gently tug the hair between the elastics to create rounded, voluminous bubbles.
Why Medium Hair Loves It
- You don’t need length to get a full look.
- You can create four or five distinct bubbles easily.
- It is the ultimate style for hiding greasy roots or unwashed hair.
Style Variations
- Add bows between the bubbles for a feminine, trendy twist.
- Keep the bubbles small for a minimalist look or pull them wide for maximum drama.
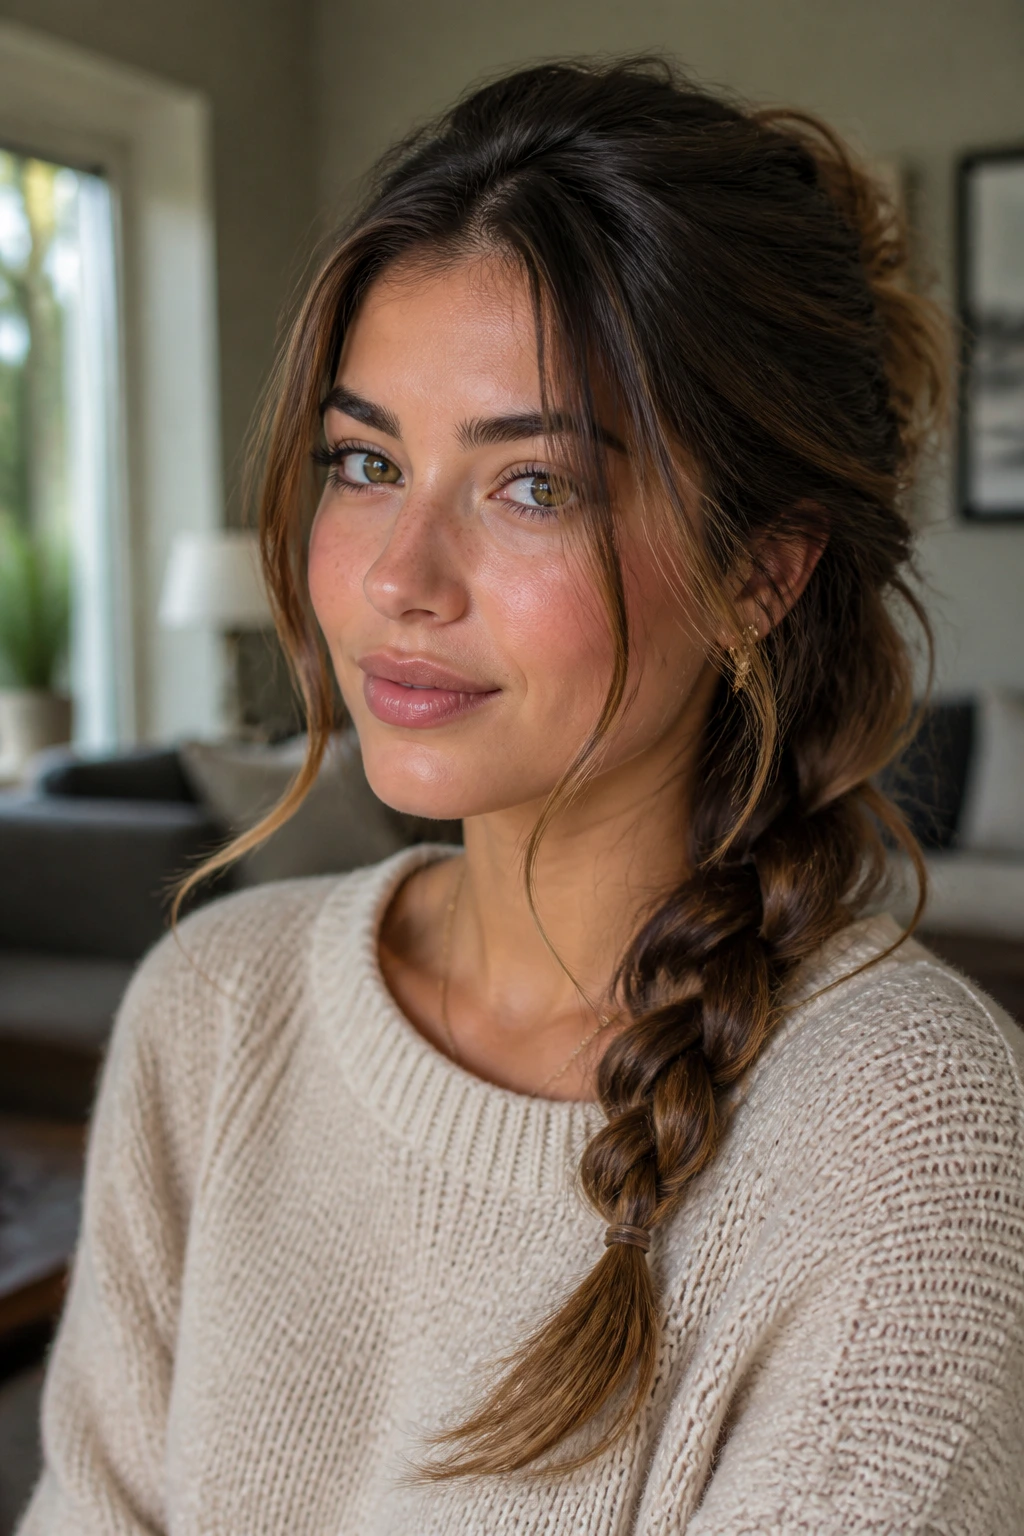
11. Three-Strand Side Braid
Sometimes the classics are best. A simple side braid is elegant, timeless, and works perfectly on medium hair because it doesn’t thin out at the ends as dramatically as it does on very long hair.
Tips for Success
- Sweep all your hair to one side and secure it with a loose elastic before you start braiding to keep the tension even.
- Use a bit of sea salt spray on your hair before braiding to give it a slightly matte, textured finish that prevents the braid from sliding out.
- If your hair is layered, secure the ends with a clear elastic and use a tiny bit of hair oil to tame any pieces that poke out.
12. Braided Headband with Down Hair
This style creates a permanent hair accessory using your own locks. Braid a section from behind your ear, bring it across the top of your head, and pin it behind the opposite ear.
The “Hidden” Trick
To hide the pin, tuck the end of the braid under the top layer of your loose hair. If you have medium hair that is straight, this can look incredibly chic, but if your hair has texture or waves, it gains a dreamy, festival-inspired aesthetic that feels very grounded.
13. Fishtail Crown
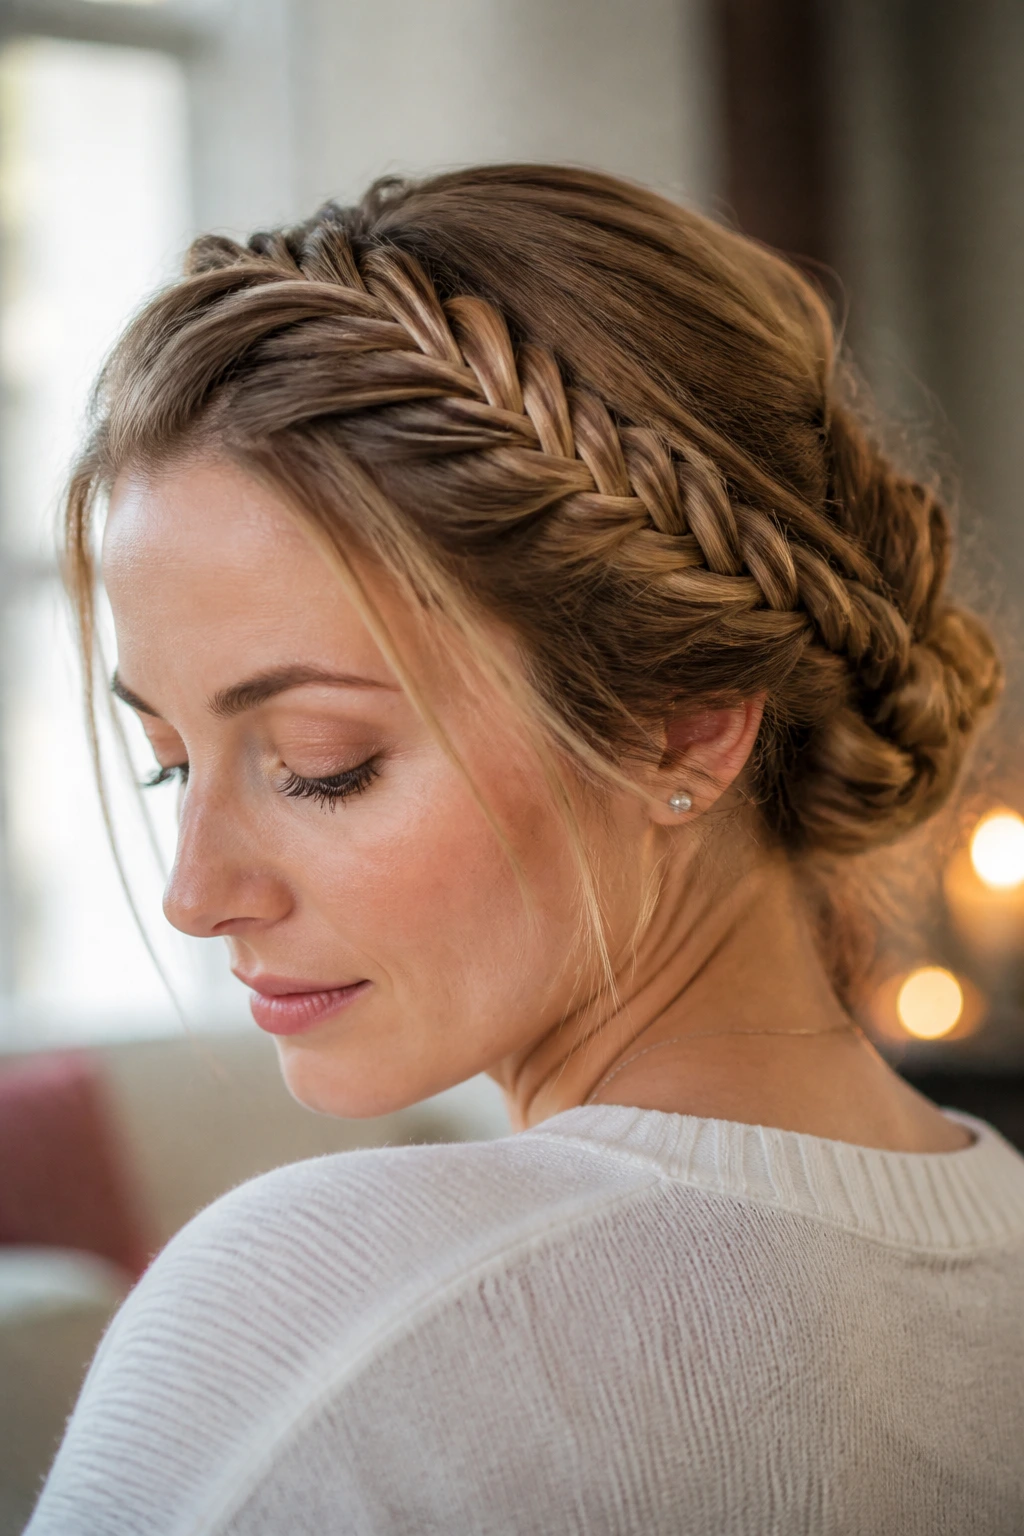
While a traditional fishtail is down, a fishtail crown is an elevated updo. It works by creating a fishtail braid along your hairline and securing it at the nape. Because you have medium hair, you don’t have to deal with long tails that get stuck in the back.
Managing the Tension
- Start by parting your hair to the side.
- Begin the fishtail at the part and incorporate small sections as you move along the hairline.
- Secure with a bobby pin right behind your ear.
- Repeat on the other side for a symmetrical, polished look.
14. Scarf-Braided Ponytail
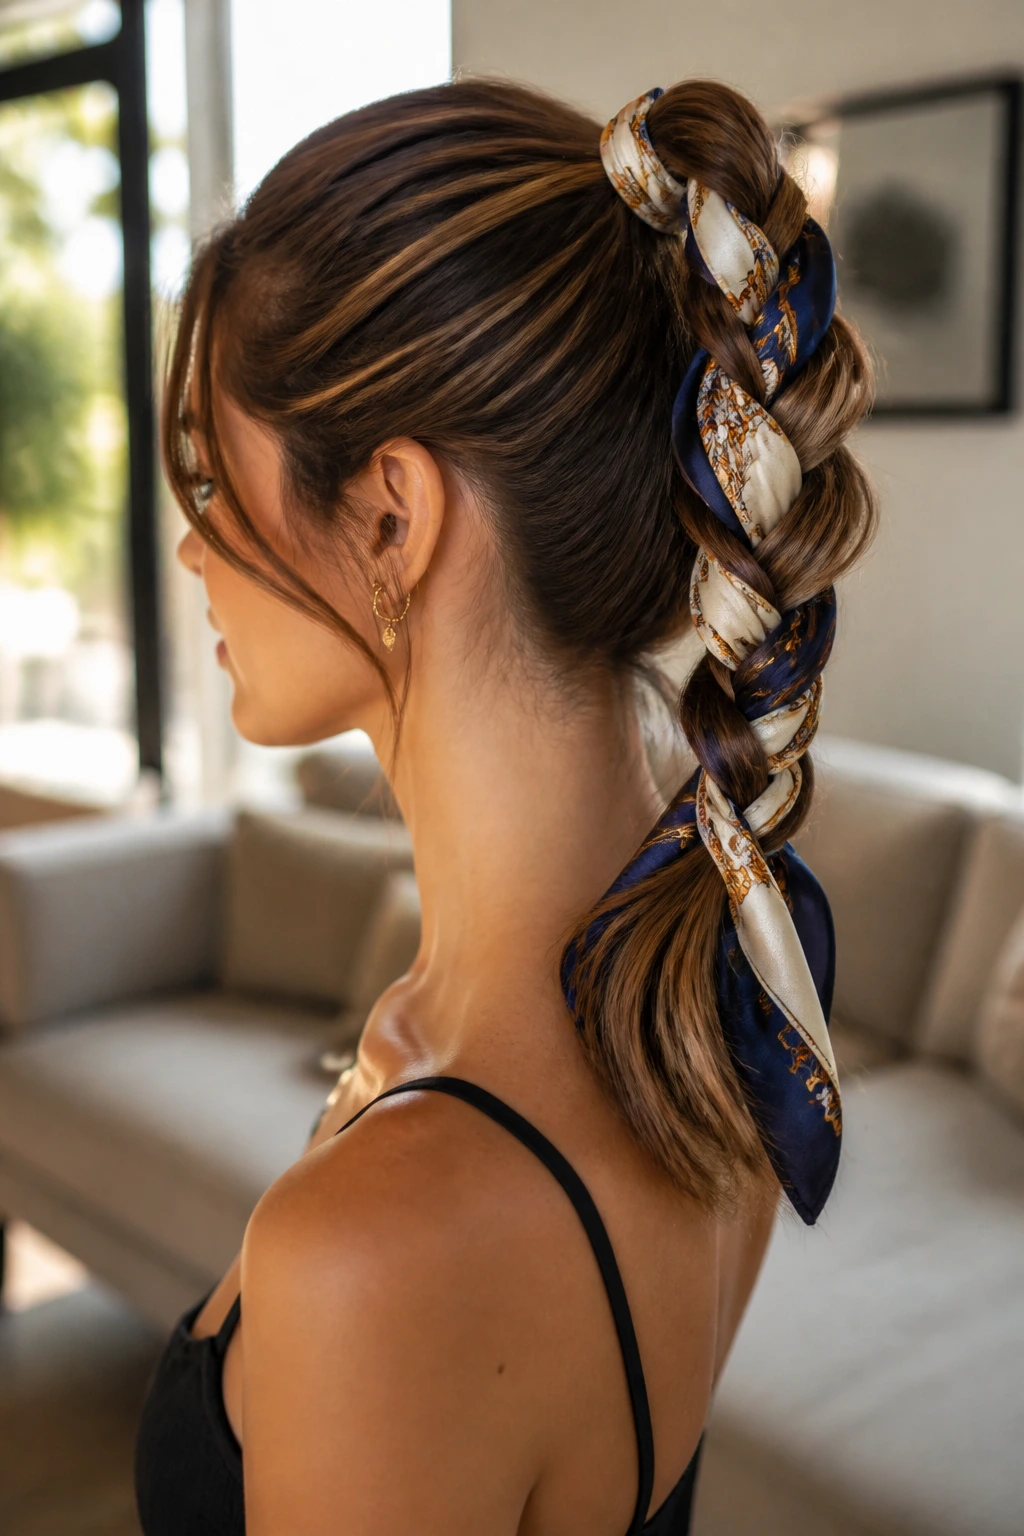
Incorporate a silk scarf into a standard three-strand braid. This adds volume, color, and a sense of luxury to a medium-length style. The scarf acts as one of your three strands, meaning your hair effectively doubles in size.
Why This Is Perfect for Medium Lengths
- The scarf provides the volume that medium hair sometimes lacks.
- It covers up any layers that might try to escape the braid.
- It is a fantastic way to match your hairstyle to your outfit.
Essential Technique
Tie the scarf around the base of your ponytail, then split your hair into two sections and use the scarf as the middle strand. Braid as you normally would, and tie the end of the scarf to secure the whole thing.
15. The “Pancaked” Dutch Braid
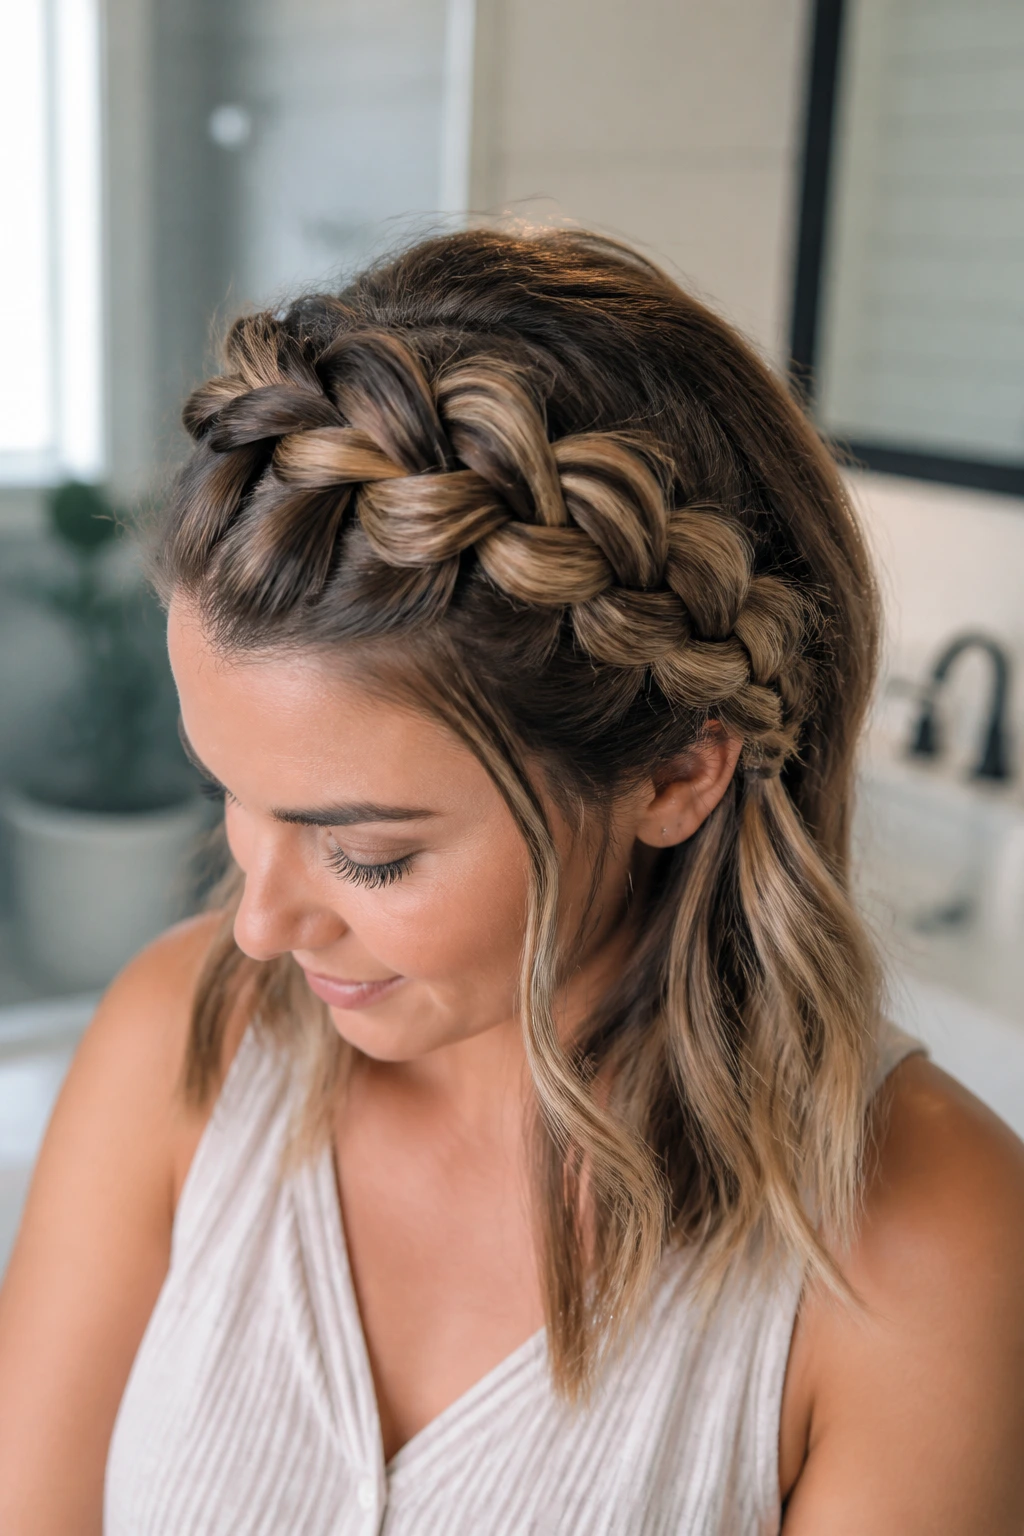
Pancaking is the act of tugging on the loops of a braid to make them wider and flatter. For medium hair, this is the most important skill you can learn. It transforms a tight, thin braid into a wide, chunky plait that looks like you have double the amount of hair.
The Rule of Uniformity
- Do not just pull at the top; pull every loop evenly from bottom to top.
- If you pull too much, the braid might fall apart, so start slowly.
- This works on any braid type—Dutch, French, or even fishtail.
16. Criss-Cross Braid
This style looks like you spent hours on a complex weave. In reality, it is just two braids that cross over at the back of your head. It is perfect for medium-length hair because it keeps the sides of your face clear while allowing the rest of your hair to hang loose.
How to Execute
- Braid two small sections from the front of your hair.
- Bring them to the back, cross them, and pin them securely.
- You can let the braids overlap or leave them slightly separated for a layered look.
17. The Twisted Crown
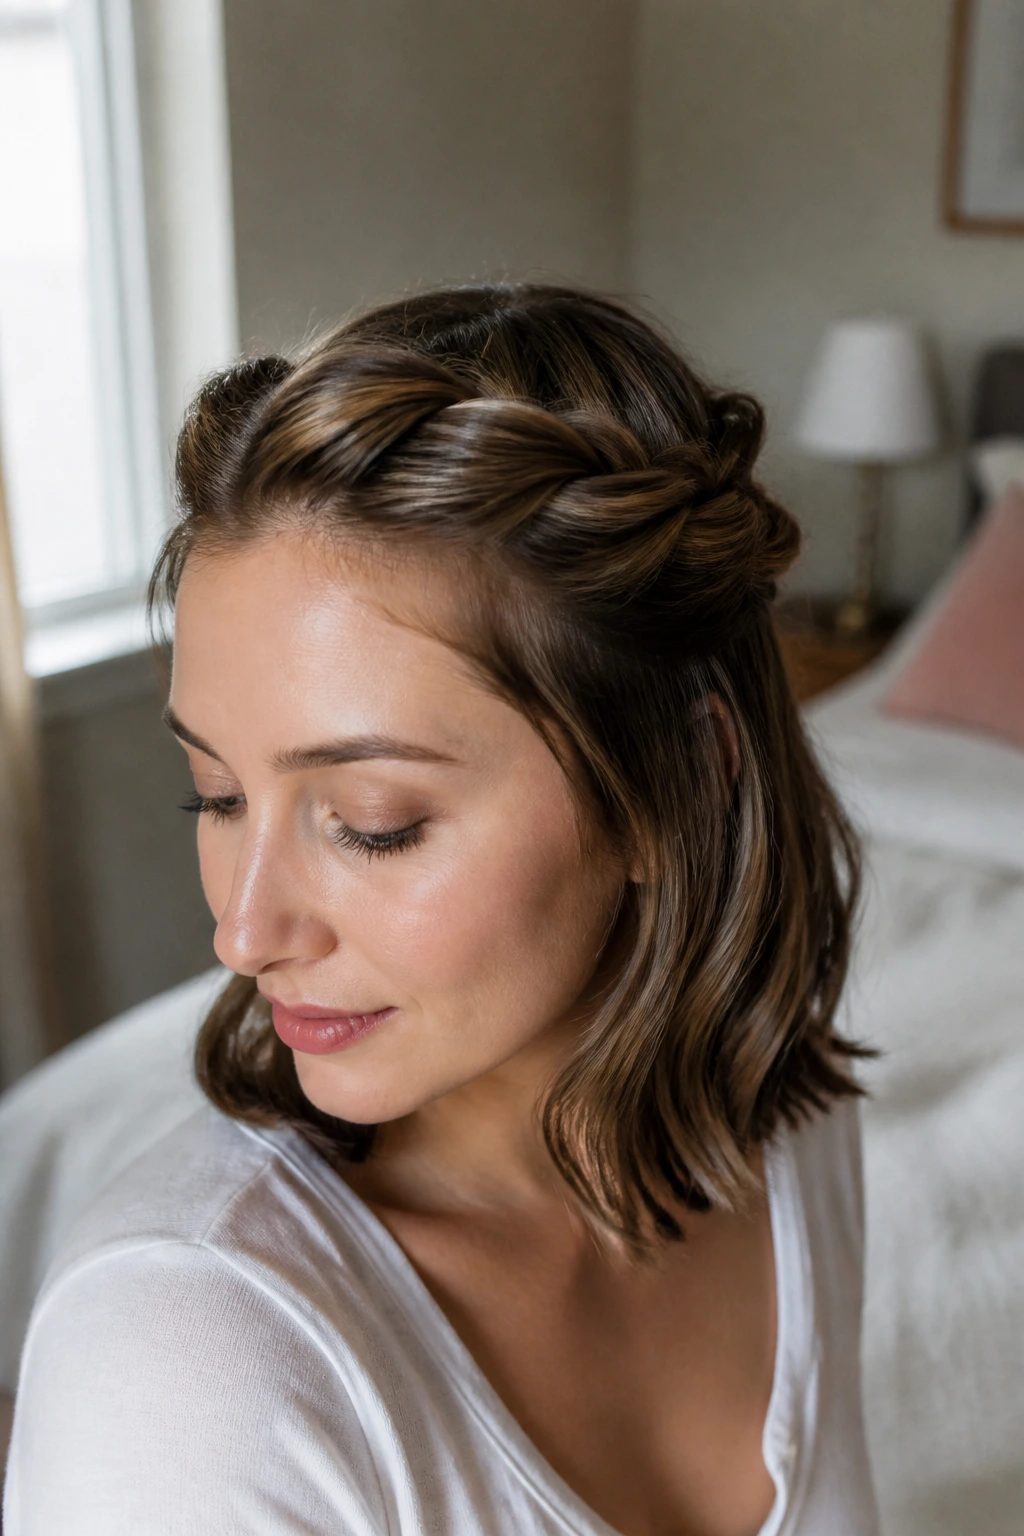
If you are not great at braiding, you can fake it with twists. Take two sections, twist them tightly toward the back, and pin them. It mimics the look of a braided crown but is significantly faster and more forgiving on layered hair.
Why Twists Beat Braids for Beginners
- No “popping” hair: You don’t have to worry about individual strands escaping a braid.
- Texture control: If your hair is frizzy, the twist actually looks intentional.
- Speed: You can finish a twisted crown in under two minutes once you get the hang of it.
18. Braided Space Buns
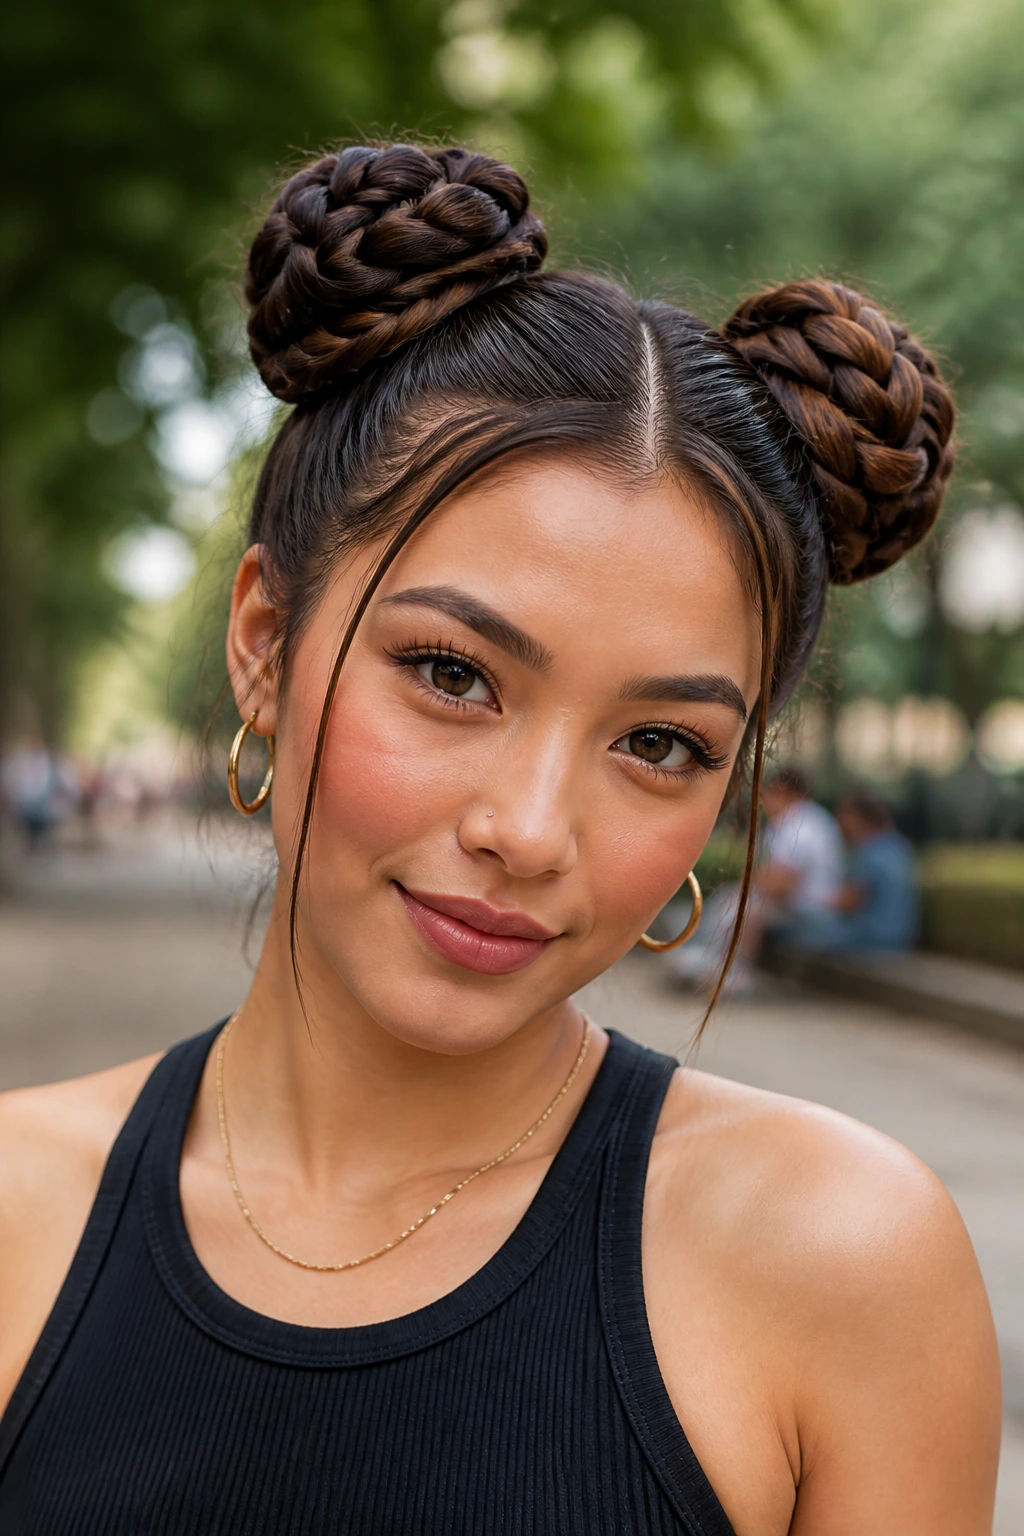
Space buns are fun, but braided space buns are elevated. Create two high pigtails, braid each one, and then wrap them into buns. The braids add texture to the buns, making them look thicker and more interesting.
Styling Tip
- Use a clear elastic for the base of the pigtail.
- Braid all the way to the ends before you wrap.
- Secure with U-shaped hair pins rather than standard bobby pins; they hold more hair with less effort.
19. The Mohawk Braid
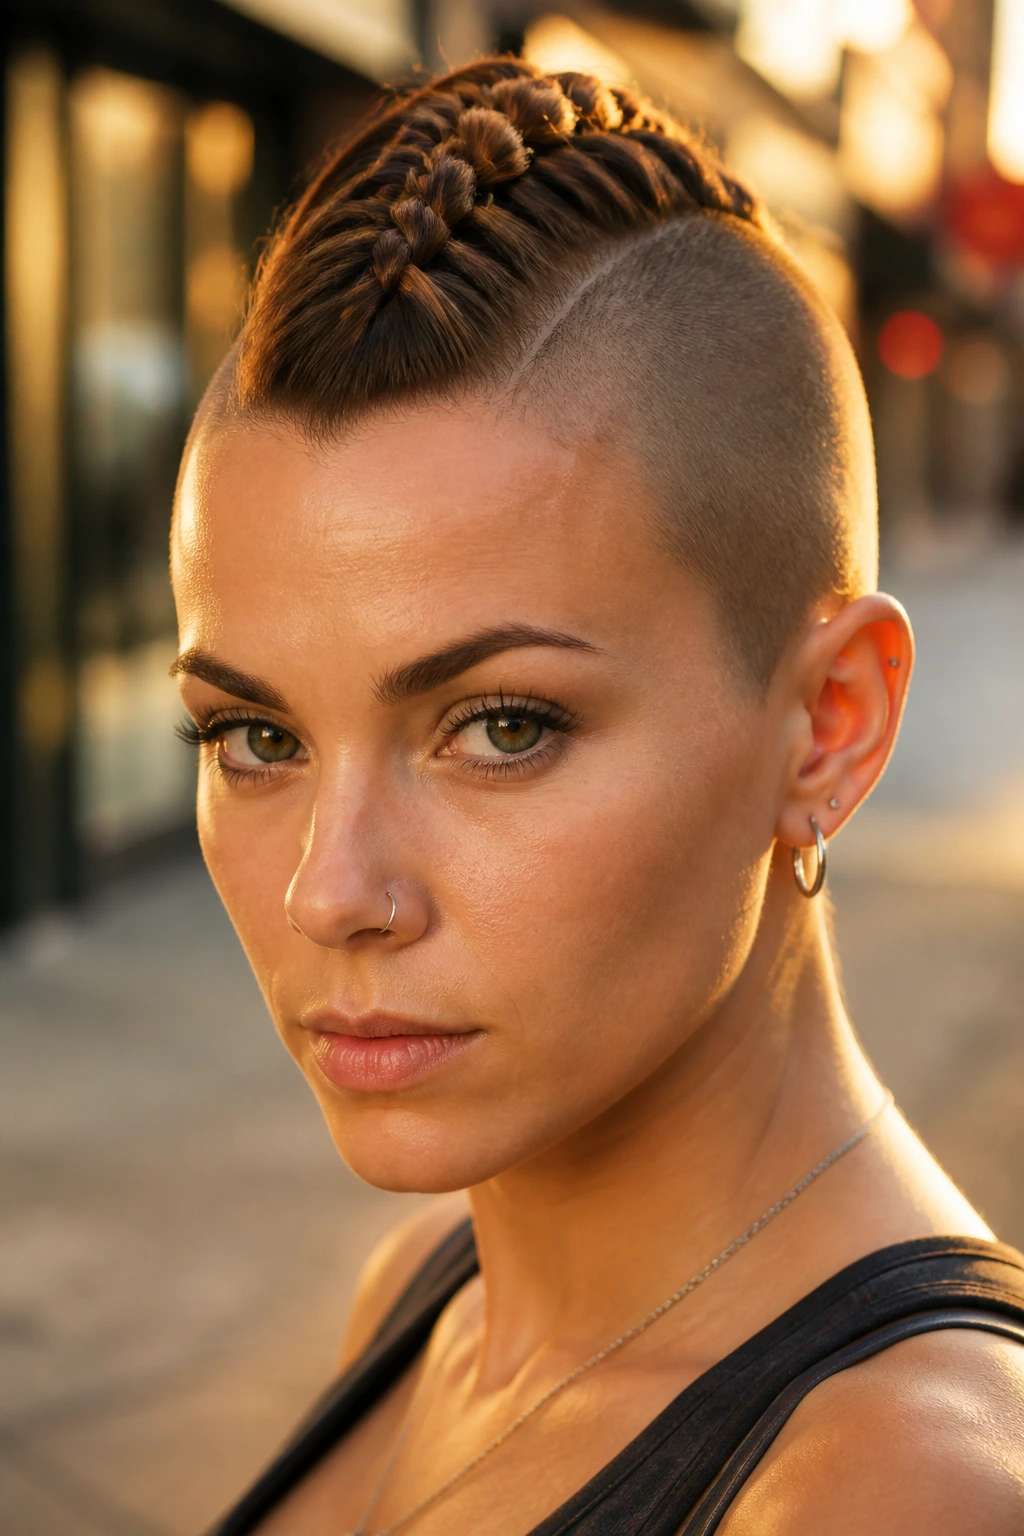
Yes, you can pull off a braided mohawk on medium hair. It gives you an edgy, cool-girl vibe without the need for actual clippers. Just braid the center strip of your hair tightly against the scalp.
Customizing the Vibe
- For a sporty look, keep the braid very tight and smooth.
- For a festival look, leave some pieces loose and pull the braid apart for that messy, textured appearance.
- This style stays in place for a long time, making it great for long days when you don’t want to re-style.
20. Double-Fishtail Accent
Instead of one braid, do two thin fishtails on one side of your head. It doubles the detail and looks like you put a lot of work into your style. This works well for formal events where you want to keep your hair down but still have an “updo” element.
Proportionality
- Ensure the braids are very thin; you want them to be an accent, not the main event.
- Keep the rest of your hair brushed through and smooth so the braids stand out clearly.
- This is a fantastic way to handle shorter fringe pieces that usually cause trouble.
21. The Half-Up Braid with Ribbon
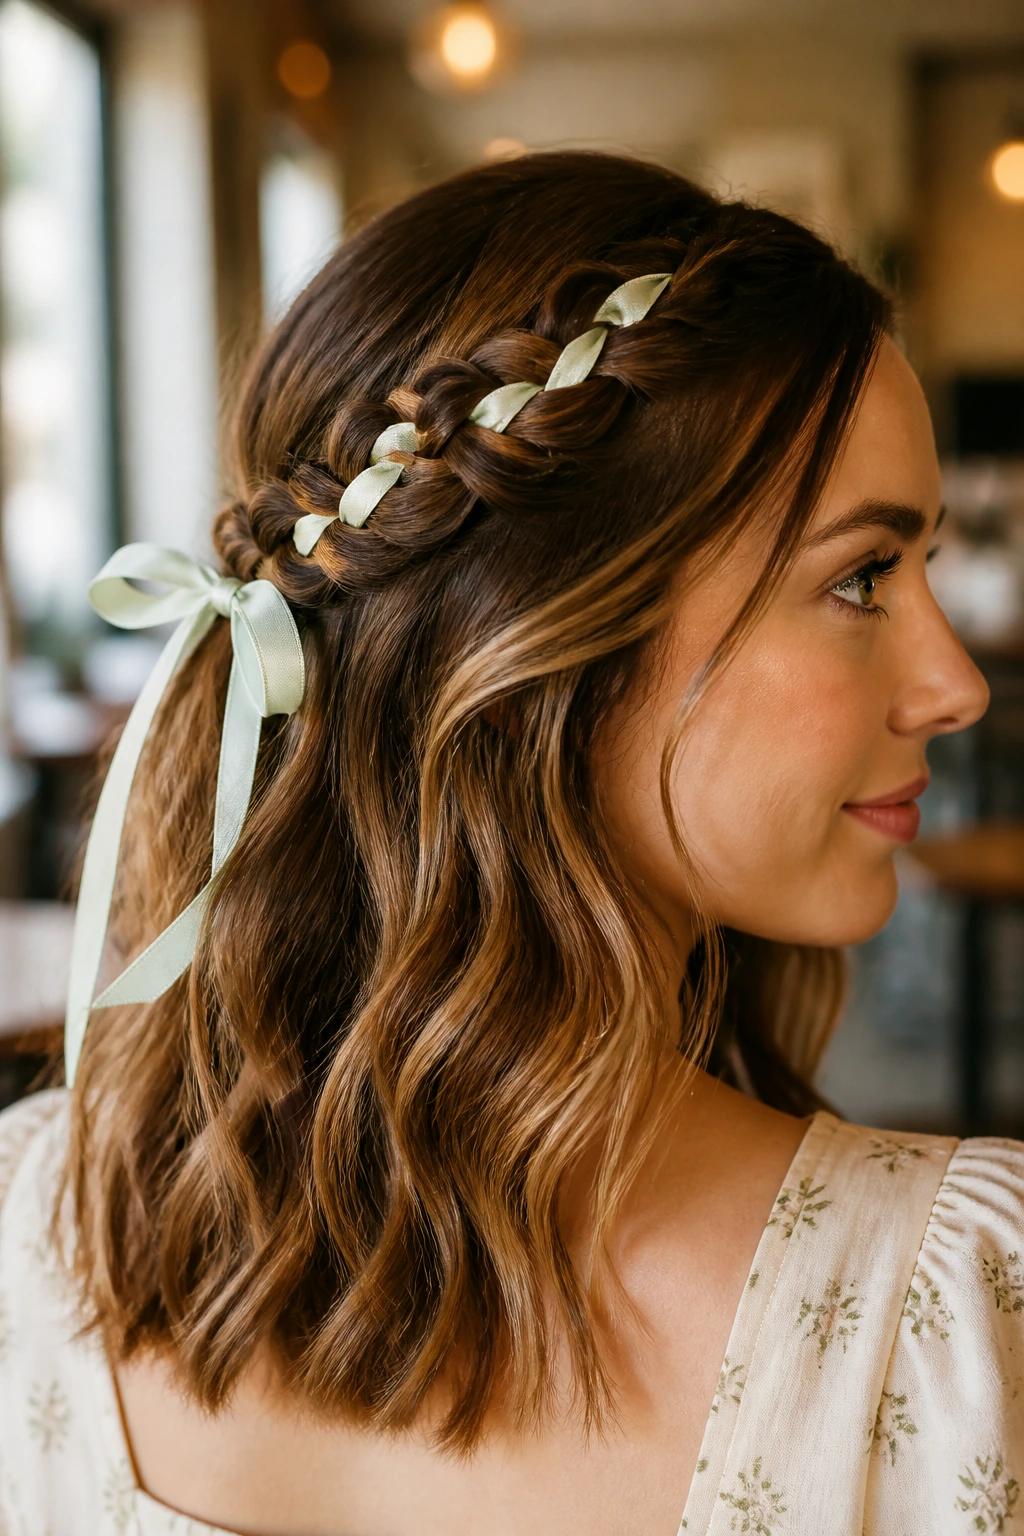
Add a velvet or silk ribbon into your braid for a touch of elegance. Medium hair looks beautiful with ribbons because they don’t get lost in the sea of hair; they remain visible, framing your face and adding a soft texture.
Ribbon Selection
- Choose a thin ribbon for a subtle look.
- Opt for a wider ribbon if you want to make a statement.
- Tie it at the base of the braid for a classic look, or weave it throughout to create a textured, intricate pattern.
22. Messy Side Braid with Face-Framing Pieces
Never underestimate the power of face-framing layers. When you braid your medium hair to the side, leave out two or three thin strands near your temples. This softens the look instantly and prevents the braid from pulling your face back too tightly.
The Art of the Loose Look
- Pull the braid apart with your fingers before you even secure it with an elastic.
- Use a curling iron to add a slight bend to the face-framing pieces you left out.
- The messier, the better. This style is meant to look undone and effortless.
23. Braided Chignon
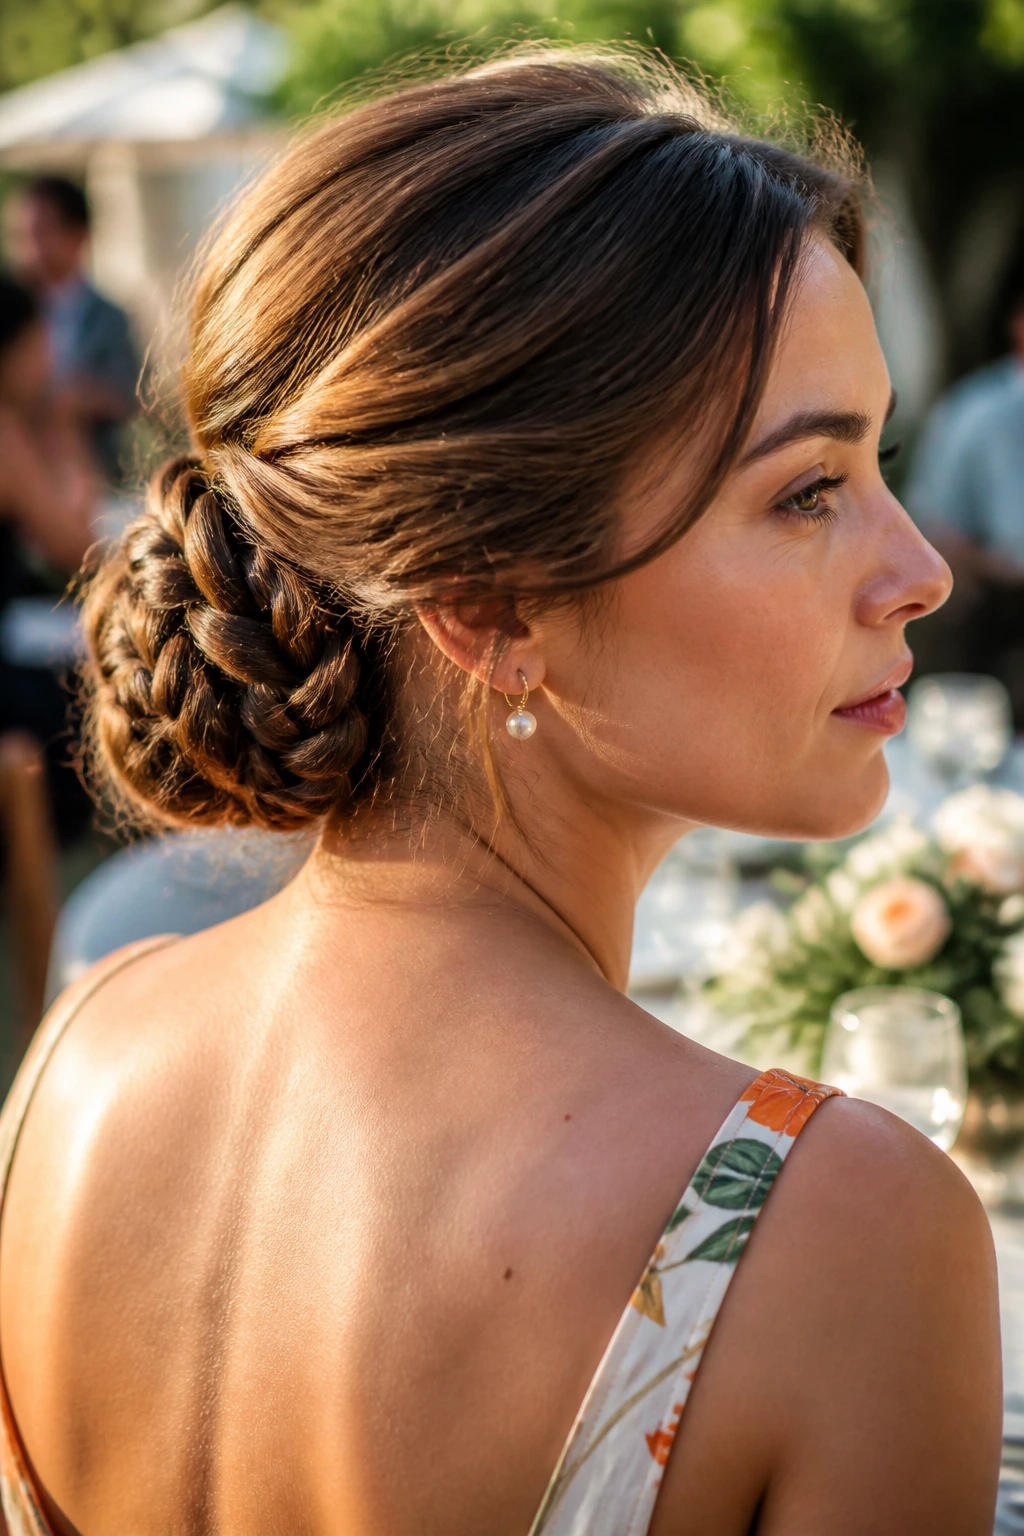
Take a standard low bun and add a braid to it. You can braid a section of your hair before pulling it into the bun, or wrap a pre-braided section around the base of the chignon. It’s a classic, sophisticated look that is perfect for office wear or dinner parties.
Why It Works for Medium Hair
A chignon on medium hair is usually the perfect size. It doesn’t look like a giant ball sitting at the back of your neck; it is sleek and understated, perfectly complemented by the texture of a small braid.
24. Three-Strand Braid with Beads
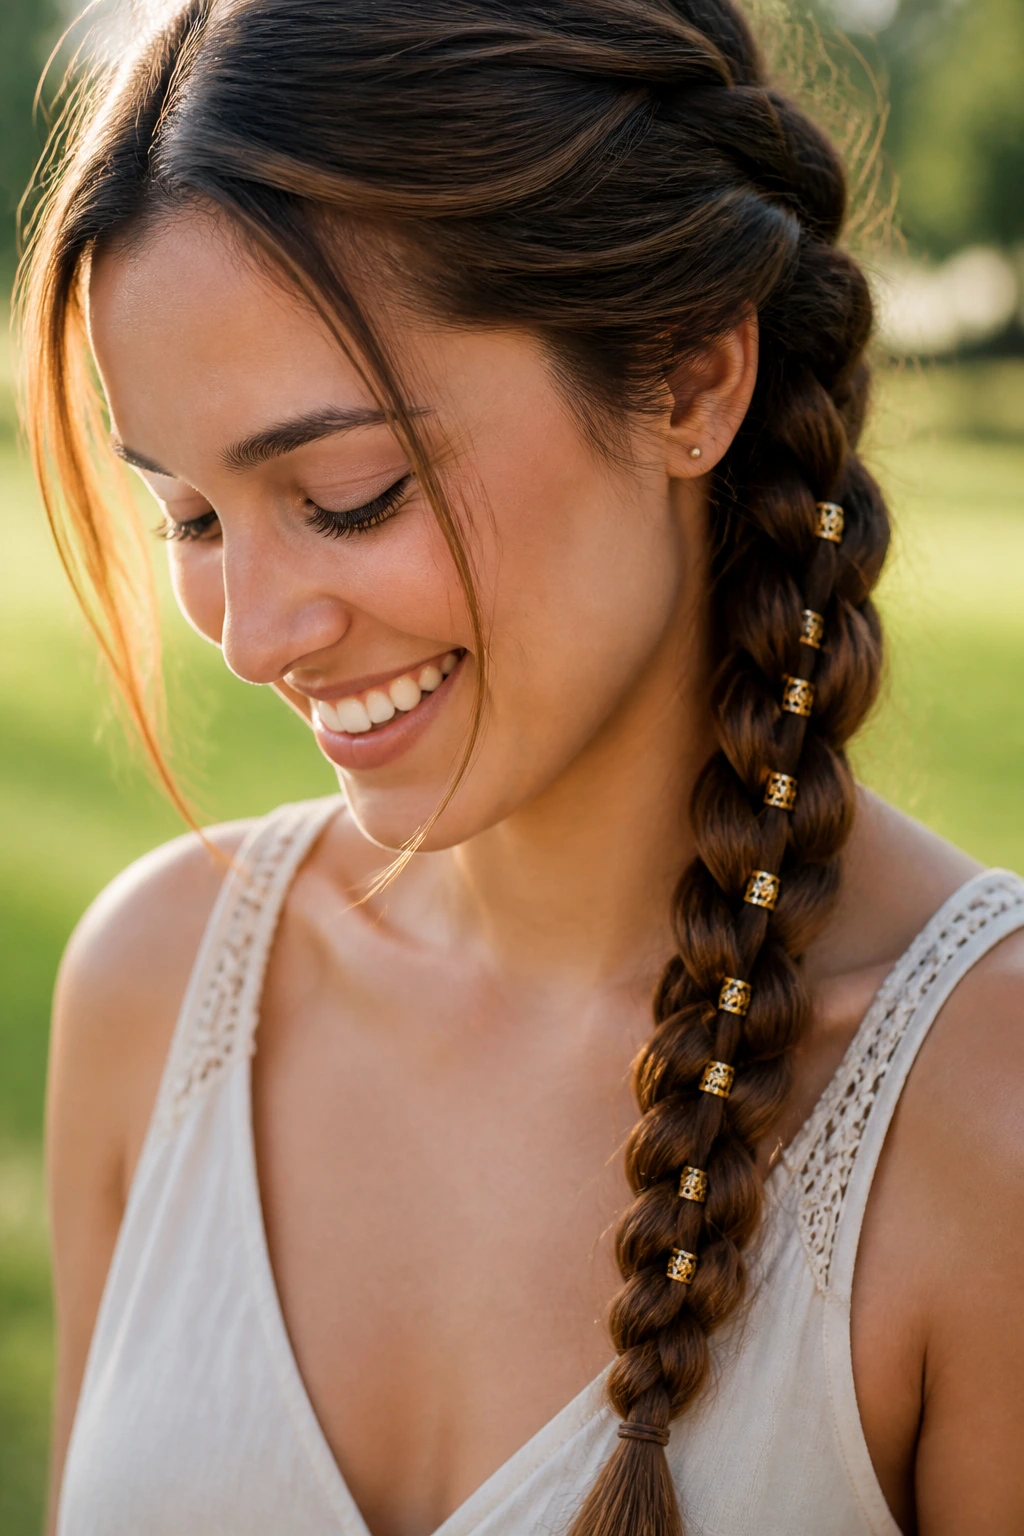
Add small, decorative beads throughout your braid. This is an easy way to elevate a style that feels too simple. Beads are lightweight and won’t weigh down your medium hair, unlike heavy clips or metal accessories.
Application Tips
- Slide the beads on as you go, or use a small tool to push them over the hair after you have finished the braid.
- Use a variety of colors if you are going for a boho-chic vibe, or stick to gold or silver for a formal occasion.
- Ensure the beads are tight enough that they don’t slide down as you move throughout the day.
25. The Inverted French Braid

Instead of braiding normally, turn your head upside down and braid from the nape of your neck up to the crown. When you finish, pull the rest of your hair into a high ponytail or a bun. This hidden detail is a great conversation starter and adds visual interest to a basic high pony.
Skill Leveling
- This requires practice, so don’t be discouraged if your first attempt is messy.
- Use a mirror behind you to keep an eye on your progress.
- Once you reach the top, secure the braid with a small clear elastic before you gather it into your final style.
26. Side-Swept Waterfall
A variation on the standard waterfall, this one only goes halfway around the head before being pinned. It keeps your hair mostly down but creates a beautiful, braided detail that mimics a crown.
Why This Style Succeeds
- It keeps shorter layers out of your eyes.
- It highlights the highlights or color in your hair.
- It is gentle on the scalp, making it comfortable for all-day wear.
27. The Double-Twist Braid
Instead of braiding, use two separate twists that you eventually tie together. It creates a “rope” effect that looks very thick and lush. For medium-length hair, this is a great alternative to a three-strand braid because it keeps the hair tighter and more secure.
Maintenance
- If you have layers, use a light-hold cream to keep them tucked into the twists.
- A quick spritz of hairspray at the end will lock the twists in place for the entire day.
- This style also keeps your hair from tangling, making it a great option for windy days.
28. Braided Ends
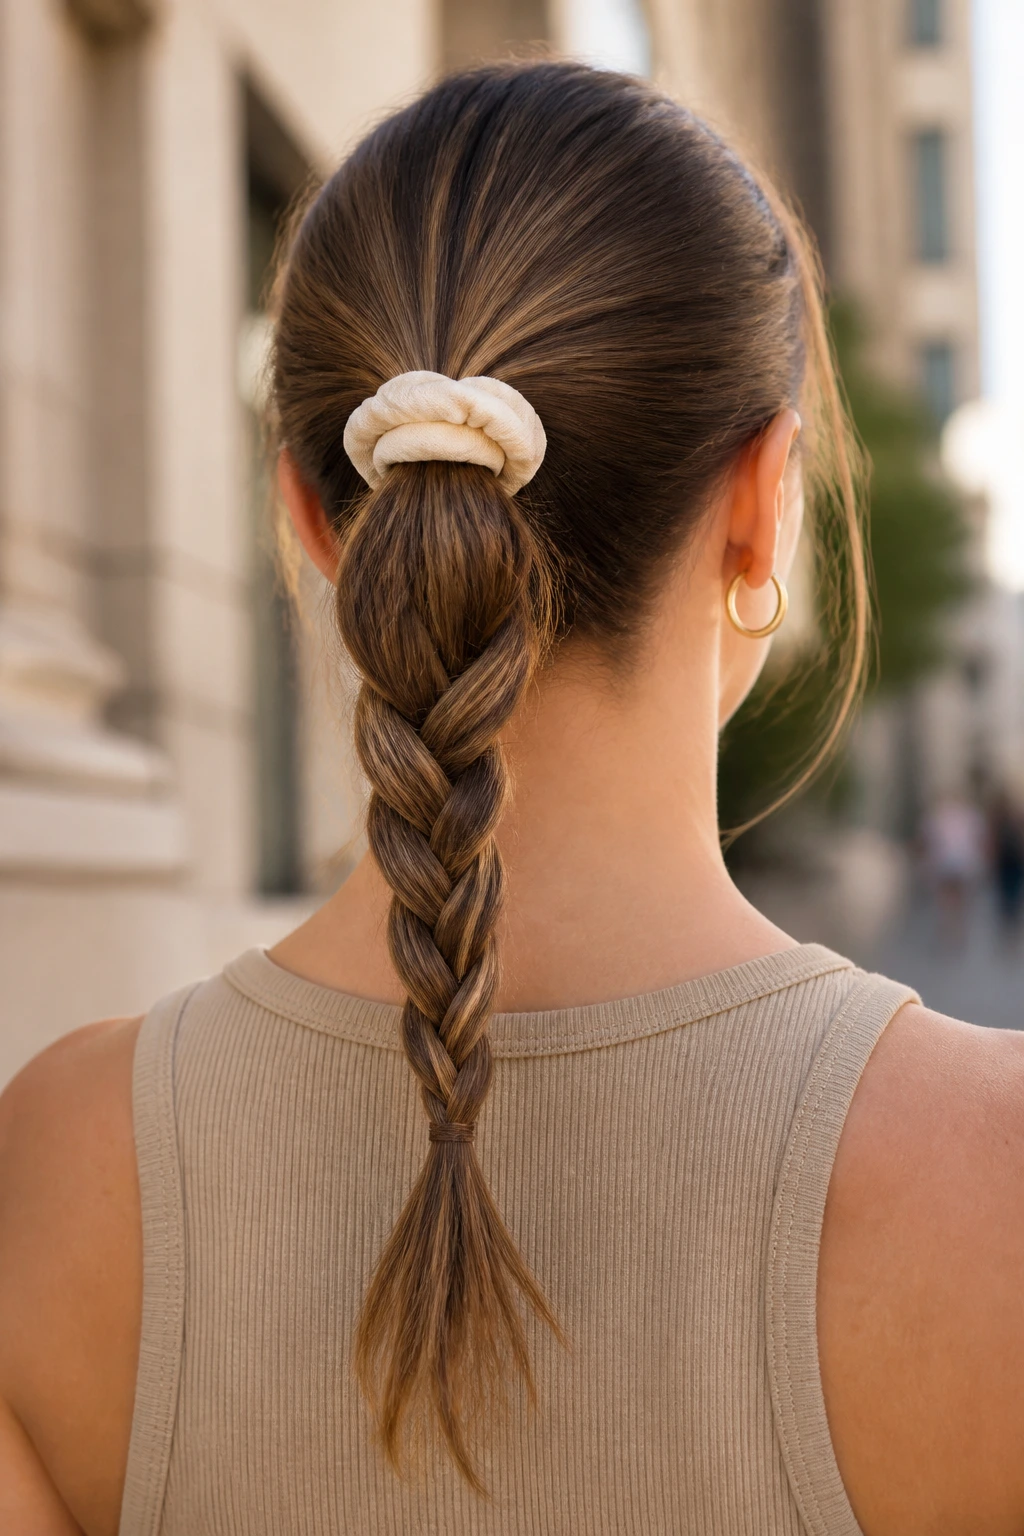
Sometimes, the best way to style medium hair is to keep it simple. Pull your hair into a ponytail and braid just the ends. It provides a clean, finished look to your ponytail and prevents your ends from whipping around in the wind.
The Modern Finish
- Use a small, high-quality scrunchie at the base of the ponytail.
- Braid the ponytail down, leaving about two inches of the end unbraided for a modern, slightly undone look.
- This is a fantastic “last-minute” style that still looks like you put effort into your appearance.
Final Thoughts
Finding the right style for medium hair comes down to embracing the unique volume and texture that this length offers. You don’t need excessive length to create beautiful, intricate braids; you just need to understand which styles highlight your hair’s natural strengths. Whether you opt for the structure of a Dutch braid or the ease of a simple twisted crown, the key is to experiment with tension, texture, and accessories.
Most of these styles require nothing more than a few clear elastics, a handful of bobby pins, and a bit of patience. As you practice, you will notice which techniques feel comfortable for you and which ones provide the best hold for your specific hair texture. Remember, the best braids are the ones that make you feel confident, even if they aren’t technically perfect. Let a few pieces fall out, let your braid be a little messy, and enjoy the process of making your hair look exactly how you want it to look.