Braided styles featuring shaved sides—often referred to as an undercut or a temple fade—are far more than a passing fashion statement. They represent a deliberate intersection of soft, intricate texture and sharp, geometric precision. When you shave the sides or back of your hair, you are essentially creating a clean canvas, a stark negative space that makes every strand of a braid look like a deliberate piece of art. For those who live in these styles daily, the appeal is clear: you get the ease of a low-maintenance cut with the endless creative potential of long hair.
Maintaining this look requires a balance of technique and confidence. You are working with two distinct textures: the buzzed area, which needs regular upkeep to stay crisp, and the longer lengths, which demand moisture and tension to hold a braid pattern throughout a busy day. If you have been hesitant to combine these styles, or if you already have the undercut and are looking for ways to maximize your aesthetic, you are in the right place. We are diving into how to marry these two extremes, keeping your hair healthy, styled, and ready for whatever your schedule holds.
1. The Classic Side-Swept Dutch Braid
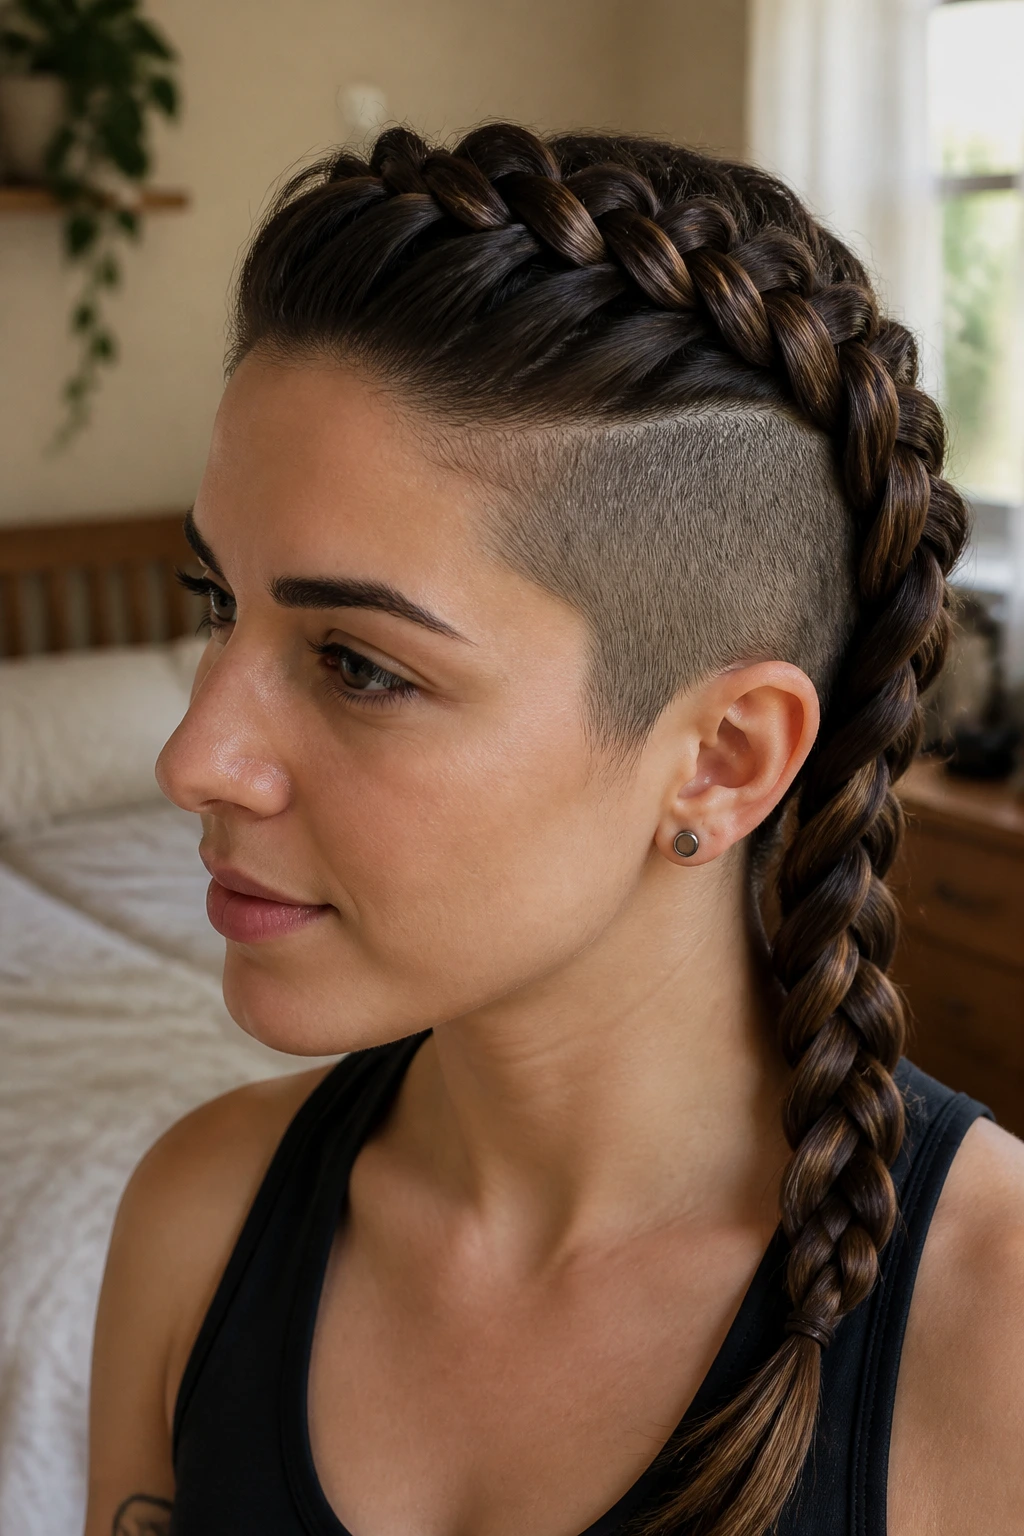
This style is the workhorse of the shaved-side community. By concentrating all your volume on one side of the head, you create an intentional asymmetry that highlights the exposed scalp on the opposite side. The Dutch braid, which is essentially an inside-out French braid, makes the hair look thicker and more defined because the three sections are pulled under each other rather than over.
Why It Works for Daily Life
The tightness of a Dutch braid ensures that your hair stays put, whether you are commuting or working through a shift. Because the hair is pulled firmly from the hairline, you don’t have to worry about loose strands hanging in your face. It is a look that feels polished enough for an office setting but edgy enough for a weekend look.
How to Achieve the Look
- Start by parting your hair on the side where you have the most length.
- Begin a Dutch braid at the front hairline, pulling in small, even sections as you work your way back toward the nape of the neck.
- Secure the end with a small clear elastic.
- Pro tip: Once you reach the end, gently tug on the edges of each loop to “pancake” the braid, making it look fuller and more relaxed.
2. The Mohawk-Inspired Fishtail
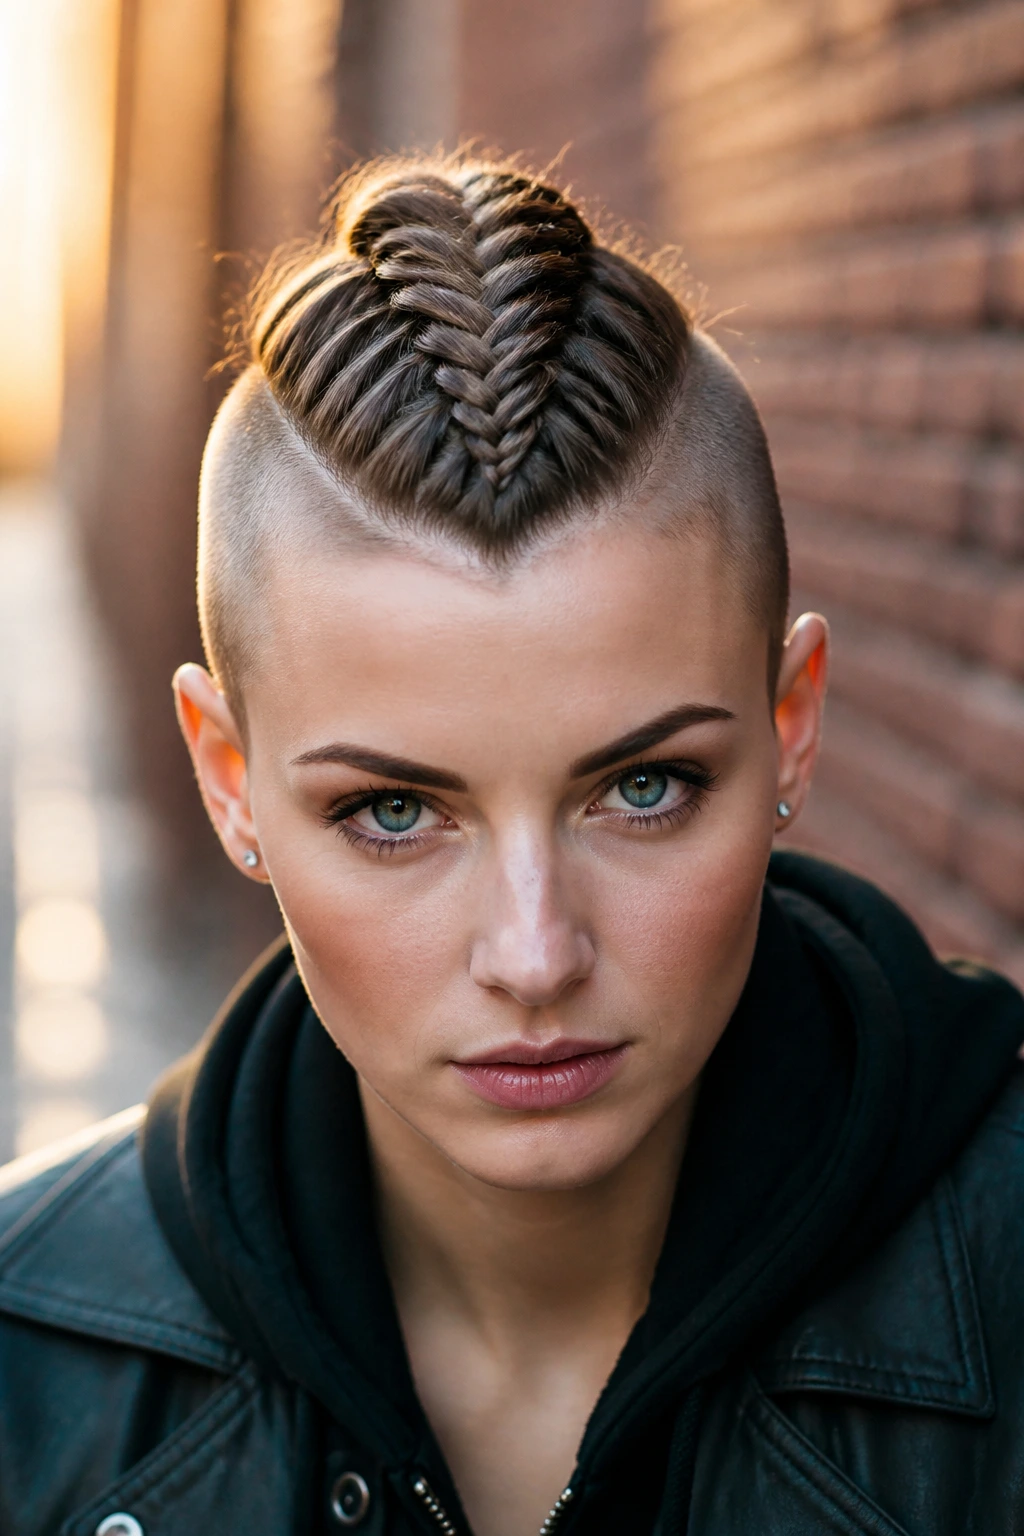
If you have an undercut that runs along both sides of your head, a central braid is the most logical choice. A fishtail braid creates a complex, woven look that masks the transition between the scalp and the hair. Unlike a standard three-strand braid, the fishtail relies on tiny, repetitive movements that result in a sleek, rope-like appearance.
The Mechanics of the Fishtail
You are taking two main sections and pulling small pieces from the outside edge of each to the center. It takes a bit more time than a standard braid, but the result is a durable, structured look that can easily withstand the wind or high activity. Because the sides are shaved, the central braid stands out with much higher contrast than it would on a full head of hair.
Styling for Texture
- Use a small amount of texturizing spray before you start.
- Work with clean, slightly damp hair if you want the braid to be extremely tight.
- Keep the tension constant as you pull the outer pieces inward.
- Finish with a light-hold hairspray to catch any flyaways that might be poking out from the transition point near your shaved sides.
3. Double Dutch Braids with Faded Detail
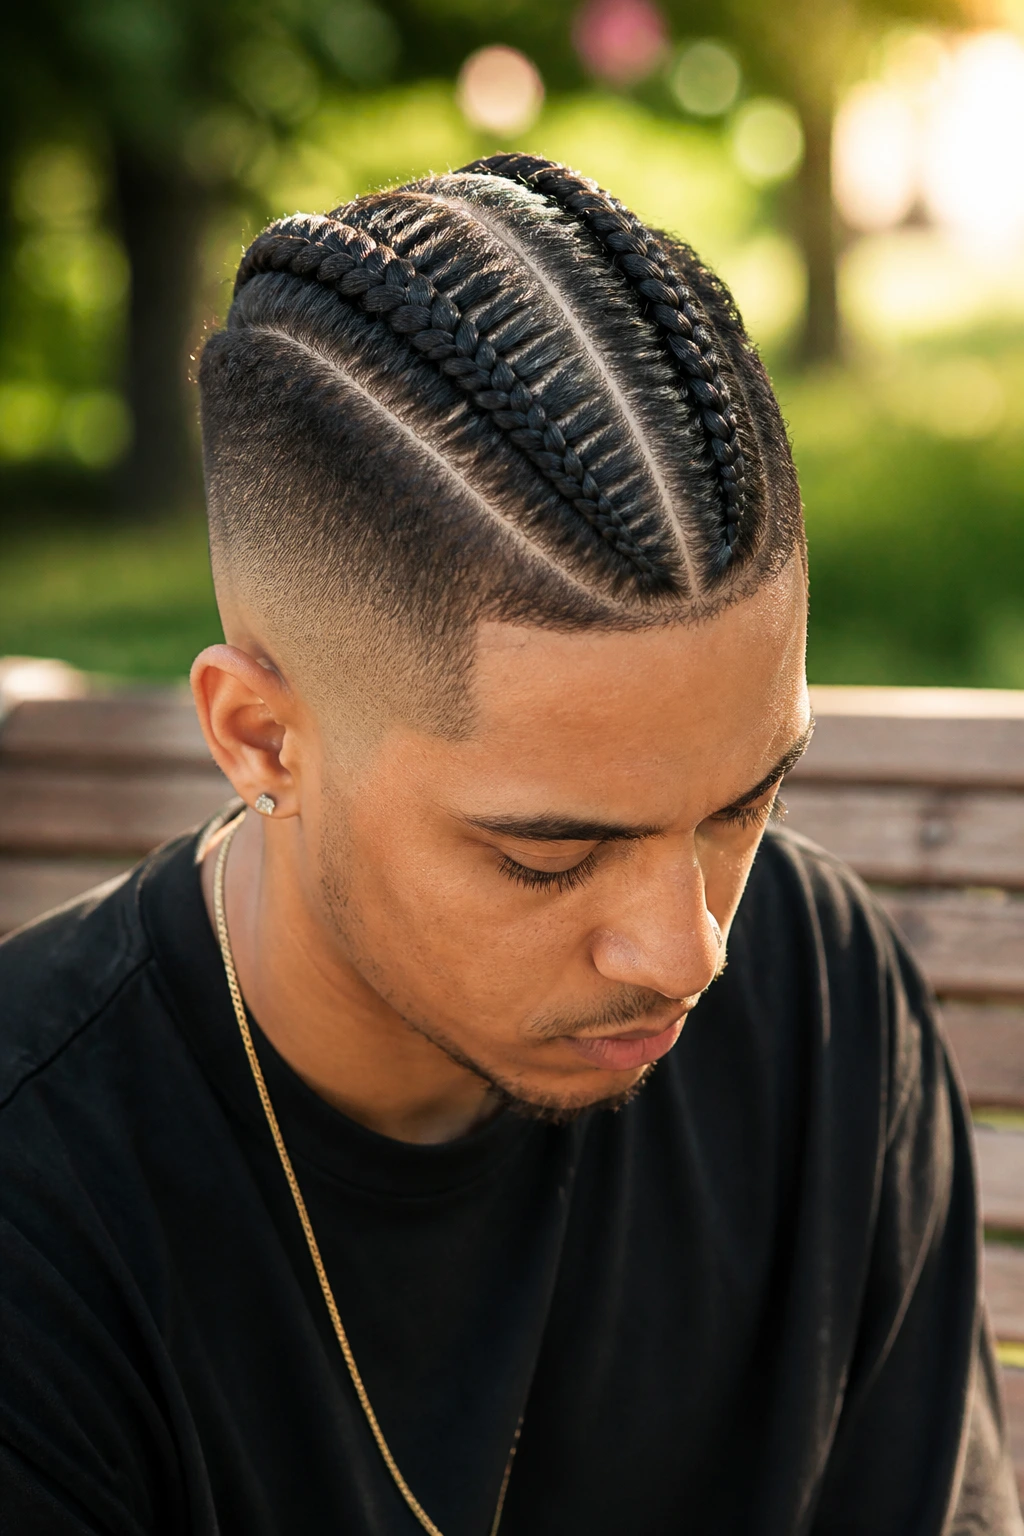
For those who want to show off a bit more of their scalp, two parallel Dutch braids are the perfect solution. This style splits your hair right down the middle, creating two distinct tracks that follow the line where your hair transitions from long to short.
Planning Your Part
The key here is the accuracy of your part. Use the tail end of a rat-tail comb to ensure the line is dead straight; if the part is messy, it will detract from the sharp lines of your shaved undercut. If your hair is on the finer side, add a bit of dry shampoo to the roots before braiding to give your hands something to grip.
Practicality for Everyday Wear
- This style is incredibly comfortable for sleeping if you don’t braid all the way to the ends.
- It keeps your hair completely off your neck, which is a major benefit during warmer months or high-intensity exercise.
- If you have an asymmetrical undercut—where one side is shorter than the other—this style naturally adapts by letting the shorter side remain tighter while the longer side has more volume.
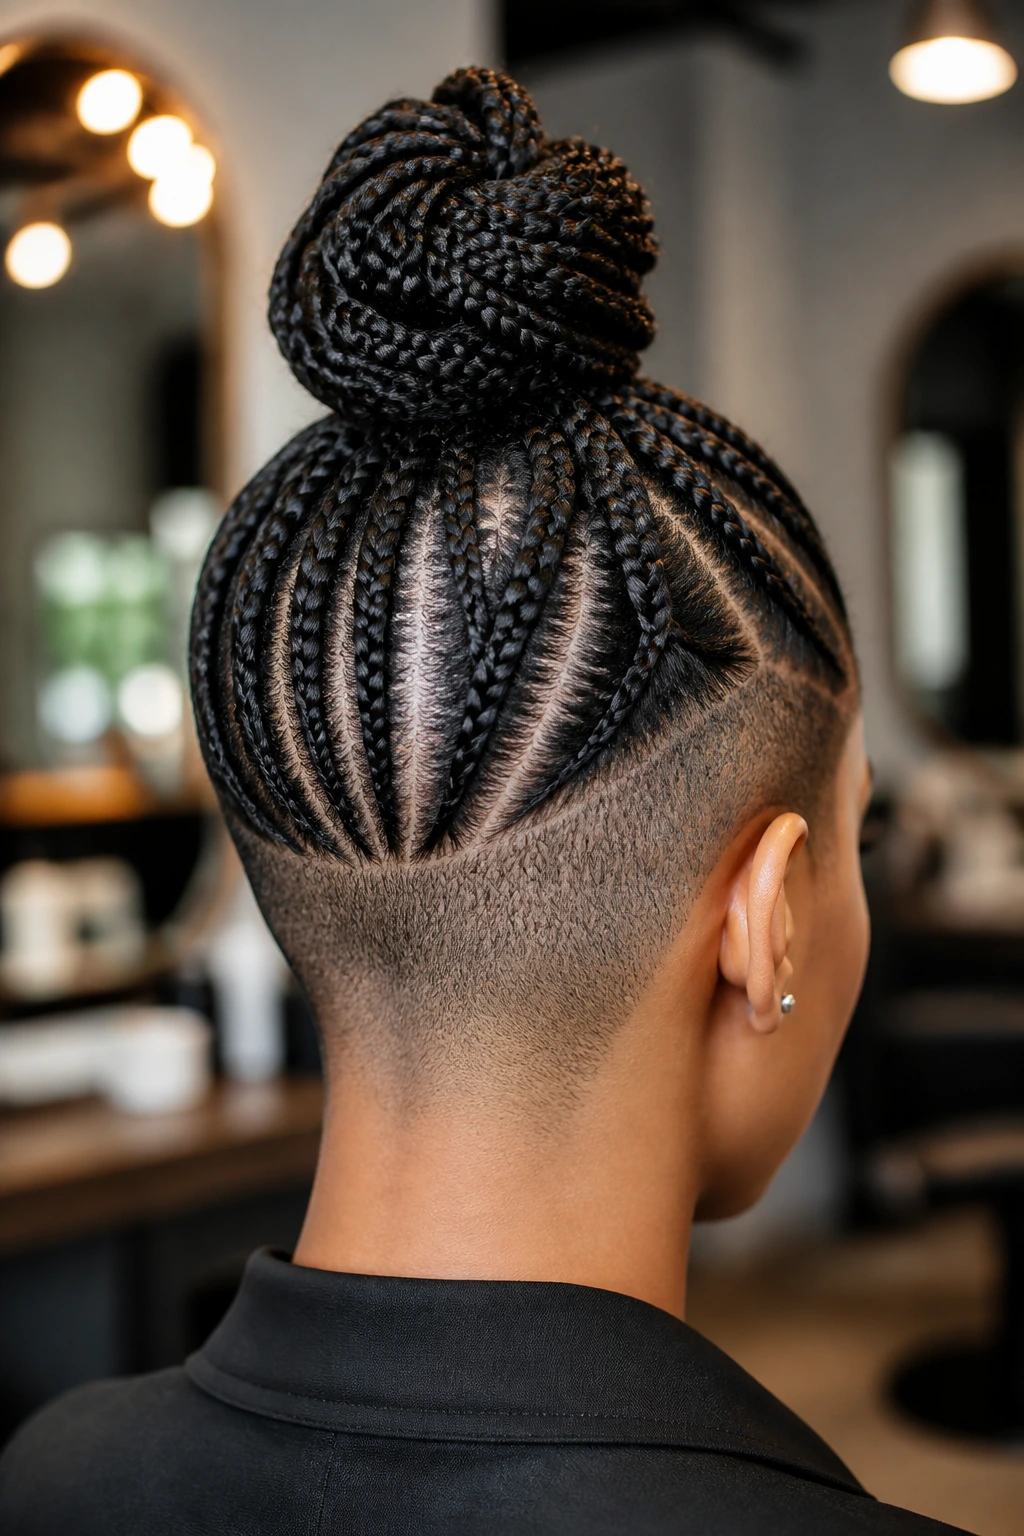
4. The Half-Up Top Knot Braid
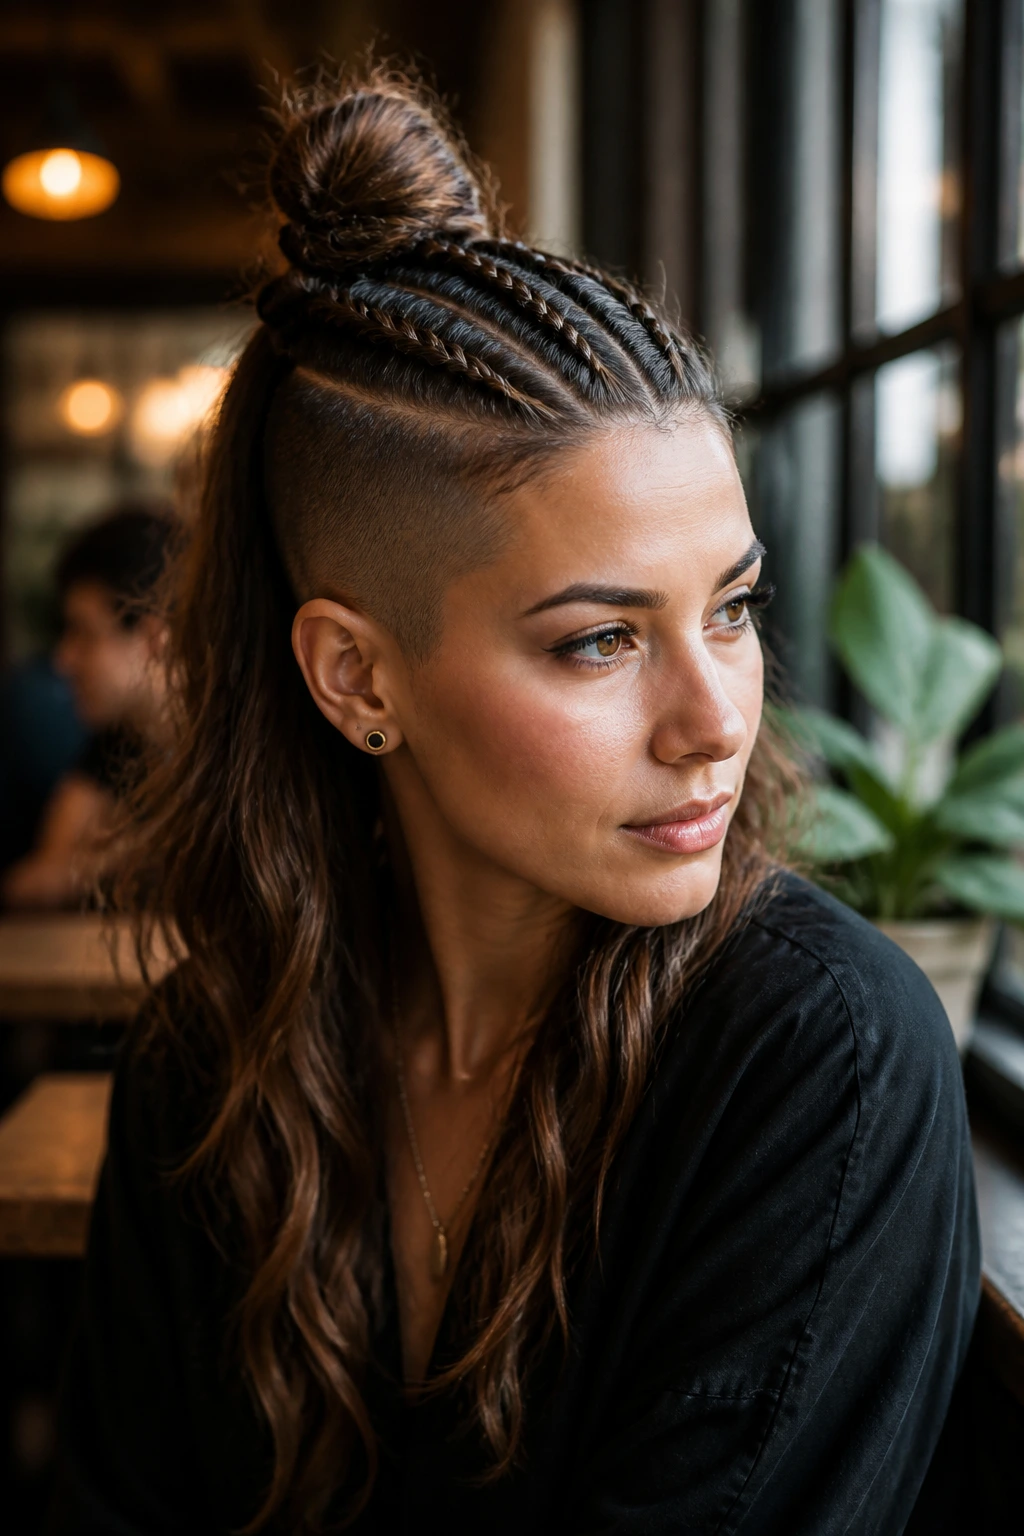
Combining a braid with a top knot is a staple for a reason. By braiding only the top section of your hair and leaving the rest down, you gain the versatility of long hair while keeping the crown area clean and focused. The shaved sides accentuate the height of the knot, giving the overall shape a much more dramatic profile.
Why This Style Is Functional
You get the security of a braid without the weight of pulling every single strand back. If you work in a role where you need to look professional but want to retain some individual flair, this is your go-to. It keeps the hair out of your eyes while showing off the transition from the buzz cut to the longer hair at the crown.
Steps for Success
- Gather the hair at the crown, keeping the width equal to the width of your shaved sections.
- Braid this section backward, stopping wherever you want your knot to sit.
- Secure the braid into a small ponytail.
- Wrap the remaining hair into a bun, tucking the ends under the elastic.
5. The Messy Crown Braid

Many people assume that braids with shaved sides must be tight and rigid, but that is not the case. A loose, messy crown braid creates a soft, ethereal vibe that contrasts beautifully with the harshness of a fresh buzz cut. This is a great way to use day-two hair, as the added natural oils make the braid easier to shape and manipulate.
Achieving the “Undone” Look
You want the hair to look lived-in. Don’t worry about perfect sections; instead, grab chunks of hair intuitively. As you braid, pull the loops wider than you think you need to. The goal is to have the braid frame your head like a halo, with the shaved parts acting as a frame for the intricate work above.
Tips for Longevity
- Use a texturizing paste to give your hair a bit of grip before you start the weave.
- Secure the braid with bobby pins that match your hair color to make them disappear.
- If the braid feels like it is slipping, tuck a small amount of clear pomade into the sections near your ears to lock them against the scalp.
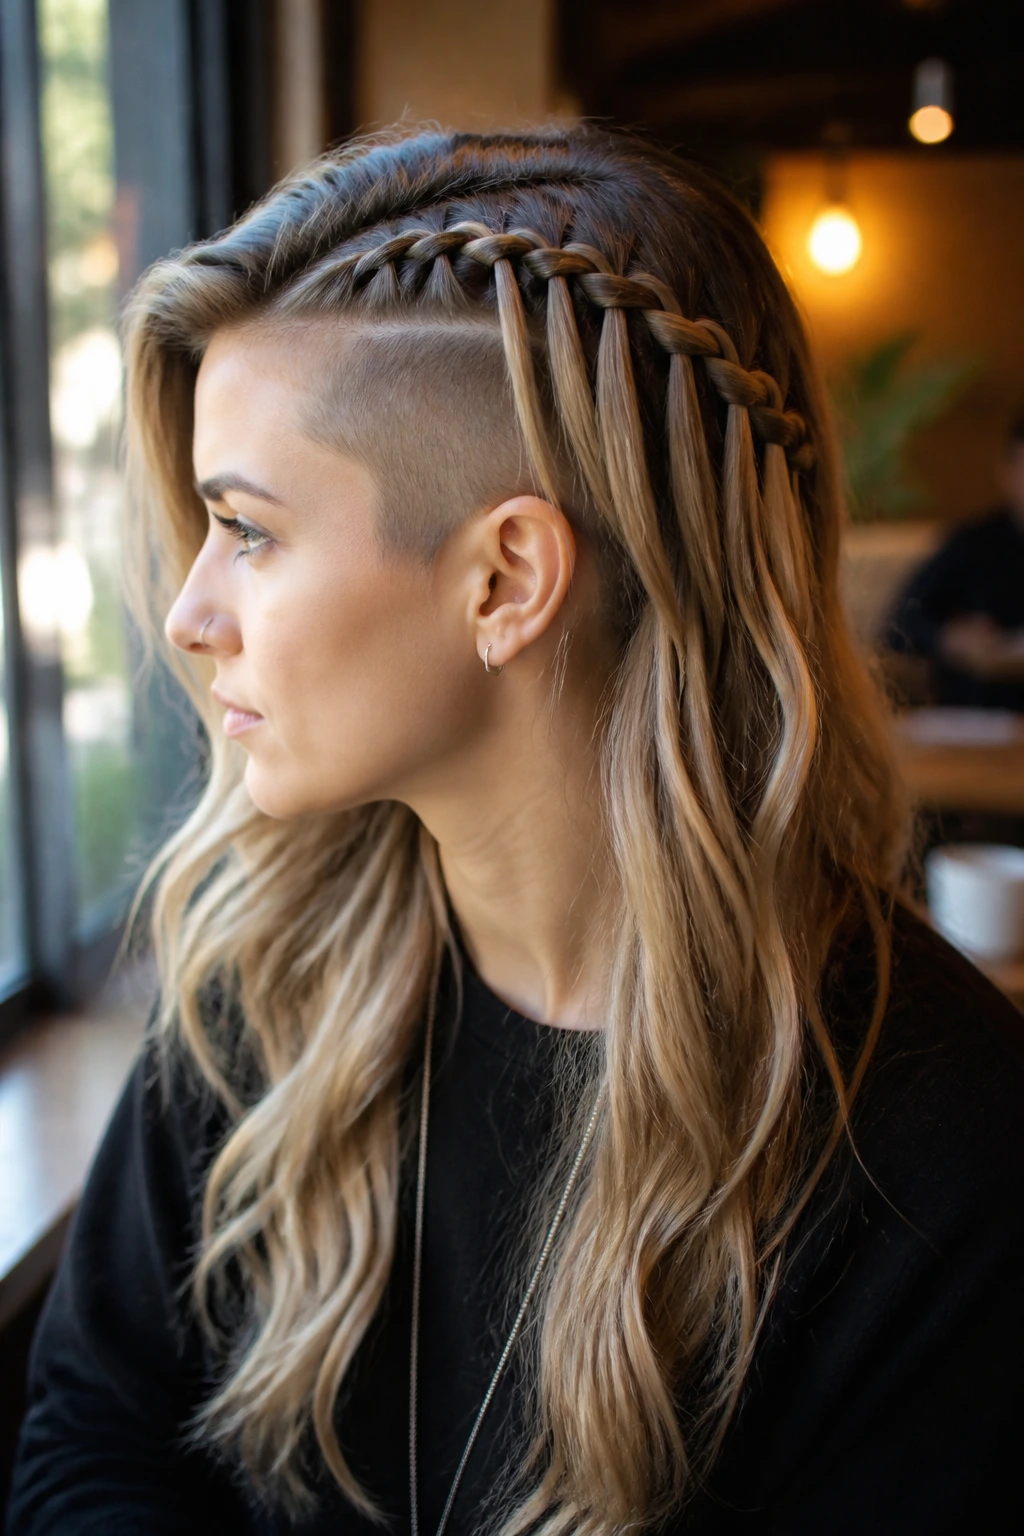
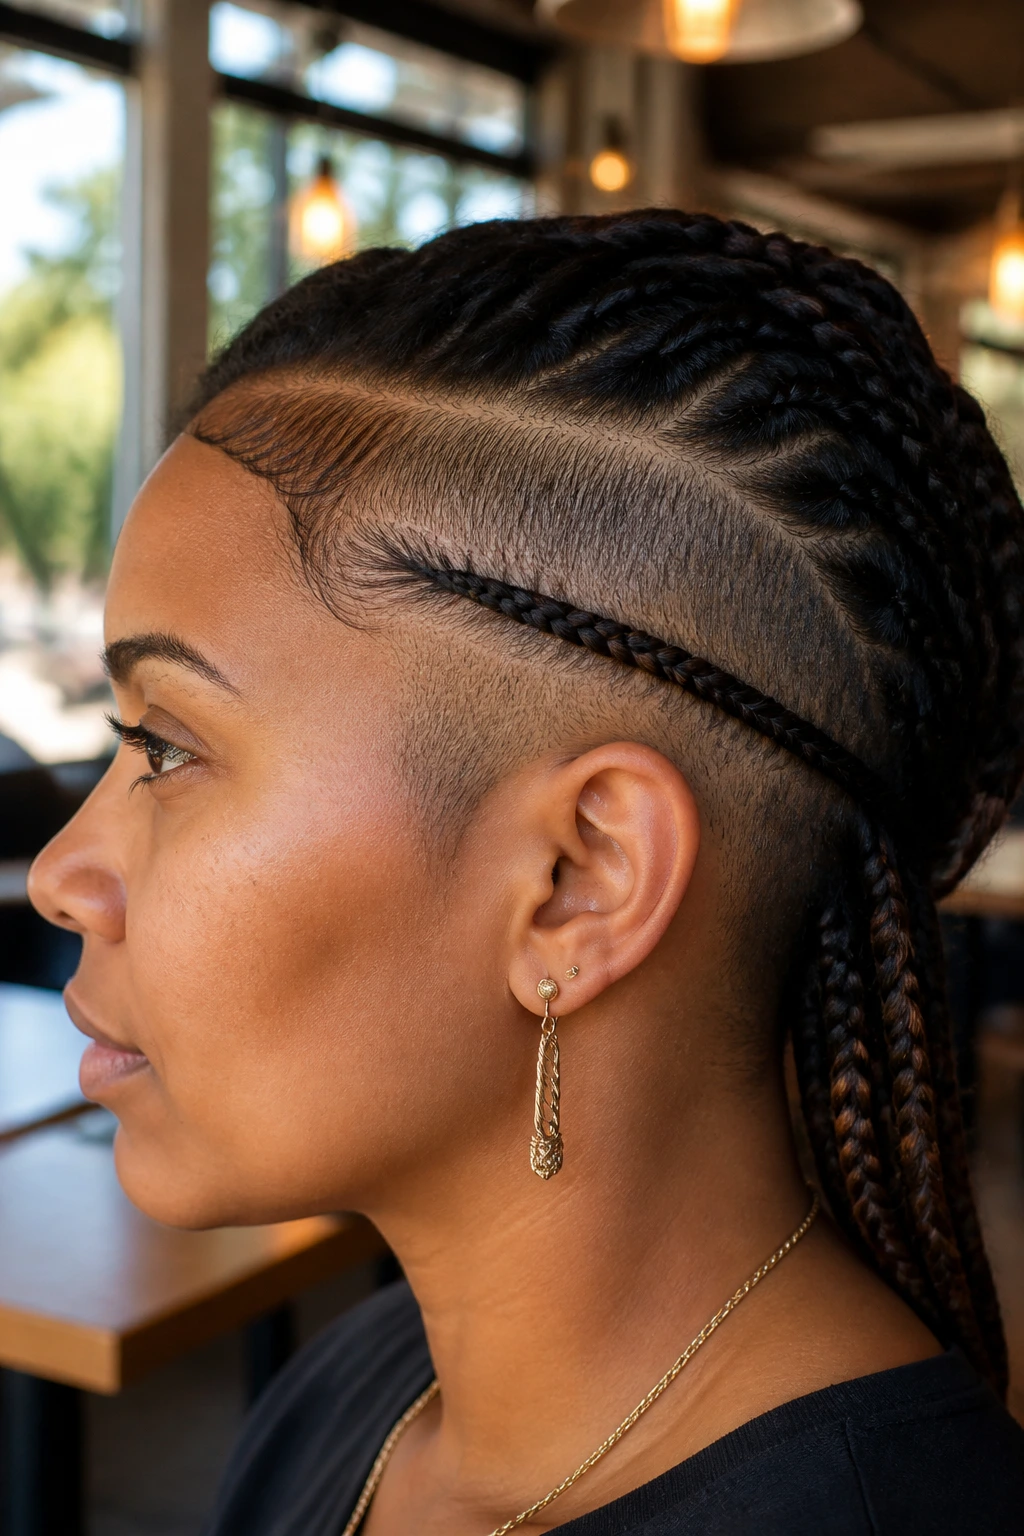
6. The Side-Braid Accent
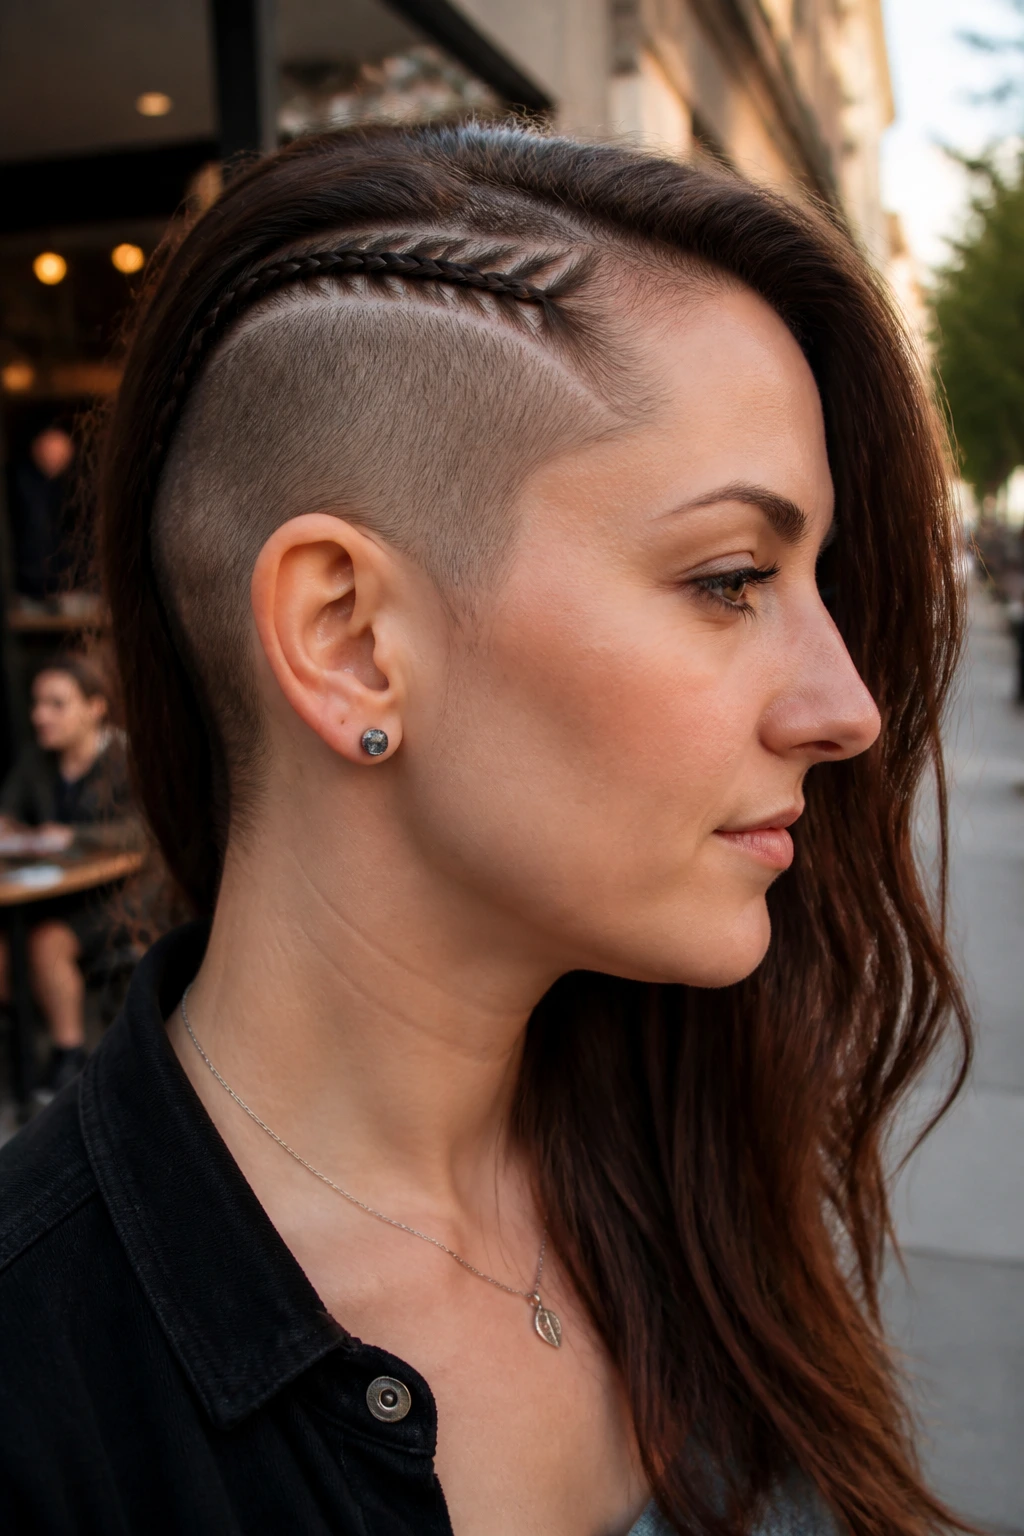
If you prefer wearing your hair down, you don’t have to abandon braids entirely. A single, thin Dutch braid along the line where the long hair meets the shaved undercut serves as a “buffer” between the two lengths. It’s a subtle detail that adds dimension to an otherwise simple hairstyle.
Integrating the Accent Braid
This works best if you have a high-contrast undercut. By braiding a small strip of hair tightly against the scalp, you emphasize the line of the cut. It effectively acts as a boundary marker, highlighting the precision of the shave.
Daily Wear Considerations
- This style doesn’t require much maintenance; you can put it in, leave it for two days, and it will still look clean.
- It’s ideal for people with very thick hair who find that a full-head braid is too heavy or time-consuming to create every morning.
- Pro tip: Use a tiny elastic at the end, and tuck it behind your ear to hide the connection point.
7. The Wrapped High Ponytail Braid
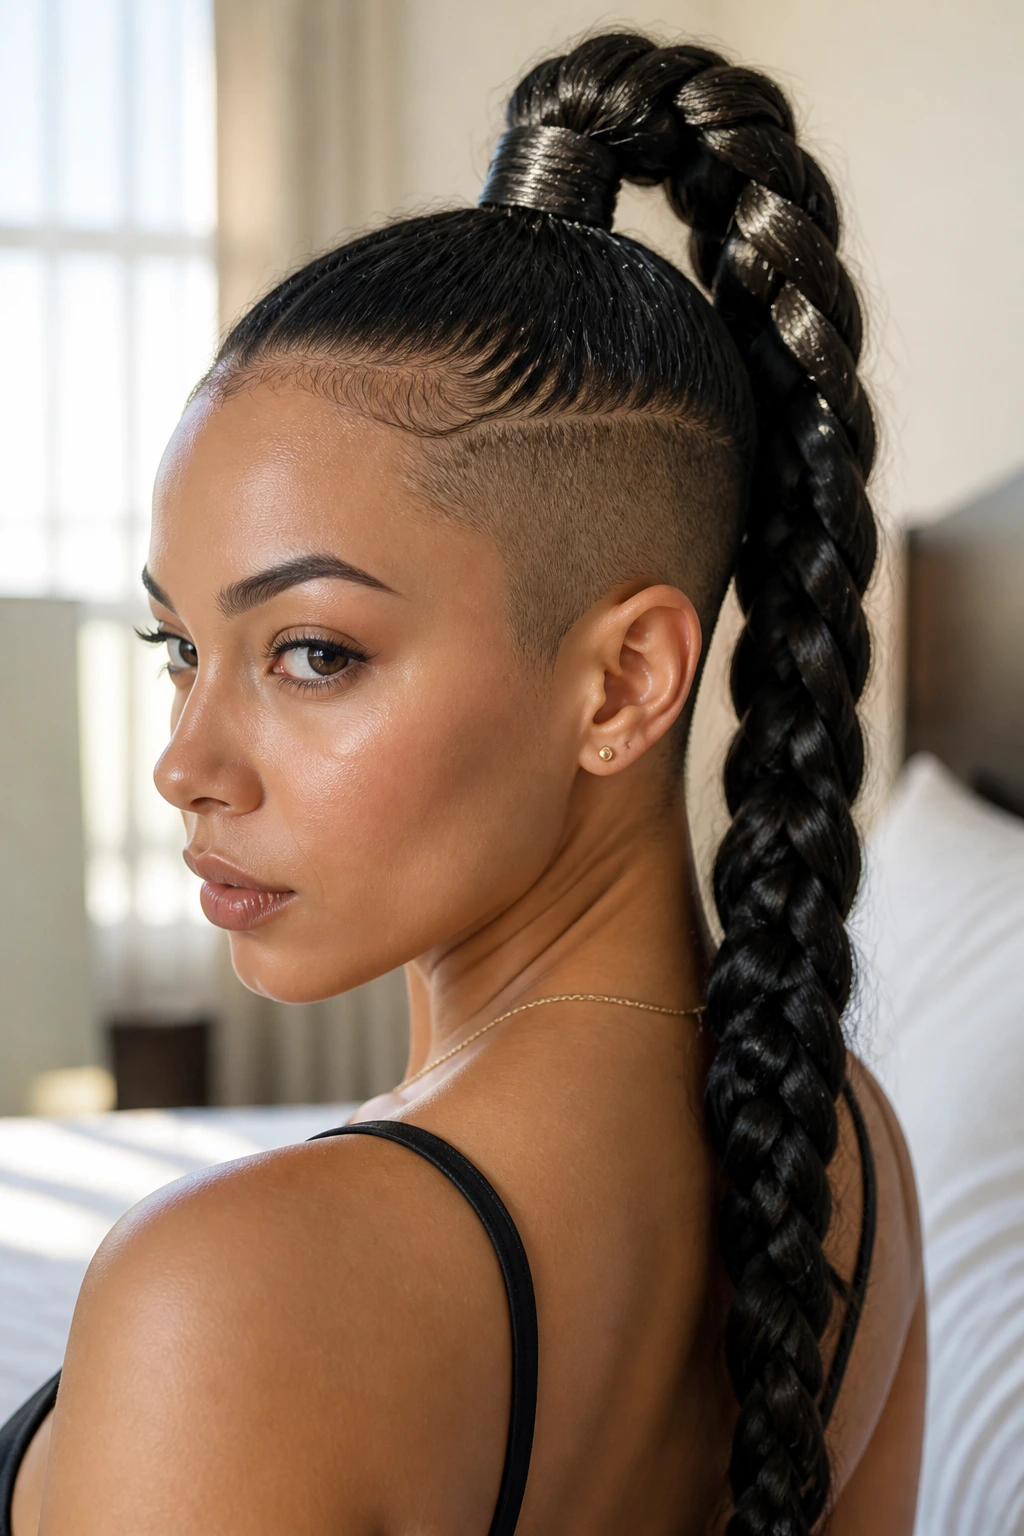
Take your standard ponytail to the next level by braiding the length of it. When your sides are shaved, a ponytail can sometimes look a bit “exposed” or plain. A thick, textured braid running down the length of the ponytail adds weight and visual interest that balances the lack of hair on the sides of your head.
The Power of Contrast
Because the ponytail is a concentrated mass of hair, and the sides are sparse, the braid acts as a focal point. You can choose between a standard three-strand, a fishtail, or even a pull-through braid. The pull-through braid is particularly effective here because it looks voluminous and thick without requiring the actual density of heavy hair.
How to Style It Daily
- Pull all hair into a high, tight ponytail.
- Apply a light shine serum to the length of the ponytail to ensure the braid looks sleek.
- If you have an undercut, make sure to smooth down any short hairs at the base of the neck with a boar-bristle brush and a dab of firm-hold gel.
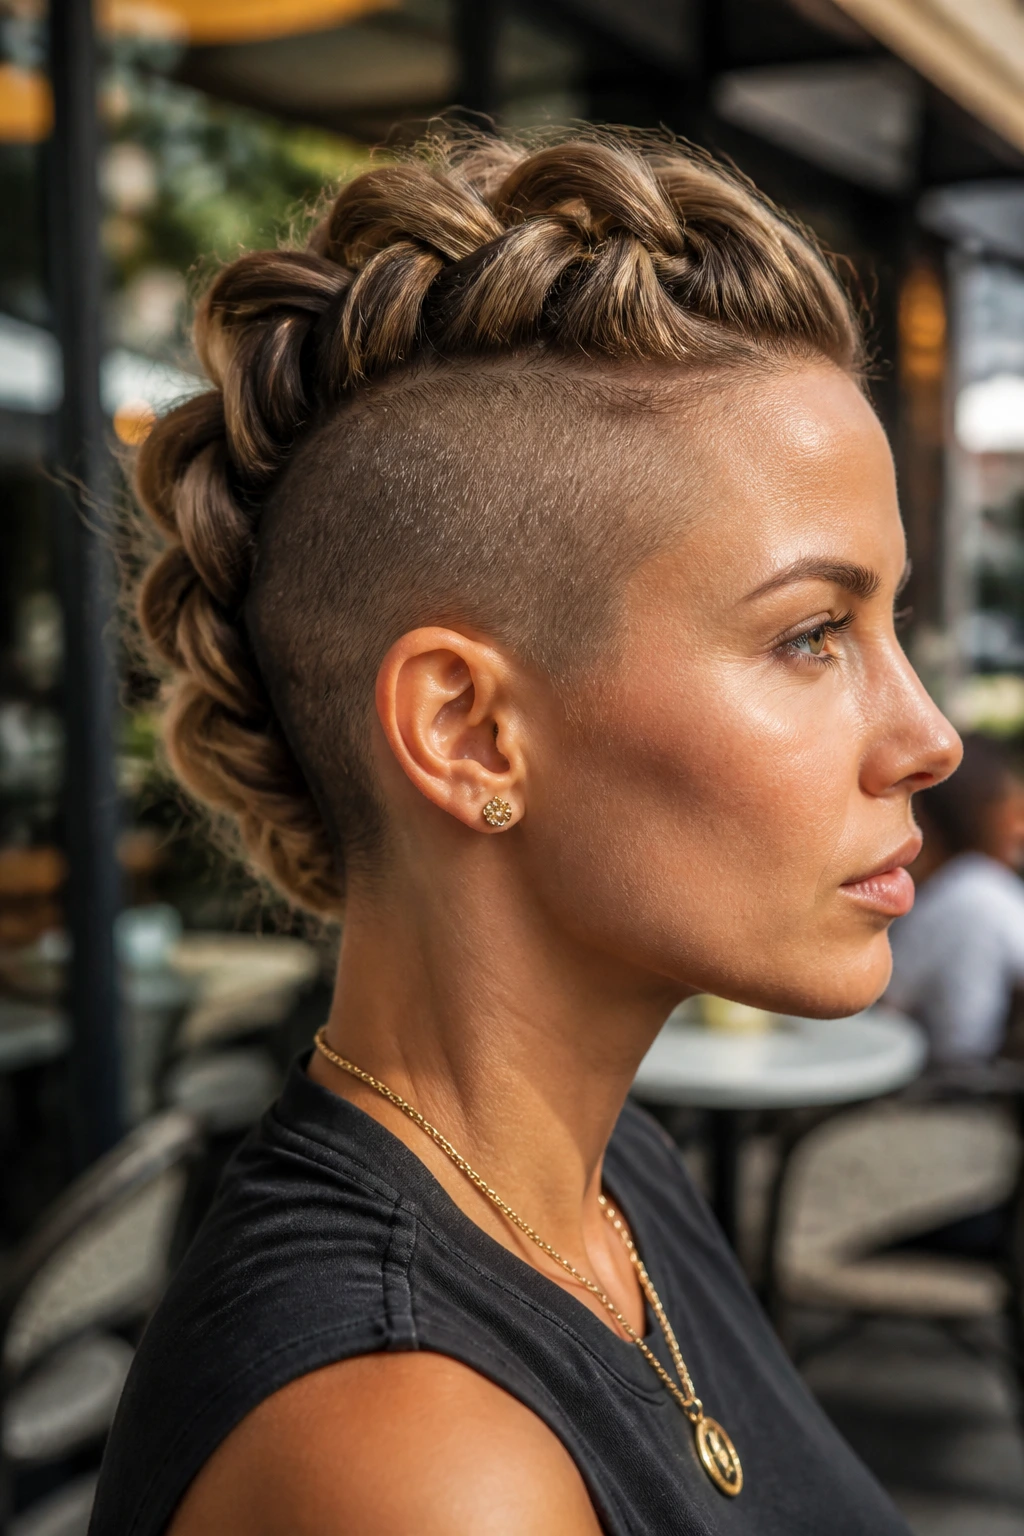
8. The Viking-Inspired Multi-Braid
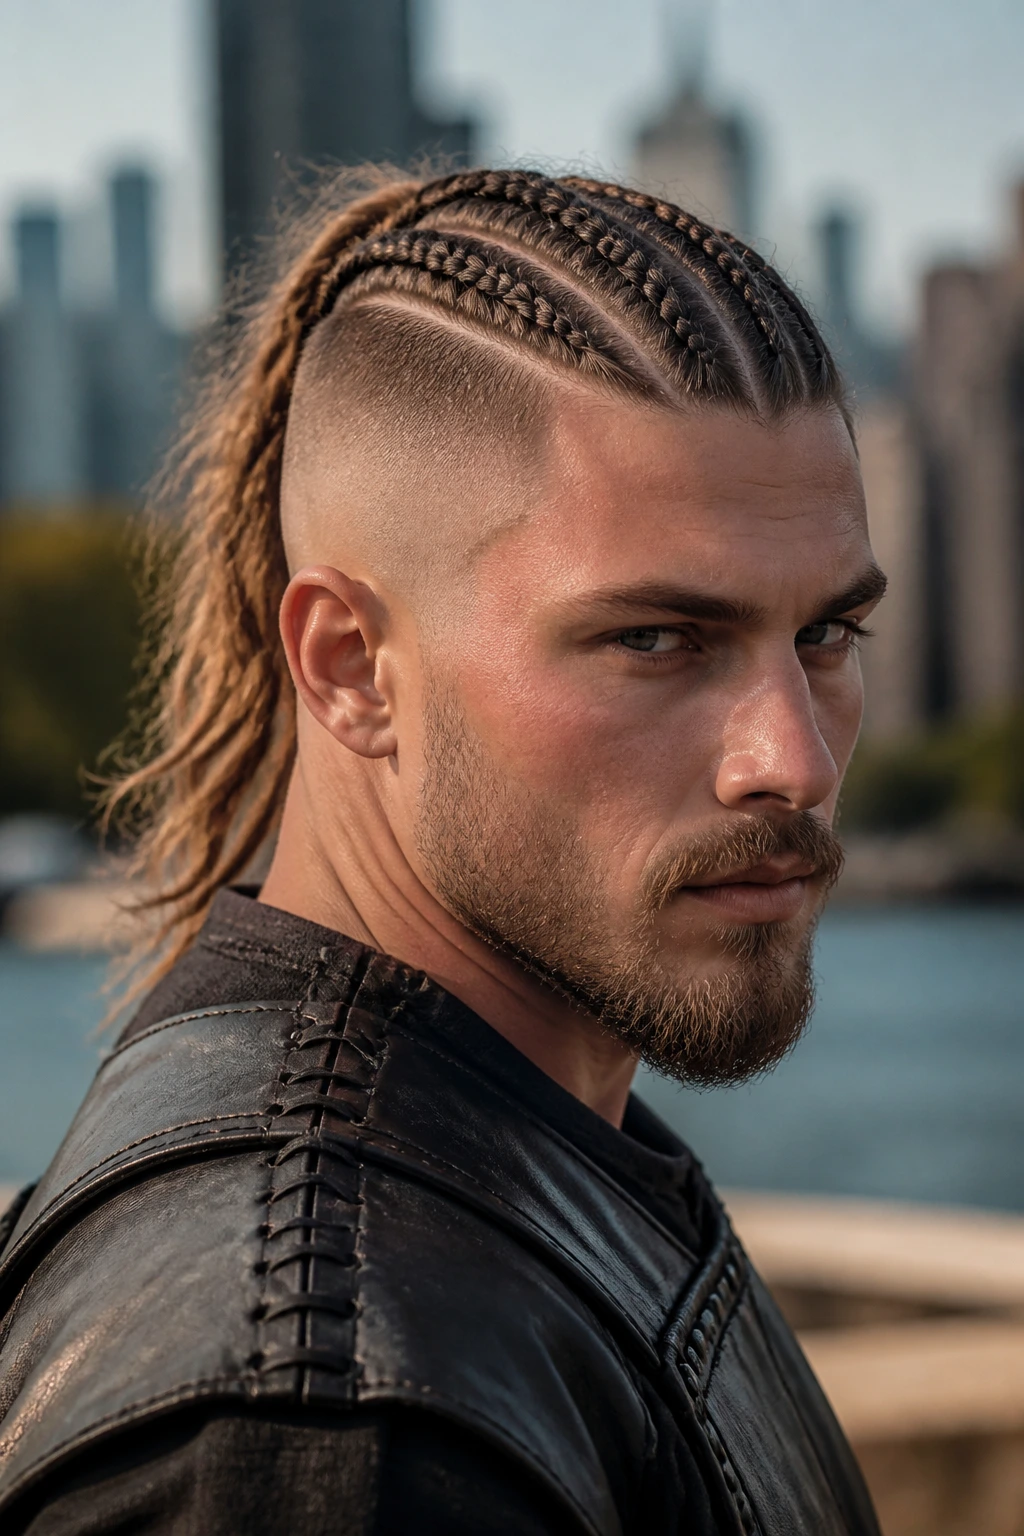
Viking styles often involve multiple braids mixed with loose hair. When you incorporate shaved sides into this look, you are essentially modernizing a historical aesthetic. Create three to four small, tight cornrow-style braids that lead back into a larger, messy braid or a ponytail.
Why It’s a Standout Look
The geometry of the multiple braids draws the eye, and the shaved sides ensure the look remains clean rather than cluttered. It’s a very popular choice for people who enjoy spending a little extra time on their hair in the morning because it yields a style that is complex enough to last for several days.
Maintaining the Weave
- Keep the braids tight at the scalp to prevent them from loosening as you go about your day.
- Use a silk pillowcase to prevent friction, which is the enemy of small braids; it will keep your scalp looking fresh and your braids from frizzing overnight.
- Focus on keeping the shaved sections clean with regular trims.
9. The Bubble Braid Illusion
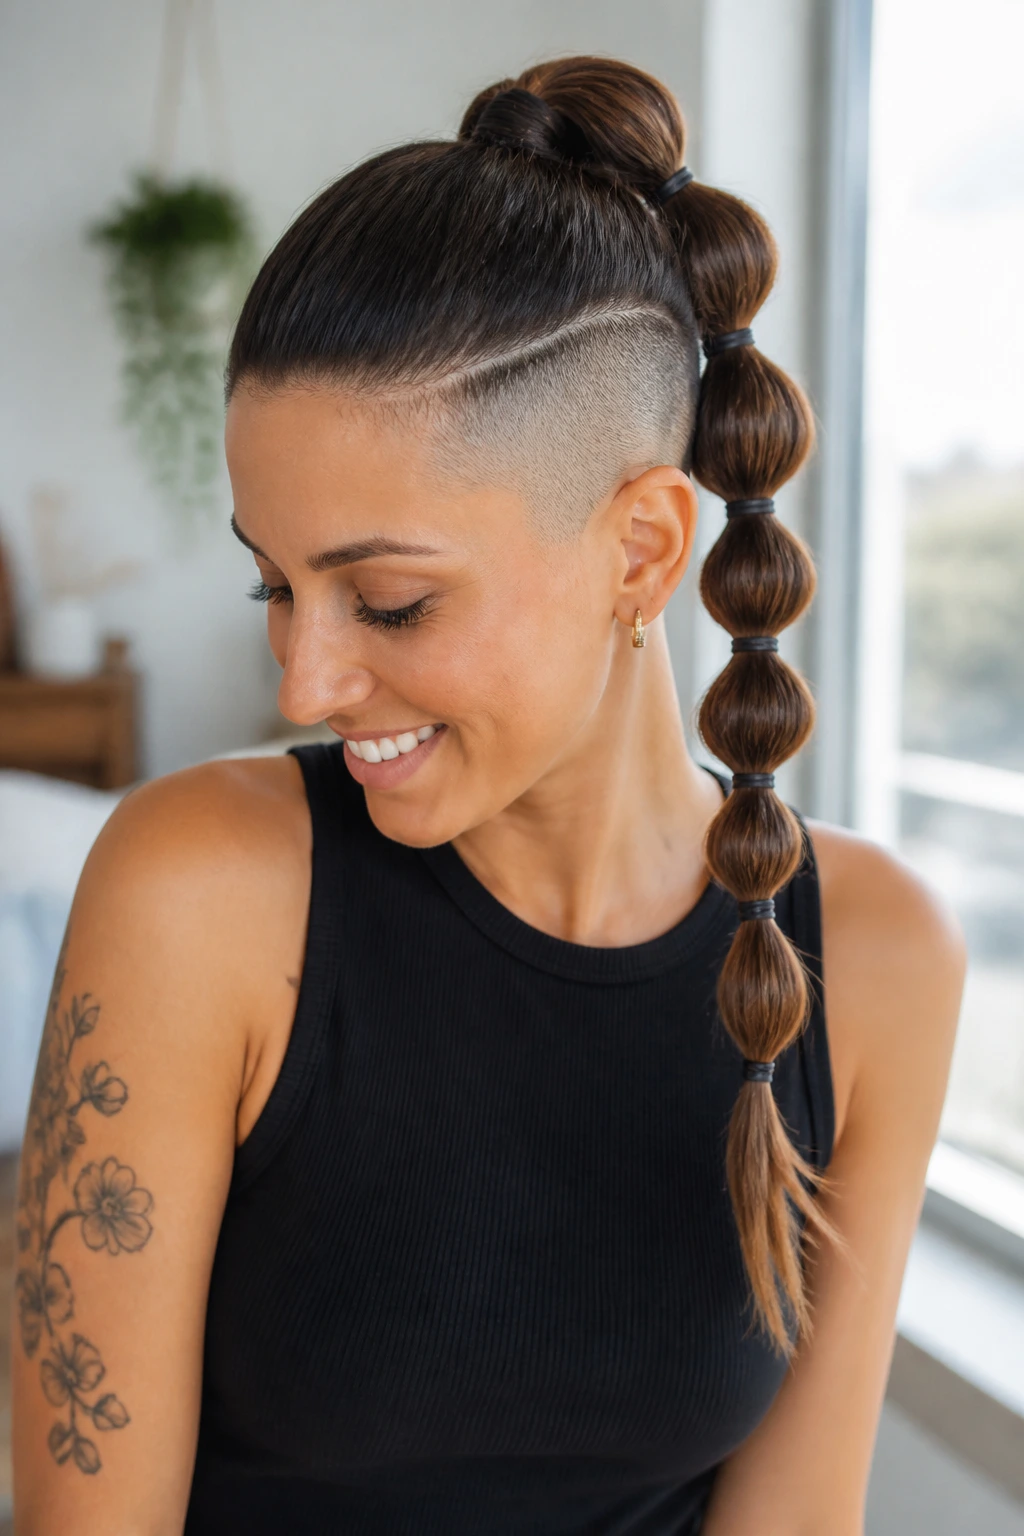
If you aren’t a master at traditional braiding, the bubble braid is your best friend. While it isn’t technically a “braid” in the traditional sense, it creates the same visual impact and is much easier to perform on your own. It works exceptionally well with shaved sides because the round “bubbles” play off the smooth texture of the skin.
The Mechanics of the Bubble
- Secure your hair into a ponytail.
- Add small elastics down the length of the hair, spaced about two inches apart.
- Gently pull the hair between the elastics to create a rounded, voluminous “bubble” shape.
- Continue until you reach the ends of your hair.
Everyday Reliability
This is the ultimate low-effort, high-reward hairstyle. It takes less than five minutes, and if a bubble gets squashed during the day, you can literally just re-fluff it with your fingers. It’s perfect for people who lead active lives and don’t want to worry about their style unraveling.
10. The Waterfall Braid
The waterfall braid is incredibly elegant and pairs wonderfully with an undercut. It allows you to keep most of your hair loose and flowing, but introduces a horizontal element of texture that cuts across the side of your head. It’s a delicate style that feels very sophisticated.
Where to Place the Braid
The braid should start at the temple—right near the edge of your shave—and move diagonally toward the back of the head. By incorporating hair from the top and dropping pieces as you go, you create a “waterfall” effect where the strands hang naturally between the braided loops.
Essential Tips
- Because this style leaves most of your hair down, it’s best for days when you don’t need your hair completely secured.
- It works beautifully on straight, wavy, or curly hair, though you will need a bit of texturizing product to keep the “dropped” strands from looking messy.
- Pro tip: Use a clear elastic to anchor the end of the waterfall braid and hide it underneath a layer of loose hair.
11. The Side-Part French Braid
A classic French braid is often overlooked, but it is one of the most secure ways to style hair when you have shaved sides. By starting with a deep side part, you can sweep the bulk of your hair into one massive, thick braid that rests against the crown of your head.
The Beauty of Tension
The French braid is distinctive because it incorporates new hair as you go, creating a smooth, tight finish that sits flat against the scalp. With shaved sides, the flatness of the braid provides a great visual balance. It keeps everything neat and prevents your hair from flopping over onto your shaved areas.
How to Make It Last
- Start by prepping the hair with a dry texture spray; this prevents the hair from sliding through your fingers while you are weaving.
- If you have layers, use a tiny bit of hair wax on the ends of your layers to help them tuck into the braid smoothly.
- Secure the final braid with an elastic that matches your hair color, or leave it slightly loose for a more casual, everyday aesthetic.
12. The Pull-Through Braid
This is a fake-it-till-you-make-it braid that creates the look of an incredibly intricate weave. By using small elastics to tie off sections and then pulling them through one another, you get a braid that looks voluminous and expensive, even if you are a beginner.
Why It’s Great for Shaved Sides
The pull-through braid naturally has a lot of width. When you pair this width with a shaved undercut, the contrast between the thick, bubbly braid and the skin is visually striking. It makes the hairstyle look like a professional editorial piece rather than a daily look.
Achieving Maximum Volume
- Always “pancake” the loops after you pull them through; this is the secret to making the braid look twice as thick.
- If your hair is on the thinner side, tease each section lightly before pulling it through the next loop.
- Use colorful elastics if you want a playful look, or clear ones for a more seamless, professional finish.
13. The Headband Braid
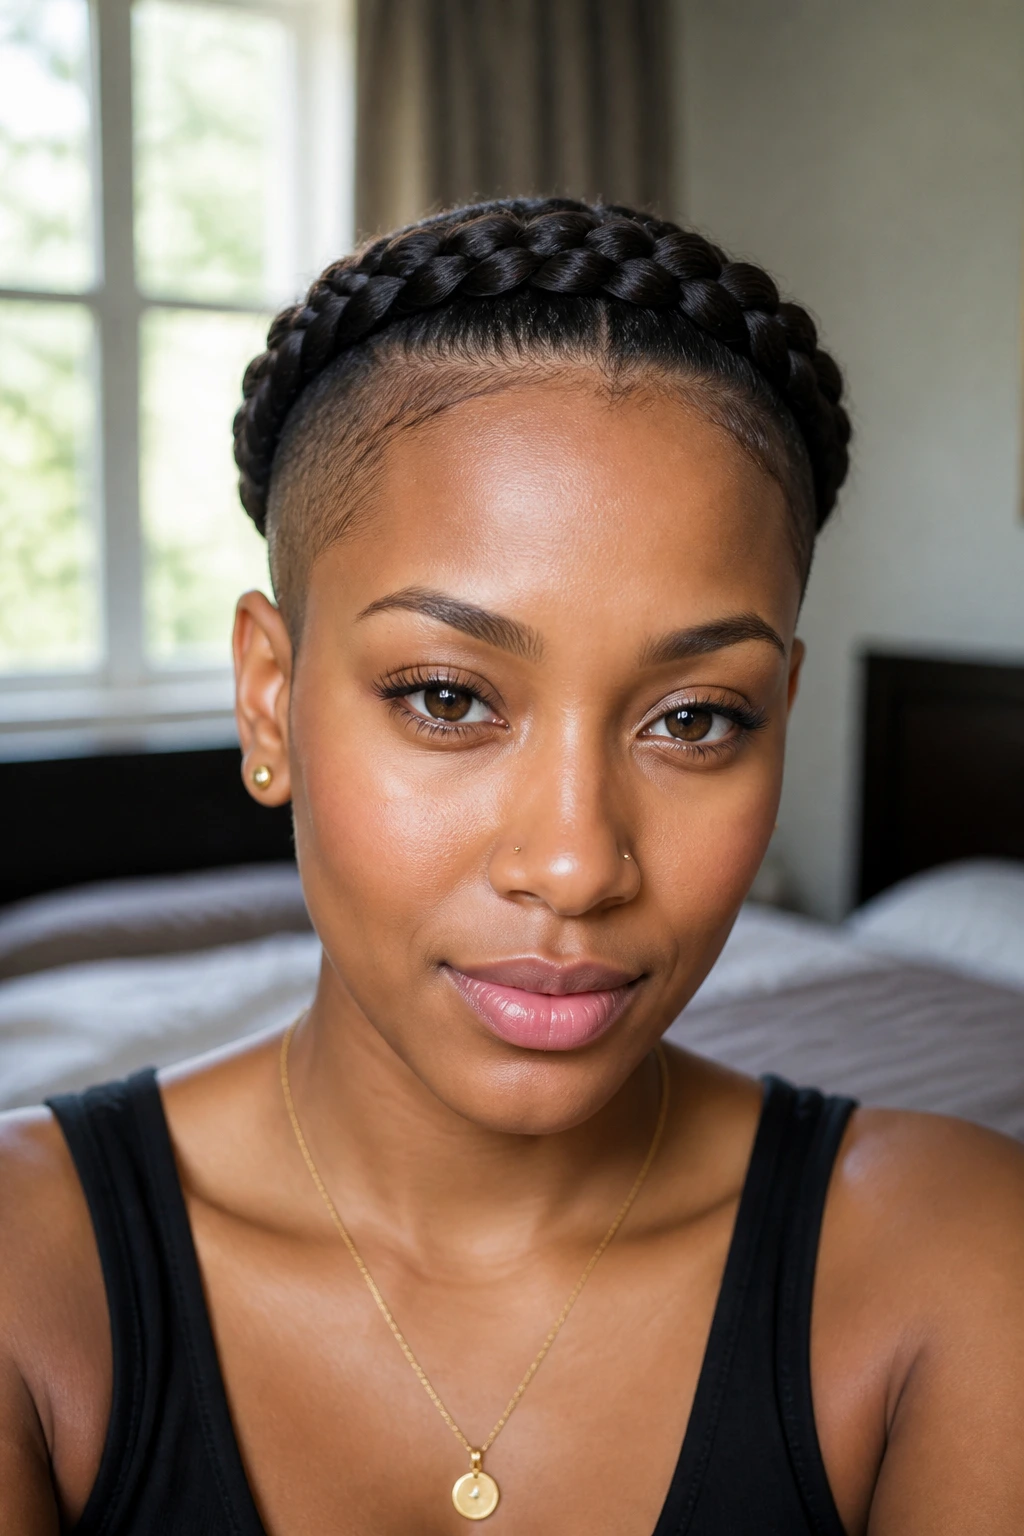
A headband braid is essentially a Dutch or French braid that travels along the front hairline from one ear to the other. For those with shaved sides, this creates a beautiful “crown” effect that mimics a headband, keeping all loose hairs away from your face and emphasizing the shape of your head.
The Versatility of the Placement
You can choose how close to the hairline you want to start. Starting right at the edge makes for a very clean, minimalist look. Starting further back allows for a bit more volume and lift at the roots, which is excellent if you have fine hair and need a bit of extra height.
Best Usage Patterns
- This style is wonderful for growing out an undercut because it keeps the shorter transition hairs tucked away.
- It pairs well with a messy bun, a low ponytail, or even loose hair in the back.
- Pro tip: Keep the braid slightly loose as you move toward the ears, then pull it tight once you reach the nape of the neck to keep the shape consistent.
14. The Low Side-Braided Bun

This is an incredibly chic option for someone who wants to look put-together with minimal effort. You take a section of hair near the temple, braid it toward the back, and then gather it into a low bun along with the rest of your hair.
The Balance Factor
The shaved side is the star here. Because the bun sits low, you expose the nape of the neck and the side of the head, allowing the shaved pattern to take center stage. It is a very mature, refined look that is perfect for professional settings.
Daily Maintenance
- Use a smoothing balm on your hair before you put it in the bun; this eliminates frizz and makes the braid look shiny.
- You can vary the size of the braid to change the look; a tight, tiny braid is subtle, while a thick, loose braid is a statement.
- Make sure your bun is secured with a sturdy elastic, as low buns can slip during a busy day.
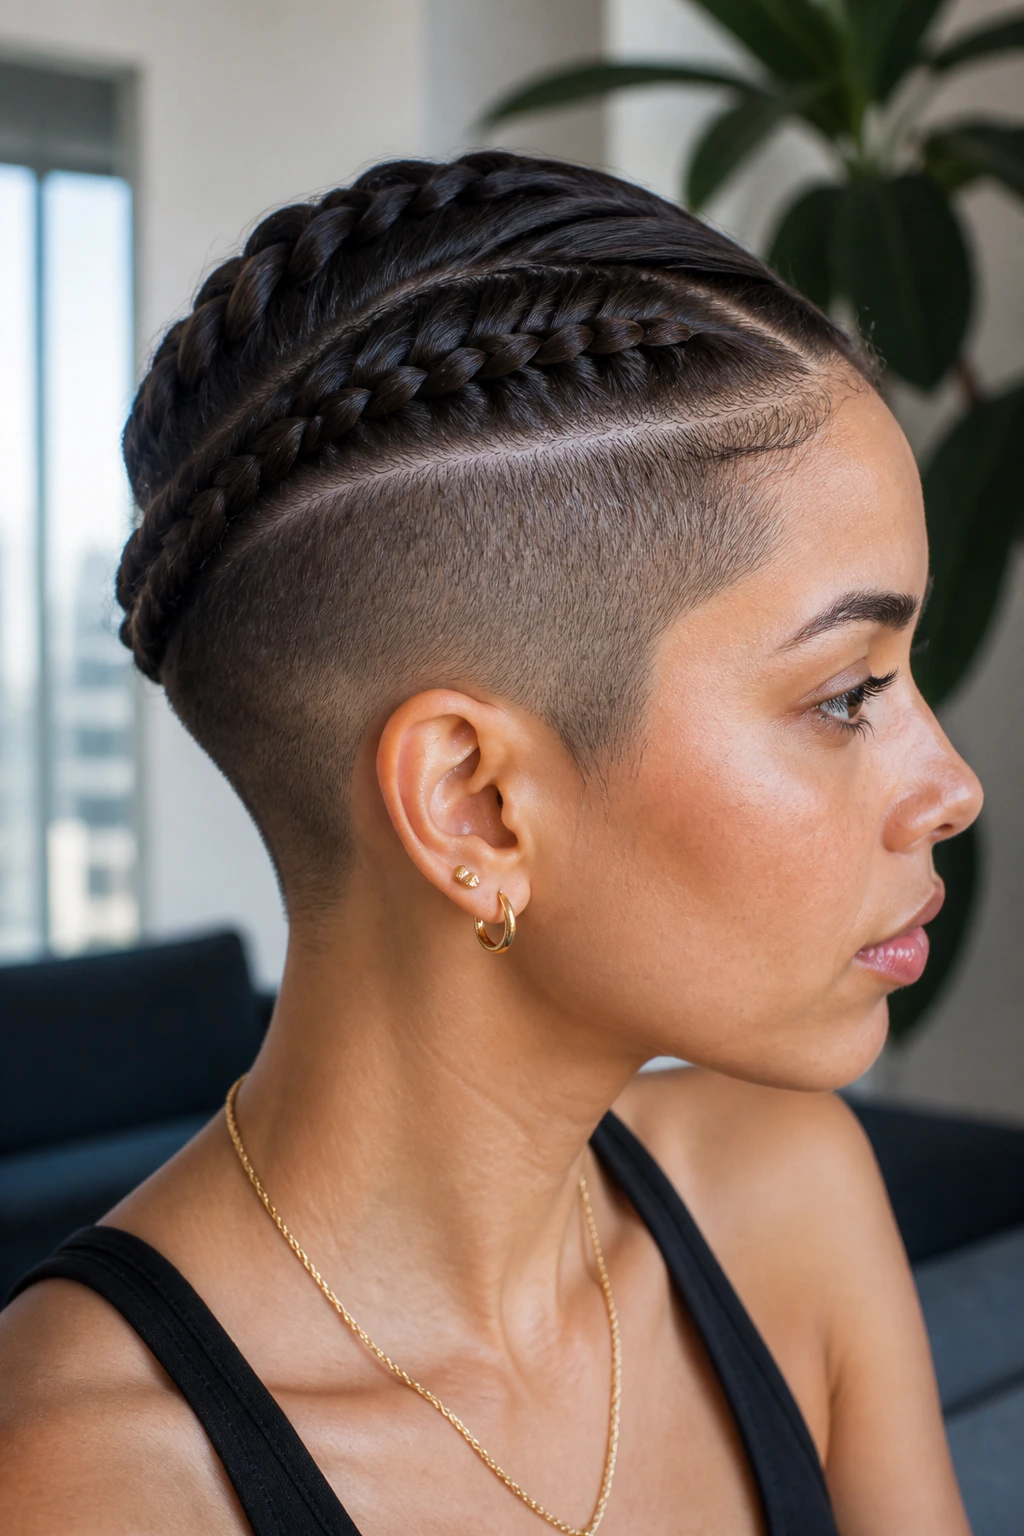
15. The Cornrow-to-Bun Hybrid
Cornrows are the ultimate way to handle shaved sides because they provide maximum control and a very tight, precise look. By braiding several rows that converge into a single high or low bun, you get a protective style that can last for several days at a time.
Why It’s a Reliable Daily Choice
This style doesn’t budge. You can go to the gym, attend meetings, and run errands without ever having to touch your hair. The shaved sides provide a sharp outline for the cornrows, ensuring the look stays clean and structured from every angle.
Care for the Scalp
- Because your scalp is more exposed in this style, keep it hydrated with a lightweight, non-greasy oil.
- If you have an undercut, make sure to use a barber-grade clipper to keep the edges sharp between your braiding sessions.
- This is a fantastic protective style, so don’t be afraid to keep it for 3-5 days at a time.
16. The Accent Side-Twist
Sometimes you don’t want a full braid. A simple two-strand twist along the side of the head can serve the same function. It is faster, requires less tension on the scalp, and offers a softer, more romantic silhouette.
Simple Steps to Perfection
- Take a small section of hair near the front of your face.
- Split it into two pieces and wrap them around each other, adding more hair as you go down the length of the undercut line.
- Secure it with a small pin or elastic right behind the ear.
Practicality for Beginners
- This style takes less than 60 seconds to create.
- It’s perfect for people who are still learning how to manage their hair around a fresh shave.
- If you find the twist starts to loosen during the day, simply use a decorative bobby pin to keep it held firmly against the scalp.
17. The Criss-Cross Braid
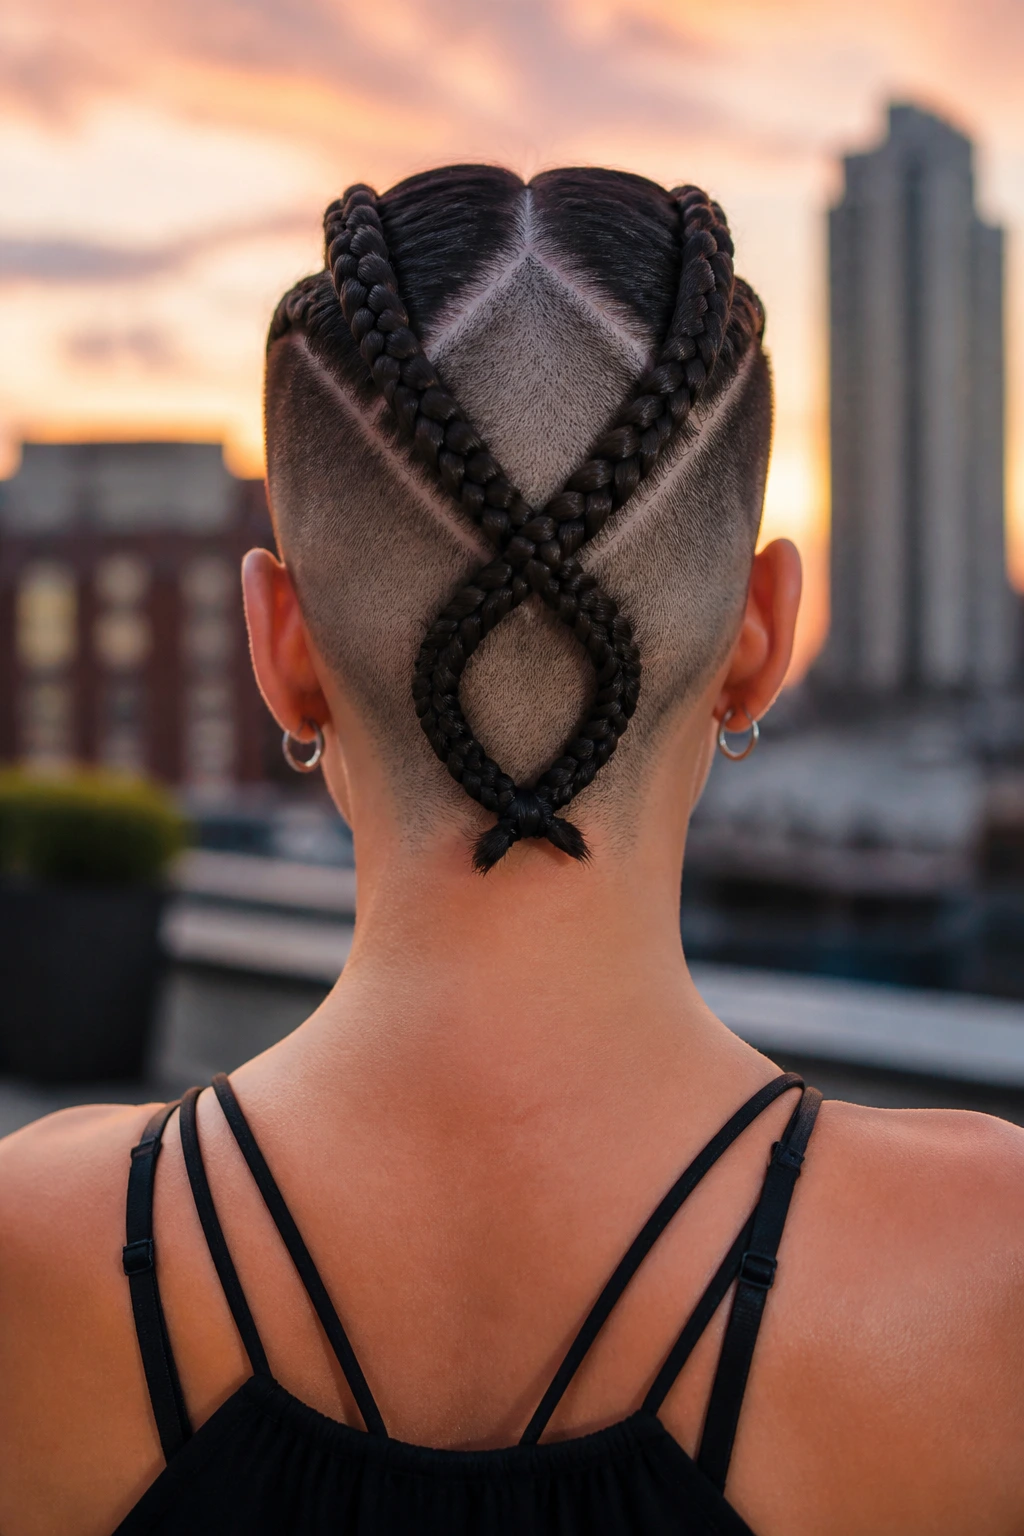
If you have an undercut at the back of your head, a criss-cross braid is a visually stunning way to fill that space. You divide the hair into two sections and create two separate braids that cross over one another before meeting at the base of the neck.
The Artistic Approach
This is a more advanced style, but it is incredibly rewarding. It looks like a lattice, and when paired with a fresh shave, it highlights the technical skill of the hairstyle. It is essentially a piece of art on the back of your head.
Daily Wear Tips
- Use a small mirror to see the back of your head while you work, or ask a friend to help you with the crossing point.
- Keep the braids tight to the scalp; if they are too loose, the criss-cross pattern will lose its definition.
- Pro tip: Finish the braids at the bottom by tucking the ends into each other or using one shared elastic to anchor the design.
18. The Loose Side-Braid with Volume
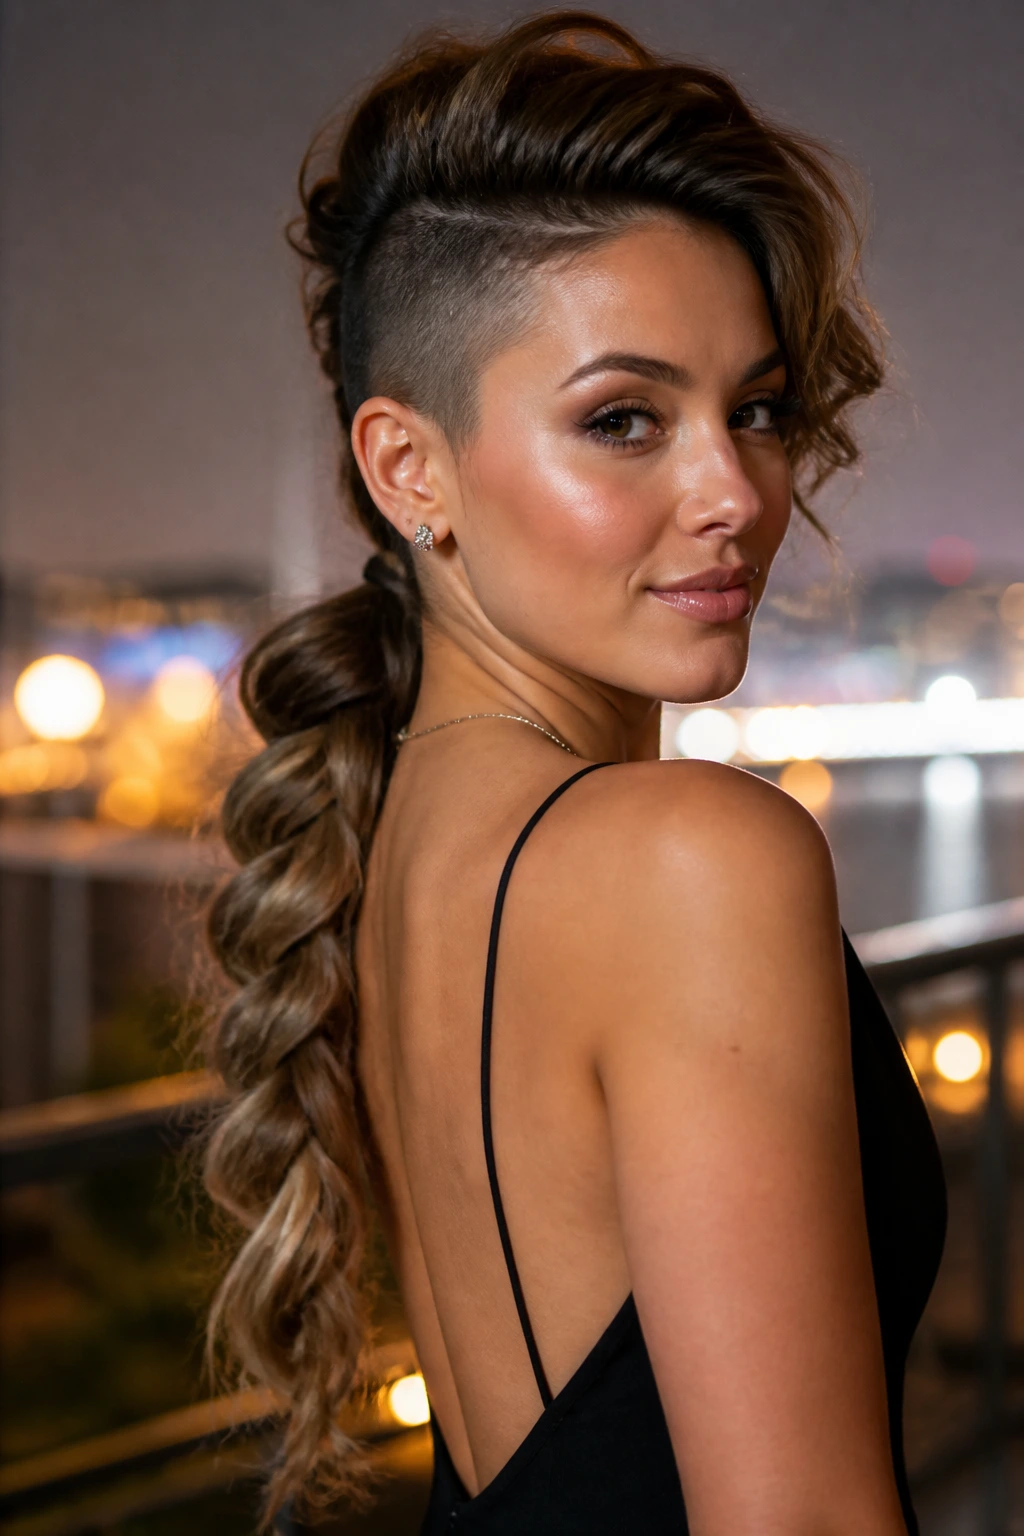
For a style that is less about control and more about aesthetics, try a single, thick, loose side-braid that starts high on one side of the head. By adding volume at the roots before you begin, you ensure the hair doesn’t look flat against the scalp.
Balancing the Shave
This style is all about the “wow” factor. When you flip the hair over to one side, you are exposing the entire length of your shaved side, making for a dramatic, high-contrast look. It is perfect for evening outings or days when you want to feel a bit more glamorous.
Keeping It Fresh
- Use a dry texture spray to add “grit” to your hair; this helps the braid stay in place without needing to be pulled tight.
- Don’t worry about perfect lines—the beauty of this style is the slight messiness.
- Tuck a few pieces behind your ear to ensure the shaved side is clearly visible, as this creates the intended silhouette.
Final Thoughts

Wearing braids with shaved sides is about embracing the contrast between structure and softness. You have the freedom to be as sharp as you want with the buzzed sections or as loose as you like with the braiding patterns. The key to making these styles work for everyday wear is consistency in your hair care and a bit of practice with tension. Do not be afraid to experiment with your parts or the direction of your braids; the beauty of having shaved sides is that your hair will grow back, and your canvas will always be ready for a new design.
Always prioritize the health of your scalp and your hair. Since the shaved sections are exposed to the elements, keep them clean and trimmed to maintain that clean, deliberate look. Whether you opt for a sleek Dutch braid or a messy, undone crown braid, remember that the most important element is your own confidence in the style. Once you master the basic tension needed to keep the braids tight against your undercut, you will find that these styles are among the most practical and stylish options in your daily repertoire.