When you have fine or thin hair, the idea of wearing a braid often feels like a setup for disappointment. You see those thick, voluminous, Pinterest-perfect plaits and wonder how they manage to look so substantial when your own ponytail feels like a wisp of silk. The truth is that thin hair actually holds certain styles better than thick, heavy hair, provided you stop trying to force your hair to do what it isn’t naturally built to do. Instead of fighting your hair’s texture, the secret lies in strategic volume, proper prep, and styles that embrace a more delicate aesthetic.
Working with thin hair requires a shift in perspective. You are not looking for the biggest, heaviest braid on the block; you are looking for styles that add dimension and movement. Whether your goal is a quick style for an early morning or something slightly more polished for an event, the following techniques will help you maximize every single strand you have. We are going to walk through twenty-one distinct ways to braid thinner hair, focusing on volume-enhancing tricks that make your hair look twice as thick as it actually is.
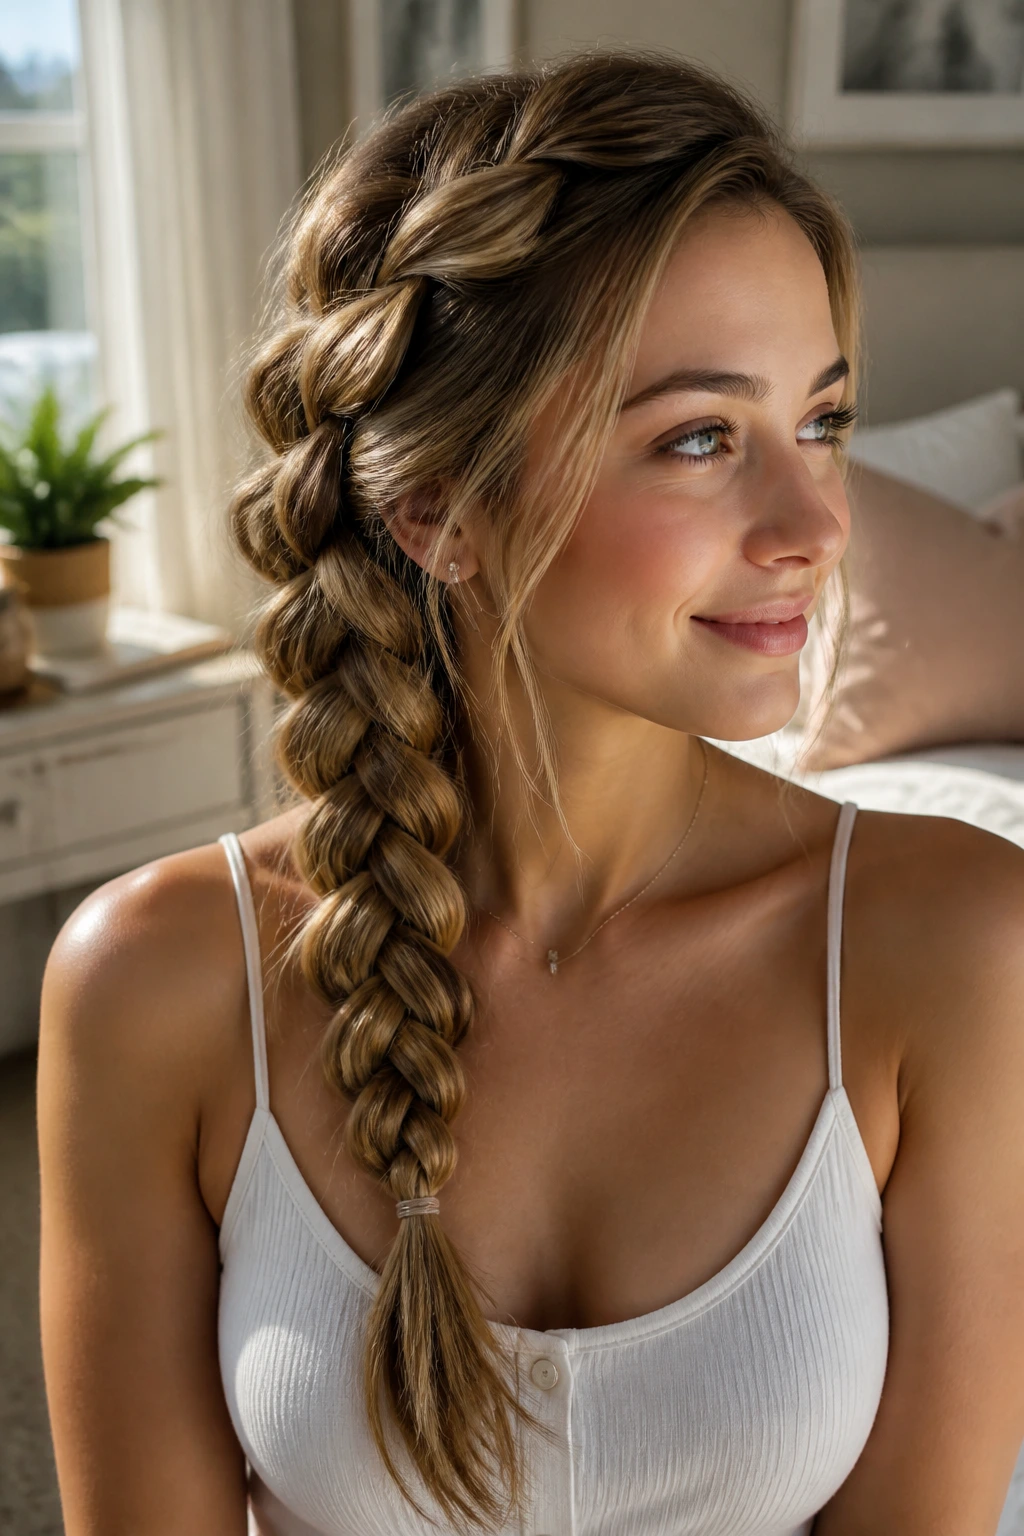
1. The Puffy Three-Strand Side Braid
The classic side braid is often the default, but on thin hair, it can look a bit sad if you just pull the strands tight. To avoid the “rat-tail” effect, start by prepping your hair with a dry texture spray or a light volumizing powder before you even begin the plait. Once you have secured the end with a clear elastic, use your thumb and forefinger to gently pull at the outer loops of each section.
Why This Adds Instant Volume
By “pancaking”—which is the professional term for pulling at the edges of the braid—you create the illusion of width. The key here is to start from the bottom and work your way up toward the crown, pulling only the outer loops so you do not accidentally pull the braid apart. Focus on small, incremental tugs rather than one big pull, as this keeps the structure intact while instantly doubling the visual density of the braid.
2. The Teased Crown French Braid
If your hair tends to lie flat against your scalp, a French braid can feel tight and revealing. To counter this, give your crown a bit of lift before you start. Use a fine-toothed comb to tease the hair at the root around the top of your head, then smooth the top layer over just enough to hide the backcombing before you begin your braid.
Essential Tips for Fine Strands
- Use a light-hold dry shampoo at the roots to add “grip.”
- Do not pull the French braid tight against the scalp; keep your tension loose and relaxed.
- Finish with a lightweight texturizing spray that won’t weigh down the ends.
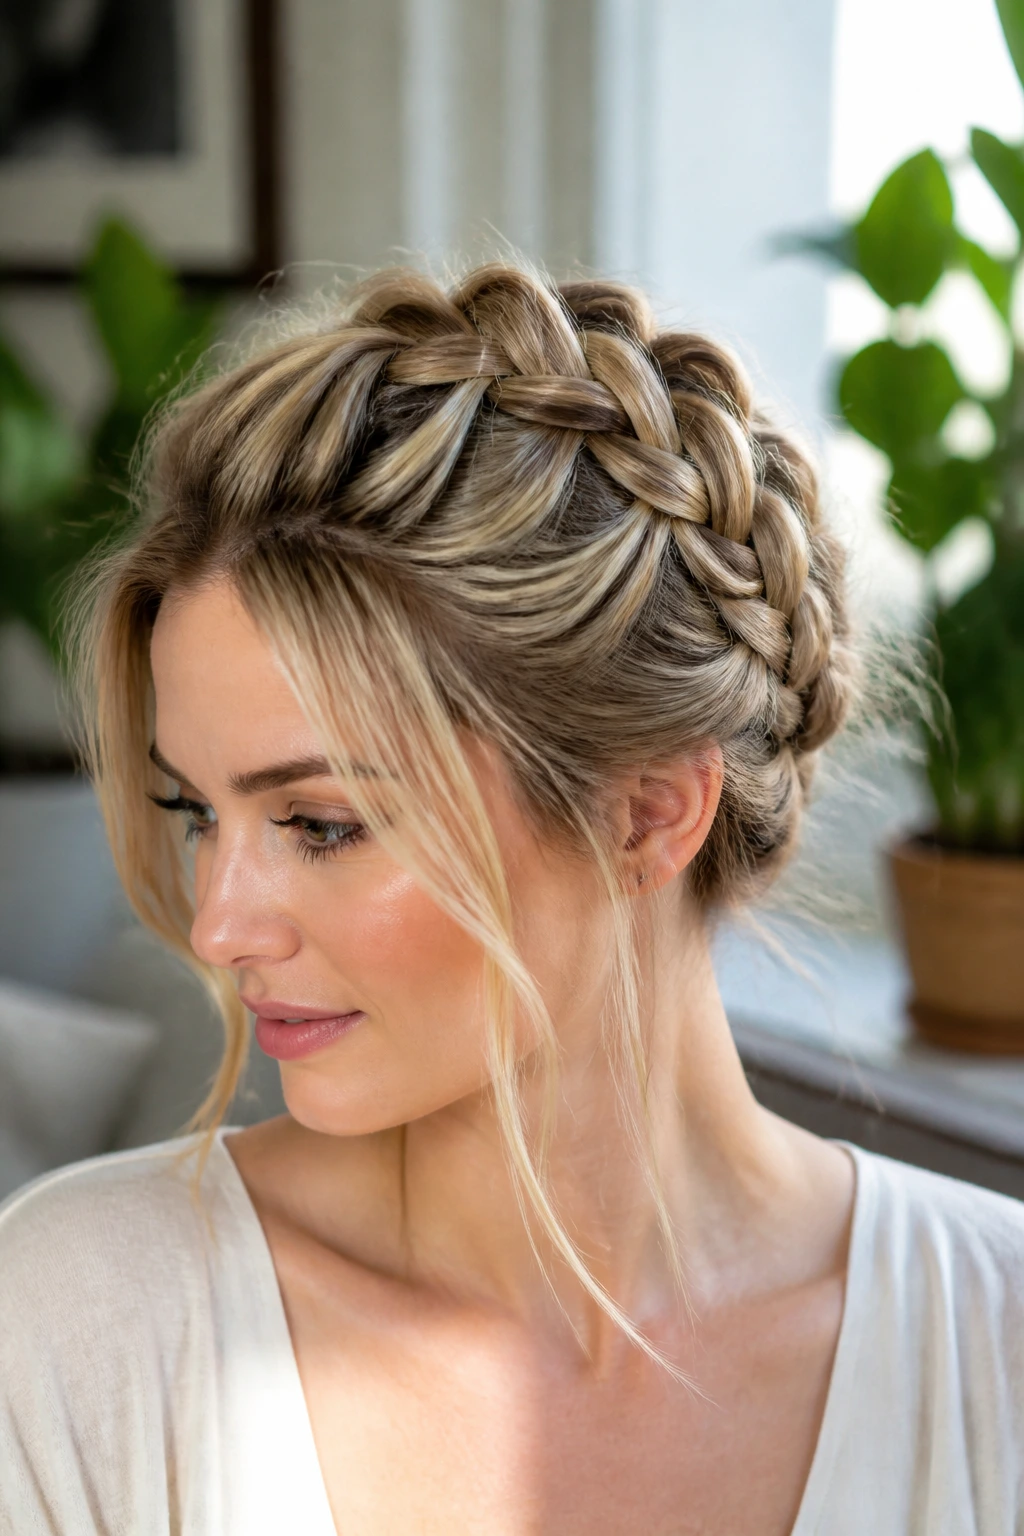
3. The Double Dutch Crown
Dutch braids are naturally more “popped” than French braids because the outer strands are crossed under rather than over, which pushes the braid outward. For thin hair, this is a massive advantage. Start by parting your hair down the middle or on a deep side part, and work the Dutch braid along your hairline toward the nape of your neck.
How to Achieve Maximum Height
Because you are crossing the hair underneath, you have a solid foundation to pull and tug at the braid sections once you have secured the ends. Don’t be afraid to pull quite hard on the edges of this style. Since it stays close to the head, it won’t fall apart easily, and the extra volume helps to create a soft, romantic frame around your face.
4. The Half-Up Lace Braid

Sometimes you don’t need to braid all of your hair. A lace braid is a variation of a French braid where you only add hair from one side. This is perfect for thin hair because it allows you to keep the majority of your length hanging down, maintaining the appearance of a fuller overall mane while adding a decorative, intricate detail.
Why It Works for Thin Hair
The lace braid sits lightly on top of your loose hair. By keeping the rest of your hair down, you retain the mass at the bottom, which is often where thin hair needs the most help. If you have any natural wave or curl, enhance it with a flat iron or wand before you start; the added texture helps the lace braid blend seamlessly into the loose strands.
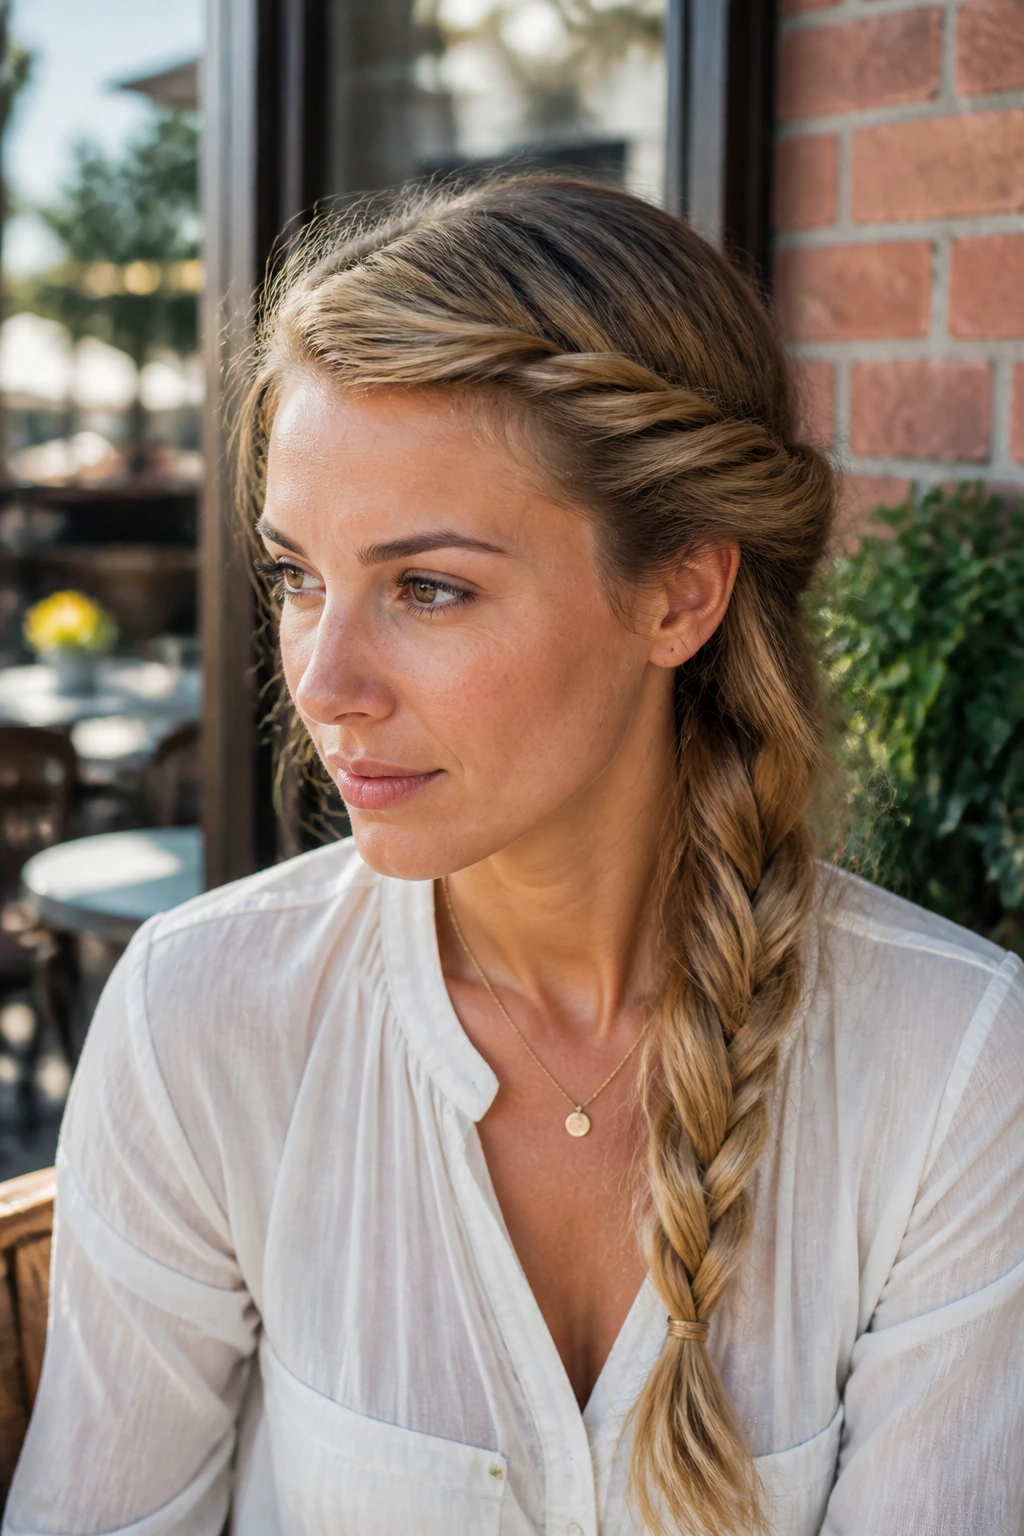
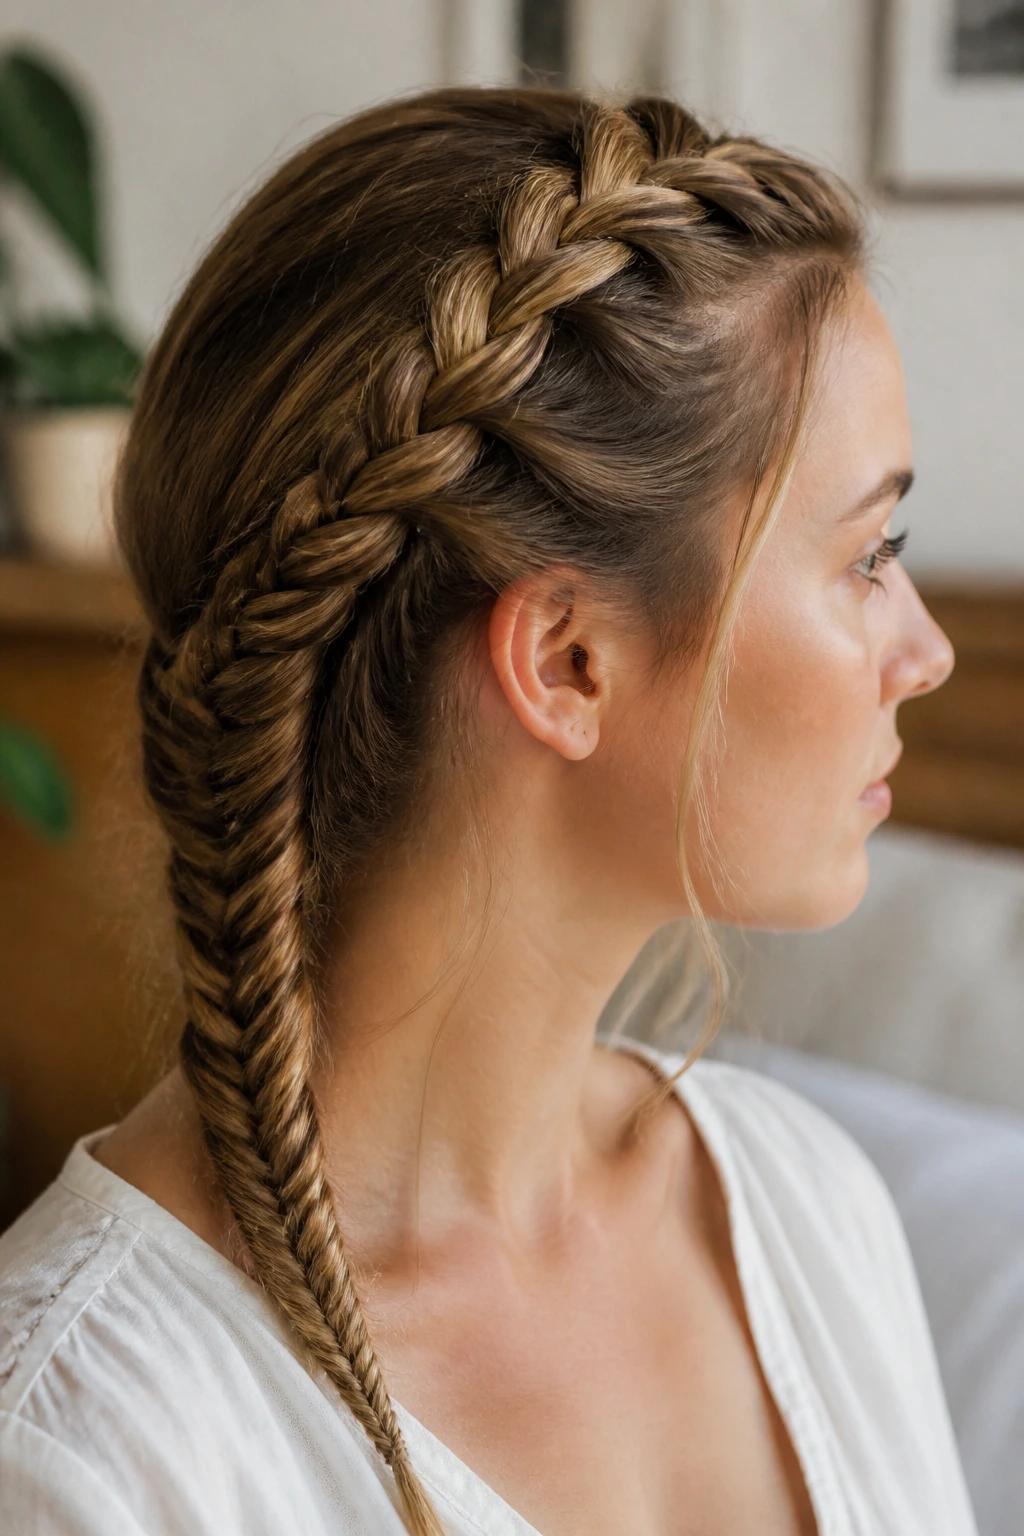
5. The Messy Fishtail Accent
A full fishtail braid can be notoriously time-consuming and often looks thin on fine hair because the technique itself requires a lot of surface area. Instead, use a fishtail as a smaller accent. Pull a section of hair back from one temple, create a small fishtail, and secure it at the back of your head, letting it nestle into your loose hair.
Expert Advice on Fishtails
Fishtail braids are all about the cross-over technique. If your hair is very fine, make sure you use a small, clear elastic at the top to secure the base so you don’t have to worry about the hair slipping out while you are weaving the small sections. The tighter your weave, the more distinct the “herringbone” pattern will look, which is exactly what makes this style so eye-catching.
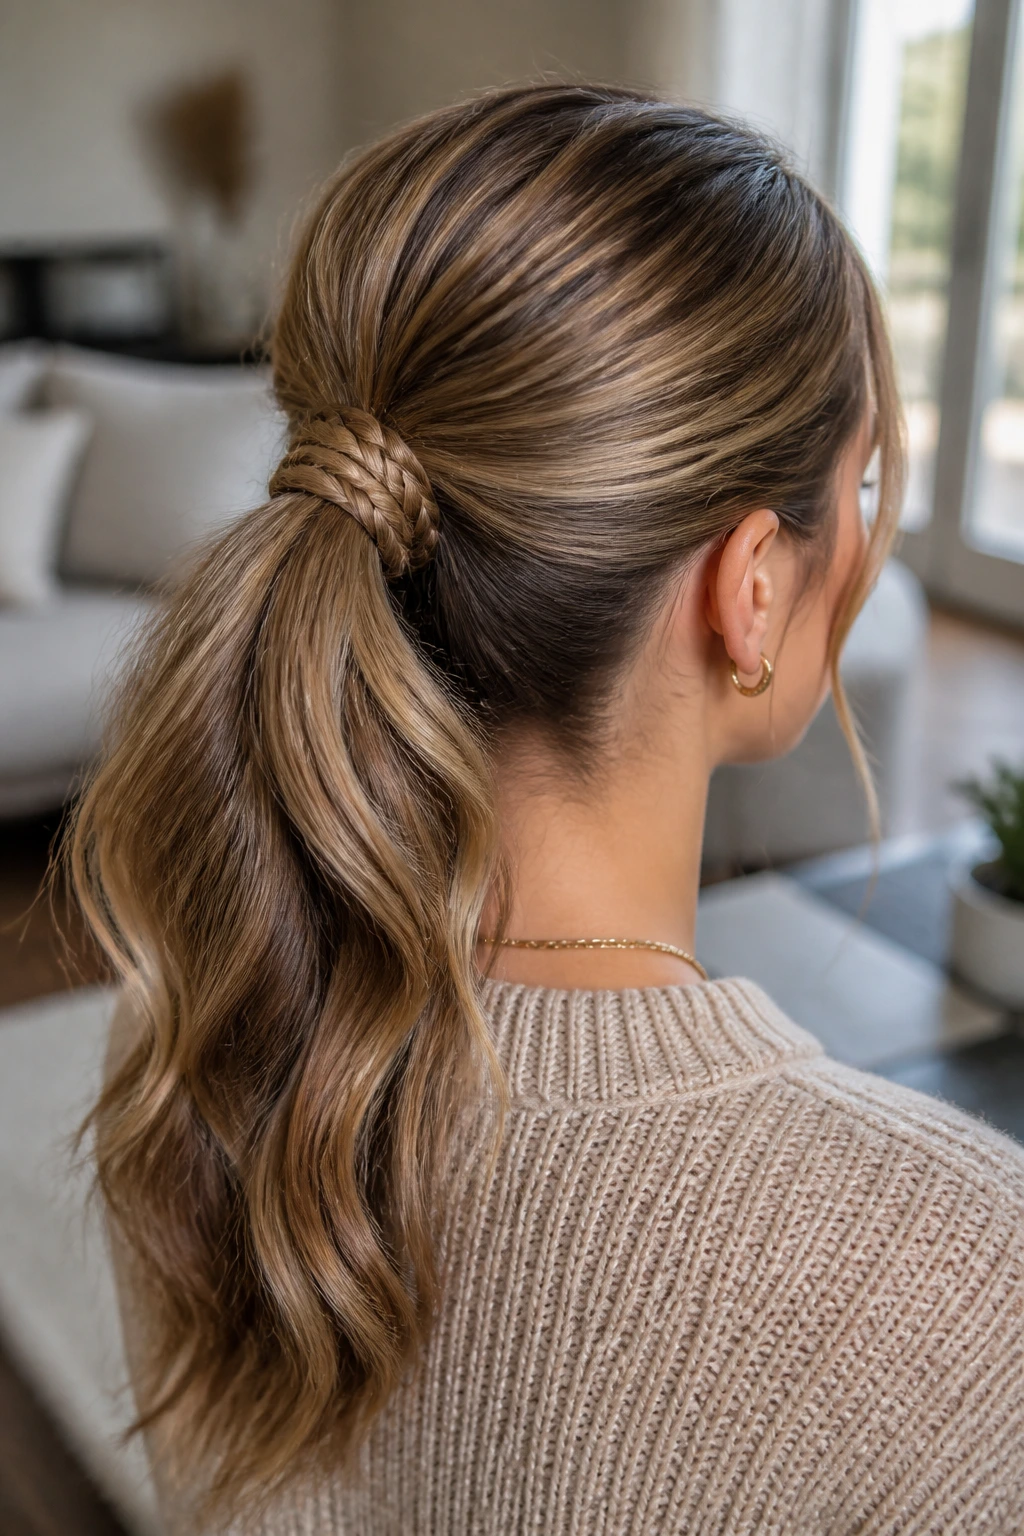
6. The Rope-Twist Ponytail
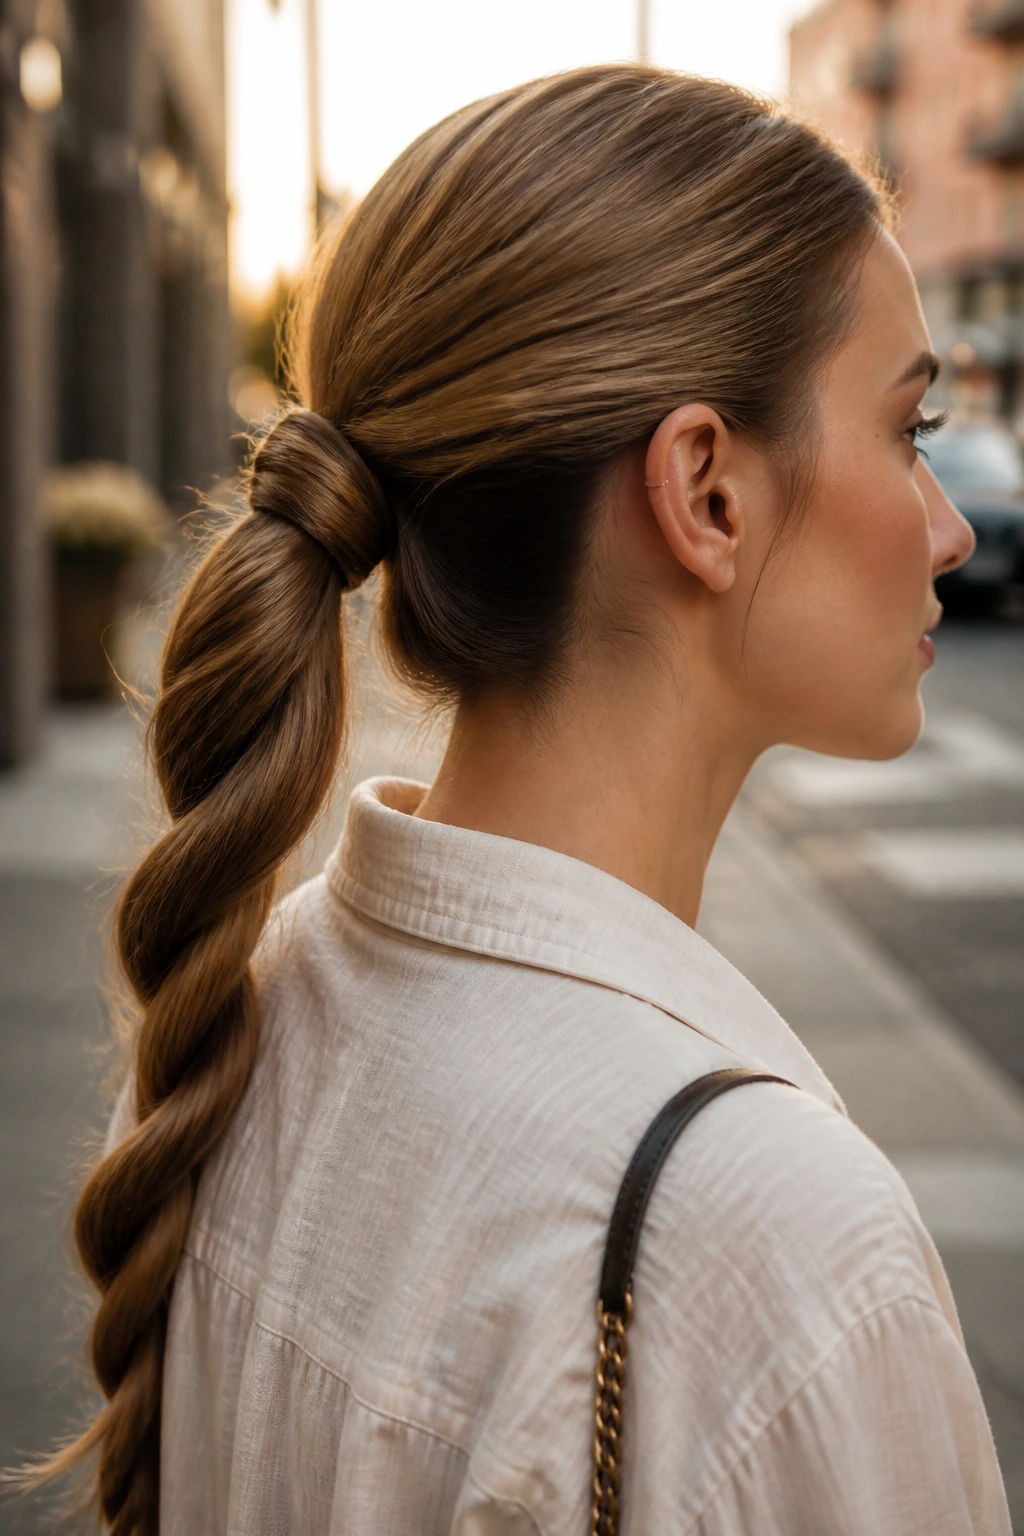
If you find traditional braiding too difficult or if your hair tends to unravel, the rope twist is your best friend. Divide a ponytail into two equal sections. Twist both sections in the same direction, then wrap them around each other in the opposite direction. Secure the end, and you have a sturdy, interesting-looking twist that stays put.
Why It Holds So Well
The twisting motion creates a tension that is much harder for fine hair to overcome compared to a loose three-strand braid. For extra volume, once the rope is finished, use your fingers to pull the twists apart horizontally. This makes the rope look much thicker and provides a lived-in, bohemian look that feels intentional rather than just a quick fix for thin hair.
7. The Pull-Through Faux Braid
This style is a life-saver for anyone who struggles with dexterity. It uses a series of small, clear elastics rather than actual braiding techniques. You stack small ponytails on top of one another and then pull the outer edges to create the shape of a thick, voluminous braid that defies the reality of thin hair.
The Secret to the Illusion
The magic is in the stacking. Each section is independent, so if you have layers that usually fall out of a standard braid, this style will catch them easily. Make sure your elastics are strong enough to hold, and spend extra time pulling the “loops” wide—this is where the style earns its reputation for making thin hair appear incredibly dense.
8. The Twisted Side-Swept Plait
This hybrid style combines a simple two-strand twist with a standard three-strand braid. Start by twisting two sections along your hairline, then bring them together into a single side braid. This provides an elegant, structured look that adds a lot of visual interest to the scalp area, which is where thin hair often looks the most sparse.
Styling Tip for Fine Texture
Use a bit of salt spray to add “grit” to your strands before twisting. Fine hair can be slippery; the salt provides the traction necessary to ensure the twists don’t slide backward throughout the day. If you find the ends look wispy, feel free to tuck them under the main braid and pin them securely with a bobby pin that matches your hair color.
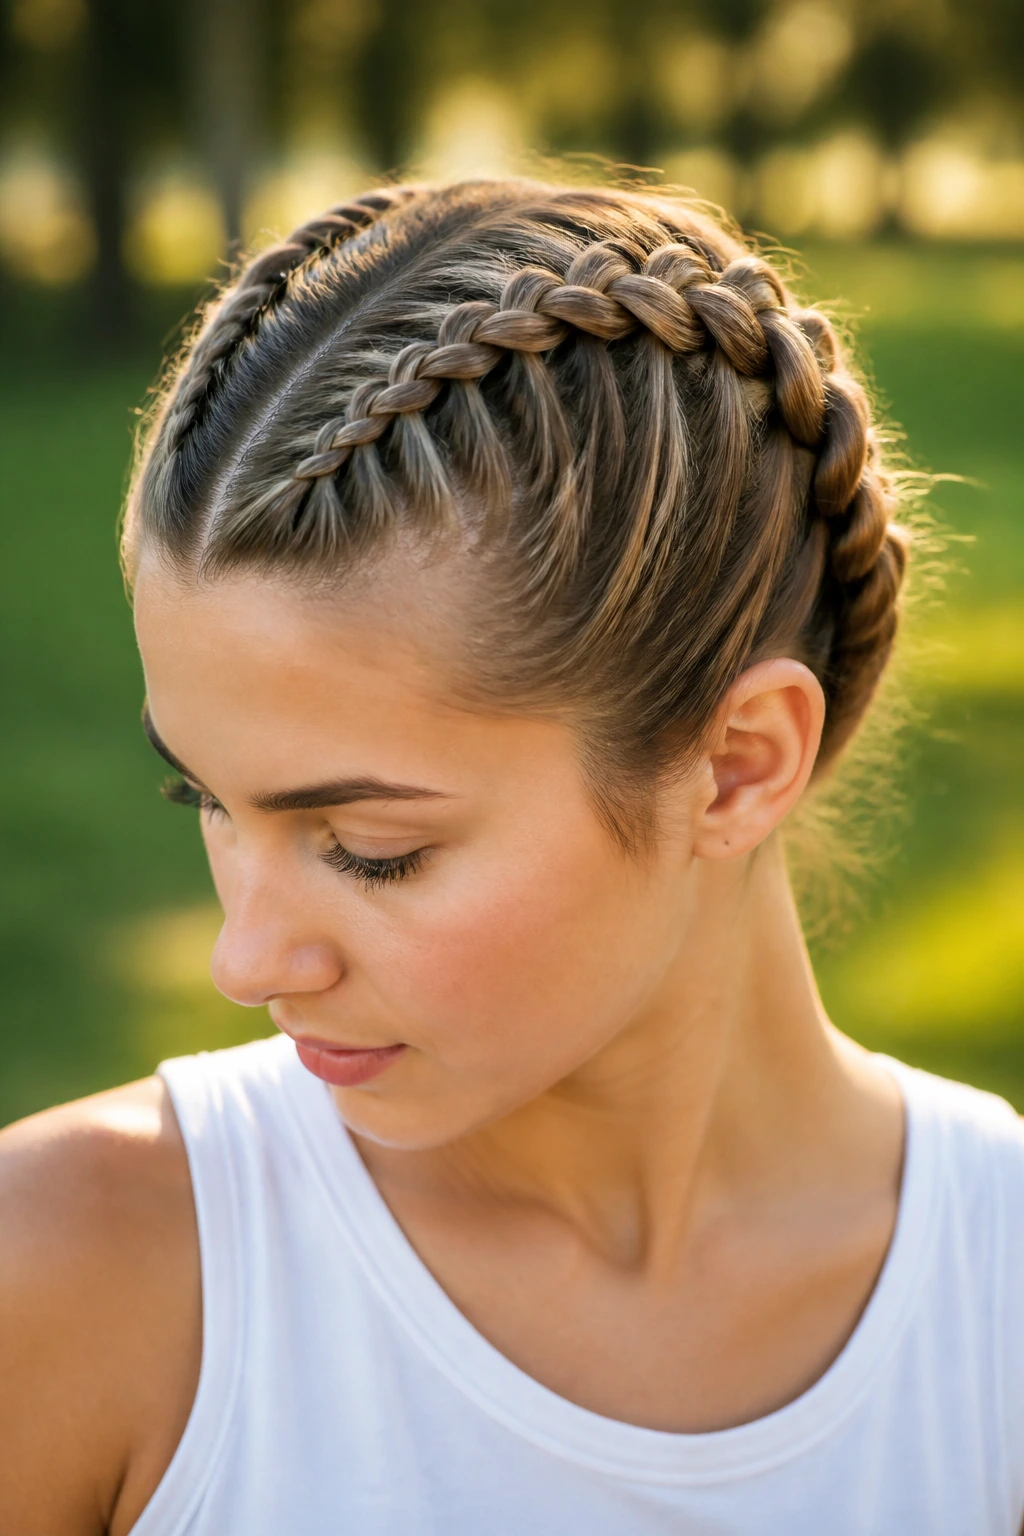
9. The Headband Braided Crown
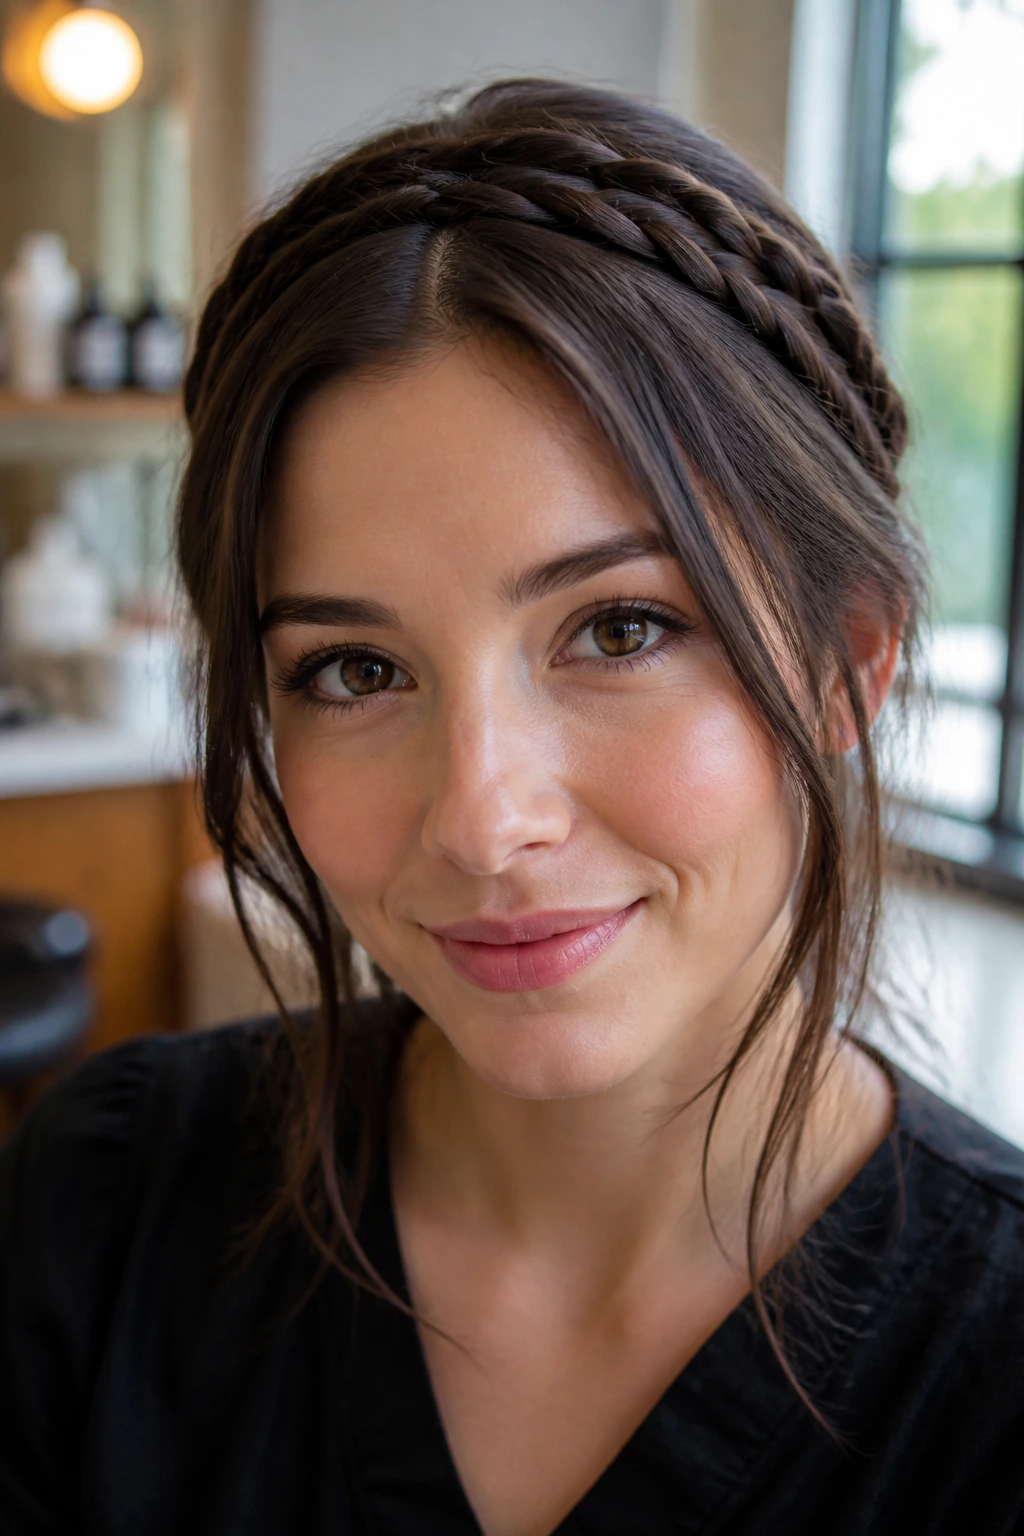
This is a classic for a reason. By creating two small braids on either side of your head and pinning them across the top like a headband, you create a halo effect that draws attention to the face. Since you are only using a small portion of your hair for the “headband,” the rest of your hair can remain loose, giving the impression of overall thickness.
Why It’s a Winning Look
It’s surprisingly protective. Because the hair is pinned up and tucked, it isn’t rubbing against your clothes or getting tangled. Use two or three bobby pins on each side to ensure the braids don’t sag. For a softer look, leave a few face-framing pieces out of the braids; this softens the hairline and prevents the style from looking too severe.
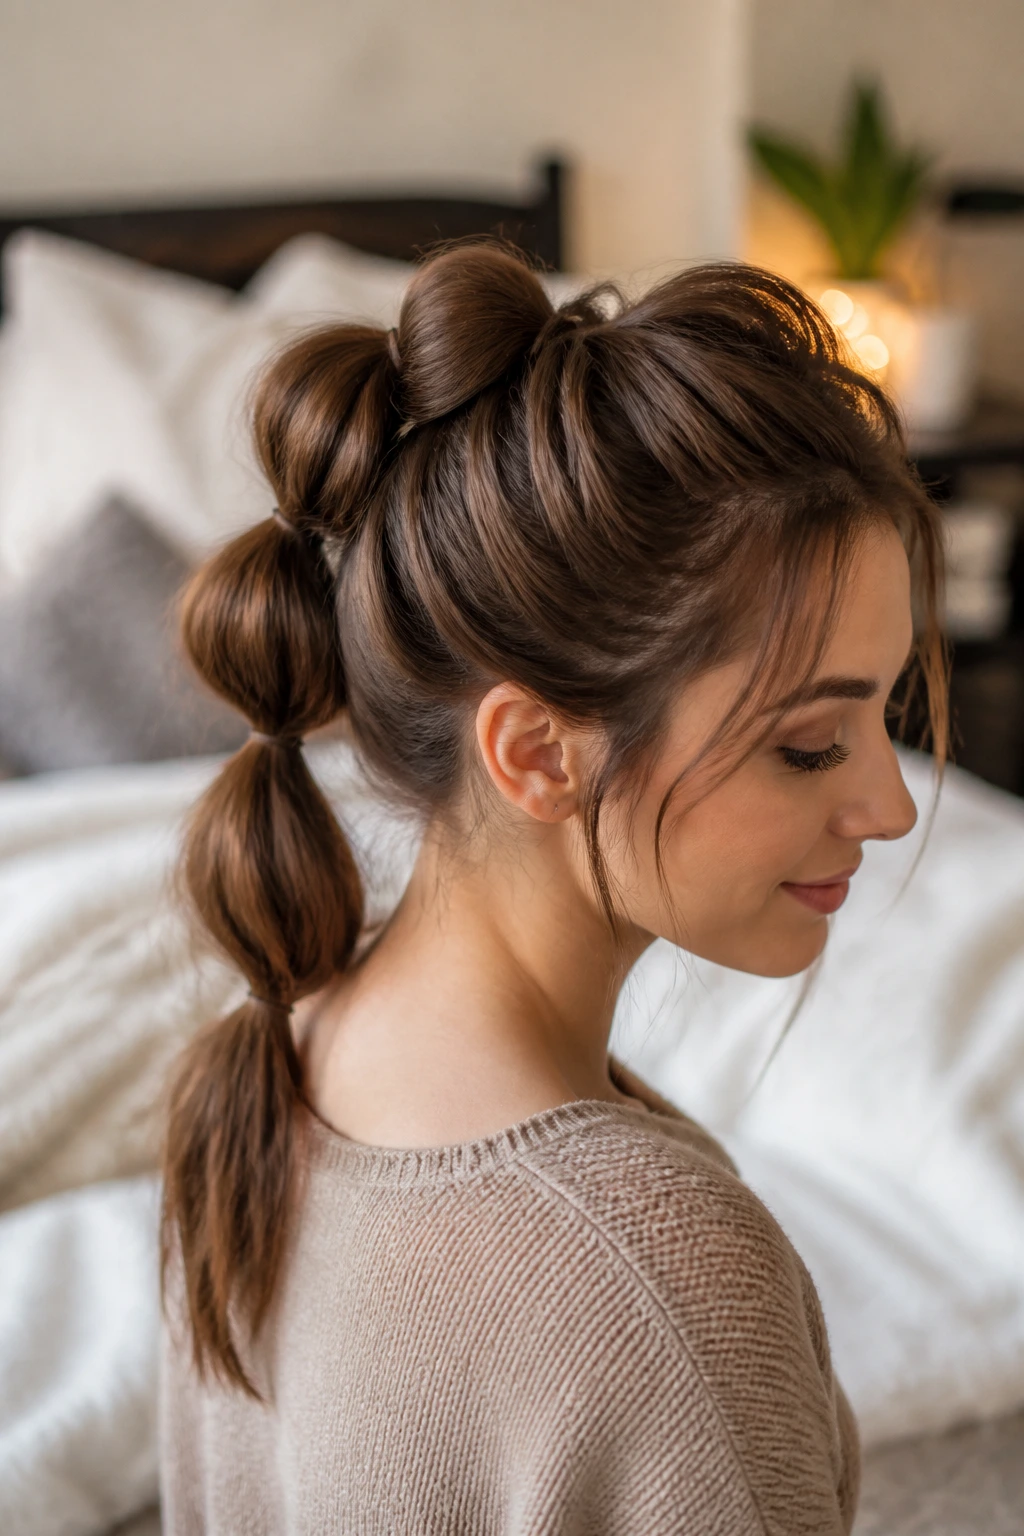
10. The Bubble Braid
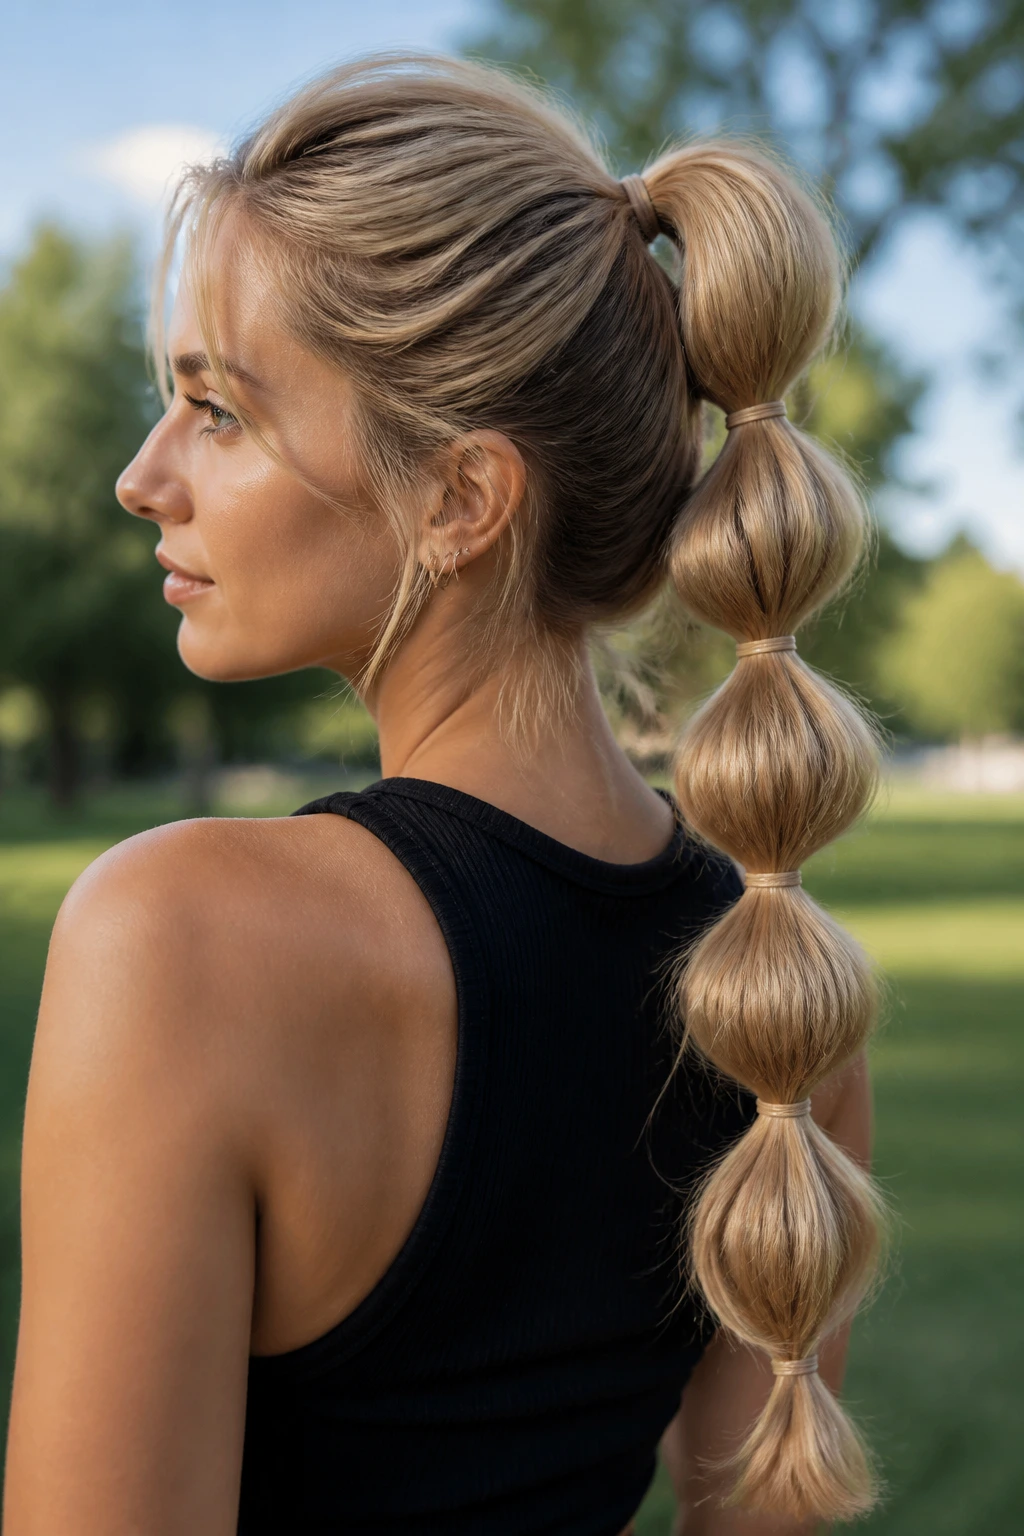
We’ve all seen the bubble ponytail, but applying it to the length of your hair is a genius move for thin hair. It creates volume through air, not through hair density. Simply secure a ponytail with an elastic, then place another elastic about two inches down, and pull the hair between the two elastics outward until it forms a rounded “bubble.”
How to Keep the Bubbles Even
Consistency is key. Use a ruler or just your fingers to measure the distance between each elastic so the bubbles look uniform. If one bubble looks smaller than the others, gently tease the hair inside that section with the tail of a comb before you fluff it out. This is a very forgiving style that works on almost any hair length from shoulder-length to waist-length.
11. The Upside-Down Braid Bun
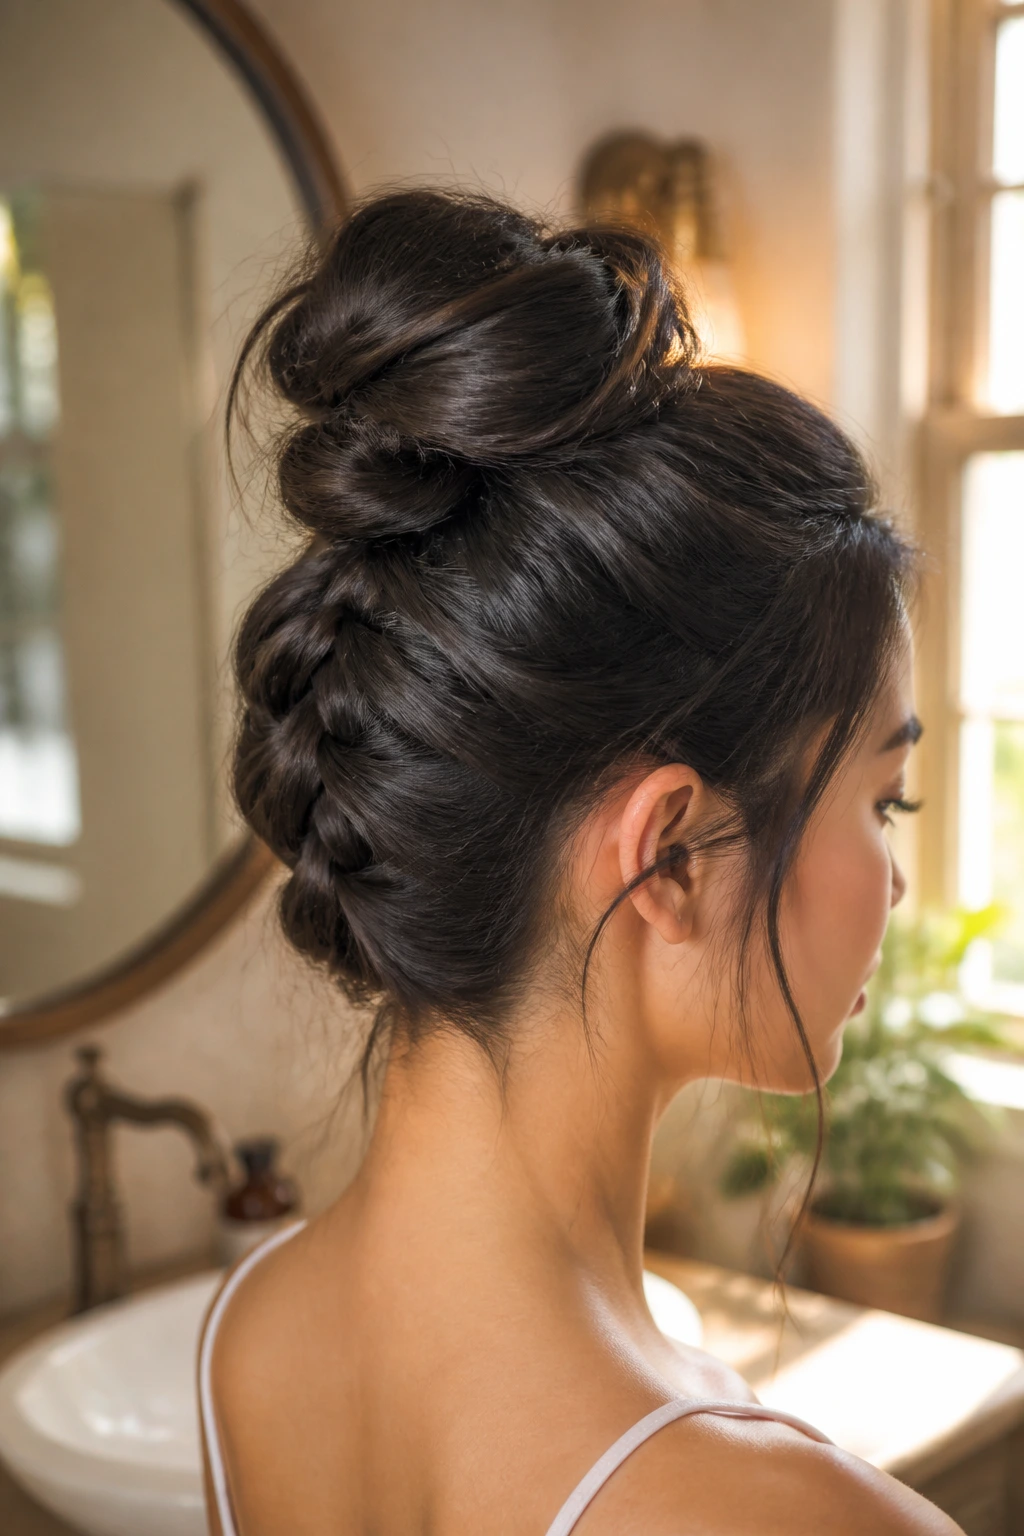
For this look, you flip your head over and French braid from the nape of your neck toward the crown. Once you reach the top of your head, gather the rest of your hair into a high bun. This is fantastic for thin hair because it uses the volume of a bun to anchor the braid, making the whole style look much larger than it would be on its own.
Managing the Tension
The trick here is to keep the braid tight at the nape so it doesn’t gap, but loosen it slightly as you move toward the crown. When you pull your hair into the bun, use a scrunchie rather than a standard hair tie. Scrunchies add bulk, which makes the base of your bun look fuller and prevents the thin hair from looking lost against your scalp.
12. The Cascading Waterfall Braid
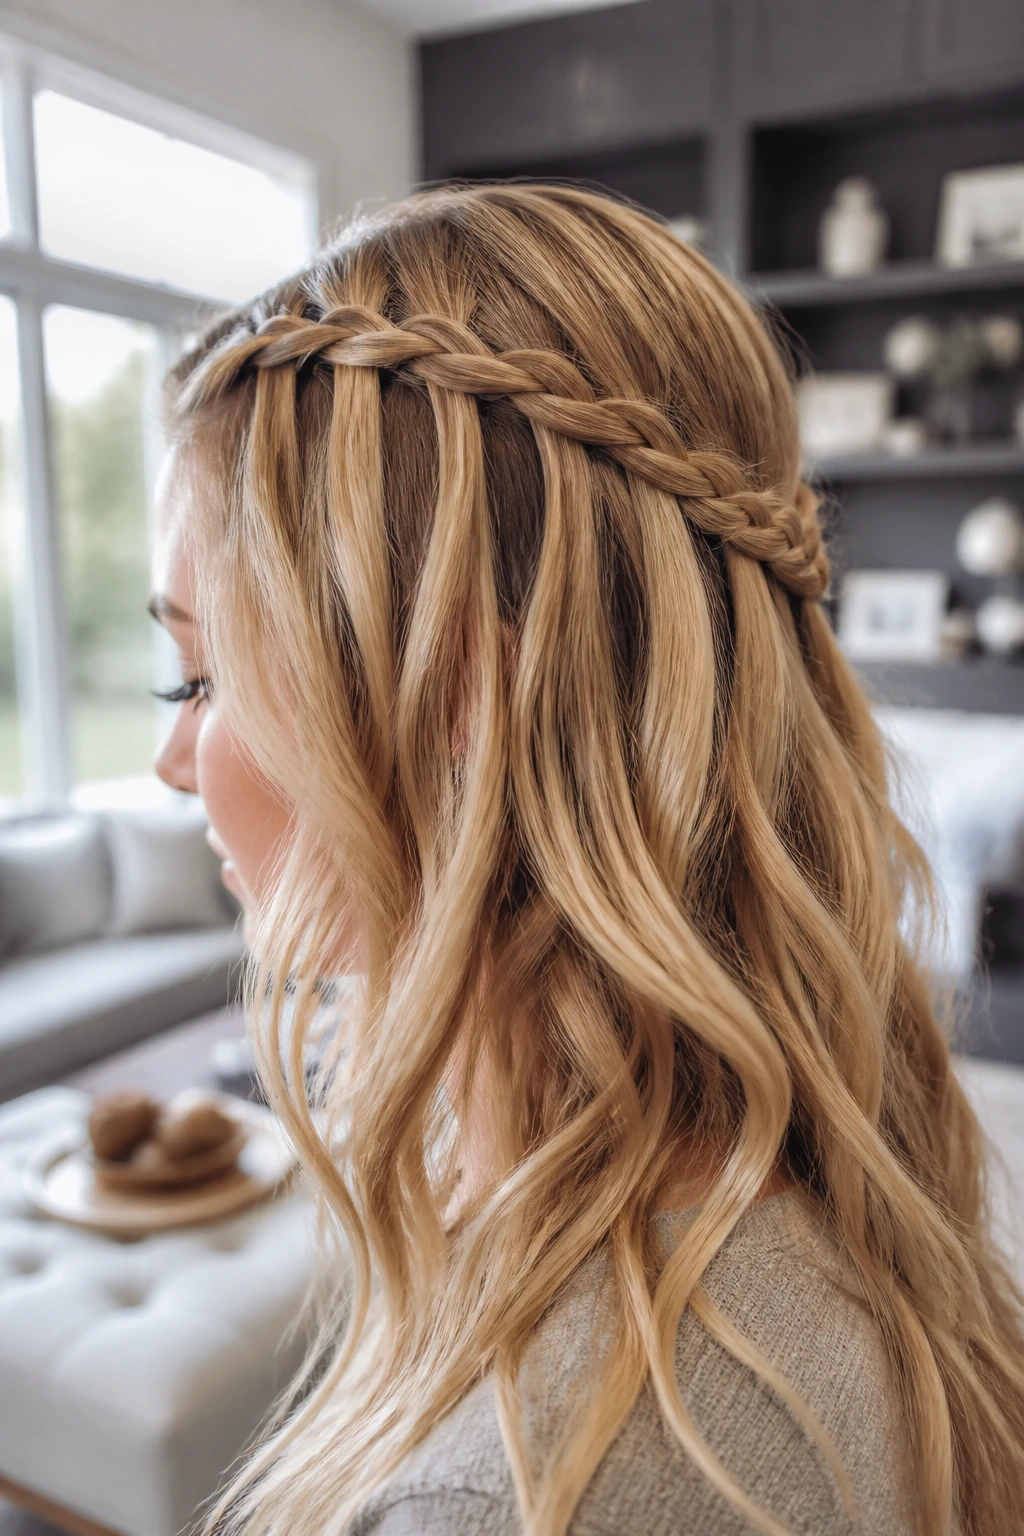
The waterfall braid is beautiful because it allows you to let most of your hair hang free while incorporating a diagonal braid. It’s perfect for adding detail without pulling all of your hair into a style that might highlight its lack of density. It looks intricate, yet it’s surprisingly simple once you master the “drop” technique.
Why It Suits Fine Hair
Since only a small amount of hair is actually braided, you won’t have to worry about the “thin braid” problem. The focus remains on the loose, cascading hair. If you have highlights, this style is especially effective, as it creates a beautiful contrast between the woven section and the rest of your hair, emphasizing the multidimensional color.
13. The Knotted Side Braid
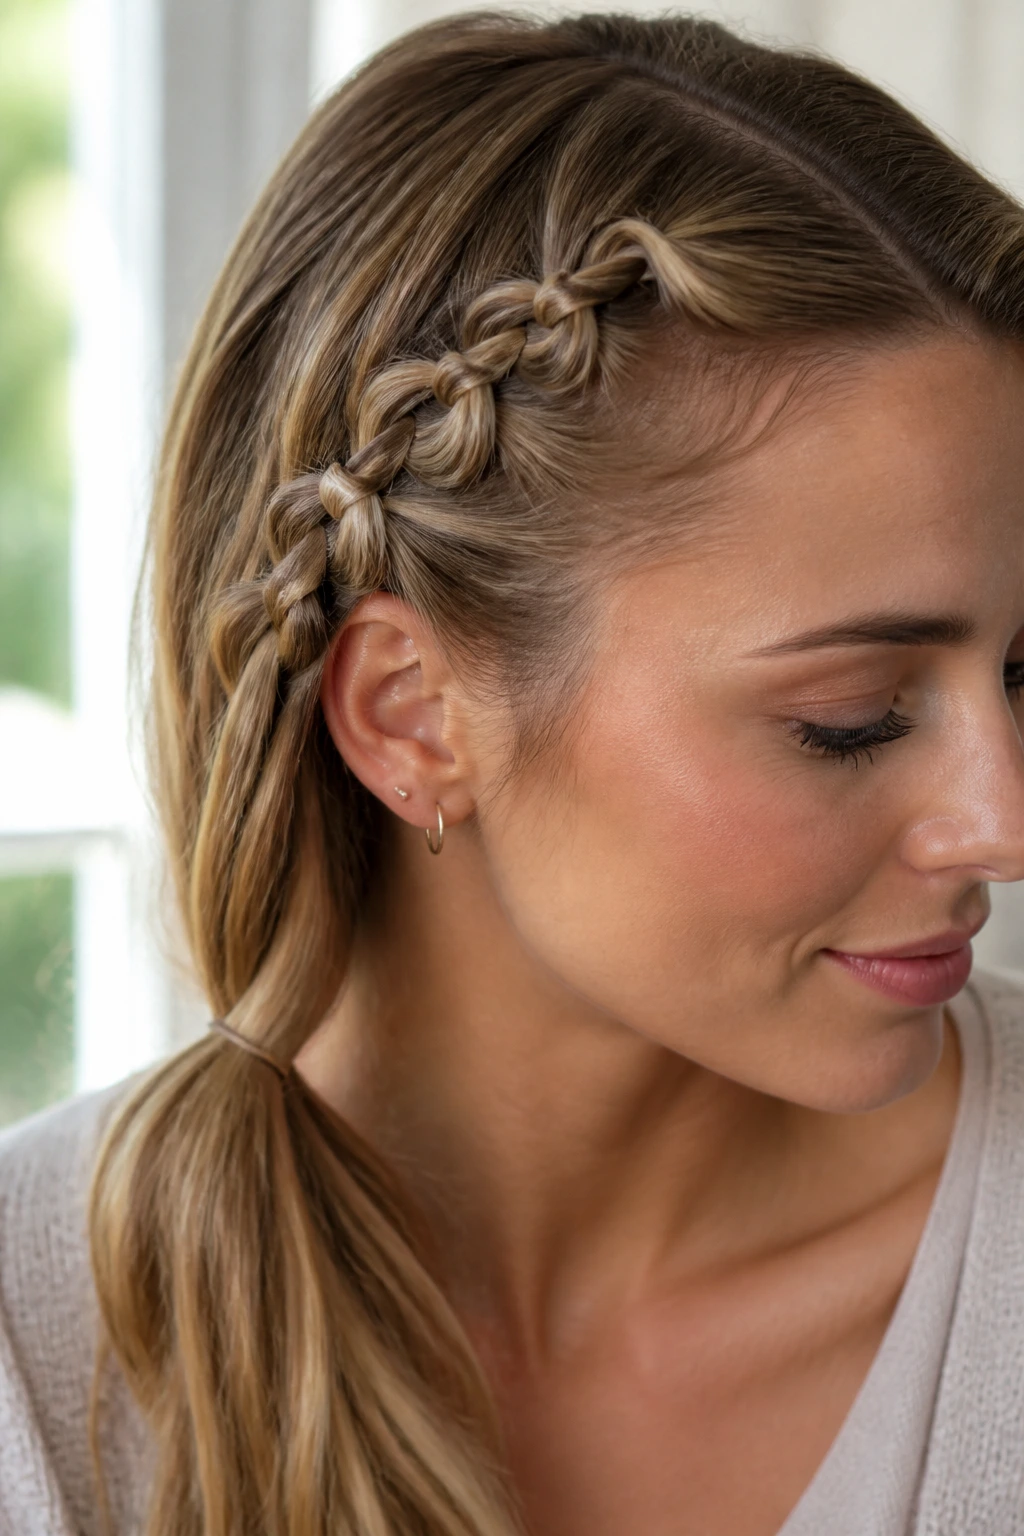
Instead of crossing hair over or under, you tie it. Taking two sections of hair, you loop one around the other in a series of simple knots. This creates a chain-like effect that looks incredibly thick because the knots naturally puff out. It is a fantastic alternative for those who find traditional braiding patterns confusing.
Pro Technique for Knots
Make sure your hair is smooth and free of tangles before starting. If your hair is very fine, it might want to knot itself in the wrong places, so work in small sections. Once you’ve knotted the length, secure it at the bottom. The resulting texture is unique and looks much more sophisticated than a standard braid, while requiring very little actual “weaving.”
14. The Accent Braid with Waves
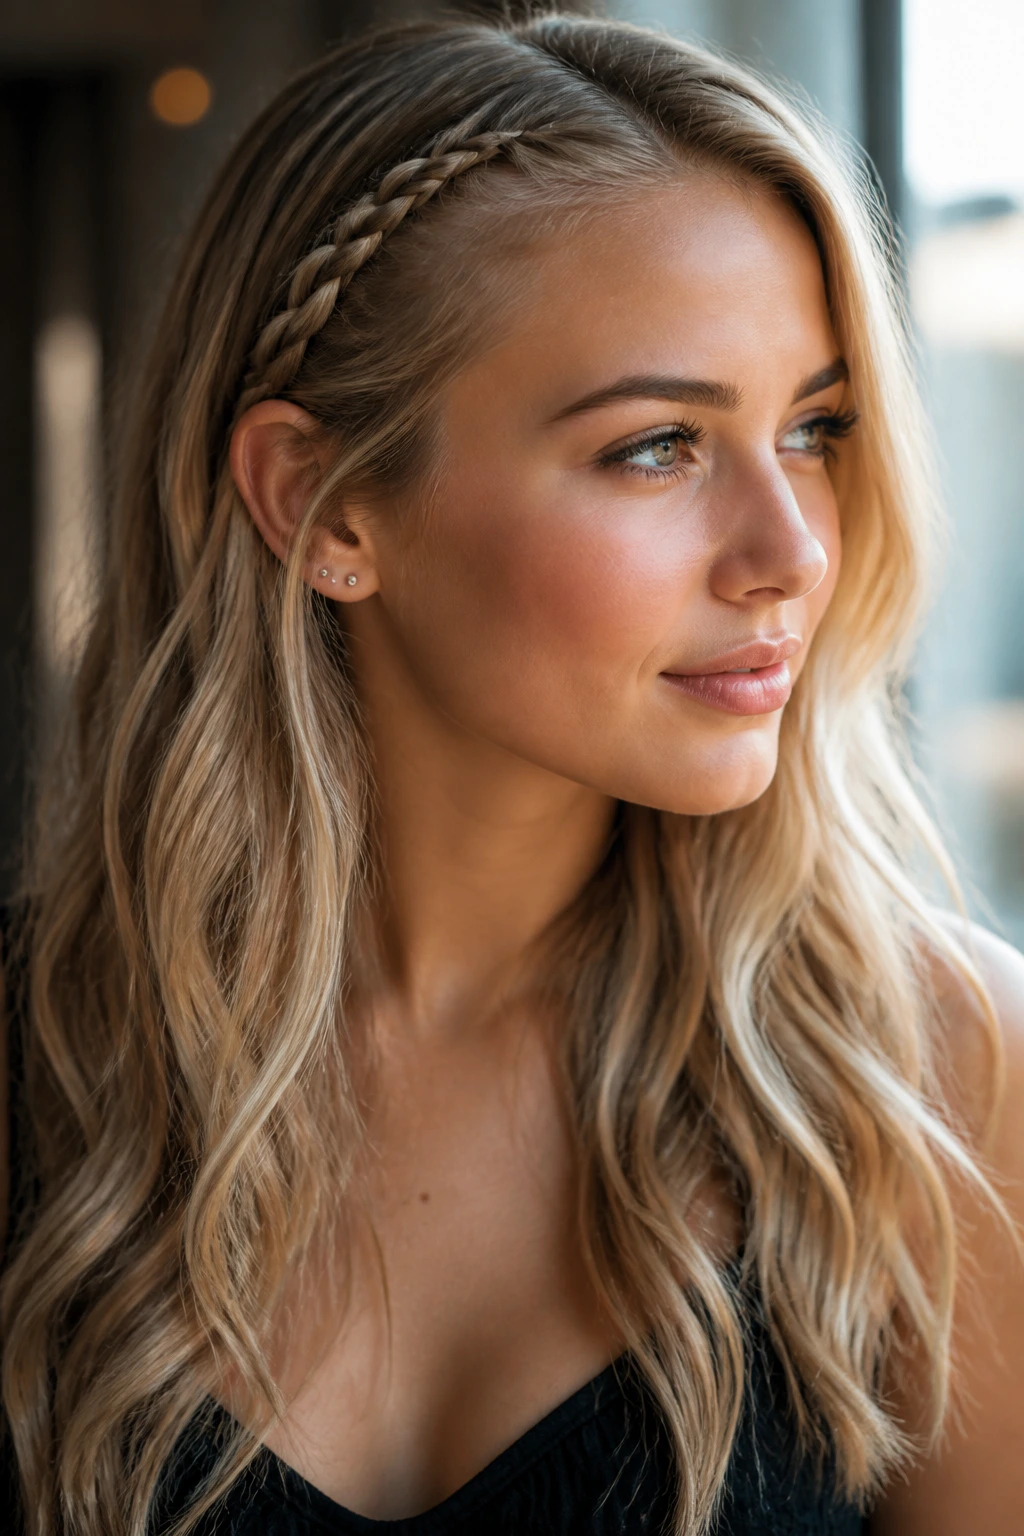
If you prefer wearing your hair down, adding a single, small accent braid near the part can change your whole look. By braiding a small section on one side and pinning it behind your ear, you create an asymmetric style that feels intentional. Pair this with loose, beachy waves to add that necessary body.
Why This Adds Dimension
A braid, no matter how small, adds a geometric element to your head. When combined with waves, it breaks up the flatness that often plagues thin hair. If you have a round face, this style helps create vertical interest, which can elongate the features. It’s a low-effort way to look like you put in a lot of work.
15. The Triple-Threat Mini Braids
Take three small sections at the front of your head and braid them individually. You can either pin them back or let them dangle with your loose hair. This style adds texture near the face, which is exactly where most people notice the thickness (or lack thereof) of the hair.
Styling for Interest
Mixing the sizes of the braids—making one slightly thicker than the others—adds a bohemian, artistic flair. Because these are mini-braids, they don’t consume much hair, leaving the rest of your mane full and bouncy. It’s a great way to manage flyaways that usually annoy you during the day, as they are now securely tucked into the braid.
16. The Volumized Mohawk Braid

Yes, thin hair can do a faux-hawk. By braiding the sides of your hair toward the center and keeping the middle section loose and high, you create the height and volume of a mohawk without the commitment of shaving your sides. This style uses the braid as a frame to push the rest of your hair upward.
How to Get the Lift
Use a volumizing mousse on damp hair before you dry it. When you are creating the braids on the sides, make sure they are very tight against the scalp. The contrast between the tight, flat braids on the sides and the loose, teased hair in the middle is what makes this style stand out as a bold, volume-heavy look.
17. The Sleek Chignon with a Braided Base
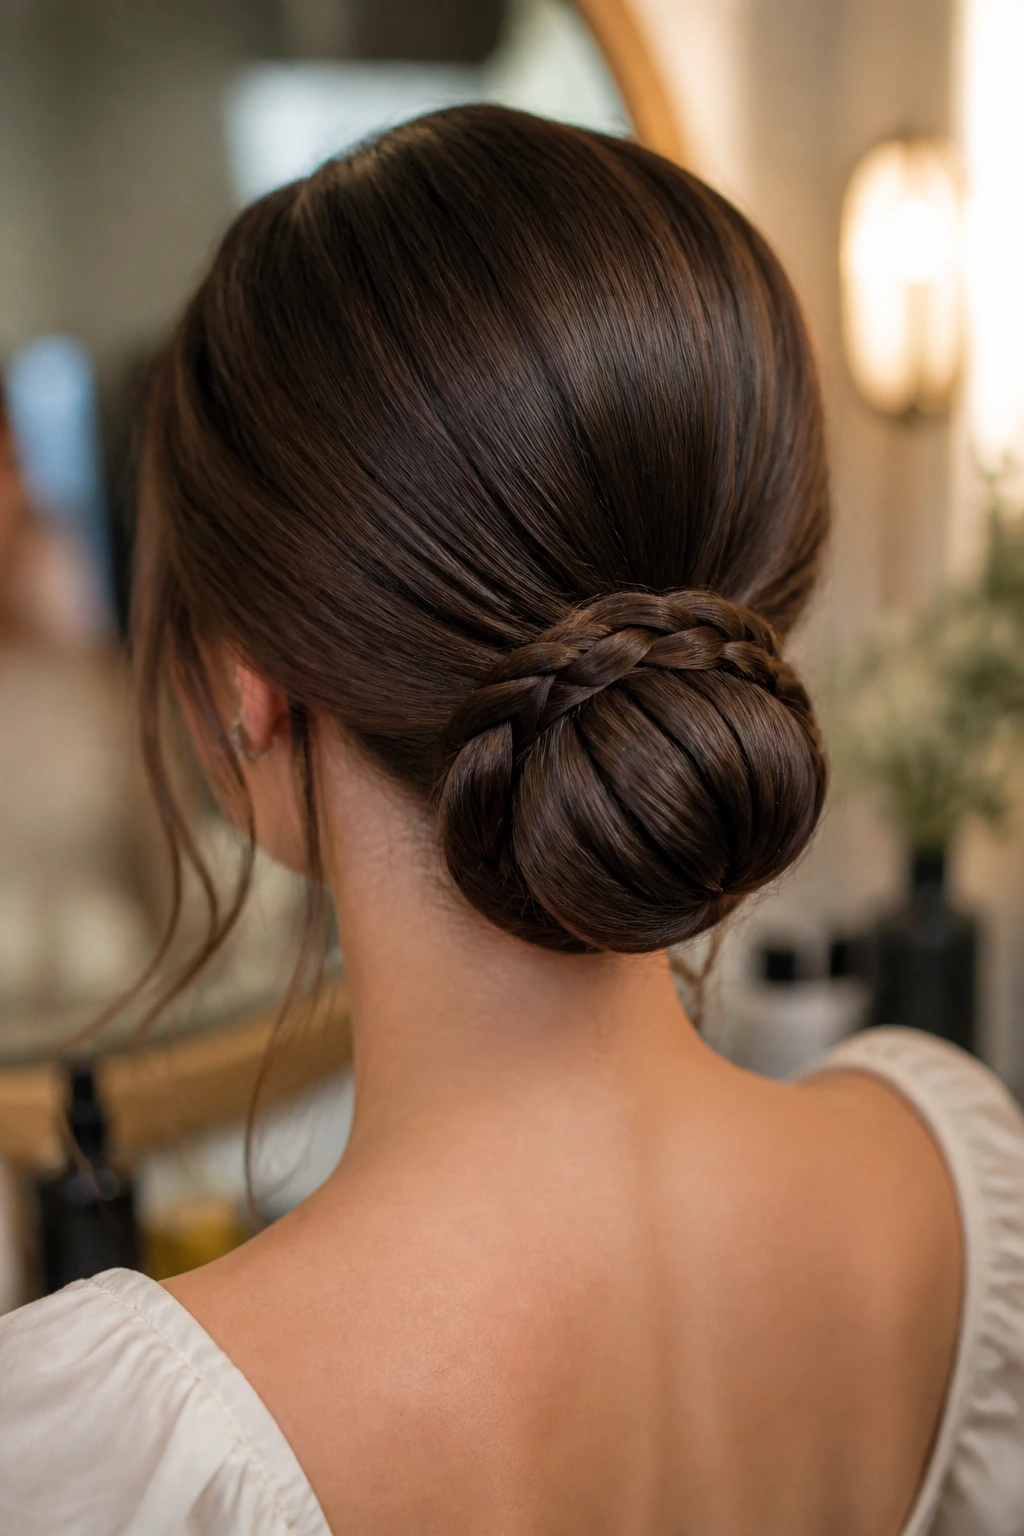
Create a low, sleek bun at the nape of your neck, but wrap the base with a small, flat braid. This style is polished and professional, but the braid at the base adds that little extra detail that makes it feel special. It’s a classic way to dress up an otherwise simple look.
Why This Style Works
It keeps the hair manageable. If your hair tends to get oily or stringy by the end of the day, a sleek chignon hides those issues perfectly. The braid at the base acts as a decorative element that draws the eye, and if you have enough length, you can even pull at the braid a little to give the base of your bun a wider, thicker appearance.
18. The Fishtail-Hybrid Headband
Start with a Dutch braid as a headband, but once you reach the halfway point, switch to a fishtail pattern. This unexpected transition makes the style more intricate and demonstrates that thin hair can handle complex weaving patterns. It adds a bit of professional flair to your everyday routine.
Tips for Switching Techniques
Practice the transition. You want the shift from Dutch to fishtail to be smooth. If you find the hair trying to pull loose, secure the spot where you switch with a tiny, hidden bobby pin. This provides an anchor point so you can focus on the fishtail weave without worrying about the Dutch braid loosening up.
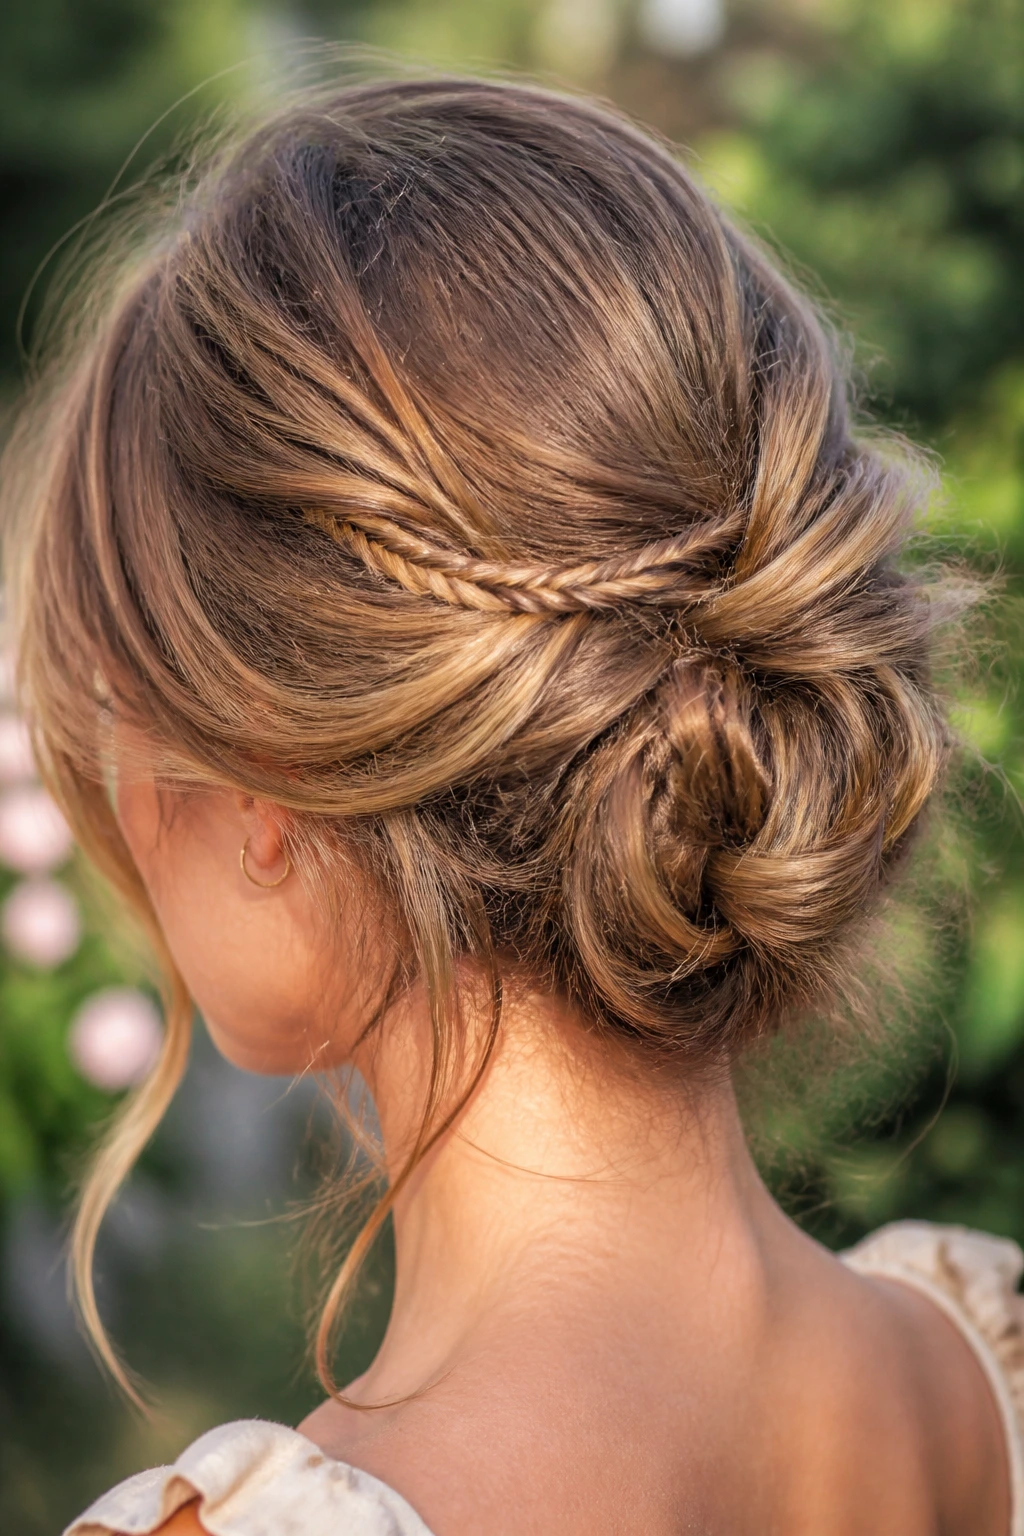
19. The Twisted Crown Bun
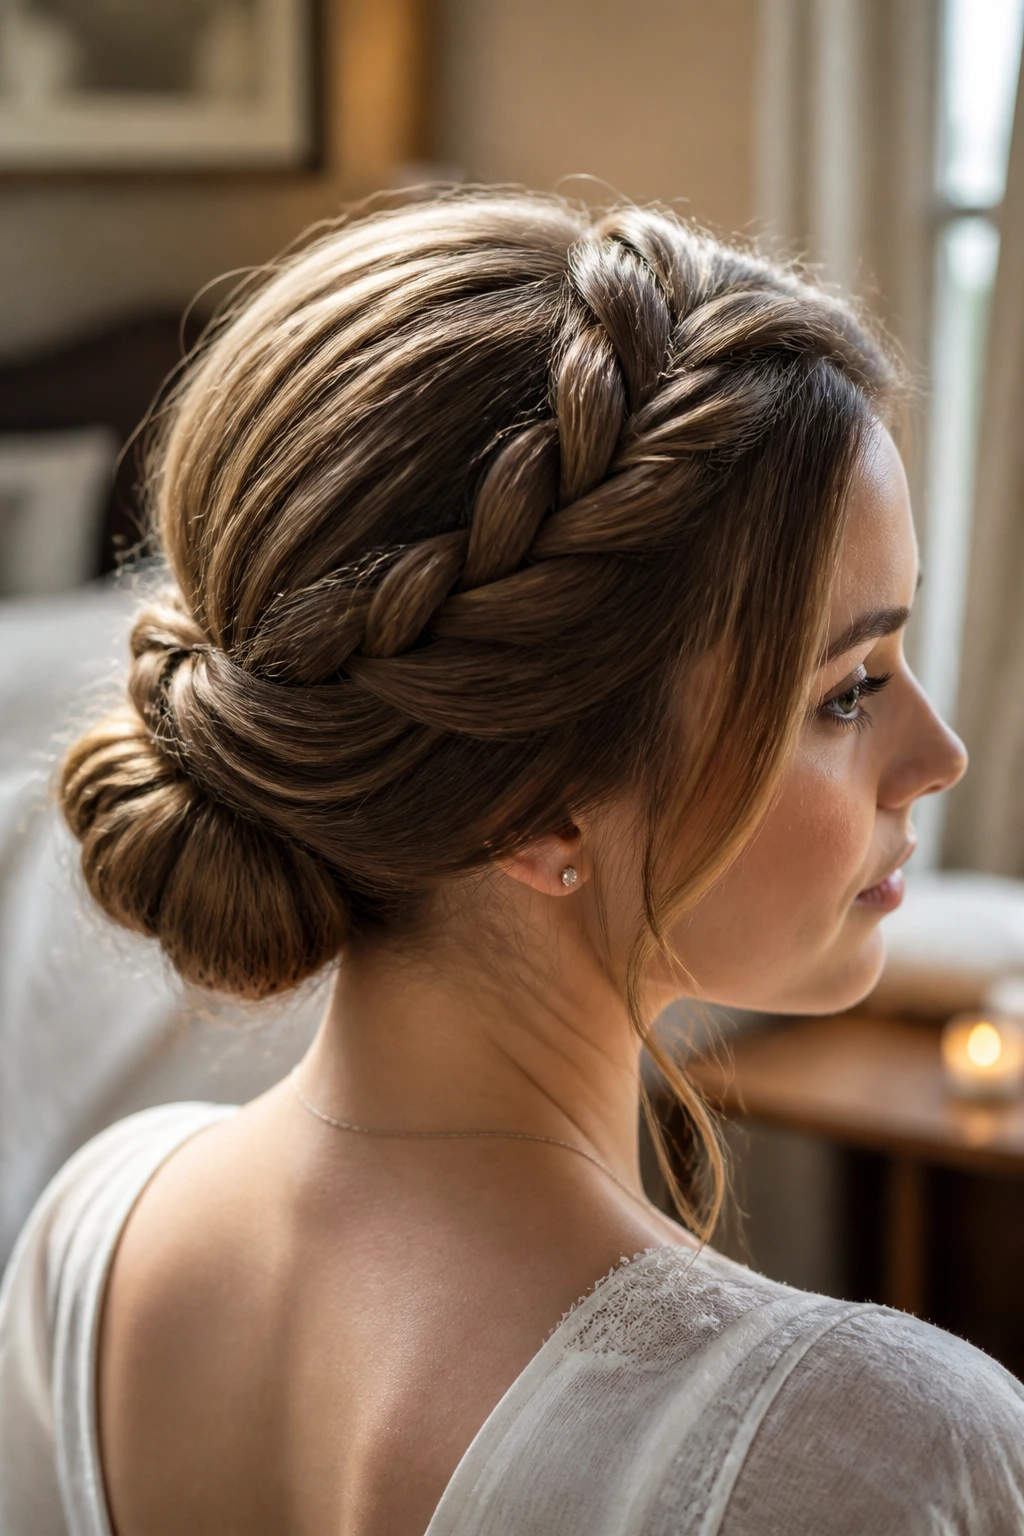
This style is all about creating a rounded, full shape at the back of the head. Twist the sides of your hair and bring them back to a low point, then braid the remaining length and wrap it into a bun. The twists add volume along the scalp, while the bun provides the weight and fullness at the bottom.
Managing Fine Texture
Twisted hair is easier to pin than braided hair. If you find your hair sliding out of braids, try twisting instead. You can use large, wide-set pins to secure the twists against your head, creating a padded effect that makes your hair look like it has a lot more body than it really does.
20. The Braided Ponytail Wrap
Take a simple ponytail and turn it into a statement. Braiding a small section of hair and wrapping it around your elastic hides the hair tie and adds a polished look. You can also braid the ponytail itself for a bit of texture, which prevents the thin tail from looking too limp.
How to Make the Ponytail Look Thicker
Add a second hair tie hidden underneath the first one to push the ponytail out slightly; this creates a “fanned out” effect. Then, wrap your braid around that base. It’s a subtle trick, but it gives your ponytail a much stronger foundation, preventing it from drooping flat against the back of your head.
21. The Soft, Romantic Side-Swept Braid
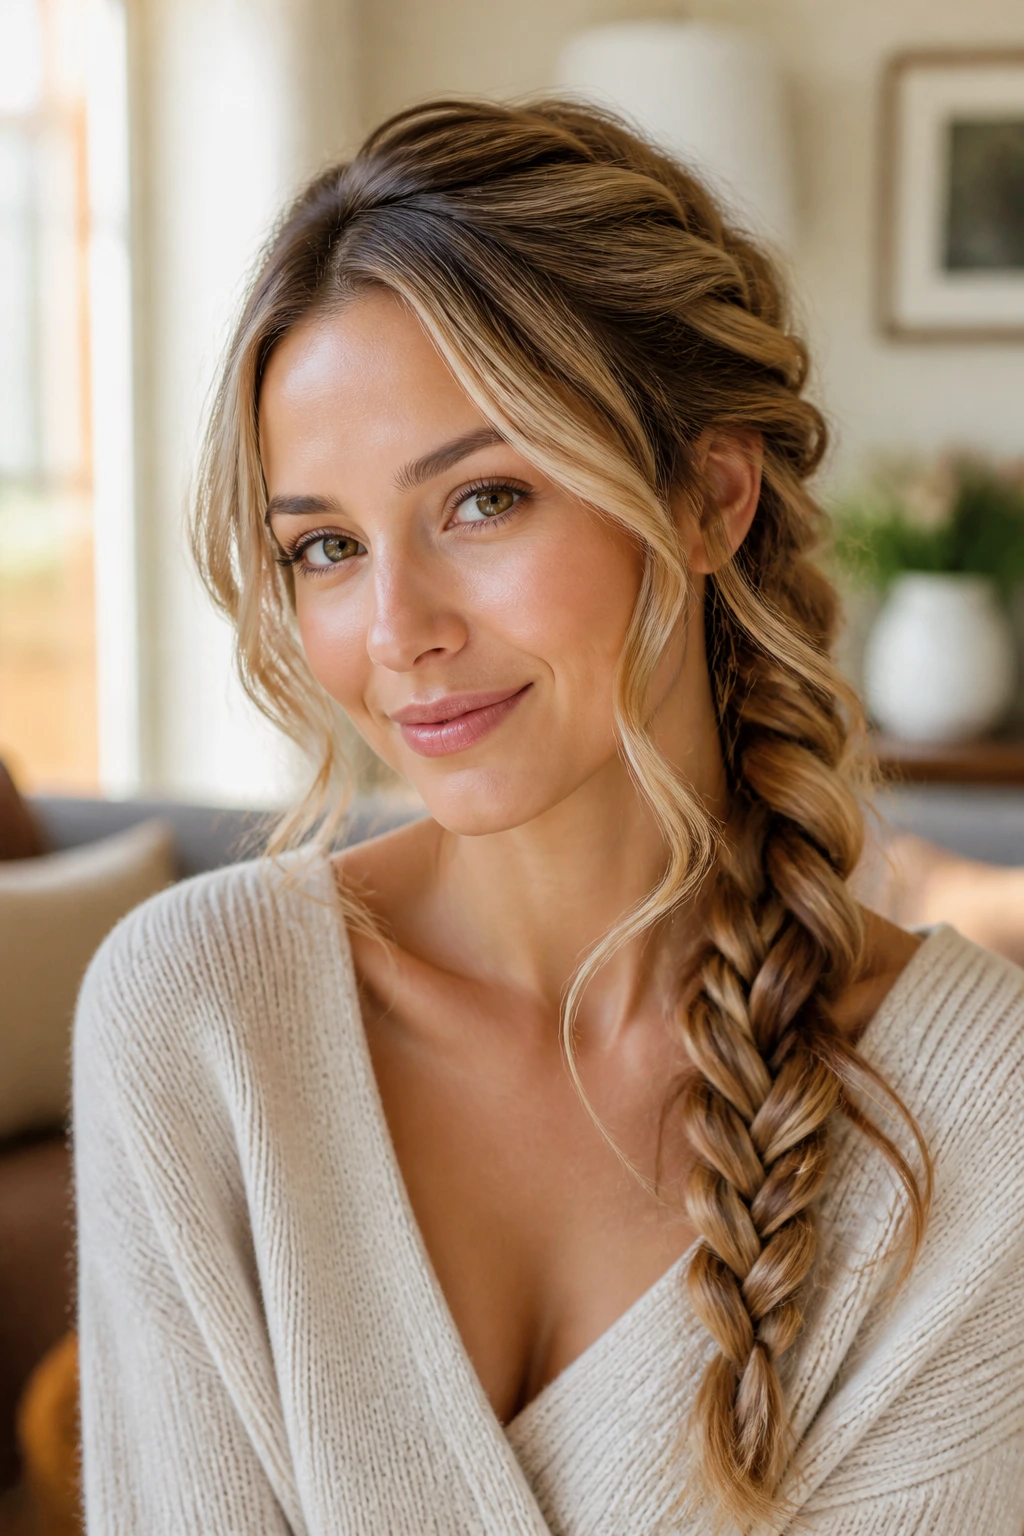
Finish your routine with a soft, loose braid draped over one shoulder, combined with some face-framing curls. This style is all about the “pancaking” technique discussed earlier. By pulling the braid wide and pairing it with soft, curled tendrils near the ears, you create a look that is delicate, intentional, and perfectly suited for fine hair.
Why It’s the Perfect Finale
It focuses on the softness of the hair rather than the density. Thin hair often looks best when it’s allowed to be ethereal and wispy. By leaning into that, you stop trying to make your hair look like someone else’s, and instead, you highlight the natural, silky qualities that fine hair possesses. Finish with a medium-hold hairspray to ensure the curls stay fresh, and you’re ready for the day.
Final Thoughts
Working with thin hair is less about finding the “magic” braid and more about understanding how your hair behaves. The most effective styles are those that build volume through texture, strategic placement, and small, clever illusions. Never shy away from products; a little bit of texturizing spray or powder can be the difference between a braid that falls flat in an hour and one that lasts all day.
Remember that perfection is not the goal. The beauty of these styles often lies in their slight imperfections, which add to the volume and movement. Experiment with these twenty-one styles and don’t be discouraged if your first attempt looks different than the photos. With a little practice and the right prep work, you will find that your hair has far more potential than you ever gave it credit for.