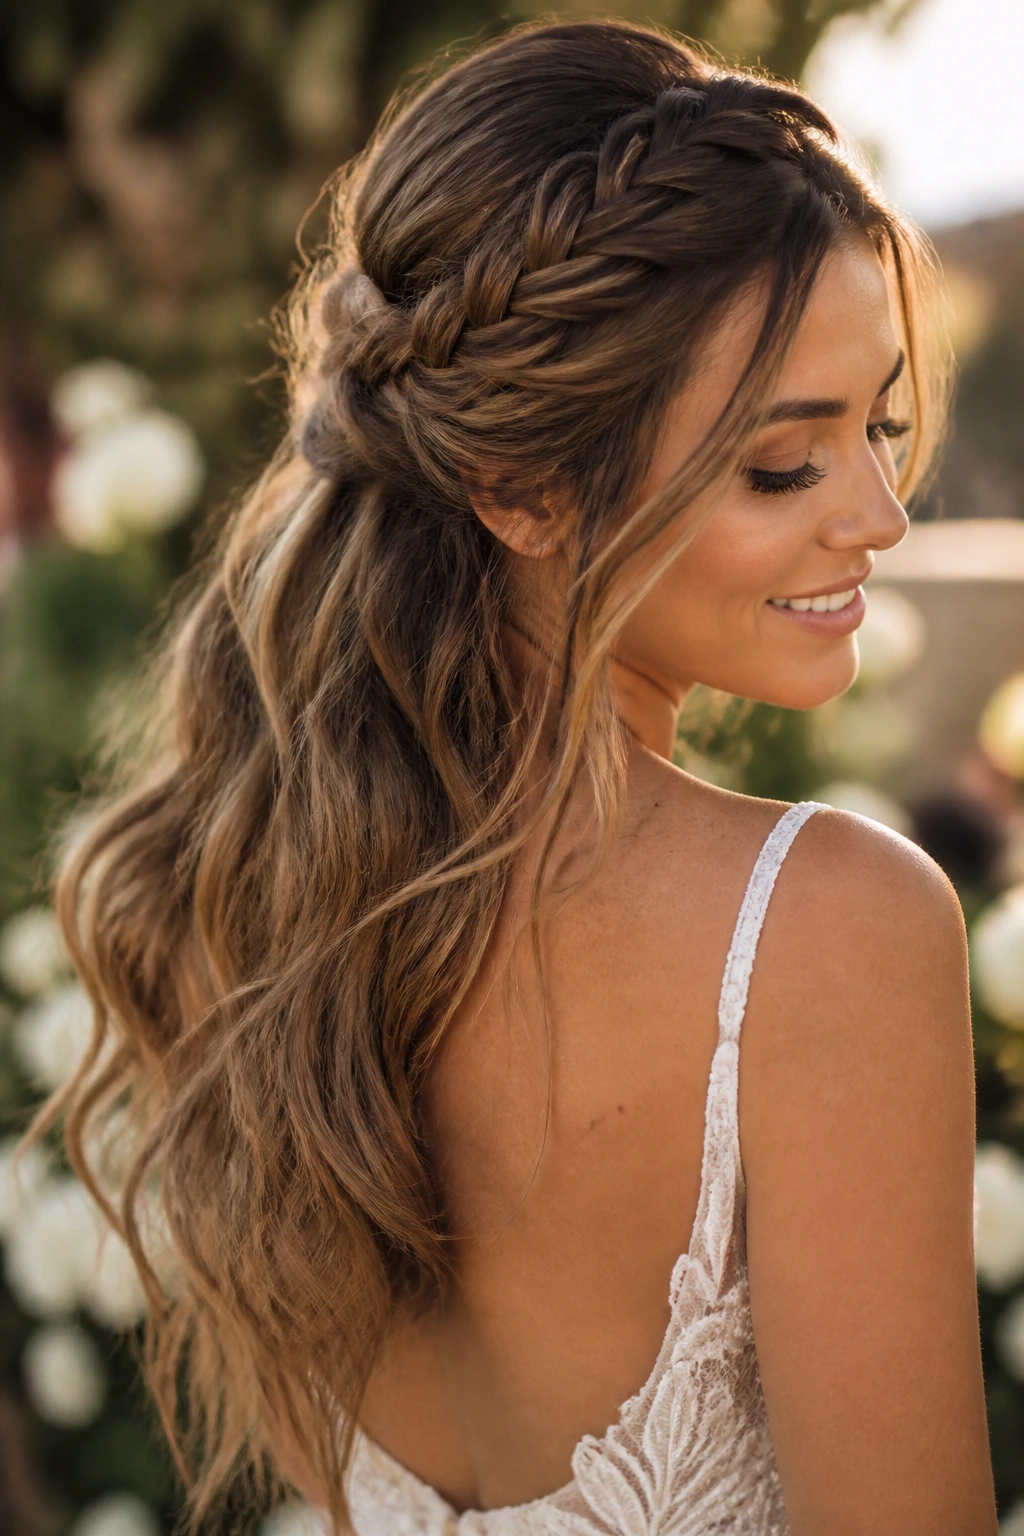
Walking down the aisle is a moment where every detail feels magnified, and for many, the hair is the ultimate accessory. It needs to hold up through happy tears, heavy floral crowns, and hours of dancing, yet it should feel entirely like you. Half-up, half-down styles have long been the gold standard for this exact balance—they offer the polish of an updo with the soft, romantic movement of hair left loose. When you weave braids into that structure, you gain texture, visual interest, and a sturdy foundation that pins can only dream of providing. Whether your vibe is bohemian elegance or classic, structured sophistication, a braided half-up style provides a reliable anchor that keeps hair away from your face while allowing you to showcase your natural length and texture.
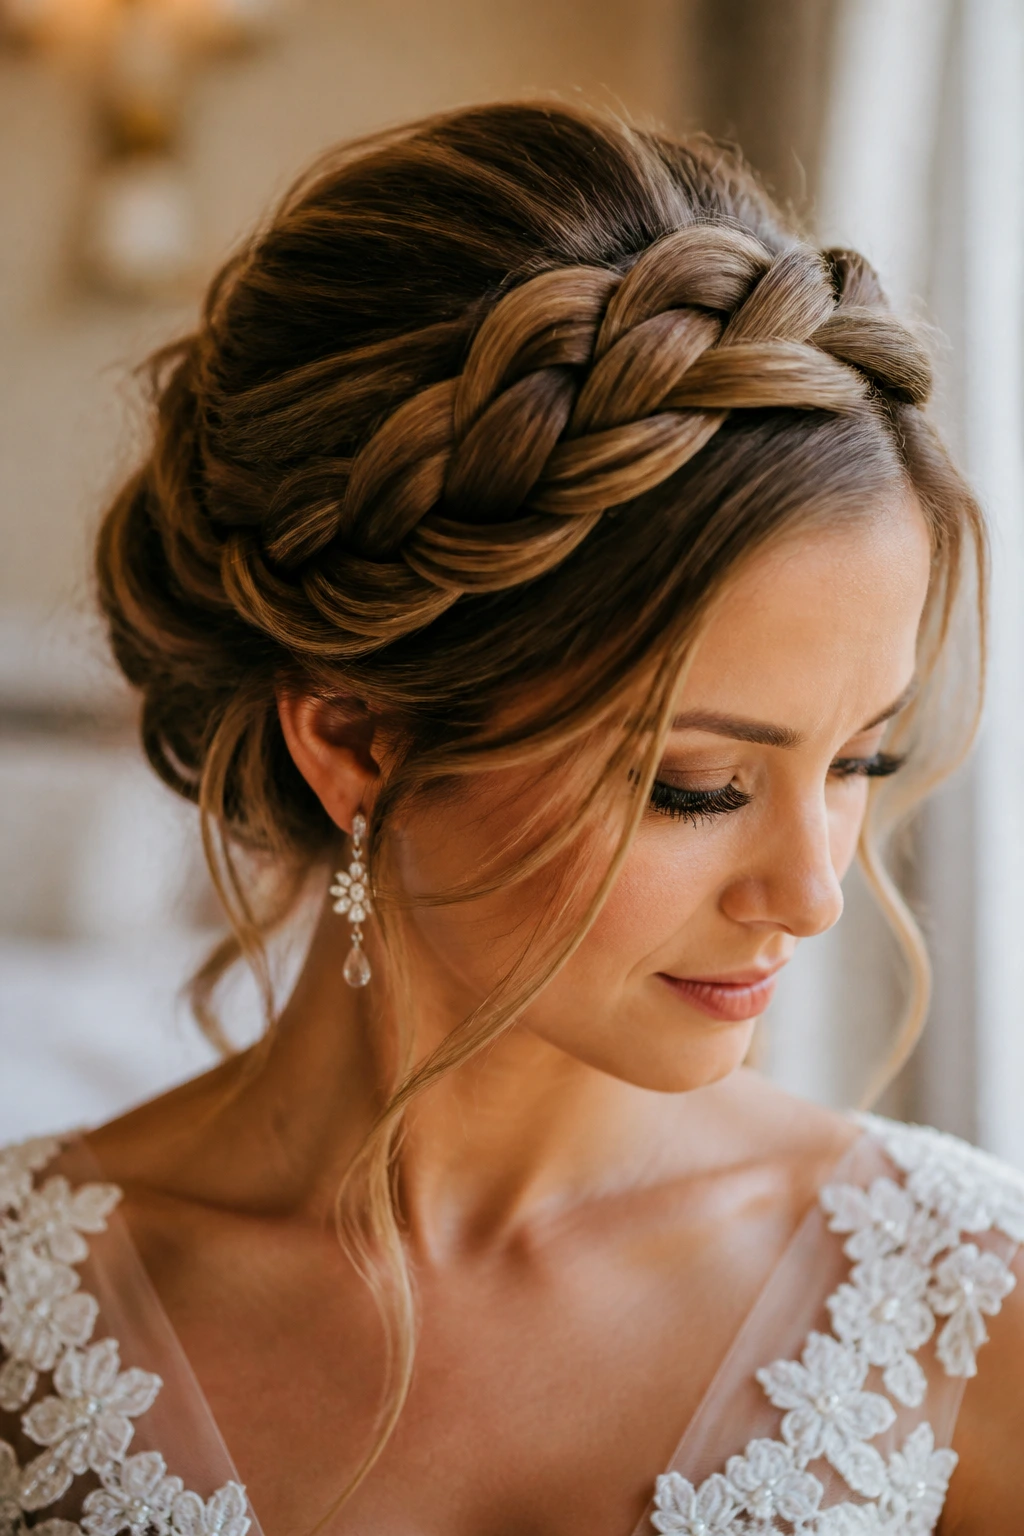
1. The Classic Twisted Crown Braid
This style relies on two simple, elegant rope braids meeting at the center of the head. It is incredibly effective for brides who want to keep the focus on their face while maintaining a soft, ethereal appearance. Because it requires less volume than a thick Dutch braid, it works exceptionally well on fine or medium-density hair.
Why This Style Succeeds
The beauty of the twisted crown lies in its simplicity. Unlike intricate fishtails that can look messy if a single strand slips, a rope twist is remarkably forgiving. If you have soft, face-framing layers, you can let them fall naturally while the twisted sections pull the weight back securely.
Quick Prep Steps
- Start with clean, dry hair and apply a texturizing spray to ensure the hair has enough “grip” to hold the twist.
- Separate two-inch sections at your temples.
- Divide each section into two and twist them away from your face, then cross them over one another.
- Secure the ends at the back of your head using small, clear elastics and a few hidden bobby pins. Pro tip: For an added bridal touch, tuck a small sprig of baby’s breath or a single pearl pin where the two twists meet.
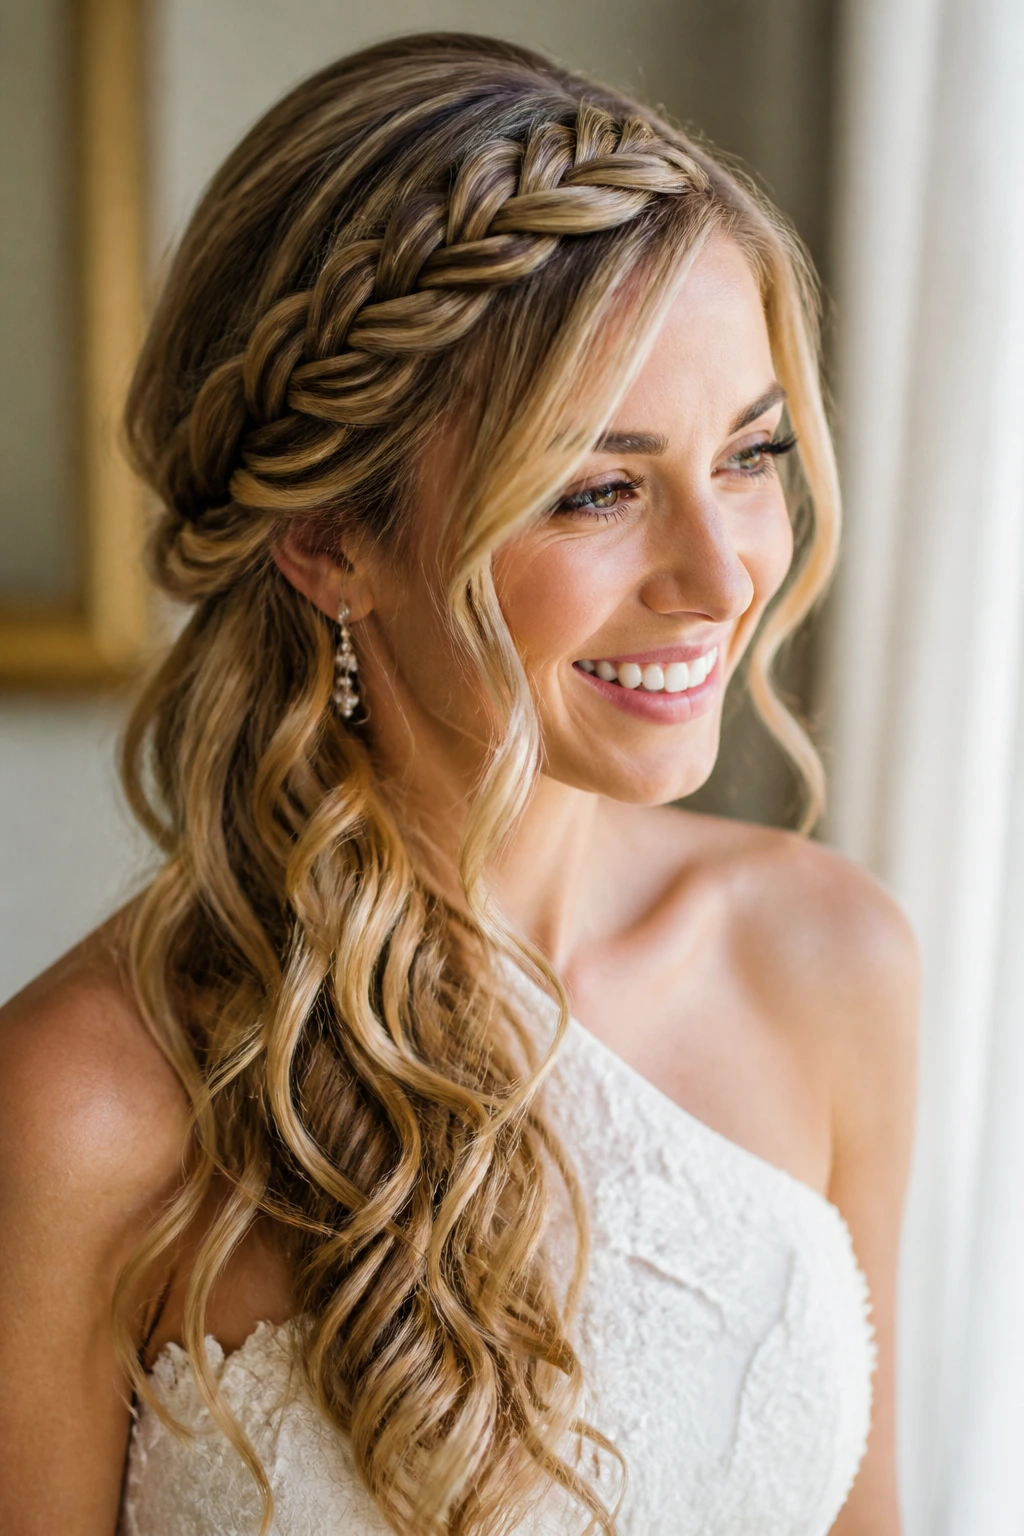
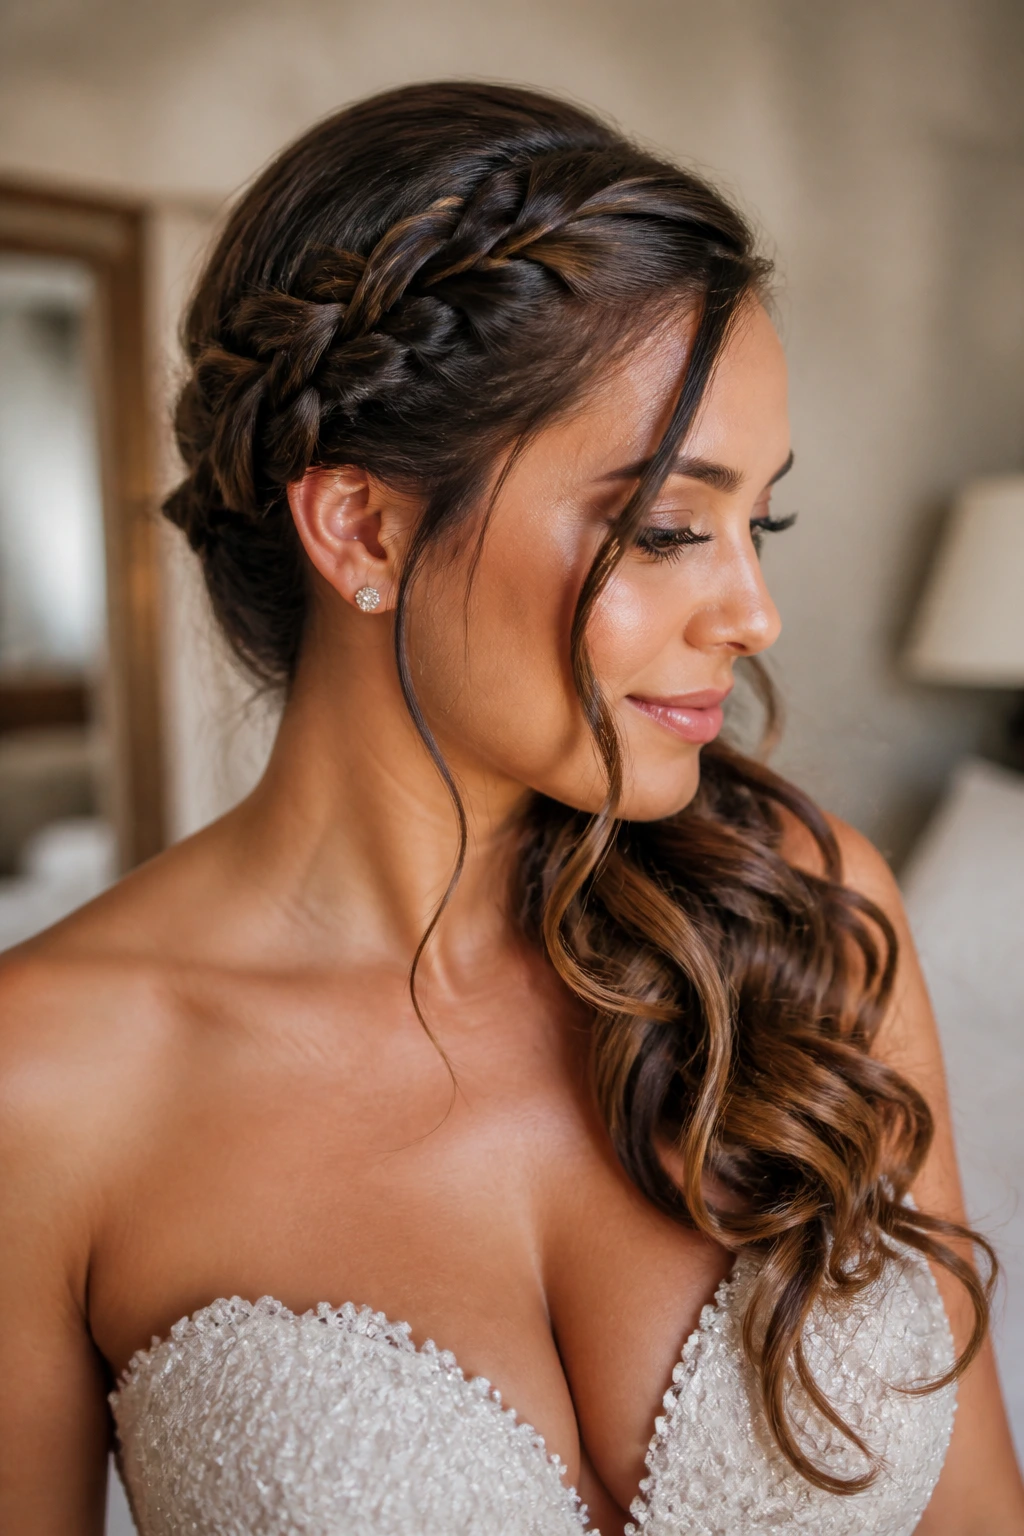
2. The Voluminous Dutch Side-Braid
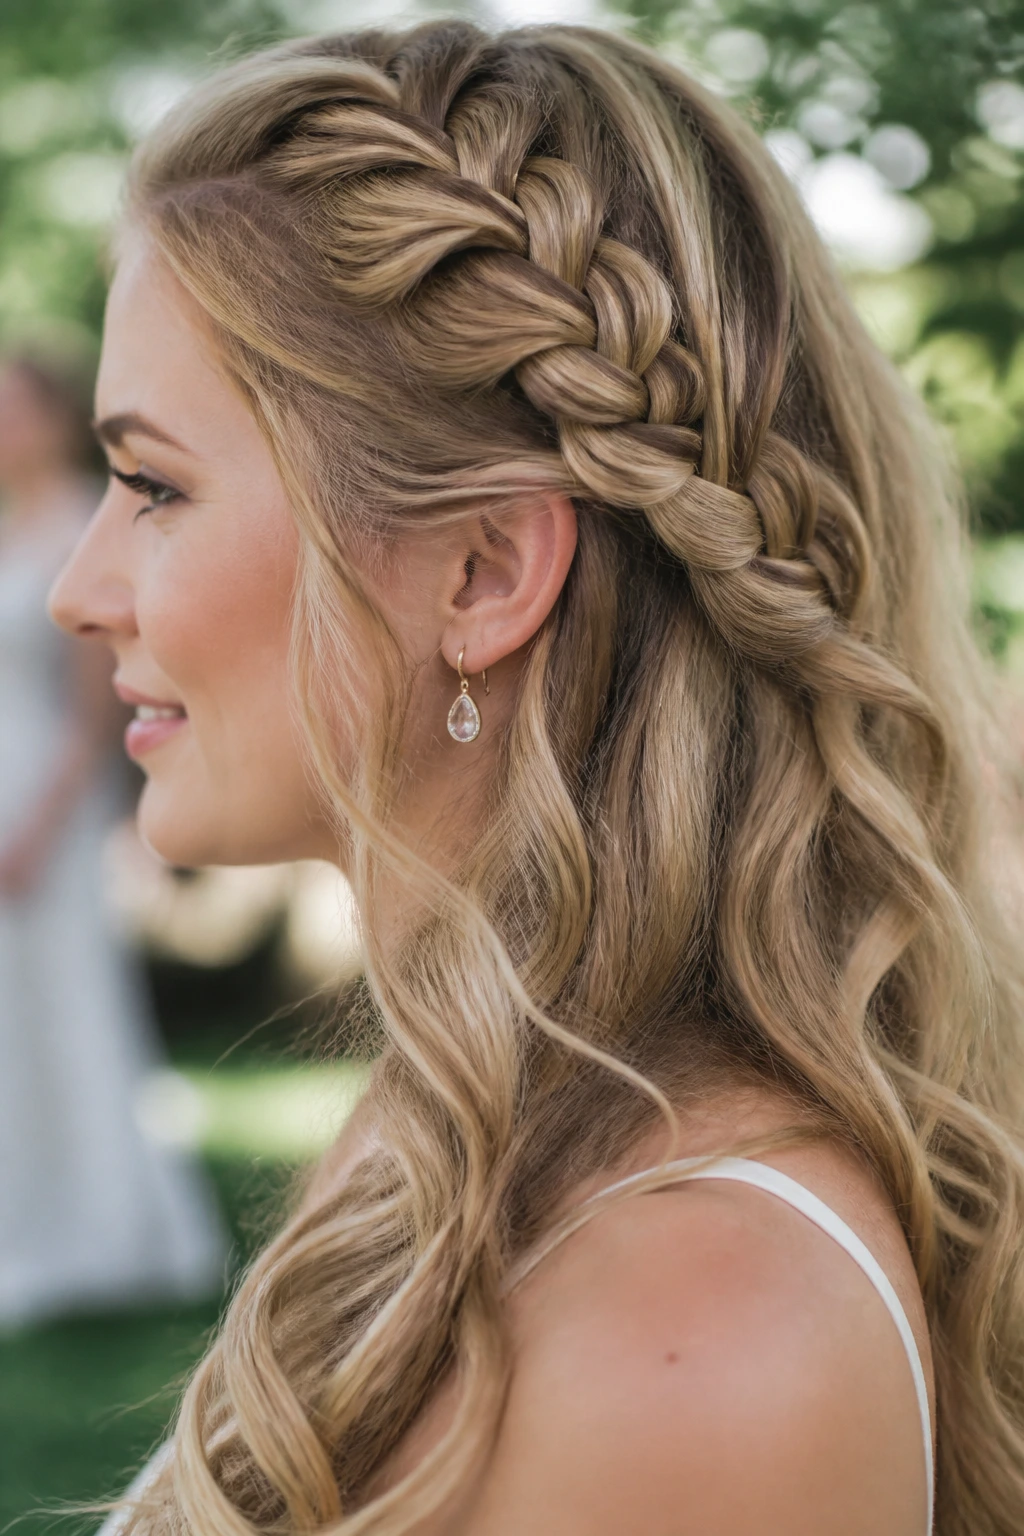
If you have thick, long hair, you need a braid that can hold its own against your natural volume. A Dutch braid—where you cross the strands under rather than over—creates a raised, 3D effect that looks spectacular from the side profile. This style is a favorite for destination weddings because it naturally handles humidity better than loose, flat waves.
Achieving That “Full” Braid Look
Most people struggle with the “flat braid” syndrome. The trick is to wait until you have secured the braid with an elastic before you begin “pancaking.” Gently tug at the outer loops of the braid, moving from the bottom up to the top, to expand the width without loosening the tension at the base.
How to Style the Rest of the Hair
Once the Dutch braid is secured at the back of the head, leave the remaining hair in loose, polished curls. Use a one-and-a-half-inch curling iron to create soft movement, making sure to curl away from the face. This directs the eye toward your features and keeps the look open.
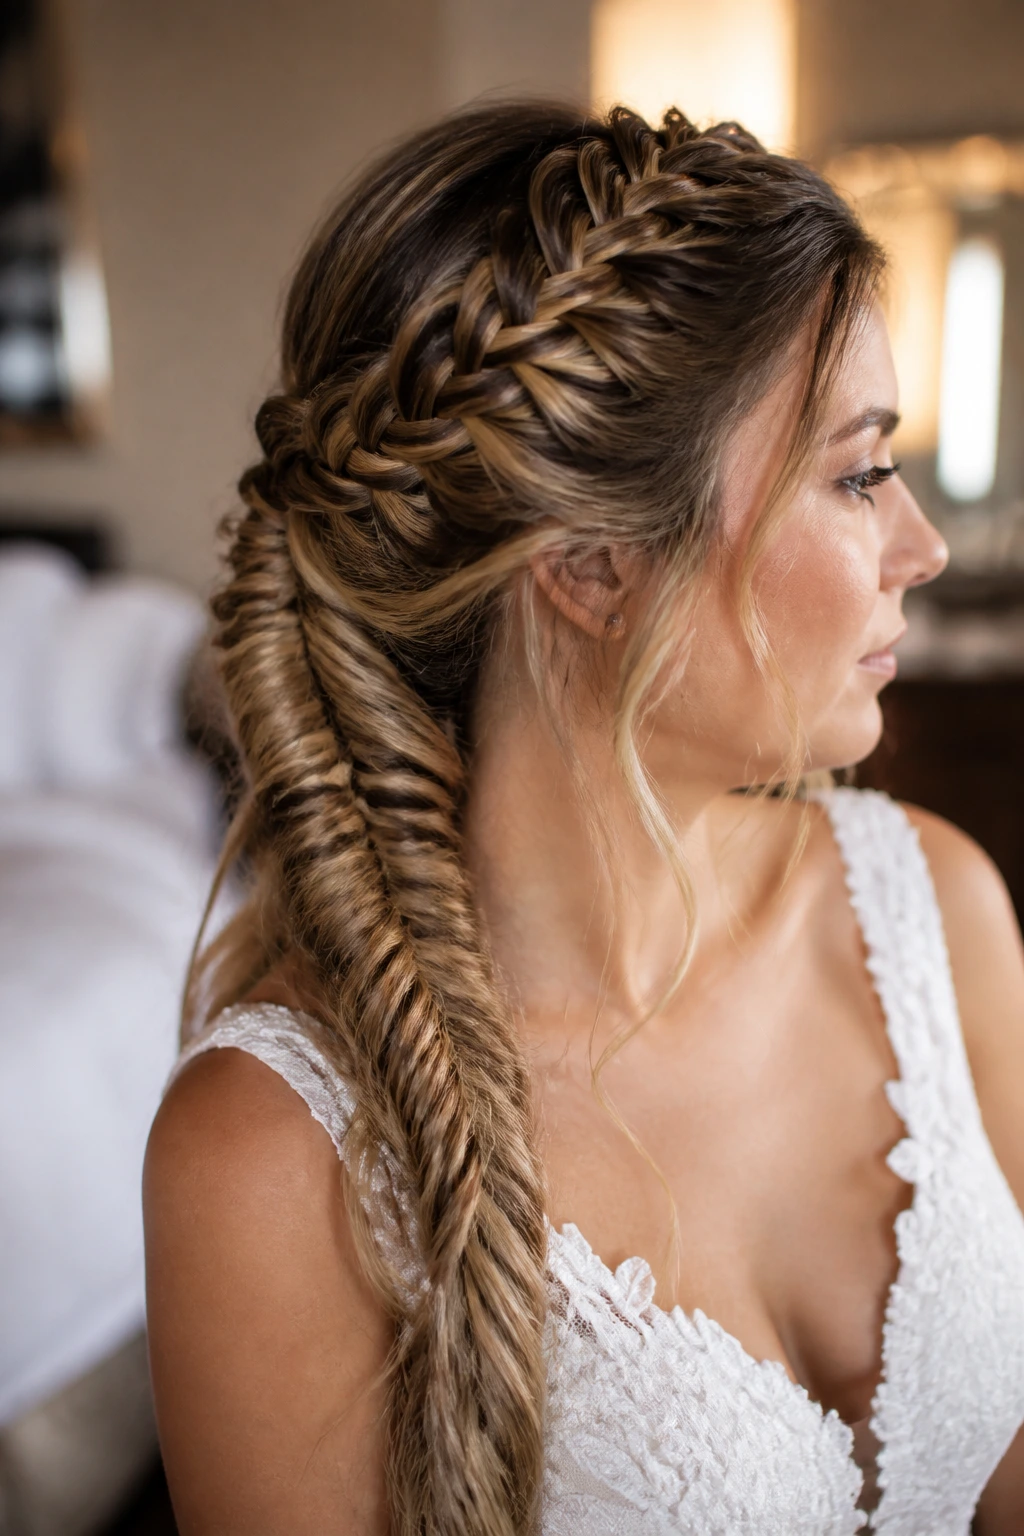
3. The Boho Fishtail Half-Up
The fishtail braid has a tight, intricate weave that suggests a high level of effort, making it ideal for a polished bohemian bridal look. Because it is physically tighter than a standard three-strand braid, it holds very well, even if you are planning an outdoor ceremony with a breeze.
Why It Works for Long Hair
A fishtail is one of the few braids that actually improves with length. If your hair is past your shoulders, the braid can cascade down the back, creating a beautiful transition from the intricate weave into your flowing, wavy ends. It is best to avoid too much product here; you want the texture to look natural, not stiff.
Keeping the Tension Consistent
- Always work in small, thin sections; the thinner the piece, the more detailed the final braid will appear.
- If you feel your arms getting tired, take a break after every two inches of braiding.
- Use a bit of dry shampoo at the roots before you begin; it creates a matte finish that helps the fishtail stand out against your scalp.
4. The Floral-Intertwined Waterfall Braid
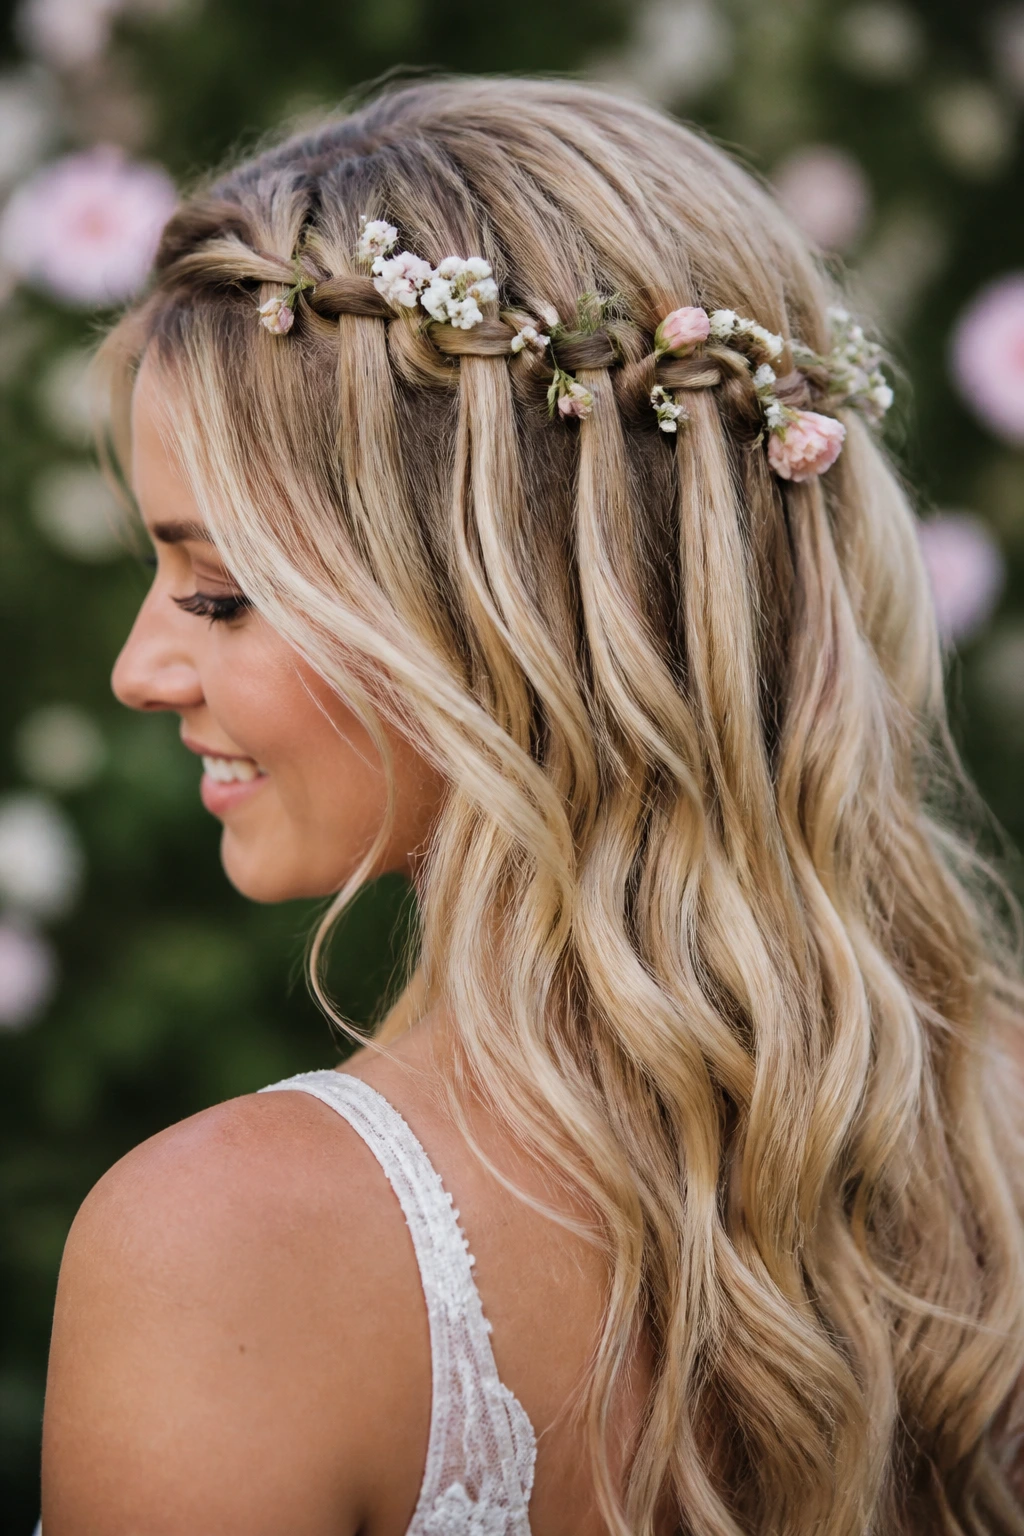
Waterfall braids are distinct because the strands “drop” through the braid rather than being contained entirely within it. This creates a cascading effect that looks incredibly romantic when paired with small, delicate flowers woven directly into the plait.
Selecting the Right Flowers
Do not use heavy, succulent-style blooms that will wilt or droop. Instead, opt for hardy, dried flowers, small spray roses, or sprigs of lavender. These stay crisp throughout the day and add a scent that is subtle and lovely during the vows.
Why This is a Crowd-Pleaser
This style is arguably the most “photogenic” choice for a wedding. It looks equally stunning from the front, side, and back. It provides an immediate sense of whimsy without feeling like a costume, making it perfect for garden weddings or intimate elopements.
5. The Messy Pull-Through Braid
If you love the look of a complex, thick braid but find your own hair is a bit too thin to achieve it, the pull-through braid is your secret weapon. It is technically a series of small, tied ponytails pulled through each other, rather than a traditional weave.
How it Fakes Thickness
You can create this look by using tiny, clear silicone bands at each step. As you pull the hair through, you tease and spread it out. It creates the illusion of a braid that is three times thicker than your actual ponytail, which is a massive confidence booster for brides worried about their hair looking “skimpy” in photos.
Essential Tools
- At least 10–15 small clear elastic bands.
- A tail comb for sectioning.
- A light-hold hairspray that doesn’t leave a crunch.
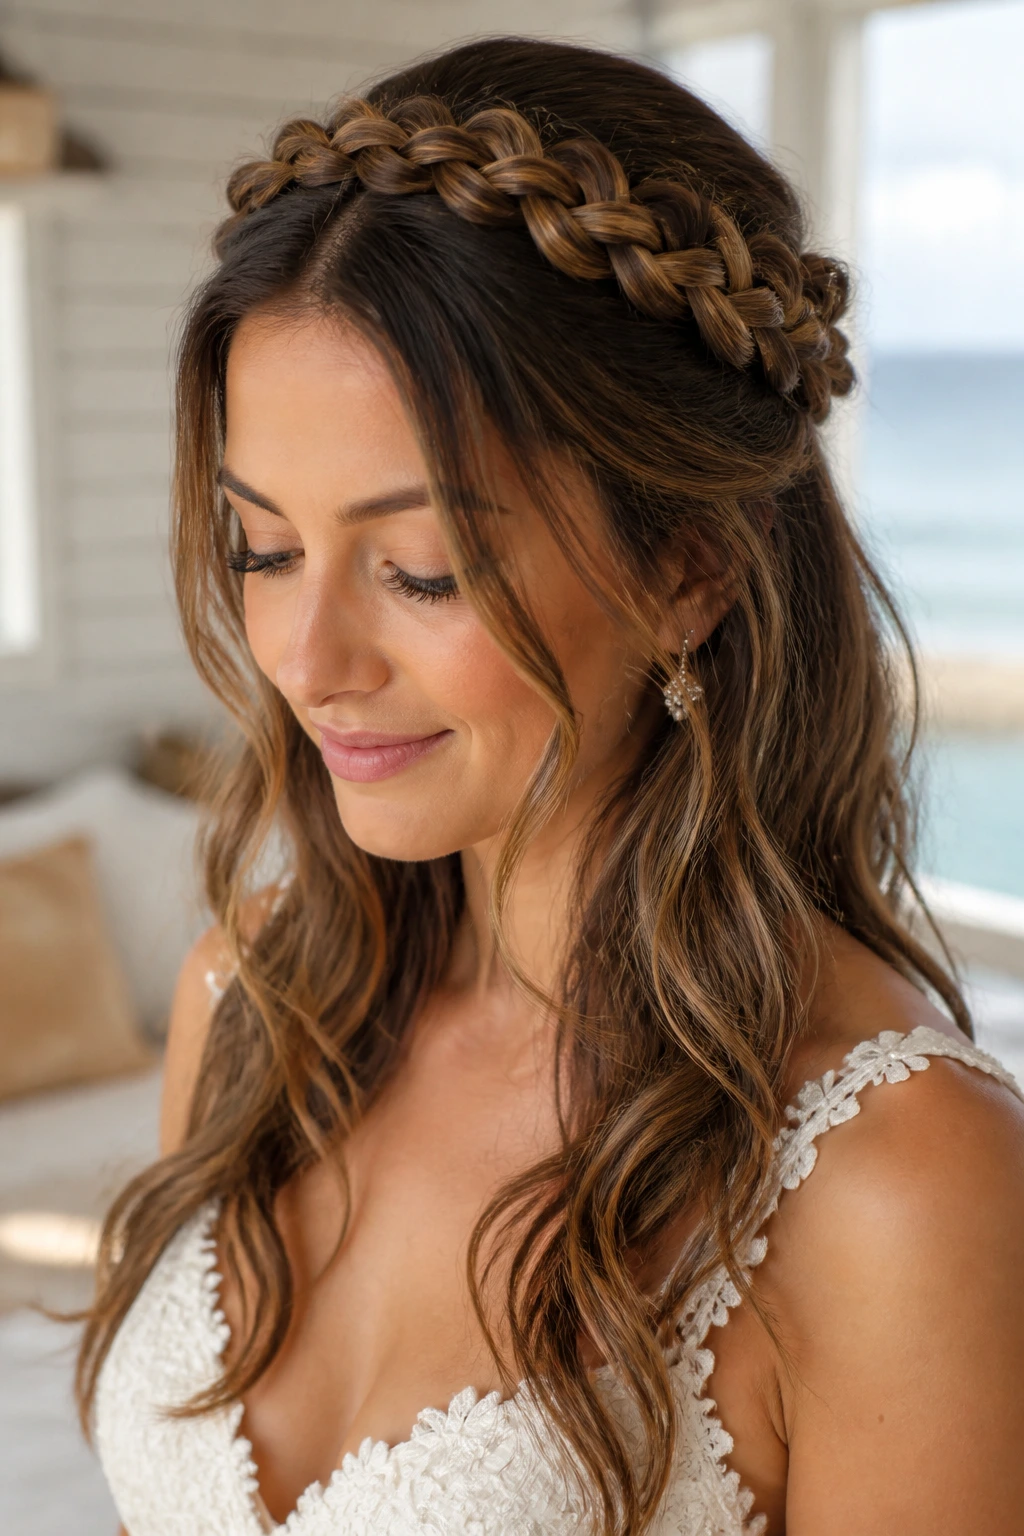
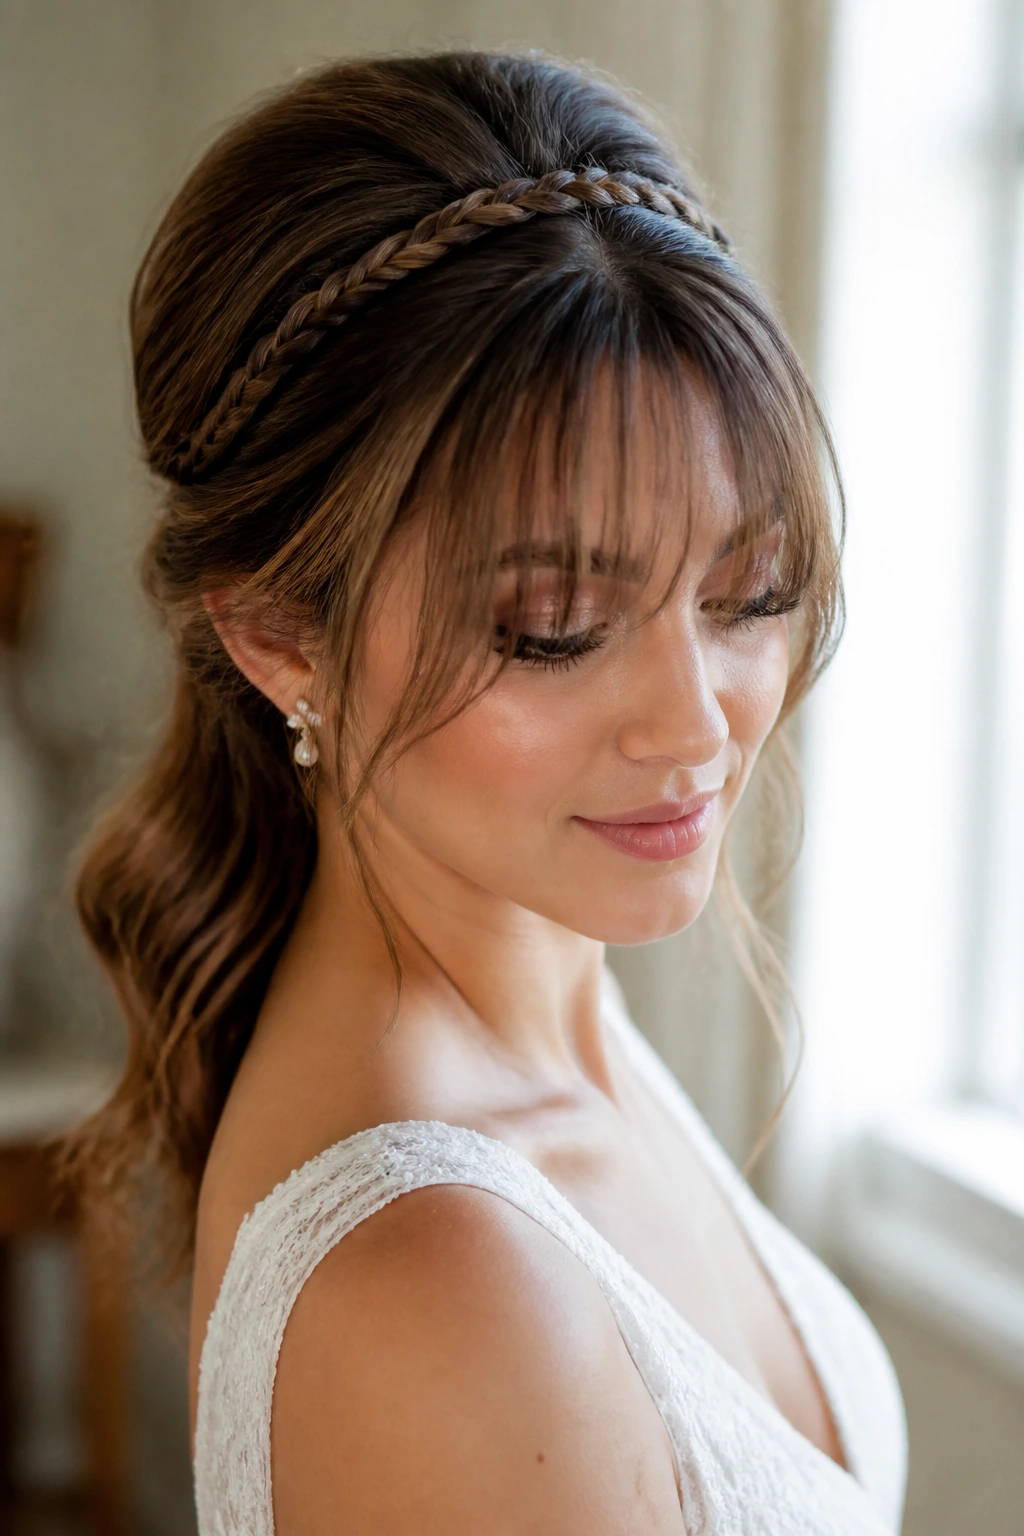
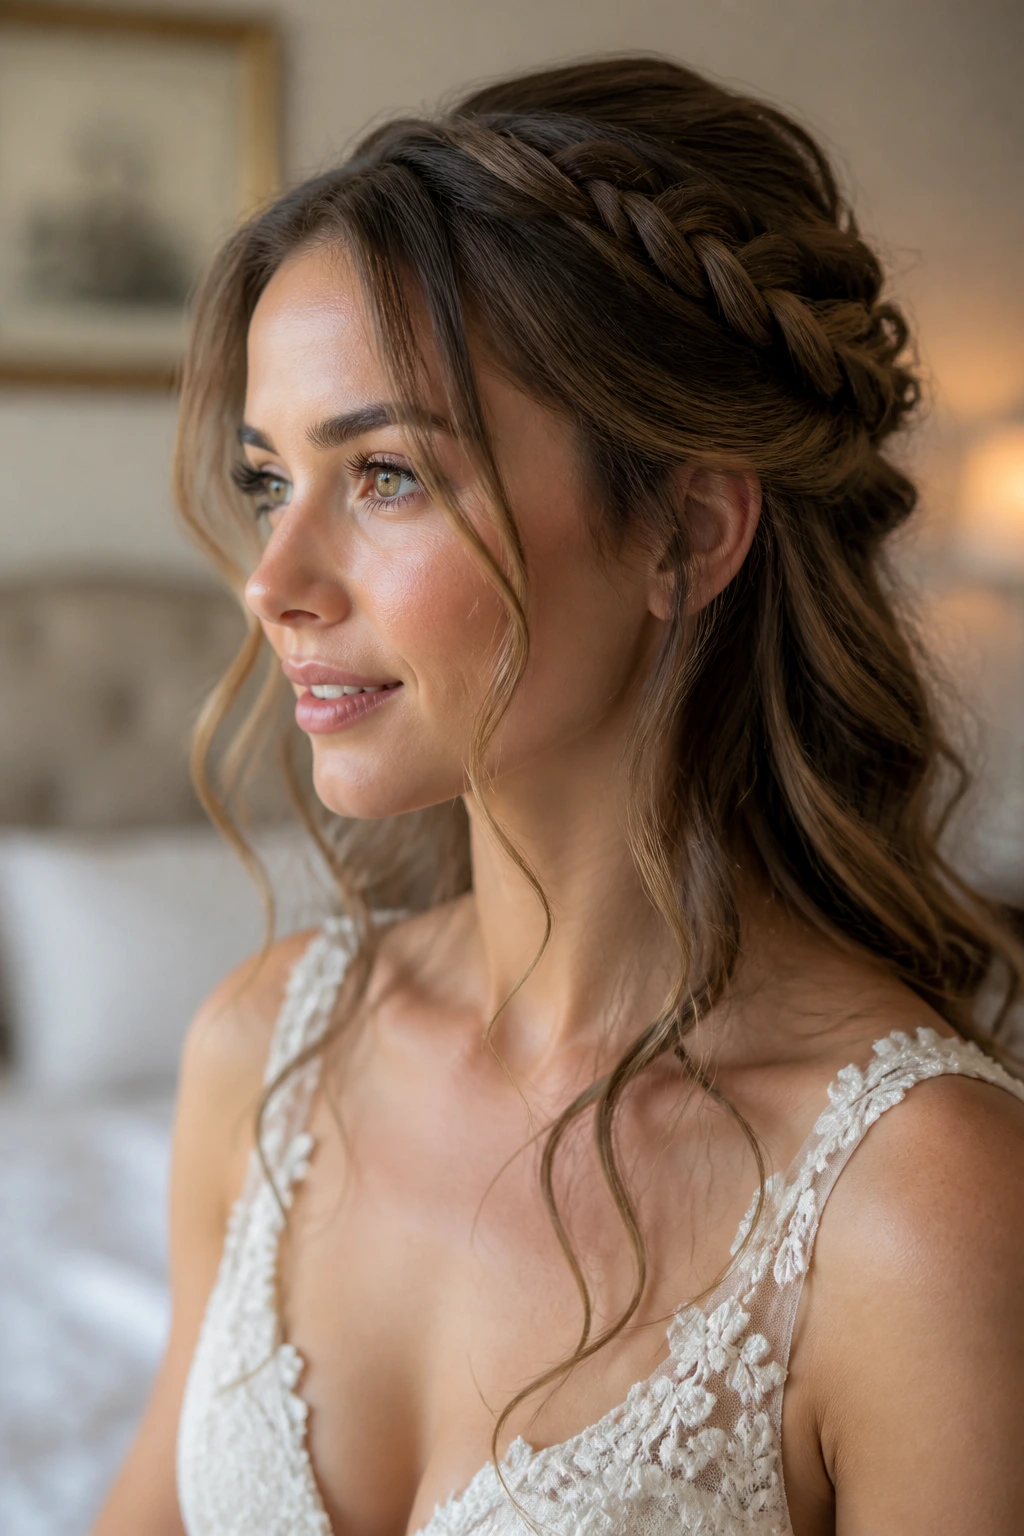
6. The Grecian Goddess Headband Braid
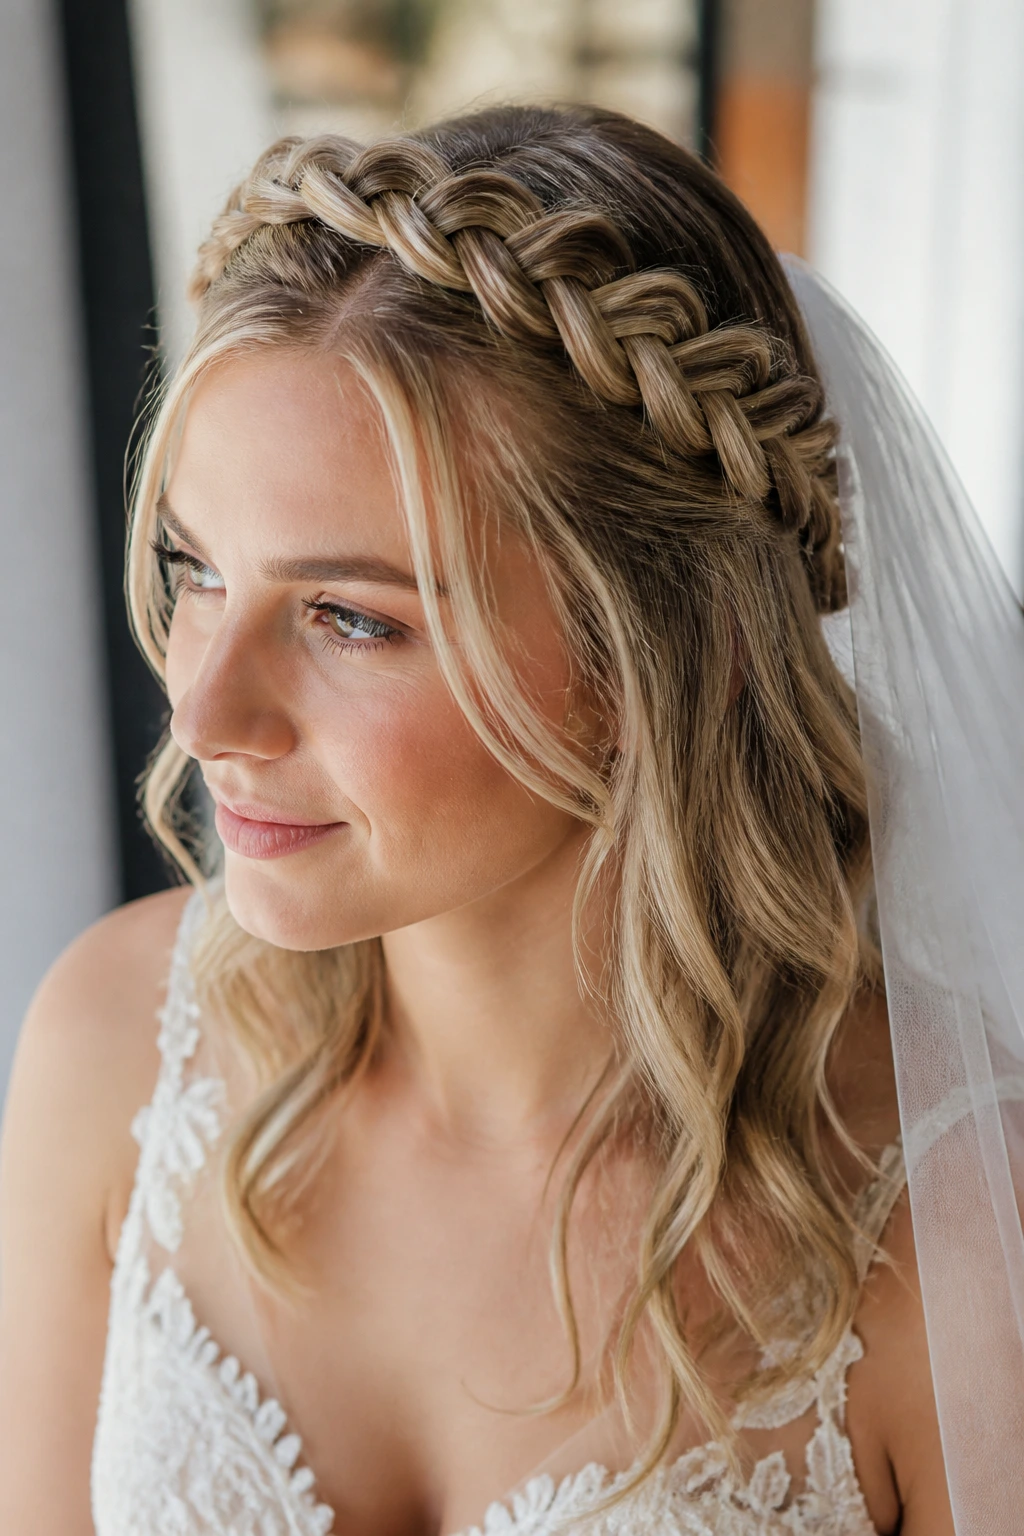
This style features a braid that starts near one ear, travels across the top of the hairline like a headband, and terminates at the other side, pinning behind the ear. It effectively replaces the need for a traditional bridal crown or tiara.
Balancing the Face
Because this style pulls hair away from the forehead, it highlights your cheekbones and eyes. If you prefer a bit of softness, pull out two small, wispy tendrils near the temples and curl them slightly with a flat iron. This adds a “lived-in” feel that keeps the headband braid from looking too severe or school-girlish.
Handling Hair Accessories
If you are wearing a veil, this style is incredibly easy to work with. The veil can be pinned directly into the back section of the braid, providing a solid anchor point that won’t slip out during the reception or when you take it off to dance.
7. The Double-Braided Mixed Texture
Sometimes, one braid isn’t enough. By combining a tight fishtail and a loose, airy Dutch braid, you create a depth that is visually arresting. The contrast between the two different textures keeps the hair interesting, especially in professional photography.
Creating the Contrast
- Start the Dutch braid on the top section for volume near the crown.
- Transition into a tighter, thinner fishtail on the side.
- Pin them together at the back so they look like they were meant to be a single, cohesive unit.
- This style is fantastic for brides with layers, as the different braiding techniques help catch shorter strands that might otherwise poke out.
8. The Twisted Side-Swept Plait
If you have a one-shoulder wedding dress, a side-swept look is almost mandatory to balance the neckline. This style takes a deep side part and creates a braid that sweeps across the forehead and disappears into the loose hair on the opposite side.
The Power of Asymmetry
Asymmetry is inherently more interesting to the human eye. By placing the braid off-center, you create a dynamic line that guides the eye across the bride’s face. It is a sophisticated way to show off earrings while keeping the hair controlled.
Perfecting the Sweep
- Blow-dry your hair with a round brush to create a smooth base.
- Use a bit of smoothing cream to eliminate flyaways along the part.
- Secure the tail of the braid with a decorative pin or a piece of silk ribbon that matches your wedding color palette.
9. The Minimalist Rope Twist Half-Up
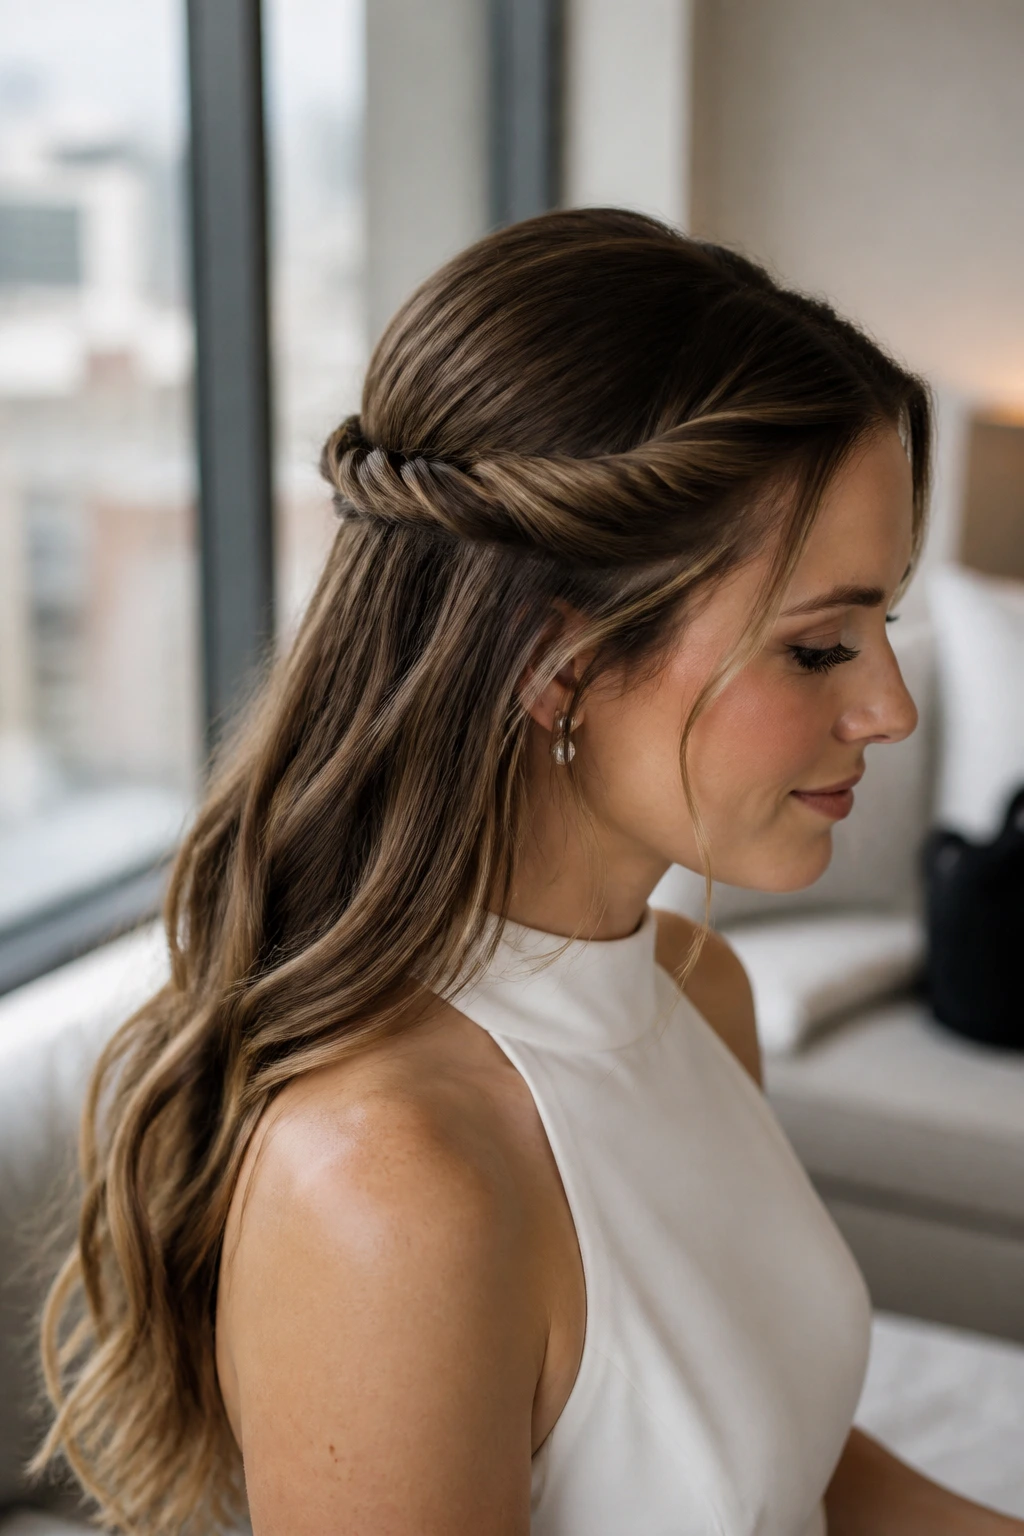
For the modern, minimalist bride, a massive, thick braid can feel like too much. A single, sleek rope twist is understated, clean, and perfectly suited for a chic city wedding or a courthouse ceremony.
Why Minimalism Wins
Sometimes, less is more. A simple rope twist, pulled tight and secured with a hidden pin, provides just enough detail to feel “bridal” without distracting from a high-neck dress or complex jewelry. It is the definition of “quiet elegance.”
Longevity Factors
Because this style has fewer moving parts and less volume, it is the easiest to maintain. You will not have to worry about the braid getting frizzy or losing its shape throughout the night. A light misting of shine spray is all you need to keep it looking polished until the final dance.
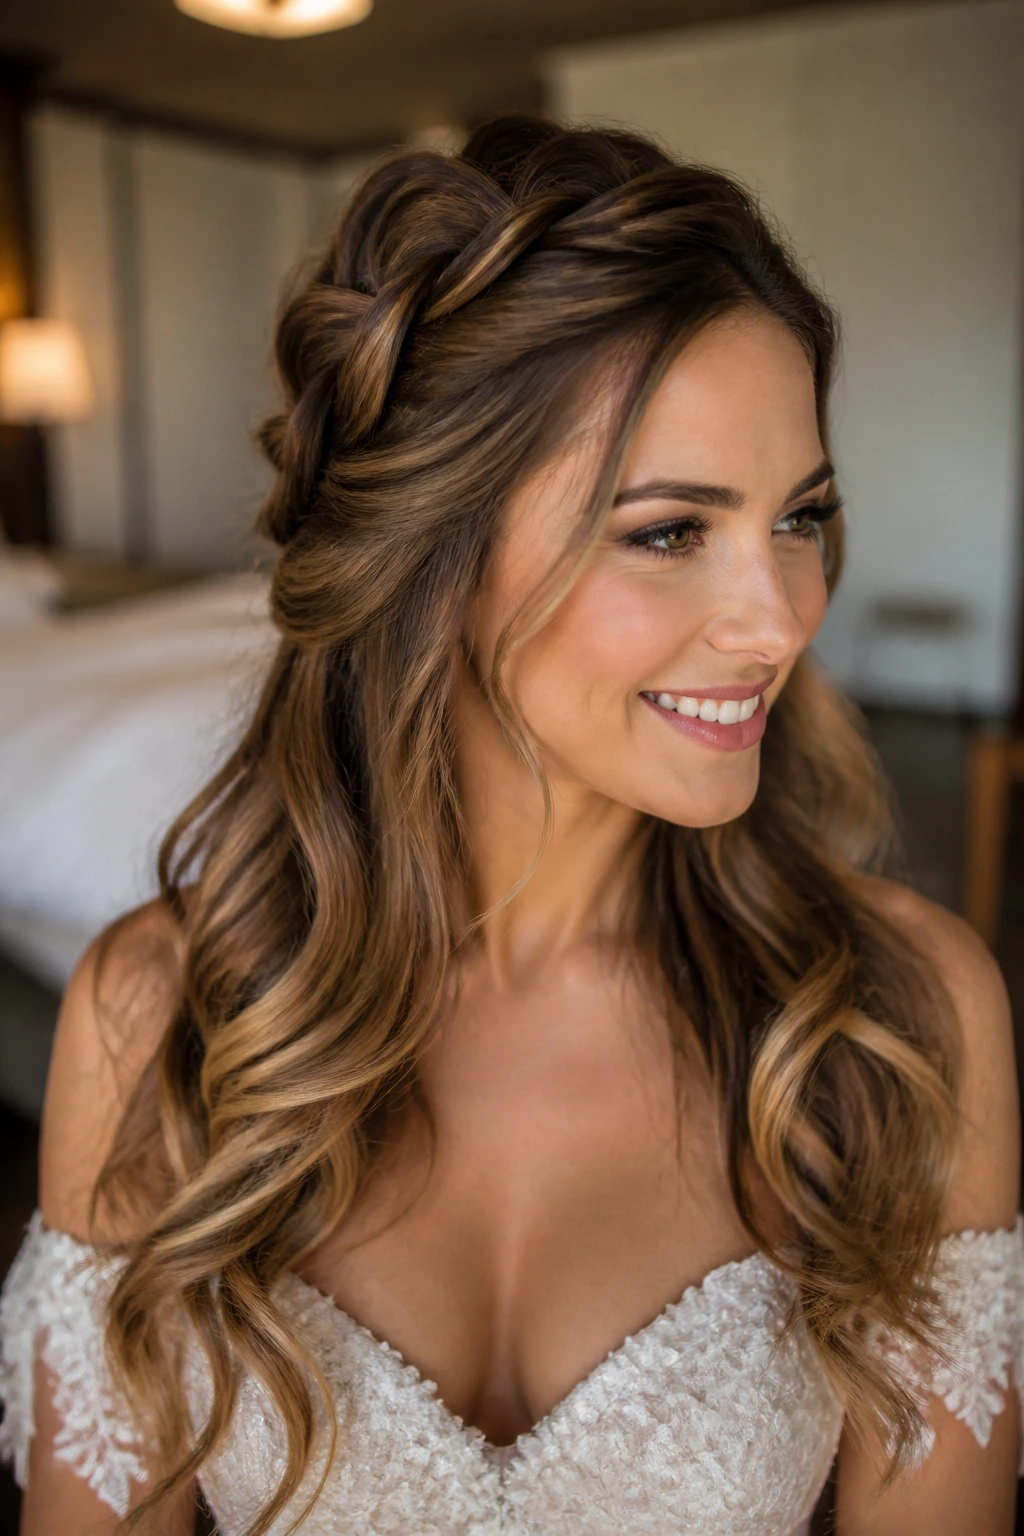
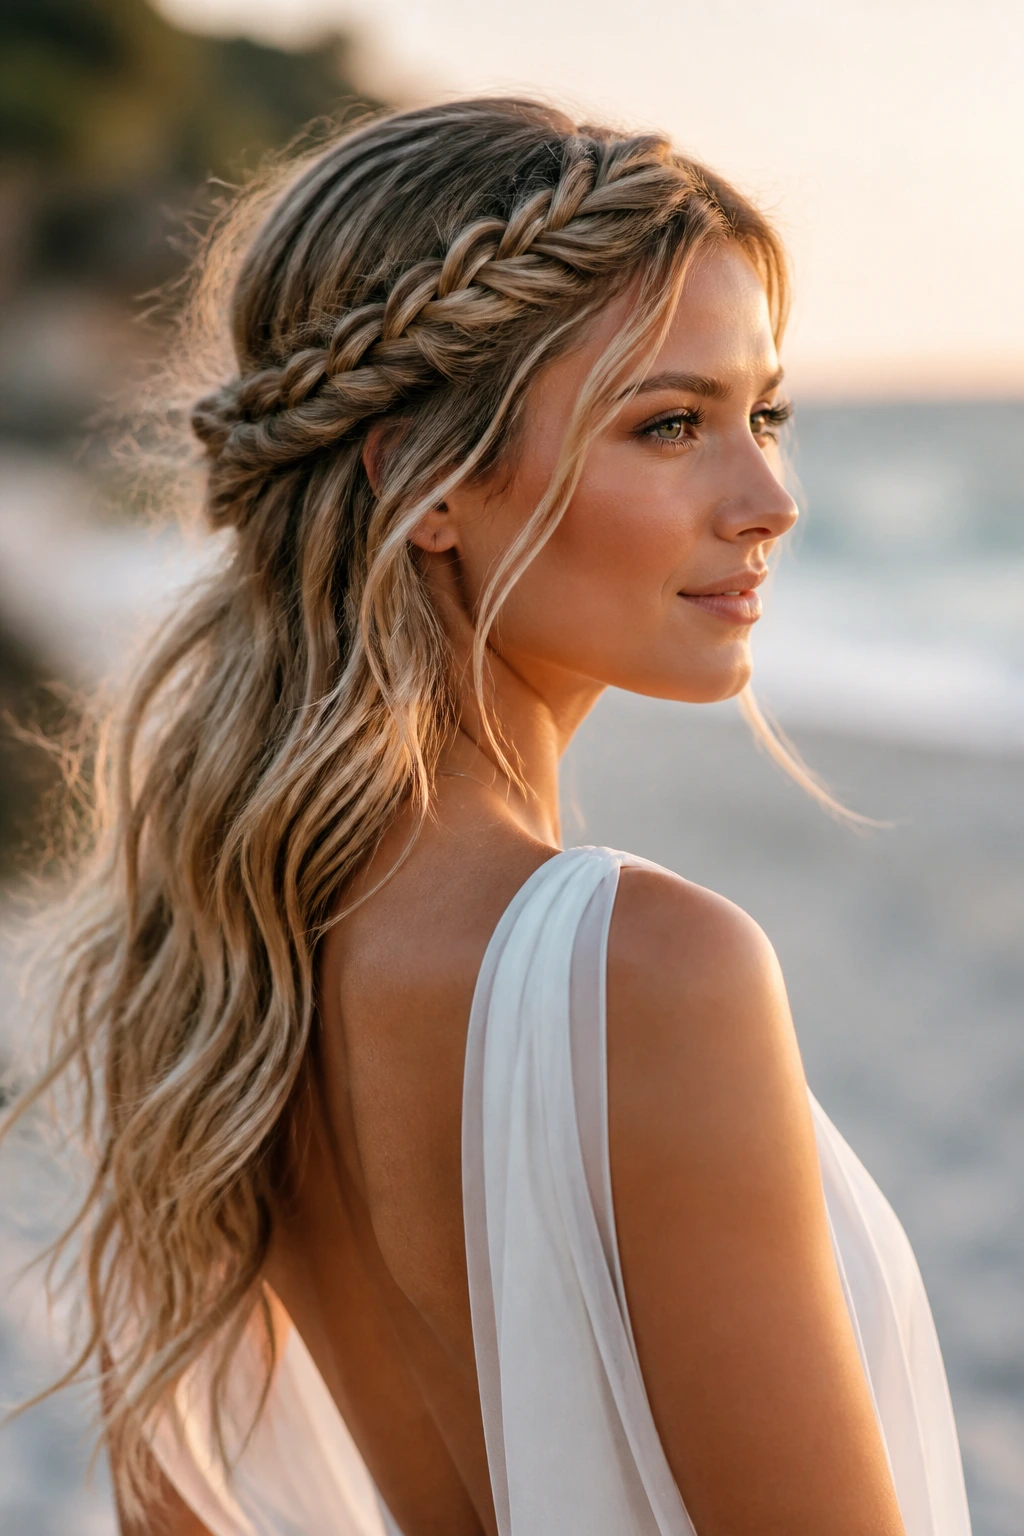
10. The Braided Halo with Loose Waves
The halo effect frames the head perfectly and works beautifully if you have long, flowing hair that you are determined to keep down. The braid acts as a “frame,” keeping the face clear while the rest of the hair cascades over the shoulders.
Waves vs. Curls
For this look, choose loose, relaxed waves over tight barrel curls. A larger curling wand—around two inches—will give you that “effortless” coastal wave. If your hair is naturally straight, use a sea salt spray beforehand to build texture.
Keeping the Halo Intact
The key is to keep the braid close to the scalp. If it sits too far back, it will lose that “halo” appearance. Use bobby pins that match your hair color exactly; if you are blonde, use light gold pins, and for dark hair, use dark brown or black.
11. The Accent Braid with Waves
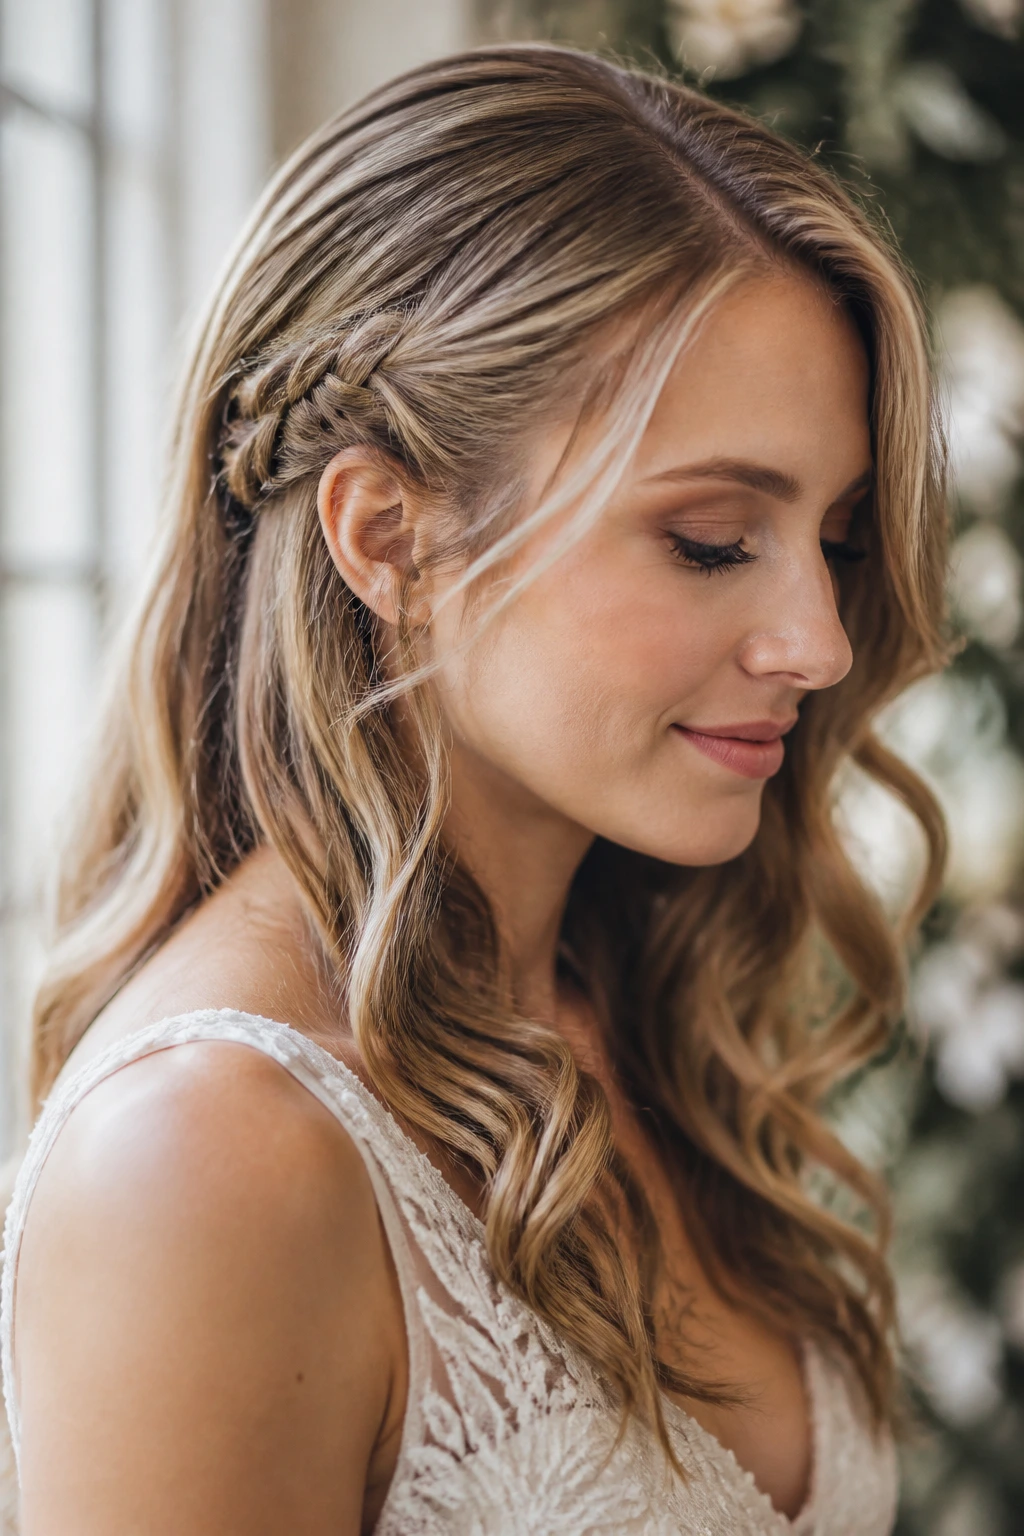
If you are worried about the braid taking over the look, use it as an accent. A single, small Dutch braid tucked behind one ear is a clever way to keep hair out of your face without committing to a full half-up, half-down structure.
Highlighting Features
This style is especially good if you have a dramatic headpiece or hair jewelry you want to feature. The small braid serves as a subtle, structural base that holds the jewelry in place, preventing the headpiece from sliding around during the ceremony.
Versatility in Styling
- This looks great with a middle part or a deep side part.
- It is the most low-maintenance option on this list, making it perfect for brides who are doing their own hair or want a very quick “touch-up” during the day.
- It pairs beautifully with veils of any length, from birdcage veils to cathedral trains.
12. The Knotted Half-Up Braid
The knot braid—where you create a series of loops that look like knots—is a sophisticated, less common choice. It adds a sculptural quality to the hair that looks almost like a work of art from the back.
Who Should Choose This
If you want something that looks “high fashion” rather than “bohemian,” this is it. It has structure, precision, and an architectural feel that complements modern, structured wedding gowns with clean lines and geometric silhouettes.
Technique for Knots
- Instead of weaving, you are pulling strands through loops.
- It takes a bit of practice to get the tension right, but once you master the “pull-through-knot,” it stays in place for an incredibly long time without needing excessive hairspray.
13. The Braided Top-Knot
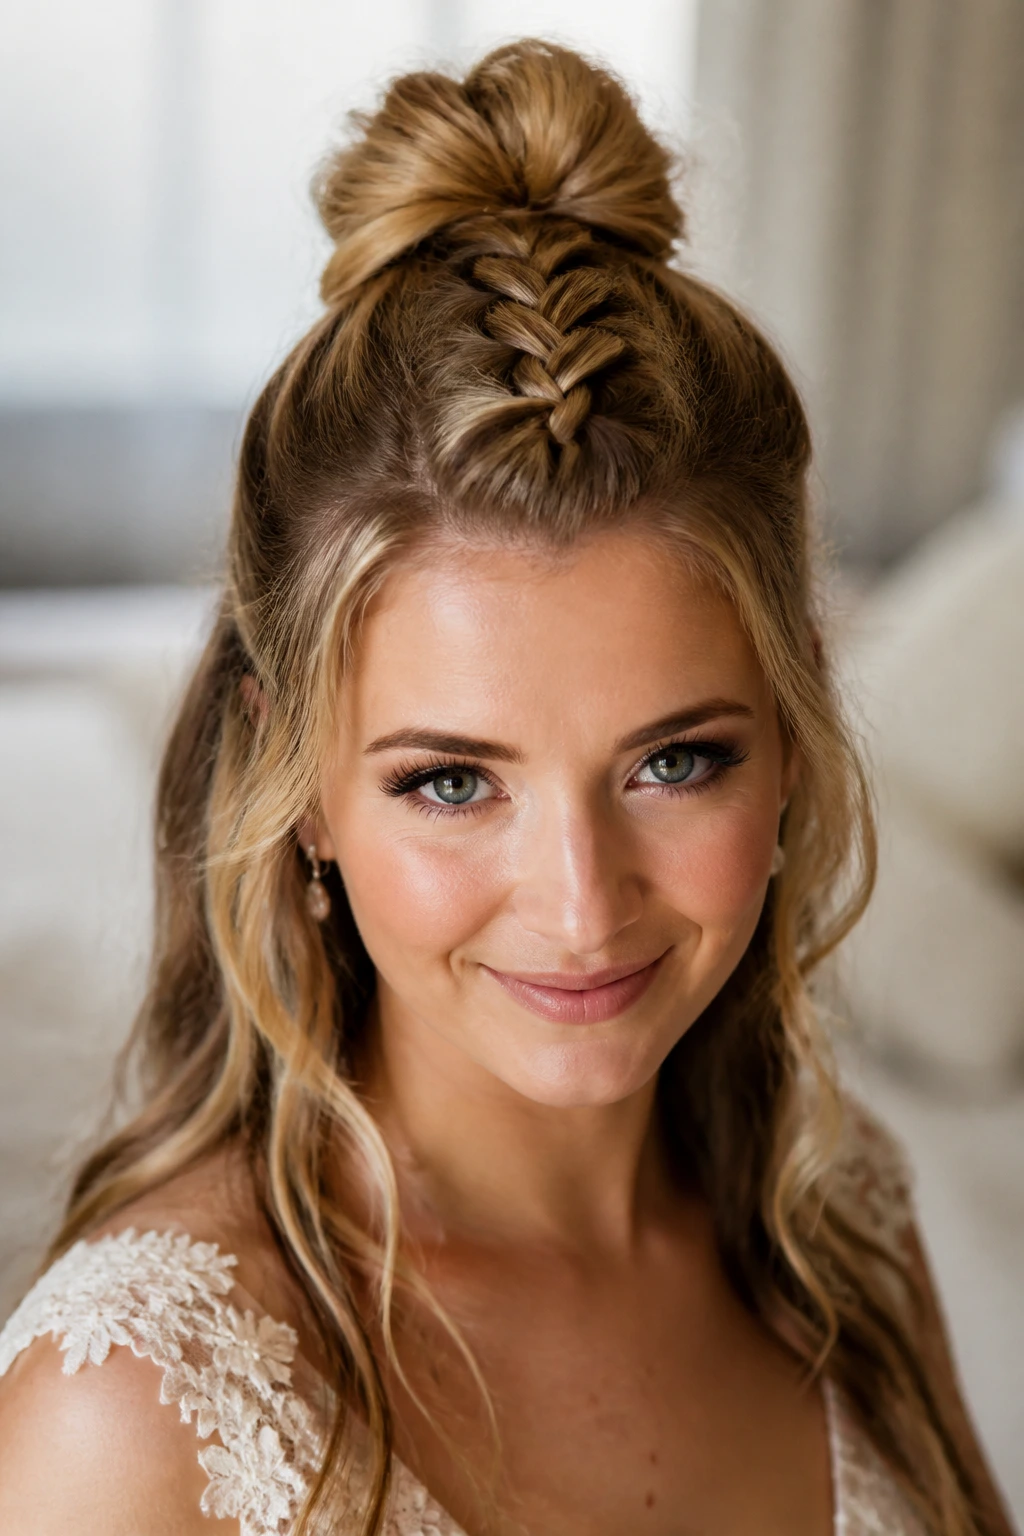
For the unconventional bride, a half-up top knot that incorporates a braid from the base of the hairline to the bun is both playful and practical. It keeps the hair completely away from the neck, which is a lifesaver during hot, sunny ceremonies.
Keeping it Soft
- Don’t pull the top knot too tight; you want a bit of “poof” at the crown to avoid looking like a librarian.
- Wrap the braid around the base of the bun to create a seamless finish.
- Add a velvet bow or a small gold clip at the base of the bun for a touch of classic bridal glamour.
Styling for Dancing
This is the ultimate “active” bride style. You can move, hug guests, and spin on the dance floor without your hair moving an inch. It is structurally sound and looks purposeful rather than accidental.
14. The Reverse Braided Half-Up

Usually, braids start at the forehead. A reverse braid starts at the nape of the neck and moves upward toward the crown. This adds volume to the back of the head, which is perfect for brides with flat hair who want to add some height.
Creating the Illusion of Height
By braiding upward, you physically push the hair at the crown up and out. This creates a “bump” that provides a lovely profile and ensures your hair doesn’t look flat against your head.
The Finish
- Secure the braid at the crown with a small, sparkly clip.
- Let the ends of the braid fall into the rest of the loose, wavy hair.
- This creates a seamless flow that is both unexpected and deeply flattering.
15. The Braided Headband with Wispy Bangs
If you have bangs or face-framing layers, a braid that sits just behind them can emphasize your fringe while keeping the rest of the hair back. It is a soft, delicate look that is very popular for spring and summer weddings.
Bang Maintenance
Use a dry texture spray on your bangs to give them a bit of hold so they don’t look too flat or oily by the reception. If you have side-swept bangs, tuck them slightly behind the braid to create a clean line.
Balance is Key
Do not braid too thick; keep the headband braid thin so it doesn’t overpower your bangs. It should look like a delicate accessory, not a thick rope.
16. The Side-Pinned Braid with Curls
This style features one thick braid on one side of the head, pinned tightly against the skull, while the other side is left open. It creates a bold, asymmetrical look that is perfect for brides with a lot of hair density.
Managing Density
If your hair is very thick, this style helps distribute the weight evenly. By braiding one side, you are effectively “thinning out” the volume near the face, which can make your jawline look more defined in photos.
Adding Glamour
Because one side is pinned back, it is the perfect spot to place a vintage hair comb or a piece of heirloom jewelry that has been passed down in your family.
17. The Waterfall Braid into a Side Ponytail
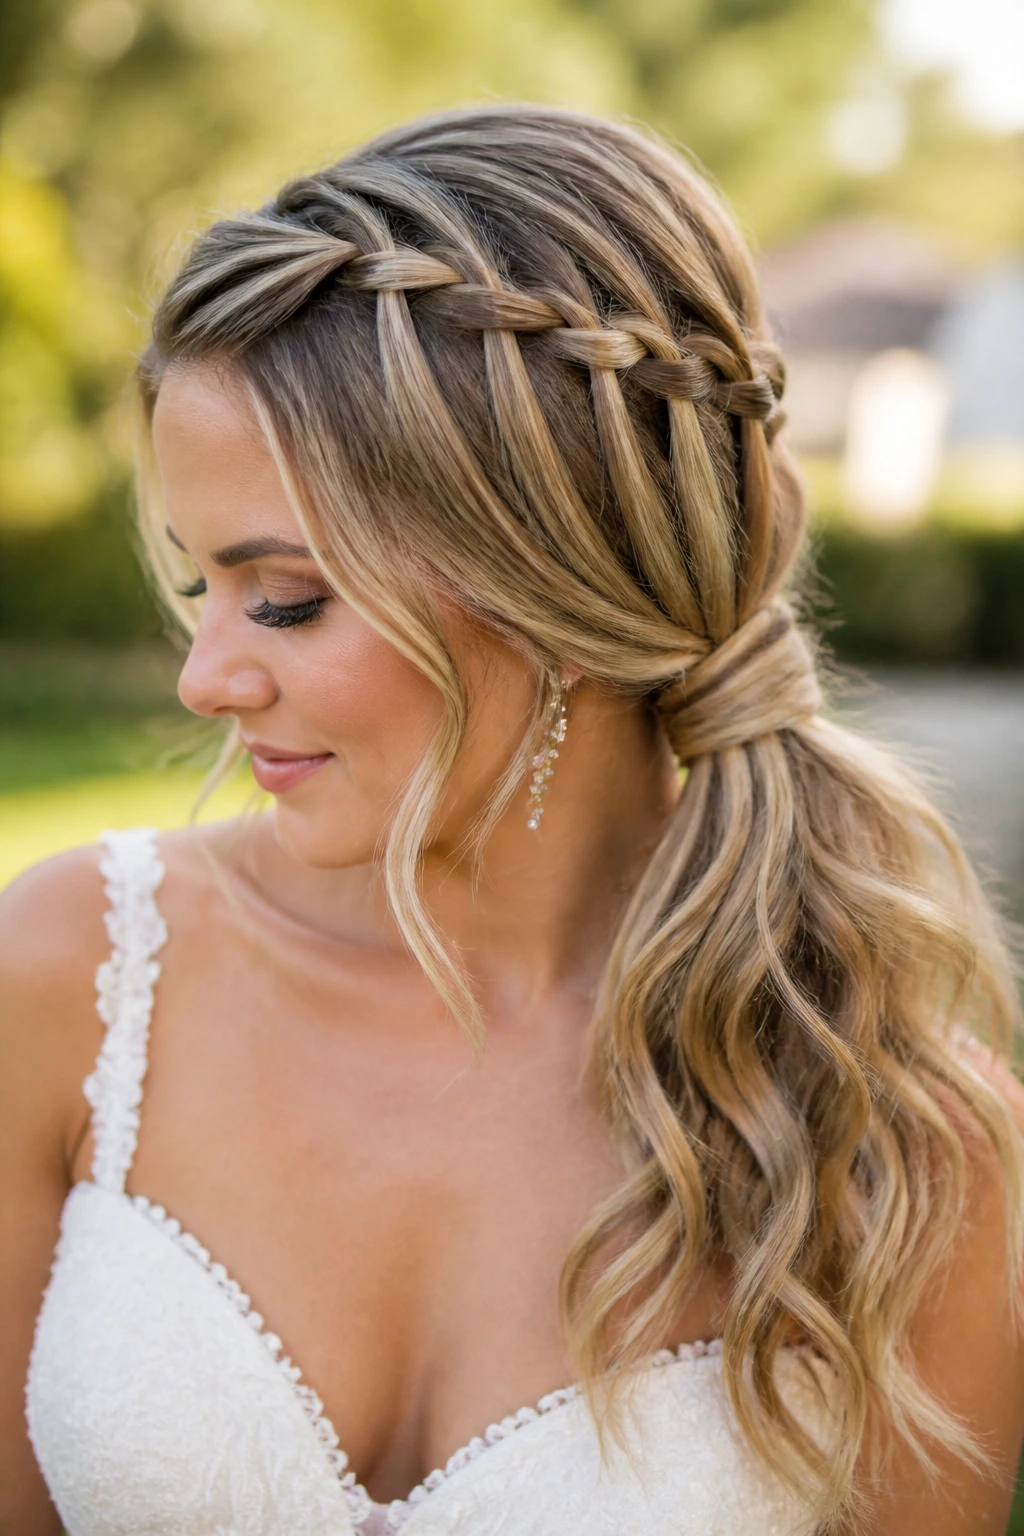
Instead of leaving all the hair down, transition the waterfall braid into a loose, low side ponytail. This is a very comfortable style that feels like an updo but offers the visual appeal of loose, romantic hair.
The Comfort Factor
Some brides dislike the feeling of hair on their neck during a long reception. A side ponytail solves this while keeping the romantic aesthetic of a braid. It is a practical, smart move for a long day of socializing.
Ponytail Volume
- Tease the base of the ponytail to add body.
- Use a piece of your own hair to wrap around the elastic; this makes the style look much more professional and “done.”
18. The “Boho-Luxe” Mixed Braid
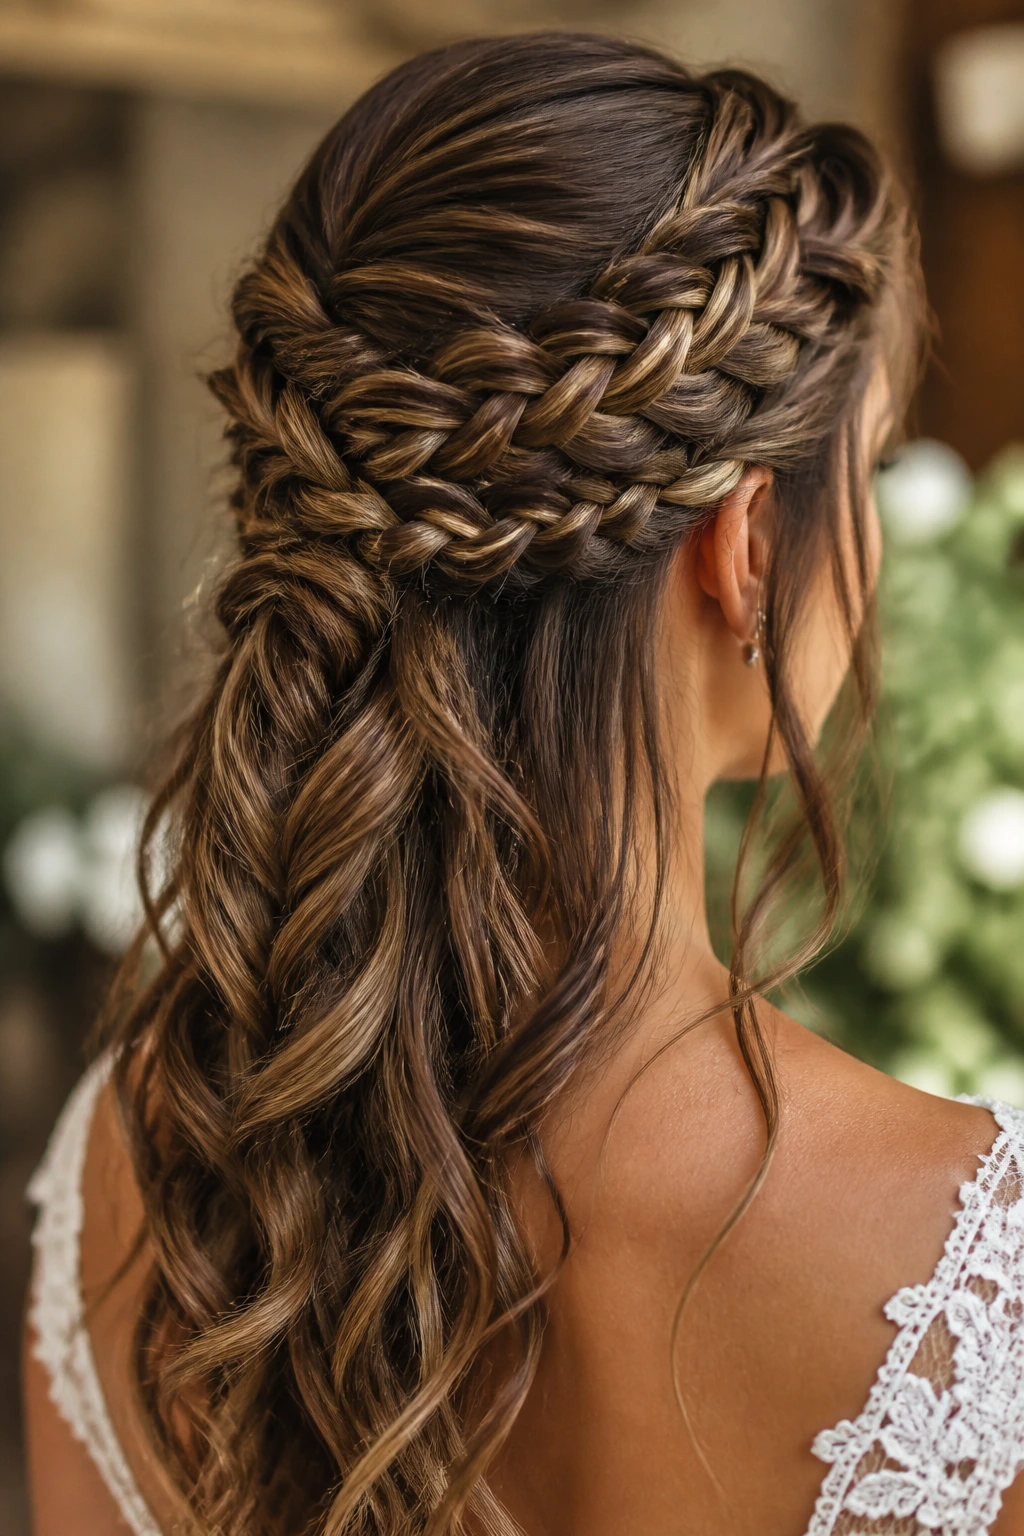
This style combines three different types of braids—a fishtail, a Dutch, and a standard braid—all flowing into one half-up look. It sounds chaotic, but when done by a professional, it creates a “boho-luxe” masterpiece.
Why it Works
It shows off texture. It’s for the bride who doesn’t want a “simple” look but wants something that feels layered and complex. It is a showstopper style that demands attention.
Planning with Your Stylist
If you choose this, you absolutely need a hair trial. Mixing braids takes time and planning to ensure they don’t look messy or disorganized. Make sure your stylist has photos of exactly where they want each braid to sit.
19. The Braided Turban Headband
If you aren’t wearing a veil, a braid that looks like a wide, soft turban headband is a beautiful way to cover the crown of the head. It looks regal, especially when paired with simple drop earrings.
The Look of Elegance
- This style requires a bit more length to achieve the “turban” width.
- Use a bit of backcombing under the braid to give the turban that desired height.
- It’s very elegant and works best with dresses that have high necklines or intricate lace detailing, as the hair style itself provides a clean, cohesive frame.
20. The Braided “Crown” with Low Waves
Instead of a tight halo, this crown is loose and draped low across the back of the head. It’s a very soft, relaxed look that feels romantic and slightly unpolished, in the best way possible.
Achieving the “Undone” Look
- Do not use too much hairspray.
- Let a few strands fall out naturally.
- Focus on making the waves look like you did them yourself—very soft, not too uniform.
Perfect for Beach Weddings
This is the quintessential beach bridal look. It’s loose enough that it doesn’t matter if it gets a little messy in the wind, and it looks beautiful paired with light, breezy chiffon dresses.
21. The Dutch Side Braid with a Velvet Ribbon
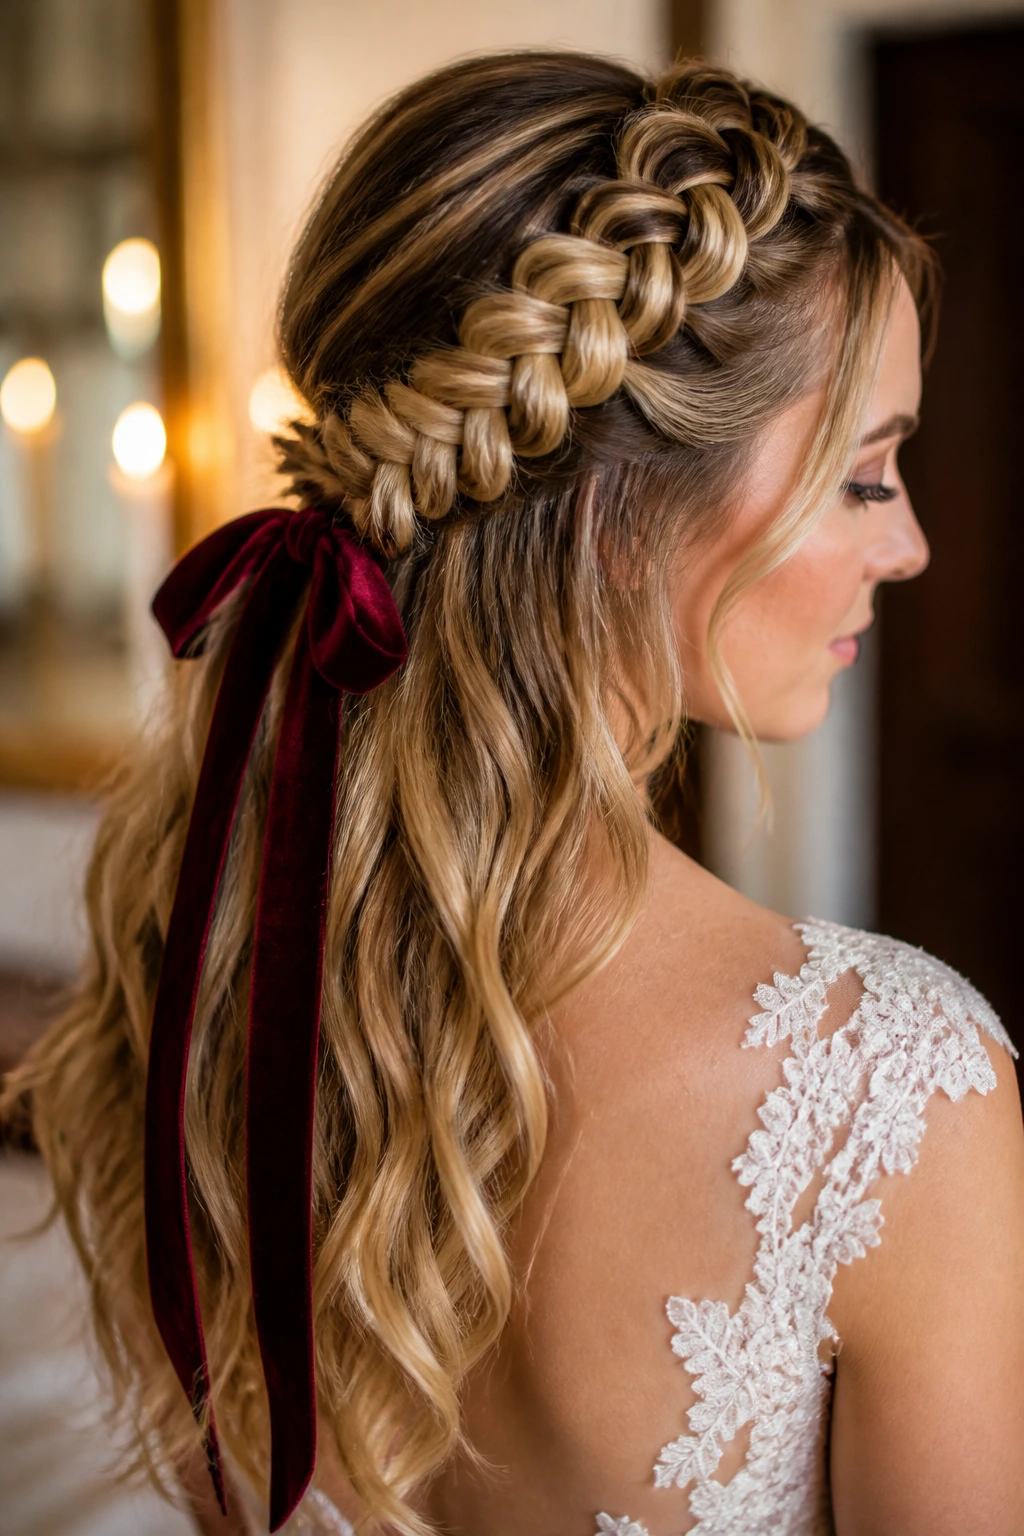
Sometimes, the braid is just the foundation for a bow. A thick Dutch side braid, tied off at the back with a long velvet ribbon, is a trend that is becoming a classic.
Choosing the Right Ribbon
Velvet works best for colder months, while silk or chiffon is better for warmer weather. The color of the ribbon can match your bridesmaids’ dresses or your wedding theme colors.
Ribbon Longevity
- Make sure the ribbon is tied securely, or even pinned with a bobby pin into the elastic, so it doesn’t fall out during the first dance.
- Long ribbons trailing down the back look fantastic in “walking away” shots during a portrait session.
22. The Braided Half-Up with Cascading Tendrils
This style is all about the tendrils. The braid is loose, and long, thin curls are left out around the face and the nape of the neck. It is soft, feminine, and classic.
Creating Wispy Pieces
- Use a small curling iron to define the tendrils.
- Keep them very thin—thick sections will look like a mistake rather than an intentional design choice.
- This is a very flattering style for almost any face shape, as it gently softens the lines of the jaw and cheekbones.
Final Thoughts

Choosing a braided half-up style is a brilliant way to ensure your hair stays secure while still feeling soft and romantic. The variety of options means there is truly a braid for every hair type and wedding theme. Whether you want a sleek, modern look or something whimsical and boho, the key is preparation—ensure your hair has enough texture, don’t be afraid of hair accessories, and always have a trial run before the big day. When you feel confident in your style, it shows, and that is the best accessory you can wear down the aisle.