Curly hair is a wild, beautiful, and often unpredictable landscape. If you are reading this, you probably already know the struggle of finding a style that keeps those curls contained without turning into a tangled, frizzy mess by the time you reach the end of your day. Double Dutch braids—also known as boxer braids—are the ultimate solution for this. They create a secure, protective frame around your face while showcasing the texture of your hair. Braiding curly hair is fundamentally different from braiding pin-straight hair. You aren’t just moving strands; you are managing volume, hydration, and the tendency of your coils to want to leap out of the braid at every turn.
We are going to move through eighteen distinct ways to style your curls into these dual inverted plaits. Whether your hair is tightly coiled, loosely waved, or somewhere in the middle, the goal is to make the process easier and the result more durable. This is not about achieving perfection on the first try; it is about learning to work with the natural tension of your curls rather than fighting against them. Grab your favorite leave-in conditioner, a detangling brush, and perhaps a bit of patience. Let us get into the techniques that make these styles work for the long haul.
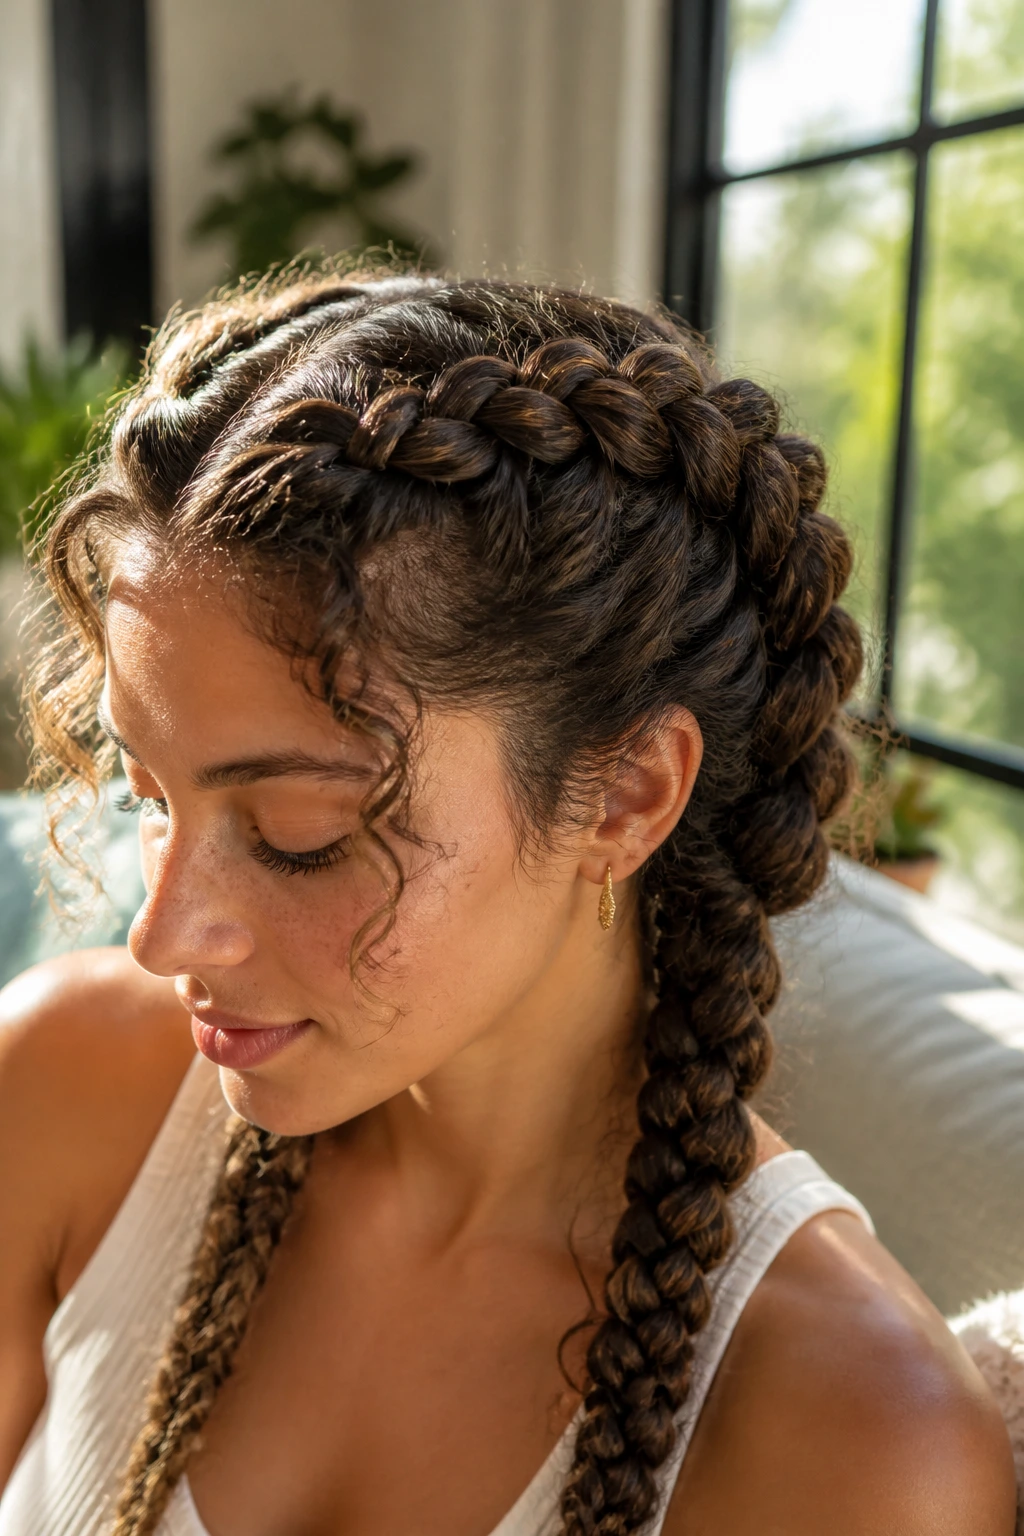
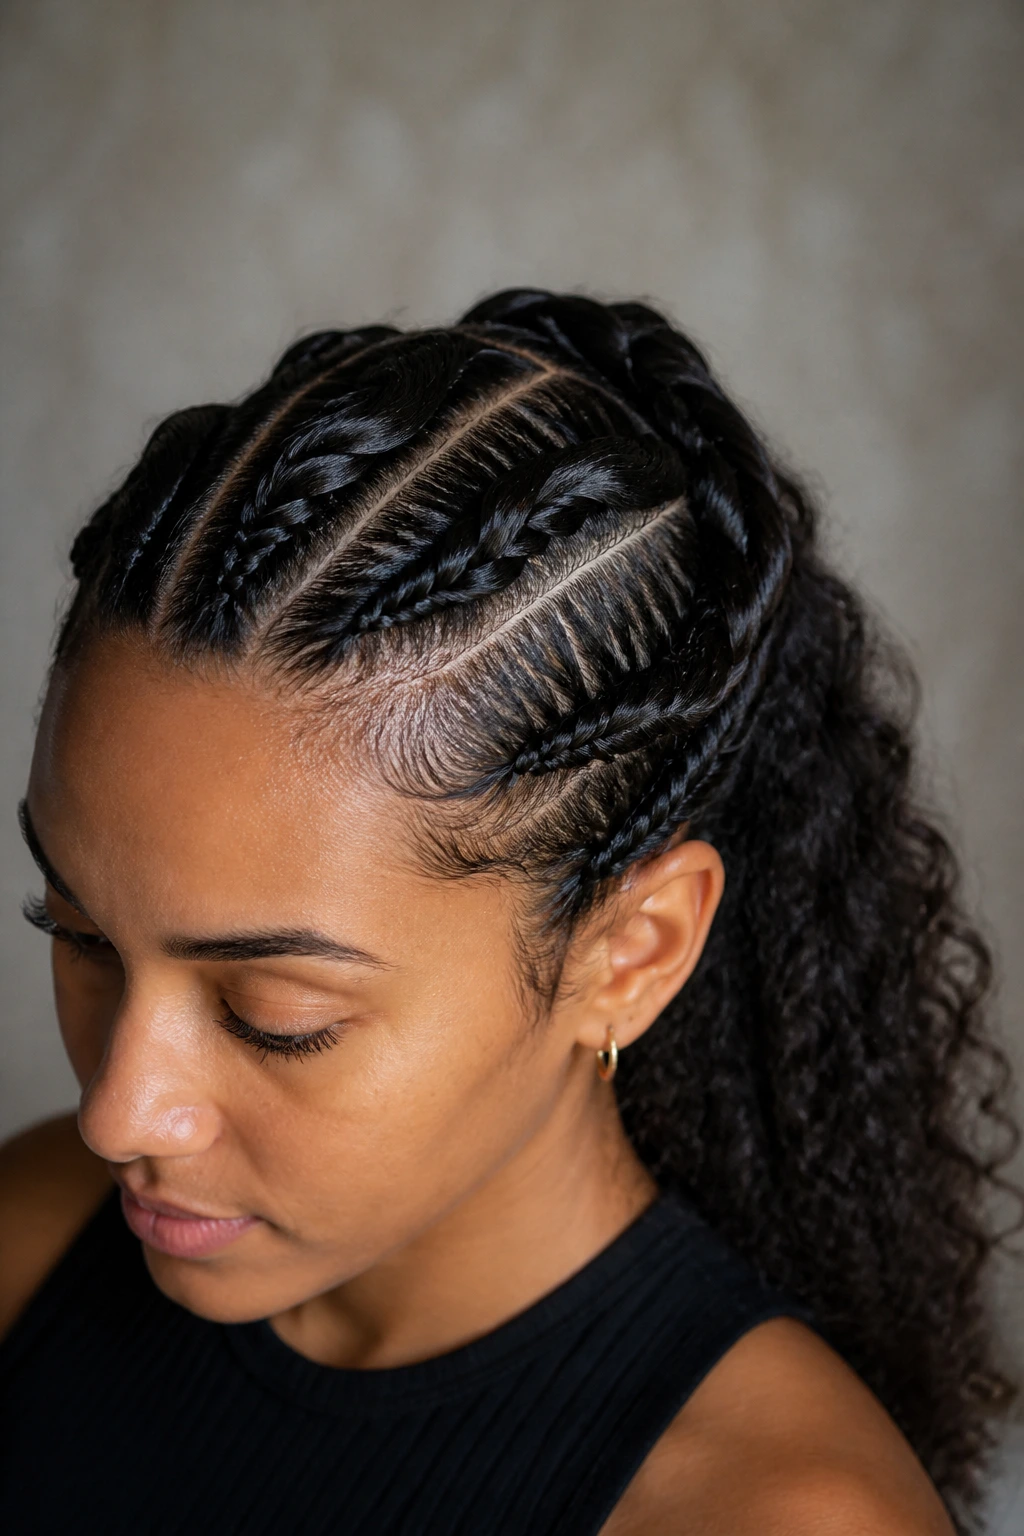
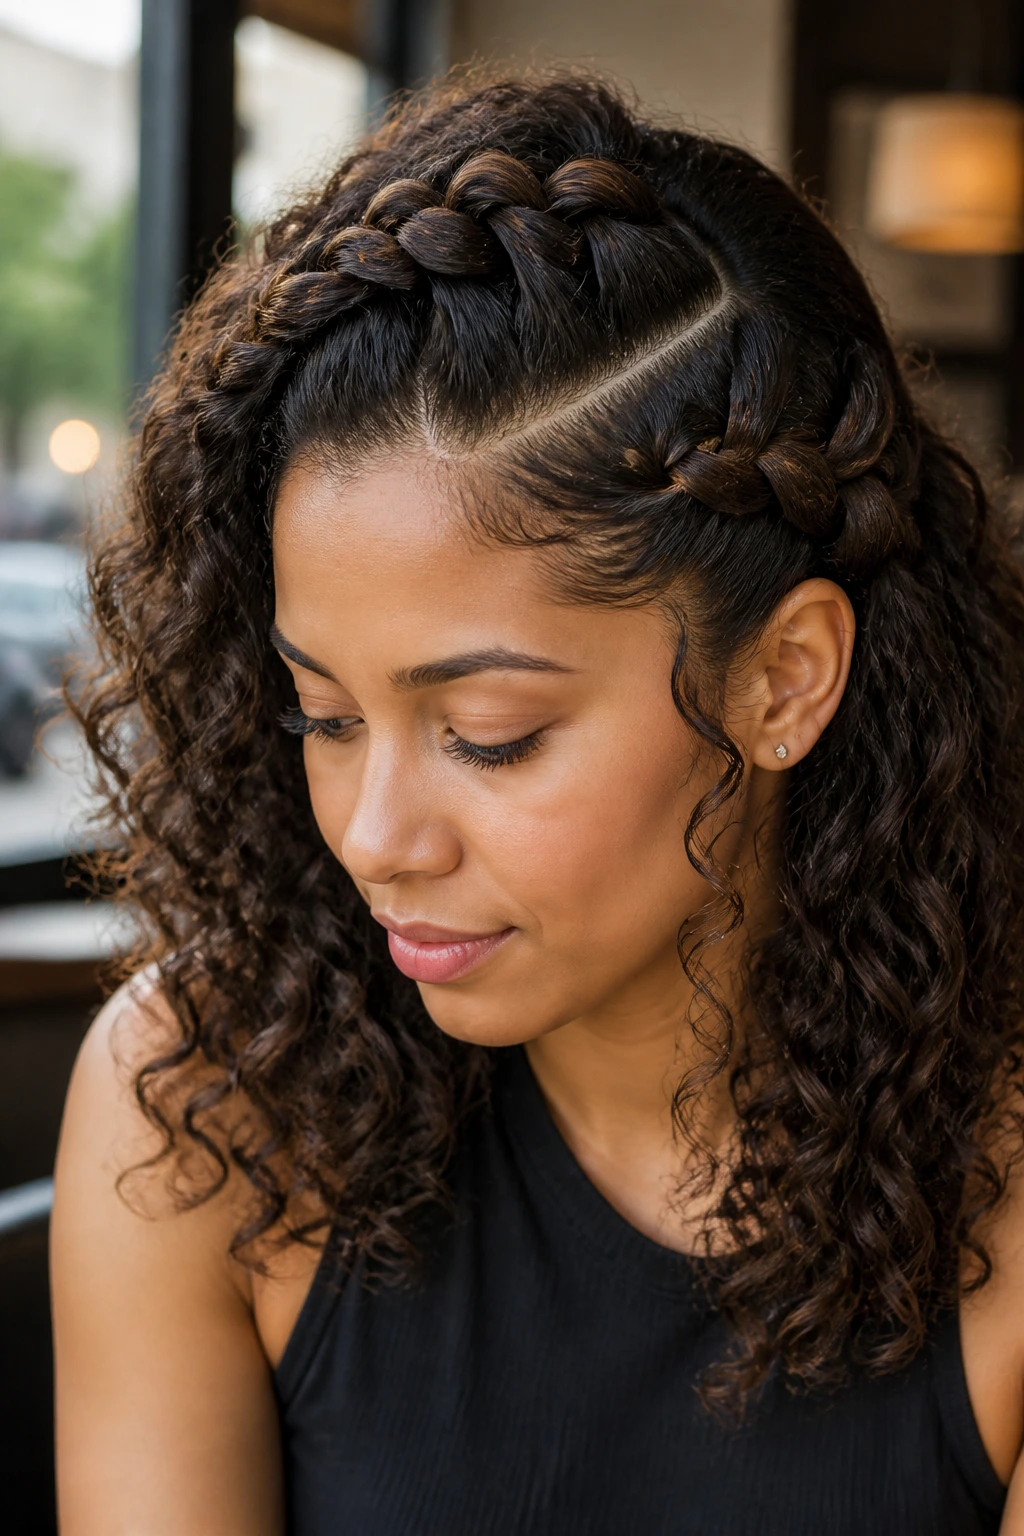
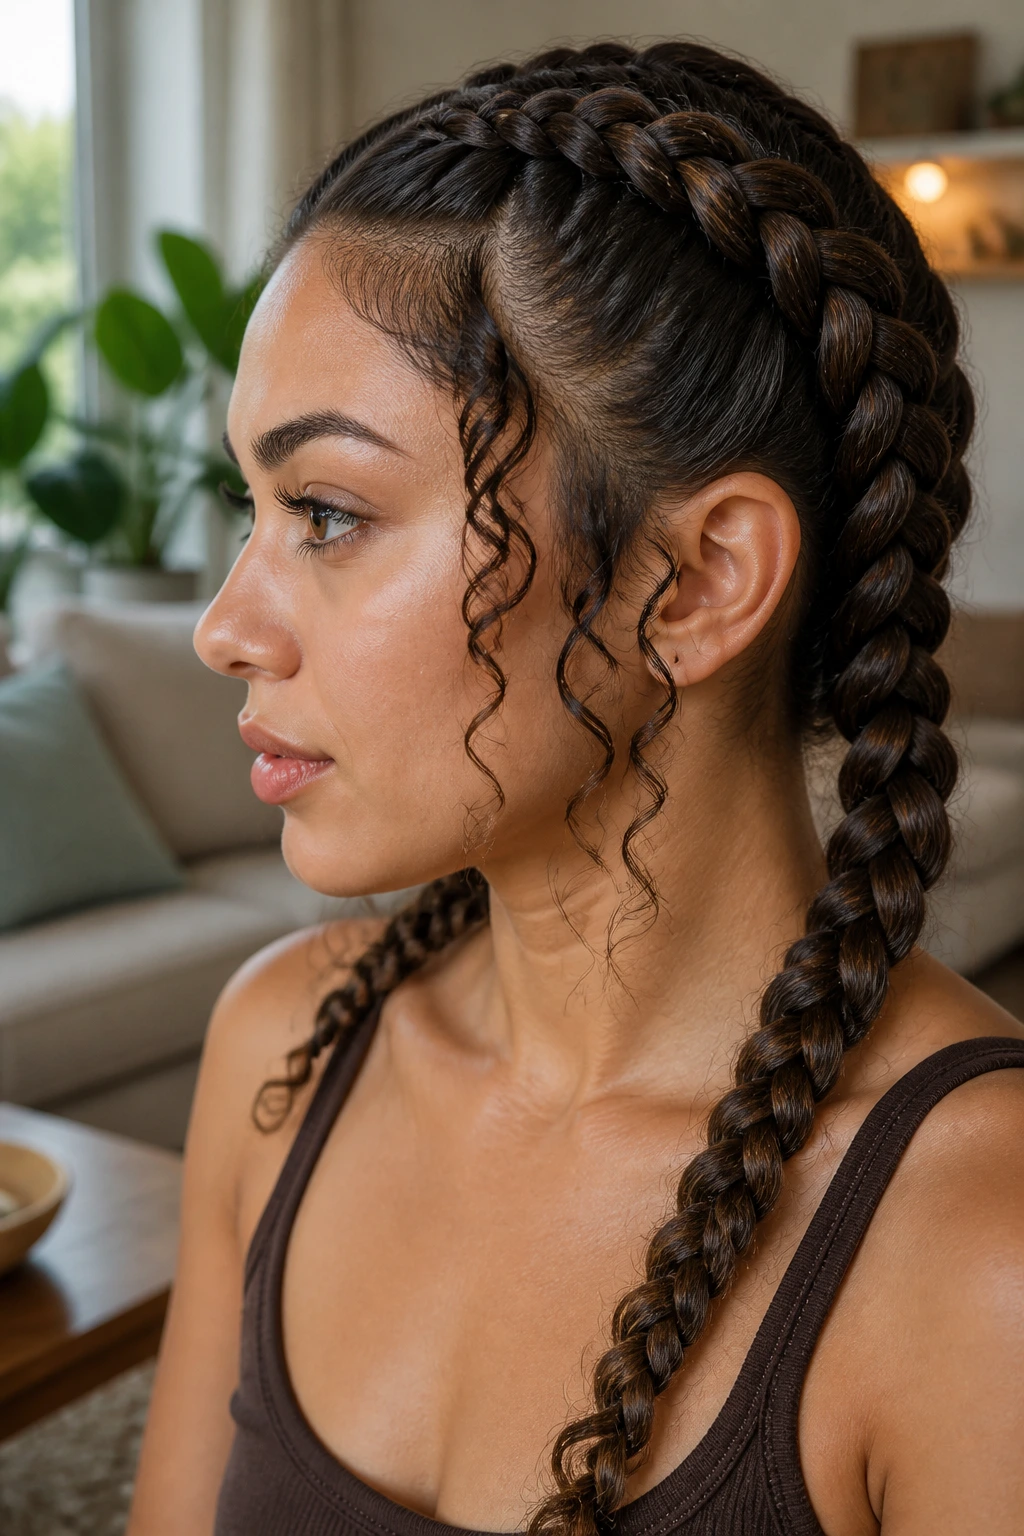
1. The Classic Parted Dutch Braid
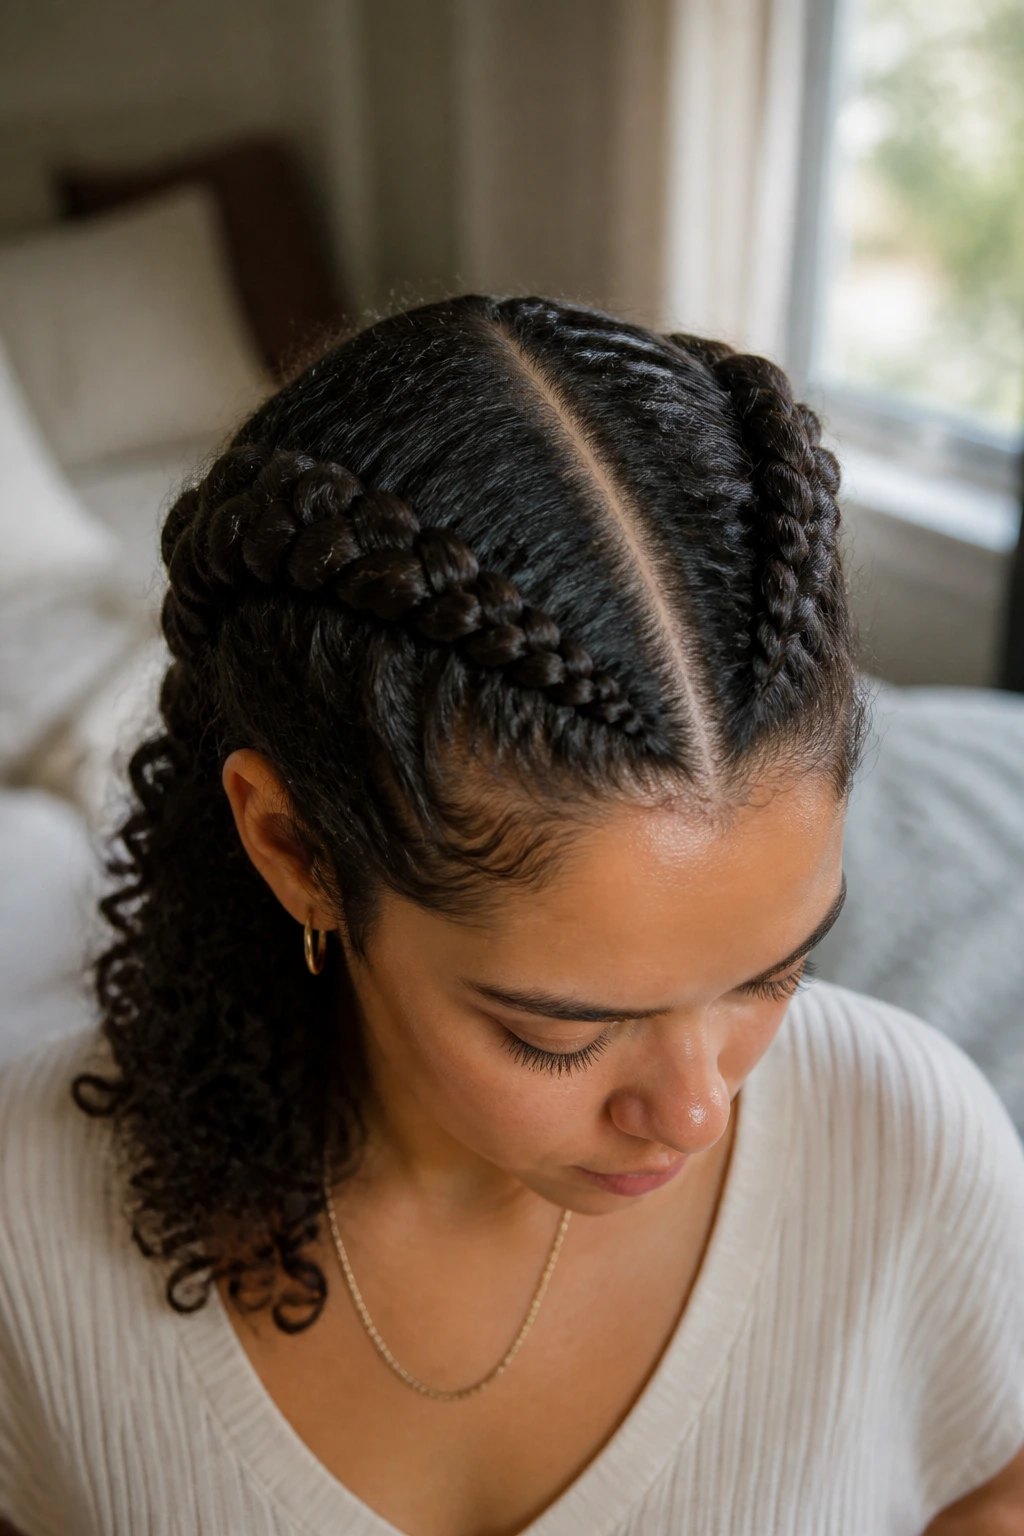
The foundation of any good double Dutch style is the center part. For curly hair, this requires precision. Use the tail end of a rat-tail comb to trace a line from your forehead all the way to the nape of your neck. You want this line to be razor-sharp. If your hair is prone to shrinking, do not be afraid to use a tiny bit of gel right at the part to keep the hair from creeping back across the divide.
Why This Style Succeeds
- It creates symmetry, which balances the high volume of curly textures.
- The two distinct sections prevent the “triangle head” effect that happens with high-volume curls.
- It is the most secure way to protect your ends from friction during sleep or exercise.
Pro tip: Use a heavy-duty holding cream while you braid. Because curly hair has a mind of its own, applying a creamy, moisturizing product as you pick up each new section of hair will act like a glue that keeps the braid sleek and frizz-free.
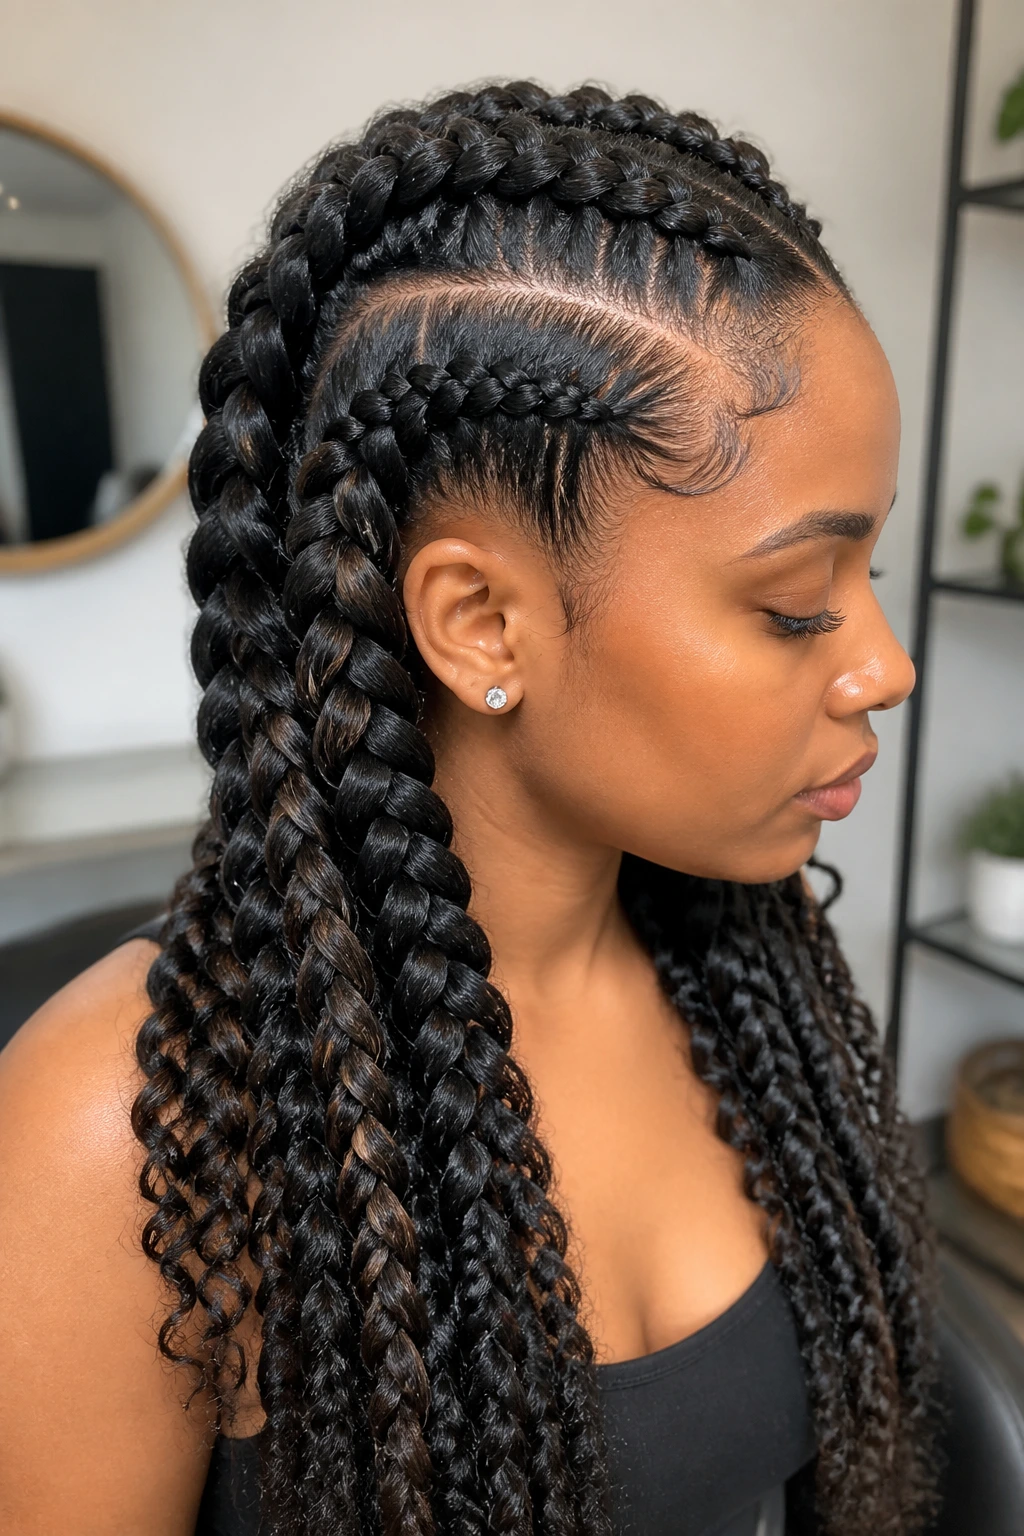
2. The High-Volume Loose Dutch Braid
Most people think braids need to be tight to last. Actually, for curly hair, a slightly looser tension creates an illusion of massive volume. After you finish braiding, use your fingers to gently pull on the loops of the braid, starting from the bottom and working your way up to the crown.
The Pancake Method
When you “pancake” a braid, you are expanding the edges. For curly textures, this looks incredible because the individual coils create a soft, cloud-like texture around the braid. Do not pull too hard, or you will pop the small baby hairs right out of the structure. Just give each loop a little tug, moving steadily upward. This turns a functional, tight style into something that looks like an editorial hair shoot.
3. The Mohawk-Style Dutch Braid
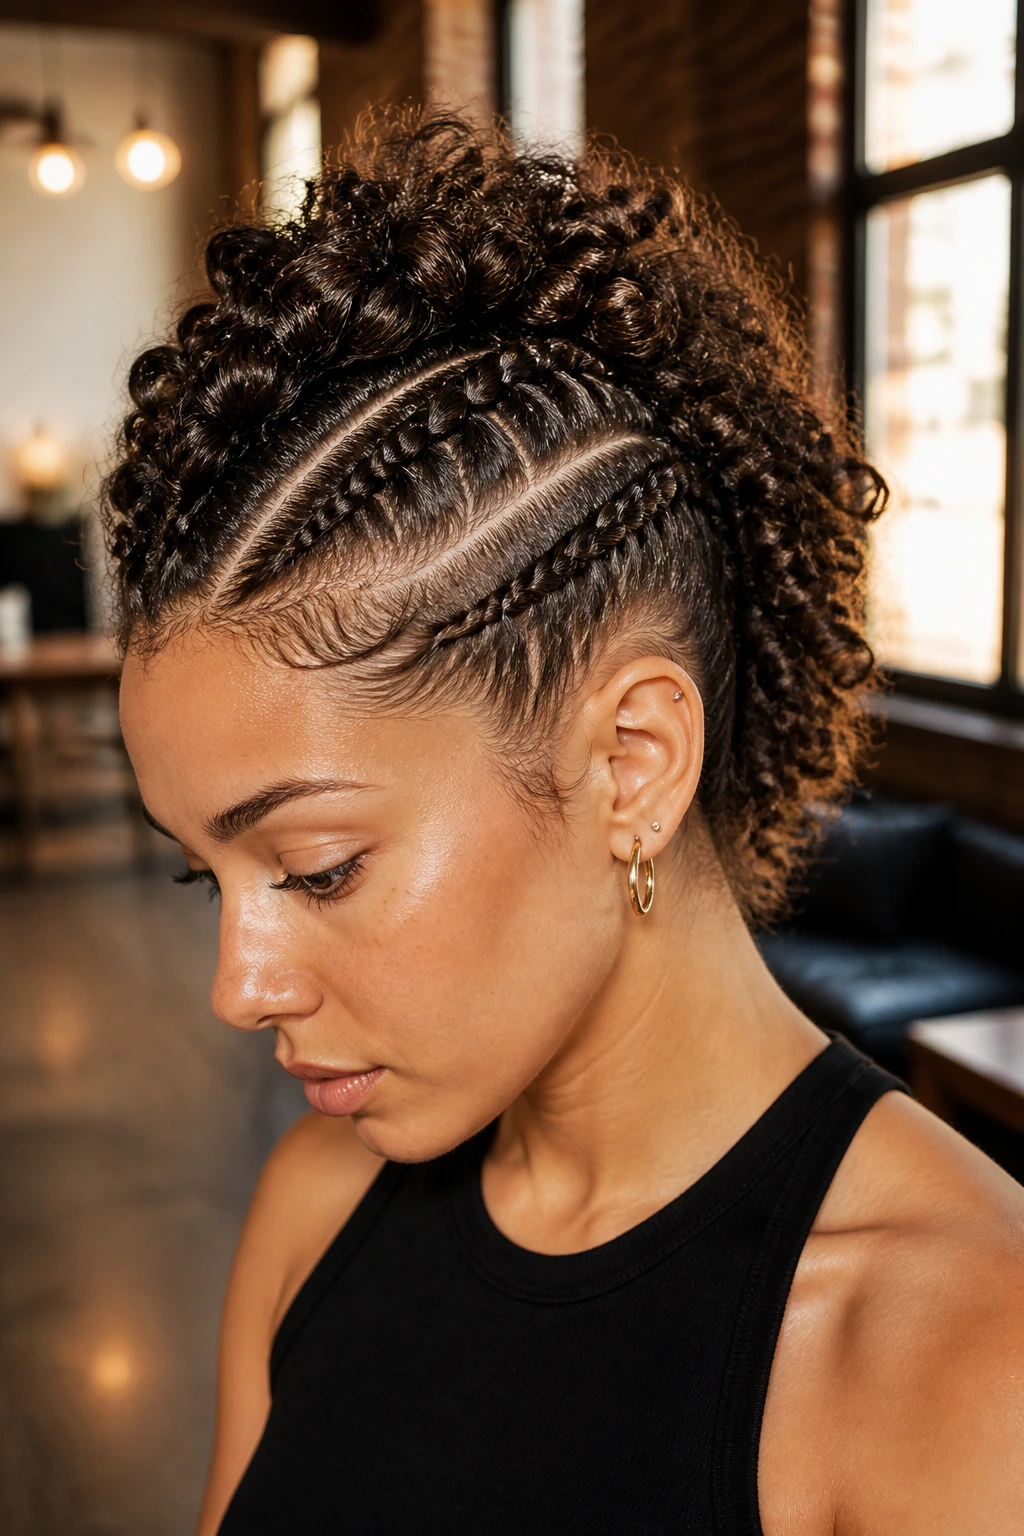
If you have tight curls, you might find that braids pulled back against the scalp feel a bit flat. The Mohawk variation changes the geometry. Instead of pulling the hair directly back, you angle the sections upward toward the crown before braiding them down. This creates a tall, dramatic ridge that mimics the look of a faux hawk. It is one of the most adventurous ways to wear your hair and keeps the bulk of the weight off your neck.
4. Double Dutch Braids with Curly Bun Ends
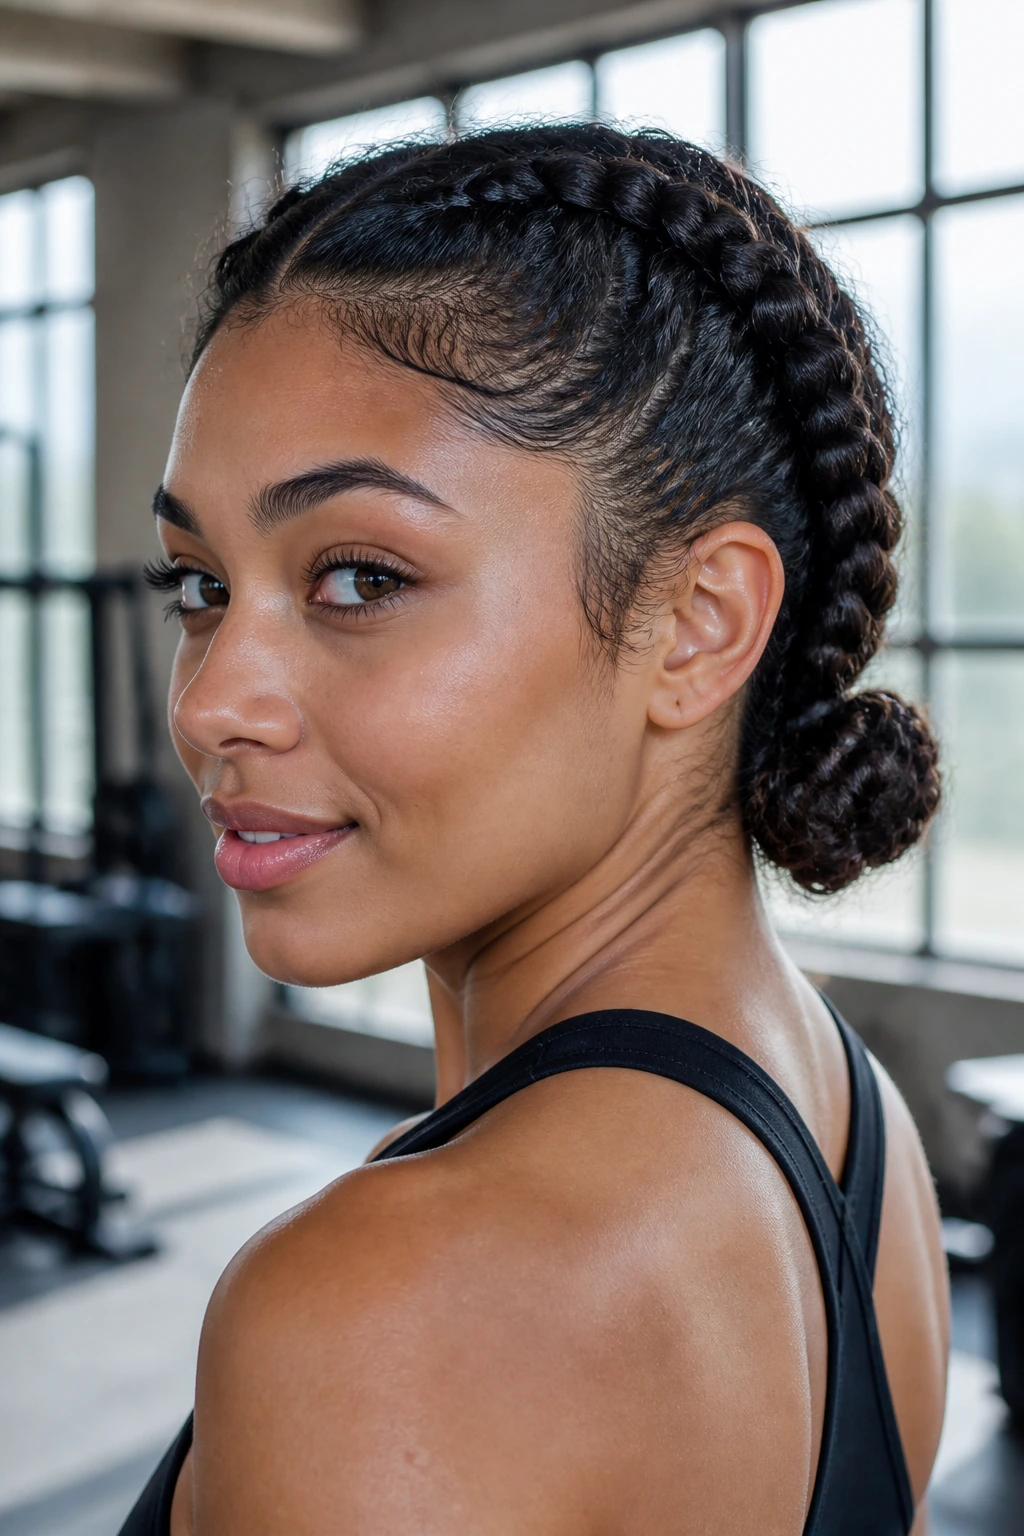
Leaving your ends exposed can lead to dryness, especially if you live in a dry climate. After you finish the Dutch braid at the nape of your neck, continue braiding the remaining hair until you reach the very tips. Then, instead of securing them with an elastic, coil the braid around itself to create a small, tight bun.
Styling the Buns
- Use bobby pins that match your hair color to secure the base of the bun.
- Tuck the very ends of the hair into the bun to hide them from the elements.
- This transition creates a chic, athletic look that easily carries over from a workout to a lunch date.
Crucial detail: If your ends are particularly prone to tangling, coat them in a small amount of argan oil before you roll them into the bun. This keeps them hydrated and prevents knots from forming while the style is set.
5. The Half-Up Dutch Braid Hybrid
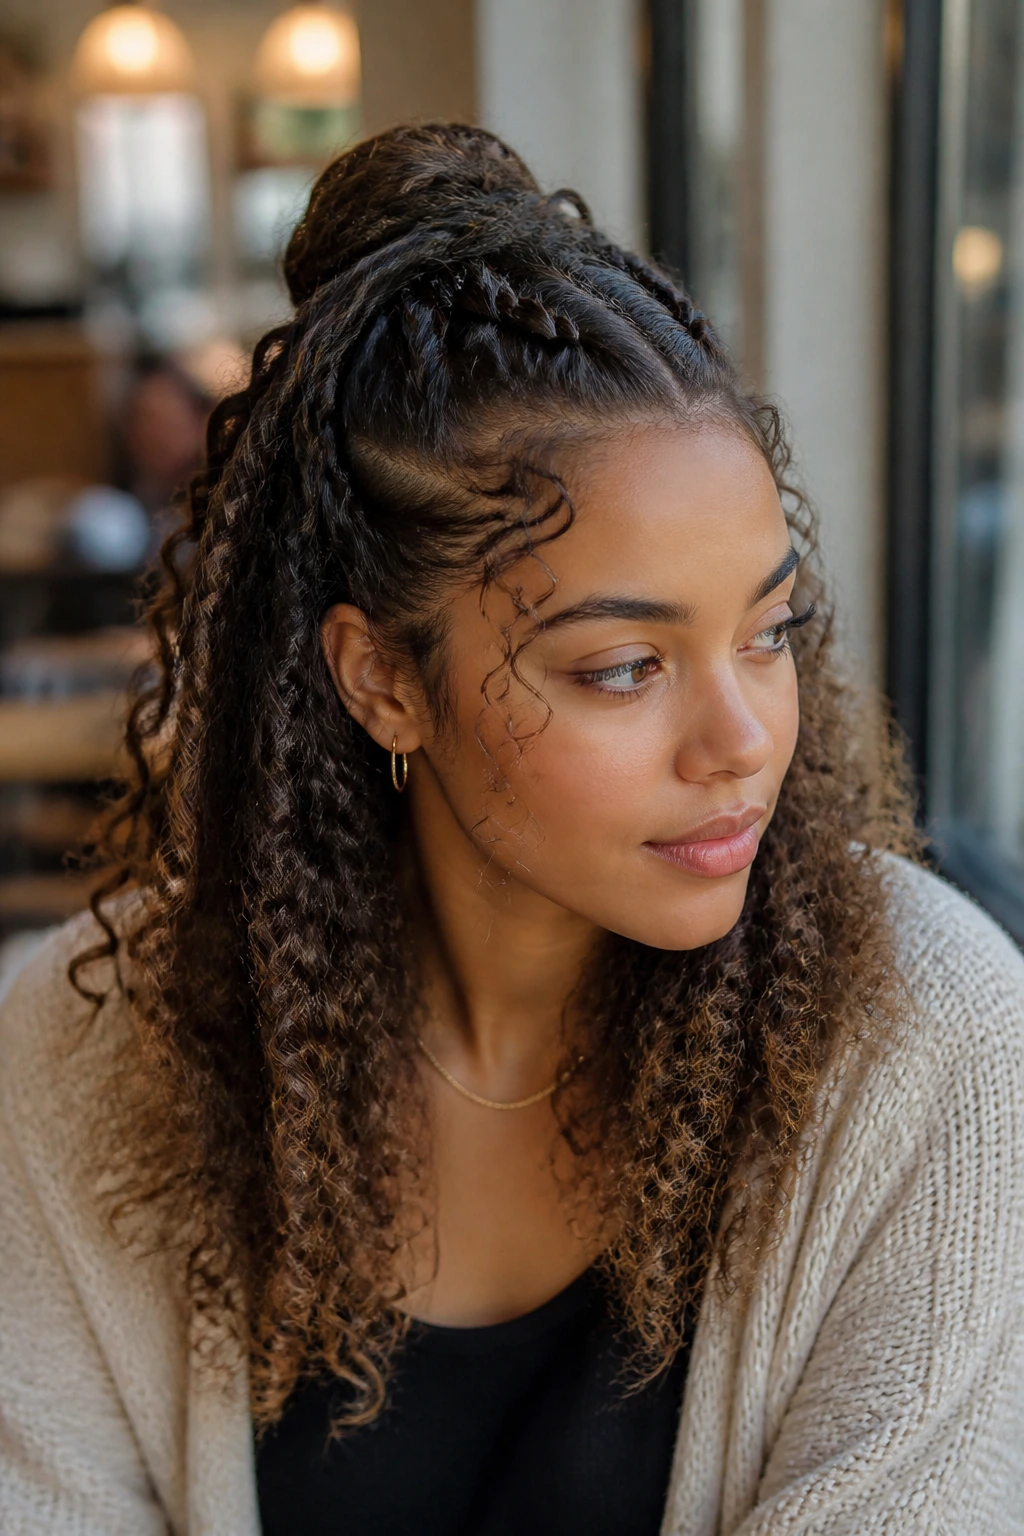
Maybe you want the security of a braid without losing the volume of your loose curls. Start your Dutch braid at the hairline, but stop once you reach the crown of your head. Secure the braids there with clear elastic bands and leave the rest of your hair in its natural, bouncy state. This is a brilliant way to keep your hair out of your eyes while letting your natural pattern dominate the rest of your look. It creates a beautiful frame for the face and keeps the style from feeling too restrictive.
6. Dutch Braids with Accented Silver Cuffs
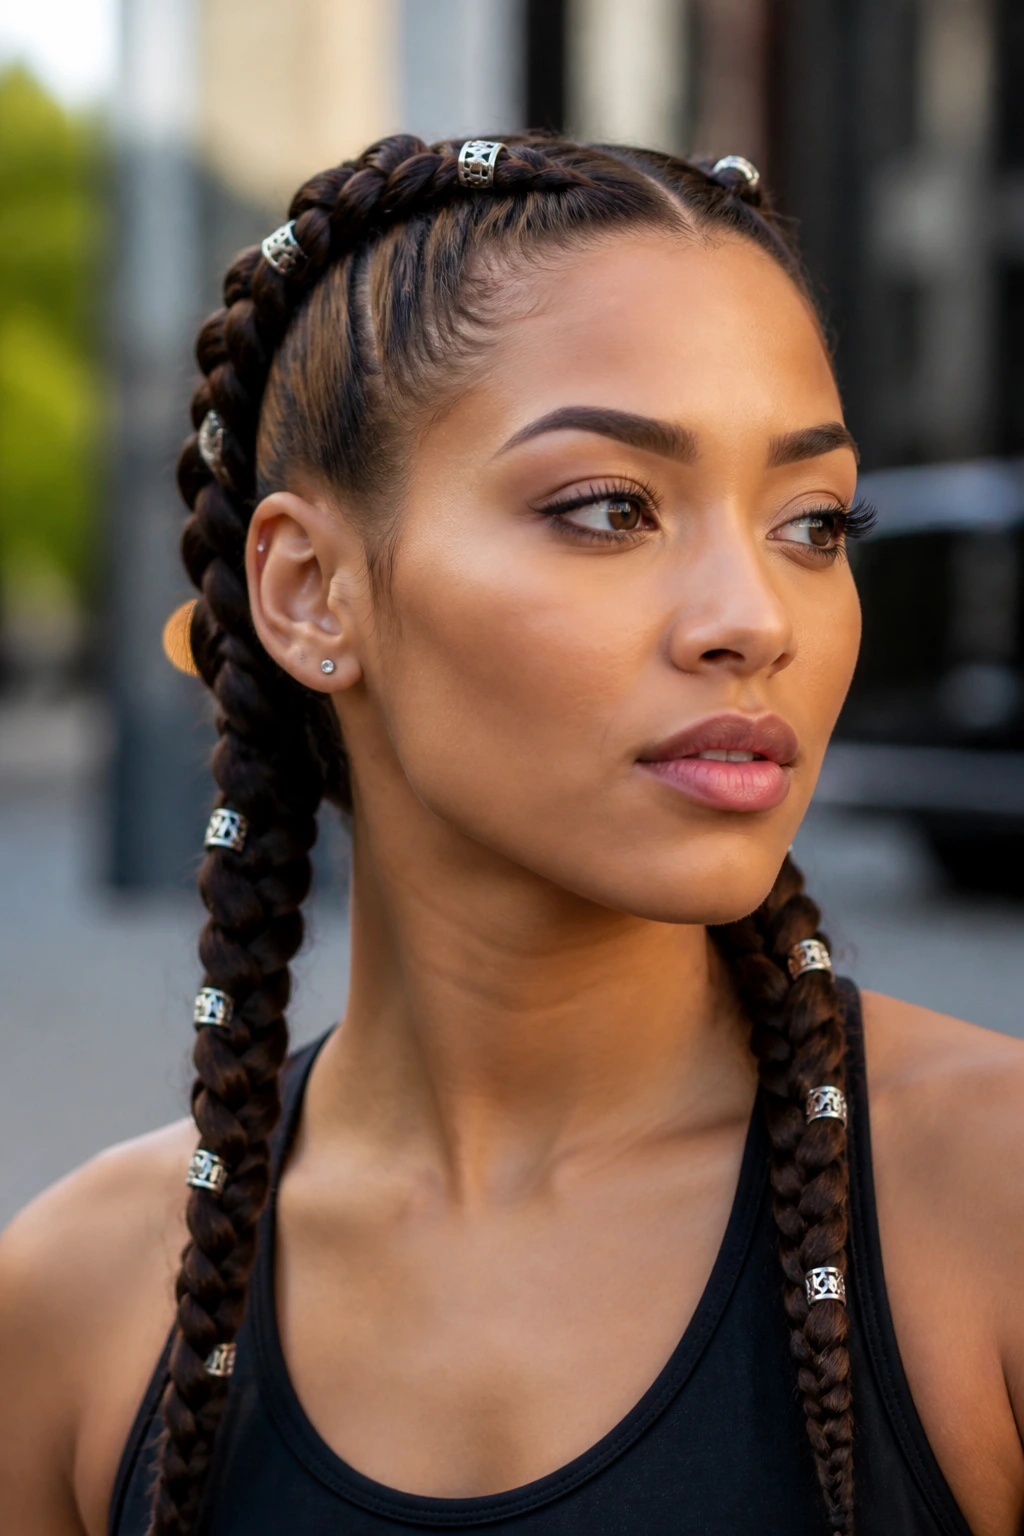
Sometimes the braid itself isn’t enough; you need a little hardware. Silver cuffs or gold rings are perfect for curly hair because they catch the light in a way that compliments the texture. Simply slide a metal ring onto the hair strand before you weave it into the Dutch braid.
Placement Strategy
- Place cuffs every two inches along the braid for an edgy, industrial aesthetic.
- Avoid placing them near the nape of the neck where they might get caught in your collar.
- Stick to lightweight metals so they do not drag the braids down throughout the day.
7. The Baby-Hair Focused Dutch Braid
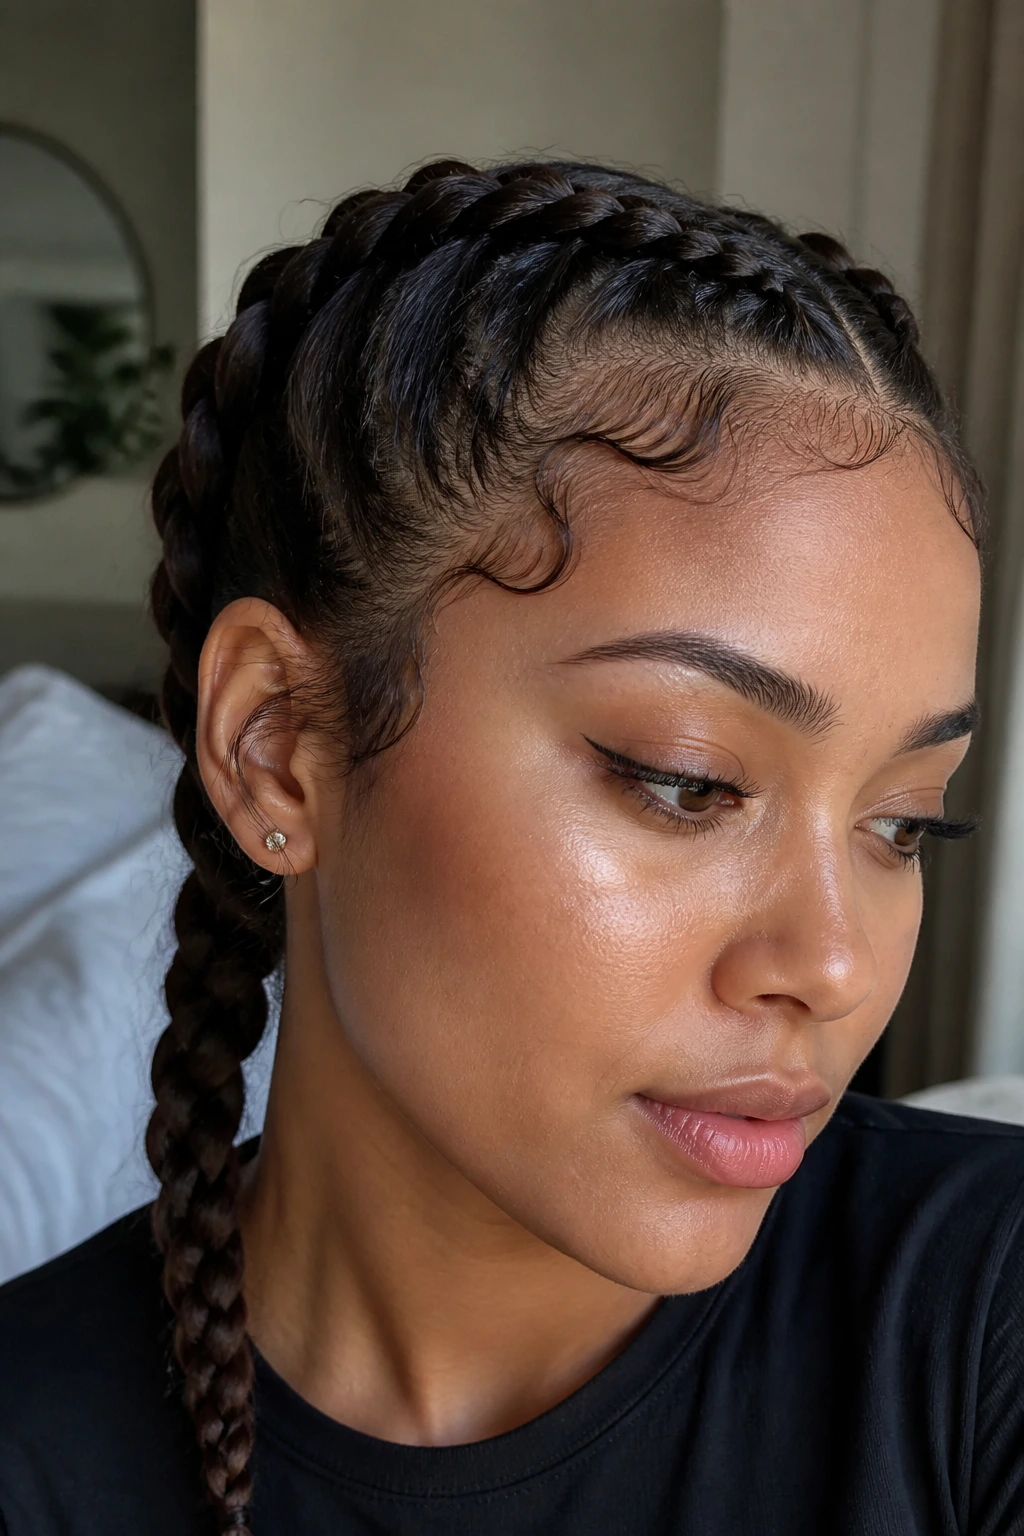
Curly hair often comes with a halo of delicate flyaways along the hairline. Instead of trying to smooth these into oblivion with high-strength edge control, lean into them. Use a small toothbrush to gently swoosh your baby hairs into place after the braids are secure. The contrast between the rigid, structural braid and the soft, wispy edges creates an incredibly polished appearance that feels intentional and artistic.
8. Inside-Out Crown Braids
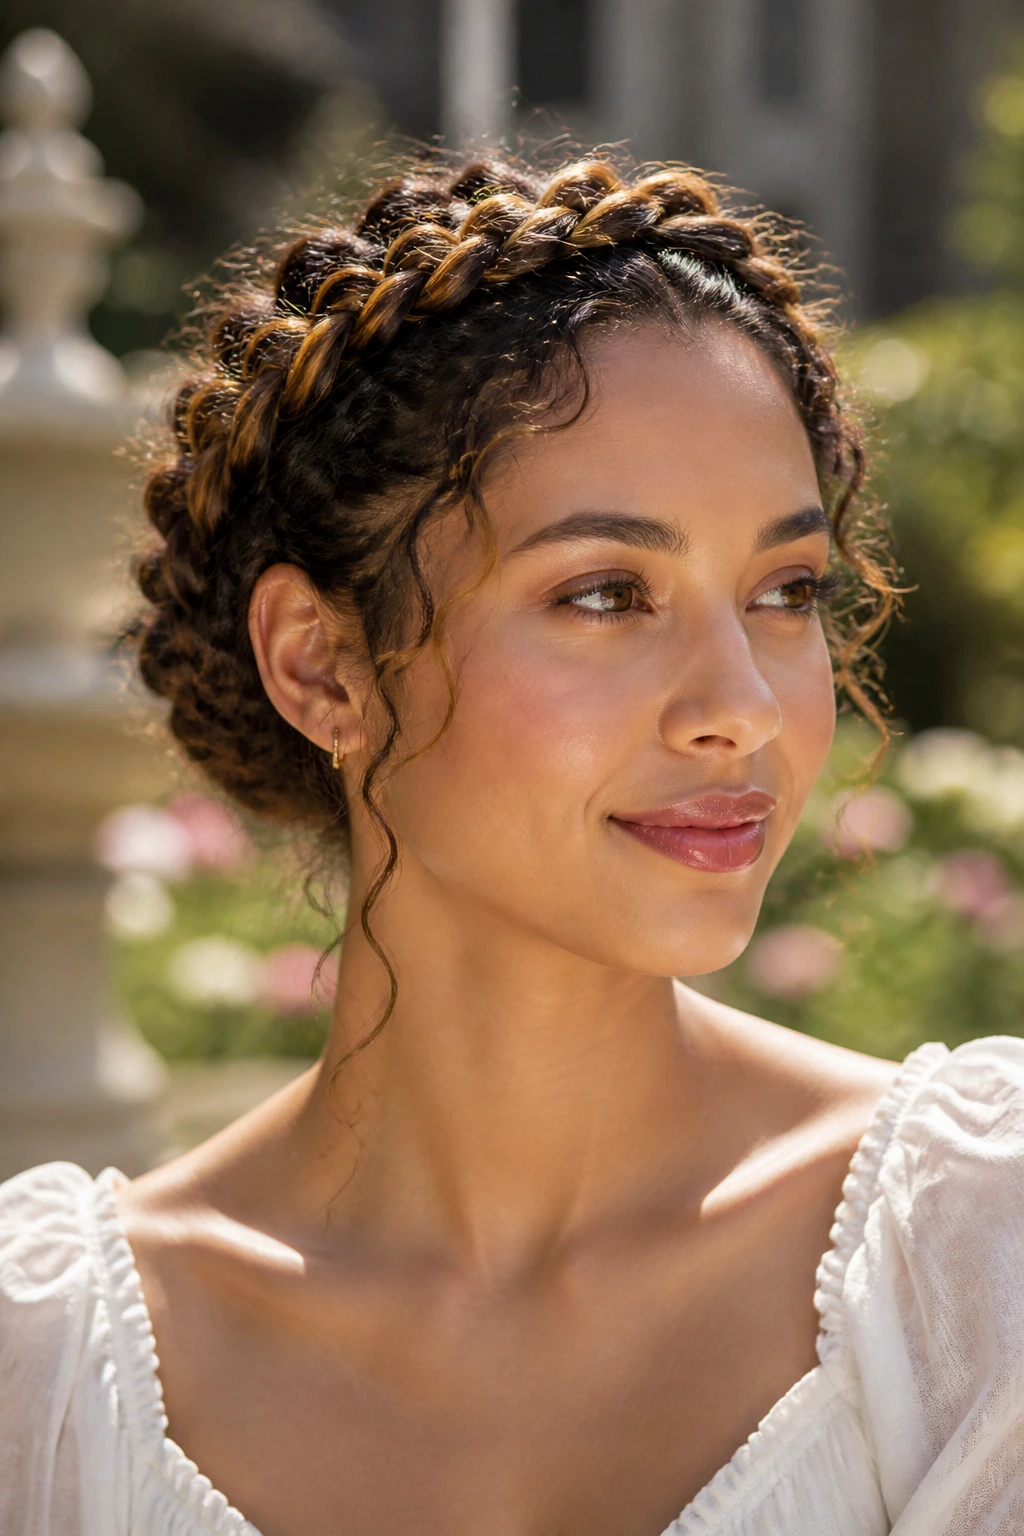
Most Dutch braids end at the nape of the neck, but you can actually wrap them around the head like a crown. Once you reach the base, continue braiding the remaining length and pin the ends underneath the opposite braid. This is a sophisticated way to manage long, curly hair. It essentially creates a protective barrier for your entire hairline.
Why This Works for Curls
- It eliminates the need for elastics at the bottom, which can cause breakage.
- The structure holds up well even in high humidity.
- It offers a regal, formal silhouette that fits well at weddings or upscale events.
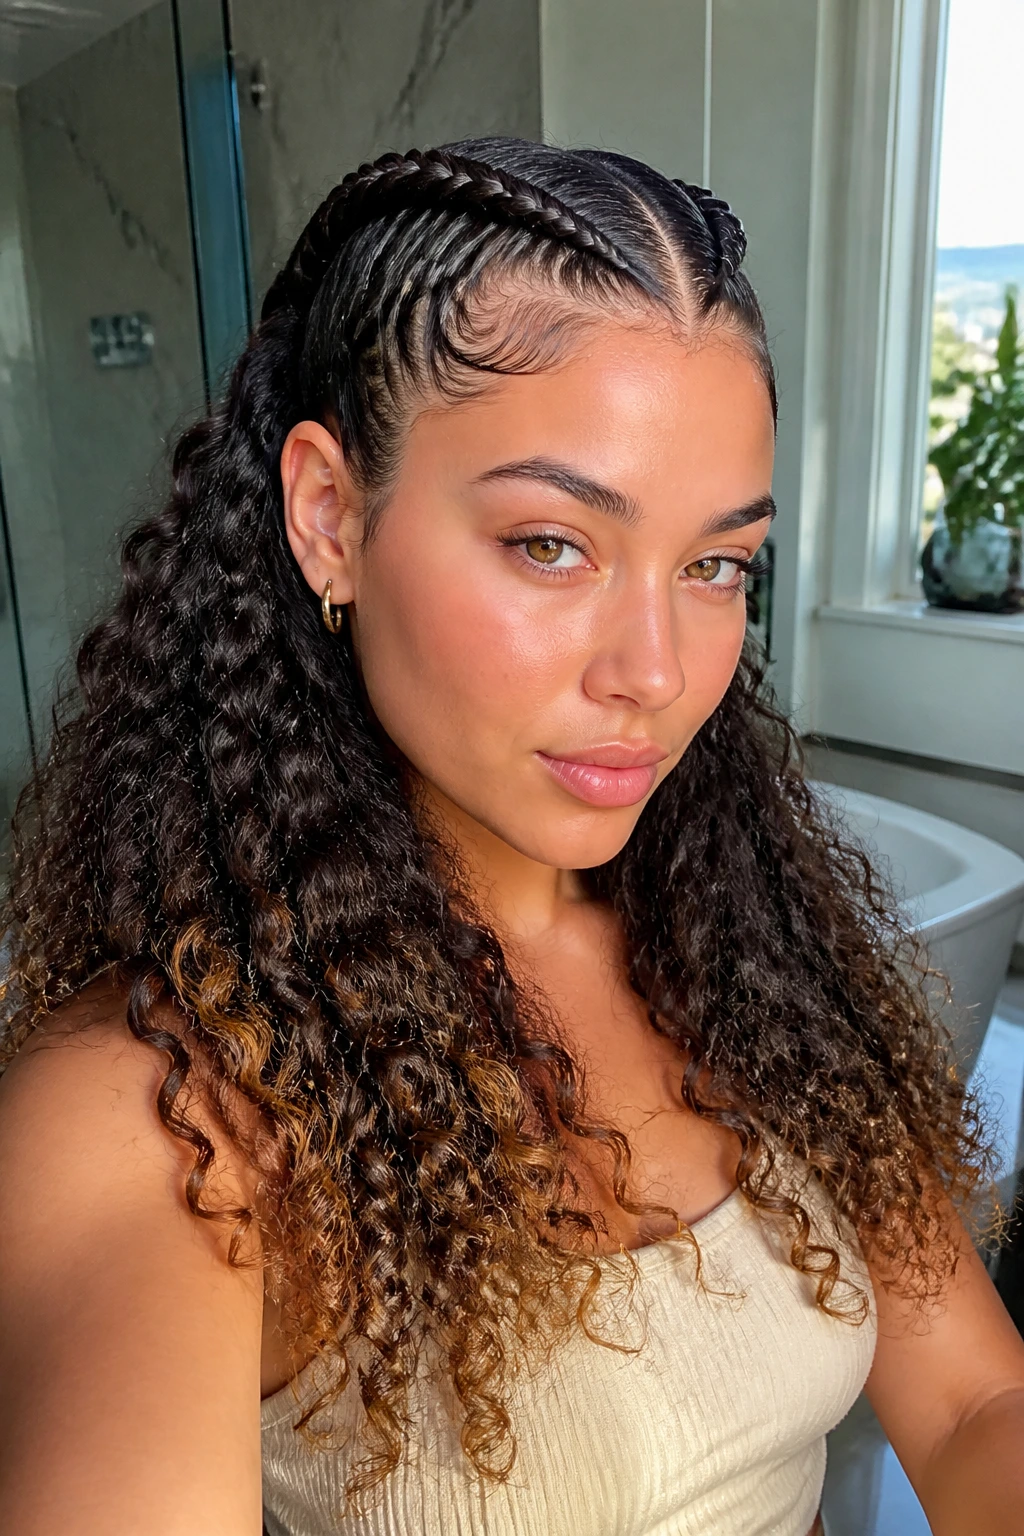
9. The Rope-Twist Dutch Braid
If a traditional three-strand braid feels too standard, swap the technique for a rope twist. When you perform the Dutch technique, keep your sections to just two strands instead of three. Twist the two sections around each other in the opposite direction of the braid’s travel. This gives the hair a sleek, corded look that is exceptionally durable. It is a fantastic option for very thick or coarse curls that usually have a hard time staying held in a standard weave.
10. The Deep Side-Part Dutch Braid
Center parts can sometimes feel a bit severe. A deep side part changes the entire energy of the style. Sweep the majority of your hair over to one side before you begin the first Dutch braid. This makes the braids look uneven in size—the larger one being the primary focal point—which is a much softer, more modern take on the look. It is an excellent way to cover a larger portion of the forehead if you are feeling self-conscious about your hairline.
11. Dutch Braids with Added Synthetic Extensions
If your natural hair is on the shorter side or lacks the density to make a “chunky” braid, don’t worry. You can feed in synthetic kanekalon hair as you go. Because you are braiding curly hair, look for extensions that have a pre-curled or kinky texture. This ensures that the added hair blends perfectly with your natural curls, making the braids look thick, long, and exceptionally full.
Application Tips
- Sectioning: Feed the extension in small increments to ensure it doesn’t look bulky at the root.
- Color matching: Try a shade slightly lighter or darker than your natural hair to add dimension and make the braids pop.
- Security: Make sure the extension is knotted or secured firmly to your natural hair before you start the Dutch weave.
12. The Space-Bun Dutch Hybrid
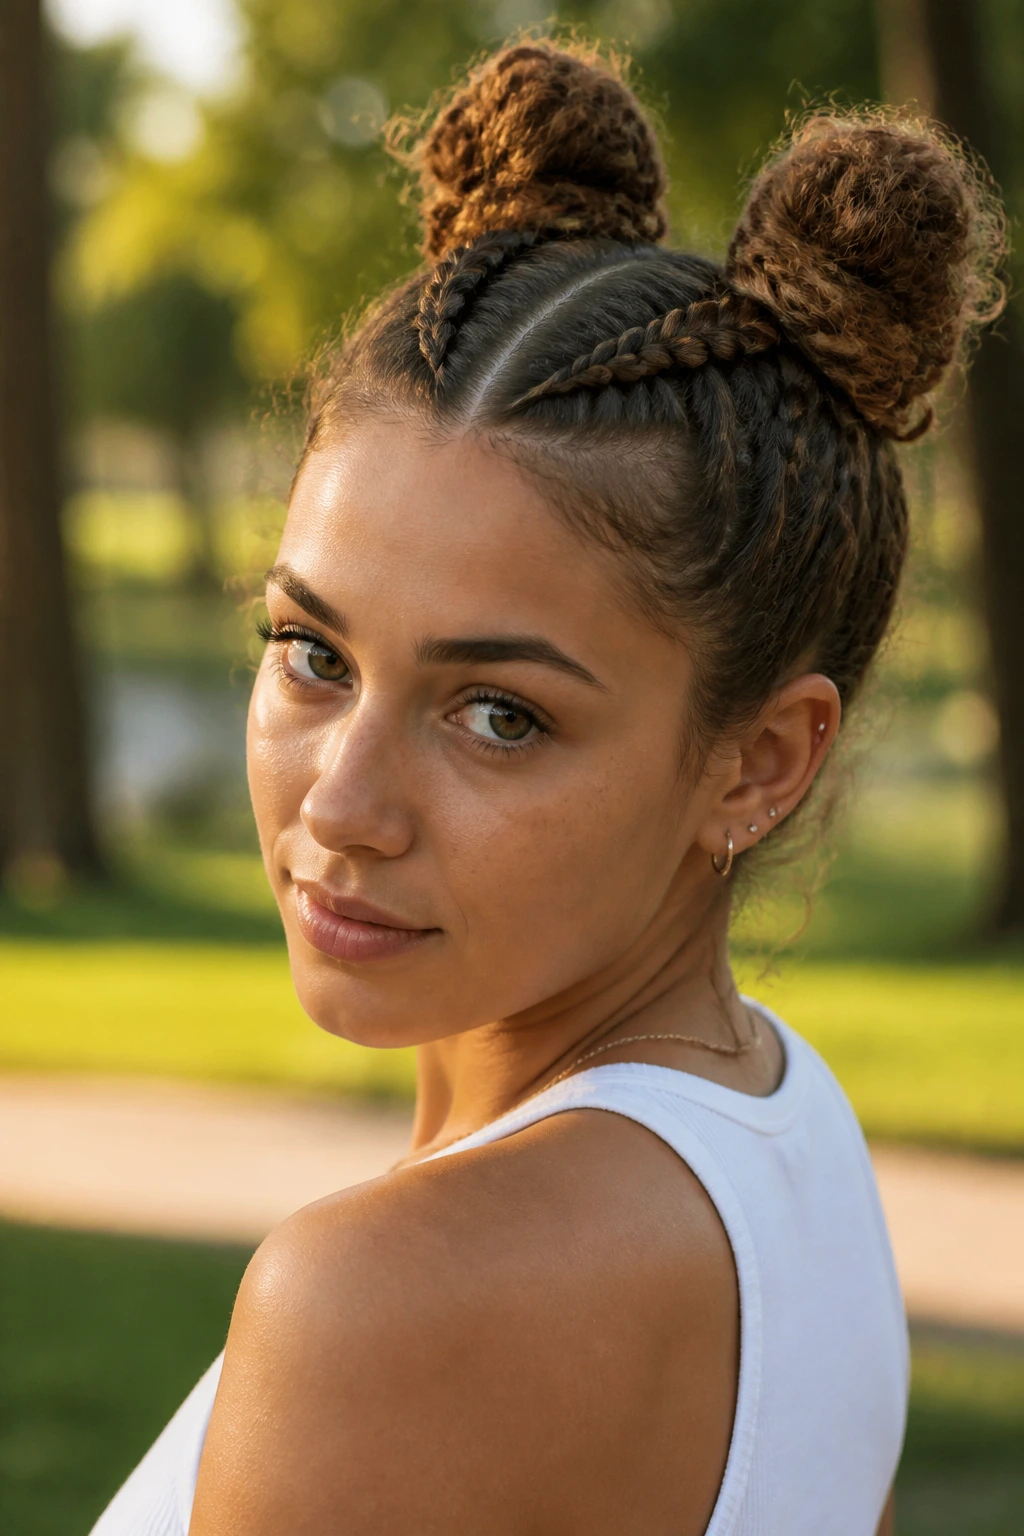
We love a classic space bun, but adding a Dutch braid at the base takes it up a notch. Braid the hair from the nape of your neck upward toward the crown. Once you reach the top of your head, stop the braid, gather the rest of the hair, and twist it into a messy bun. This is the ultimate “weekend hair” style. It keeps your neck cool, your hair out of your face, and looks like you spent much more than fifteen minutes putting it together.
13. The Zig-Zag Part Dutch Braid
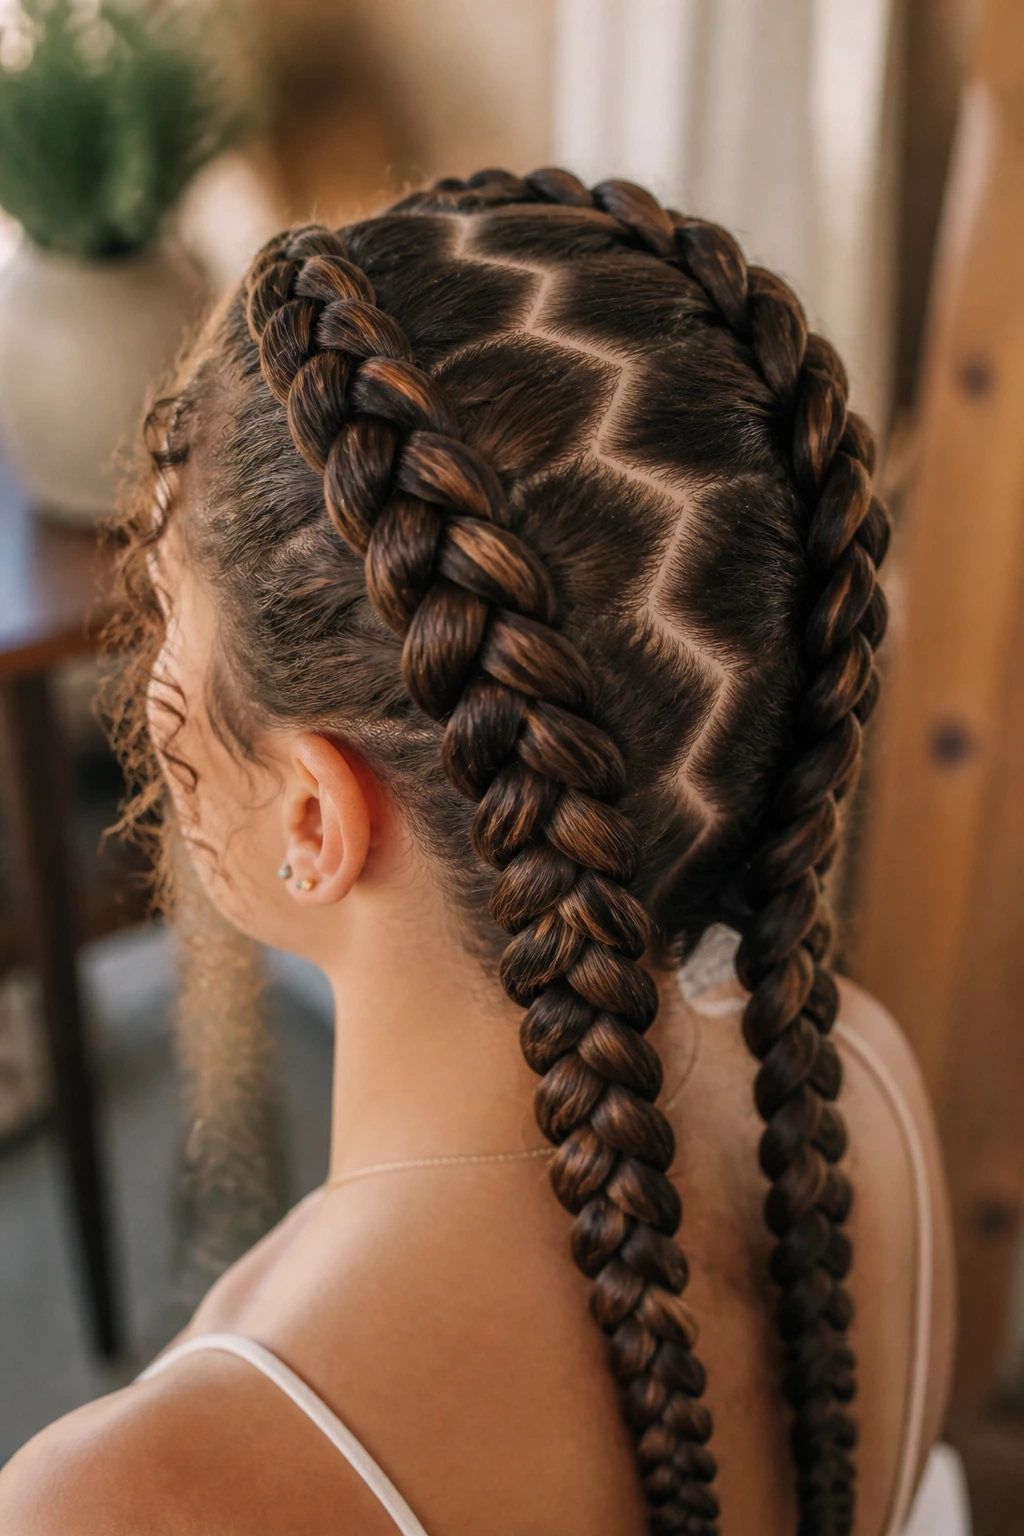
If you want to add a bit of personality to the back of your head, use a zig-zag part. It creates a dynamic, architectural element that makes the separation between the two braids look much more interesting than a straight line.
How to execute it:
- Take your rattail comb and draw a lightning bolt shape from your forehead down to your neck.
- Use clips to keep the two sides completely separate while you work.
- Be warned: this requires a bit of patience, as the hair will want to migrate across the zig-zag line. Use a light mist of water to help guide the hair into its new designated side.
14. Double Dutch Braids with Ribbon Accents
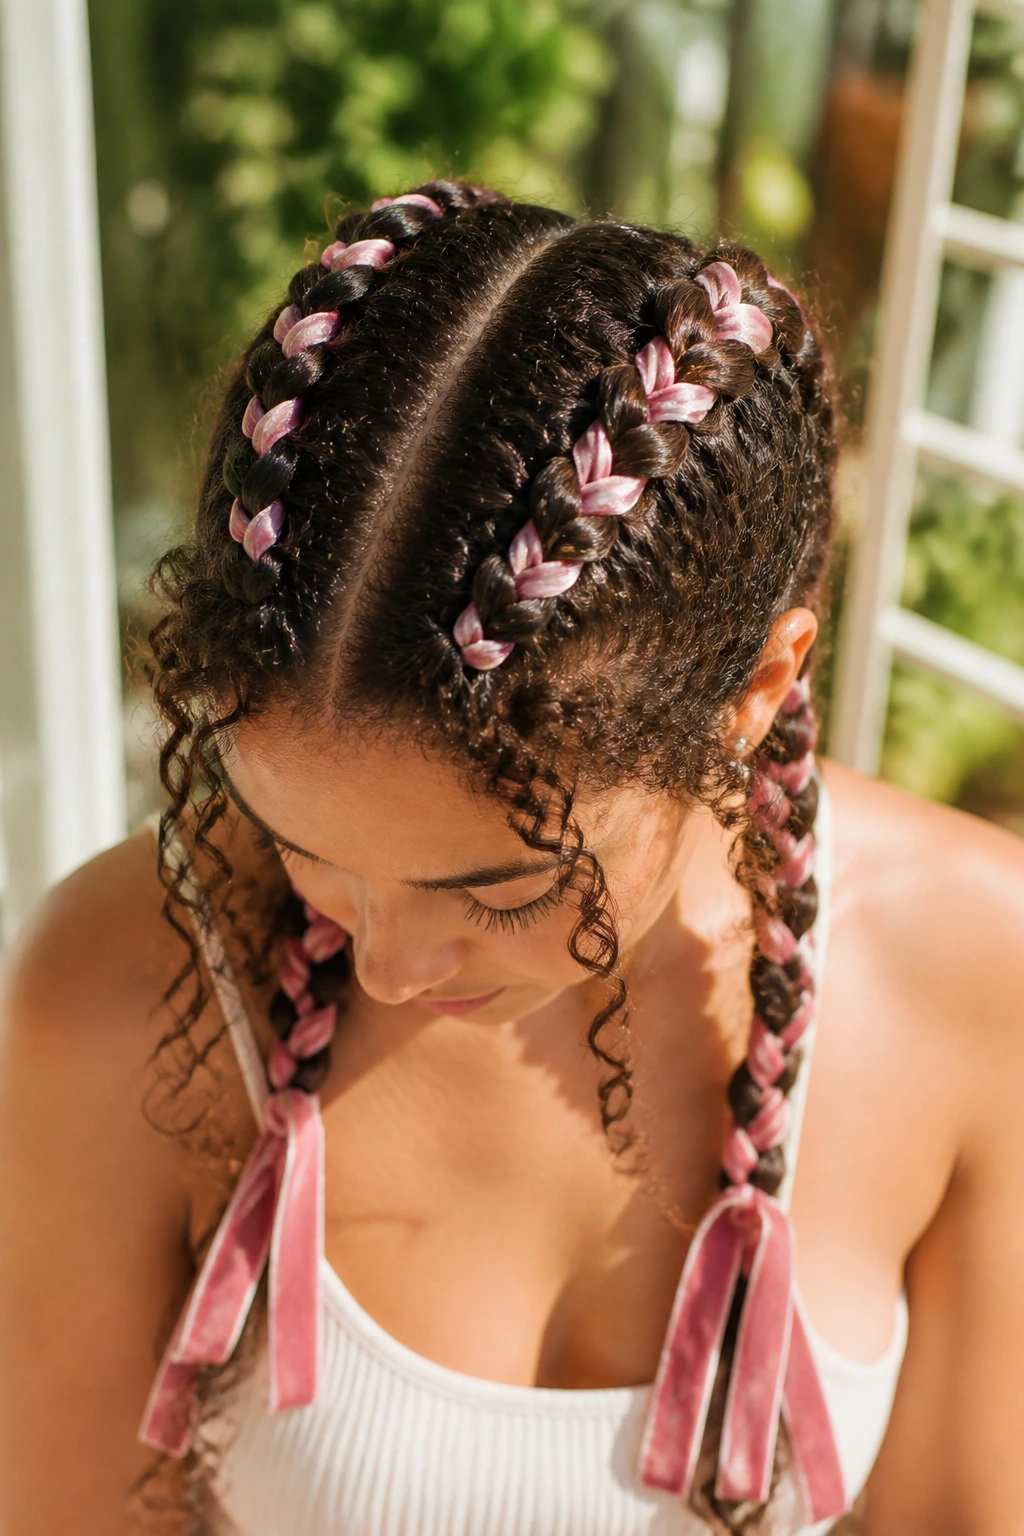
Ribbons are making a comeback, and they look stunning when woven into curly hair. You can either braid the ribbon in as if it were a strand of hair or tie small bows at the bottom of each braid. Velvet ribbons provide a beautiful texture contrast against tight coils, while silk ribbons offer a bit of shine. This is a subtle way to elevate a sporty style into something far more feminine and whimsical.
15. The “Pancake” Braid with Scattered Flowers
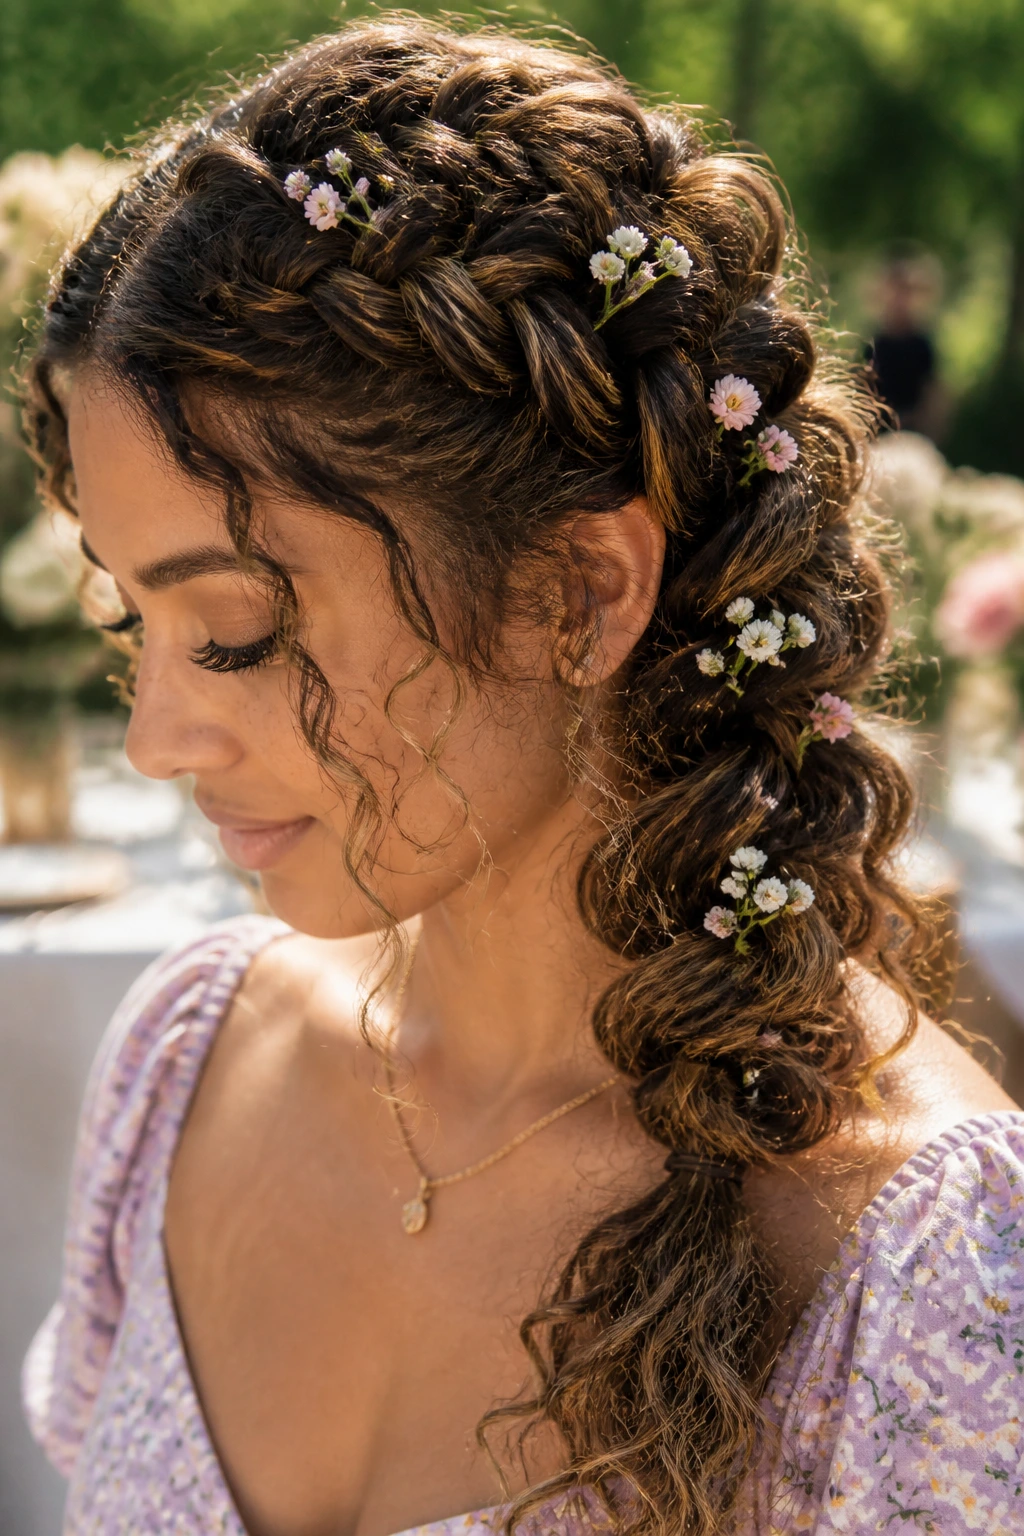
If you are attending a garden party or a summer event, flowers are the perfect accessory for a braided style. Small, fresh blooms like baby’s breath or daisies can be tucked into the individual loops of a “pancaked” Dutch braid. Because your hair has the grip of a curly texture, the flowers will stay put much longer than they would in straight hair. This look is romantic, earthy, and perfectly suited for those with a flair for the dramatic.
16. Dutch Braids with Curly “Tendrils”
You don’t have to braid every single strand of hair. Leave a small, triangular section of hair out around the ears or near the temples. Once the braids are finished, use a finger-twirl technique with a bit of styling mousse to define these loose strands into tight ringlets. These tendrils frame the face beautifully and add a sense of movement that offsets the tight, locked-down feel of the Dutch braids.
17. The Sleek-to-Texture Transition
This style is all about contrast. Spend extra time using a pomade or edge control to make the hair perfectly smooth at the roots. As you braid, allow the texture of the hair to emerge more naturally. By the time you reach the mid-lengths, the curls should be in their full, glorious, un-slicked state. The visual transition from the tight, controlled root to the loose, wild end is a fantastic way to celebrate the versatility of your curl pattern.
18. Double Dutch Braids with Colorful Beads
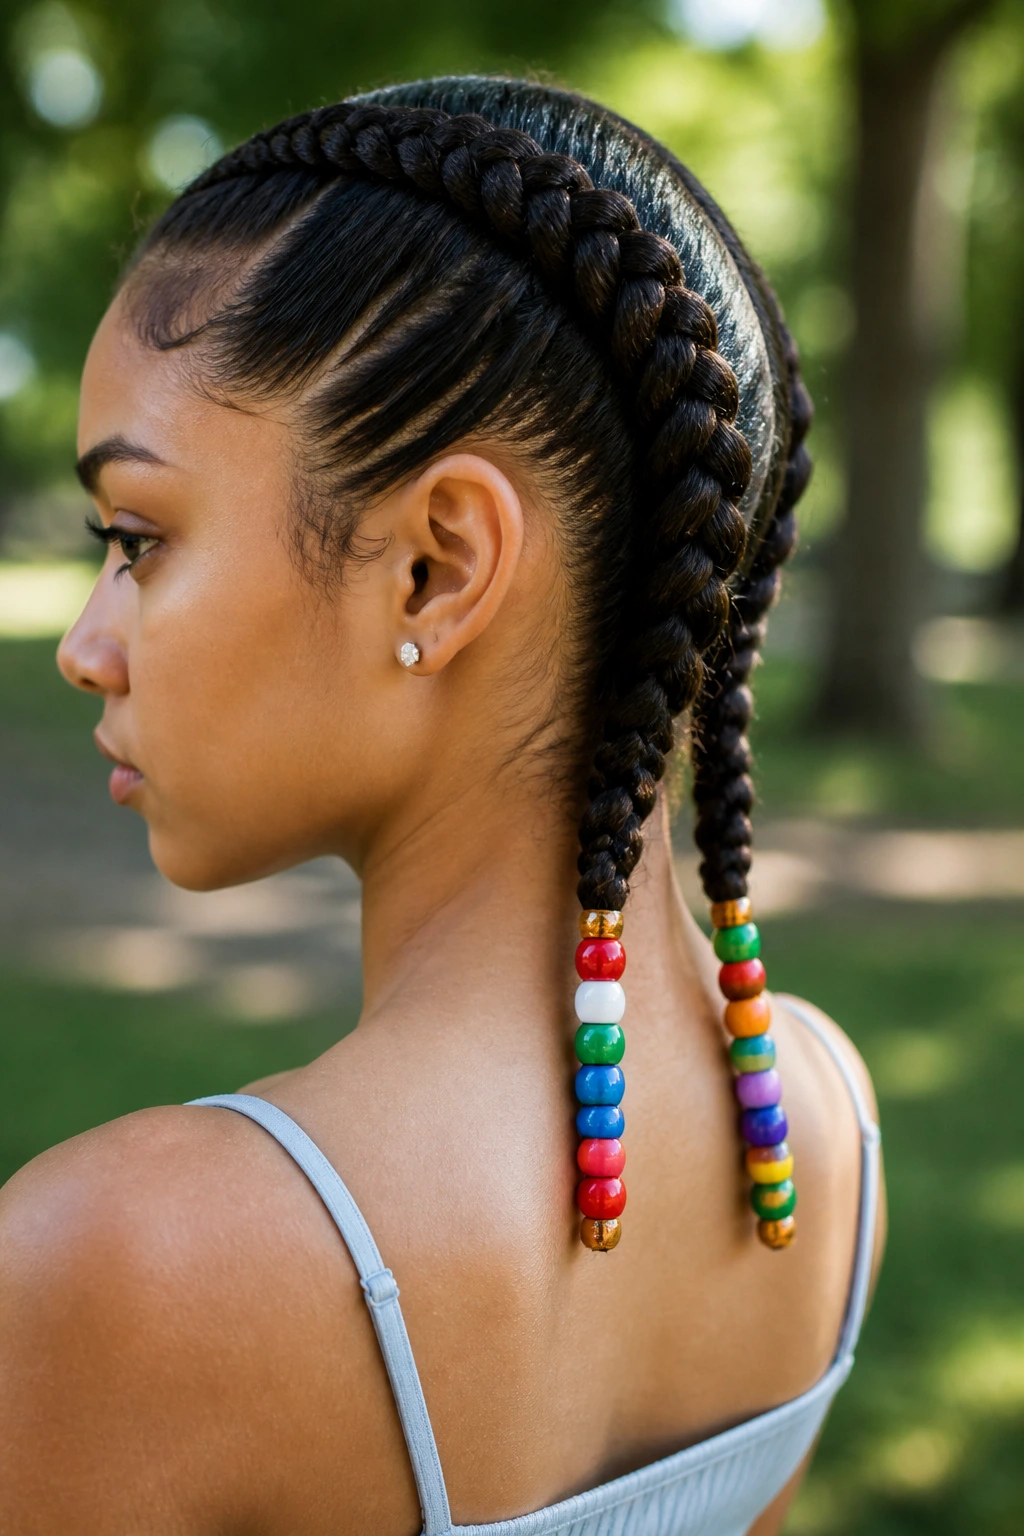
Beads at the end of your braids are not just for kids. Wood, clay, or clear acrylic beads can add an earthy, bohemian vibe to your hair. Slide three or four beads onto the ends of the braids and secure them with a sturdy elastic. The weight of the beads will actually help pull the braid down, preventing it from frizzing up at the ends and keeping the structure intact throughout the day. It is a functional and stylistic choice that speaks to a love for intricate, well-cared-for hair.
Common Mistakes When Braiding Curly Hair
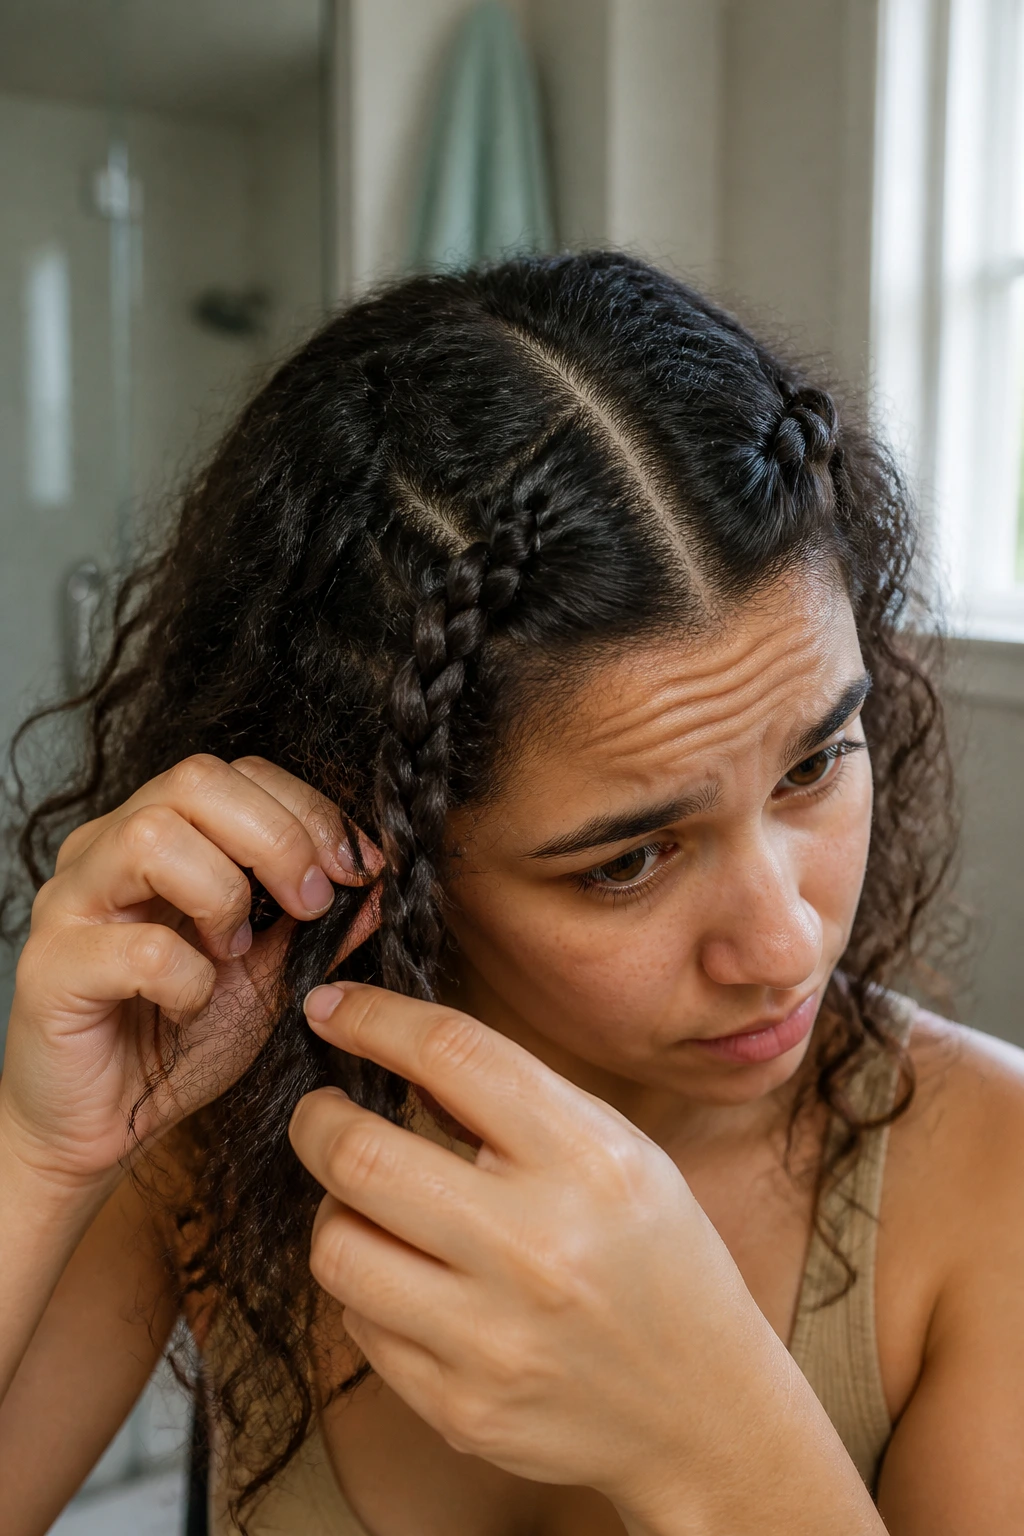
The most common mistake people make is braiding on completely dry hair. Curly hair is inherently drier than straight hair; when you pull it taut, it has very little “give” and is prone to snapping. Always dampen your hair with a mix of water and leave-in conditioner before you start. This provides the slip necessary for smooth sectioning.
Another error is trying to braid too quickly. When you move fast, you miss the rogue strands that cause the braid to look messy. Take your time to clean up each section as you add it to the braid. If a piece of hair sticks out, tuck it under and smooth it with a dab of product. The “neatness” of a Dutch braid is largely determined by how clean your sections are when you feed them into the main structure. Don’t rush; the time you spend prepping is time you won’t have to spend re-doing the style later.
Maintenance and Longevity
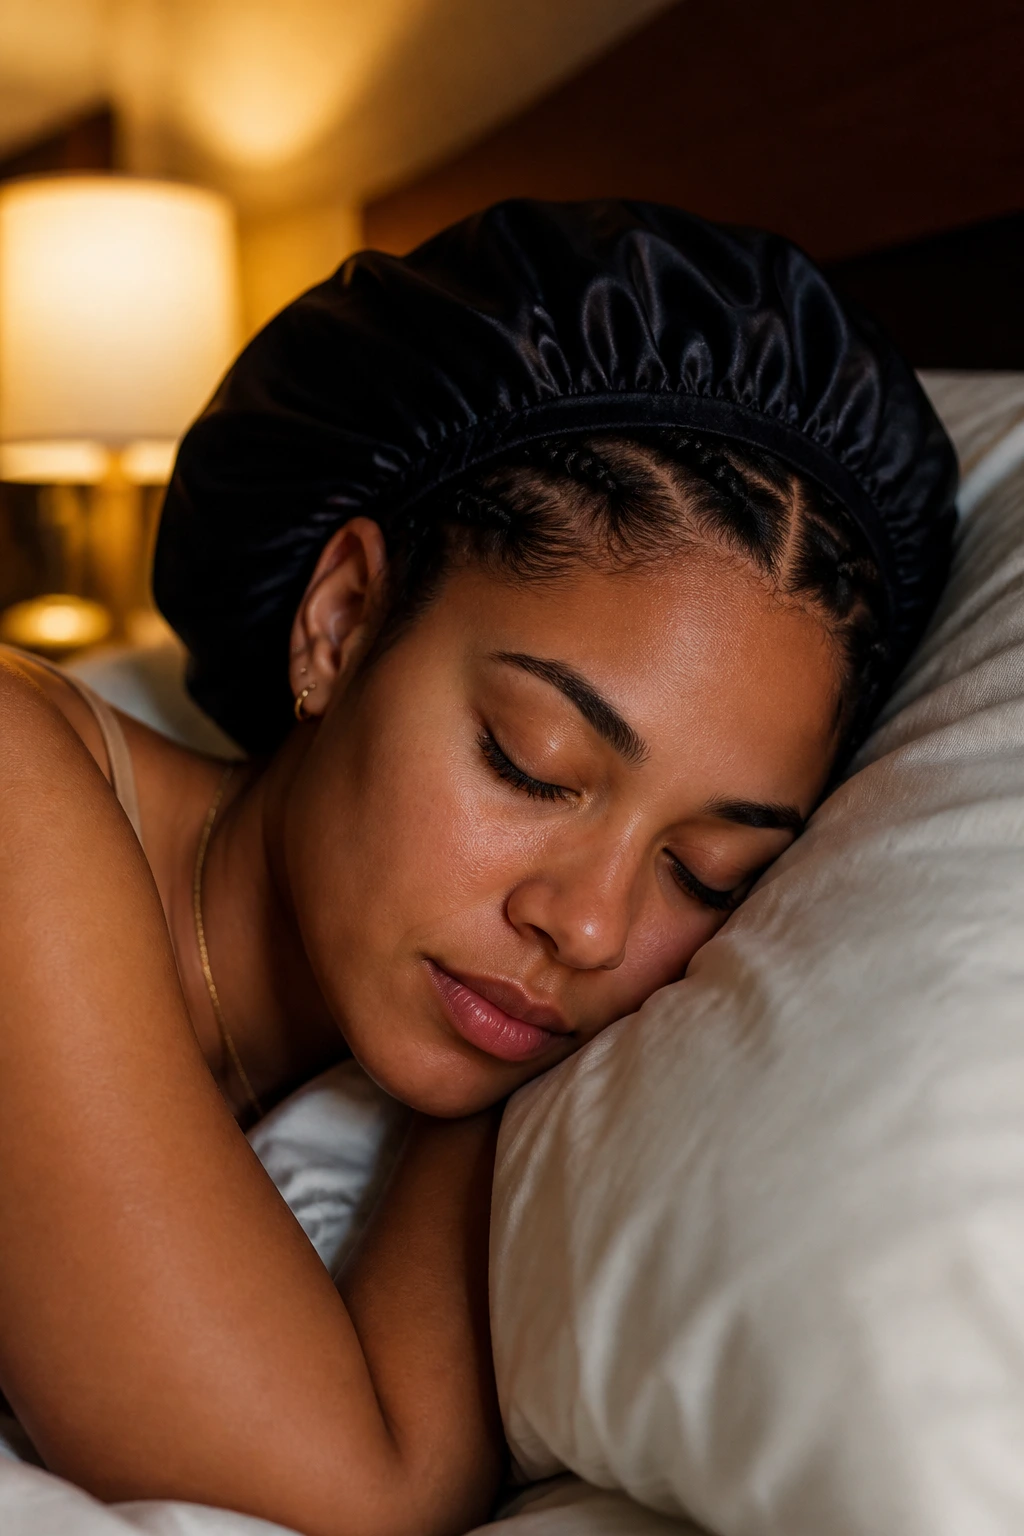
To keep your double Dutch braids looking fresh for more than a single day, you must protect them while you sleep. A silk or satin bonnet is non-negotiable. The friction of cotton pillowcases will pull at your curls, causing frizz to erupt from the braids by morning. If you don’t like wearing a bonnet, at least sleep on a silk pillowcase.
When you notice a bit of frizz forming, do not try to brush it down. Instead, take a tiny amount of hair oil on your palms and gently press it down over the top of the braids. This will tame the flyaways without destroying the structure you worked so hard to create. If you have been sweating from a workout, a quick dry-shampoo mist at the roots can help refresh the style without requiring a full wash.
Final Thoughts
The beauty of double Dutch braids on curly hair is the marriage between structure and chaos. You are taking a hair texture that naturally wants to expand and giving it a beautiful, geometric frame. Whether you go for the sleek, slicked-back look or the loose, pancaked volume, remember that your curls provide a unique depth that straight-haired styles simply cannot match. It might take a few tries to get the tension right, but once you master the technique, you have a go-to style that is as resilient as your own natural pattern. Play with your parting, experiment with accessories, and don’t be afraid to let a few curls escape the braid—that is exactly what makes them yours.