Braids are more than just a functional way to keep your hair off your face. For those of us with medium-length hair—that sweet spot between the chin and the mid-back—braids offer the ideal balance of manageability and creative expression. You have enough length to experiment with intricate patterns, yet your hair doesn’t feel heavy or overwhelming to manipulate during the styling process. Whether you are dealing with fine, straight strands or thick, textured coils, the versatility of braided styles is nearly endless.
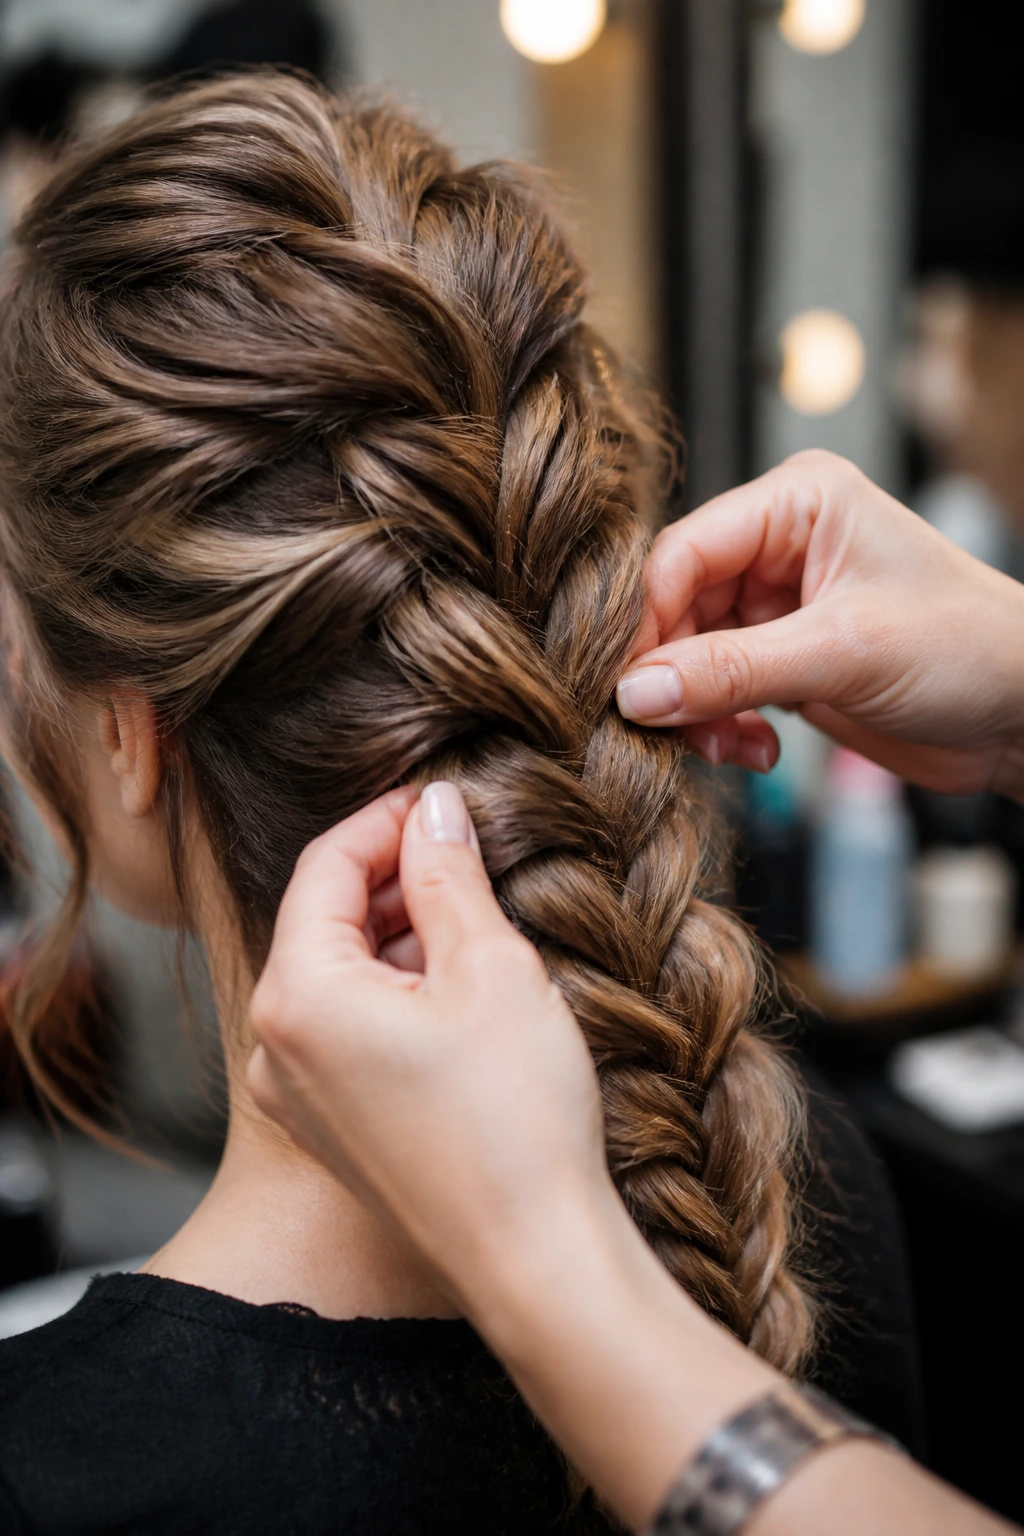
The key to successful braiding at this length is preparation. If your hair is freshly washed and feels too soft or slippery, it might be difficult to get those tight, crisp lines you see in magazines. A little bit of grit helps. I often find that using a dry shampoo or a texturizing spray, even on clean hair, gives me the “tack” I need to keep the braid from unraveling. Let’s look at twenty-eight unique styles that make the most of that medium-length canvas.
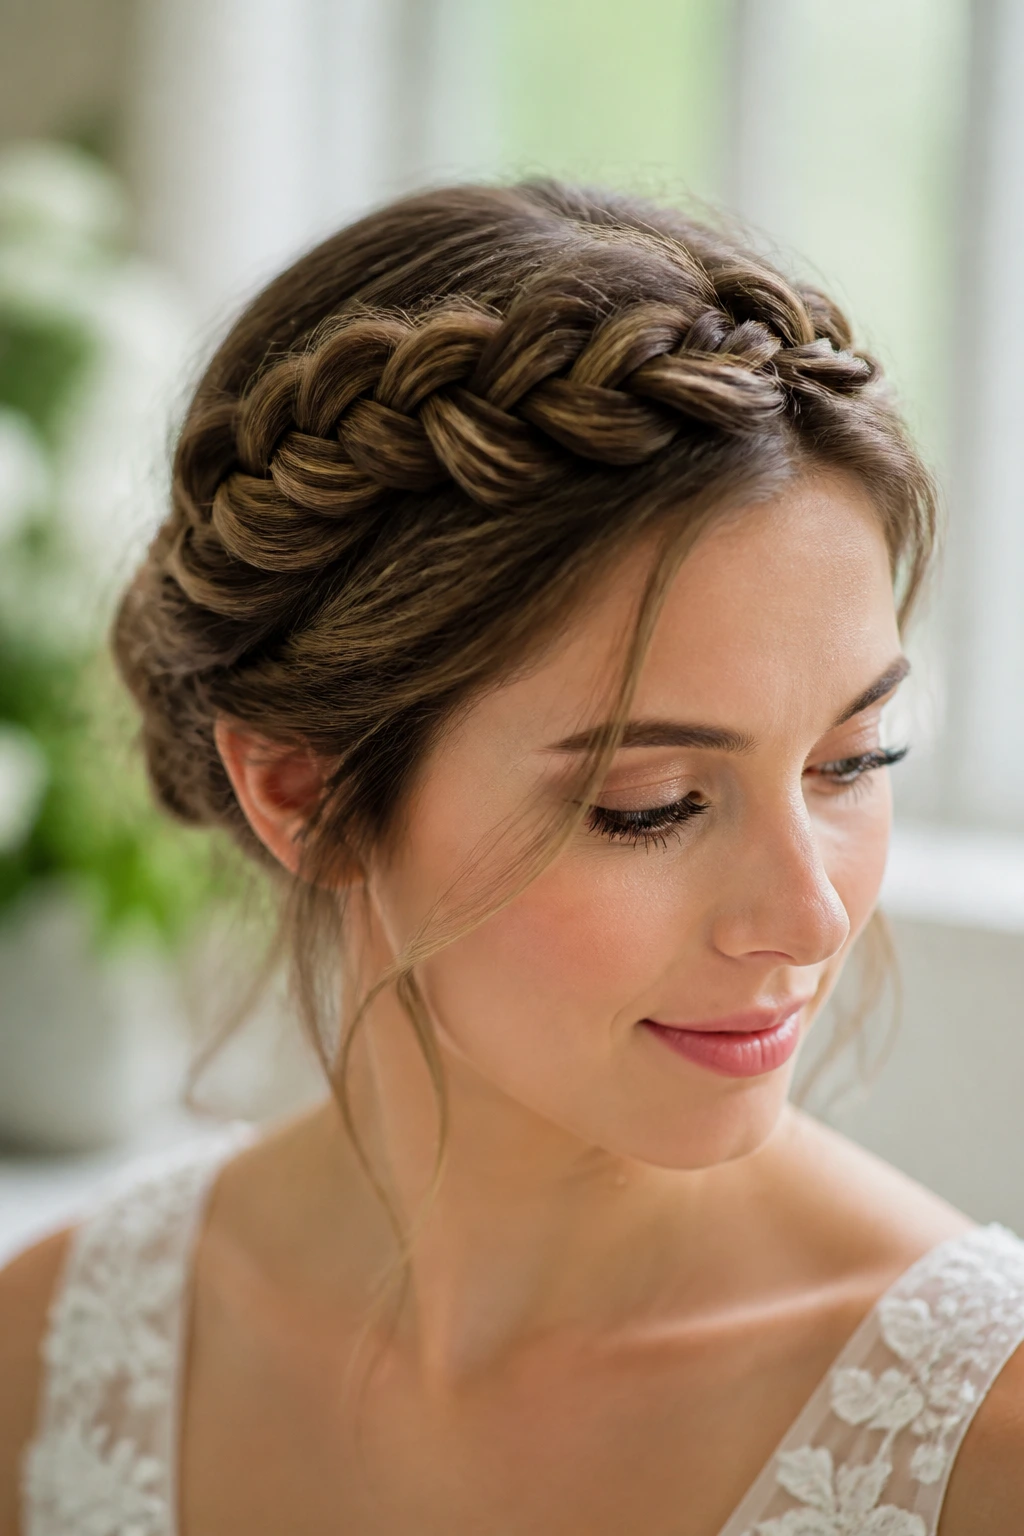
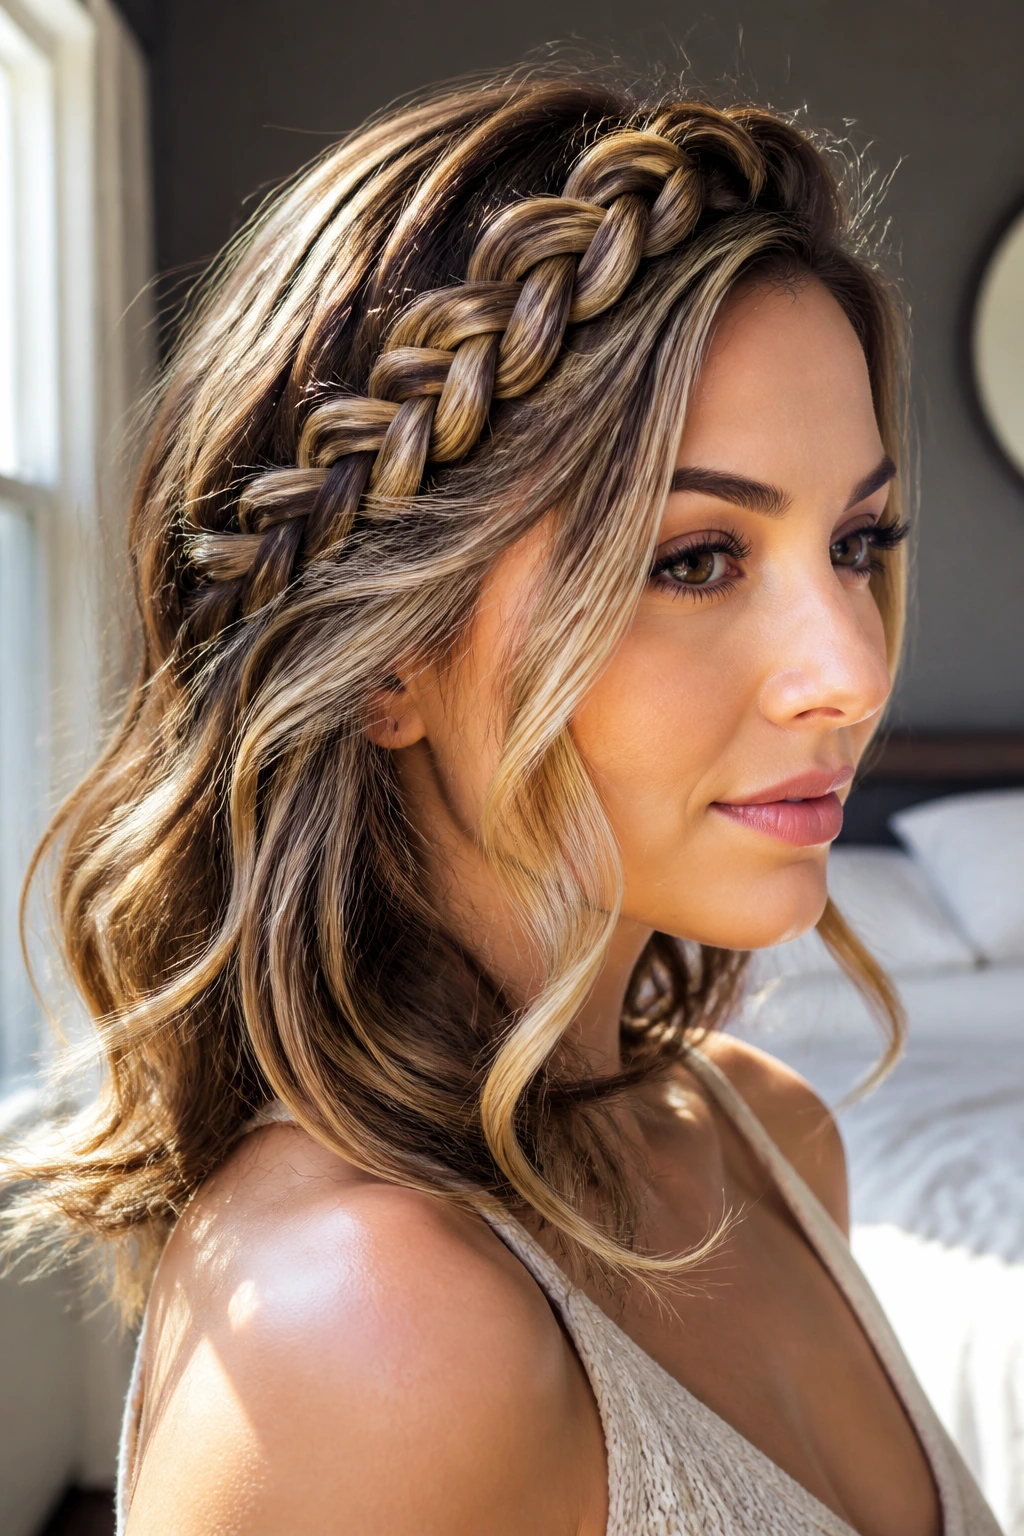
1. The Classic Three-Strand Dutch Crown
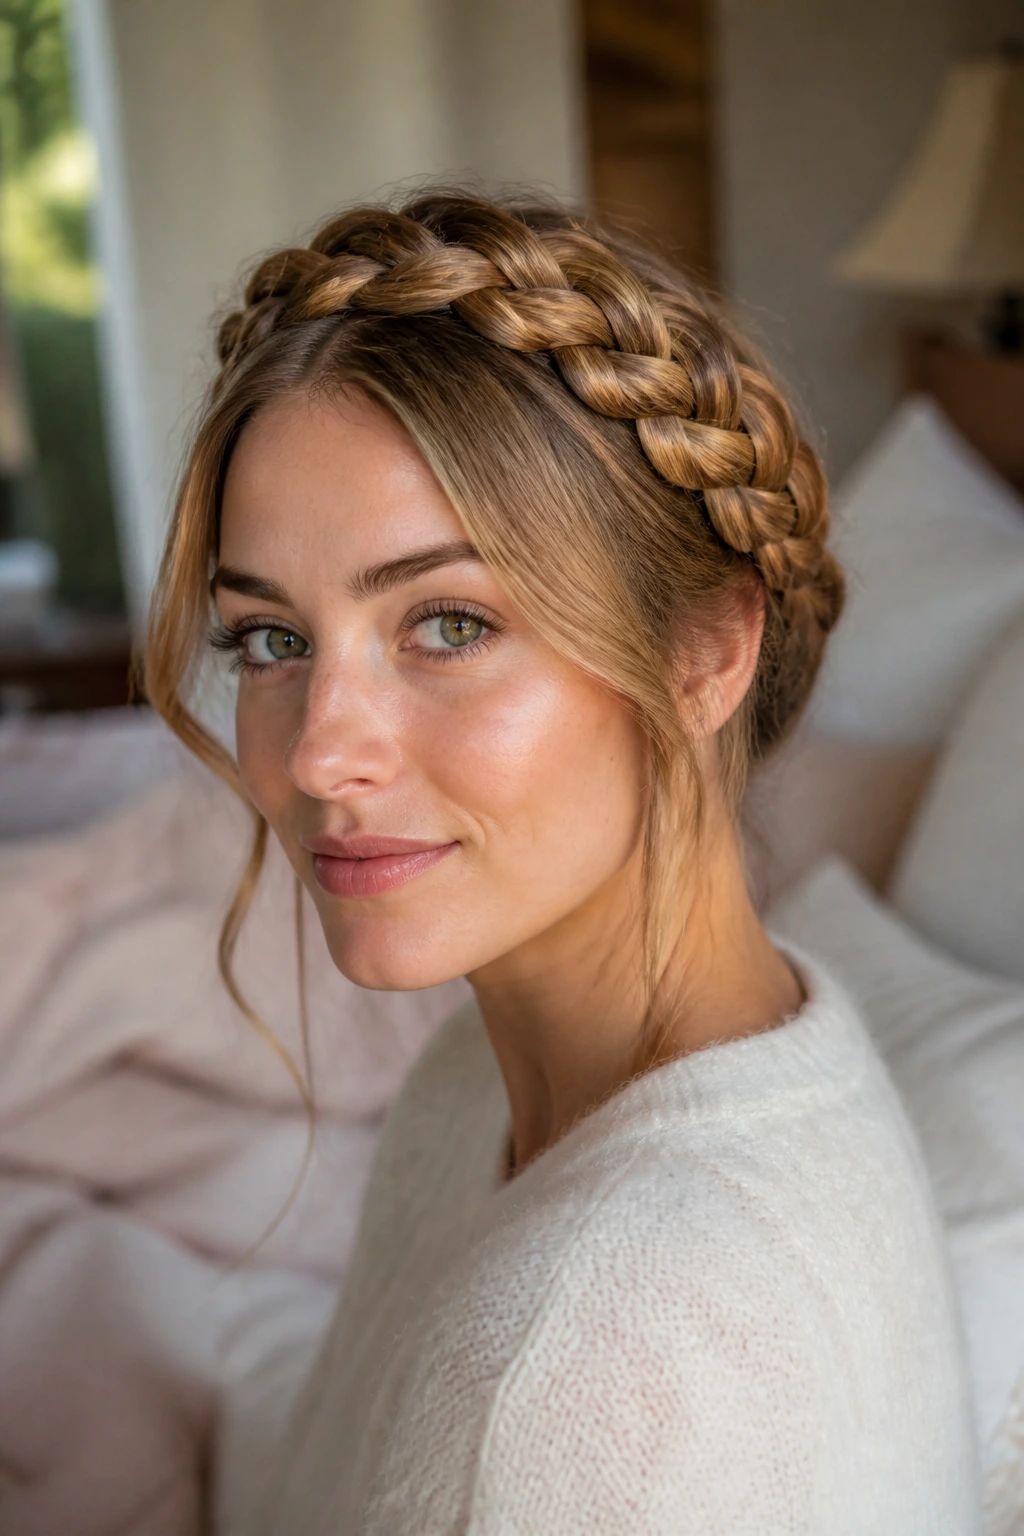
This style is timeless, essentially creating a headband out of your own hair. You start at one temple, Dutch braiding along the hairline toward the other side, and pinning the tail under the base of the starting point. It works incredibly well on medium hair because the length is perfect for wrapping around without needing multiple extension pieces to make it look full. Just remember to pull at the loops once you have secured the end; this creates that lived-in, voluminous look that feels very intentional.
2. Double Dutch Pigtails
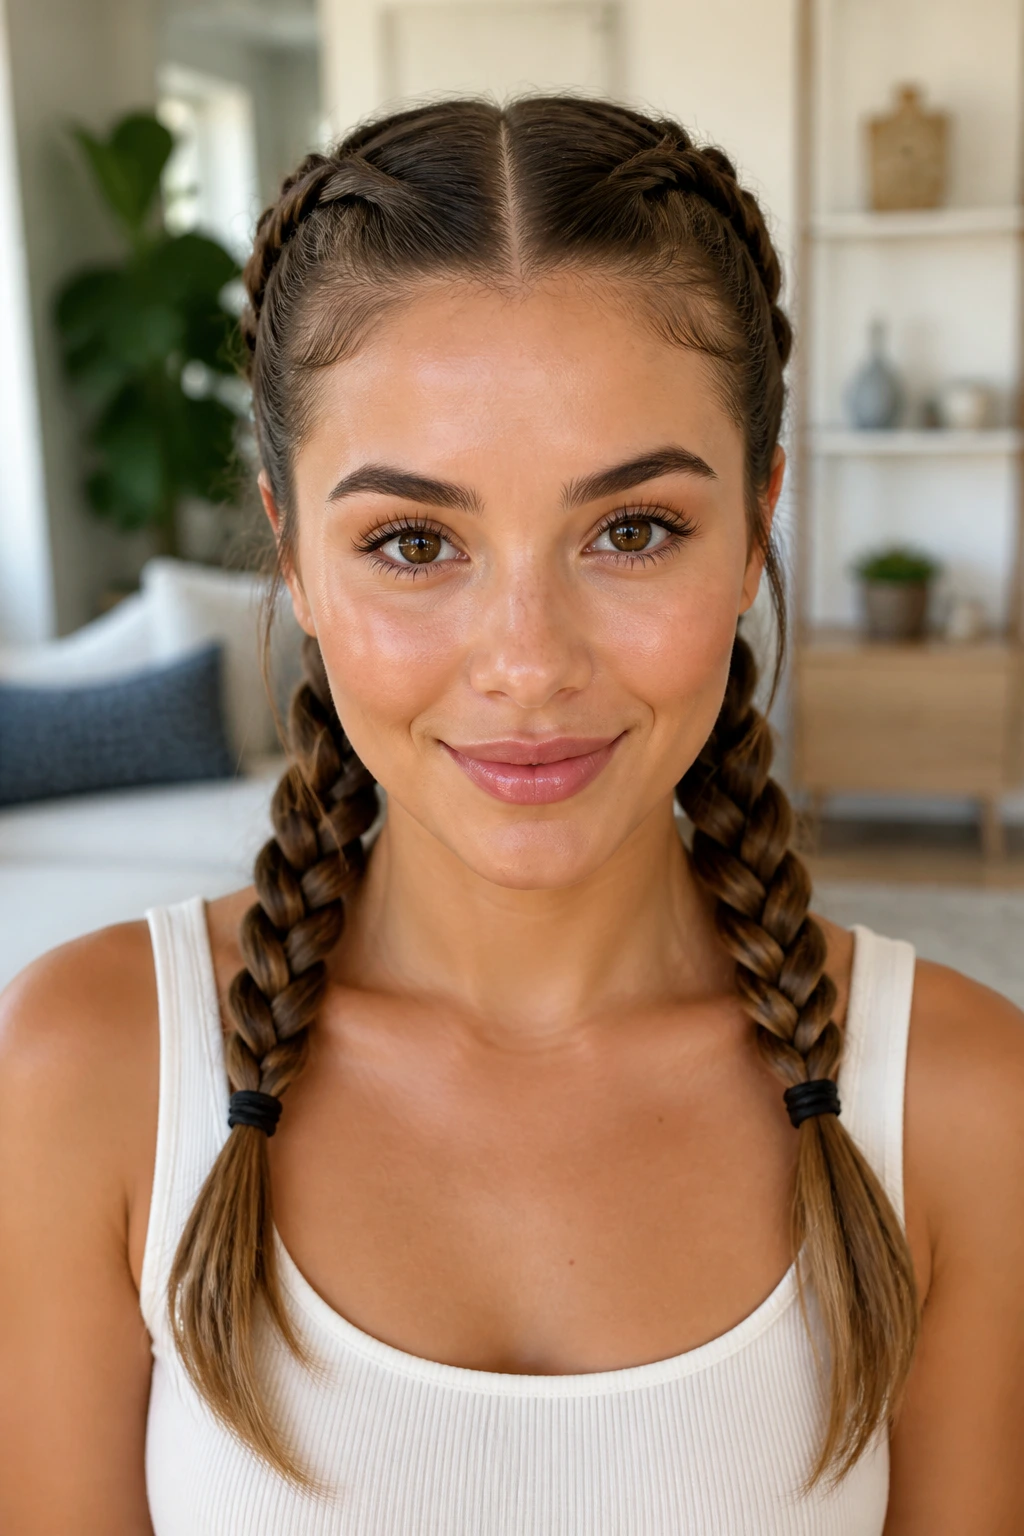
Sometimes you just want to feel like a kid again, but with a grown-up aesthetic. Part your hair down the center and create two Dutch braids that travel from the forehead to the nape of the neck. Because your hair isn’t excessively long, the tails will sit neatly at your shoulders without looking like they are dragging you down. Using clear elastic bands at the bottom keeps the focus entirely on the pattern of the weave itself rather than the hardware.
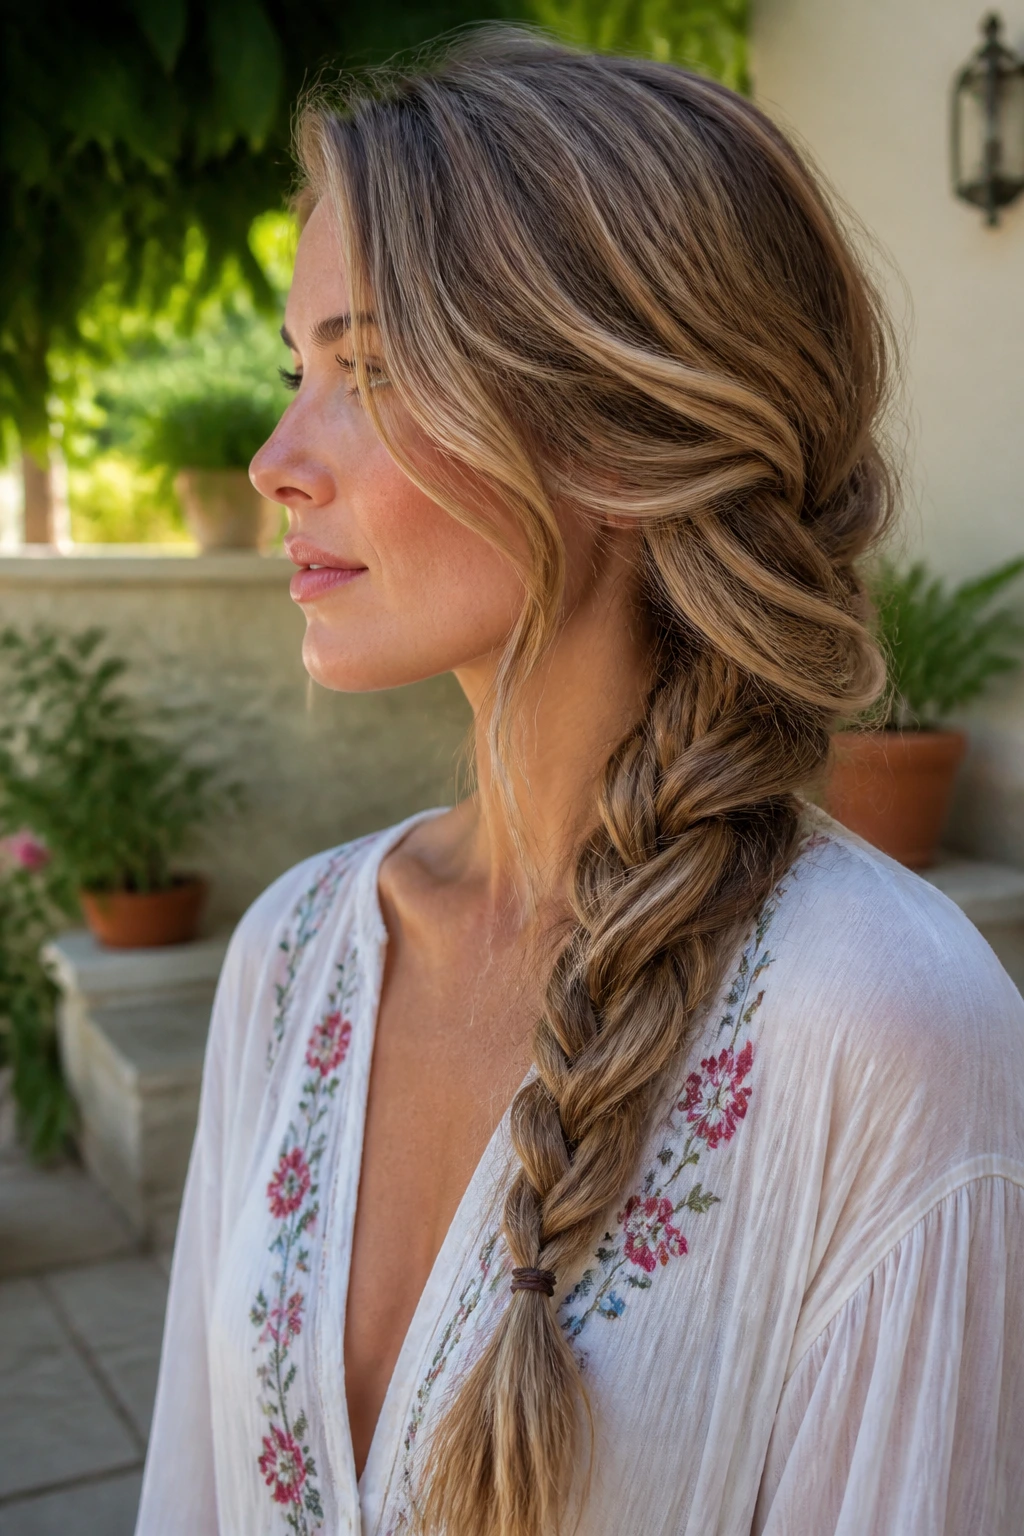
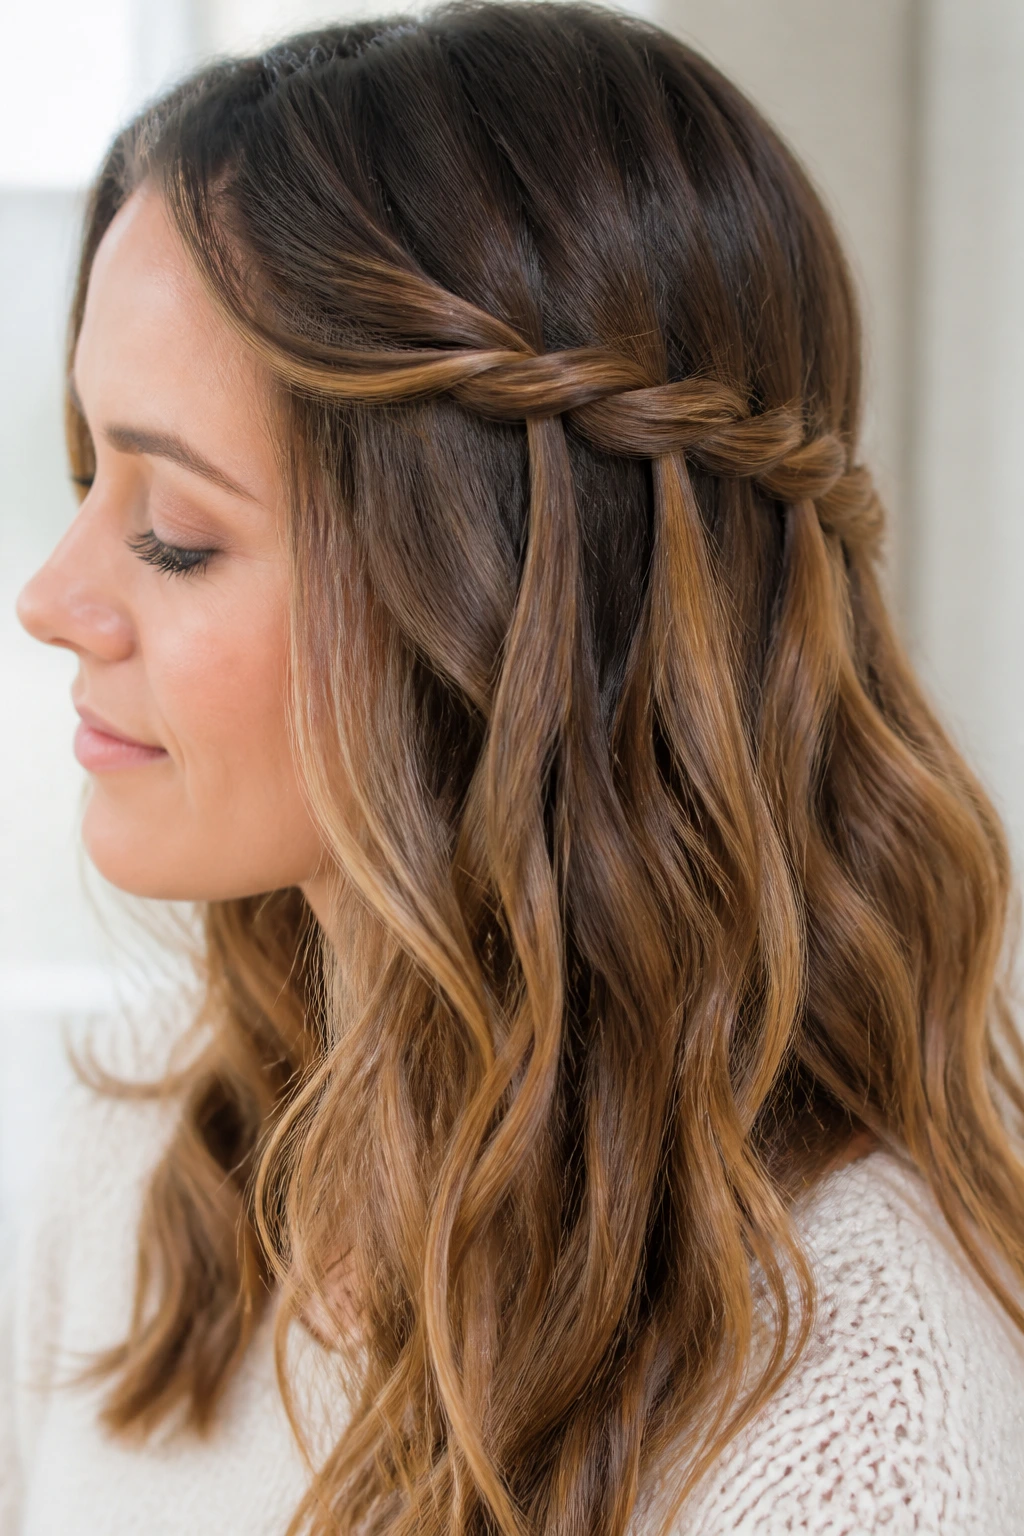
3. The Messy Waterfall Braid
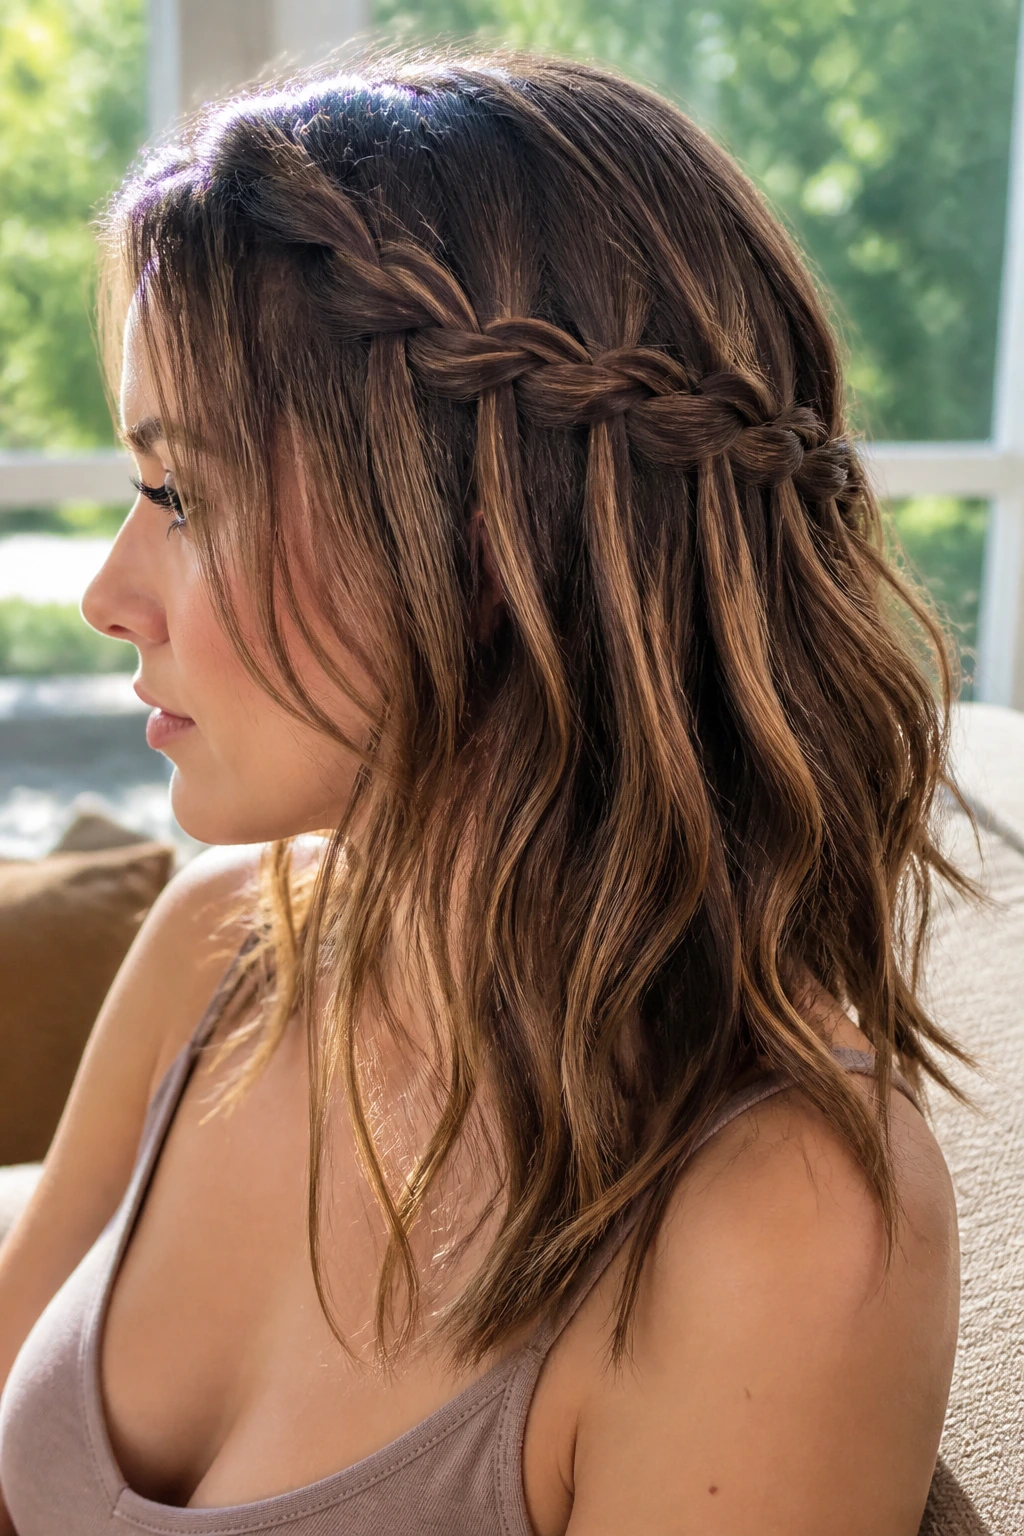
If you prefer wearing your hair down, the waterfall braid is your best friend. Instead of incorporating all your hair into the braid, you drop the bottom strand every time you cross it over, allowing it to hang naturally. This creates a cascading effect that looks complicated but is surprisingly simple once you master the rhythm. On medium hair, this style showcases the cut and color depth, making it an excellent choice for a social event where you want a bit of extra polish.
4. Half-Up Fishtail Accent
A fishtail braid looks intricate, but it is just a two-strand technique. Take two small sections from the sides of your head, bring them to the back, and start a fishtail braid that sits atop your loose, flowing hair. This is one of my go-to looks for a busy day when I want to look styled but don’t have an hour to spend in front of the mirror. It adds a bohemian touch that elevates a simple wavy hairstyle into something truly elegant.
5. French Braid Ponytail
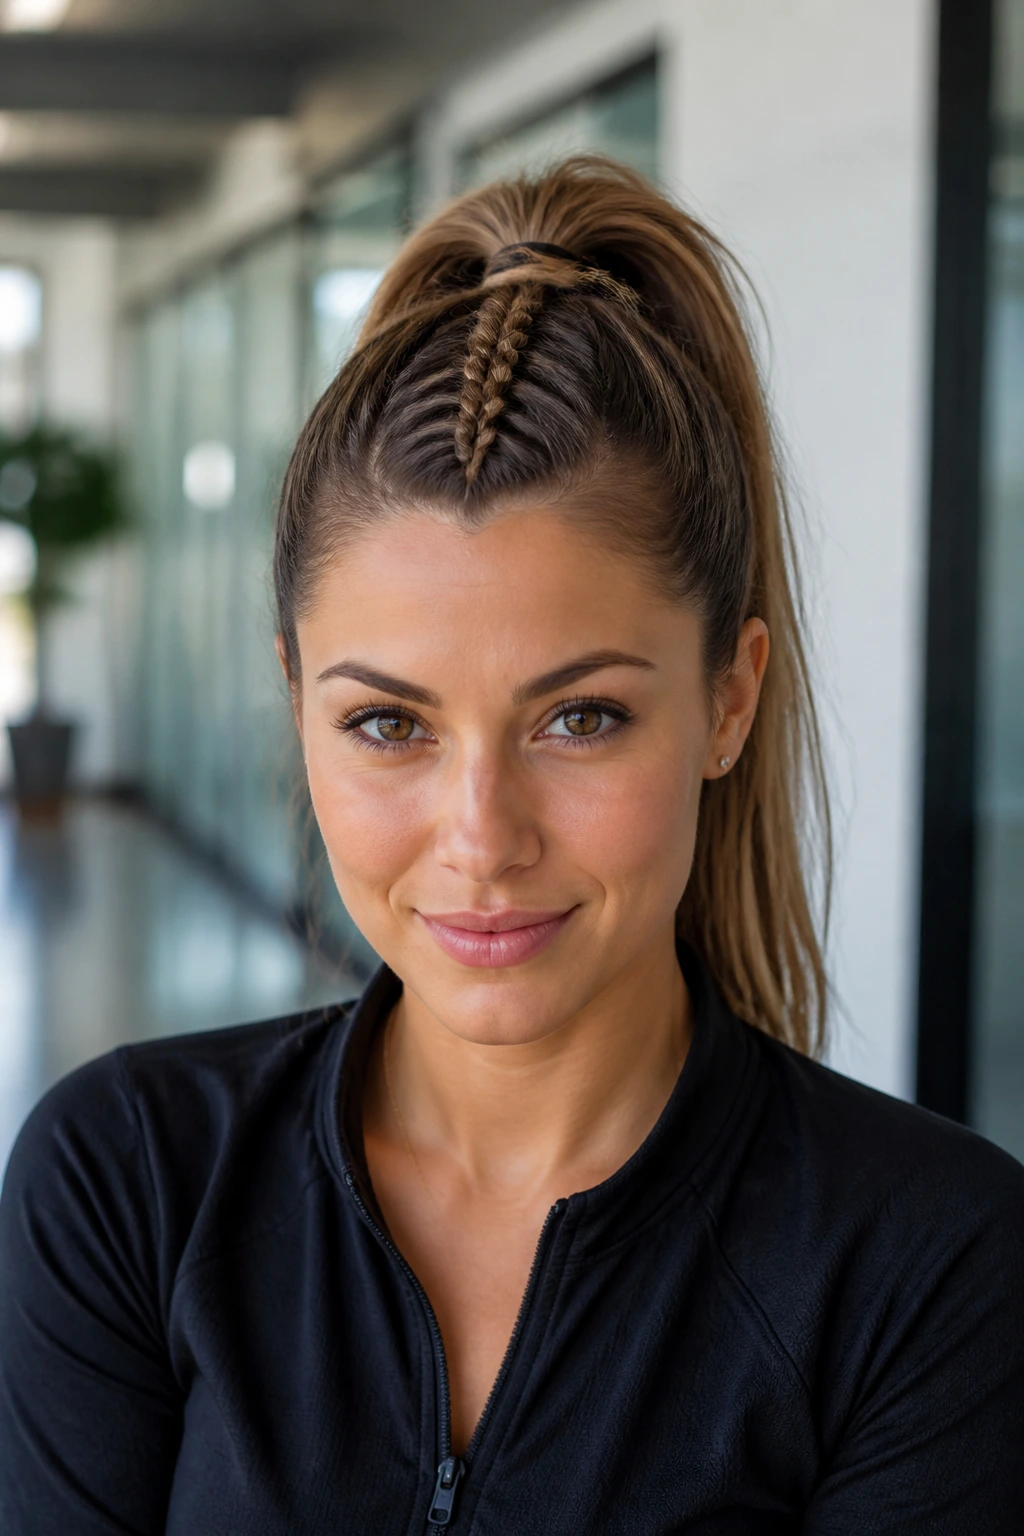
Combining two classics—the French braid and the high ponytail—gives you a secure, sporty look that stays put through almost anything. Start the French braid at the hairline and stop at the crown of your head, gathering the rest of your hair into a pony. If you want a bit more drama, wrap a small section of hair around the elastic to hide the band. It’s a clean look that works as well in the office as it does at the gym.
6. The Bohemian Side-Swept Plait
For a relaxed, effortless vibe, pull all your hair to one side and weave it into a loose, slightly undone braid. Don’t worry about being perfect here; the beauty is in the messiness. I suggest using a little bit of hair oil to tame flyaways before you start, which keeps the look intentional rather than disheveled. If you want to dress it up, tuck in a few small flowers or decorative pins once you’ve tied it off.
7. Triple Braided Low Bun
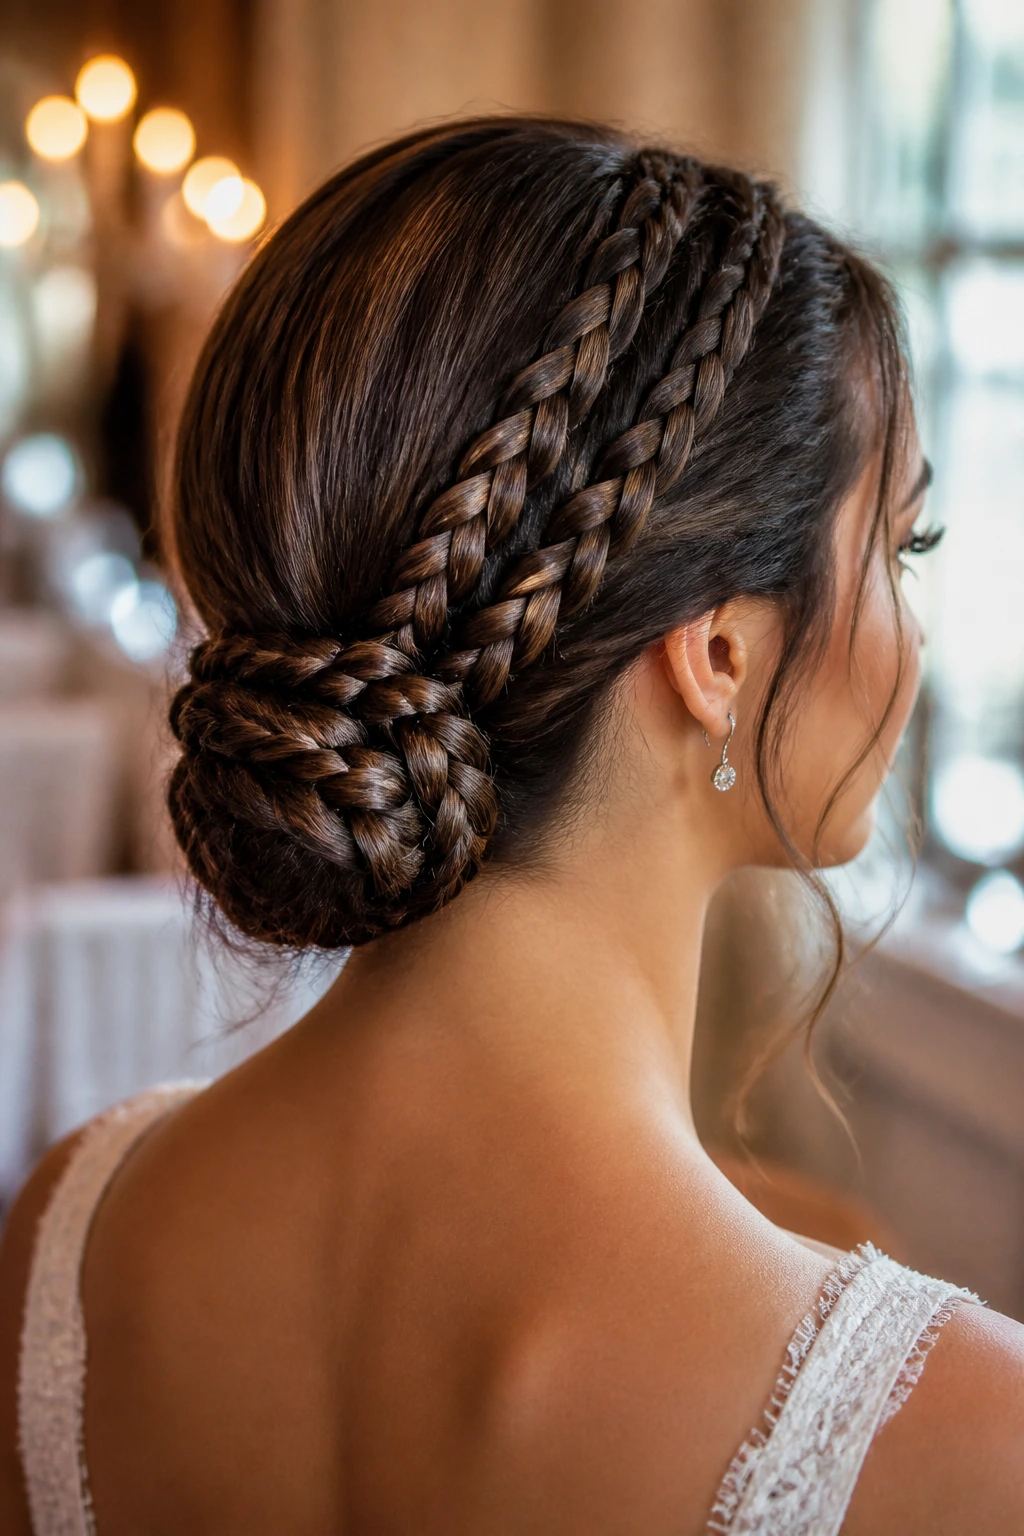
This is an excellent option for weddings or formal dinners. Divide the hair at the nape of your neck into three equal sections and braid each one individually. Once they are secured, twist the three braids together into a singular, low chignon. Because your hair is medium-length, the bun will have the perfect amount of substance—not too huge, but full enough to look sophisticated and well-balanced.
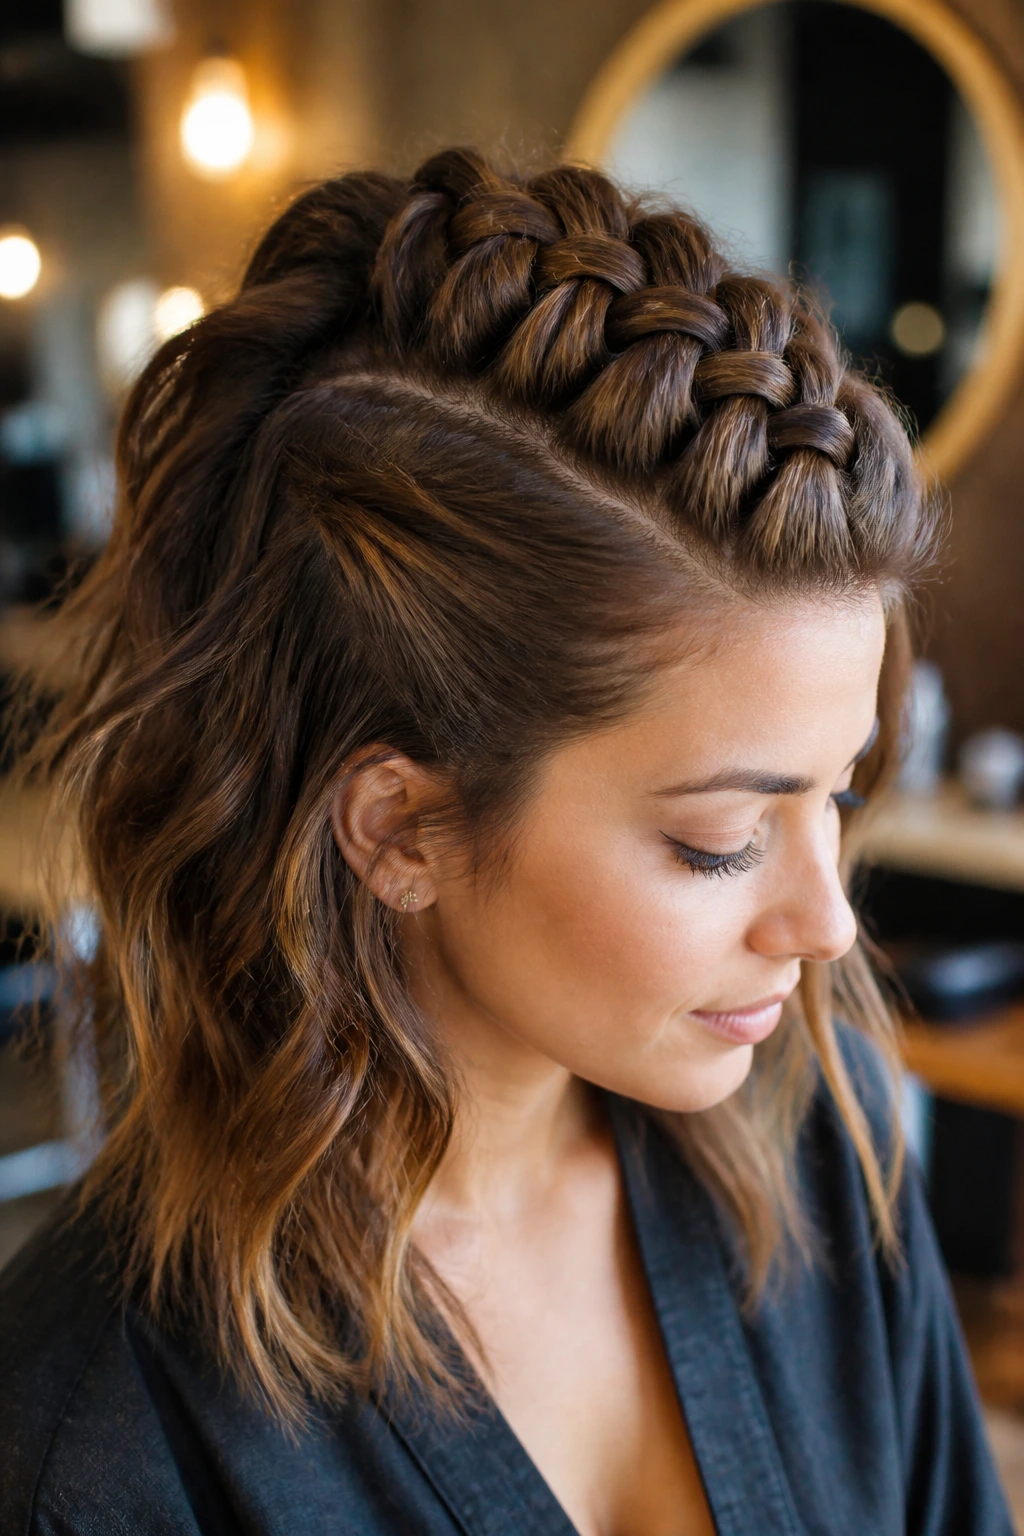
8. The Pull-Through Braided Faux-Hawk

If you want something edgy, this is it. It isn’t a traditional braid, but rather a series of mini-ponytails threaded through each other. It mimics the look of a thick, voluminous Mohawk down the center of your head. It’s perfect for medium-length hair because you don’t need a lot of mass to create the illusion of a full, thick braid. The secret here is to be generous when pulling at the loops; the wider the loops, the cooler the overall effect.
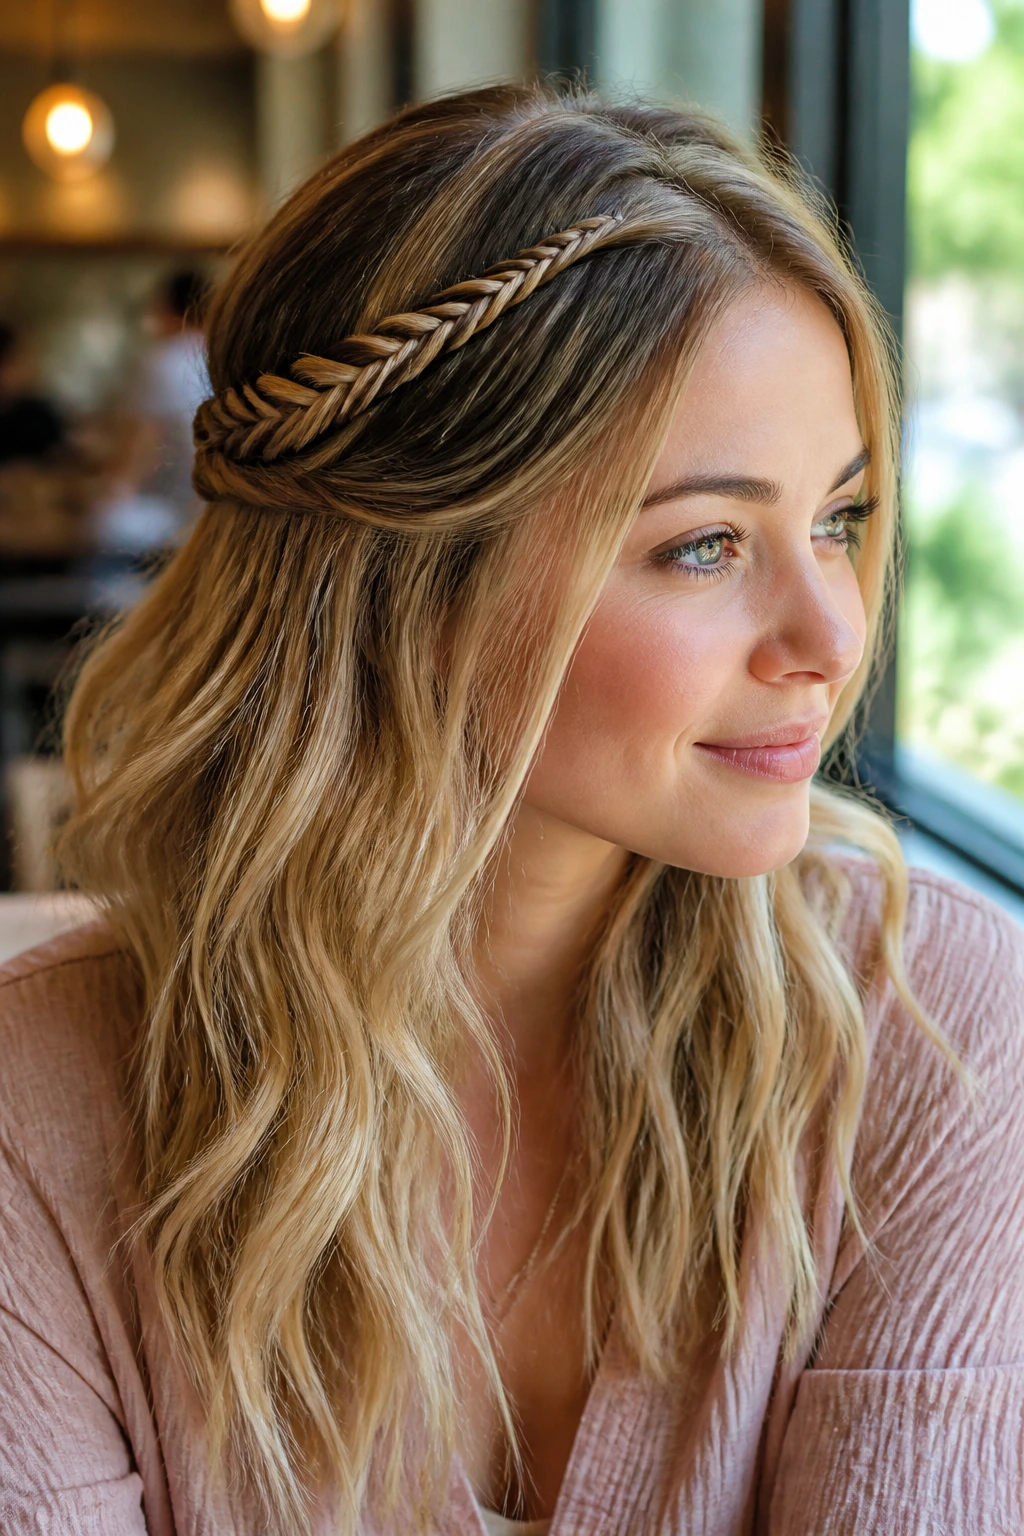
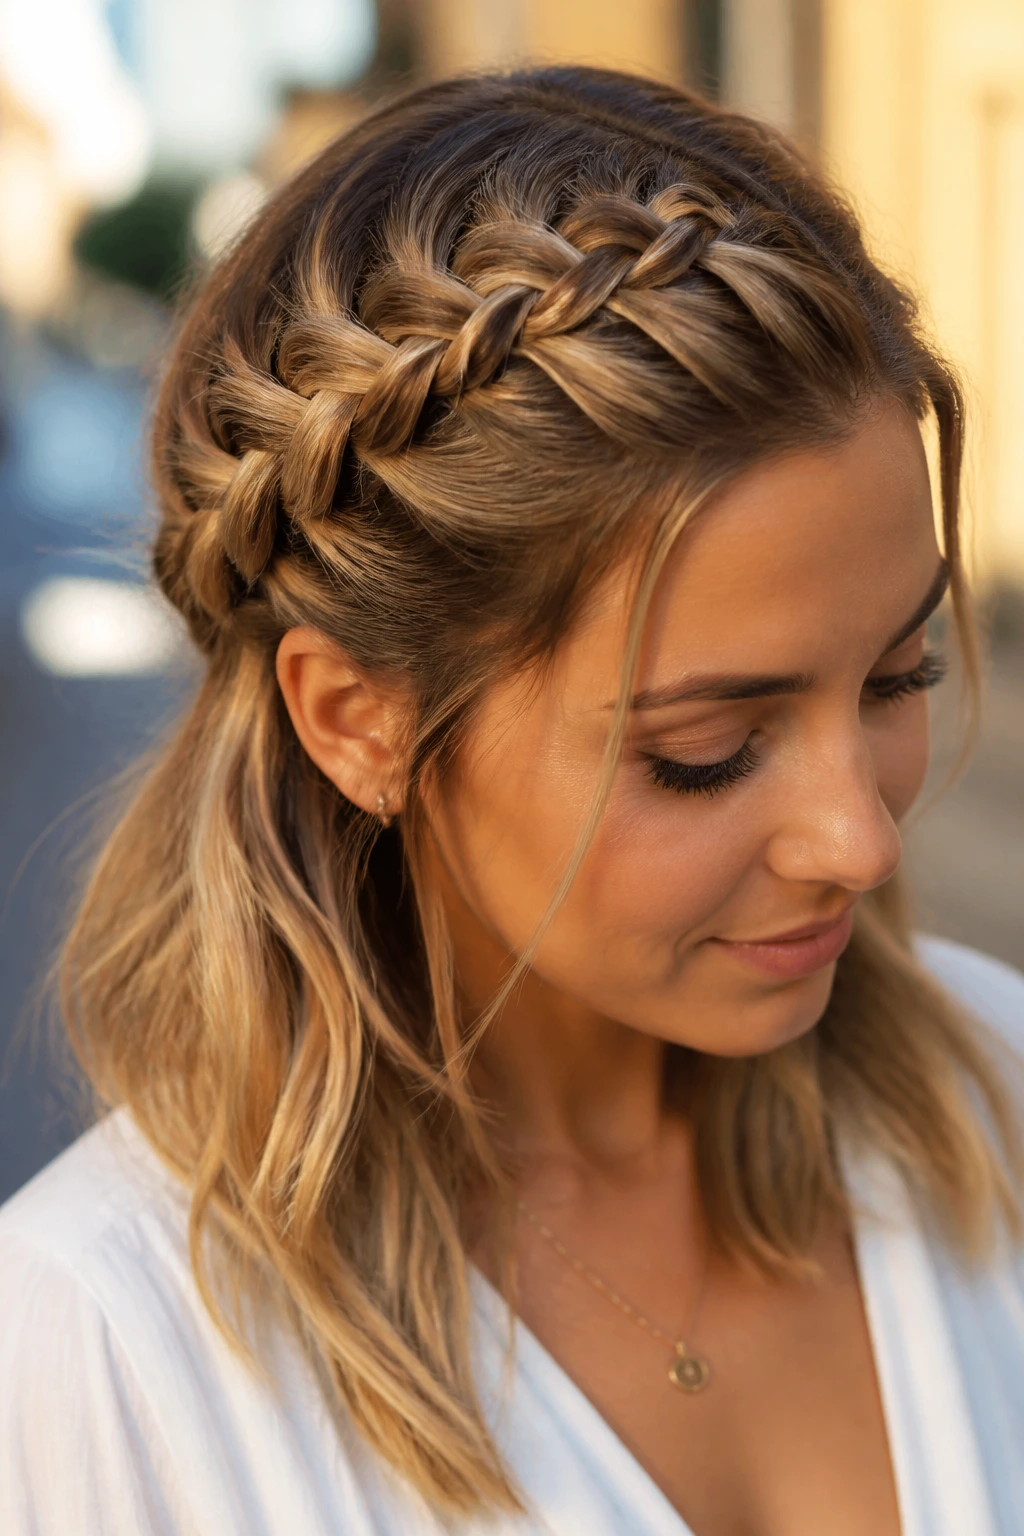
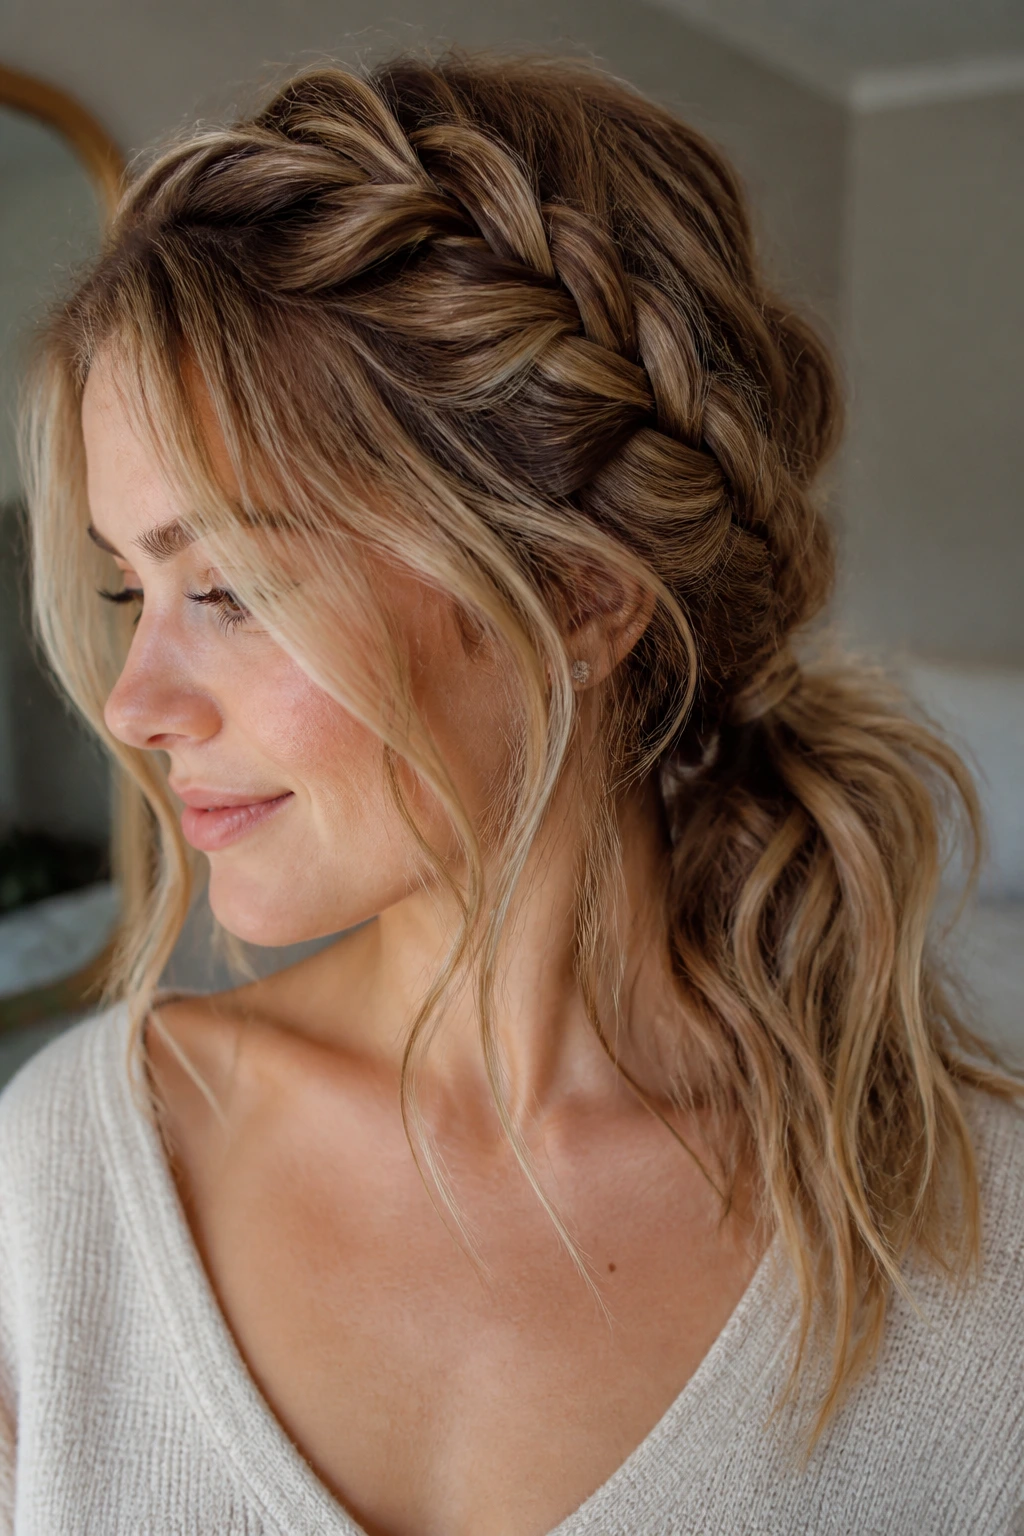
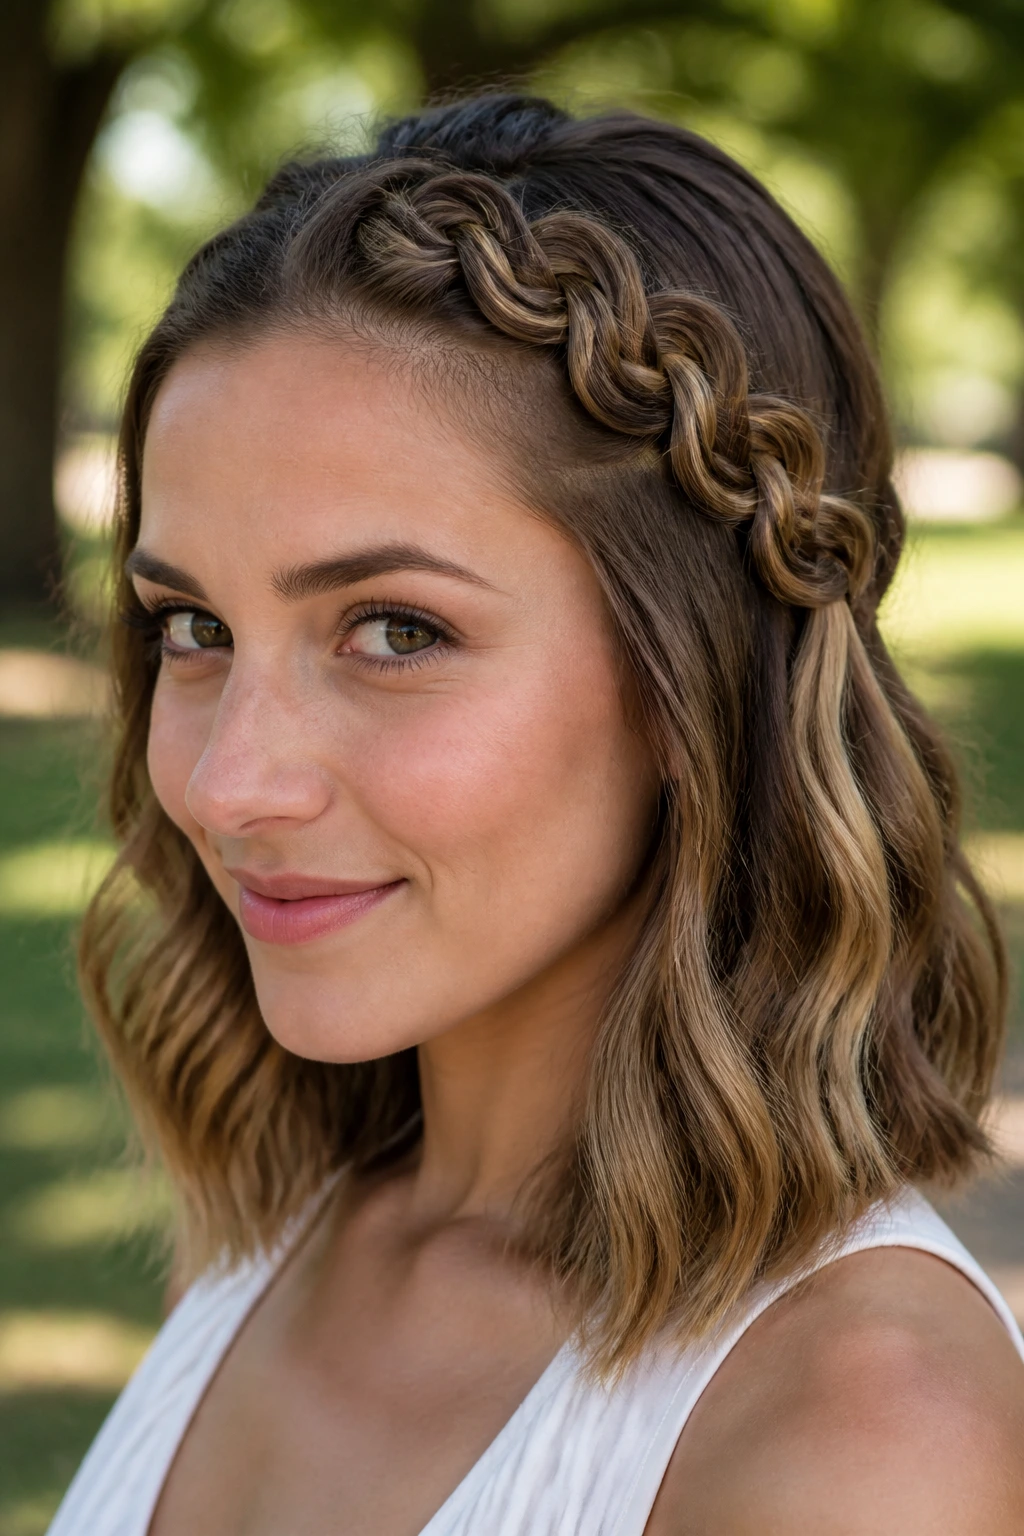
9. Rope Braid Headband
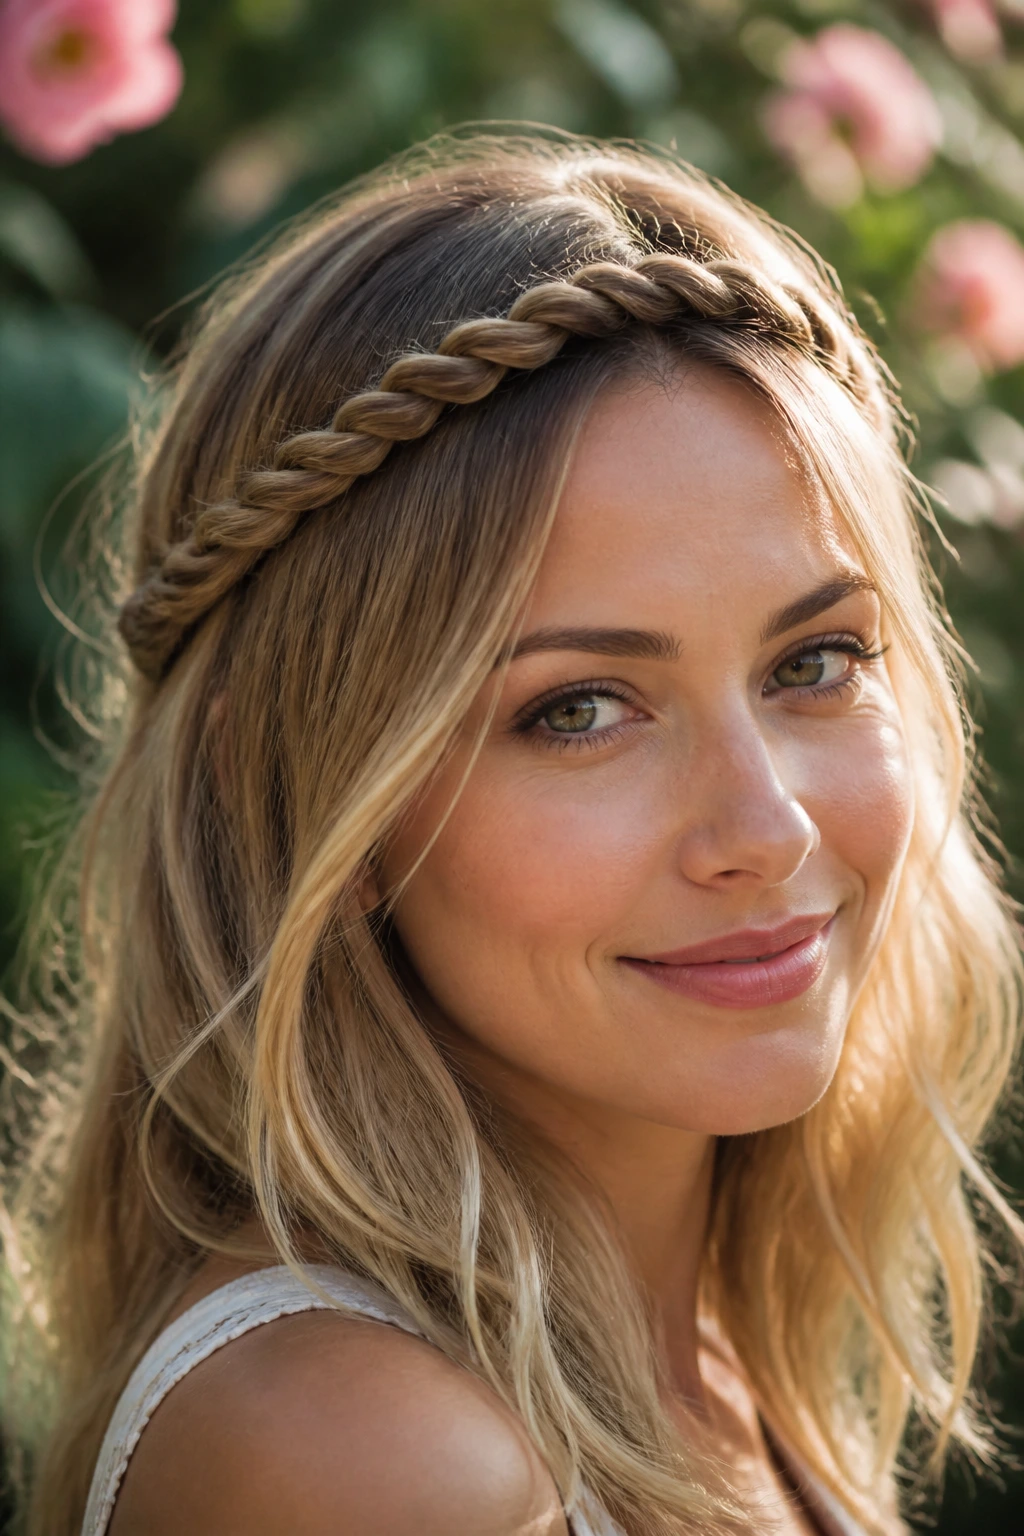
The rope braid, or twist, is often faster than a traditional three-strand weave. By twisting two sections of hair in opposite directions before crossing them over each other, you create a rope-like aesthetic. Wrapping this across your forehead as a headband is a fantastic way to frame your face. It keeps the hair secure during warmer months while looking polished and intentional.
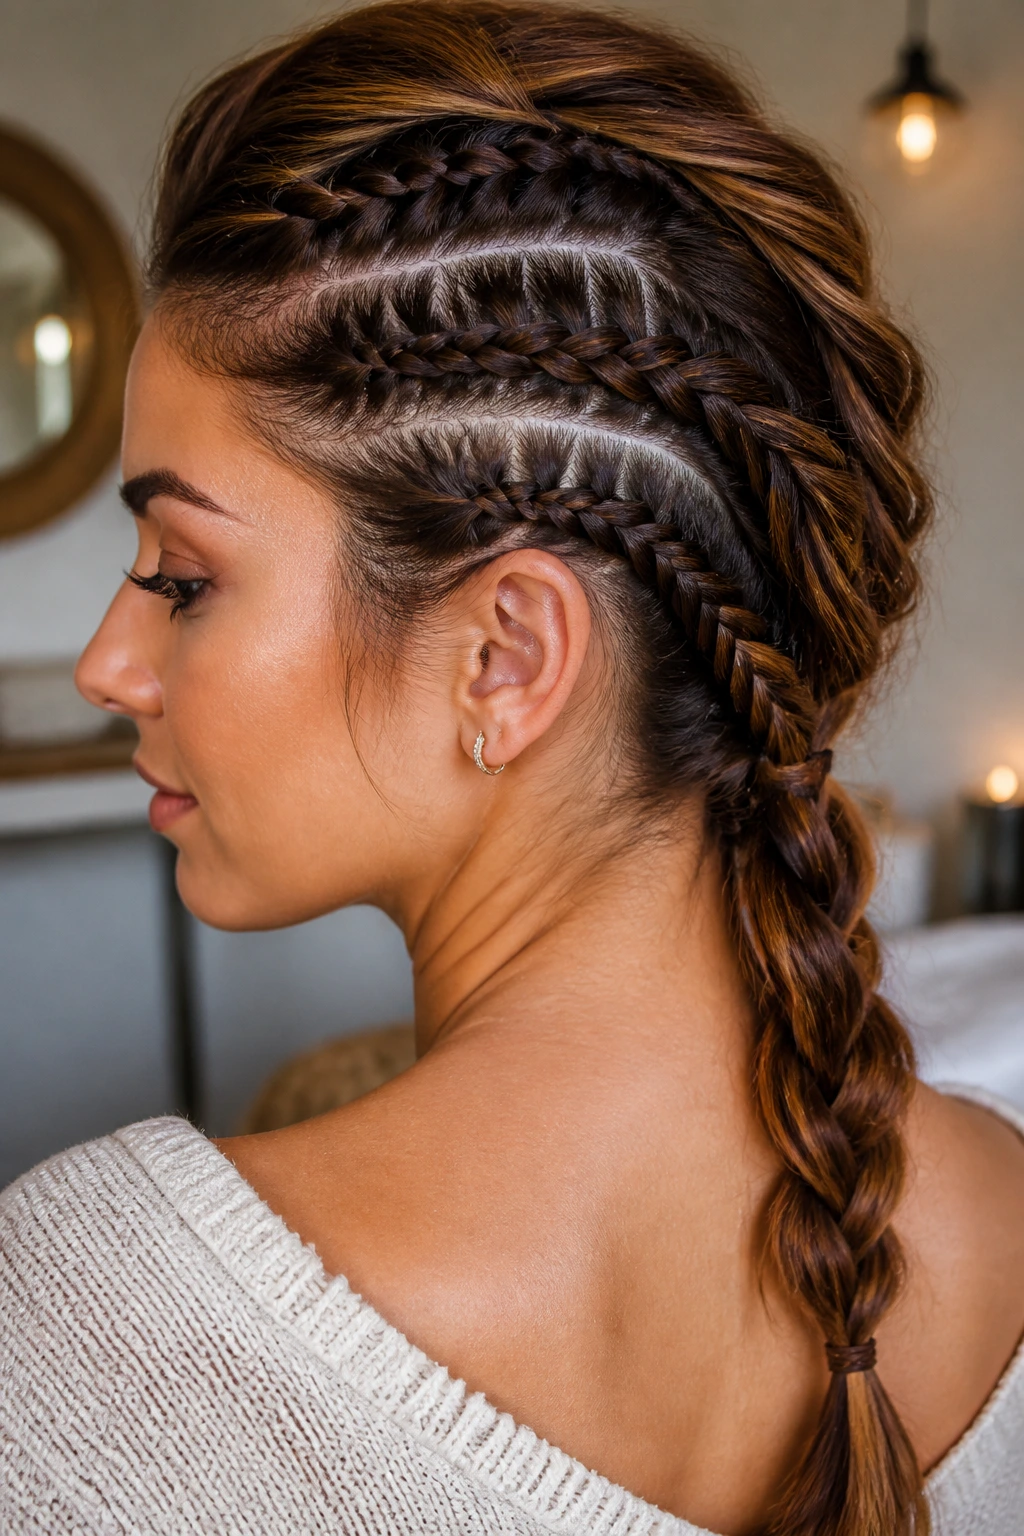
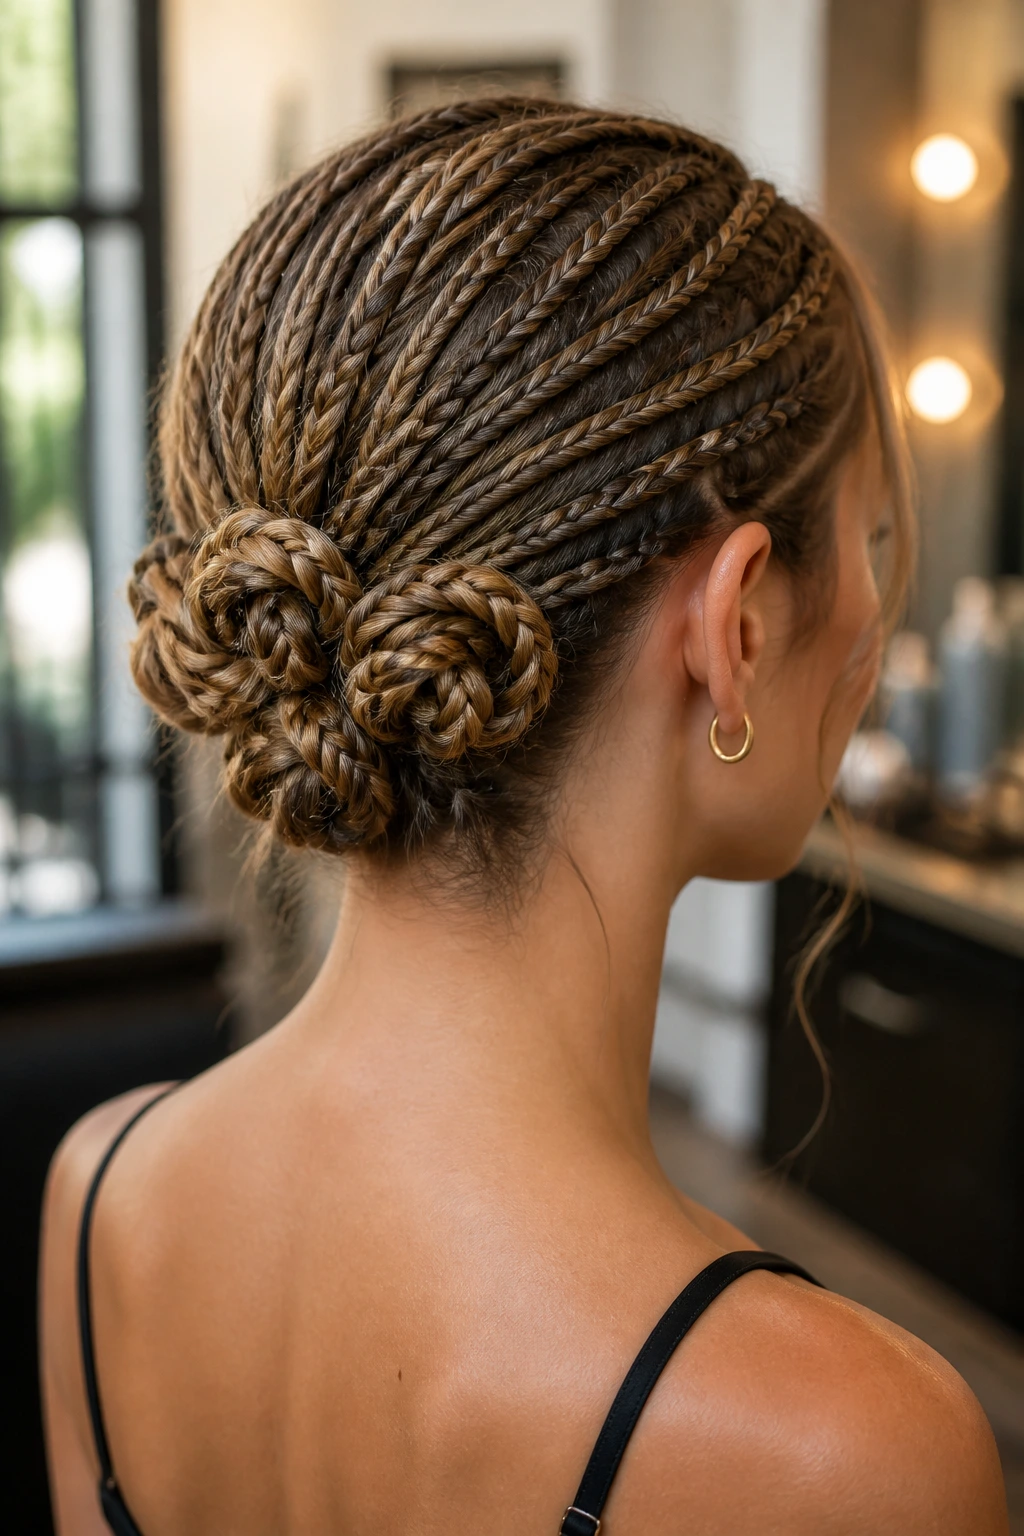
10. The Cornrow-to-Bun Hybrid
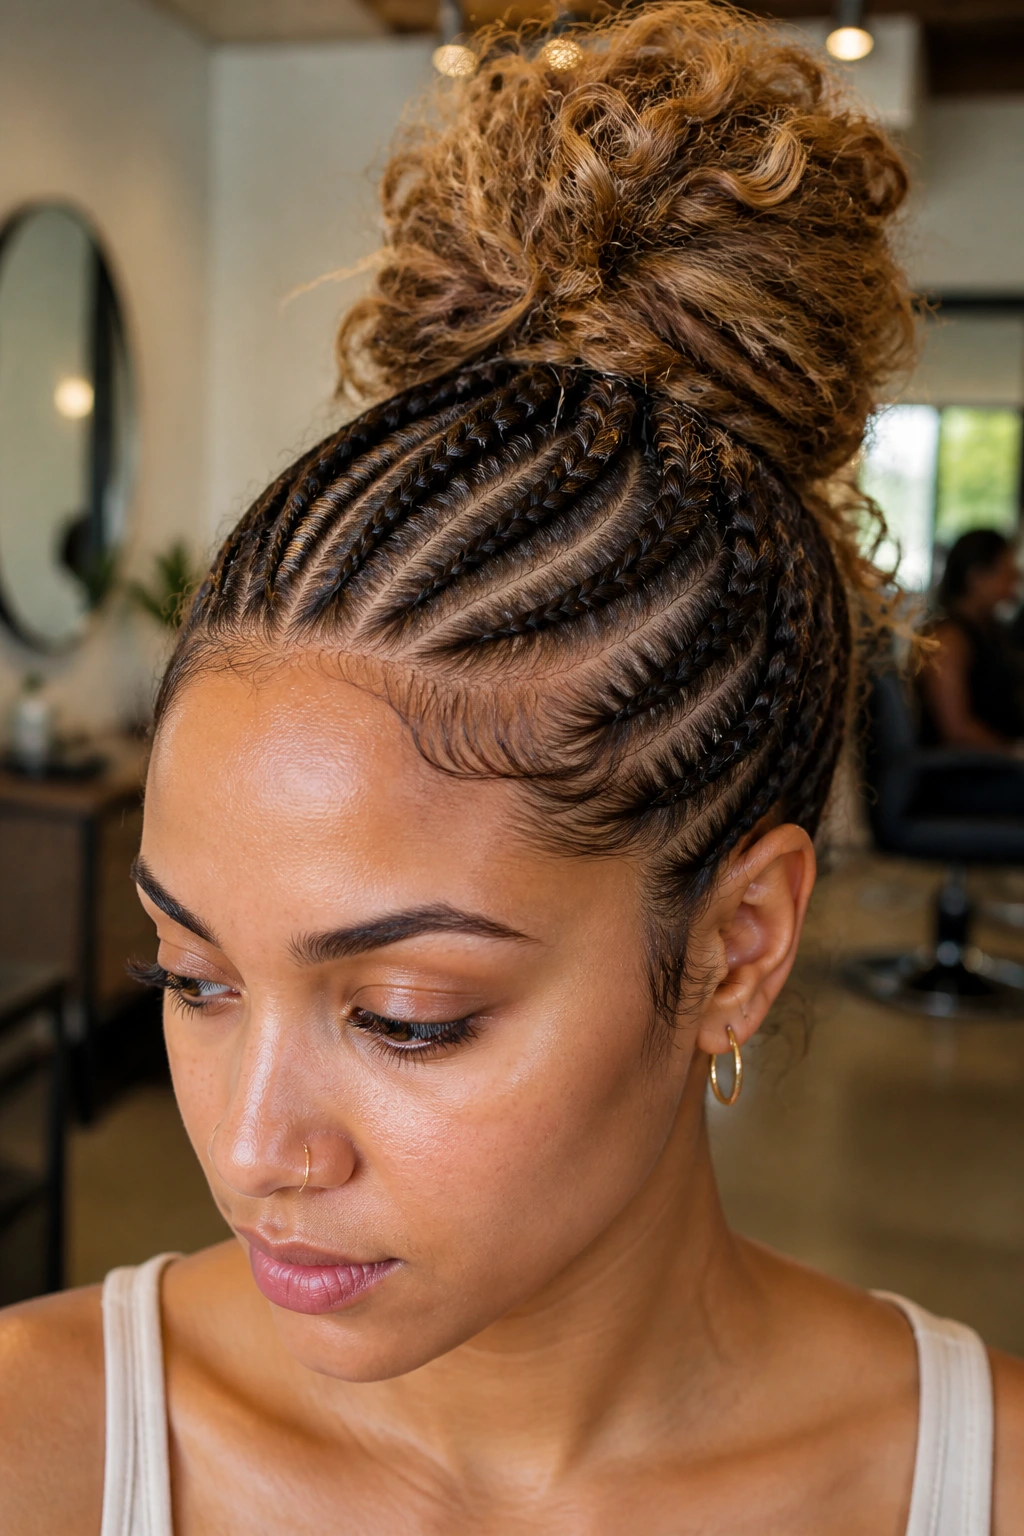
You can take a few thin cornrows starting from the front hairline and lead them into a high, textured bun. This adds a level of geometric interest to an otherwise simple updo. It works great for medium hair because you won’t have too much excess bulk to tuck into the bun, making the transition from the scalp-hugging rows to the bun seamless and clean.
11. Scarf-Integrated Braid
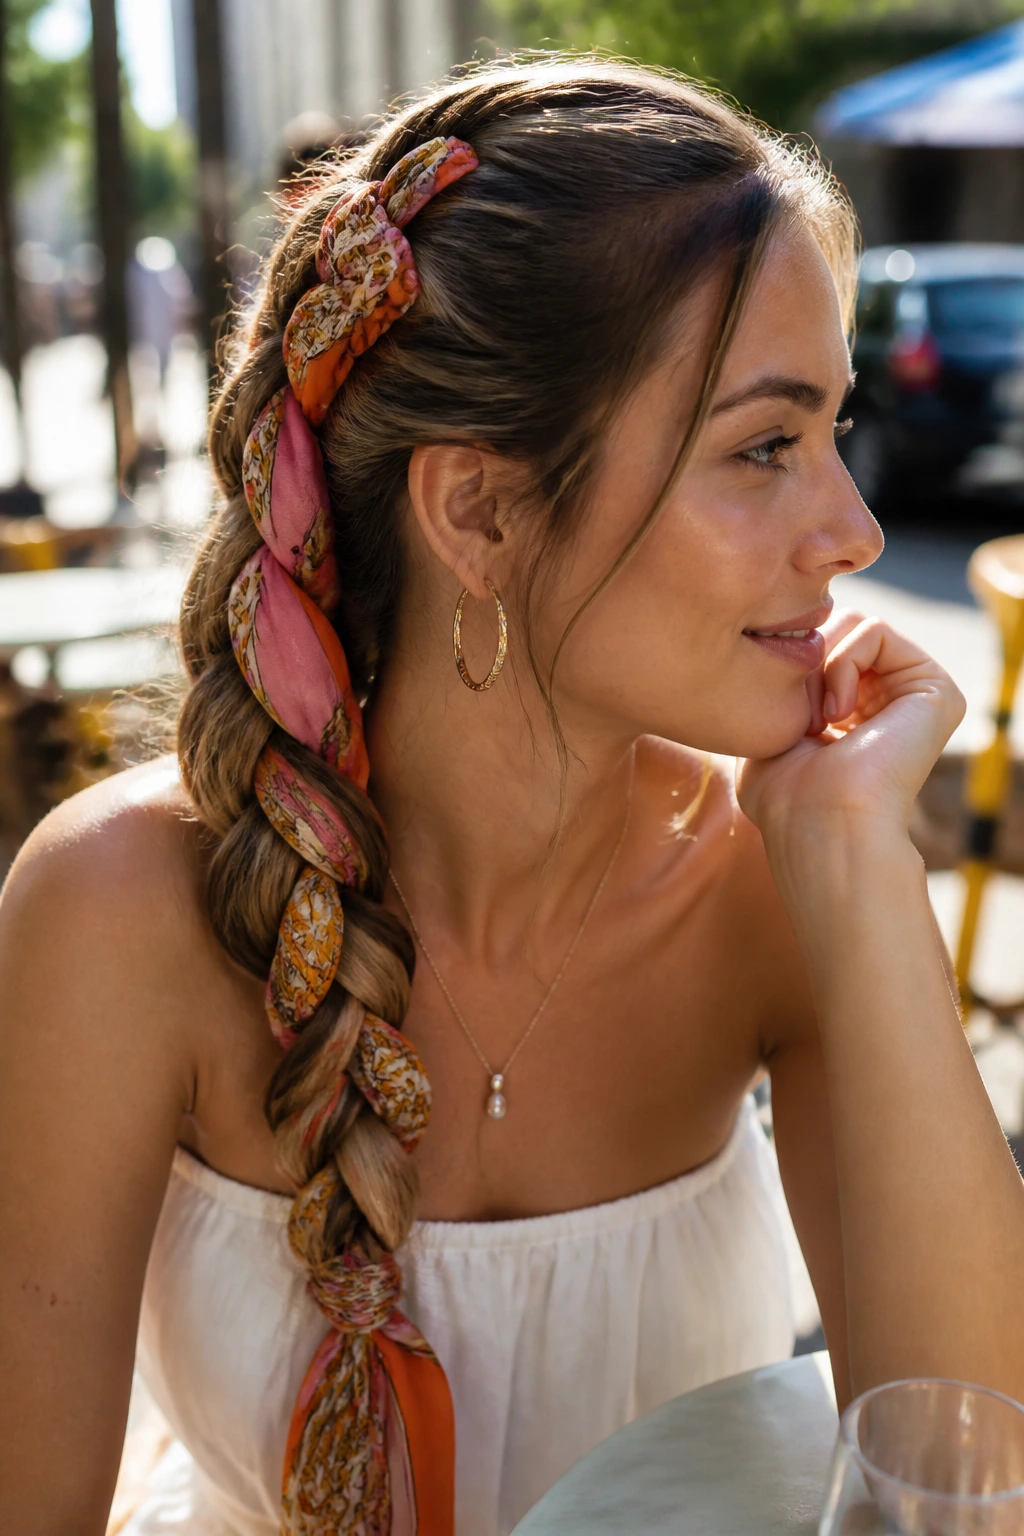
Take a silk or patterned scarf and incorporate it into your three-strand braid as if it were one of the strands. This instantly adds volume and color, which is a massive help if your hair is on the finer side. Medium hair is the ideal length for this because the braid won’t get too heavy or long, which keeps the scarf from sliding out under the weight of your hair.
12. The Five-Strand Statement Braid
If you have mastered the three-strand, it is time to move up. A five-strand braid is visually dense and looks like a piece of art. Because you are essentially weaving five strands together, the resulting braid is wider and flatter than a standard one. On medium-length hair, this looks substantial and dramatic without the hassle of managing an endless amount of tail.
13. Bubble Braid Ponytail
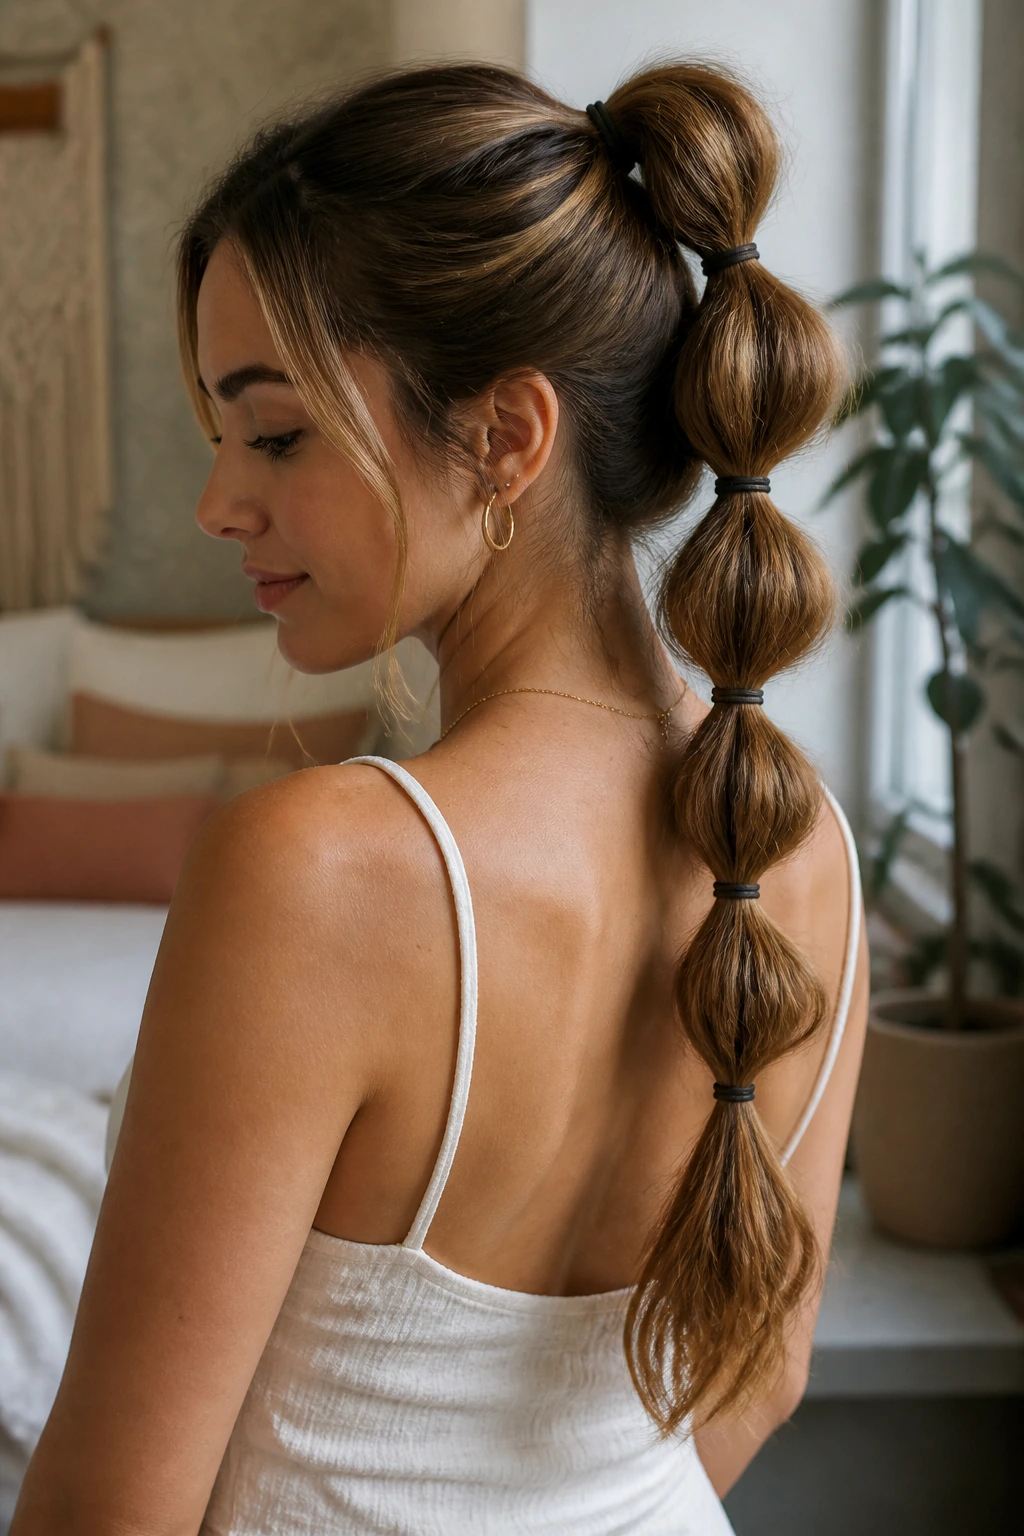
Much like the faux-hawk, this is technically a series of ponytails rather than a weave. You secure a section with an elastic, then another a few inches down, and “fluff” the hair in between to create a bubble. It is incredibly playful and works perfectly with the length of medium hair, where you can easily get four or five “bubbles” without the style becoming too long to manage.
14. Twisted Halo Braid

Instead of a standard braid around your head, use a two-strand twist. It creates a soft, ethereal look that feels very romantic. Start from one side of the head, twisting sections in as you work your way around the hairline. Pin the end securely behind your ear, hiding the tails of the hair within the twist. It is a fantastic option for a soft look that doesn’t feel overly stiff or tight.
15. The Hidden Accent Braid
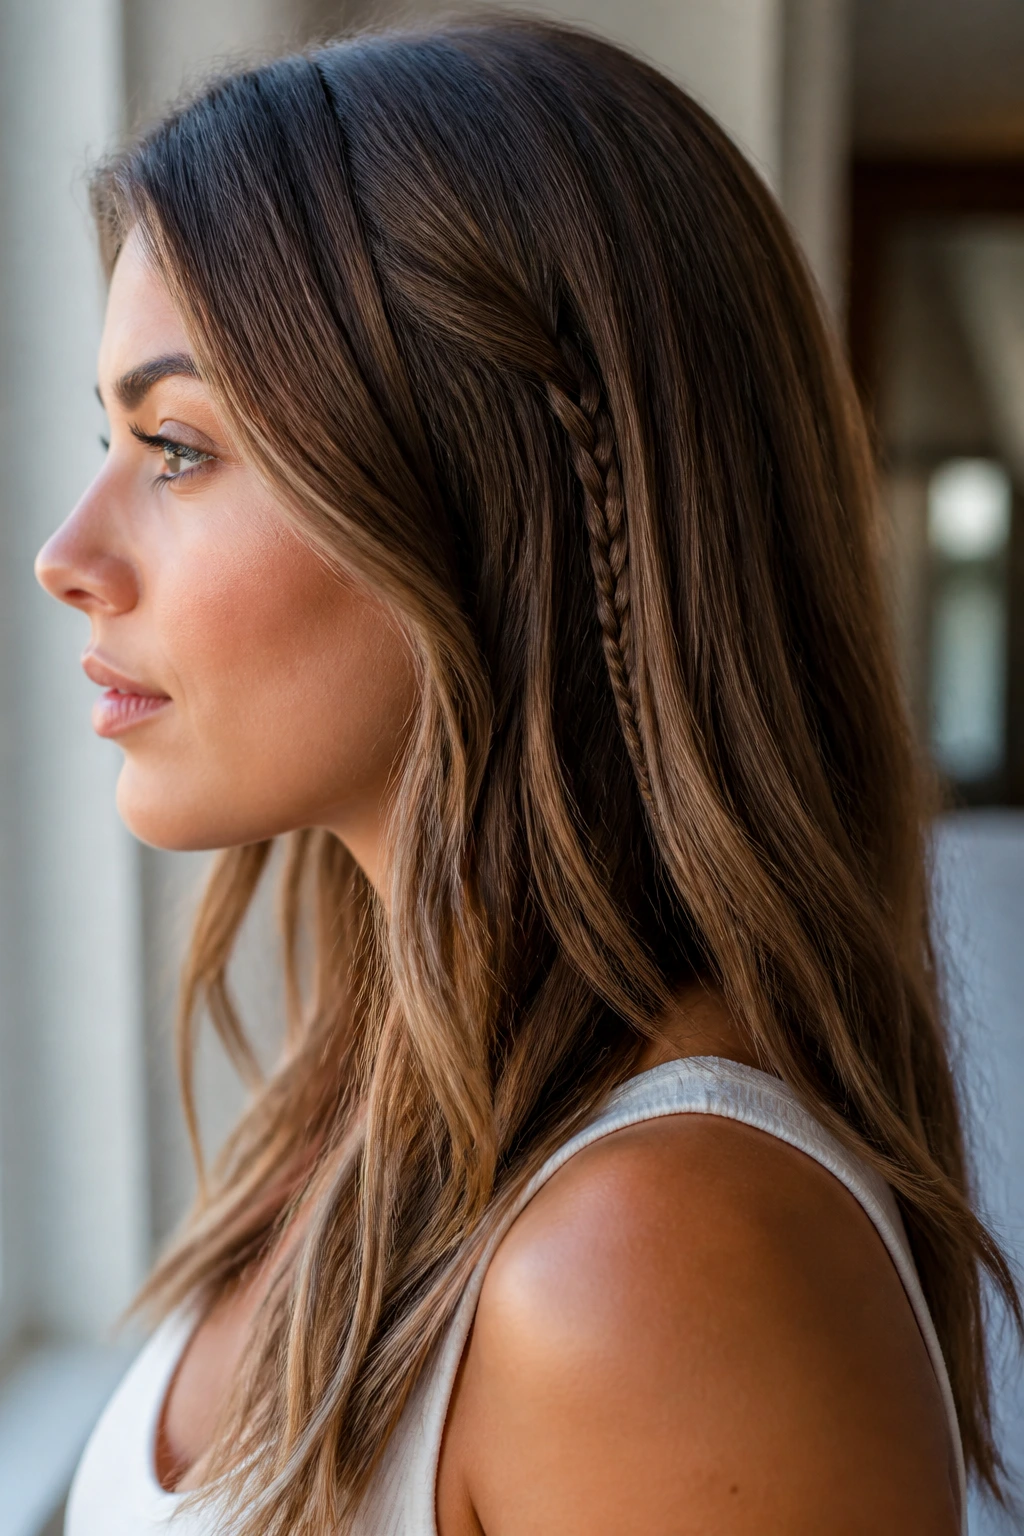
Wear your hair down and loose, but weave a single, tiny three-strand braid hidden behind the top layer of hair on one side. This adds a surprise element that catches the light and adds a bit of dimension to your haircut. It’s perfect for those who want to participate in the braid trend without committing to a full updo.
16. Double French Braid Space Buns
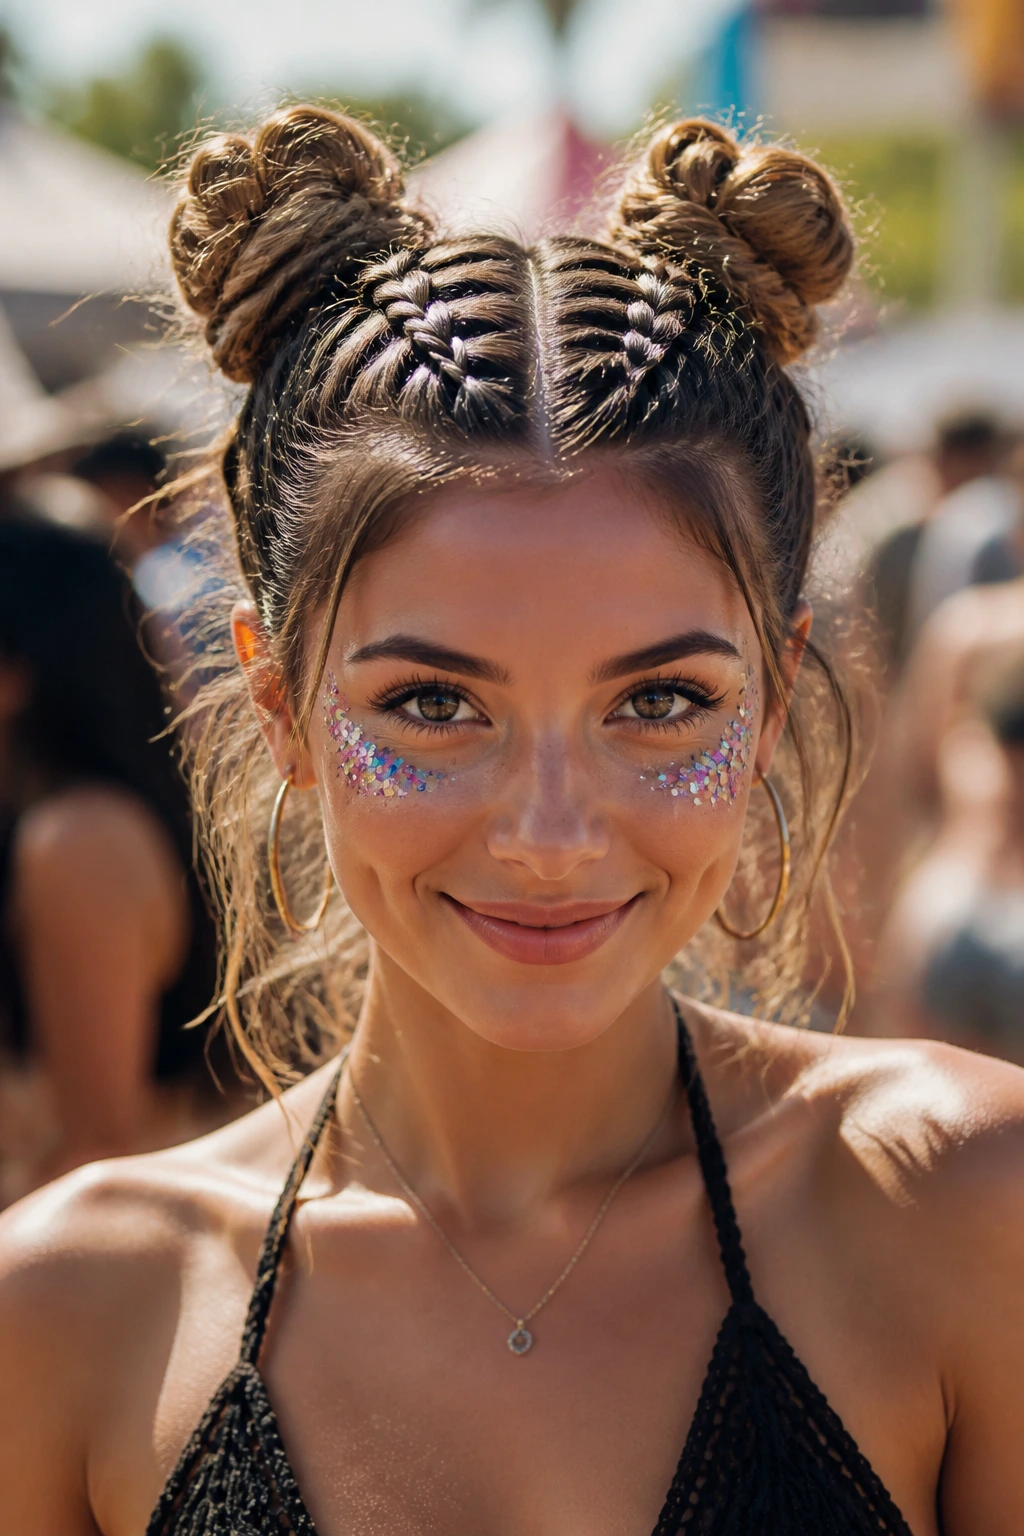
Part your hair down the center and French braid upward from the nape of the neck toward the crown. Once you reach the top, twist the remaining hair into two high, messy buns. This is a bold, fun look that is very popular for outdoor events or festivals. The medium length provides just enough hair to make the buns look cute and perky without having to fight with too much excess length.
17. The Waterfall Twist
This is the easier cousin of the waterfall braid. Instead of braiding, simply twist two small sections together, incorporating a new strand of hair into the twist with every cross-over. It looks slightly softer than the traditional waterfall braid and is arguably faster to execute. It’s a great way to keep your hair out of your eyes while still showing off your length.
18. Braided Chignon with a Clip
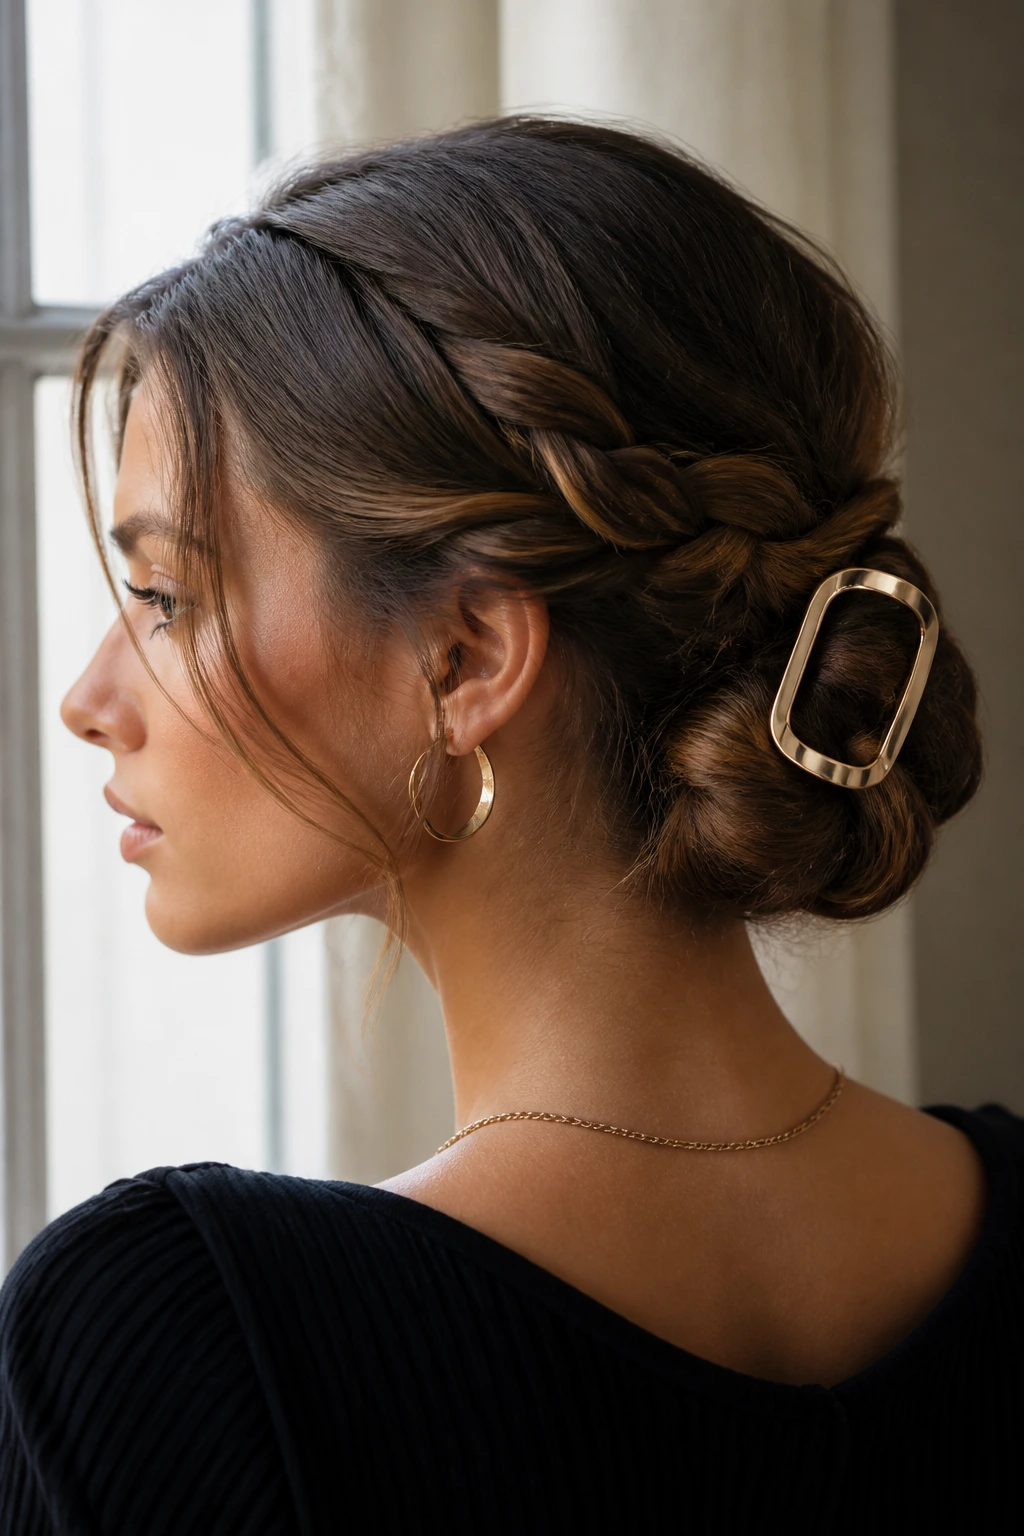
Create a simple, low braid and tuck it into a neat chignon, then secure it with a large, decorative metal clip. The key to this look is the accessory. The contrast between the softness of the braid and the sharp, clean lines of a metallic clip creates a modern, architectural finish. Medium hair is ideal for this because the chignon will sit close to the neck, making it feel very balanced and elegant.
19. The Snake Braid
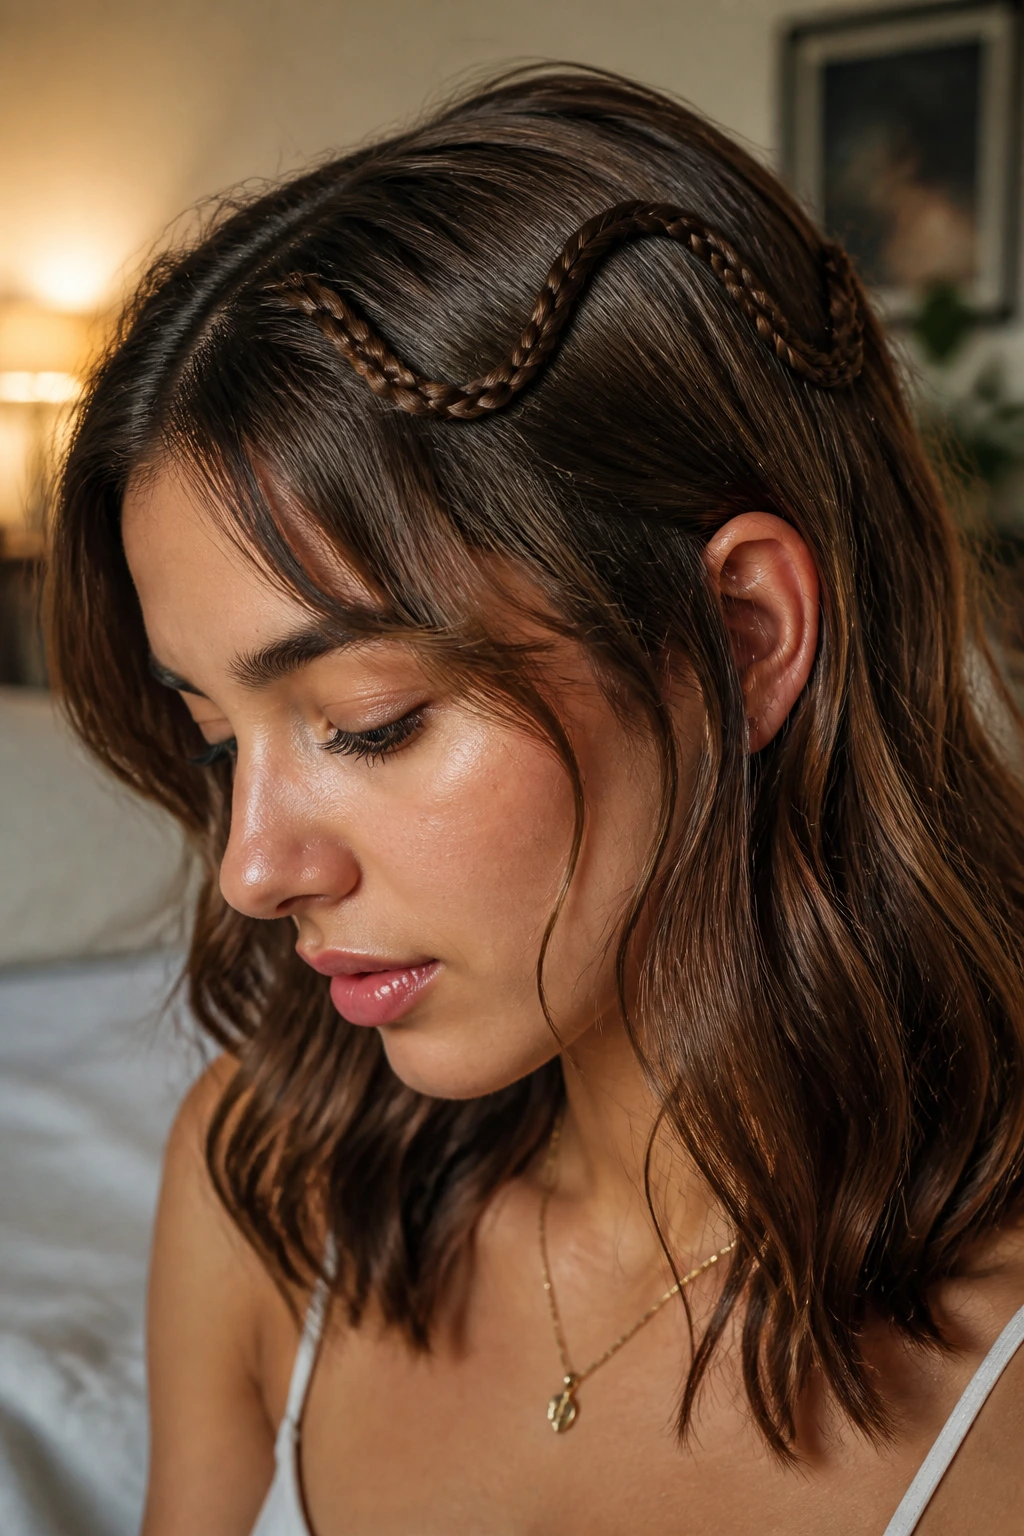
This is a fun technique where you take a single thin braid and “wobble” it back and forth across your head, securing it with bobby pins. It creates a serpent-like appearance that looks much harder than it actually is. It’s a great way to add interest to a plain hairstyle, especially if you have highlights that make the pattern of the braid really stand out.
20. The Mohawk-Inspired Dutch Braid
Take a thick section down the center of your head and Dutch braid it, while leaving the hair on the sides loose or pinned back. This creates a bold, striking shape that looks almost like a faux-undercut. Because your hair isn’t excessively long, the braid will sit firmly on the top of the head without dragging backward, keeping the volume exactly where you want it.
21. Braided Headband with Loose Waves

For this look, create a thin, tight Dutch braid along your hairline. Leave the rest of your hair loose and curled into soft, beachy waves. This look is perfect for those who want a practical headband style but also want to keep the softness of an open hairstyle. It is a very balanced look, combining the structure of the scalp braid with the movement of loose, wavy ends.
22. The Triple-Threat Side Braid
Divide your hair into three horizontal sections on one side of your head. Braid each one tightly against the scalp before bringing all three braids together into a single, loose braid at the back. It’s an intricate look that screams “attention to detail.” Using a little bit of pomade on your fingers while braiding will help keep those tiny sections from escaping, ensuring a clean, polished result.
23. Fishtail Crown
Similar to the Dutch crown, but using the fishtail technique. This one takes a bit more patience, but the result is a much tighter, more refined pattern. It looks fantastic for weddings or dressier occasions. Because it’s a fishtail, the “crown” will have a slightly thinner profile, which can be very flattering if you don’t want your head to look too bulky with hair.
24. Messy Braided Ponytail
Braid your hair loosely, but don’t worry about the ends looking perfect. Leave some wispy strands around your face. Pull the braid into a low ponytail and let it hang. It’s the ultimate “I woke up like this” look. I find that this style works best with a bit of dry texture spray to add volume, as it prevents the braid from looking too thin or lifeless.
25. The Over-the-Top Lace Braid
A lace braid is essentially a French braid where you only add hair from one side. This is perfect for framing the face. Run it diagonally across the front of your head for a soft, asymmetrical look that feels very contemporary. On medium hair, this style draws attention to the face and works beautifully with layers, as the shorter pieces can naturally pop out to add softness.
26. Braided Knot Updo
Create a series of small, individual braids and then tie them together into a series of knots at the back of the head. It’s an abstract, sculptural updo that looks like modern art. This is a style that rewards creativity—you can tie the knots as tight or as loose as you want. Because you aren’t doing one long, continuous braid, the medium length is actually an advantage here, making it easier to maneuver the shorter sections into the knot structure.
27. The Side-Part Dutch Braid

Part your hair deep to one side and braid the heavier side into a Dutch braid that disappears behind your ear. This is an incredibly sophisticated way to manage hair that tends to fall into your face. It looks like you have put a lot of work into it, but it’s essentially just a single scalp braid that keeps your look streamlined and clean.
28. The Infinity Braid
The infinity braid is named for the “figure-eight” motion you use to cross the strands. It creates a beautiful, continuous chain-link effect. It is a bit more advanced, but once you get the hang of it, it is incredibly satisfying. On medium hair, this braid has a nice, sturdy presence. It won’t get tangled easily, and it stays quite tight, which makes it perfect for a long day when you need your hair to stay pristine from morning until night.
Choosing the Right Tools and Products
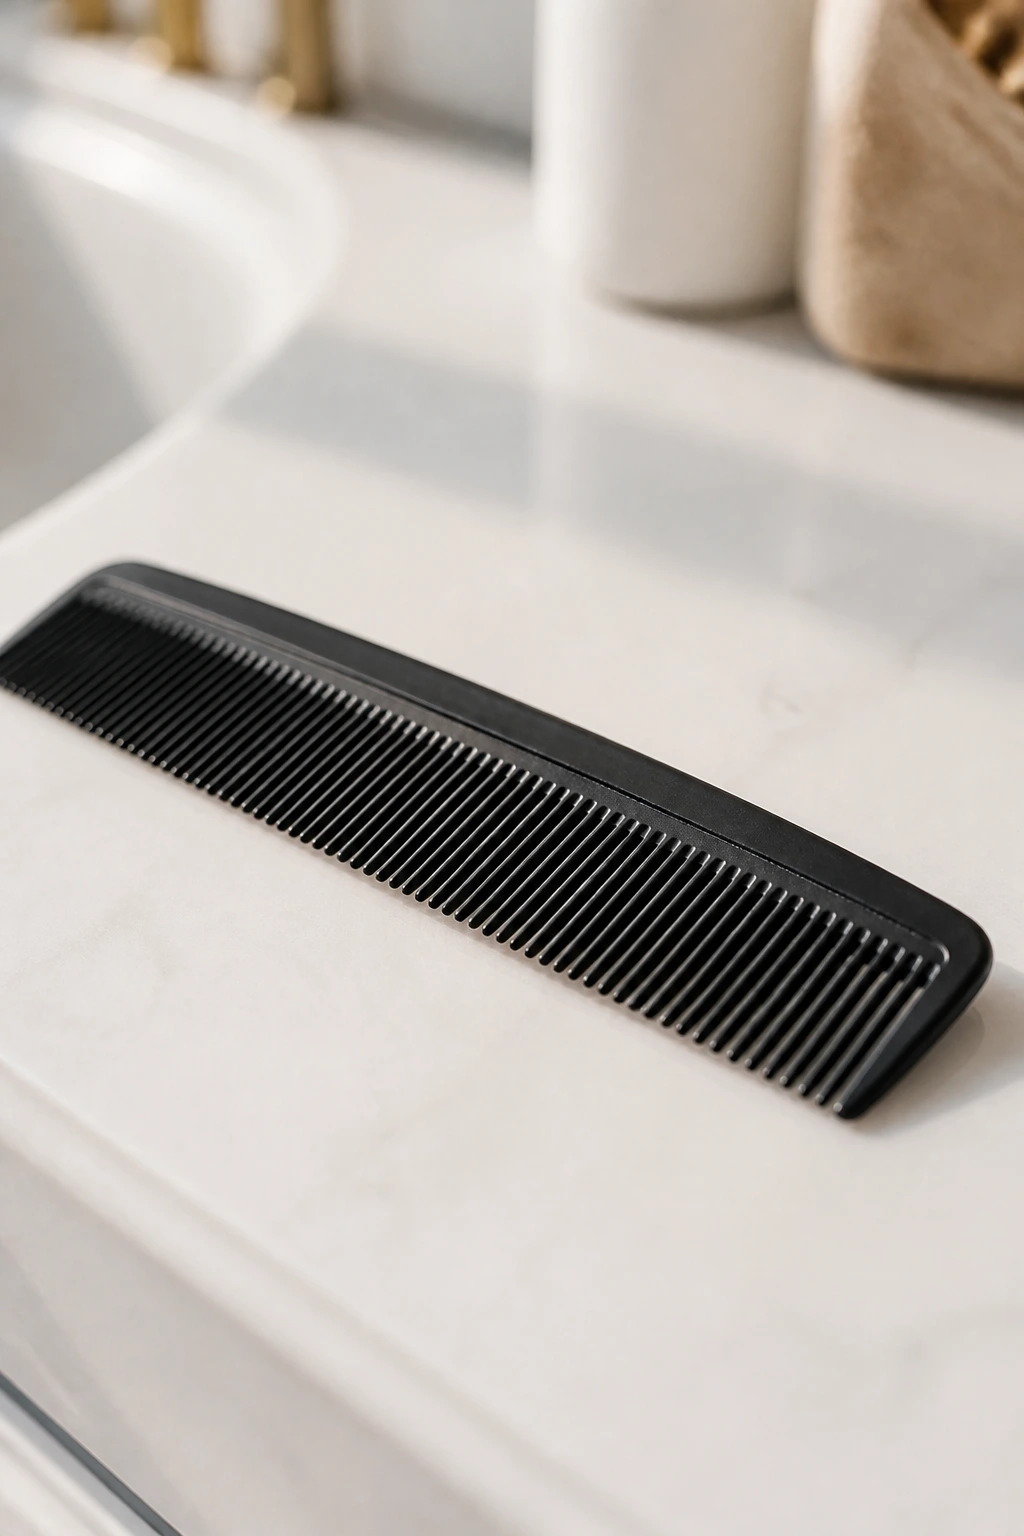
To pull off these looks, you need to rely on more than just your fingers. A good fine-tooth comb is essential for creating clean partings. Without a straight part, a braid can quickly look messy. I also recommend keeping a stash of high-quality clear elastic bands that won’t snap under the tension of your hair. They are far less distracting than thick, colored elastics.
When it comes to products, a light-hold hairspray is your best friend. You want something that provides structure without making your hair feel like it’s glued in place. For those with slippery or fine hair, a dry texture spray is non-negotiable. It adds that essential “grip” that makes the hair behave when you are pulling and weaving it. If you have thicker, coarser hair, a touch of styling cream can help smooth out flyaways during the braiding process.
Handling Common Braid Pitfalls
The most common mistake I see is braiding too tightly from the start. You might feel like you need a death grip on your strands to get the braid to stay, but this often leads to a flat, lifeless look. Instead, try to keep a consistent, moderate tension while you work, and then go back and “pancake” the braid—this is where you gently pull on the loops of the braid to fluff them out. This one technique is the difference between a braid that looks thin and flat and one that looks full and professional.
Another issue is dealing with layers. If you have a layered cut, your ends might pop out of the braid halfway through. Don’t panic. Simply use a tiny dab of styling wax on those ends before you tuck them back into the weave, or use a small bobby pin to anchor the rogue ends in place. Once you are done, a light mist of hairspray will lock everything down, ensuring that those layers stay tucked in for as long as you need them to.
Final Thoughts
At the end of the day, braiding is a skill that improves with repetition. You might not get a perfect five-strand braid on your first attempt, and that is perfectly okay. The goal is to get comfortable with the motion of your hands and the texture of your hair. Once the technique becomes muscle memory, you will find yourself doing these styles without even thinking about it.
Don’t be afraid to mix and match these techniques. You can take the base of a Dutch crown and finish it with a fishtail tail, or swap out a standard three-strand braid for a rope twist in any of the styles mentioned. The best braids are the ones that reflect your personal style and make you feel confident. So pick one, grab your brush and a few elastics, and start experimenting. Your hair is the perfect length to have a little fun.