Braided hairstyles have a magnetic quality—they offer structure, control, and a distinct aesthetic that feels intentional without needing hours in front of a mirror. When you start adding metal cuffs, however, the entire look shifts. You move away from the traditional, soft-focus boho vibe and into something sharper, more modern, and undeniably high-fashion. Adding gold or silver accents to your hair isn’t just about decoration; it’s about treating your strands like a canvas for hardware, creating a look that’s as much about industrial design as it is about texture.
If you have straight hair, you might think braids aren’t for you, or that they’ll just slip out the moment you step outside. That is a myth that needs busting. Straight hair is actually the perfect base for precision work because it doesn’t fight the braid. You can get crisp, clean lines that aren’t obscured by frizz or natural volume. The trick is preparation—a bit of grit, some intelligent product use, and the right approach to sectioning can turn even the sleekest, most slippery hair into a stable foundation for a look that commands attention.
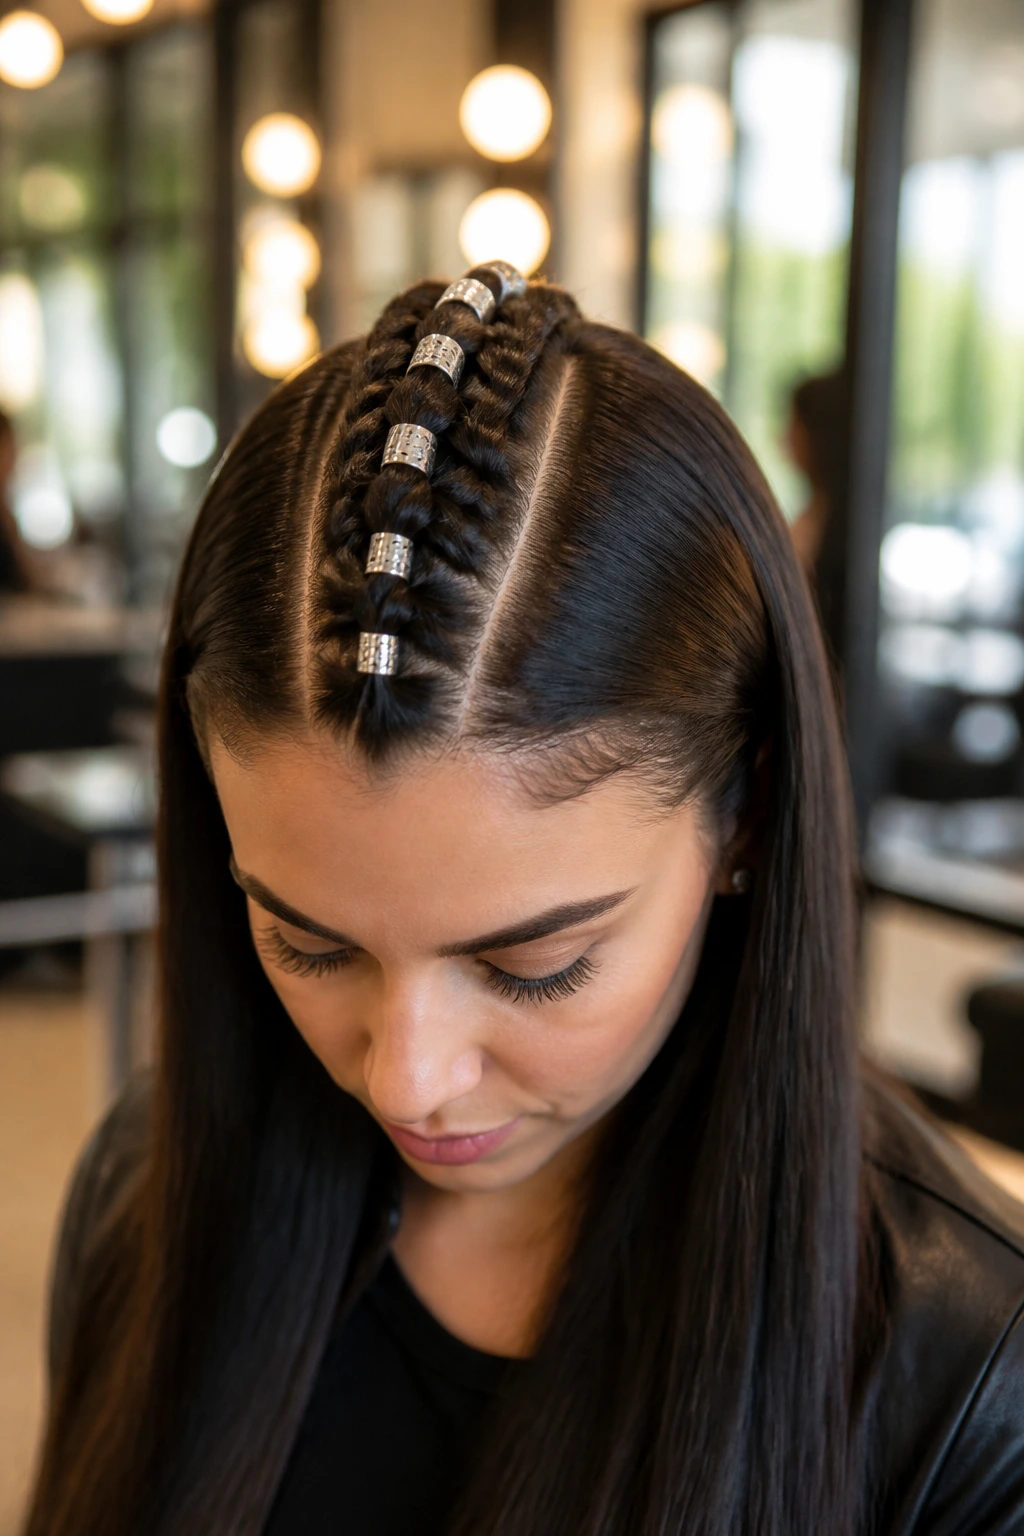
1. Classic Three-Strand Parted Braids
You should always start with the basics before you attempt to add jewelry. A clean center part creates symmetry, which acts as a guide for your cuffs. Take a one-inch section of hair near your hairline and begin a tight three-strand braid, working it toward the crown of your head. Secure it with a small, clear elastic that matches your hair color, then space your cuffs out every inch along the length of the braid.
Why It Works for Straight Hair
Straight hair tends to be slippery, which makes intricate plaits like fishtails or Dutch braids harder to maintain without slipping. A simple three-strand braid is the most secure weave you can rely on. It’s tight, reliable, and provides a solid base for metal cuffs to clamp onto without sliding down.
Quick Styling Tips
- Use a texturizing spray before you start to give the strands enough “grip” to stay in place.
- Opt for lightweight aluminum cuffs rather than heavy steel to prevent the braid from sagging.
- Space the cuffs inconsistently—placing them at different intervals adds an element of calculated chaos.
2. The Asymmetrical Side-Swept Plait
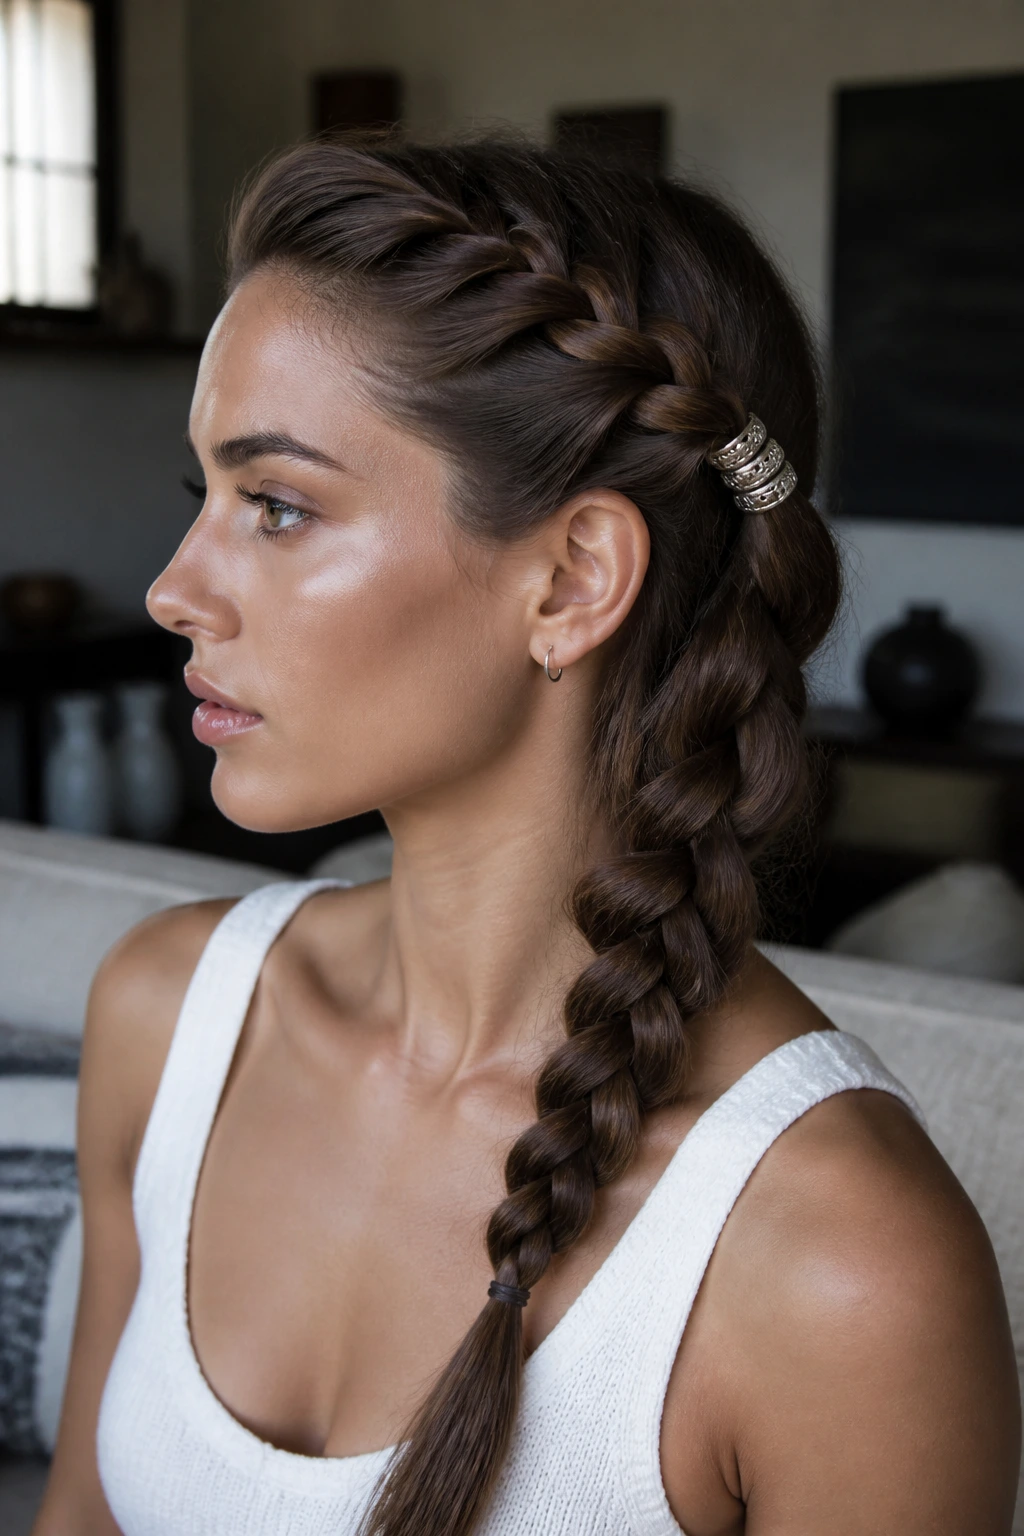
Sweep all your hair to one side and divide it into three equal sections to create a single, thick, side-swept braid. The key here is the tension; you want the braid to be tight against your scalp as it travels across your temple, then relaxed as it falls over your shoulder. Once the plait is secure, add a cluster of three small silver cuffs right at the bend where your hair transitions from scalp to loose braid.
The Visual Impact
By pulling everything to one side, you create a dramatic silhouette. The metal cuffs catch the light against the sleek, straight texture of your hair, drawing the eye toward your face. It is an effective way to highlight your profile without requiring elaborate styling tools.
How to Get the Look
- Prep hair with a light-hold pomade to smooth down flyaways.
- Section off the top layer and braid it diagonally across the back of the head.
- Integrate the rest of your hair into a single low braid.
- Snap the cuffs onto the underside of the braid links for a cleaner look.
3. Double Dutch Braids with Spaced Accents
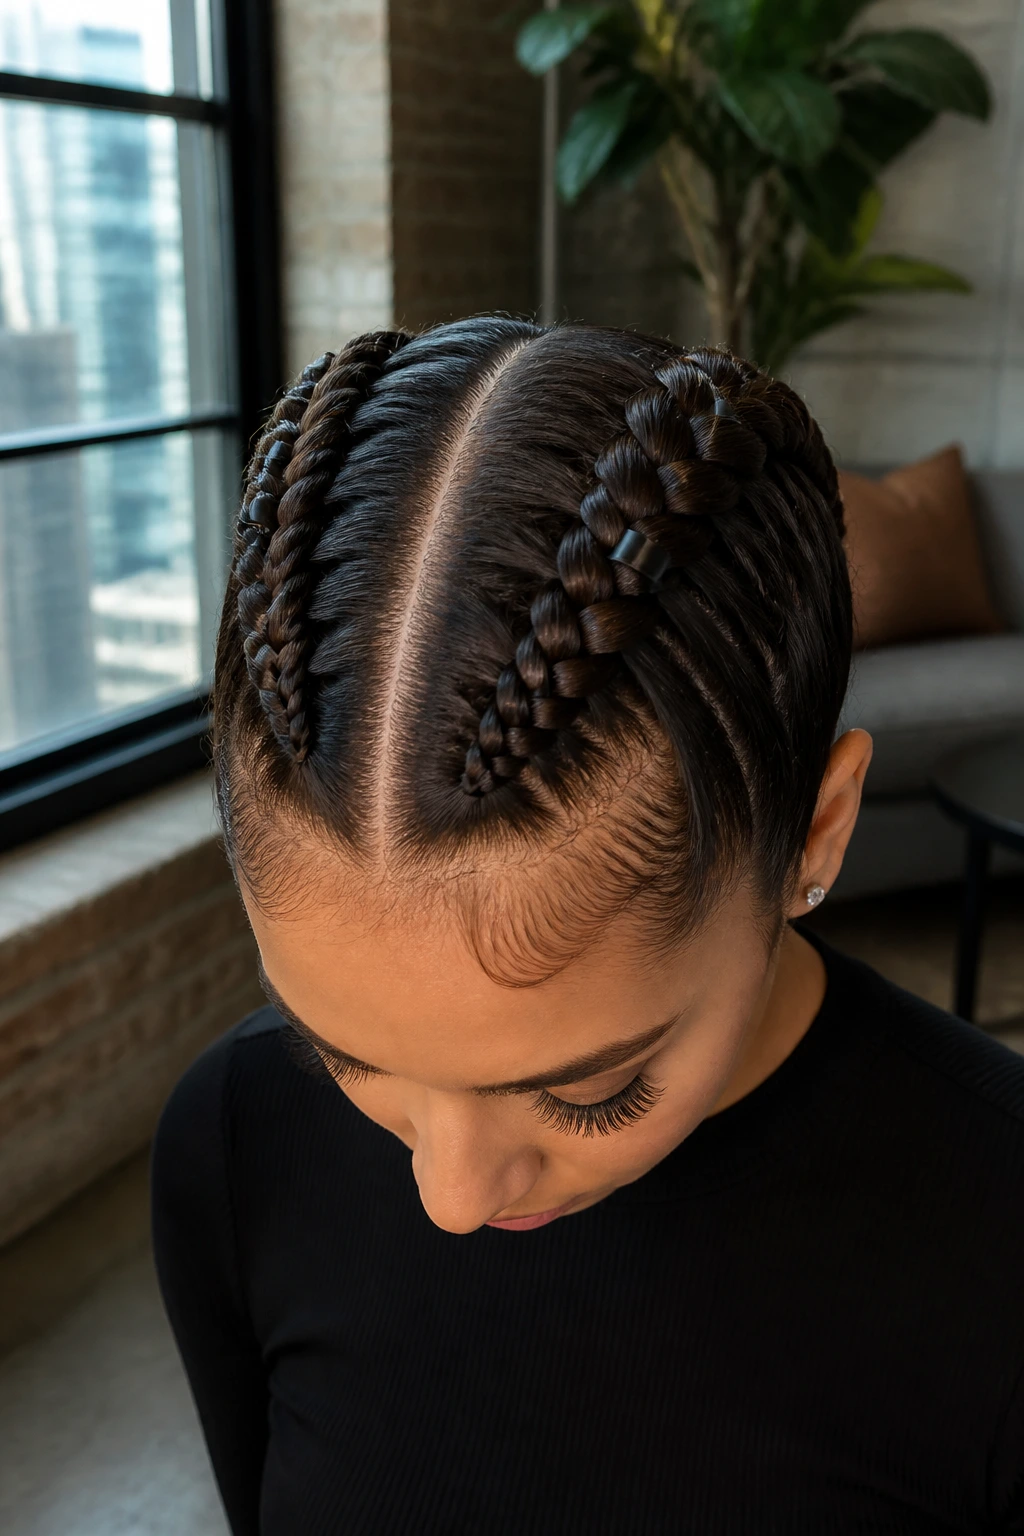
Dutch braids, where you cross the strands under instead of over, create a raised 3D effect that sits perfectly on top of straight hair. Part your hair down the middle and create two symmetrical Dutch braids that run from your forehead to the nape of your neck. Use matte black or dark gunmetal cuffs for this style; they blend seamlessly into the hair while providing a subtle, edgy contrast.
Why This Technique Matters
Since straight hair doesn’t have the natural bulk of curly hair, Dutch braids will look flatter than you might expect. By physically pulling the edges of the braid outward—a technique often called “pancaking”—you give the braid a thicker, more dimensional appearance before adding your cuffs.
Common Pitfalls
- Over-pancaking: If you pull too hard, the braid will lose its tension and your cuffs will slide off.
- Inconsistent sizing: Keep the segments uniform to ensure your metal jewelry sits at the same depth on both sides of your head.
- Elastic choice: Use mini bands that are clear or color-matched to your hair to keep the focus on the metallic accents.
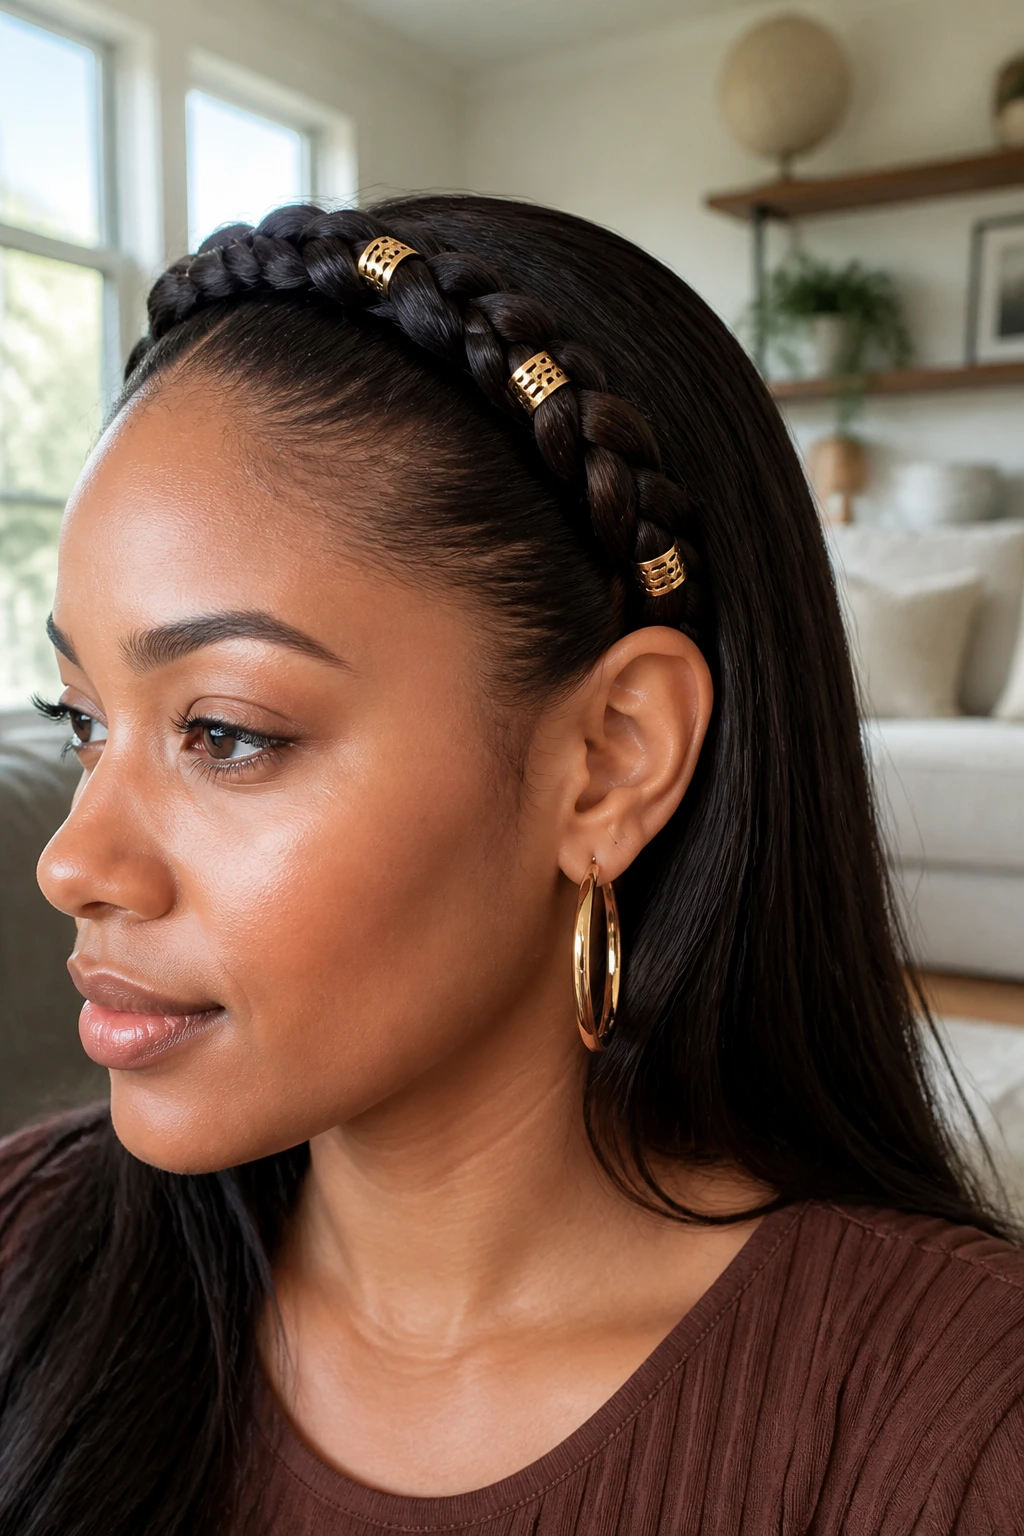
4. Half-Up Crown Braid
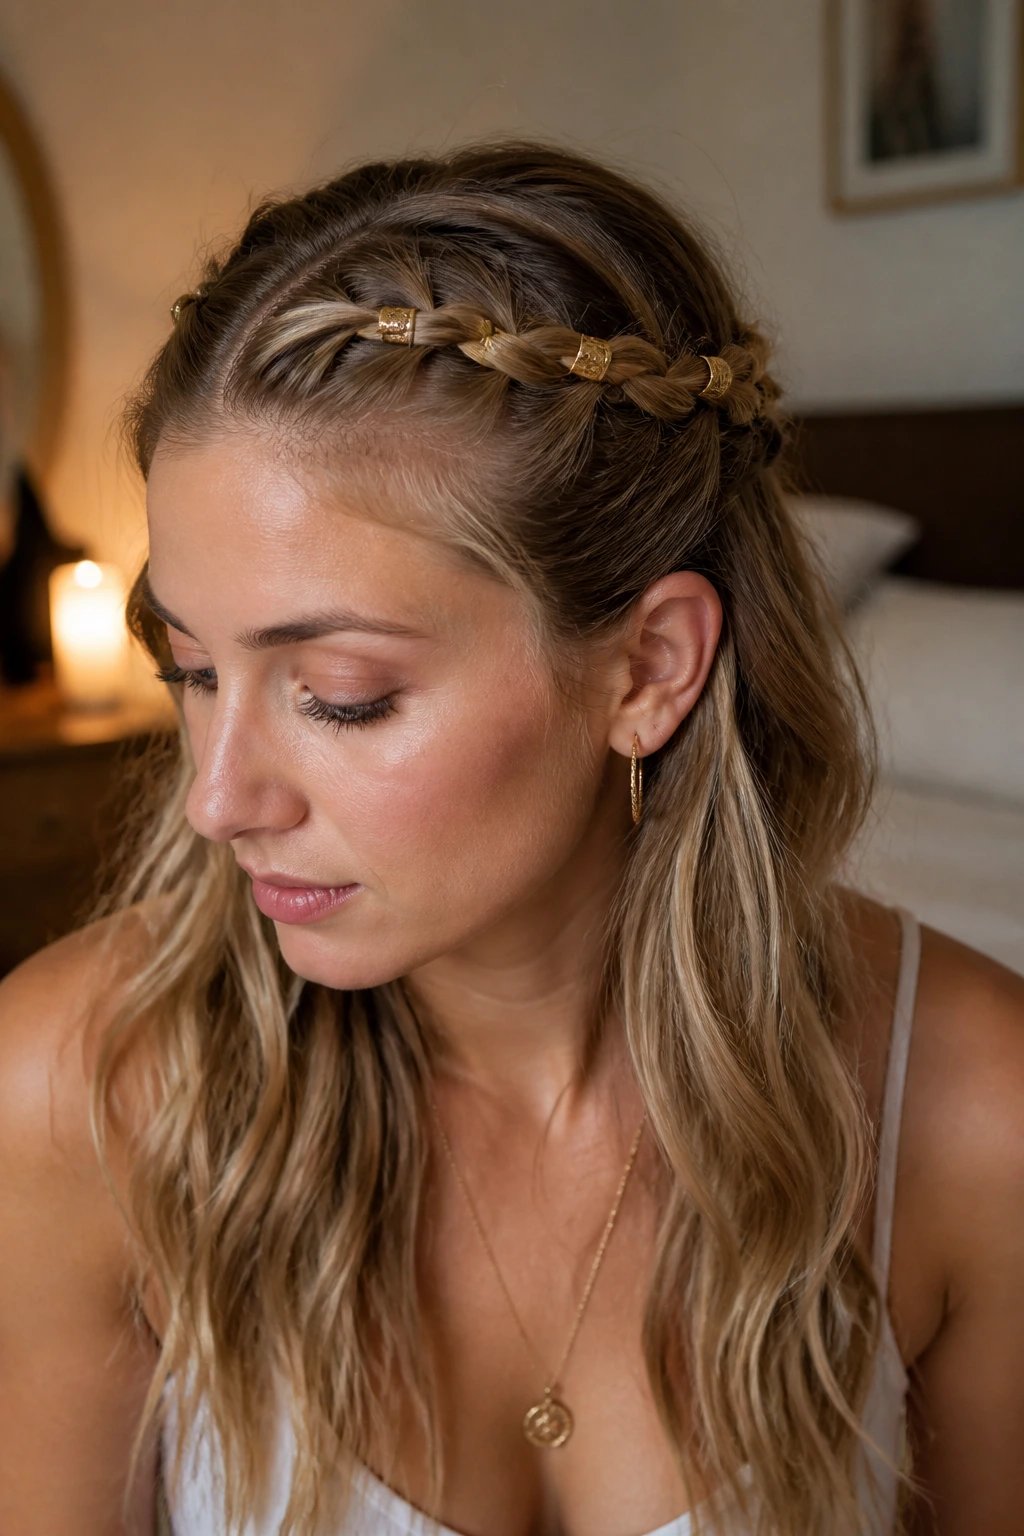
This style is the answer for those who want their hair down but need to keep it out of their face. Take two small sections from your temples and create thin braids that meet at the back of your head. Secure them together with a small, discreet clip or elastic, then add cuffs along the lengths of these two smaller braids. This creates a “halo” effect of metal that looks sophisticated and clean.
Why It Works
It keeps the sleekness of your straight hair in the back while adding a structured, artistic element to the front. Because the braids aren’t bearing the weight of all your hair, they are less likely to pull or droop throughout the day, keeping your cuffs perfectly positioned.
Styling Nuances
Use an iron to give the ends of your loose hair a slight, polished bend. This creates a contrast between the rigid, jewelry-adorned braids and the soft, flowing ends of the rest of your hair.
5. Single Front-Fringe Braid
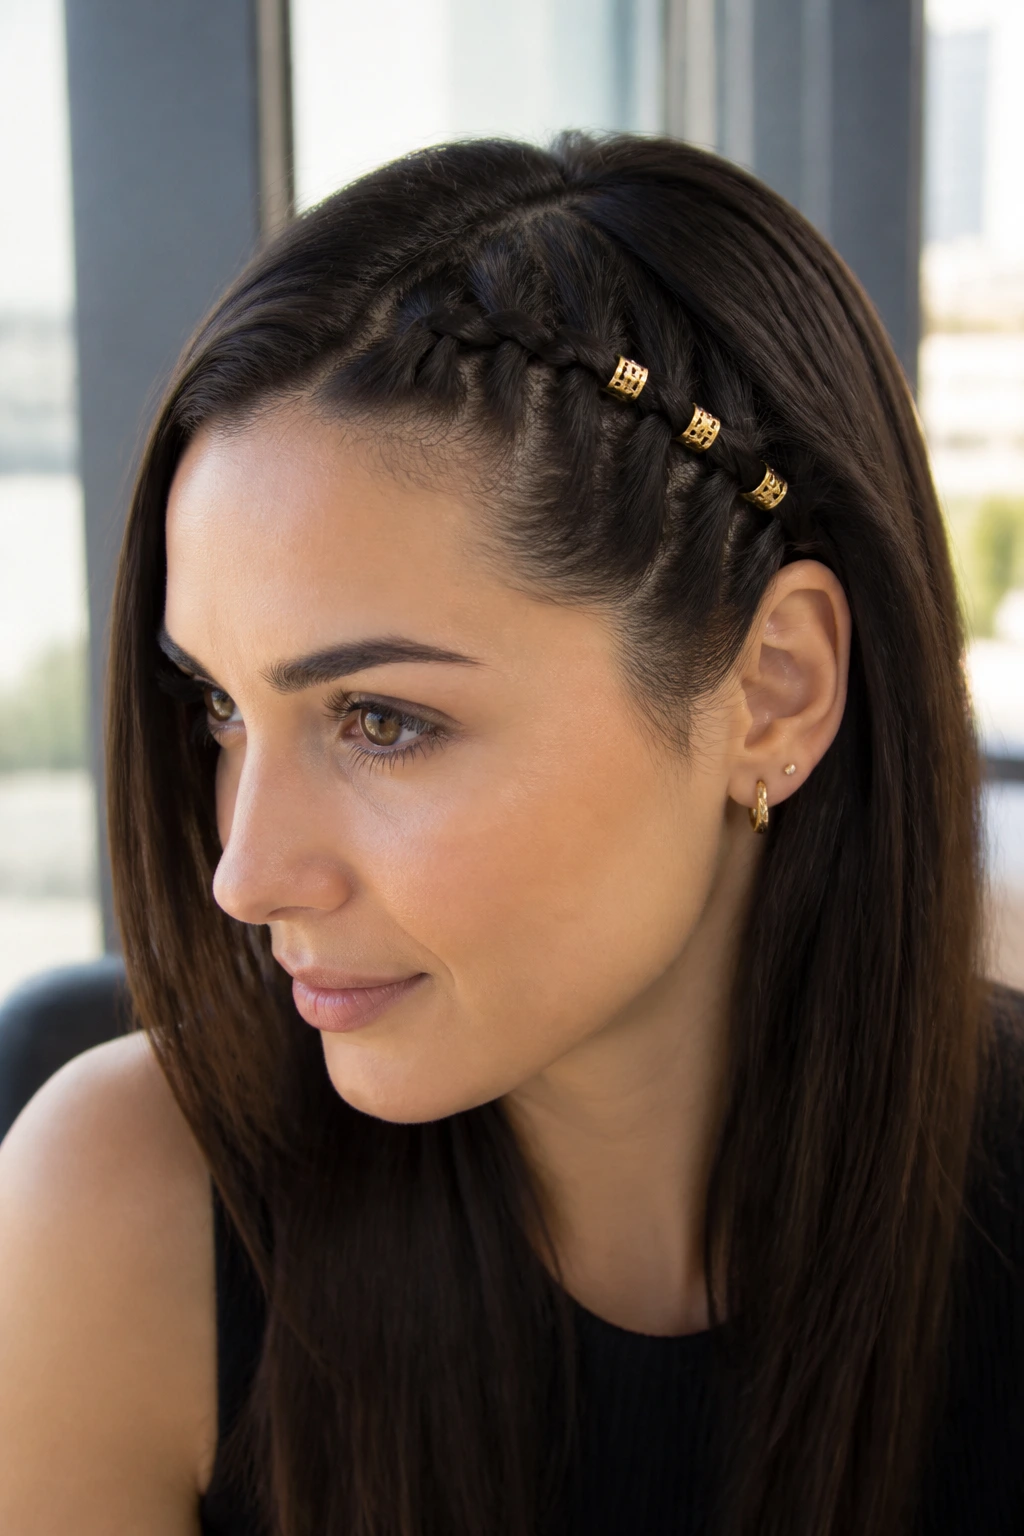
If you have long, straight hair, braiding just the front section of your hair is a quick way to add detail without a full-head commitment. Create a tight French braid starting at the forehead and ending behind your ear. The cuffs should be concentrated on the section that sits above your temple, providing a glint of gold when you move your head.
The Benefit of Minimalist Styling
Not every look requires an hour of labor. This style takes less than five minutes but feels like a deliberate styling choice. It works exceptionally well for professional settings where you want to show a bit of personality without overwhelming your outfit.
Essential Tools
- A fine-tooth comb for a perfectly straight parting.
- A small dab of shine serum on the braided section to keep it from looking dull.
- Lightweight open-ring cuffs that you can squeeze shut with your fingers for a secure fit.
6. Micro-Braids with Interspersed Rings
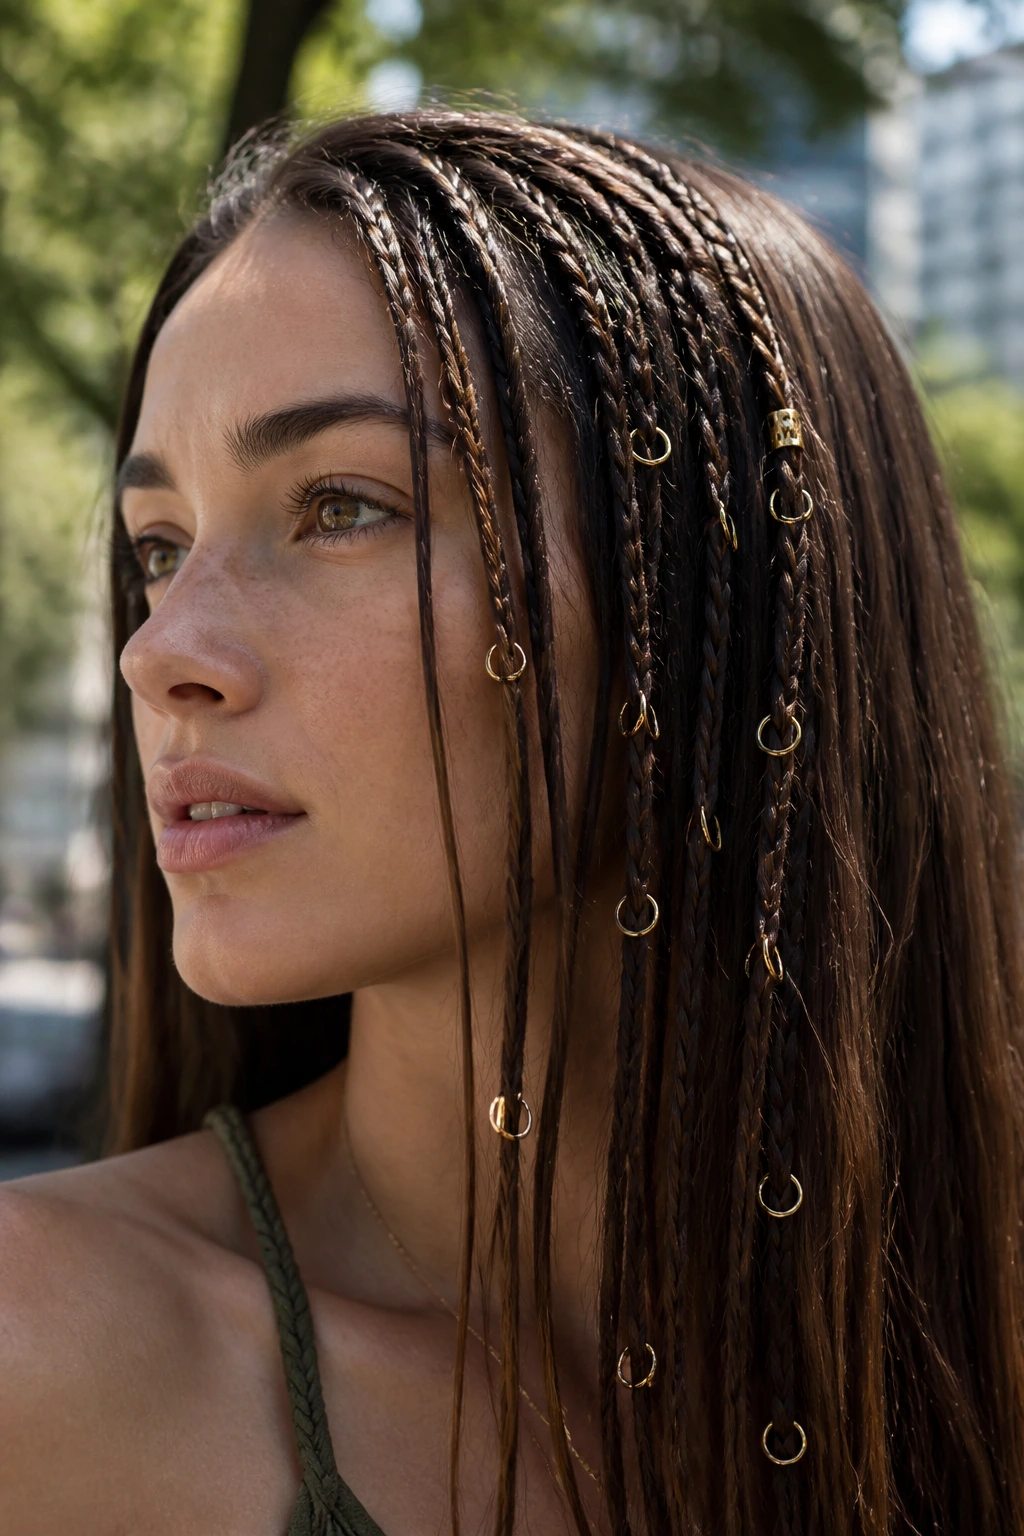
For a more bohemian approach that still respects the straight-hair texture, create several tiny micro-braids scattered throughout your head. You don’t need to braid everything; just 4 or 5 thin plaits will do. Thread small rings—not just cuffs, but actual jewelry rings—onto these braids at different heights.
Making it Look Cohesive
The trick to micro-braids is consistency in spacing. If you randomly place the braids, it can look messy. Instead, place them near your face and around the crown. This ensures the jewelry remains visible and acts as a frame for your features.
Maintenance Note
Micro-braids can be fragile. Use small elastic bands at the bottom to secure them, and avoid using heavy, bulky cuffs. Instead, stick to thin, delicate hoops that won’t pull on the strands and cause breakage over time.
7. The Mohawk-Inspired Braid
This is for the days when you want a little more attitude. Create a tight, vertical Dutch braid right down the center of your head, starting from the hairline and ending at the crown. Use large, chunky silver cuffs along the spine of the braid. The rest of your hair can be worn straight and sleek, letting the center braid stand out as the focal point.
Creating Volume at the Root
Because straight hair lies flat, you will need a root-lifting powder to create the necessary base for a mohawk-style braid. Sprinkle a small amount of texturizing powder at the hairline before you start, and tease the roots slightly. This gives the braid structure and keeps the cuffs from dragging the hair down toward your scalp.
Finishing the Look
Ensure the section of hair you aren’t braiding is perfectly flat-ironed. The contrast between the busy, metallic center braid and the sharp, straight sides is what makes this style so striking.
8. Braided Pigtails with Cuff Sequences
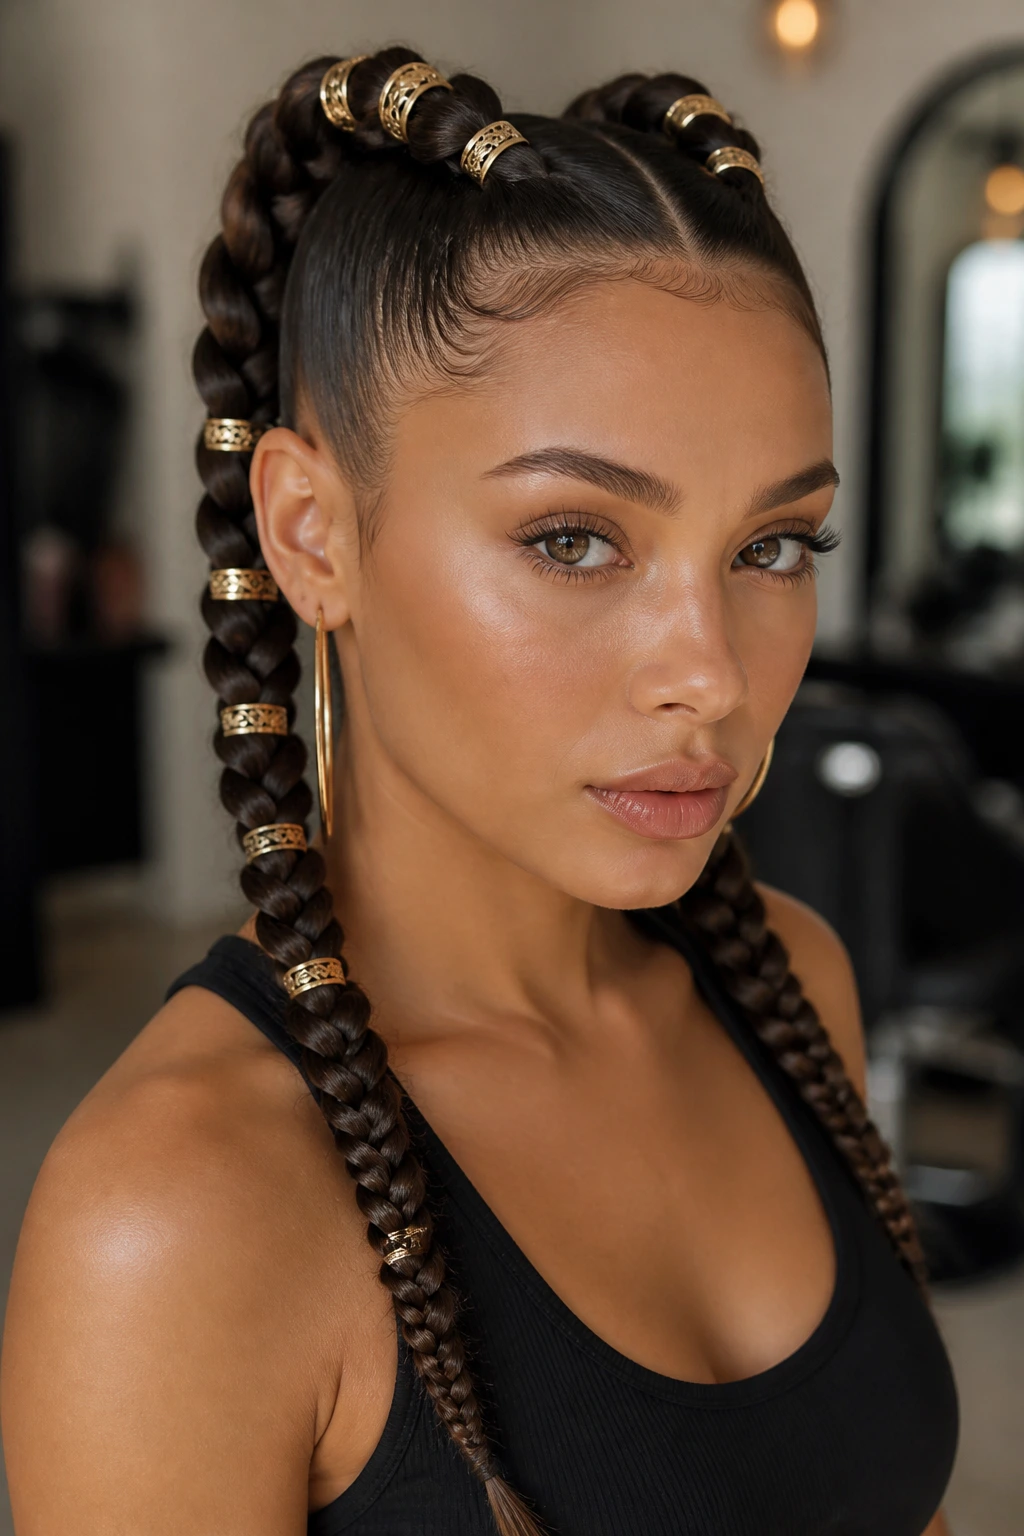
Divide your hair into two sections and create high, tight braids that start from the temples. To make this look sophisticated rather than juvenile, keep the braids narrow and pull them tight. Add five to six cuffs in a row on each braid, starting an inch down from your hairline.
The Sequence Strategy
A single sequence of cuffs looks more intentional than scattering them randomly. Line them up precisely so that each cuff rests just above the next. This creates a “zip” effect that looks like high-end hardware.
Why This Works
It takes a classic style and updates it with an industrial edge. Because you have two braids, the symmetry makes the jewelry look like an extension of your accessories, similar to wearing earrings.
9. Waterfall Braid with Embedded Accents
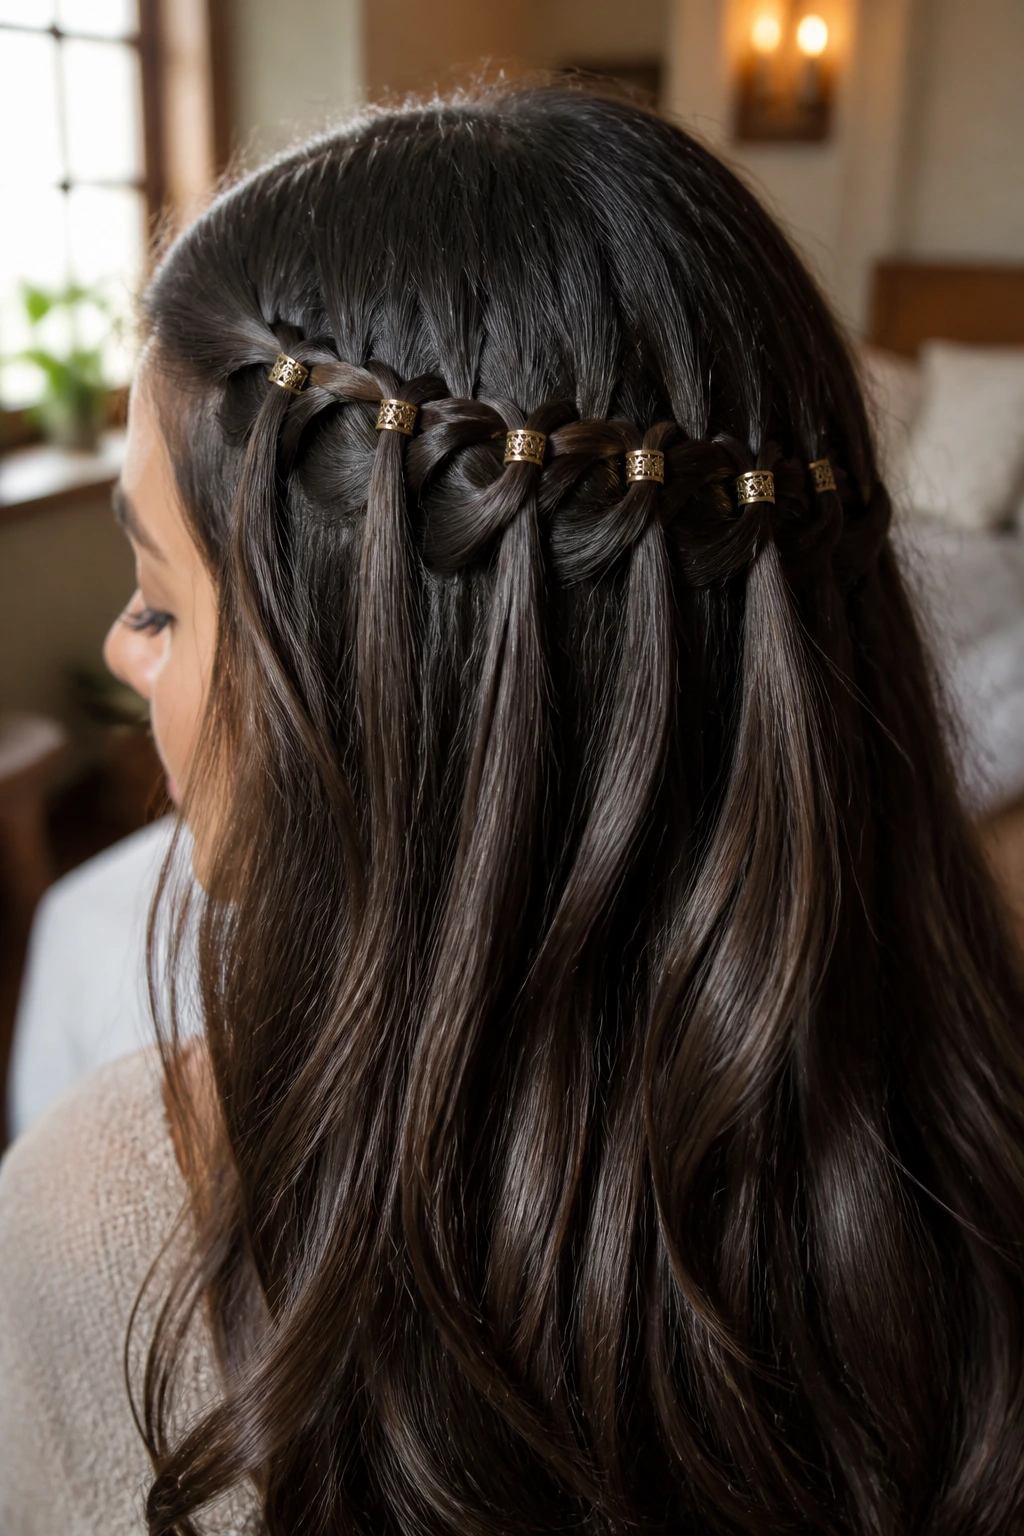
A waterfall braid is one of the most beautiful styles for straight hair because it allows you to show off the length and flow of your locks while still incorporating a braid. As you weave the braid around the back of your head, add a cuff to the top strand of each “waterfall” loop.
Technical Precision
Waterfall braids can be tricky to master because they involve dropping strands. To keep the cuffs secure, you must slide them onto the hair before you weave that specific section into the braid, or use open cuffs that you can clamp on after the braid is finished. Clamping them after is much easier if you aren’t a braiding expert.
The Final Touch
Use a shine spray on the loose, falling sections to ensure they remain smooth and glass-like, which makes the metal cuffs pop even more.
10. The Fishtail Side-Braid
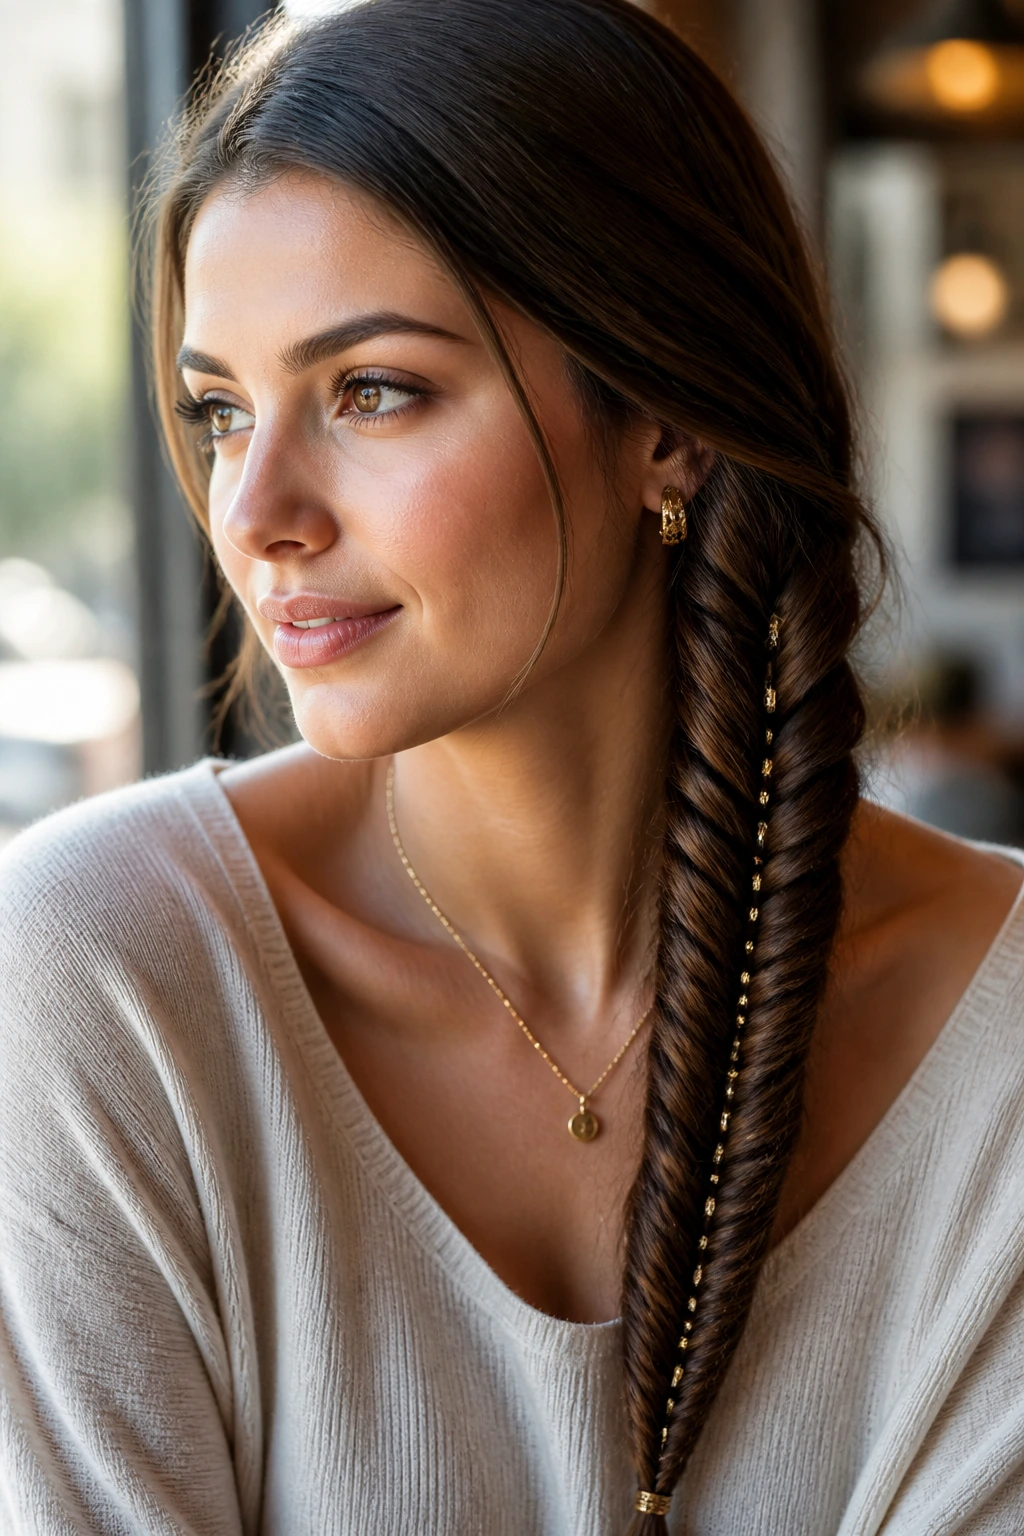
Fishtail braids are synonymous with intricate, tight patterns that look incredibly clean on straight hair. While they take a bit longer to craft, the result is a smooth, herringbone-like finish that acts as the perfect host for metal cuffs. Because a fishtail is so compact, use very thin, narrow cuffs that match the width of the braid segments.
Why Fishtail?
Unlike a three-strand braid, a fishtail doesn’t have large loops, so heavy cuffs will simply fall off. You need jewelry that is as delicate as the braid itself. This creates a refined, elegant look that is perfect for events or dinner dates.
Styling Tip
Start your fishtail braid from a low ponytail base if you find it difficult to hold the sections while working at the back of your head. Once the braid is finished, you can carefully snip the elastic at the top if you want a seamless look.
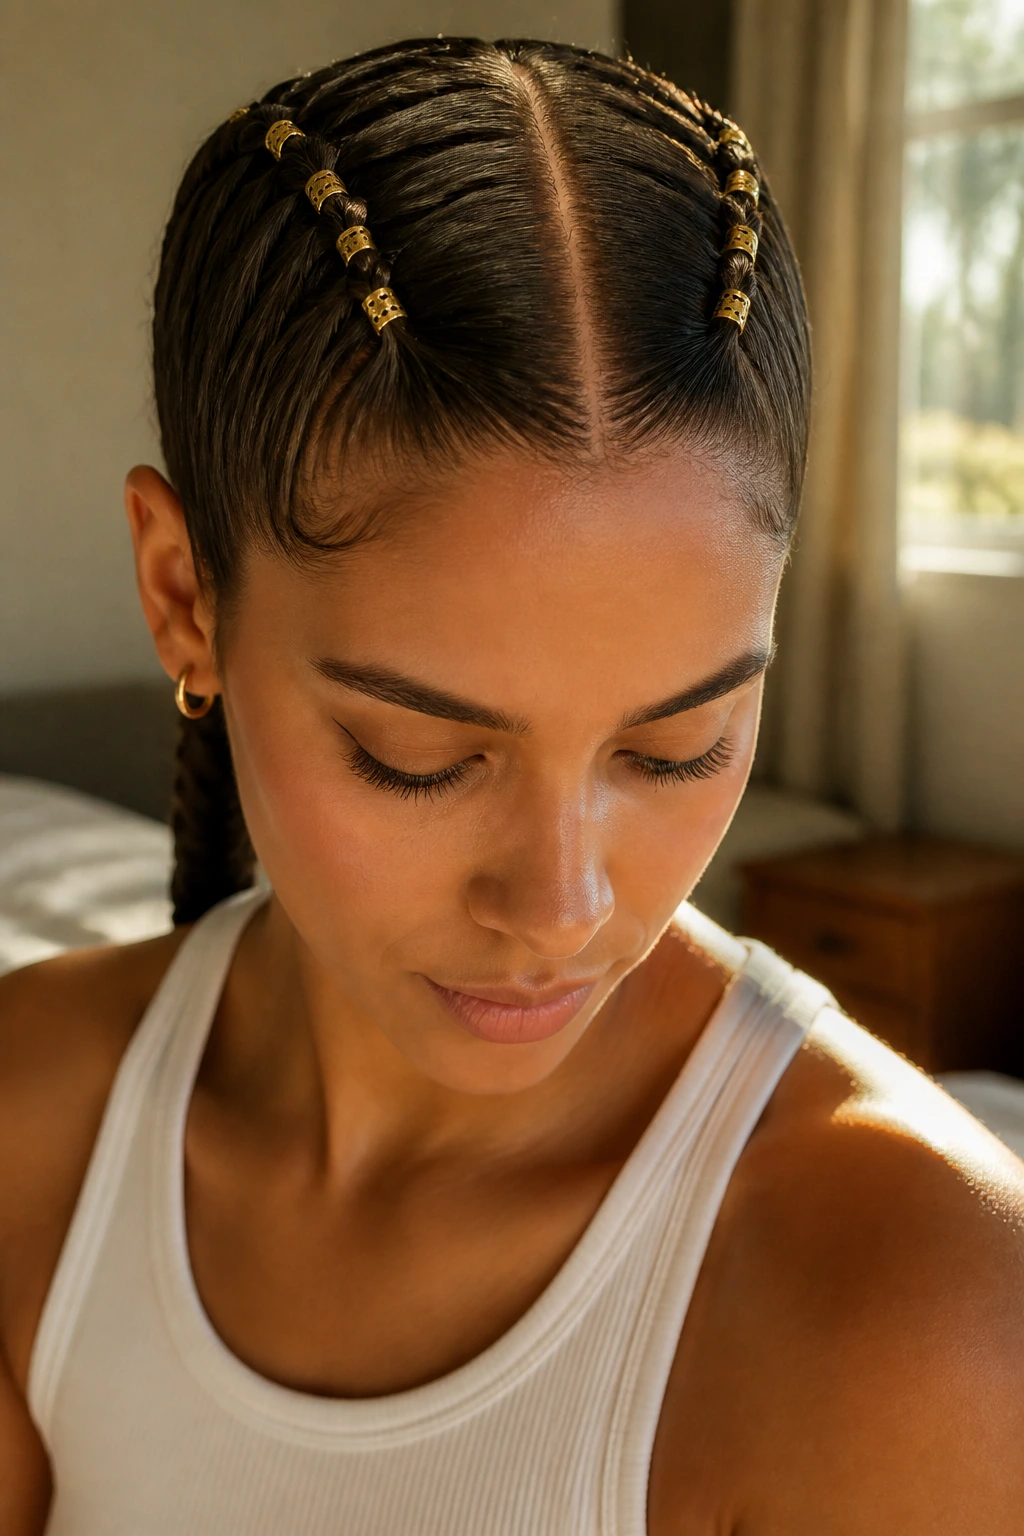
11. Cornrow-Inspired Sleek Braids
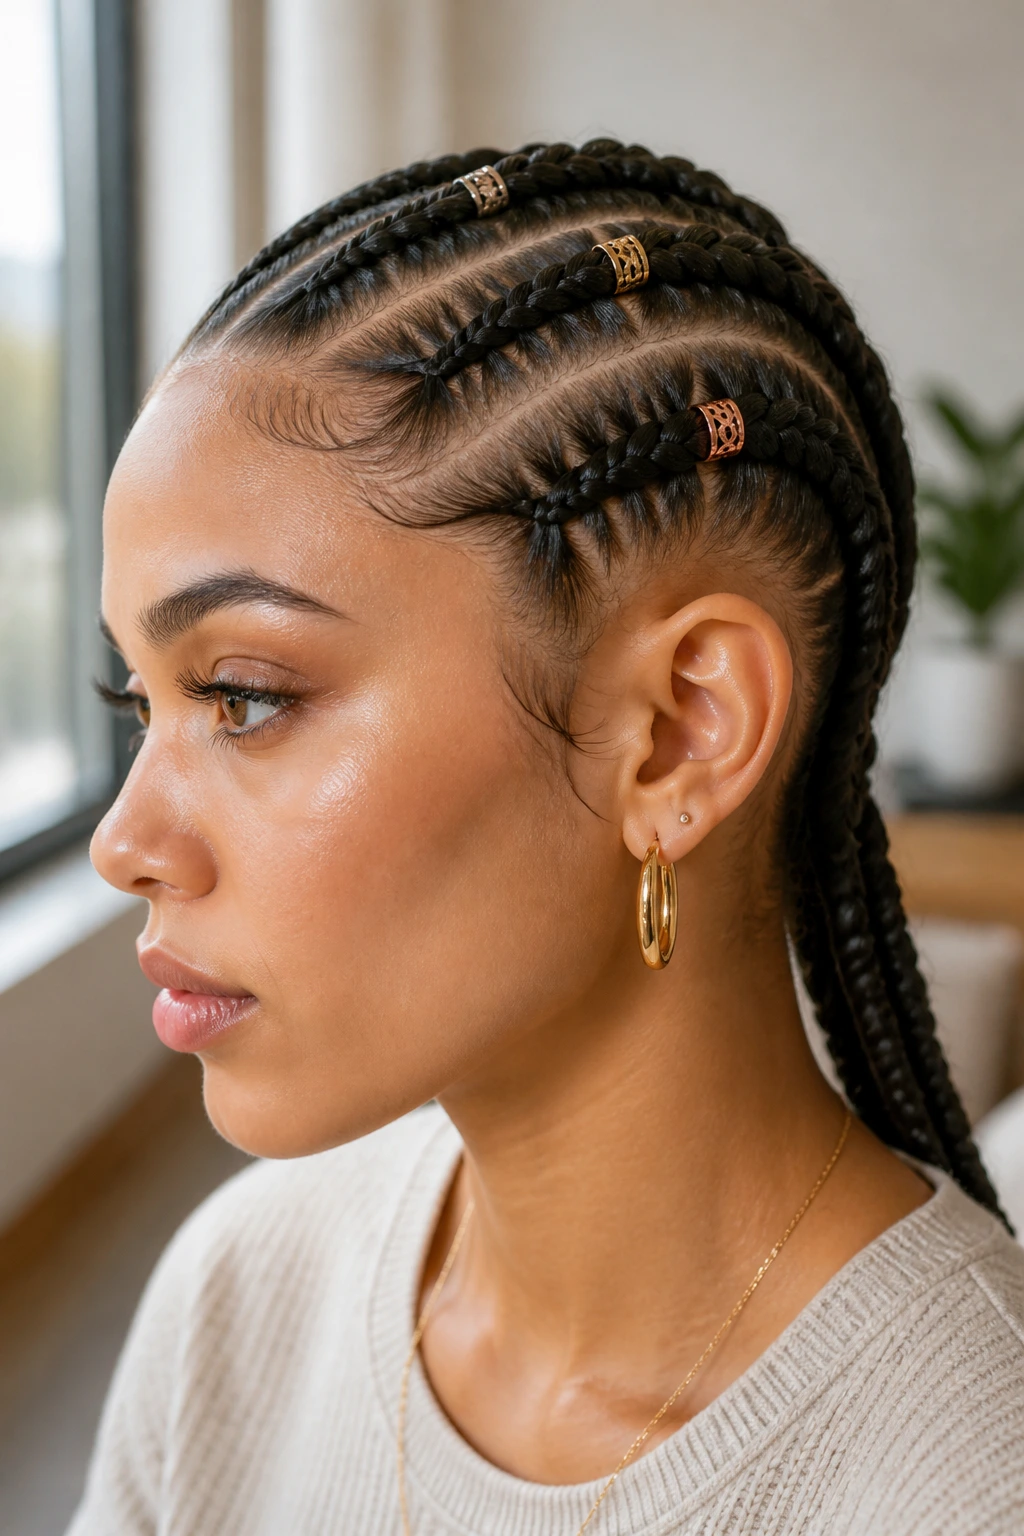
You can achieve the look of cornrows without having to commit to a full head of extensions. By tightly braiding three or four rows from the forehead back, you can create a sleek, pulled-back appearance that highlights the contours of your face. Use a different metal finish—like rose gold or brushed copper—on each braid for a custom, personalized look.
Maintaining Tension
For this look to succeed on straight hair, tension is everything. Use a water-based styling gel or a light edge-control cream to keep the hair smooth as you braid. This ensures that the cuffs don’t catch on stray hairs and that the lines of the braids remain sharp.
The Metal Choice
Because you are keeping the braids tight and close to the scalp, don’t use heavy jewelry. Go for thin, delicate cuffs that hug the hair tightly. This prevents the metal from pulling on your roots, which can cause discomfort over time.
12. Loose Side-Braid with Cuff Clusters
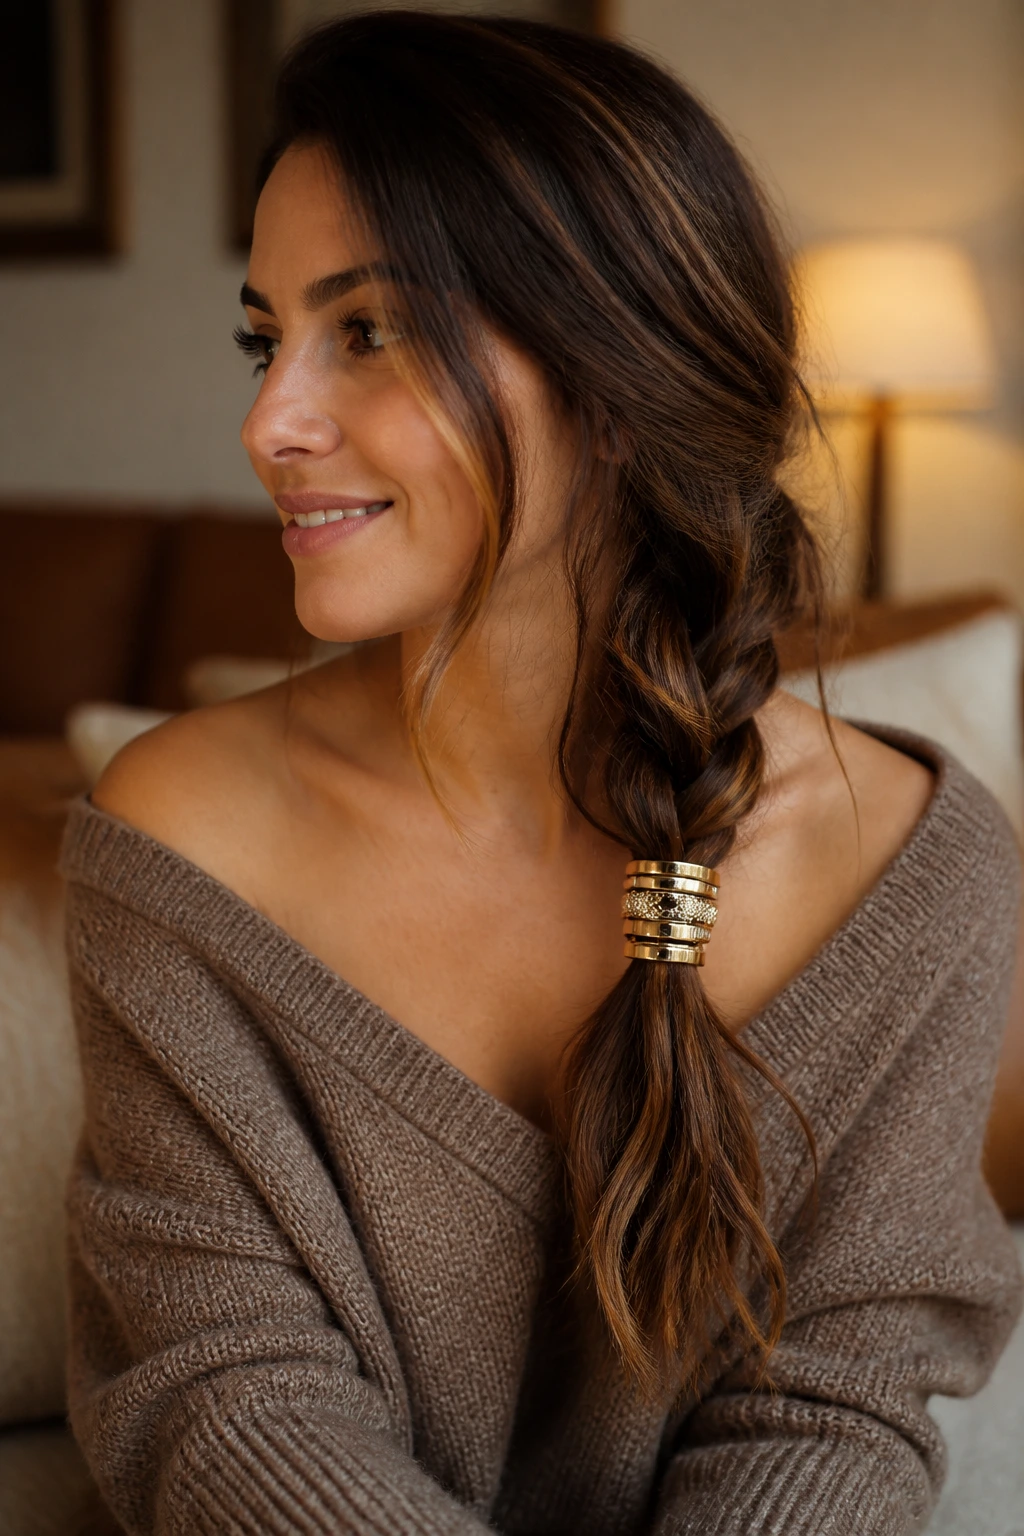
Sometimes you don’t need a perfectly tight braid. Create a loose, low side-braid and let it fall naturally over your shoulder. Instead of placing cuffs all the way down, cluster five or six of them right at the base of the braid where it meets your hair tie.
The Cluster Effect
Clustering the jewelry creates a heavy, anchored look that serves as a transition piece between the braid and your loose hair. It’s an interesting take on the “hair accessory” trend, making the cuffs look more like a piece of jewelry you bought specifically for the end of your braid.
Balancing the Weight
Since all your cuffs are in one spot, use a stronger hair tie to support the base of the braid. If the braid is too loose, the weight of the metal cluster might pull the braid apart.
13. Double-Braid Top Knot
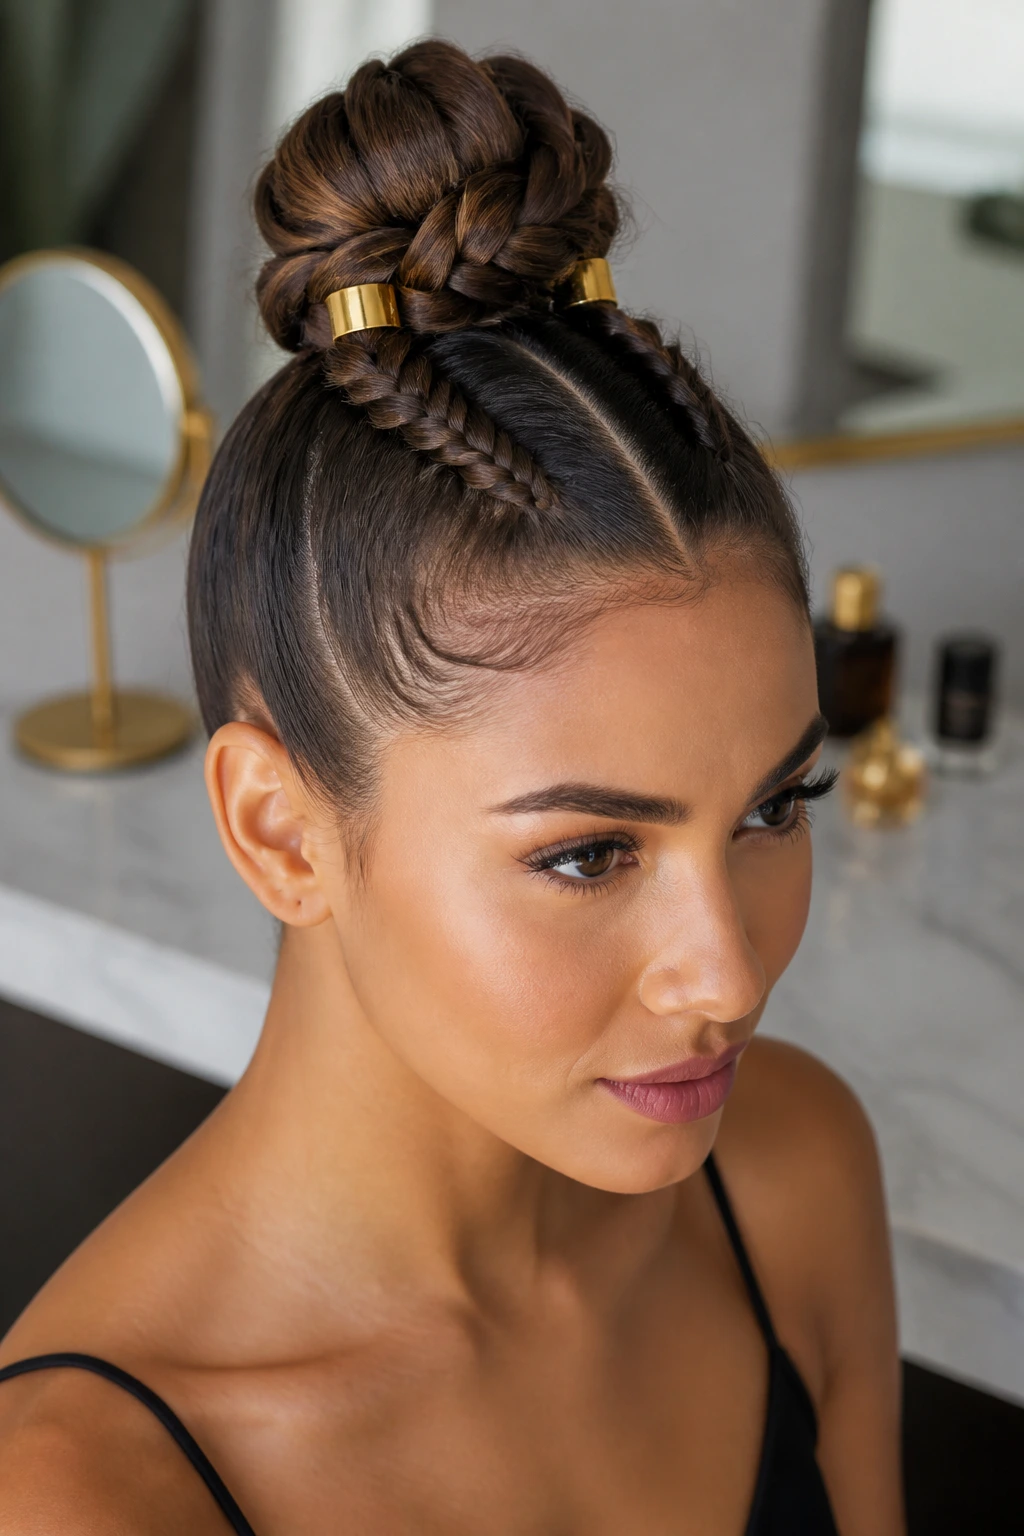
Pull your hair up into a high, sleek ponytail. Before wrapping it into a bun, divide the tail into two sections and braid them tightly. Wrap these braids around the base of the ponytail to create a braided bun. Add a single, large cuff at the base of each braid where they enter the bun.
Why This Style Works
It’s an elegant, up-do style that keeps hair off your neck. The cuffs provide a flash of metal at the base of the bun, giving it a high-fashion architectural feel.
Prep Work
Use a smoothing brush to pull your hair into a perfectly tight ponytail before you begin braiding. Any bump or stray hair will ruin the clean aesthetic of this look.
14. Wrapped Braid around a High Ponytail
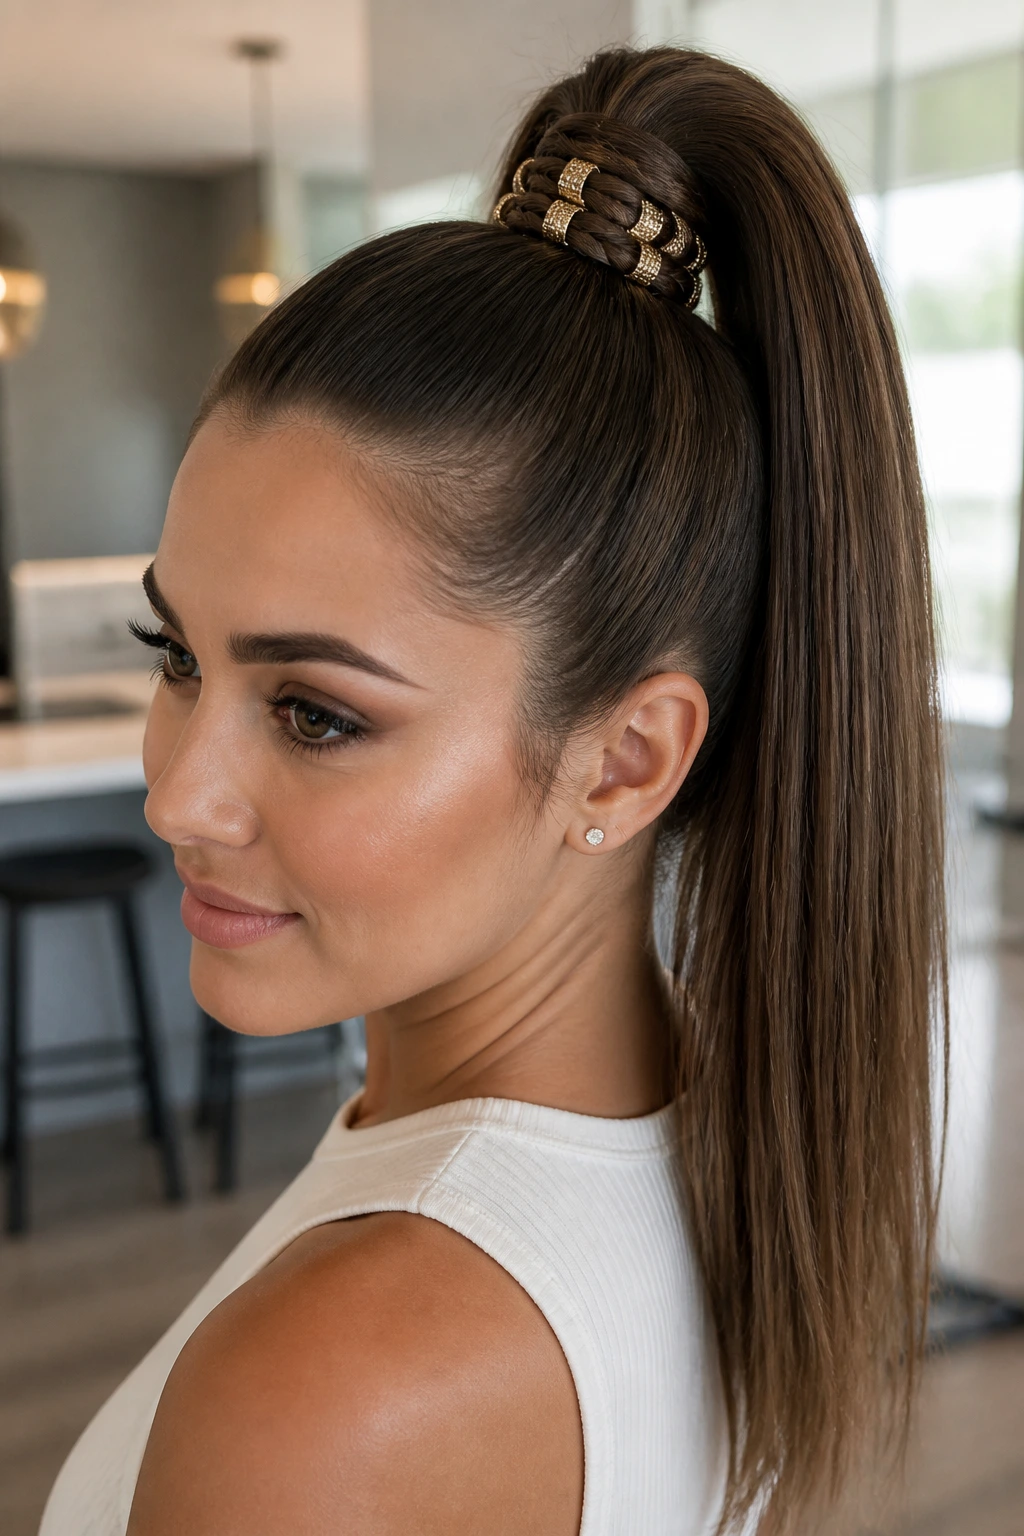
Take a high, straight ponytail and take one small section from underneath the base. Braid this single section tightly, and then wrap it around the ponytail’s base to hide the elastic. Once wrapped, add three cuffs at equal distances along this specific wrap-around braid.
The Hidden Detail
This is a sophisticated, subtle way to incorporate cuffs. Because the braid is hidden beneath the main body of the ponytail, the cuffs only become visible when you turn your head, providing a nice surprise element.
Maintaining Security
Ensure the wrap-around braid is secured with a bobby pin that matches your hair color. Without that extra support, the braid—and its precious cuffs—will slowly unwind throughout the day.
15. The “Ladder” Braided Detail
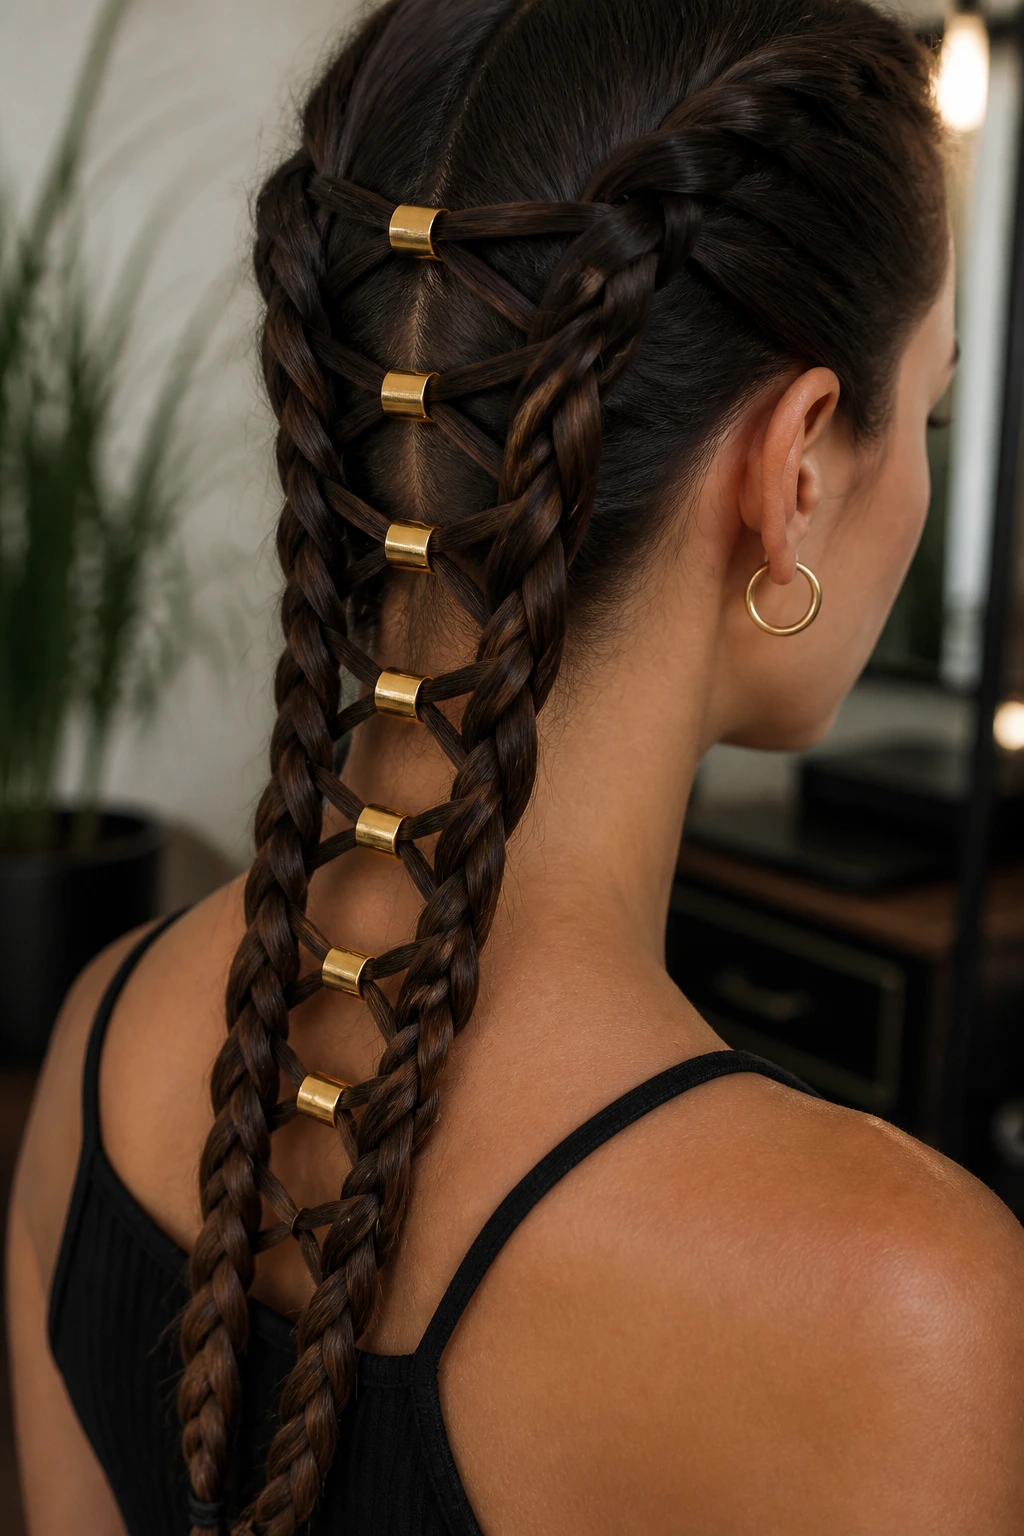
This is a more advanced technique that involves taking two parallel braids and “lacing” a third section of hair between them like a ladder. Add one cuff at every horizontal rung of the ladder. This is a very artistic, time-consuming look, but for straight hair, it is unparalleled in its clarity and precision.
Why It’s Unique
This isn’t a style you see every day. The mechanical look of the ladder combined with the industrial feel of the metal cuffs makes it look like something straight off a runway. It requires patience and a good set of clips to hold everything in place while you work.
Pro-Tip
Use a tail comb to ensure your sections are perfectly straight. The geometry is what makes the ladder effect work; if the sections are uneven, the entire pattern will look disorganized.
16. Fishtail Pigtails with Cuff Gradient
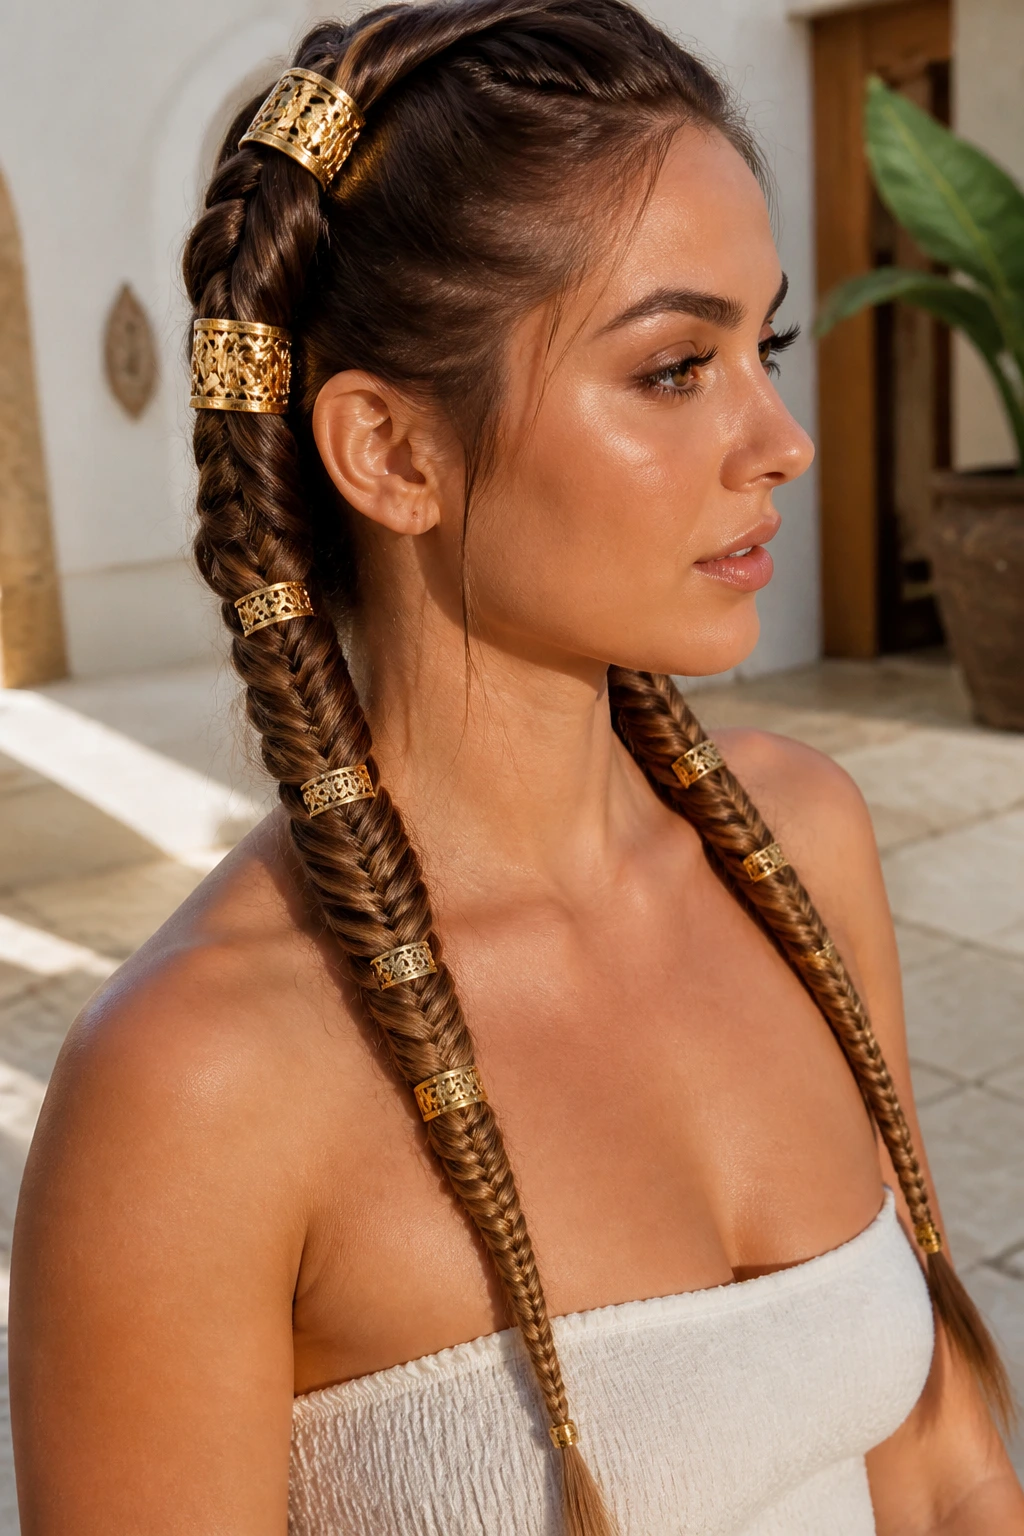
If you’re feeling bold, try two long fishtail braids starting from the crown. Apply a gradient of cuffs: start with large, spaced-out cuffs at the top, and as you get toward the ends of the braids, transition to smaller, tightly-packed cuffs.
Creating the Gradient
Visual balance is key. By putting larger items at the top and smaller ones at the bottom, you guide the eye downward in a way that feels intentional. It gives the braids a sense of movement and weight.
Essential Gear
- Plenty of patience. Fishtail braids on long hair can take time.
- A light-reflecting spray for the final look, which makes the metal cuffs shine brighter.
17. The Sleek Crown Braid
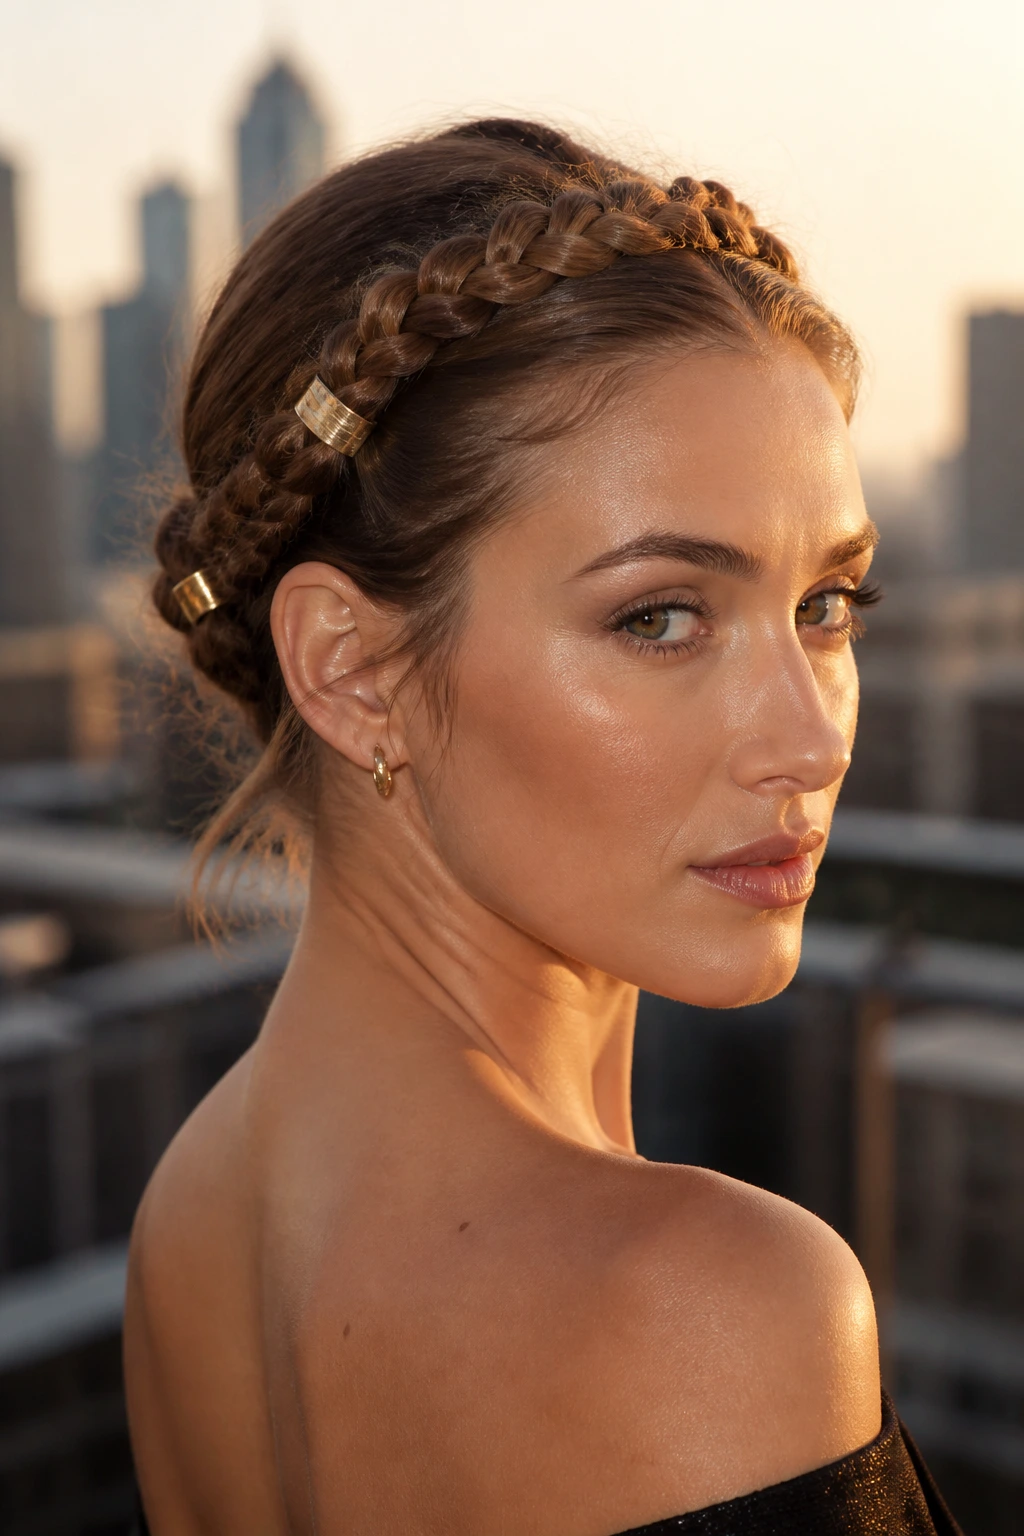
A traditional crown braid usually involves wrapping a braid around the head like a headband. On straight hair, this can look incredibly clean. Add cuffs at the temples and at the very center of the back of the head.
The Crown Advantage
This keeps your hair entirely off your face and is excellent for hot weather. The cuffs act as an accessory you don’t even have to carry in your purse—they’re already part of your look.
Avoiding “Matronly” Vibes
Sometimes, a crown braid can look a bit old-fashioned. The metal cuffs are the perfect antidote to that. By adding industrial hardware, you completely modernize the look and strip away any “folksy” associations.
18. Braided Headband with Cuff Detail
Use a synthetic hair extension braid that matches your hair color and tie it on like a headband. Before putting it on, pre-load it with cuffs. This is a “cheat” method that gives you the look of an elaborate braided crown without actually having to braid your own hair.
The Cheat Sheet
This is perfect for days when you don’t have time to style your hair but still want a polished look. You can find pre-braided bands in most beauty supply stores that are designed to be integrated into your own hair.
How to Blend
Use a bit of hairspray to blend your real hair into the headband. If you have any baby hairs at the hairline, tuck them back using a small amount of pomade to keep the look seamless.
19. The “Snake” Braid
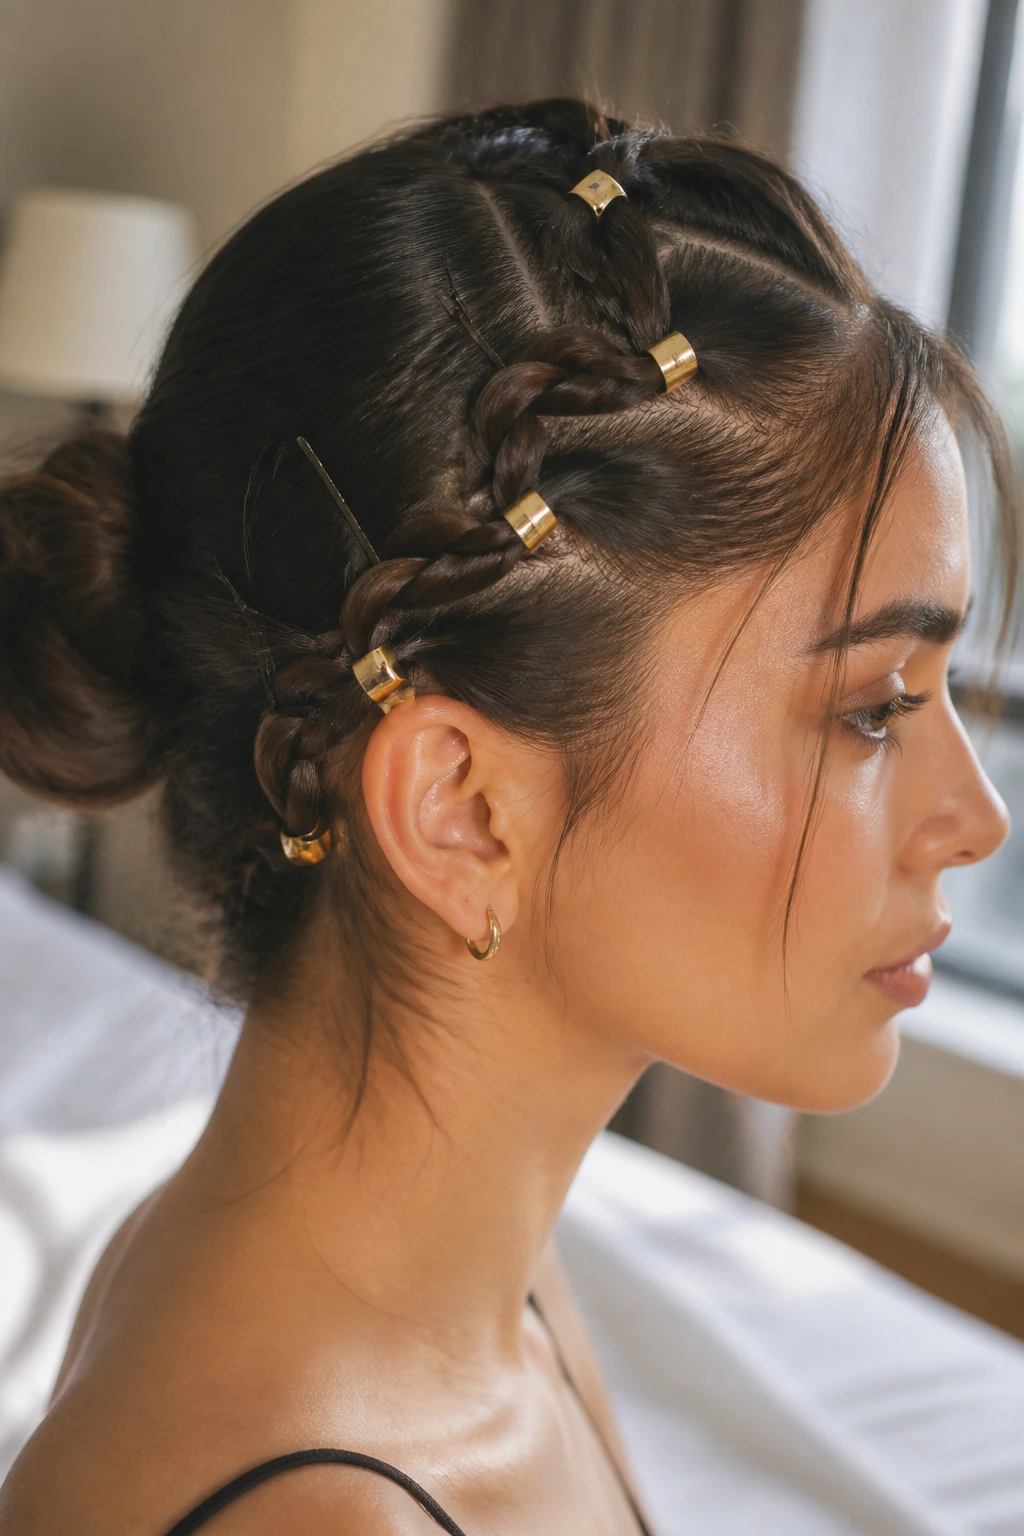
Create a single braid that winds back and forth across the side of your head in a “snake” pattern. Add a single, distinct cuff at every turn of the snake. This is a highly geometric look that requires you to pin the hair down at each turn to maintain the shape.
Staying Secure
Because the braid is being forced into a pattern it doesn’t naturally want to take, use bobby pins that are the same color as your hair to anchor each “turn” of the snake. The cuffs will cover these pins, so no one will ever know how much structure is happening underneath.
Creating Contrast
If your hair is dark, use gold cuffs. If your hair is light, use black or silver. The contrast is what draws the eye to the pattern you’ve created.
20. Simple Braided Tips
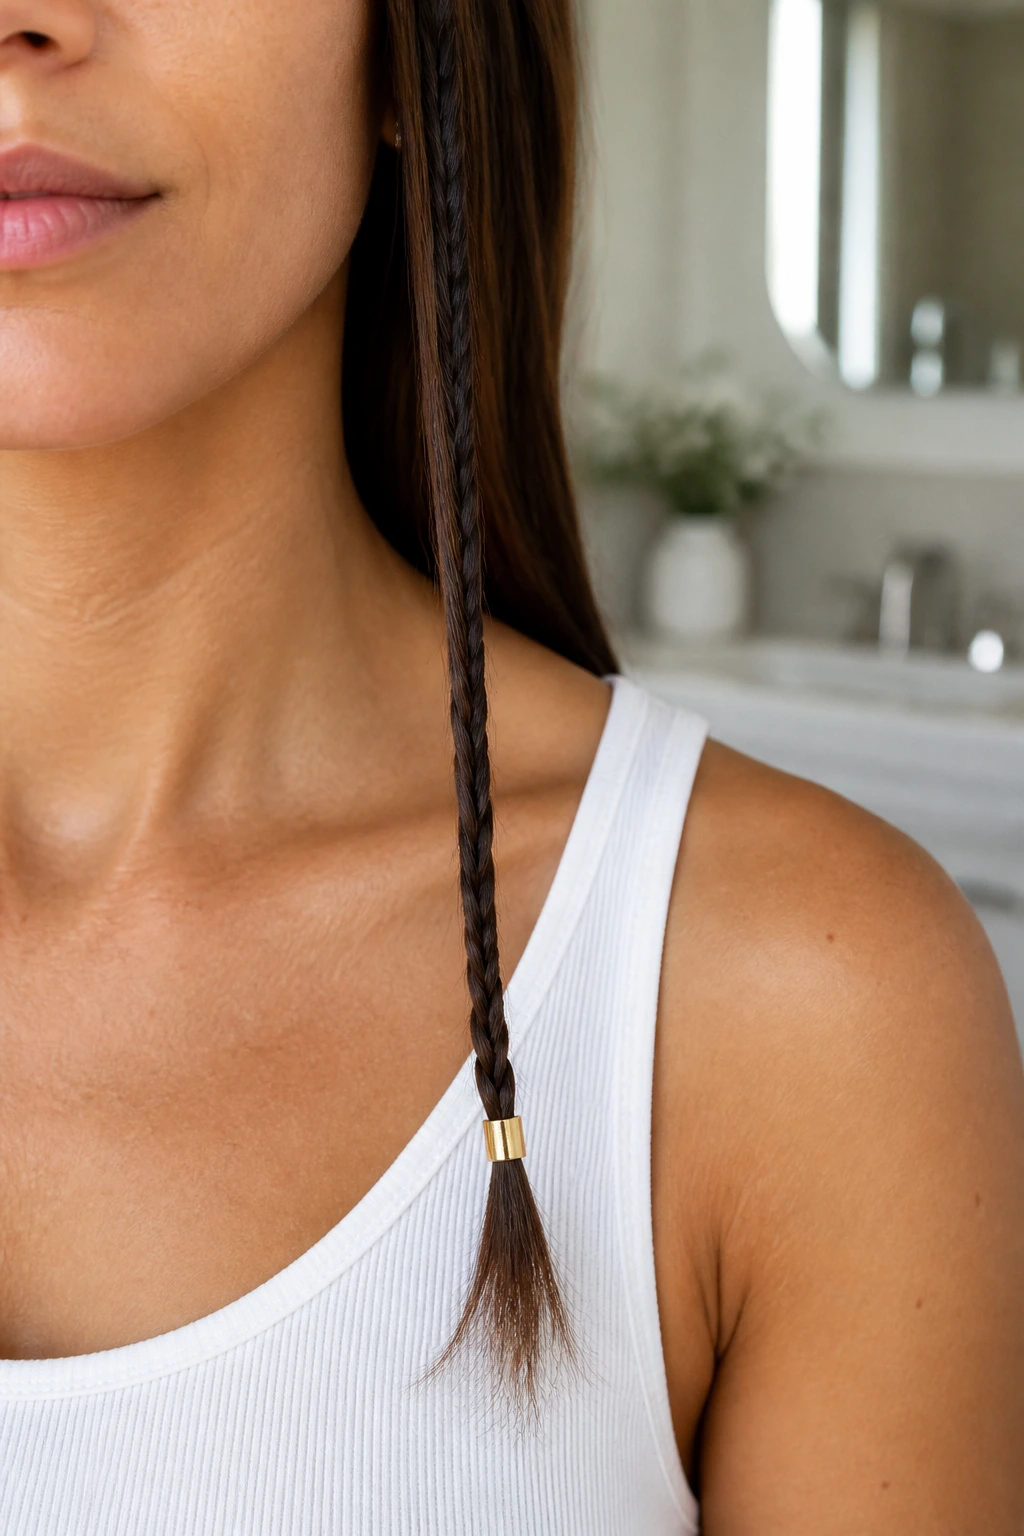
If you don’t want the braid to be the main event, just braid the last two inches of your hair and finish with a single, heavy-duty cuff at the very end. This is a minimalist way to play with the trend without changing your entire hairstyle.
Why Less is More
Sometimes, a subtle nod to a trend is more elegant than going all-out. This is a great style for everyday wear—it’s understated, quick, and adds a little bit of interest to an otherwise simple straight style.
The Finishing Flourish
Since the cuff is at the bottom, ensure your ends are healthy and free of split ends. A quick trim goes a long way toward making the cuffs look like deliberate high-end jewelry rather than a way to hide damaged hair.
Final Thoughts
Working with straight hair can sometimes feel limiting, but it is actually the ultimate blank canvas for braided styles with cuffs. Because your hair lacks the natural volume or chaos that can clutter a design, you can achieve a level of geometric precision that other textures struggle to maintain. The secret is simply to respect the slip of the hair; use high-quality, lightweight cuffs, be generous with texturizing products, and never underestimate the power of a clean sectioning job.
You don’t need to be a professional stylist to make these looks work. Start with the simpler styles—like the side-swept plait or the braided tips—to get a feel for how the jewelry interacts with your hair weight. Once you’re comfortable with how the cuffs clamp down, you can start experimenting with more complex patterns. At the end of the day, it is about having fun with your aesthetic and treating your hair like the versatile accessory it really is. Keep your tools sharp, your sections clean, and your style consistent, and you will find that a few simple pieces of metal can completely transform your daily look.