



Morning chaos is a universal equalizer. You wake up with exactly seven minutes to get your head together, and your hair looks like it survived a minor dust storm. This is where cowgirl hair steps in to save your morning routine. It is a styling approach that embraces natural texture, wind-blown movement, and a bit of rugged practicality, turning overnight bedhead into a deliberate, stylish statement.
Historically, women working under harsh sun and biting winds needed styles that stayed secure without requiring constant attention. Those practical solutions have evolved into a distinct aesthetic that pairs perfectly with modern, fast-paced mornings. This style is not about achieving glassy, pristine perfection. Rather, it focuses on working with the hair you have, utilizing quick braids, strategic pins, and classic accessories to look put-together in minutes.
The secret to pulling this off lies in the grit. Squeaky-clean hair is actually the enemy of these styles, as it lacks the friction needed to hold braids and twists without slipping. A little bit of texture—whether from natural scalp oils, yesterday’s product, or a quick blast of dry shampoo—is what makes these looks hold. You do not need a shelf full of hot tools; instead, a few leather ties, some bobby pins, and a reliable wide-toothed comb will get you through the week.
Let us look at twenty fast, durable ways to style your hair that capture this classic spirit while keeping your busy mornings running smoothly.
1. Classic Double Dutch Braids
Many people confuse French braids with Dutch braids, but the difference is simple. Dutch braids require you to cross the strands under the center rather than over, which makes the braid pop up off the head instead of lying flat. This structure is highly resistant to wind, rain, and physical activity, making it an excellent choice for long, demanding days.
Why This Style Keeps You Moving
When you braid your hair close to the scalp, you secure the bulk of your hair length. This prevents friction against your clothes, which causes tangles and breakage. Because the braids are tight to the head, they do not swing or pull on your hair follicles as you move.
Quick Style Metrics
- Best for: Medium to long hair of all thicknesses
- Time required: 5 minutes
- Key tools: Two snag-free elastic bands, a rat-tail comb for clean parting
- Hold level: Maximum—will easily last through active physical work
Pro tip: Pull the outer loops of each braid link outward slightly once finished to make the braids look twice as thick.
2. Low Messy Bun with a Wide-Brim Hat
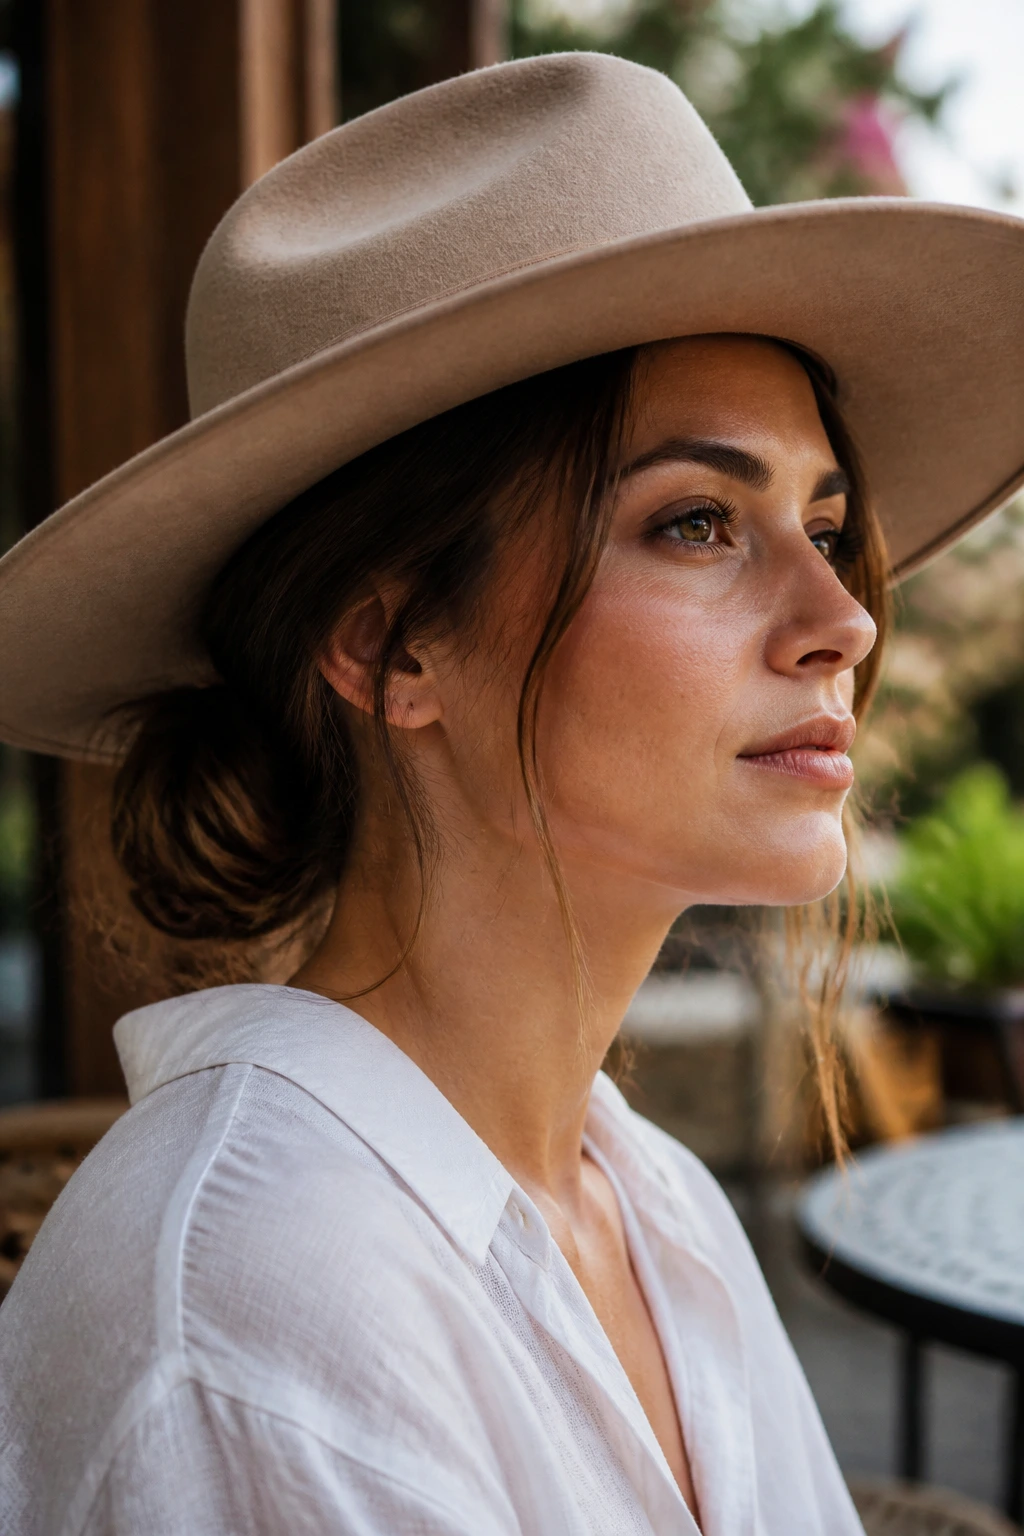
The low bun is a classic fallback, but under a hat, it becomes a structural anchor. A wide-brim felt or straw hat needs a low-slung hairstyle to sit comfortably on your brow without riding up. By positioning the bun right at the nape of your neck, you create a natural shelf that prevents the back of the hat from slipping down.
Instead of trying to smooth down every flyaway, let the natural texture of your hair show. The hat will cover any bedhead at the crown, while the low bun keeps your length neat and out of your face.
If your hair is particularly fine or slippery, mist the bun area with a sea salt spray before twisting. This adds the necessary friction to keep your elastic from sliding out during the day.
3. High-Volume Bubble Ponytail
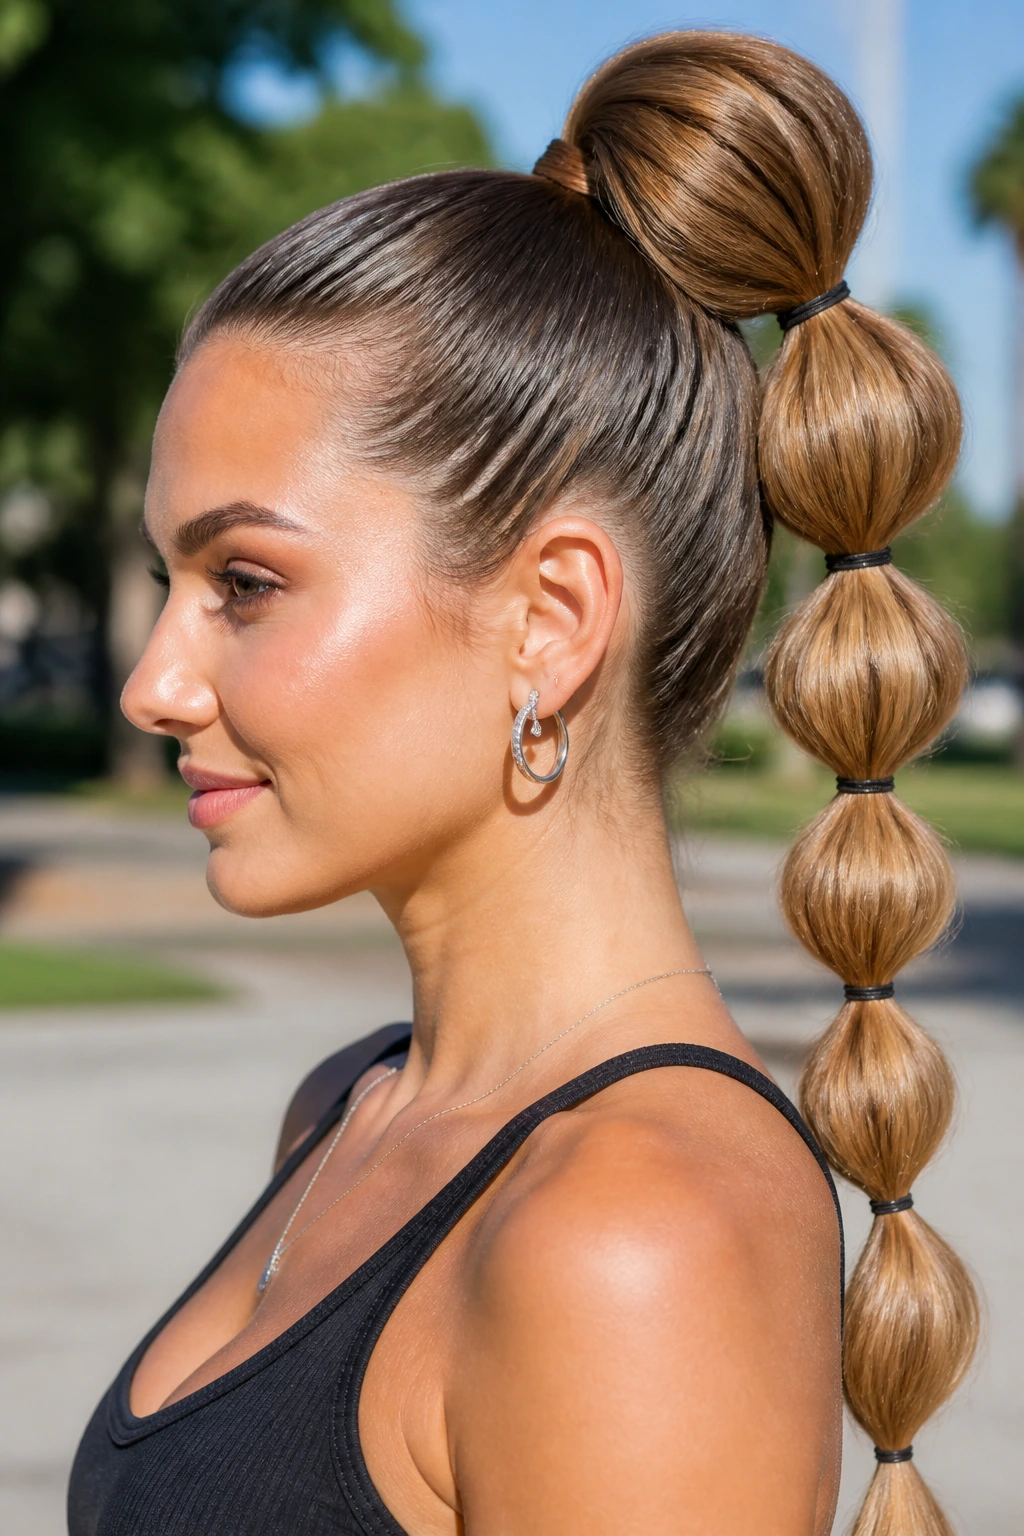
Why settle for a plain ponytail when you can add structure with minimal extra effort? The bubble ponytail is a highly visual style that looks intricate but relies entirely on basic elastic placement. It keeps long hair completely contained while maintaining a bold, thick appearance.
How does this hold up throughout the day?
Unlike a traditional three-strand braid that can unravel or loosen, each section of a bubble ponytail is individually locked in by an elastic. Even if one section shifts, the rest of the style remains completely intact.
How to Style It
- Step 1: Pull your hair into a high ponytail and secure it with a strong base elastic.
- Step 2: Place another elastic two to three inches down the ponytail shaft.
- Step 3: Use your fingers to gently pull the hair between the elastics outward, creating a rounded bubble shape.
- Step 4: Repeat this process down the length of your hair, leaving the very end free.
4. Half-Up Tooled Leather Barrette Wrap
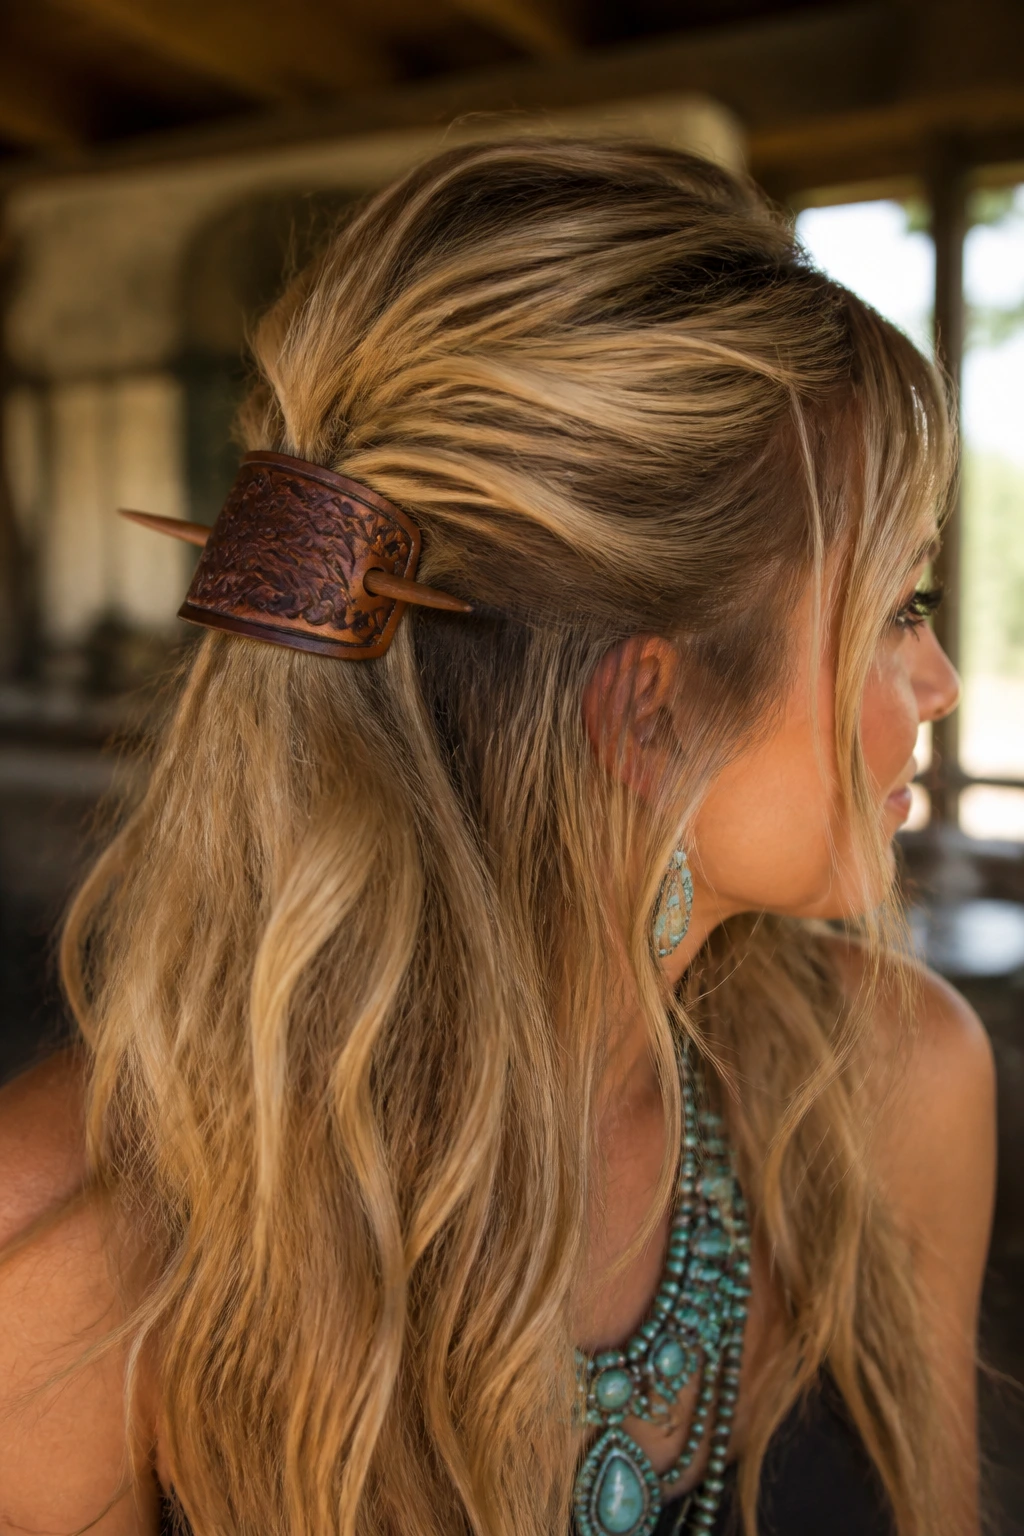
There are mornings when you want your hair out of your eyes, but you still want to show off your length. A thick, tooled leather barrette with a wooden stick fastener is the perfect utility player for this situation. It holds the top half of your hair securely while adding a rustic, classic accent.
This style works best on second-day hair that has built up a bit of natural body.
Step-by-Step Execution
- Gather a section of hair from just above your ears, pulling it back to the center-rear of your head.
- Twist this gathered section once to create a flat base for the barrette.
- Place the leather shield over the twist, aligning the pre-punched holes on either side.
- Slide the wooden peg through the first hole, under the twisted hair close to the scalp, and out through the second hole. Key warning: Do not grab too much hair, or you will bend the leather shield and prevent the pin from securing properly.
5. Sleek Rope Braid with Bandana Tie
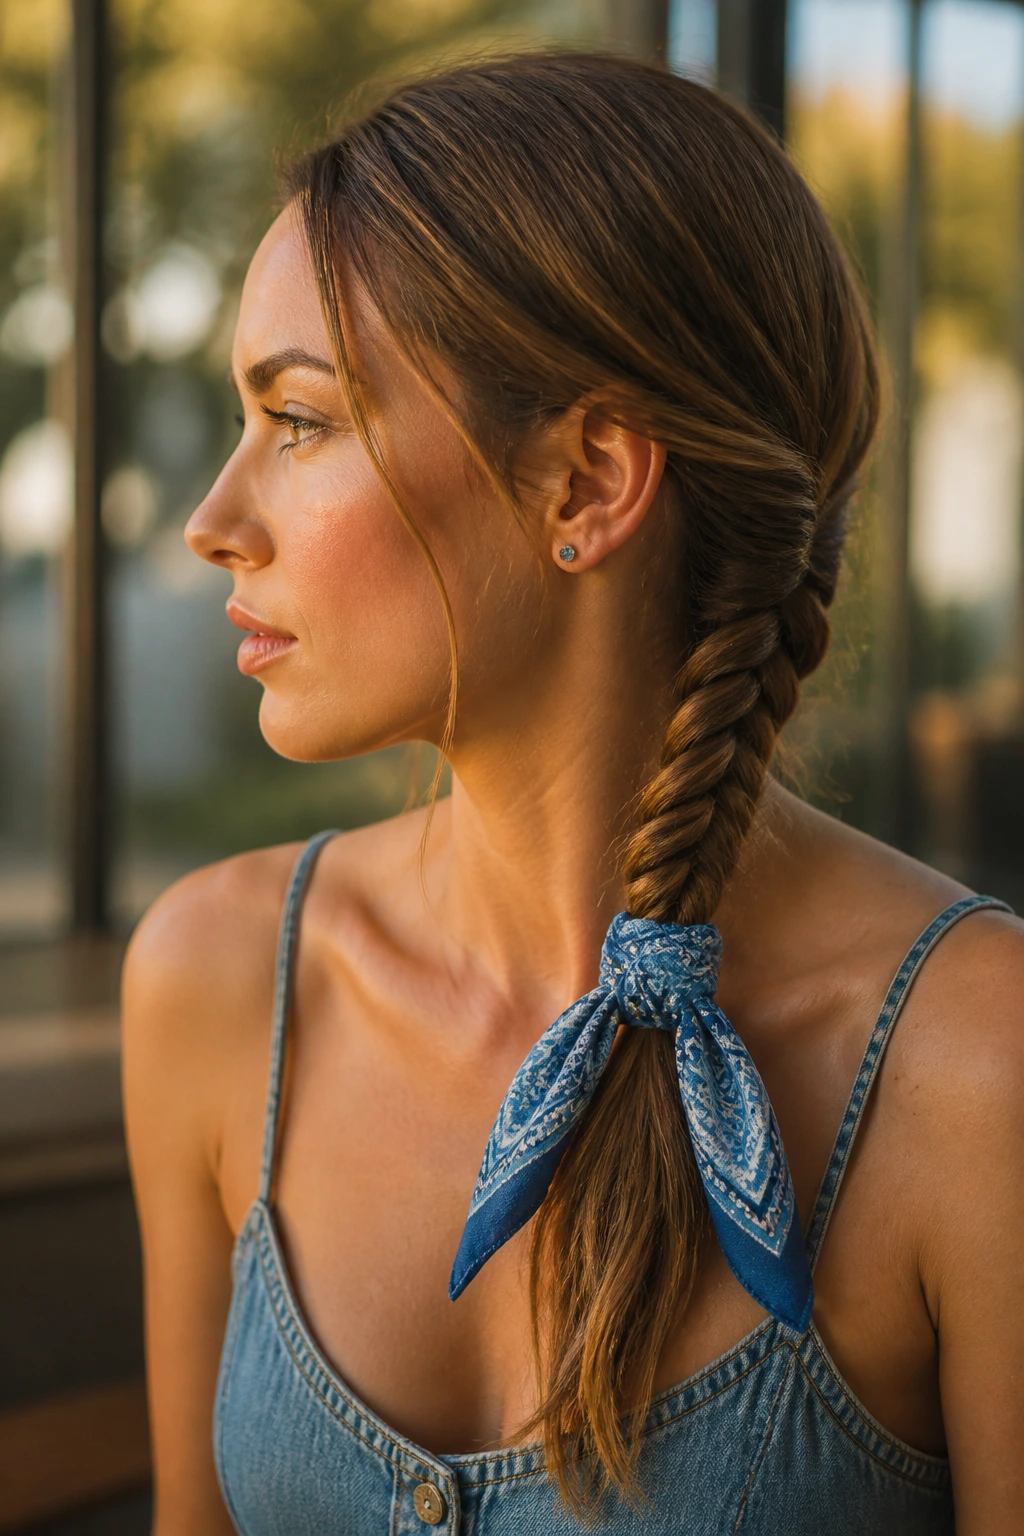
A rope braid uses two strands instead of three, relying on opposing twists to lock the hair into a cord-like structure. It is significantly faster to create than a traditional braid, and it offers a cleaner, more graphic look.
To start, gather your hair into a low ponytail and secure it with a clear elastic. Divide the ponytail into two equal sections. Twist both sections individually to the right, then wrap them around each other to the left. This opposing tension is what keeps the rope from unraveling.
Secure the bottom with another elastic, then wrap a folded cotton bandana around the top base. Knot it once, letting the ends hang down alongside the braid. This provides a splash of color while hiding your basic hair tie.
6. Messy Fishtail Side Braid
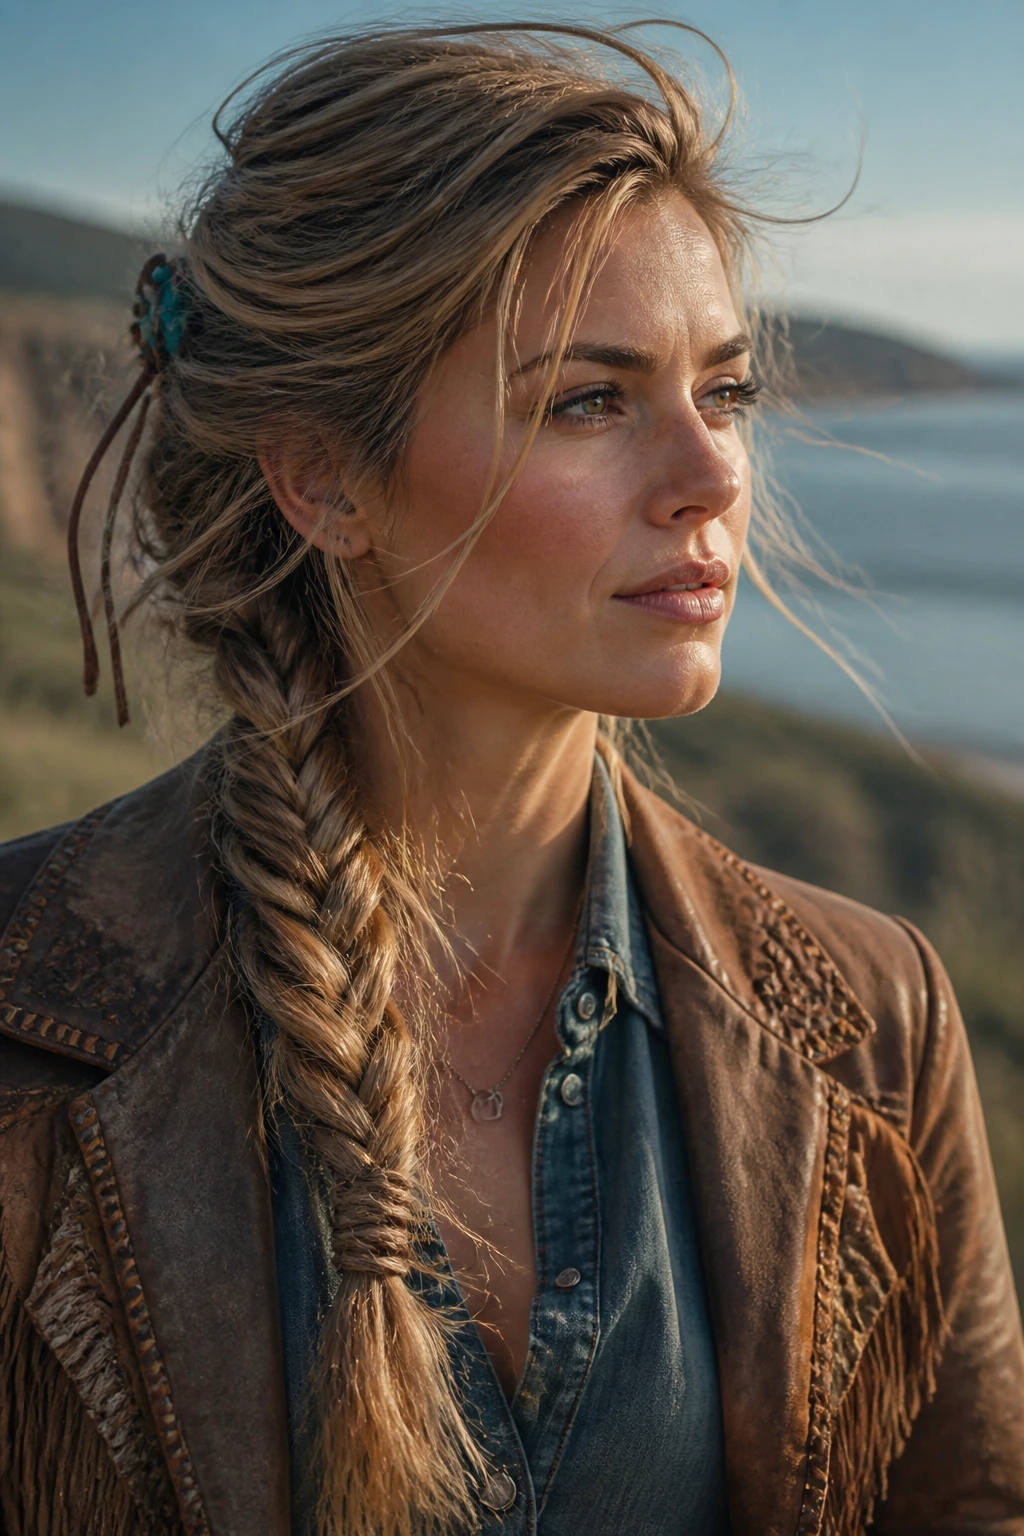
Unlike standard plaits that look best when neat, a fishtail braid actually improves as it loosens and develops flyaways. This makes it an incredibly forgiving style for windy days or high-energy work.
While a standard braid uses three thick chunks of hair, a fishtail uses two main sections and pulls tiny strands from the outside of one to the inside of the other. This creates a dense, herringbone texture.
Who It Is Best For
This style is ideal for those with thick, textured hair that has some natural wave. If your hair is very fine, the braid may look thin; you can combat this by spraying a texturizing powder along the braid before pulling it apart.
The Specific Recommendation
Do not braid all the way to the very end of your hair. Leave about three to four inches of unbraided tail at the bottom. This allows the braid to swing naturally and prevents the bottom elastic from pulling too tightly on your ends.
7. The Tousled Shag with Front Face-Framing Micro-Braids
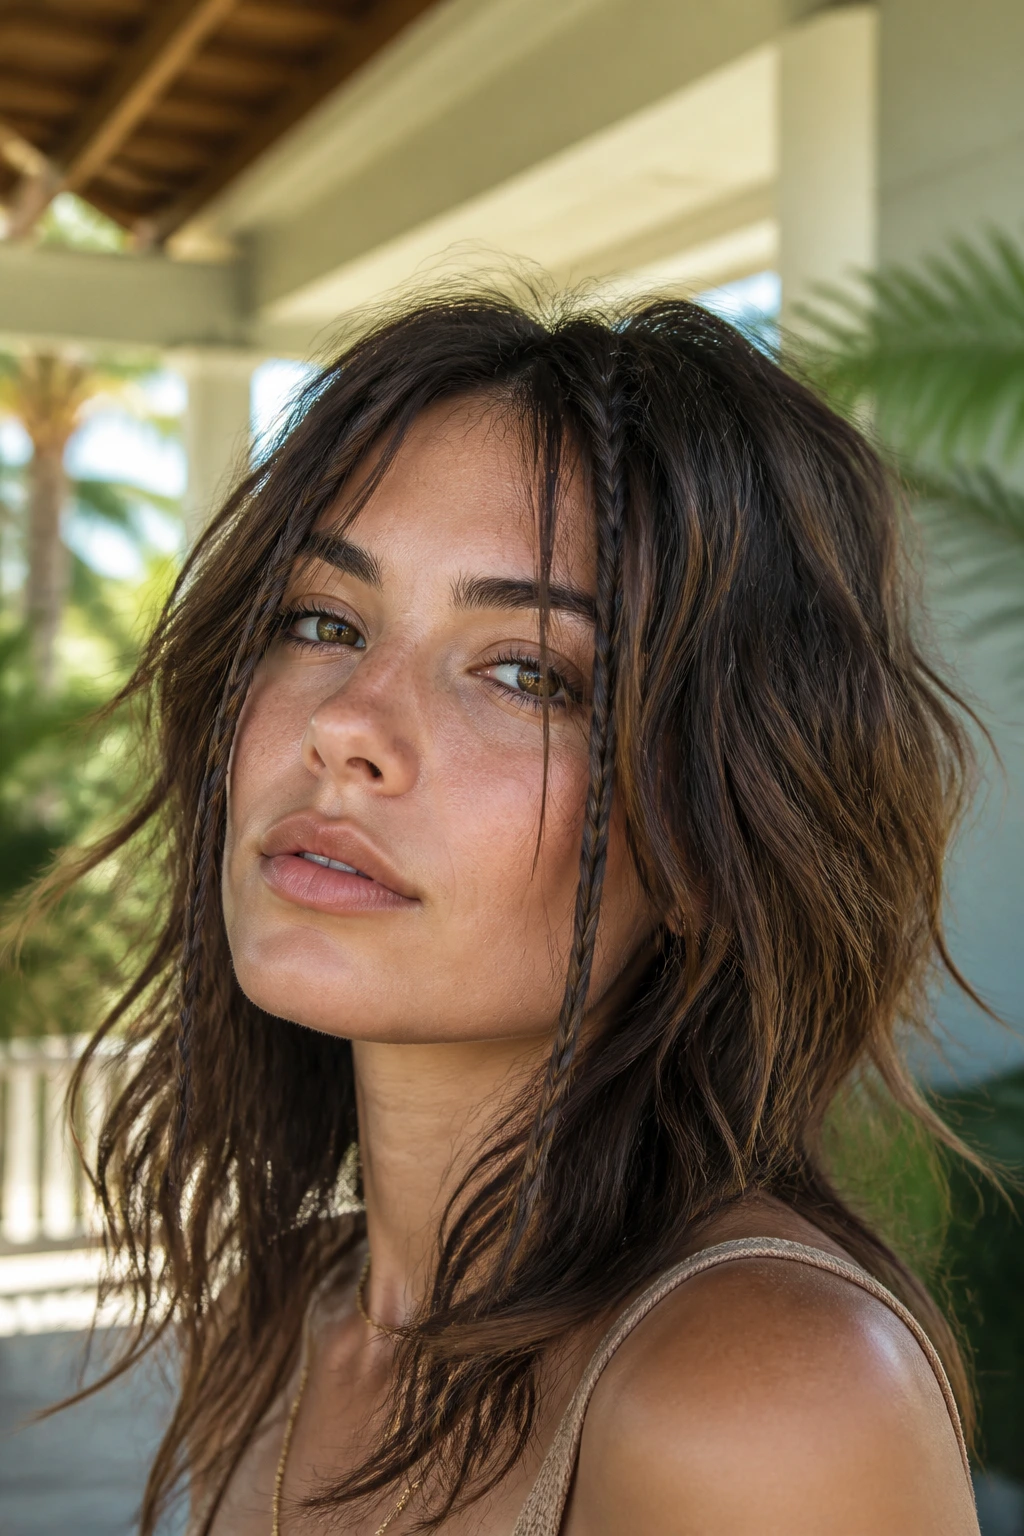
For those with shorter layers or a modern shag cut, traditional braids are out of the question. You can still bring that rustic, outdoor aesthetic to your look by incorporating two tiny micro-braids right at your hairline.
Why This Style Saves Time
Instead of spending fifteen minutes with a curling iron trying to tame bedhead, you simply work with your hair’s natural texture. The two small braids frame your face, drawing attention away from any messy waves behind them.
Quick Style Metrics
- Best for: Shags, wolf cuts, and heavily layered medium-length hair
- Time required: 3 minutes
- Key tools: Two mini clear elastics, a light texturizing paste
- Hold level: Medium—the braids stay secure, while the rest of your hair moves freely
Pro tip: Rub a pea-sized amount of matte texturizing paste between your palms and scrunch it into your damp or dry ends to define your layers.
8. High Ponytail with Suede Cord Wrap
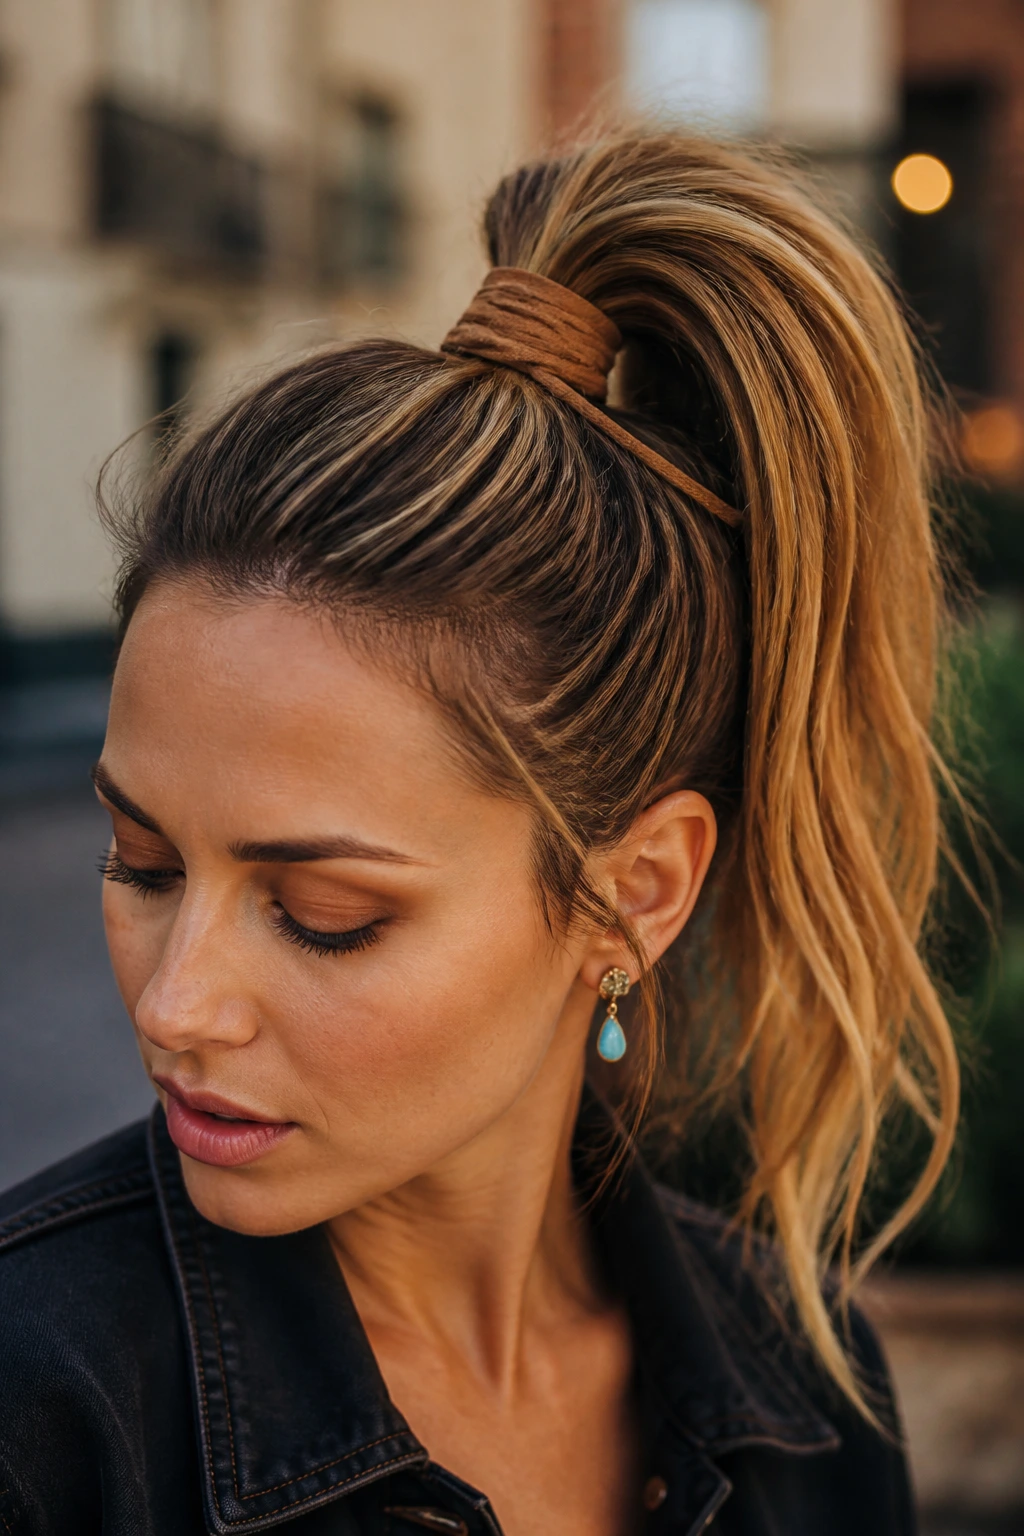
A standard high ponytail can feel a bit basic, but wrapping the base with a length of raw suede cord completely changes the shape. It structures the pony, forcing it to sit high and proud rather than drooping by lunchtime.
Start by pulling your hair into a high, tight ponytail using a heavy-duty elastic that can support the weight of your hair. Take a yard of thin suede cord—brown, tan, or black work best—and loop it around the elastic to knot it in place.
Begin wrapping the cord down the first two inches of the ponytail, keeping each wrap tight and flush against the last one. Tie the ends of the cord in a simple square knot, letting the remaining tails hang down. This structure keeps the ponytail elevated and away from your neck, which is incredibly helpful during hot weather.
9. Twisted Low Ponytail with Turquoise Accents
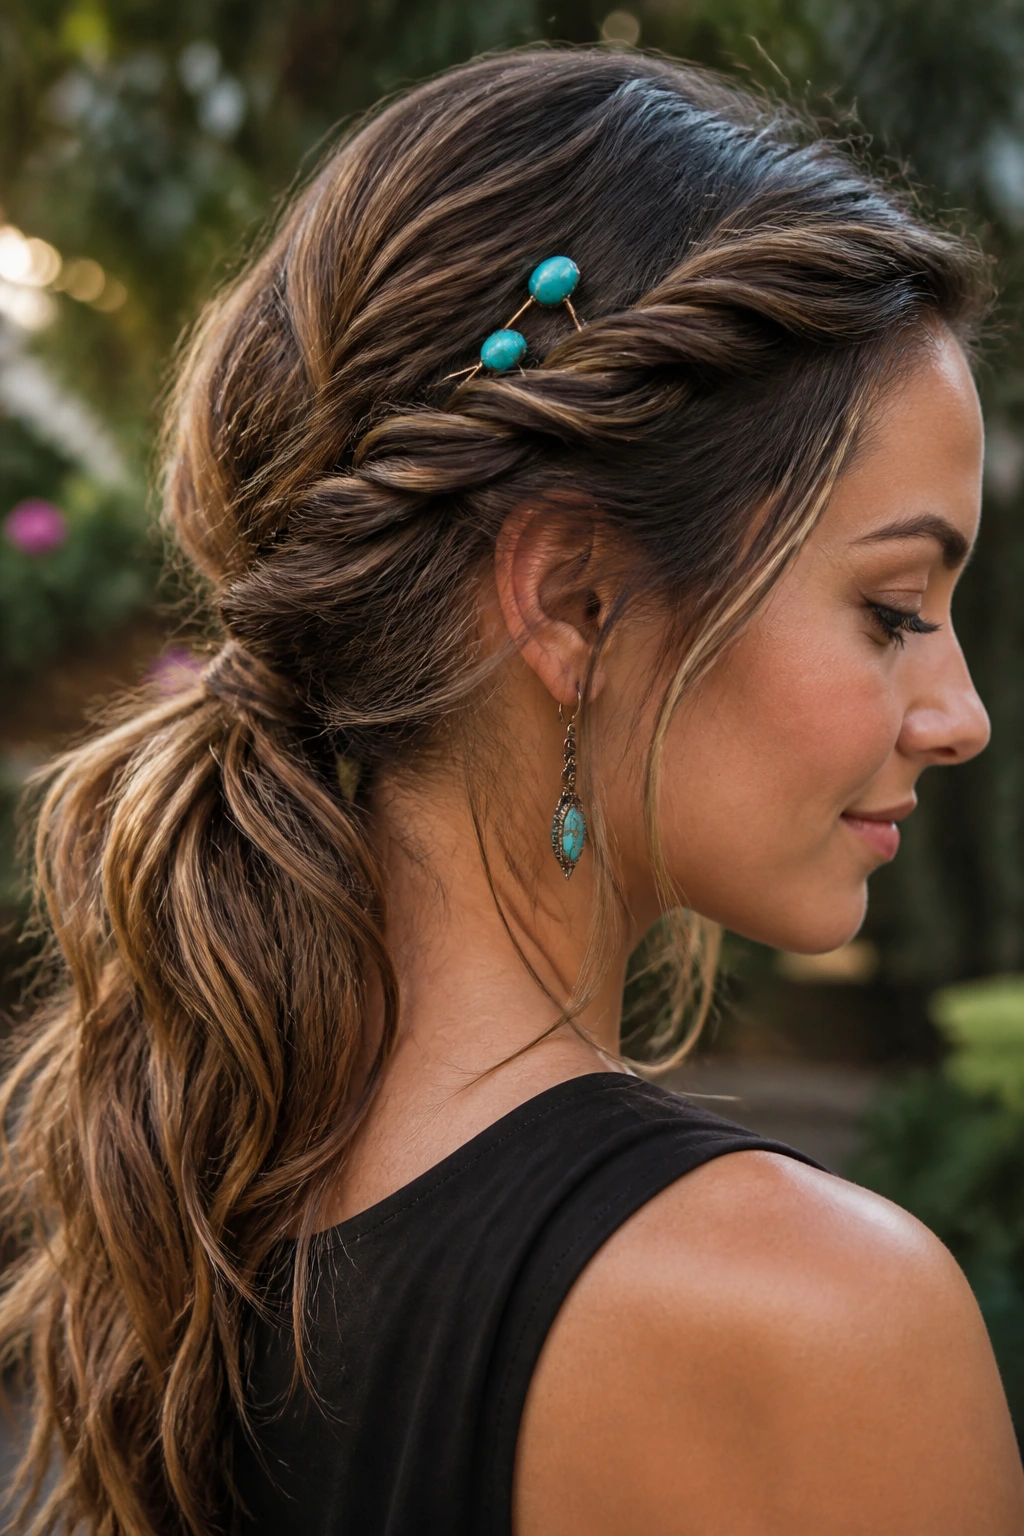
This look offers a softer alternative to a tight pony. By twisting the side sections of your hair back into the main length, you hide the hairline and create a beautiful, rolling texture along the sides of your head.
Why does this twist hold better than a regular low ponytail?
The twists on either side act as anchors. They distribute the tension across the sides of your scalp rather than concentrating it all on one central elastic, reducing morning headaches.
How to Style It
- Step 1: Leave two substantial sections of hair free at the front of your face, near your temples.
- Step 2: Pull the remaining back section of your hair into a loose low ponytail.
- Step 3: Take the left front section, twist it backward away from your face, and wrap it over the top of the ponytail elastic.
- Step 4: Repeat with the right side, wrapping it in the opposite direction, then secure both ends underneath the pony with a bobby pin.
- Step 5: Slide a silver and turquoise hair pin directly into the center of the twist to finish.
10. Textured French Braid Crown
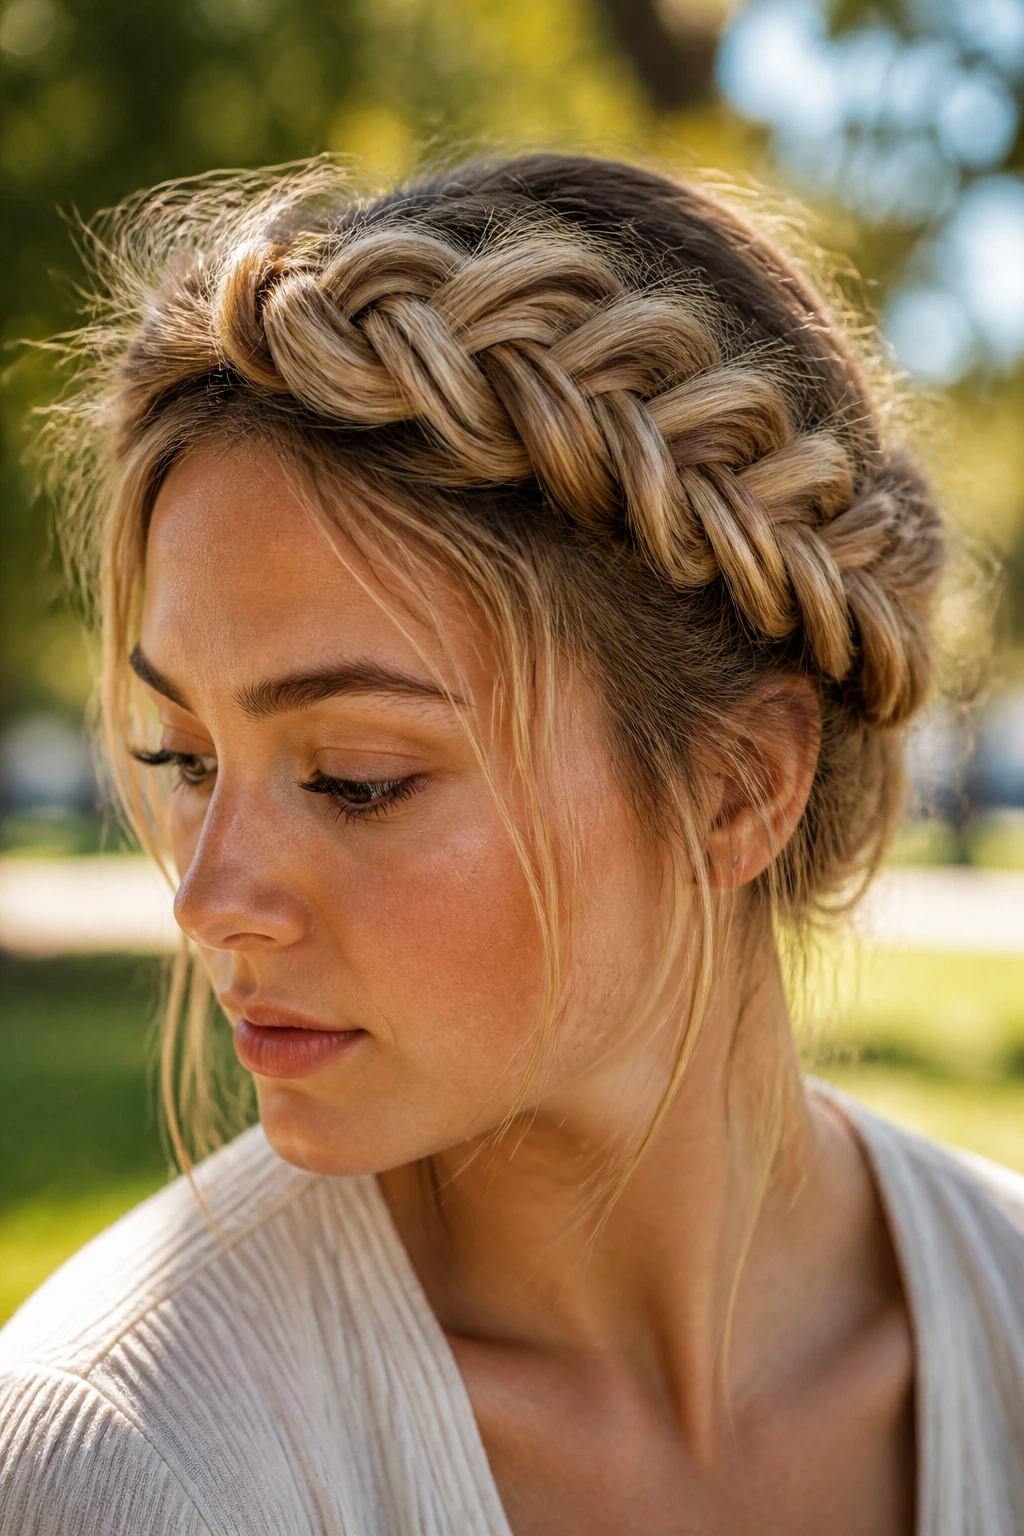
If you want your hair completely off your neck and secured for twenty-four hours, a braided crown is the gold standard. It keeps everything tucked away, meaning you do not have to worry about wind, sweat, or dust ruining your style.
This style essentially wraps a French braid around the circumference of your head. It may take a couple of practice runs to get the hand placement down, but once you do, it is a five-minute lifesaver.
Step-by-Step Process
- Create a deep side part, then start a French braid right at the parting line, working down along your hairline toward your ear.
- Continue braiding around the back of your head, keeping the braid low near the nape of your neck, gathering hair as you go.
- Once you reach the opposite side, finish with a standard three-strand braid with the remaining tail.
- Pin the tail flat along the top of your head, tucking the raw ends under the start of the French braid. Key warning: Secure the pins deeply into the braid structure, crossing them in an “X” shape to prevent them from sliding out when you shake your head.
11. Low-Slung Double Pigtail Buns
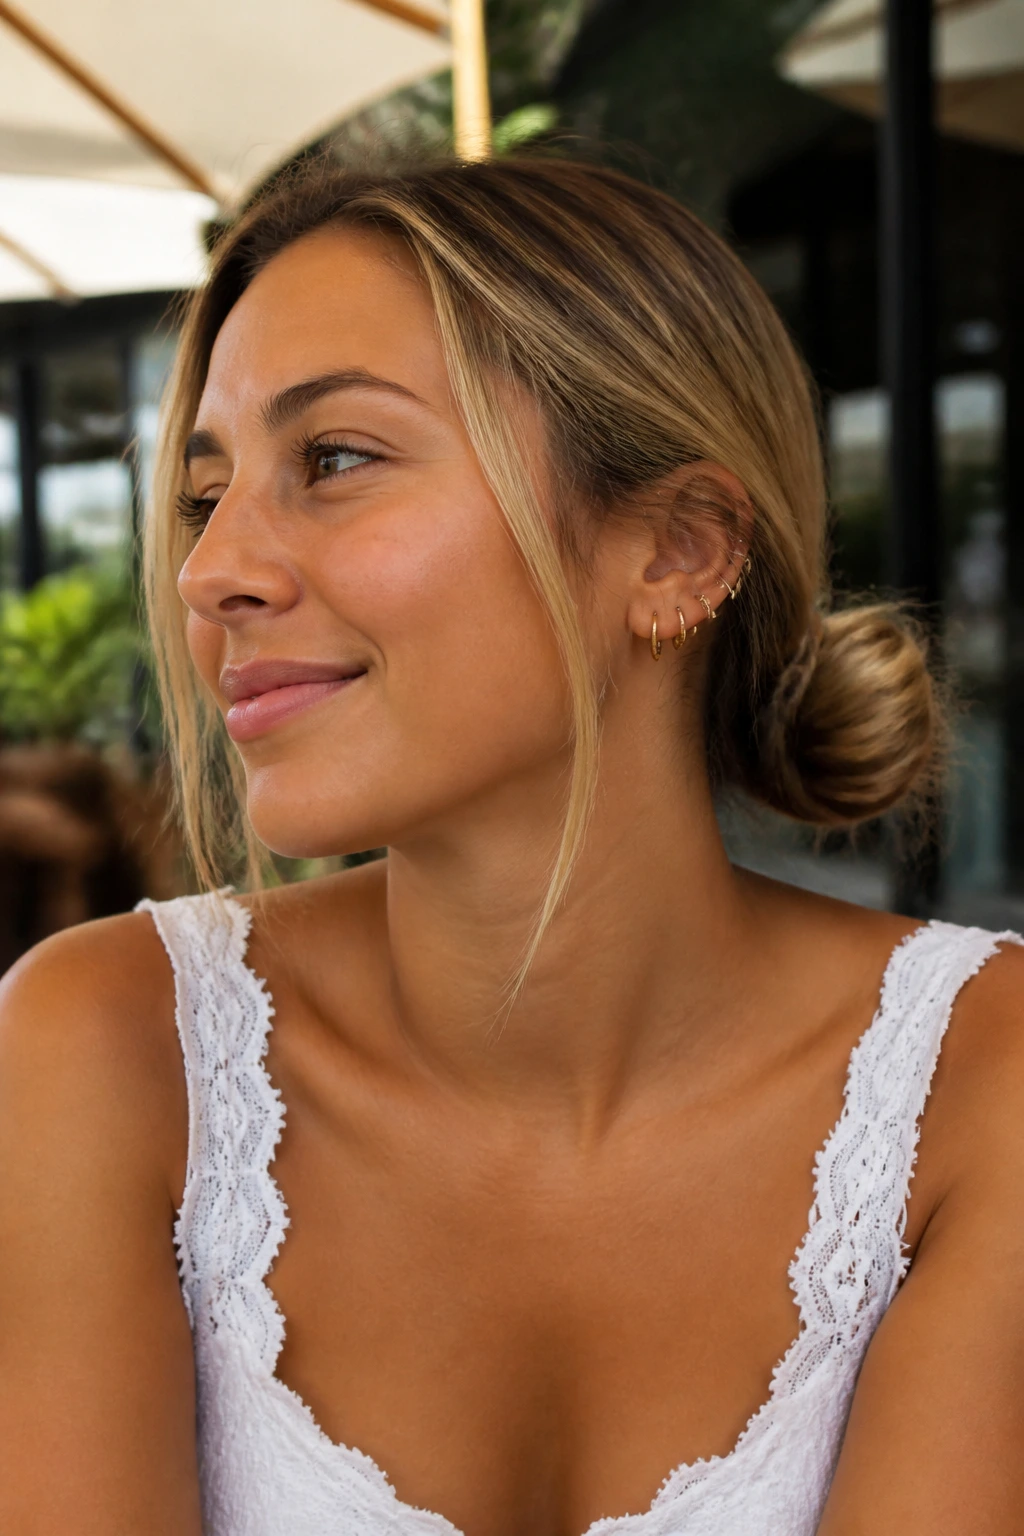
Pigtails can sometimes feel too youthful, but lowering them and twisting them into small, dense buns at the base of your skull creates an incredibly practical, mature look. It is a fantastic option for thick hair that is too heavy for a single high bun.
To create these, part your hair down the center from your forehead to the nape of your neck. Secure each side into a low ponytail behind your ears. Twist each ponytail tightly until it starts to coil in on itself, then wrap it around the base to form a bun.
Secure each bun with a second elastic or a few heavy-duty U-pins. This style is flat enough against the back of the head to allow you to wear hats, helmets, or hoods comfortably, making it a go-to for outdoor chores or cold-weather layering.
12. Half-Up Topknot with Raw Wood Hair Pin
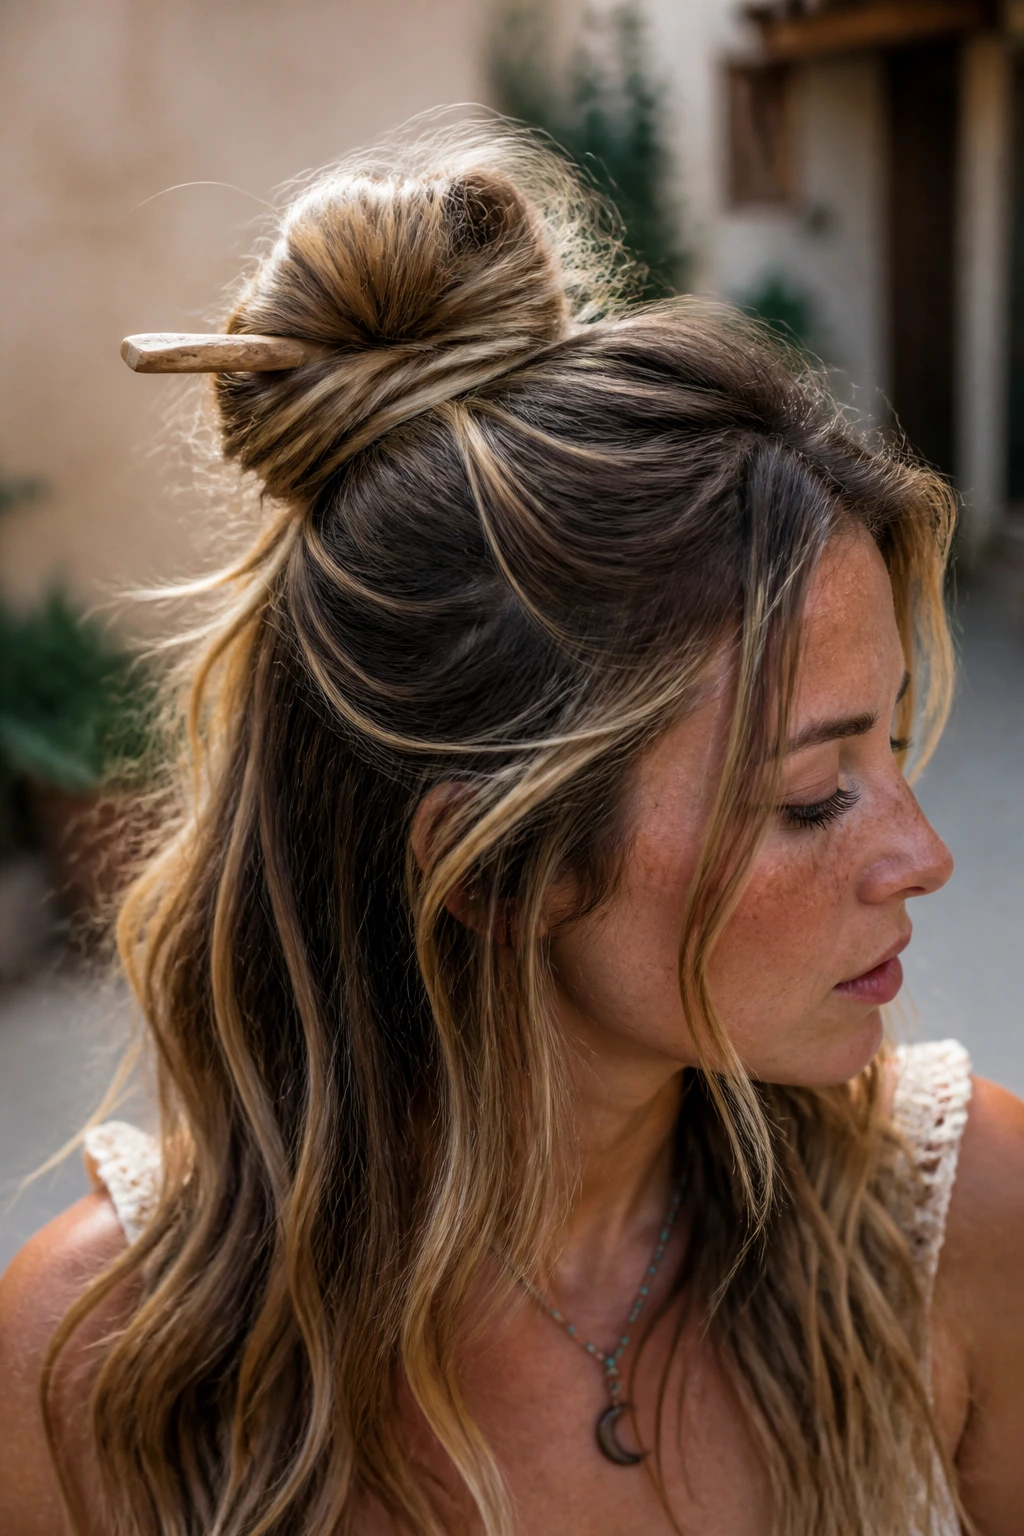
When you need your hair out of your eyes but still want to feel the length of your hair behind you, this style is the quickest answer. A single raw wood hair fork or pin provides a secure hold without the pulling sensation that metal or plastic clips often cause.
How This Differs From Standard Clips
Standard plastic claw clips lay flat against the head but can break easily if dropped on concrete or wood. A dense wooden pin is nearly indestructible and holds hair by tension alone, which is much gentler on your hair shafts.
Who It Is Best For
This look is great for curly or wavy hair that has natural volume. The topknot provides height and structure at the crown, while your natural curls cascade down your back.
The Specific Recommendation
When inserting the wooden pin, make sure you catch some hair from the scalp level before pushing it through the bun. This creates a bridge of tension that keeps the topknot from sagging forward as you walk.
13. Side-Swept Waves with Silver Concho Pins
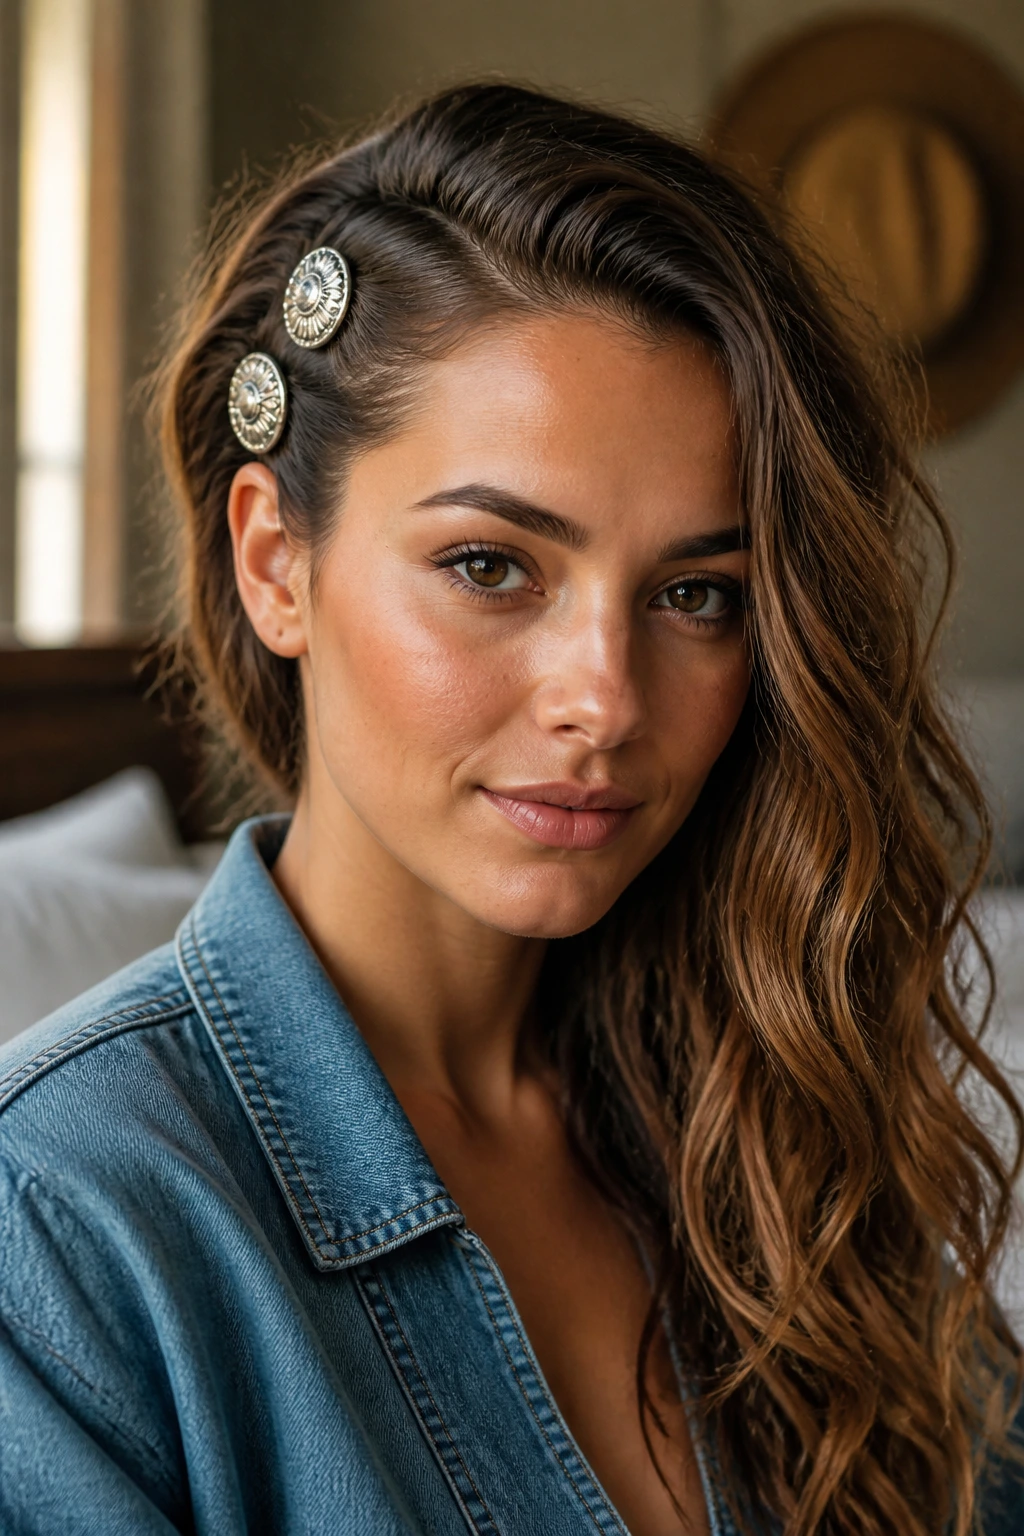
This style is perfect for those who want to show off their natural waves but need to keep one side of their hair securely tucked away from their face. It is an asymmetrical look that feels rugged yet incredibly polished.
Why This Works for Natural Texture
Instead of fighting your hair’s volume, you use it to your advantage. By pinning down one side tightly, the opposite side appears fuller and more dramatic.
Quick Style Metrics
- Best for: Wavy, curly, or textured medium-to-long hair
- Time required: 2 minutes
- Key tools: Two silver concho bobby pins, a paddle brush
- Hold level: Medium—keeps one side perfectly clear while leaving the rest free to move
Pro tip: Slide the concho pins in horizontally, pointing toward your ear, to create a clean, modern line that holds the hair flat against your temple.
14. Classic Four-Strand Plait
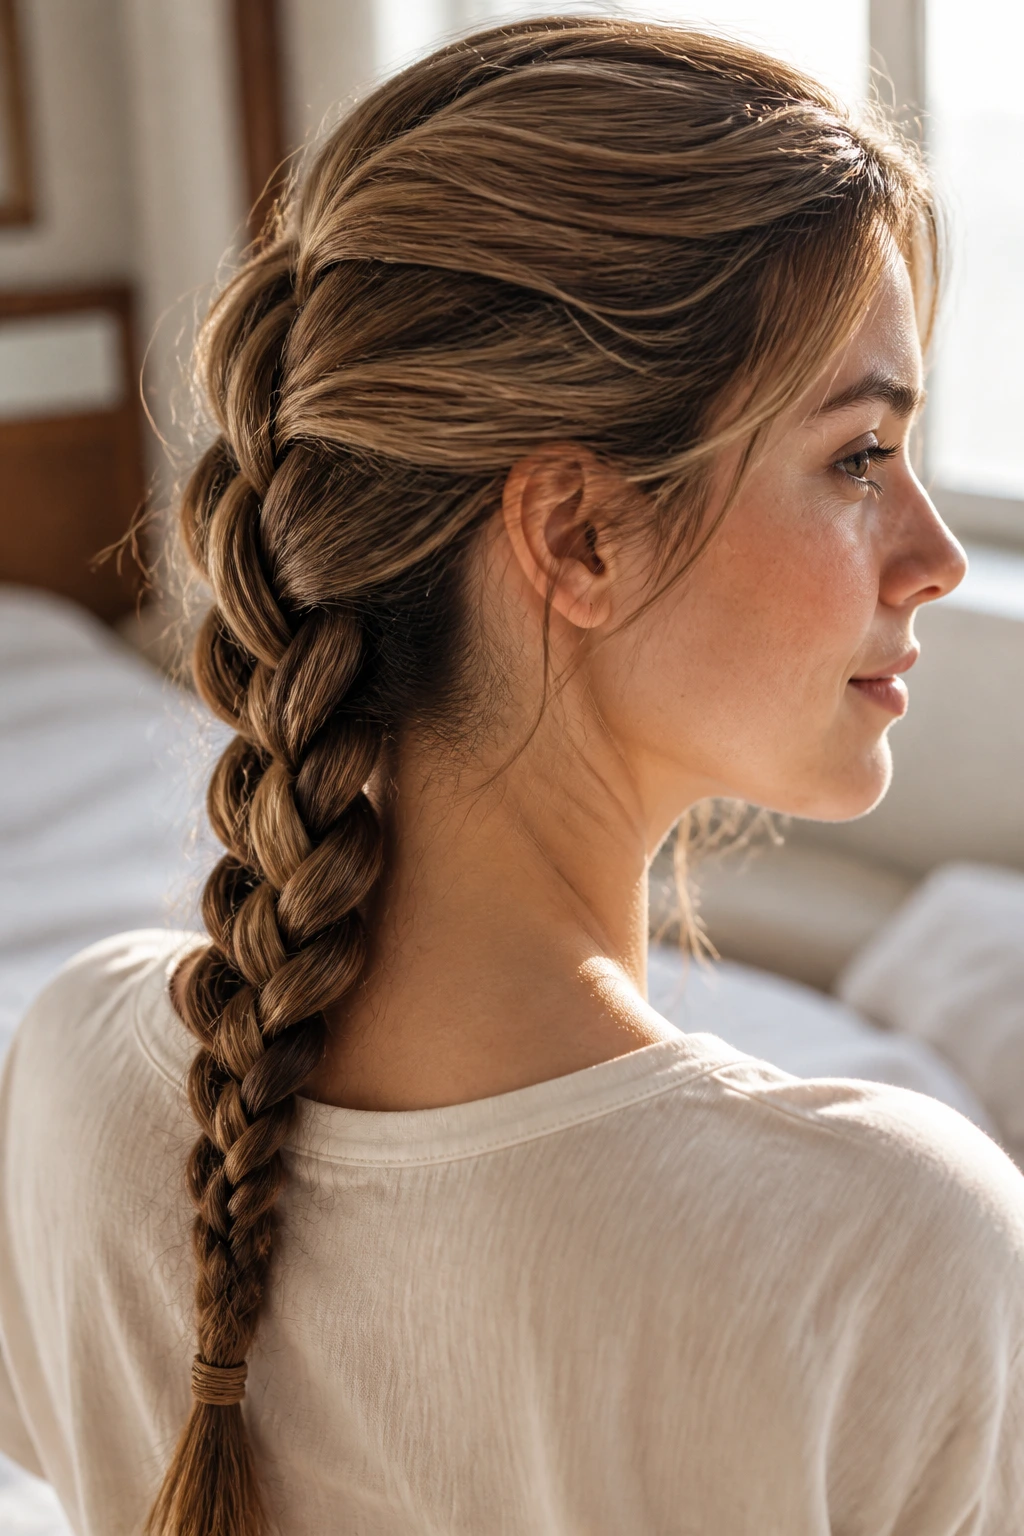
If you are tired of the standard three-strand braid, upgrading to a four-strand plait is a simple way to make your hair look like a piece of finely woven leather tack. It lies flatter than a traditional braid, making it incredibly comfortable to wear down your back when sitting against a headrest or chair.
The pattern sounds more intimidating than it actually is. Think of it as weaving: you take the outer strand, wrap it under one, and over the next. By repeating this simple rhythm down the length of your hair, you create a wide, woven band.
Because this braid is wider, it distributes the weight of your hair evenly. This is a massive benefit for those who suffer from neck strain or scalp tenderness when wearing their hair braided for long periods.
15. The Folded Loop Bun with Leather Hair Slider
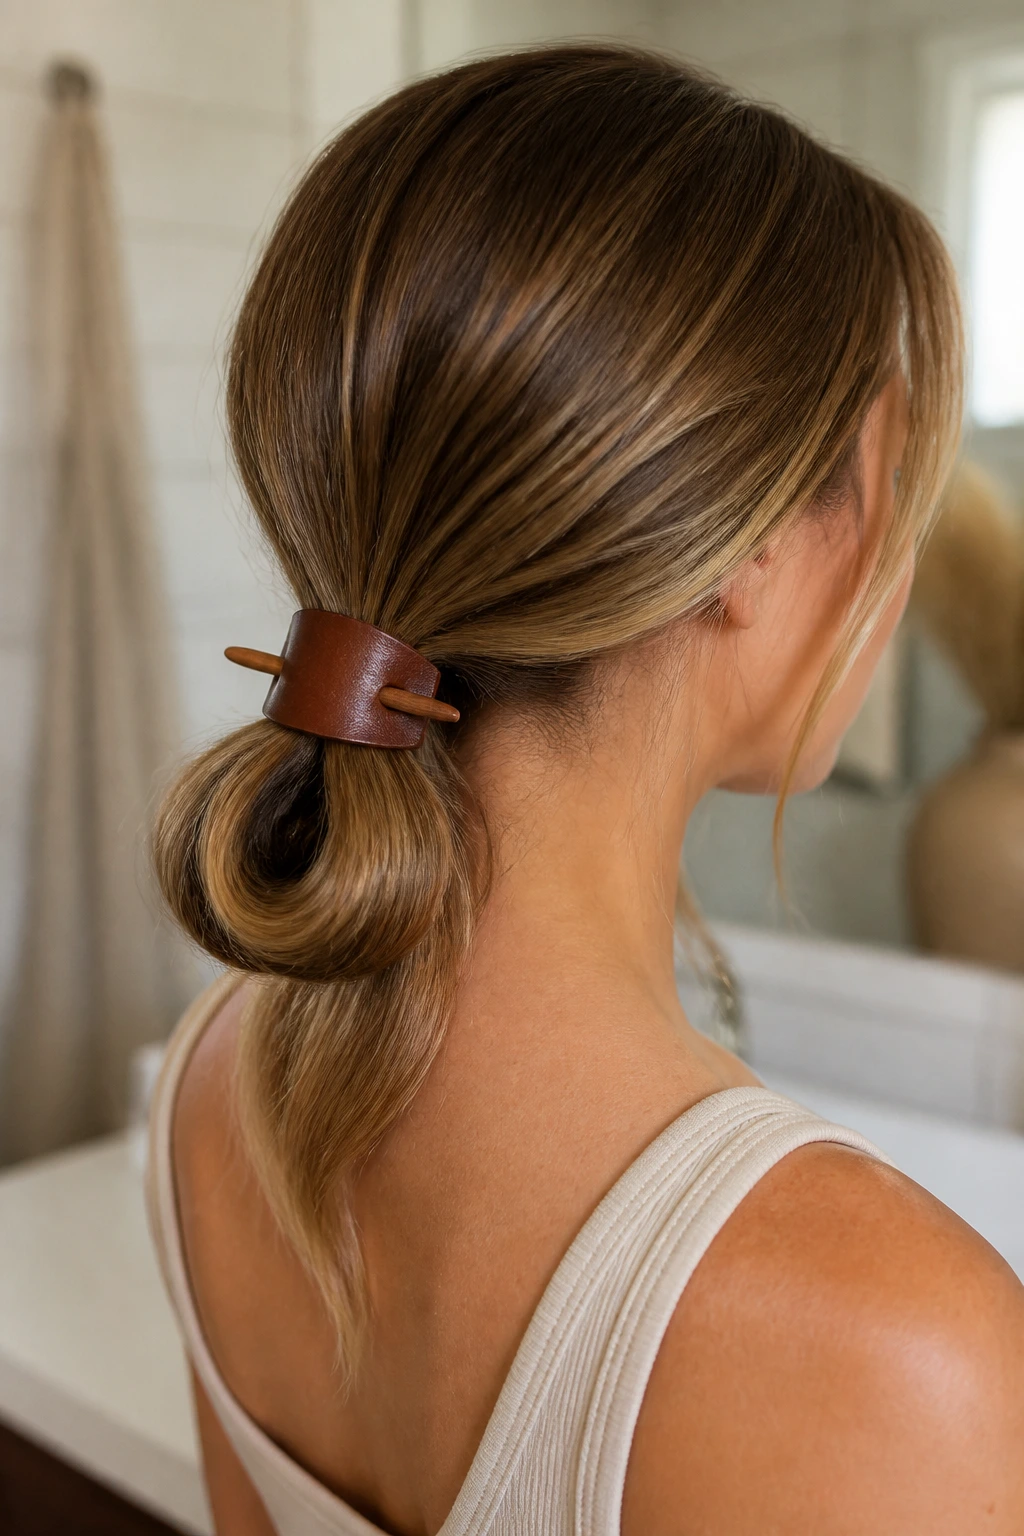
A classic bun requires a lot of twisting, which can stress your hair ends and lead to breakage over time. The folded loop bun avoids this entirely by folding the hair once and securing it with a leather slider.
Why does this protect your hair ends?
Because you are not coiling the hair tightly, the fragile ends of your hair remain tucked inside the loop, shielded from environmental damage and friction against your clothes.
How to Style It
- Step 1: Pull your hair back into a low ponytail, but on the final pass through the elastic, do not pull the hair all the way through. Leave it in a large loop.
- Step 2: Let the ends of your hair hang down beneath the loop.
- Step 3: Place a leather hair slider over the center of the loop.
- Step 4: Pass the wooden peg through the leather slider and under the base elastic to lock the loop in place.
16. Criss-Cross Pulled Back Crown Section
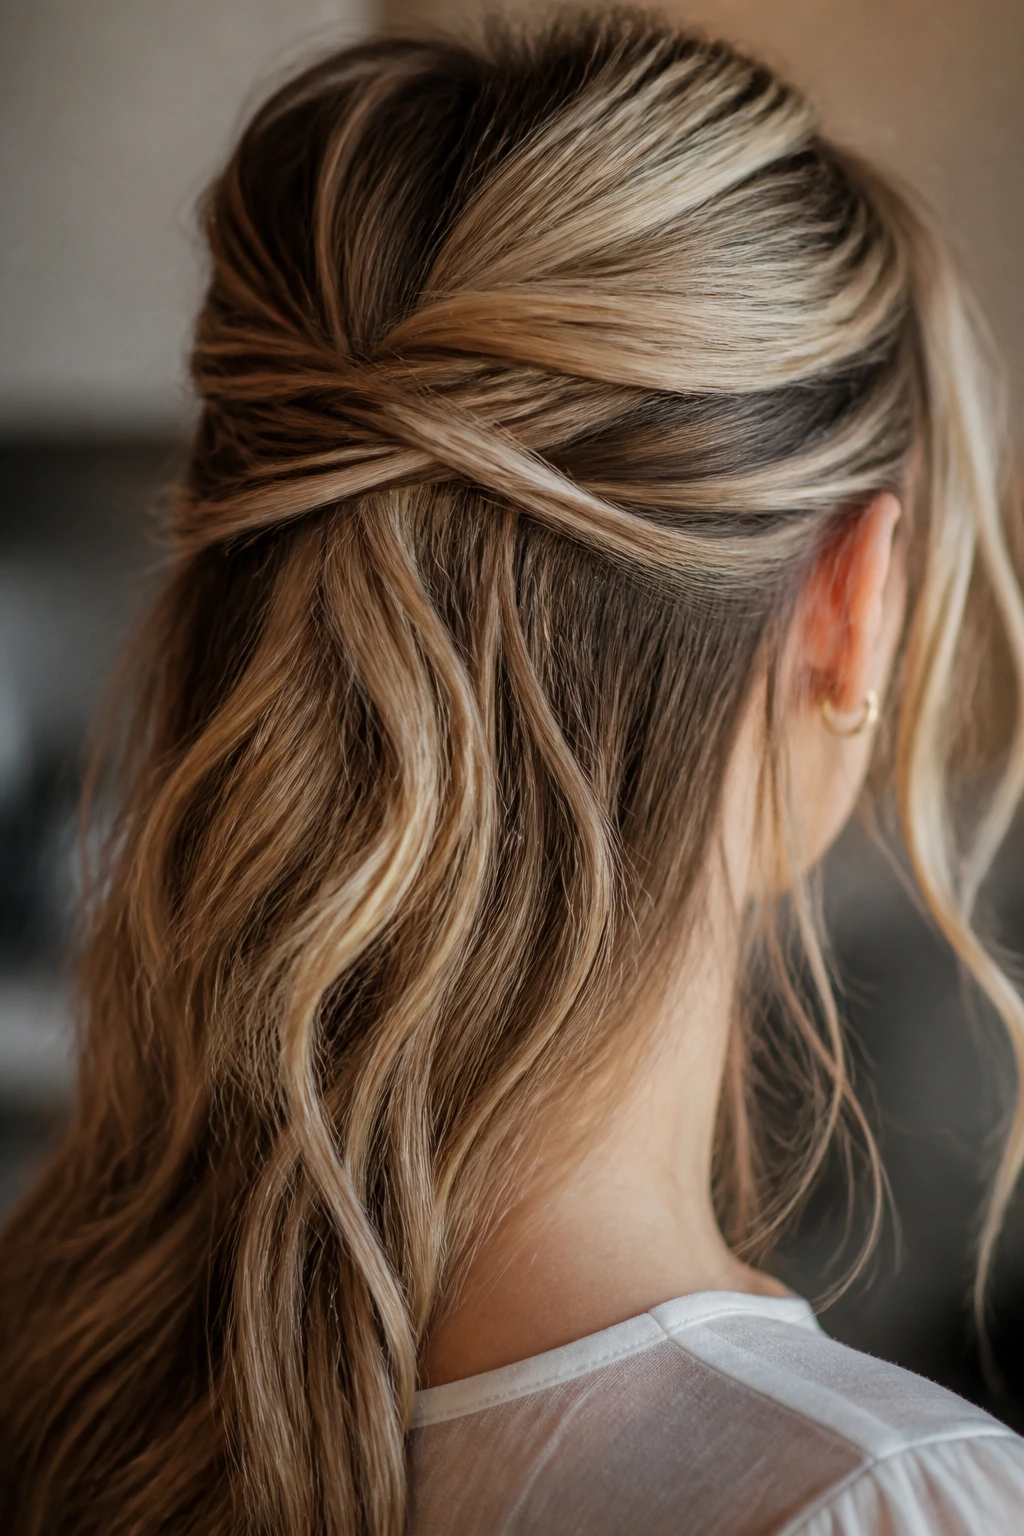
This is a beautiful, highly functional option for keeping fine hair or growing-out bangs out of your face. It uses small sections of hair crossed over each other to create a clean, geometric pattern at the back of your head.
To start, take a small section of hair from above your left temple and pull it across to the right side of your crown, securing it with a small bobby pin. Take a matching section from the right temple, pull it over the first section to the left side, and pin it down.
Why This Style Outlasts Simple Pins
By crossing the hair sections over each other, you lock the pins beneath the hair layers. The weight of the crossed hair presses down on the pins, preventing them from sliding out even if your hair is very fine or straight.
This style leaves the rest of your hair loose, giving you a comfortable, secure look that requires absolutely no heat styling.
17. Voluminous Southern Blowout with Felt Hat
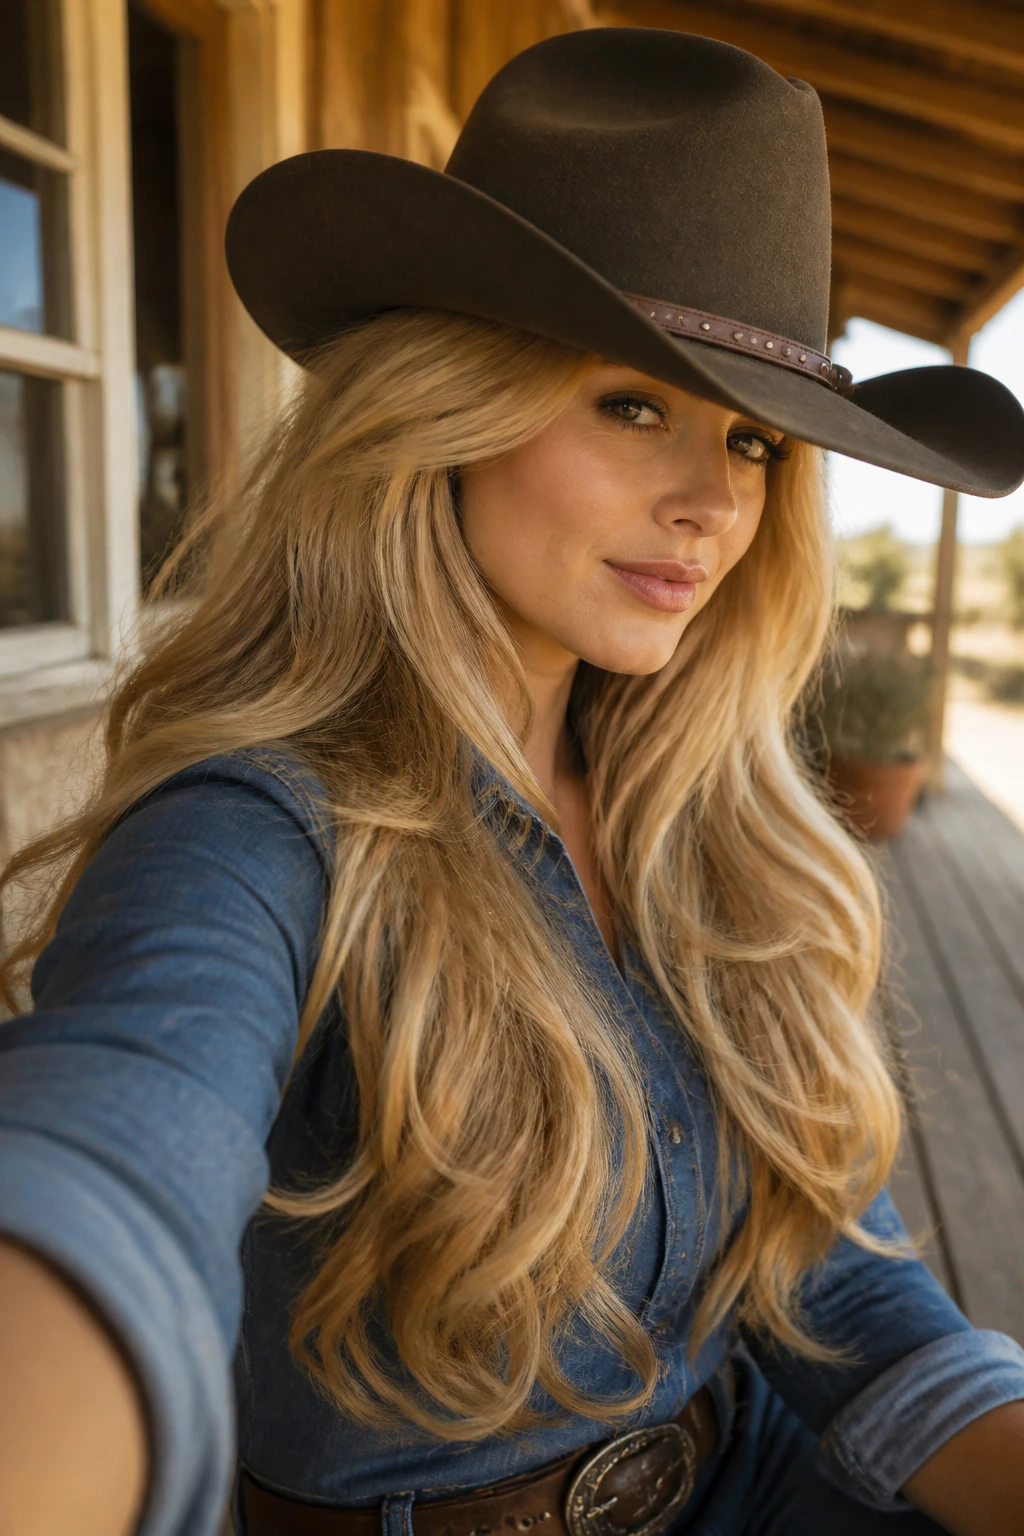
Some mornings demand big, classic volume. If you have older curls or a blowout that has lost its bounce, putting on a structured felt hat is the ultimate trick to instantly look put-together while maintaining that impressive volume.
Start by flipped your head upside down and misting your roots with a texturizing spray to revive the volume. Flip back up and shake out your hair with your fingers—do not use a brush, as this will flatten the texture.
Place your felt hat straight down onto your head, pulling it slightly forward. The crown of the hat will tame any unruly flyaways at the top of your head, while your voluminous lengths flare out dramatically from beneath the brim.
18. Triple-Segmented Braid
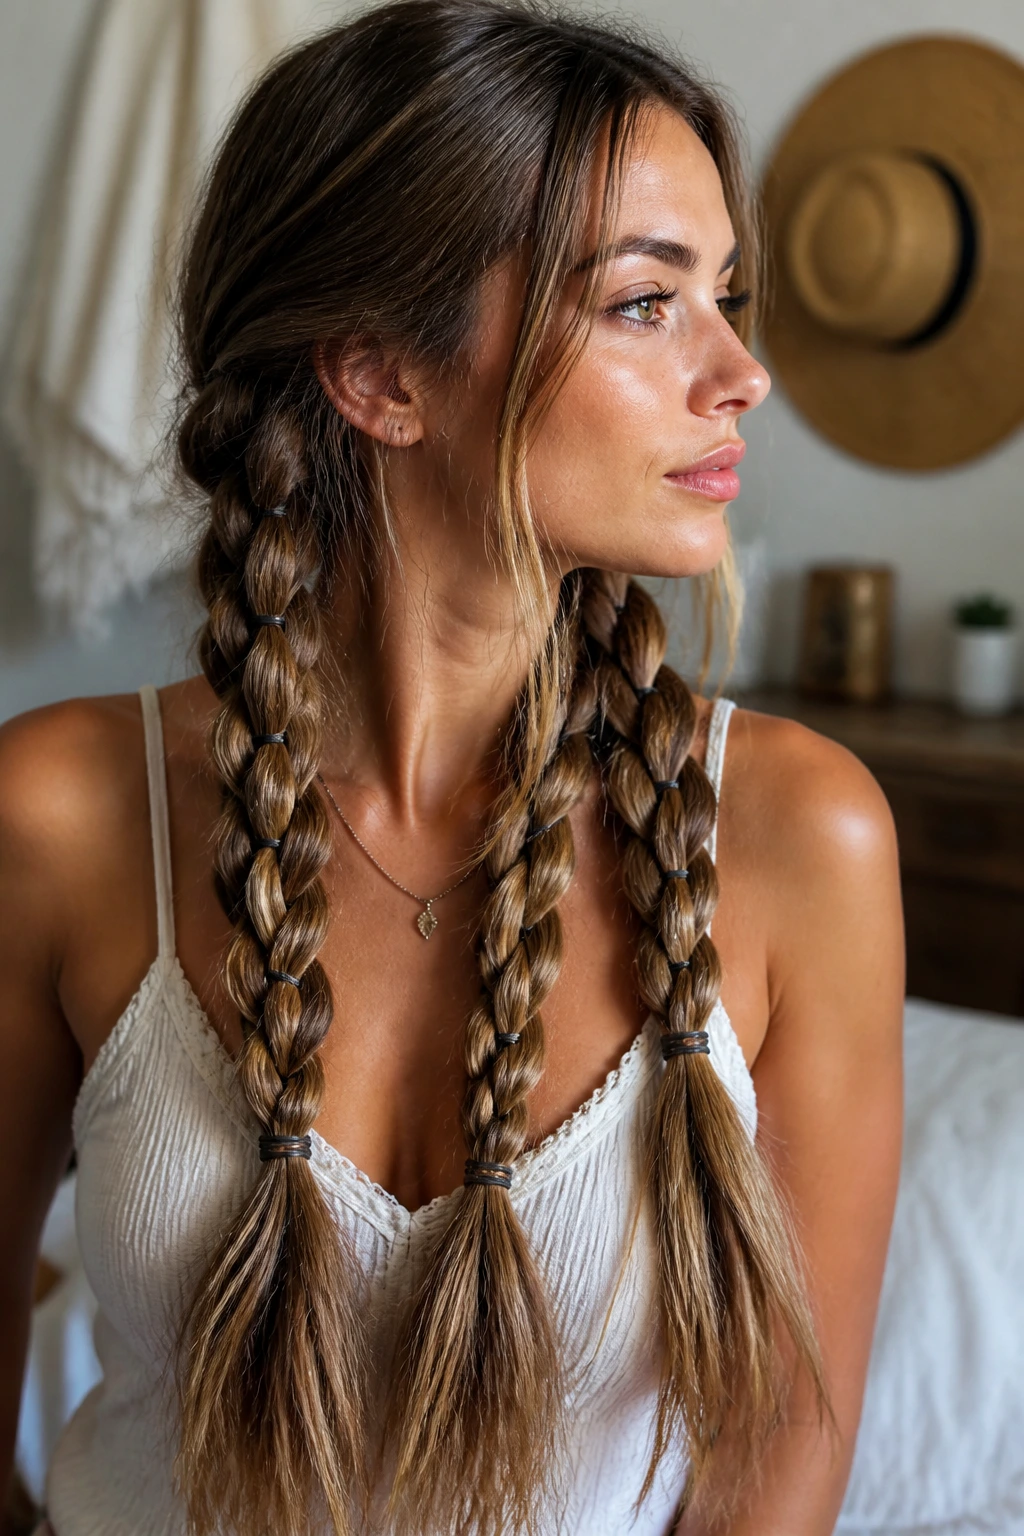
This style is a lifesaver for those with ultra-long hair that tends to tangle within minutes of stepping outside. It combines the security of a ponytail with the containment of a braid.
Why This is Better Than a Standard Braid
In a normal braid, loose layers near the face often slip out during the day. By segmenting the style with elastics first, you lock those shorter layers in place before you even begin to braid.
Who It Is Best For
This look is ideal for long, thick hair with lots of layers. The segmented sections keep everything organized and prevent the braid from looking messy or unfinished.
The Specific Recommendation
Use colored elastics that match your hair color for a seamless look, or choose raw brown bands to complement a rustic, outdoor wardrobe.
19. Woven Ribbon Side Plait
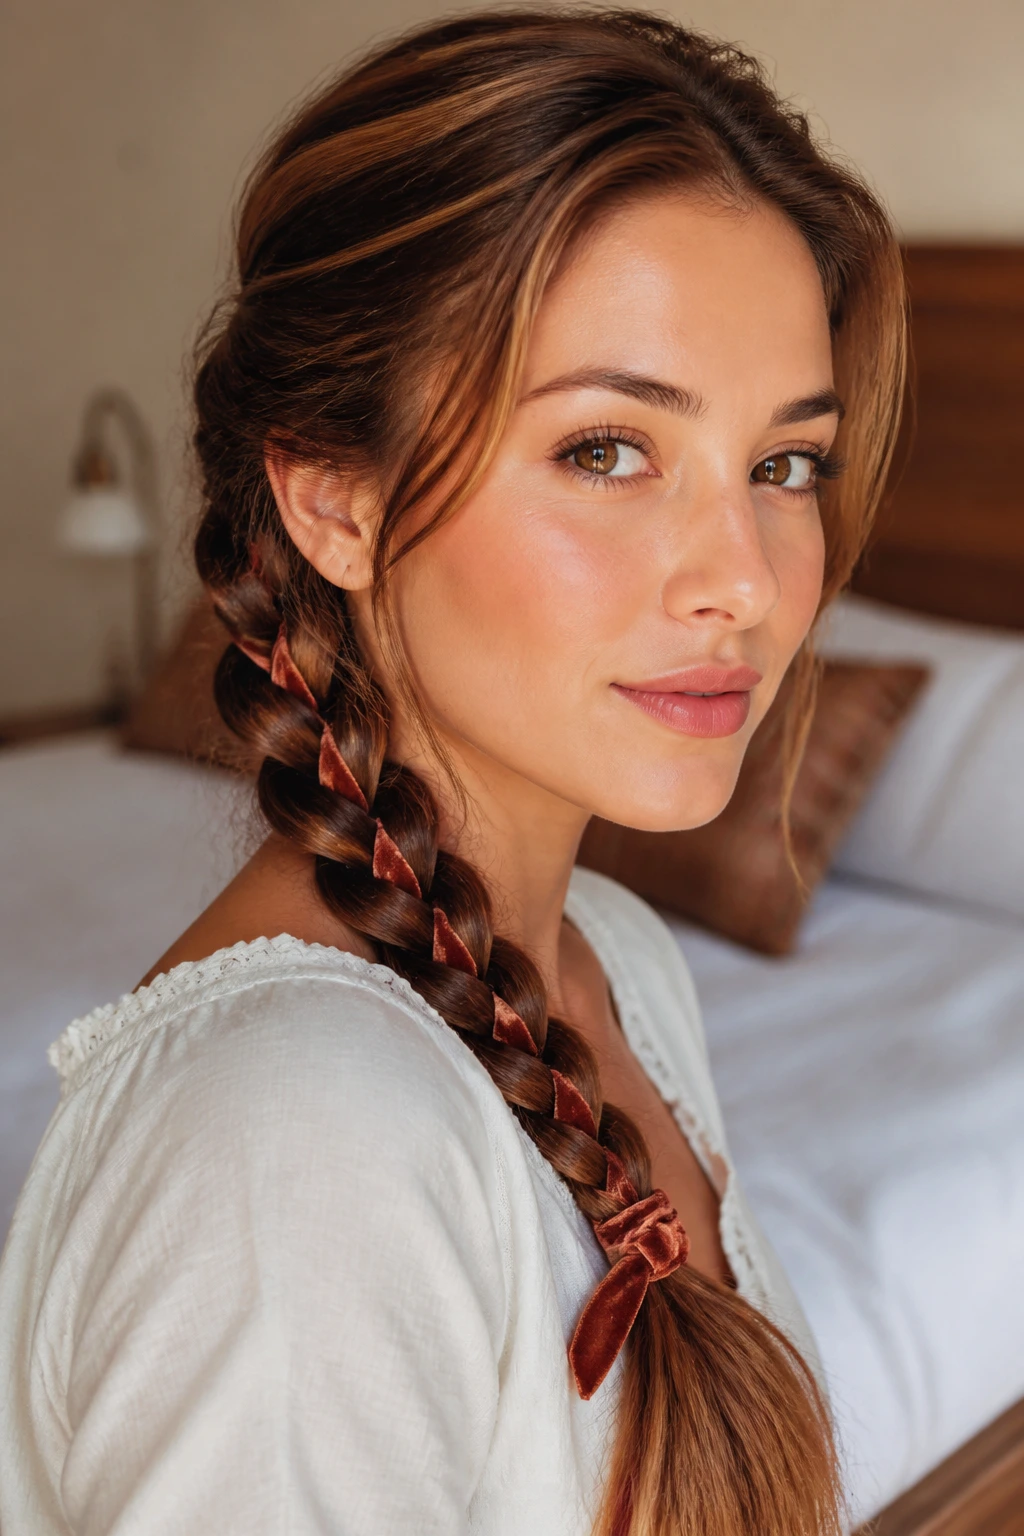
Adding a simple velvet or cotton ribbon to your braid is a quick way to make a basic style look deliberate and detailed. It requires zero extra styling time because you simply treat the ribbon as one of your braid strands.
Why This Adds Structural Hold
The fabric of the ribbon provides traction inside the braid, helping to hold slippery hair types together without the need for hairspray.
Quick Style Metrics
- Best for: Fine to medium long hair
- Time required: 4 minutes
- Key tools: One yard of fabric ribbon, one clear elastic
- Hold level: High—the ribbon keeps the plait tightly locked in place
Pro tip: Tie the ribbon to your starter elastic at the nape of your neck before you begin braiding to ensure it does not slip as you work.
20. The Bedhead Shakeout with Sea Salt Spray
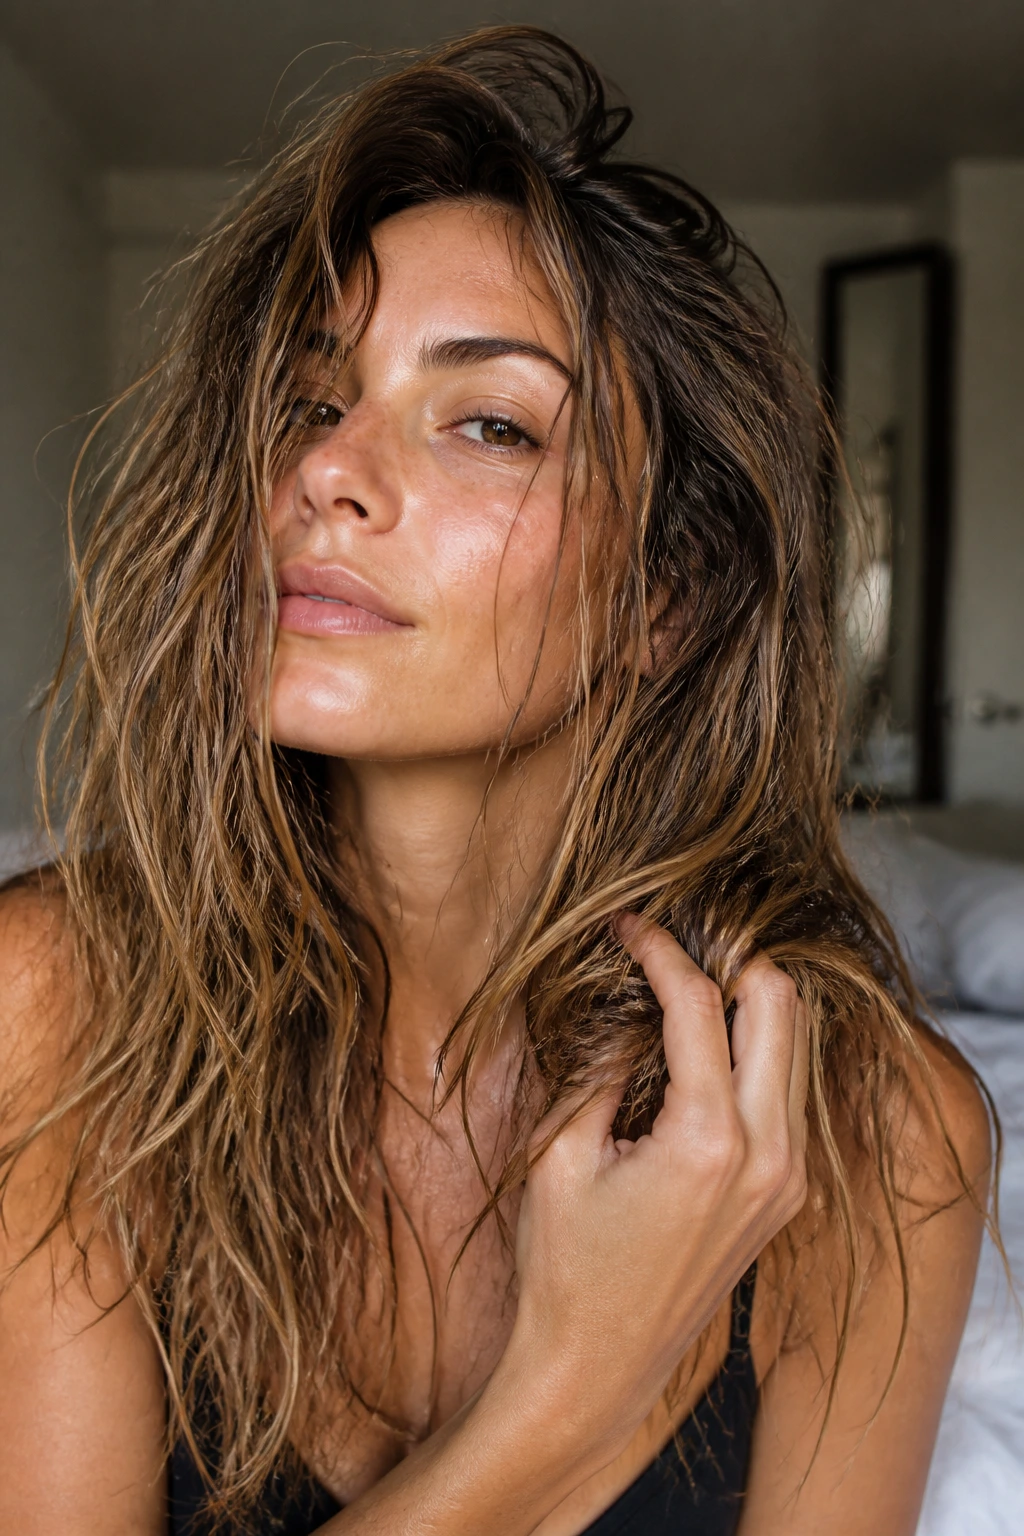
When you have absolutely no time for braids, pins, or hats, you have to lean completely into your natural texture. This style is about refining your bedhead rather than hiding it.
Mist your hair generously with a high-quality sea salt spray, focusing on the mid-lengths and ends. Use your hands to scrunch your hair upward, encouraging any natural wave or curl to form.
Why This Works
The salt spray adds grit and matte texture, turning messy bedhead into a beachy, wind-swept style. It takes less than sixty seconds and looks incredibly natural and effortless.
Avoid brushing your hair once the spray dries; instead, use your fingers to gently separate any clumps to keep the texture looking soft and touchable.
The Bottom Line
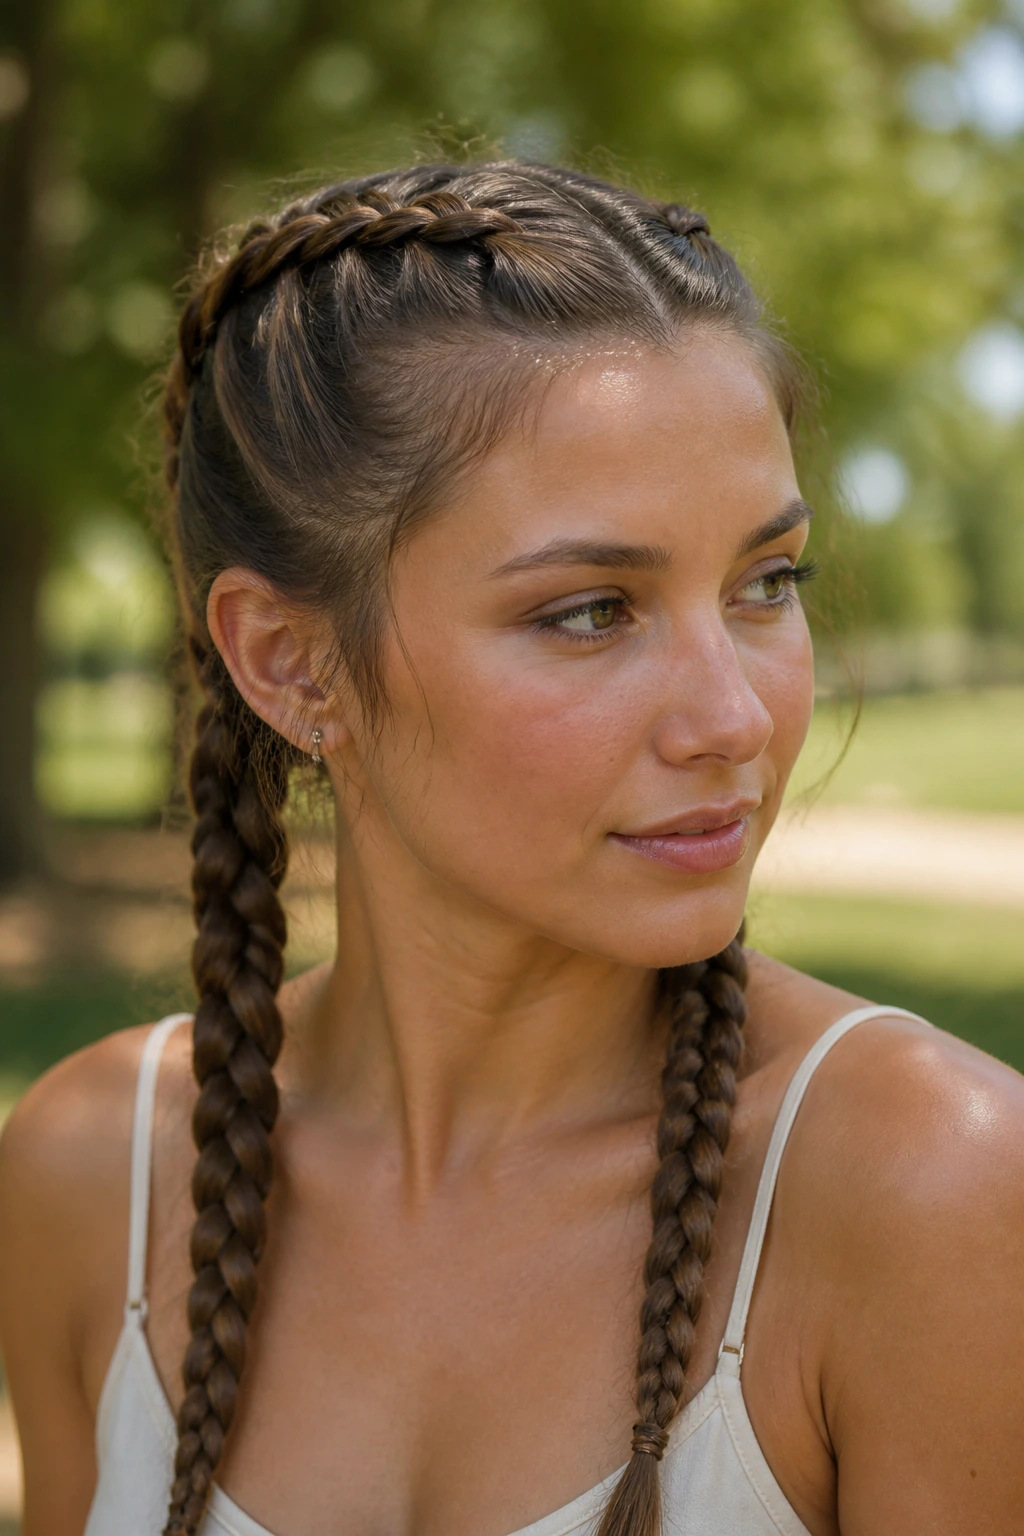
Fast morning routines do not have to mean boring hair. By embracing the rugged, practical spirit of these classic styles, you can turn chaotic mornings into an opportunity to showcase your natural hair texture.
Invest in a few durable accessories—like leather ties, wooden pins, and a great wide-brim hat—and you will find yourself looking forward to styling your hair, even when you only have five minutes to spare. Work with your hair, not against it, and let the wind do the rest of the work for you.
