



The alarm rings, the coffee maker is still dripping, and you have exactly twelve minutes to get ready and walk out the door. We have all been there. It is the morning rush, that chaotic pocket of time where elaborate beauty routines go to die. On mornings like these, your hair often feels like an adversary that needs to be tamed rather than styled.
But looking pulled together does not require a cosmetology degree or a spare forty-five minutes. In fact, fighting your hair’s natural texture on a rushed morning is a losing battle. The secret lies in working with what you have—whether that is second-day bedhead, natural wave, or slightly oily roots.
The best hairstyles rely on basic physics and clever mechanics rather than intricate styling techniques. By using the right tension, a few strategic pins, and some well-placed accessories, you can create styles that look deliberate, elegant, and entirely effortless. Let us look at how to navigate those busy mornings without sacrificing your personal style.
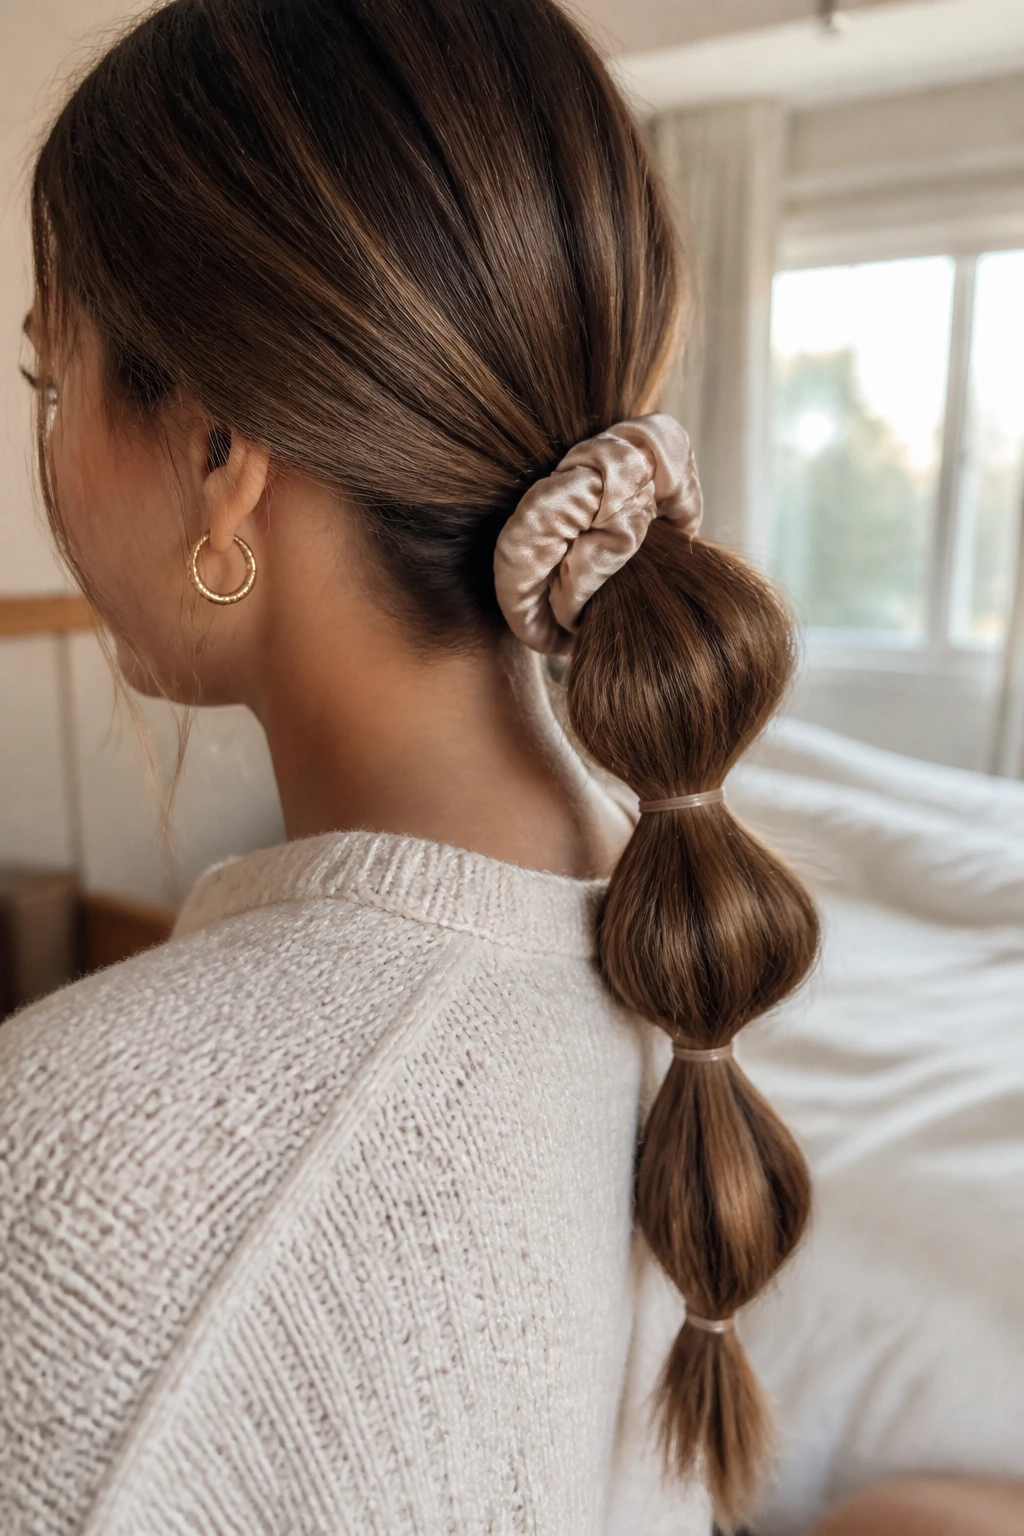
1. Low Bubble Ponytail with Silk Scrunchie
A standard low ponytail can sometimes feel a bit uninspired. By adding a few simple sections, you can transform a basic ponytail into something that looks highly structured and deliberate. The bubble ponytail is exceptionally stable, keeping your hair secured throughout the day without sagging.
Why It Beats a Basic Ponytail
The beauty of this style is that it tames length while adding visual interest. It works best on medium to long hair and is highly effective at hiding overnight tangles or bends from sleep. By using silk scrunchies, you also protect your hair from the friction and breakage that common elastic bands cause.
What You Need
- A boar bristle brush
- 2 to 3 clear elastic hair bands
- One silk scrunchie for the base
- A light mist of water or leave-in conditioner
To style it, brush your hair back into a low ponytail at the nape of your neck and secure it with your silk scrunchie. Moving down the length of the ponytail, place a clear elastic every two to three inches. Once the elastics are in place, use your fingers to gently pull the hair outward between each band. Always pull the bubble sides outward gently to create a rounded sphere rather than a squished oval.
2. Half-Up Top Knot with Claw Clip
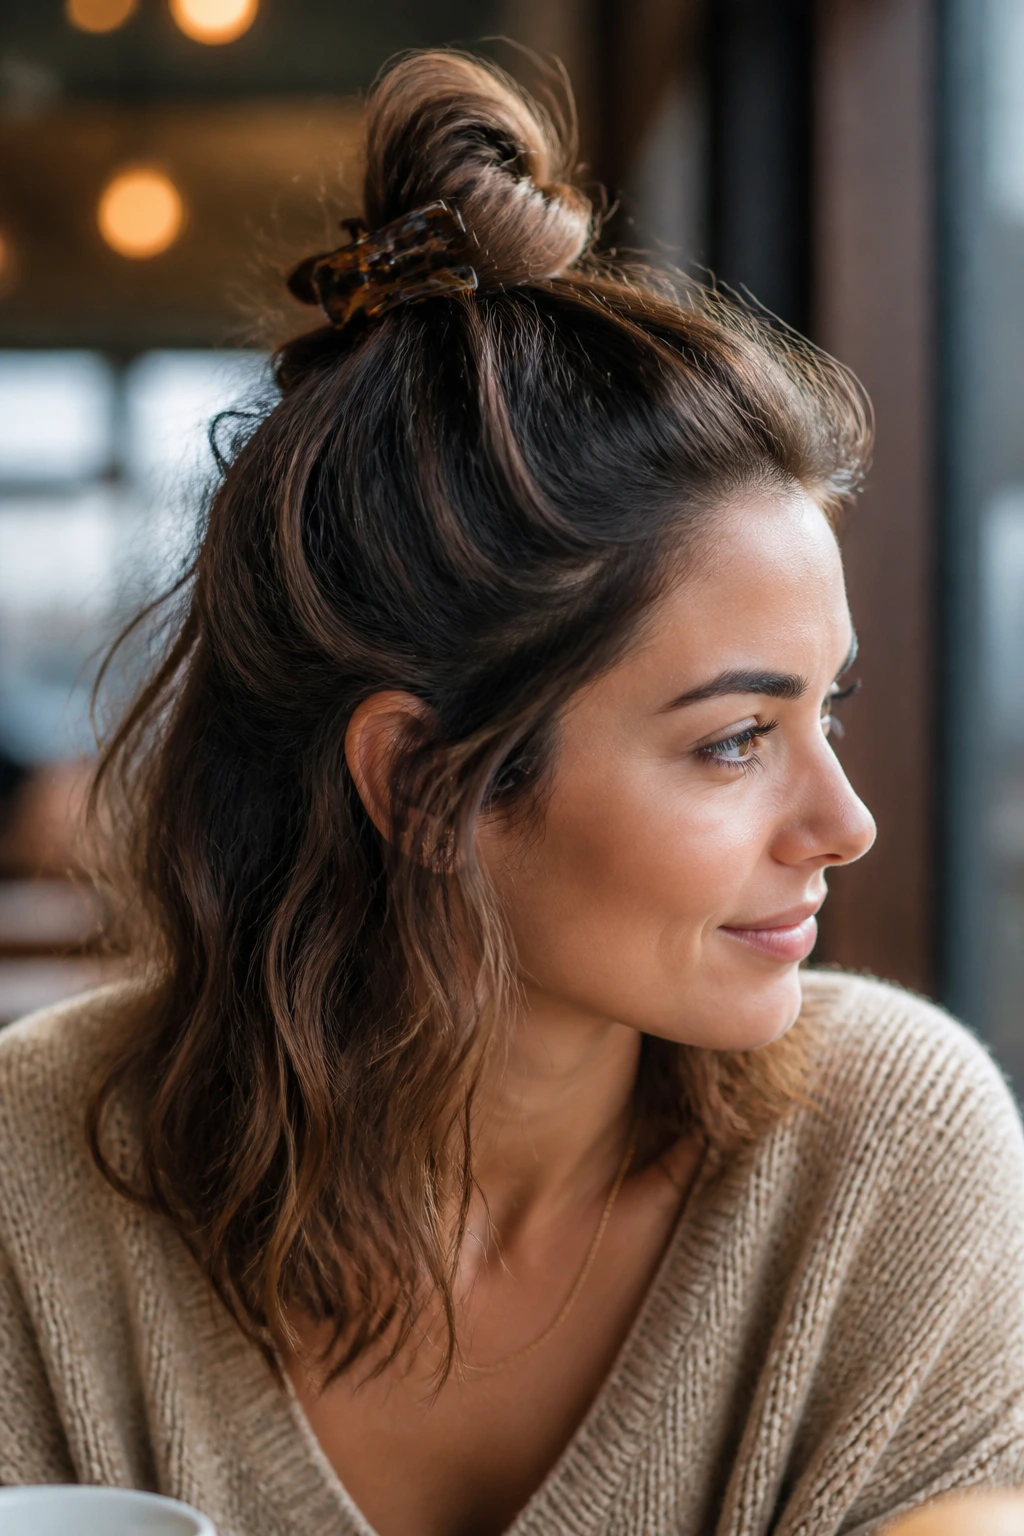
Claw clips are the ultimate tool for second-day hair. They hold your hair securely without the tension of a traditional hair tie, which helps prevent tension headaches during long days. This half-up version keeps your hair out of your face while letting the rest cascade naturally.
Gather the top third of your hair, starting from just above your ears and pulling back toward the crown of your head. Twist this section tightly until it begins to coil around itself, forming a small, compact bun.
Instead of reaching for bobby pins, clamp a medium-sized claw clip directly over the base of the bun, securing it against your scalp. This leaves the ends of the bun to spill over the top of the clip, creating a relaxed, informal silhouette. It is an excellent choice for wavy or curly hair that already has built-in texture.
3. Twisted Messy Side Braid
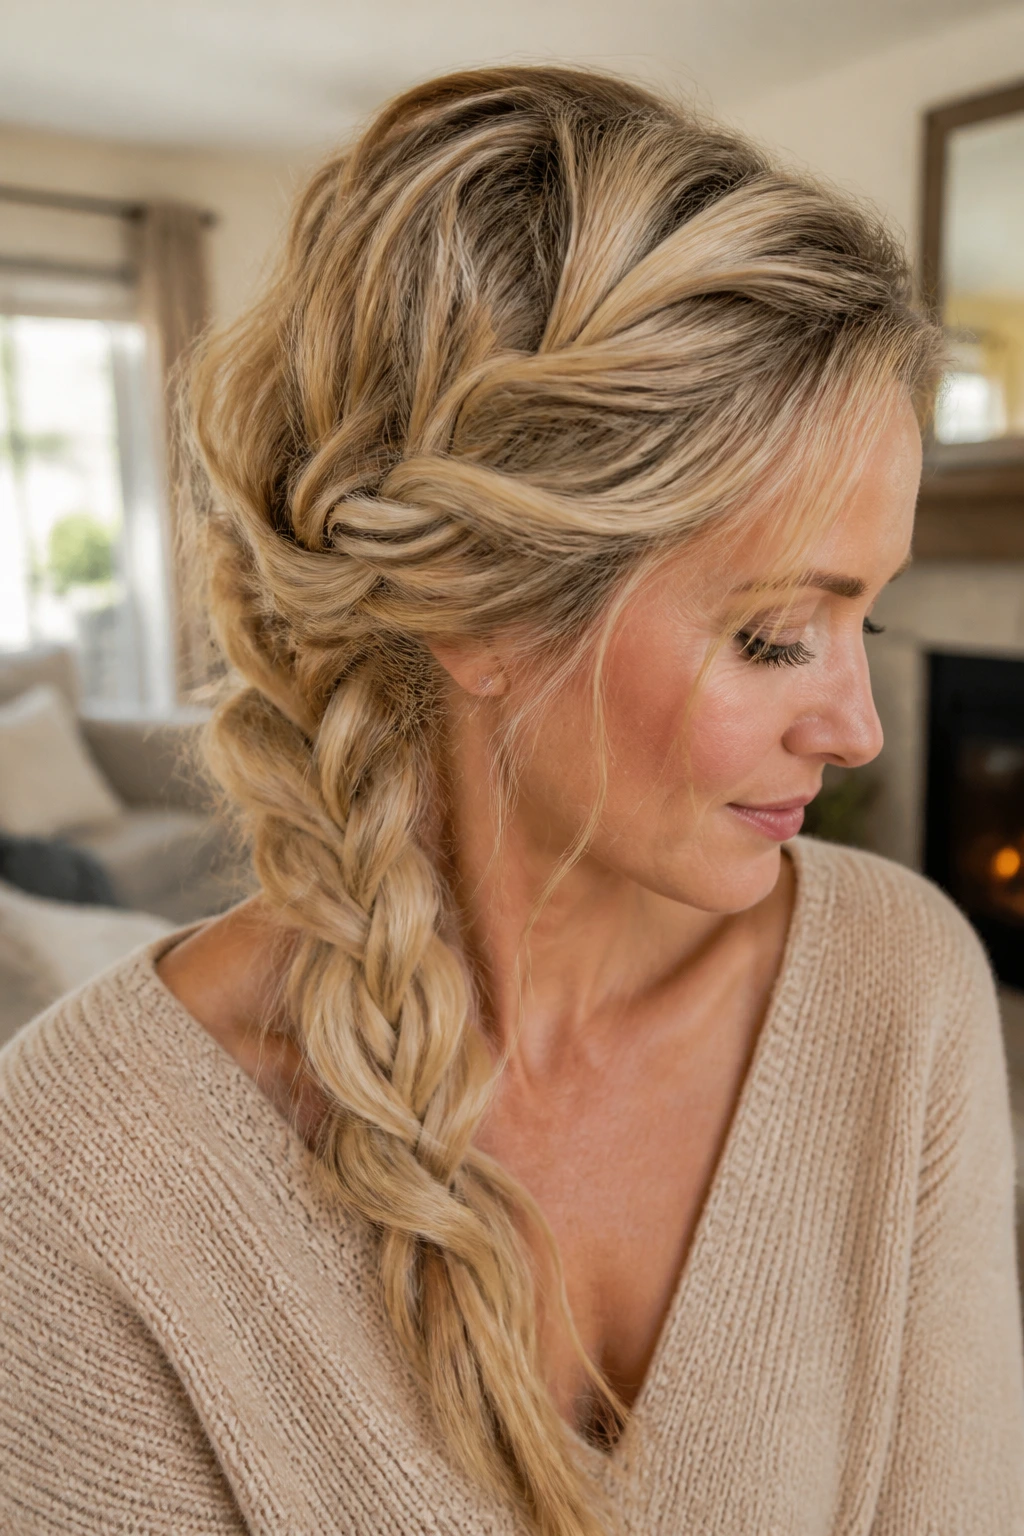
Standard three-strand braids can sometimes look flat or overly youthful. By incorporating a twist at the very beginning of the style, you add volume at the crown and give the braid a mature, textured look. This style is incredibly forgiving of layers that might otherwise poke out of a tighter braid.
Why the Twist Matters
Starting a braid directly from the neck can pull the hair tight against the scalp, highlighting any flat areas. A side-swept twist creates a beautiful frame around your face and adds a soft, organic volume that lasts all day.
How to Style It
Gather all your hair to one side of your neck. Take a two-inch section near your ear and split it into two pieces. Twist these two pieces around each other, incorporating small amounts of hair from your hairline as you move down toward the nape of your neck. Once all your hair is gathered on one side, split it into three sections and braid normally. Secure the end with a small elastic, then gently pull at the outer loops of the braid to loosen and widen the structure.
4. Sleek Low Bun with Center Part
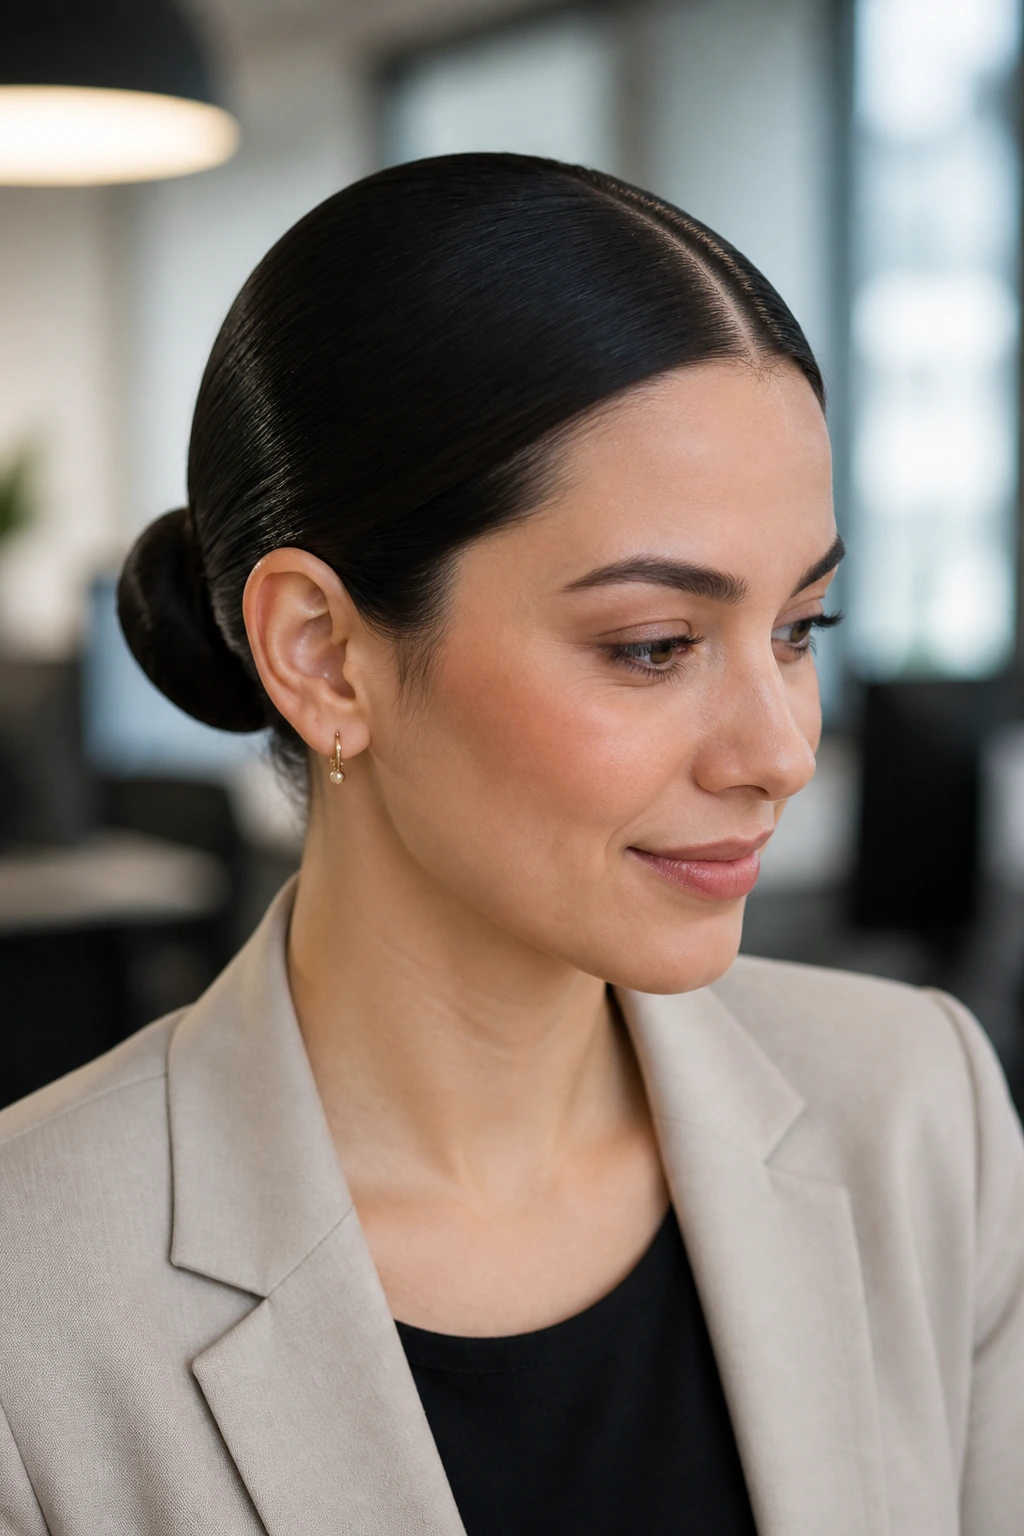
Imagine having an unexpected video call in five minutes and your hair is a wild map of sleep lines. This sleek low bun is your best defense. It uses the natural oils of second-day hair to your advantage, creating a polished, professional look in under two minutes.
Start by using the tail of a comb to draw a clean, straight part down the center of your scalp. Spritz your hair lightly with water or a tiny drop of hair oil to smooth down any flyaways along the part. Brush your hair down and back, keeping it close to your head, and secure it into a tight ponytail at the very base of your neck.
Key Styling Details
- Use a soft boar bristle brush to lay the hair flat without creating bumps.
- Twist the ponytail tightly into a rope, then wrap it around the base of the elastic.
- Secure the bun with a few sturdy bobby pins pushed straight into the center of the bun.
This style looks incredibly elegant and pair-ready with a simple sweater or blazer. It is proof that you do not need freshly washed hair to look completely put together.
5. The Tucked-In Scarf Updo
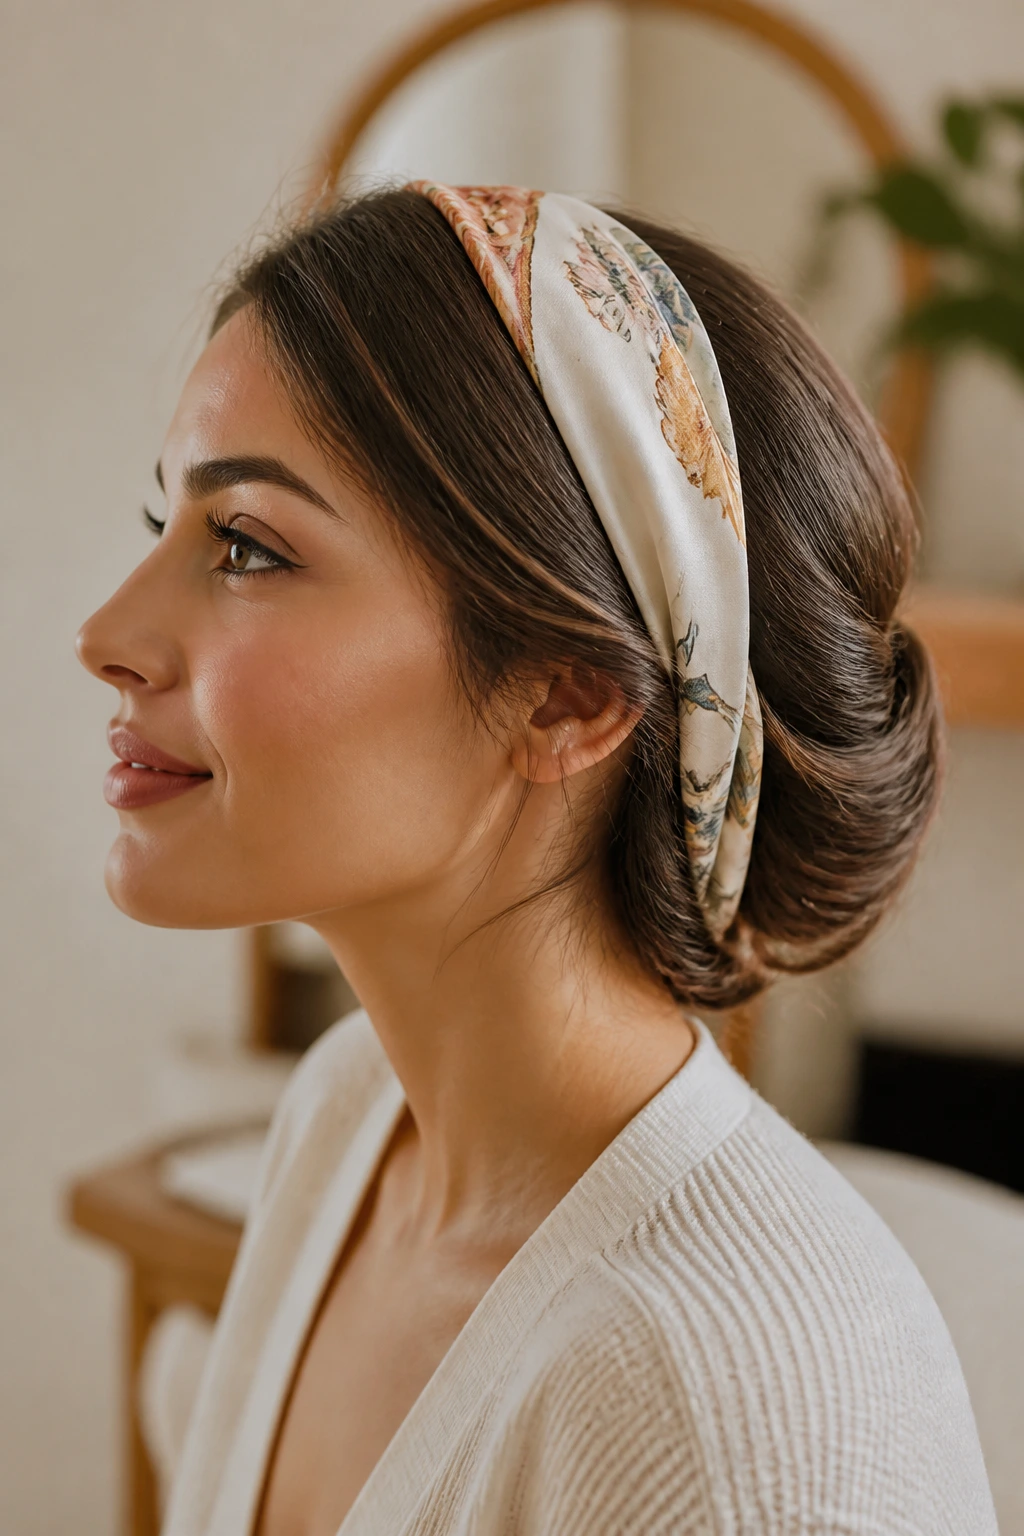
A silk scarf is a wonderful tool to keep in your vanity drawer for mornings when your hair simply refuses to cooperate. This style is essentially an optical illusion; it looks like a complex, vintage-inspired chignon, but it actually takes less than two minutes to assemble.
Fold a square silk scarf diagonally to create a long, narrow band about two inches wide. Tie this band around your head like a classic headband, knotting it securely at the nape of your neck, underneath all of your hair.
Now, take the loose length of your hair and begin tucking it up and over the scarf band, wrapping the strands around the silk fabric until all your hair is enclosed. The texture of the scarf will grip your hair, holding the roll in place without the need for dozens of pins. It is soft, incredibly comfortable, and works on almost any hair length past the shoulders.
6. Double Dutch Braided Pigtails
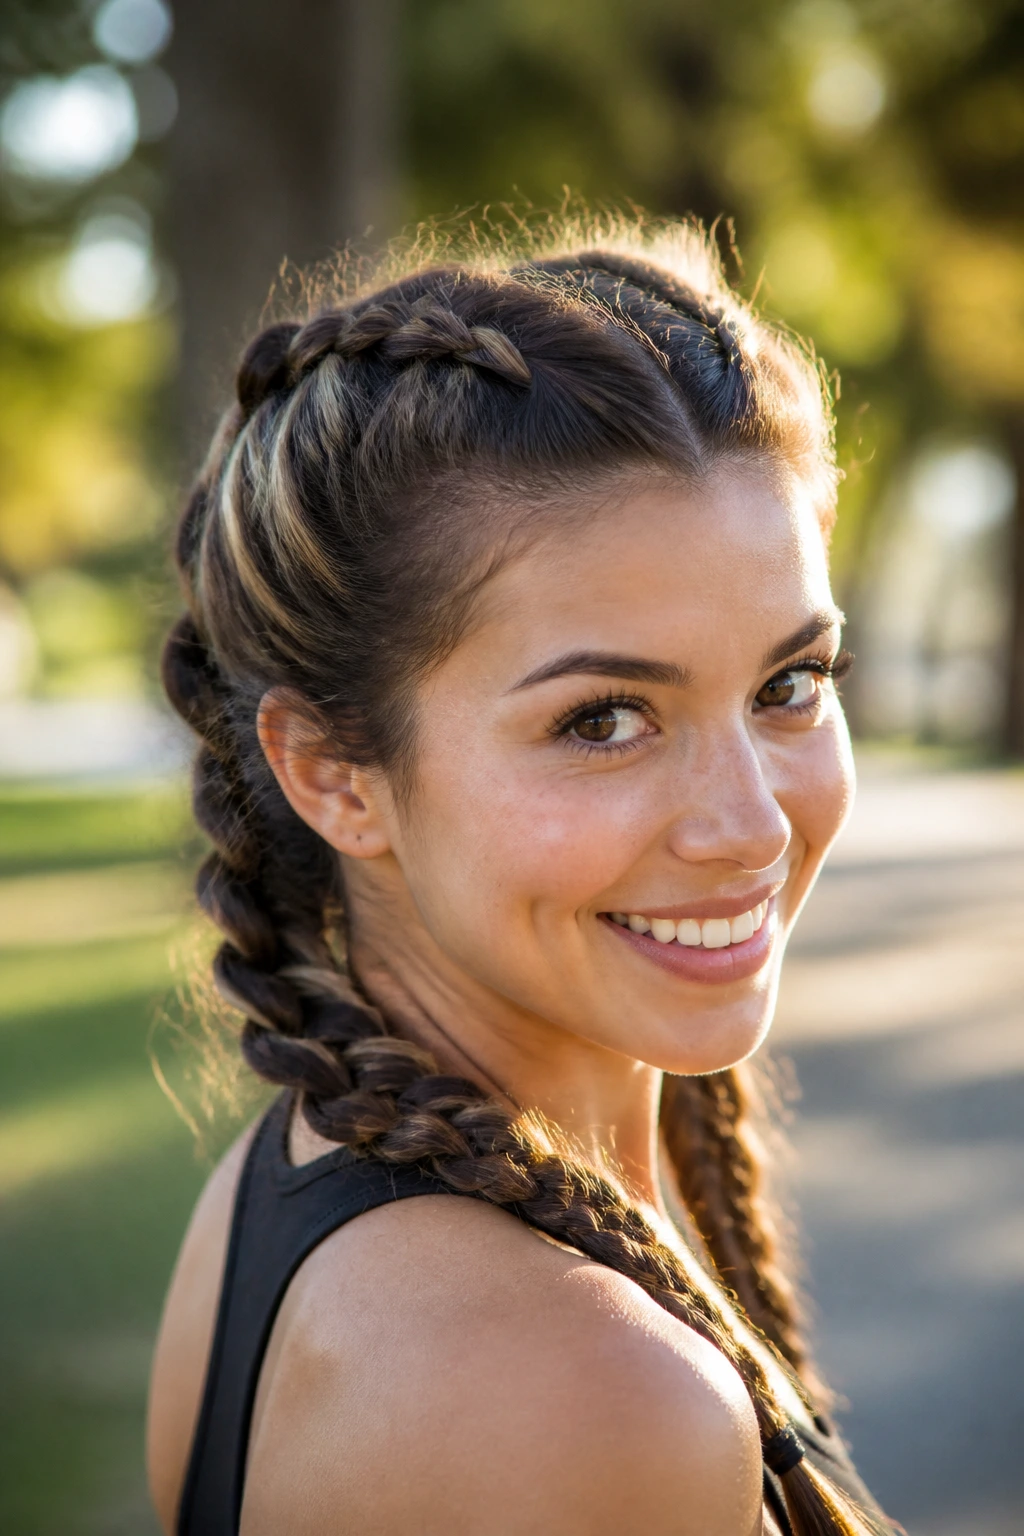
Unlike standard braids that start at the nape of the neck, Dutch braids sit directly on top of the head like a crown. This style is exceptional for long, thick hair that tends to get heavy and uncomfortable when worn in a single ponytail or bun.
Dutch braiding involves crossing the strands under the middle strand rather than over. This creates a raised, three-dimensional braid that stands out from the rest of your hair. It is a highly practical choice for active days or mornings when humidity is high and frizz is inevitable.
Spray your fingers with dry shampoo before starting to keep your grip firm on slick strands. Once you reach the nape of your neck, you can either continue braiding to the ends or secure the braids at the neck and let the rest of your hair hang in two textured ponytails.
7. The Two-Minute French Twist
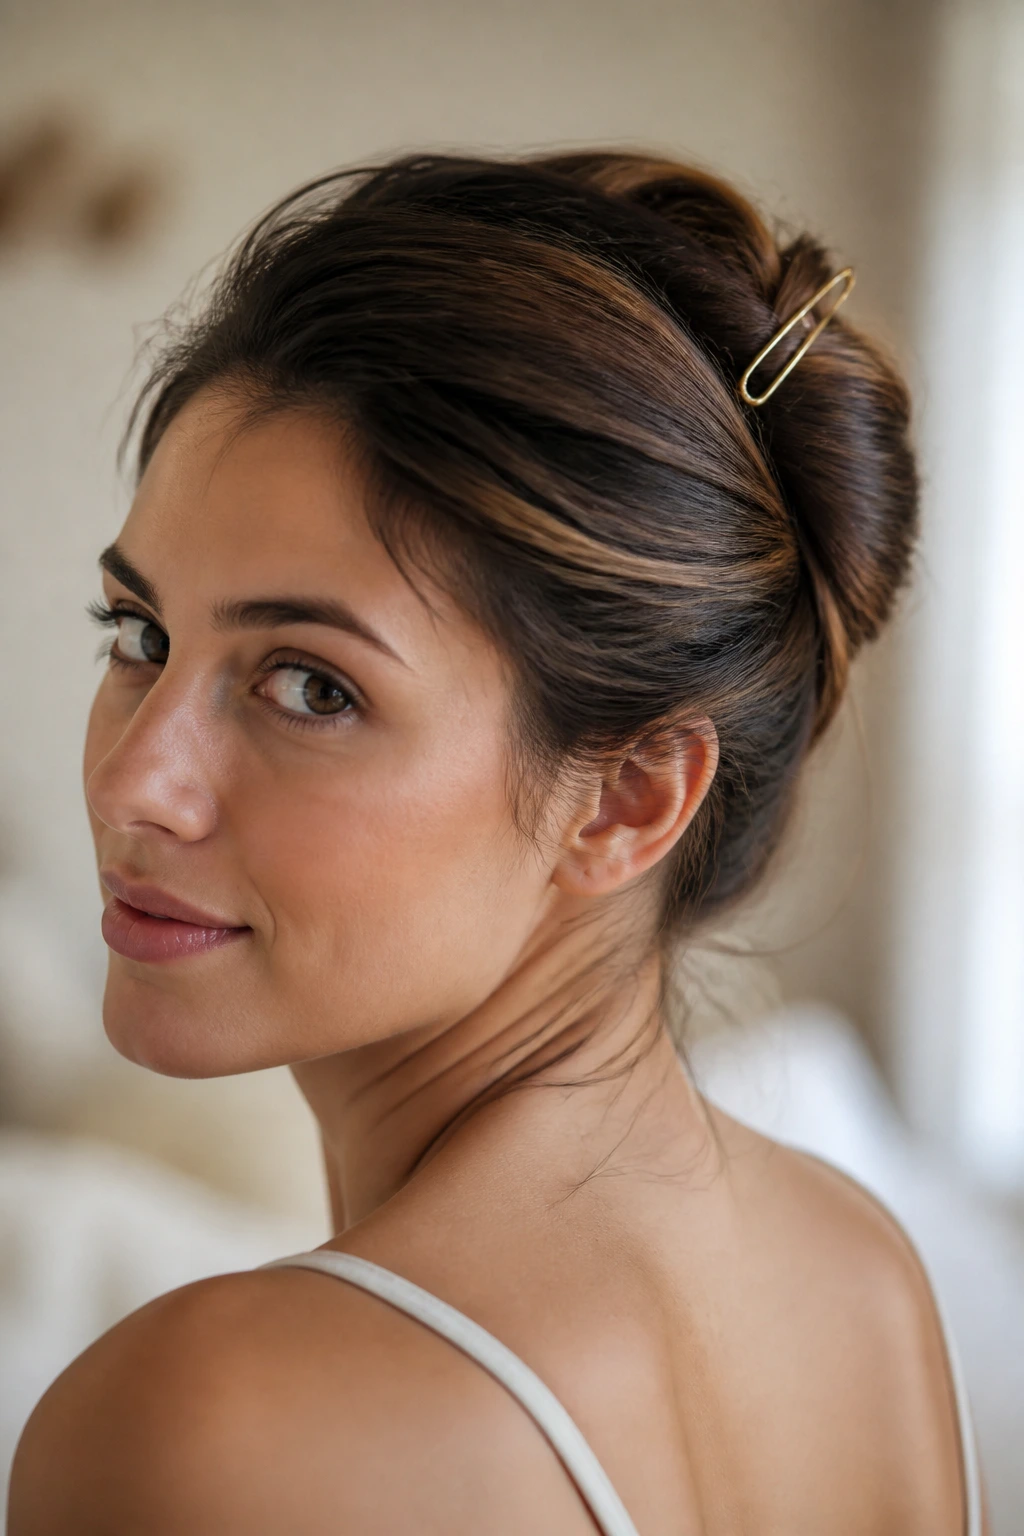
The French twist has a reputation for being difficult and requiring a mountain of hairpins. In reality, you can achieve a casual, modern version of this classic updo with just one or two large U-shaped hair pins.
Mastering the Roll
The trick to a fast French twist is all in how you hold and twist your hair. You are not trying to create a red-carpet updo; you want a relaxed, slightly messy version that feels comfortable for a day of errands or office work.
What You Need
- A U-shaped hair pin (often called a French hair pin)
- A light texture spray
Gather your hair into a low ponytail in your hands, but do not secure it with an elastic. Hold the base of the ponytail with your left hand, and use your right hand to twist the length of your hair upward toward the ceiling. As you twist, the hair will naturally fold up against the back of your head. Tuck the ends of your hair inside the fold. Slide the pin in horizontally, catch some hair, then flip it 180 degrees and press it inward against the scalp to lock the twist.
8. High Ponytail with Wrapped Hair Base
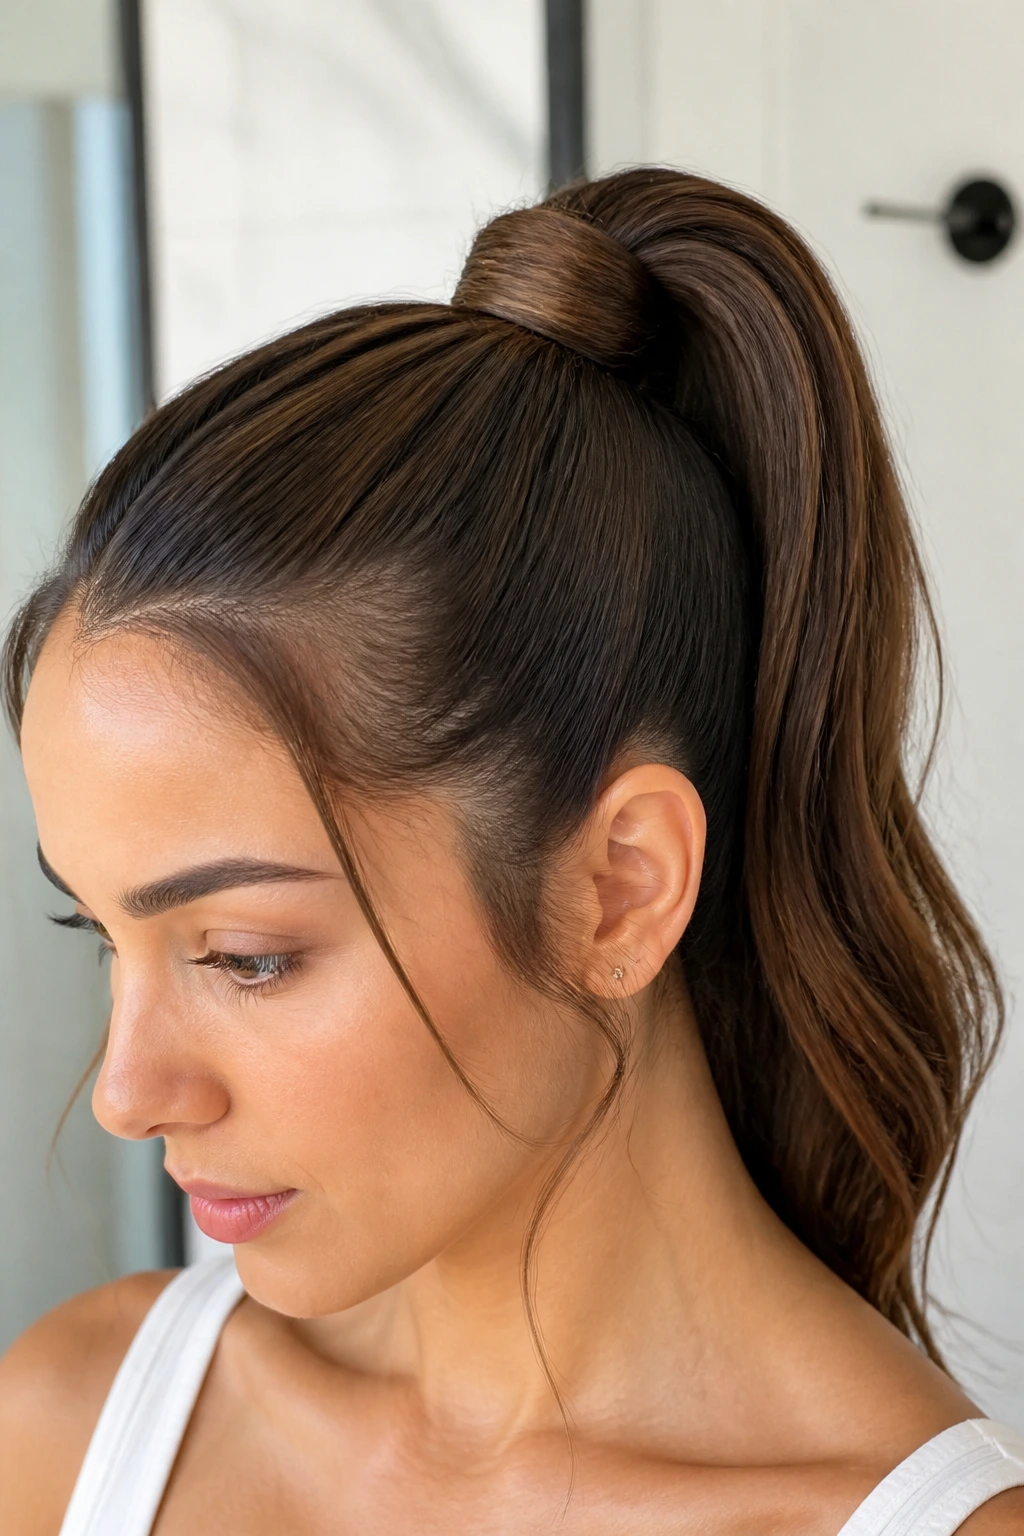
A basic high ponytail can sometimes look a bit casual, almost like you are heading to the gym. Wrapping the base of the ponytail with a small section of your own hair is a simple step that elevates the entire look instantly.
Pull your hair up high, aligning it with the top of your ears or slightly higher. Secure it with a sturdy, high-tension elastic band. Once the ponytail is secure, separate a small, pinky-finger-sized strand of hair from the very underside of the ponytail.
Wrap this strand repeatedly around the elastic band until the band is completely covered. To secure the end, use a single bobby pin. Push the pin straight down through the wrapped hair and into the base of the ponytail elastic. This keeps the pin hidden and ensures the wrap will not unravel during the day.
9. Braided Headband with Loose Waves
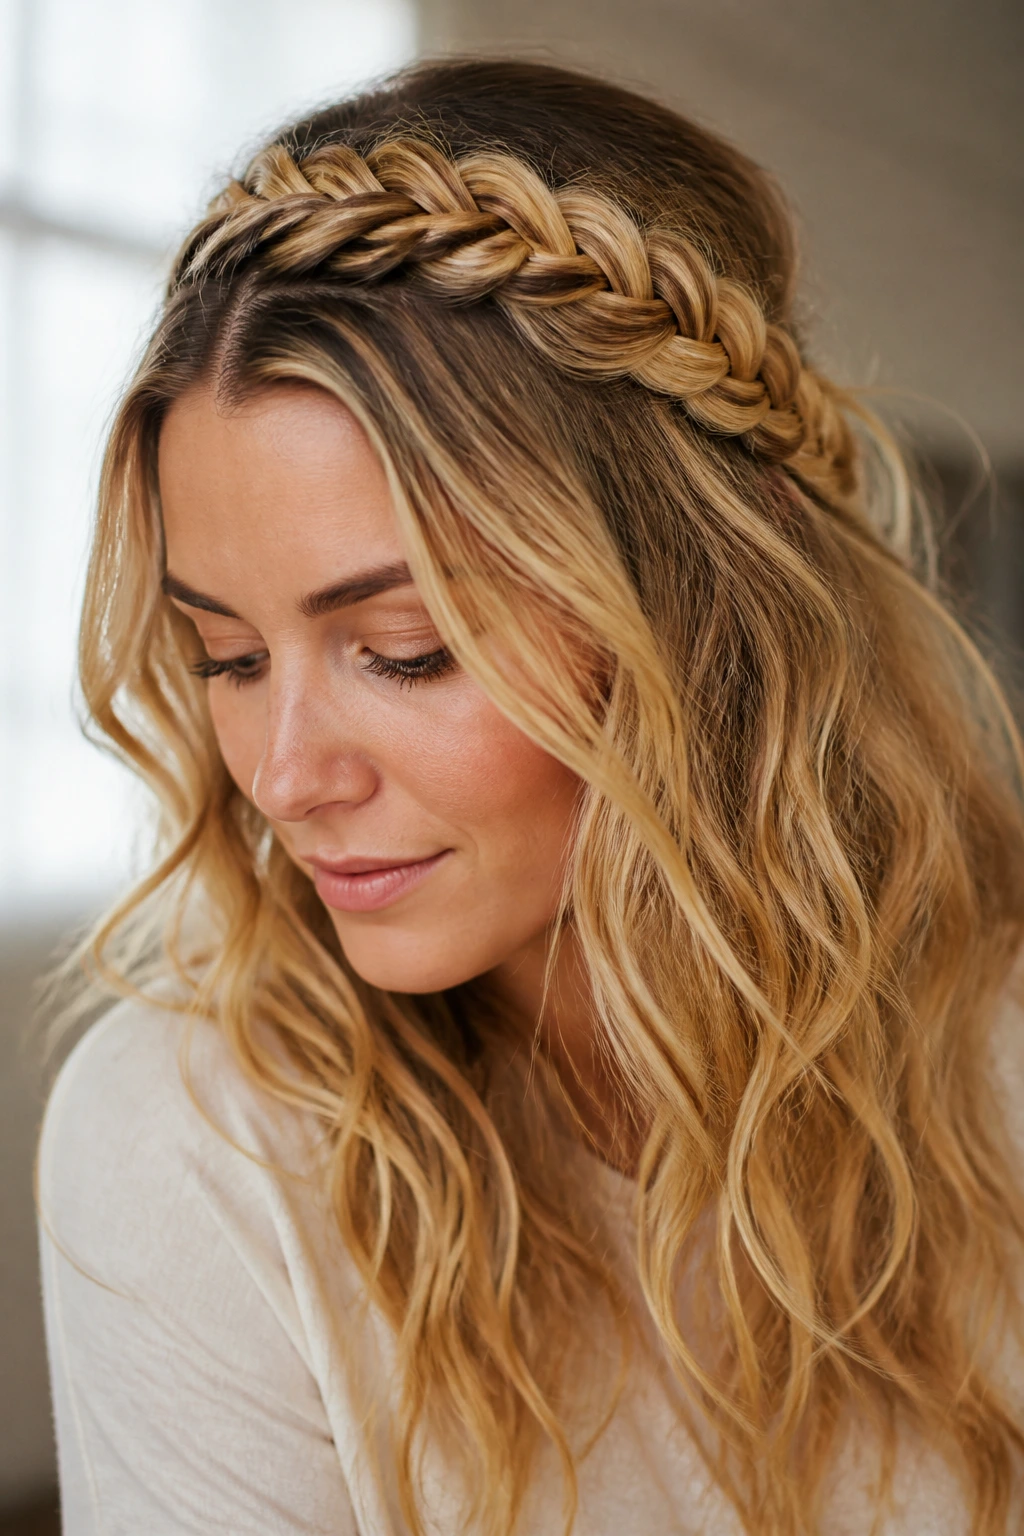
What do you do when your bangs or face-framing layers are in an awkward growing-out stage? Instead of pinning them back with flat bobby pins, you can weave them into a simple, beautiful braided headband.
Face-Framing Control
This style keeps the hair out of your eyes while leaving the back of your hair loose and natural. It is an excellent way to wear your hair down while still feeling organized and styled.
Step-by-Step Styling
Take a two-inch section of hair from just behind your left ear. Braid this section all the way to the ends, securing it with a small, clear elastic. Pull this braid over the top of your head, laying it flat across your crown like a headband. Secure the end of the braid behind your right ear with a bobby pin, hiding the pin beneath your loose hair. If you have time, you can repeat this on the other side for a double-banded look.
10. Pineapple Updo for Curly Hair
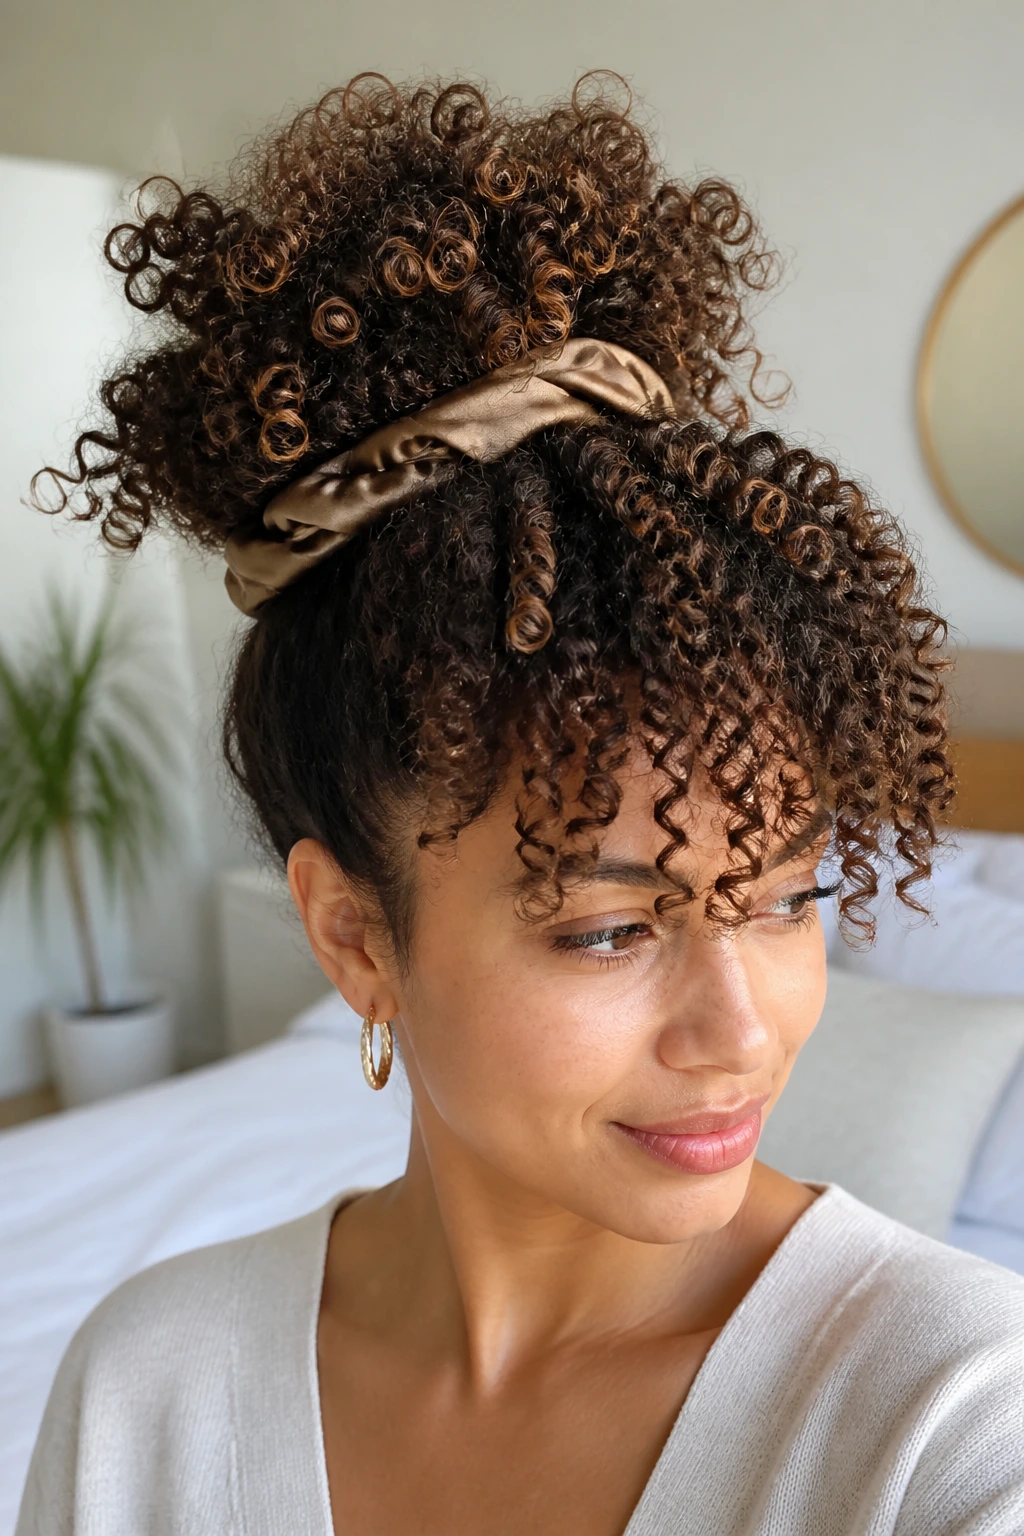
For those with curly, coily, or highly textured hair, mornings can often feel like a battle against flattened curls. The pineapple updo is a classic technique that preserves your curl pattern while creating a beautiful, high-volume shape.
Gather all your hair at the very top of your head, shifting it slightly forward toward your forehead. Thread a loose, satin scrunchie around the base of the hair once or twice. Do not pull it tight; you want the curls to remain bouncy and full of volume at the crown.
Curly Care Checklist
- Use only silk or satin scrunchies to avoid flattening your curls.
- Let the curly ends cascade forward over your face like a fringe.
- Spritz the ends with a mixture of water and leave-in conditioner to refresh the curl definition.
This style keeps your curls protected from friction and looks beautifully intentional. It is a wonderful way to showcase natural texture without spending hours with a diffuser.
11. Space Buns with Face-Framing Tendrils
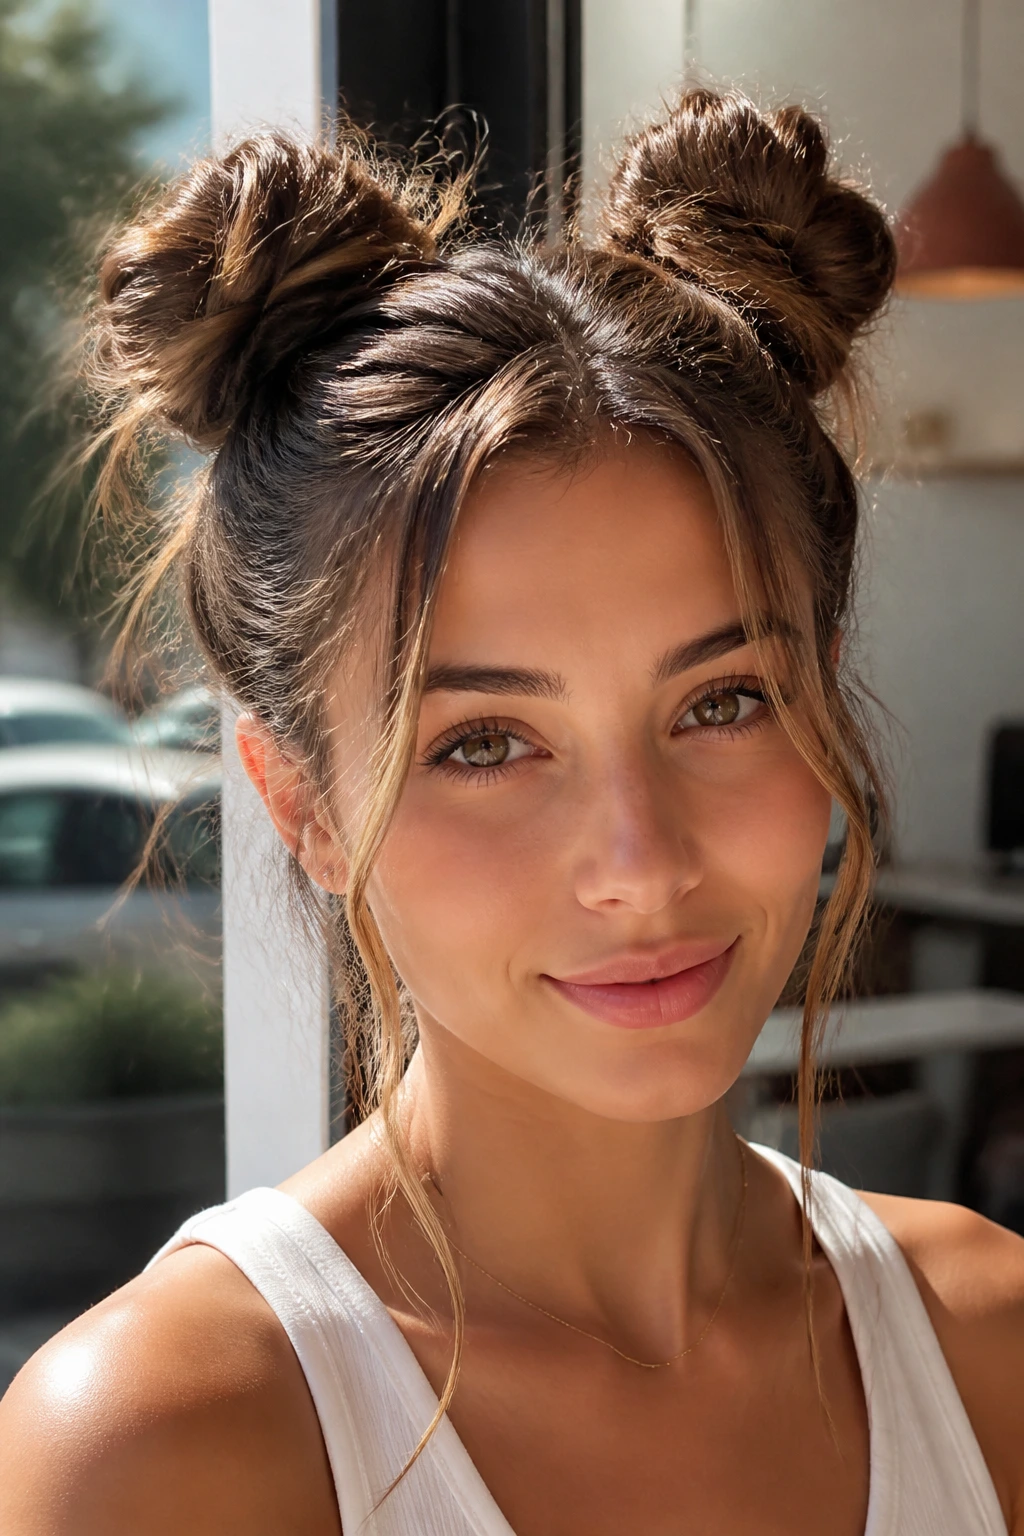
Space buns are a joyful, casual option that works beautifully on medium to long hair. They are essentially two high messy buns, but they offer a balanced weight distribution that is often much more comfortable than a single heavy top knot.
To style them, split your hair down the center into two equal sections. Pull each section into a high ponytail on either side of your crown. Twist the length of one ponytail loosely, wrapping it around the base to create a soft, rounded bun, and secure it with a hair tie or bobby pins. Repeat on the other side.
To keep the style from looking too rigid, pull a few soft strands of hair down around your hairline and in front of your ears. This softens the look, framing your face and giving the style a relaxed, lived-in quality.
12. The Triple Topsy-Tail Ponytail
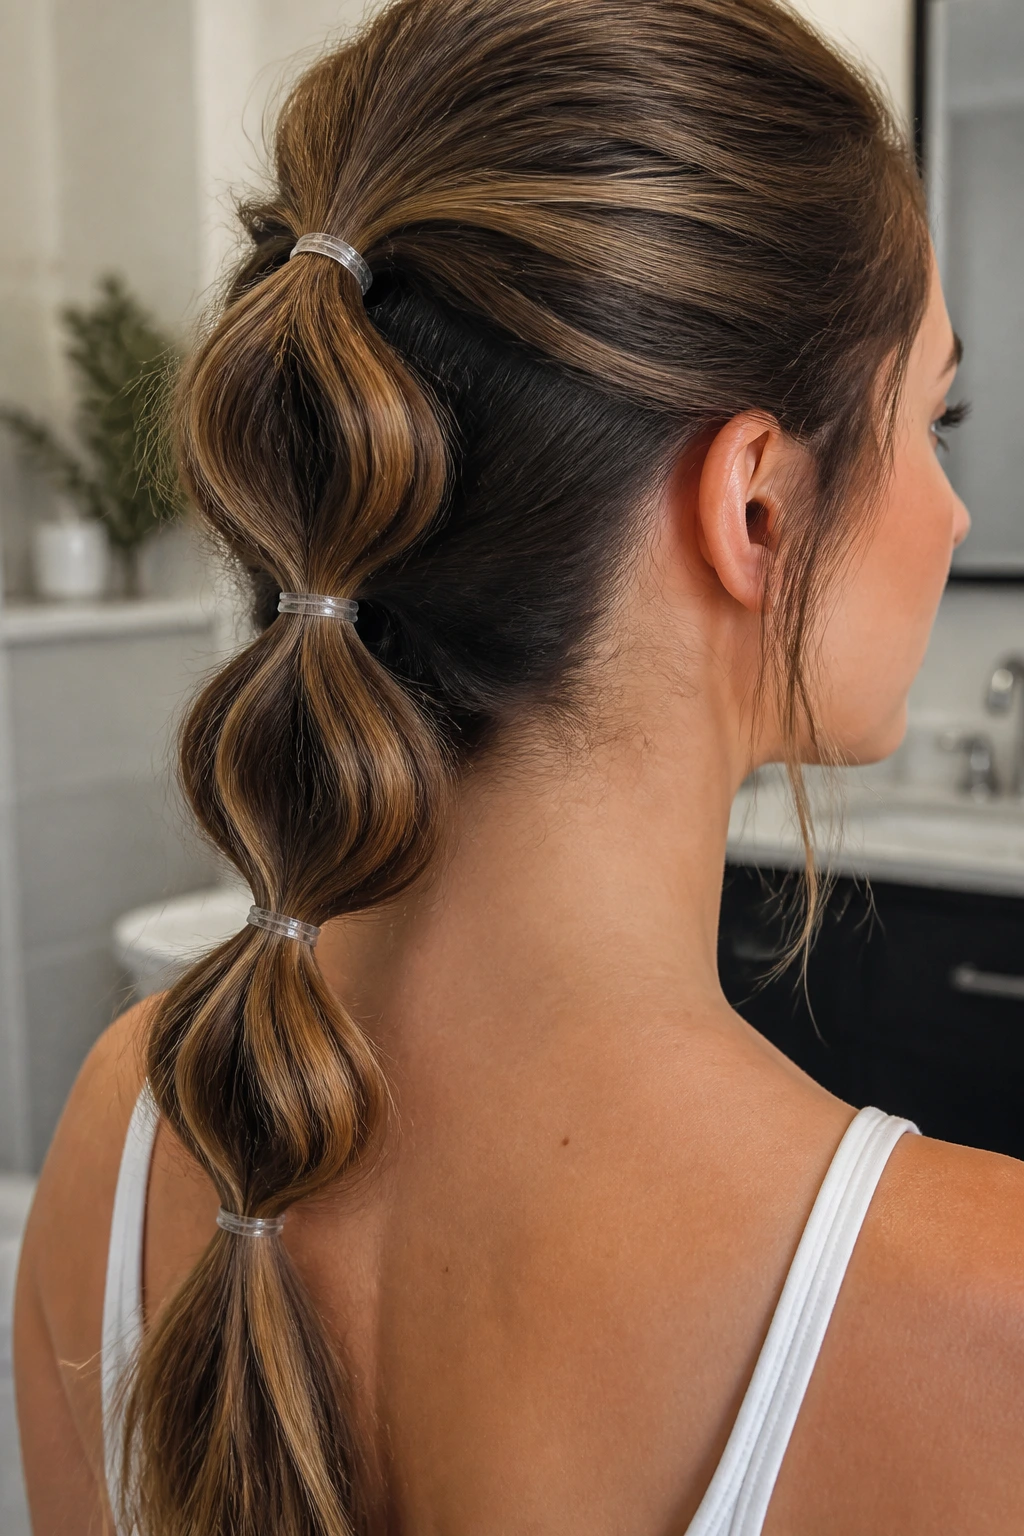
If you have thick, heavy hair, you know that high ponytails often sag before lunchtime. The triple topsy-tail ponytail is an elegant solution that distributes the weight of your hair across three separate sections, ensuring it stays high and secure all day.
Unlike a standard ponytail, this style uses a series of inverted loops to create a woven, almost braided look down the back of your head. It is incredibly secure and looks far more complicated than it actually is.
To style it, section your hair horizontally into three equal parts: top, middle, and bottom. Secure the top section into a ponytail with a clear elastic. Create a small gap in the hair just above the elastic, and flip the tail of the ponytail up and through the gap.
Next, gather the middle section of your hair, combine it with the tail of the top section, and secure them together with another elastic. Repeat the flip. Finally, combine all remaining hair at the nape of your neck and flip it one last time. Keep the elastics slightly loose before flipping each tail through to avoid pulling on your scalp.
13. Side-Swept Fishtail Braid
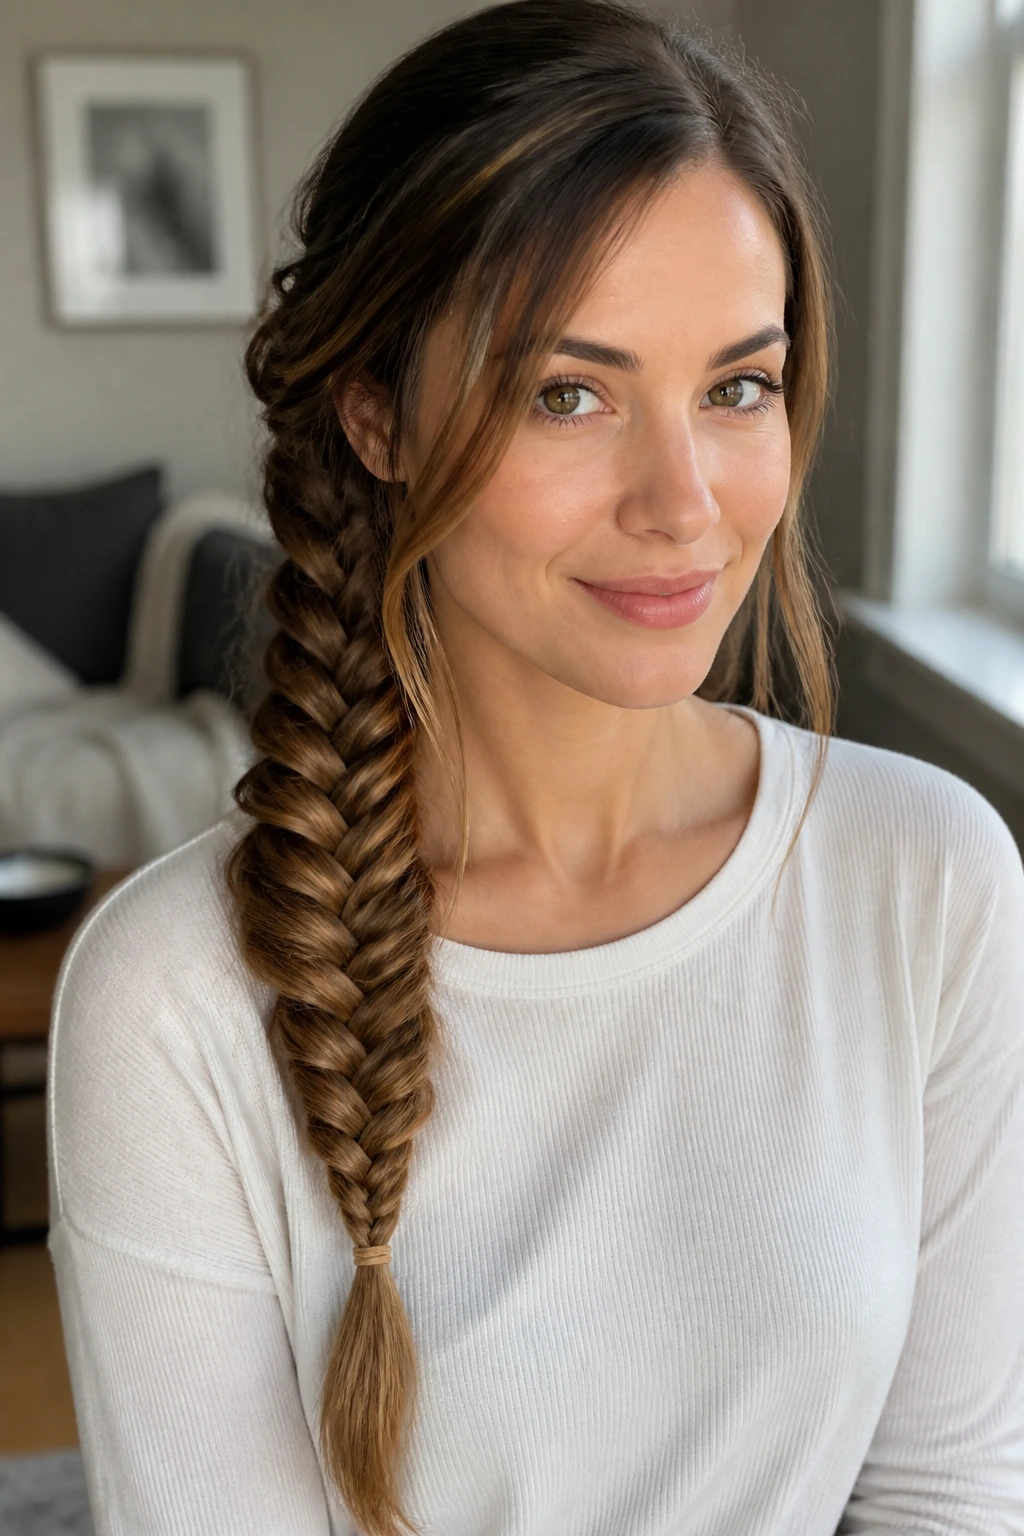
The fishtail braid has a beautiful, intricate texture that looks like a woven basket. While it looks complex, it actually only uses two sections of hair, making it simpler to master than a traditional three-strand braid once you get the rhythm down.
The Two-Strand Secret
The trick to a beautiful fishtail braid is using very small sections from the outer edges of your hair. This creates a detailed, delicate pattern that looks wonderful when swept over one shoulder.
Quick Braiding Tips
- Split your hair into two large, equal sections.
- Take a tiny strand from the outer edge of the left section and cross it over to the right section.
- Take a tiny strand from the outer edge of the right section and cross it over to the left section.
- Repeat this alternating pattern down the length of your hair.
Once you secure the end with an elastic, use your fingers to gently pull the braid apart, flattening and widening the loops. This “pancaking” technique gives the braid a soft, romantic texture.
14. Half-Up Bow Style with Ribbon
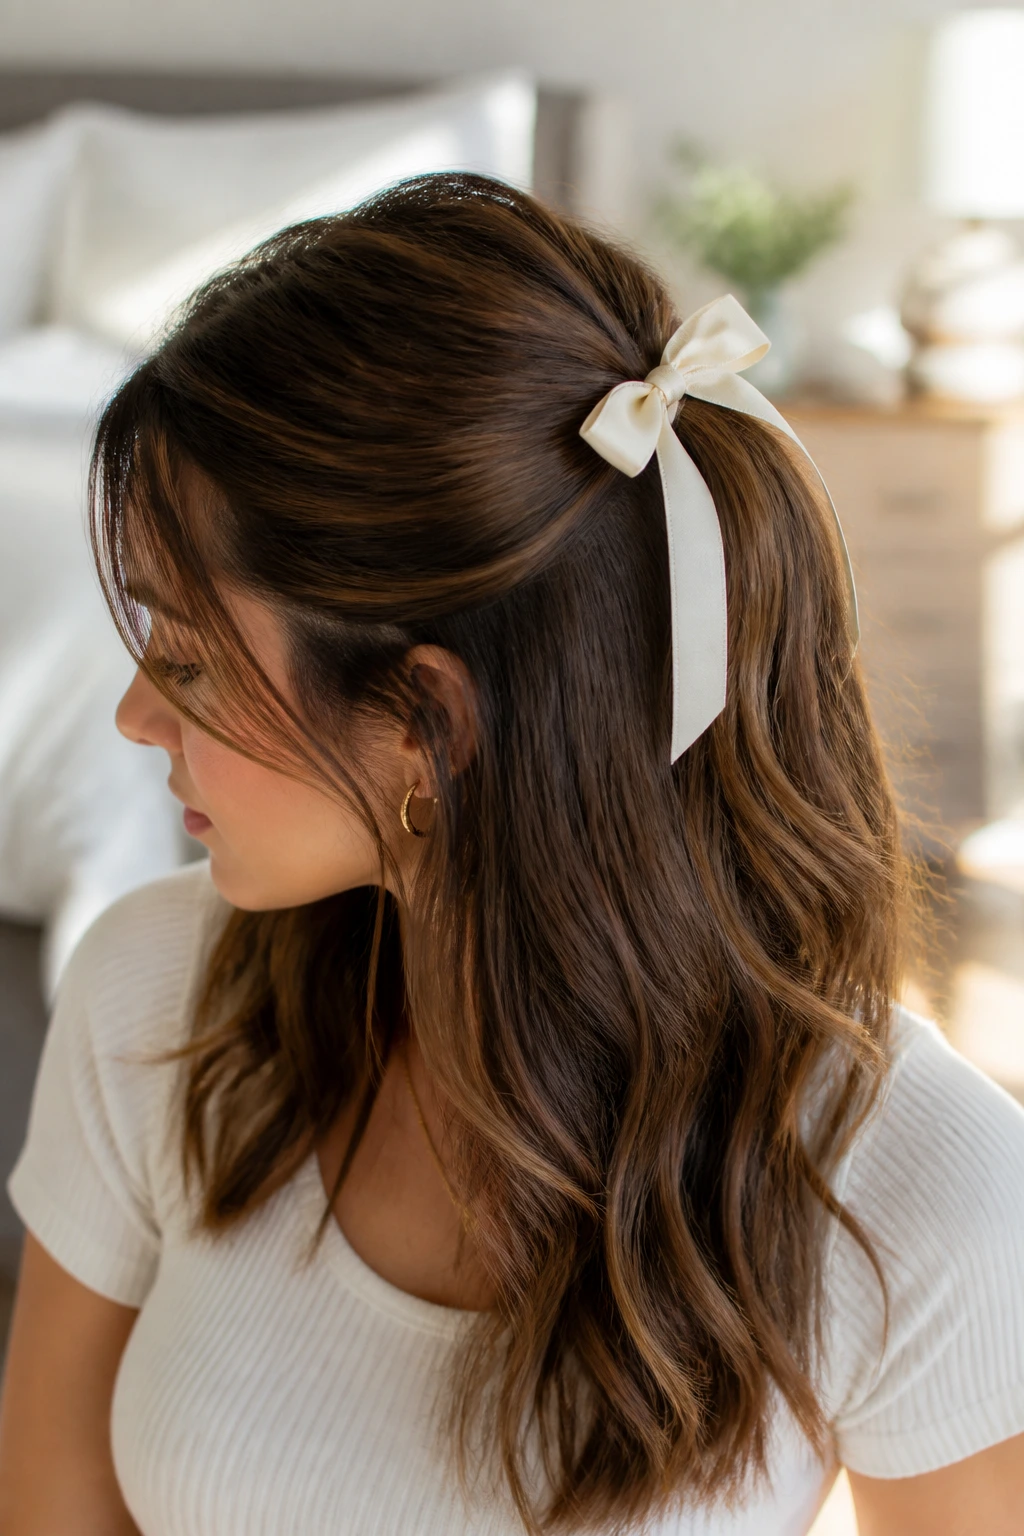
When you are short on time, accessories can do almost all the heavy lifting for you. A simple length of velvet or grosgrain ribbon can turn a basic half-up style into a timeless, elegant look.
Gather the top third of your hair back into a simple half-up ponytail, securing it at the crown of your head with a basic elastic. Then, tie a ribbon directly over the elastic, finishing it with a soft bow.
This completely hides the hair tie and adds a touch of classic charm to your outfit. It is a wonderful option for mornings when your ends look great but your roots are feeling a bit flat or lived-in.
15. Messy High Bun with Creased Bobby Pins
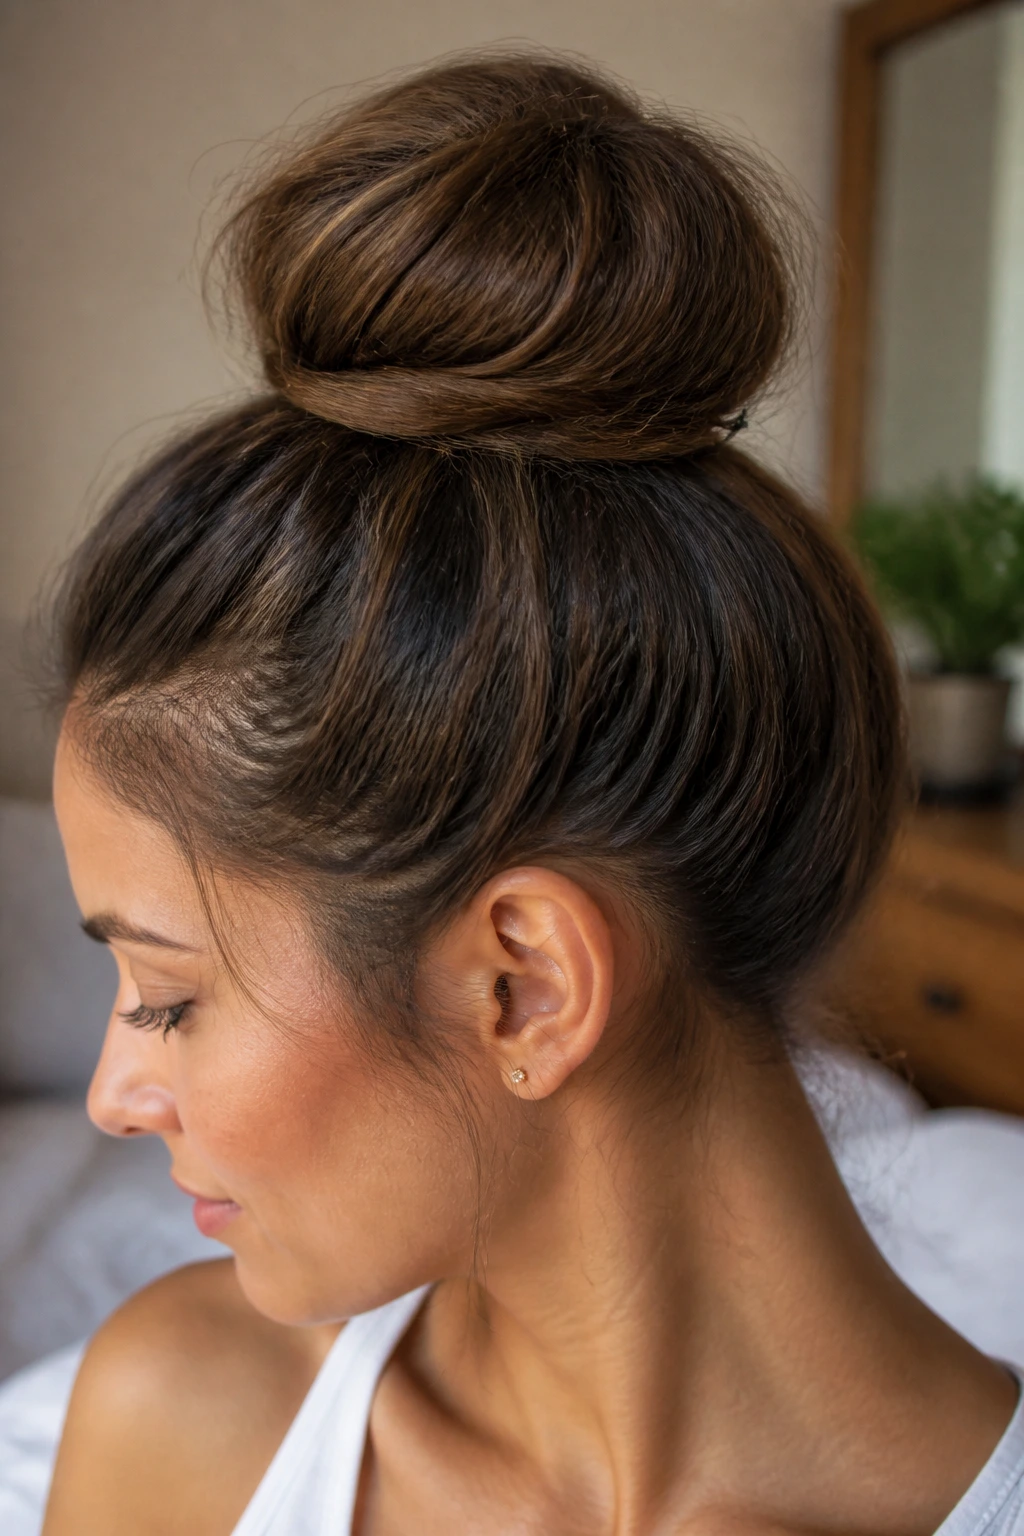
The messy bun is a staple of busy mornings, but there is a fine line between an effortlessly chic bun and one that looks like it survived a windstorm. The key to a great messy bun is creating a secure anchor at the scalp.
Tilt your head upside down and gather all your hair at the crown of your head. Flip your head back up, and hold the hair loosely in one hand. Twist the hair from the base to the ends, then wrap it around itself to create a wide, flat donut shape rather than a tall cone.
Secure the bun by pushing creased bobby pins horizontally into the base, catching both the hair of the bun and the hair flat against your scalp. This keeps the bun close to your head and prevents it from wobbling or sagging as you move throughout your day.
16. Smooth Low Ponytail with Deep Side Part
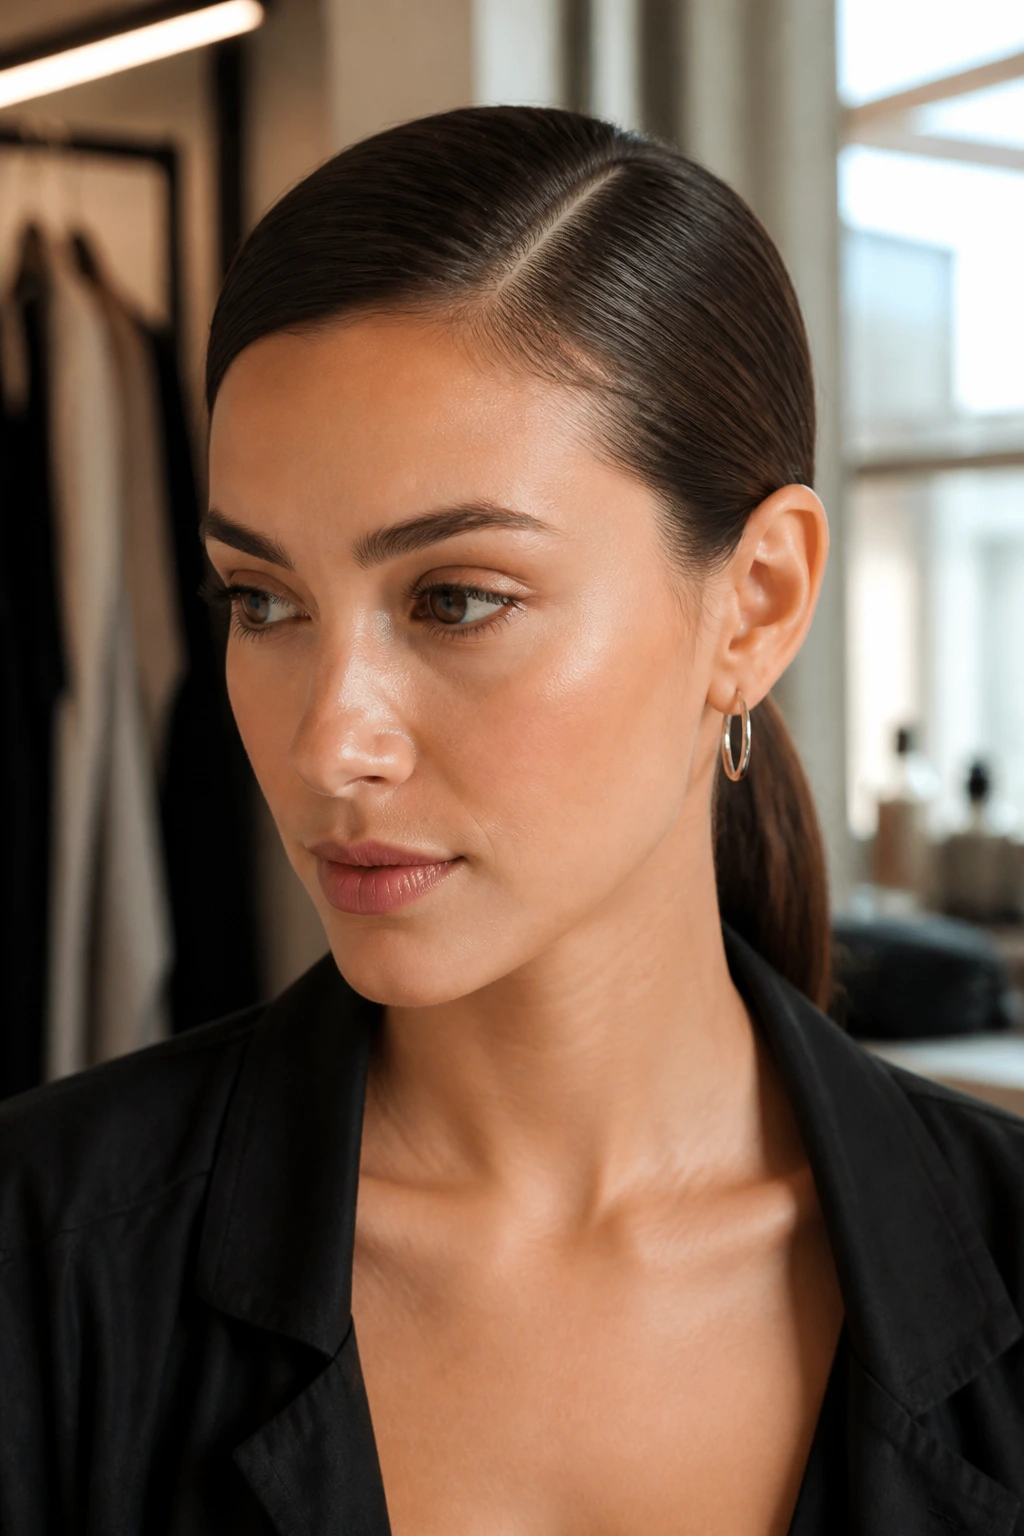
There are mornings when your hair is clean and fresh, but it lacks any volume at the roots. Instead of spending twenty minutes trying to blow-dry volume back into your hair, lean into the sleekness of a low, structured style.
Use the tail of a comb to create a sharp, deep side part directly above the arch of your eyebrow. Sweep your hair across your forehead, keeping it flat and smooth against your scalp, and gather it into a tight, low ponytail at the nape of your neck.
Sleek Ponytail Details
- Use a small amount of lightweight styling cream or oil to smooth down any baby hairs along the part.
- Secure the ponytail with a flat, dark elastic that matches your hair color.
- Let the length of the ponytail drape over one shoulder.
This style is clean, modern, and highly professional. It pairs beautifully with tailored clothing and takes less than two minutes to complete from start to finish.
17. Rope-Twisted Low Ponytail
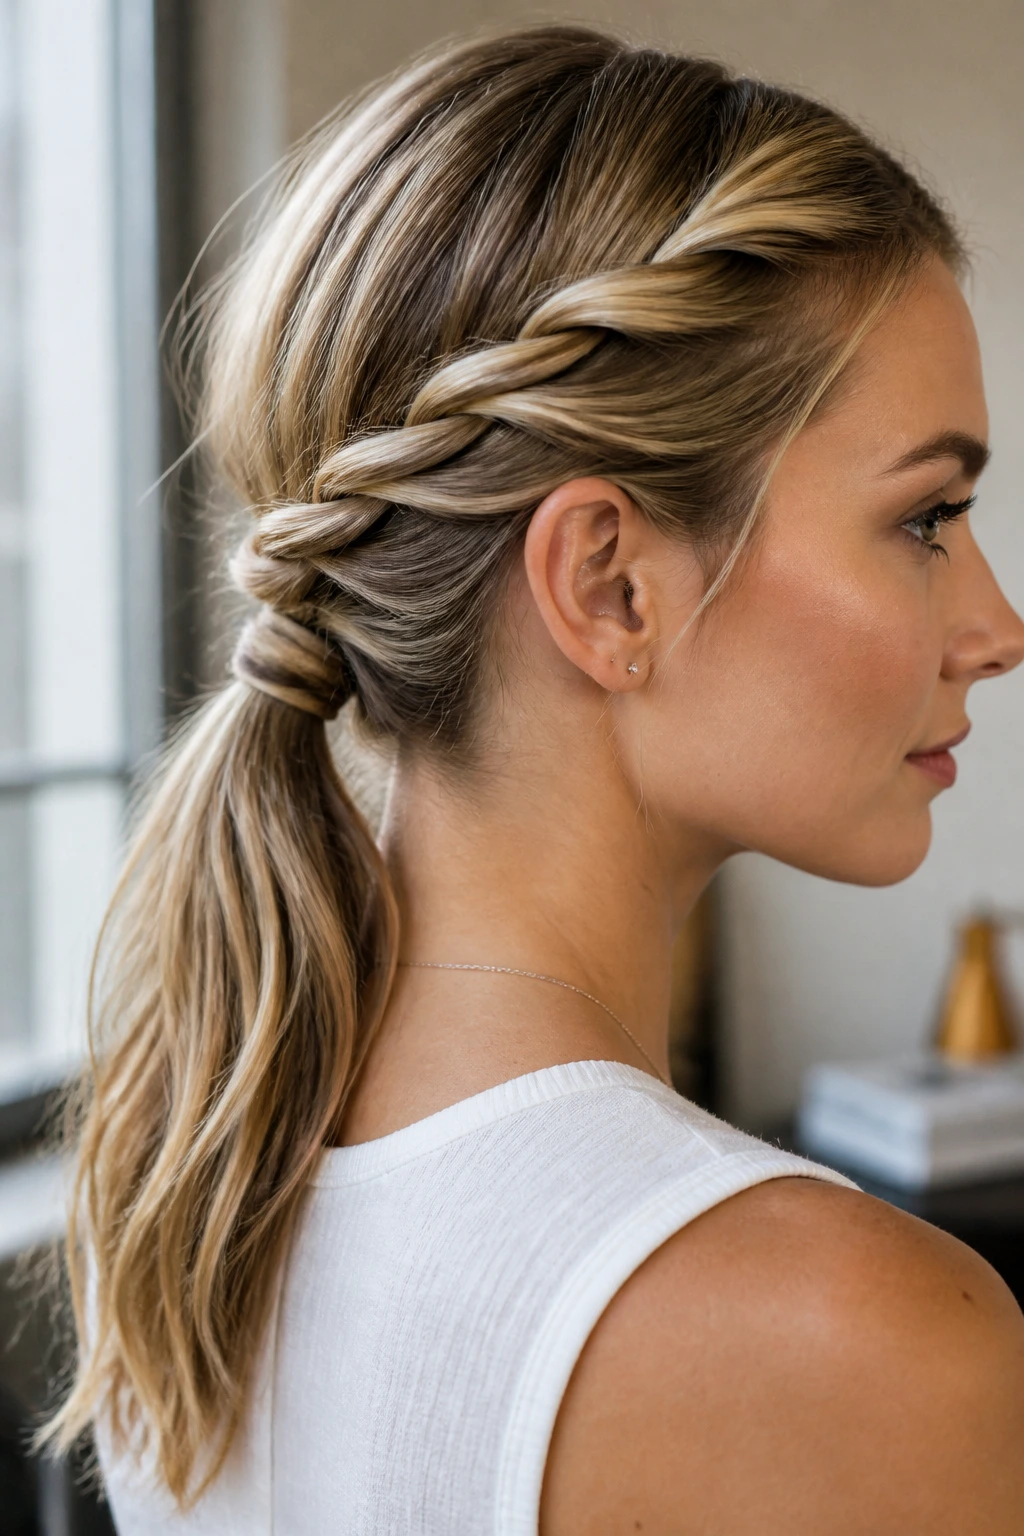
A rope twist is a fantastic alternative to a standard braid because it only uses two sections of hair. It is incredibly fast to assemble and creates a clean, architectural line down your back.
Divide your low ponytail into two equal parts. Twist both sections individually to the right, keeping the tension firm. Then, wrap the two twisted sections around each other to the left.
This counter-twisting motion is the most important part of the style; if you twist both directions the same way, the rope will unravel immediately. Secure the bottom with a clear elastic. It is a highly secure style that holds up beautifully through busy days without shedding loose hairs.
18. The Shaken-Out Bedhead Shag
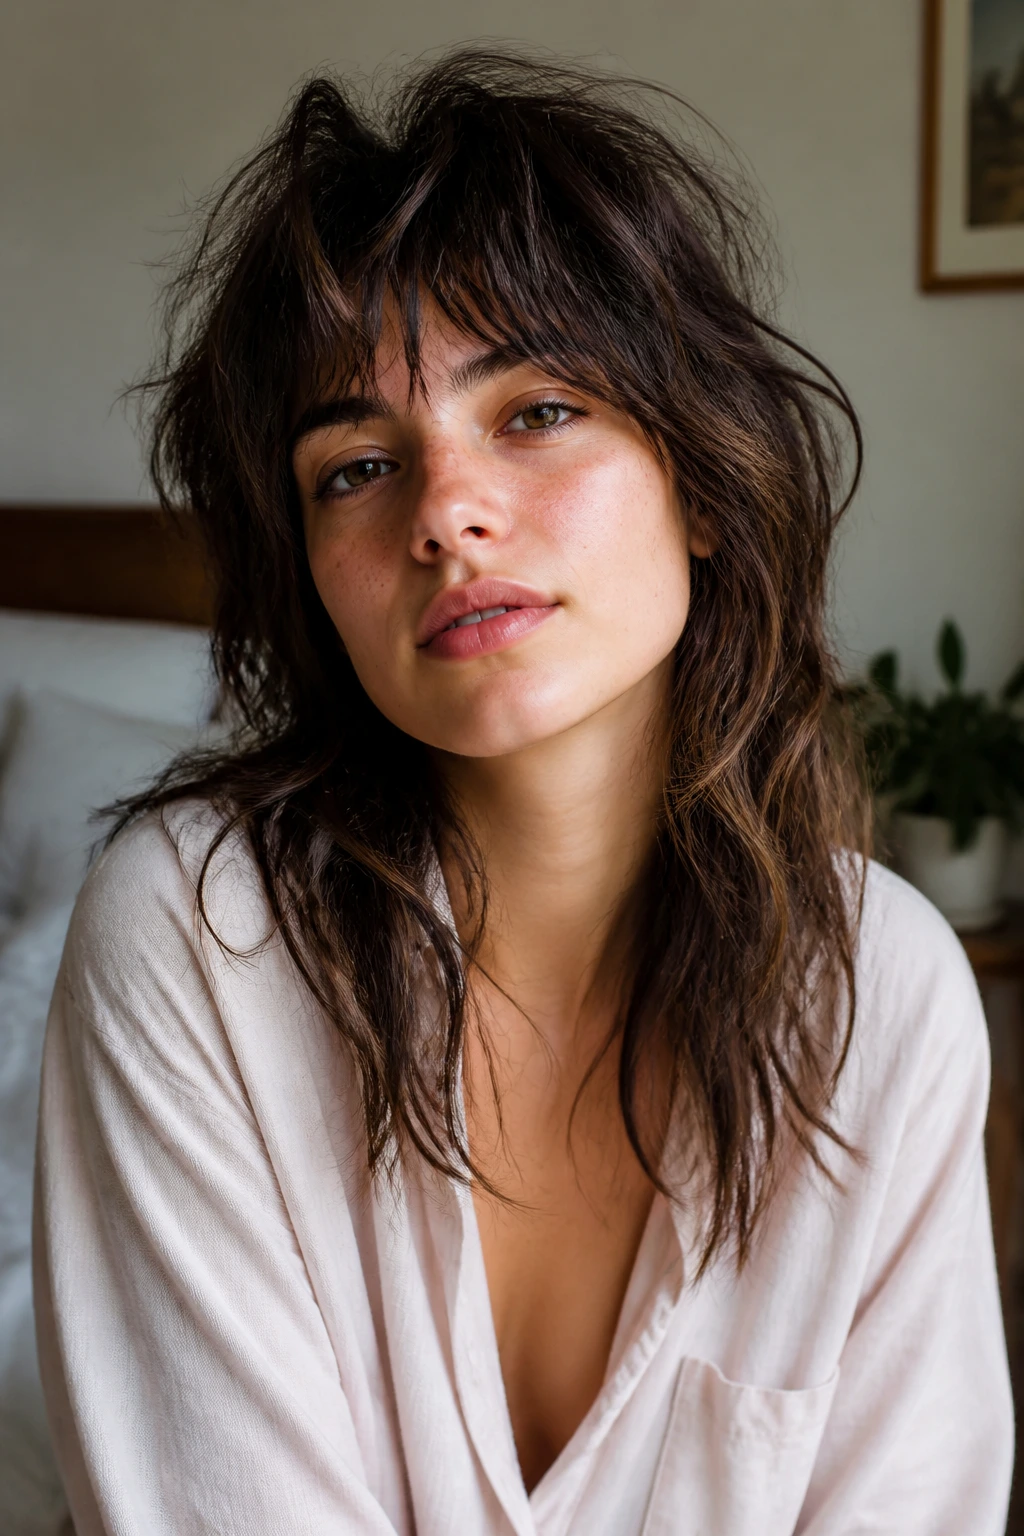
If you have a heavily layered cut like a shag, a wolf cut, or a textured bob, you do not need to tie your hair up to look styled on a busy morning. You can use your natural sleep texture to create a lived-in look.
Instead of brushing your hair, which can cause layered cuts to lose their shape and frizz, use a dry texture spray. Spray the product directly into your roots, focus on the crown, and then tilt your head upside down.
Massage your scalp with your fingertips, using circular motions to wake up the roots and build volume. Flip your head back up, and use your fingers to piece out the ends of your layers. This creates a cool, effortless look that embraces the natural movement of your haircut.
19. Quick Rolled Chignon with Bobby Pins
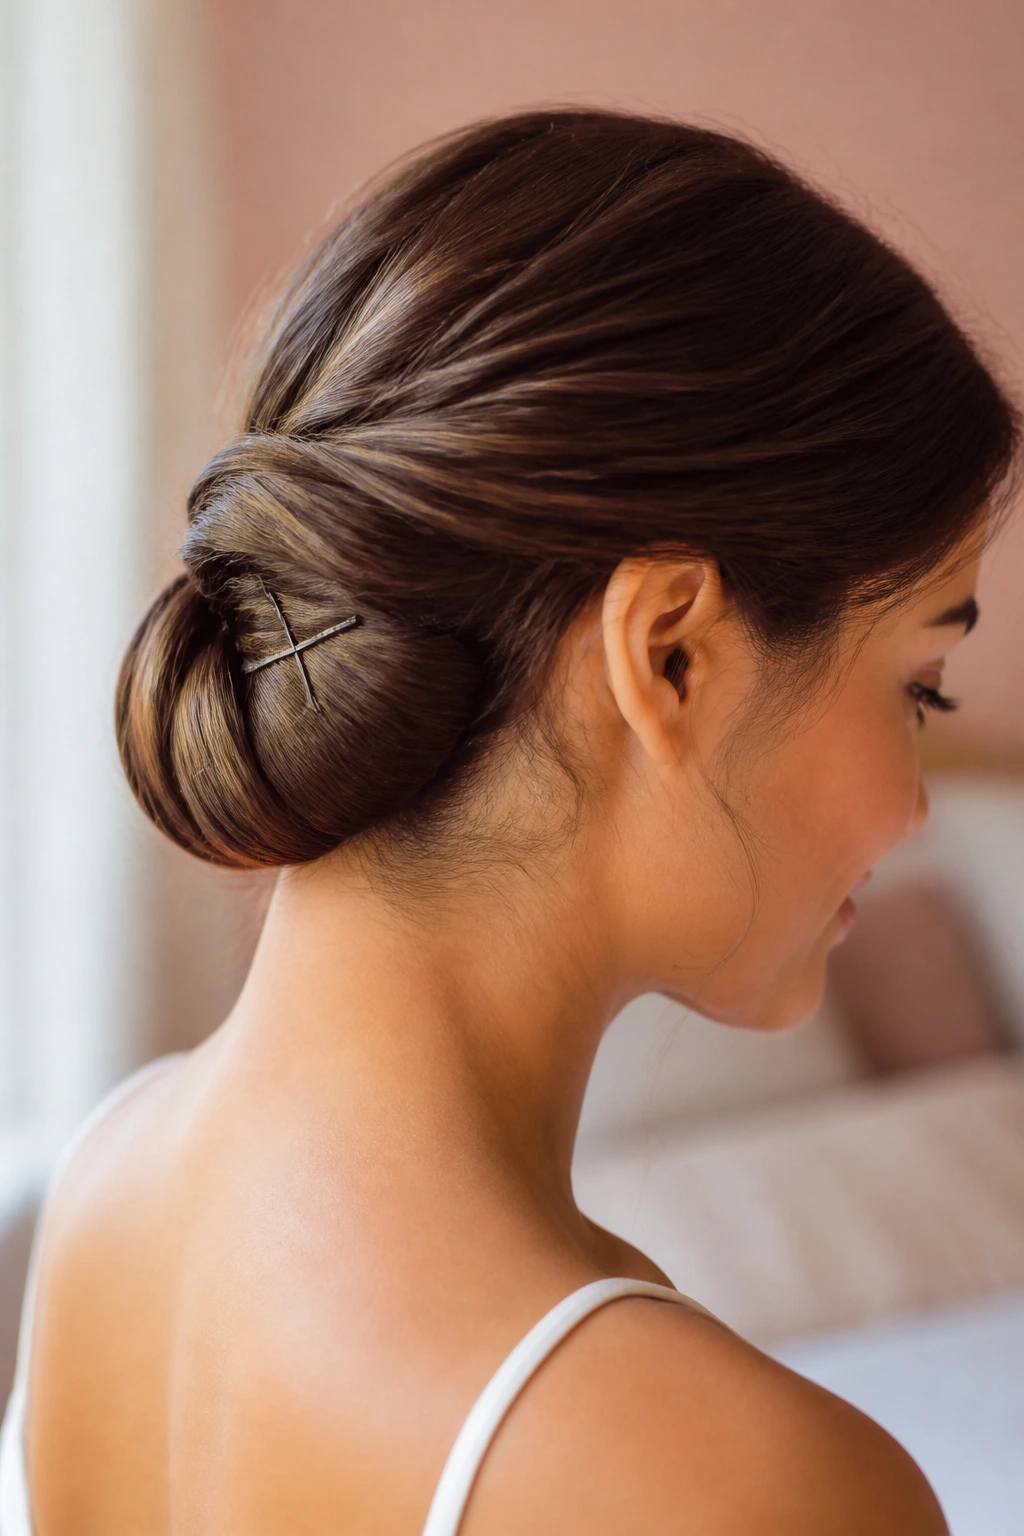
A chignon sounds like something that requires a salon appointment, but you can create a simple, rolled version using a clever tucking method that takes less than two minutes.
The Tucked-Under Trick
This style works by creating a small pocket of space just above your hair tie and folding the length of your ponytail inside it. It is incredibly secure and hides the ends of your hair completely.
Quick Chignon Steps
- Secure your hair in a loose low ponytail at the nape of your neck.
- Use your fingers to create a vertical split in the hair just above the elastic.
- Loop the ponytail up and push the length down through the split.
- Repeat this tucking motion until all the loose hair is rolled into a soft bun.
Cross two bobby pins in an “X” shape inside the pocket to secure the roll forever. This locking mechanism ensures the bun will not shift, even if you are running to catch a bus or walking in windy weather.
20. Flat-Iron Waves with Textured Spray
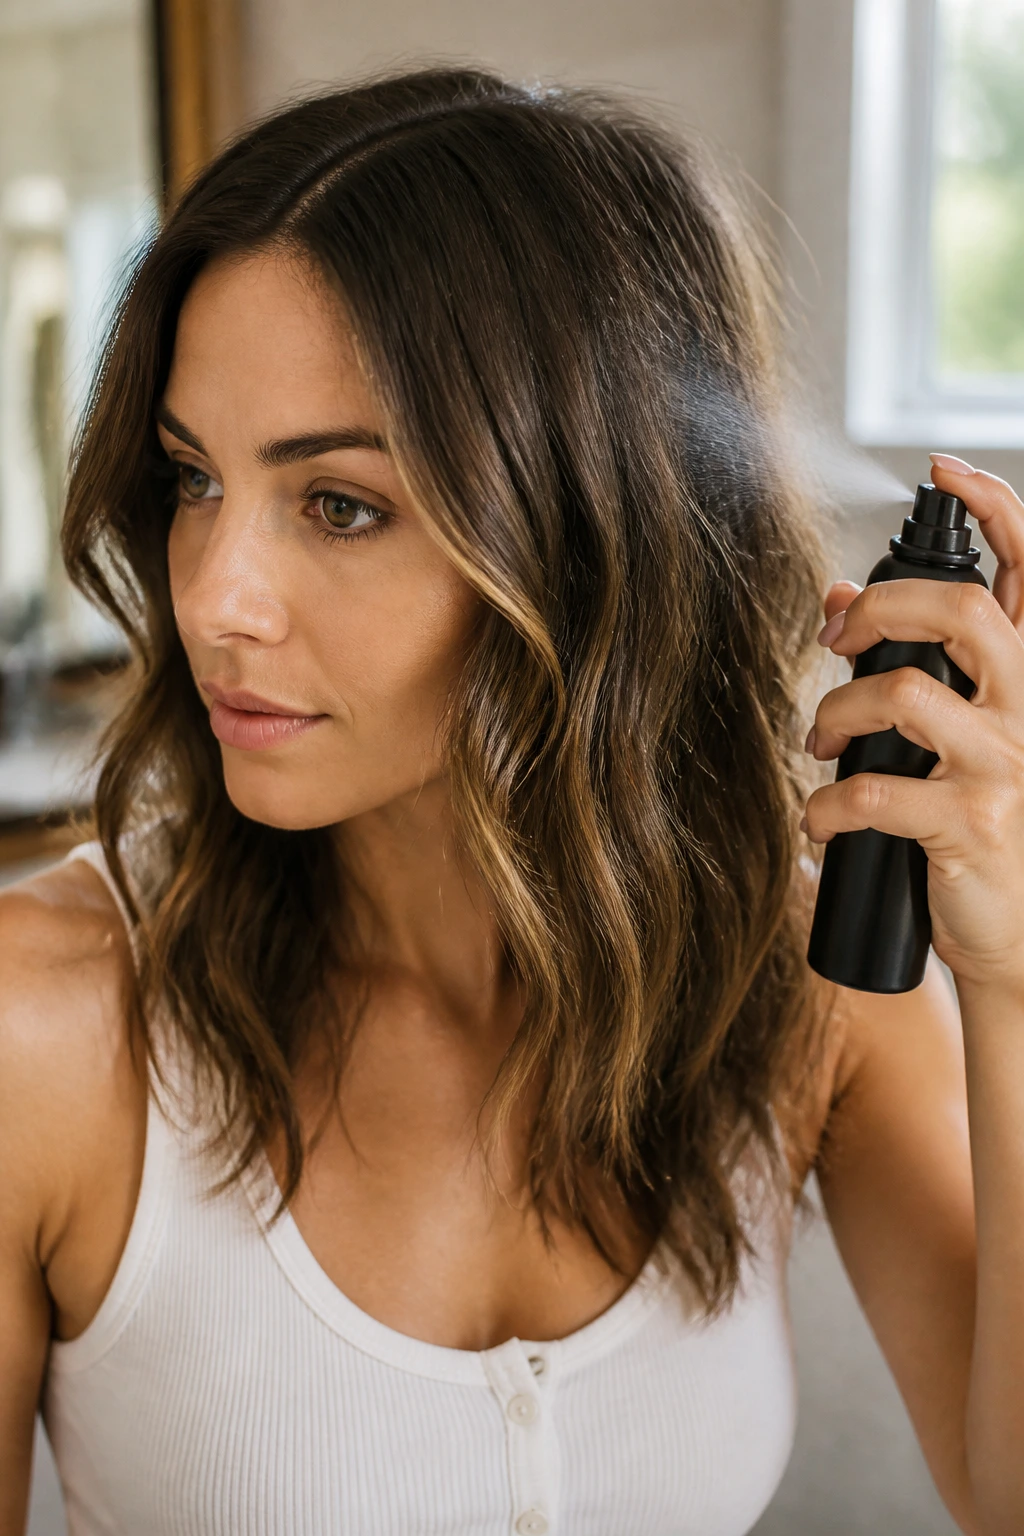
You do not need to curl your entire head of hair to look like you spent time styling it. On busy mornings, you can save valuable time by focusing only on the top layer and the pieces of hair that frame your face.
Leave the bottom layers of your hair in their natural state. Take a flat iron and clamp it mid-shaft on a face-framing piece. Turn the iron half a turn away from your face, and slide it down to the ends.
Repeat this on three or four key sections around your crown. Shake out the waves with your fingers, and spray the ends with a dry texture spray. The styled top layer will blend with your natural under-layers, creating a full, wavy look in a fraction of the time.
21. The Half-Down Claw Clip Cascade
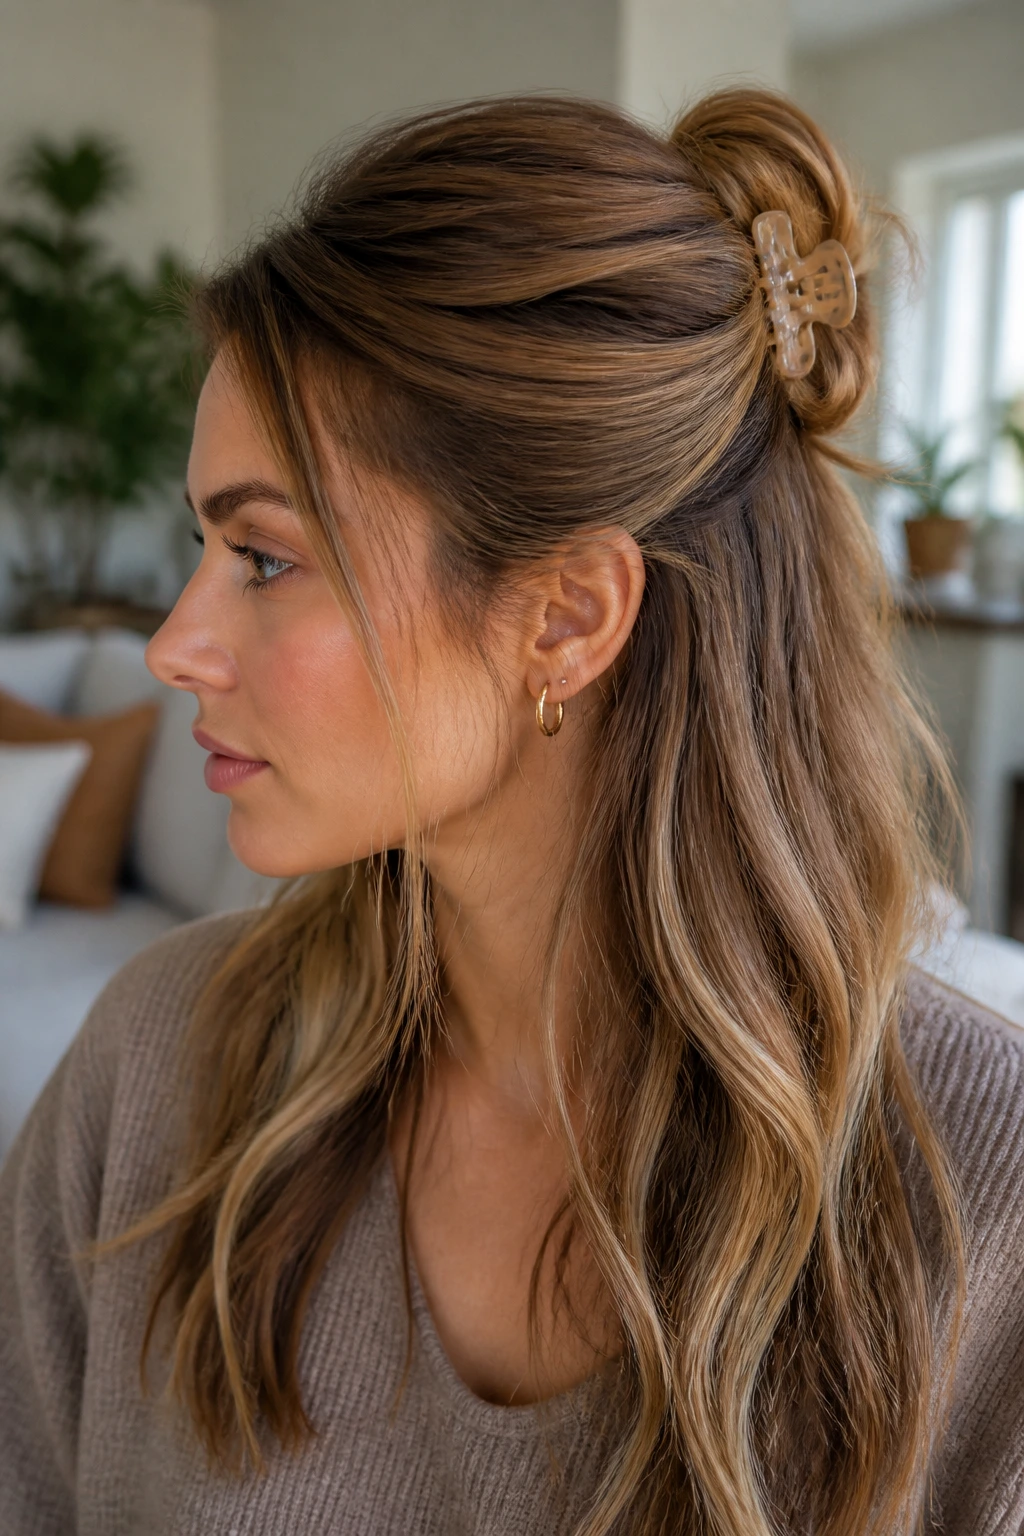
For a style that feels romantic and soft, the half-down claw clip cascade is an excellent option. It uses a medium-sized claw clip to gather the center section of your hair, letting the rest fall naturally around your shoulders.
Leave the hair around your ears loose to frame your face. Gather a section of hair from the crown of your head, starting from the temples. Twist this section upward, pressing it flat against the back of your head.
Clamp your claw clip over the middle of the twist, leaving the ends of the hair to fold over the top of the clip. This creates a beautiful, cascading waterfall of hair that looks soft and natural. It is an incredibly comfortable style that keeps the hair out of your eyes while still letting you wear it down.
Wrapping Up
On those chaotic mornings when time is short, the goal is not perfection. It is about finding a simple, reliable style that makes you feel confident as you head out the door. By keeping a few reliable tools—like silk scrunchies, a good boar bristle brush, a dry texture spray, and a couple of claw clips—on your vanity, you can turn a bad hair day into a non-issue.
Remember to work with your hair’s natural texture rather than trying to force it into something it is not. If your hair is oily, lean into a sleek, low bun. If it is wild and wavy, embrace a messy top knot or a textured braid. Once you master the basic mechanics of these simple styles, you will find that busy mornings do not have to mean boring hair.
