



The alarm blares, and reality hits immediately. You have exactly twenty minutes to get dressed, grab your bag, and somehow make your hair look presentable before walking out the door. For those with thick, textured curls or coils, this moment often brings a wave of decision fatigue.
Textured hair is beautiful, but it requires a strategic approach when time is short. The goal during a frantic morning is not to fight your natural curl pattern, but to work with it. You want styles that protect your strands, look deliberate, and take less than ten minutes to put together.
Finding the right style for Black hair for busy mornings is all about preparation and having a small menu of reliable options. Whether you are rocking a teeny-weeny afro, long box braids, or a classic twist-out, you can look polished without sacrificing your sleep.
Let us look at how you can transform your morning routine with twenty-five simple, beautiful styles that require minimal effort but deliver maximum style.
The Golden Rules of Low-Maintenance Textured Hair
The secret to an easy morning starts the night before. If you sleep on a cotton pillowcase without protecting your hair, you will likely wake up with dry, flattened curls and a lot of frizz. Cotton pulls moisture away from your strands and causes friction, which leads to tangles.
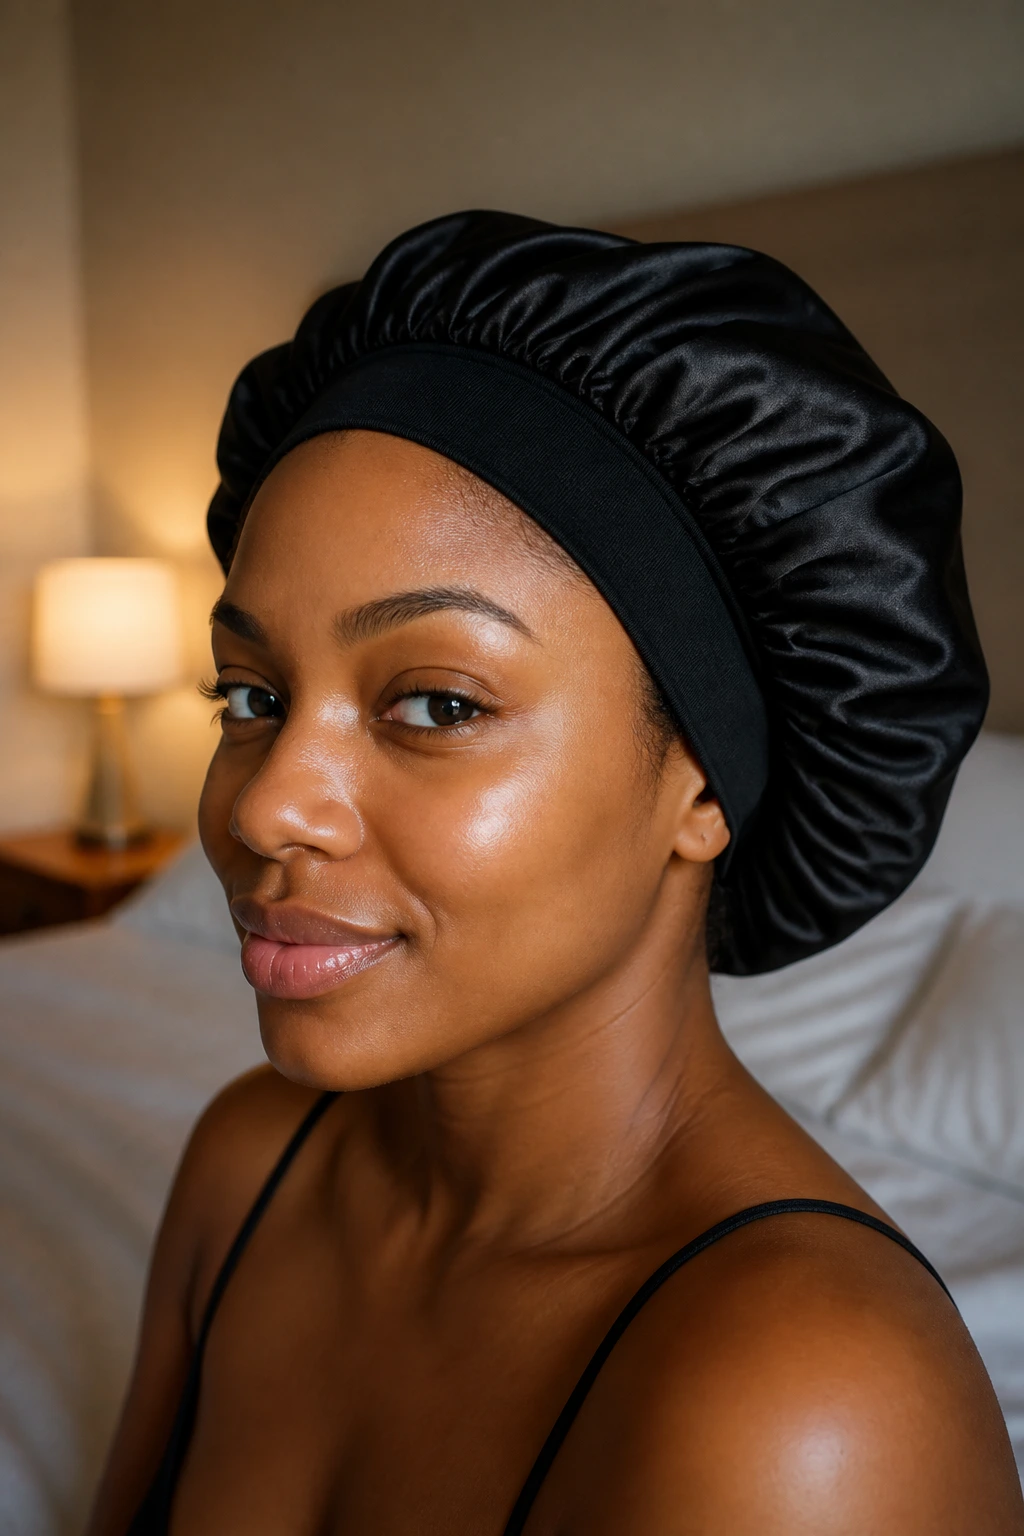
Protecting your hair at night saves you valuable minutes when the sun comes up. Wrap your hair in a silk or satin scarf, or wear a spacious satin bonnet to keep your natural oils where they belong. If bonnets are not your style, a high-quality satin pillowcase works wonders.
Moisture is your best friend when it comes to quick styling. Dry hair is stubborn and difficult to manipulate, whereas hydrated curls are cooperative and springy. Keeping a spray bottle filled with water and a light leave-in conditioner on your bathroom counter is a game-changer for quick refreshes.
1. The Classic High Puff
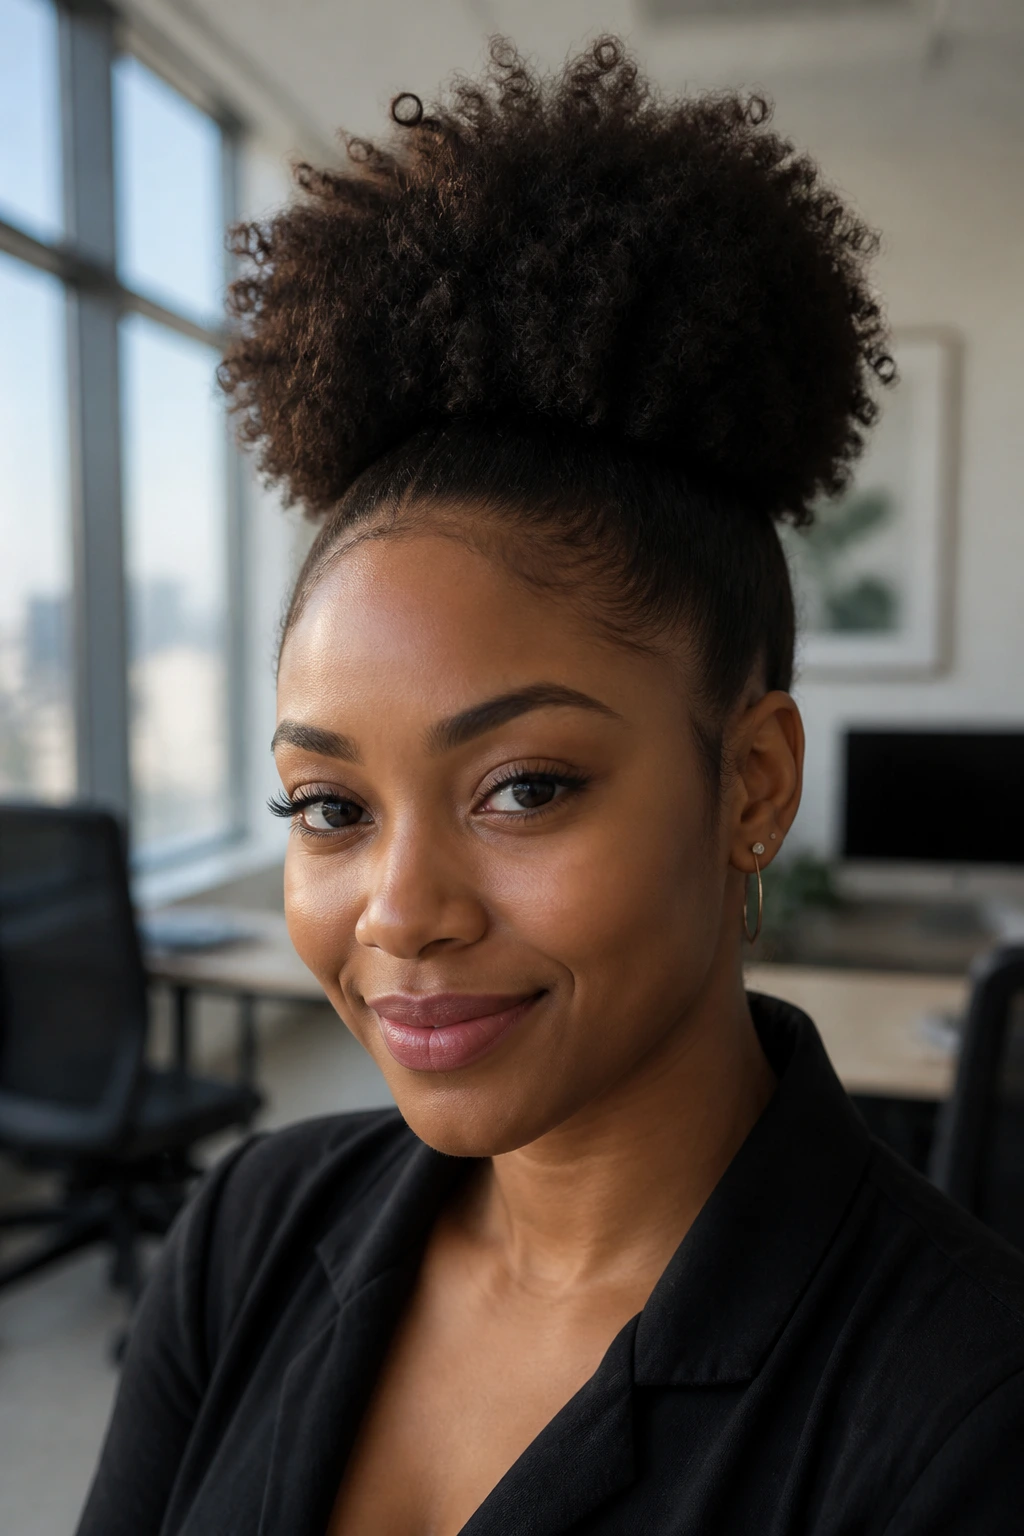
The high puff is the undisputed champion of quick styling for natural hair. It is simple, clean, and highlights your facial features while letting your natural volume shine. You can wear this style to the office, the gym, or a casual brunch without skipping a beat.
Why the Puff Works
This style gathers your hair at the crown of your head, leaving the ends free to cascade outward like a pineapple. It works incredibly well on hair that is a few days past wash day, as the natural oils at your roots make it easier to smooth your hair upward.
Quick Prep Steps
- Mist your roots lightly with water to soften the hair.
- Apply a small amount of moisturizing styling cream or gel to your edges.
- Brush your hair upward toward the crown using a soft-bristle brush.
- Loop a long, stretchy headband or hair tie around your neck, pull it up to your forehead, and gently slide it back to secure your hair into a puff.
Pro tip: Avoid pulling the hair tie too tight, as this can cause tension headaches and damage your hairline over time.
2. The Slicked-Back Low Bun
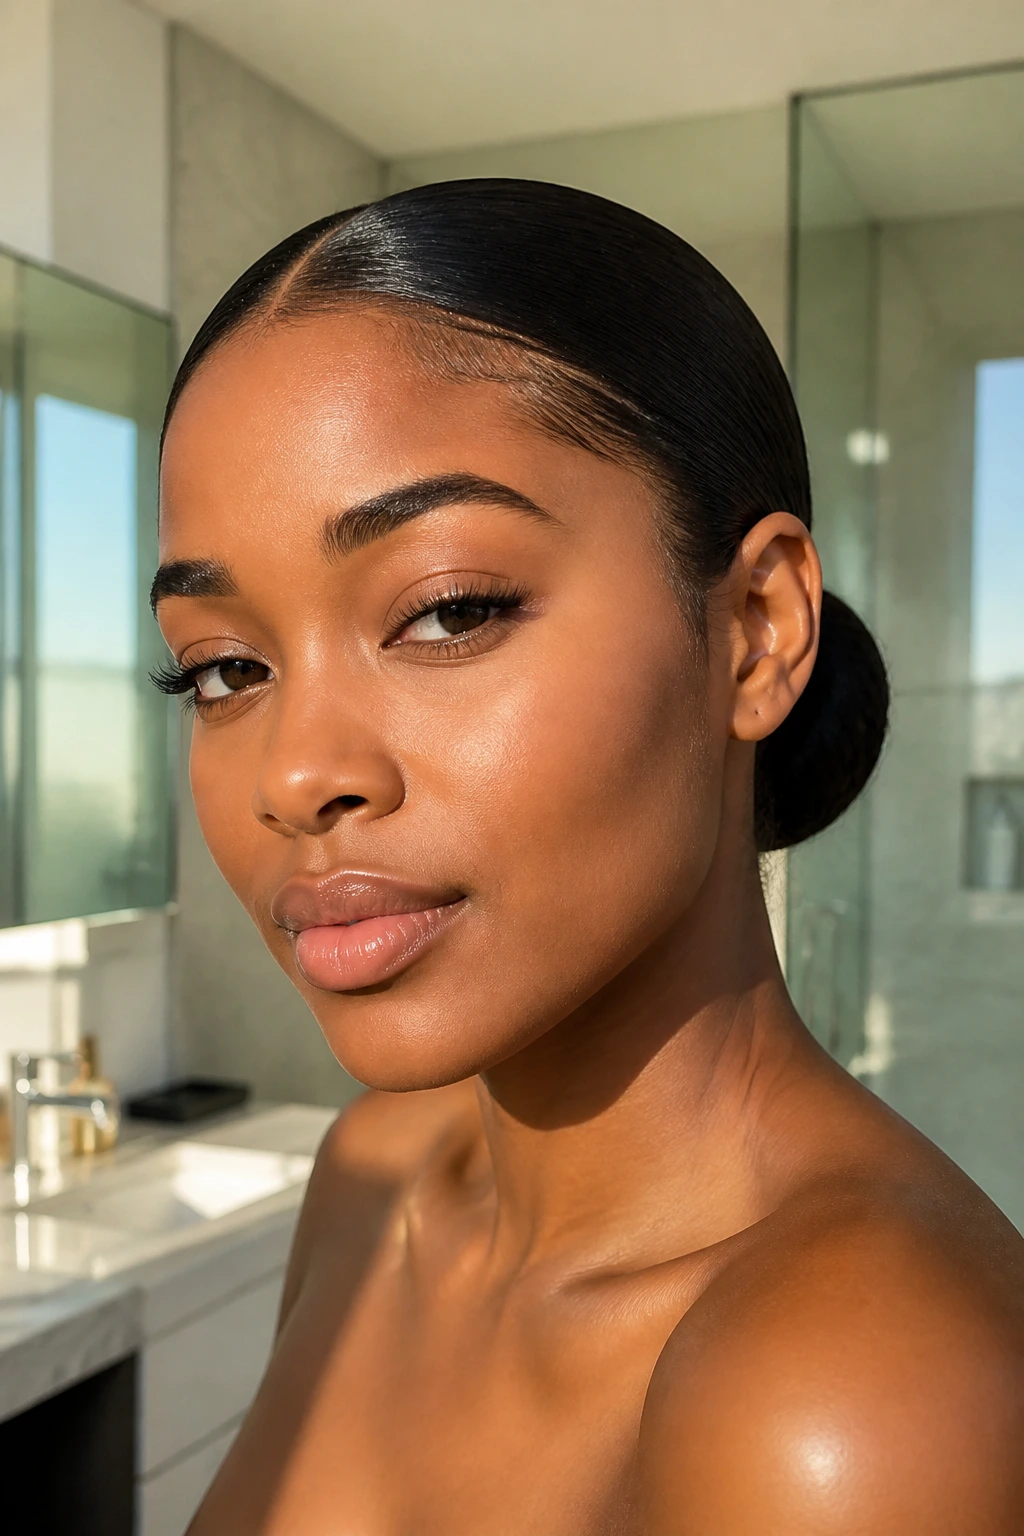
Some mornings demand a sleek, professional look that screams organization. The slicked-back low bun is your best option for these moments, as it keeps your hair contained and protected from the elements.
This style works best on stretched hair or blow-dried locks, but you can easily achieve it on shrunken curls too. Start by parting your hair down the middle or slightly to one side. Apply a generous layer of alcohol-free styling gel along your hairline and down to the nape of your neck.
Brush the hair down smoothly, gathering it into a tight ponytail at the back of your head. Twist the length of your ponytail into a neat coil, wrap it around the base, and secure it with a few bobby pins.
3. Half-Up, Half-Down Topknot
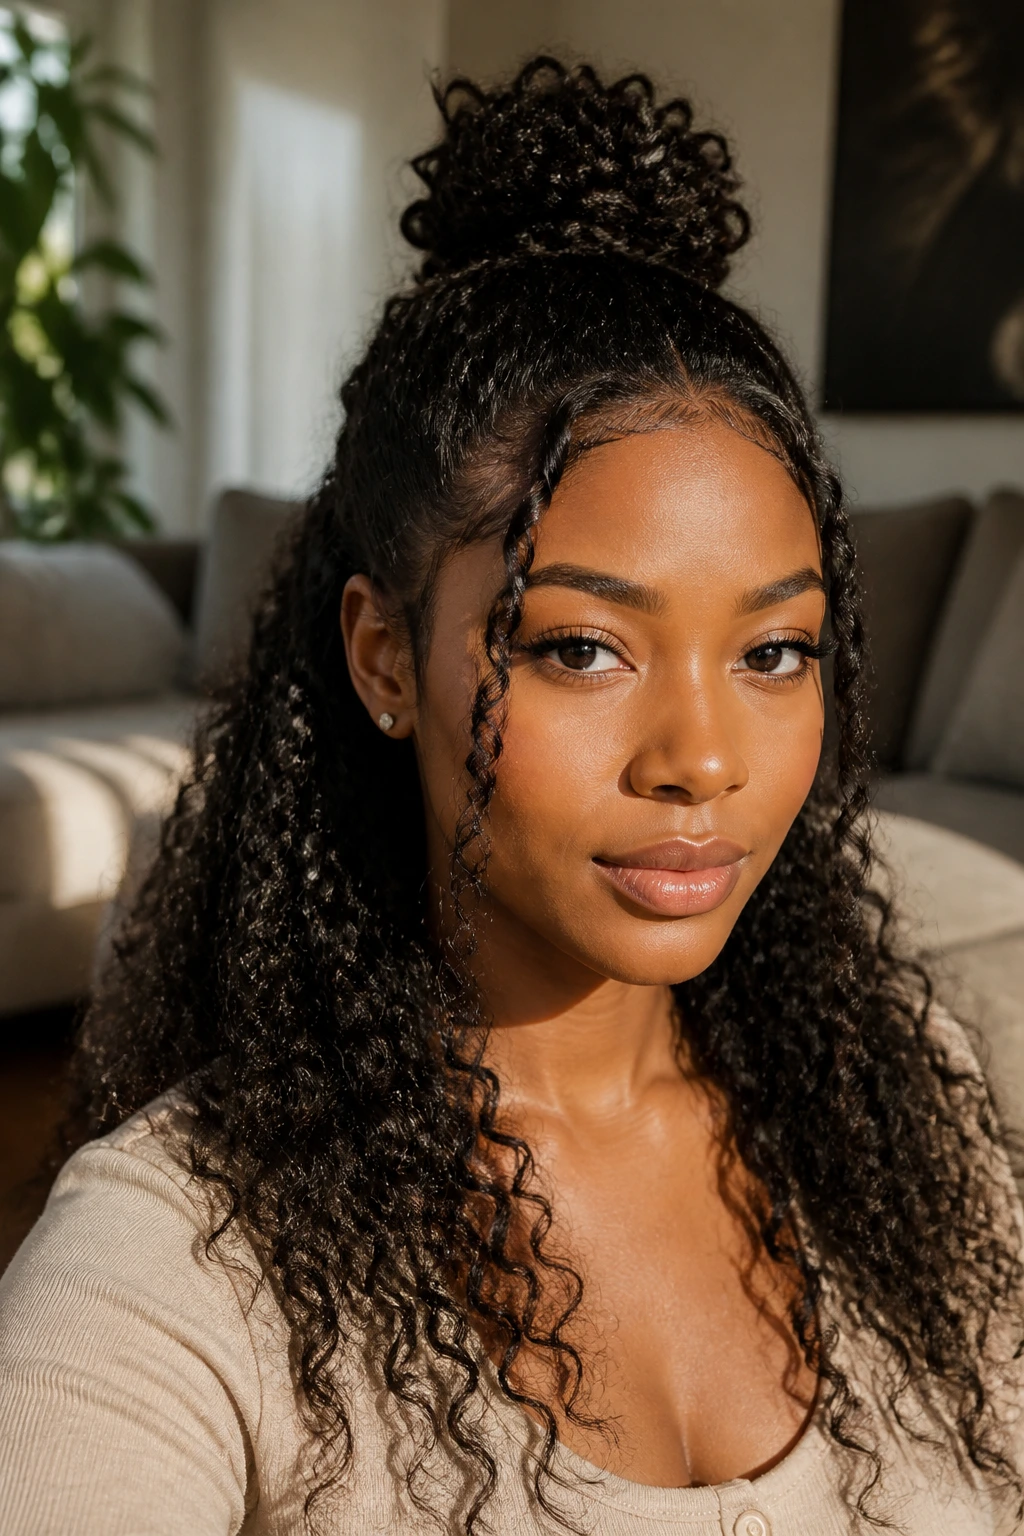
What if you want the best of both worlds? The half-up, half-down topknot allows you to show off your curl definition at the back while keeping the front of your hair out of your face.
Finding the Right Balance
To make this look intentional, you need to section your hair cleanly. Use your fingers or a rat-tail comb to create a horizontal part from ear to ear, separating the front section from the back.
Gather the top section into a high ponytail, then wrap the hair around itself to form a small, neat bun on top of your head. Secure it with an elastic.
How to Style the Back Section
- Spray the loose hair in the back with a light moisturizing mist.
- Gently scrunch in a dollop of curl-defining cream to revive any flattened areas.
- Let the back curls hang naturally over your shoulders.
4. The Flat-Twisted Halo
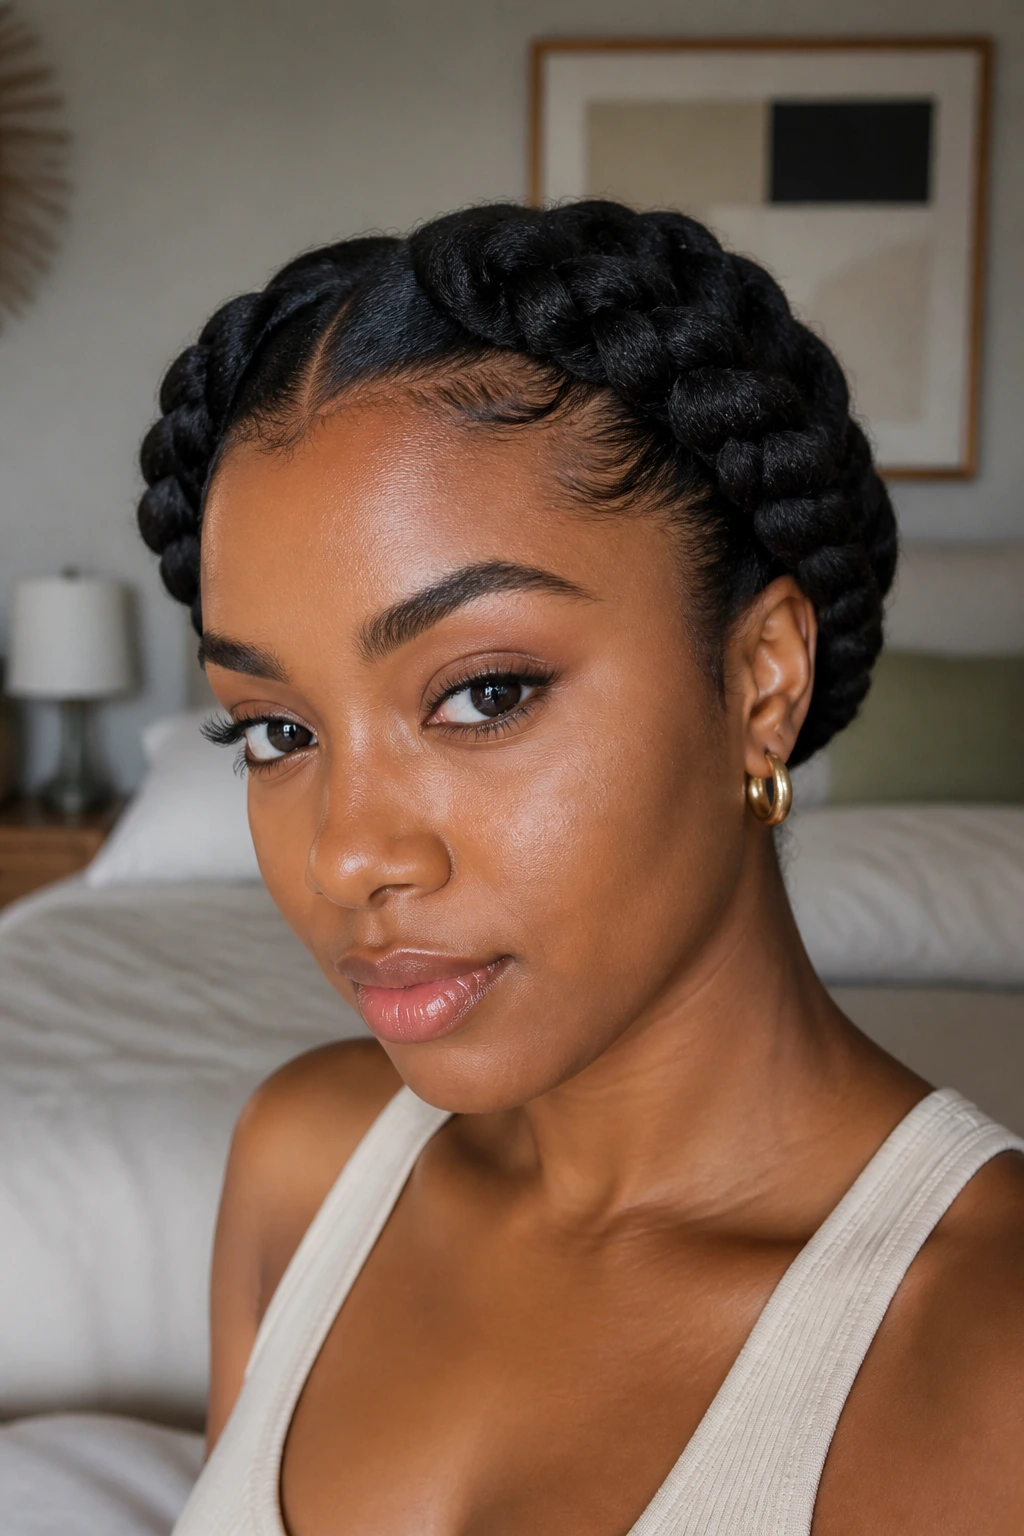
A friend once told me she could never do her hair in under five minutes because flat twisting felt too complicated. That changed when she learned the halo technique, which is essentially two large flat twists that frame the face and meet at the back of the neck.
This style looks incredibly intricate, but it is actually very simple once you get the motion down. It is the perfect choice for rainy days when humidity threatens to ruin your curl definition.
Styling Details
- Part your hair down the middle from your forehead to the nape of your neck.
- Start on one side, flat twisting the hair along your hairline toward the back of your head.
- Repeat the process on the other side.
- Pin the ends of both twists together at the back using two bobby pins.
This keeps your ends tucked away and protected from friction, helping you retain length while looking perfectly put together.
5. Pineapple with a Bold Headwrap
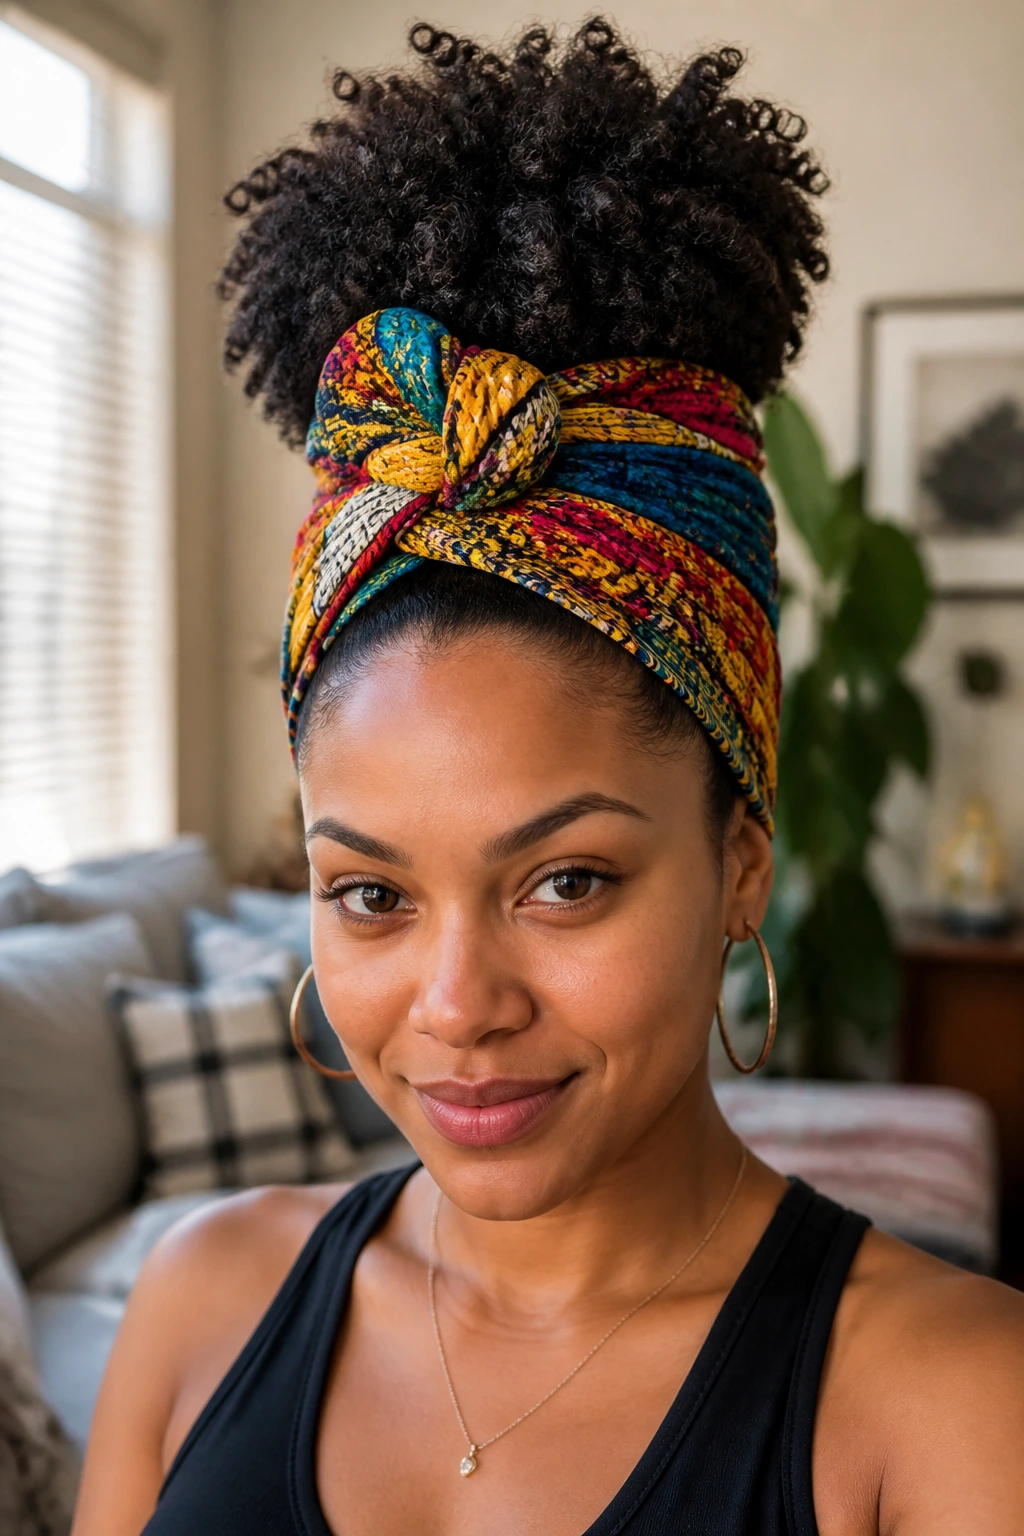
When your twist-out is completely flat on one side and you do not have time to revive it, a colorful headwrap is your saving grace. This style allows you to hide the messy parts of your hair while showing off a burst of curls at the crown.
To achieve this, gather your hair into a high pineapple at the top of your head using a loose hair tie. Take a silk or cotton scarf, fold it into a wide band, and wrap it around the back of your head.
Bring the ends to the front, tie them into a neat knot or bow just below your pineapple, and tuck the loose ends under the wrap. Adjust the curls on top so they cascade forward over the band.
This look is vibrant, stylish, and takes less than three minutes to put together. It is an excellent option for those days when your hair simply refuses to cooperate.
6. Two-Strand Twist Out Refresh
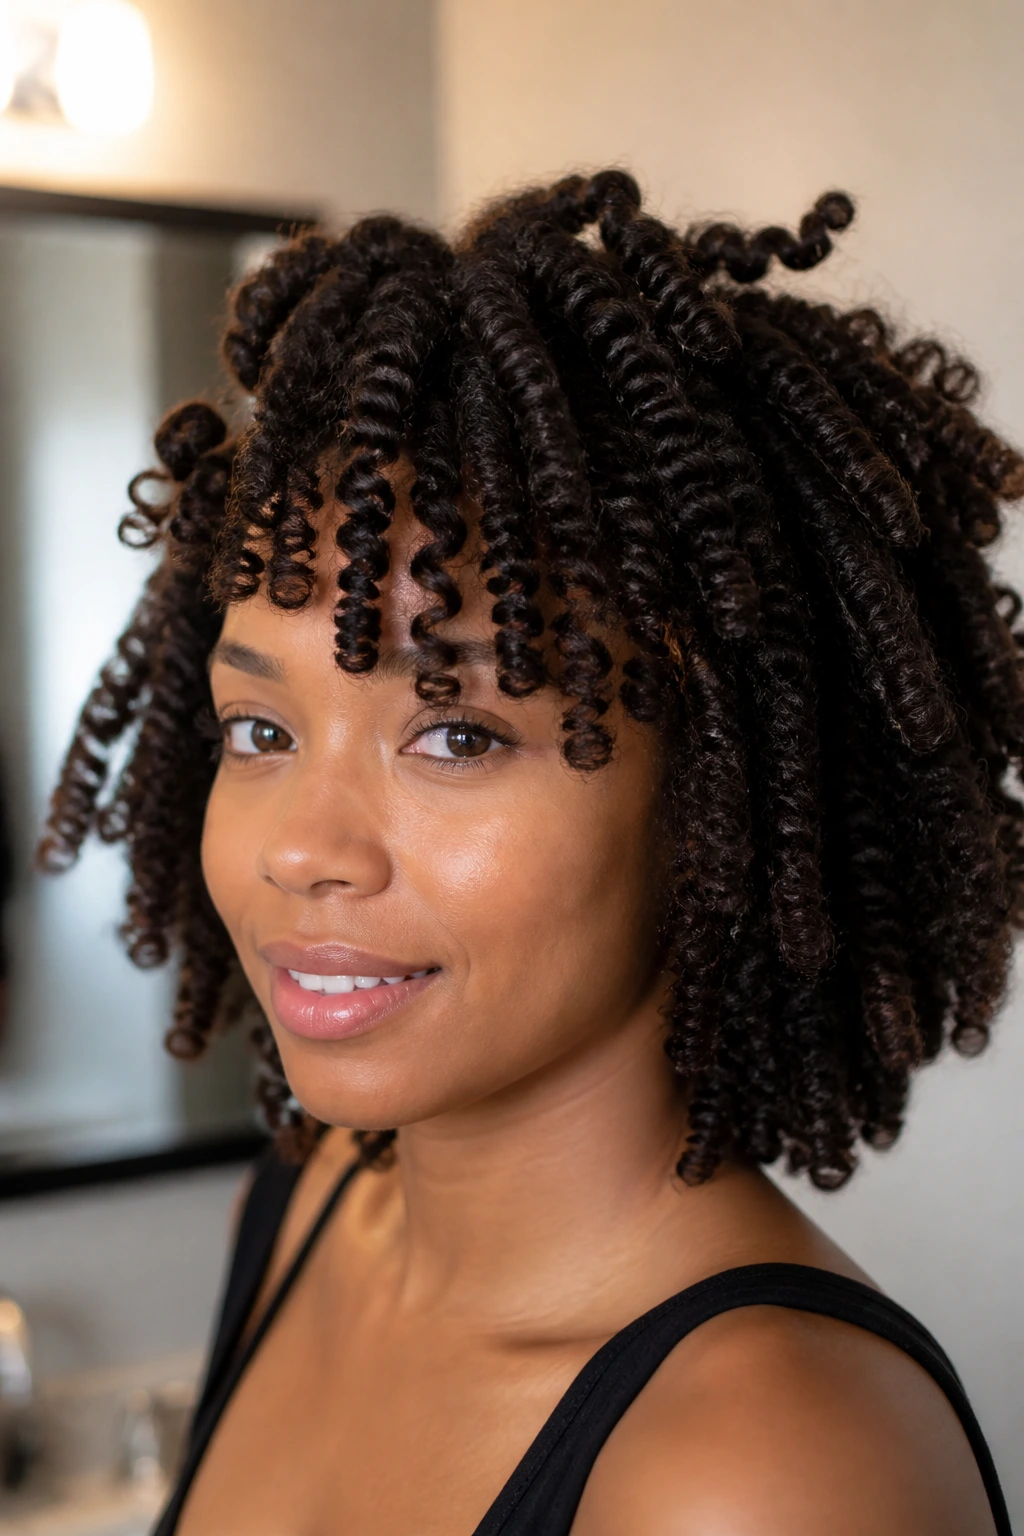
Unlike structured protective styles, a twist-out is meant to look lived-in and voluminous. However, by morning three or four, those curls can look a bit wild and lose their shape.
Instead of re-twisting your entire head before bed, you can easily refresh your curls in the morning with a simple shake-and-go technique. Mist your hair with a light mixture of water and leave-in conditioner to reactivate the products already in your hair.
This style is perfect for medium to long hair lengths that have a natural spring to them. Gently pull apart any clumped sections that have matted together, then use a hair pick at your roots to lift and build volume without disturbing the defined ends.
7. The Side-Swept Afro Puff
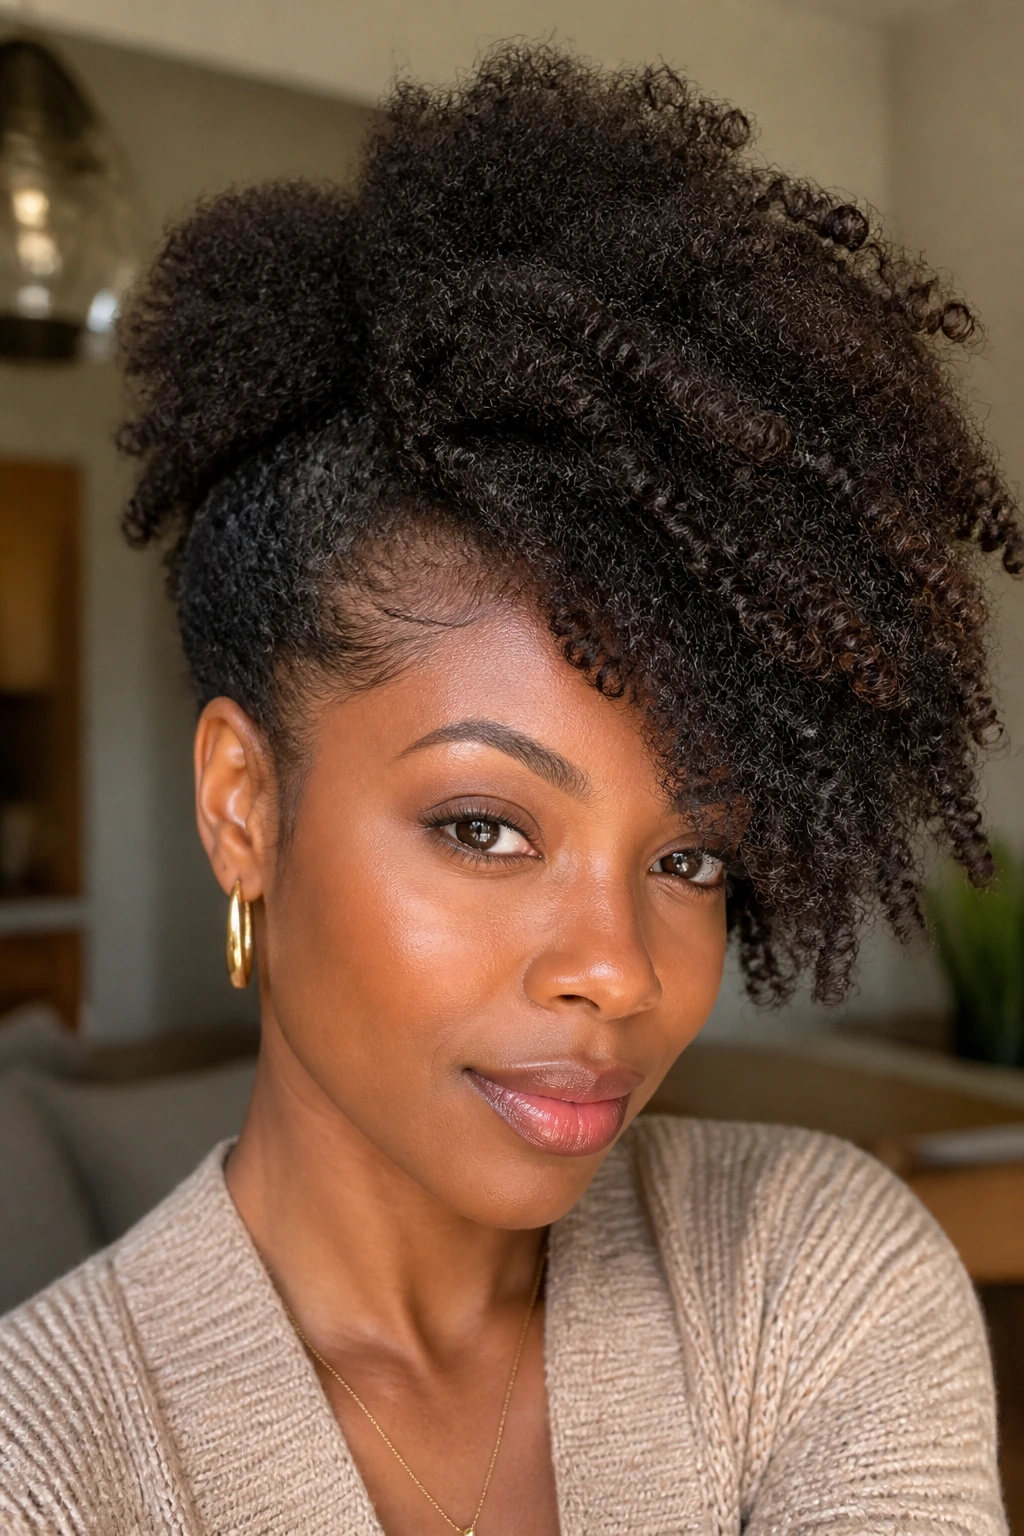
The side-swept puff offers a soft, romantic alternative to the traditional high puff. By shifting the volume to one side of your head, you create an asymmetrical silhouette that looks incredibly chic with minimal effort.
Why It Works
This style works by redirecting the visual weight of your hair, making it a great option if you have uneven curl patterns or a patch of hair that is slower to grow. It frames the face beautifully and works on short to medium lengths.
Styling Steps
- Create a deep side part on your preferred side.
- Apply a light moisturizer to the side with less hair and brush it flat against your head.
- Use a few bobby pins to secure this flat section behind your ear.
- Let the remaining hair fluff out naturally on the opposite side, using a pick to build volume.
Pro tip: You can add a decorative gold slide or a vintage hair clip to the flat side to make the look feel even more intentional.
8. Double Space Puffs
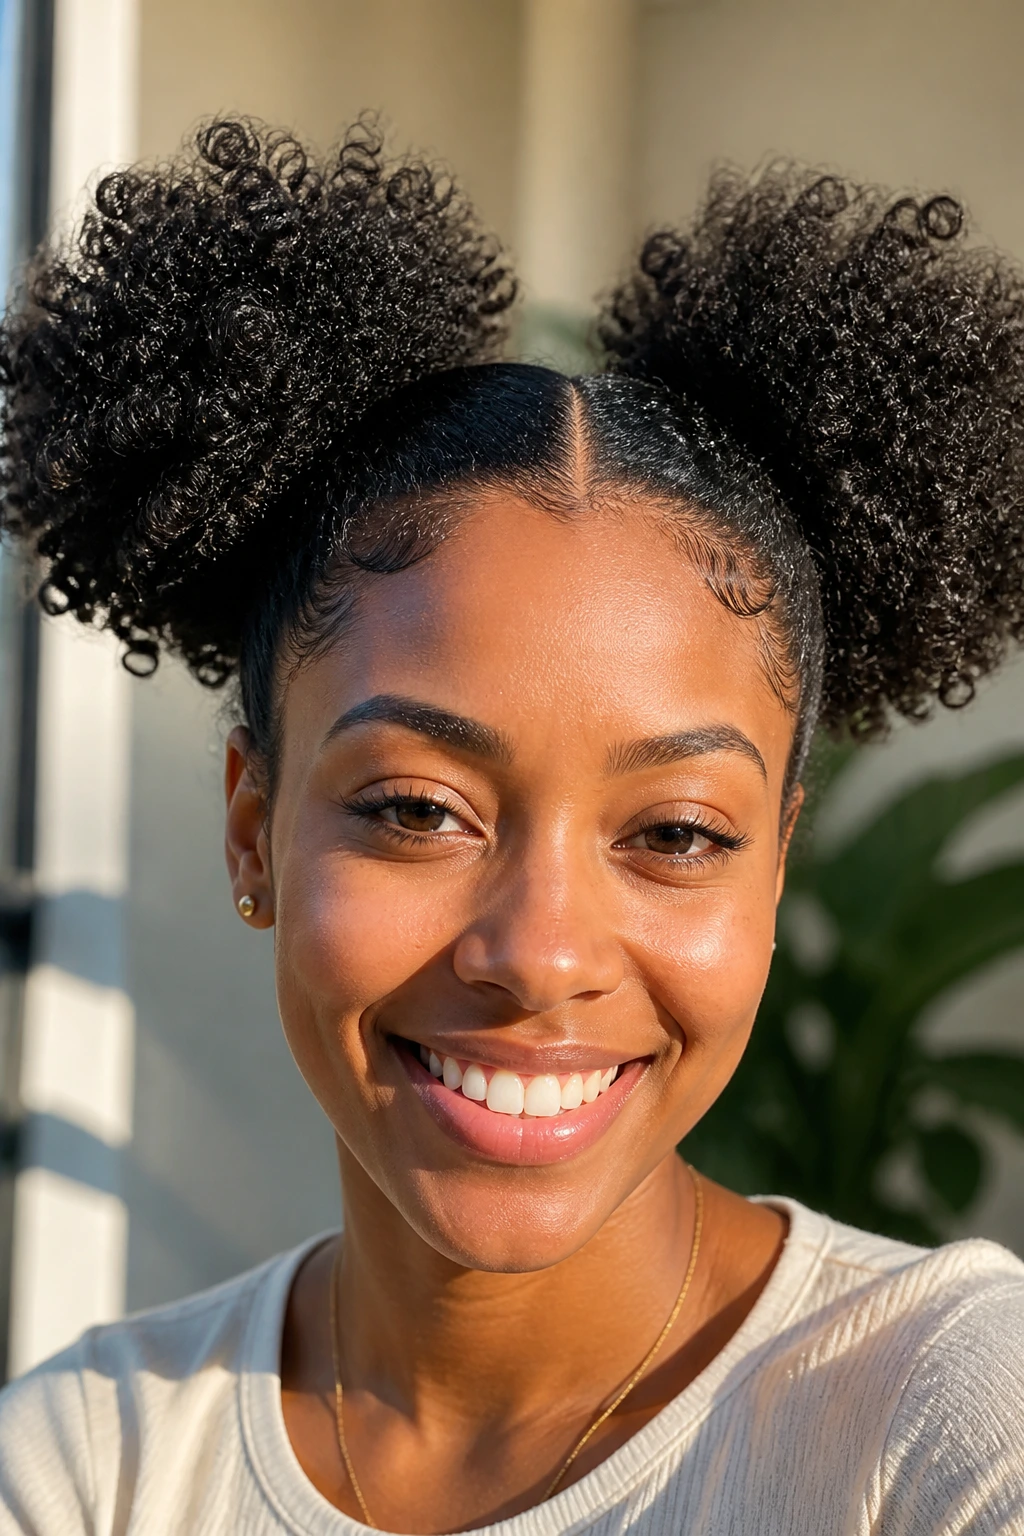
If you want a look that is fun, youthful, and full of personality, double space puffs are a fantastic option. This style divides your hair into two high puffs on either side of your head.
Start by parting your hair down the center from your forehead to the nape of your neck. Gather the hair on the left side into a high ponytail near the top of your head, securing it with a soft elastic.
Repeat the process on the right side, ensuring both ponytails are aligned. Fluff the ends of each puff to create a round, symmetrical shape. You can leave your edges natural or smooth them down with a little edge control gel depending on your personal style.
9. The Low Sleek Ponytail with a Middle Part
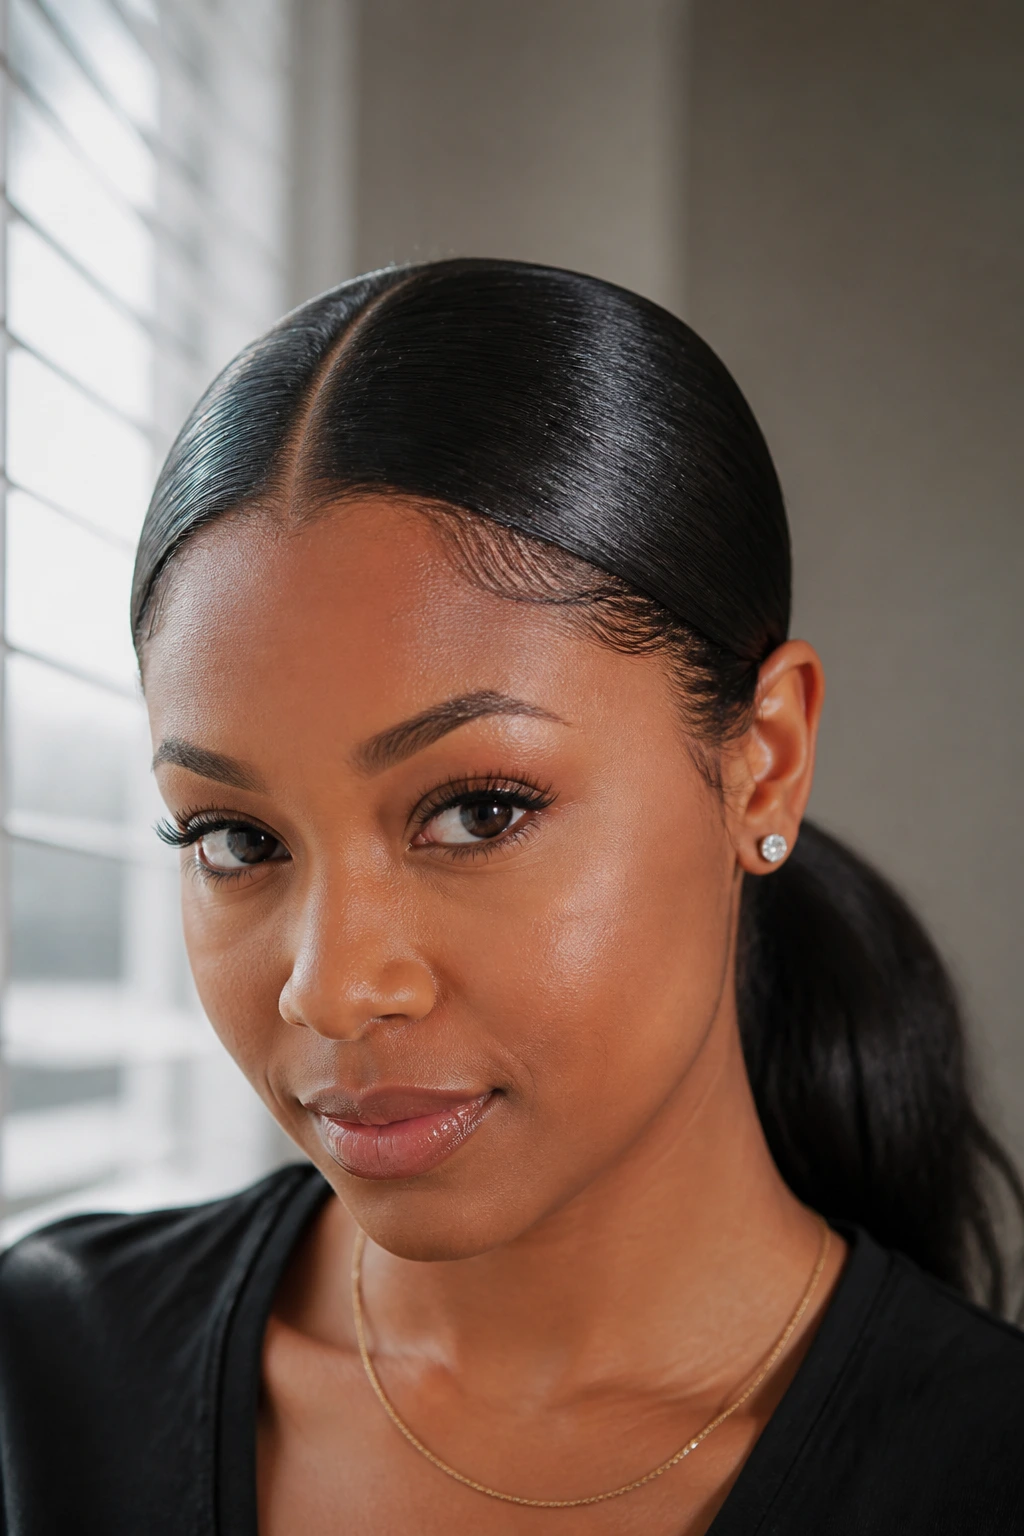
Can a low ponytail look sophisticated? Absolutely, especially when it is styled with a sharp middle part and a smooth, shiny finish.
This look works beautifully on all hair textures, but it is especially easy to achieve on stretched hair. Start by creating a precise middle part using a rat-tail comb.
Achieving the Sleek Look
Apply a light, moisturizing oil or serum to your hair to add shine and reduce frizz. Brush your hair downward and backward, smoothing it behind your ears.
Gather the hair at the nape of your neck and secure it with a sturdy hair tie. If your hair is long, you can let the ponytail hang freely, or wrap it into a neat loop for a shorter, more compact look.
10. Three-Minute Bantu Knot Out
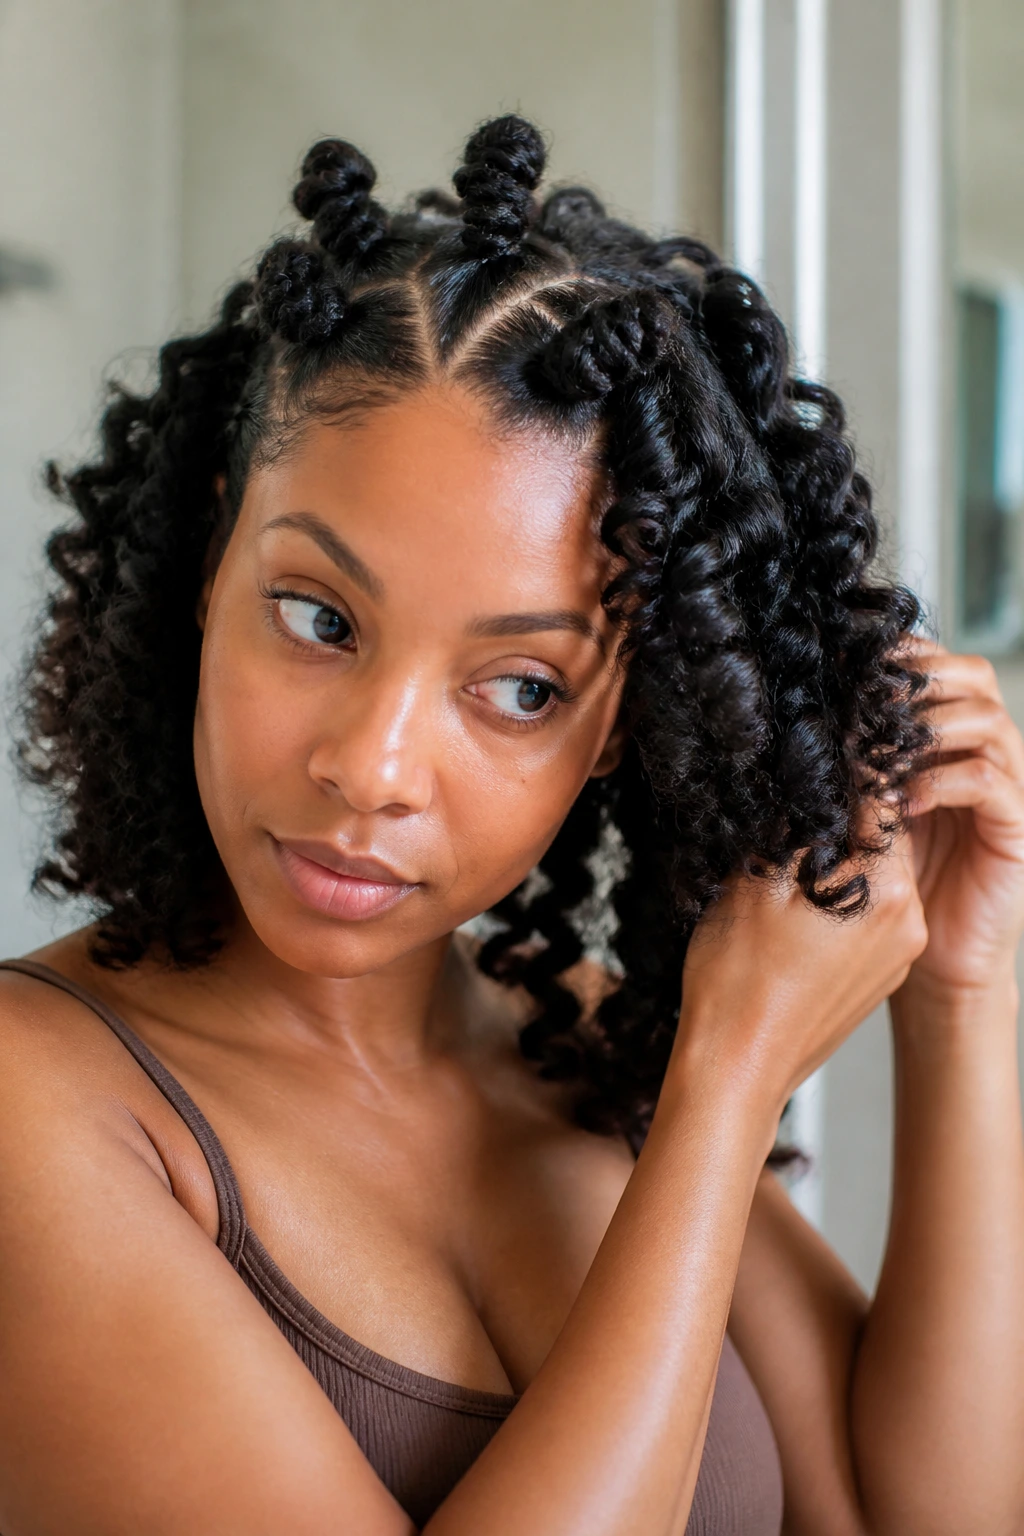
We have all had those mornings where we unravel our overnight bantu knots only to realize they are not fully dry. Instead of panicking, you can quickly turn this mishap into a deliberate style.
When you unravel a damp knot, you get a beautiful, wavy texture at the roots but a slightly frizzy look at the ends. Rather than fighting the frizz, embrace the texture by separating the curls gently with a little oil on your fingertips.
Quick Adjustments
- Separate each knot into two or three smaller sections to add instant volume.
- Use a hair pick at the roots to blend the parts and hide any exposed scalp.
- Shake your head gently to let the curls fall into place naturally.
This gives you a big, beautiful, textured style that looks like you spent hours on it, even if you only had three minutes.
11. The French Roll with a Claw Clip
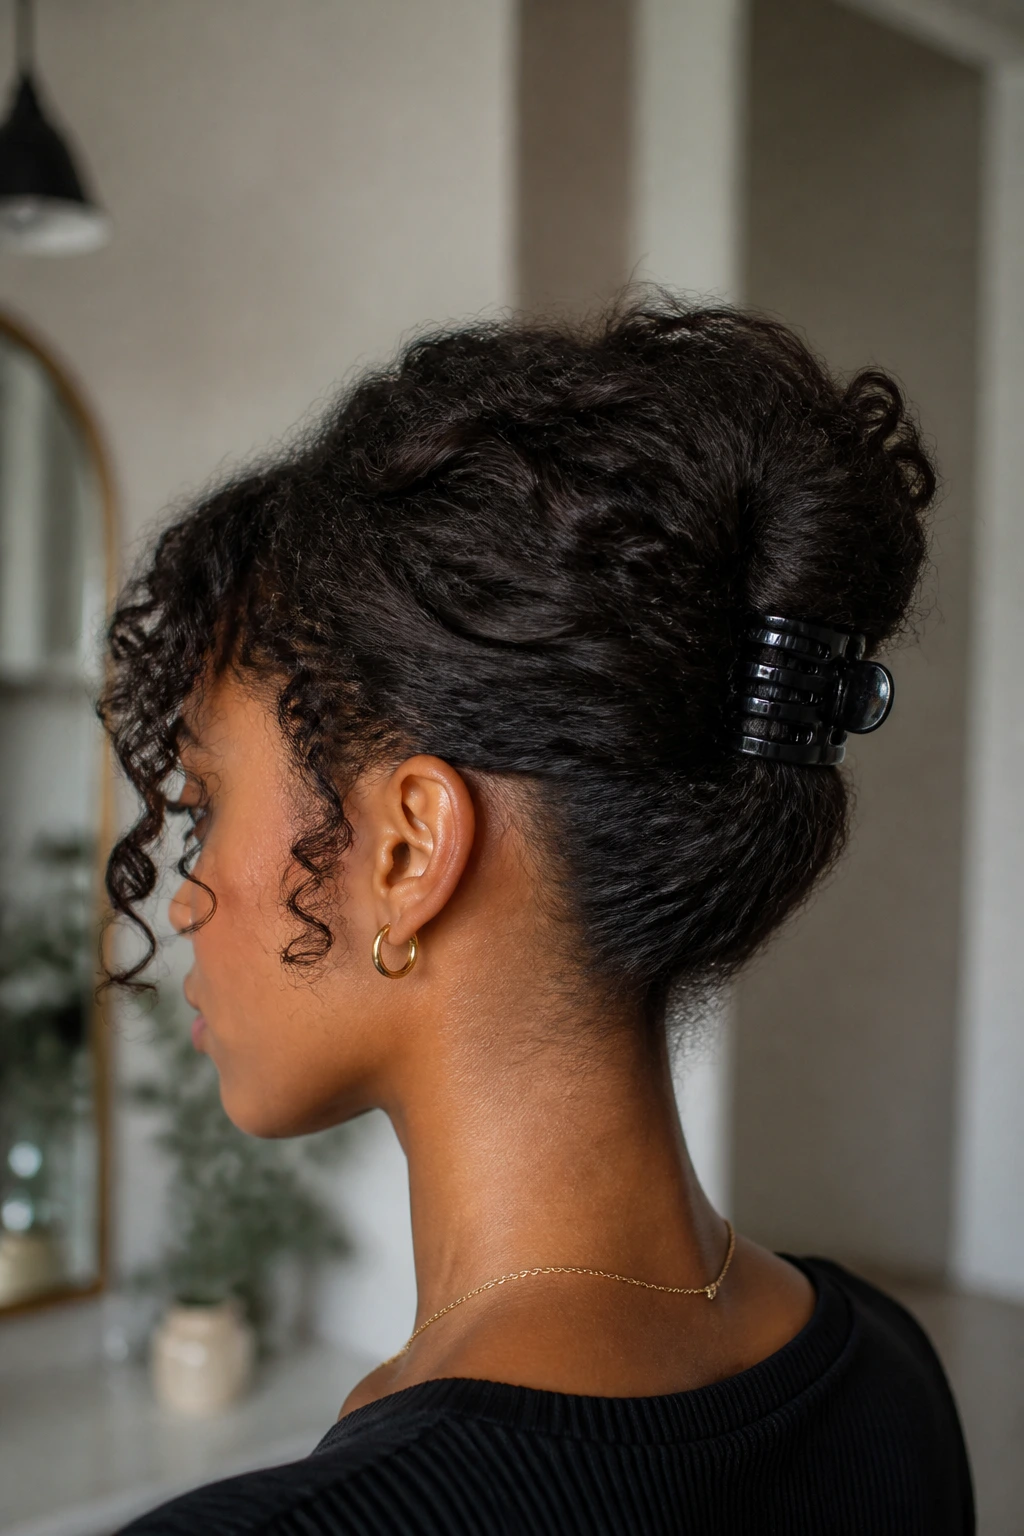
The claw clip has made a massive comeback over the years, and it is a wonderful tool for textured hair. This style is incredibly fast, keeps your ends tucked away, and looks effortlessly elegant.
Gather your hair at the nape of your neck as if you were making a low ponytail. Begin twisting the hair upward toward the crown of your head, flattening the twist against the back of your skull as you go.
Once you reach the top, tuck the remaining loose ends under the roll or let them spill over the top for a fountain effect. Clamp your claw clip over the center of the roll to secure it in place.
If you have very thick or long hair, look for extra-large clips with wide, sturdy teeth designed specifically for textured hair to ensure a secure hold all day long.
12. Finger Coils Refresh with Mist
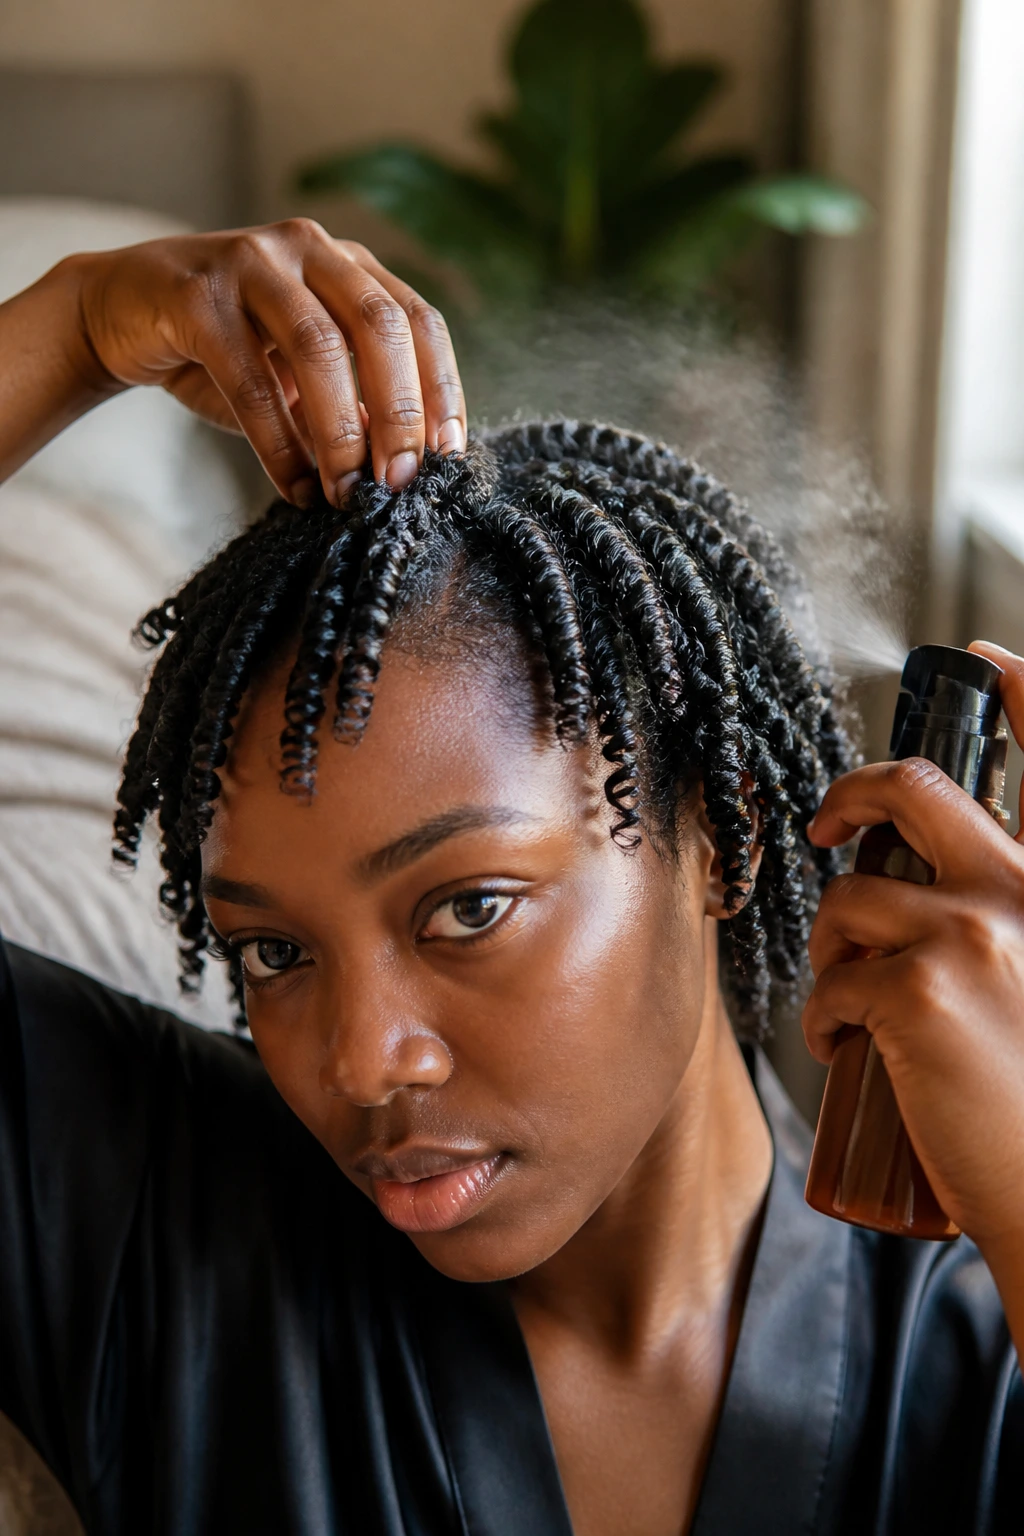
Finger coils are a gorgeous protective style, but they can look a bit crushed after a night of deep sleep. A quick misting routine can bring them back to life in under five minutes.
Unlike a twist-out, which can handle a lot of picking and fluffing, finger coils need a gentler touch to maintain their tube-like shape. Avoid brushing or combing through them when they are dry.
This style is perfect for short to medium lengths. Spray your hair with a light moisturizing mist, then gently shake your head from side to side to encourage the coils to separate and drop. Use your fingers to coil any individual strands that have unraveled around your face.
13. The Asymmetrical Side Braided Puff
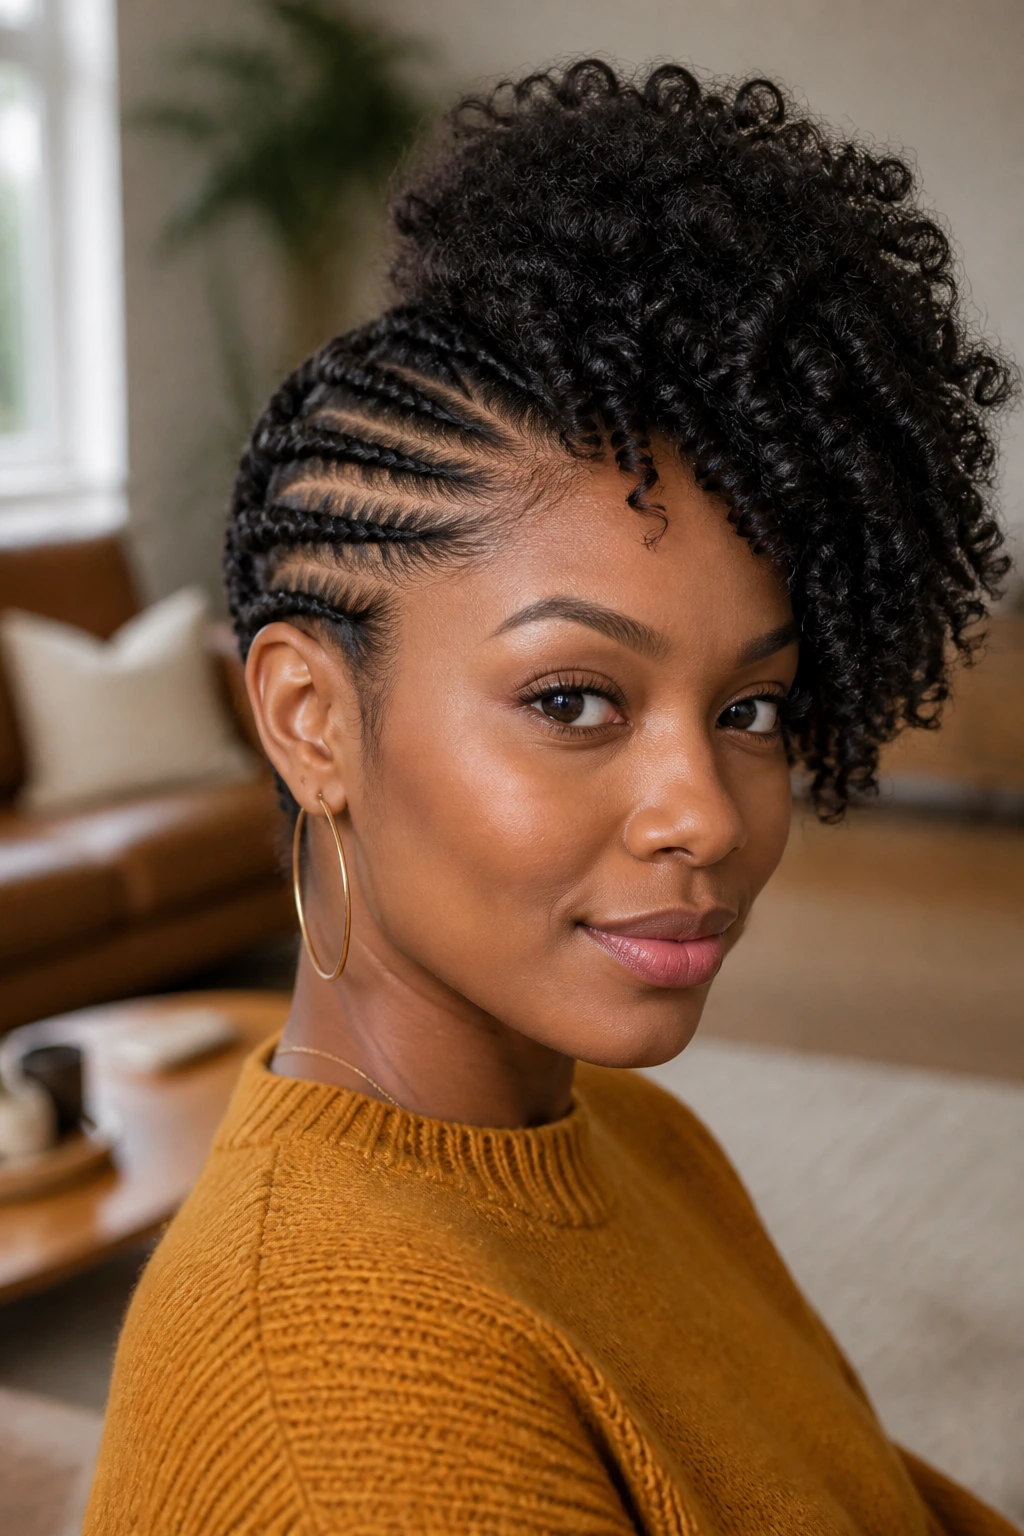
If you have five extra minutes and want to elevate your standard side puff, adding a few flat braids on one side of your head is an excellent way to do it.
Why This Style Stands Out
This look combines the simplicity of a puff with the neatness of braids. It creates a beautiful contrast between the structured side of your head and the voluminous, free-flowing curls on the other.
Step-by-Step Styling
- Part your hair on the side, separating a small section of hair near your ear.
- Divide this smaller section into three equal parts and braid them flat against your scalp, moving upward toward the crown.
- Secure the ends of the braids with small bobby pins.
- Gather the rest of your hair into a high puff on the opposite side of your head, incorporating the ends of your braids into the puff.
Pro tip: If you do not know how to cornrow, you can easily substitute the braids with flat twists for a similar effect that takes half the time.
14. Faux Hawk with Side Bobby Pins
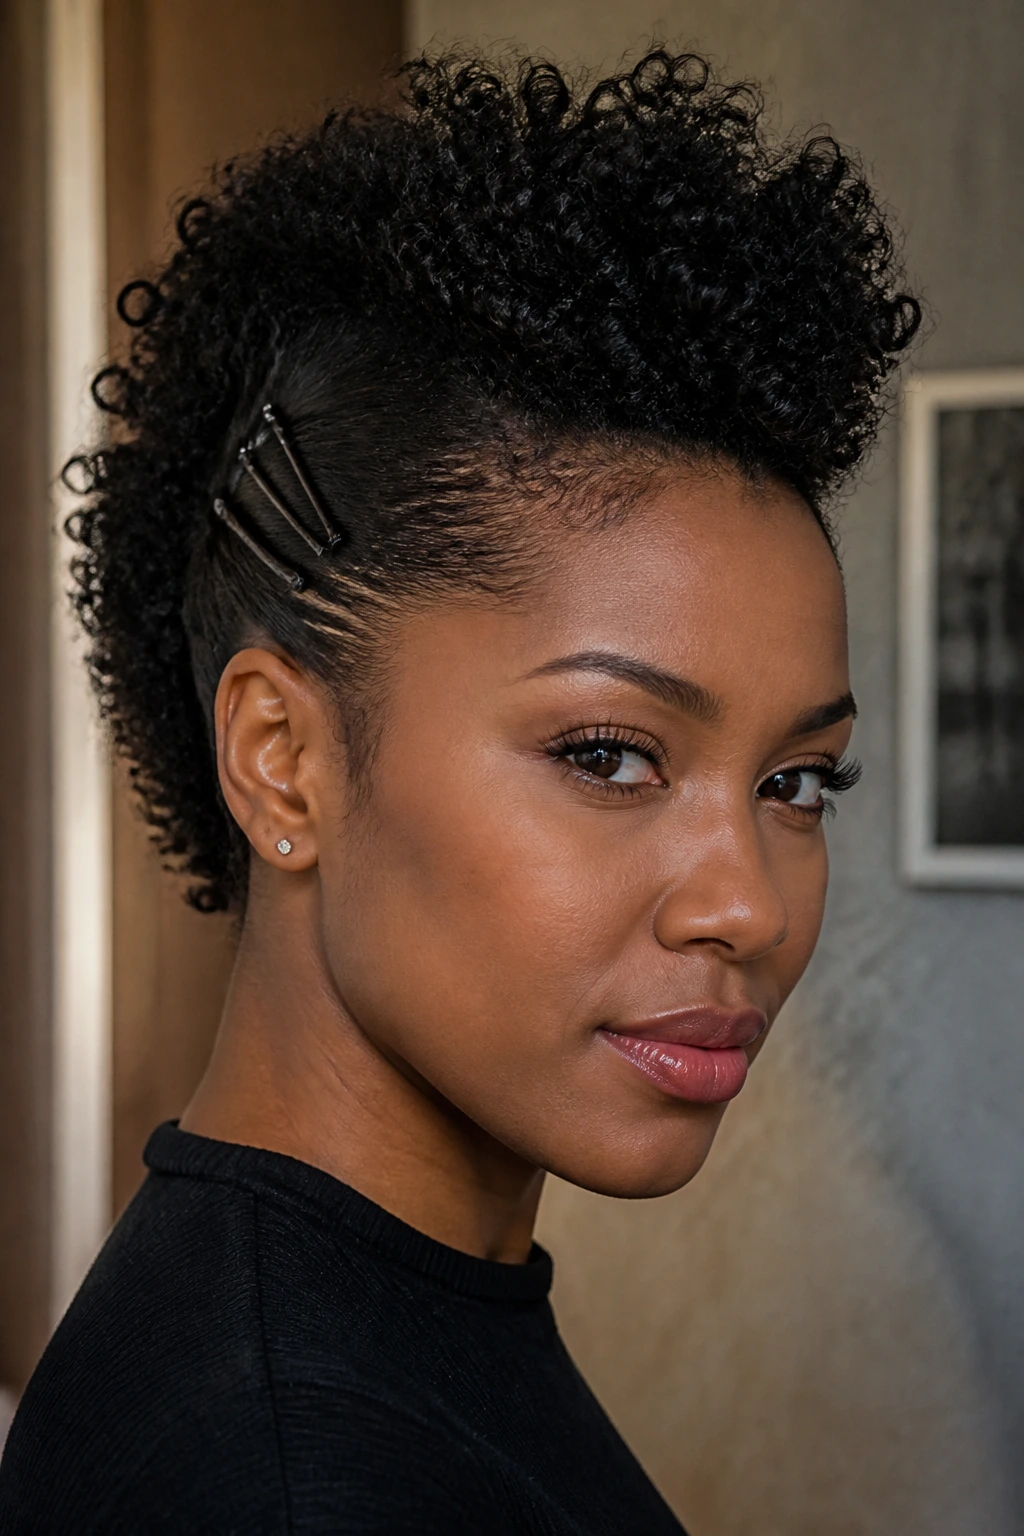
For a look that is edgy, bold, and incredibly fast, the bobby-pin faux hawk is a fantastic option. This style pins the sides of your hair flat against your head, leaving a thick strip of curls running down the center.
Start by applying a moisturizing cream to the sides of your hair, brushing them upward toward the center of your head. Use long, sturdy bobby pins to pin the hair flat, inserting them vertically from your ears up toward the crown.
Repeat the process on both sides until all the hair on the sides of your head is pinned flat. Fluff the remaining center strip of hair with your fingers, pulling it forward slightly to create a voluminous mohawk shape.
15. The Wrapped Low Ponytail
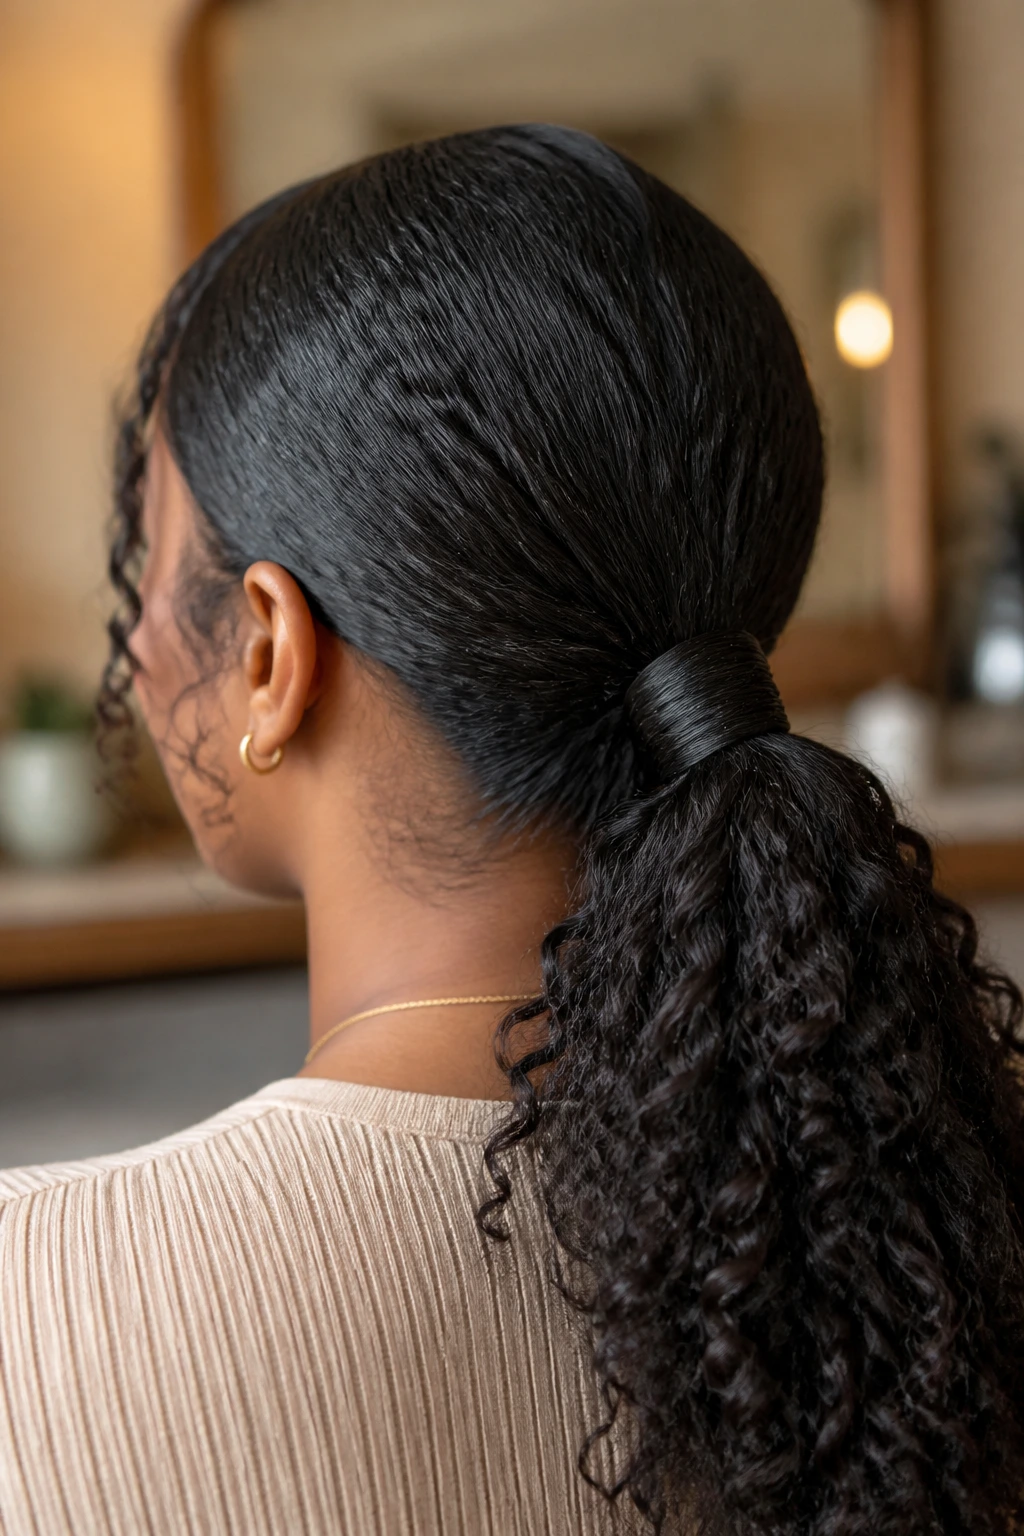
A simple low ponytail can sometimes feel a bit basic. You can quickly elevate this look by wrapping a small section of your hair around the hair tie to hide it.
This small detail makes your hairstyle look professional and polished, as if you visited a salon before work. It is an excellent choice for relaxed hair, blown-out natural hair, or long locks.
Creating the Wrap
Gather your hair into a neat low ponytail and secure it with a thin elastic band. Take a small, half-inch section of hair from the underside of your ponytail.
Wrap this section around the base of the ponytail, covering the elastic completely. Secure the end of the wrapped hair underneath the ponytail using a small bobby pin.
16. TWA Wash-and-Go Shake-Out
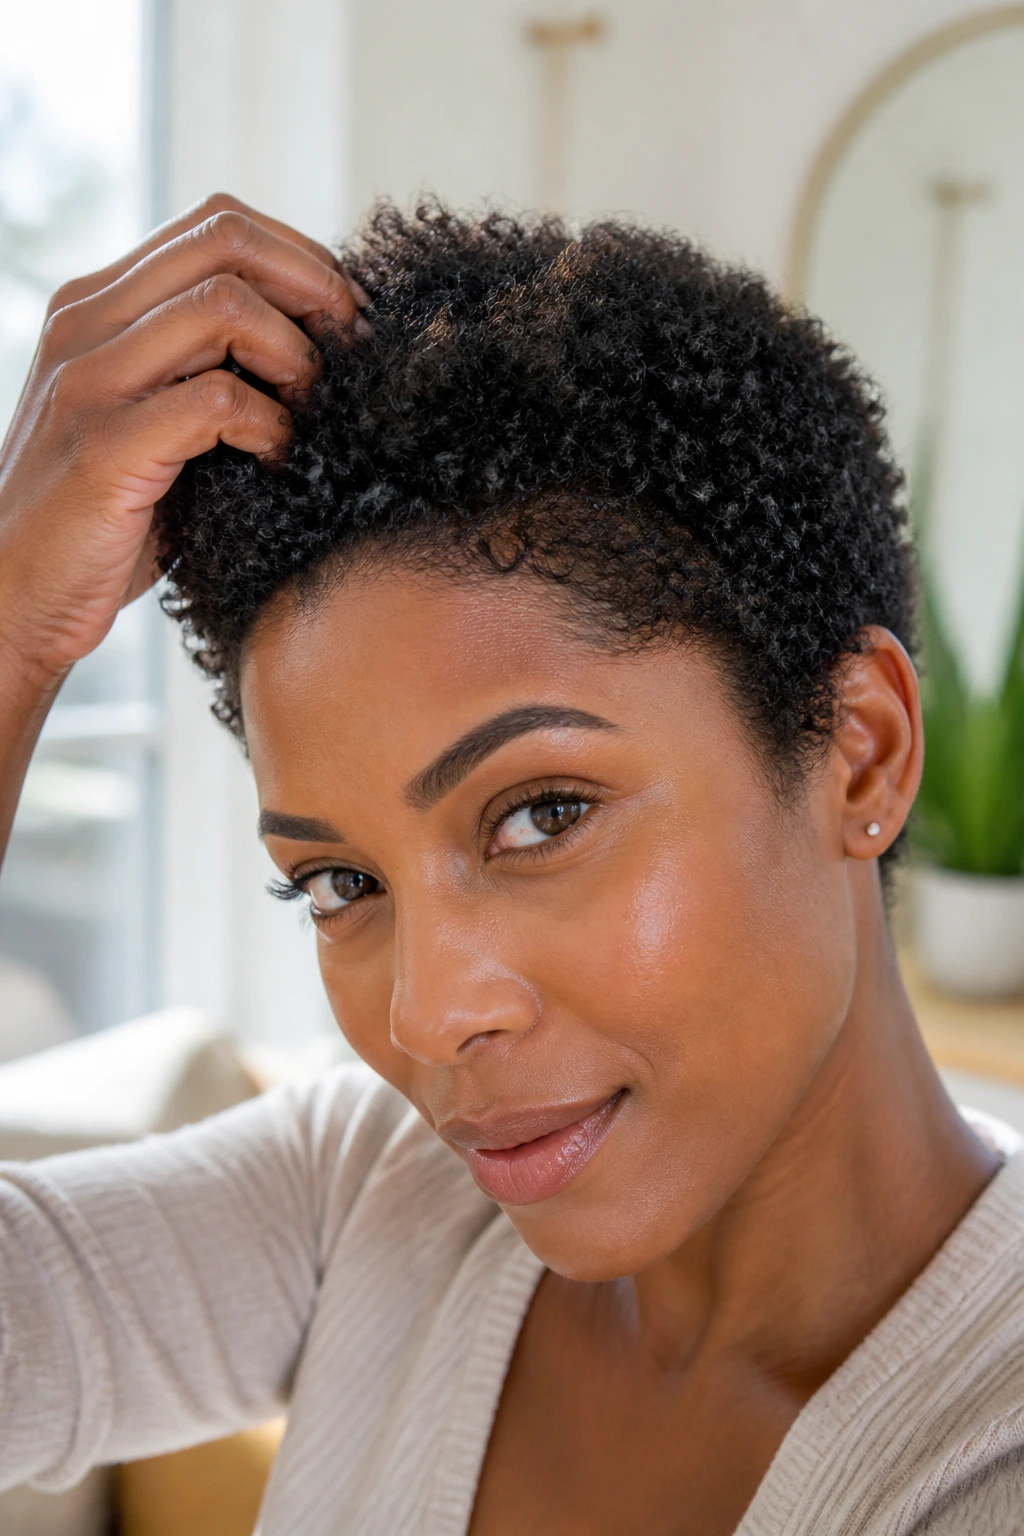
The teeny-weeny afro (TWA) is one of the easiest lengths to style on a busy morning. If you have a short crop, you do not need to worry about heavy manipulation or complex styling.
Many people assume a wash-and-go requires a full wash day process every morning, but that is not the case. You can easily refresh a TWA in the shower by letting the steam reactivate your styling products.
Quick Morning Routine
- Let the shower steam warm up your hair while you wash your face.
- Lightly mist your hair with water if it feels dry.
- Apply a coin-sized amount of leave-in conditioner or curl cream to your palms and gently pat it over your curls.
- Shake your head vigorously to let the curls separate, and use a small sponge or your fingers to define any areas that have flattened overnight.
This keeps your styling time under three minutes while ensuring your curls look defined, hydrated, and ready for the day.
17. The Goddess Braid Headband
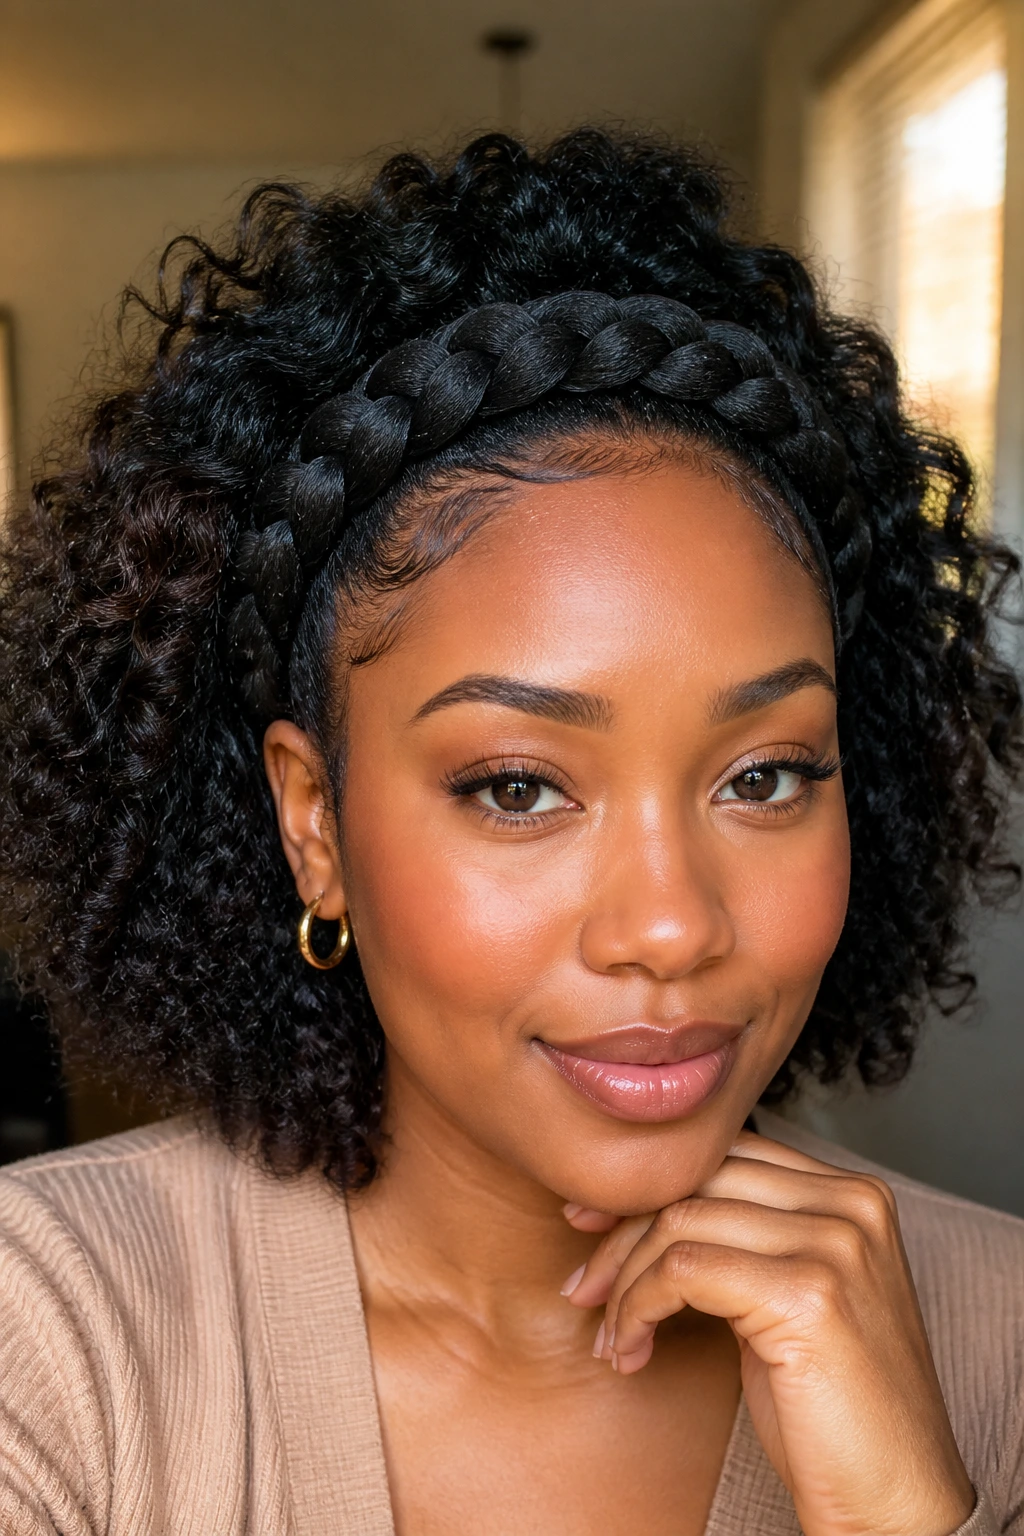
The goddess braid headband is a beautiful, classic style that works wonderfully on medium to long hair. It involves creating one large, chunky braid along your hairline, acting as a natural headband.
To style this, part your hair from ear to ear across the top of your head, separating a section of hair at the front. Braid this front section flat against your scalp from one ear to the other.
Once you reach the opposite ear, secure the end of the braid with a small hair elastic and tuck it behind your ear with a bobby pin. You can leave the rest of your hair loose, puff it out, or pull it back into a neat bun.
This style is excellent for keeping your hair out of your eyes while still showing off your length and texture.
18. Multi-Elastic Bubble Ponytail
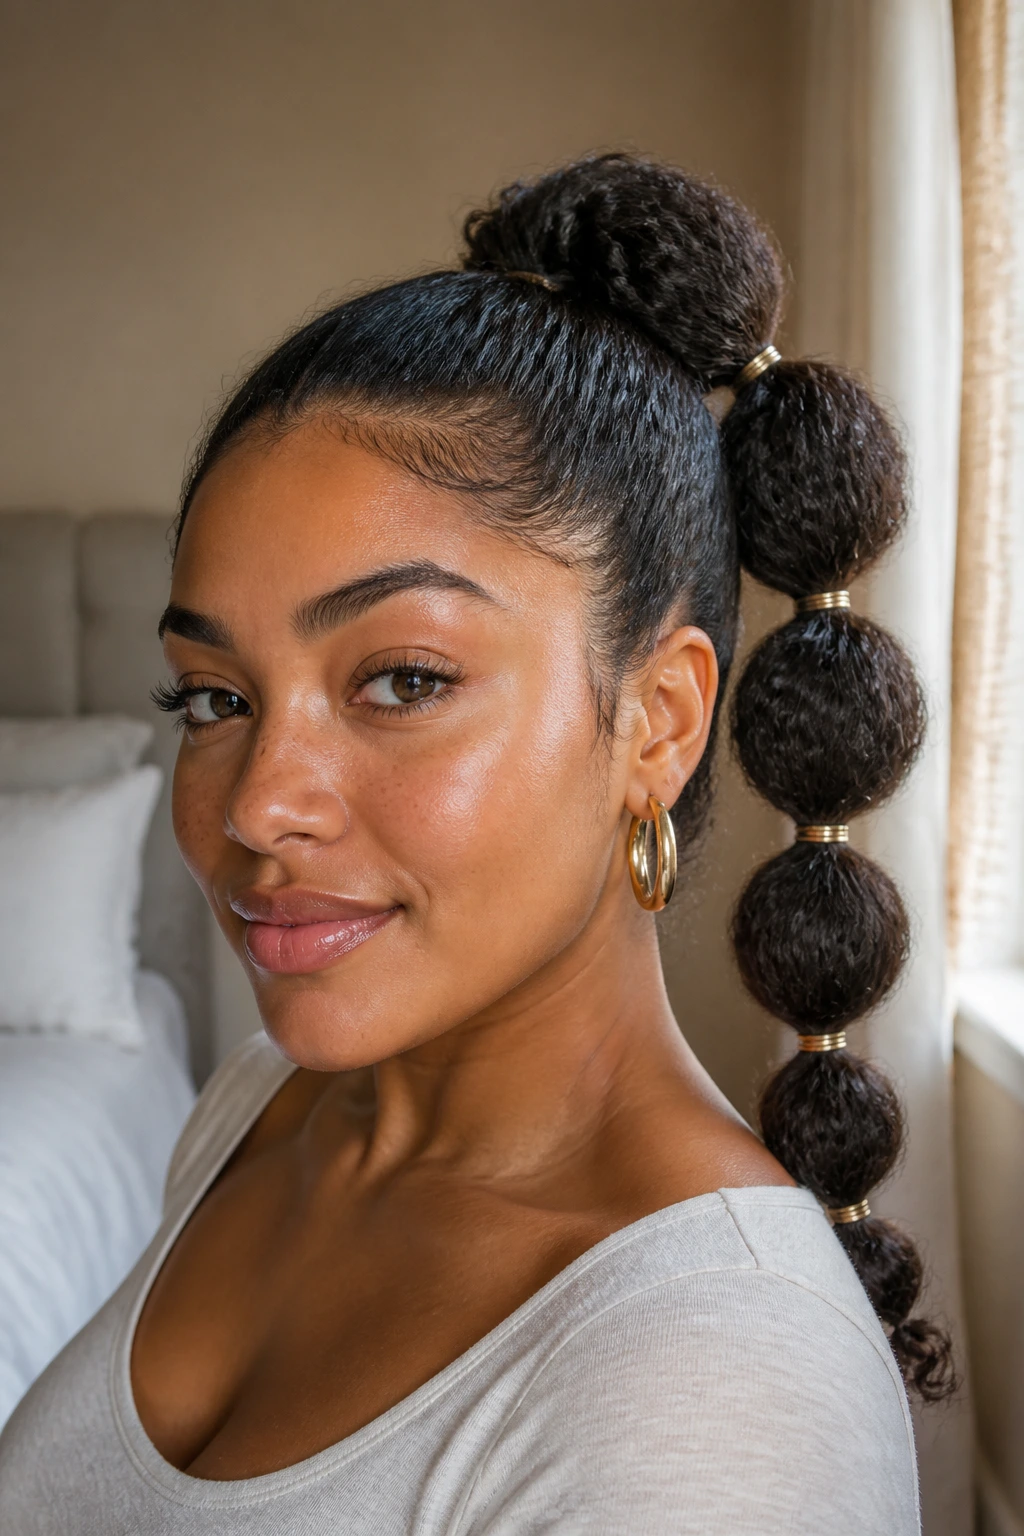
If you have long, thick hair or are wearing a stretched style, a bubble ponytail is a playful, modern option that takes very little effort but looks highly styled.
Unlike a standard ponytail, which can sometimes look flat, a bubble ponytail uses multiple elastic bands placed along the length of the hair to create small, round “bubbles” of volume.
This style is perfect for medium to long hair lengths that have been stretched or blown out. Start by gathering your hair into a high ponytail and securing it with a sturdy band.
Place another elastic band about two to three inches down the length of your ponytail. Gently pull the hair between the two bands outward to create a rounded bubble shape, then repeat the process down the length of your hair.
19. The Sleek Topknot with Laid Edges
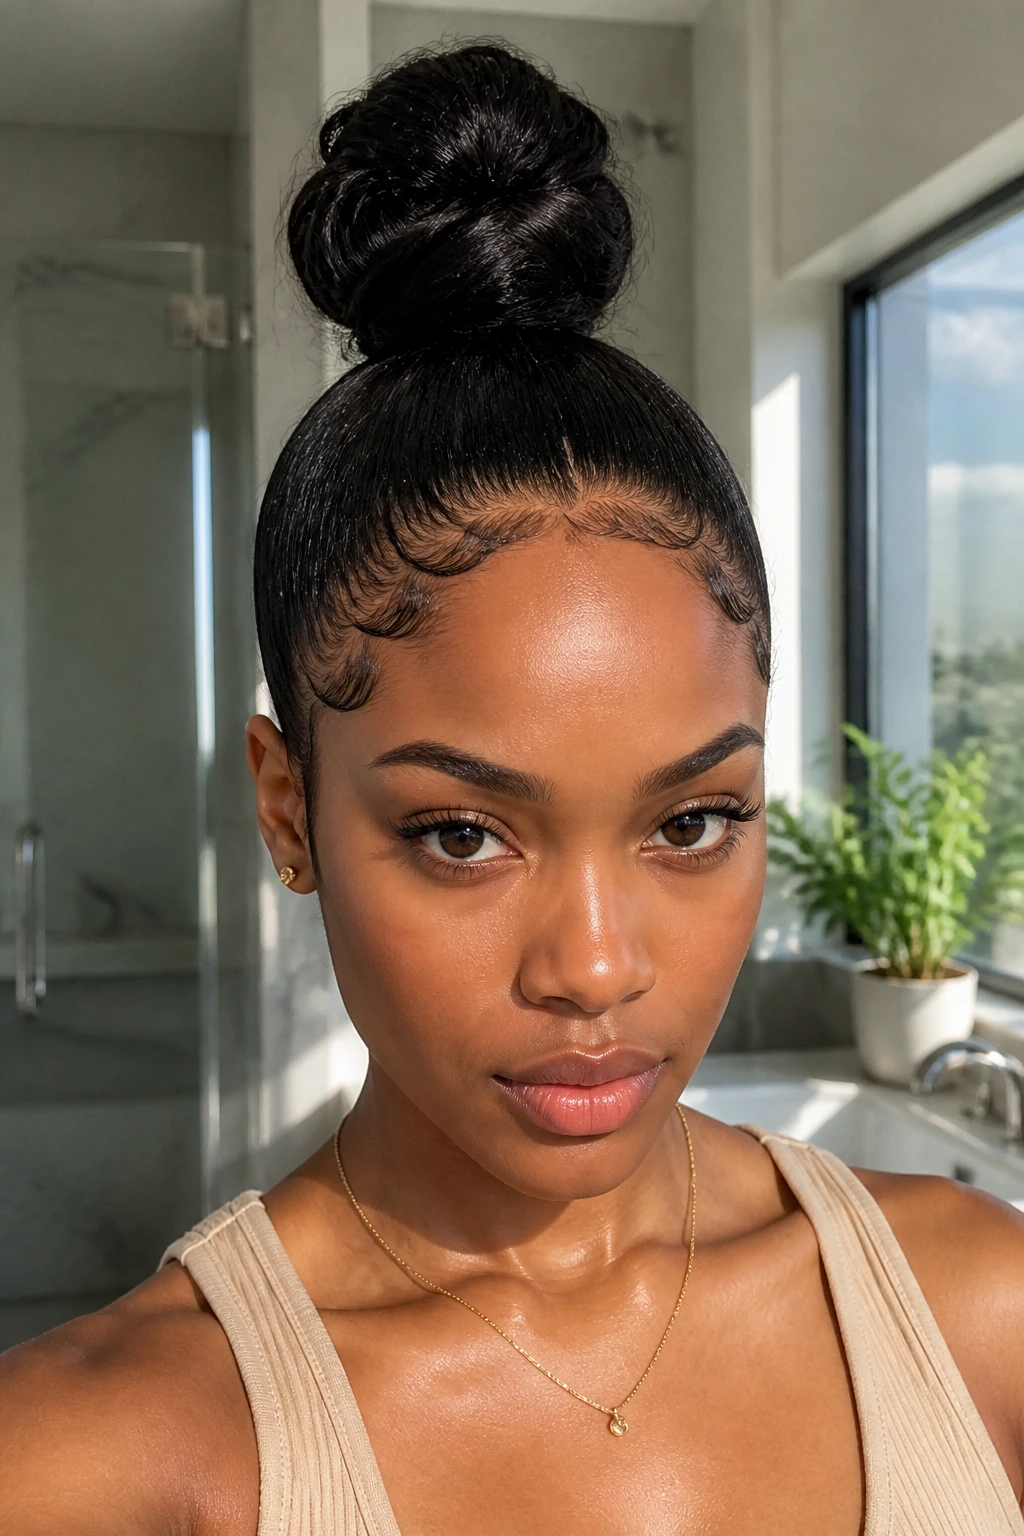
When you want a style that looks incredibly neat and holds up against wind, rain, or a busy workday, the high topknot is a classic choice.
Preparing the Hair
For a truly sleek finish, you want to make sure your hair is properly moisturized before smoothing it upward. Apply a leave-in conditioner followed by a generous layer of styling gel to your hair.
Brush your hair upward toward the crown, ensuring there are no bumps or loose strands. Gather your hair into a tight ponytail and secure it with a firm elastic.
Shaping the Topknot
- Twist the ponytail tightly from the base to the ends.
- Wrap the twisted hair around the base of the ponytail to form a neat, compact bun.
- Secure the bun with a second elastic or a few bobby pins.
- Use a soft-bristle toothbrush and a small amount of edge control gel to lay down your baby hairs along your hairline.
This creates a beautiful, clean frame for your face and keeps your hair perfectly in place all day long.
20. The Chunky Two-Strand Crown
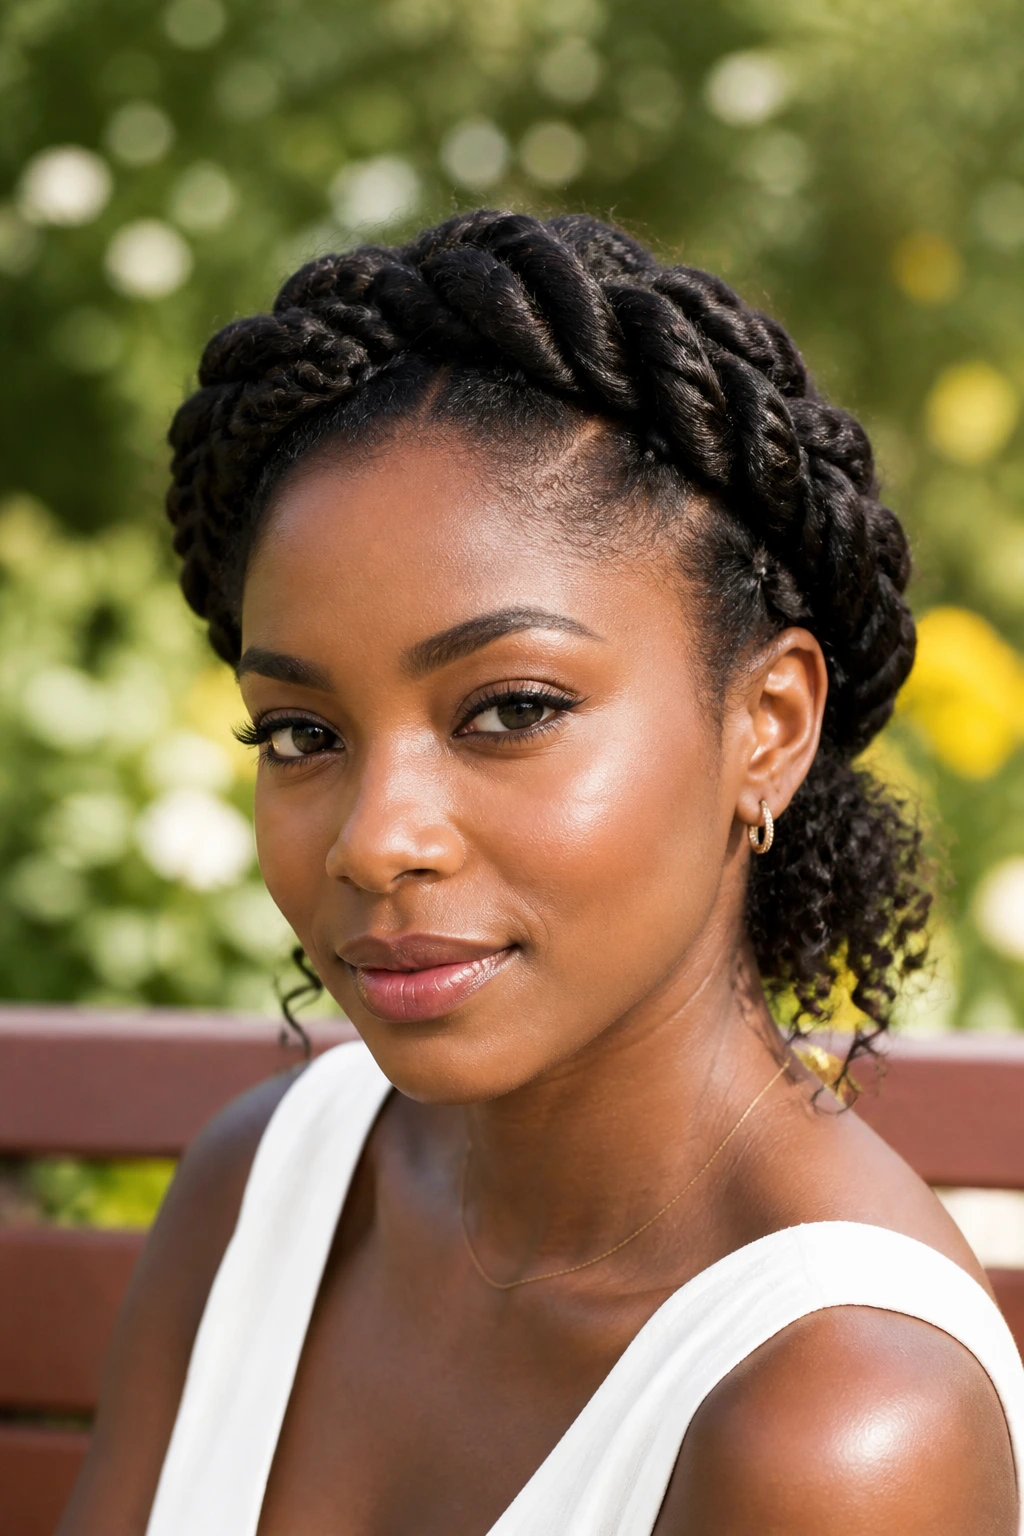
For a soft, bohemian look that keeps your hair protected, the chunky two-strand crown is an excellent option. It is similar to the flat-twisted halo but uses much larger, looser twists for a softer appearance.
Part your hair down the center or to one side. Take a large section of hair from the front on one side and split it into two equal parts. Twist them around each other, incorporating more hair as you move down the side of your head toward the back.
Repeat this on the other side. Pin the ends of both twists together at the back of your head using bobby pins, letting any loose curls spill out at the nape of your neck for a relaxed, romantic finish.
21. The Half-Back Flat Twist
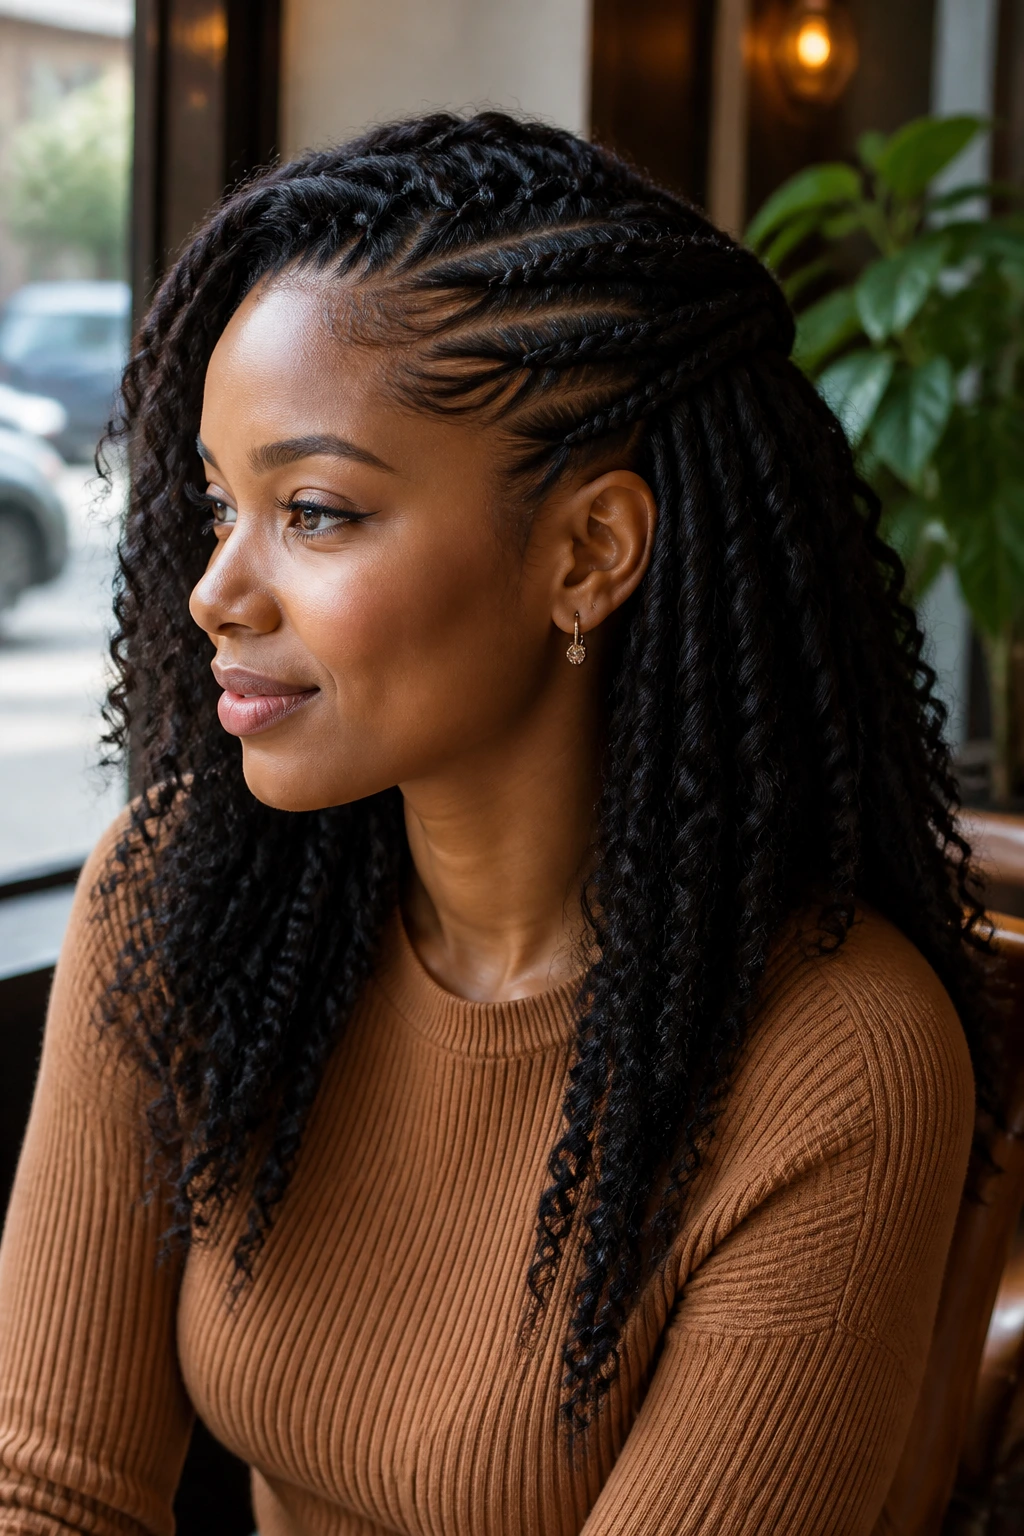
The half-back flat twist is a beautiful style that keeps your hair secure while letting your texture shine. It involves creating several flat twists on the sides of your head that meet in the middle.
This style is perfect for those mornings when you want to show off your length but need to keep your hair out of your face for work or school.
Creating the Pattern
Part your hair down the middle or slightly to the side. Take a small section of hair near your temple and create a flat twist moving backward toward the center of your skull.
Repeat this process on the opposite side, creating a second flat twist that meets the first one at the back of your head. Secure both twists together with a small hair elastic.
Let the remaining hair in the back hang loose, using a light curl-defining spray to refresh the texture and add bounce.
22. Box Braid High Bun
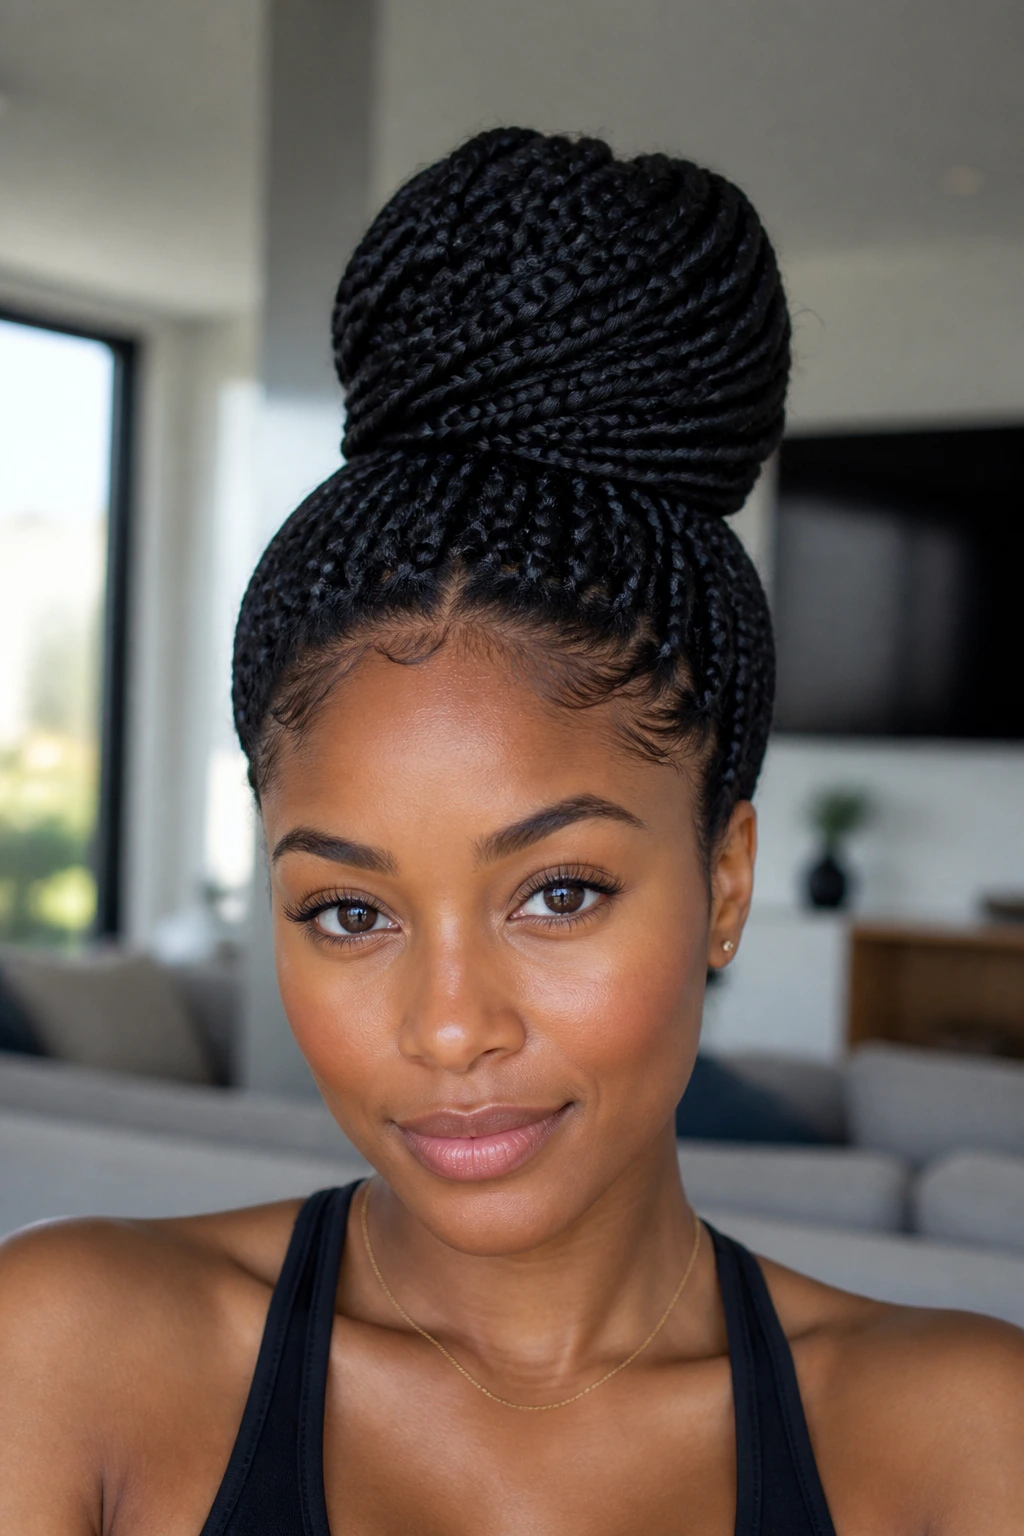
If you are wearing box braids, locs, or twists, you already have an excellent foundation for quick styling. A high bun is one of the easiest ways to style braids on a busy morning.
Many people find styling braids difficult because of the sheer weight and volume of the hair. However, this high bun technique distributes the weight evenly, making it comfortable to wear all day.
Quick Bun Method
- Flip your head forward, allowing all your braids to hang toward the floor.
- Gather the braids into a high ponytail at the crown of your head and secure them with a thick, stretchy headband.
- Divide the ponytail into two equal sections.
- Wrap the first section around the base of the ponytail in a clockwise direction, then wrap the second section in a counter-clockwise direction.
- Tuck the ends of the braids under the bun to secure them.
This style is neat, elegant, and keeps your braids protected and out of your way while you tackle your morning tasks.
23. Flat-Twisted Low Ponytail
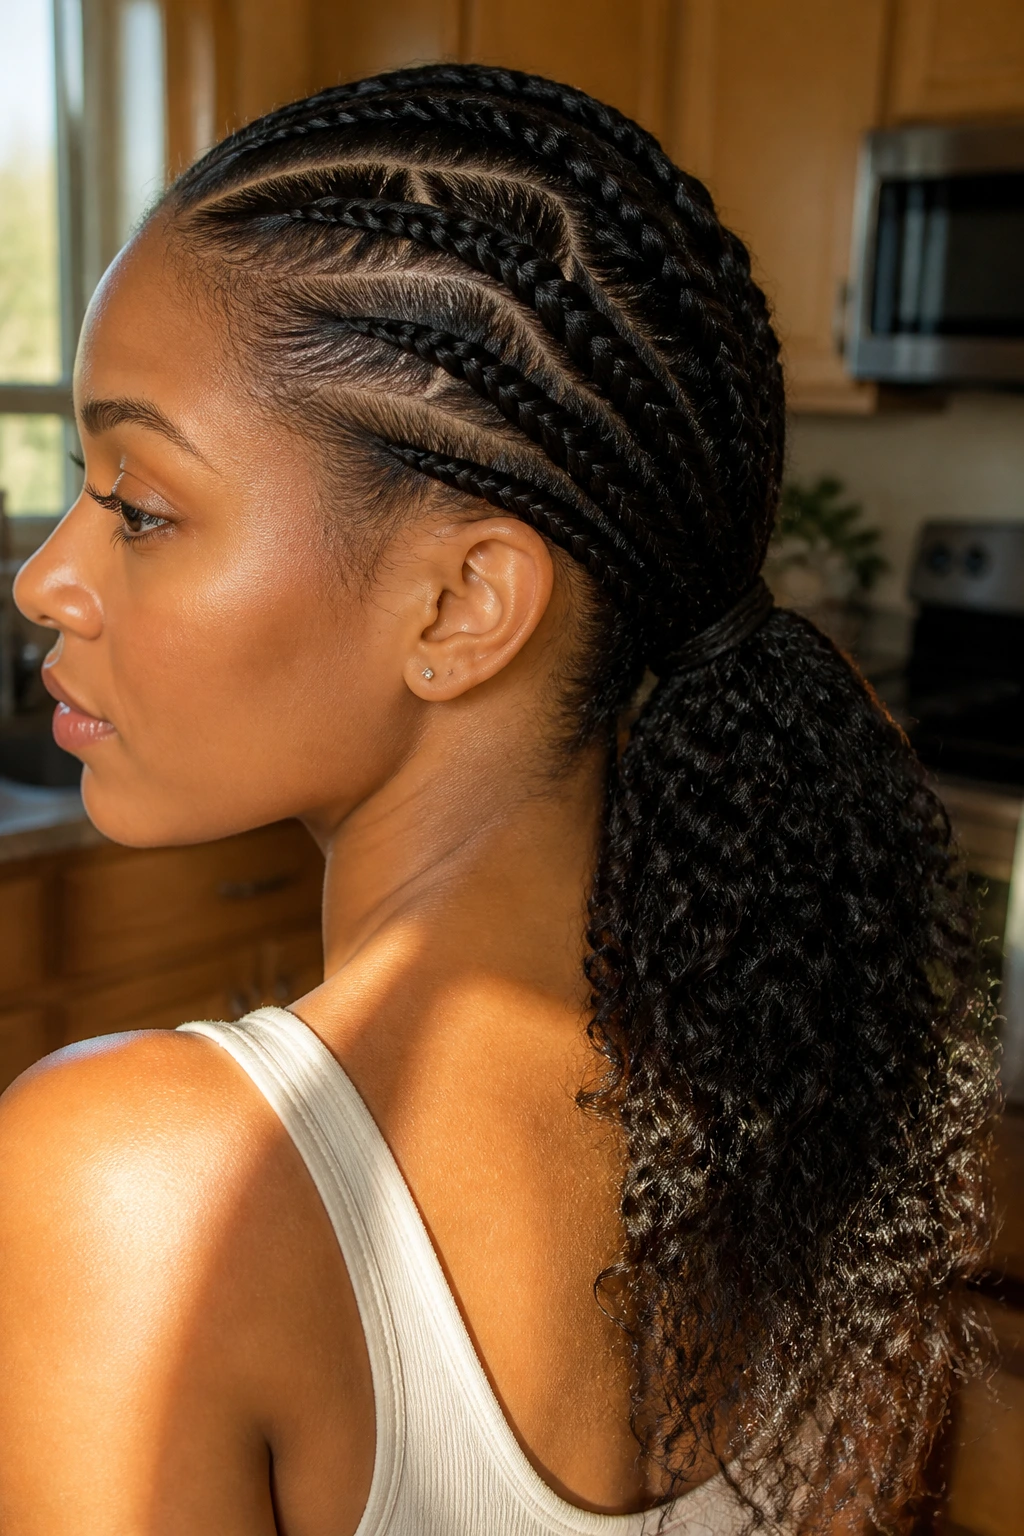
The flat-twisted low ponytail combines the neatness of protective styling with the simplicity of a classic low ponytail. It is a fantastic option for stretched or blow-dried hair.
Start by creating a deep side part. Take a large section of hair along the front hairline on the side with more hair, and flat twist it backward toward your ear.
Secure the end of the twist with a small bobby pin. Gather the rest of your hair, along with the end of your flat twist, into a low ponytail at the nape of your neck, and secure it with a soft elastic.
This style keeps your hair neat and contained while adding a touch of visual interest to a classic silhouette.
24. The Scarf-Wrapped Pineapple
When you want a style that is both practical and fashionable, wrapping your high pineapple in a silk scarf is a wonderful way to add a pop of color to your outfit.
Unlike a full headwrap, this style leaves the ends of your hair free, allowing your natural volume and texture to take center stage.
Styling the Wrap
Gather your hair into a high pineapple at the crown of your head, letting your curls spill forward over your forehead.
Fold a colorful silk scarf into a long, narrow band about three to four inches wide. Place the center of the scarf against the back of your neck, bring the ends forward, and tie them into a neat knot at the front of your head, just below your curls.
Tuck any loose ends of the scarf under the band to keep the look neat and clean.
25. The Curly Frohawk
The curly frohawk is a fun, high-volume style that is perfect for celebrating your natural texture on a busy morning. It creates a bold, mohawk-style silhouette using your natural curls.
Preparing the Sides
To create this look, you want the sides of your head to be as flat as possible to emphasize the volume in the center. Apply a light moisturizing cream or gel to the sides of your hair.
Brush the sides of your hair upward toward the center line of your head. Use a series of bobby pins or small hair clips to secure the hair flat against your scalp, moving from your temples down to the nape of your neck.
Fluffing the Center
- Use a hair pick to lift and fluff the center strip of hair, building volume from front to back.
- Use your fingers to define any loose curls along the top of your frohawk.
- Let a few curls fall forward over your forehead to create a soft, face-framing fringe.
This style is full of life, character, and takes less than five minutes to put together once you have your pins in place.
Essential Tools for Fast Morning Hair Styling
Having the right tools on hand can make the difference between a stressful morning and a smooth, easy styling routine. You do not need a lot of expensive equipment, but a few high-quality basics will save you time and protect your hair from damage.
Keep a continuous spray bottle on your bathroom counter. Unlike a standard spray bottle, a continuous mist bottle delivers a fine, even spray of water that hydrates your hair without soaking it, making it much easier to refresh your curls quickly.
A high-quality edge brush or an old, soft-bristle toothbrush is excellent for smoothing down flyaways and styling your baby hairs. Pair this with an alcohol-free edge control gel that offers a firm hold without causing flaking or drying out your scalp.
Finally, keep a collection of soft, snag-free hair ties, stretchy headbands, and a box of sturdy bobby pins in your vanity. Avoid using hair ties with metal clasps, as these can easily snag on textured hair and cause breakage.
Wrapping Up
Managing Black hair for busy mornings does not have to be a daily source of stress. By embracing your natural texture, protecting your strands at night, and keeping a few simple styles in your routine, you can look polished and feel confident in less than ten minutes.
The most important thing to remember is that textured hair is incredibly versatile. If a twist-out does not look perfect, turn it into a high puff. If your wash-and-go is looking a bit flat, throw on a colorful headwrap or pin the sides back into a quick frohawk.
With a little practice and the right tools, your morning hair routine can become a quick, satisfying ritual that sets a positive tone for the rest of your day. Treat your curls with kindness, keep your styling simple, and step out the door with confidence.
