



That first step onto the warm sand brings an immediate sense of relief, but for those of us with fine, delicate strands, it also triggers a familiar wave of panic. Within minutes, the salty sea breeze and heavy coastal humidity can turn a carefully styled blowout into a limp, flat, and stringy mess. It feels like a constant battle between enjoying the ocean and hiding a scalp that suddenly looks far too visible.
Most styling advice for beach days seems written for people with thick, cascading waves who can simply wash, go, and look like they belong in a surf magazine. For thin hair, that approach is a recipe for tangles and flat roots. We need strategies that work with our hair texture, not against it. We need styles that create the illusion of density, protect delicate ends from sun damage, and actually look better as the day gets messier.
Finding the right look is about clever positioning, light tension, and choosing styles that do not require heavy creams or greasy oils. If you have been searching for ways to keep your hair looking full, breezy, and effortlessly put together by the water, this collection of 25 Easy Beach Hairstyles for Thin Hair will give you plenty of practical ideas to try on your next seaside outing.
Let us get one thing straight before packing the beach bag: fine hair requires a completely different styling logic than thick hair when exposed to sun, salt, and wind. By understanding how these elements interact with your hair, you can stop fighting the beach and start using it to your advantage.
Why Thin Hair Struggles at the Beach (and How to Fight Back)
Fine hair has a tiny diameter, meaning each individual strand lacks the structural strength to hold itself up. When you add humidity to the mix, the air fills with moisture that penetrates the hair shaft, causing it to swell and collapse. Add sweat from a warm day, and your roots quickly lose all their lift, hugging your scalp and making your hair look thinner than it actually is.
Salt water is another double-edged sword. On one hand, salt deposits on the hair shaft, creating friction between strands. This friction is actually what gives you that coveted beachy texture and temporary volume. On the other hand, salt is highly hygroscopic, meaning it draws moisture out of the hair. For thin hair, which is already prone to dryness and breakage, too much salt water leaves you with a tangled, brittle web that is incredibly difficult to brush out without causing damage.
The Prep Is Everything
To get through a beach day successfully, you have to prep your hair before your feet even touch the sand.
- Apply a lightweight, UV-protecting leave-in spray to damp hair to shield it from sun damage.
- Use a dry shampoo at your roots before you go outside to absorb sweat and oil before they start to weigh your hair down.
- Avoid heavy silicones or thick oils, which will only turn into a sticky magnet for sand and wind.
Working with Your Scalp
One of the biggest complaints from people with thin hair at the beach is scalp exposure. When hair gets wet or windy, it clumps together, revealing the skin underneath. To counter this, avoid perfectly straight, clean parts. Instead, use a zigzag part or messy, finger-combed divisions. This disrupts the straight lines and makes your hair look naturally thicker at the roots while protecting your scalp from painful sunburn.
1. The Double-Wrapped Low Messy Bun
This style is a lifesaver for days when the wind is relentless and you want your hair completely secured but still soft and voluminous around your face. By wrapping the hair twice with a soft elastic, you create a sturdy base that does not slip, even when fine hair gets slick with salt water.
Why It Works for Thin Hair
Traditional buns can look like a tiny, sad golf ball at the back of a fine-haired head. This double-wrap technique spreads the hair outward, making the bun appear twice its actual size without requiring a foam donut or heavy hairpins.
Quick Styling Steps
- Spritz your roots with a dry texture spray to add grip and lift.
- Gather your hair at the nape of your neck, leaving a few face-framing pieces loose.
- Pull your hair halfway through a hair elastic to create a loop, twist the band, and loop it over the folded hair once more.
- Gently tug the outer edges of the loop outward to widen the bun, securing any loose ends with small bobby pins.
Pro tip: Pull a few strands loose right above your ears to soften the look and hide any areas where your scalp might show when your hair is pulled back.
2. The Textured Crown Braid
Unlike thick hair, which can make a crown braid look like a heavy helmet, thin hair creates a delicate, ethereal halo that feels incredibly lightweight and comfortable in hot weather. It keeps every strand off your face and neck, ensuring you stay cool while looking completely put together.
To make this look work, you want to avoid tight, severe braiding. Start by parting your hair down the middle, but keep the line soft and slightly uneven. Braid each side loosely into a standard three-strand braid, securing the ends with small, clear elastics.
Once both braids are secured, the real magic happens. This is where you use a technique called “pancaking.” Hold the base of the braid with one hand and use your other hand to gently pinch and pull the outer loops of the braid outward. This instantly doubles the width of the braid, making your hair look thick and full of volume. Wrap the braids across the top of your head, tucking the ends underneath each other, and secure them with a couple of sturdy bobby pins.
3. The Bubble Ponytail with Clear Elastics
If you are tired of standard ponytails that look thin and limp after five minutes, this segmented style is the perfect alternative. It uses multiple hair bands to build structure and create pockets of air that give the illusion of thick, bouncy hair.
What Makes It Stand Out
The bubble ponytail does not rely on natural thickness to look voluminous. Each “bubble” can be puffed out to your liking, allowing you to customize the level of fullness.
How to Style It
- Pull your hair into a standard mid-height ponytail and secure it with a clear elastic.
- Place another clear elastic about two inches down the ponytail shaft.
- Pinch the hair between the two elastics and gently pull it outward in all directions to create a rounded bubble shape.
- Repeat this process down the length of your ponytail, leaving the very end loose.
4. The Half-Up Claw Clip Twist
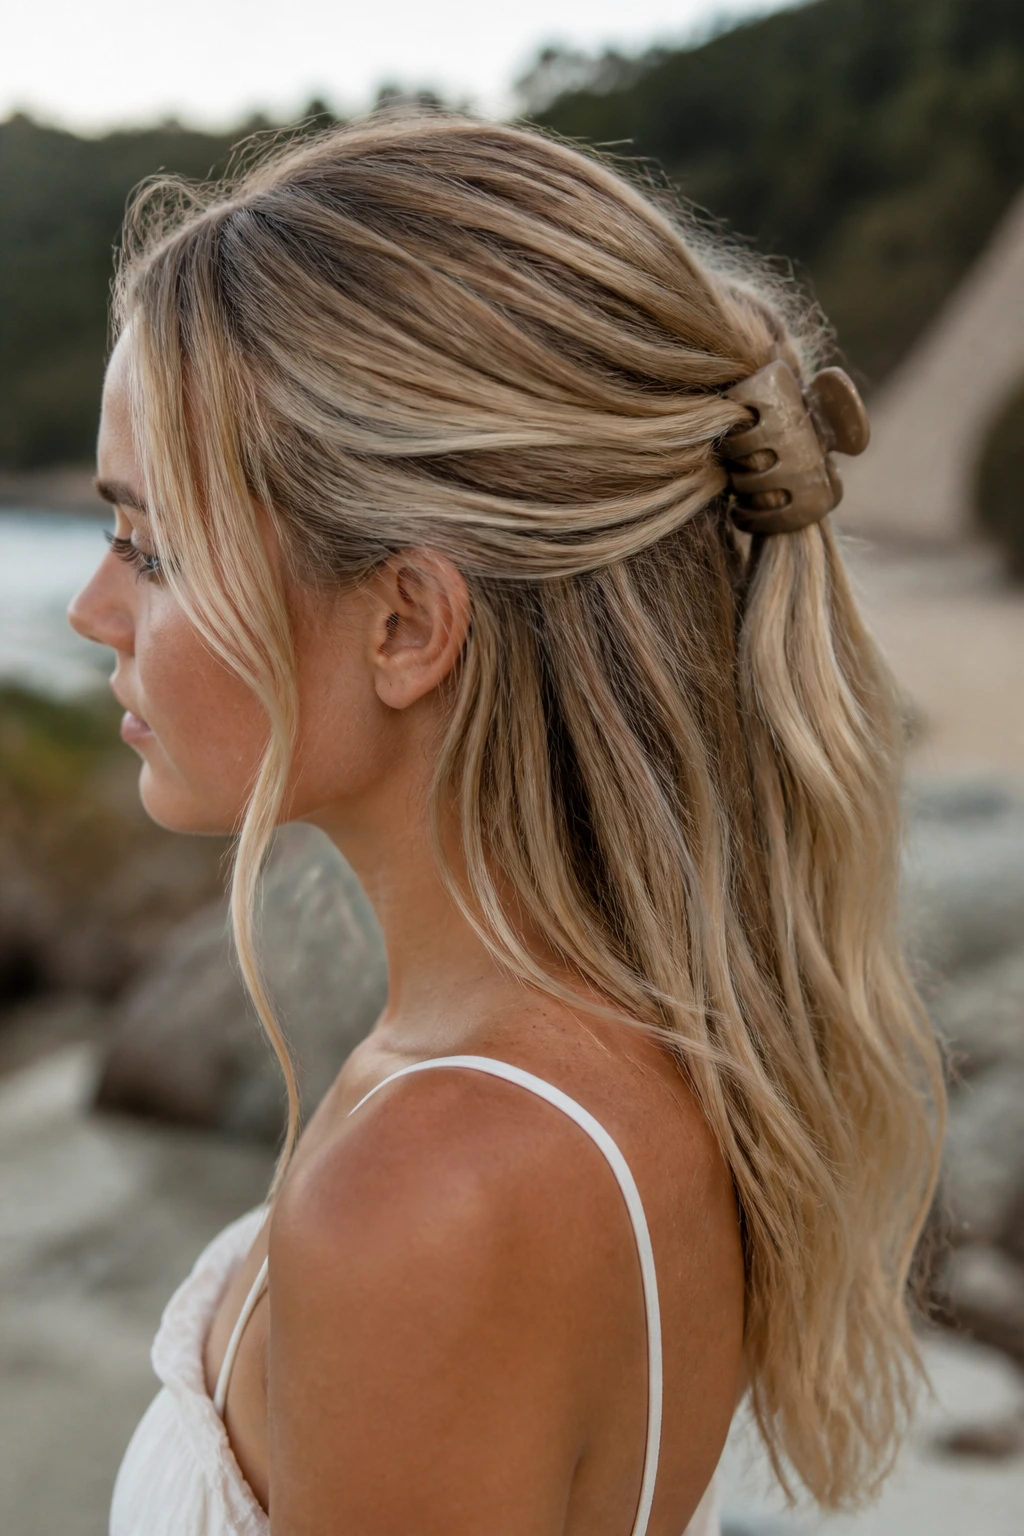
Claw clips are fantastic for thin hair because they do not squeeze your strands flat the way traditional hair ties do. This half-up style keeps your hair out of your eyes while letting the rest of your hair flow freely, catching the sea breeze.
The trick here is to use a medium-sized claw clip with a matte finish. Shiny plastic clips tend to slide right out of fine hair, but matte or rubberized coatings provide excellent grip. Gather the hair from just above your ears, pull it to the back of your head, and twist the gathered section clockwise once. Push the twist slightly upward toward your crown to create a little bit of height and volume at the top, then clamp the claw clip over the twist to secure it.
This style works incredibly well with air-dried, salty hair. The natural texture from the sea salt spray gives the clip something to hold onto, meaning you won’t have to adjust it throughout the day.
5. The Scarf-Woven Dutch Braid
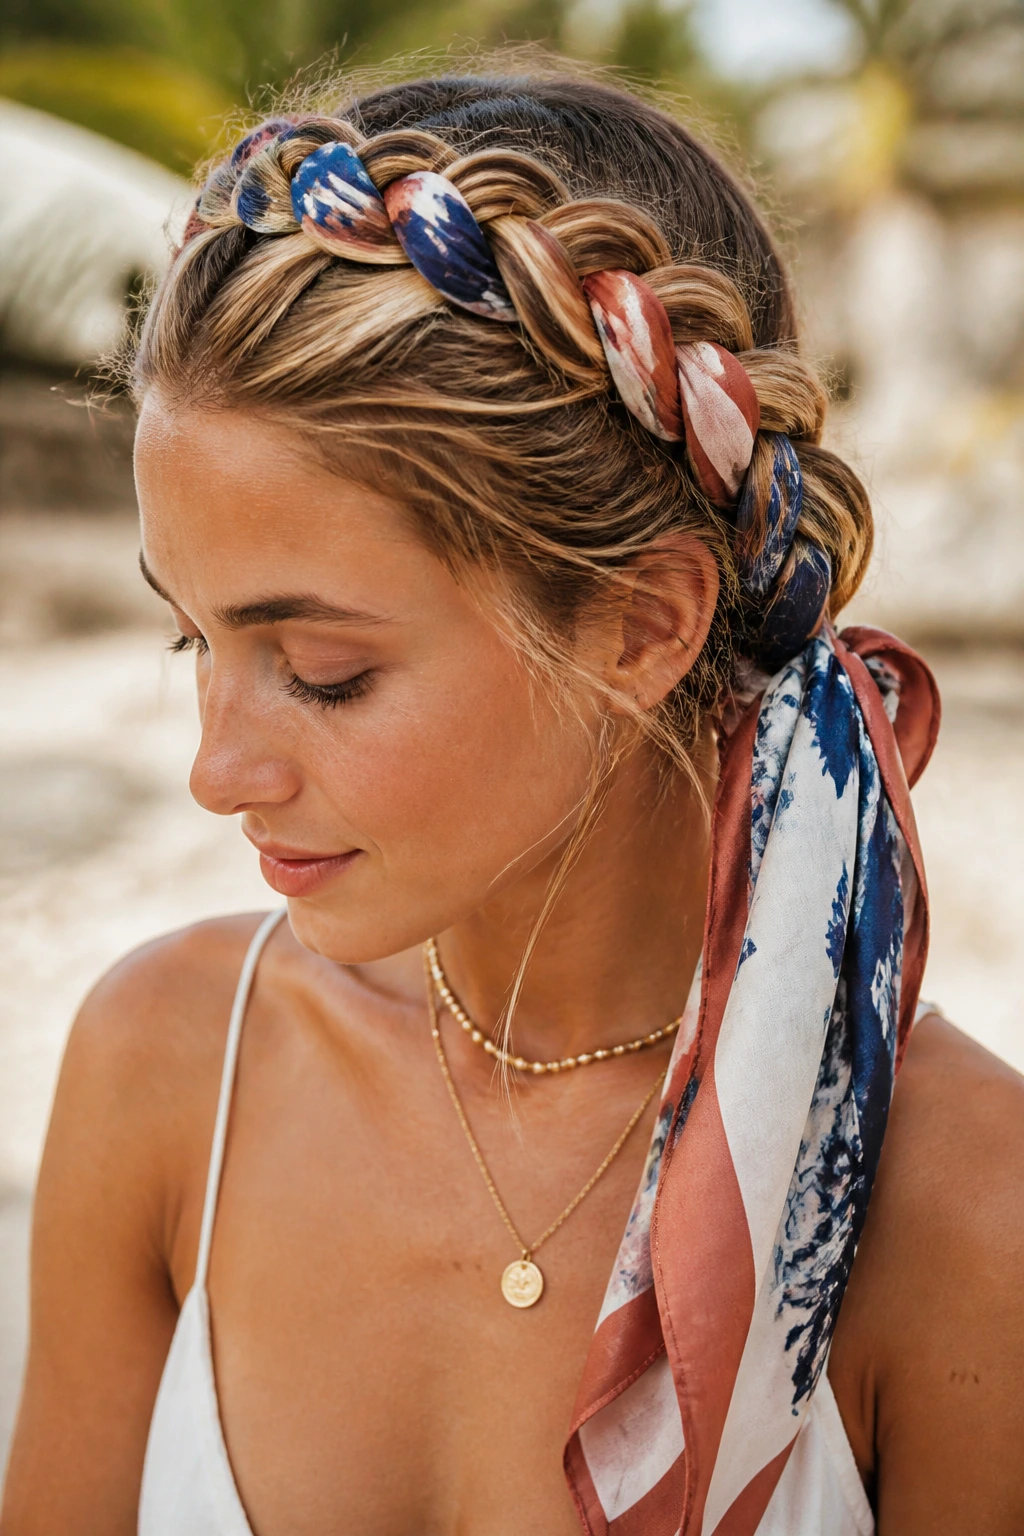
Adding a lightweight silk or cotton scarf to your braid is the ultimate cheat code for fine hair. It physically adds bulk to the braid, making it look incredibly thick, colorful, and chic without needing any extra hair.
Start by folding a long, thin scarf in half. Tie your hair into a loose low ponytail with a clear elastic, and loop the scarf around the base so that the two long ends hang down alongside your hair. Divide your hair into three sections, letting the two ends of the scarf merge with two of your hair sections.
As you weave a Dutch braid—crossing the sections under each other rather than over—the scarf will wrap through the braid, creating a beautiful pattern of color and instantly doubling the thickness of the braid. Secure the bottom with another clear elastic and let the remaining scarf ends dangle. It is comfortable, protective, and looks incredibly stylish.
6. The Side-Swept Fishtail Braid
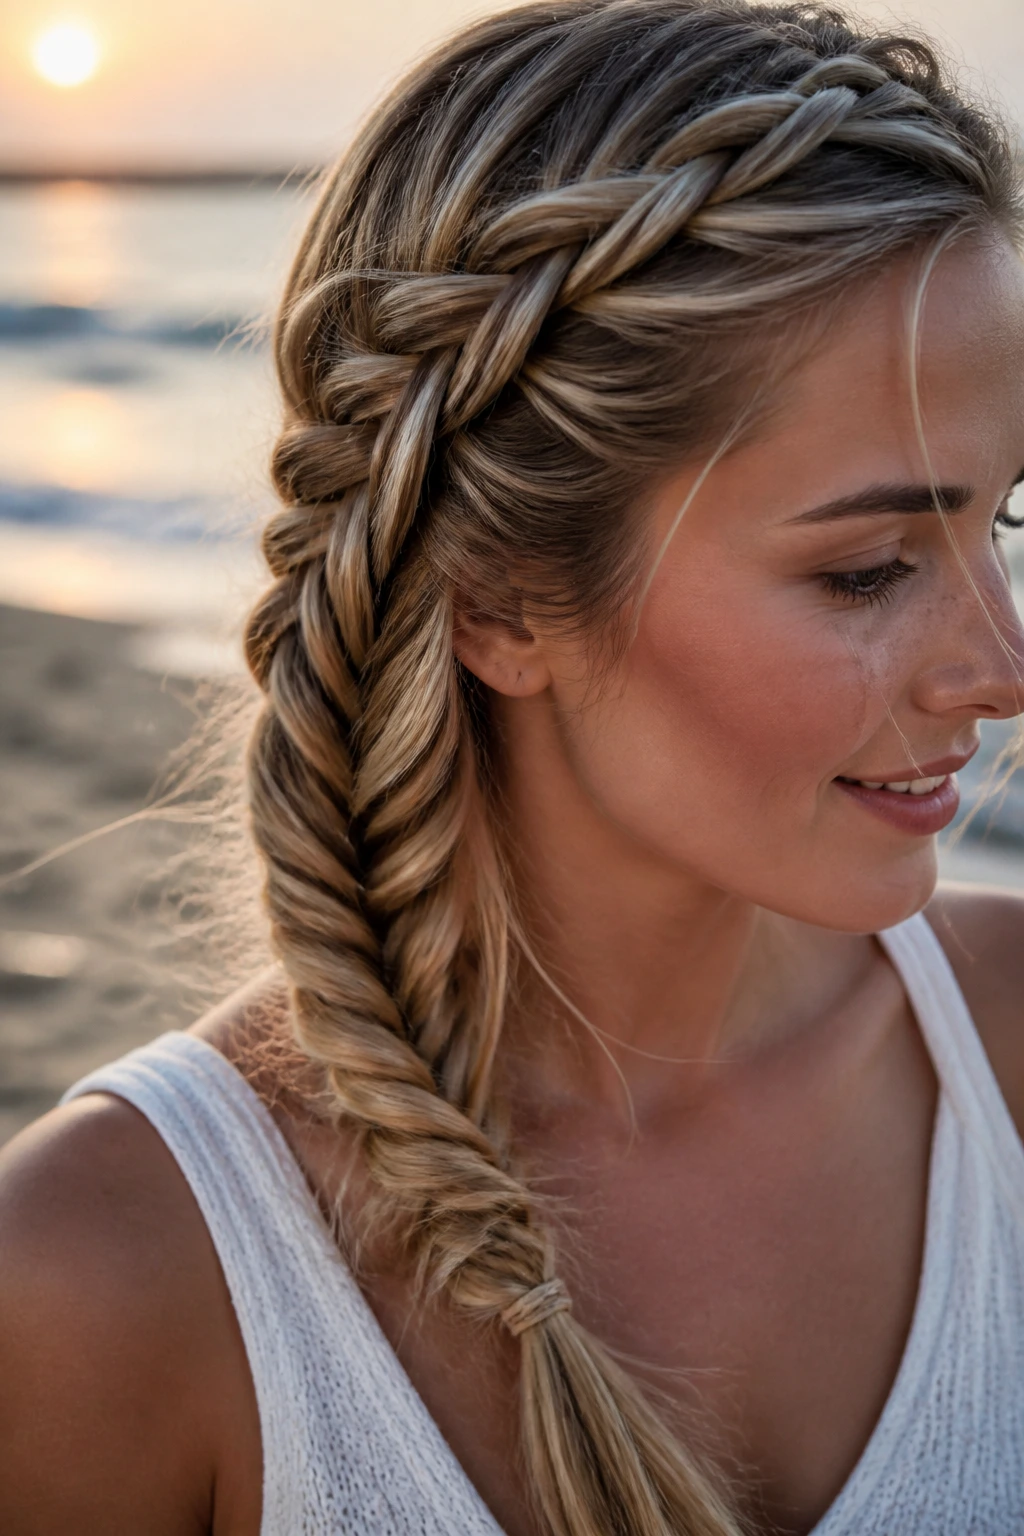
The fishtail braid has a reputation for being complicated, but it is actually one of the most forgiving styles for fine hair because of its intricate texture.
Why This Style Fits Fine Hair
A standard three-strand braid can sometimes look thin and rope-like on fine hair. A fishtail braid uses smaller sections of hair, creating a wider, more detailed pattern that naturally looks much thicker, especially when swept to one side.
Quick Facts for Beach Braids
- Grip is key: Fine hair is often too slippery for a fishtail braid; style it on day-two hair or use sea salt spray first.
- Tension control: Keep the braid loose at the top near your face to maintain softness and volume around your crown.
- Pancake the sides: Always pull the outer edges of the braid apart once you finish to maximize the width.
Pro tip: If your hair is too short for a full side braid, start the fishtail at your temple and secure it behind your ear, letting the rest of your hair hang loose.
7. The Pineapple Updo with a Silk Scrunchie
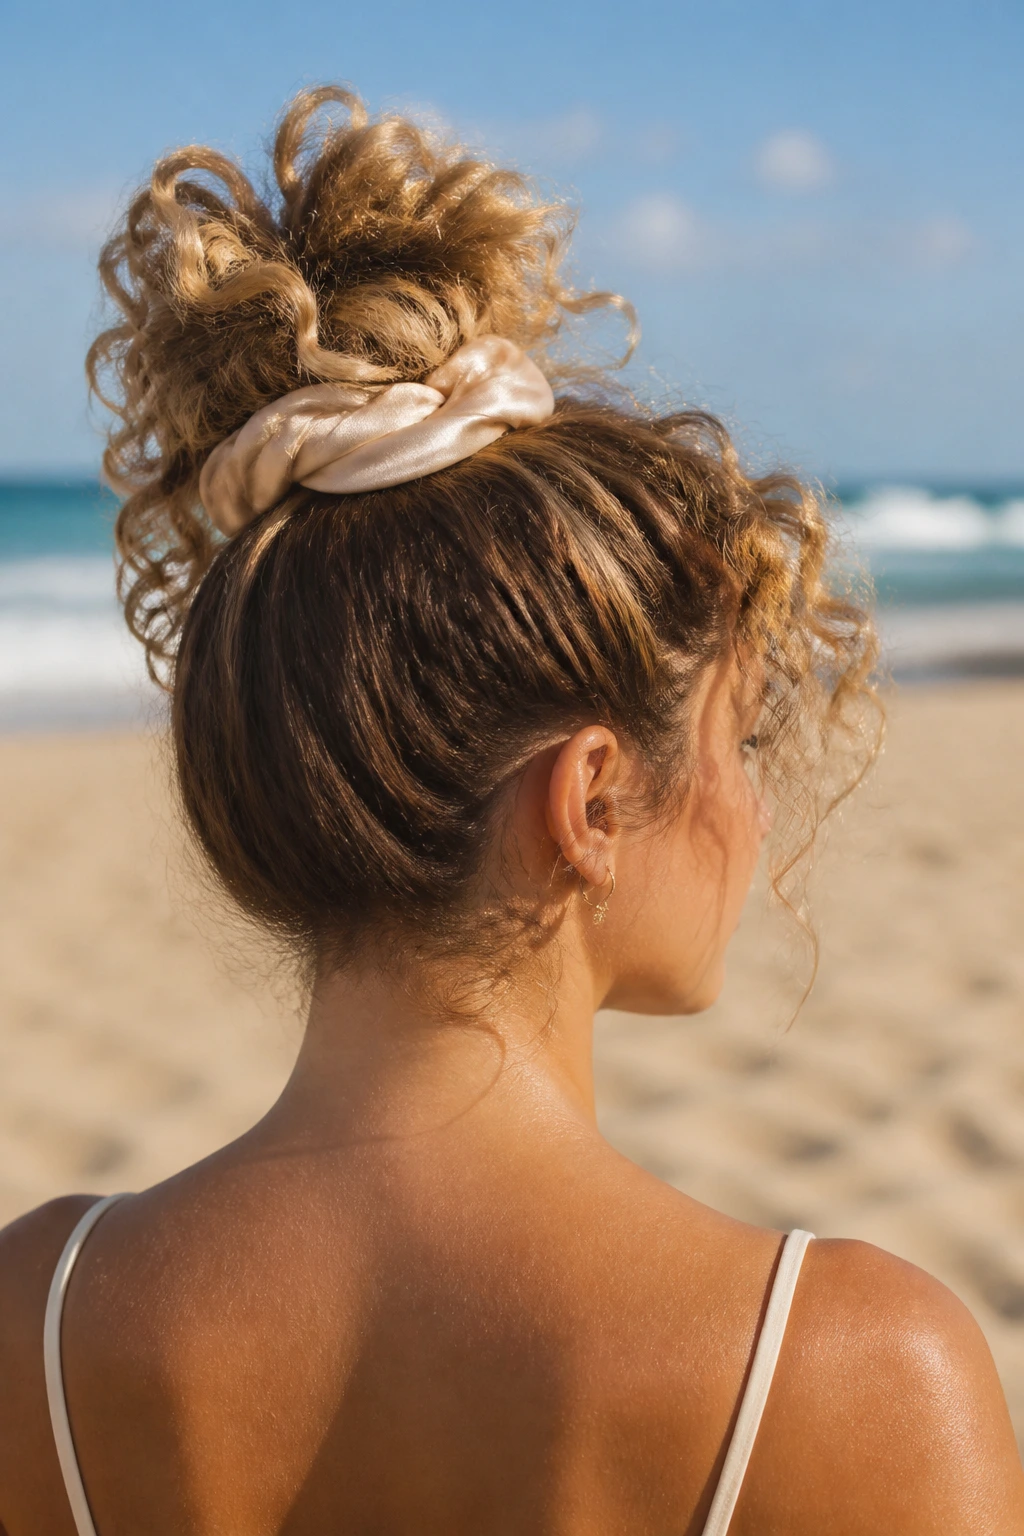
Perfect for curly or naturally wavy thin hair, the pineapple updo gathers your hair at the very top of your head, allowing your curls to cascade forward and create a beautiful, volumizing canopy.
Using a tight hair tie will flatten your curls and put too much tension on fine roots. Instead, use a wide silk or satin scrunchie. Bend forward, gather your hair at the highest point of your head, and loop the scrunchie around it just once or twice. The goal is a loose hold that keeps the hair high up without pulling it taut against your scalp.
Let the ends of your hair flop forward over your forehead. This creates a gorgeous, full fringe effect that frames your face beautifully while keeping your neck completely bare and cool.
8. The Twisted Space Bun Duet
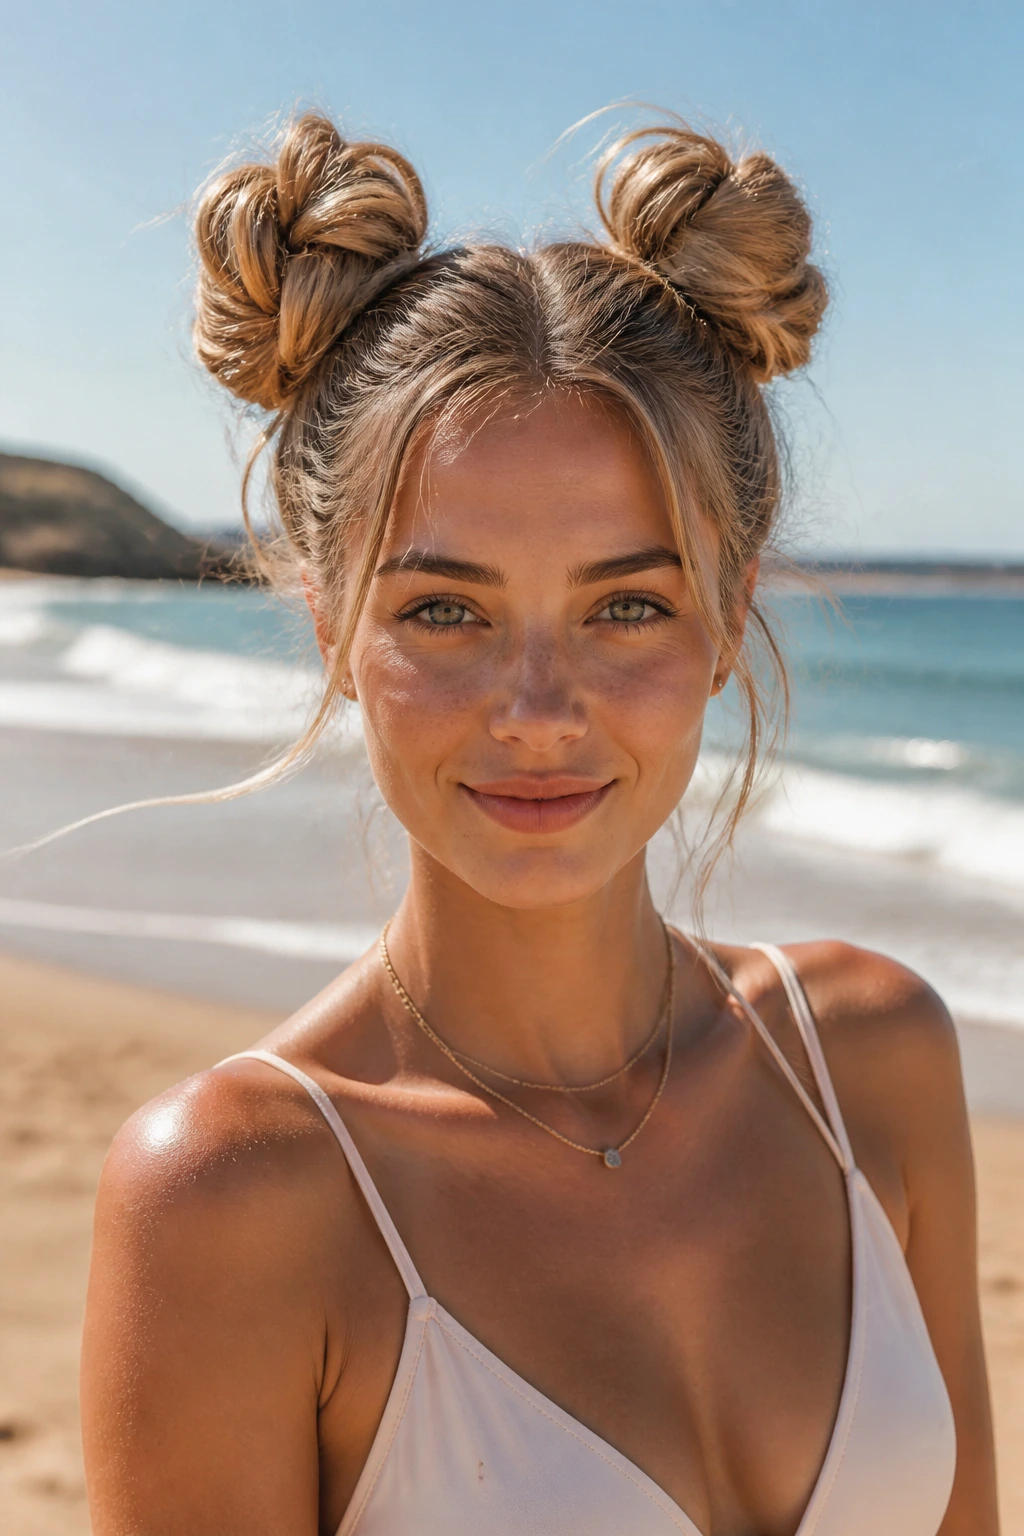
Space buns are incredibly fun for the beach, but when you have thin hair, a single pair of buns can sometimes look small and sparse. The secret to making them look full is twisting the hair before wrapping it.
Why It Works
Twisting your hair strands together before coiling them into a bun creates air pockets within the style. This makes the buns look much larger and more textured than they would if you simply wrapped flat hair.
Step-by-Step Styling
- Part your hair down the center from your forehead to the nape of your neck, creating two equal sections.
- Pull each section into a high pigtail and secure with a soft hair band.
- Take one pigtail and twist the hair tightly from the base to the ends.
- Coil the twisted strand around the base of the pigtail, keeping the coil flat against your head rather than building it upward.
- Secure with bobby pins, then repeat on the other side.
9. The Faux-Hawk French Braid
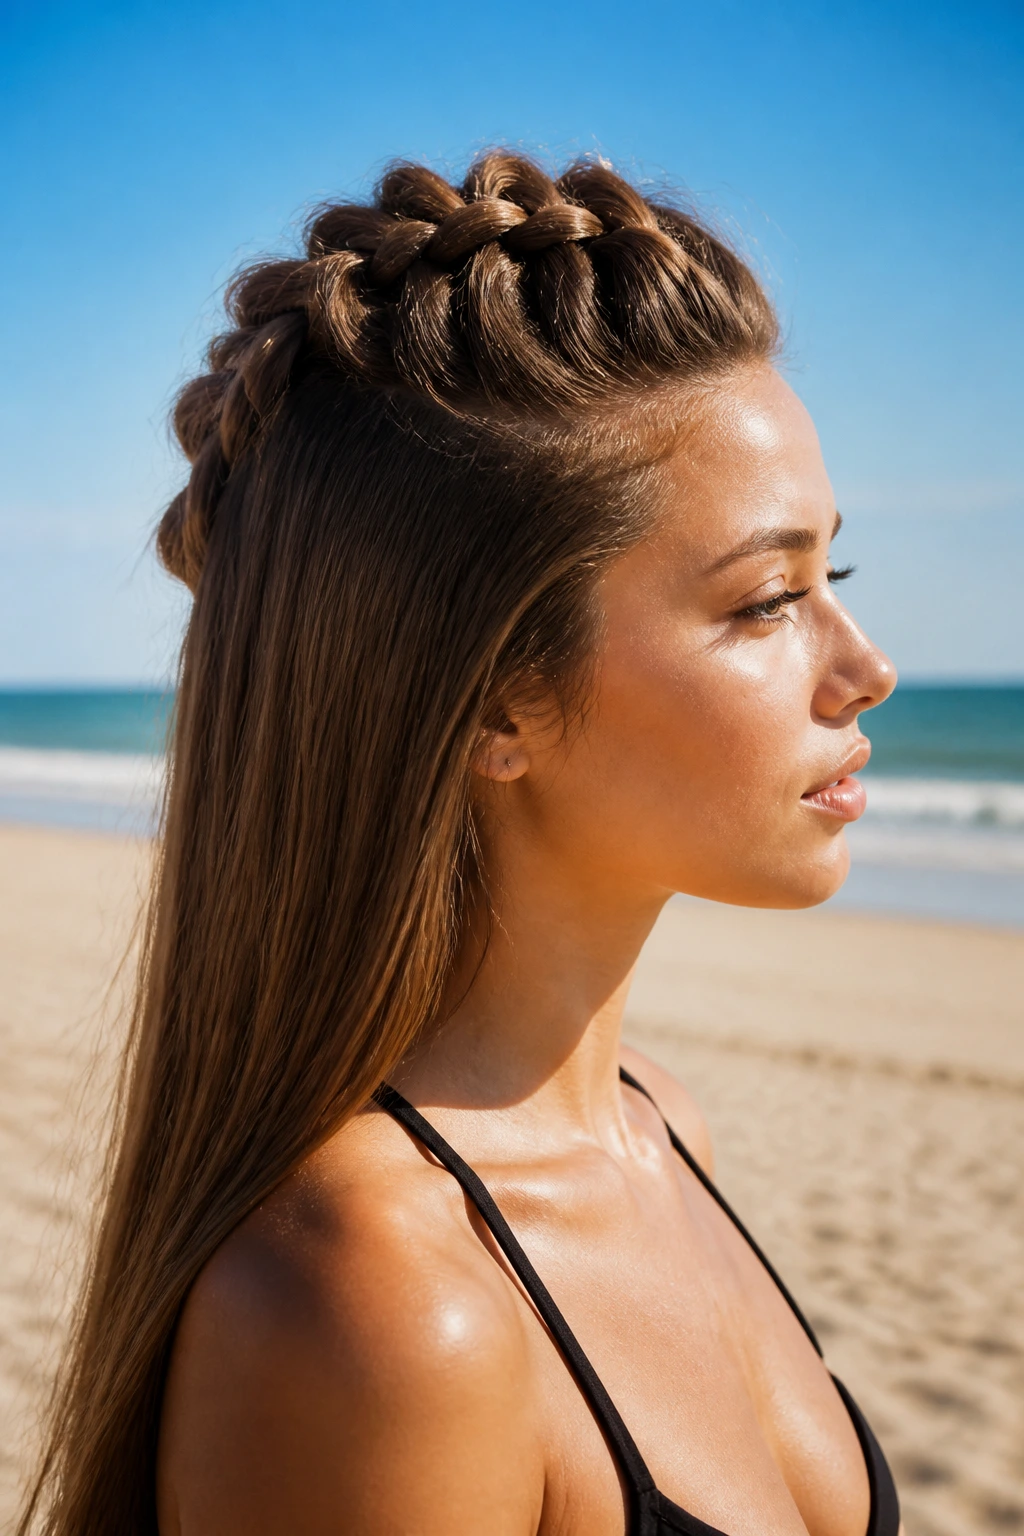
This edgy yet feminine style is perfect for anyone who wants to keep their hair secure during beach activities like volleyball or paddleboarding while still maintaining a lot of volume on top.
Instead of braiding all of your hair together, you will create a single French braid down the center of your head, using only the middle section of your hair (from your hairline to the crown). Keep the sides of your hair loose or slick them back with a touch of lightweight leave-in conditioner. Braid the center section loosely, pulling in hair as you go, and secure it with an elastic at the crown of your head.
This creates a beautiful “mohawk” effect that naturally lifts the hair at the front of your head, preventing that flat, plastered look that fine hair often gets when pulled straight back.
10. The Slicked-Back Wet Look with Coconut Oil
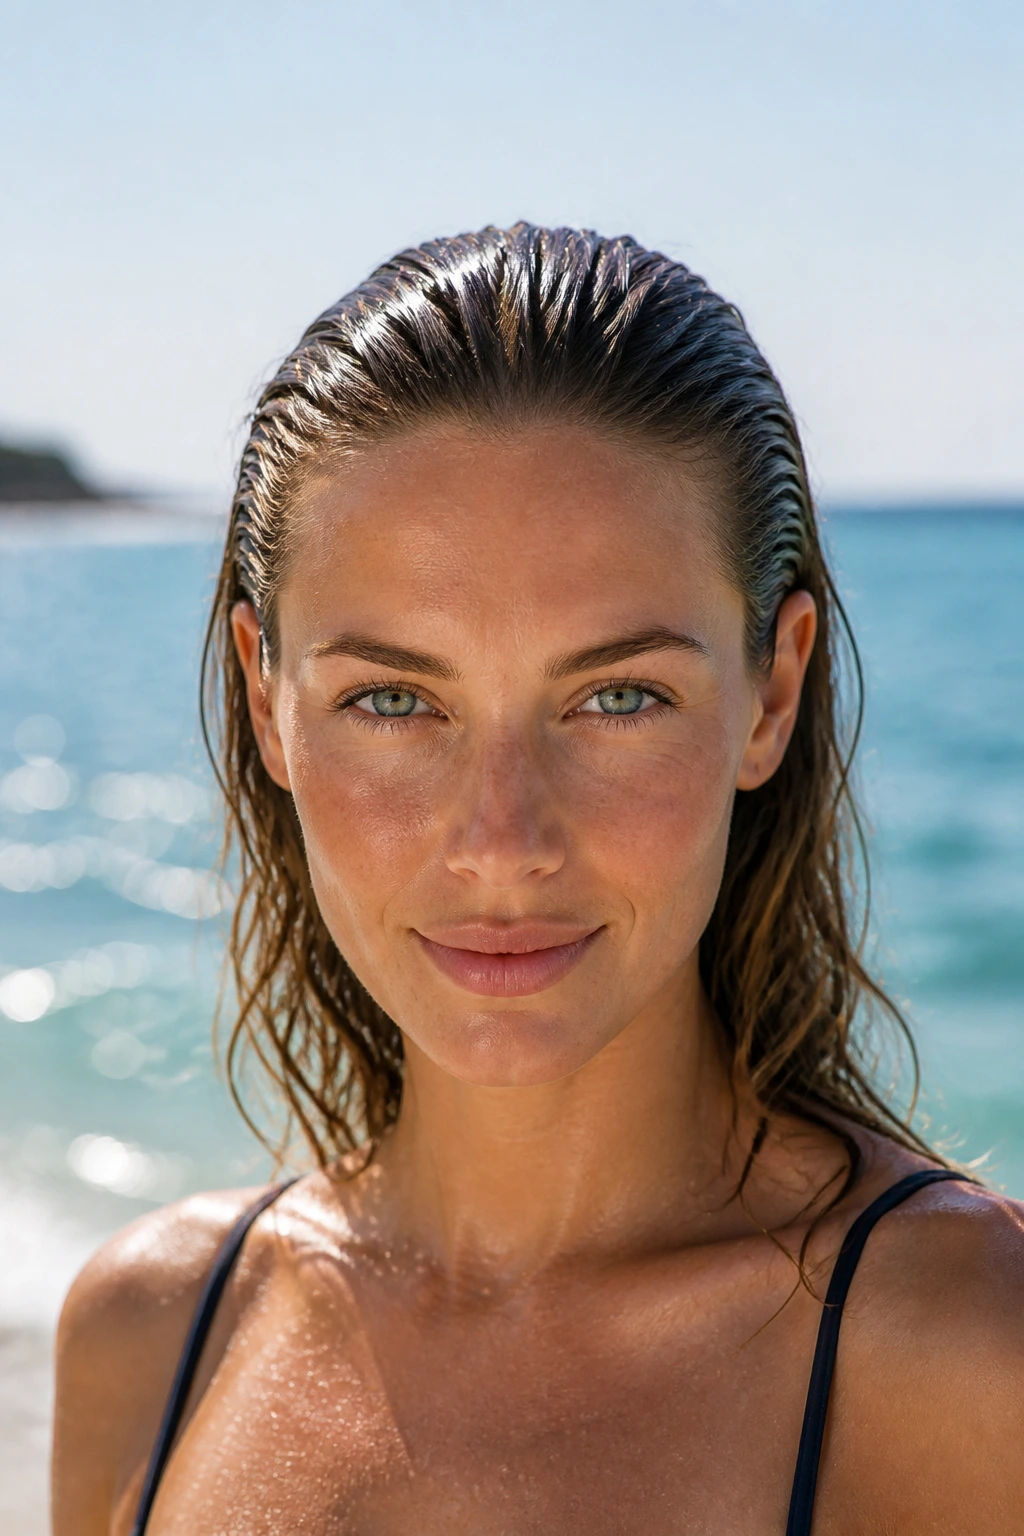
If you cannot beat the moisture, embrace it. The wet-look style is incredibly chic, easy to achieve, and perfect for days when you plan on swimming and don’t want to worry about your hair drying frizzy.
Why This Style Fits Fine Hair
Many people with fine hair avoid wet styles because they fear it makes their hair look too thin. However, by slicking the hair straight back off the face with a nourishing treatment, you create a deliberate, high-fashion look that hides flat roots completely.
The Best Approach
- Wash your hair or damp it thoroughly with fresh water.
- Take a small coin-sized amount of pure coconut oil (or a lightweight hair mask) and warm it between your palms.
- Smooth the oil through your hair from the roots to the mid-lengths, using a wide-tooth comb to push the hair straight back off your forehead.
- Leave the ends dry or let them naturally curl in the salt air.
Pro tip: This style doubles as a deep conditioning treatment. The heat from the sun will help the oil penetrate your hair shaft, leaving it incredibly soft when you wash it out later.
11. The Triple-Tucked Ponytail
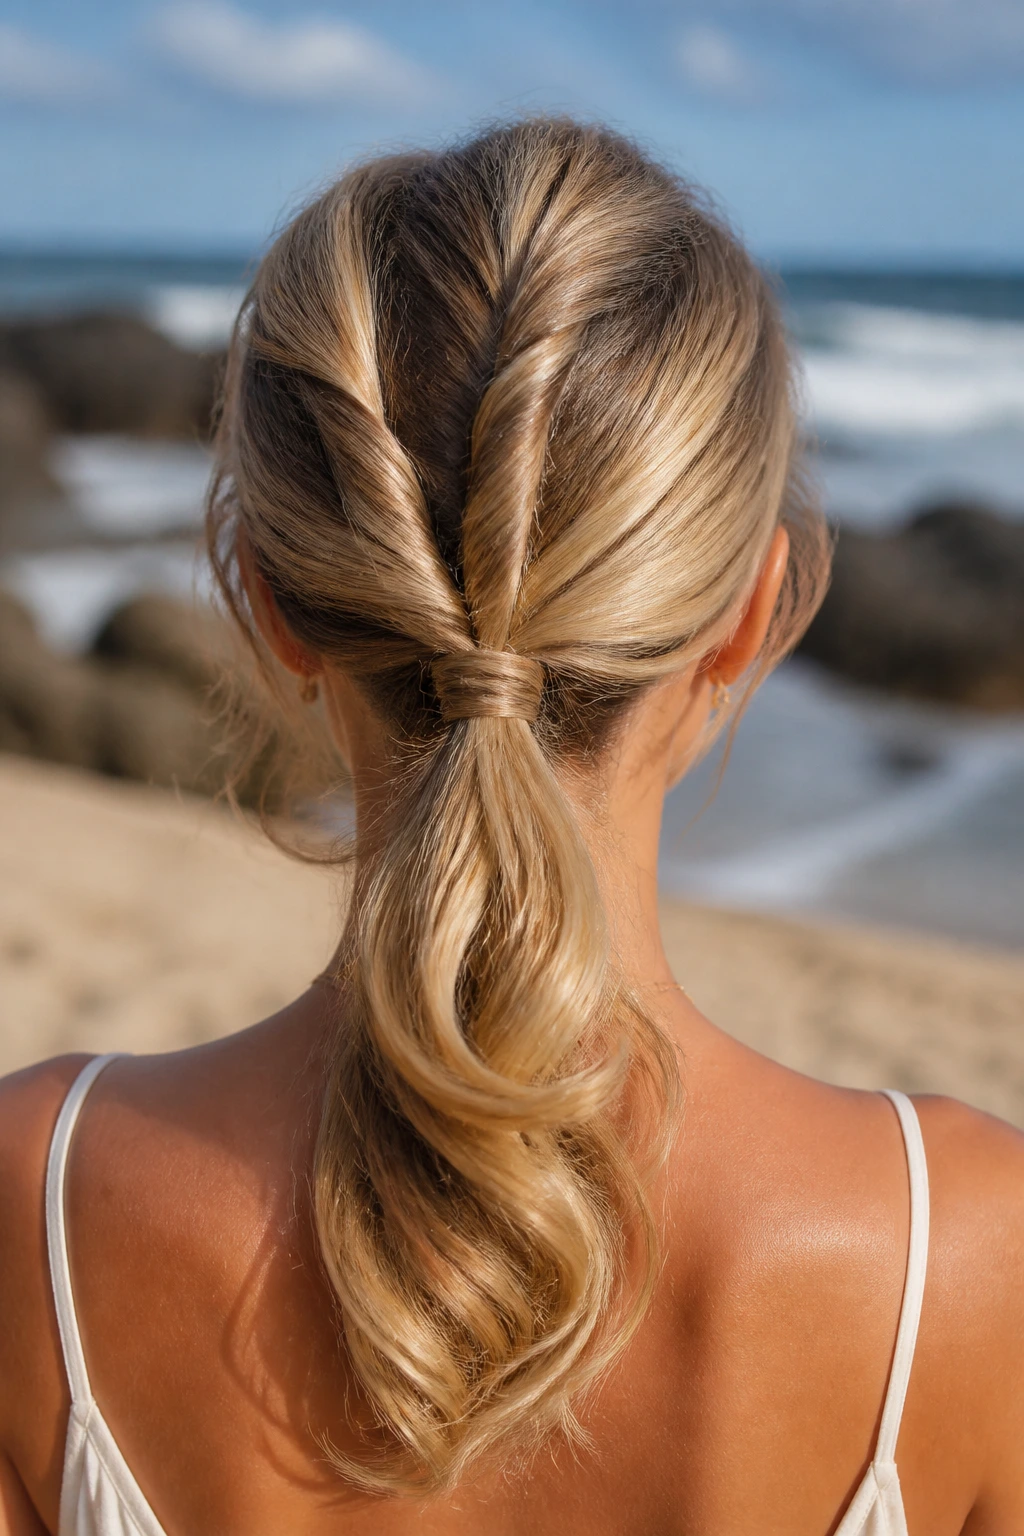
This is an elegant twist on the classic low ponytail that uses a series of simple topsy-tail flips to build thickness and cover up any gaps where your scalp might show at the back of your head.
Start by securing your hair into a loose low ponytail at the nape of your neck. Use your fingers to create a small vertical split in the hair just above the hair tie. Take your ponytail, flip it upward, and tuck it down through the split you just made. This creates two beautiful, twisted rolls of hair on either side of the pony.
To make it look even thicker, slide the hair tie down an inch and repeat the process one more time. This double-tuck technique hides the hair elastic entirely and creates a beautiful, cascading pattern of twists that looks like a complicated braid but takes under a minute to do.
12. The Beach Hat Braided Pigtails
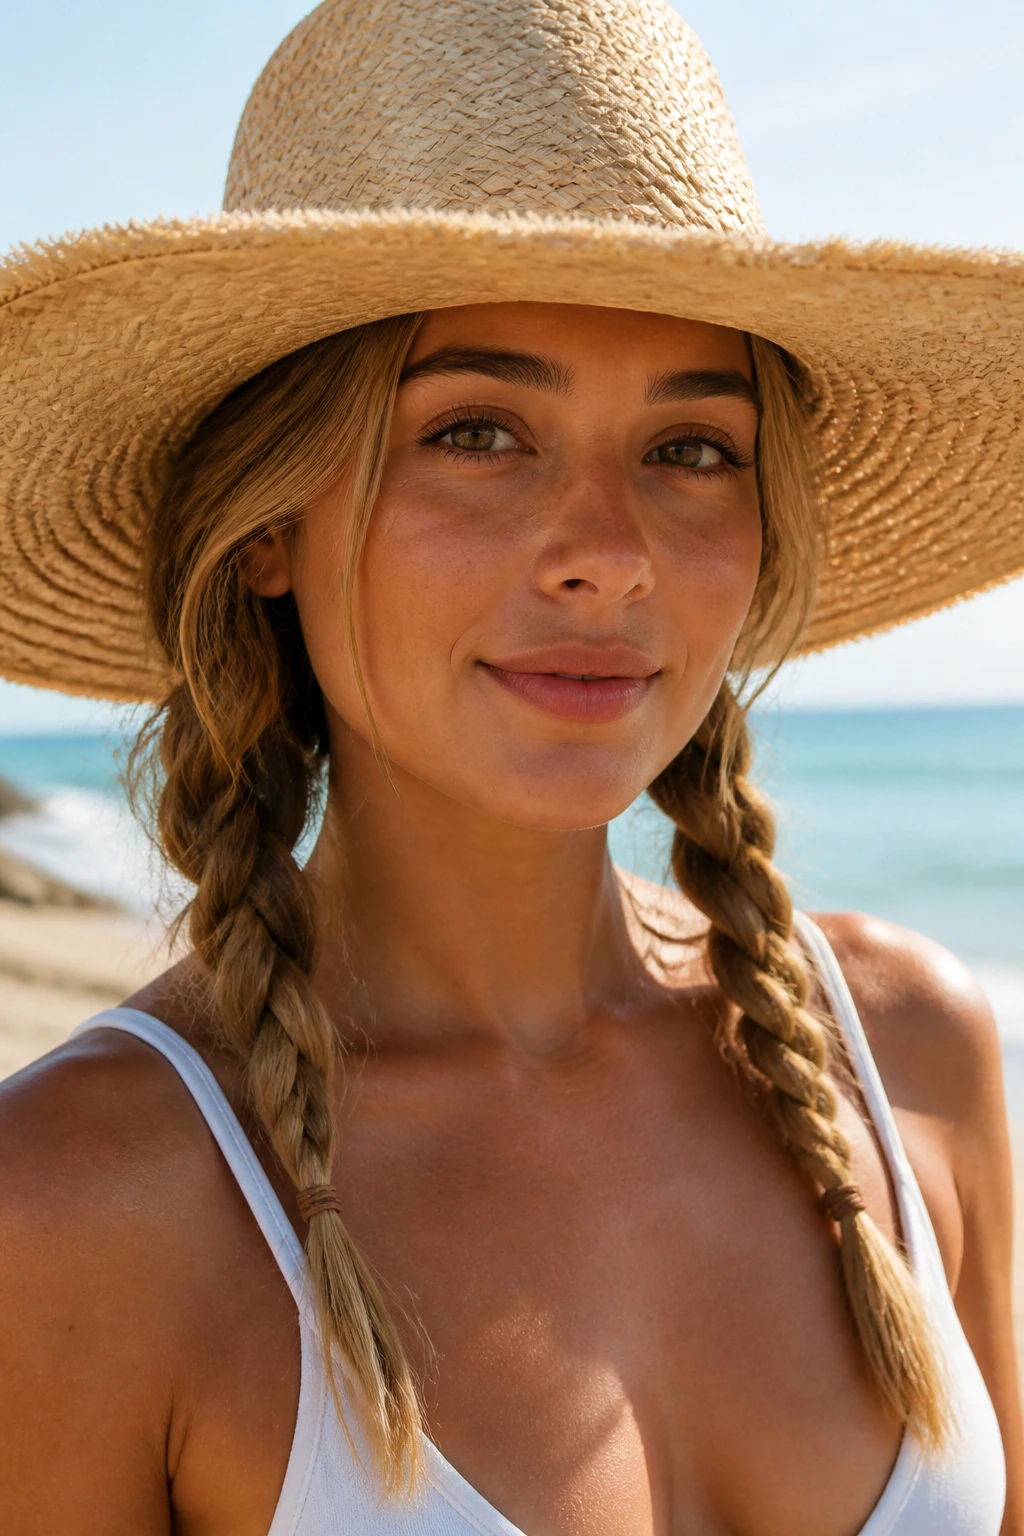
Wearing a sun hat is the best way to protect your scalp and face, but finding a hairstyle that fits comfortably under a brim can be tricky. These low, messy braided pigtails are designed specifically for hat days.
Why This Style Fits Hat Days
Low pigtails sit comfortably below the band of a straw hat or baseball cap. By braiding them loosely, you prevent the wind from whipping your hair into a tangled, knotted mess while you walk along the shore.
Quick Facts
- Positioning: Start the braids low behind your ears so they do not push your hat upward.
- Volume hack: Pull a few soft pieces of hair loose around your temples to frame your face beneath the brim.
- Elastic choice: Use soft fabric elastics or scrunchies to protect fine ends from friction against your shoulders.
Pro tip: Spray your pigtails with a little water and texture spray before braiding. When you take the hat off and undo the braids at the end of the day, you will have gorgeous, heat-set beach waves.
13. The Half-Up Topknot with Salt Spray
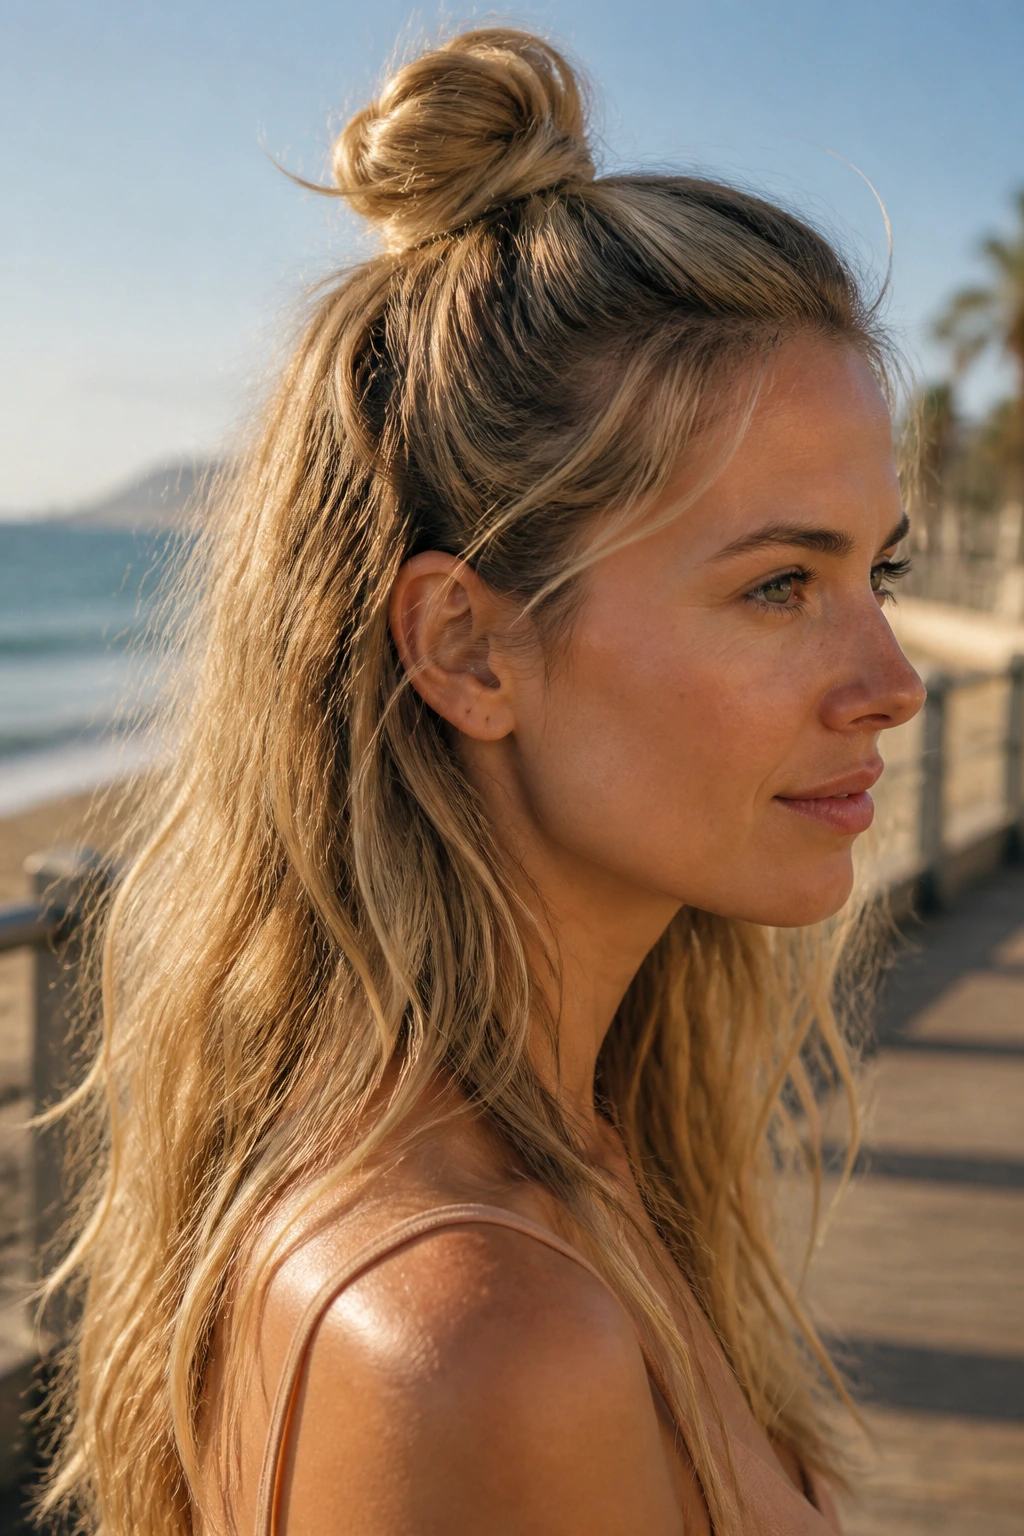
This is the ultimate cool-girl beach style. It gives you the best of both worlds: the volume and lift of an updo on top, with the beachy length of loose hair underneath.
Gather the hair from the crown of your head, keeping the section relatively small so you don’t take too much density away from the bottom layer. Twist this top section into a small, messy knot at the very top of your head, securing it with a small elastic or bobby pins.
Spray the remaining loose hair with a sea salt spray, scrunching it with your fingers to encourage natural waves. The topknot keeps the flat hair at your crown lifted, while the salt spray gives the bottom layer the grit and texture it needs to look full and voluminous.
14. The Rope-Twisted Side Ponytail
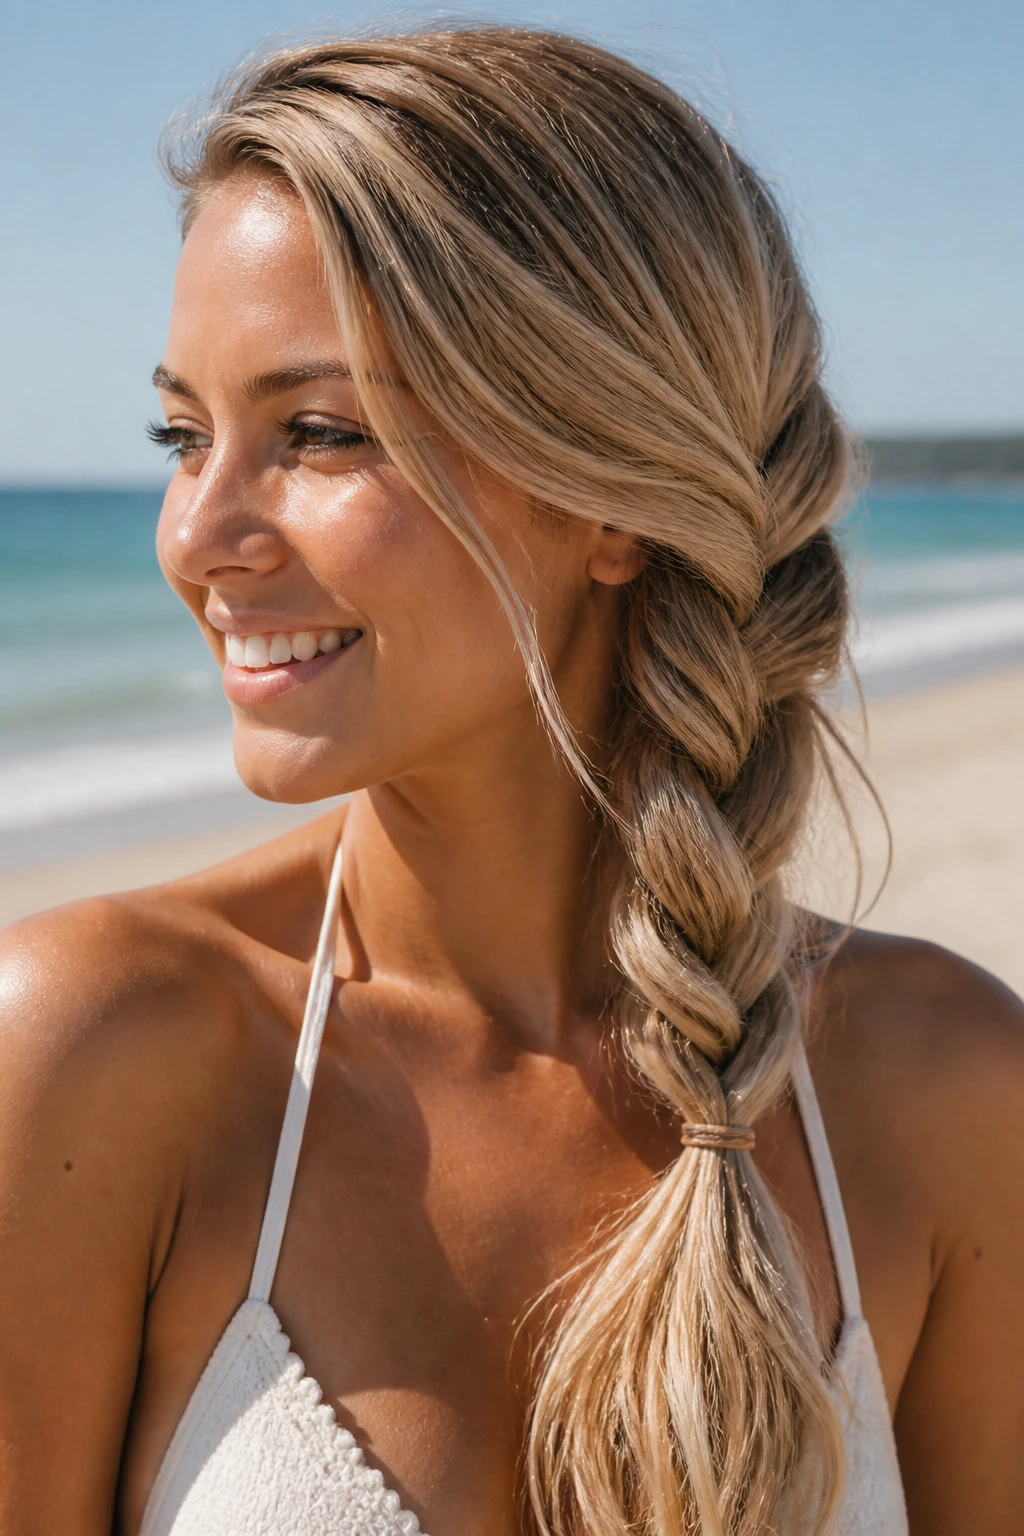
If you struggle with three-strand braids, the rope twist is a much easier alternative that actually looks wider and thicker on thin hair because of how the strands overlap.
Why It Works for Thin Hair
A rope twist only uses two sections of hair instead of three. Because each section is larger, the twist appears much bulkier and more substantial than a standard braid, making it an excellent choice for fine strands.
How to Style It
- Sweep all your hair to one side and split it into two equal sections.
- Twist both individual sections clockwise.
- Wrap the two twisted sections around each other counter-clockwise (wrapping them in the opposite direction is the secret to keeping the twist from unraveling).
- Secure the bottom with an elastic and gently tug the edges of the twist to puff it out.
15. The Criss-Cross Bobby Pin Faux Bob
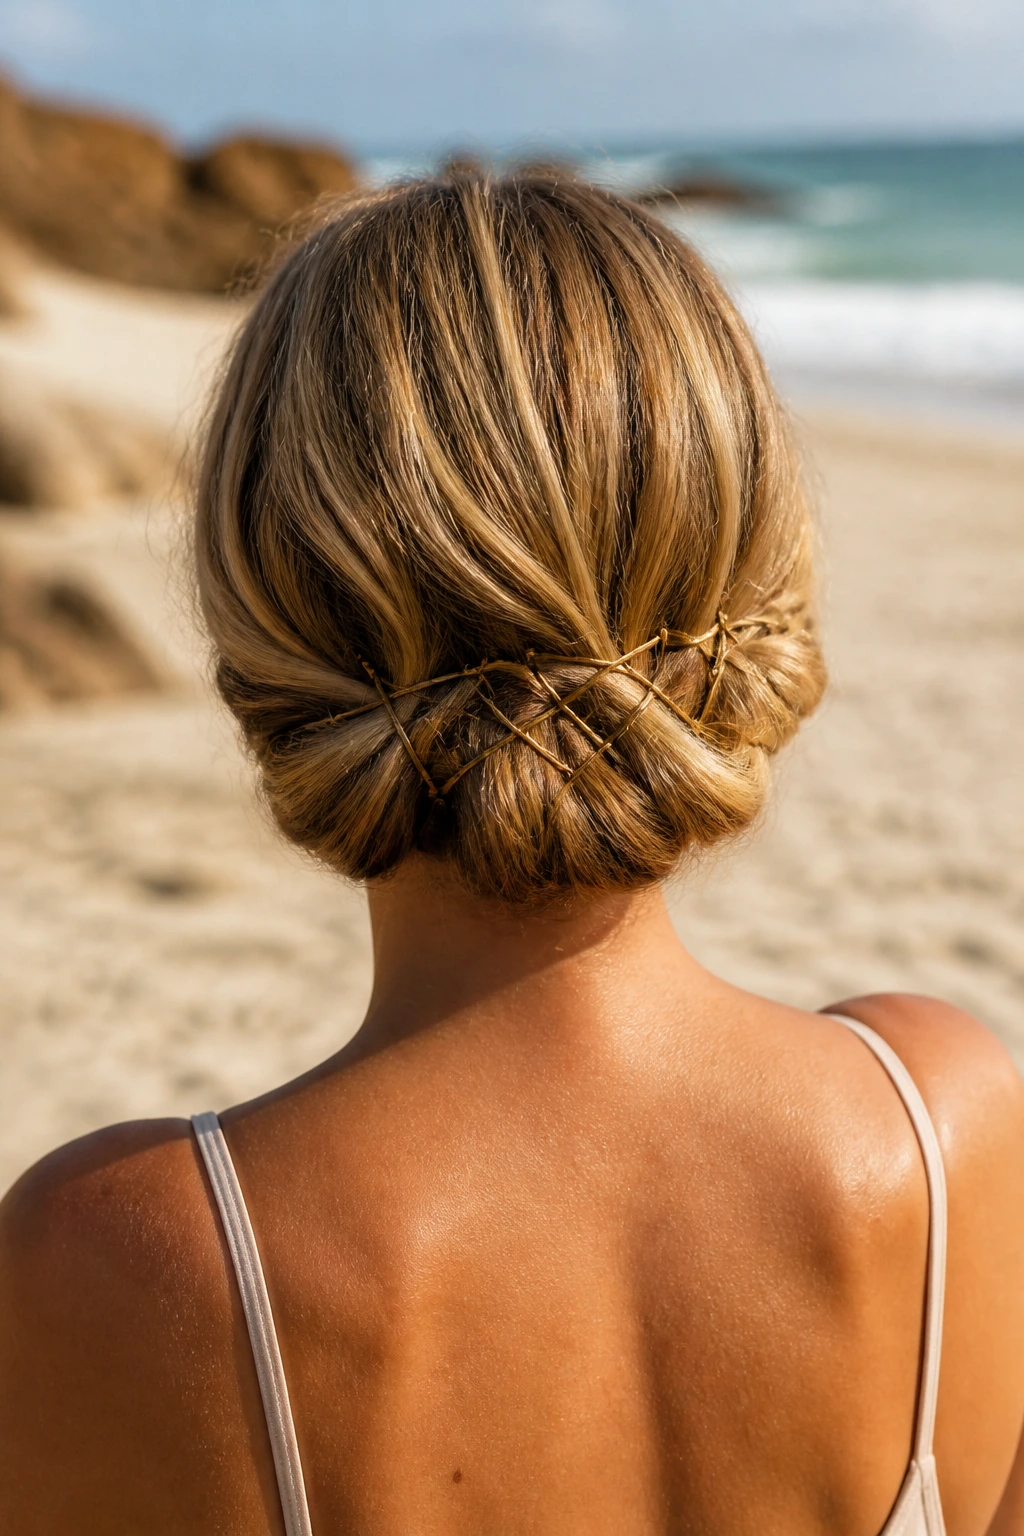
For those with fine, shoulder-length hair, this style is a clever way to tuck your ends away, protect them from dry sea air, and create a chic, vintage-inspired look.
Apply a small amount of texturizing powder or dry shampoo to your hair for grip. Gather your hair loosely at the nape of your neck, fold it upward under itself, and pin it flat against your head using sturdy bobby pins.
To make this look intentional and fun for the beach, use colorful or metallic bobby pins and insert them in a visible criss-cross or chevron pattern across the back of your head. This holds the fine hair securely in place while adding a beautiful decorative element that distracts from any lack of natural volume.
16. The Headband-Wrapped Halo Roll
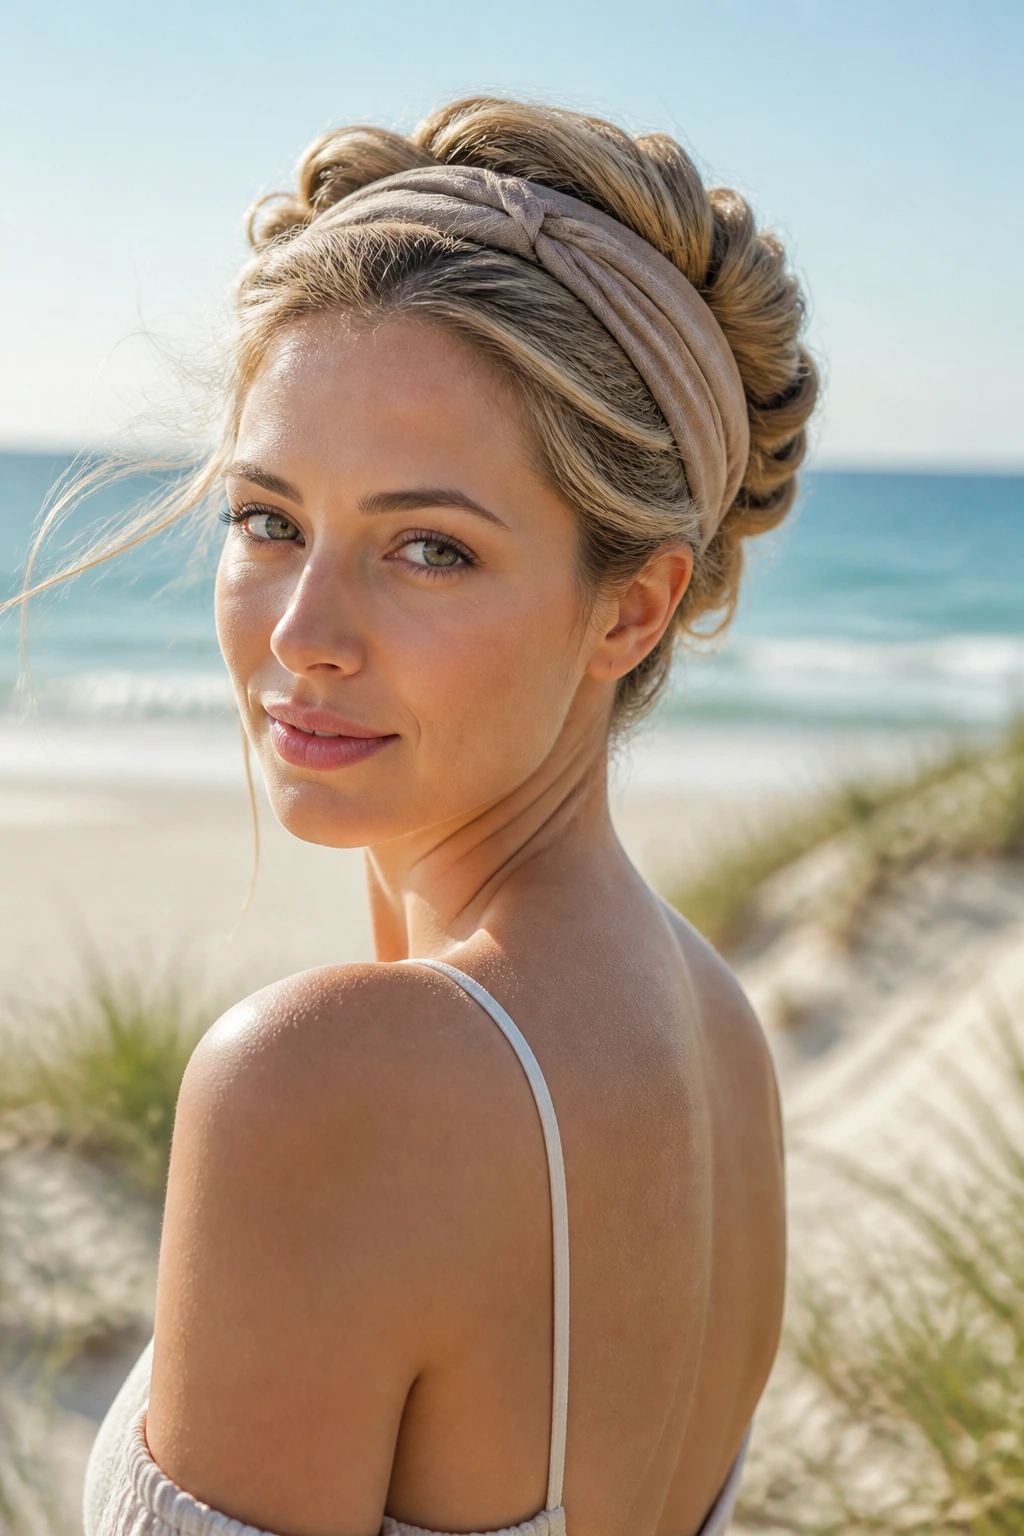
This style uses an elastic headband as a structural anchor, allowing you to wrap your hair around it to create a classic, romantic halo updo that is incredibly secure.
What Makes It Stand Out
This look is completely foolproof. It does not require any braiding skills or complex pin placement, yet it looks incredibly elegant and holds up perfectly even against strong ocean winds.
Step-by-Step Styling
- Place a soft, elastic headband over your hair, sitting it low on your forehead and crown (like a crown).
- Starting from the front, take a small section of hair and tuck it over and under the headband.
- Move backward, taking the next section of hair, joining it with the first, and tucking it over the band again.
- Continue this process all the way around your head until all your hair is rolled up and secured around the band.
17. The High Ponytail with Volume-Boosting Base
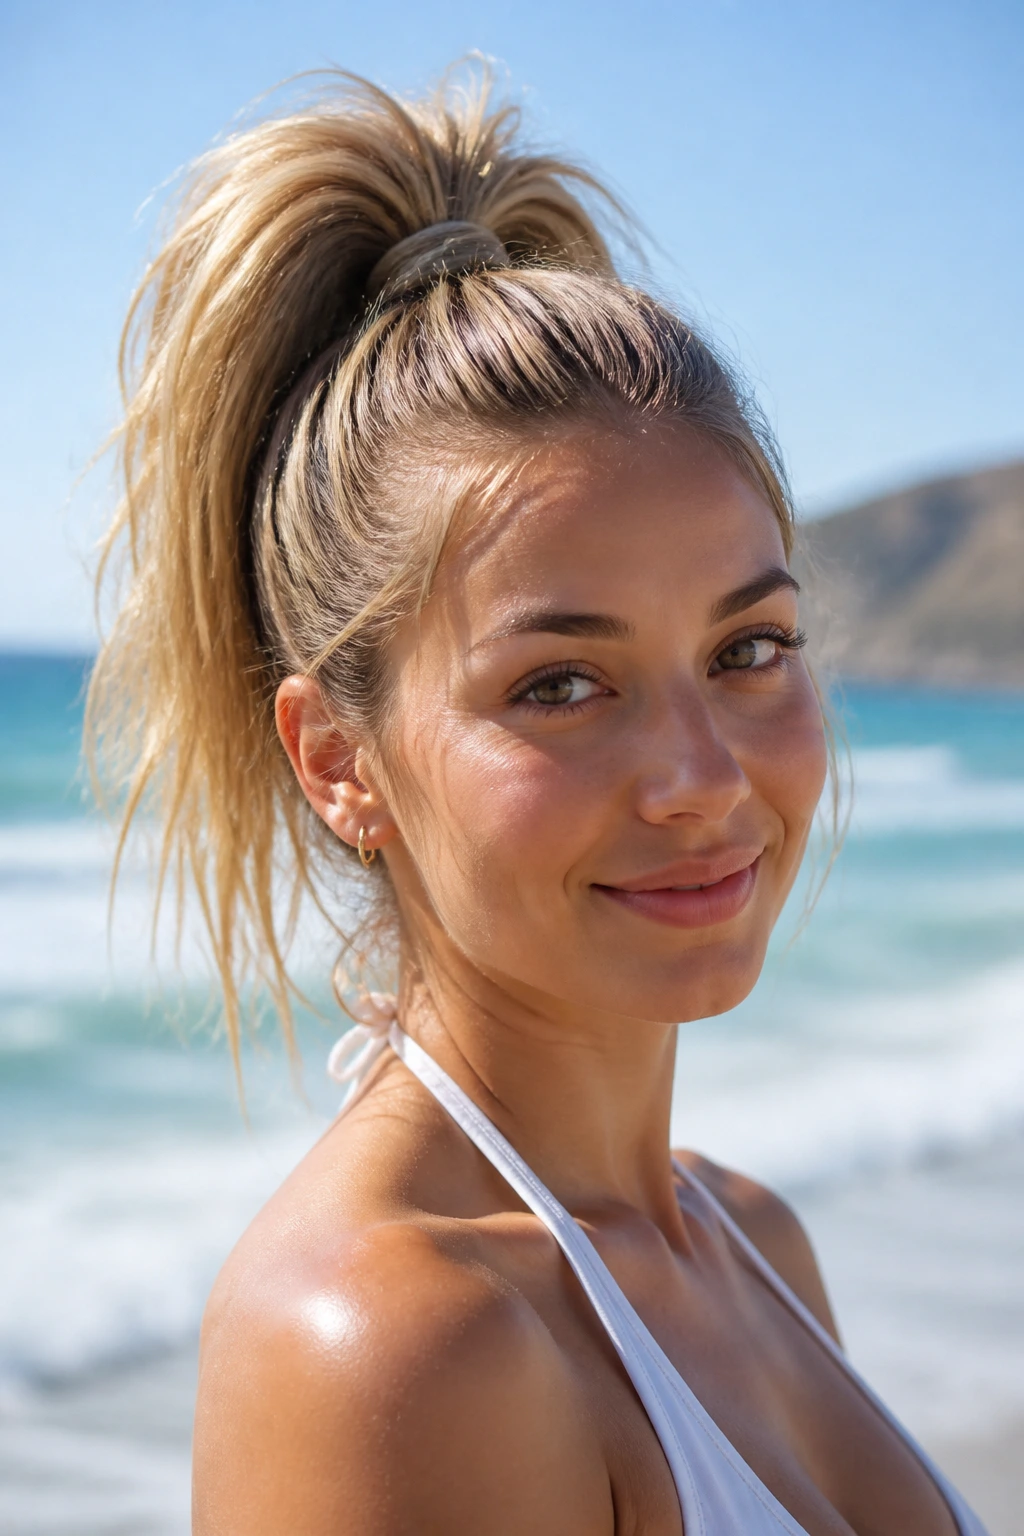
A high ponytail is a classic summer look, but on thin hair, it can easily droop, looking flat against the head and thin at the tail. This clever hack uses two hidden bobby pins to keep your ponytail standing tall and proud all day.
Gather your hair into a high ponytail and secure it tightly with a sturdy elastic. Once secured, split the ponytail horizontally into two sections (top and bottom). Take two standard bobby pins and slide them vertically down through the center of the hair tie, pointing toward your scalp.
Let the top section of the ponytail fall back down over the pins. The bobby pins act as a tiny kickstand, lifting the base of the ponytail up and away from your head. This instantly makes the ponytail look twice as bouncy and full of life.
18. The Loose Waterfall Braid
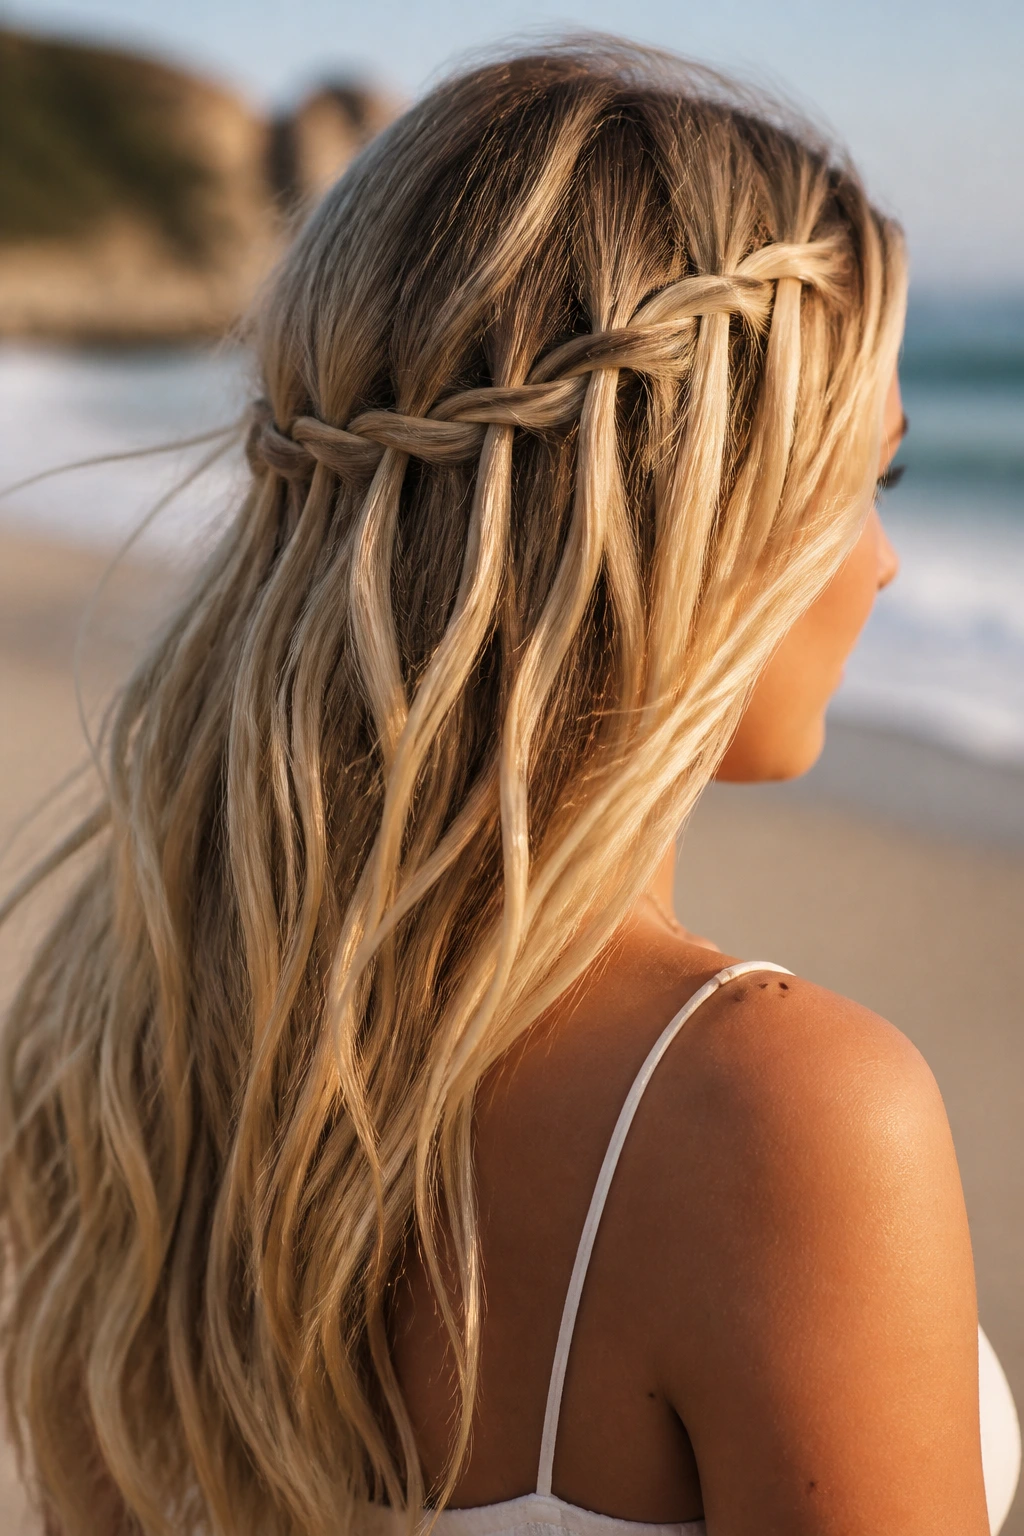
The waterfall braid is a beautiful, romantic style that lets your hair flow naturally while adding a gorgeous braided detail across the back of your head.
Why This Style Fits Fine Hair
Unlike traditional French braids that pull all your hair into a tight band, a waterfall braid lets strands cascade down through the braid. This maintains the maximum amount of loose, flowing hair, which helps your hair look as thick and full as possible.
Quick Facts
- Grip is essential: Use a touch of dry texturizing spray on your fingers before braiding fine hair.
- Direction: Braid horizontally around the back of your head rather than straight down.
- Pancaking: Keep the braided band wide by gently pulling the loops apart once you secure the end.
Pro tip: If you have fine layers around your face, leave them out of the braid entirely to keep the front of your hair looking soft and voluminous.
19. The Knotted Half-Up Crown
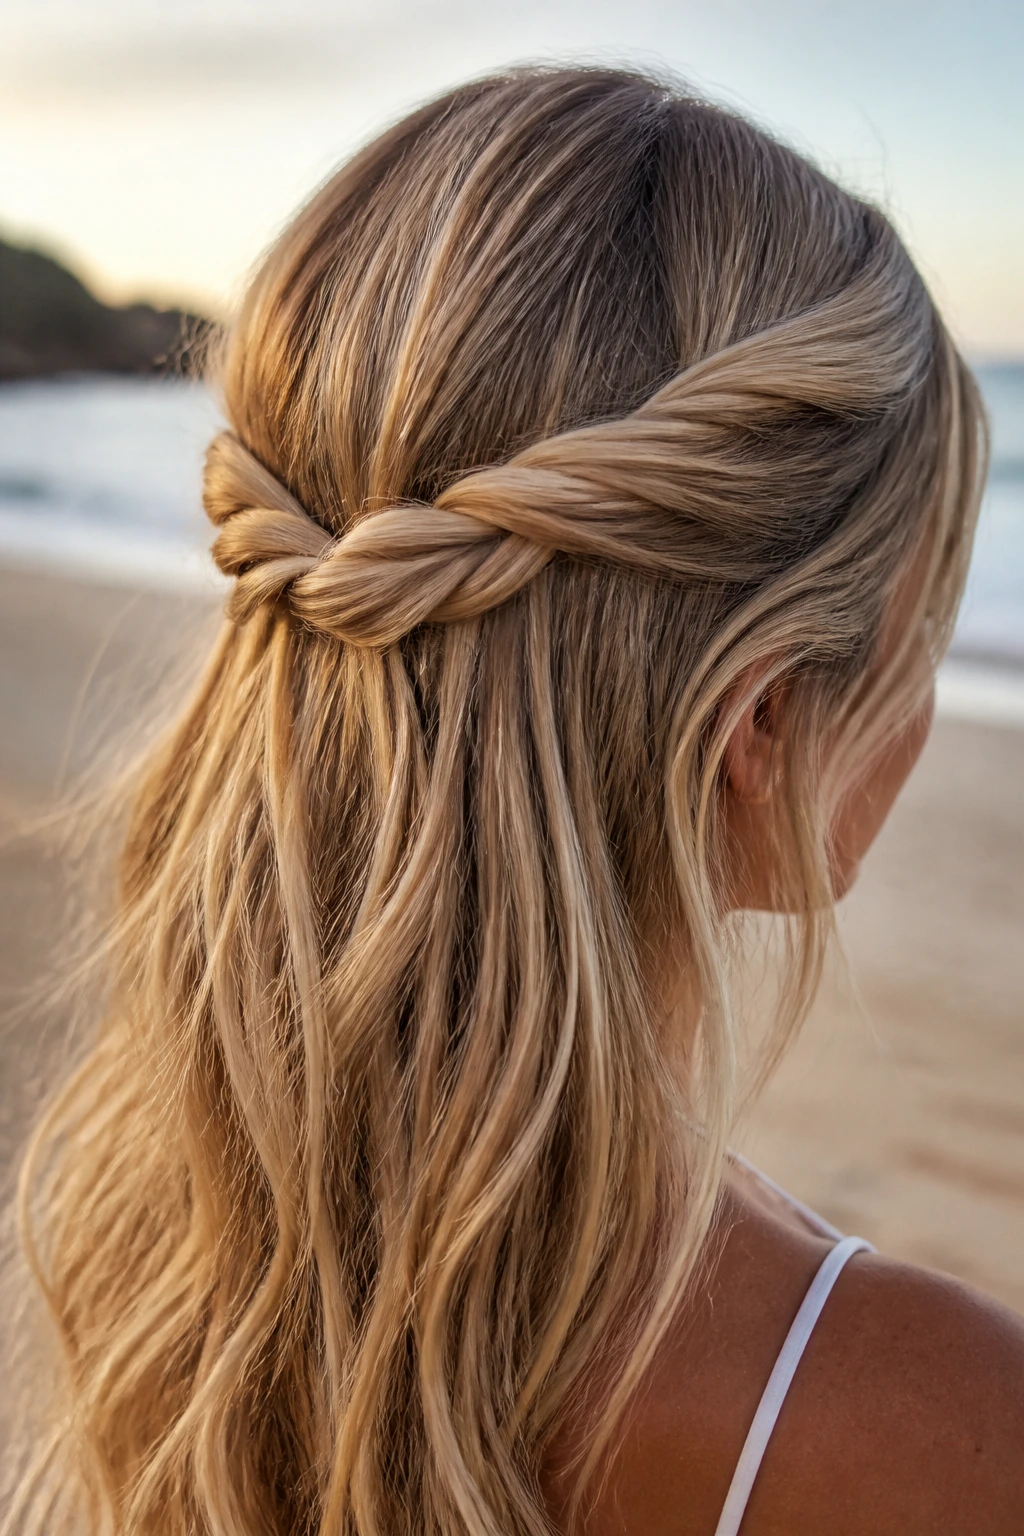
This style uses a series of simple, loose knots to create a gorgeous, crown-like effect around the back of your head, keeping your hair secured while showing off its natural movement.
Take two small sections of hair from your temples and pull them to the back of your head. Cross the right section over the left, and tuck it under to create a simple, single knot—just like you are starting to tie a shoelace.
Secure the center of the knot with a small bobby pin pushed vertically down into the hair. Let the remaining ends of the sections blend back in with the rest of your loose hair. This look is incredibly beautiful, takes seconds to do, and adds a lovely touch of bohemian texture to fine hair.
20. The Bohemian Side Twist
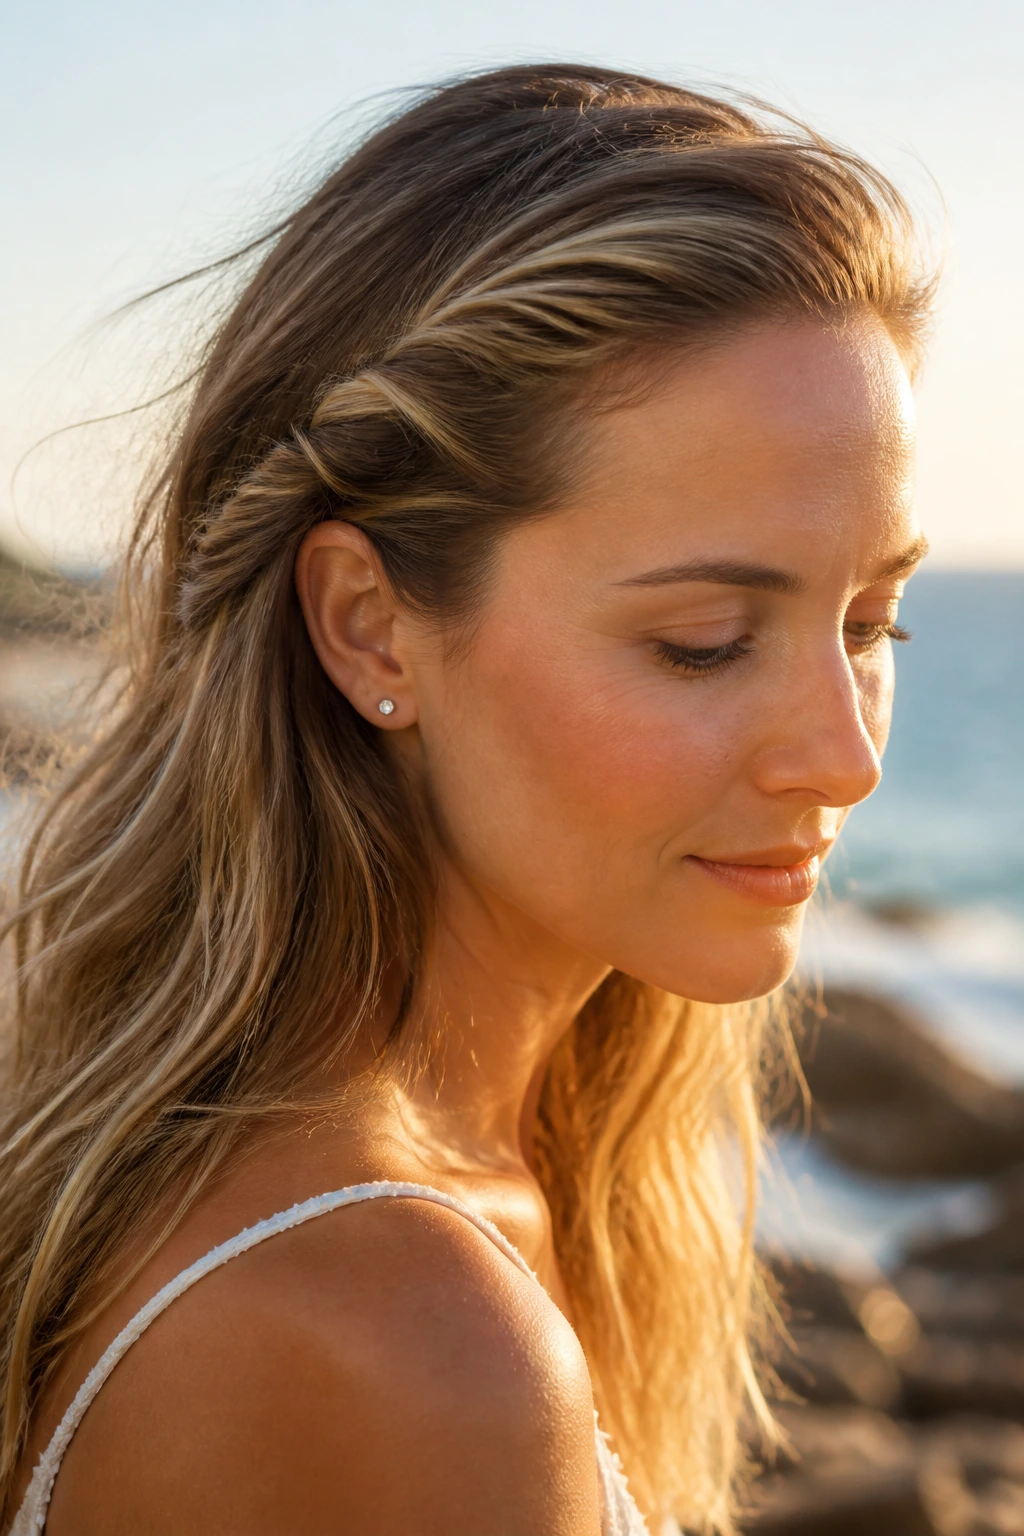
For those days when you want a relaxed, effortless look that requires zero styling tools, the bohemian side twist is your best friend.
Why It Works for Thin Hair
Twisting the hair along your hairline pulls it back softly, creating a rolled effect that looks much thicker than a flat, braided strand. It also hides any sparse areas around the temples beautifully.
How to Style It
- Create a deep side part on whichever side of your head you prefer.
- Take a small section of hair from the heavy side of the part and split it into two.
- Twist the two sections around each other, adding a little bit of hair from your hairline with each twist (similar to a French braid).
- Continue twisting down past your ear, then secure the end behind your ear with a bobby pin hidden under your loose hair.
21. The Messy Chignon with a Shell Bobby Pin
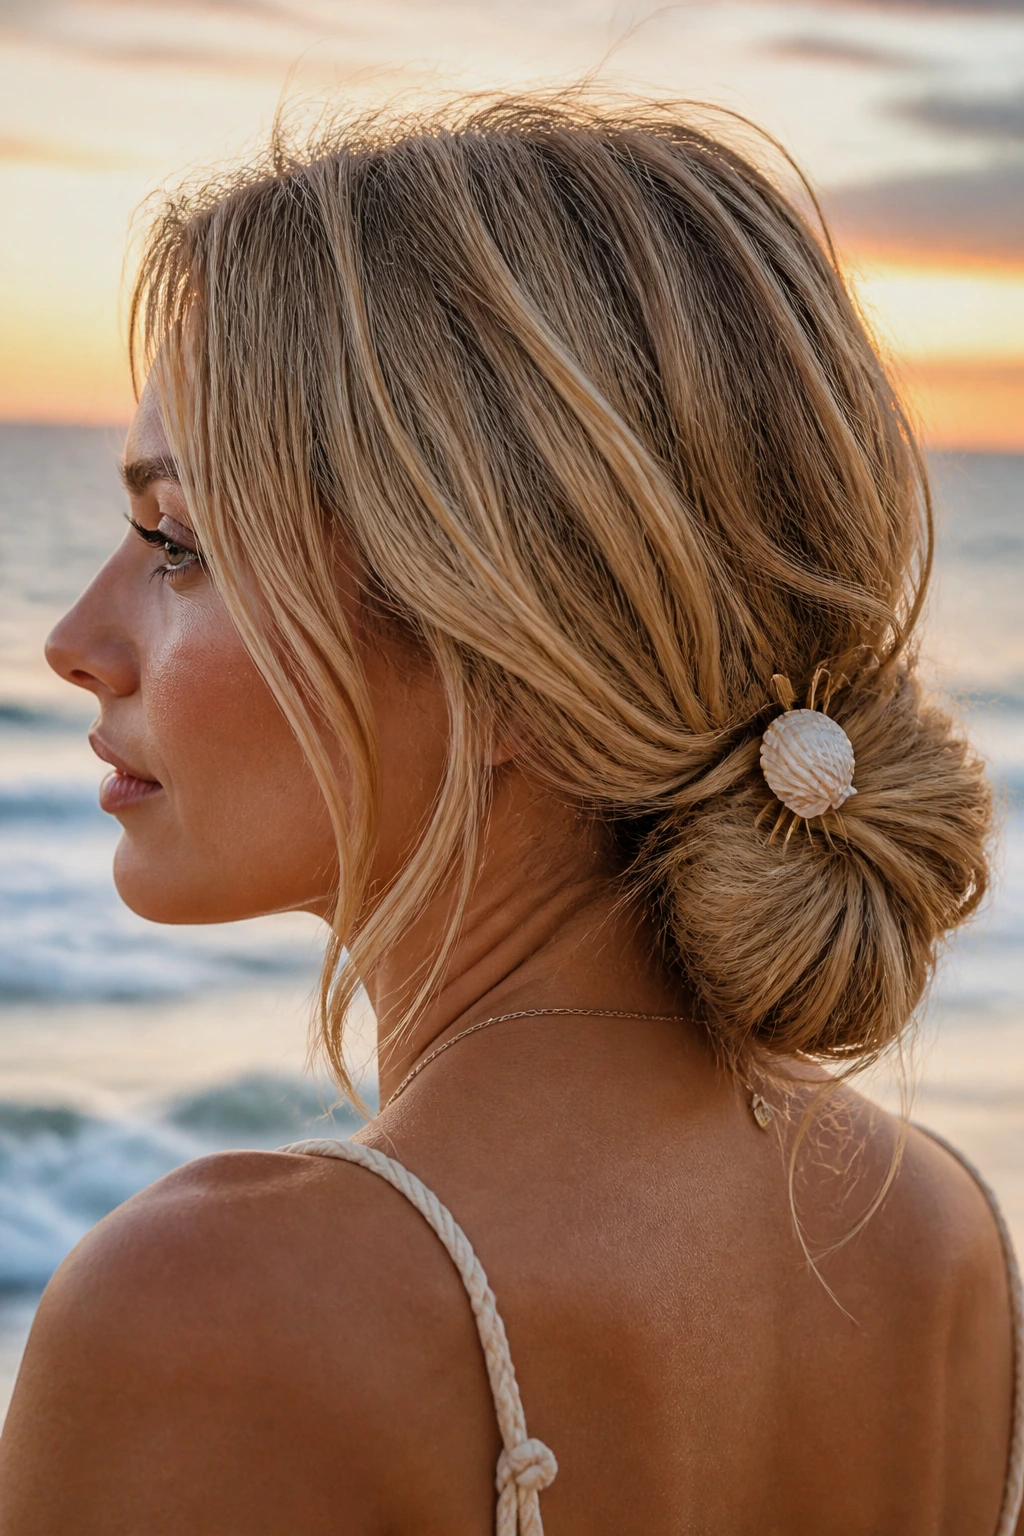
A low chignon is a beautiful, classic hairstyle that transitions perfectly from a day on the sand to a sunset dinner by the water.
To make a chignon work for thin hair, you want to avoid making it too neat. Pull your hair into a low ponytail, leaving a few loose pieces around your face. Twist the ponytail loosely, then wrap it around its base to create a flat, circular bun.
Secure the bun with a couple of bobby pins, then gently tug at the center of the bun to loosen the hair and make it look fuller. Finish the look by sliding a decorative, shell-topped bobby pin into the side of the bun. It adds a lovely beachy detail while helping to keep everything locked in place.
22. The Segmented Pull-Through Braid
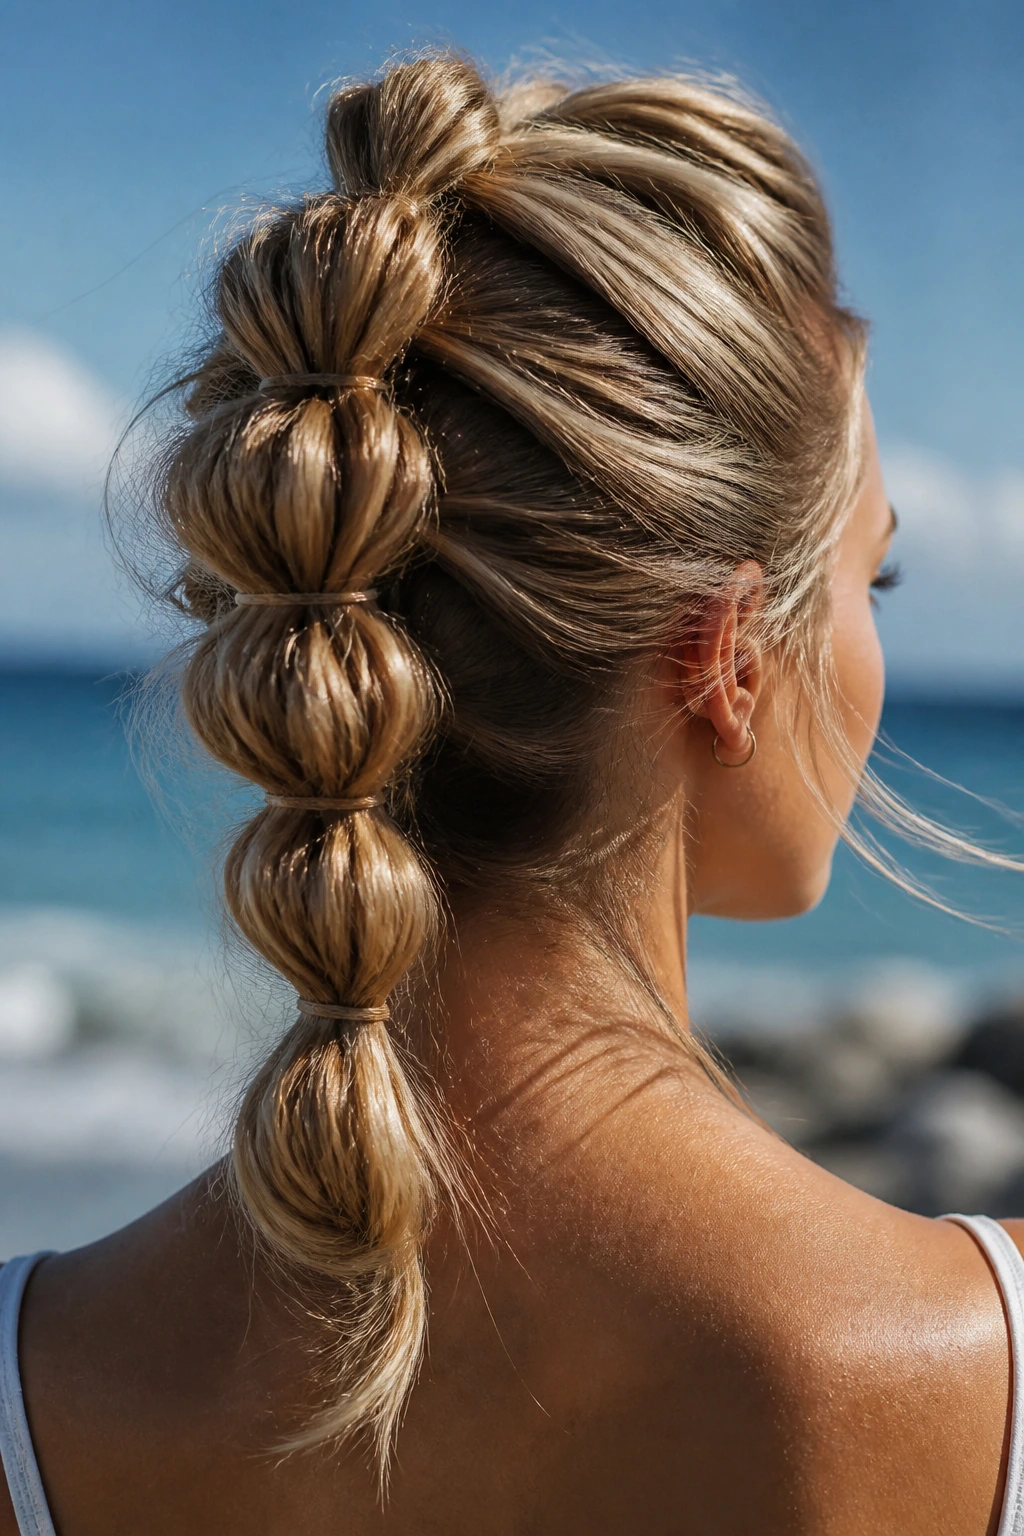
This style looks like an incredibly complex, thick braid, but it is actually a series of connected ponytails. It is one of the best ways to get massive volume on very thin hair.
What Makes It Stand Out
Because this style is made of connected ponytails rather than a woven braid, it cannot slip or unravel, making it extremely durable for active beach days.
Step-by-Step Styling
- Gather a small section of hair at your crown and tie it into a small ponytail with a clear elastic.
- Gather a second section of hair directly below the first and tie it into a second ponytail.
- Split the first ponytail in half, wrap the two halves around the second ponytail, and tie them together with the next section of hair below.
- Repeat this process down the length of your head, pulling the outer edges of each loop outward to create a thick, braided effect.
23. The Bandana-Wrapped Low Ponytail
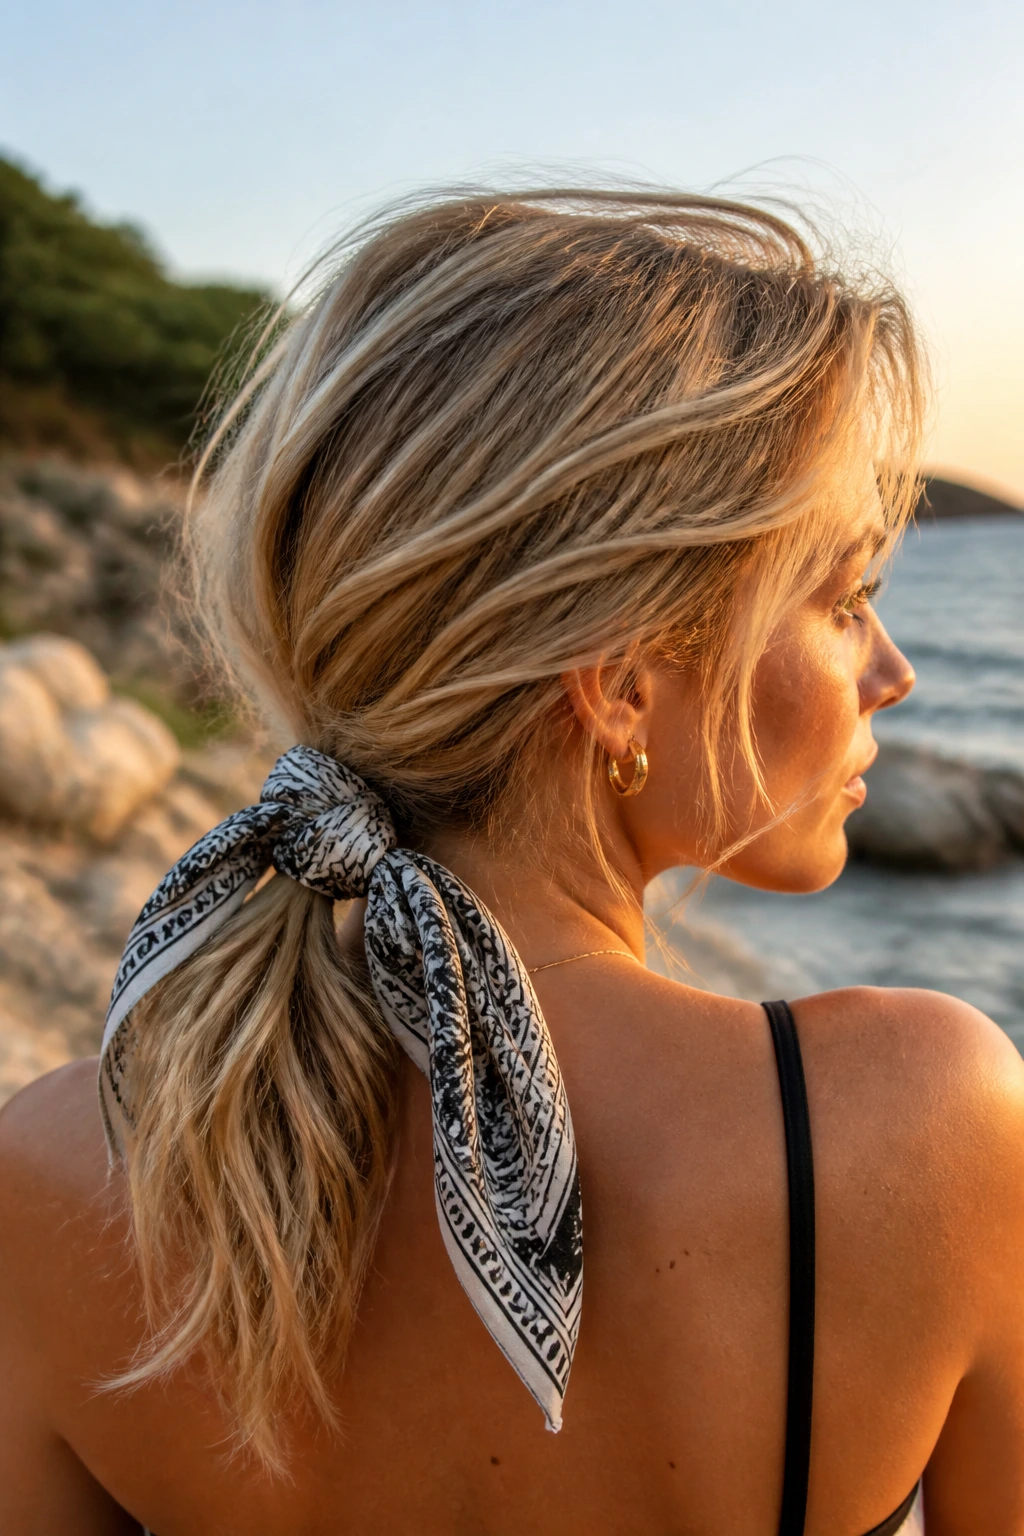
A bandana is a classic summer accessory that is both incredibly stylish and highly functional for protecting thin hair from the elements.
Why This Style Fits Bandana Days
Wrapping a bandana around the base of a low ponytail instantly hides a small hair tie and adds physical volume to the back of your head. It also protects your scalp from sunburn along your parting line.
Quick Facts
- Fabric choice: Choose a lightweight cotton or silk bandana that won’t feel heavy on your head.
- Positioning: Fold the bandana into a long triangle, wrap it over the top of your head, and tie the ends beneath your ponytail at the nape of your neck.
- Volume boost: Tease the hair slightly under the bandana to keep it from looking flat.
Pro tip: If your hair is very fine and slippery, secure the bandana to your hair with two bobby pins placed discretely behind your ears.
24. The Multi-Elastic Dragon Braid
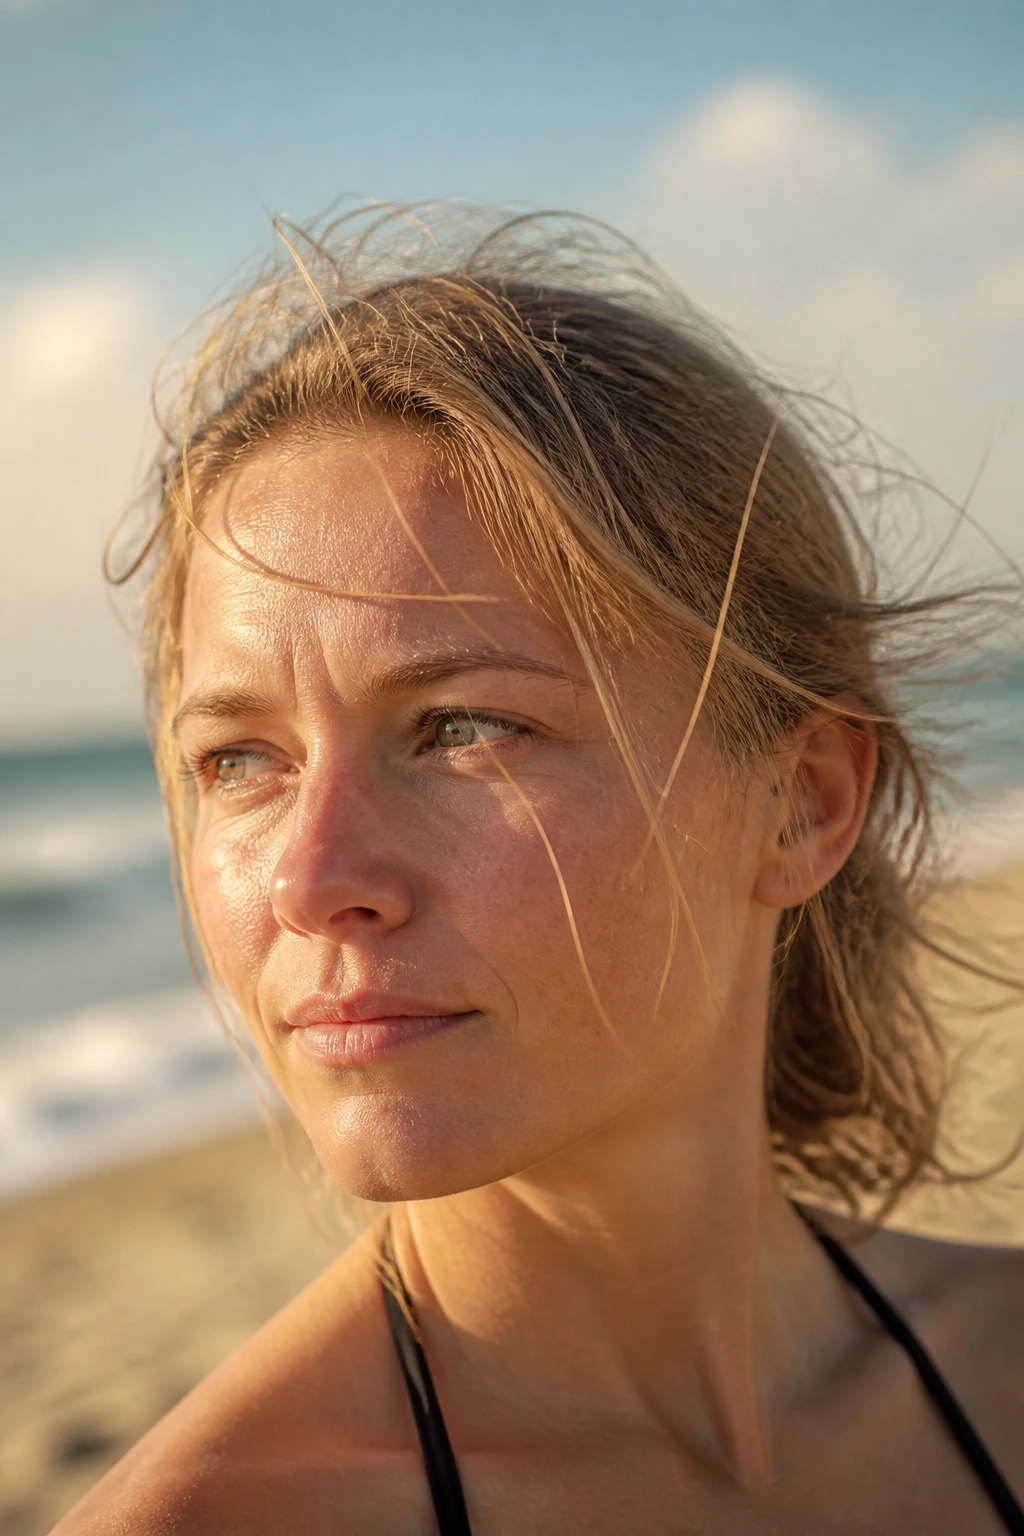
This style is a variation of the pull-through braid that sits high on your head, creating a striking, voluminous look that keeps your hair completely secure.
Start by pulling the top section of your hair into a high ponytail. A few inches down, add another clear elastic. Take the hair between the two elastics, split it in half, and pull the rest of your hair up and through the split. Secure it with another band.
As you repeat this process down your head, you will create a beautiful, segmented pattern that looks incredibly thick and full of energy. It is a fantastic choice for windy days on the water because the multiple elastics ensure that no strands can escape and tangle.
25. The Air-Dried Shag with Sea Salt Mist
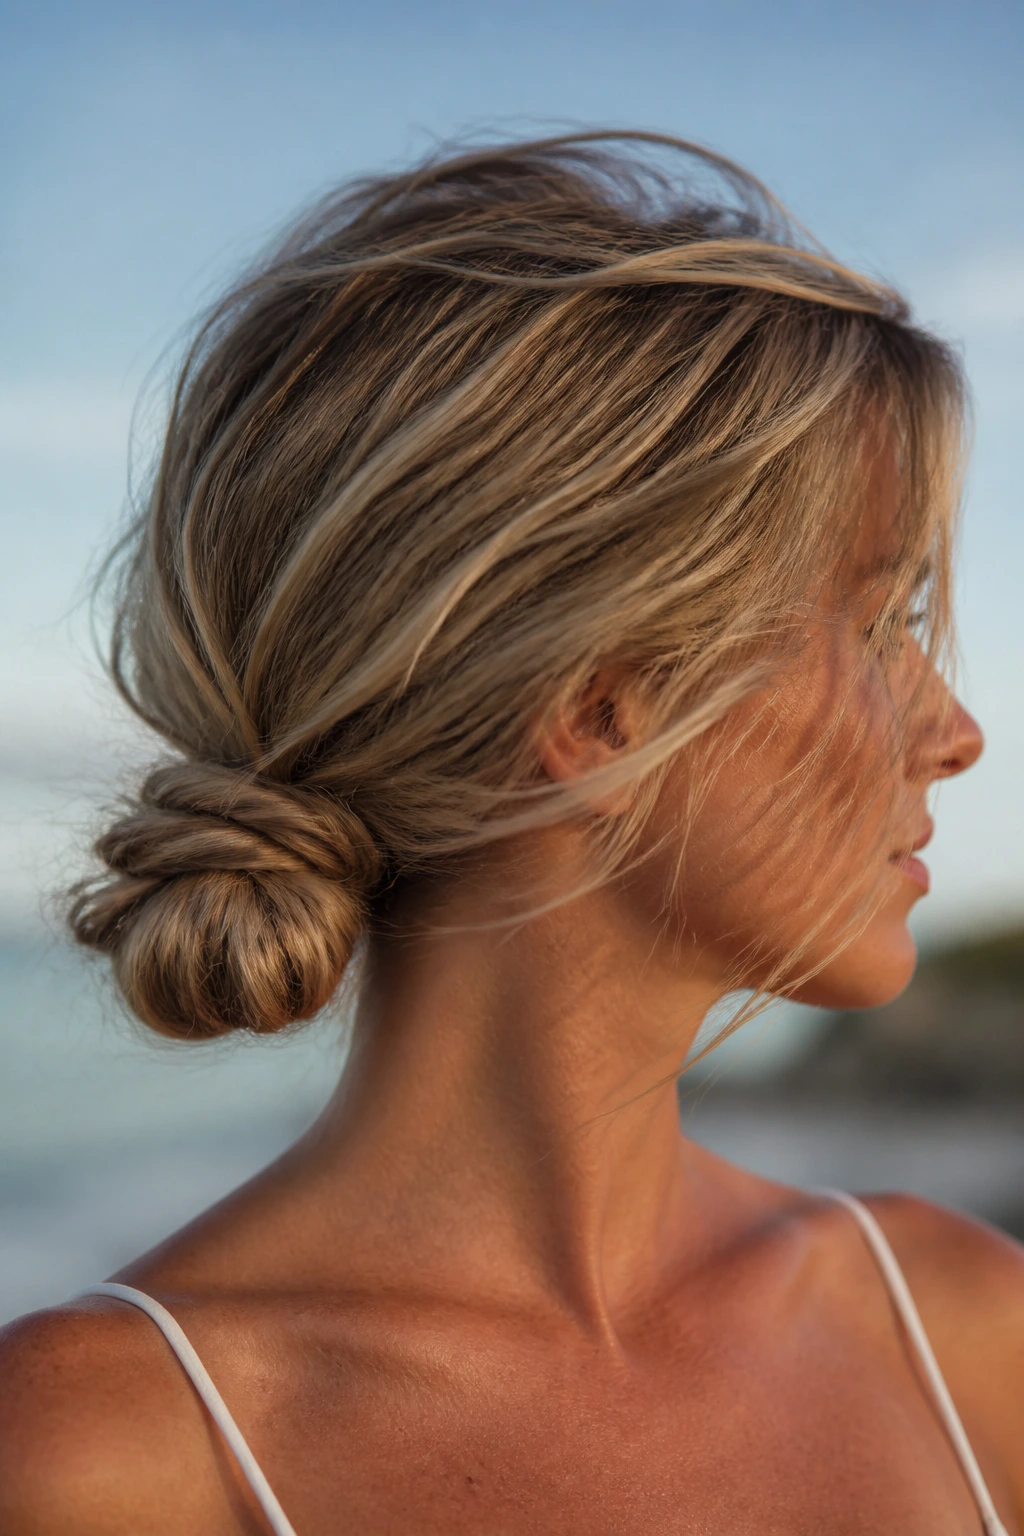
If you want to let your hair hang completely loose, the key is to embrace natural texture and movement. A shag-style cut is perfect for fine hair because the shorter layers naturally build volume.
To style this look for the beach, apply a generous mist of lightweight sea salt spray to damp hair. Use your fingers to scrunch your hair upward, encouraging any natural wave or bend. Let your hair air-dry in the sun and wind, avoiding the urge to brush it out.
The salt spray will coat your fine strands, creating friction and texture that prevents your hair from clumping together and looking thin. It is an effortless, wild look that is perfect for a relaxed day by the ocean.
Crucial Hair Products for Fine Hair in Sand and Sun
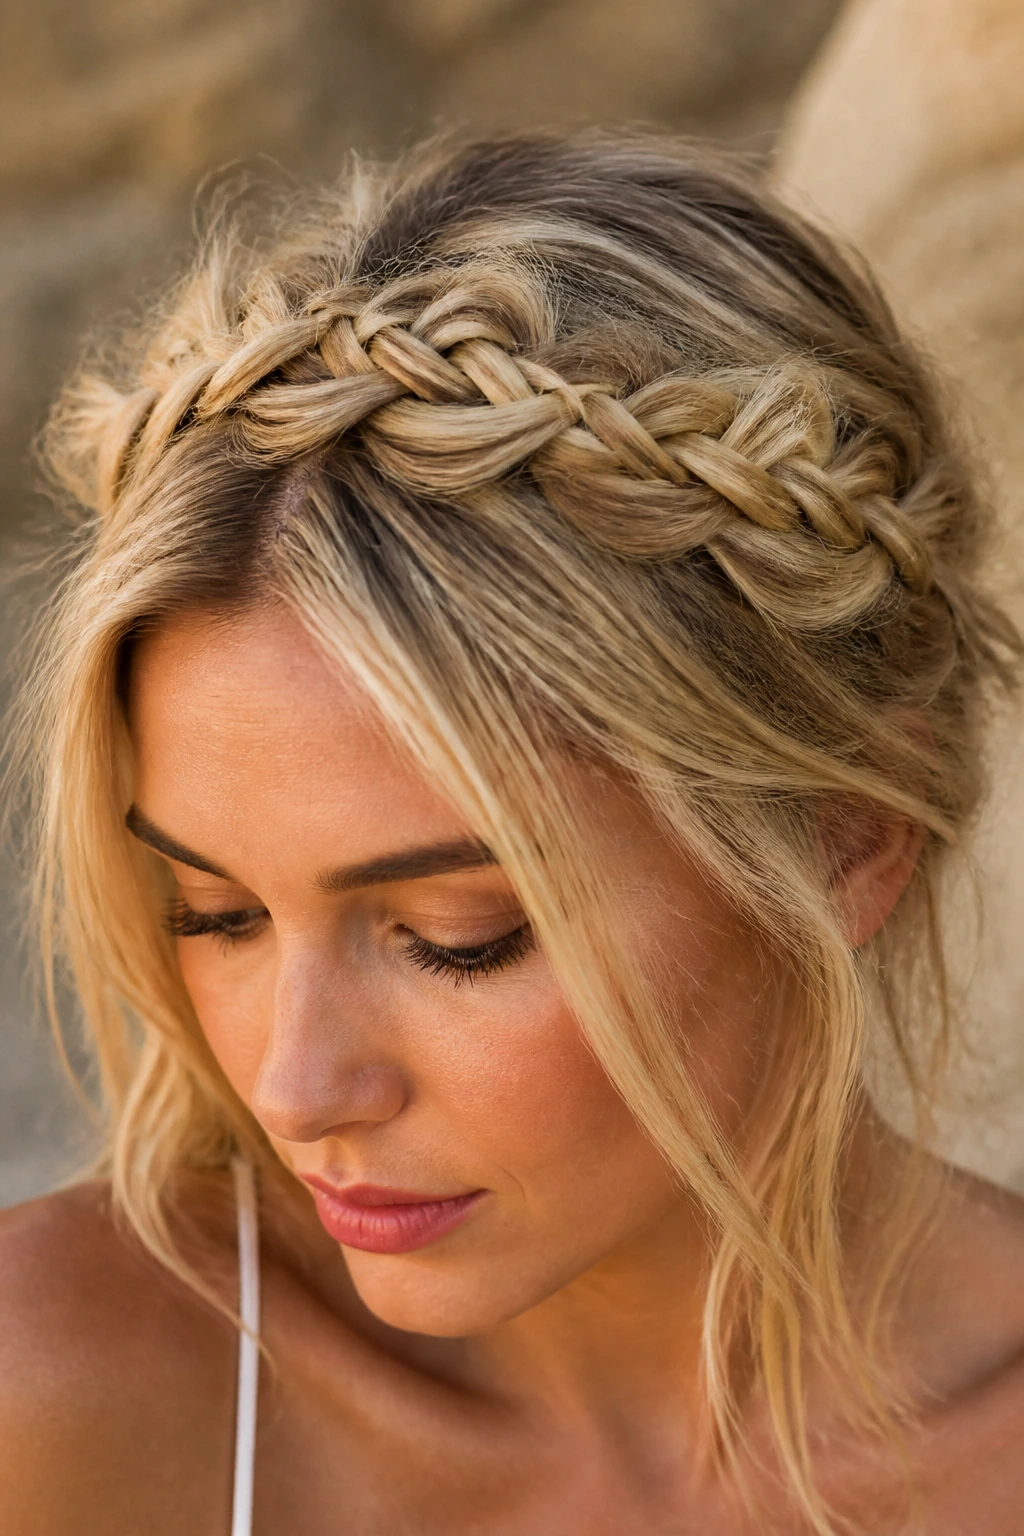
Having the right styling techniques is only half the battle; you also need to use the right products to protect your fine strands and keep them looking full. When shopping for beach hair products, look for formulas that are specifically designed to add texture and volume without adding weight.
The Power of Sea Salt Sprays
Sea salt spray is a staple for a reason, but not all of them are created equal. Some formulas can be incredibly drying, which can cause fine, delicate hair to break easily. Look for sea salt sprays that also contain nourishing ingredients like aloe vera, coconut water, or argan oil. These ingredients will give you that gorgeous, textured grip while keeping your hair hydrated and protected from the drying effects of the sun.
| Product Type | Best Use | Key Benefit for Fine Hair |
|---|---|---|
| Sea Salt Spray | Mid-lengths and ends | Adds texture, grip, and natural waves |
| Dry Shampoo | Roots and crown | Absorbs oil, sweat, and boosts volume |
| Leave-In UV Spray | All over damp hair | Protects strands from sun damage and dryness |
| Matte Pomade | Baby hairs and hairline | Secures flyaways without looking greasy |
Wet Brushes and Wide-Tooth Combs
Brushing fine hair when it is wet or full of salt water is a major cause of breakage. Never use a standard bristle brush on wet, salty hair. Instead, always pack a wide-tooth comb or a dedicated wet brush in your beach bag. These tools are designed to glide through tangles gently, preventing damage to your delicate hair fibers.
Wrapping Up
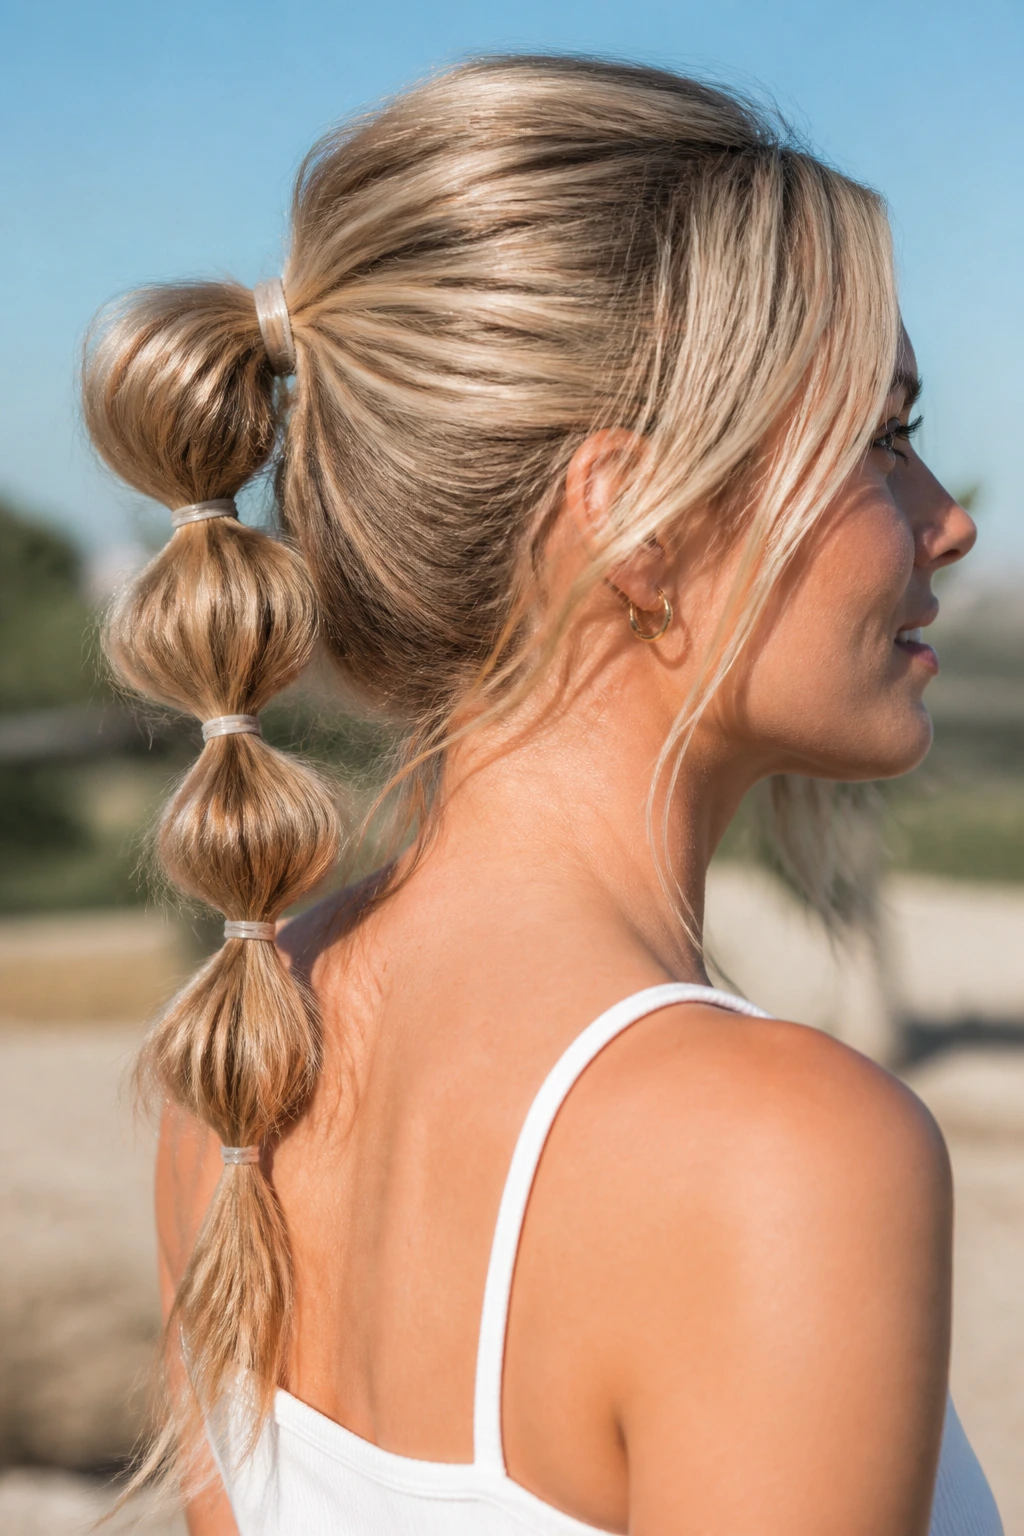
Fine hair does not have to mean boring or high-maintenance hair when you are headed to the beach. By choosing styles that work with your natural texture, using clever positioning to build volume, and keeping your styling products lightweight, you can enjoy the sun and sand without spending a second worrying about your hair.
Whether you opt for a secure crown braid, a playful bubble ponytail, or a simple, chic bandana wrap, these styles will keep you looking effortlessly beachy and beautiful all summer long. Pack your beach bag, grab your favorite texture spray, and get ready to enjoy your next seaside adventure with complete confidence.
