



The morning alarm goes off, and the battle begins. You have exactly thirty minutes to get dressed, drink something caffeinated, and make your hair look like you spent an hour on it. Usually, the default is a slicked-back ponytail that pulls your skin tight or a completely unstyled mess that looks like you rolled out of bed—because you did. There is a middle ground. A styling choice that speaks of competence, ease, and a bit of character.
That middle ground is the messy knot. It is not the severely lacquered bun of previous generations, nor is it the gym-bound topknot that looks like a pineapple. This is about strategic chaos. It is a styling approach that relies on friction, natural texture, and a few well-placed pins to create a shape that looks relaxed but is completely secure. It says you are too busy doing excellent work to worry about stray hairs, yet you still manage to look exceptionally put together.
To get these styles to hold throughout a long workday of meetings and desk tasks, you have to throw out the idea that clean hair is the best hair. Squeaky-clean hair has no grip. It slips out of pins and collapses under its own weight. If you are working with freshly washed hair, you need to fake the texture. A dry texturizing spray, a light dusting of volumizing powder, or even a bit of sea salt spray will give your strands the grit they need to stay where you put them.
Let us look at how to master these shapes for the office, starting from simple twists and moving into more structured, creative knots.
1. The Low-Slung Twisted Chignon
You are running ten minutes late and have a morning presentation. This is the knot you choose when you need to look like you have your life completely under control. It sits right at the nape of your neck, resting softly against your collar.
The Art of the Low-Slung Twist
This shape relies on creating two separate sections of hair, twisting them around each other, and securing them with a minimalist hair pin. By splitting the hair first, you distribute the weight of your hair evenly, which keeps the knot from sagging by lunchtime.
Quick Styling Steps
- Split your hair into two equal low ponytails, holding one in each hand without using elastics.
- Tie the two sections into a simple, loose knot, just like you would tie a pair of shoelaces.
- Take the remaining ends of the hair and wrap them gently around the center knot.
- Tuck the ends underneath and slide a U-shaped hairpin downward through the center of the knot to lock it against your scalp.
Pro tip: Pull a few small strands free around your ears to keep the front of your hair from looking too severe or flat.
2. The French Twist Hybrid
A classic French twist can sometimes feel a bit too stiff, like you are playing a character in a period movie. This hybrid version keeps the elegant vertical line of the classic twist but lets the ends break free at the top for a softer, modern feel.
The secret here is using your hands as the primary shaping tool rather than a brush. You want to sweep your hair to one side, holding it flat against the back of your head with one hand. Once you have it positioned, you insert bobby pins vertically from the bottom up along the center line to create a stable anchor wall.
When you fold the hair back over those pins, you are creating a pocket. Instead of tucking the very tips of your hair inside that pocket, you let them spill over the top like a fountain. This creates a messy, textured crown that balances the sleekness of the twist underneath. It looks incredibly chic when paired with a high-necked blouse or a structured blazer.
3. The Double-Loop Half-Up Knot
Why does this half-up style work so well for a casual office environment? It keeps the hair completely out of your face while still showing off your length and natural texture in the back.
This style is particularly great for days when your hair has some wave or curl to it. You get the polish of a bun with the softness of loose hair, making it a great choice for creative workplaces.
How to Build the Loop
To get this look, gather the section of hair above your ears and pull it back to the crown of your head. Instead of pulling the hair all the way through your elastic band on the final wrap, leave it as a small loop. Take the remaining tail of that loop, split it in half, and wrap those two pieces in opposite directions around the base. Fasten them with small bobby pins underneath the bun to hide your work.
4. The Loop-Through Low Bun
You have exactly thirty seconds before a video call starts and your hair is a wild, unstructured mess. The loop-through low bun is the absolute fastest way to look professional without needing a mirror.
The Fast-Loop Technique
This method is all about utilizing the elastic band to do the heavy lifting for you, creating a folded shape that looks far more intricate than it actually is.
- Pull your hair into a low ponytail at the nape of your neck using a strong elastic.
- On the very last pass of the elastic, pull the hair only halfway through to create a loop that points downward.
- Take the loose ends that are hanging down and wrap them upward around the elastic band to cover it completely.
- Secure those ends by tucking them directly into the elastic band itself, requiring zero bobby pins.
This shape has a beautiful, compact look that stays flat against your head, meaning you can lean back in your office chair without your hair getting pushed out of place.
5. The Topknot with Face-Framing Tendrils
There is a fine line between an office-appropriate topknot and a messy bun you wear to wash your car. The difference lies entirely in the details and how you prep the front of your hair.
To make a topknot work for the office, start by applying a tiny bit of lightweight styling cream or oil to your palms. Run your hands over the sides of your head as you pull your hair up to the very top of your crown. This controls any wild flyaways while leaving the bun itself loose, voluminous, and textured.
Once the bun is secured with an elastic, use your fingertips to gently massage your hairline. This releases those baby hairs and shorter layers around your temples and ears. These soft, face-framing strands break up the roundness of your face and make the high bun look intentional rather than rushed.
Keep the bun itself light and airy by gently tugging at different sections of the loop to expand its size. If you have fine hair, you can lightly backcomb the ponytail before looping it to create the illusion of double the volume.
6. The Side-Swept Braided Knot
Unlike a standard side ponytail, which can sometimes look a bit young or sporty, this side-swept braided knot has an asymmetric elegance that feels highly sophisticated.
This style shifts the focal point of your hair to one side, resting just behind your ear. It is a brilliant way to show off a great pair of earrings or the collar detail of a structured coat. It is best suited for medium to long hair lengths that have enough slip to drape over one shoulder.
To create it, start a loose three-strand braid behind one ear and secure the end with a small, clear elastic. Roll that braid upward into a flat, rose-like spiral against your head, tucking the tail underneath. Use three or four large bobby pins around the perimeter of the spiral to lock it flat against your scalp, keeping the braid loose so the texture remains visible.
7. The Three-Section Stacked Bun
When you have incredibly thick or heavy hair, a single messy knot can often result in a headache by midday. The weight of the hair pulls on a single point of your scalp, causing tension.
Managing Heavy Hair
By dividing your hair into three equal vertical sections, you distribute the weight across your entire head. This not only makes the style incredibly comfortable to wear for twelve hours straight, but it also creates a stunning, architectural look that resembles a professional updo.
Quick Styling Steps
- Divide your hair into three equal vertical sections down the back of your head: top, middle, and bottom.
- Secure each section into a small loop bun, stacking them directly on top of each other along the center line.
- Take the loose ends of the top bun and tuck them into the middle bun, then take the ends of the middle bun and tuck them into the bottom one.
- Use a few bobby pins to connect the edges of the three buns together so they look like one continuous, textured knot.
Pro tip: Use matte bobby pins that match your hair color exactly so the structural support remains completely invisible.
8. The Messy Shell Knot
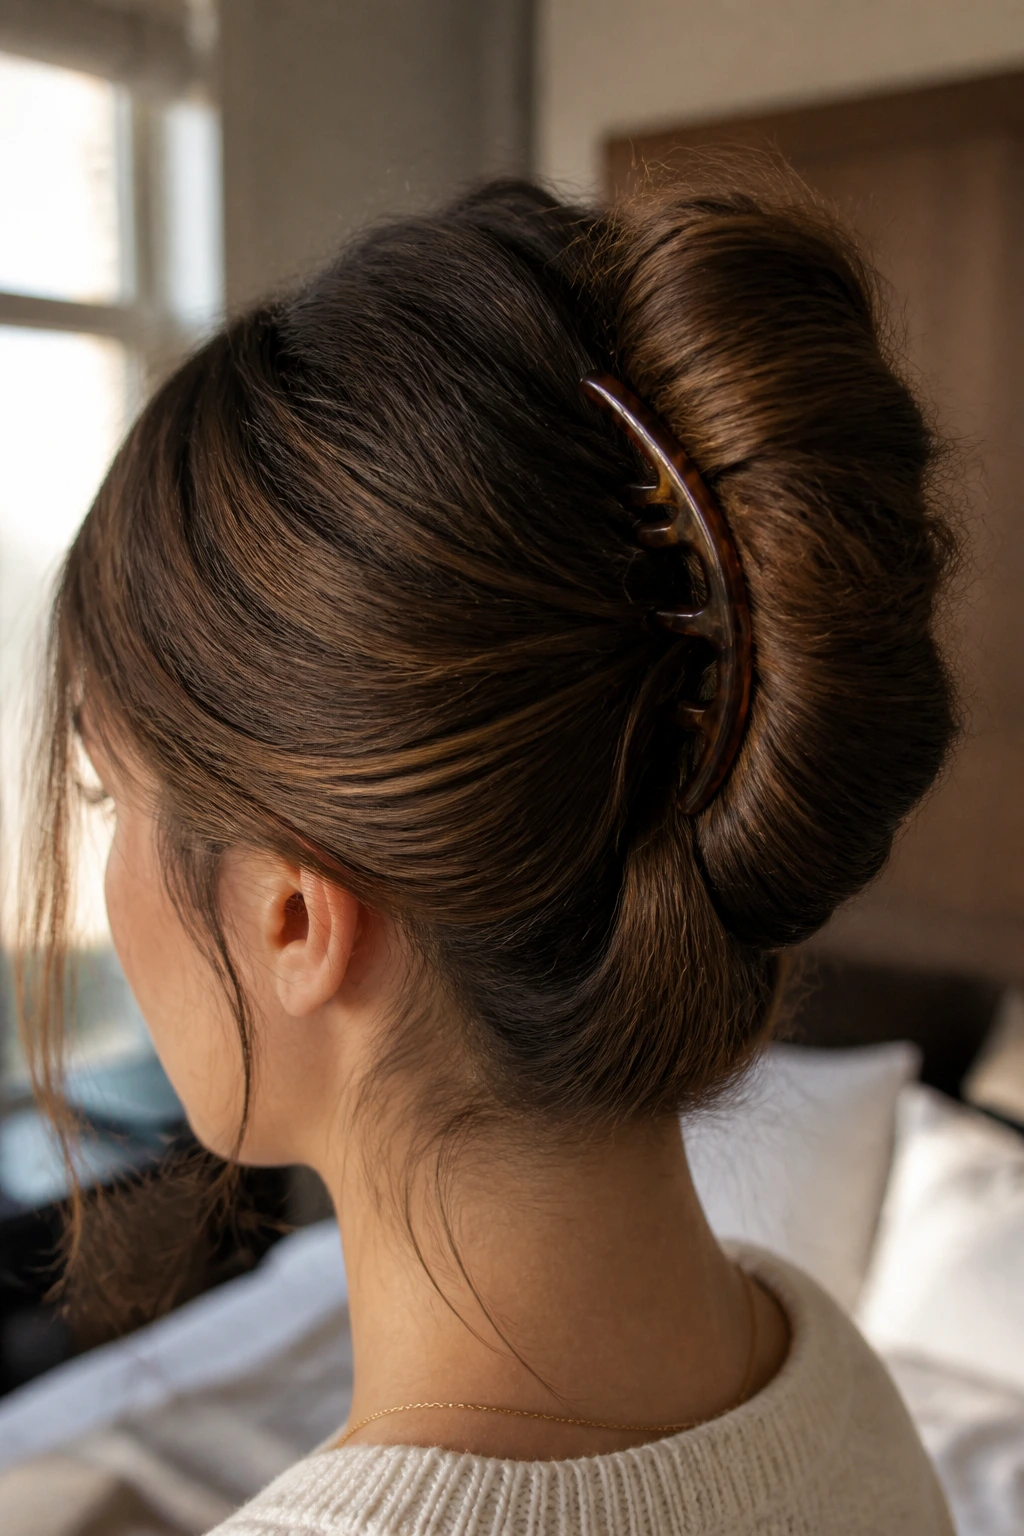
The best hair accessories are completely invisible, and this style relies on the natural curves of your hair to create its shape. It looks like a sea shell resting at the back of your head.
To get this look, you want to gather your hair into a mid-level ponytail. Twist the entire length of the hair tightly in one direction until it begins to coil back on itself naturally. Instead of letting it wrap into a standard round bun, guide the coil upward and flat against your head, creating a elongated vertical shape.
Slide a large, curved hair fork or crescent-shaped pin through the top layer of the coil, catch a small amount of hair against your scalp, and push the pin down. The tension of the twisted hair will hold the pin firmly in place, giving you a secure, comfortable hold that requires no elastics at all.
9. The Claw-Clip Tuck Bun
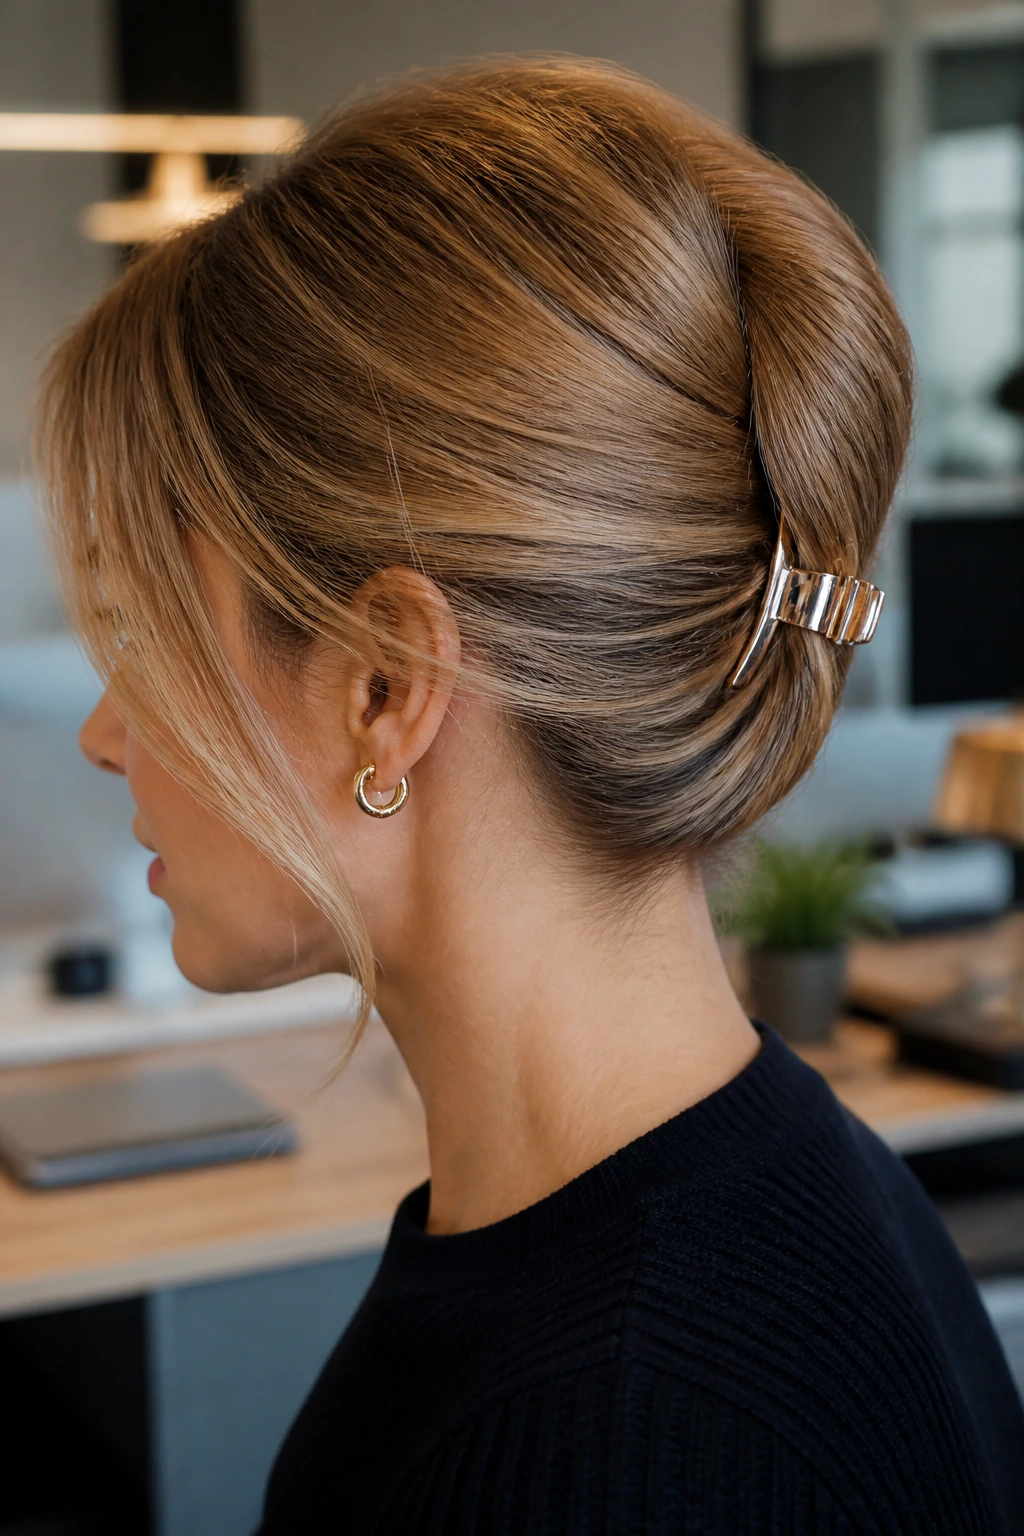
Is the claw clip actually appropriate for a formal office setting? Absolutely, provided you choose the right clip and use a styling technique that hides the more casual elements of the look.
This style is perfect for those days when you want your hair completely up and away from your collar, but you do not want the tension of elastics or the hassle of multiple bobby pins.
Selecting the Right Clip
For a professional setting, skip the brightly colored plastic claw clips and opt for a sleek metal clip in gold, silver, or tortoiseshell. A matte finish or a geometric design instantly makes the accessory feel like a piece of jewelry rather than a bathroom utility item.
To style, gather your hair at the nape of your neck and twist it upward into a tight column. Fold the column in half so the ends point back down toward the floor. Place your metal claw clip directly over the center of the fold, capturing both the twisted column and the hair underneath against your scalp. Let the ends drape softly over the top of the clip to hide the teeth.
10. The Spiky Y2K Knot
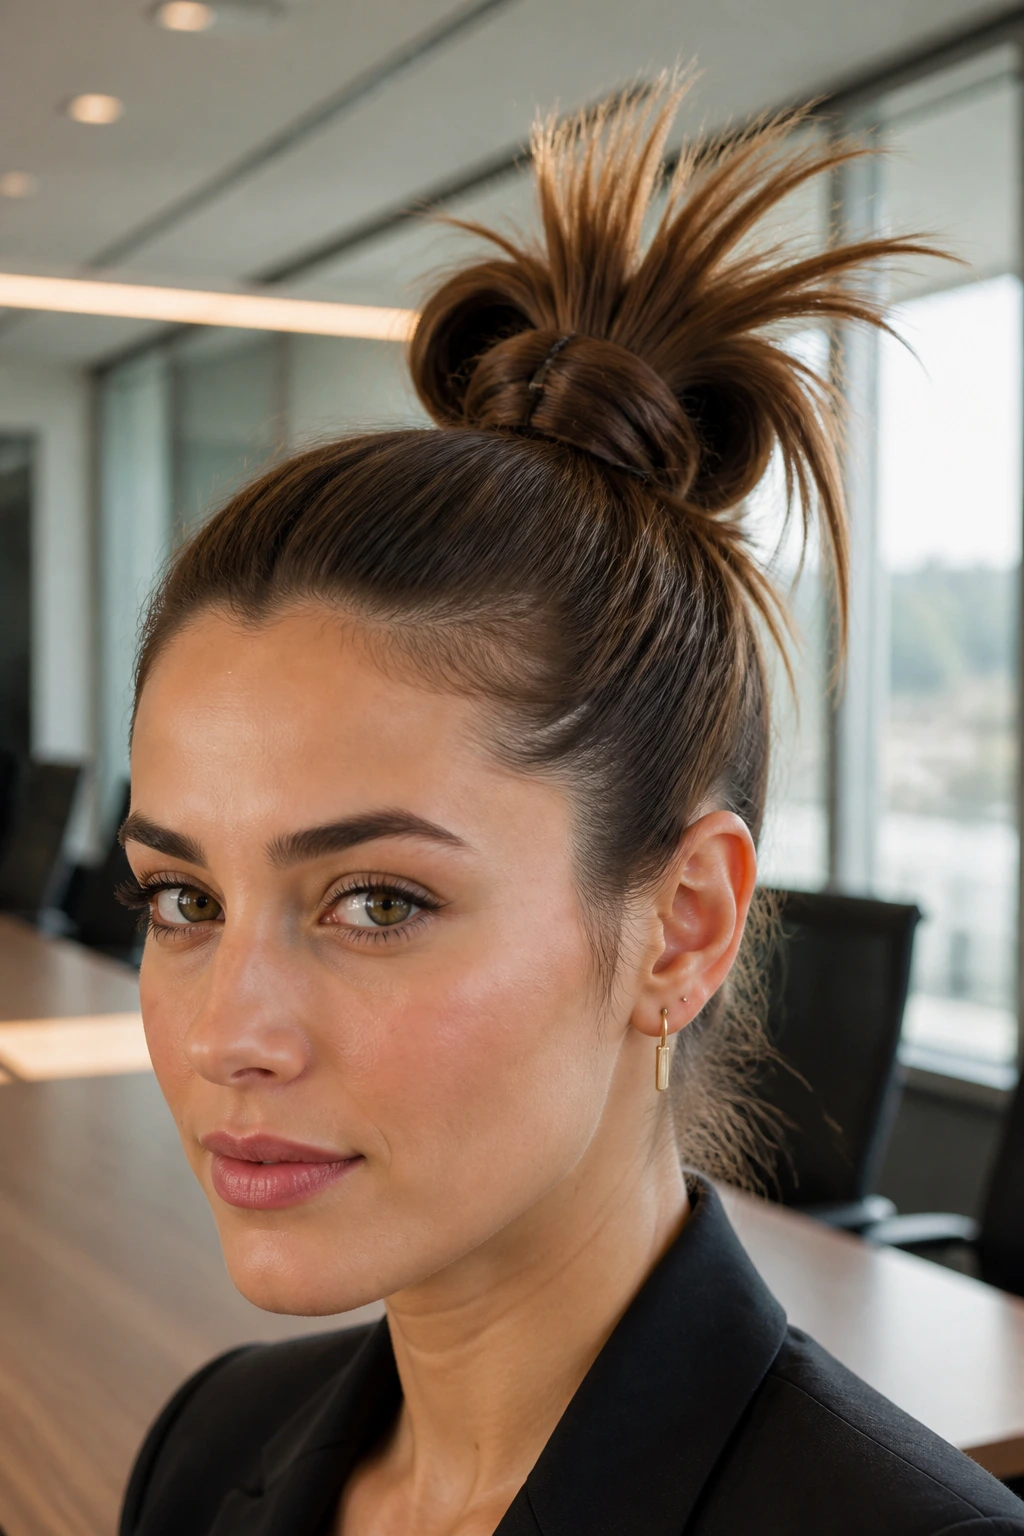
During the midday slump when your collar feels stiff and you need a quick refresh, this spiky knot offers a clean, energetic look that feels modern and sharp.
The Tail-Out Technique
This style plays with contrast, combining a smooth, secure base with sharp, textured ends that fan out at the top of the knot.
- Apply a tiny drop of hair oil to your palms to smooth down the sides of your hair as you pull it into a high ponytail.
- Loop the hair through an elastic band, but leave at least three to four inches of the ends sticking out of the top.
- Fan those ends out so they frame the top of the loop, using a tiny bit of texturizing wax on your fingertips to make the ends look piecey and defined.
- Secure the base of the loop with two bobby pins crossed over each other for maximum hold.
The result is a look that feels incredibly fresh, polished, and just a little bit edgy while remaining entirely appropriate for a desk job.
11. The Folded Pretzel Bun
This is a beautiful, flat-profile knot that looks incredibly complicated but is actually based on a simple folding motion. Because it sits flat against the back of your head, it is highly comfortable if you spend your workday leaning against a high-backed office chair or a headrest.
To create the pretzel shape, start by making a low ponytail and securing it with an elastic. Split the tail into two equal sections. Loop the left section upward and through the space above the elastic, pulling it only halfway through to create a loop on the left side. Repeat this exact motion with the right section on the right side.
Take the remaining ends of both sections, cross them over the center of the elastic to hide it, and pin them underneath. The result is a symmetrical, woven knot that looks like a beautiful, handcrafted pretzel. It has a very low profile and holds its shape beautifully even if you have a habit of running your hands through your hair during stressful meetings.
12. The Silk Scarf Interwoven Knot
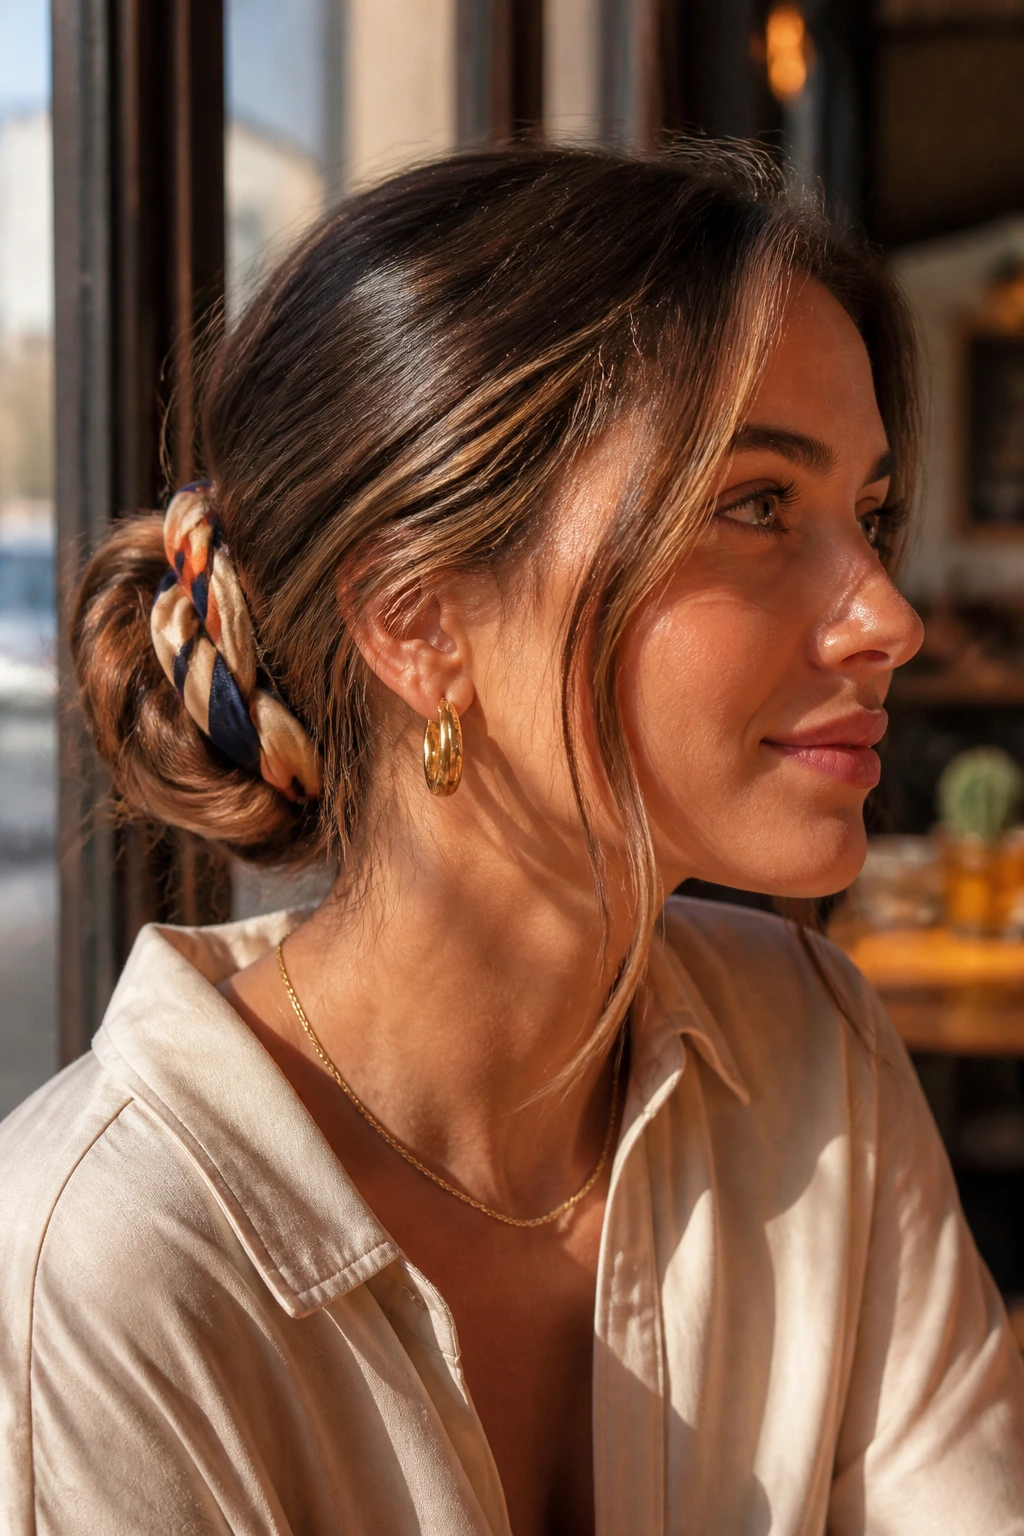
Using a simple silk scarf is an incredibly easy way to introduce a touch of color and pattern into your office wardrobe without wearing loud jewelry.
This style works best when you use a small, square silk scarf folded into a narrow band. It acts as both a structural element of the knot and a visual highlight.
Unlike plain elastic bands which can cause friction and breakage, the silk scarf protects your hair while adding instant polish to a simple bun. It is an excellent choice for third-day hair that needs a bit of a lift.
To style, tie the center of the folded scarf around the base of a low ponytail with a simple double knot. Divide your hair into two sections, letting one tail of the scarf merge with each section. Twist the hair and the scarf together, then wrap those two twisted sections around the base to form a low, patterned bun. Secure with bobby pins, letting the silk ends peek out softly from the edges.
13. The Half-Wrapped Cinnamon Roll
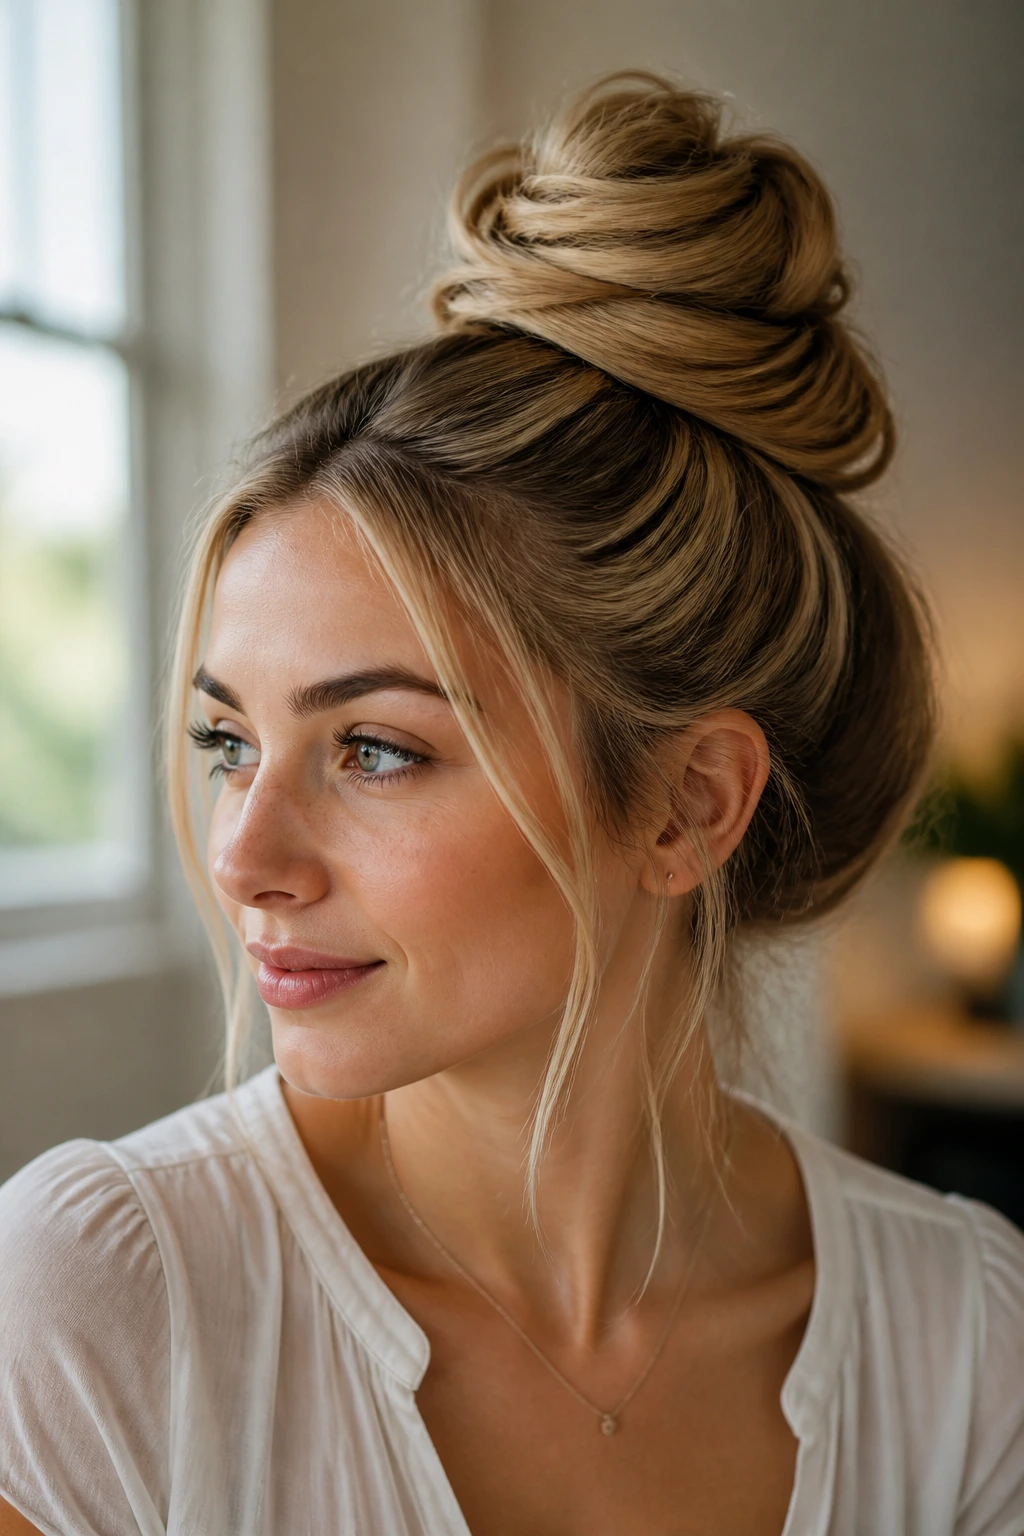
If you have very long hair, a standard bun can often feel too massive or heavy. This half-wrapped technique distributes the length of your hair to make the knot look smaller and more delicate.
Scaling Down Massive Volume
By wrapping only half of your hair into the core knot and using the rest to encircle the base, you create a beautiful layered effect that looks like a gourmet pastry.
Quick Styling Steps
- Pull your hair into a mid-height ponytail and split it into a top section and a bottom section.
- Twist the top section into a tight, compact bun and secure it firmly to your scalp with bobby pins.
- Take the bottom section, leave it loose and untwisted, and drape it smoothly around the base of the bun you just made.
- Tuck the ends of the draping section under the core bun and pin them in place.
Pro tip: Keep the outer wrap loose so it creates a soft frame around the tighter center, adding visual depth to the style.
14. The Deconstructed Crown Braid Knot
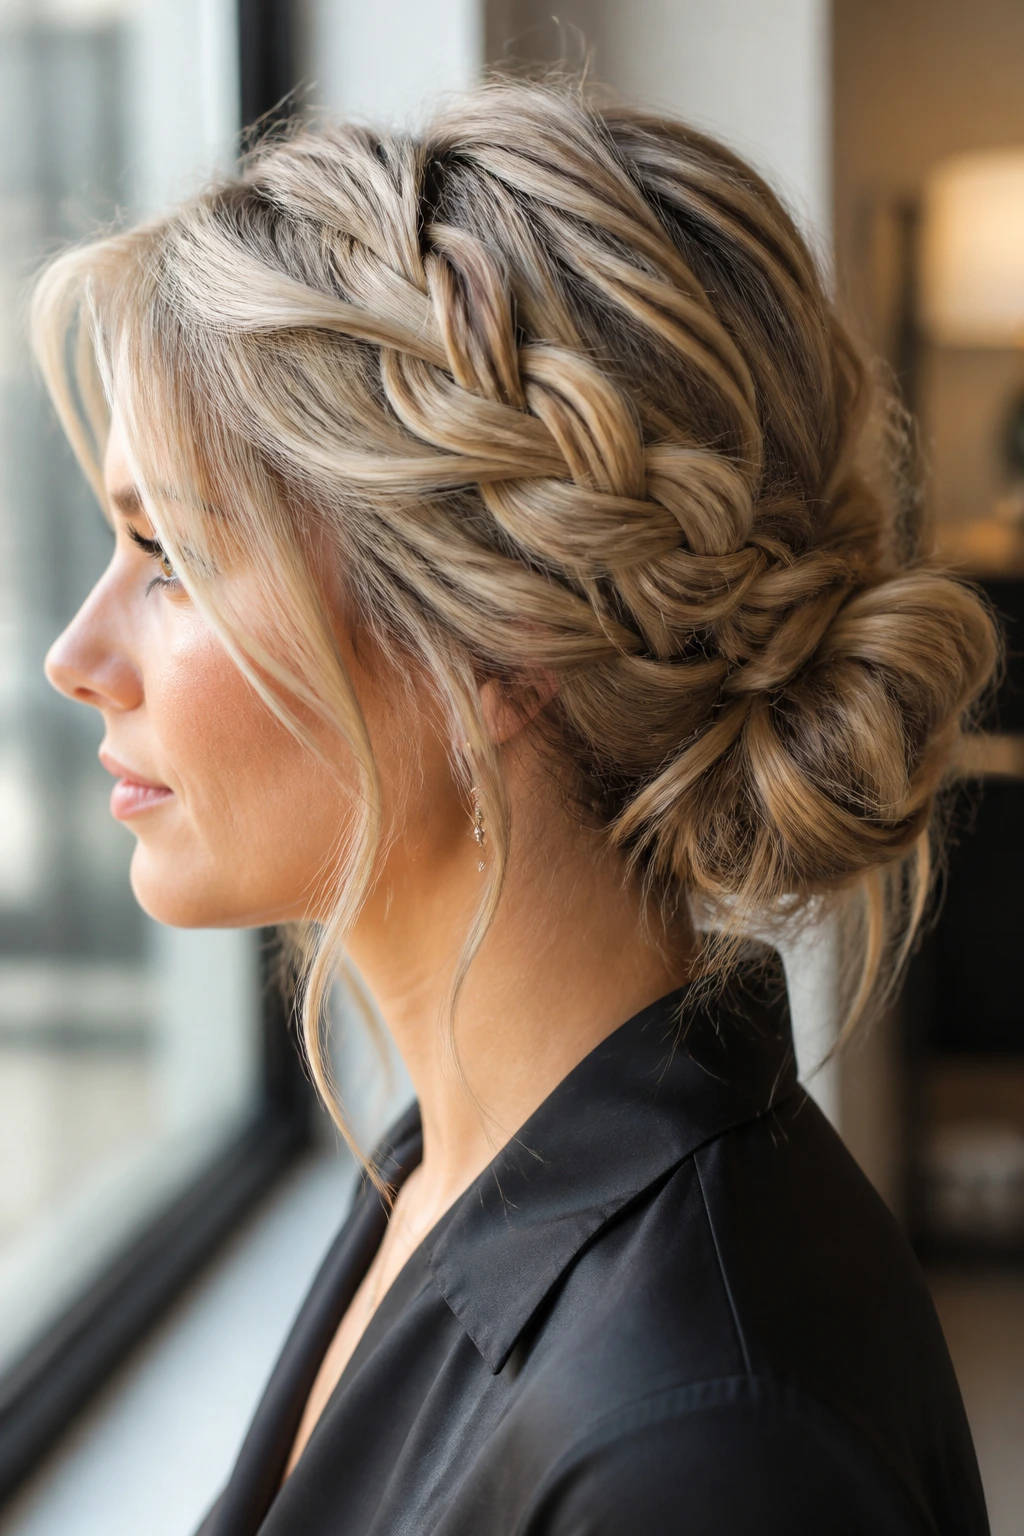
There are days when your schedule is packed with back-to-back meetings and you cannot afford to have a single strand of hair falling into your eyes. This deconstructed crown braid offers maximum security with a romantic, textured finish.
This style uses a loose French braid along the side of your head that feeds directly into a messy low knot. It is a fantastic option if you are growing out bangs or have shorter layers around your face that refuse to stay in a standard ponytail.
Start by parting your hair to one side. Take a three-inch section of hair from the heavier side of the part and begin a loose French braid, moving downward toward the nape of your neck. Once you reach the back of your head, gather all of your hair—including the braid—and twist it into a low, messy loop. Secure it with a thick elastic, then gently pull at the loops of the braid to make it look wider and softer.
15. The Lazy Girl’s Hairpin Twist
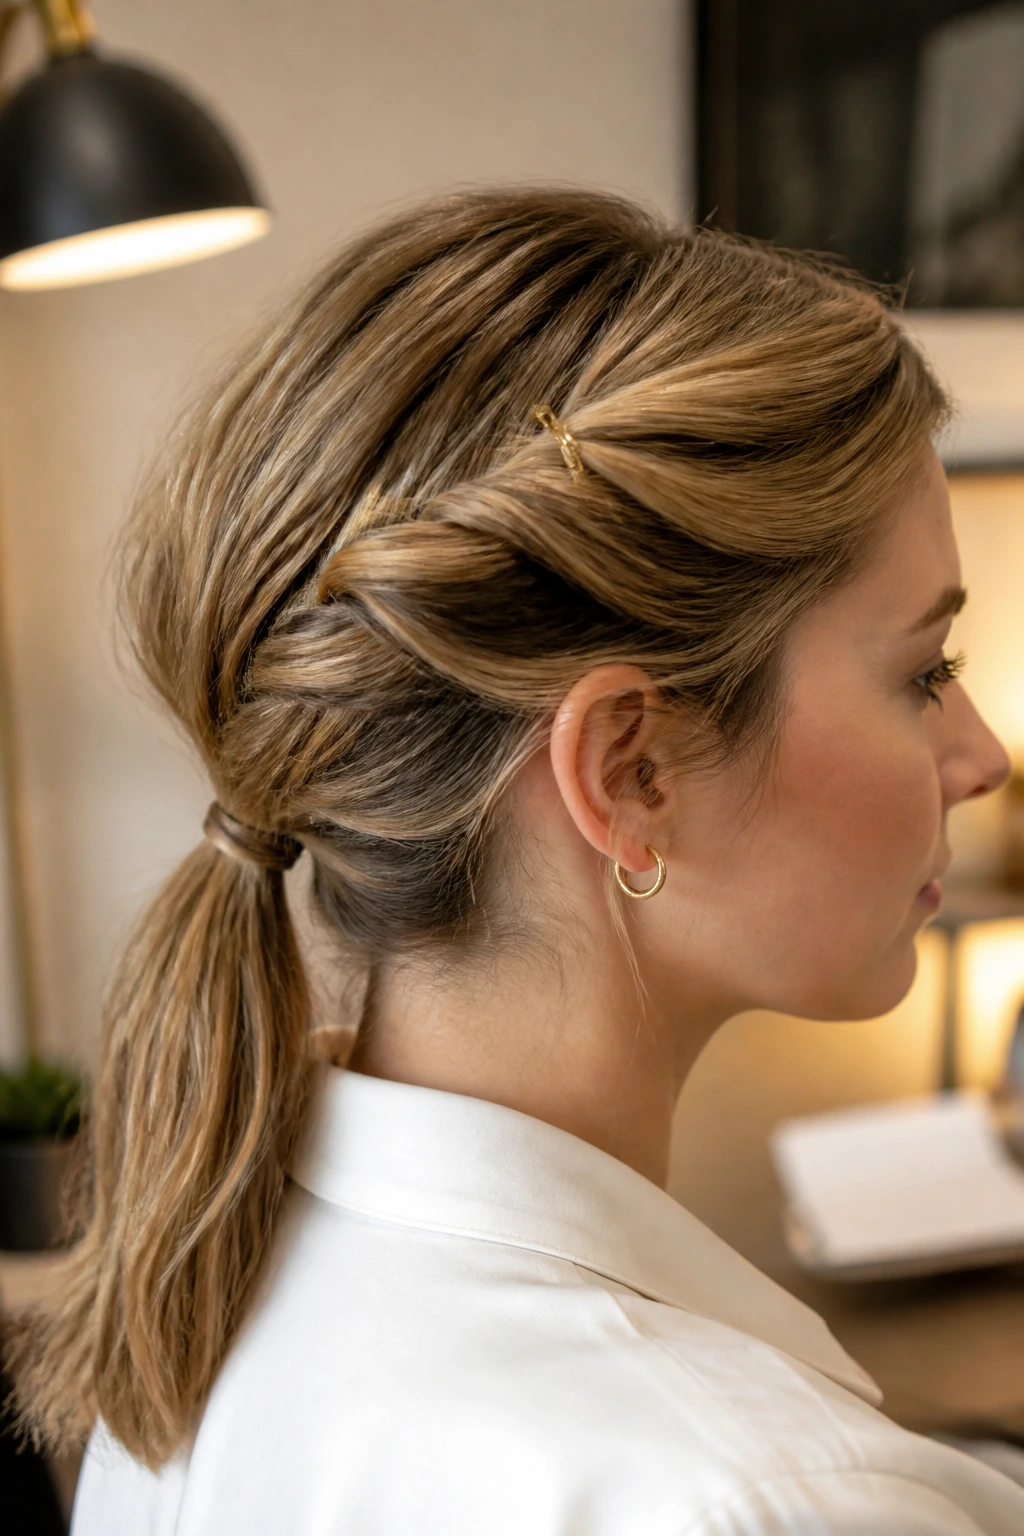
You are sitting at your desk, the afternoon heat is rising, and you just want your hair off your neck immediately. You do not have an elastic, but you do have a single wooden or metal hairpin in your desk drawer.
This style is the ultimate demonstration of effortless styling. It relies entirely on physics and tension to hold your hair up, requiring no prep and no extra tools.
The Physics of the Hairpin Twist
The key to making this style hold is the “flip” motion. You must insert the pin going in the opposite direction of the final hold, catch a small amount of scalp hair, and then flip the pin over to lock it.
How to Style It
Gather your hair into a low ponytail in your hand. Twist the hair tightly upward until it forms a rope, then coil that rope around its own base to form a spiral. Take your hairpin and insert it vertically down through the very top edge of the spiral, pointing the tips toward your forehead.
Once the tips touch your scalp, rotate the pin 180 degrees so the tips now point down toward your collar. Push the pin all the way down through the center of the coil. The knot will instantly tighten and lock flat against your head.
16. The Volumized Crown Knot
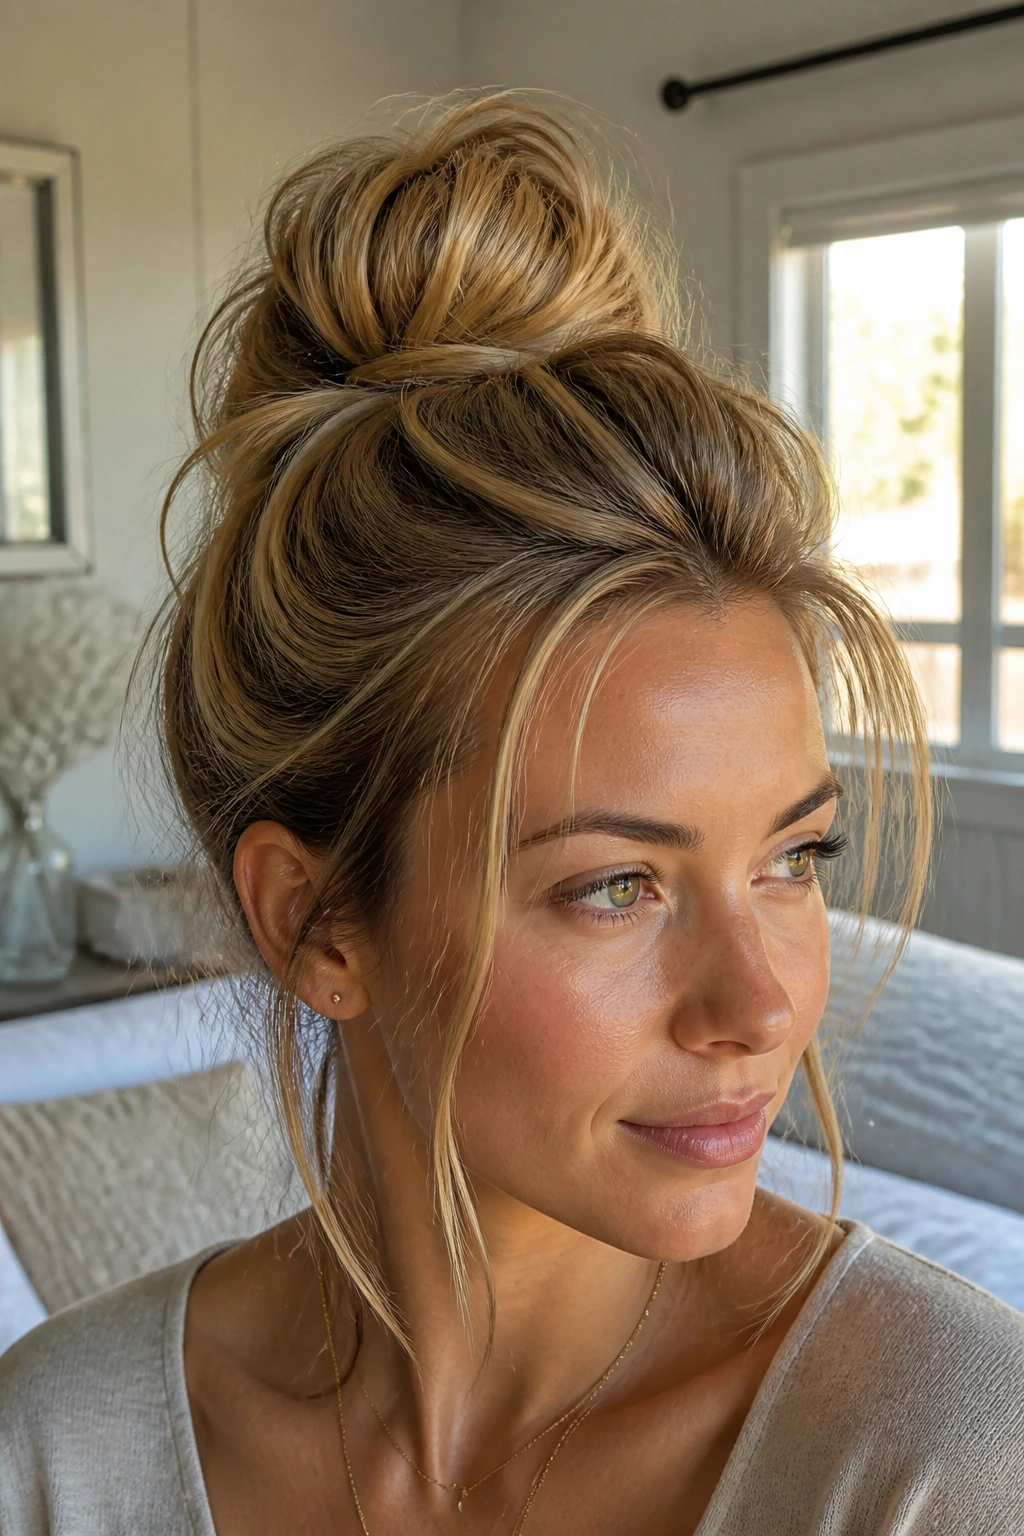
Fine, flat hair often looks swallowed up by a messy bun. If your hair tends to lie flat against your scalp, you need to create some structural height at the crown before you even think about building your knot.
Creating High-Impact Volume
This style uses a light backcombing technique at the crown to create an internal cushion of hair that supports the weight of the messy knot.
- Section off the top portion of your hair, from your hairline back to your crown, and lift it straight up.
- Use a fine-toothed comb to gently backcomb the underside of this section, focusing only on the three inches closest to your scalp.
- Smooth the top layer of hair back over the cushioned area using your fingers, keeping the volume intact.
- Gather all of your hair into a high ponytail, loop it into a messy knot, and pin it securely.
This creates a beautiful, balanced profile that flatters your facial features and keeps your hair from looking flat or lifeless in professional photos.
17. The Triple-Twist Low Knot
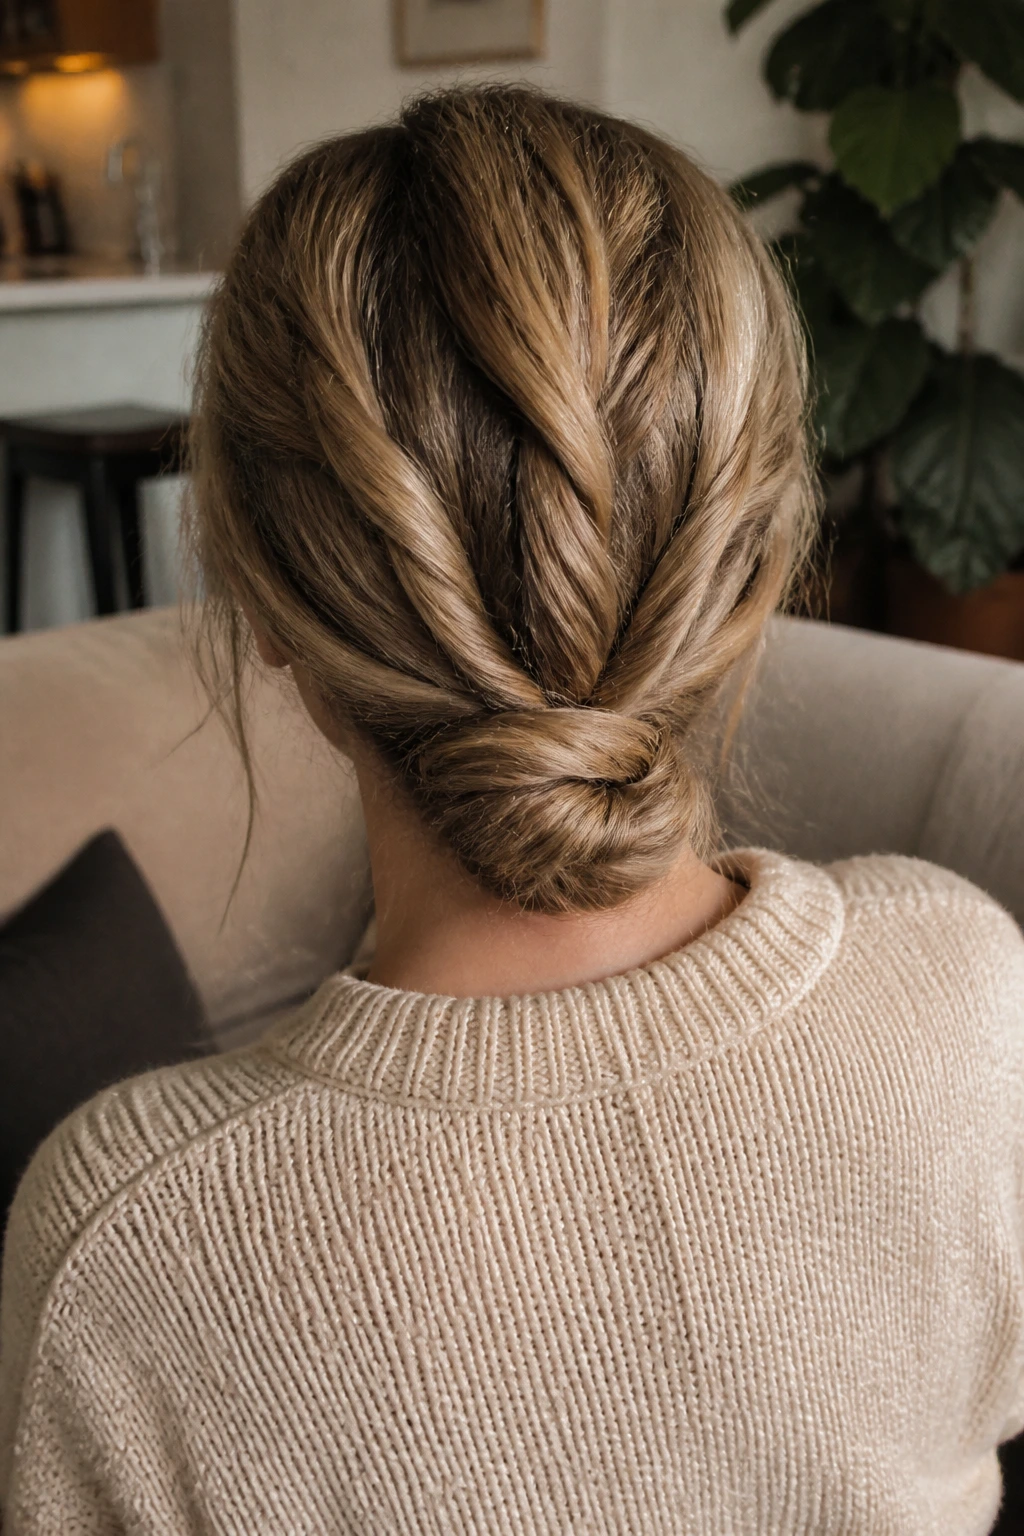
If you have slippery, straight hair that refuses to stay in a bun, this triple-twist method is your best defense against gravity. By twisting three separate sections of hair before combining them, you create an incredible amount of internal friction that keeps the style locked in place all day long.
To start, divide your hair into three equal vertical sections at the back of your head. Twist the left section tightly clockwise and pin it temporarily out of the way. Repeat this with the right section, twisting it counterclockwise. Finally, twist the middle section downward.
Gather all three twisted sections together at the nape of your neck and tie them into a single, loose knot. Tuck the remaining ends underneath the knot and secure them with four large bobby pins, pushing the pins in horizontally from the sides. The twists will lock against each other, creating a highly secure, textured shape that will not budge even during a fast-paced commute.
18. The Sleek-Front Messy-Back Hybrid
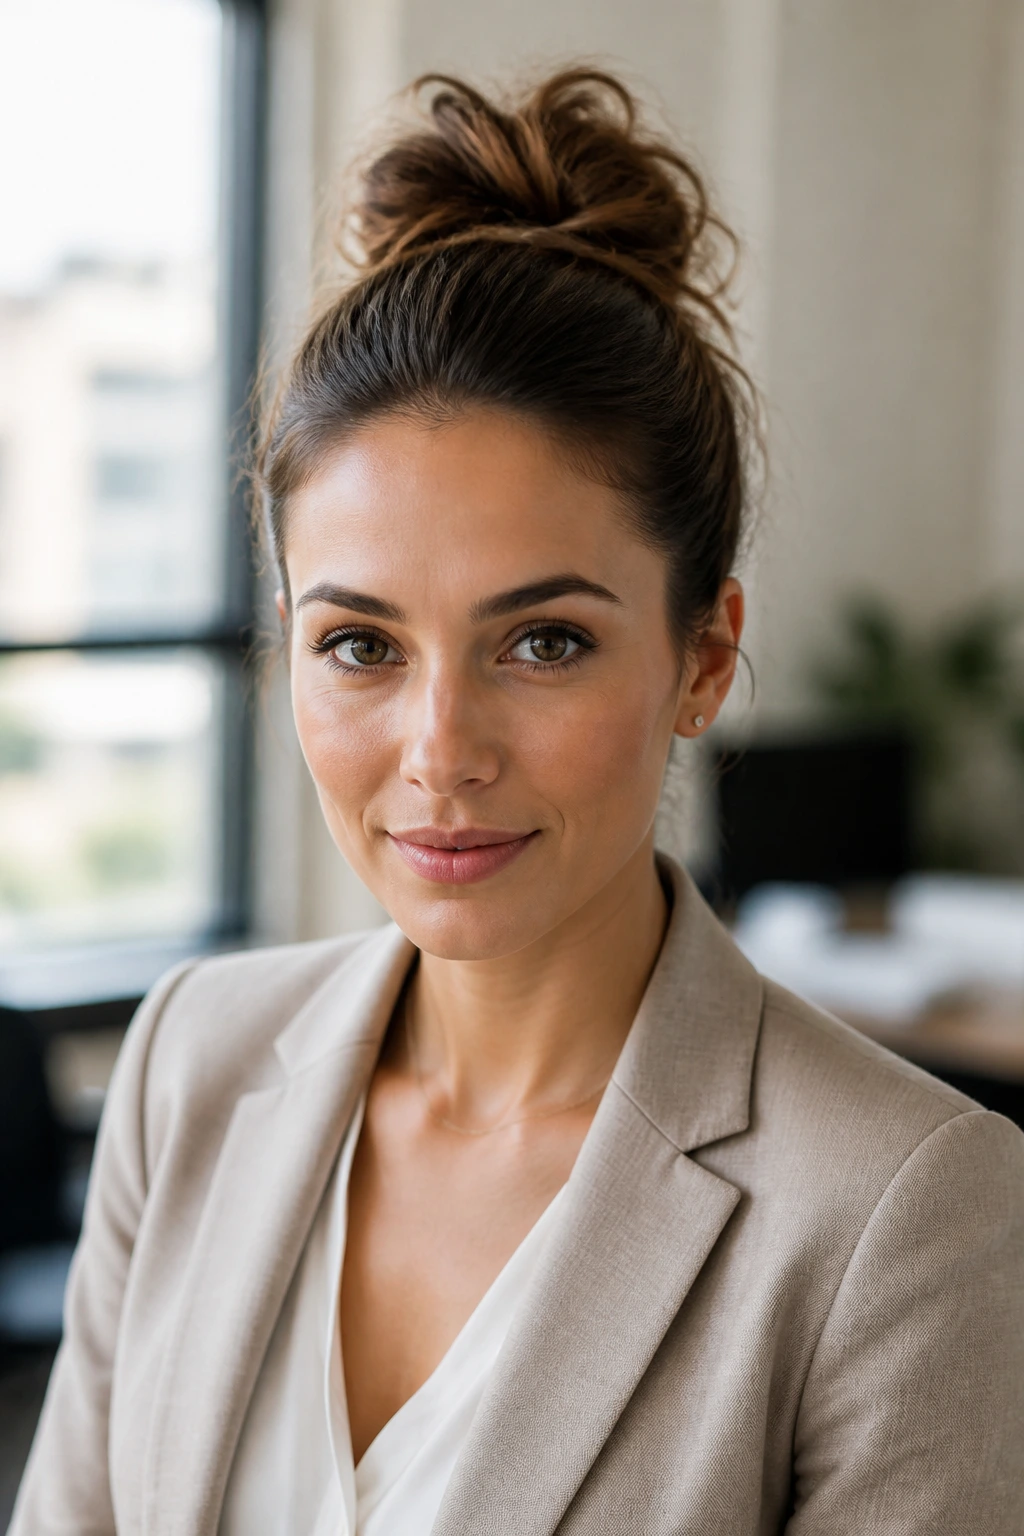
When you want to look incredibly polished from the front for a video presentation, but you still want the comfort and ease of a messy bun, this hybrid style is the perfect solution.
This style splits your hair into two distinct zones: a highly controlled, sleek front section and a textured, voluminous back section.
It is an excellent choice if you have curly or wavy hair and want to show off your natural texture while keeping your hairline clean and professional.
To achieve this, use a comb to create a clean center part that extends back about three inches. Apply a small amount of pomade or styling gel to a boar-bristle brush and sweep the front sections of your hair smoothly back behind your ears. Secure them at the back of your head with a small elastic.
Gather the rest of your hair, along with the tail of the front section, and loop it into a high, textured messy bun, letting your natural curls or waves run wild.
19. The Knotted Low Ponytail Bun
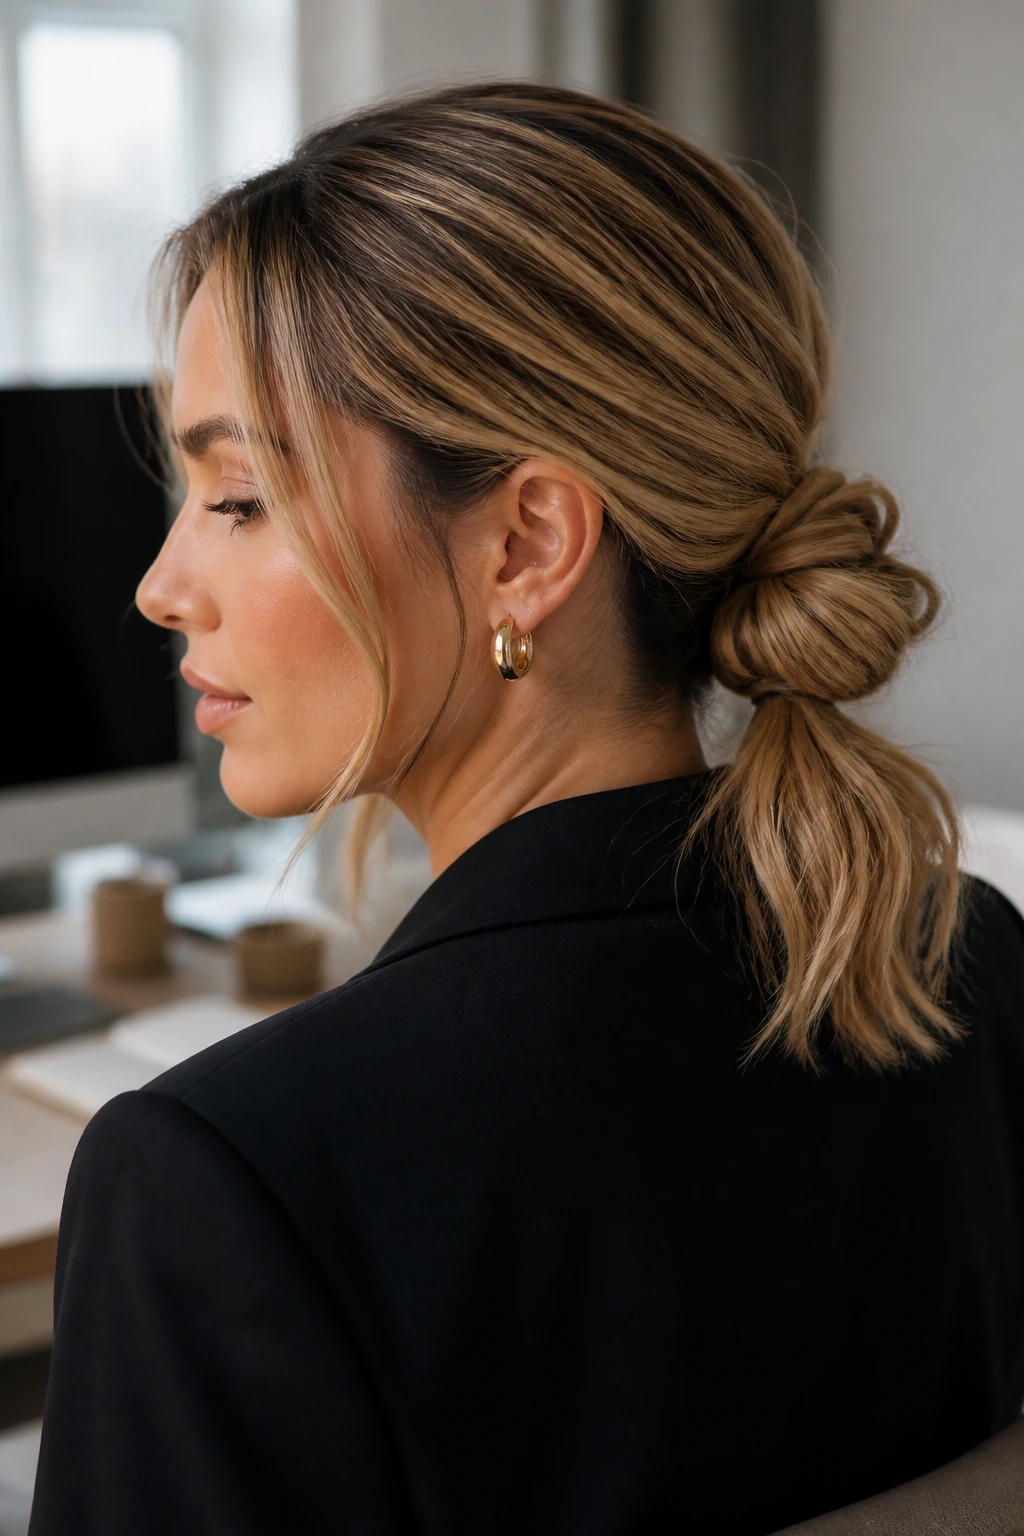
This style is the perfect compromise between a classic low ponytail and a full updo. It has the movement and length of a ponytail, but the clean structure of a bun.
The Half-In, Half-Out Look
By securing only the top half of your ponytail in a loop, you get the best of both worlds: a clean, compact shape at the base and a soft cascade of hair below.
Quick Styling Steps
- Pull your hair into a low ponytail and secure it with a strong, high-grip elastic.
- Take a two-inch section of hair from the underside of the ponytail and wrap it around the elastic to hide it completely.
- Take the top half of the remaining ponytail and fold it upward to create a loop, securing the middle of the loop to your scalp with a bobby pin.
- Let the bottom half of the ponytail hang loose underneath the loop, creating a beautiful layered cascade.
Pro tip: Use a curling iron to add a slight wave to the loose section of hair to make the overall style look cohesive and soft.
20. The Faux-Hawk Textured Knot
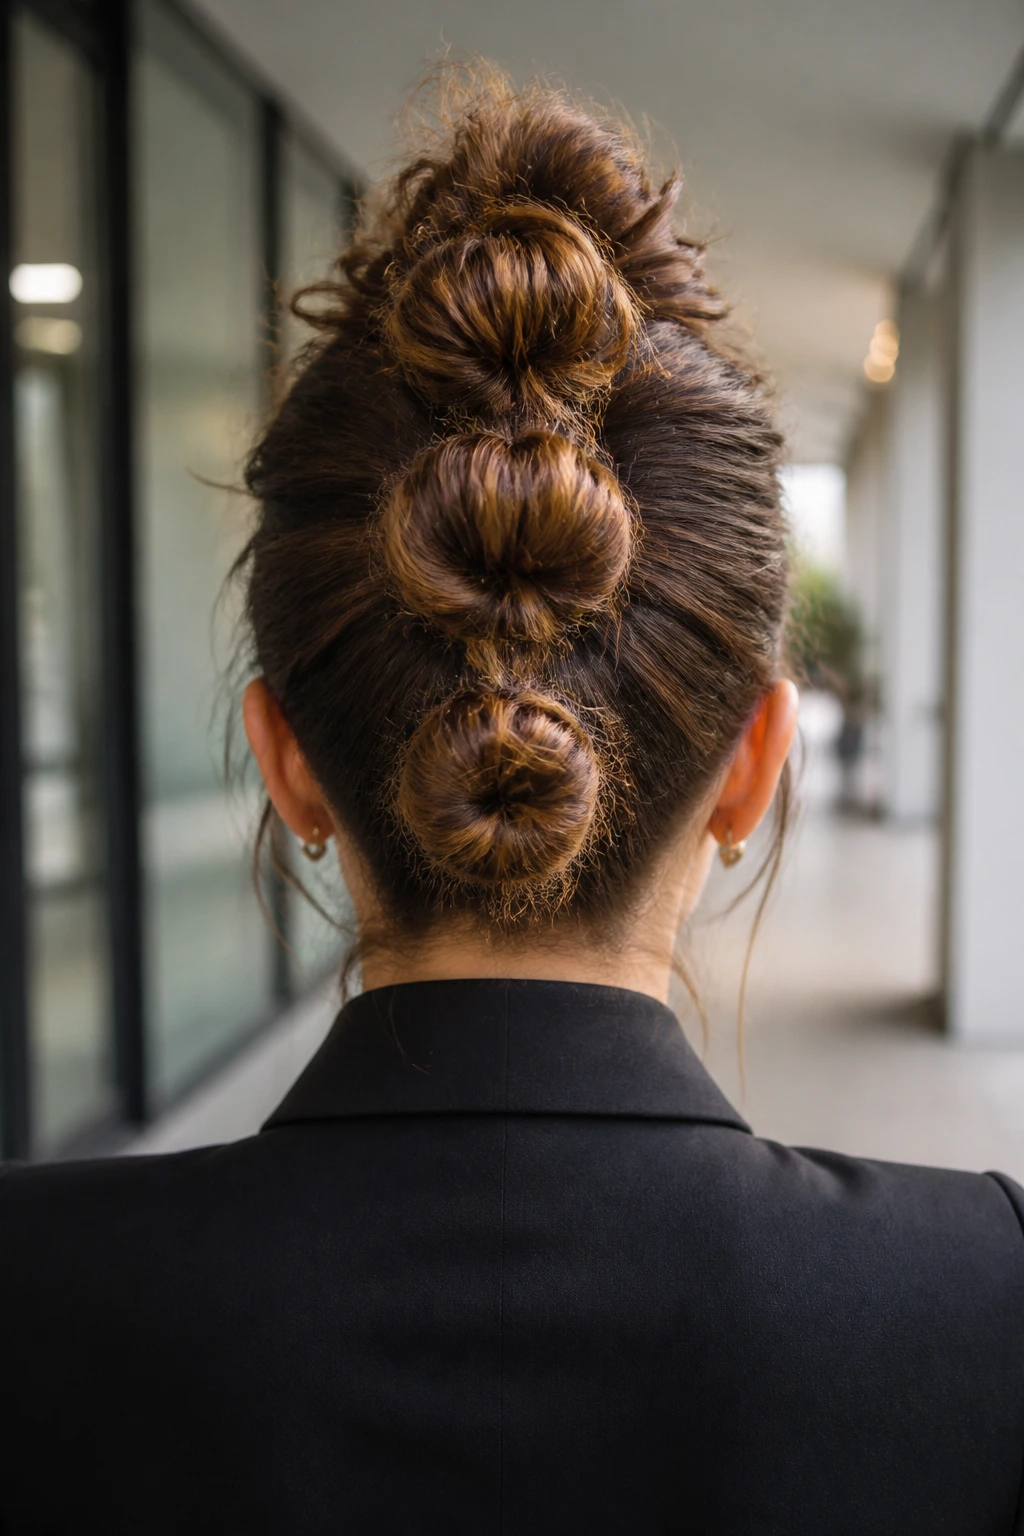
For creative offices, design firms, or casual workspaces, this style offers an artistic, architectural look that showcases your personal style while remaining completely professional.
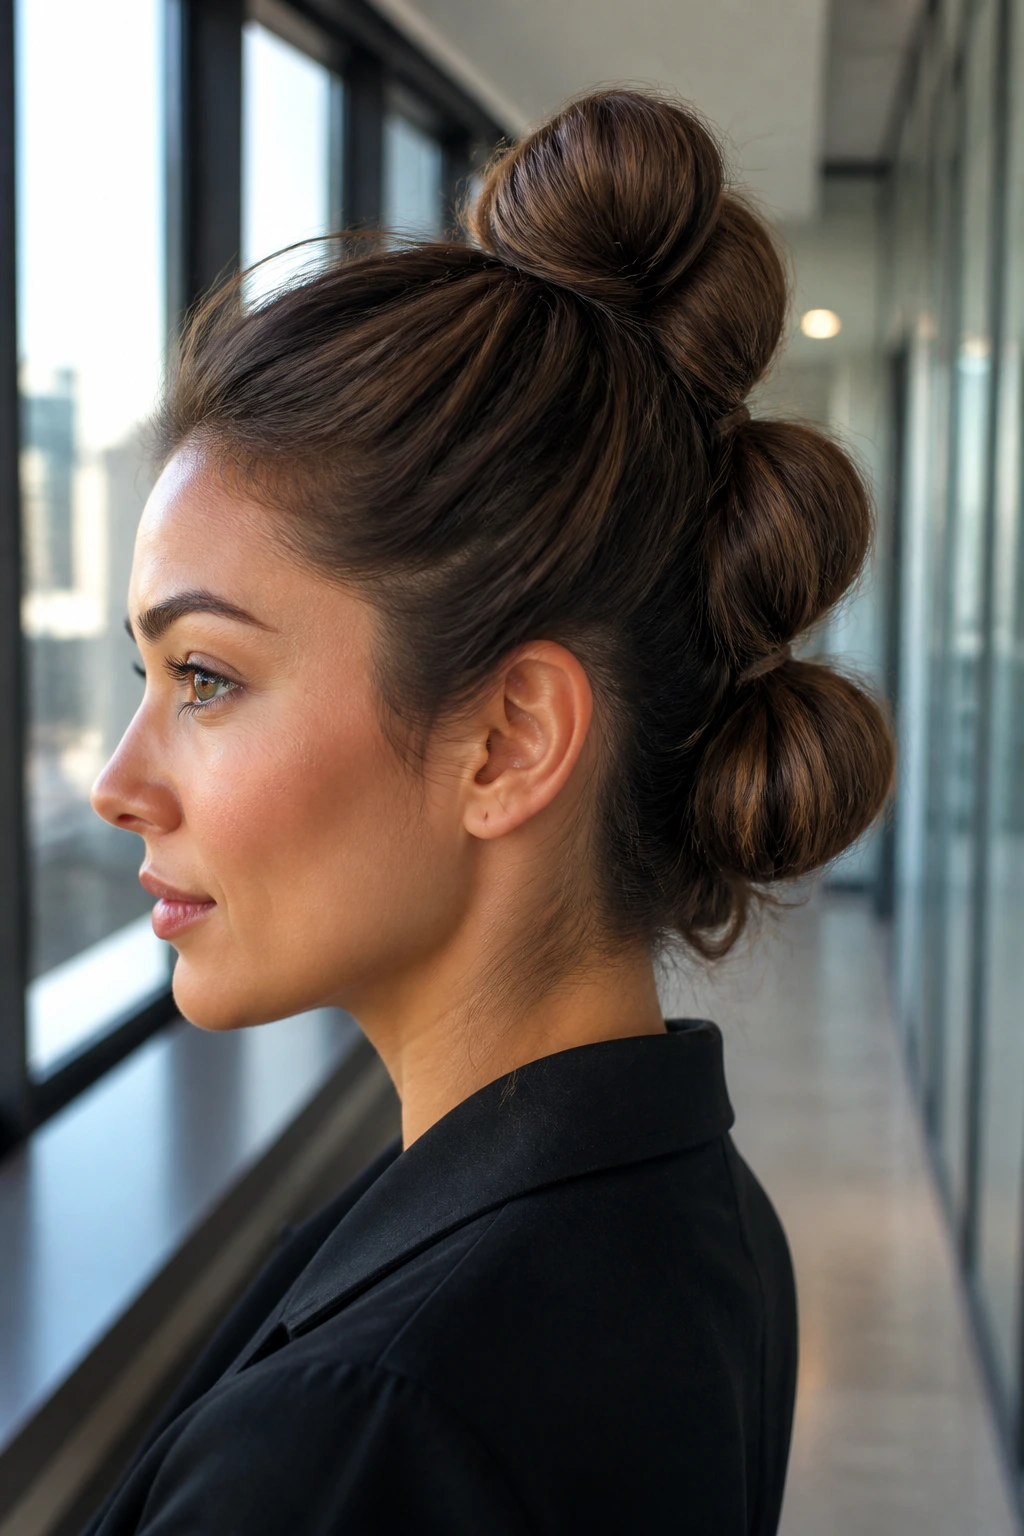
This style uses three textured knots aligned vertically down the center of your head, creating a soft, faux-hawk silhouette that is incredibly flattering and unique.
To create this look, divide your hair horizontally into three equal sections: top (crown), middle (ears), and bottom (nape). Twist each section into a tight, messy knot and secure it with a small elastic. Use your fingers to gently pull at the edges of each knot to expand its size until the edges of the three knots touch, forming one continuous, textured ridge down the back of your head. Secure any gaps with small bobby pins.
21. The Soft Gibson Tuck Knot
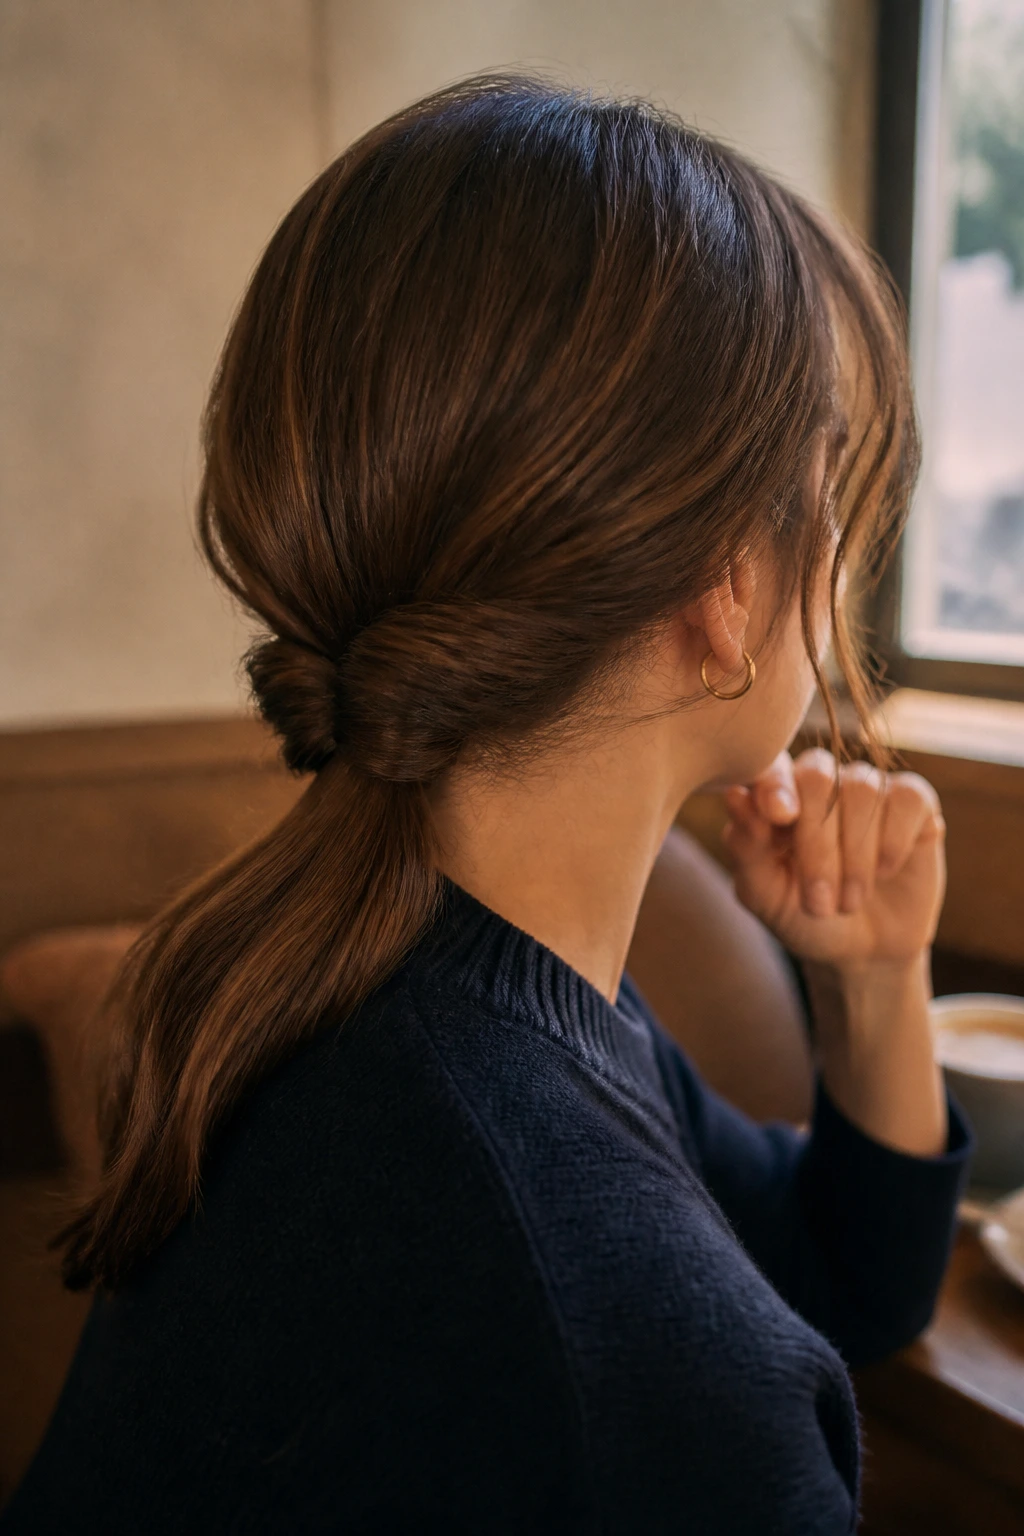
This is a modern, relaxed take on a classic Victorian hairstyle. It has a beautiful, roll-like shape that sits low at the nape of your neck, offering a soft, romantic look that pairs beautifully with knitwear and structured collars.
The Pocket-Tuck Method
This style relies on creating a “pocket” of hair above your elastic and tucking your length inside it, creating a rolled effect that looks incredibly elegant.
How to Style It
Secure your hair in a loose low ponytail using a thin elastic, leaving about two inches of slack between the elastic and your scalp. Use your fingers to split the hair above the elastic in half, creating a small pocket.
Lift the ponytail upward and tuck it down into the pocket you just created. Repeat this tucking motion with the remaining length of the hair until all of it is rolled up inside the pocket. Secure the roll to your scalp using several bobby pins pushed in horizontally along the base.
The Bottom Line
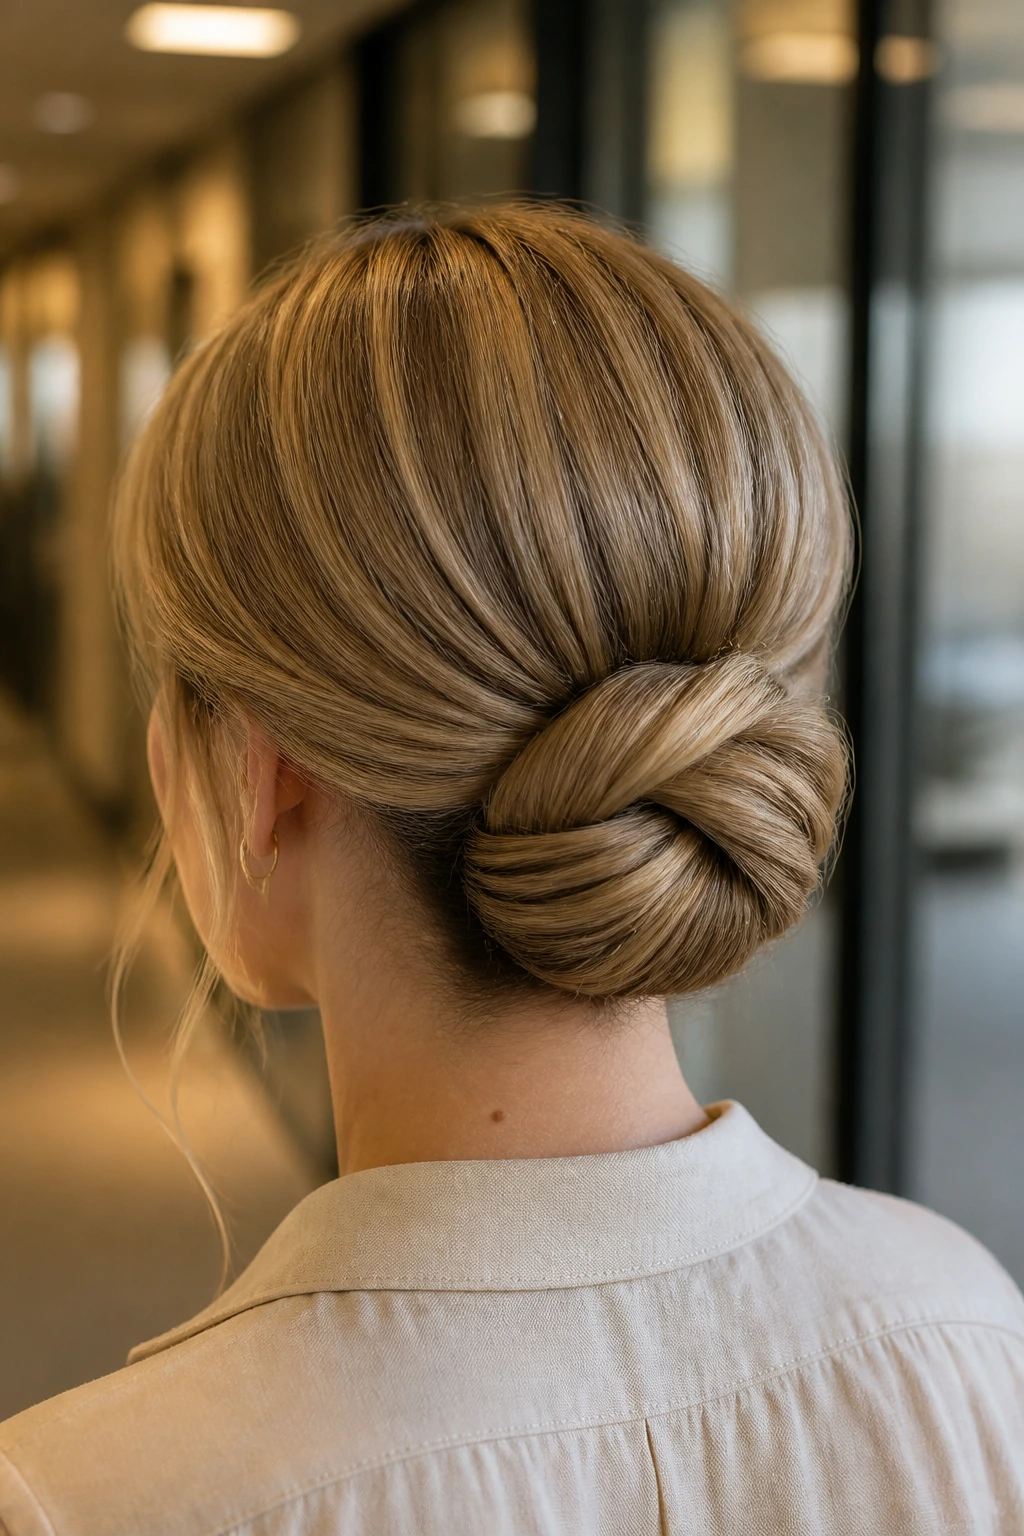
A great office hairstyle is not about achieving absolute perfection. It is about finding a balance between looking professional and feeling comfortable enough to focus on your work. The messy knot is the perfect vehicle for this. It embraces the natural texture of your hair, tolerates a busy day of movement, and looks better as the hours go by and a few strands break free.
When styling these knots, remember that the right tools make all the difference. Keep a small kit in your desk drawer with a few high-quality U-shaped hairpins, some matte bobby pins that match your hair color, and a travel-sized texturizing spray. With these tools on hand, you can transform your look in under a minute, turning a flat, lifeless morning style into a textured, professional knot that carries you through the workday with complete confidence.
