



The alarm rings, and reality sets in. You have exactly fifteen minutes to transform your bedhead into something that looks like you planned it. It is easy to default to the same tired elastic band, pulling your hair into a flat, sad ponytail that does nothing for your confidence. But your mornings do not have to feel like a compromise between sleep and style. With a few smart moves, you can walk out the door looking put together in less time than it takes to brew a pot of coffee.
Working with your hair’s natural state is the key. Trying to force a sleek, straight look on humid, second-day waves is a losing battle when you are short on time. Instead, we want to cooperate with the textures we already have. Second-day hair actually holds styles better than freshly washed hair because the natural scalp oils—or a quick puff of dry shampoo—provide grip and hold. This means your braids will stay put, your buns will have more volume, and your pins will not slide out before lunchtime.
To make these quick styles work, you only need a basic toolkit. Keep a boar bristle brush, some seamless elastic bands, a handful of sturdy bobby pins, and a reliable water spray bottle on your vanity. Having these tools organized means you will not spend five precious minutes digging through a drawer looking for a hair tie.
Let us look at twenty-two distinct, practical hair ideas that will get you out the door quickly while keeping your personal style intact.
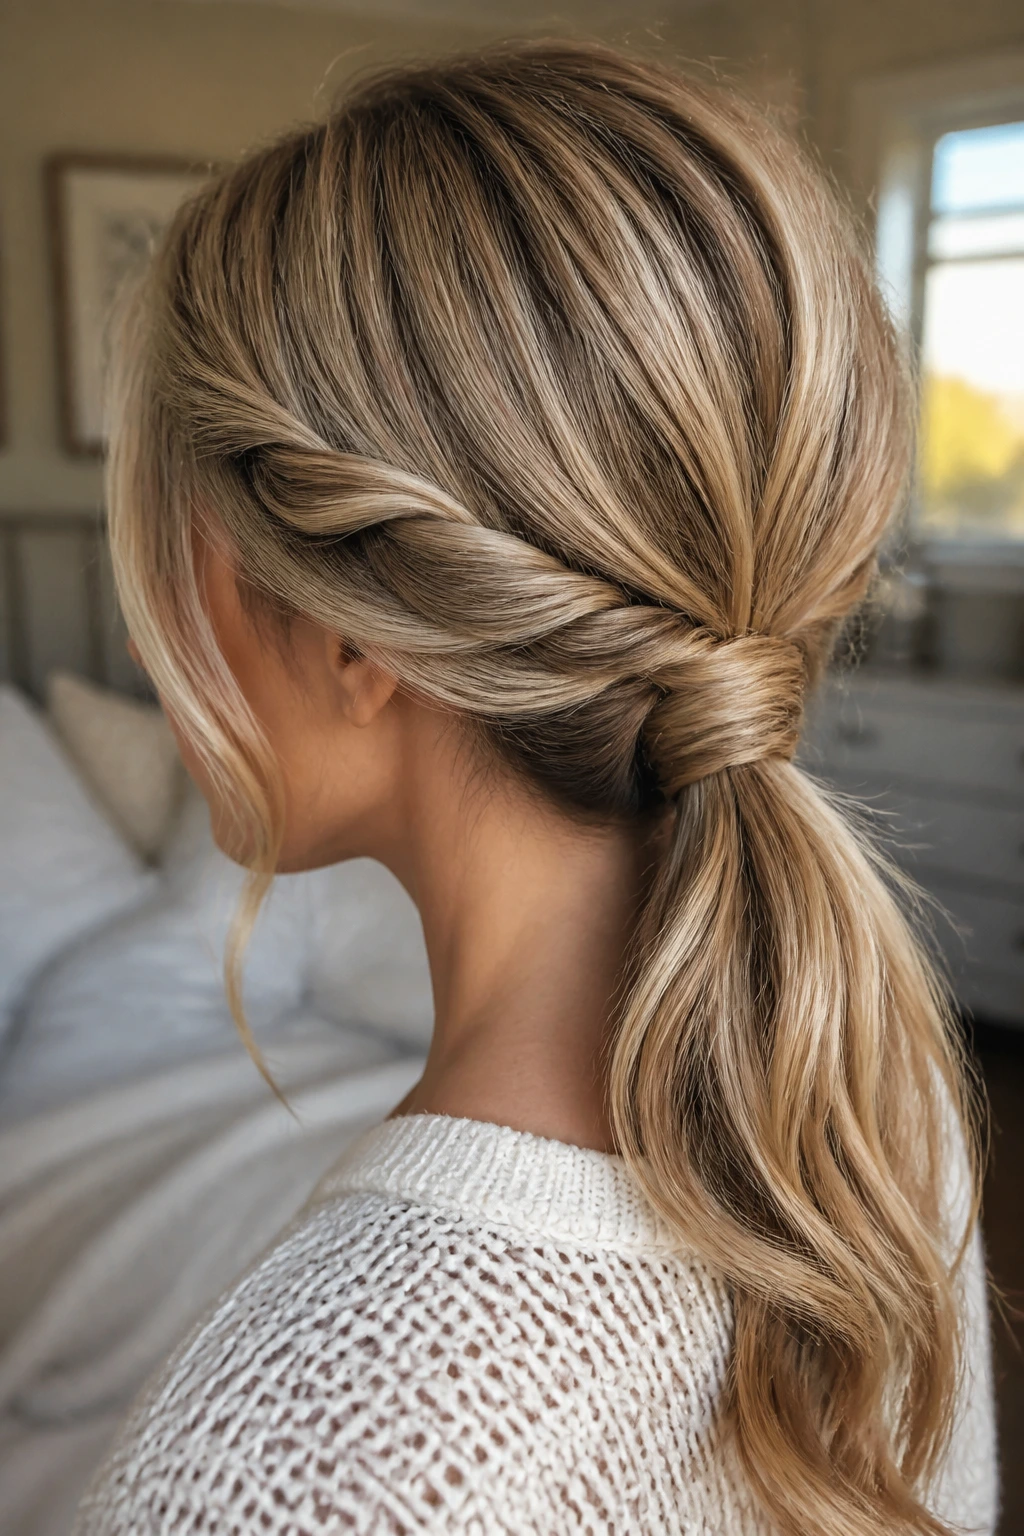
1. The Double-Twist Low Ponytail
This style takes the traditional low ponytail and gives it a clean, tailored finish with just two simple twists. It works beautifully on straight, wavy, or slightly textured hair that has been brushed through to remove tangles.
Why the Twist Beats the Basic Ponytail
By splitting the hair into three sections and twisting the outer portions inward, you conceal the elastic band completely. This gives the illusion of a complex, salon-styled look while using nothing more than your own hair to create structure. It holds securely all day because the twists pin down the main body of the ponytail.
Fast Steps to Create the Twist
- Section off two-inch pieces of hair on either side of your face, leaving the back section loose.
- Gather the back section at the nape of your neck and tie it securely with a small, clear elastic.
- Twist the left front section tightly toward the back of your head, crossing it over the top of the elastic.
- Wrap the end of this left twist under the ponytail, pinning it securely with a bobby pin pushed upward from the bottom.
- Repeat the twisting process with the right front section, crossing it over the first twist and pinning it underneath.
Pro tip: Lightly mist your fingers with a medium-hold hairspray before twisting to keep flyaways flat and smooth.
2. The Three-Minute Bubble Braid
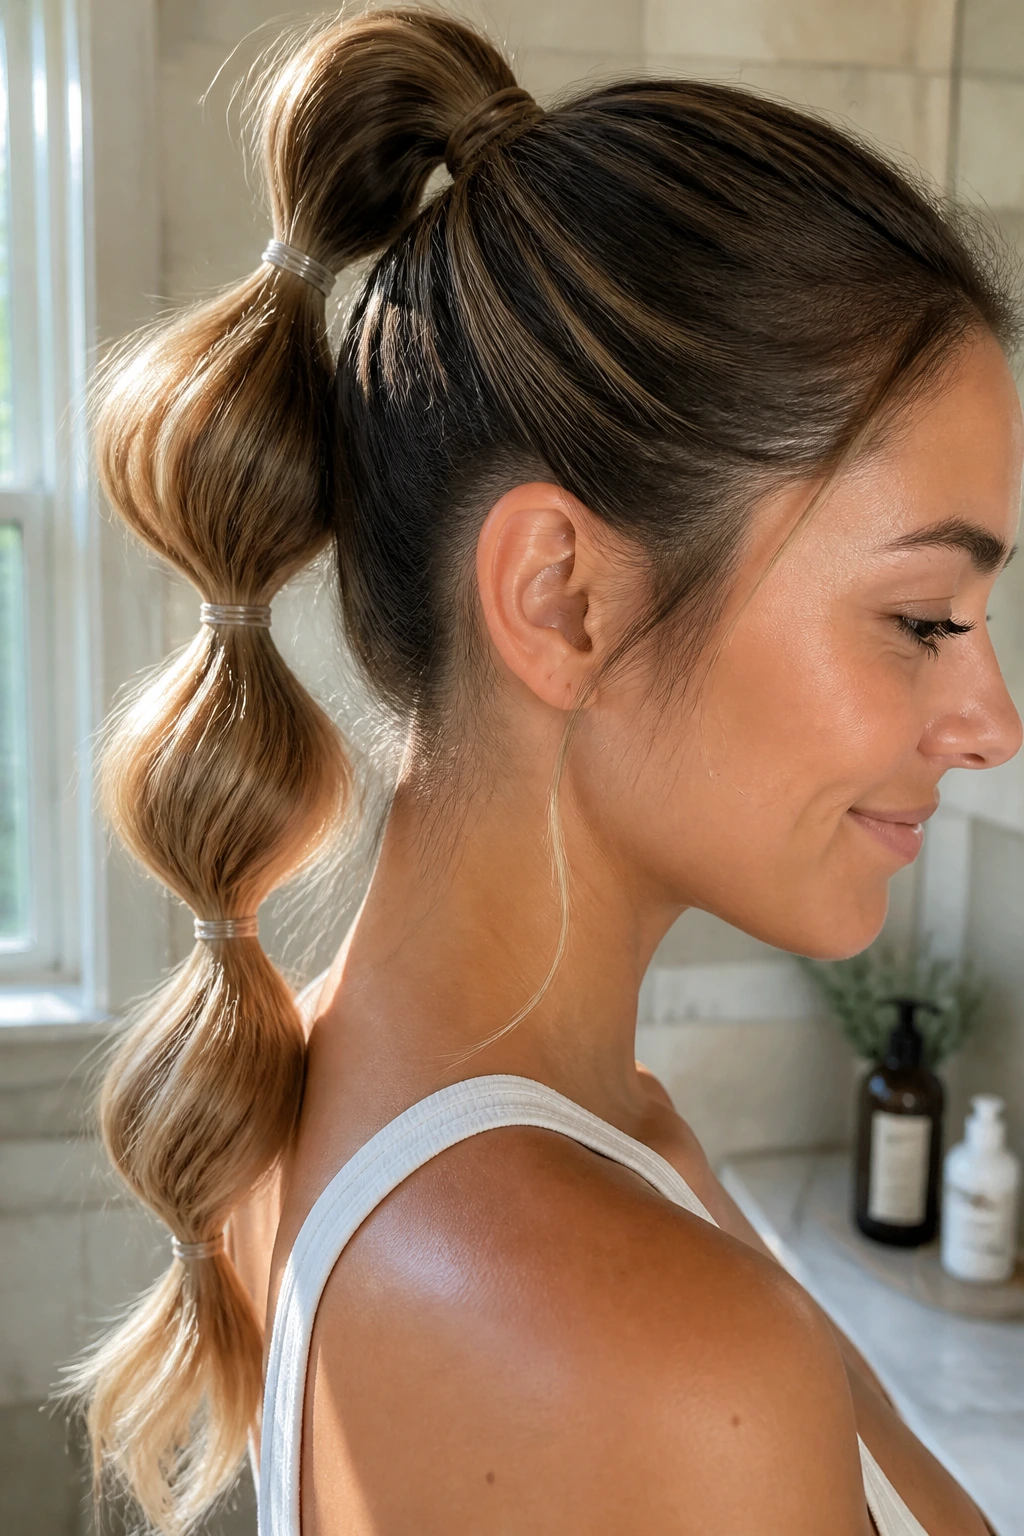
This style looks incredibly intricate but requires absolutely zero braiding skills. It is highly effective for long hair that tends to get tangled during a busy day, keeping every strand locked in place.
You only need a handful of small, elastic bands—ideally matching your hair color—to create this look. Start by gathering your hair into a high or mid-height ponytail and securing it tightly. Then, place another elastic band about two to three inches down the ponytail shaft.
Once that second band is secure, use your fingers to gently pull the hair between the two bands outward in all directions. This creates a rounded, bubble-like shape. Repeat this process down the length of your hair, leaving a small tail at the bottom.
The beauty of this style is its resilience. It handles wind, movement, and humidity without losing its shape, making it excellent for outdoor days or active mornings.
3. The Half-Up Top Knot with a Velvet Scrunchie
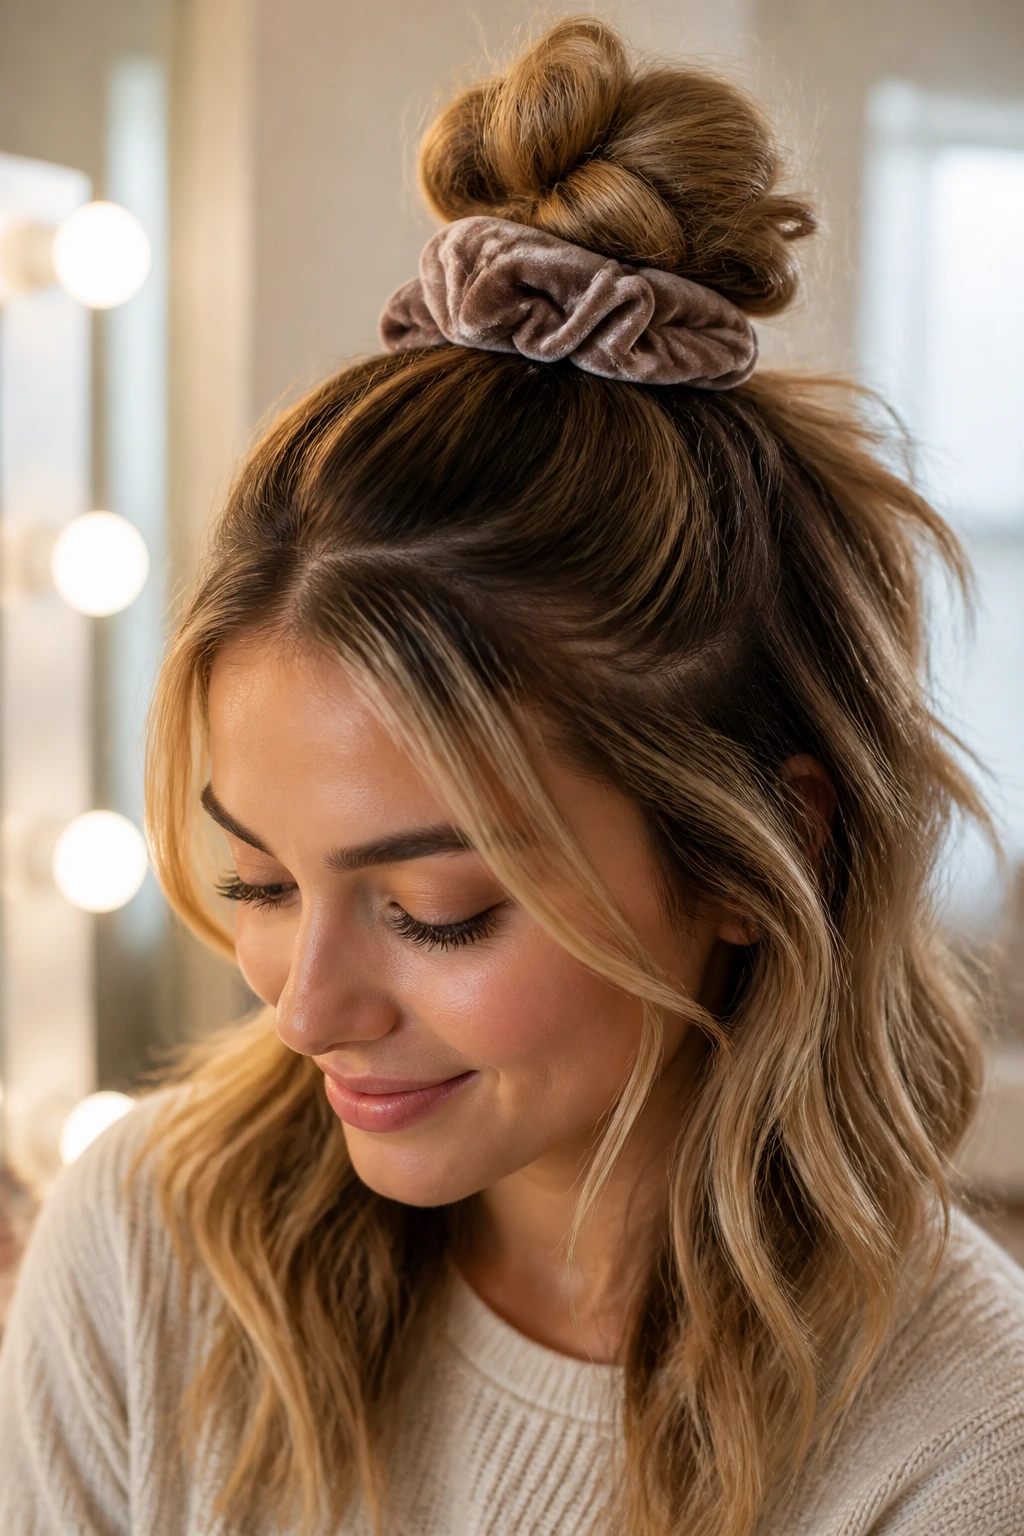
Why does this work so well when you are running short on time?
The answer lies in how it frames your face while keeping hair out of your eyes. It is the ultimate compromise for those who hate having their hair fully tied back but still need to look focused and organized. It hides greasy roots at the crown of your head while letting your natural lengths show off their texture.
To make this look intentional rather than sloppy, use a high-quality velvet or silk scrunchie. The fabric adds a deliberate element to your outfit, making the messy knot look like a conscious style choice.
How to Style It
Section your hair from the tops of your ears up to your crown, creating a clean horseshoe shape. Pull this top section into a high ponytail, but on the last pass of the elastic, only pull the hair halfway through to form a loop. Wrap the remaining loose ends around the base of the loop to hide the band. Place your velvet scrunchie directly over the base, and pull gently on the sides of the knot to add volume and texture.
4. The Inside-Out French Roll Claw Clip
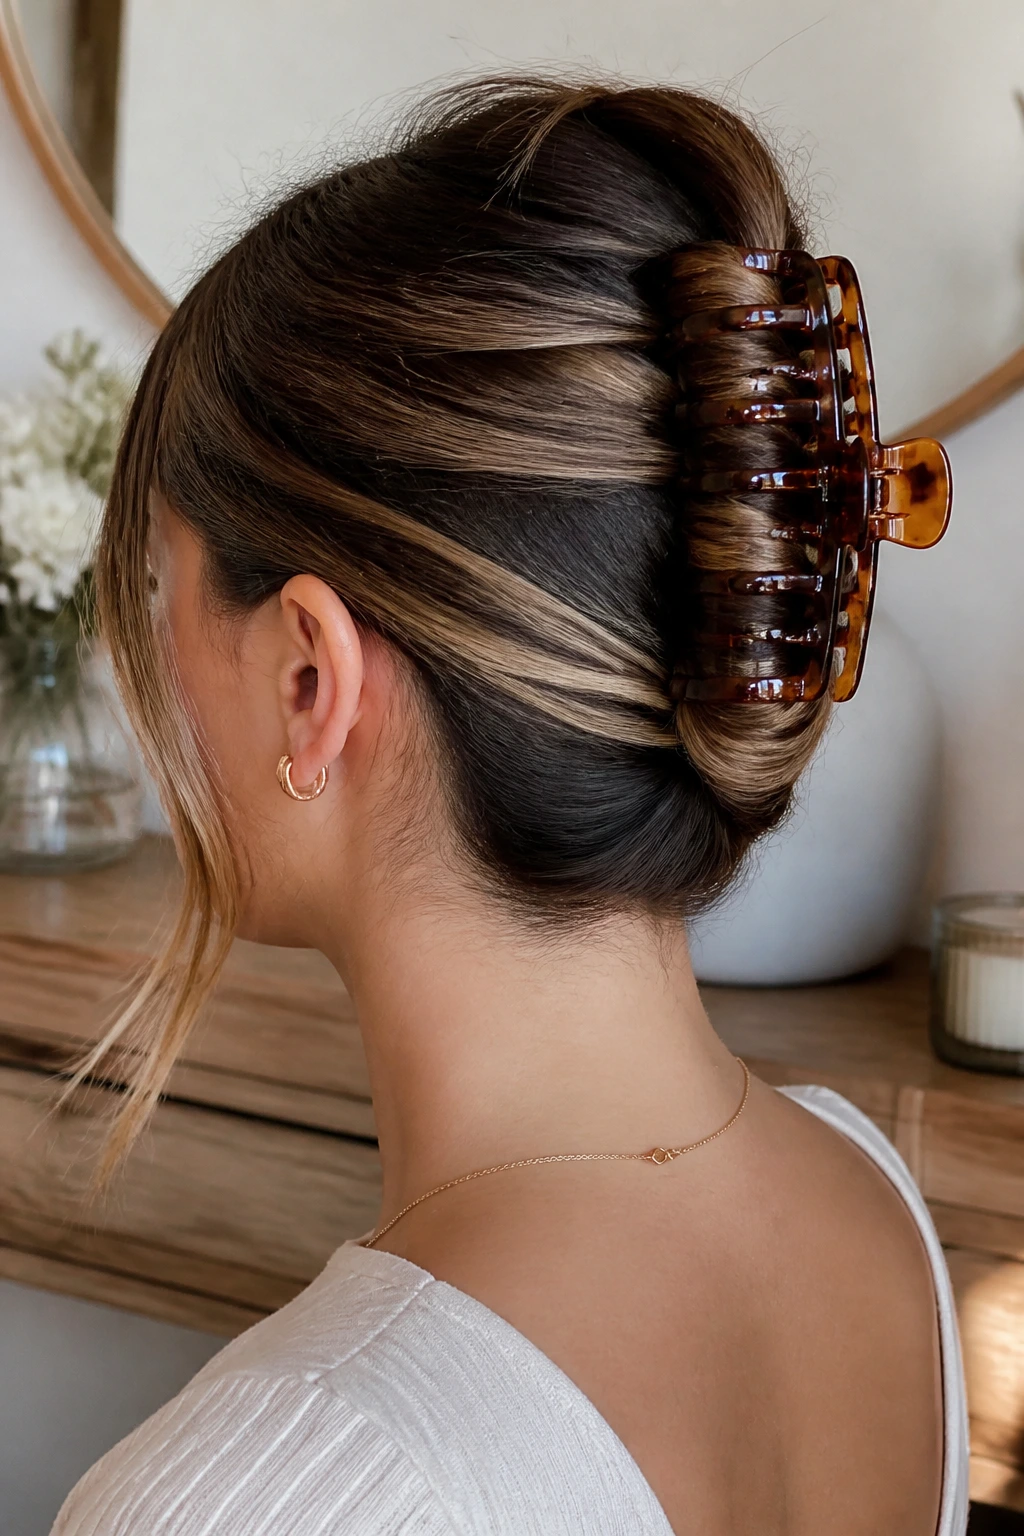
You probably remember claw clips from years past, but the modern way to wear them is far more secure. It is the perfect remedy for heavy hair that pulls down traditional ponytails.
The secret is a simple twisting motion that locks the hair against your scalp. A friend once showed me this technique during a hot summer afternoon, and it completely changed how I deal with second-day hair.
- Gather your hair at the nape of your neck as if making a low ponytail.
- Twist the entire length of the hair tightly in a clockwise direction.
- Point the twist upward along the back of your head, keeping it flat against your scalp.
- Fold the remaining loose ends back down behind the twist if your hair is long.
- Secure the middle of the twist to your scalp using a wide-toothed claw clip.
This holds your hair flat against your head, distributing the weight evenly so you do not get a headache by lunchtime.
5. The Sleek Low Bun with a Deep Side Part
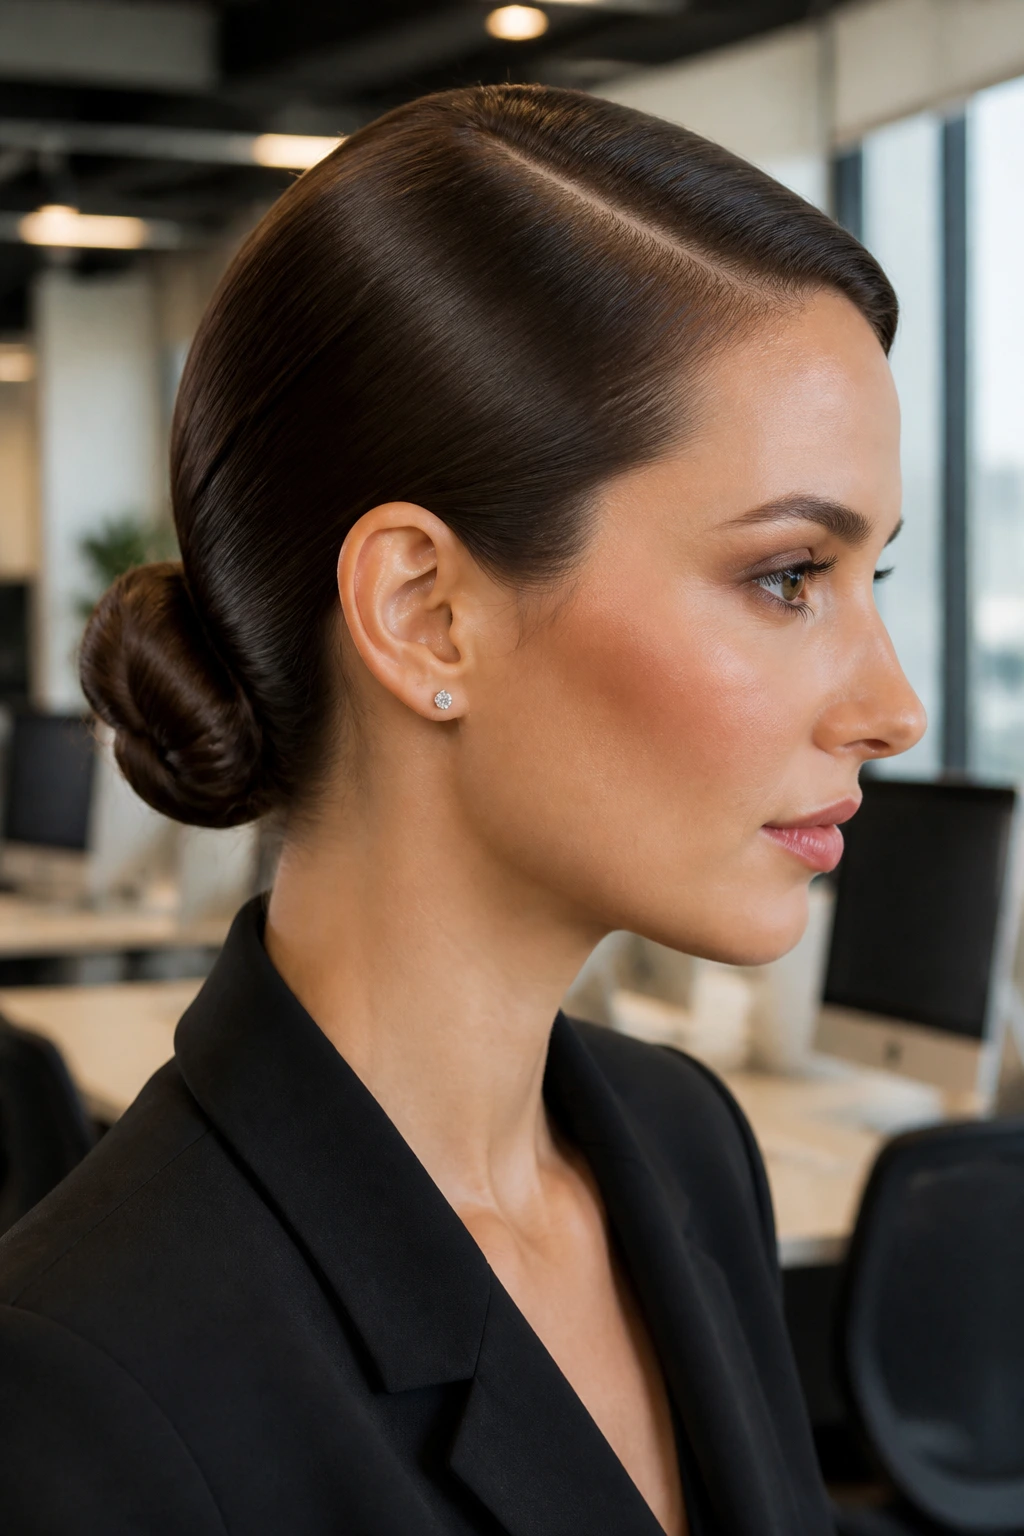
When you need to look sharp for an important meeting, a messy bun will not cut it. This style is polished, professional, and takes less than four minutes to execute. It works best on hair that is a day or two past its last wash, as the natural oils help create that glassy, smooth finish.
Start by using a fine-toothed comb to create a clean, straight part on either the left or right side of your head. Align the part with the arch of your eyebrow for the most balanced look. Brush your hair down and back toward the nape of your neck, keeping it as close to the scalp as possible.
Secure the hair into a tight low ponytail at the very base of your head. Twist the ponytail tightly into a rope, then wrap it around the elastic to form a compact coil. Push two or three long bobby pins into the outer edges of the coil, aiming them inward toward the center of the bun to lock it down.
To finish, spray a small amount of flexible-hold hairspray onto a clean toothbrush. Gently brush down any baby hairs along your hairline and part. This simple tool prevents wet hairspray from ruining the dry texture of your hair while ensuring a clean finish.
6. The Tucked-Under Halo Headband Roll
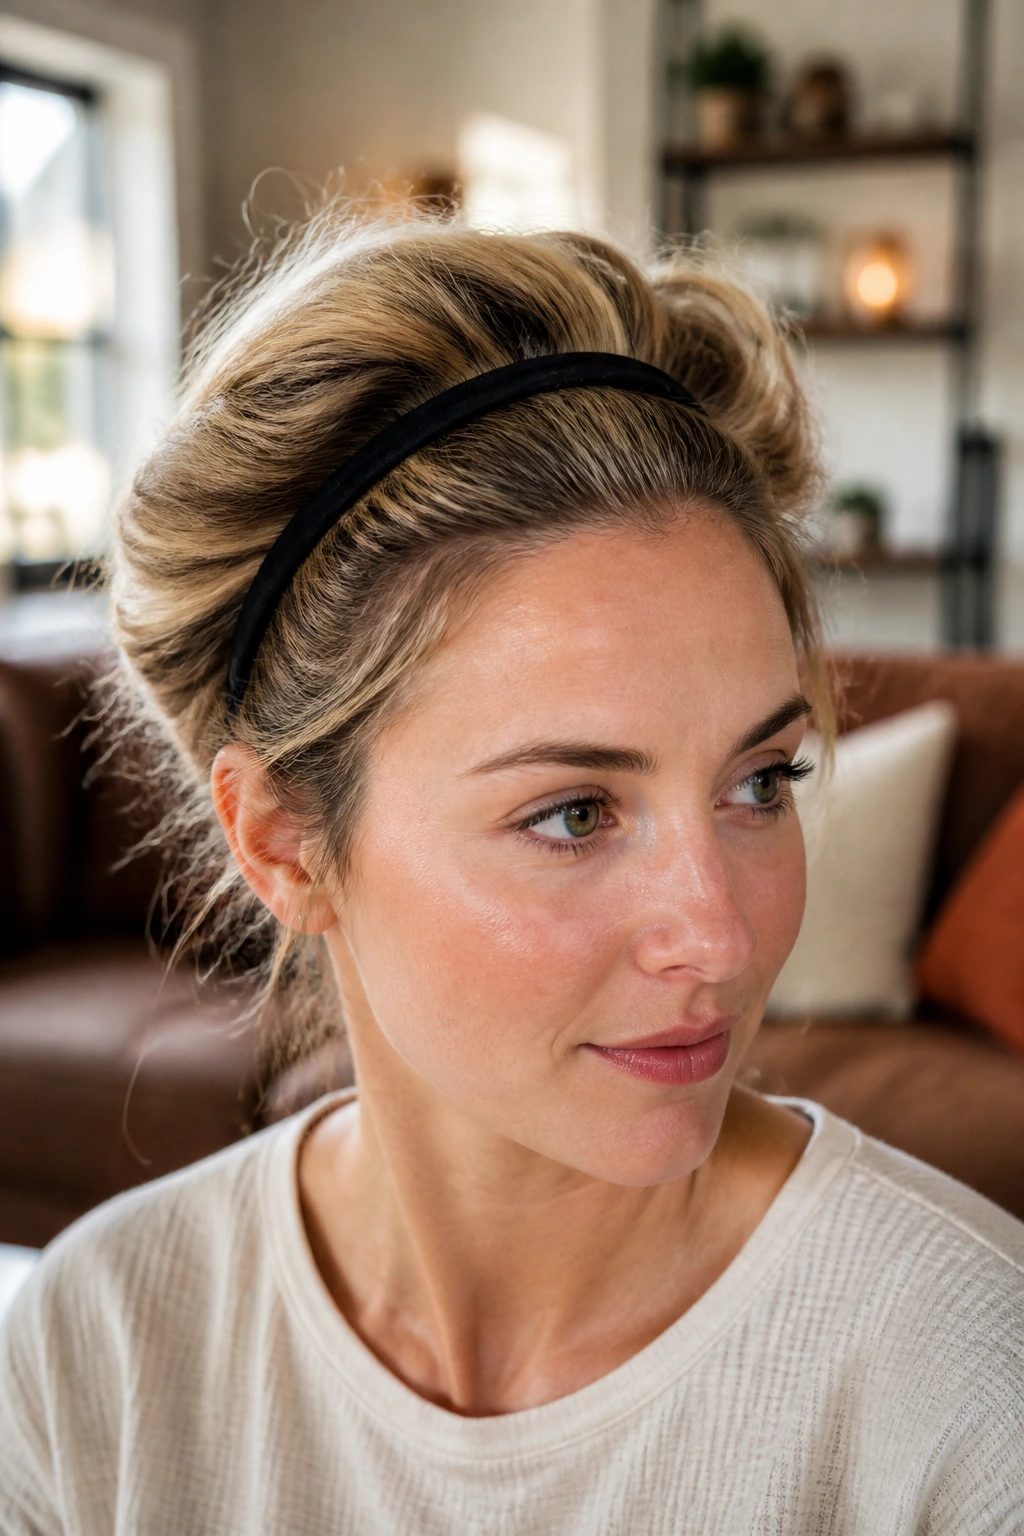
Unlike traditional braided crowns that take twenty minutes of careful hand coordination, this style uses an elastic headband as a shortcut. It gives you a soft, romantic look that looks like it took hours of pinning, but actually relies on gravity and friction.
What makes it different is that the hair wraps around the headband itself, hiding the back of the band completely. It is best for medium-length hair that has some natural texture or wave to prevent slipping.
If you have very fine, slippery hair, spray the elastic headband with dry shampoo before placing it on your head to give it extra grip. Place the headband over your hair like a crown, then simply tuck sections of hair up and over the band, working from the ears toward the back until all the loose ends are secured inside the roll.
7. The Five-Strand Faux Dutch Braid Ponytail
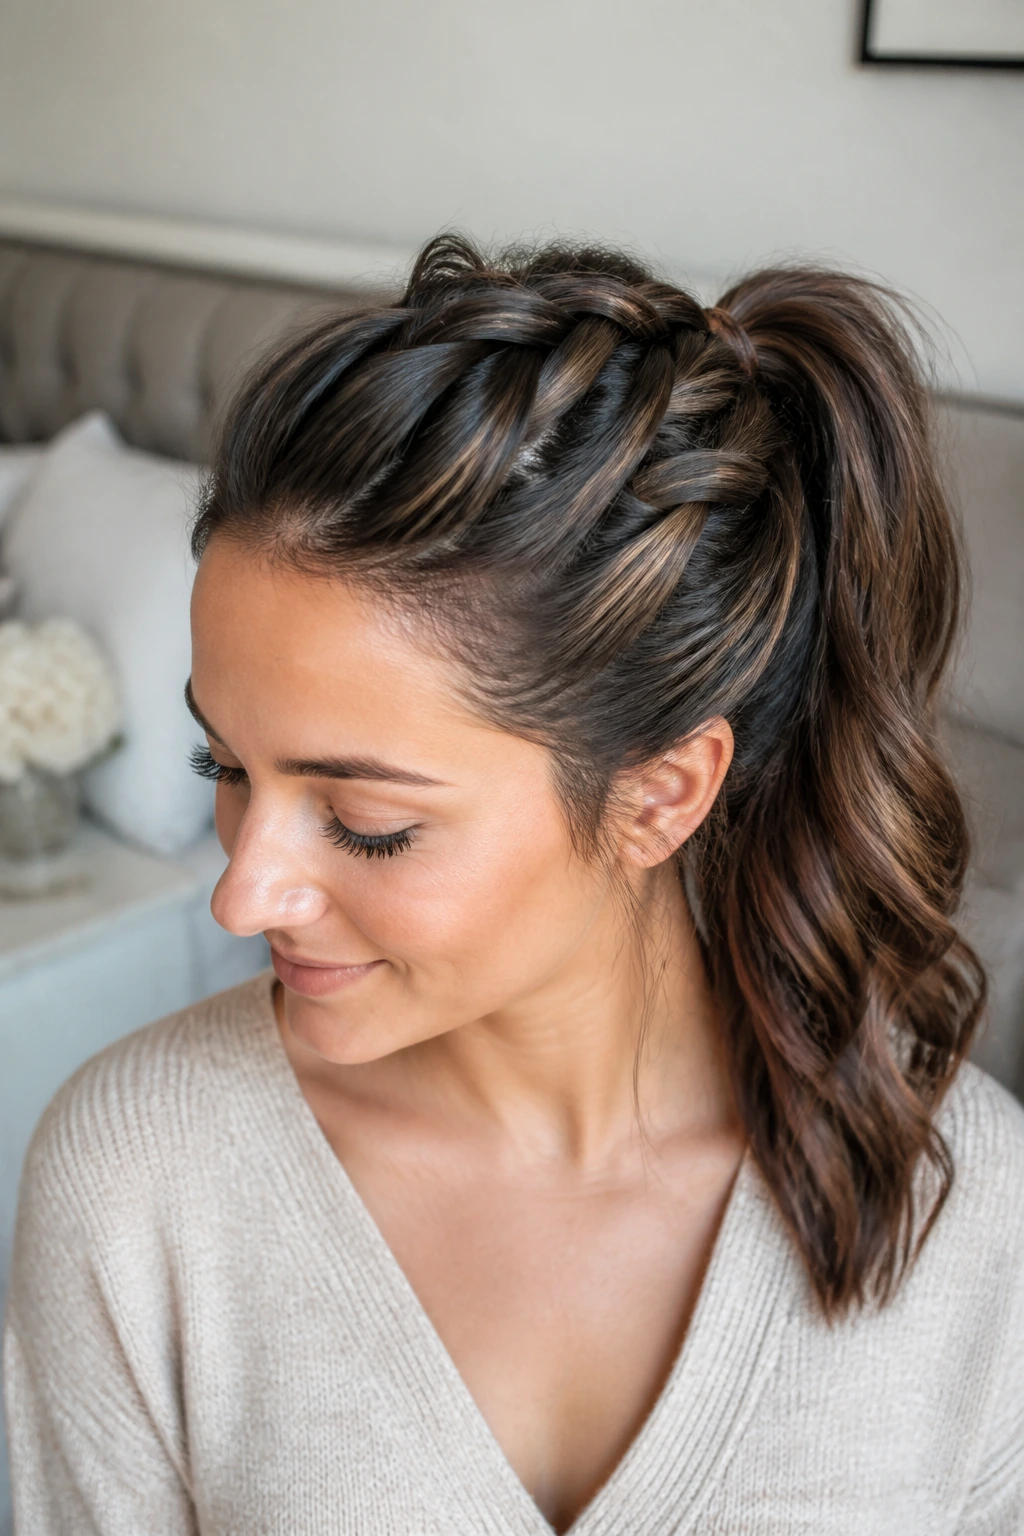
This style offers the visual depth of a complex braid without the finger-twisting frustration of actually braiding five separate strands. It relies on a simple overlapping technique that mimics the look of a Dutch braid.
The Illusion of Complexity
By using small elastic bands to lock overlapping sections of hair over one another, you build a raised center ridge. It mimics the classic Dutch braid but is far easier to keep even and tight. It will not sag or loosen throughout the day, which is a common issue with traditional braids on slippery hair.
Step-by-Step Overlap Process
- Section a small square of hair at your front hairline and tie it with a small elastic.
- Create a second ponytail directly behind the first one.
- Split the first ponytail into two equal halves, bringing them around the sides of the second ponytail.
- Gather a new section of hair, combine it with the split halves, and tie them together with a third elastic.
- Repeat this splitting and tying process down the crown of your head until you reach the nape.
Pro tip: Once finished, gently pull the outer edges of each section to pancake the braid, making it look twice as thick.
8. The Messy High Bun with Face-Framing Tendrils
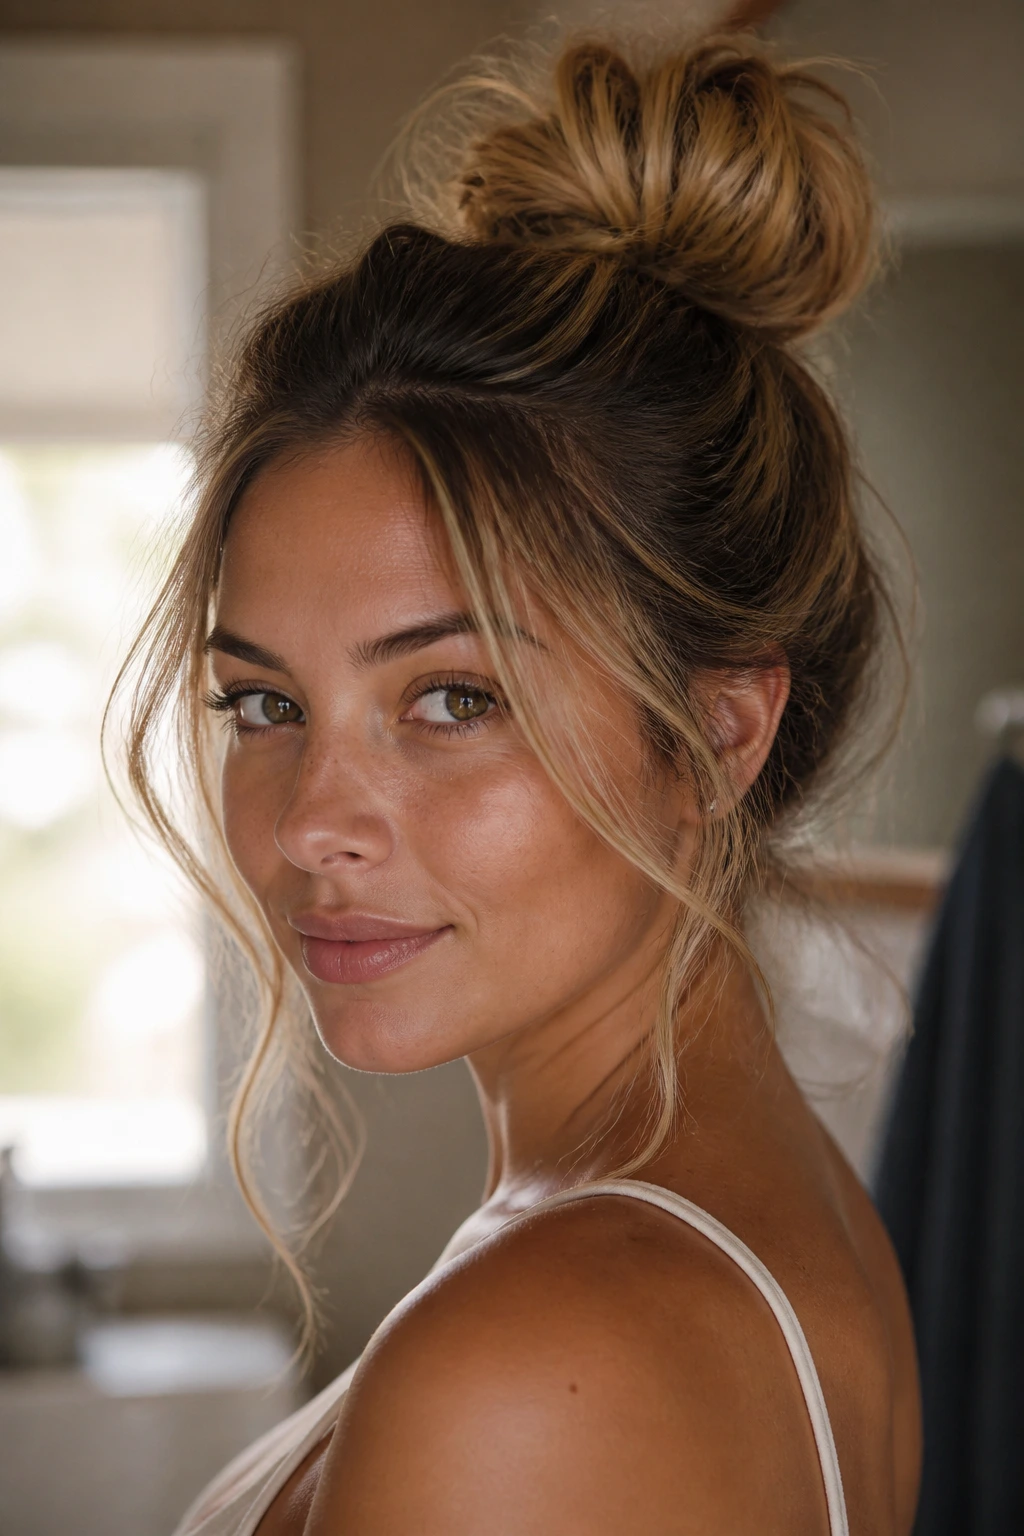
The messy bun is a classic, but there is a fine line between looking effortlessly chic and looking like you just rolled out of bed. The difference lies entirely in the prep work and the placement.
For this style, always tip your head completely upside down before gathering your hair. This lets gravity do the heavy lifting, ensuring your bun sits high on the crown rather than sliding down the back of your head. Use a soft, fabric scrunchie to secure the hair, wrapping it twice and pulling the hair into a loose loop on the final wrap.
Once the bun is secure, use your pinky fingers to gently tug a few small strands of hair free around your temples and ears. This frames your face and softens the look. It prevents the bun from looking too severe or tight against your face.
9. The Side-Swept Fishtail Accented Waves
Why should you consider an accent braid instead of a full braid?
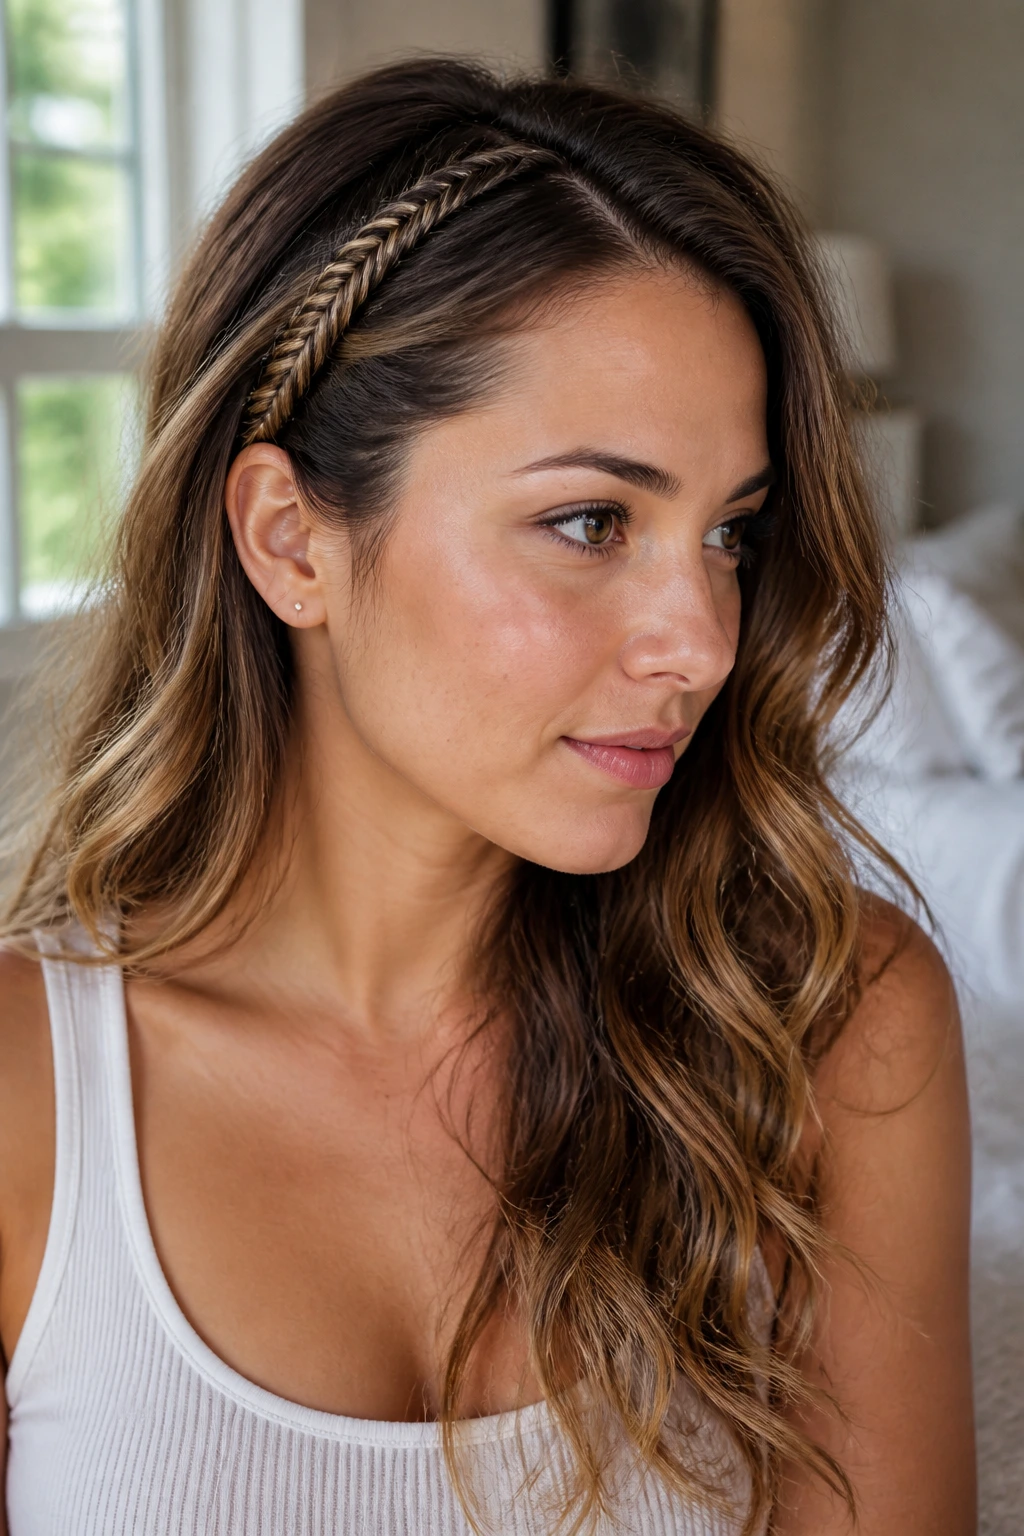
A full fishtail braid can take ten minutes of meticulous work, which is ten minutes too long when you are in a rush. An accent braid gives you the visual interest of the style while leaving the rest of your hair loose and natural. It is a highly effective way to dress up simple, air-dried waves.
It takes less than two minutes because you are only braiding a small, two-inch section of hair near your hairline, making it incredibly fast.
How to Style It
Part your hair deeply on one side. Grab a small section of hair near the part and split it into two equal columns. Take a thin strand from the outside of the left column and cross it over to the right. Then, take a thin strand from the outside of the right column and cross it over to the left. Repeat this down to the ends, secure with a clear elastic, and pin the braid back behind your ear, letting your natural waves fall over it.
10. The Silk Scarf Low Loop Bun
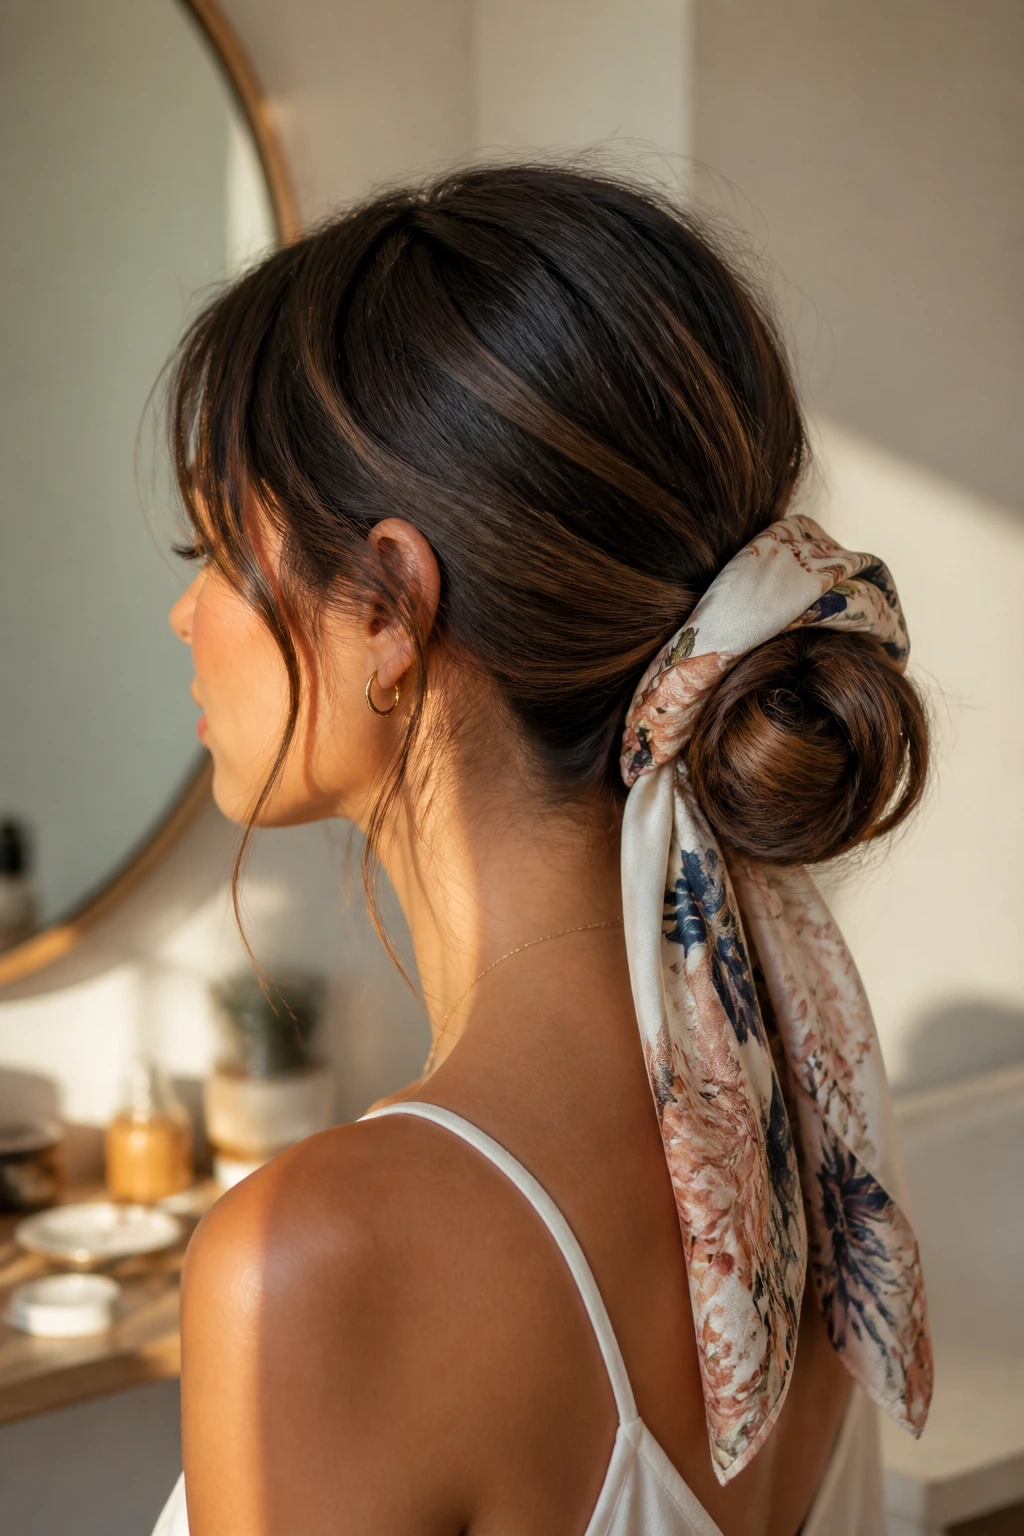
A colorful silk scarf is a reliable shortcut for bad hair days. It hides messy roots, covers up frizz, and adds a bright pop of color to any neutral outfit.
I started keeping a small drawer of vintage scarves near my mirror specifically for mornings when my hair refused to cooperate. It takes a boring low bun and instantly makes it look like a planned fashion choice.
- Brush your hair back into a low ponytail at the nape of your neck and secure it with an elastic.
- Fold your silk scarf into a long, narrow band about two inches wide.
- Thread the scarf through the elastic band so that equal lengths hang down on either side.
- Twist your ponytail into a loose bun, wrapping the scarf ends along with the hair.
- Tie the ends of the scarf into a soft knot at the bottom of the bun, letting the tails hang free.
The silk fabric is gentle on your hair cuticles, reducing friction and preventing breakage throughout the day.
11. The Double French Twist with Bobby Pins
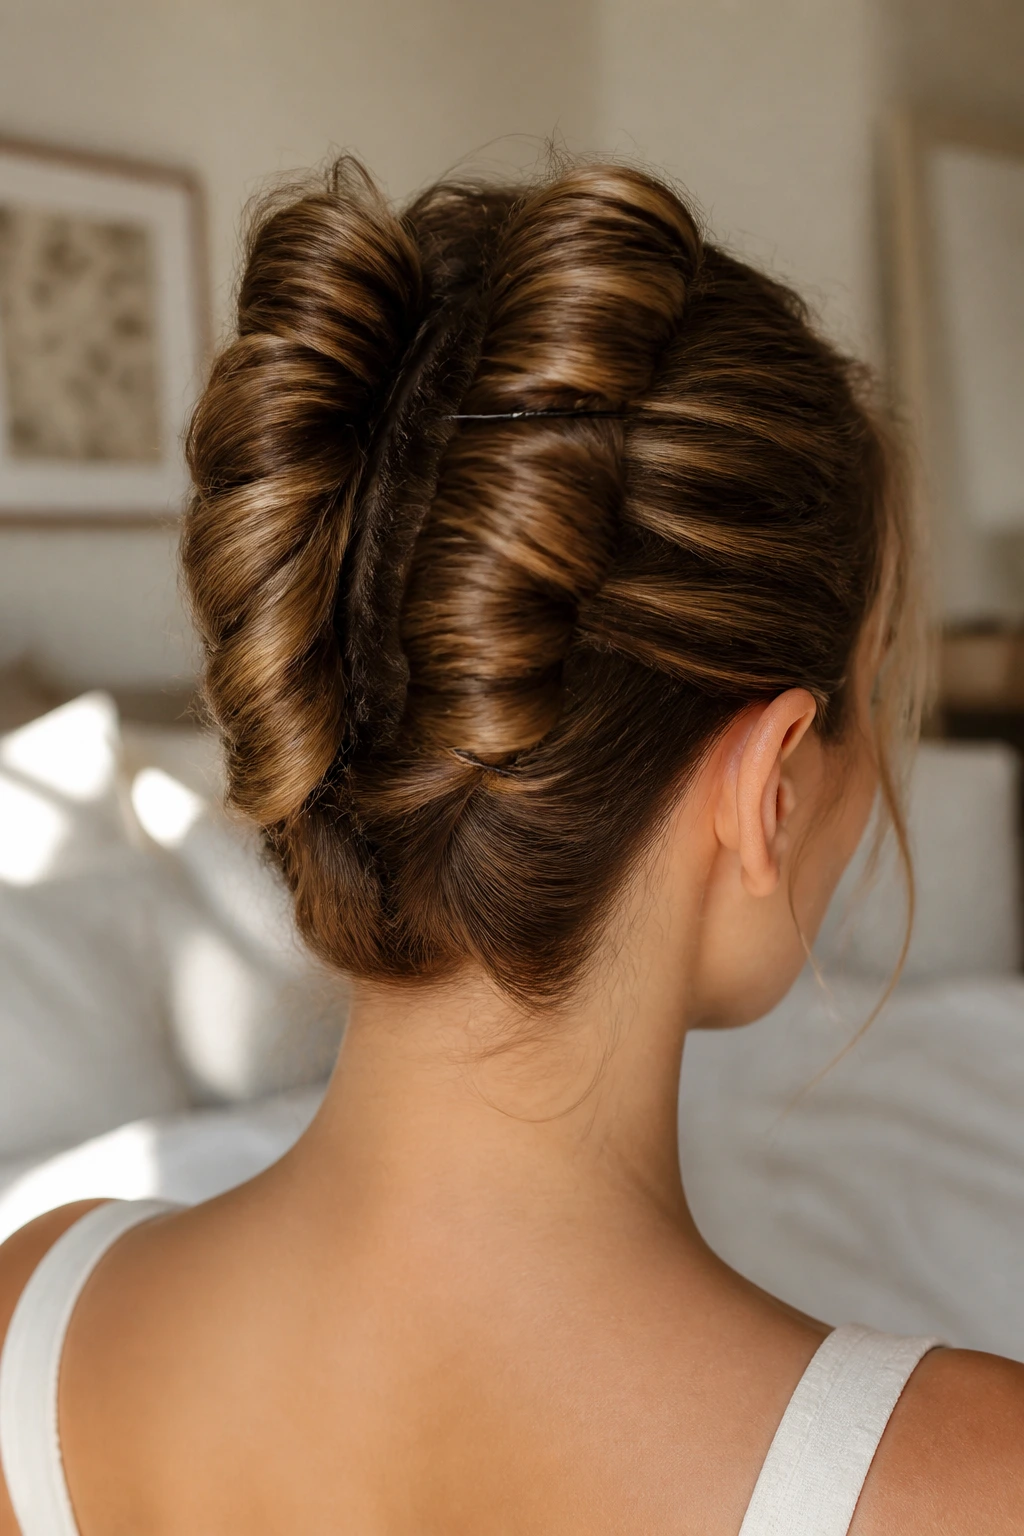
If you have shorter hair, like a chin-length bob, updo styles can feel frustrating because the short layers always slip out at the back. This double-twist method solves that problem by splitting your hair into two vertical sections. It keeps the shorter pieces secure while giving you a clean, elegant silhouette that works for any formal or casual setting.
Divide your hair down the center back into two equal left and right sections. Take the left section and twist it tightly inward toward the center of your head. Secure this twist with three or four bobby pins, inserting them vertically from the top down along the seam of the twist.
Now, take the right section and twist it inward, overlapping it slightly with the first twist. Secure this side with bobby pins, pushing them upward from the bottom to create an interlocking pattern with the first set of pins. This opposing tension is what keeps the style secure all day.
The result is a clean, modern twist that holds short layers in place without needing a can of heavy hairspray. It is an excellent option for those with fine, slippery hair that struggles with traditional clips.
12. The Knotted Half-Up Crown Braid
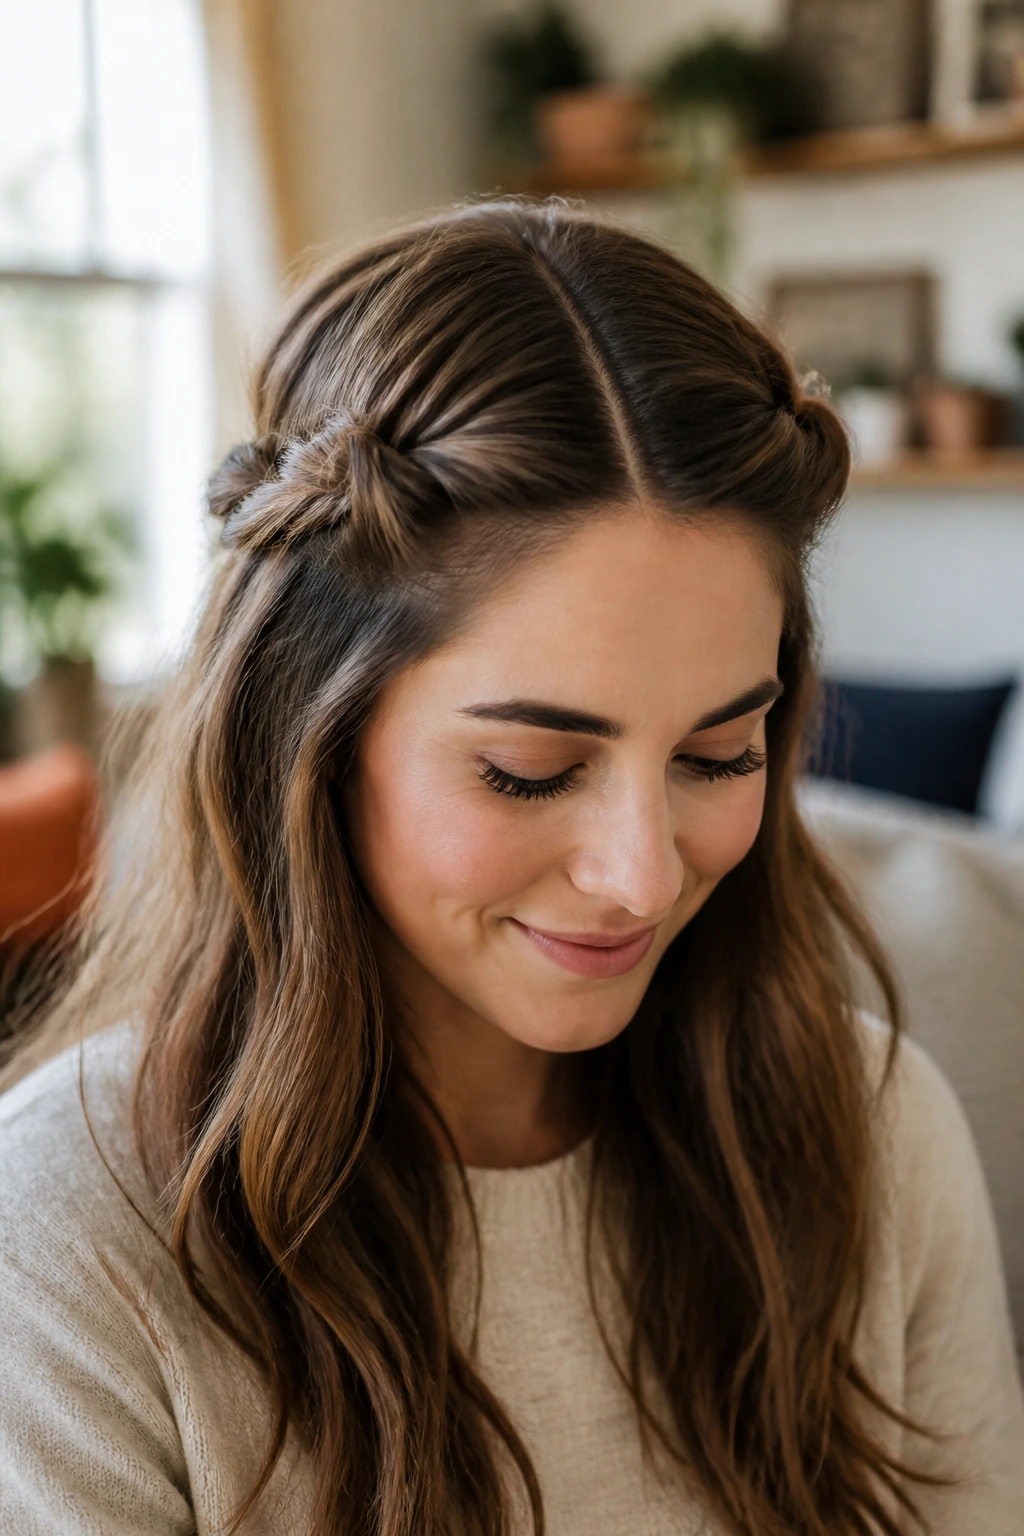
Unlike standard crown braids that require complex French braiding techniques, this style relies on simple overhand knots. It is a much faster alternative that delivers a textured, bohemian look with minimal effort.
It is best for those with wavy or curly hair, as the natural texture helps hold the knots in place without slipping. It also works well on fine hair if you prep it with a quick blast of texturizing spray first.
If you want a style that looks artistic but requires zero braiding knowledge, this is your solution. You simply take two small sections of hair from the front temples, tie them into a loose overhand knot at the back of your head, secure the center with a single bobby pin, and let the ends blend into your loose hair.
13. The Braided Headband on Loose Textured Hair
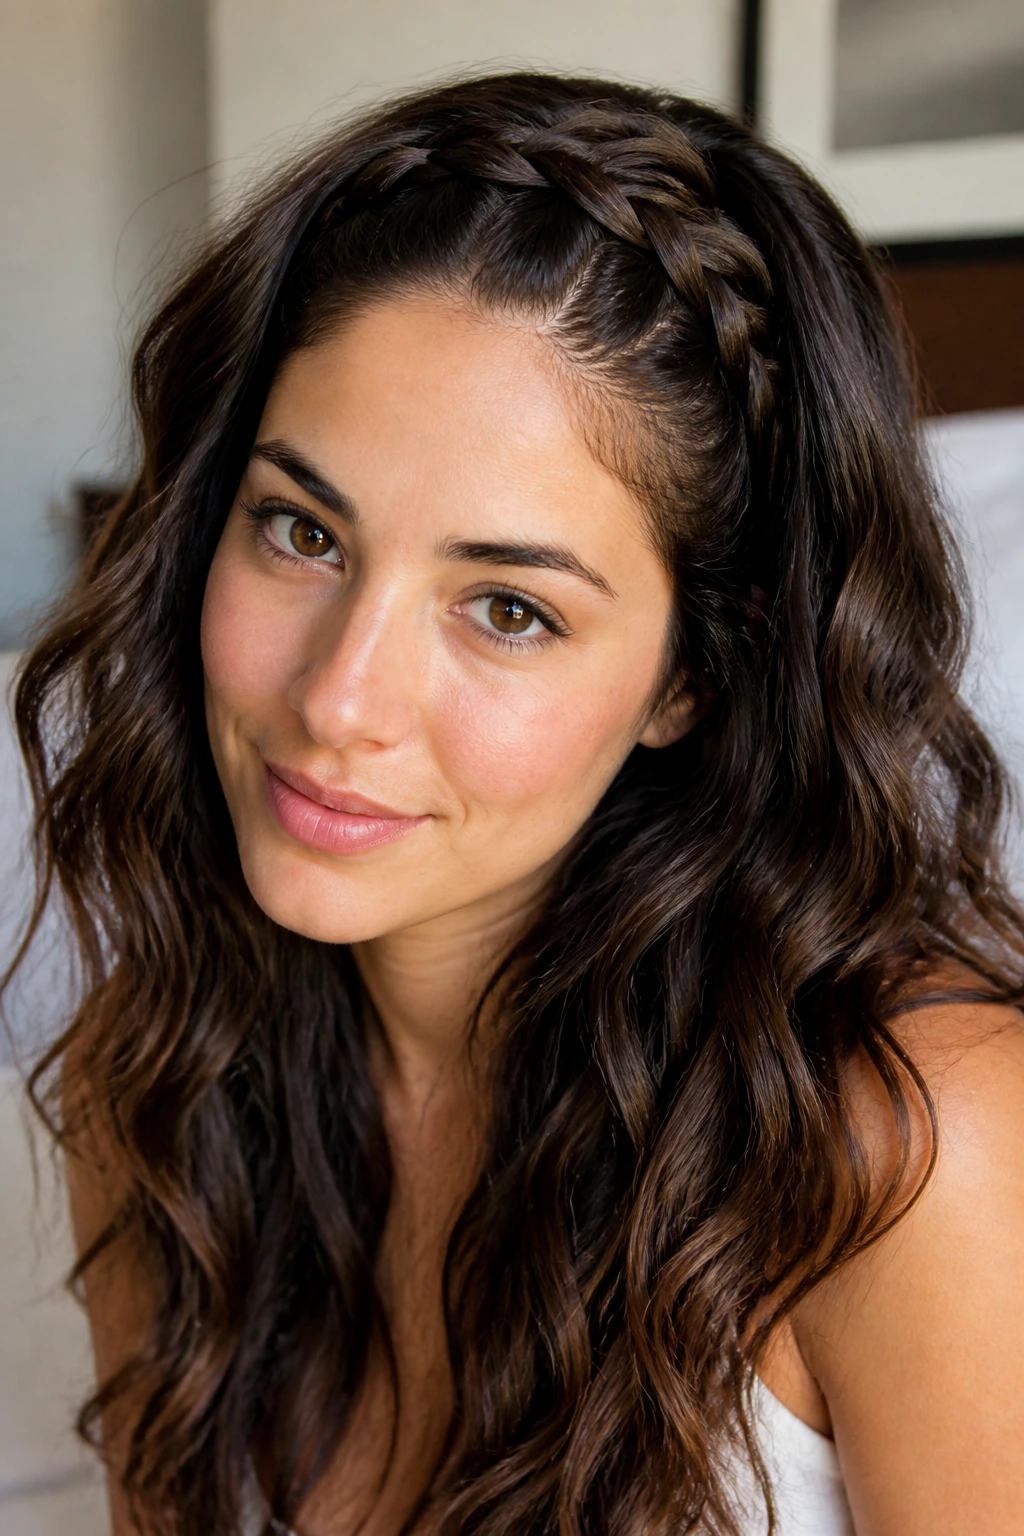
This style keeps the hair out of your eyes while letting your natural lengths flow free. It is a highly practical option for windy days when you still want to wear your hair down.
The Built-In Hair Accessory
By using your own hair to create a headband, you avoid the headache-inducing pressure of plastic store-bought bands. It stays secure because it is anchored directly to your scalp behind your ears. It is a beautiful way to show off highlights or color variations in your hair.
Steps to Create the Braided Band
- Take a two-inch section of hair from behind your left ear, near the nape of your neck.
- Braid this section tightly to the very end and secure it with a small, clear elastic.
- Pull the braid up and over the top of your head, positioning it about two inches back from your hairline.
- Pin the end of the braid behind your right ear, hiding the tail under your loose hair.
- Repeat on the other side if you want a double-banded look, crossing the second braid behind the first.
Pro tip: Lightly pull at the loops of the braid before pinning to make the headband look thicker and more defined.
14. The Low Rope Twist Chignon
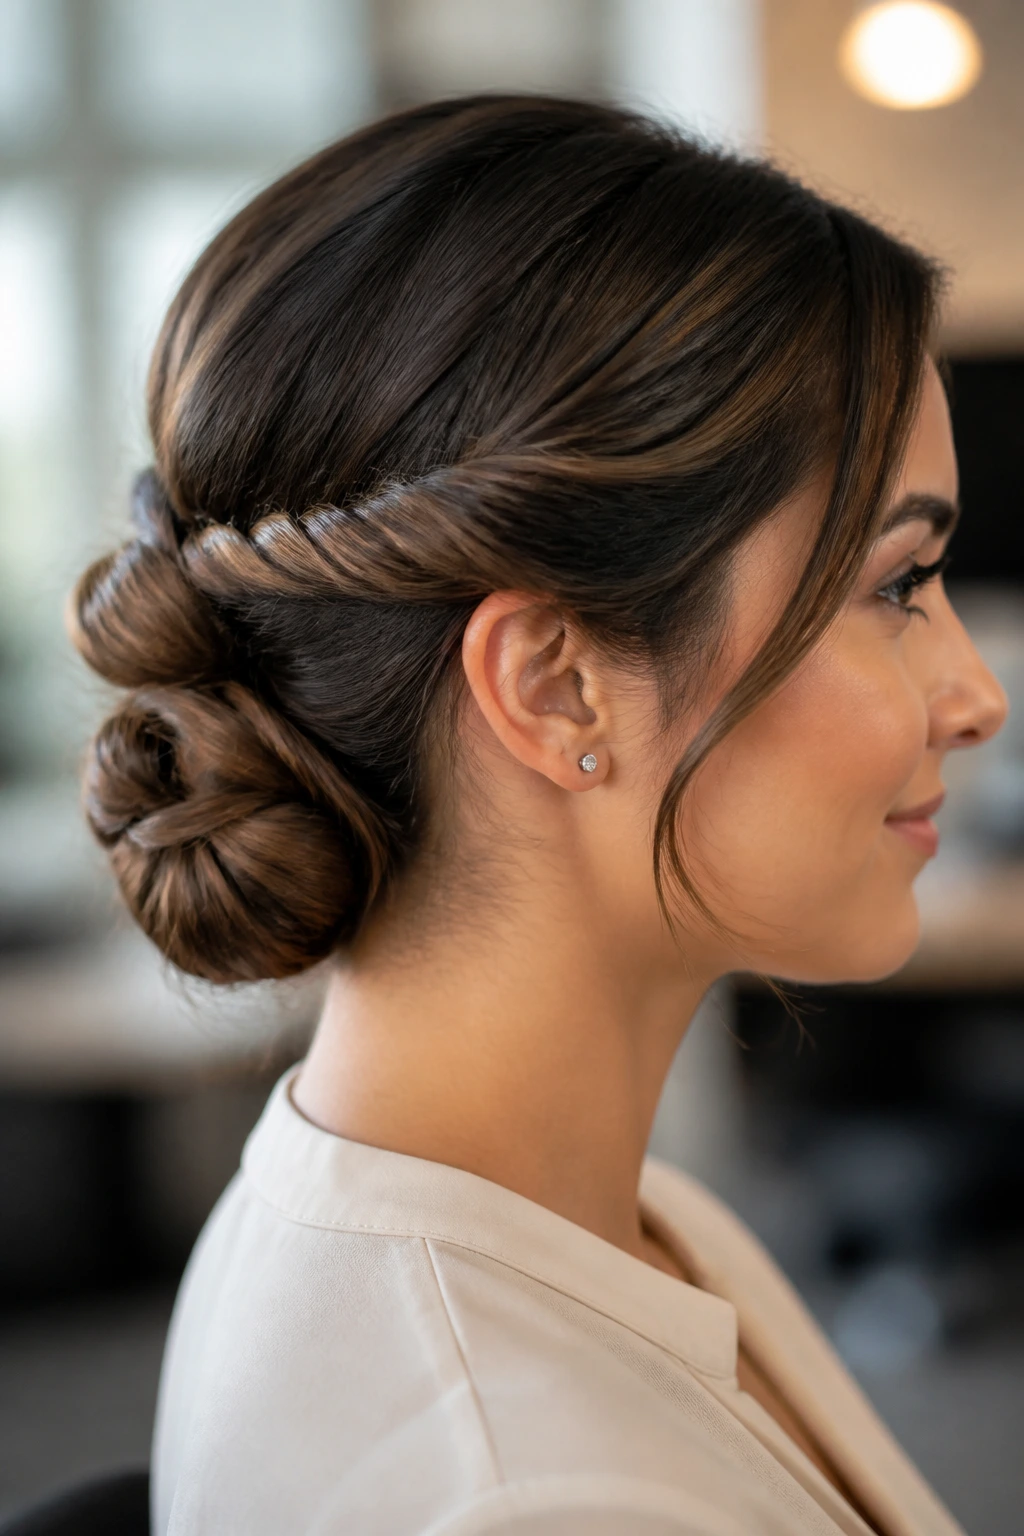
Most people assume a chignon requires dozens of pins and professional styling hands, but a simple rope twist makes it incredibly simple. It is a sleek, compact bun that holds its shape even through active movement or long commutes.
Start by dividing your low ponytail into two equal sections. Twist each section individually to the right, then wrap them around each other to the left. This counter-twisting method is crucial because it locks the rope together so it cannot unravel.
Once you reach the bottom, tie the end with a small elastic. Roll this rope upward toward the base of your ponytail, forming a neat, horizontal roll at the nape of your neck. Secure the sides with two large bobby pins pushed horizontally into the base of the roll.
This style looks exceptionally clean and professional, making it a great option for office environments or formal dinners when you only have five minutes to prepare.
15. The Triple-Stacked Ponytail for Maximum Volume
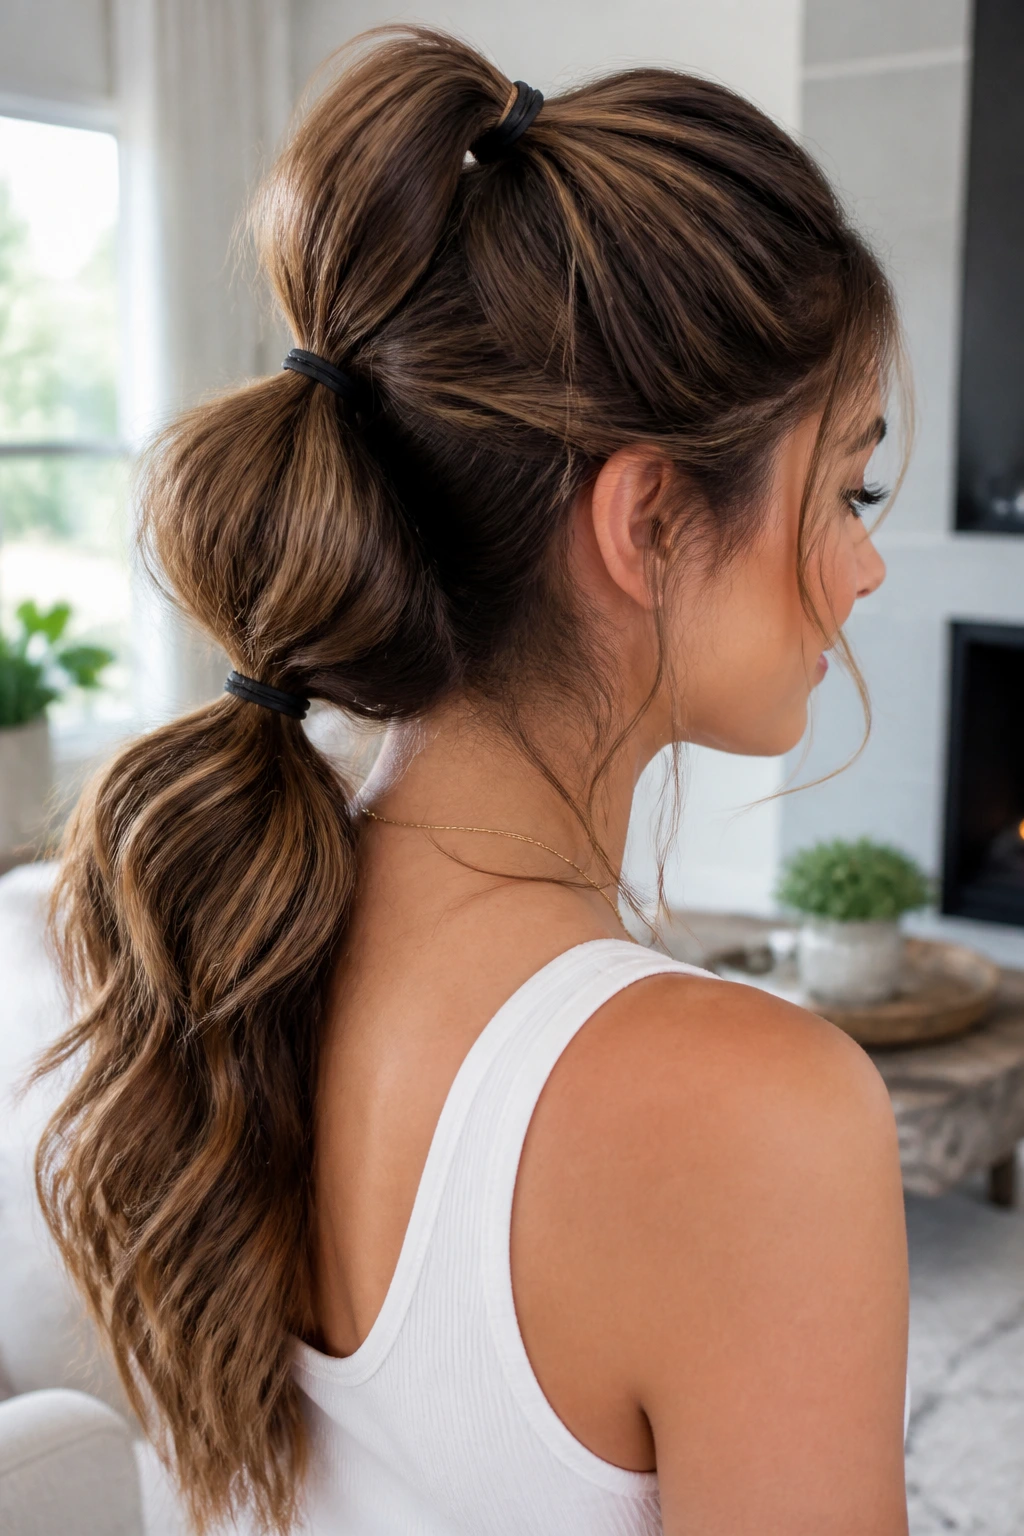
Why does a single ponytail always end up looking flat and sad by midday?
The weight of all that hair pulls down on the single elastic, flattening the crown and leaving you with a limp look. The triple-stacked method solves this by distributing the hair into three smaller, stacked sections. It creates the illusion of a single, incredibly thick ponytail with massive volume and length.
It works by using the top sections to support the weight of the bottom sections, lifting the entire style up away from your neck.
How to Style It
Section your hair into three equal horizontal bands: top, middle, and bottom. Tie the top section into a high ponytail at your crown. Gather the middle section, along with the tail of the top ponytail, and tie them together just below the first band. Finally, gather the bottom section and the remaining tail, securing them into a low ponytail at the nape of your neck.
16. The Criss-Cross Half-Up Bobby Pin Slide
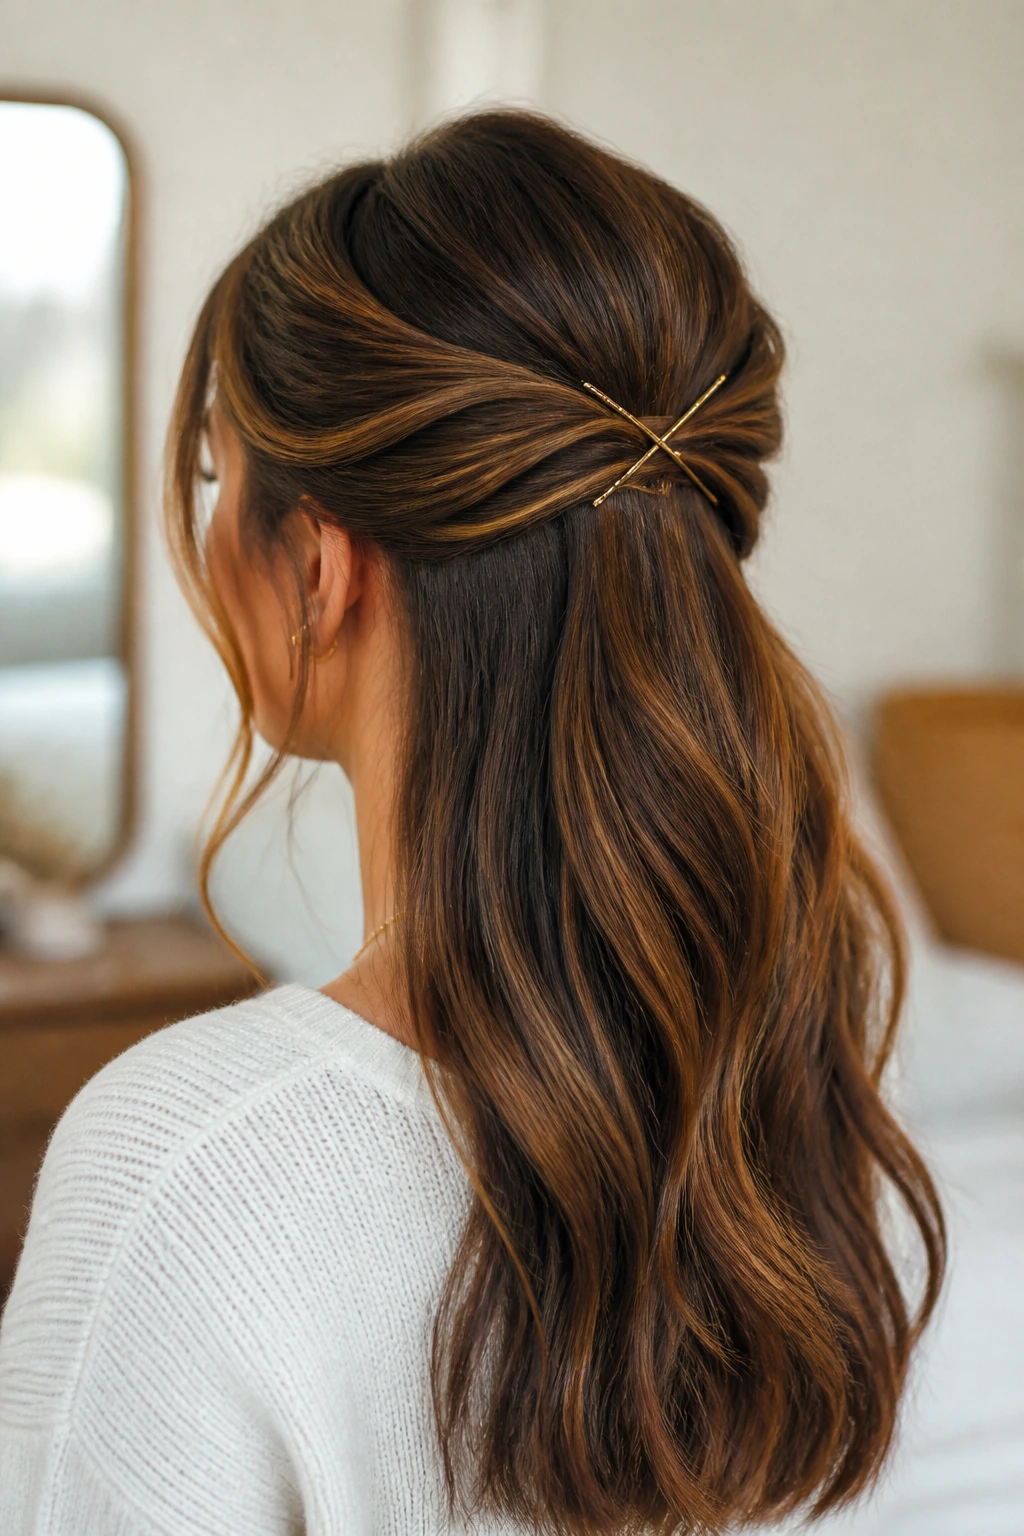
Sometimes you want a style that is incredibly minimal, relying on simple geometric lines rather than braids or buns. This look uses your bobby pins as a design element rather than hiding them.
I love this style because it is virtually impossible to mess up. It takes less than sixty seconds and works on any hair length, from a short pixie cut to waist-length hair.
- Brush your hair straight back away from your face, smoothing the top and sides.
- Gather a small section of hair from the left temple and pull it across the back of your head.
- Secure this section with a long, metallic bobby pin pushed horizontally from right to left.
- Pull a matching section of hair from the right temple, crossing it over the first section.
- Secure this right section with a second bobby pin, crossing it over the first pin to form a clean “X” shape.
Using gold, copper, or silver pins creates a beautiful metallic detail that catches the eye while keeping your hair securely back.
17. The Sleek High Ponytail with a Wrapped Base
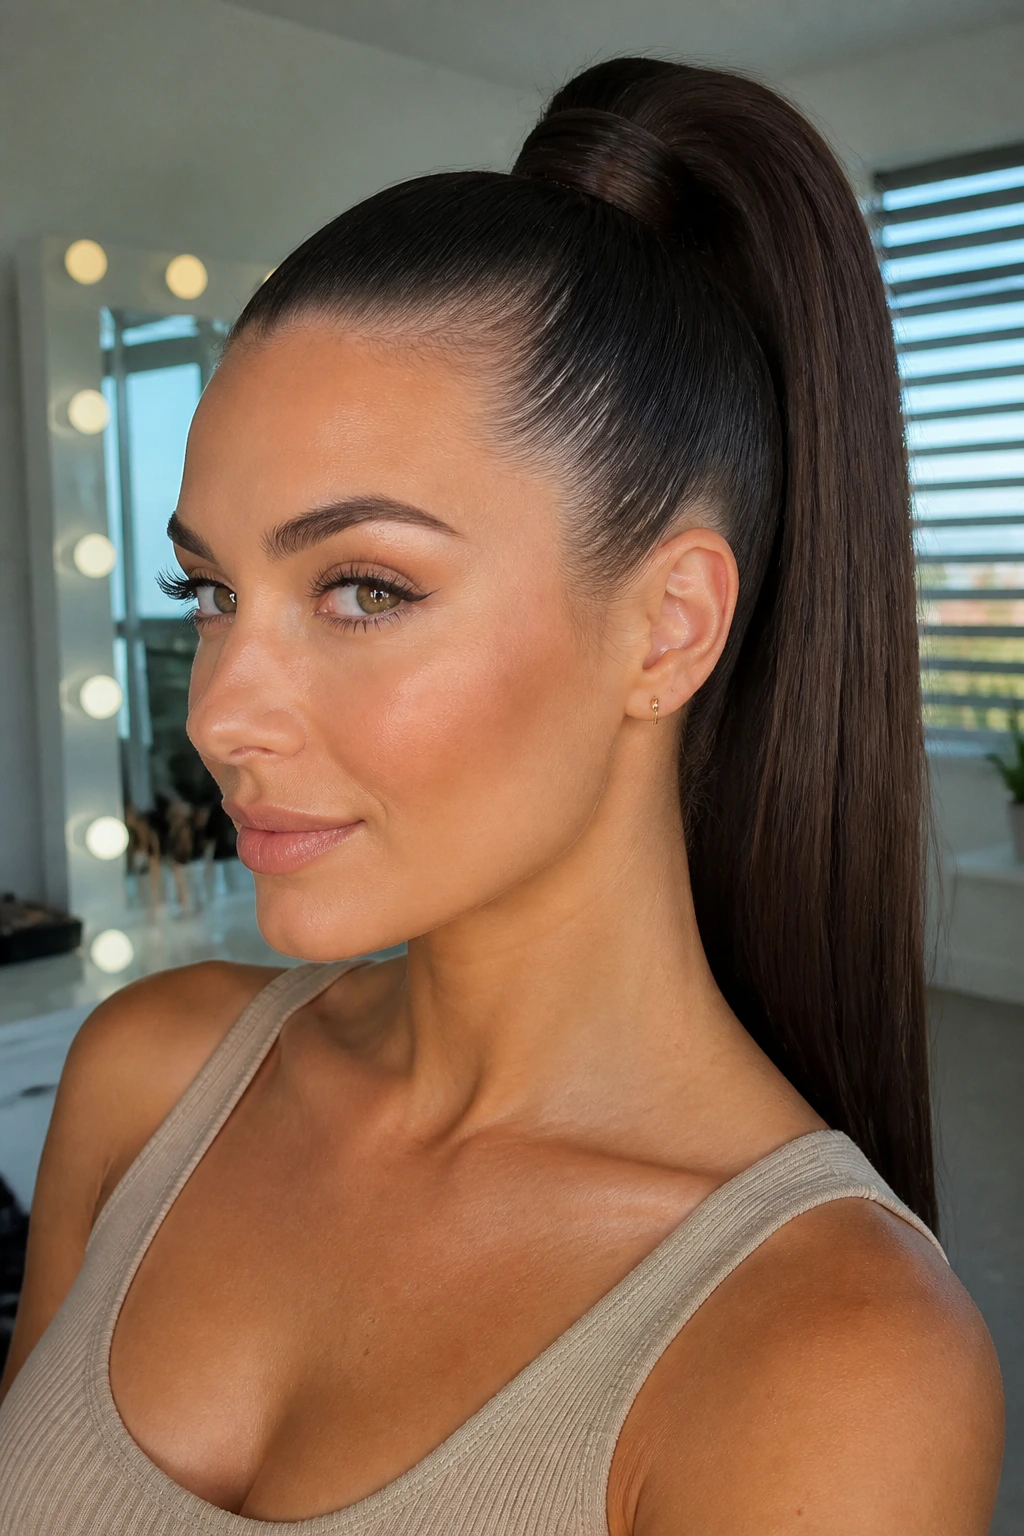
A high ponytail is a classic, but a visible elastic band can make it look like you are heading to the gym rather than the office. By taking one extra minute to wrap the base, you elevate the entire look into something polished and intentional. This style works best on straight or blown-out hair, but looks equally stunning on natural curls.
Tilt your head back slightly while brushing your hair up into a high ponytail. This prevents sagging or bagging at the nape of your neck, keeping the lower sections smooth. Secure the hair tightly with a sturdy elastic band placed high on the crown of your head.
Take a thin, half-inch strand of hair from the underside of the ponytail. Wrap this strand tightly around the elastic band until the band is completely covered from view. Push a small bobby pin vertically down through the wrapped hair, aiming it straight into the center of the ponytail base to lock it in place.
For a clean, high-shine finish, mist a small amount of shine spray over the lengths of the ponytail. Run a fine-toothed comb through the tail to distribute the product evenly and remove any remaining tangles.
18. The Quick-Roll Gibson Girl Updo
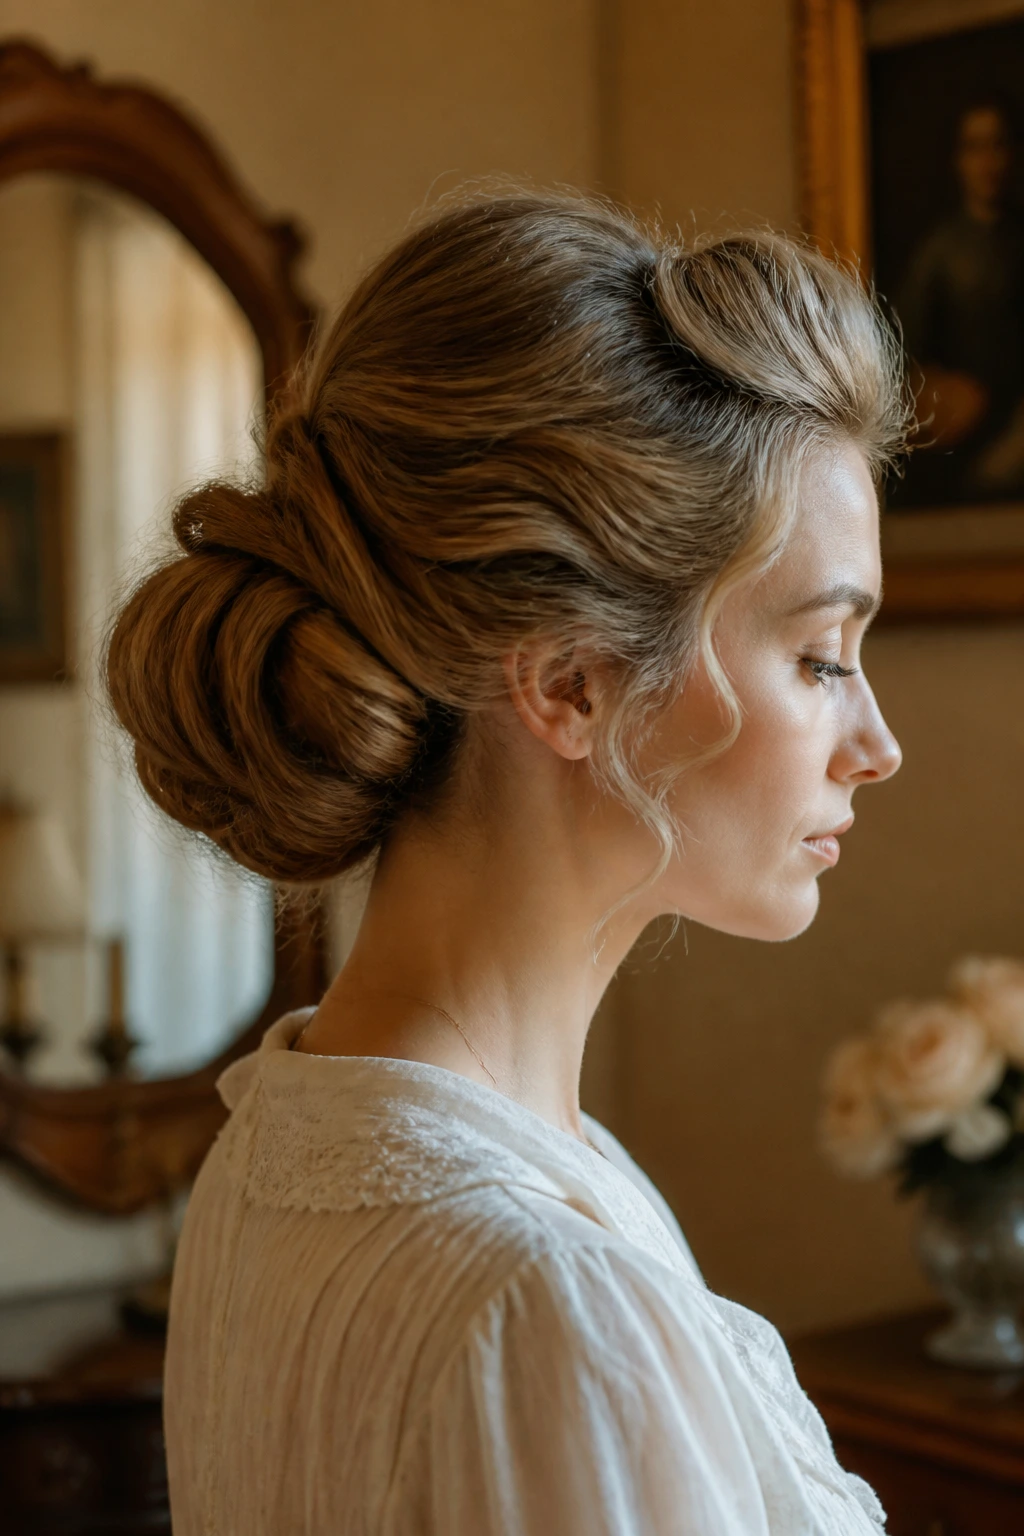
Unlike standard buns that sit on the outside of your head, this vintage-inspired style rolls the hair inward, creating a soft, pillowy frame around your neck. It is a highly practical option for hot summer days when you want your neck completely cool and free of hair.
What makes it different is the horizontal silhouette, which feels much softer and more romantic than a high bun. It is best for those with fine to medium hair that needs an extra boost of volume and thickness.
If your hair is very thick, split the roll into two smaller sections to prevent it from dropping. Simply tie your hair into a loose low ponytail, pull the elastic down two inches, split the hair above the elastic to create a pocket, and tuck the ponytail down and into that pocket until all the hair is rolled inside.
19. The Space Bun Half-Up Hair Prep
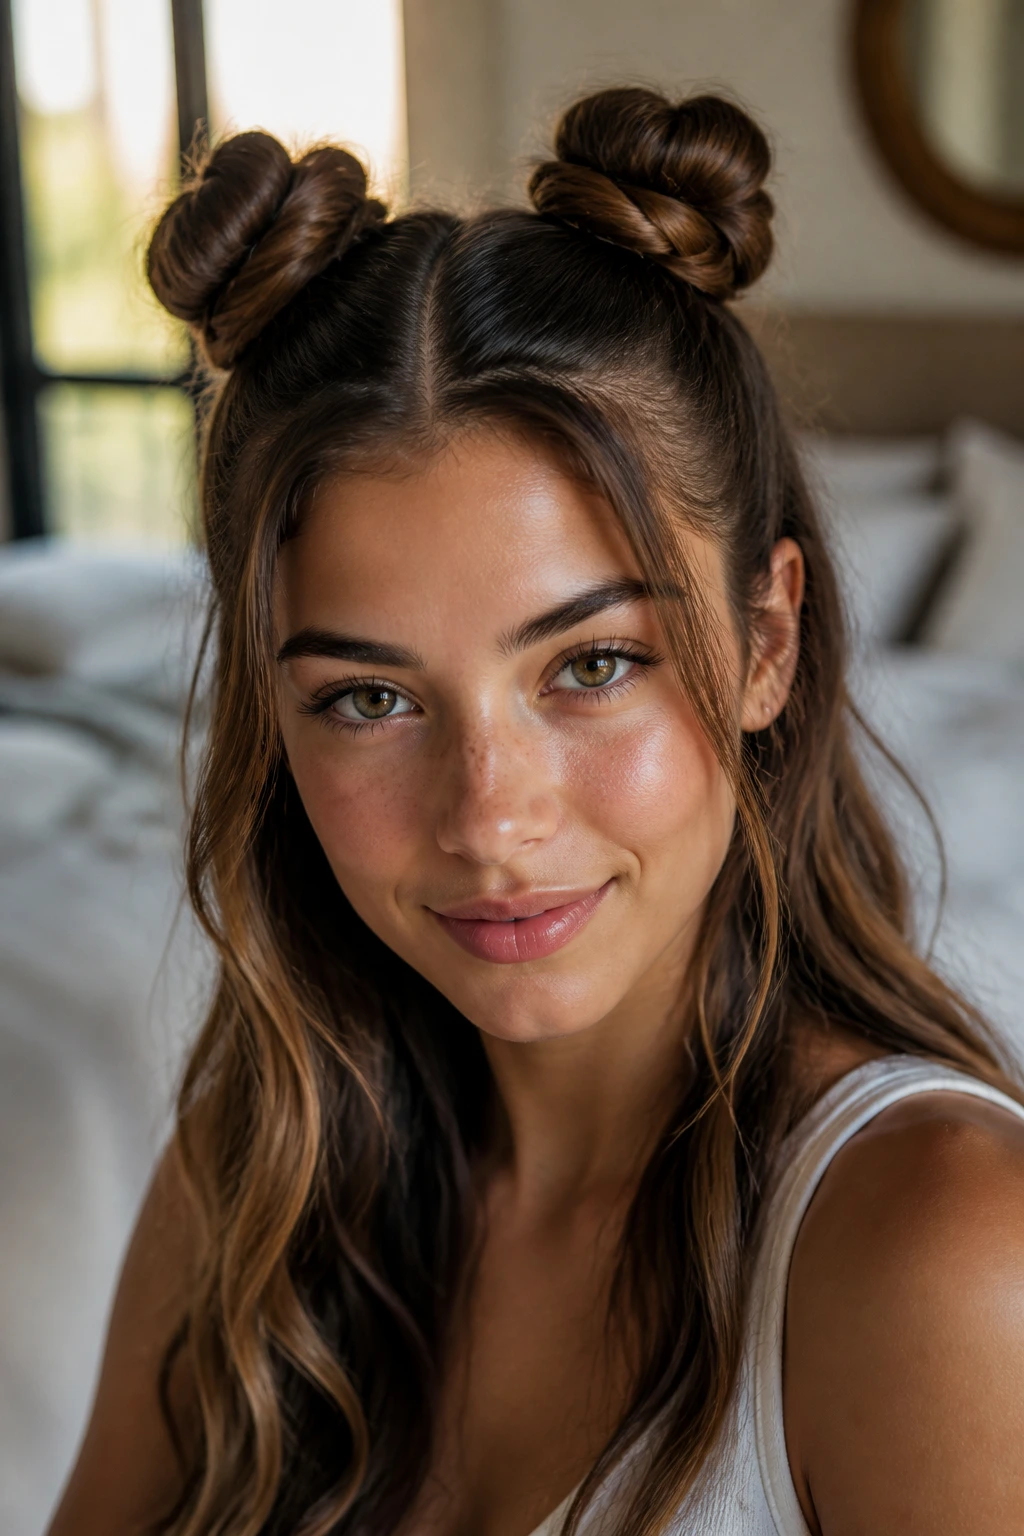
This style offers a playful, energetic look that is perfect for casual days or weekend outings. It keeps the hair off your face while showing off your natural lengths in the back.
A Playful Take on the Half-Up Look
By splitting the top section of your hair into two small buns, you create a balanced, symmetrical style that feels youthful and fun. It is highly effective for hiding uneven layers or growing-out bangs. The double buns distribute the weight of your hair, making it more comfortable than a single heavy knot.
Steps for Double Buns
- Part your hair down the center from your forehead back to the crown of your head.
- Gather the left top section into a high ponytail and twist it tightly to the end.
- Wrap the twisted hair around its base to form a small bun, securing it with a small elastic.
- Repeat the process on the right top section, ensuring both buns are at the same height.
- Gently pull at the outer edges of the buns to give them a fuller, softer shape.
Pro tip: Pull out a few thin strands of hair in front of your ears to soften the look and frame your jawline.
20. The Bohemian Side Braid with Loose Pulls
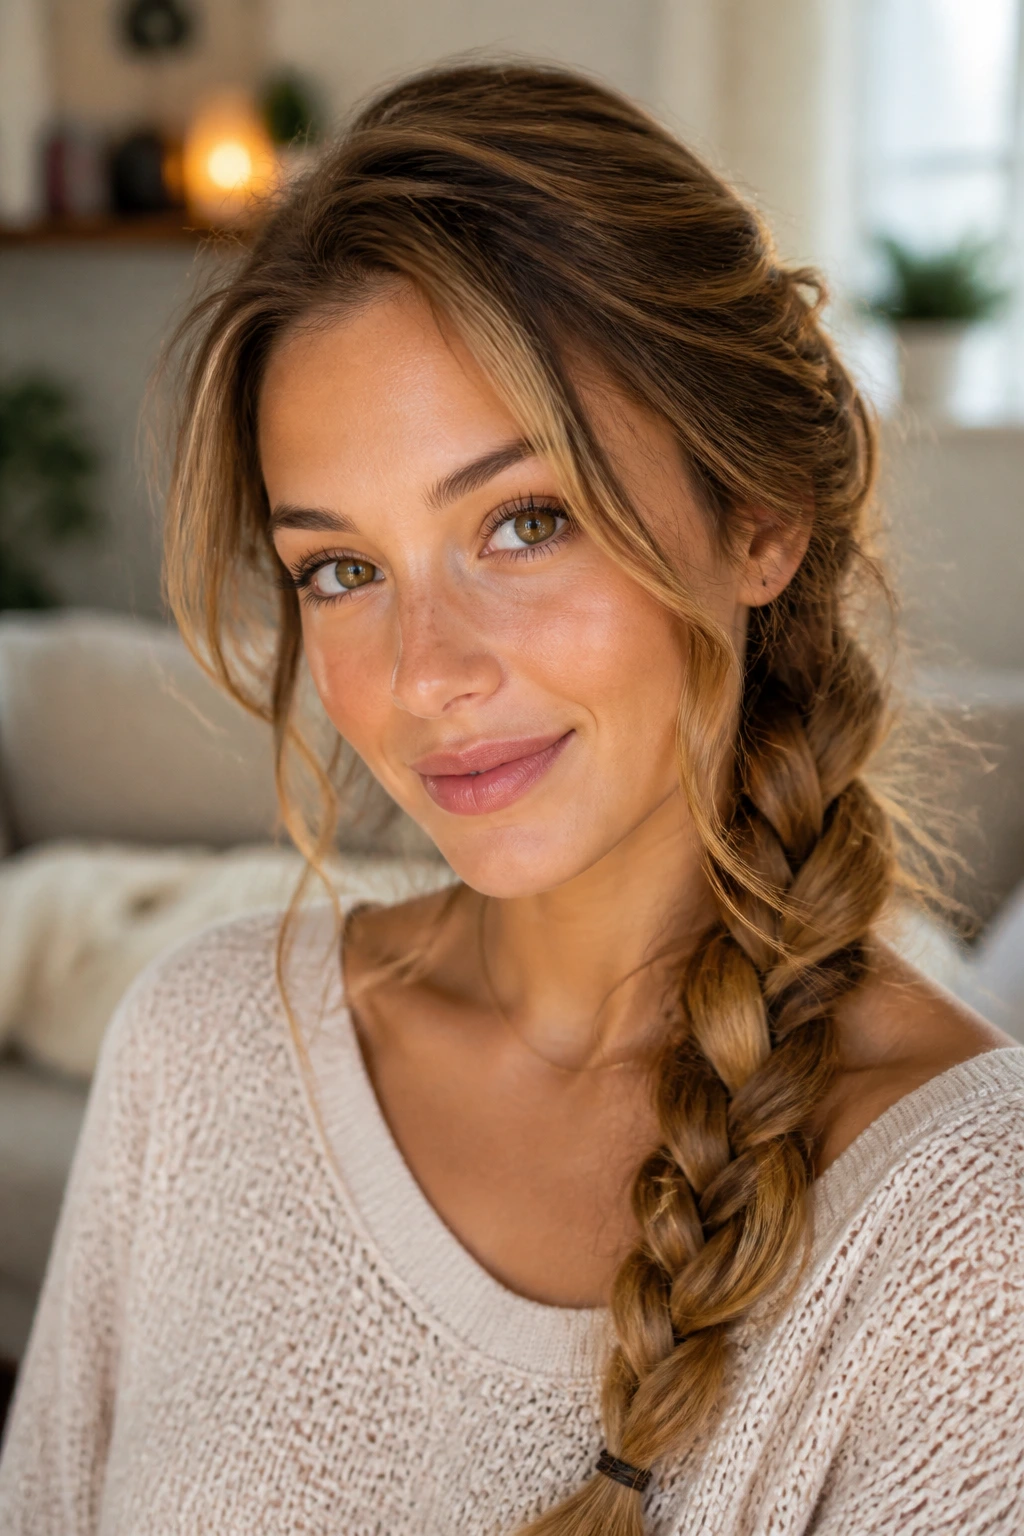
A tight, precise braid can sometimes look a bit too severe, but a loose, pulled-out side braid offers a relaxed, romantic vibe. It is highly forgiving of second-day frizz and works beautifully with curly or wavy hair textures.
Sweep all of your hair over one shoulder and split it into three sections. Braid the hair loosely downward, keeping the tension soft as you cross the outer strands over the middle. Secure the bottom with a small elastic band, leaving a two-inch tail.
Now, start at the bottom of the braid and gently pinch and pull the outer loops of the braid outward. Work your way up to the top, loosening each section slightly to create a thick, textured effect.
This technique makes even thin hair look incredibly thick and voluminous. It is an excellent option for those who want a casual, bohemian look that actually benefits from natural flyaways and texture.
21. The Pin-Curled Faux Bob for Short Hair
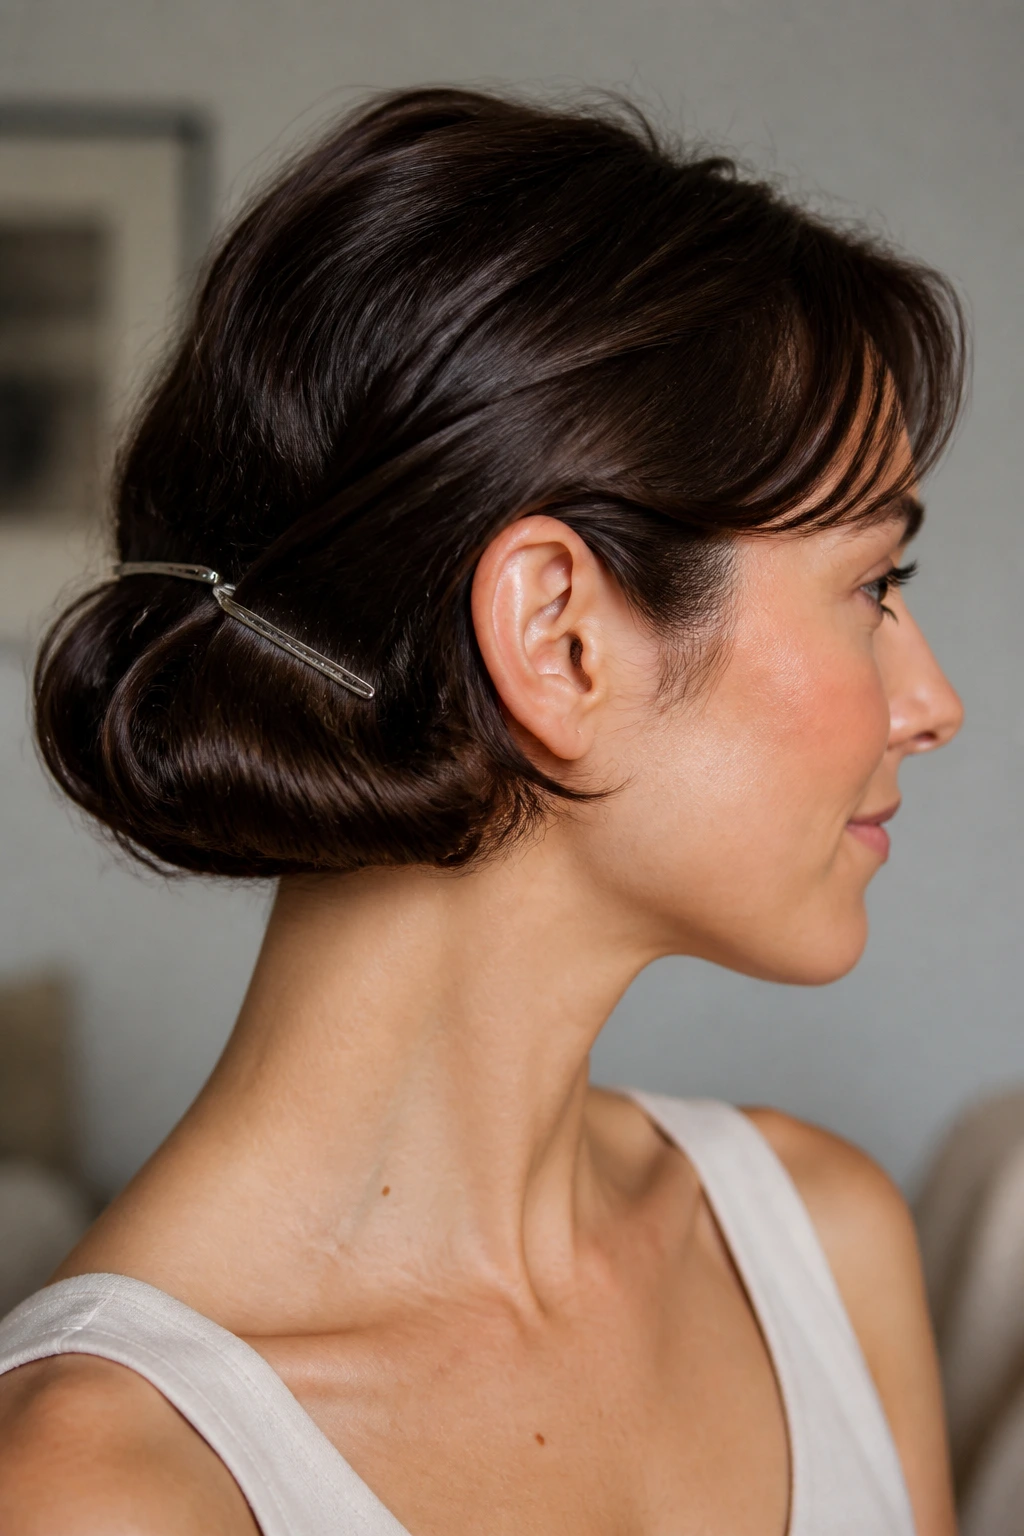
Why should long-haired individuals have all the fun when it comes to changing up their length?
If you have medium-length hair and want to try a shorter, classic look for a day, this faux bob is a fantastic option. It lets you tuck away your length without committing to a haircut, giving you a sleek, vintage style in minutes.
It relies on a simple folding technique that tucks the bottom half of your hair out of sight.
How to Style It
Tie your hair into a very loose low ponytail at the nape of your neck, using a small, clear elastic. Carefully roll the entire ponytail upward and inward, tucking it under the hair at the back of your head. Secure the rolled hair flat against your scalp using several large, sturdy bobby pins pushed horizontally. Gently pull on the hair at the sides to create a smooth, rounded bob shape that frames your face.
22. The Wet-Look Slicked-Back Pixie Style
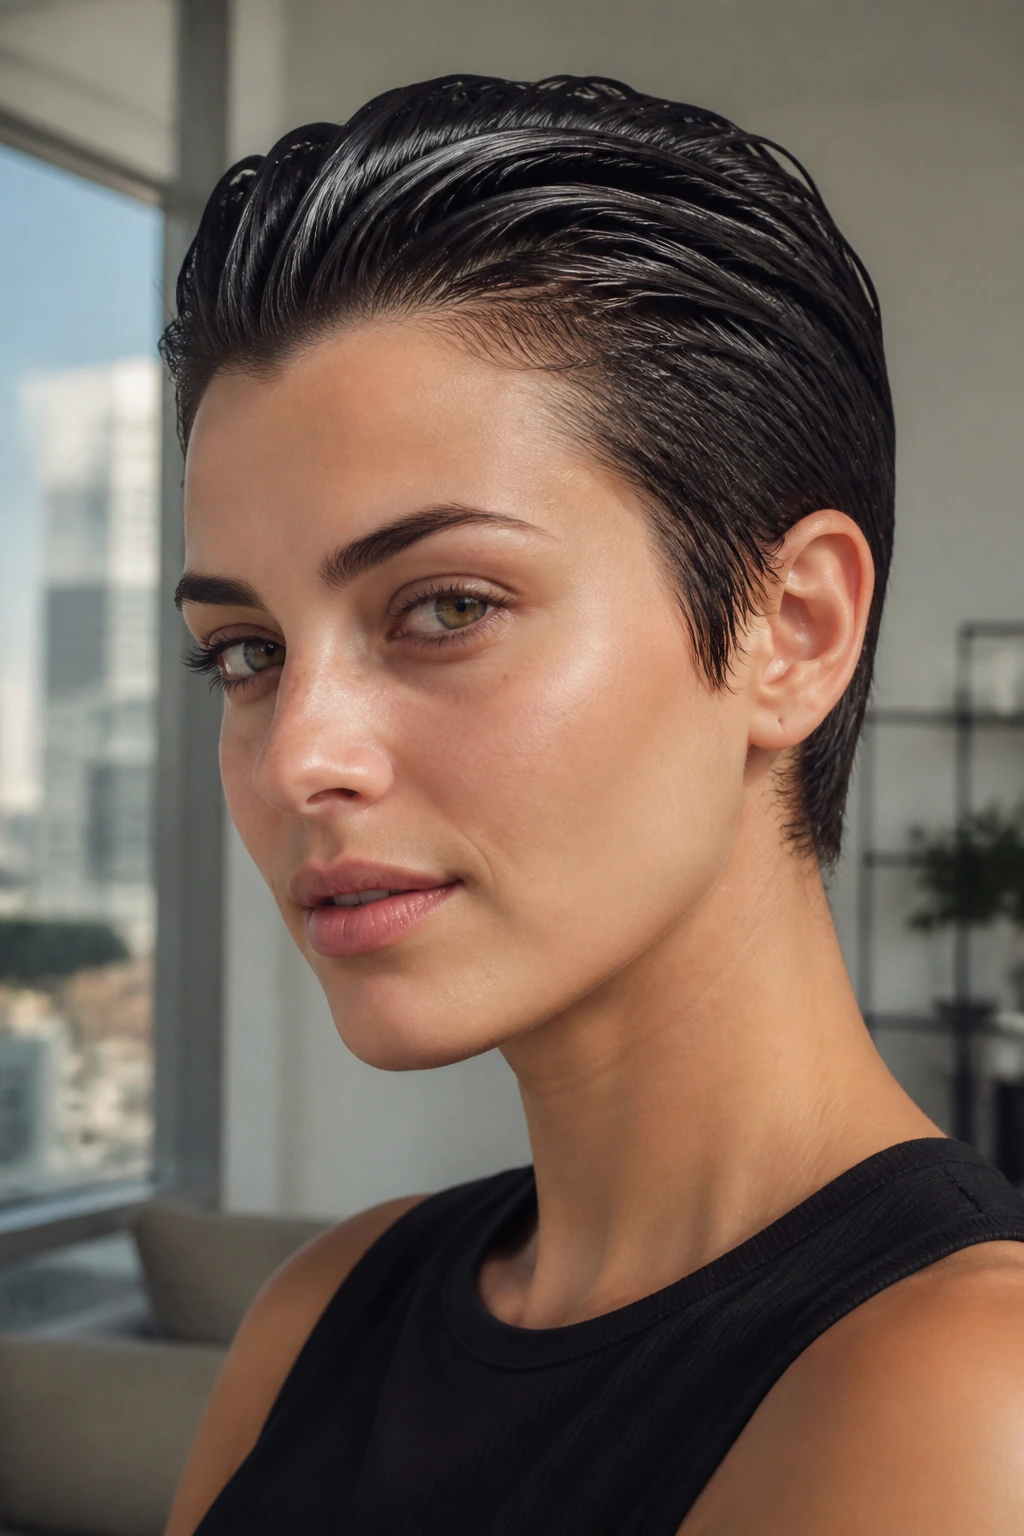
Having short hair does not mean you cannot change up your style on busy mornings. This sleek, high-shine look takes less than two minutes and is highly effective for taming bedhead or stubborn cowlicks.
I love this style for rainy days because it actually uses moisture to its advantage, keeping your hair looking sharp regardless of the humidity levels outside.
- Start by misting your pixie cut with water until it is damp but not soaking wet.
- Rub a dime-sized amount of high-shine pomade or hair wax between your palms to warm it up.
- Run your hands through your hair, pushing it straight back away from your forehead and temples.
- Use a fine-toothed comb to create clean comb lines, keeping the sides flat against your head.
- Allow the hair to air dry, letting the product lock the shape into place with a glossy finish.
This gives you a modern look that stays secure from morning meetings to evening dinners.
The Bottom Line
Mornings are unpredictable, but your hair does not have to be. By choosing styles that work with your natural texture rather than fighting against it, you can save valuable time and reduce heat damage from styling tools. Keeping a small, dedicated kit of hair ties, bobby pins, and a texturizing spray close at hand ensures you can execute any of these twenty-two styles in under five minutes.
The secret to great morning hair is preparation. If you tend to get oily roots, spray a small amount of dry shampoo on your scalp before you go to sleep. The powder will absorb excess oils overnight as you move, leaving you with clean, high-volume hair when you wake up.
Do not be afraid to experiment with these styles to find which ones work best for your unique hair length and texture. A style that feels awkward on the first try often becomes second nature by the third. Once you master a few of these quick looks, you will never have to settle for a boring ponytail again.
