Getting out the door when your hair is at that temperamental chest-length stage can feel like a high-stakes race against the clock. It is long enough to tangle, thick enough to hold heat, and short enough that a standard messy bun often just looks like a frantic knot rather than a deliberate style. Finding the balance between “I rolled out of bed like this” and “I actually care about my appearance” is the holy grail for anyone managing mid-back or chest-length locks during a rushed morning.
The reality of hair that hits the chest is that it requires more maintenance than a pixie cut but lacks the weight of true waist-length hair that stays put in a simple coil. If you find yourself staring in the mirror at 7:00 AM wondering how to tame the volume without spending forty minutes with a round brush and a hair dryer, you are in the right place. These styles are designed for people who value their sleep but refuse to sacrifice their personal aesthetic in the process.
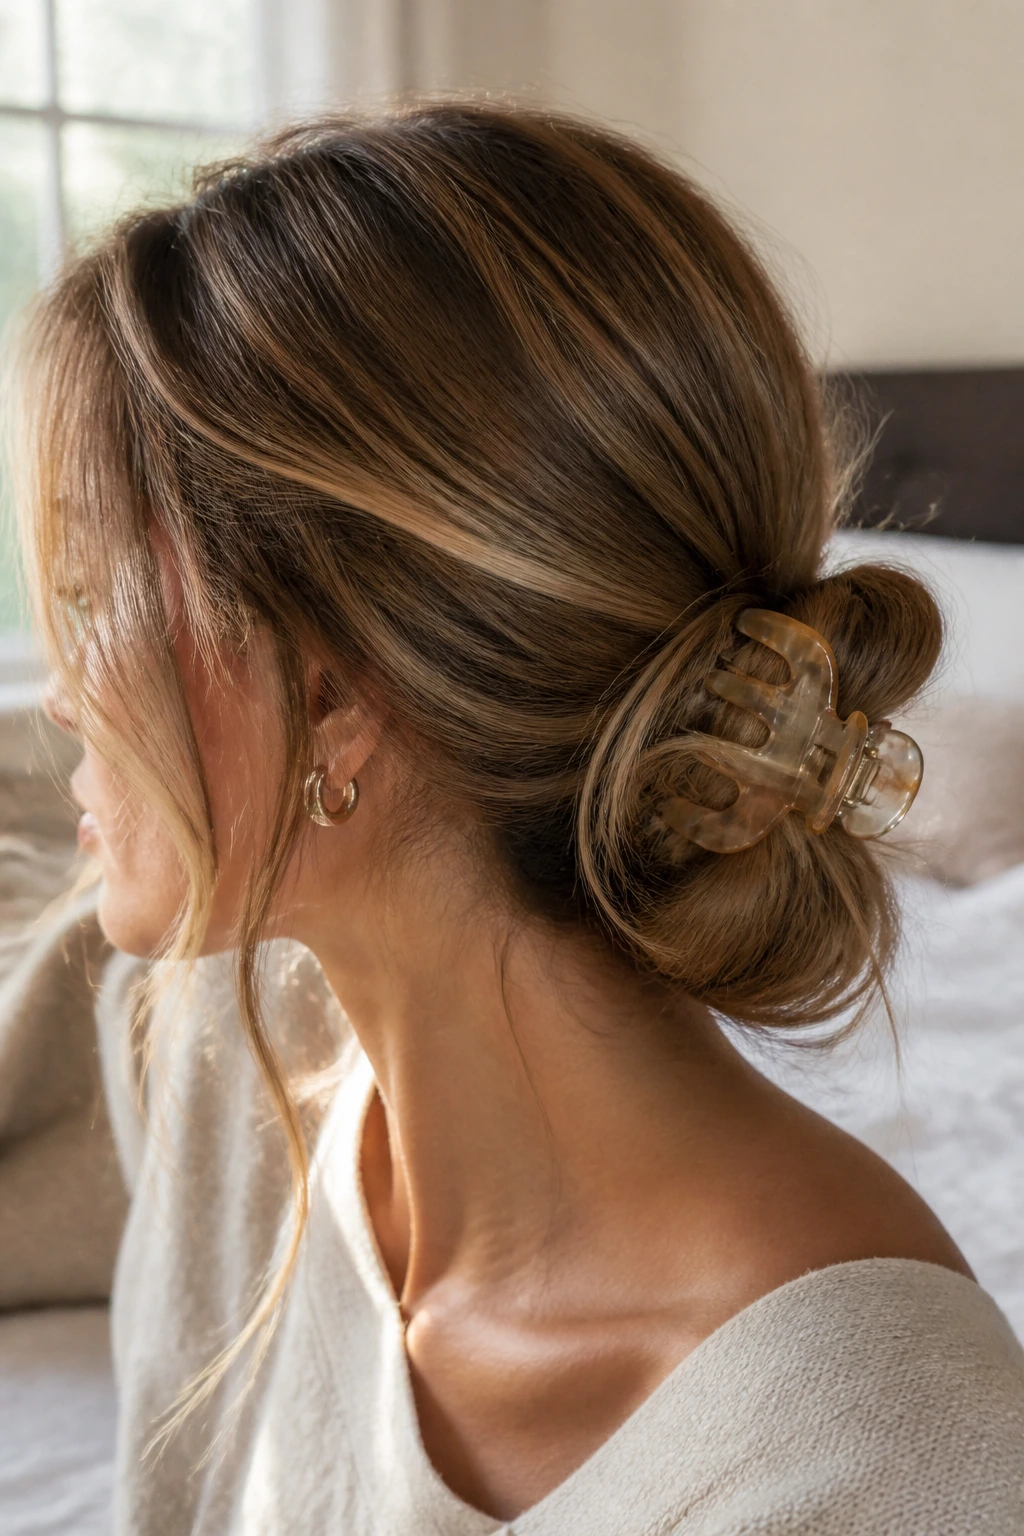
1. The Low Messy Chignon with a Claw Clip
When you need to look polished but have exactly thirty seconds, the low chignon is your best friend. Start by gathering your hair at the nape of your neck as if you are going to make a low ponytail. Instead of pulling it all the way through the elastic, loop it halfway so you have a small bun, then secure the remaining ends around the base.
Why It Works for Chest-Length Hair
This length is ideal for this specific style because you do not have an excess of heavy hair to wrestle into place. The ends are short enough to tuck neatly without sticking out awkwardly, creating a sleek silhouette that looks intentional.
Getting the Look Right
- Gather your hair into a low ponytail base.
- Twist the length once or twice.
- Secure with a medium-sized claw clip rather than an elastic to reduce tension on your roots.
- Pull a few face-framing strands loose to soften the edges.
Pro tip: If your hair is freshly washed and too slippery, add a light texture spray before you begin to give the claw clip something to grip onto.
2. The Classic Half-Up Top Knot
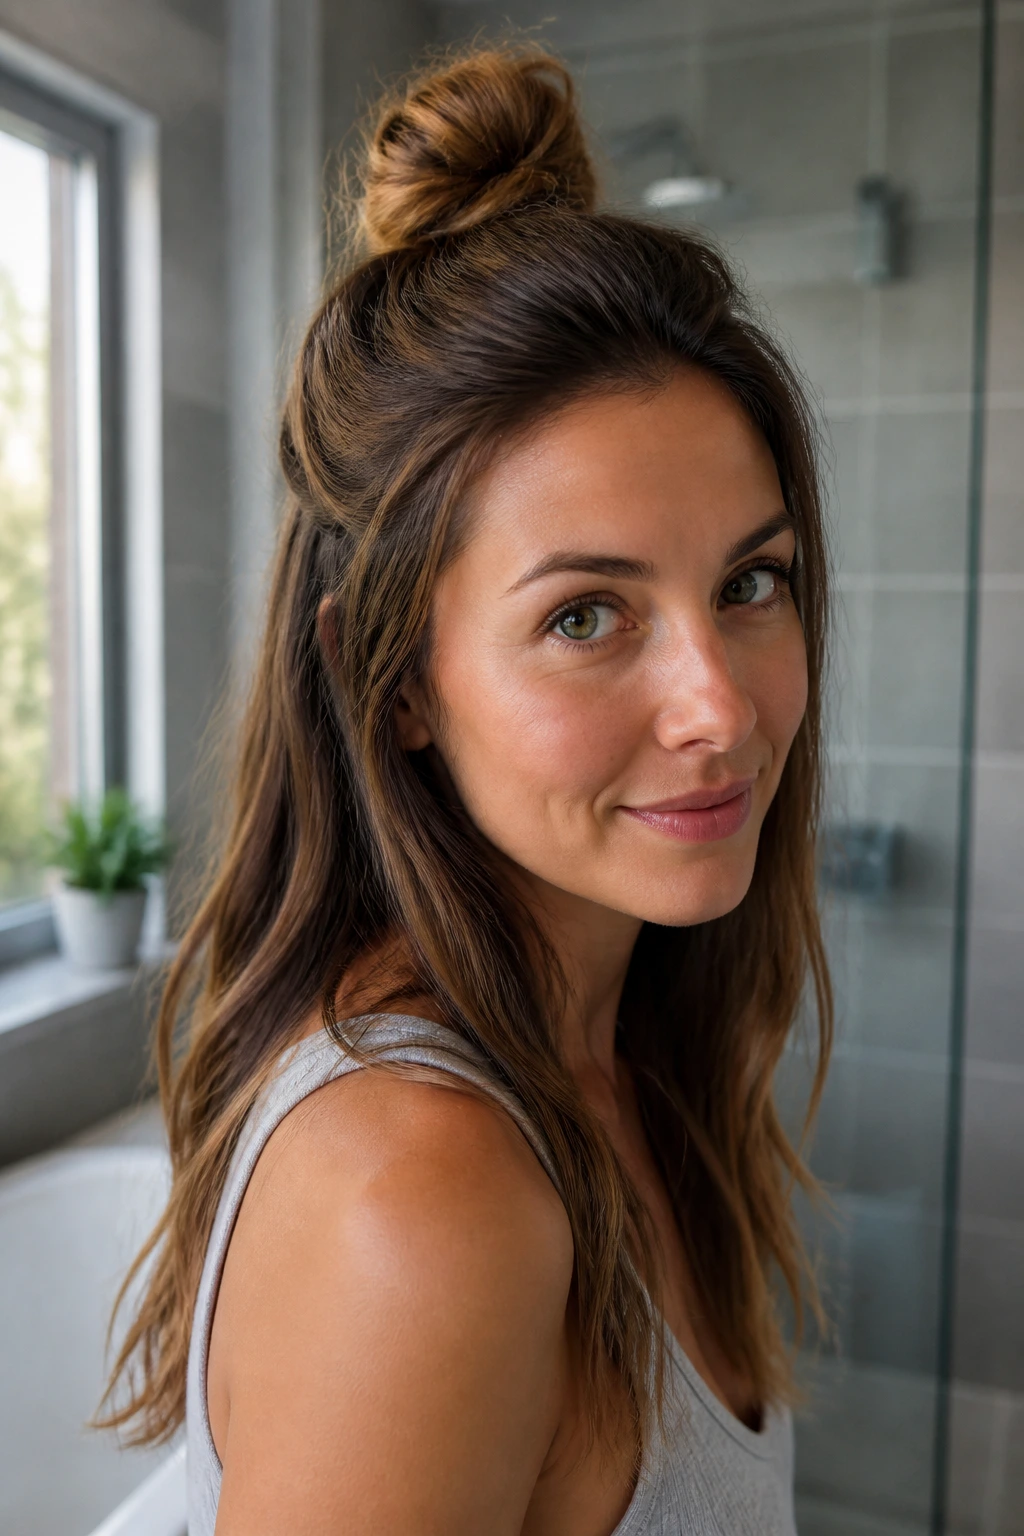
The half-up top knot is a staple for a reason—it pulls your hair away from your face while still showing off the length that hits your chest. By keeping the top half contained, you minimize the amount of hair you need to style, effectively cutting your morning routine in half.
How to Execute This Style
Separate the top section of your hair from the temples back to the crown of your head. Pull this section into a high ponytail and secure it with a small elastic. Twist the ponytail into a tight rope and coil it around the base to form a bun. Secure the ends with a few bobby pins or a second small clear elastic.
Why This Style Persists
It is a versatile look that transitions from a casual office environment to a post-work social setting without needing a single adjustment. By leaving the bottom half of your hair down, you retain the visual benefit of your chest-length layers, which helps frame your face in a flattering way.
Warning: Do not make the bun too tight at the root, or you risk a “pinched” look that can cause scalp discomfort throughout the day.
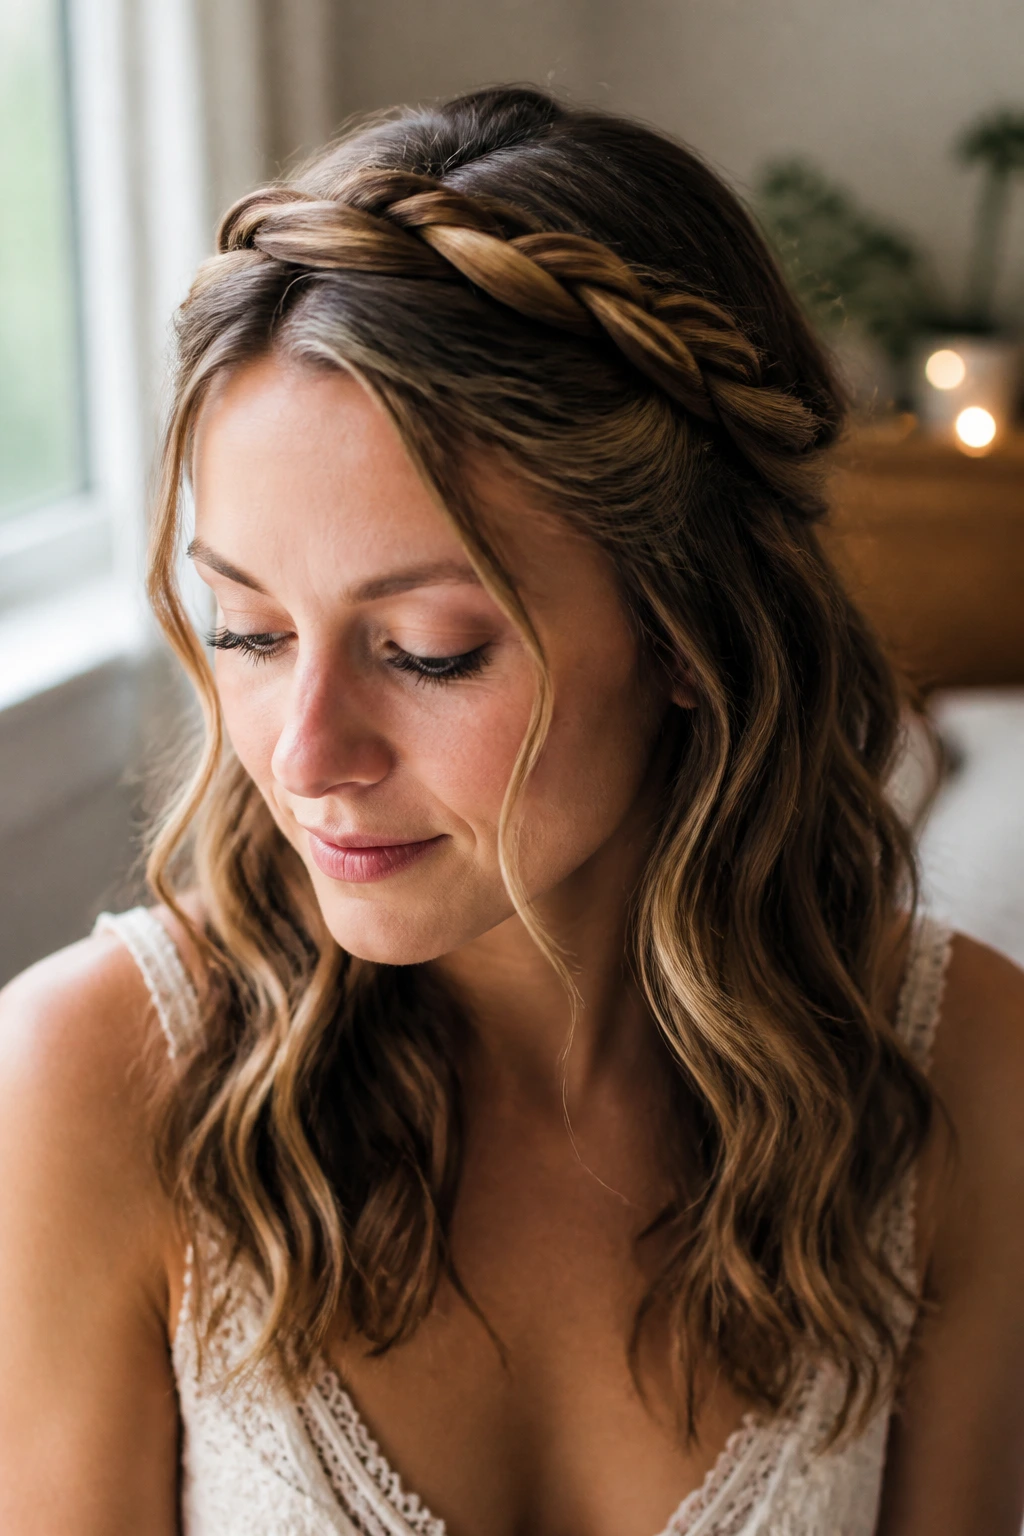
3. The Braided Headband Illusion
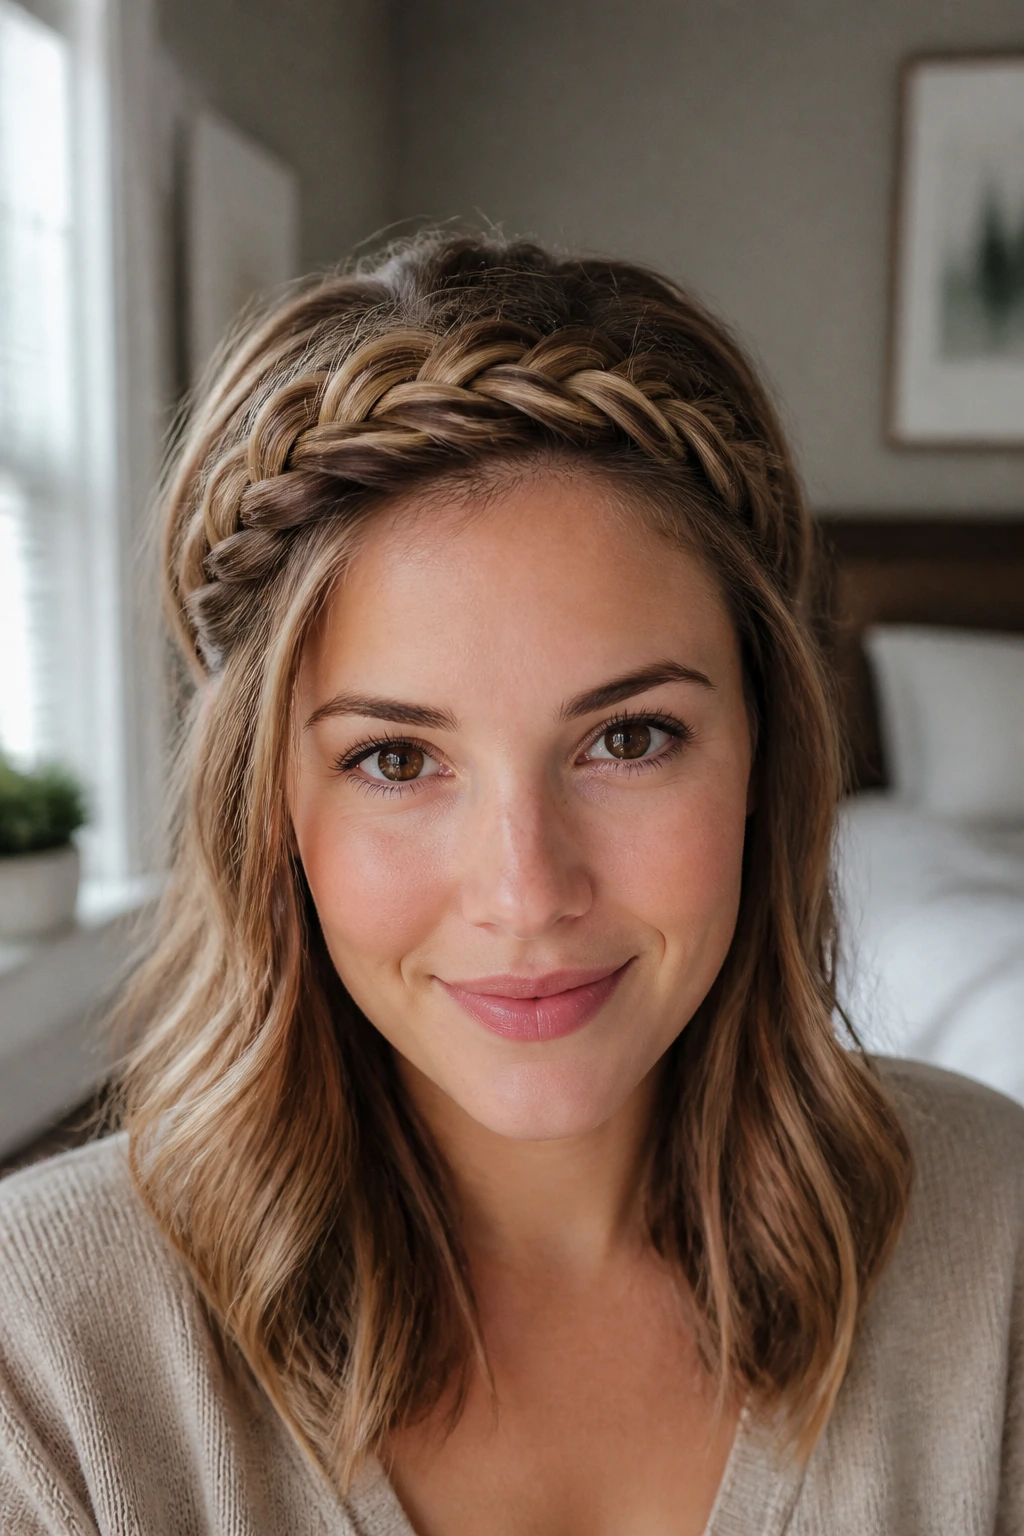
Braids are the ultimate solution for second-day hair that has lost its bounce. A single Dutch braid starting from one temple and wrapping around to the other creates a natural headband that looks intricate but takes very little effort once you get the motion down.
The Mechanics of the Braid
Start near your hairline on the left side, taking a small section of hair. Dutch braid it horizontally across your head, adding in small pieces as you move toward the right side. Once you reach the opposite ear, pin the end of the braid discreetly behind your ear using a bobby pin that matches your hair color.
Why It Saves Time
You are effectively styling the front of your hair—the part that everyone sees first—and leaving the back natural. This is perfect for those mornings when you want to avoid heat styling altogether. The braid hides oily roots and keeps your hair out of your eyes while you commute or work.
Styling Note: If your braid looks too tight or formal, gently tug at the loops to loosen them. This “pancaking” technique makes the braid look wider and more relaxed.
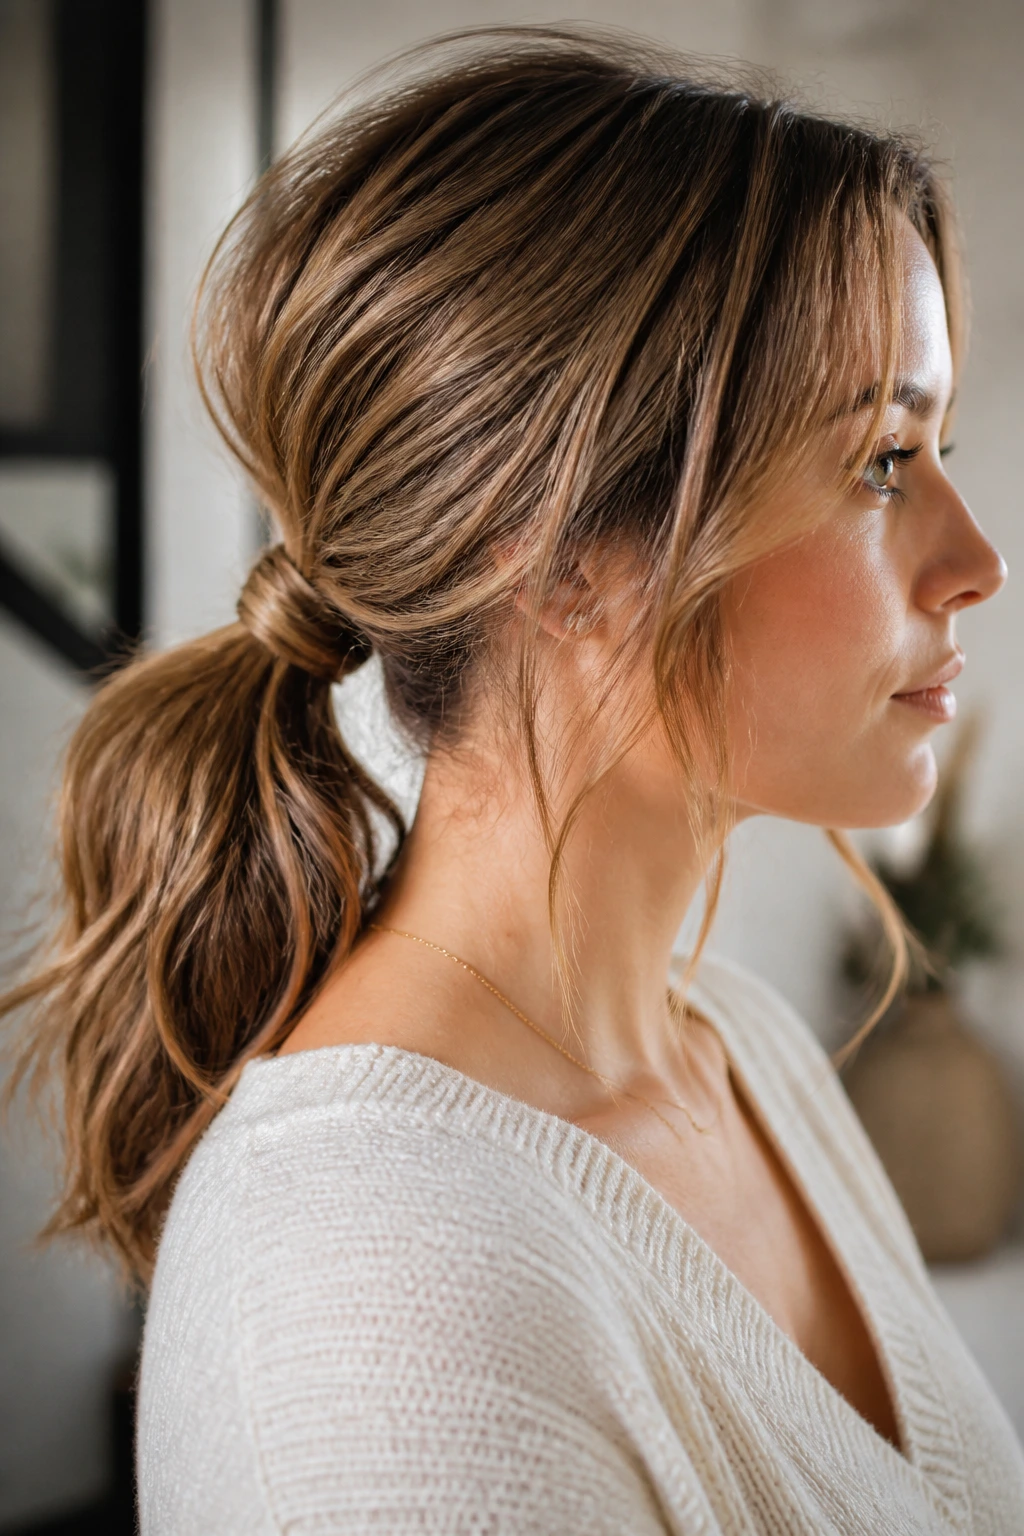
4. The Sleek Low Pony with a Ribbon
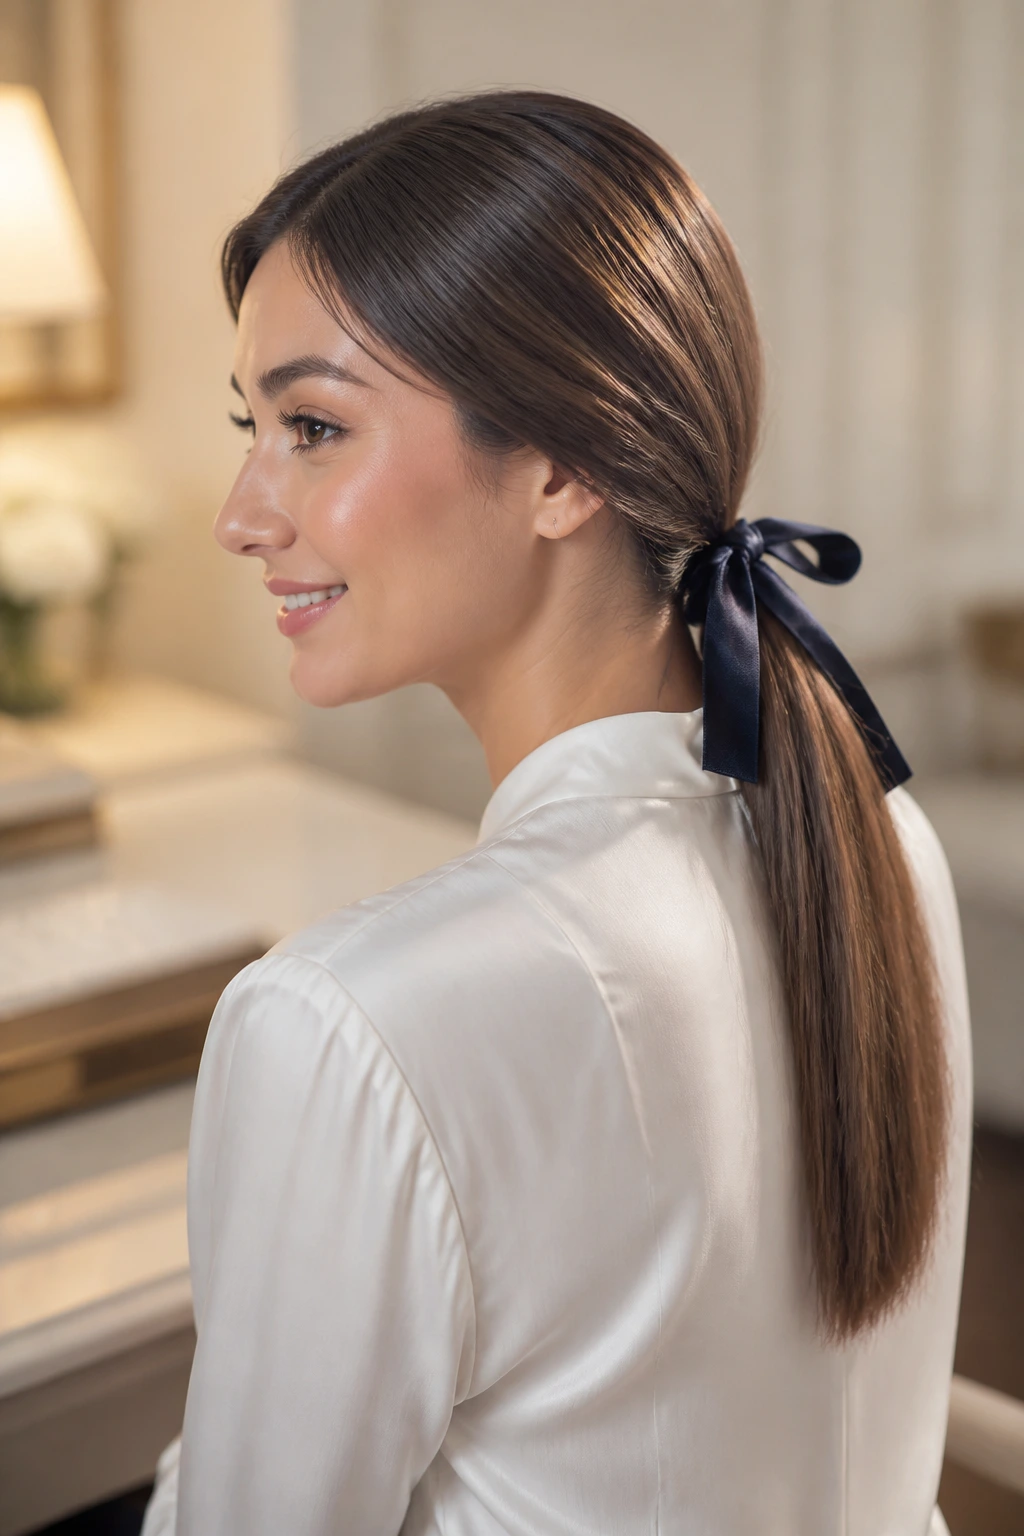
Sometimes the most effective style is the simplest one. A low ponytail is incredibly professional, but on chest-length hair, it can occasionally veer into “gym hair” territory if you are not careful. Adding a velvet or silk ribbon instantly elevates the look and makes it feel deliberate.
Choosing Your Accessories
The material of the ribbon matters more than you might think. Silk or satin ribbons slide out of fine hair, while velvet ribbons offer just enough friction to stay in place. A dark navy or forest green ribbon looks sophisticated, while a cream or blush option feels soft and light.
Achieving the Professional Finish
- Brush your hair until it is completely smooth.
- Secure it at the nape of your neck with a clear elastic that matches your hair color.
- Wrap your ribbon around the elastic and tie it into a neat bow.
- Use a small amount of anti-frizz serum to tame any flyaways near your ears.
Avoid this mistake: Do not place the pony too high. At chest length, a high ponytail can look a bit juvenile. A low placement is the hallmark of a more mature, refined style.
5. The Messy Side Braid with Volume
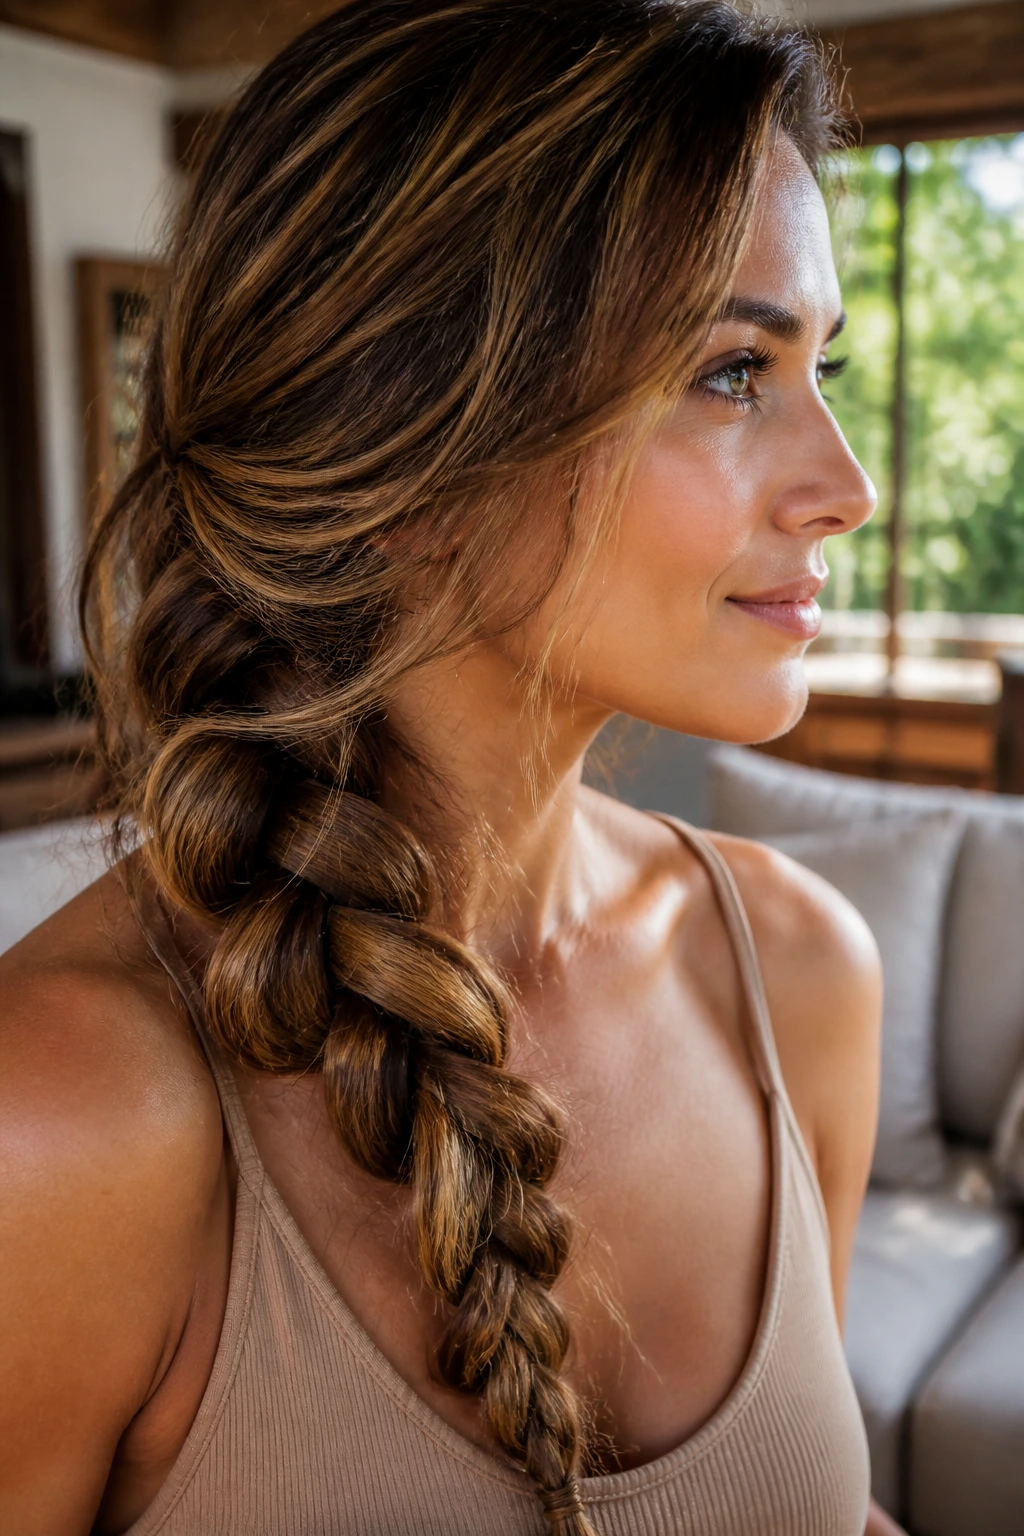
If you are running late and your hair is behaving poorly, a side braid is the ultimate camouflage. Because your hair is chest-length, it is long enough to make a substantial braid but short enough that you won’t be braiding for fifteen minutes.
The Secret to a Full Braid
The key to a good messy side braid is the preparation. Before you start braiding, flip your head upside down and give your hair a quick blast of dry shampoo or texturizing powder. This creates the grit needed to keep the braid from sliding apart as you move during the day.
Variations on the Look
- The Fishtail: Use this for a tighter, more structured look that lasts longer.
- The Three-Strand: Use this for a softer, more romantic vibe that works well with loose waves.
- The Pull-Through: This gives the illusion of a complex braid without actually weaving sections.
Pro tip: Once you reach the end of the braid, secure it with a tiny clear elastic, then use your fingers to pull at the outer edges of each section to make the braid look twice as thick.
6. The Twisted Side-Swept Pin-Up
When you want to keep your hair off your face but don’t want a ponytail, a side-swept twist is an elegant alternative. It works particularly well if you have bangs or shorter face-framing layers that tend to fall into your eyes during the day.
Why This Style Suits Busy Mornings
It takes less than a minute. By twisting the front section of your hair away from your face and pinning it to the side, you open up your features and look instantly more alert. It is a fantastic way to handle hair that is slightly wavy from sleeping on it overnight.
The Technique
- Take a one-inch section of hair near your part.
- Twist it toward the back of your head.
- Add more hair to the twist as you go, moving downward toward your ear.
- Secure it with two bobby pins crossed over each other to create an ‘X’ shape, which holds better than a single pin.
Style hack: If you have trouble with pins sliding out, spray them lightly with dry shampoo before inserting them into your hair.
7. The Double-Bun (Space Buns)
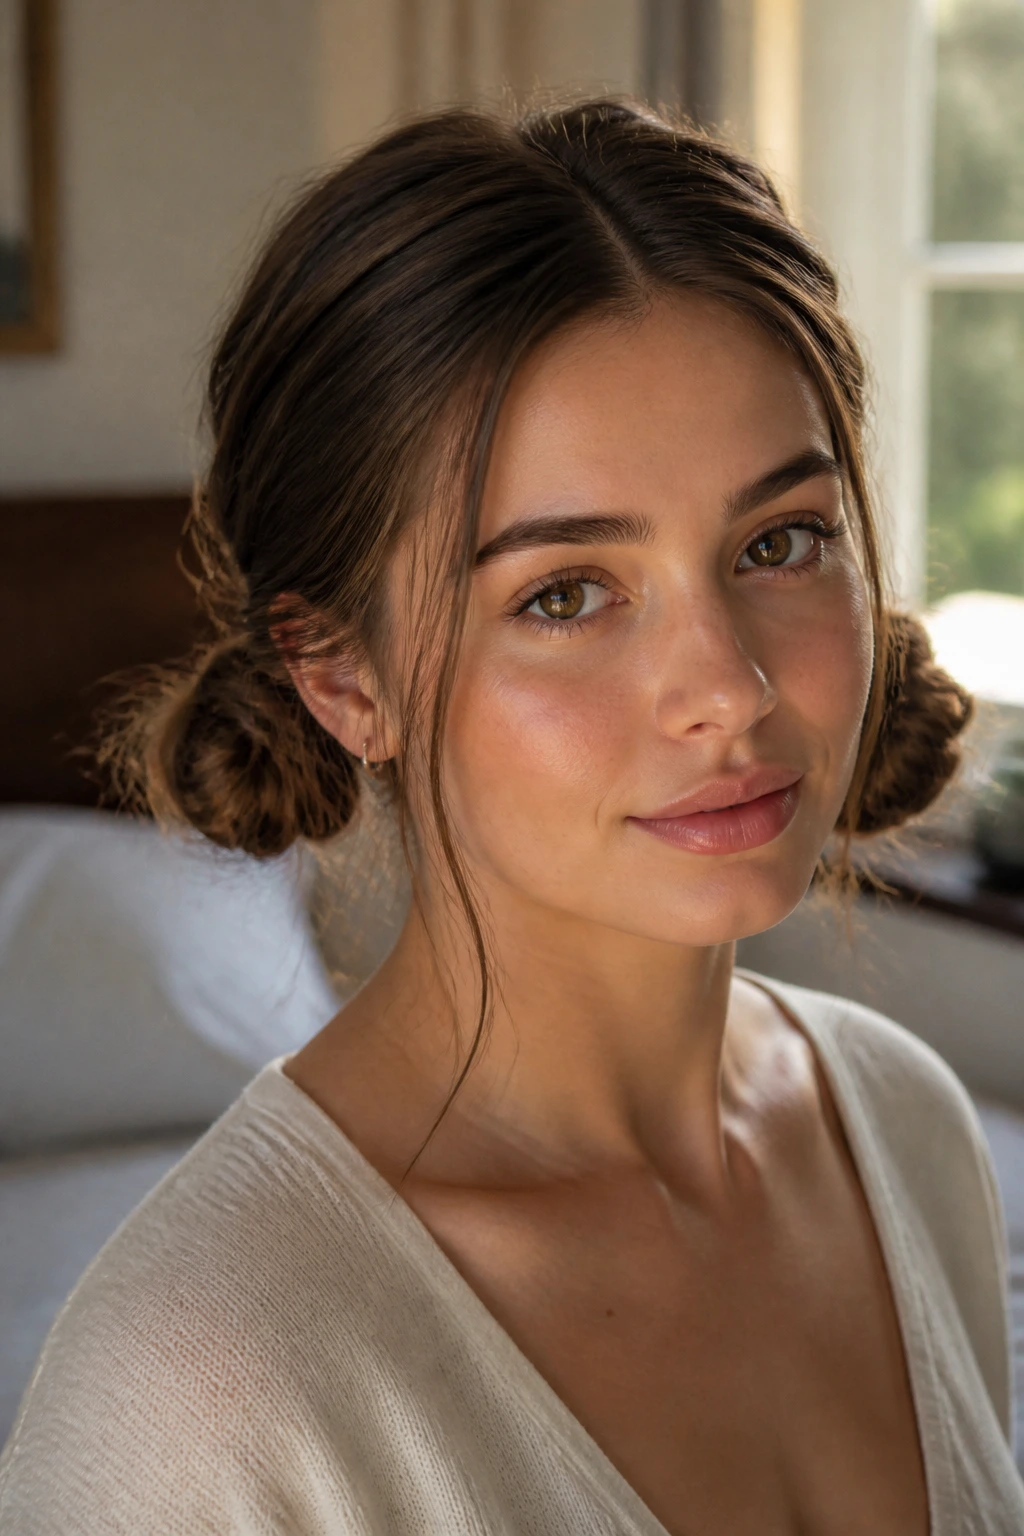
For the days when you want something fun and energetic, the double-bun is unbeatable. While it is often associated with weekend festivals, a low version of these buns can actually look quite chic and balanced when positioned at the base of the head.
The Low-Profile Approach
Instead of high, oversized buns, pull your hair into two low pigtails. Coil each pigtail into a small bun at the base of your skull and pin them securely. This creates a balanced, symmetrical look that keeps your chest-length hair totally contained.
Why This Is Practical
It is one of the most secure hairstyles for high-movement activities. Whether you are running to catch a train or chasing children, the double-bun is not going anywhere. It also happens to be a great way to hide a bad hair day or roots that are in need of a touch-up.
Warning: If you have very thick hair, ensure your elastics are strong enough to support the weight of two buns; otherwise, they may sag by the afternoon.
8. The Scarf-Wrapped Pony
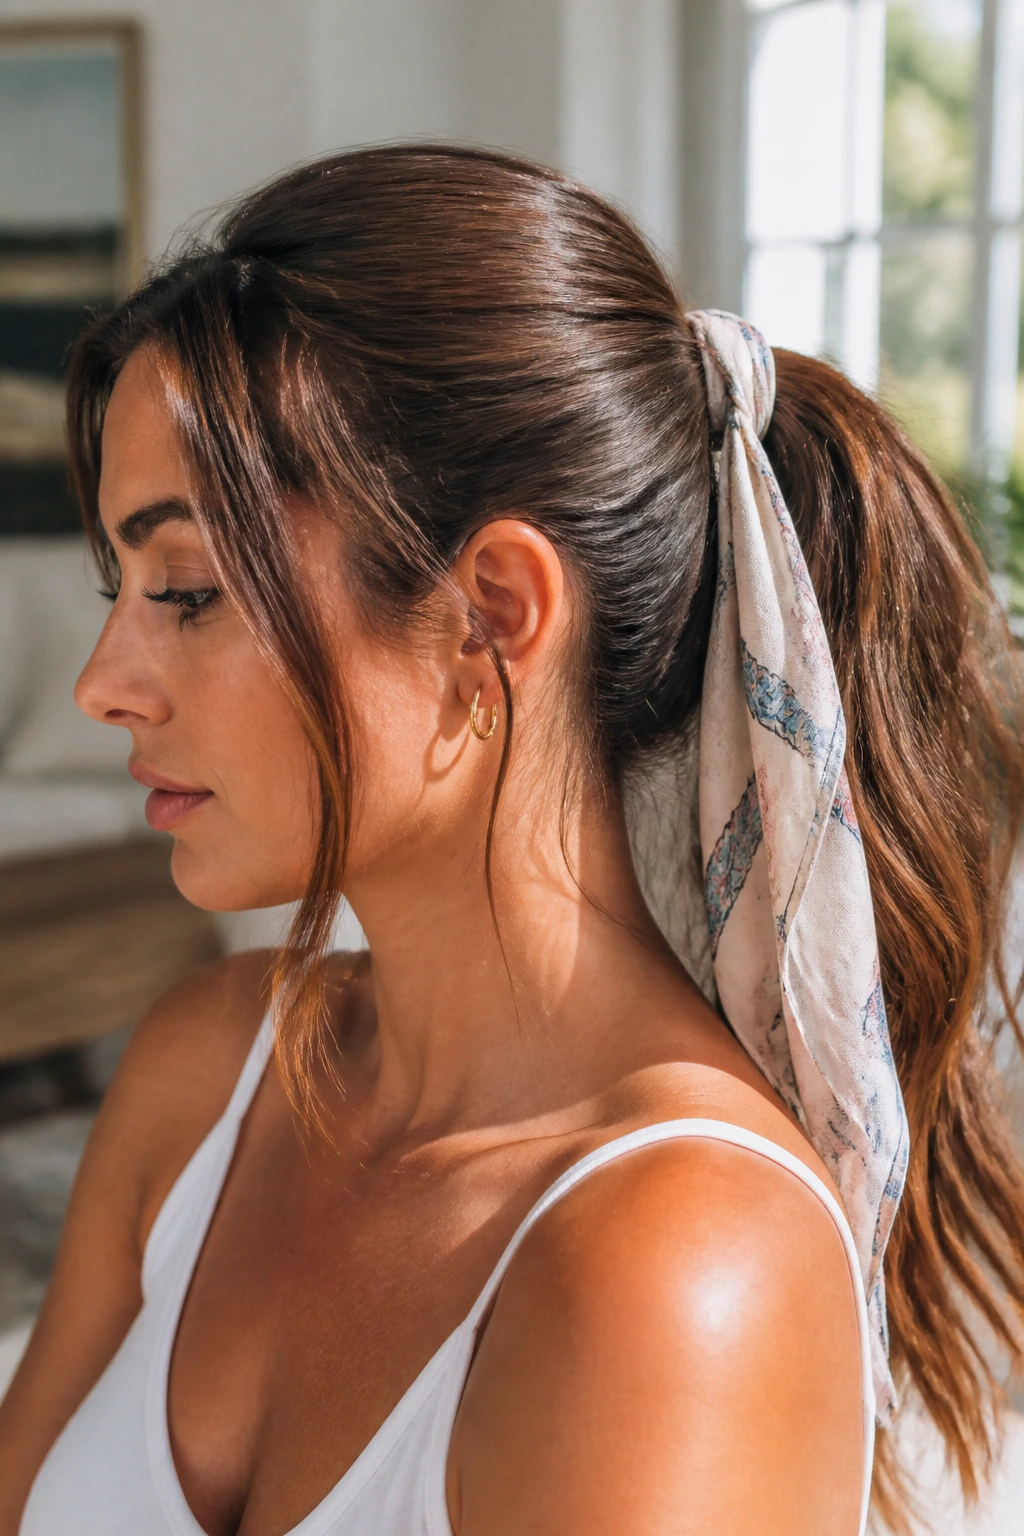
A printed scarf can disguise a multitude of sins, from oily roots to ends that haven’t seen a trim in months. For chest-length hair, a scarf-wrapped ponytail is a stylish way to add color and texture to an otherwise simple outfit.
Incorporating the Scarf
Tie your hair into a ponytail first, then wrap the scarf around the base. You can let the ends of the scarf hang down alongside your hair to blend in with your length. This creates a visual continuity that makes the style look much more intricate than it actually is.
Choosing the Right Fabric
Avoid bulky, heavy scarves, as they will drag your ponytail down and cause the elastic to slip. Lightweight silk, cotton, or thin polyester blends are best for this. They stay tied in a knot much more effectively and feel lighter on your head.
Style tip: Try a scarf with a pattern that matches the colors in your outfit. It makes your morning outfit choice feel curated and cohesive.
9. The Faux-Bob for Length Illusion
Ever wonder what you would look like with shorter hair without the commitment of a haircut? A faux-bob is the perfect way to change your look for the day. It hides the chest-length ends and creates a sophisticated, vintage-inspired silhouette.
How to Create the Faux-Bob
Start by creating a loose, low ponytail, but do not pull the ends all the way through the elastic. Instead, tuck the ends underneath and pin them to the nape of your neck. Use plenty of bobby pins to ensure the hair is tucked under securely so that no loose ends are visible from the front.
Where to Wear It
This style is excellent for formal events, dinners, or meetings where you want to look polished and structured. It completely changes your profile and provides a fresh way to wear your hair without needing scissors or a trip to the salon.
Recommendation: Apply a smoothing cream to your hair before starting to ensure the ends tuck away cleanly.
10. The Bubble Ponytail
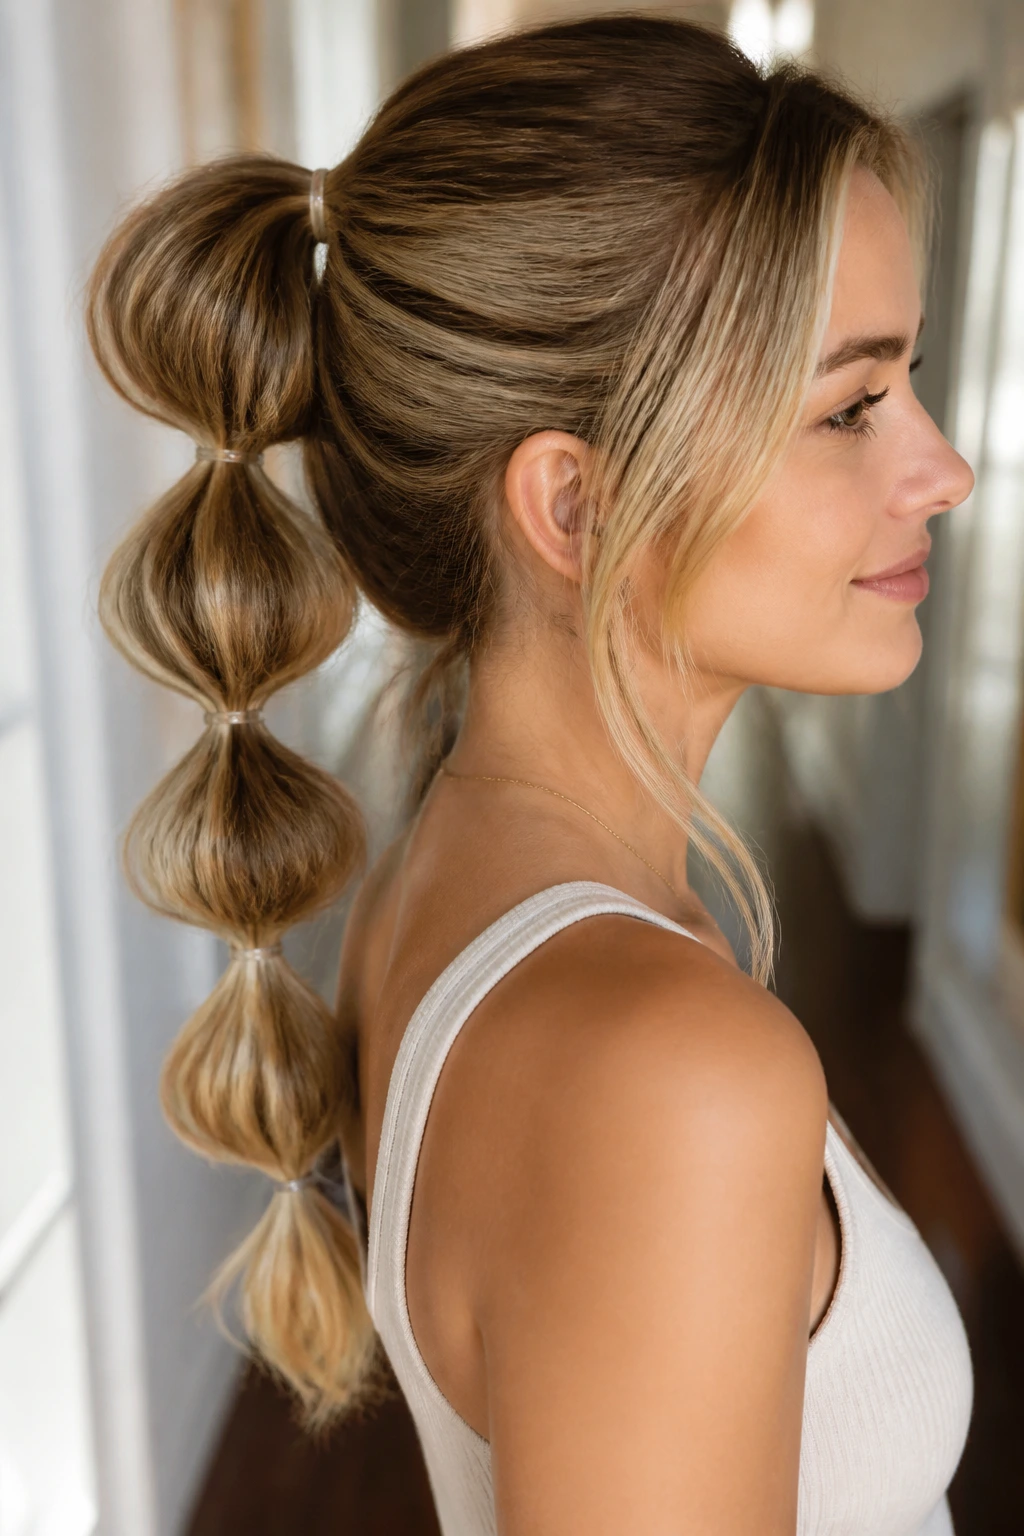
The bubble ponytail is a creative, modern take on the traditional look that works perfectly for mid-length hair. It requires only a few clear elastics and about two minutes of time, yet it looks like you spent much longer working on it.
The Step-by-Step
- Gather your hair into a ponytail at your preferred height.
- Place a second elastic about two inches down from the base.
- Gently tug at the hair between the two elastics to create a rounded “bubble” effect.
- Repeat this process all the way down the length of your ponytail.
Why It Excels for Busy Mornings
It is incredibly forgiving. Because the style is meant to look voluminous and slightly imperfect, you do not need to worry about achieving perfect smoothness or precise sectioning. It works beautifully on straight, wavy, and curly hair alike.
Pro tip: If you find the elastics show too much, take a tiny strand of hair from the underside of the ponytail, wrap it around the elastic, and pin it to hide the plastic.
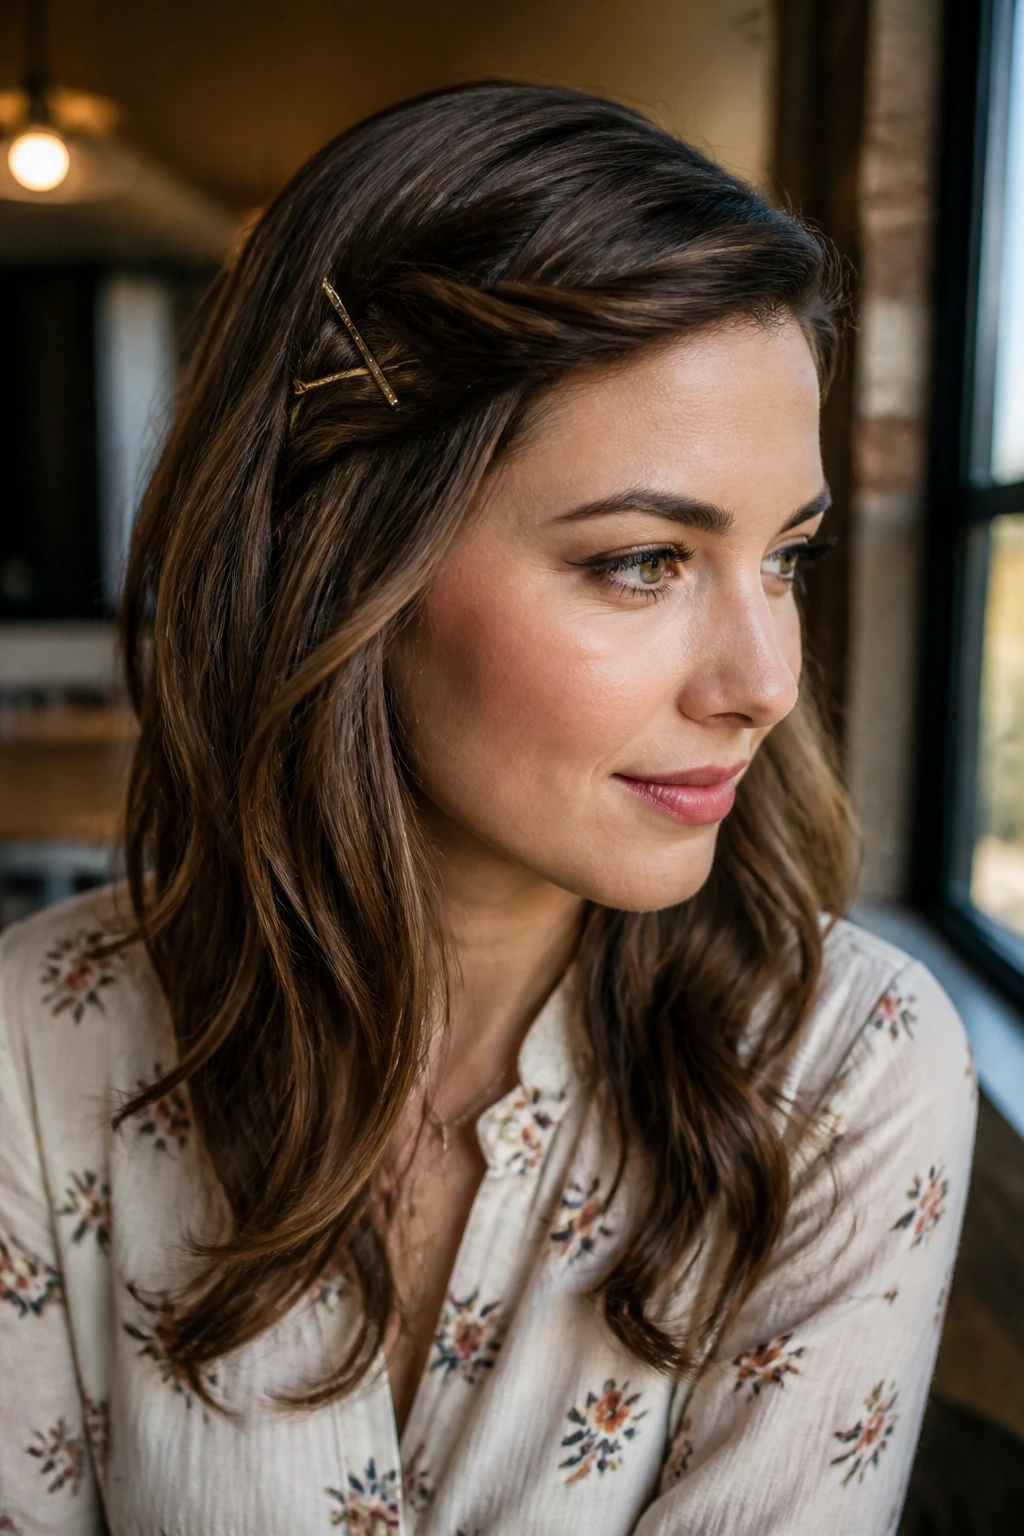
11. The Half-Down Bobby Pin Design
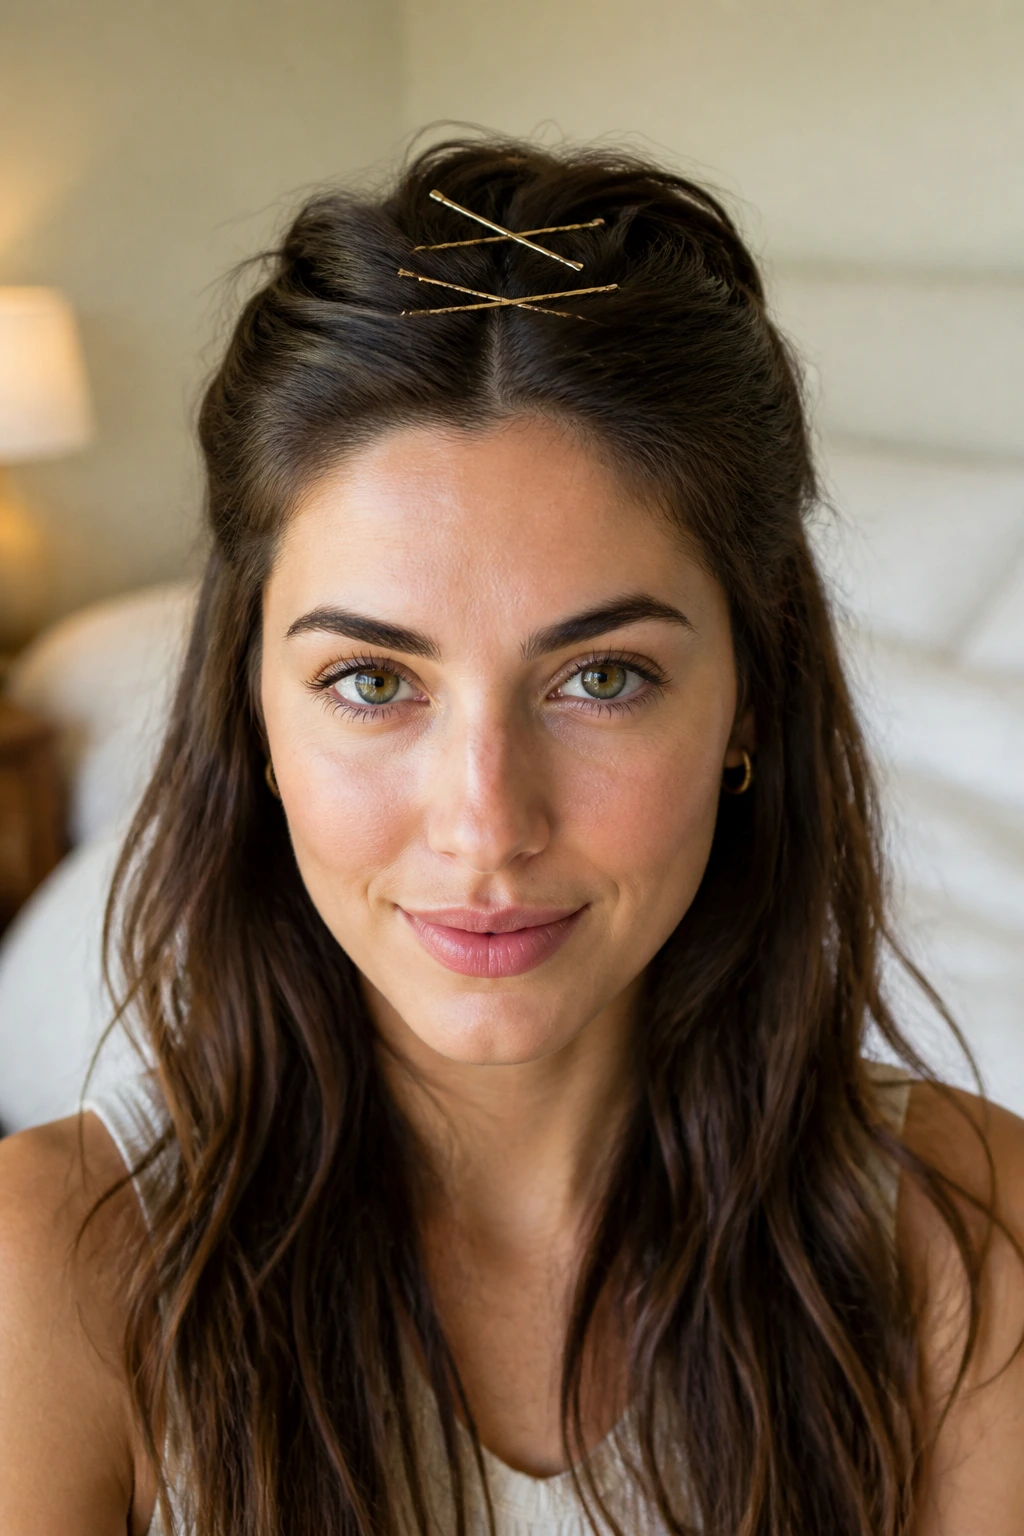
When you have a bit of time to focus on details, a geometric bobby pin arrangement can turn a simple half-up look into a work of art. This style is all about placement and letting your natural hair texture do the heavy lifting.
Creating the Look
Take the two front sections of your hair and pull them back toward the center of your head. Instead of using an elastic, pin them in place with several bobby pins. Arrange the pins in a pattern—an ‘X’ shape, a triangle, or a horizontal line—to turn a functional necessity into an accessory.
Choosing Your Pins
The market is full of decorative bobby pins, from gold-toned minimalist bars to pearl-studded clips. Using these elevates the look from a “lazy morning” style to a “deliberate choice.” It is a fast way to make your chest-length hair look styled even when you haven’t used heat tools.
Avoid this: Do not use too much hairspray on the front sections, or the pins will slip right out. A light texture spray is always better than a strong-hold liquid spray.
12. The Low Bun with a Headband
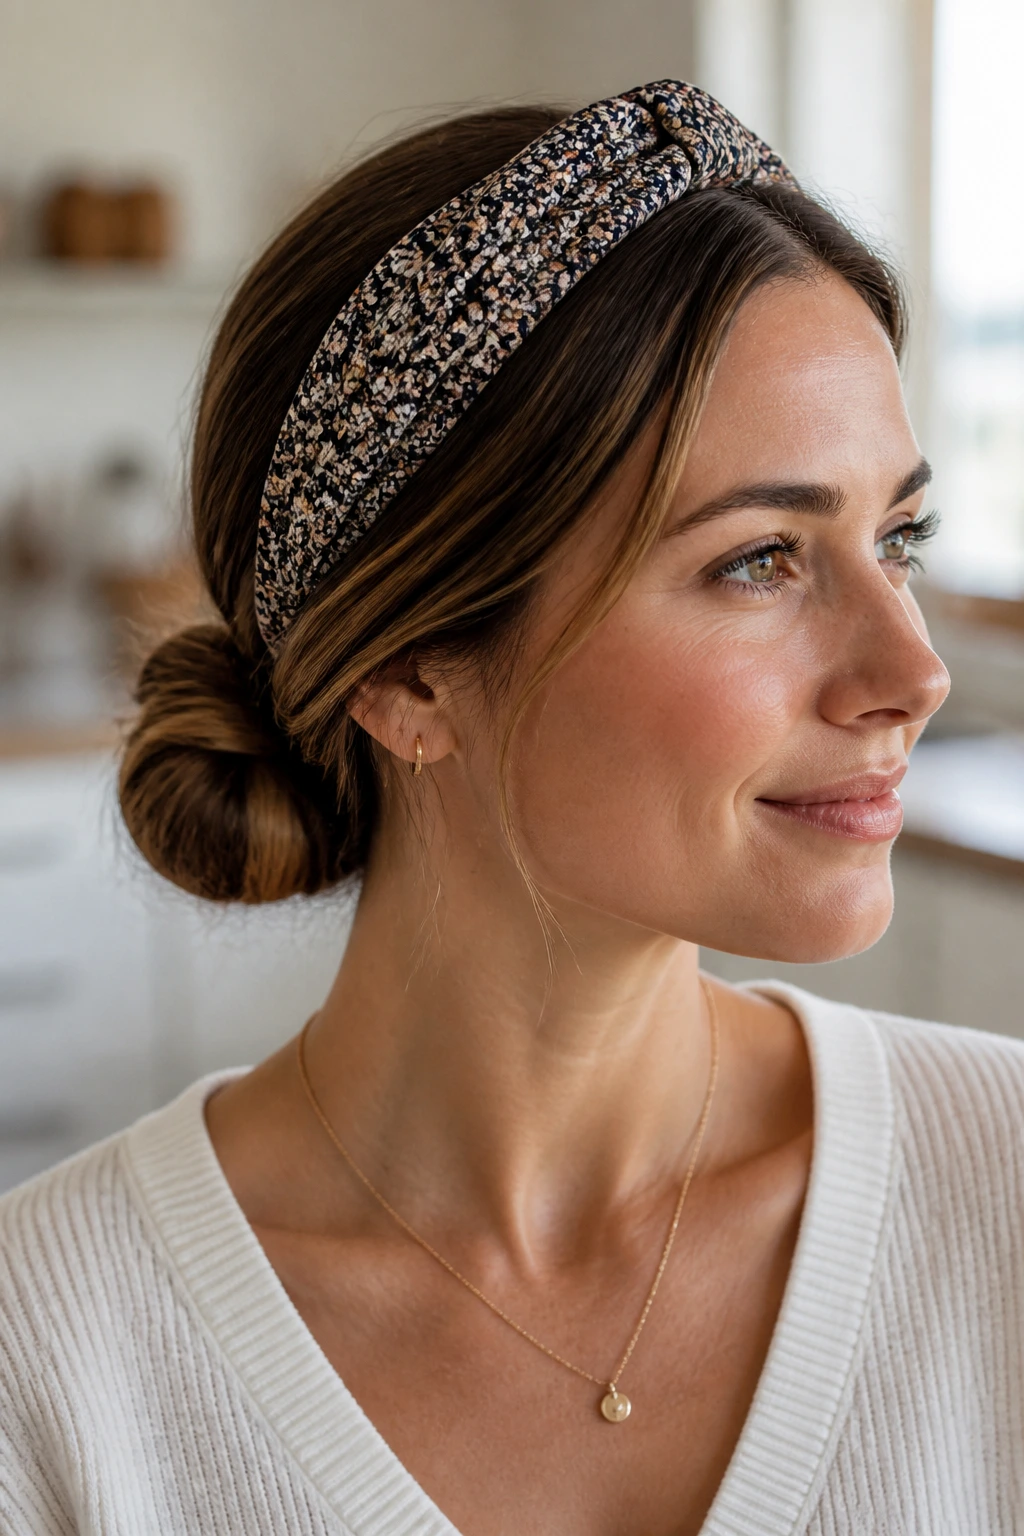
Sometimes you just want to get your hair out of your face and keep it there for twelve hours. A simple low bun combined with a thick or patterned headband is the most reliable way to achieve this.
Why It Works for Chest-Length Hair
The bun keeps the length contained at the nape of your neck, and the headband manages all the flyaways and shorter layers around your face. It is a clean, no-nonsense look that is perfect for errands, grocery shopping, or casual days at home.
Styling the Headband
Experiment with headband placement. Pushing the headband further back toward your crown can give your hair a bit of height, while wearing it closer to your hairline keeps your forehead clear. Fabric headbands are generally more comfortable for all-day wear than hard plastic bands.
Style hack: If you have bangs, ensure the headband sits right behind them so they can still frame your face while the rest of your hair is tucked away.
13. The Half-Twist with a Statement Clip
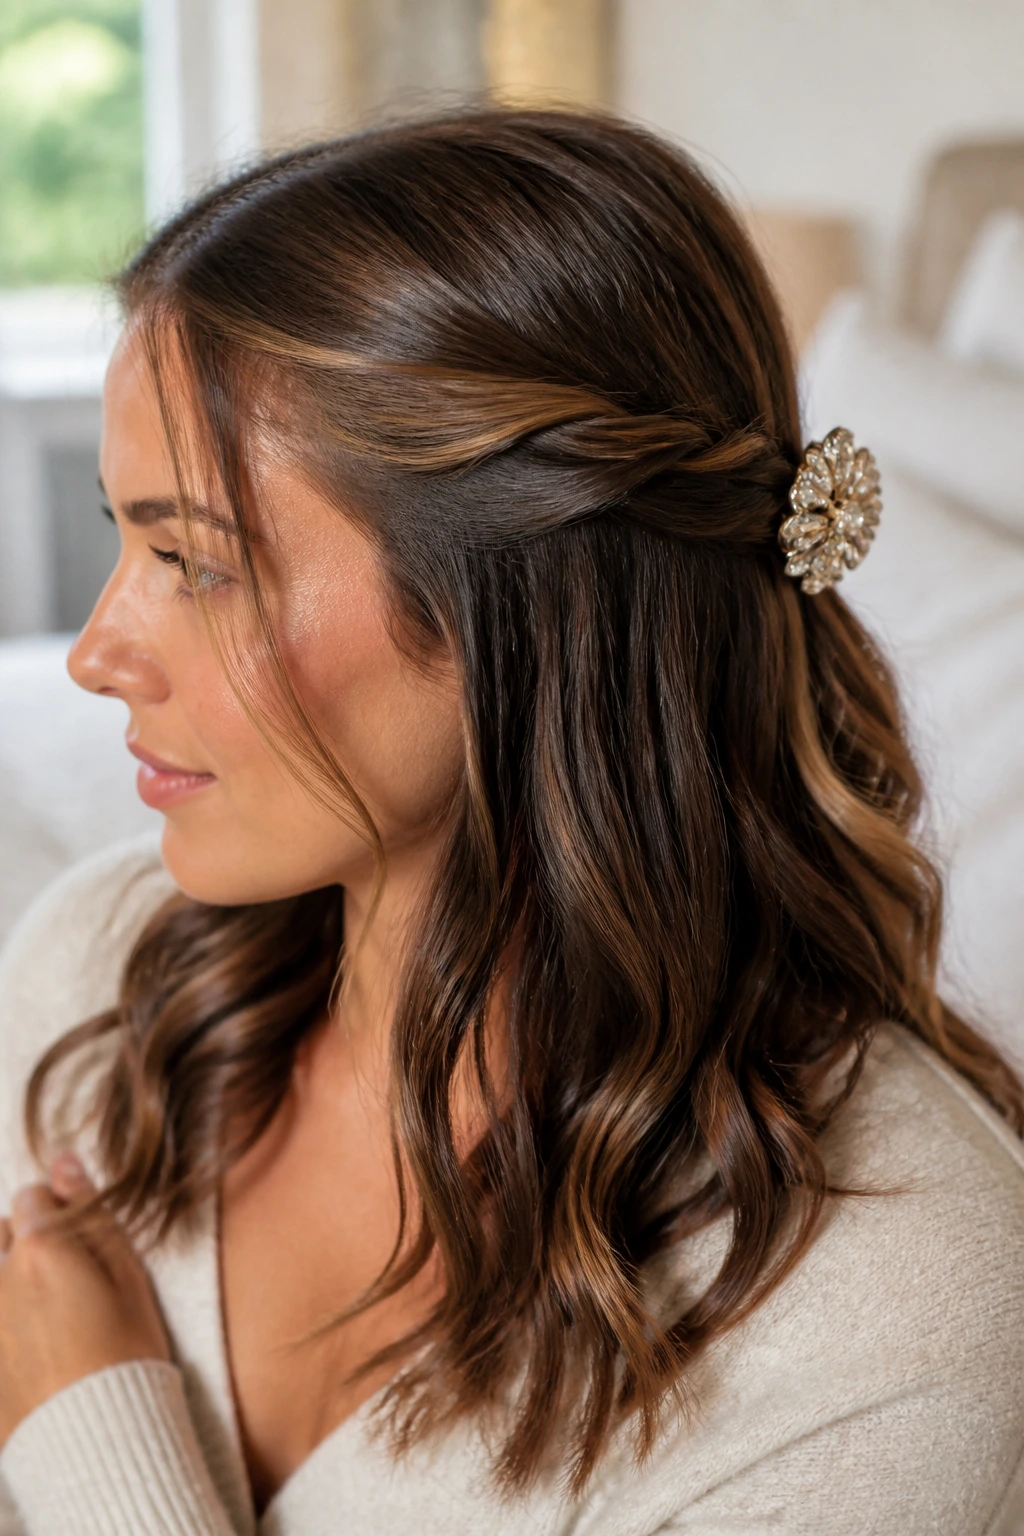
If you are tired of elastics, a statement barrette or claw clip is a fantastic alternative for a half-up style. It looks high-end and is far kinder to your hair than rubber bands, which can cause breakage over time.
The Mechanics of the Half-Twist
Instead of pulling your hair back into a ponytail, gather two sections from near your temples, twist them gently, and pull them to the back of your head. Secure them together with a large, decorative clip. This style is quick and gives you a bit of volume at the crown.
Why This Style Stays
It is one of the most gentle ways to style hair. By avoiding tight elastics, you protect your ends from friction and keep your hair healthier in the long run. Plus, the clip provides a focal point that distracts from any lack of styling in the lengths of your hair.
Recommendation: Look for clips with a curved internal shape; they fit against the curve of your head much more comfortably than flat, straight clips.
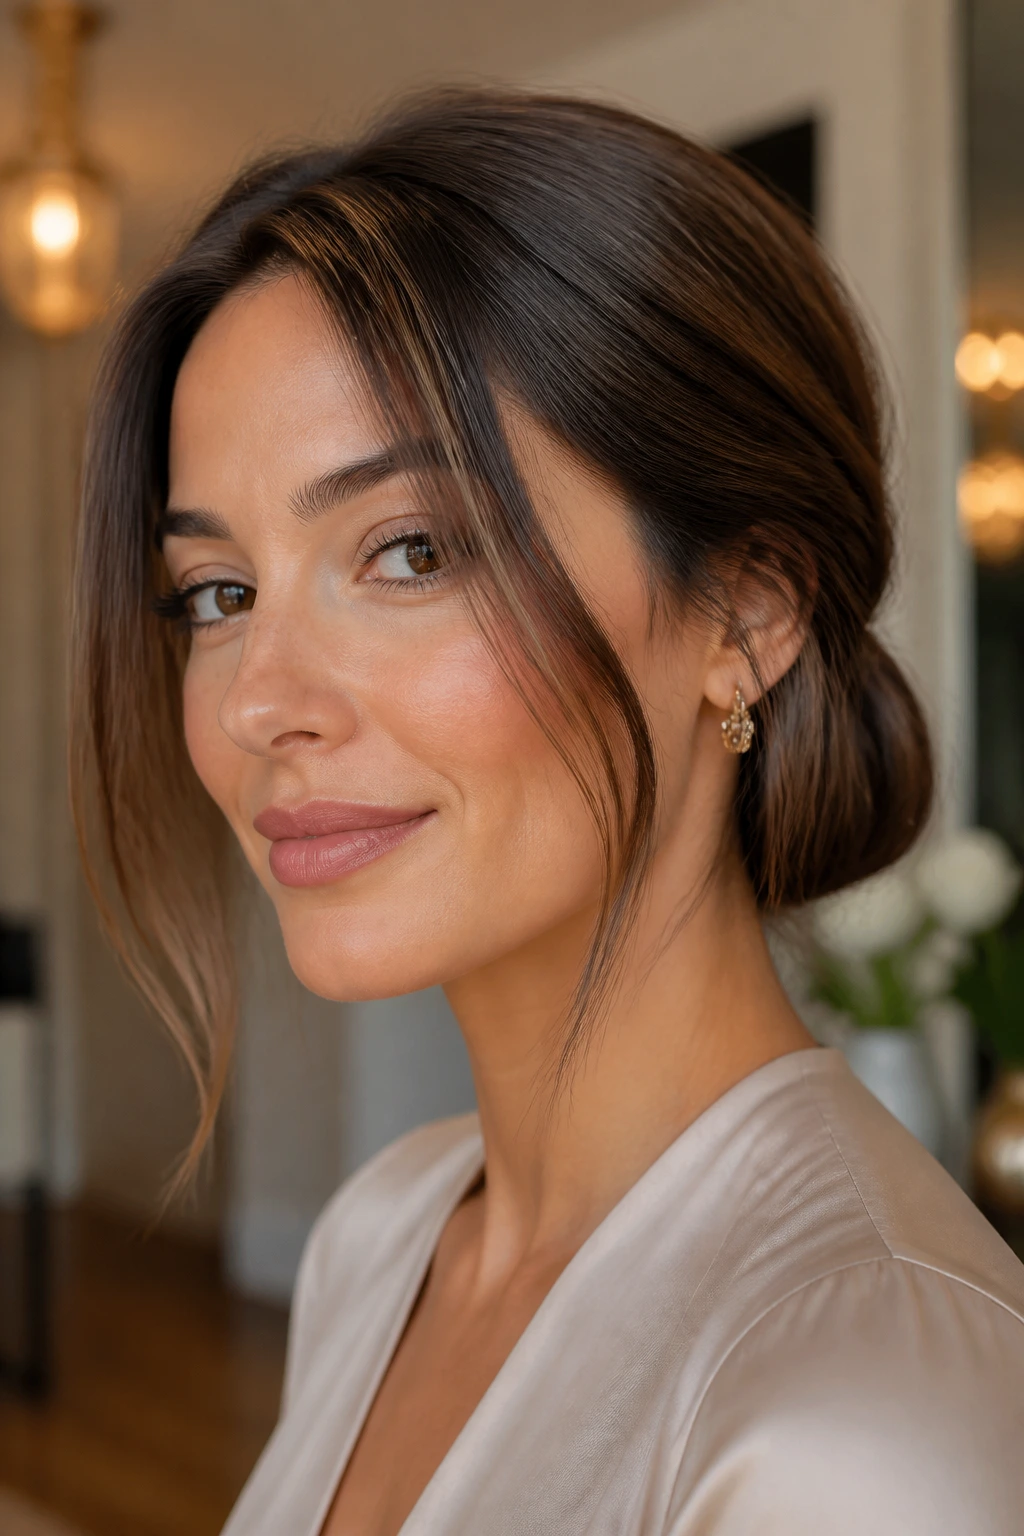
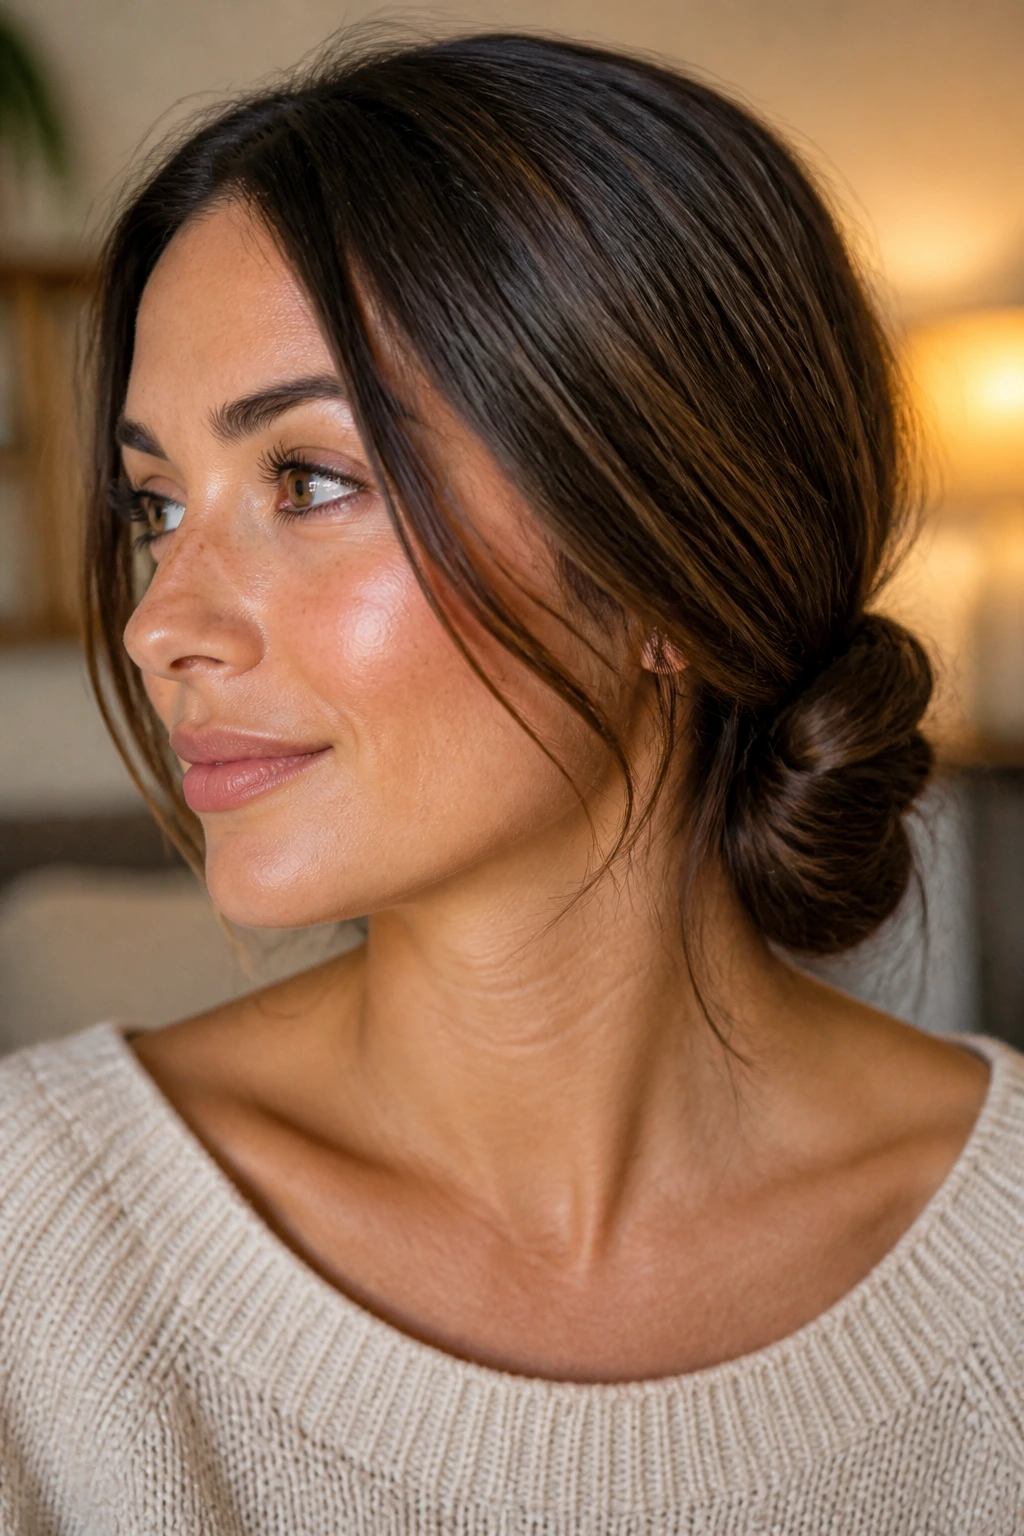
14. The Sleek Low Bun
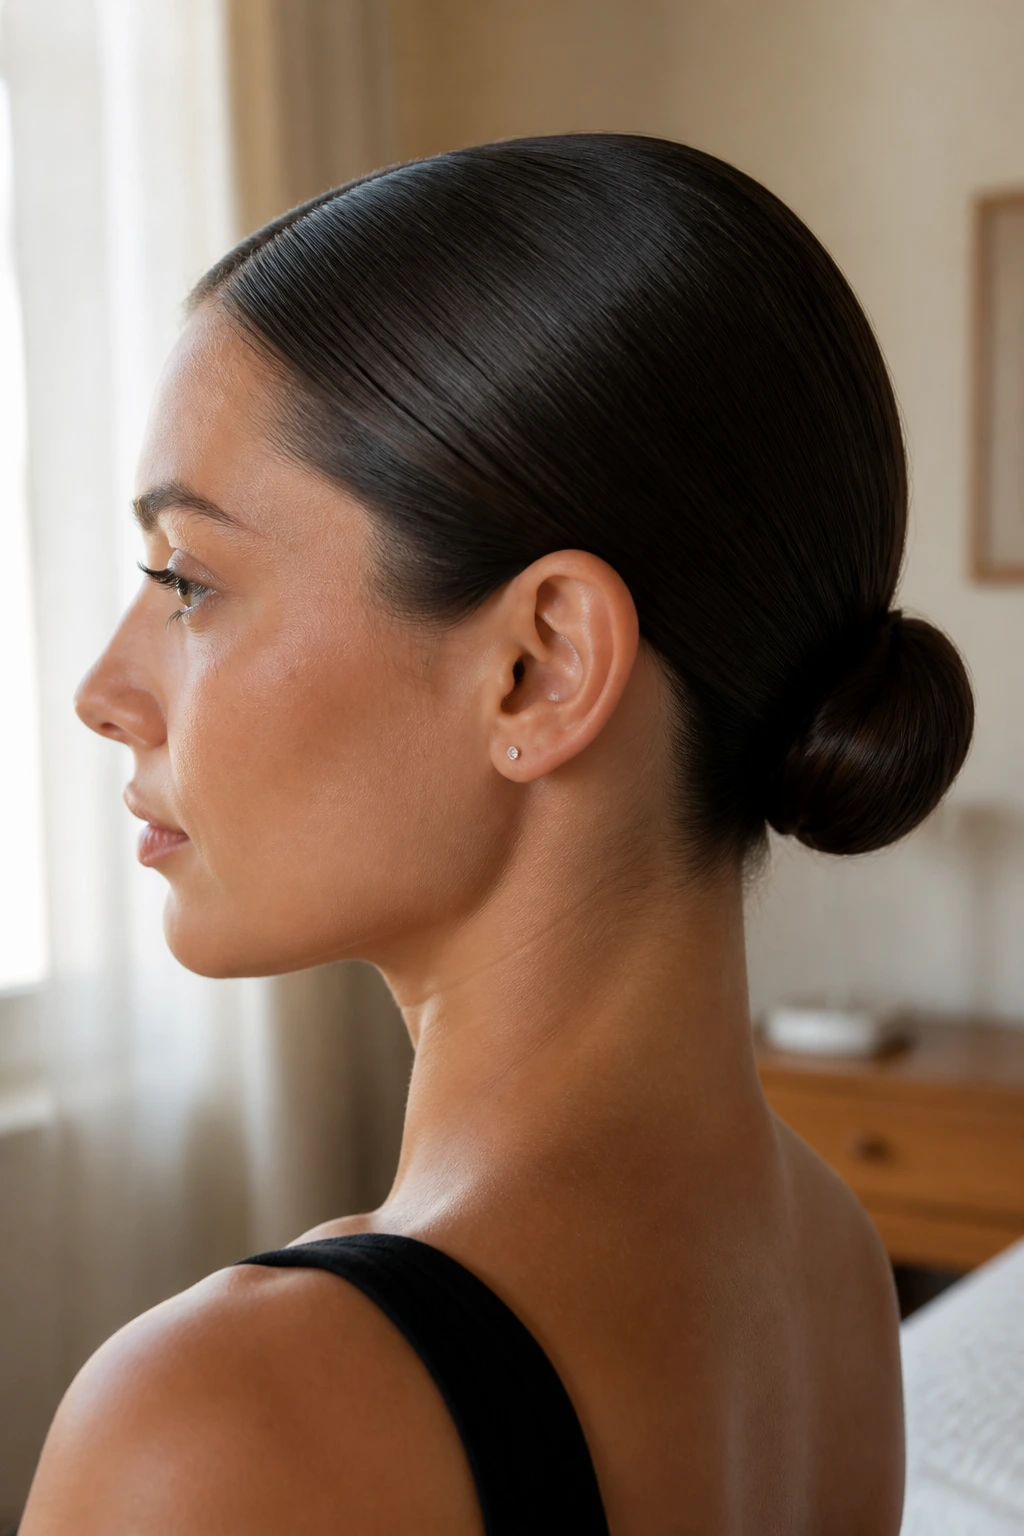
There is something inherently powerful about a perfectly sleek, low bun. It is the style of choice for busy executives and artists alike because it demands zero maintenance once it is set in place.
The Foundation of the Look
You will need a boar-bristle brush and a good pomade or smoothing wax. Start by brushing your hair down toward the nape of your neck. Apply a small amount of product to the palms of your hands and smooth it over the top and sides of your head to flatten any flyaways.
Why It Is Essential
It is the ultimate “clean girl” aesthetic. Because your hair is chest-length, you have just enough length to create a neat, compact bun without it becoming too massive. Secure it with a flat, snag-free elastic to ensure it sits flush against your head.
Avoid this mistake: Do not pull the hair so tightly that you feel pain at your scalp. A sleek look is great, but scalp tension can lead to headaches, which is the last thing you need on a busy morning.
15. The Loose Side Braid with Ribbons
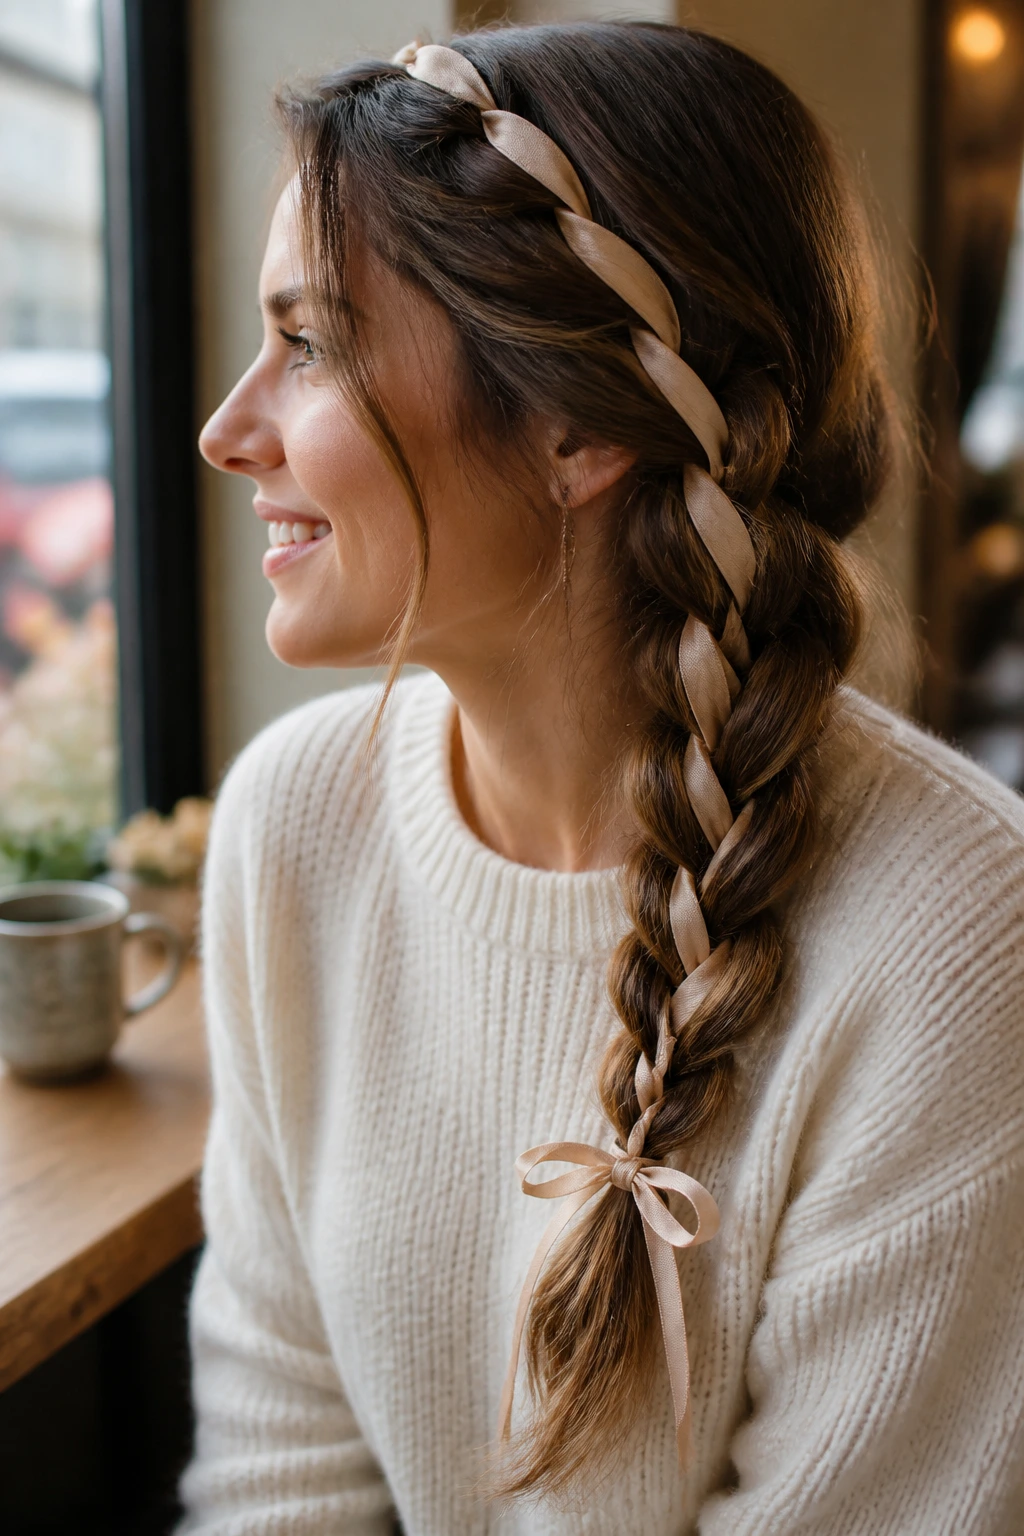
Mixing textures can make a simple hairstyle look incredibly expensive. By weaving a thin piece of ribbon through a standard three-strand side braid, you elevate a humble hairstyle into something special.
How to Weave the Ribbon
- Cut a length of ribbon about twice as long as your hair.
- Fold it in half and tie the center of the ribbon to the hair elastic at the base of your ponytail.
- As you braid, incorporate the two ends of the ribbon into two of the three strands of your hair.
- Secure the end of the braid with a tiny elastic and tie the remaining ribbon ends in a bow.
Why It Works for Busy Mornings
It hides the fact that your hair might be greasy or unwashed, as the ribbon draws the eye away from the roots. It is also an excellent way to use up leftover craft supplies, like velvet ribbon or lace trim.
Pro tip: Choose a ribbon color that contrasts slightly with your hair color so that the weaving pattern is clearly visible.
16. The Half-Down Knot
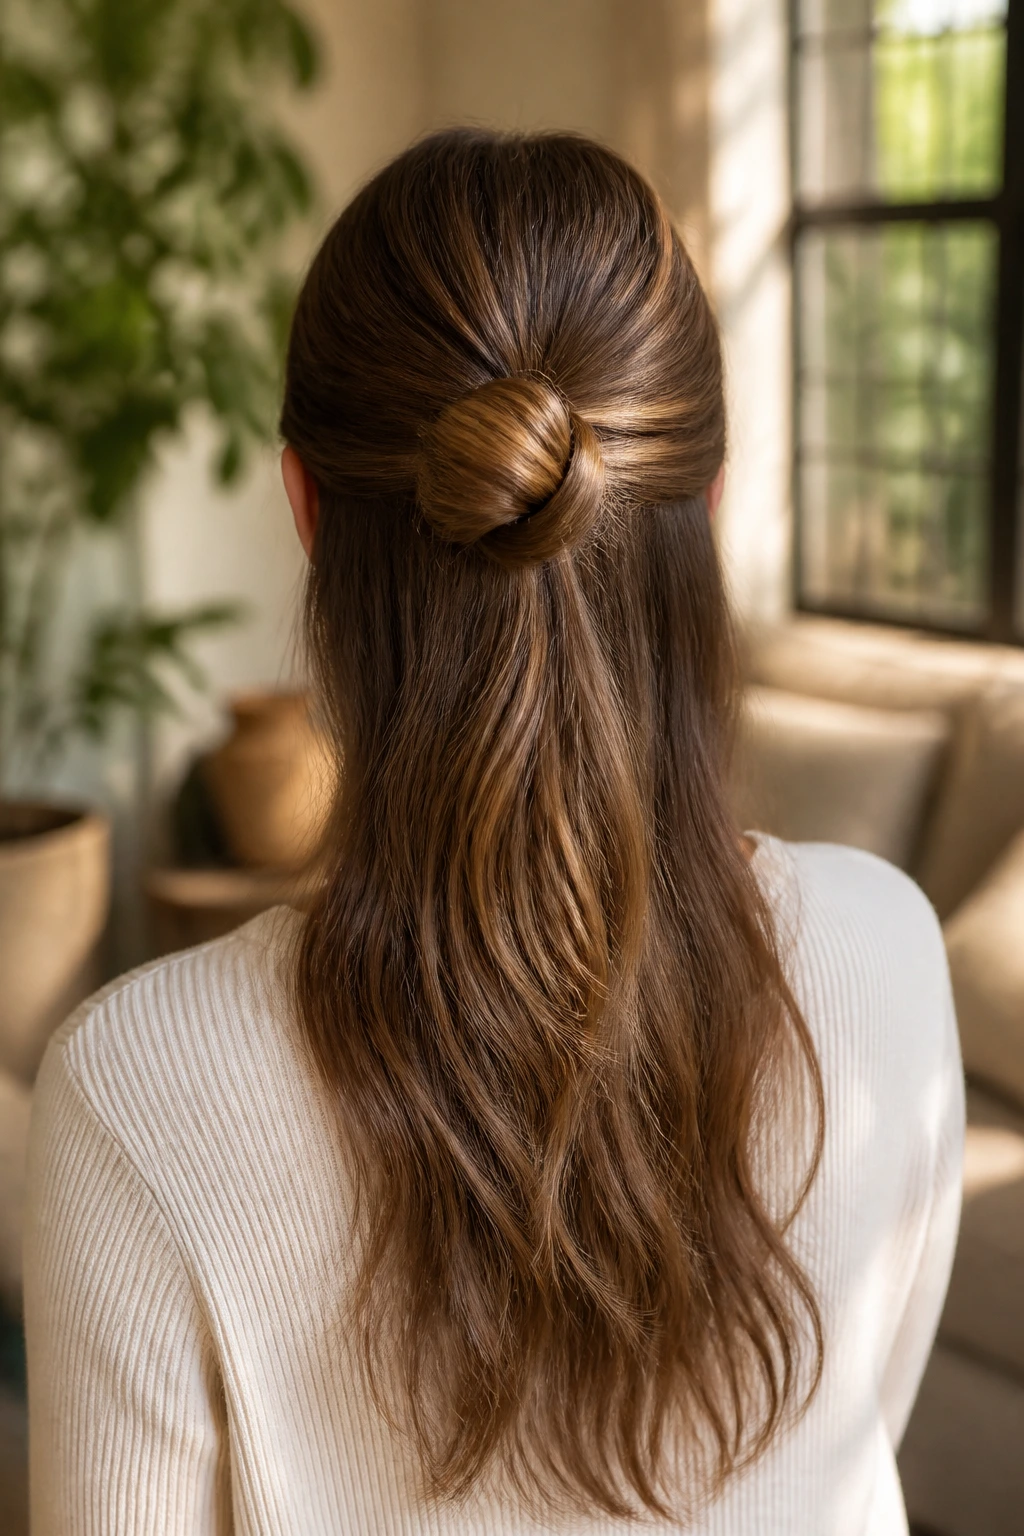
This is similar to the top knot, but instead of coiling the hair into a bun, you simply tie it into a knot and pin the ends down. It is a more minimalist, edgy look that works well for people with layered, chest-length hair.
Executing the Knot
Separate the top section of hair. Instead of putting it in an elastic, tie the hair into a simple knot as if you were tying a piece of string. Pin the ends of the knot down with a few bobby pins. The result is a sculptural, interesting shape that holds well.
Why You’ll Love It
It is much flatter against the head than a bun, meaning it won’t catch on your sweaters or jacket collars. It is a subtle, cool-girl style that feels less “gym session” and more “thoughtful design.”
Style Note: If your hair is very soft or silky, you might need a tiny clear elastic to hold the knot in place before you pin it, just to keep the knot from unraveling.
17. The High-Volume Ponytail (The Two-Tier Trick)
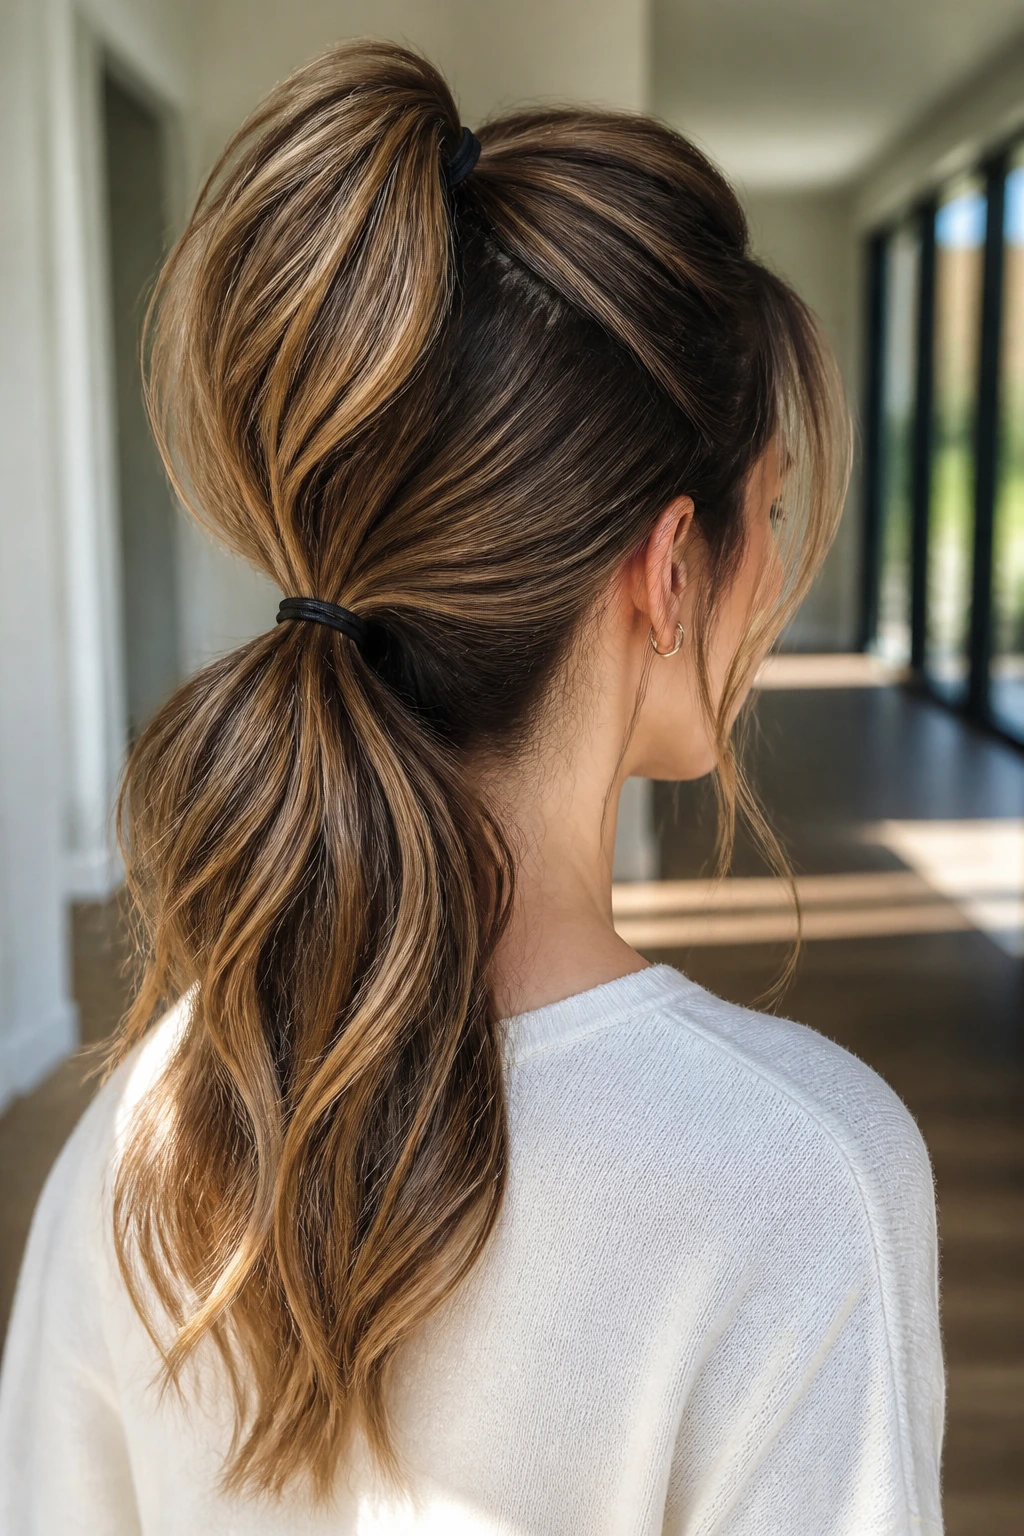
If you feel your ponytail looks thin or limp, the two-tier trick is a game-changer. By splitting your ponytail into two separate sections, you create the illusion of double the volume and length.
The Two-Tier Technique
- Divide your hair into a top half and a bottom half.
- Pull the top half into a ponytail at the crown of your head.
- Pull the bottom half into a second ponytail directly underneath the first one.
- Gently fluff the top ponytail so it falls over the bottom one, effectively hiding the second elastic.
Why It Wins
It makes your hair look significantly fuller and adds height to the base of the ponytail. It is a favorite among people who have fine, chest-length hair and want to achieve that bouncy, voluminous look without using extensions.
Recommendation: Ensure the two ponytails are positioned close enough together that the top one can fully cover the bottom one.
18. The Low Braided Bun
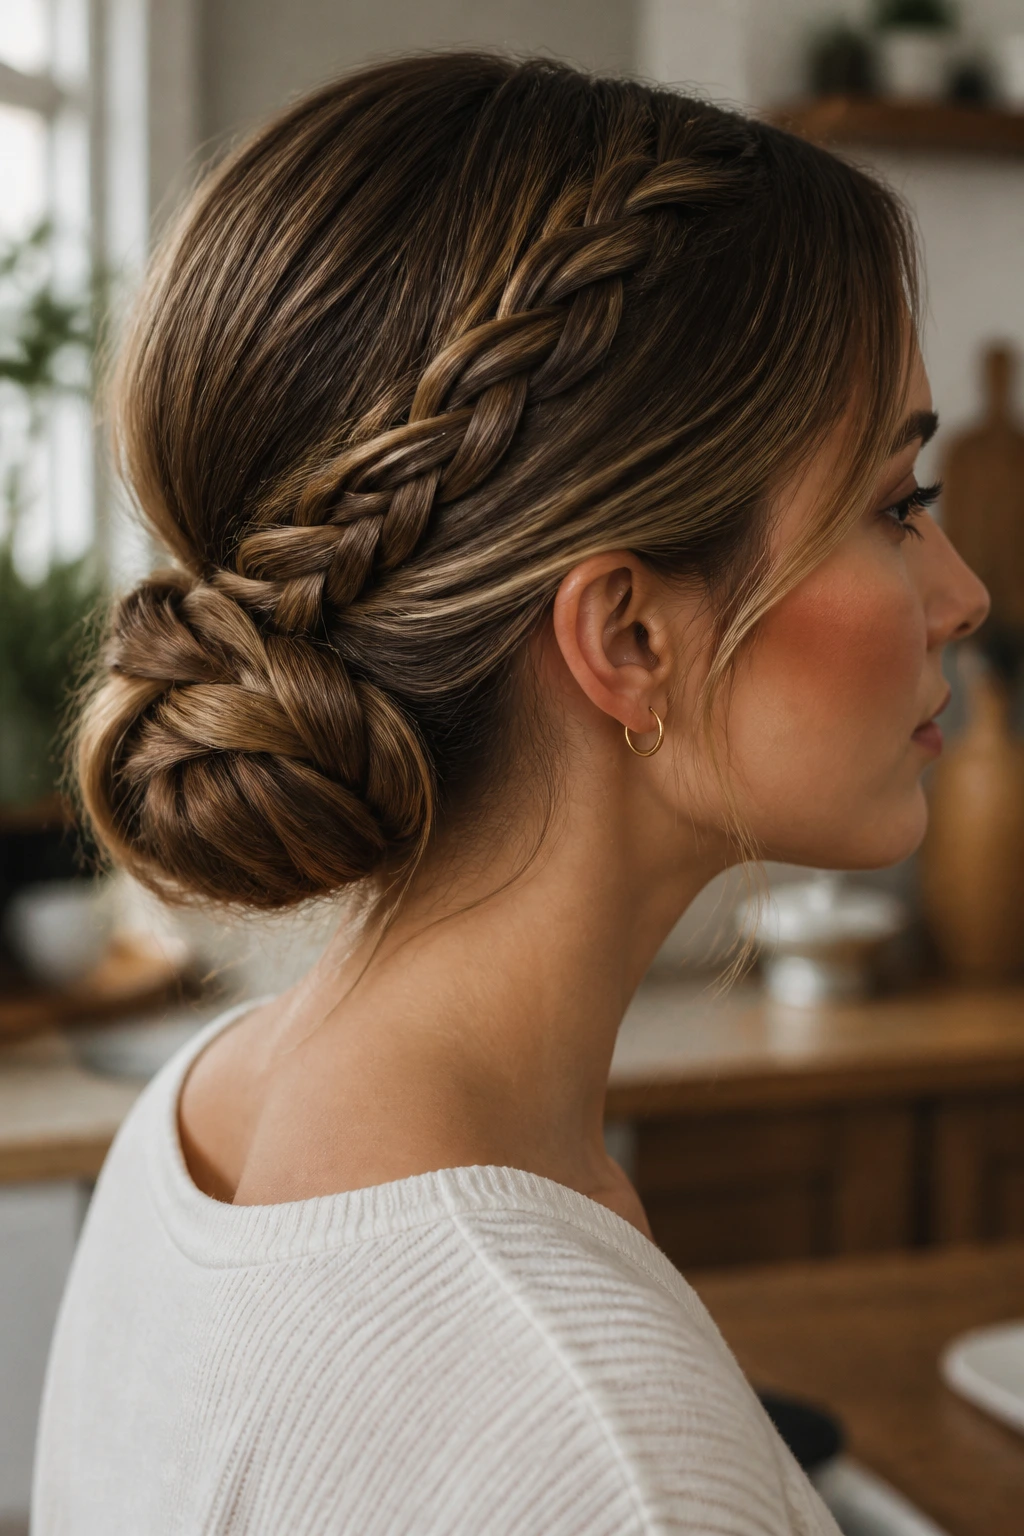
This style combines the neatness of a bun with the security of a braid. It is perfect for those days when you have a bit more time or need your hair to stay pristine for a long period.
How to Create It
- Put your hair in a low, tight ponytail.
- Braid the ponytail into a standard three-strand braid.
- Wrap the braid around the base of the ponytail to create a bun.
- Pin it in place with multiple bobby pins.
Why This Style Is Superior
It is virtually indestructible. Once you have pinned this bun, it will not budge until you physically take the pins out. It looks sophisticated and formal enough for a dinner but simple enough for a morning meeting.
Style tip: If you have highlights or lowlights, this style beautifully showcases the different shades in your hair as the braided sections wrap around each other.
19. The Twisted Headband Look
Using a twisted headband or a hair vine is a great way to pull back the front of your hair while leaving the rest to hang down. It is a very romantic, bohemian look that requires almost zero skill.
The Execution
Place the headband around your head like a crown. Take small sections of hair from the front and loop them over and under the headband, tucking the ends behind the band. Continue this all the way around until you reach the back.
Why It Is Effective
It takes about two minutes and looks like a complex updo. Even though you are leaving the back of your hair down, you have created a structural element in the front that looks intentional and stylish. It is the perfect cheat for a busy morning.
Avoid this: Do not make the loops too tight. The beauty of this style is in its soft, airy volume, so keep the loops relaxed and slightly undone.
20. The Low Side Knot
The low side knot is a playful, asymmetric style that feels fresh and modern. It moves the hair away from your face and keeps the weight off your neck, which can be quite comfortable during warmer months.
How to Tie the Knot
Sweep all of your hair to one side at the nape of your neck. Take the hair and tie it into a simple knot, then pin the remaining length under the knot with a few bobby pins. It creates a sleek, low-profile look that stays put.
Why You Should Use It
It is a great way to showcase earrings or necklines that you don’t want your hair covering. The side-swept look is naturally flattering, and the knotted finish adds a unique, crafty detail that sets it apart from a standard bun or ponytail.
Pro tip: Use a light-hold cream before tying the knot to ensure the ends of your hair don’t frizz out of the knot once it is pinned.
21. The Half-Down Claw Clip Twist
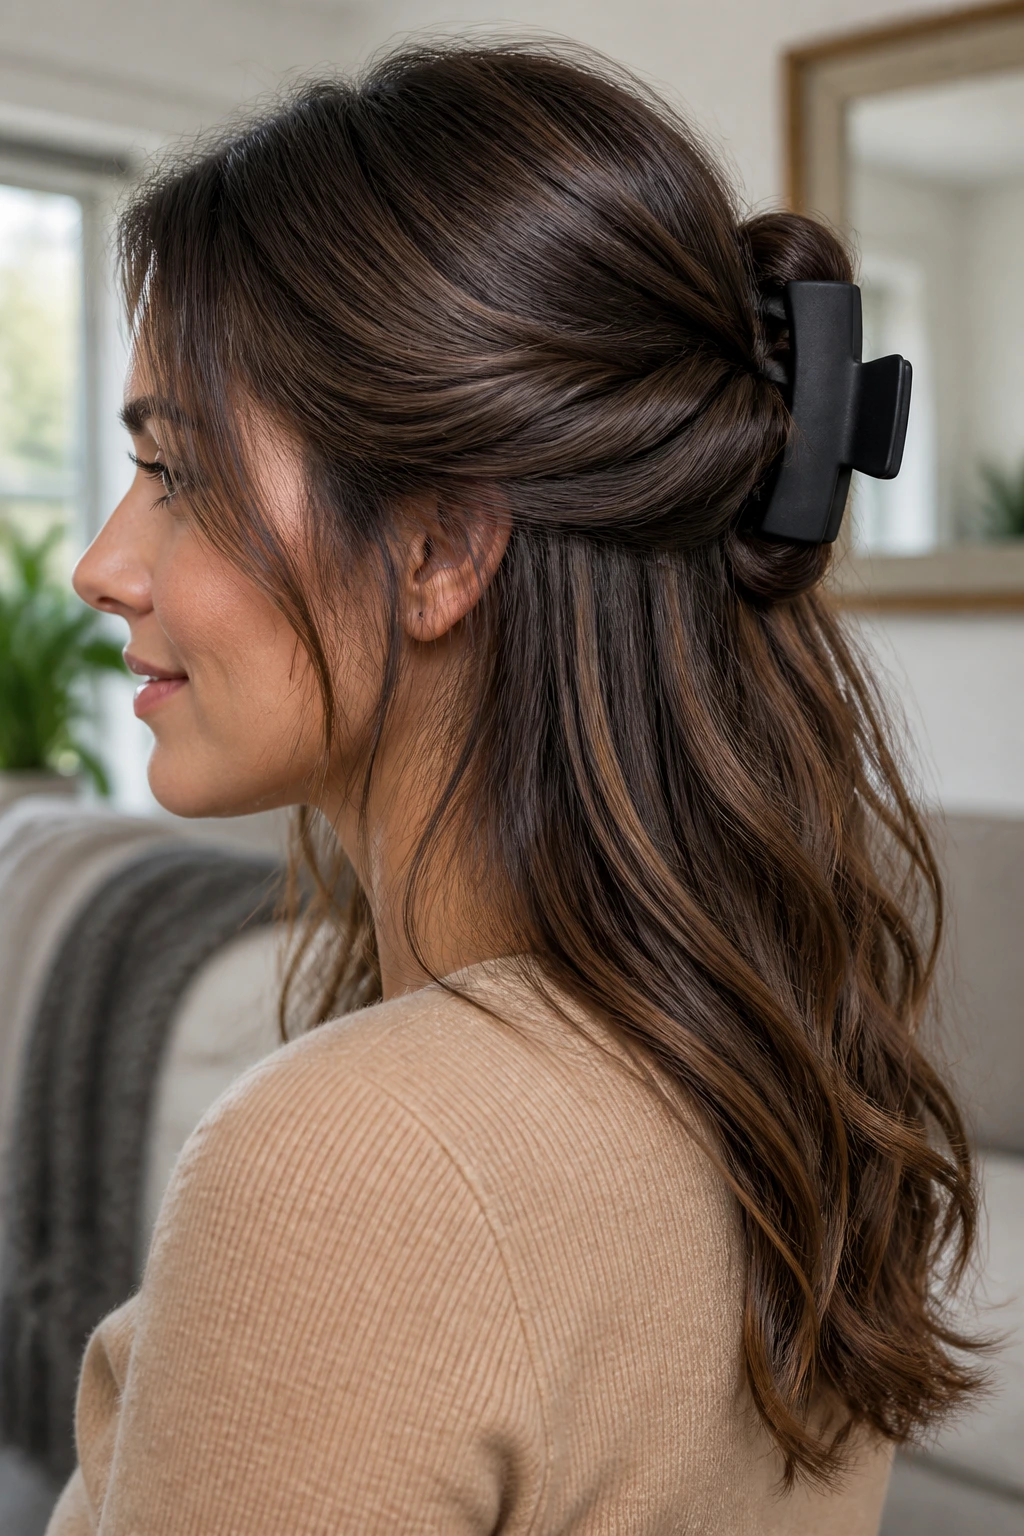
This is the ultimate evolution of the half-up style. By twisting your hair rather than just clipping it, you create more volume and a more secure hold that lasts all day.
The Twist Method
Gather your hair into a half-up position. Instead of pulling it straight back, twist it once, then use a small, elegant claw clip to secure the twist. The twist adds texture, while the clip provides the hold.
Why It’s Better Than a Pony
It avoids the “kink” that hair elastics leave in your hair. If you want to wear your hair down later in the day, this style is much easier to undo without leaving your hair looking bent or creased. It is also much gentler on your strands.
Recommendation: Choose a claw clip that has a matte finish or a unique marble pattern to make the style feel more like an intentional accessory.
22. The Low Messy Pony with a Hidden Elastic
For the ultimate “no-style” style, the low messy pony with a hidden elastic is king. It looks effortless, chic, and completely put-together, even if you spent less than ten seconds on it.
The Hidden Elastic Trick
- Tie your hair into a low ponytail.
- Take a small one-inch section of hair from the underside of the ponytail.
- Wrap it around the elastic until it is completely hidden.
- Tuck the end of the strand into the elastic and secure it with a tiny bobby pin.
Why This Remains a Favorite
It elevates the most basic hairstyle into a professional, groomed look. That simple step of hiding the plastic elastic makes all the difference in the world. It tells the world that you are refined and attentive to detail, even on the busiest of mornings.
Final thought: Always keep a small pack of bobby pins and a couple of spare clear elastics in your bag. They are the tools that turn these quick morning fixes into reliable, all-day styles.
Final Thoughts
Chest-length hair is often considered the “awkward” stage, but it is actually one of the most versatile lengths you can work with. It is long enough to manipulate into intricate updos but short enough that it doesn’t become heavy or unmanageable during a rush. The key to mastering your morning routine isn’t learning how to spend more time, but rather learning which styles give you the highest reward for the least amount of effort.
Focus on tools that make your life easier, like high-quality claw clips, silk ribbons, and a good texturizing spray. These simple items are the difference between a frantic, pulled-back mess and a deliberate, stylish choice. As you experiment with these twenty-two looks, you will naturally find three or four that suit your hair texture, your personal style, and the specific pace of your mornings. That is all you really need to keep your routine consistent and stress-free.