When you have a texture that craves moisture and tends toward frizz, styling can feel like a constant battle against the elements. You might spend hours smoothing out your strands, only to watch the humidity undo your hard work before the day is half over. That is where cornrows come in. They are not just a way to tuck your hair away; they are a structural foundation that can tame flyaways, provide lasting protection, and offer a clean, polished look that stays put for weeks. Whether you are dealing with tight coils or a softer, high-porosity wave pattern, the tension and precision of a good braid can be the ultimate solution for keeping your hair under control while looking sharp.
Working with frizz-prone hair requires a different approach than working with straight or relaxed hair. You cannot just pick up a tail comb and start pulling; you have to consider hydration, product buildup, and the specific tension your scalp can handle. When you prep your hair correctly, you turn a frustrating texture into an advantage, as the natural volume of your hair often makes cornrows look fuller and more intricate than they would on flatter hair.
1. Classic Straight-Back Cornrows
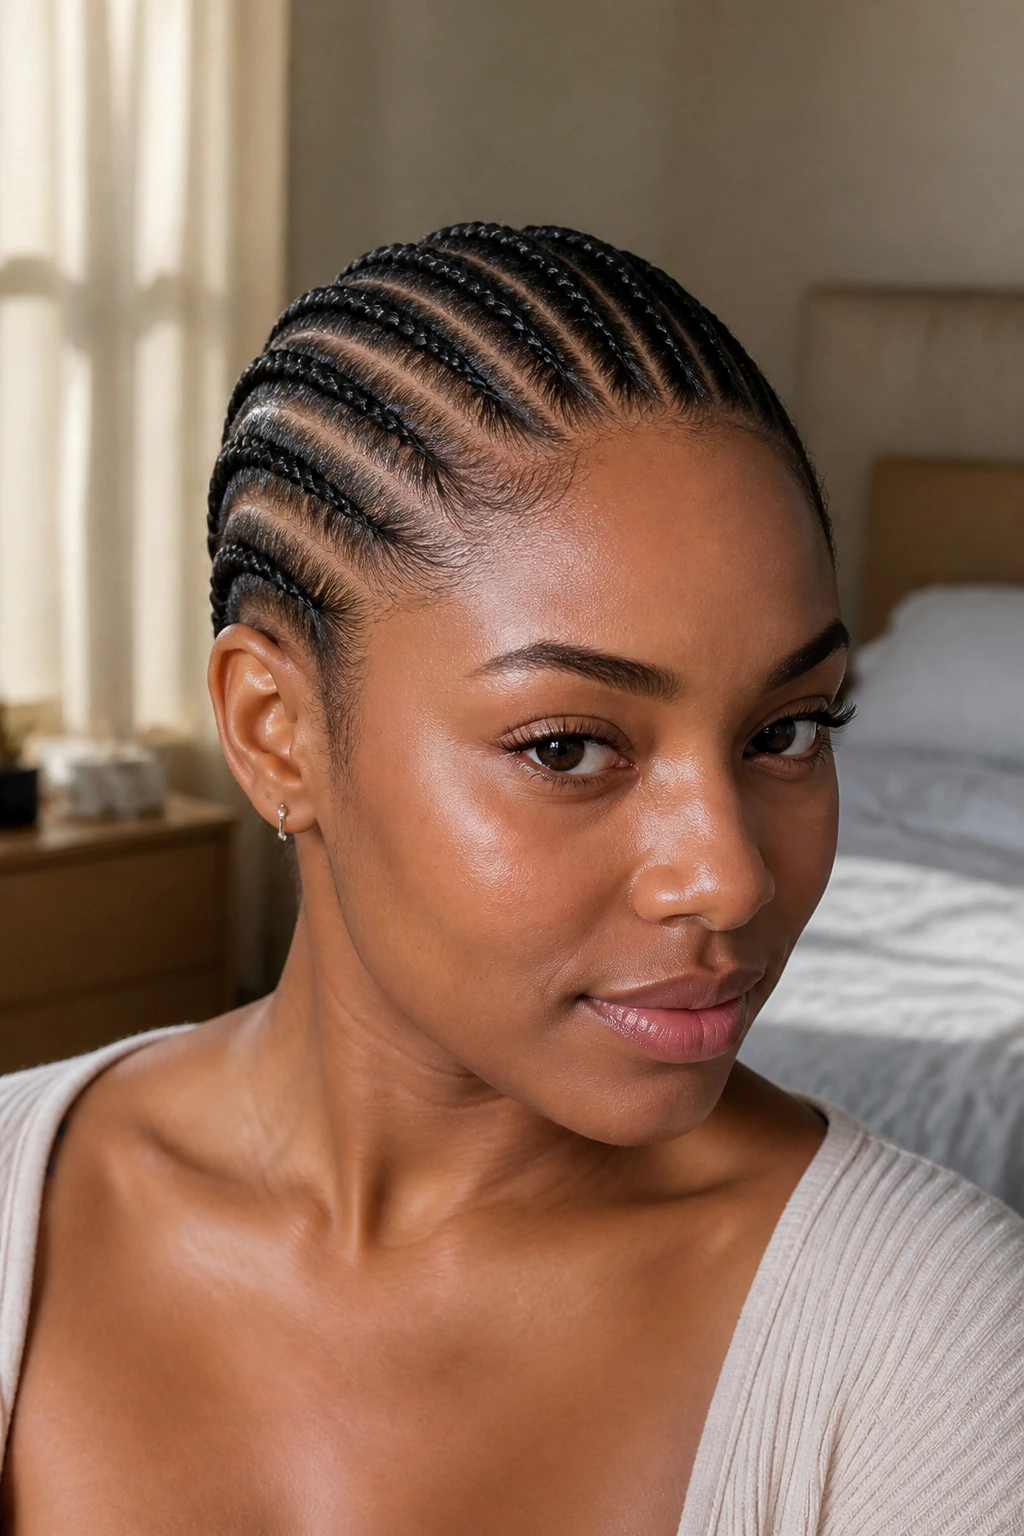
Sometimes the simplest approach is the most effective. Straight-back cornrows are the bedrock of protective styling for a reason: they are timeless, functional, and provide a perfectly even canvas for your hair. For those with frizzy hair, the trick to getting that sleek, high-shine look lies in the initial prep. You want to start on clean, deep-conditioned hair, using a light pomade or a water-based styling wax along the parts to catch every single hair.
The Prep Work
- Always detangle starting from the ends and working your way up to the roots before you begin braiding.
- Apply a leave-in conditioner to keep the hair pliable, as dry, frizzy hair will snap under the tension of a tight braid.
- Use a fine-tooth comb only for creating the parts, but rely on your fingers to smooth the hair into the braid itself.
Pro tip: If you find the ends getting frizzy while you braid, keep a small spray bottle of water and oil mixture handy to dampen them just before you feed them into the stitch.
2. Fulani-Inspired Braids with Beads

The beauty of Fulani braids lies in the blend of structure and decoration. You get a central cornrow leading from the front to the back, often accompanied by side braids that feed into the main pattern. Because this style uses decorative elements like gold cuffs or wooden beads, it draws the eye away from any potential fuzziness along the hairline. It turns a potential “problem” area into a centerpiece.
Achieving the Fulani Look
- Start with a clear, sharp middle part that runs from your hairline to the nape of your neck.
- Braid the side sections toward the front of your ears to frame your face.
- Use clear edge control to lock down your hairline, but do not pull too tight; frizzy hair can be fragile, and you do not want to sacrifice your edges for the sake of a style.
Pro tip: Choose beads that match your outfit or mood, but be careful with the weight—too many glass beads can cause sagging, which pulls at the roots and contributes to breakage.
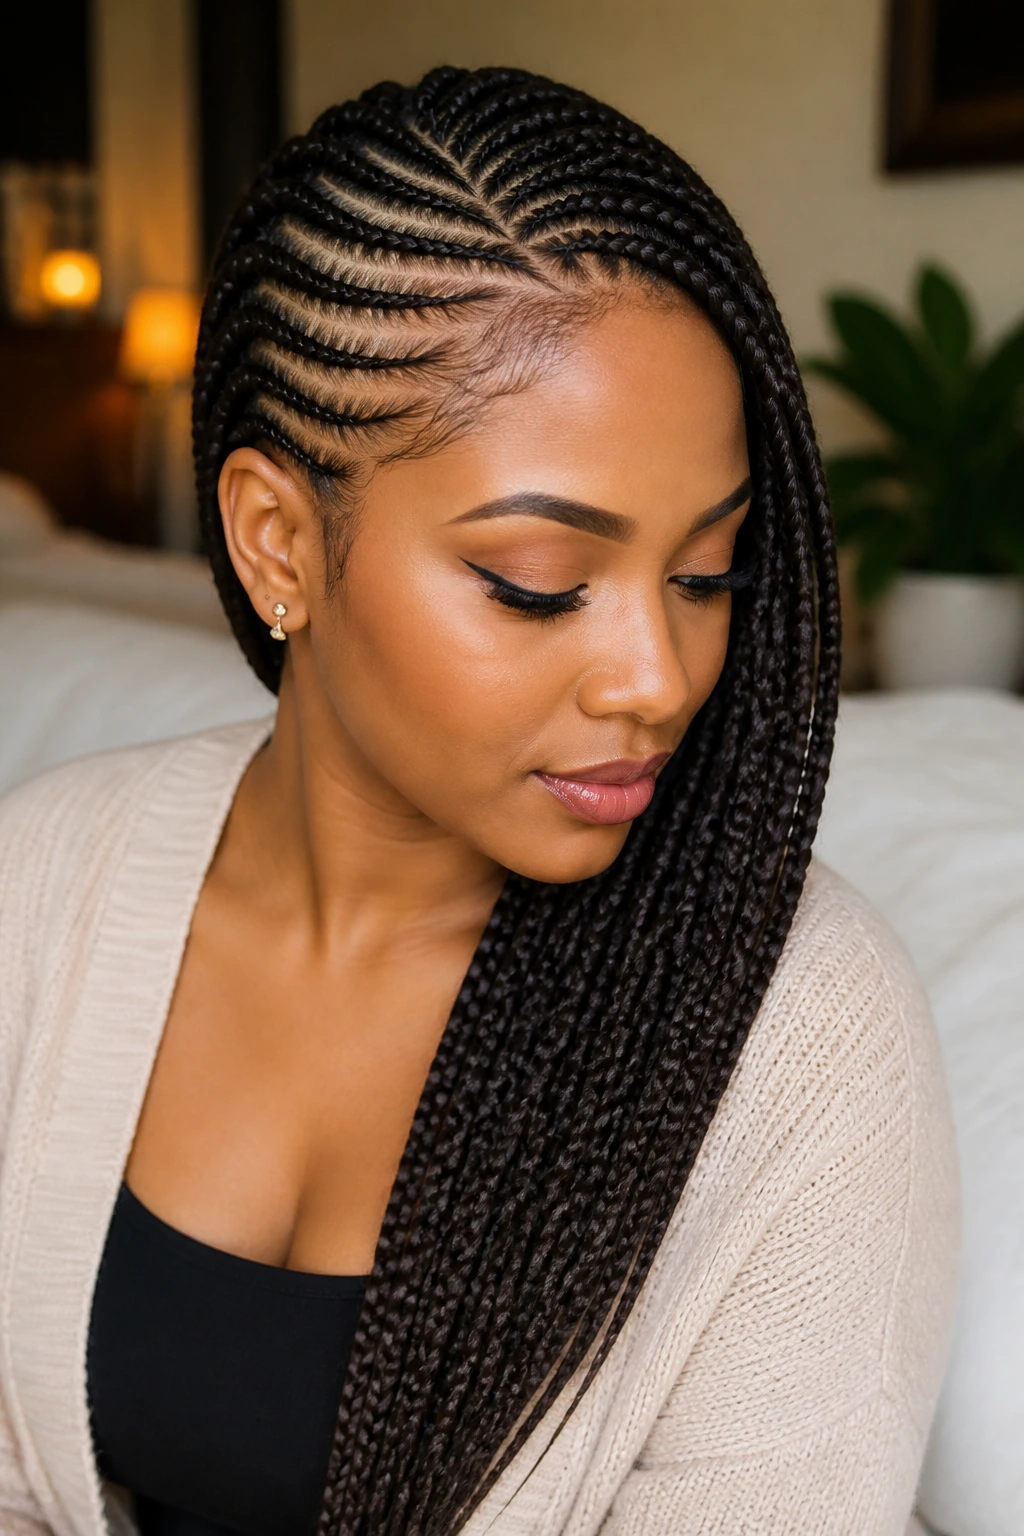
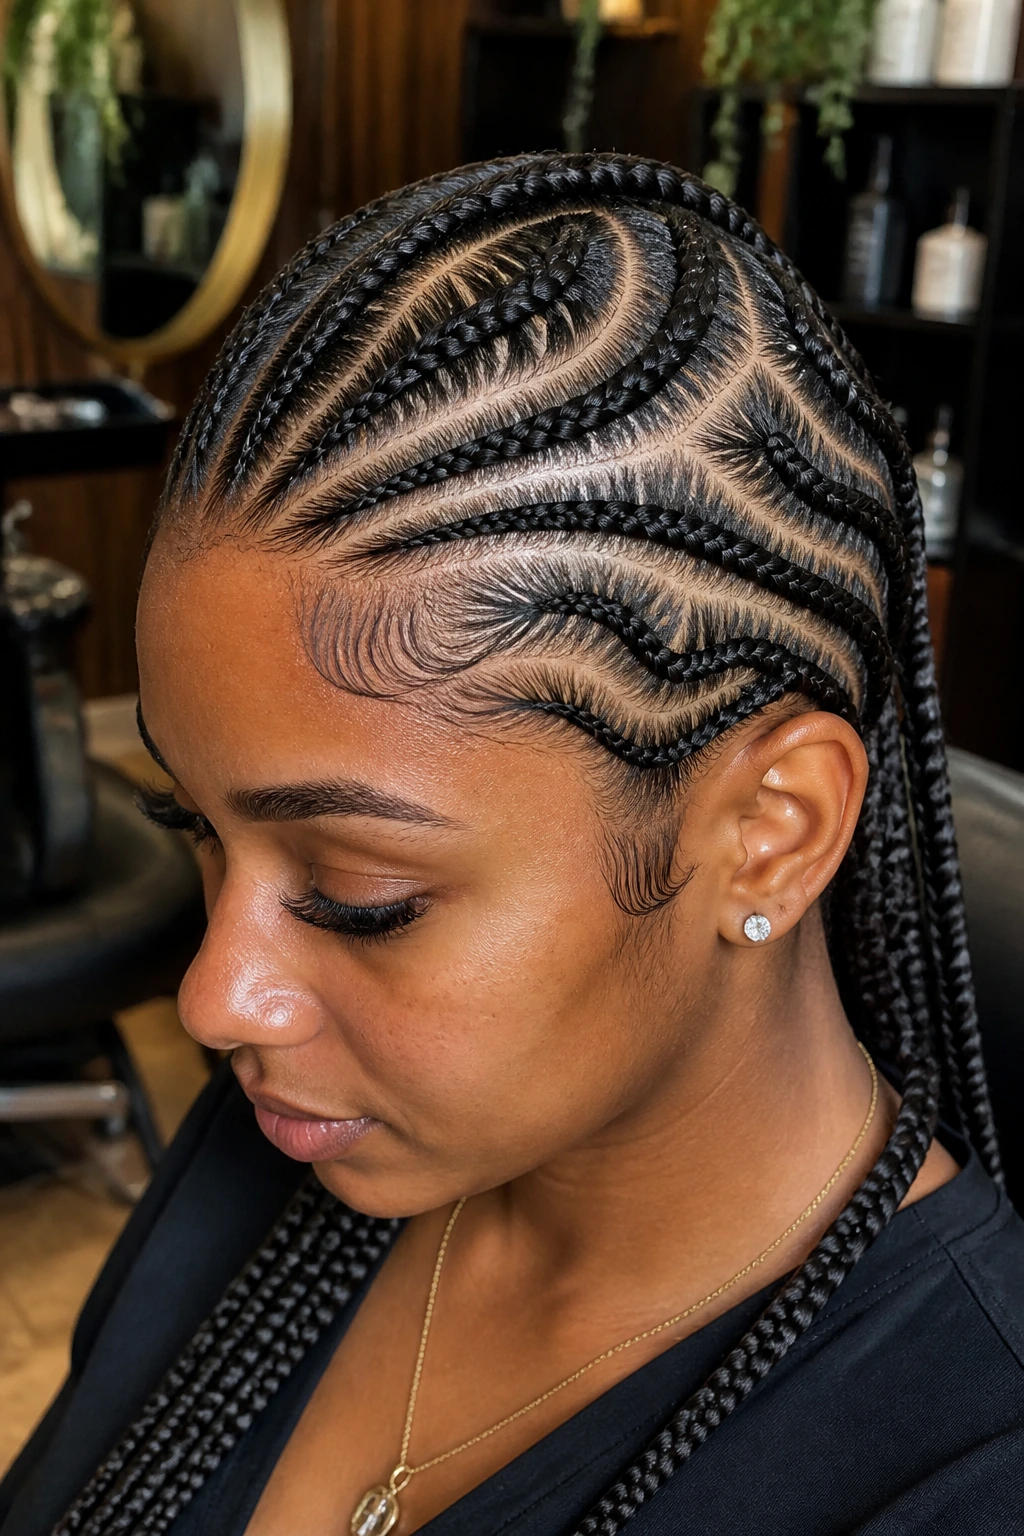
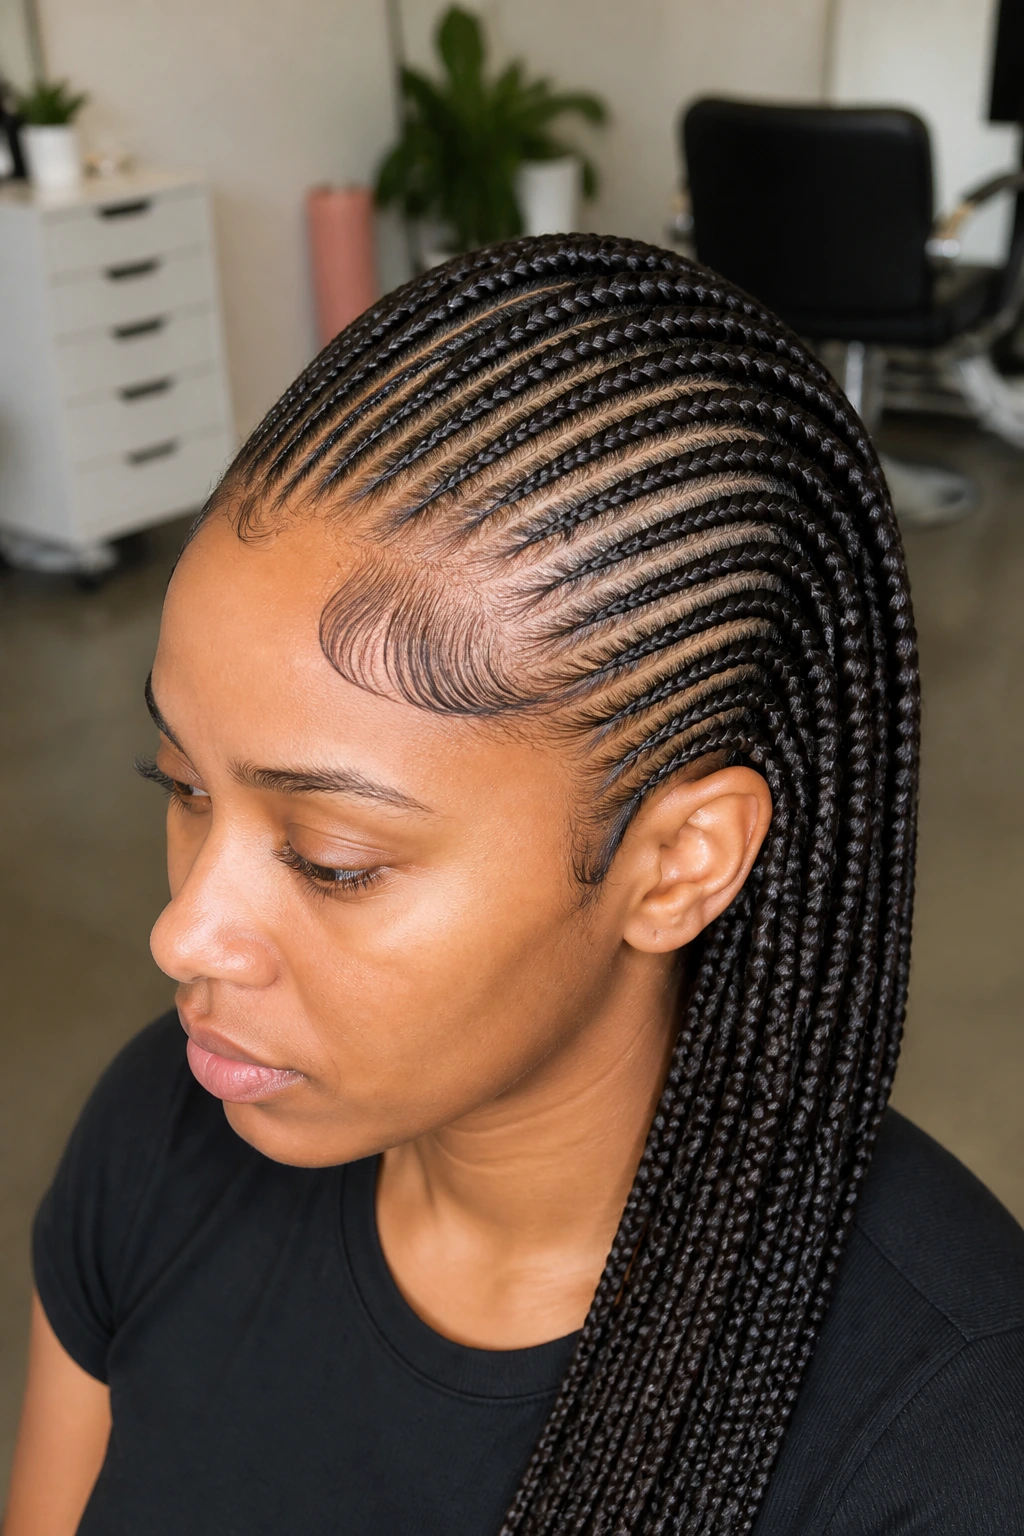
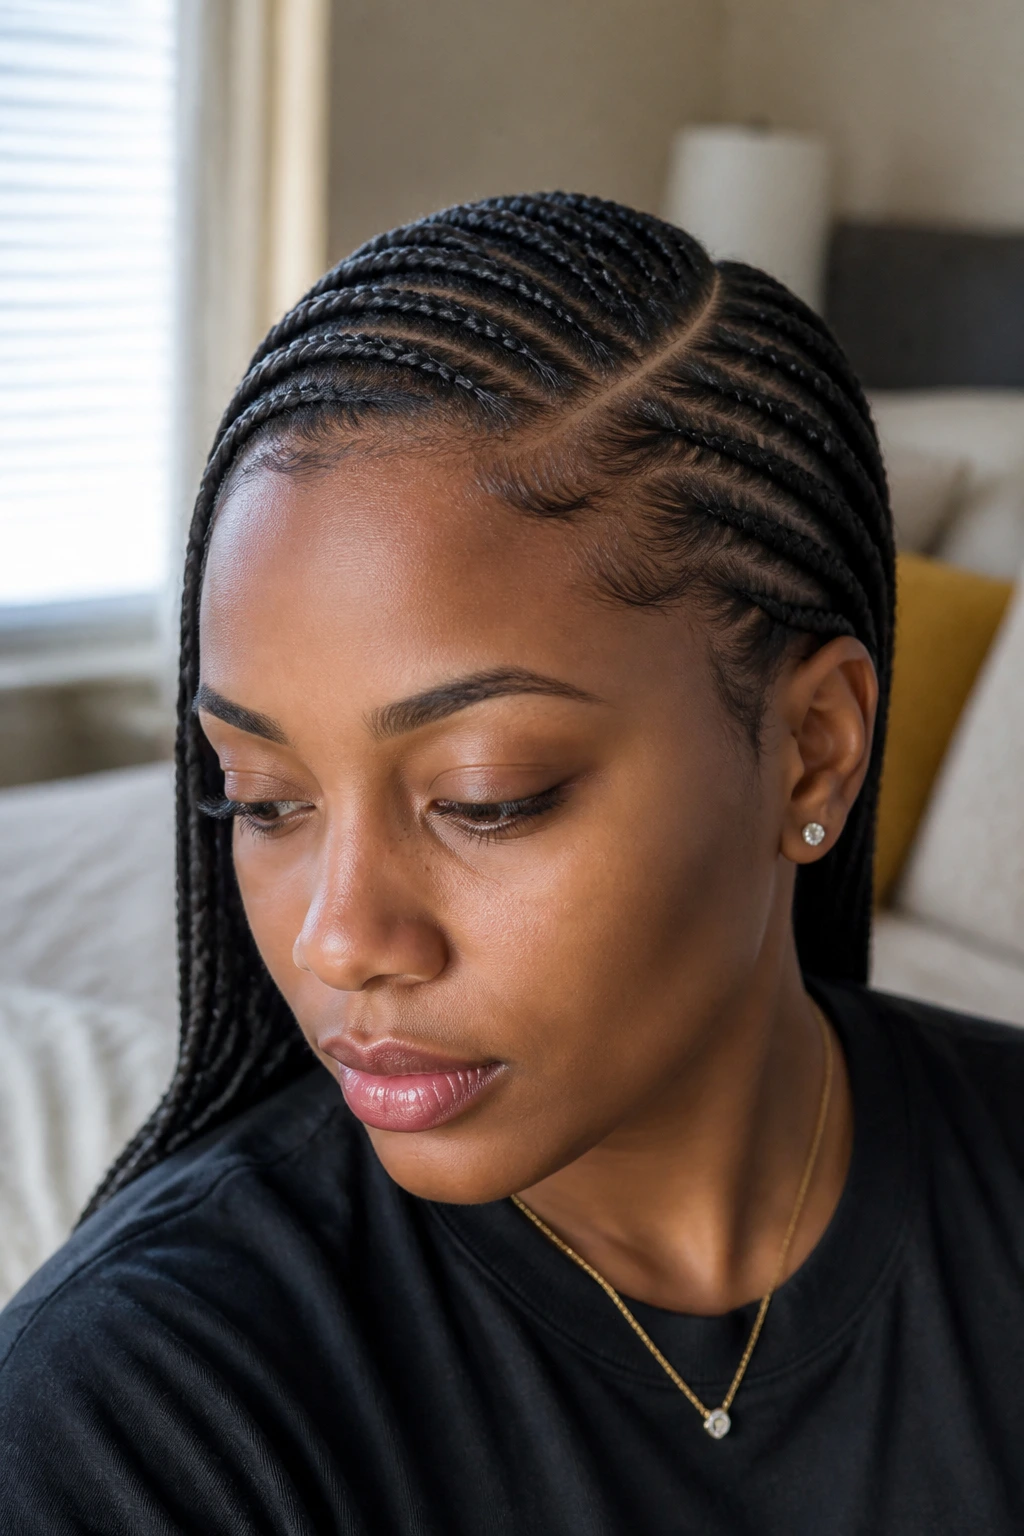
3. Stitch Braids for Precision
Stitch braids are all about that layered, clean appearance. The “stitch” refers to the way you feed the hair into the braid, creating a series of horizontal lines that look almost like knitted fabric. This technique is particularly forgiving for frizzy hair because the constant feeding motion keeps the hair tucked tightly against the scalp, essentially locking the frizz inside the braid structure itself.
Why Stitching Works
- It provides a very uniform look that hides inconsistent curl patterns.
- The technique requires a bit of practice, but once you master the “feed-in” motion, it becomes much faster than standard braiding.
- You can vary the size of the stitches to create wider, more dramatic braids or thinner, tighter ones.
Practical application: Use a generous amount of braiding gel or wax when you create the stitches. This is not the time to be shy with product—you need a barrier between your hair and the air to prevent those flyaways from popping up an hour after you finish.
4. Feed-In Goddess Braids
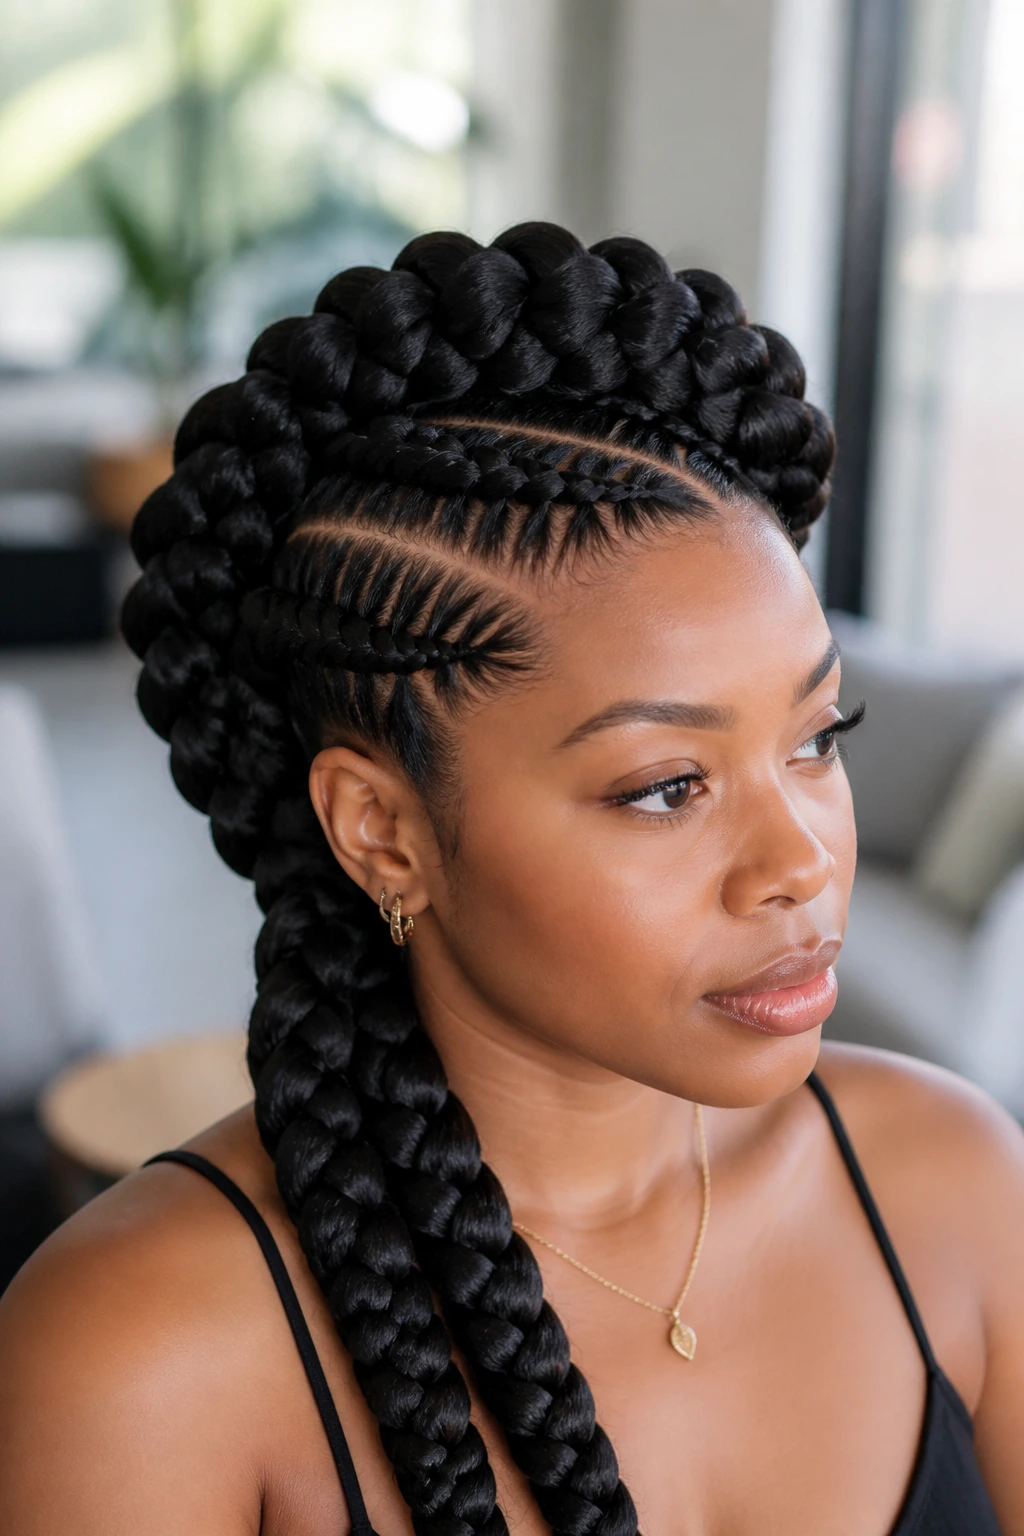
If you want something larger and more voluminous, goddess braids are the answer. These are essentially thick, raised cornrows that can be styled in a crown, a side sweep, or straight back. Because they are bigger, you use less tension than you would with micro-braids, which is a major win for your scalp health and hair integrity.
Balancing Volume and Smoothness
- Since you are working with large sections, ensure you smooth each section thoroughly with a brush before you begin the braid.
- You can add hair extensions during the feeding process to add weight and length, which helps keep the braid smooth and uniform.
- Focus on the tension at the base—if the base of the braid is secure, the rest will hold its shape even if your natural hair is prone to frizz.
The result: A regal look that feels light but provides the protection you need for a busy week.
5. Side-Swept Cornrow Patterns
A side sweep is one of the easiest ways to change your look without changing your entire hair routine. You simply direct all your cornrows toward one side of your head, creating a cascading effect. This is perfect for people who feel their face shape is better suited by asymmetrical styles or who want to show off earrings on one side.
Styling for the Side
- Start your parts from the opposite ear and work toward the ear you want the hair to fall over.
- Ensure the braids start tight at the hairline and gradually loosen as they reach the ends to maintain a soft flow.
- If you have natural hair that is prone to shrinking, a side-swept look hides the difference in length between sections quite well.
Maintenance note: When you sleep, use a silk or satin bonnet. A cotton pillowcase will pull at your hair all night, leading to the dreaded “halo” of frizz around your braids by morning.
6. Zig-Zag Parting
Sometimes you need to move beyond the straight line. Zig-zag parts are a playful way to elevate a standard cornrow style. The jagged lines break up the visual weight of the hair and provide a modern, edgy aesthetic. This is a great choice if you are doing a half-up, half-down style where the scalp is highly visible.
Executing the Zig-Zag
- Use the handle of a metal tail comb to trace the zig-zags slowly.
- Take your time—if the part isn’t sharp, the whole style can look messy, which is the last thing you want when dealing with frizz.
- Keep the braids themselves simple so the part remains the focal point.
Why this works: The sharp, clean geometry of the part acts as a frame, making your hair look intentional and expertly groomed regardless of its texture.
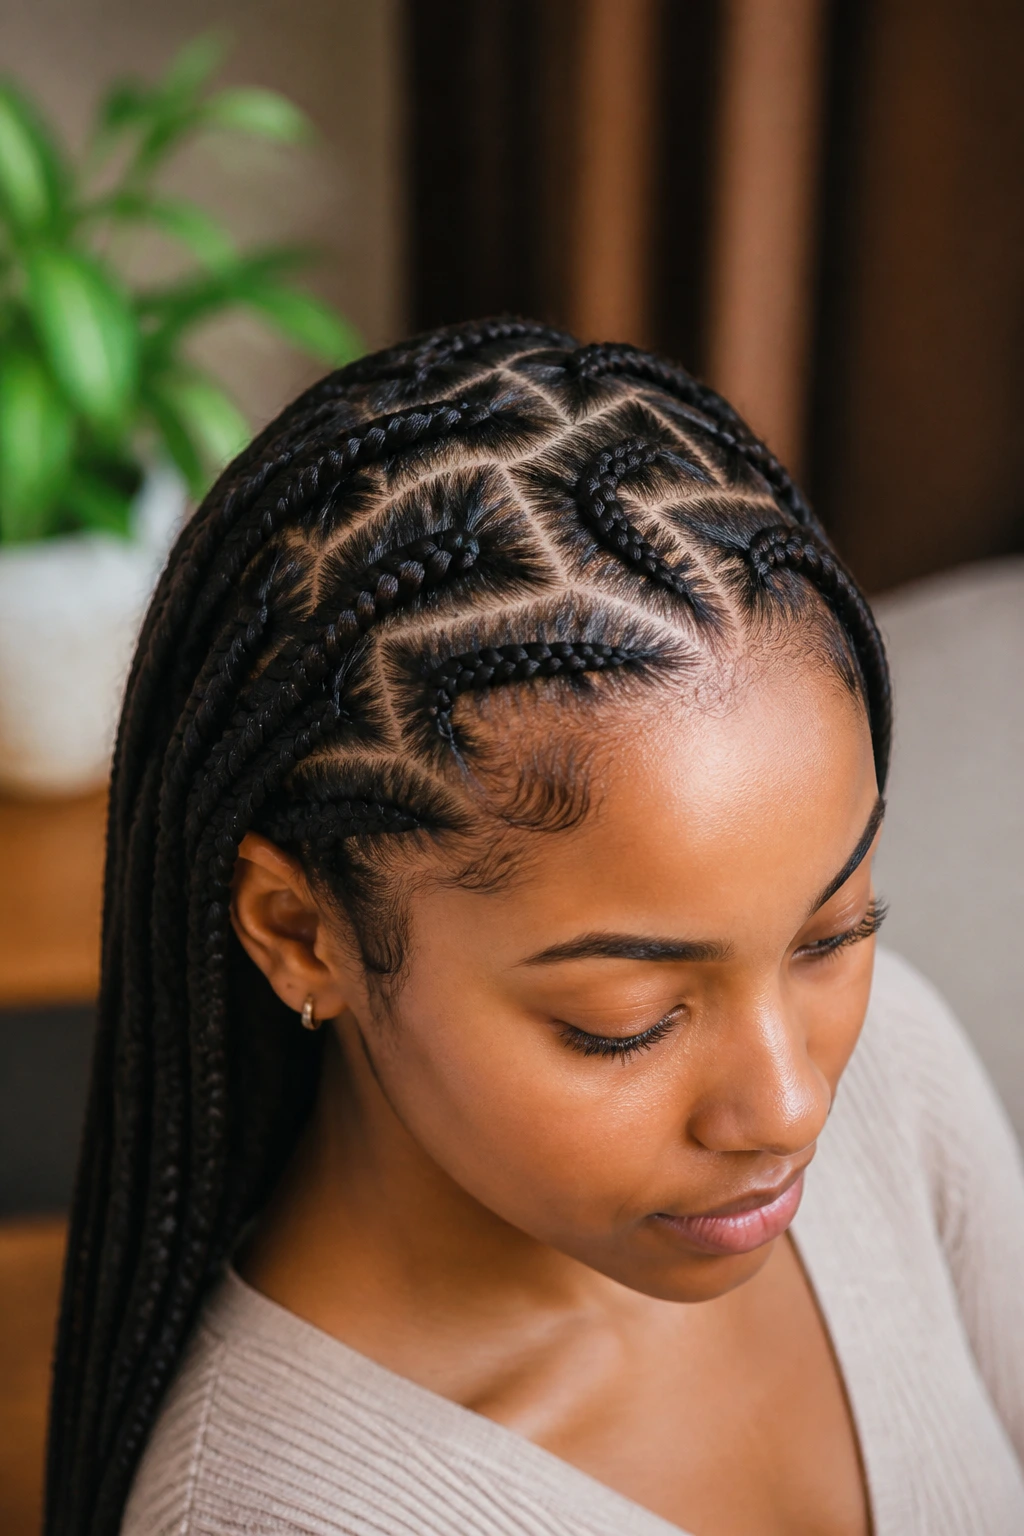
7. Tribal-Inspired Cornrow Design
Tribal braids often feature intricate, curved patterns and horizontal lines that differ from traditional straight-back styles. These designs are highly customizable and often incorporate various shapes that look complex and sophisticated. Because tribal braids often rely on smaller, tighter segments, they are excellent at keeping even the most stubborn frizz tucked away for long periods.
The Complexity Factor
- Start by mapping out your design with a light-colored eyeliner pencil if you are doing it yourself—it makes it much easier to follow the lines.
- Be mindful of the curvature; when you braid in a curve, you have to be extra careful not to pull the hair at an awkward angle, which can cause snapping.
- Use a soft holding spray at the end to catch any tiny stray hairs that might have escaped the process.
Pro tip: Tribal designs look incredible when accessorized with gold clips placed at the intersections of the braids.
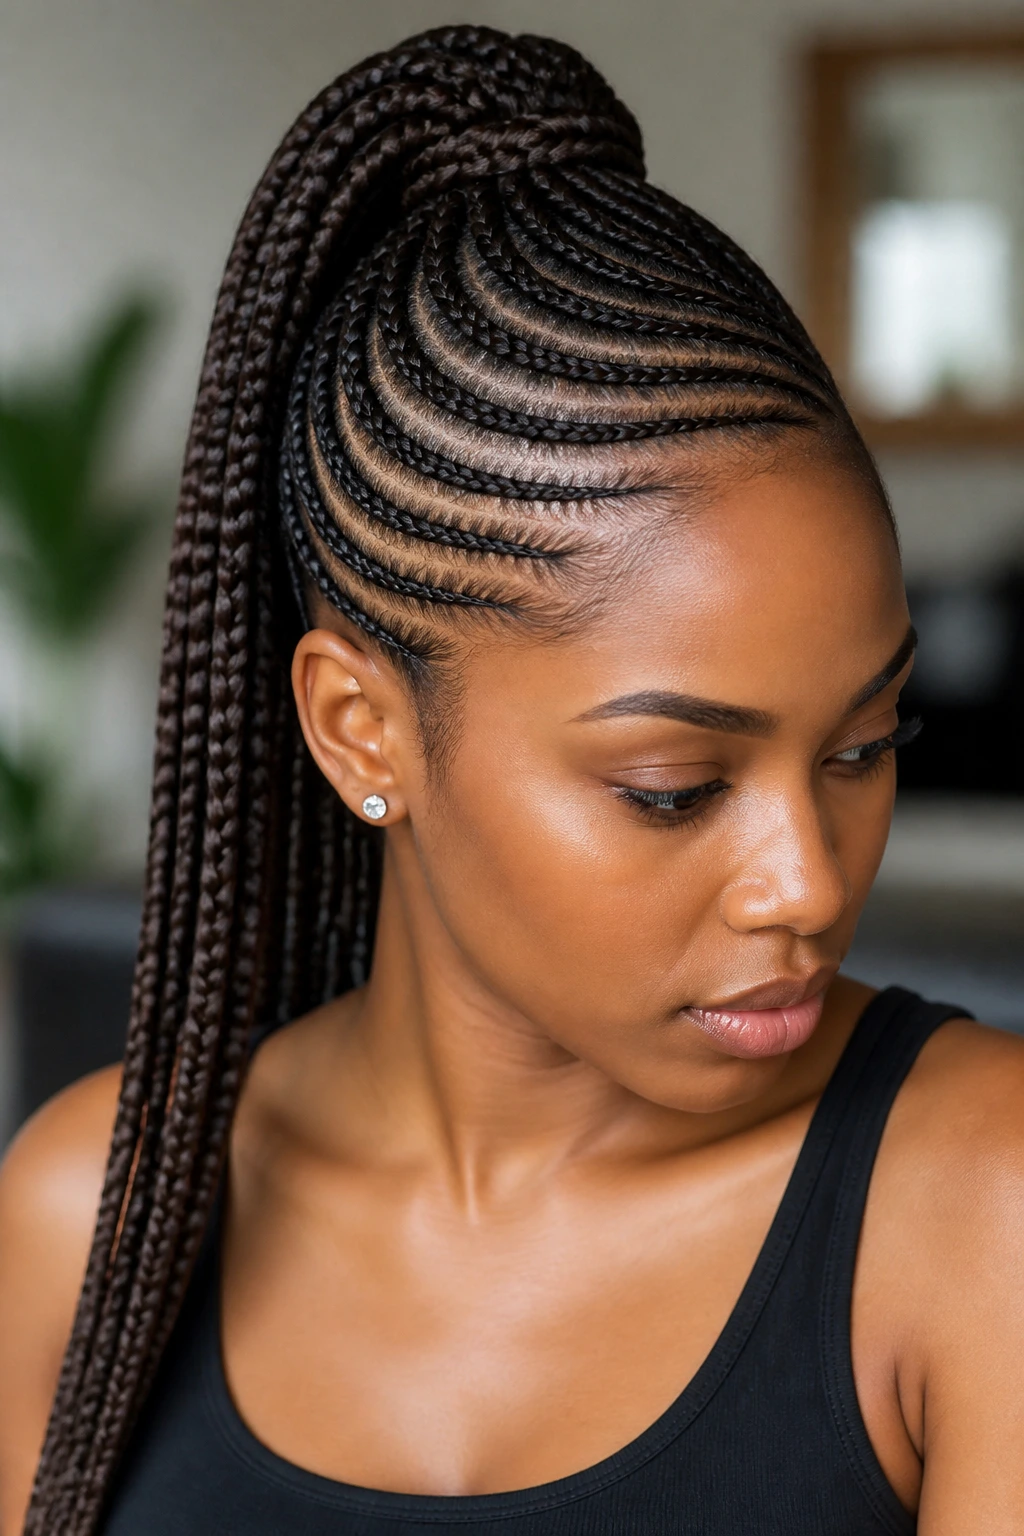
8. Braided High Ponytail
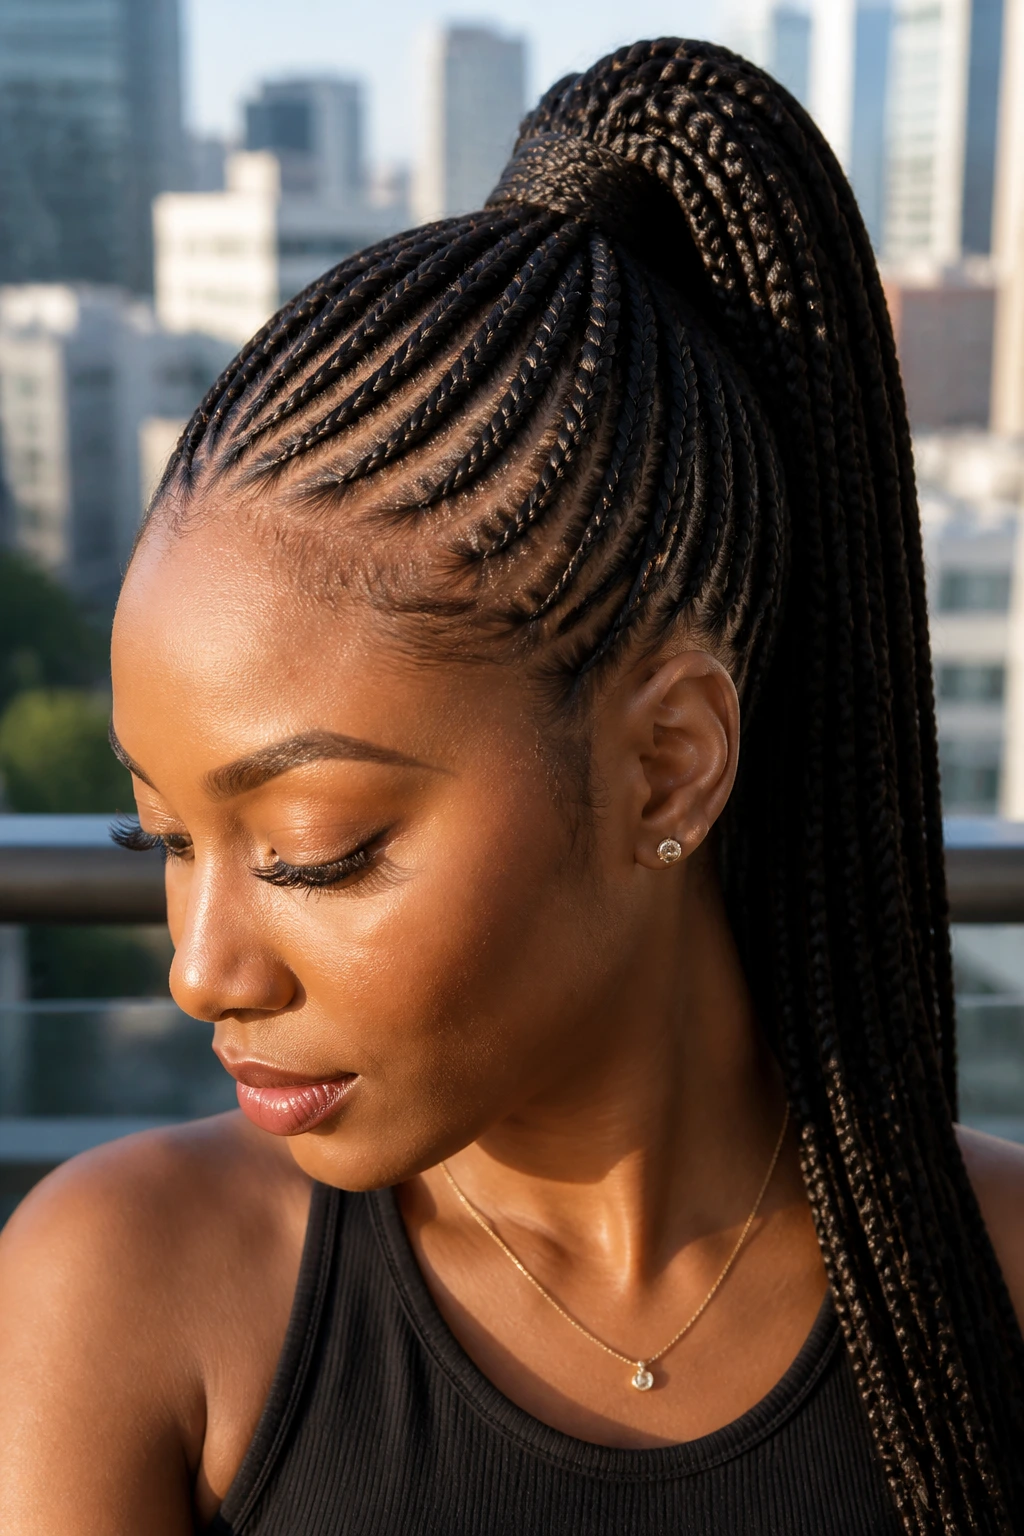
Combining cornrows with a ponytail is the ultimate way to get the hair off your neck while keeping a polished look. You braid the hair from the hairline toward the crown, then secure the loose ends into a sleek ponytail. You can even wrap a small piece of hair around the base of the ponytail to hide the elastic, which adds a professional finish.
Getting the Tension Right
- The key here is the transition from the scalp to the ponytail base.
- If you braid too tightly at the crown, you will have tension headaches; if you braid too loosely, the ponytail will sag.
- Use a firm-hold styling cream to smooth the hair as you transition it into the elastic.
Maintenance: A ponytail style can be refreshed by re-smoothing the edges with a bit of water and gel every few days, which will keep you looking fresh for the duration of the style.
9. Criss-Cross Cornrows
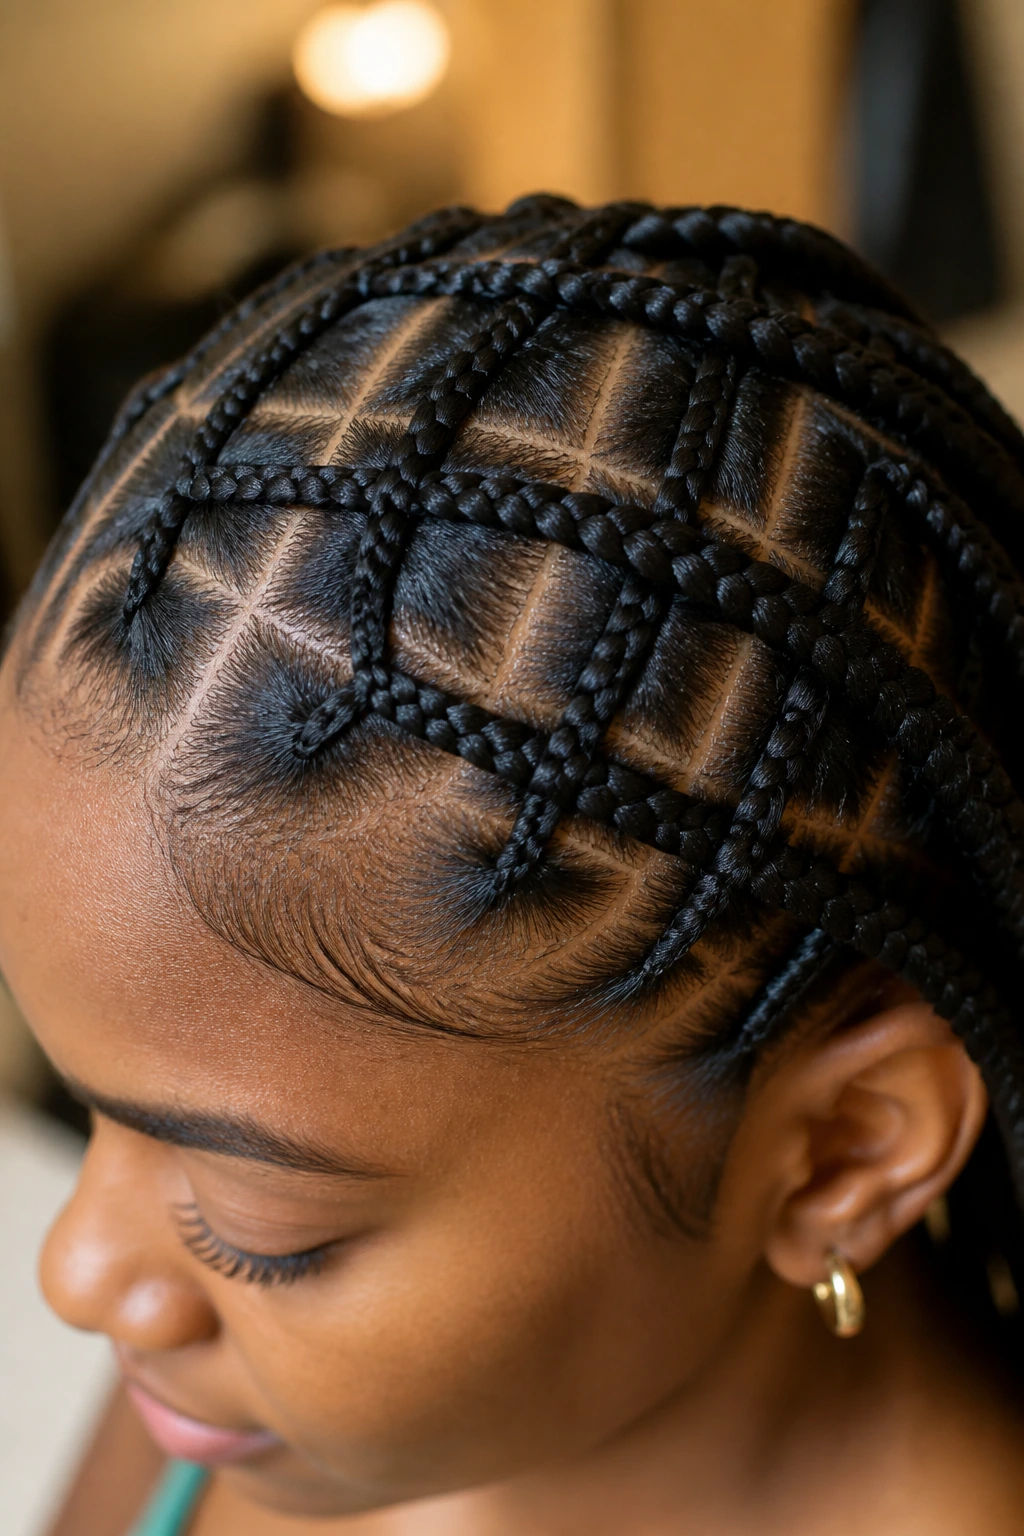
Criss-cross patterns are visually arresting and perfect for anyone who wants to add a bit of flair to their protective style. By layering braids over one another, you create a dimensional look that feels much more elaborate than it actually is. This is a fantastic option for a night out or a special occasion.
The Overlap Technique
- Braid one section diagonally, then braid the next section so that it crosses over the first at a perpendicular angle.
- You can keep the braids thin to create a tighter, more intricate net-like pattern.
- Be careful with the friction; because the braids are touching and overlapping, ensure your hair is well-moisturized so the friction doesn’t cause breakage.
Practical tip: Use a light hair oil on your scalp after installing these braids to keep it hydrated, as the complex pattern can make it a bit harder to reach your scalp for regular maintenance.
10. Mohawk Cornrows
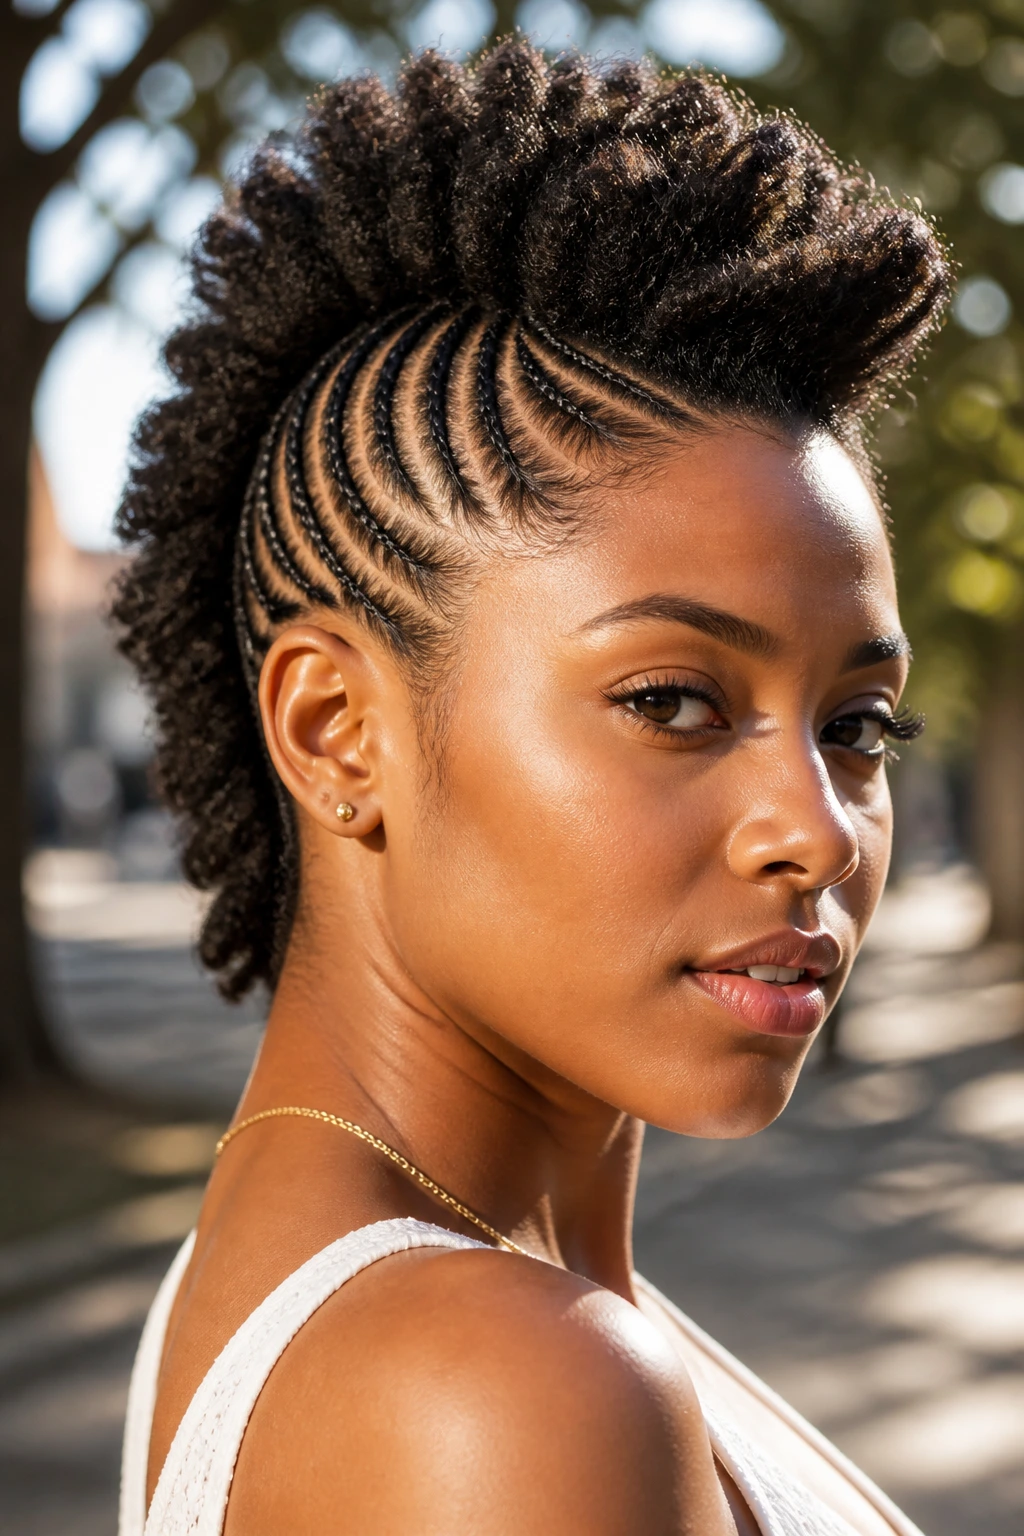
A braided mohawk is a bold, high-fashion statement that works beautifully with frizzy hair. By cornrowing the sides of your head upward toward the center, you create a high-volume crest that mimics the look of a mohawk. This style is excellent for people who want to embrace their natural volume while still keeping their hair under control.
Building the Crest
- Start your cornrows at the temples and behind the ears, moving upward.
- The braids on the sides can be small and tight, while the braids in the center can be larger or even twisted to add height.
- You can finish the center with loose curls or knotless braids to give the mohawk more texture.
Why it’s a winner: It keeps your hair away from your face and neck, making it a great summer-ready style that stays put through physical activity.
11. Heart-Shaped Cornrows
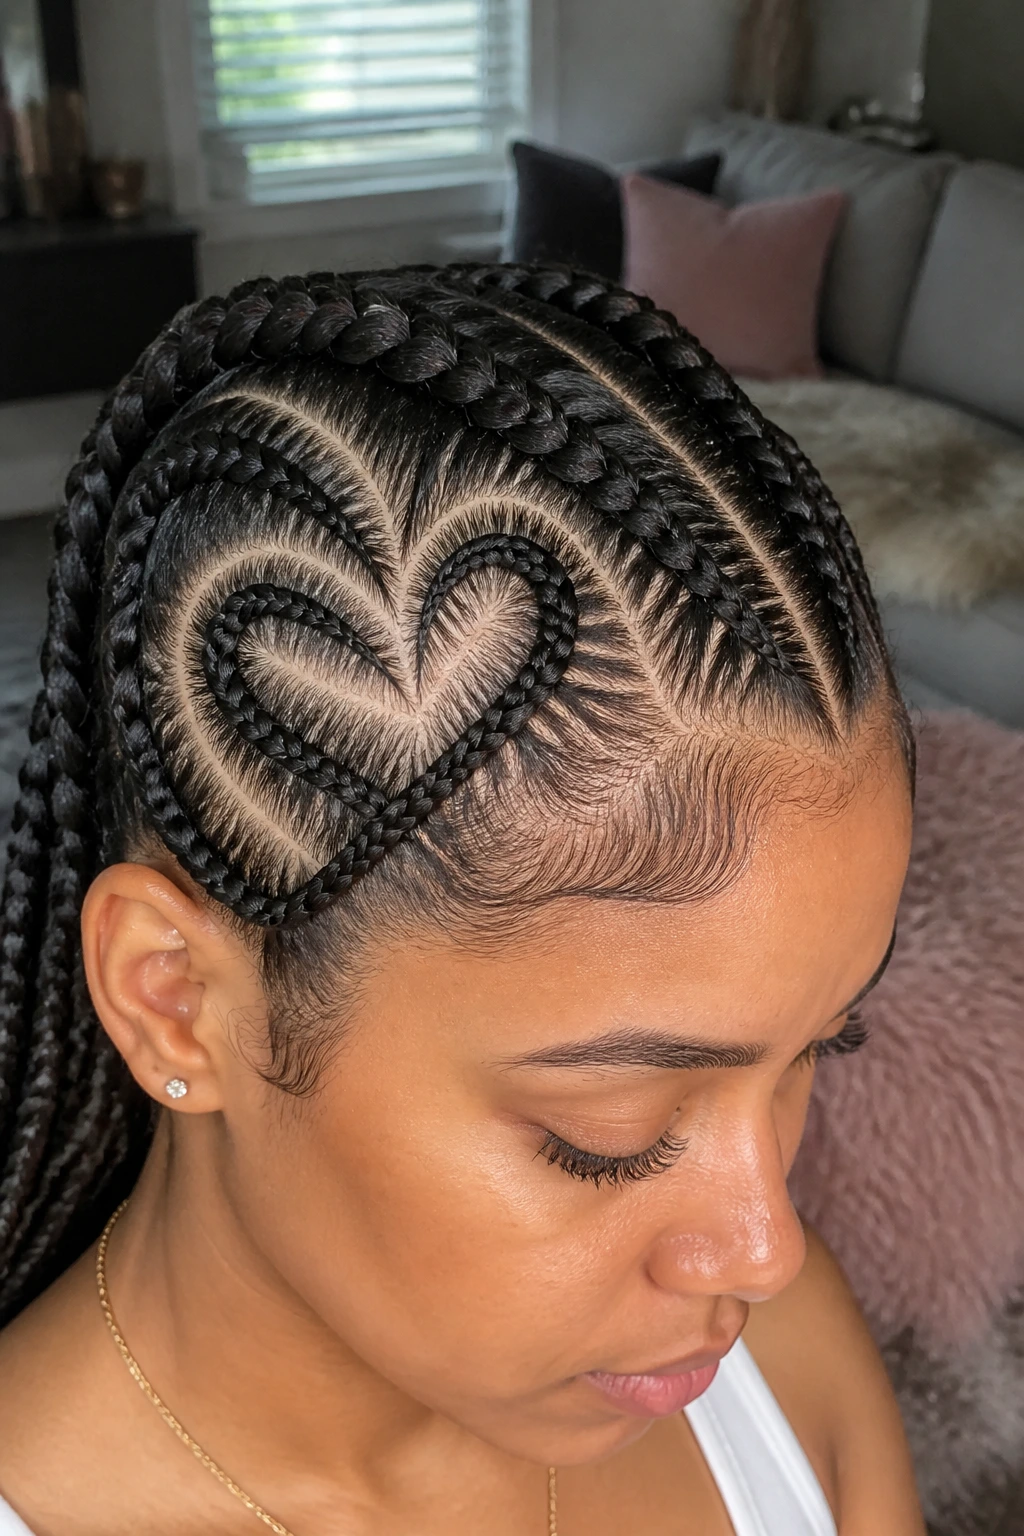
If you are looking for something playful and creative, heart-shaped parts are a classic choice. You create two curved cornrows that meet in the middle to form a heart, usually at the front or side of the head. It is a sweet, feminine touch that is very popular for festivals or casual, fun weekends.
Forming the Shape
- Use a rat-tail comb to sketch the heart shape onto your scalp first.
- The secret to a perfect heart is starting the braid at the “V” at the bottom and braiding outward toward the top curves.
- Keep the braids thin so the heart shape is clearly defined and not lost in a sea of hair.
Pro tip: This style is great for showing off, but it does require regular touch-ups to keep the heart shape sharp and free of flyaways.
12. Double-Bun Cornrows
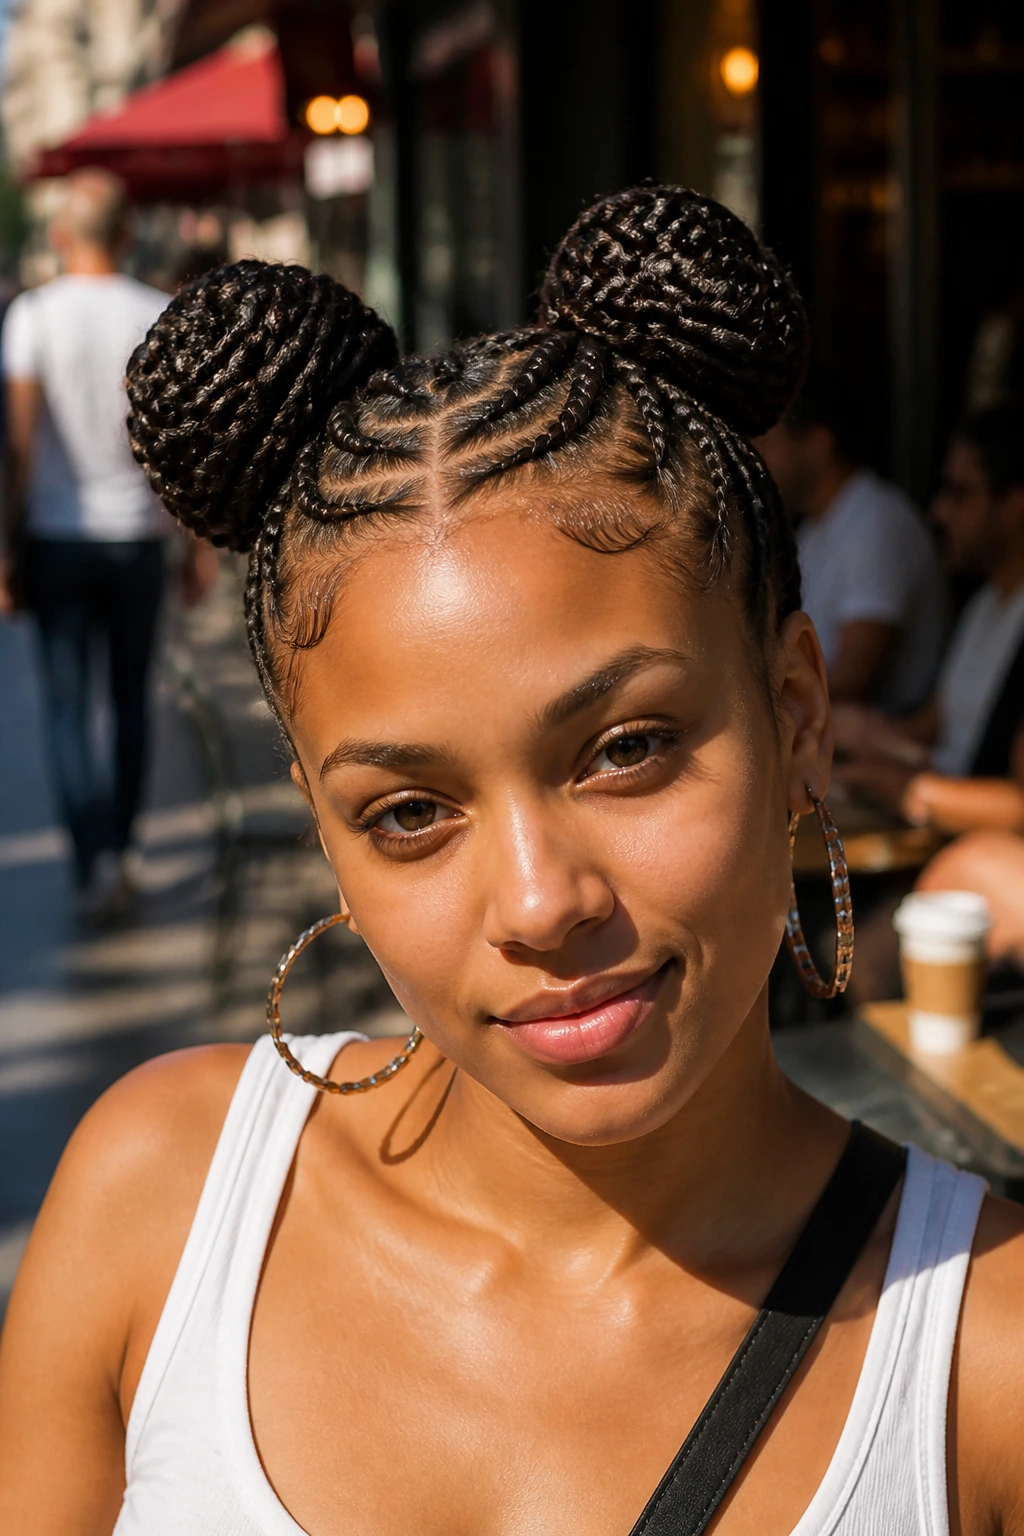
Take your classic straight-back cornrows and transform them by gathering the ends into two high buns. This is a fun, youthful style that also serves a practical purpose: it keeps your ends tucked away and protected from damage. It is an ideal style for anyone who finds that leaving their ends loose leads to tangles and knots.
Structuring the Buns
- Part your hair down the center from front to back.
- Braid each side into a straight-back cornrow, or do multiple braids on each side that converge at the crown.
- Wrap the ends around to form a neat, secure bun.
Comfort level: This style is generally very comfortable because the weight of the hair is distributed evenly across two points on the head, reducing the pressure on your scalp.
13. Braided Crown or Halo
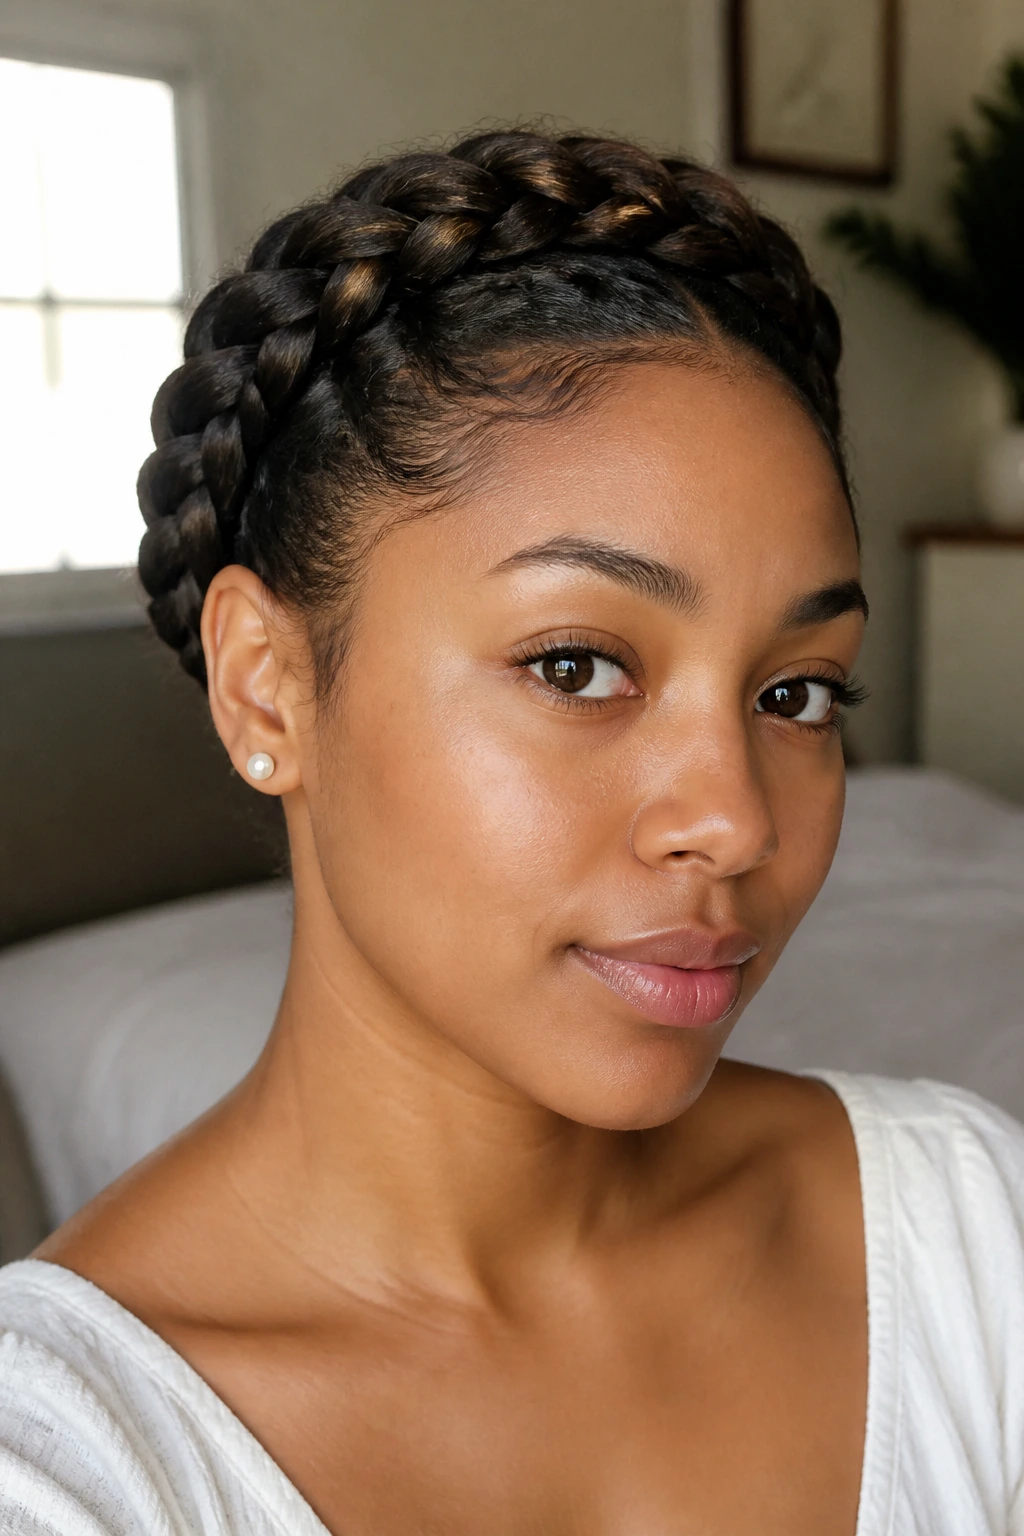
A halo braid involves cornrowing the hair around the perimeter of the head so that the braids meet to form a ring. This creates a sophisticated, almost regal appearance. For those with frizzy hair, this style is fantastic because it keeps the hair smoothed down against the scalp all the way around, effectively hiding the texture.
Getting the Halo Look
- Start at one ear and braid along the hairline toward the other side, picking up hair as you go.
- If your hair is too short to reach all the way around, you can add extensions to complete the circle.
- Once you reach the end, pin the tail of the braid underneath the starting point for a seamless finish.
Style tip: A halo braid looks wonderful with minimal makeup and statement earrings, as the style keeps your face completely clear and open.
14. Feed-In Micro Braids
If you love the look of tiny braids but want the benefit of a feed-in style that protects your hair, micro-cornrows are the way to go. These take longer to install, but the result is incredibly sleek and durable. They mimic the look of individual box braids but with the added security and scalp-access benefits of cornrows.
Precision is Key
- This style requires a lot of patience and a high-quality edge gel.
- Because the braids are so small, you need to use very little hair in each section to keep them lightweight.
- The density of the braids means they will last for several weeks, making them a great “set it and forget it” option for a busy month.
Maintenance: Keep your scalp moisturized with a tea tree oil spray, which will help prevent the itchiness that sometimes accompanies tiny, tight braids.
15. The Half-Up, Half-Down Look
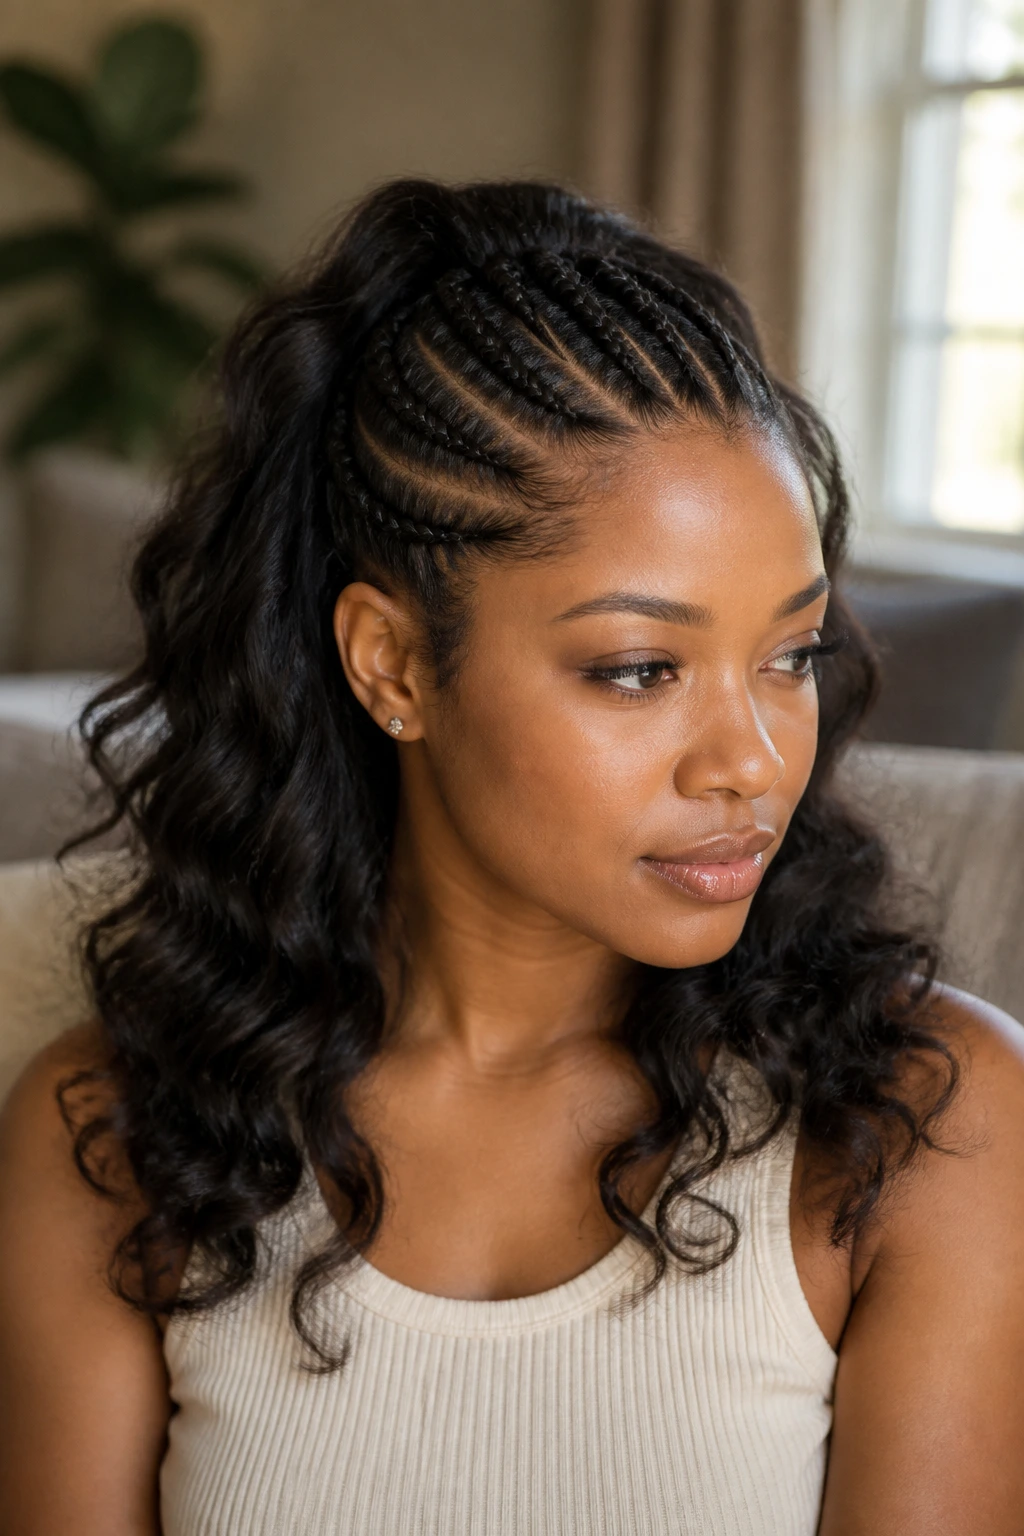
This is a classic hybrid style that gives you the best of both worlds: the sleek control of cornrows on top and the freedom of loose hair at the back. You cornrow the front section of your head and leave the back loose. If your loose hair is prone to frizz, you can use a curl-defining cream or a light twisting method to keep the back section looking uniform.
Balancing the Textures
- Braid the front section as tightly as you like to ensure the scalp looks crisp.
- Use a high-quality curl custard on the loose hair in the back to create definition and minimize frizz.
- You can even add beads or gold cuffs to the ends of the cornrows where they transition into the loose hair.
Versatility: This style is perfect if you want to look polished but still want to feel like you have “hair down” for a more casual, flowy look.
16. Chunky Two-Braids
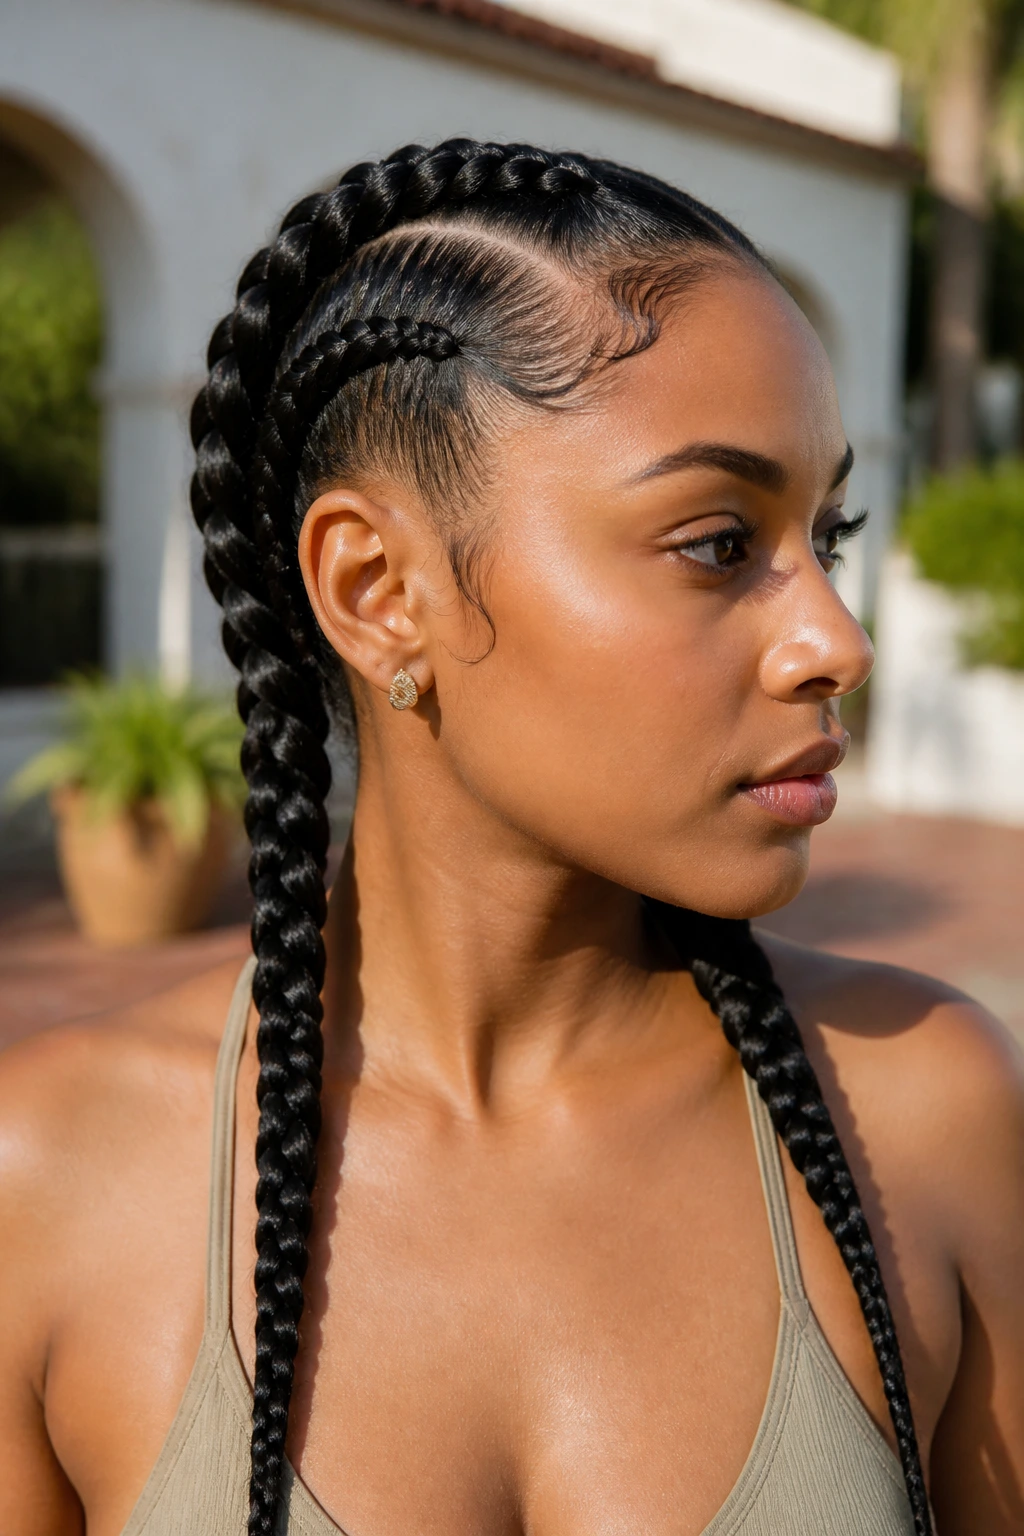
Sometimes referred to as “boxer braids,” these are two large, thick cornrows running from the hairline to the nape. These are extremely fast to do and are perfect for a lazy weekend or a quick morning routine. Because the braids are so chunky, they are very easy to maintain and can be re-done in under ten minutes.
Simplifying the Process
- Start with a sharp middle part.
- Use a firm hold cream as you braid to ensure the chunky sections stay smooth.
- If you have trouble with the ends, you can finish them with clear rubber bands to keep them from unraveling.
Practical application: If you are a beginner at braiding, start here. The larger sections are much more forgiving than micro-braids and give you plenty of practice with finger placement and tension.
17. Cornrows with Curly Ends
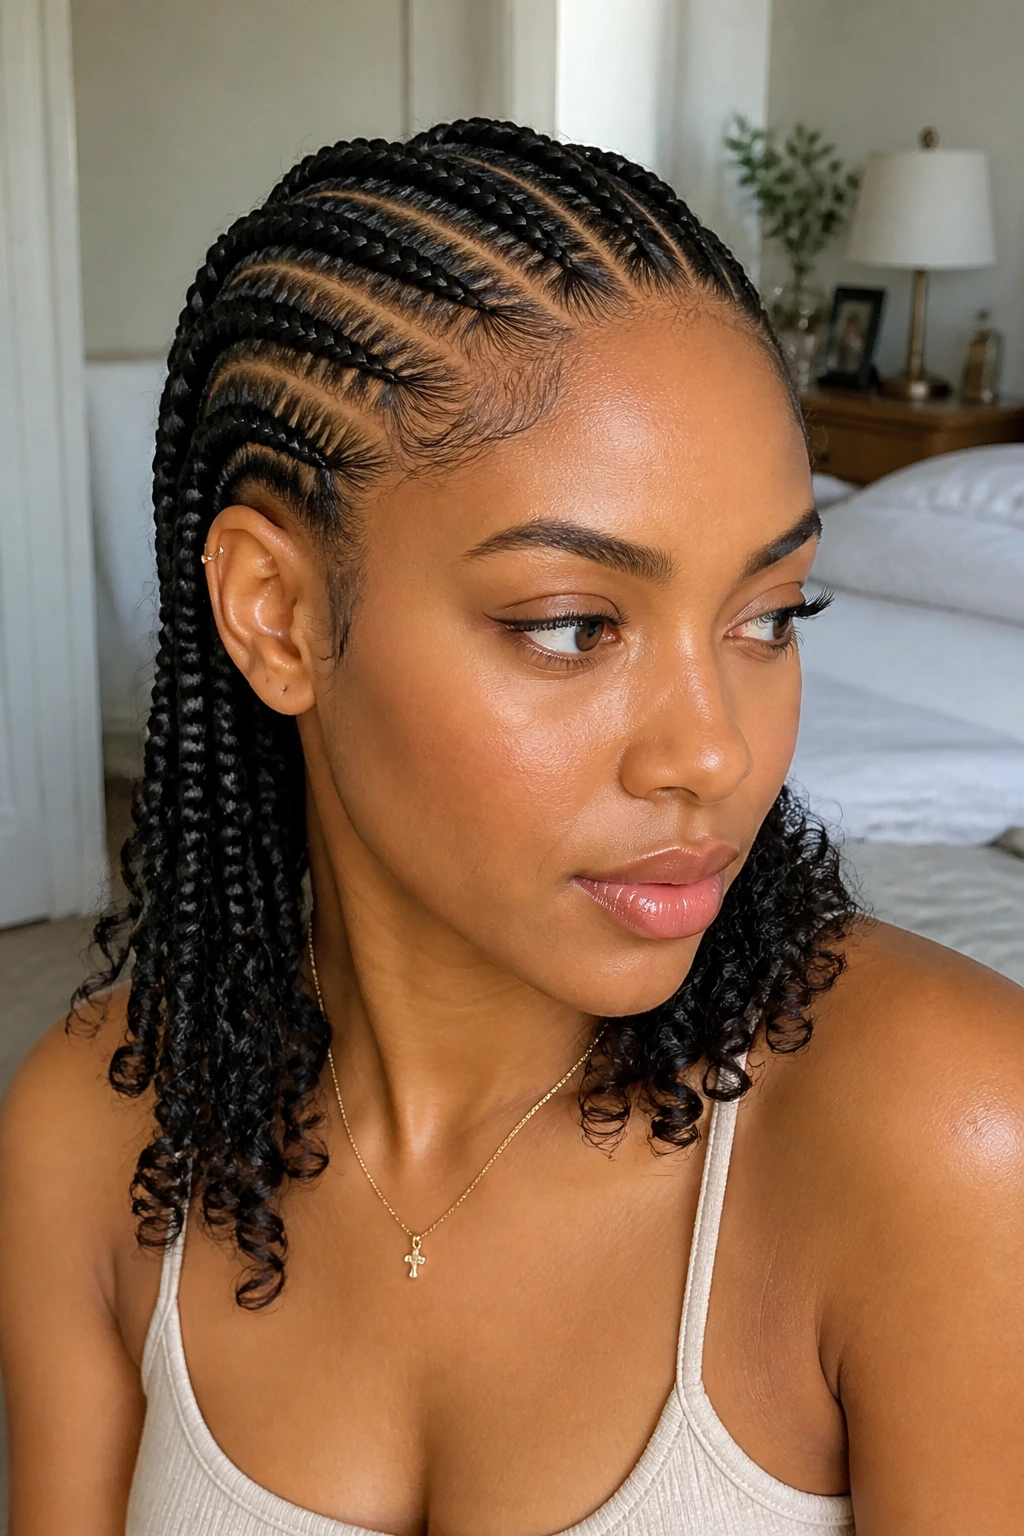
This style is all about the contrast between the sleek, cornrowed scalp and the loose, bouncy curls at the ends. It is incredibly popular because it allows you to wear a protective style while still showing off your natural curl pattern. You braid the hair until you reach your desired length, then leave the rest out or curl it with flexi-rods.
Creating the Blend
- Use a small amount of styling gel on the hair you plan to curl to ensure the texture matches the braids.
- After you stop braiding, twist the remaining hair or put it on a flexi-rod to set the curl pattern.
- This prevents the loose ends from becoming frizzy or tangled throughout the day.
Style note: The curls at the ends add a soft, romantic touch that softens the sharp lines of the cornrows.
18. Braided Updo with Accessories
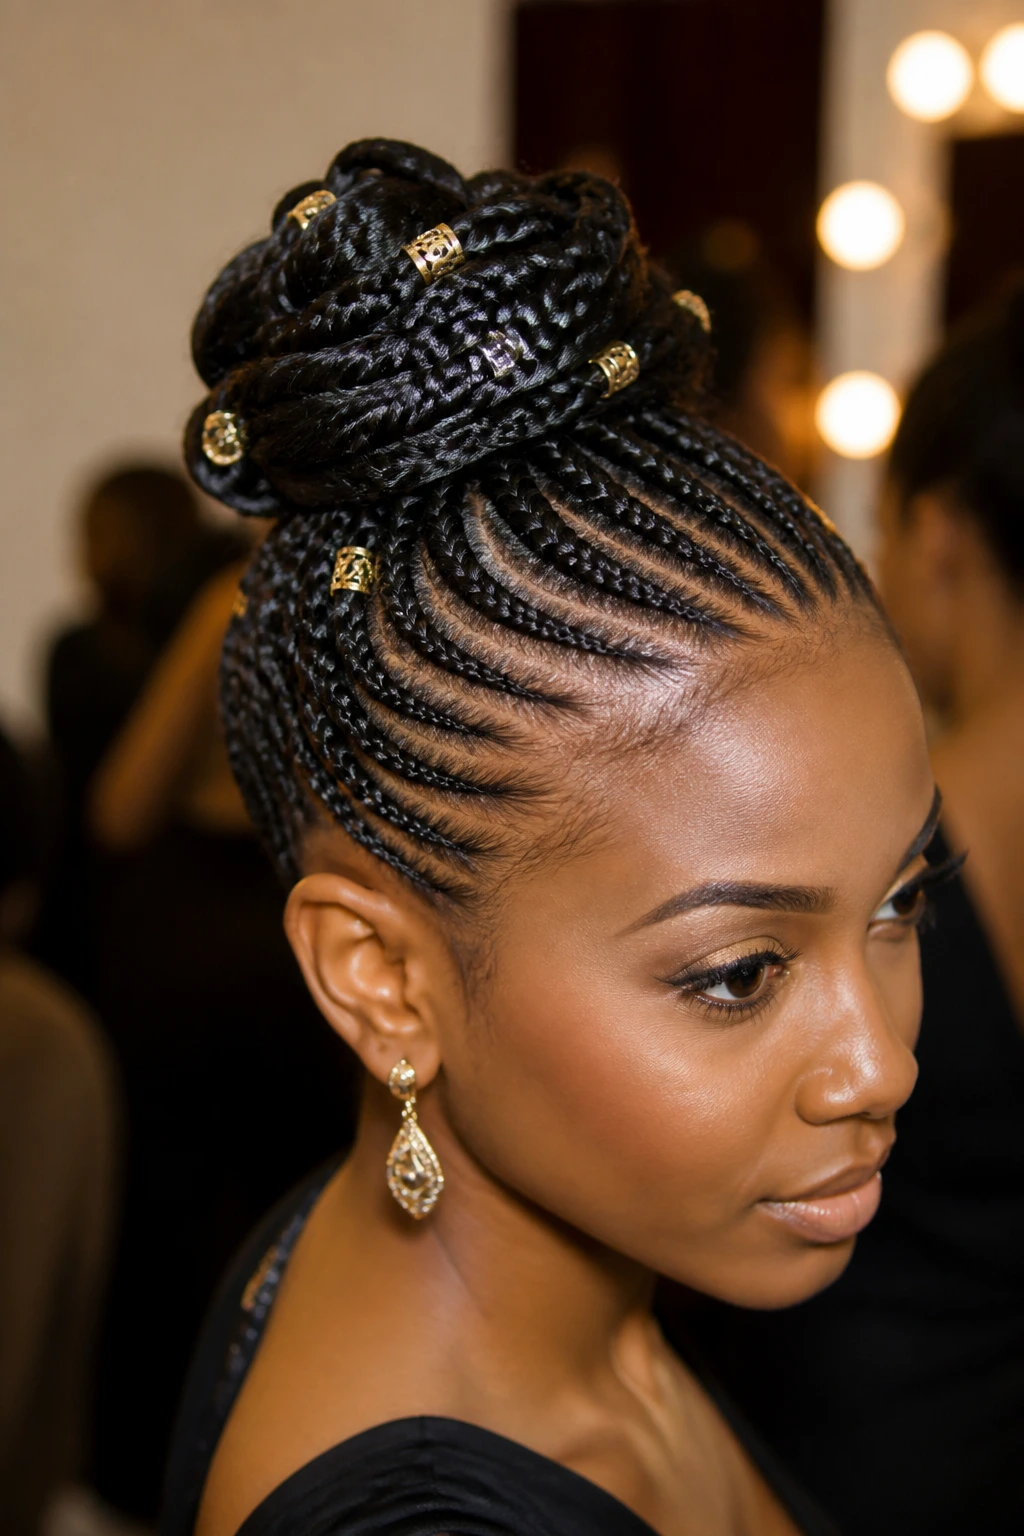
If you are attending a formal event, a complex cornrowed updo is a stunning choice. You can combine multiple braiding patterns—curves, zig-zags, and straight-backs—to build a unique shape, then pin the ends up into a bun or a sophisticated knot. Accessories like pearls, gold threads, or decorative pins can elevate the look instantly.
Mastering the Updo
- Do not be afraid to use a bit more hairspray than usual to keep every strand in place for an event.
- Use U-pins to secure the heavy braids; they hold much better than standard bobby pins and won’t snag your hair.
- Focus on making the base of the updo very secure so it doesn’t shift when you move.
Final touch: Coordinate your hair accessories with your jewelry for a cohesive, put-together ensemble.
19. Cornrows with a Side Part
A side-part cornrow style is a more mature, sophisticated variation of the center-part straight-back. It frames the face beautifully and provides a sense of asymmetrical balance. You can either braid all the hair toward the side or create a clean part and braid both sides away from it.
The Power of the Side Part
- A deep side part can add volume to your hair on one side, which is great if your hair tends to feel flat.
- When braiding, ensure the tension at the part is consistent so you don’t get gaps in the pattern.
- Smooth your edges along the side part to emphasize the line.
Why choose this? It’s a very flattering style that works well for both professional and casual environments.
20. Colorful Cornrows
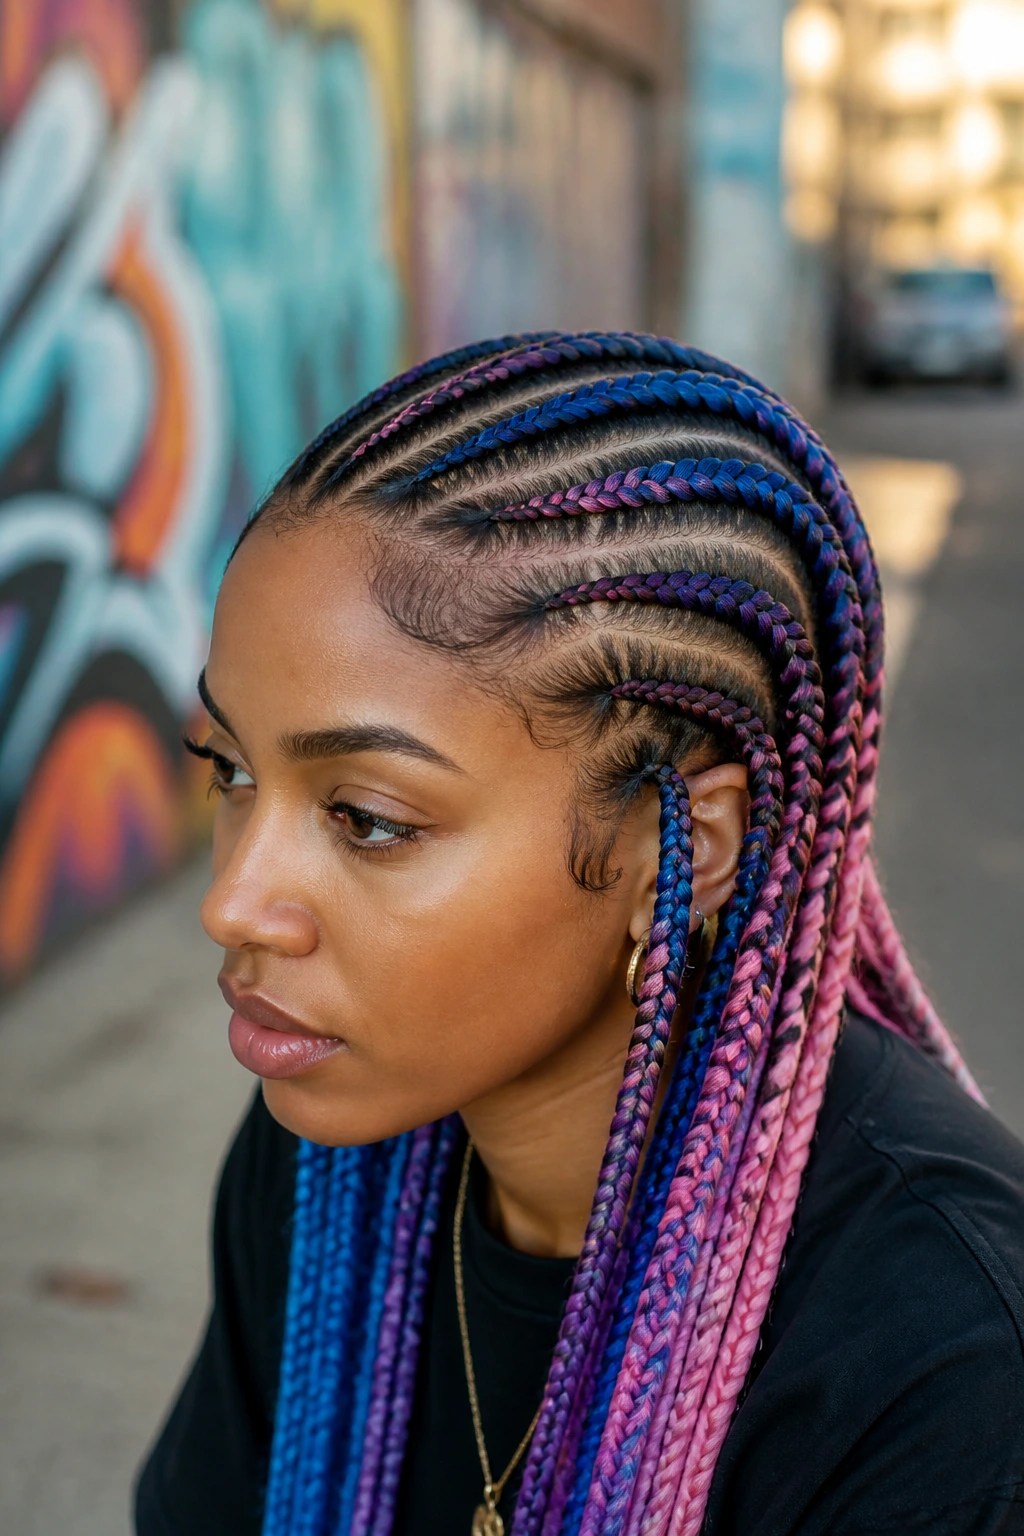
If you are tired of the natural look, adding colored hair extensions into your cornrows can change your entire aesthetic. Whether you go for vibrant blues, deep purples, or natural-looking blondes and browns, color adds a dimension that makes frizz seem completely irrelevant. The visual interest of the color distracts from the texture of the hair.
Working with Color
- Ensure the hair extensions match the texture of your natural hair as closely as possible to prevent a clashing finish.
- You can mix colors for a custom look, like an ombre effect that transitions from dark at the roots to light at the ends.
- Be aware that some synthetic hair can be dry; pre-treat it with a bit of spray-on conditioner before you start braiding to make it easier to work with.
Style tip: Don’t be afraid to try colors you wouldn’t normally wear—cornrows are temporary, making them the perfect playground for color experimentation.
21. Cornrows with Beads at the Ends
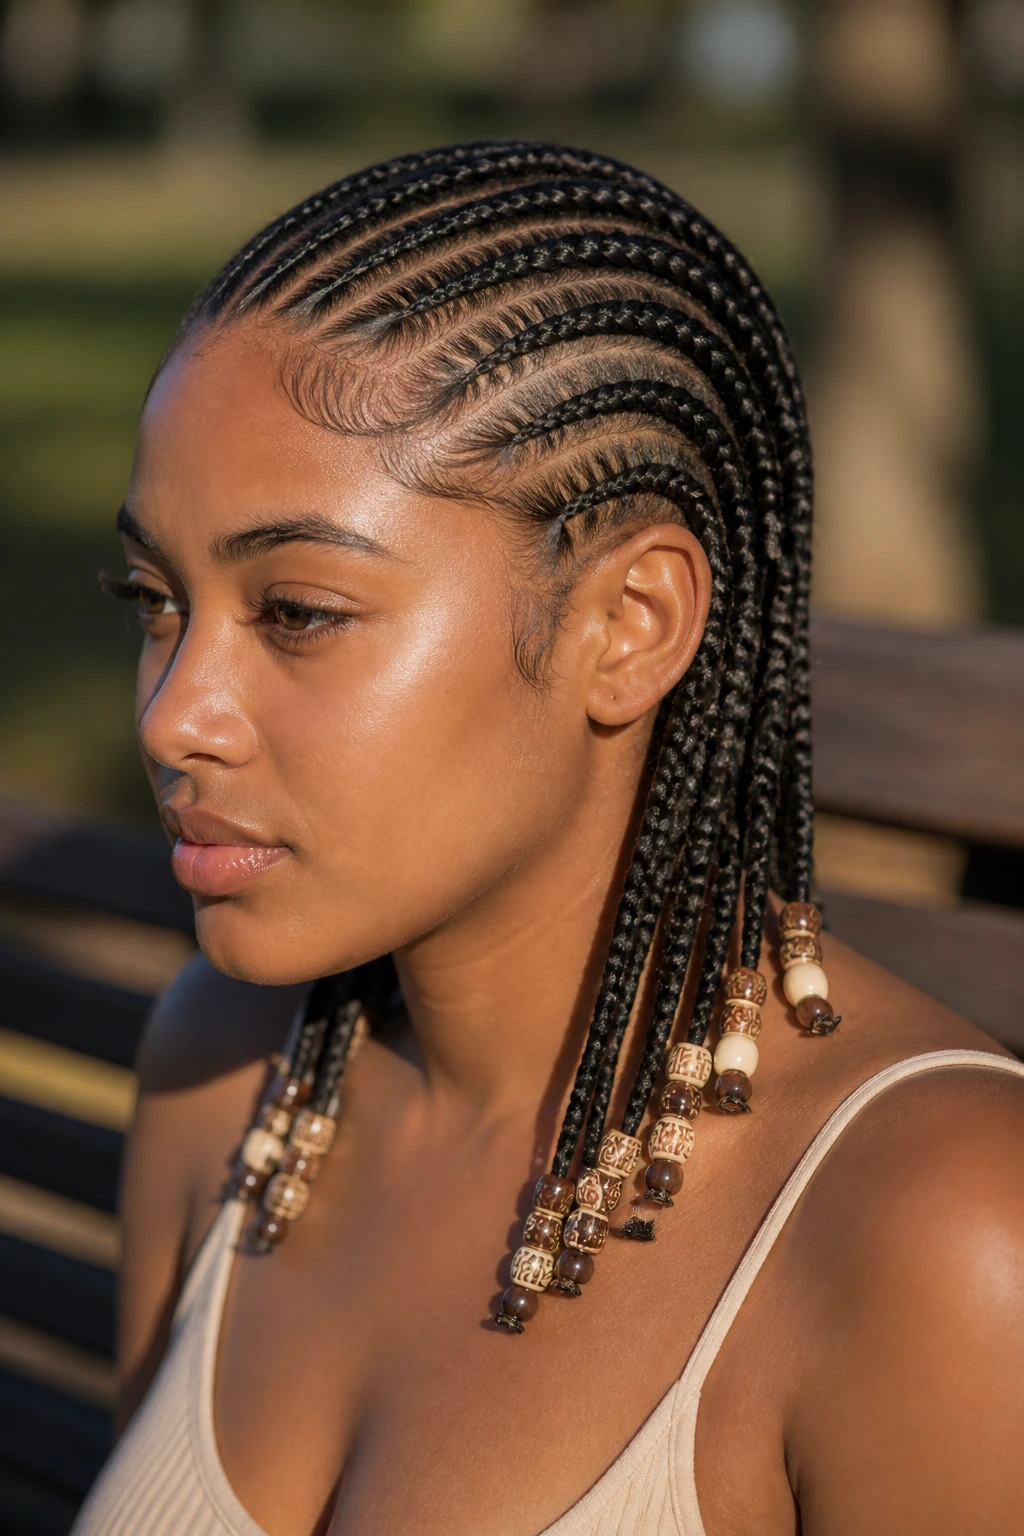
Beads aren’t just for children; they are a timeless, cultural accessory that adds weight and beauty to your style. By placing beads only at the ends of your cornrows, you create a polished, finished look that keeps the ends of your hair secure and protected. This is also a practical way to keep the ends of your braids from unravelling.
Bead Selection
- Choose beads that are the right size for the thickness of your braids—if they are too small, they will rip your hair; if they are too big, they will slide off.
- You can mix and match different styles of beads, such as matte, metallic, and clear, for a sophisticated finish.
- If you find the beads are clacking too much, use a small rubber band to secure the last bead to the braid.
Pro tip: Beads are great for frizzy hair because the weight helps pull the ends down, keeping them straight and smooth.
22. Wrap-Around Cornrows
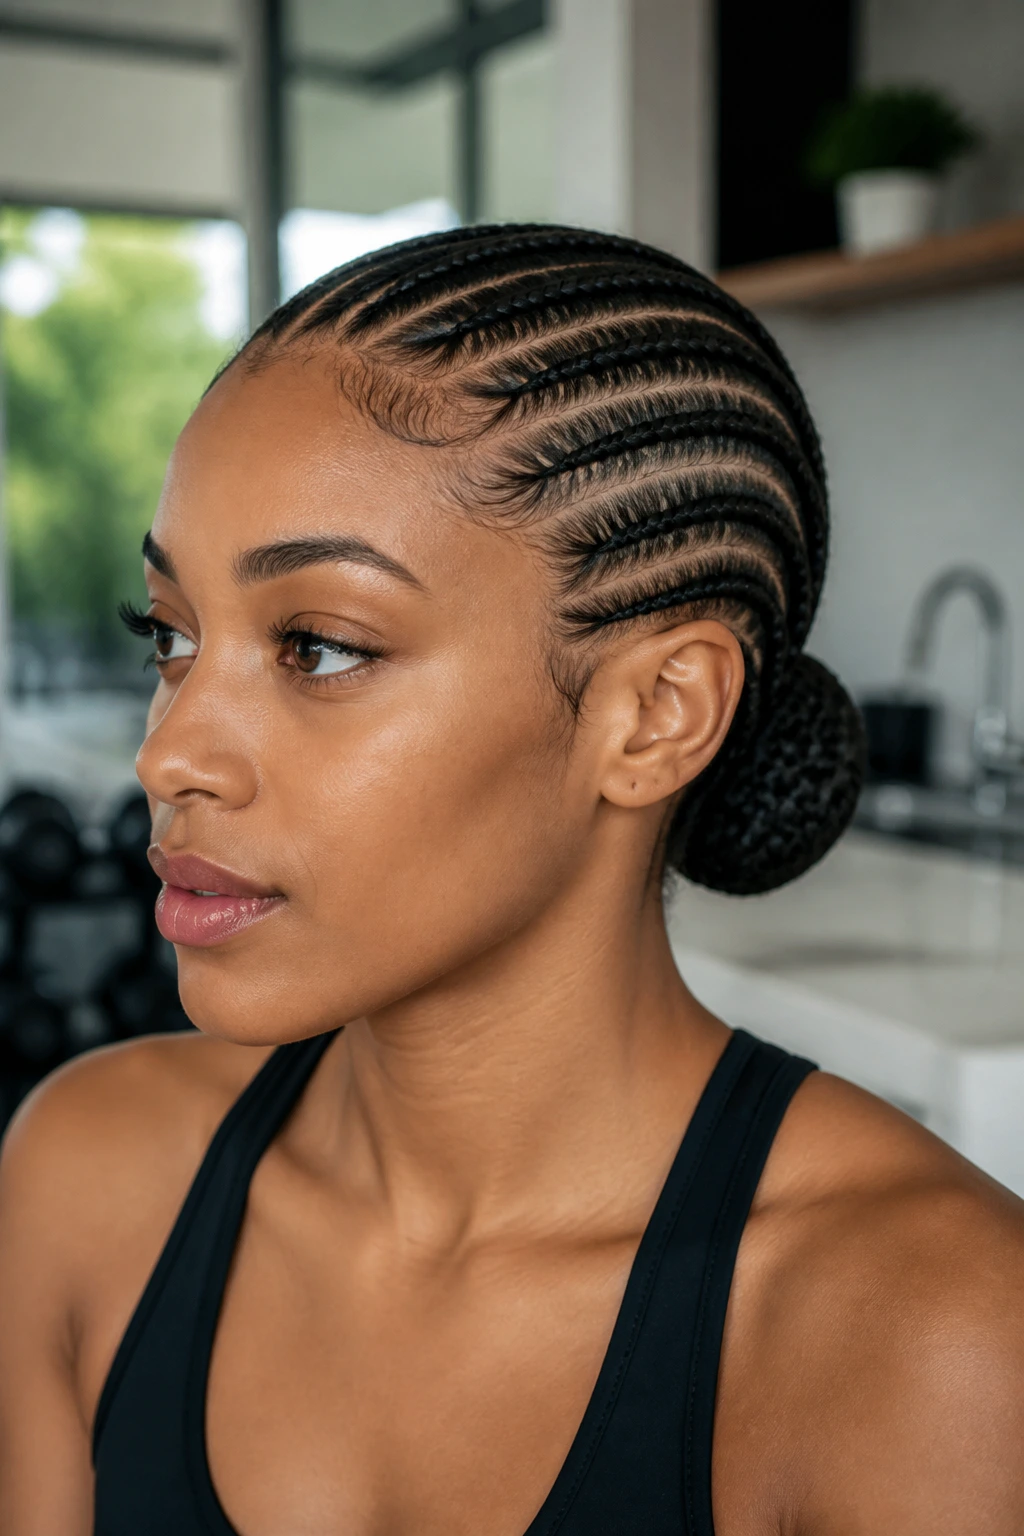
A wrap-around style involves braiding the hair along the sides and gathering it all toward the back into a single, low ponytail or a braided bun. This style is excellent for keeping all the hair tucked away from the face, which is perfect for working out or active days. It is simple, effective, and very easy to maintain.
The Wrap Technique
- Braid the hair toward the center, starting from the temples and working toward the nape.
- Gather all the ends into one main braid or a ponytail.
- You can wrap the main braid around itself to form a low bun, which adds a bit of elegance to the look.
Maintenance: Because all the hair is gathered toward one point, it is very easy to wrap a silk scarf around the base at night to keep the style smooth and frizz-free.
Final Thoughts

The key to successfully managing frizzy hair with cornrows is acknowledging that preparation is just as important as the braiding itself. If you start with a dry, unmanaged base, no amount of gel or tension will save you from flyaways. Deep conditioning, proper detangling, and using a high-quality product to coat the hair as you go are the secrets that make the difference between a messy style and a sharp, long-lasting look.
Do not fear tension, but treat your hair with respect. Cornrows are meant to protect, not to cause stress. If you find your scalp is screaming at you, back off—a looser braid is always better for the long-term health of your edges than one that is pulled to the point of pain. Experiment with these styles, find the parts and patterns that suit your face shape, and remember that with the right hydration, your texture will become an asset that adds beauty and character to every style you choose.