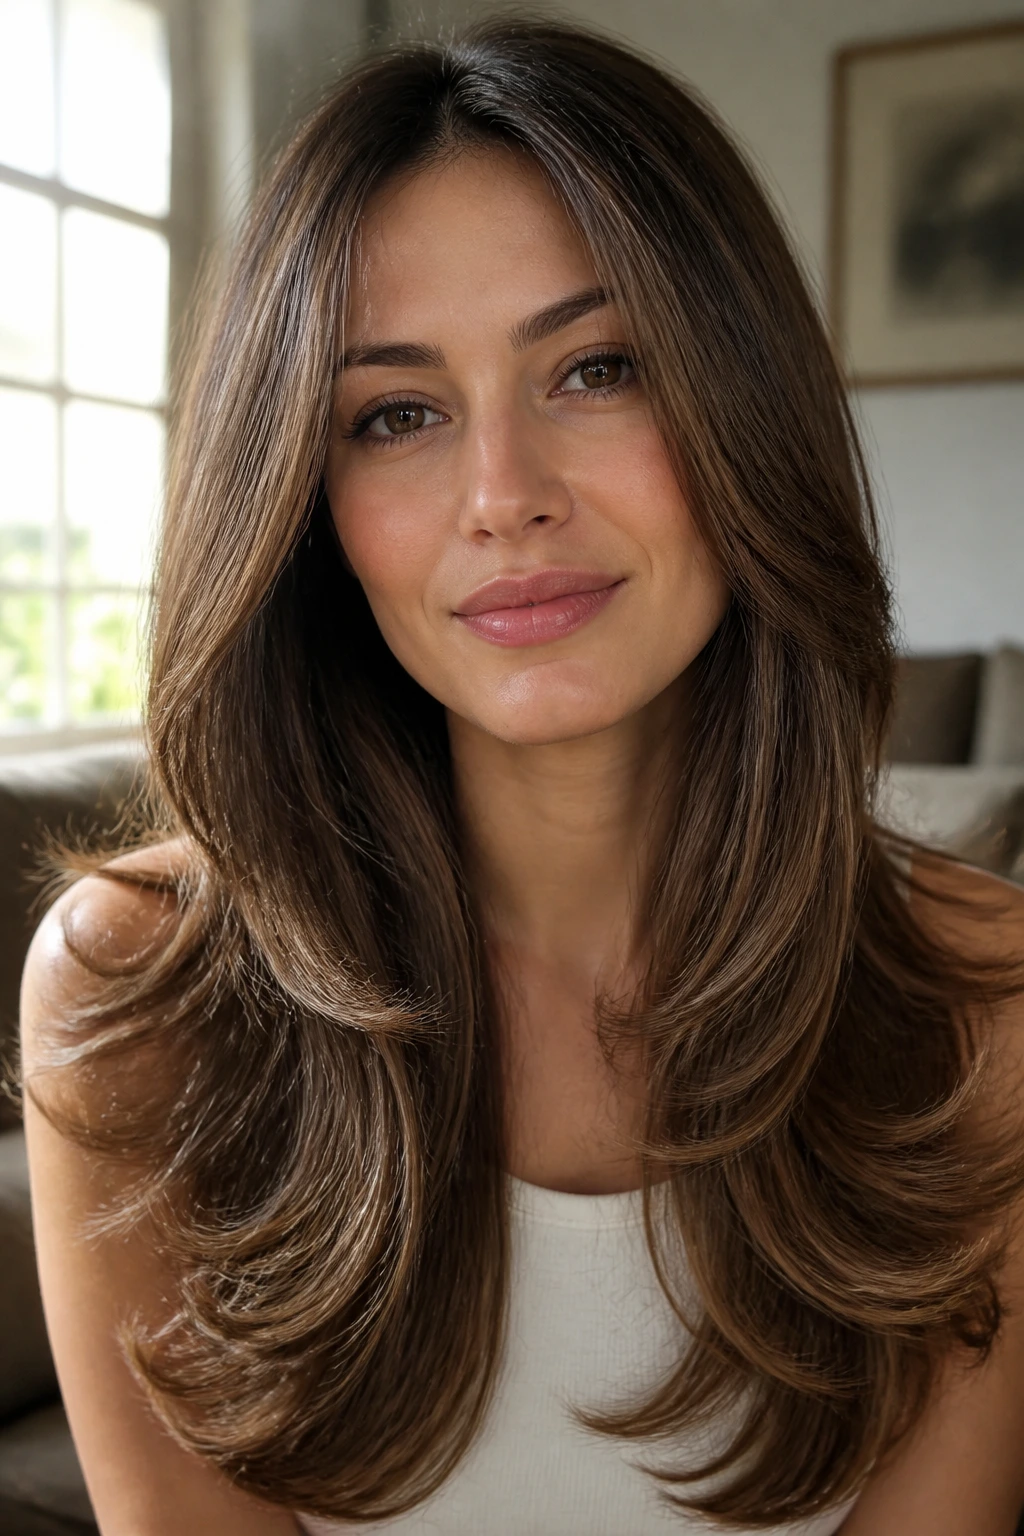
Sassy hair isn’t about meeting a specific standard of beauty; it’s about the attitude that radiates from your reflection when you catch it in a mirror. It’s that extra bit of confidence that comes from a cut or style that feels inherently “you,” even on a Tuesday morning when you’re just running out for coffee or heading to a standard work meeting. When your hair feels intentional, it changes your posture. You move differently when you aren’t constantly tucking stray pieces behind your ears or worrying about whether your style has completely fallen flat by noon.
The secret to everyday sass is finding that precise intersection between low-maintenance effort and high-impact style. We have all spent far too many mornings wrestling with flat irons or fighting stubborn cowlicks, only to end up with something that feels lackluster. The best styles don’t require a professional stylist standing over your shoulder; they require good products, a bit of technique, and the willingness to let your hair do what it wants to do—just with a bit more direction.
Whether your hair is pin-straight, tightly coiled, or somewhere in the messy middle, there is a look that fits your routine without sacrificing that edge. We are going to break down twenty-two distinct ways to style your hair so that it feels fresh, bold, and entirely your own. Let’s stop settling for a default ponytail and start treating everyday styling like the creative act it truly is.
1. The Undone Textured Lob
There is something undeniably cool about a long bob that looks like you just woke up and shook it out, even if it actually took three minutes with a salt spray. The key here is the bluntness of the cut; the ends should be crisp, which contrasts perfectly with the messy, lived-in texture throughout the lengths. If your hair is naturally fine, a light texturizing powder at the roots will give you the grip needed to prevent it from sliding into a flat, limp shape by midday.
Why It Works for Daily Life
This style thrives on imperfection. Because it isn’t meant to be perfectly smoothed, you aren’t beholden to your hair dryer or a round brush. If a piece goes rogue, it just adds to the aesthetic. It is the ultimate wash-and-go look that still feels intentional, rather than just lazy.
Essential Styling Steps
- Apply a texturizing sea salt spray to damp hair, focusing on the mid-lengths and ends.
- Scrunch the hair with your hands as it air-dries to encourage natural movement.
- If you need extra volume, spray a dry texturizer at the crown and massage it in with your fingertips to lift the roots.
2. Sleek High Pony with a Wrap
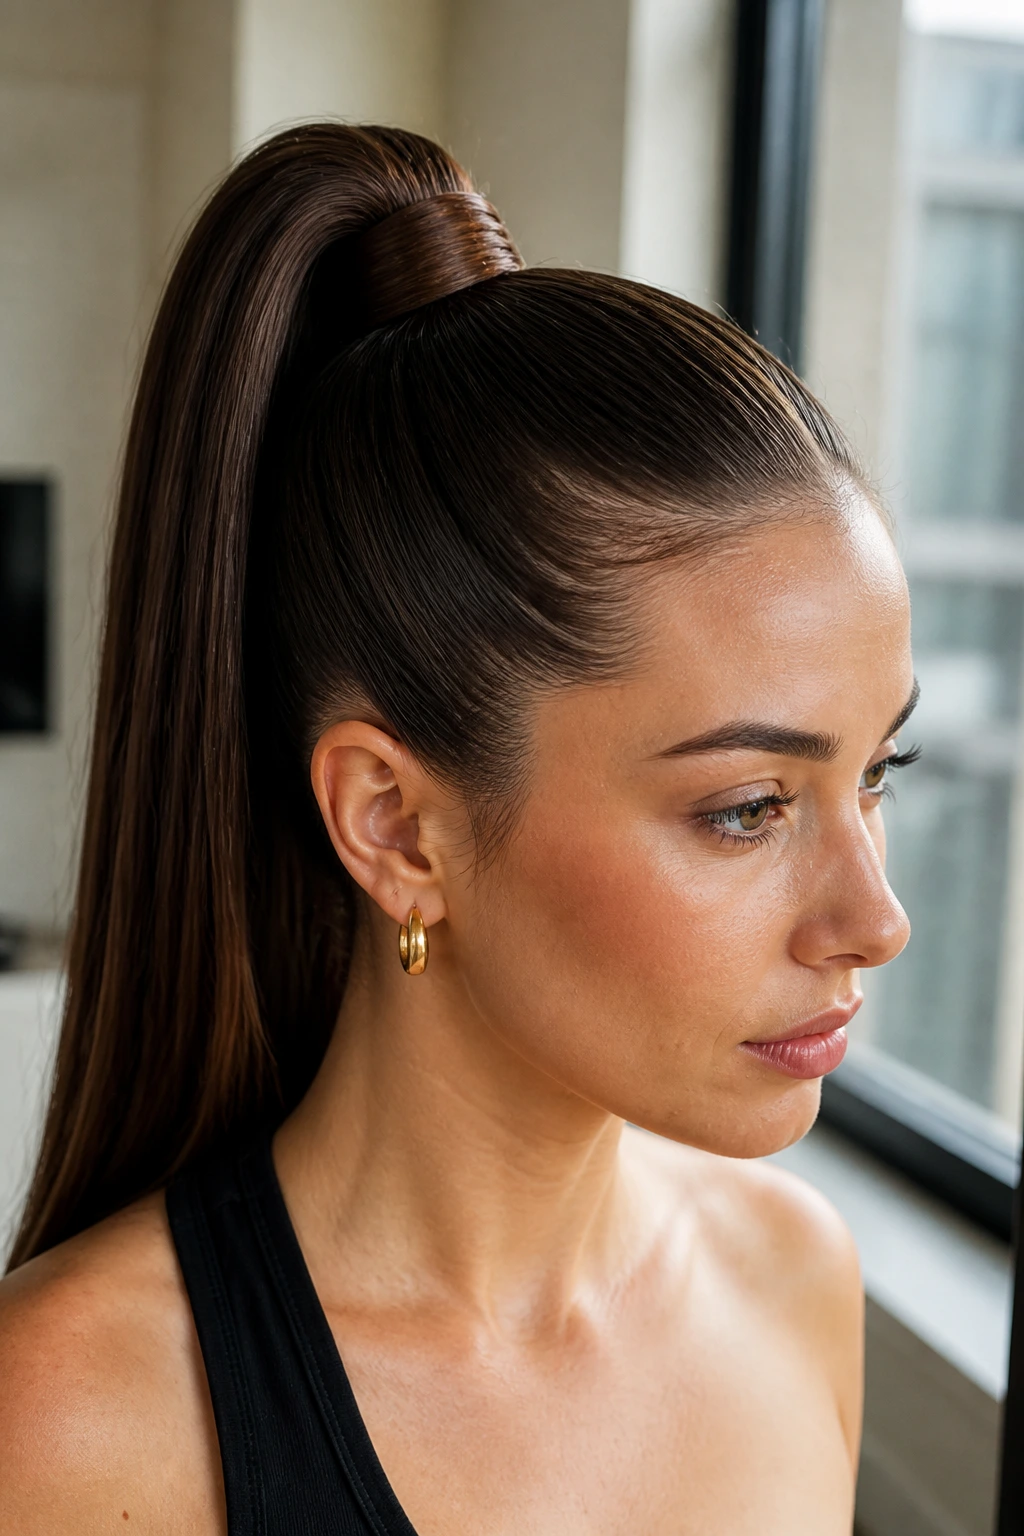
A high ponytail is the classic choice for a reason, but wrapping a small section of hair around the elastic takes it from a gym look to something that feels sharp and deliberate. It elevates a simple updo into a hairstyle. This look works best on second-day hair, where the natural oils provide a bit of grip and shine, making it easier to pull everything into a taut, smooth shape.
How to Achieve the Look
Use a boar bristle brush to sweep your hair upward toward the crown of your head. Once it is secure, pull a small, half-inch piece of hair from the underside of the ponytail. Wrap that strand tightly around the base to hide the hair tie, securing the end with a tiny bobby pin tucked underneath. If you want to go the extra mile, a quick pass with a straightener on the lengths of the pony gives it a glass-like finish that looks incredibly expensive.
3. The Deep Side-Part Pixie
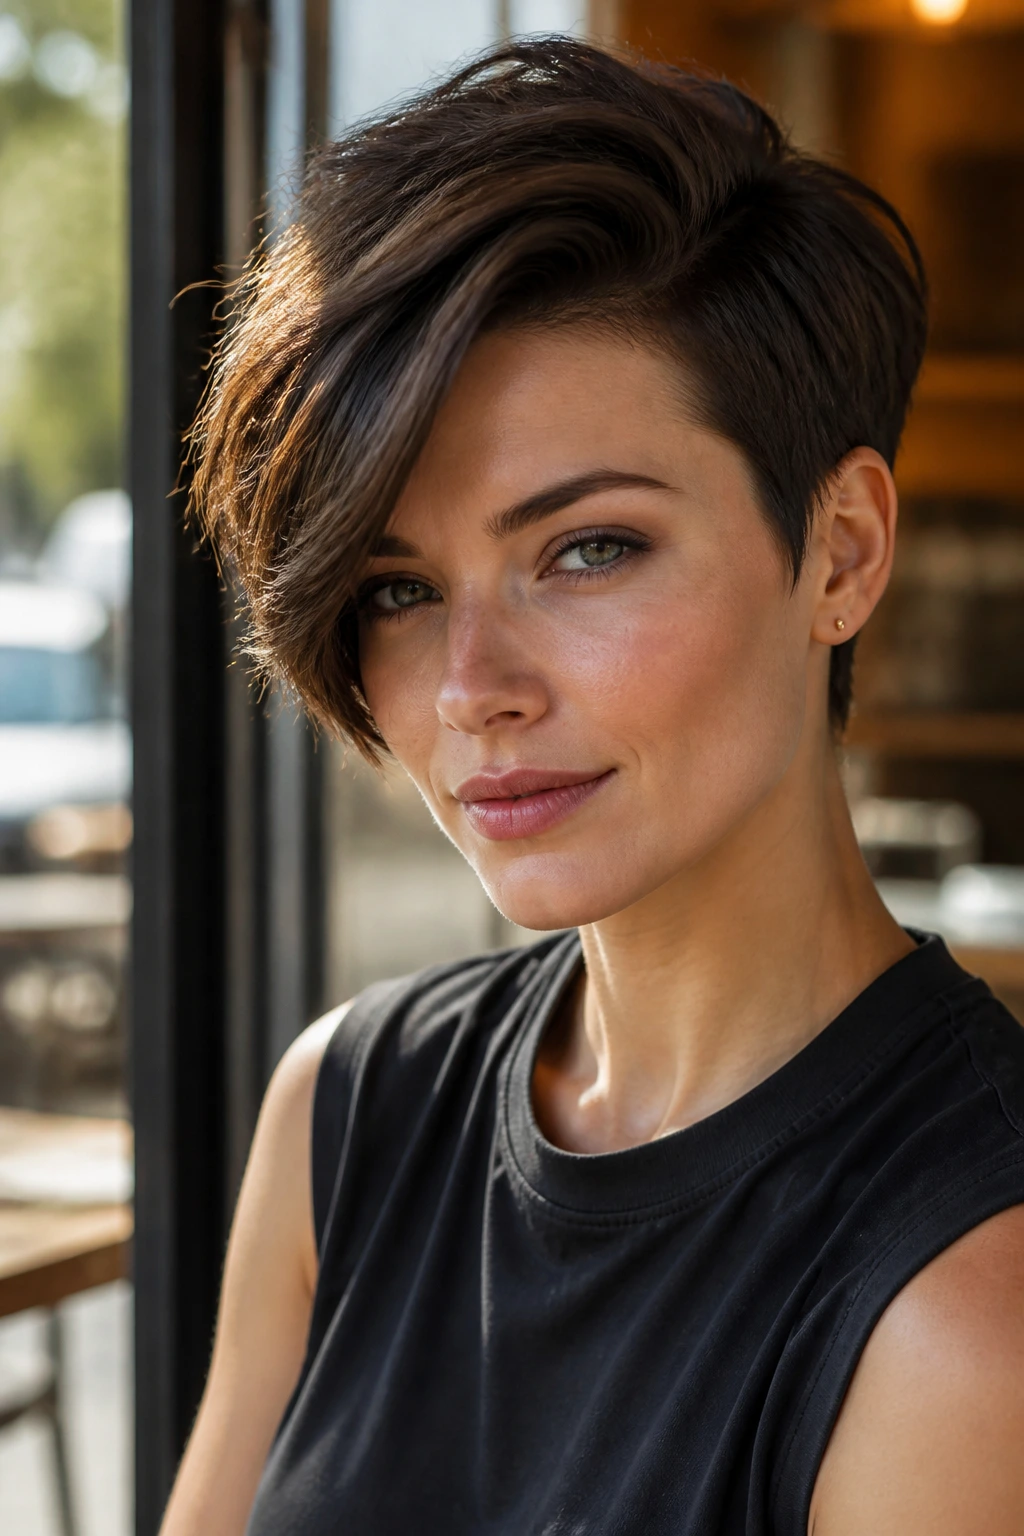
If you have a short crop, shifting your part to an extreme angle can completely reinvent your look without needing a single snip of the scissors. It forces your hair to create a sweeping, dramatic shape across your forehead, which adds a sense of movement and volume to even the finest hair types. This style is unapologetic, bold, and highlights your bone structure in a way that longer, face-framing styles simply cannot.
Styling for Maximum Impact
Use a strong-hold pomade or a light styling cream to define the texture. The goal is to keep the hair looking piecey rather than stiff. If you find the hair falling back into its usual part, use a quick blast of heat from a blow dryer while holding the hair in the new position to set it before applying your product.
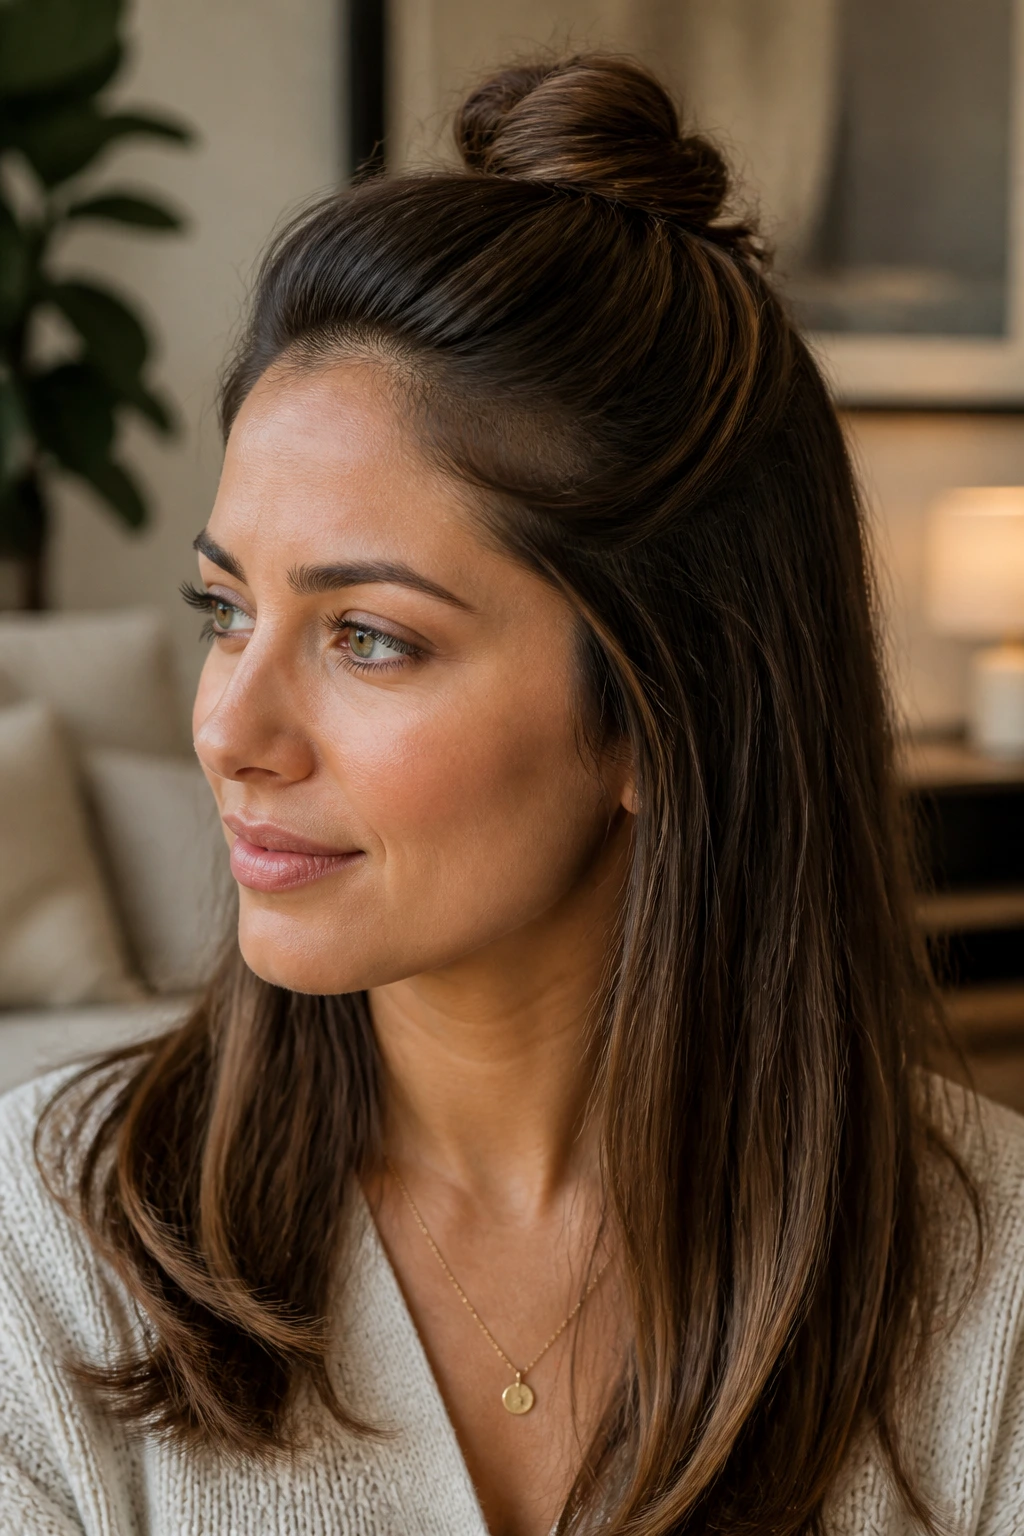
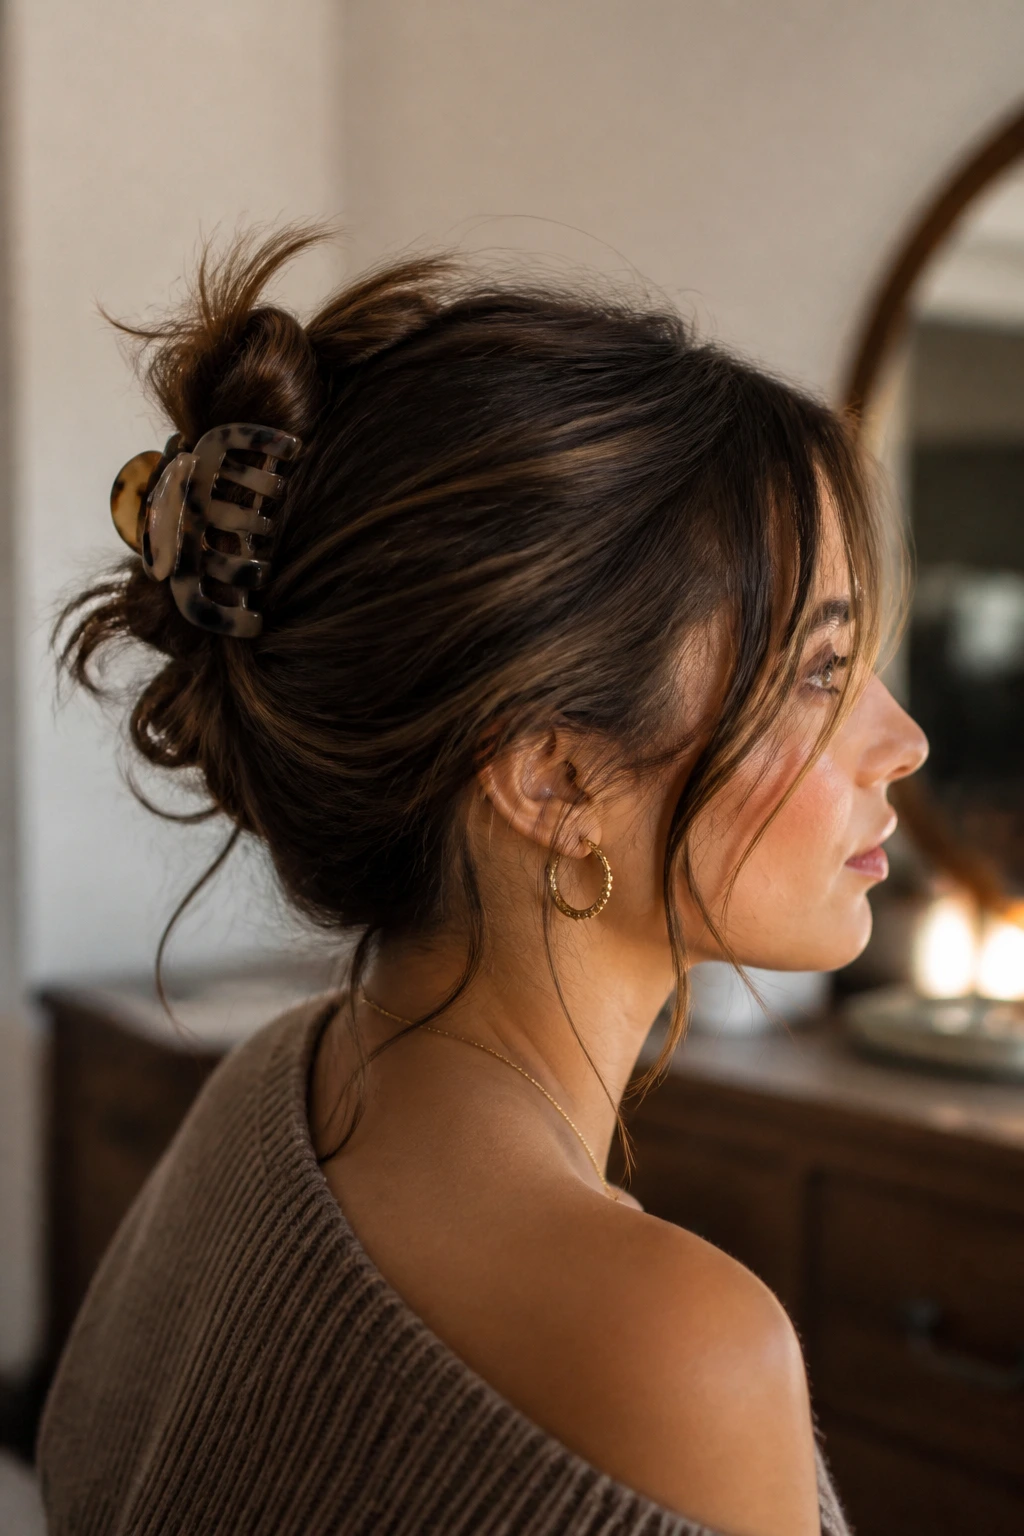
4. The Half-Up Messy Top Knot
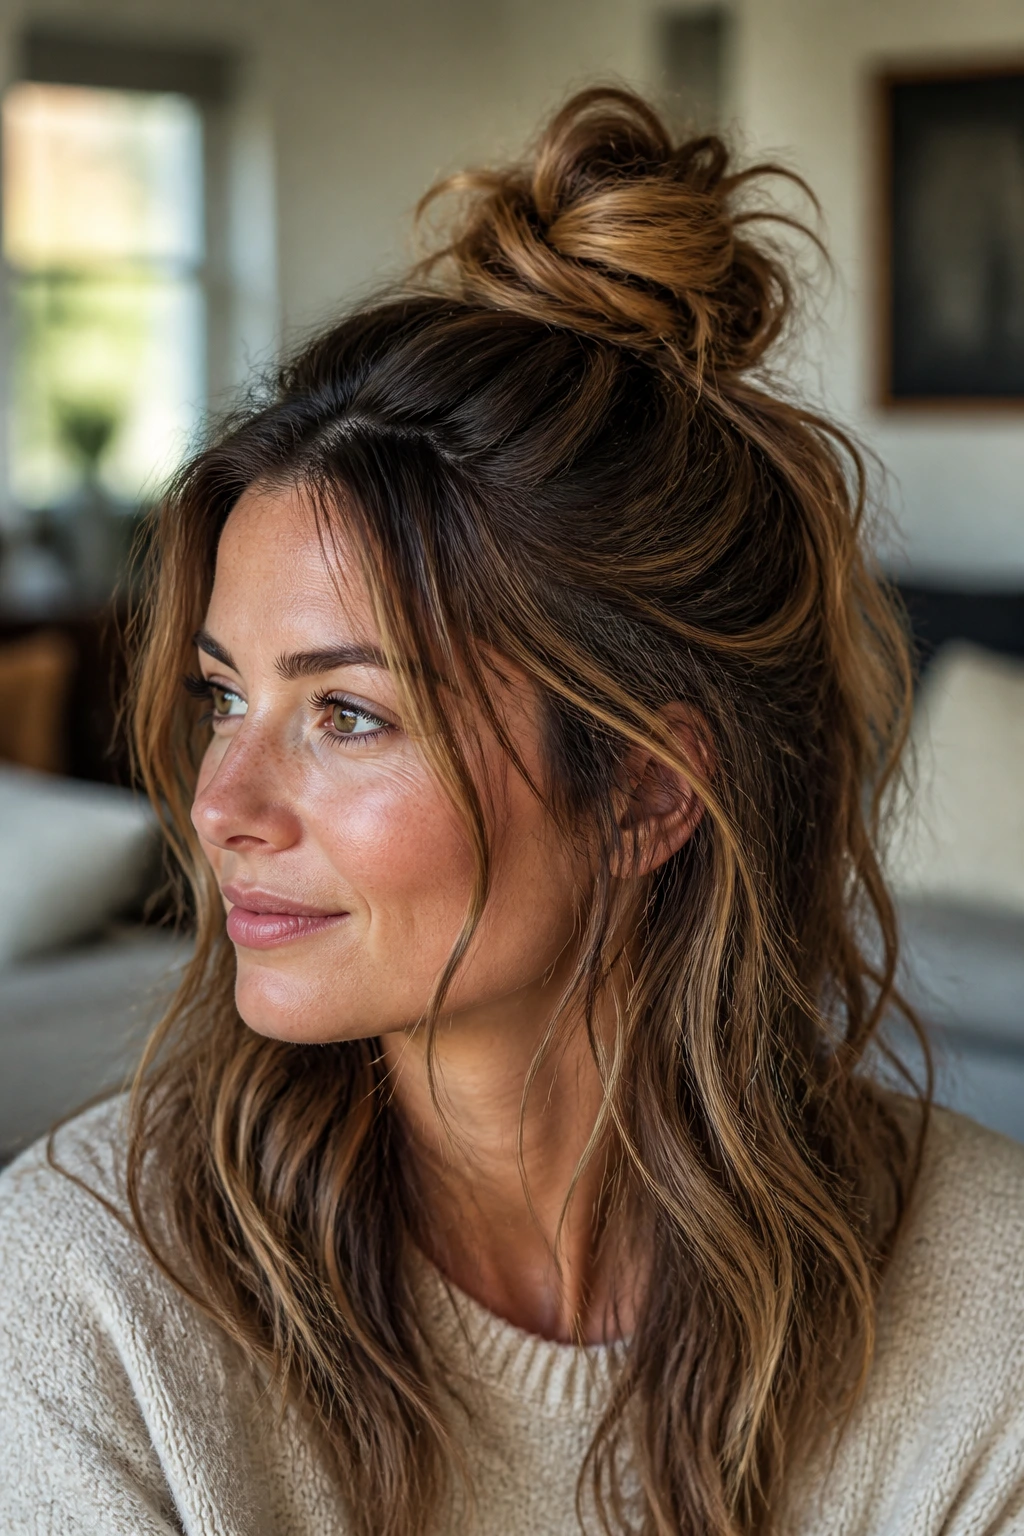
This is the savior of the “my hair is almost clean but not quite” phase. By gathering only the top section of your hair into a loose, haphazard knot, you get the volume and sass of an updo while still keeping the majority of your hair down to frame your face. It’s balanced, easy, and looks like you put effort into your style even when your internal clock is racing.
Making It Look Intentional
Do not use a perfectly circular bun. Let the ends of your hair stick out from the knot for a more playful, organic finish. Use two or three small bobby pins to secure it rather than a bulky elastic; this allows the bun to sit higher and look more relaxed. If you have bangs or shorter layers, leave a few tendrils out around your temples to soften the edges.
5. Voluminous Heatless Waves
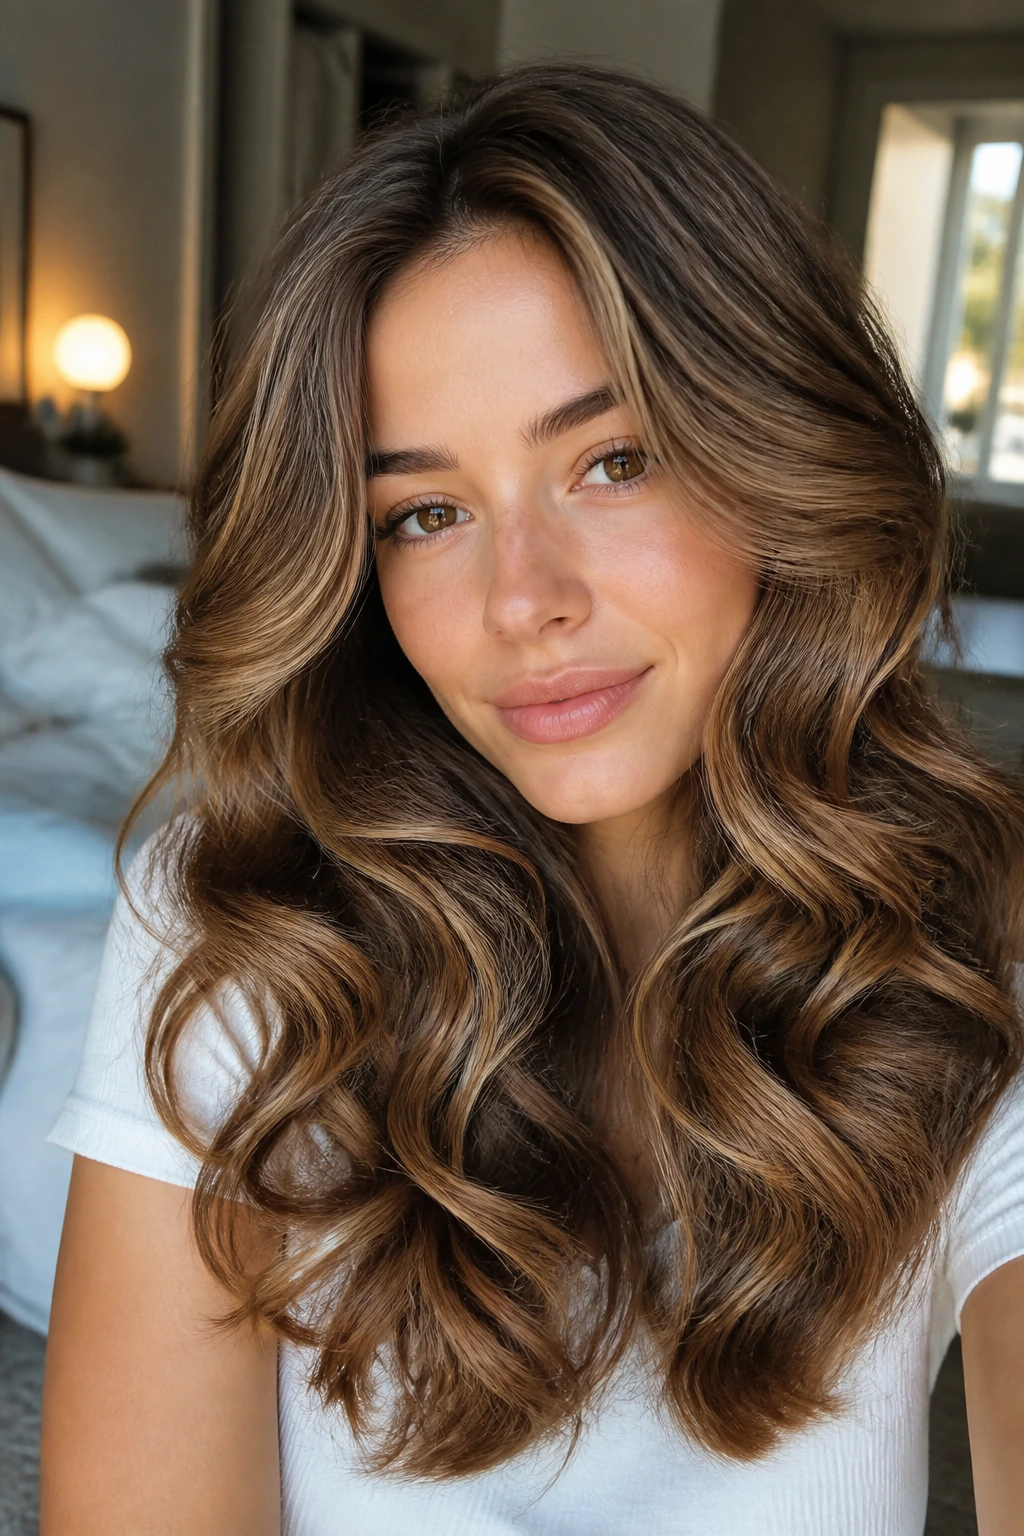
We have all seen the tutorials for overnight heatless curls using everything from silk robes to foam rollers, but the real trick is the product you use before you wrap. A light mousse or a curl-enhancing cream applied to damp hair ensures that the waves stay bouncy rather than frizzy once you take them down. This method is the ultimate way to achieve that “I spent an hour with a curling iron” look while you were actually sleeping.
Why This is a Game-Changer
You avoid heat damage entirely, which means your hair stays healthier and shinier over time. When you take the curlers out in the morning, do not brush through the waves. Instead, use your fingers to gently rake through them. This preserves the structure and keeps the finish looking modern rather than dated.
6. The Low Braided Chignon
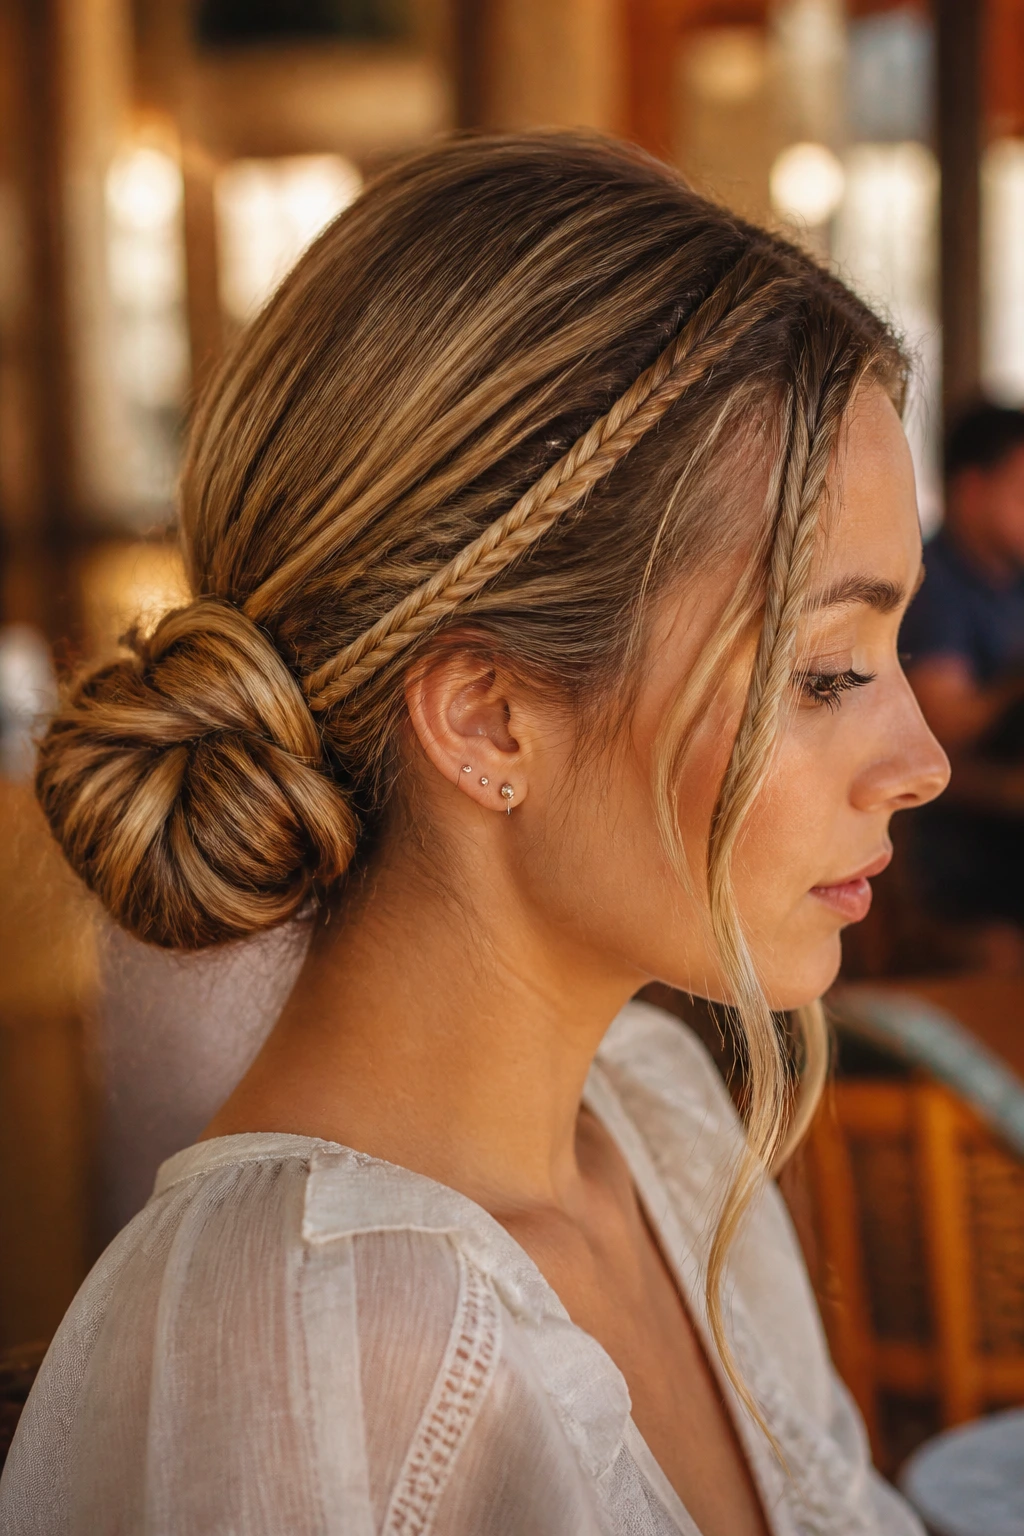
A simple low bun can feel a bit like a librarian cliché unless you incorporate some texture before you pin it. Start by braiding two small sections at the front of your hairline or a larger braid down the center of the back before rolling the rest of your hair into a knot. This detail takes the style from a functional necessity to a deliberate design choice that feels romantic and refined.
Pro Tips for Success
- Use a dry shampoo on the roots even if your hair is clean; it adds the texture needed to make the braid look substantial.
- Pull gently on the edges of the braid once it is secured to make it look wider and more effortless.
- If you have layers that keep slipping out, a light-hold hairspray applied to a toothbrush can smooth them into place without the helmet-like feel of a heavy mist.
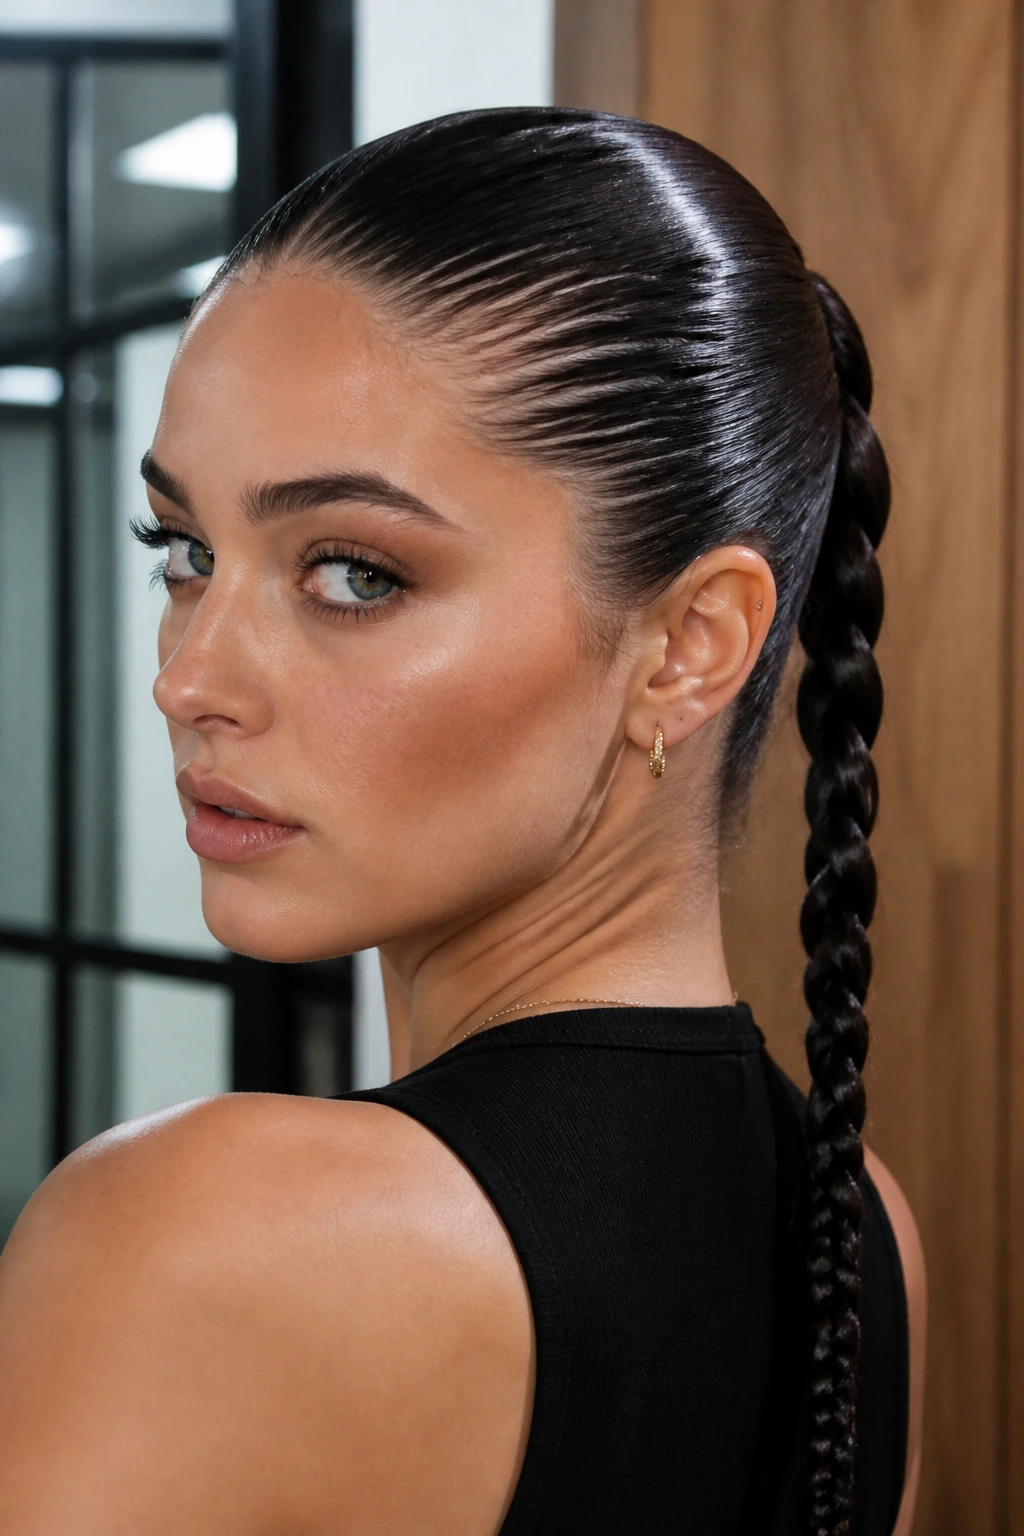
7. The Slicked-Back “Wet” Look
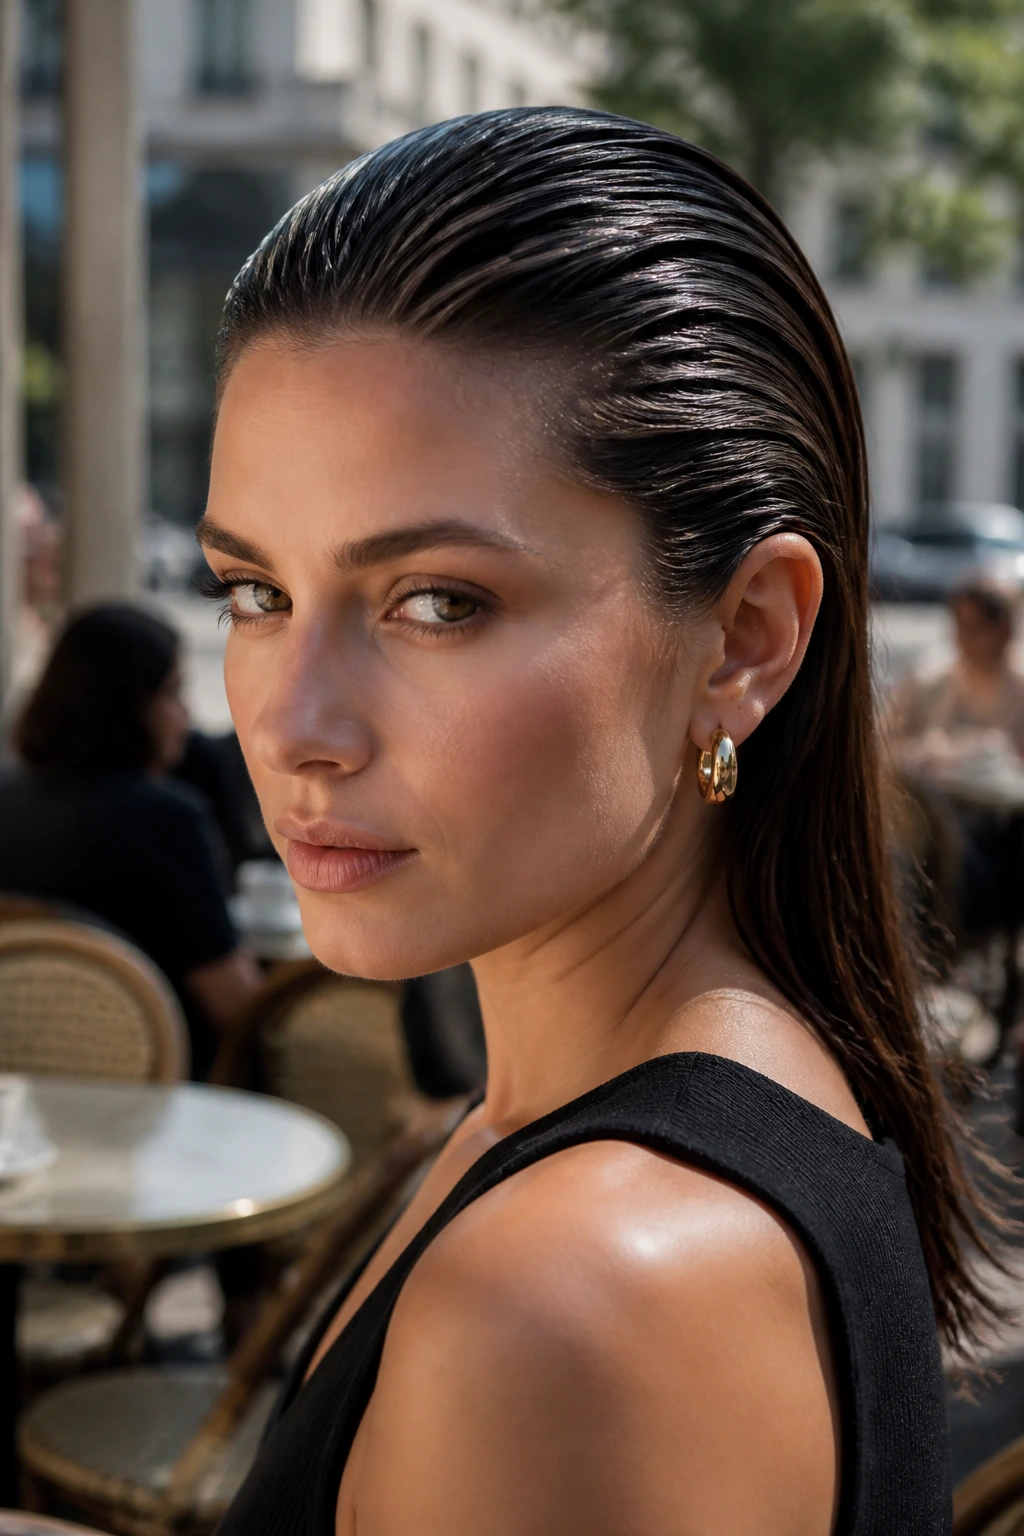
This look is all about confidence. It involves using a high-shine gel or a light hair oil to pull the hair back away from the face, giving you a sharp, editorial appearance that is actually incredibly practical for days when your hair isn’t behaving. It works particularly well for hair that is already a bit greasy, as the product just blends right in.
How to Get the Balance Right
The danger is looking greasy rather than “wet.” Start with a small amount of gel—about the size of a dime—rubbed between your palms. Apply it to the hair at your hairline and work it back toward the crown. Once you reach the mid-lengths, stop adding product. Let the rest of the hair remain dry or simply use a tiny amount of oil on the ends to keep them from looking brittle.
8. Face-Framing Micro-Braids
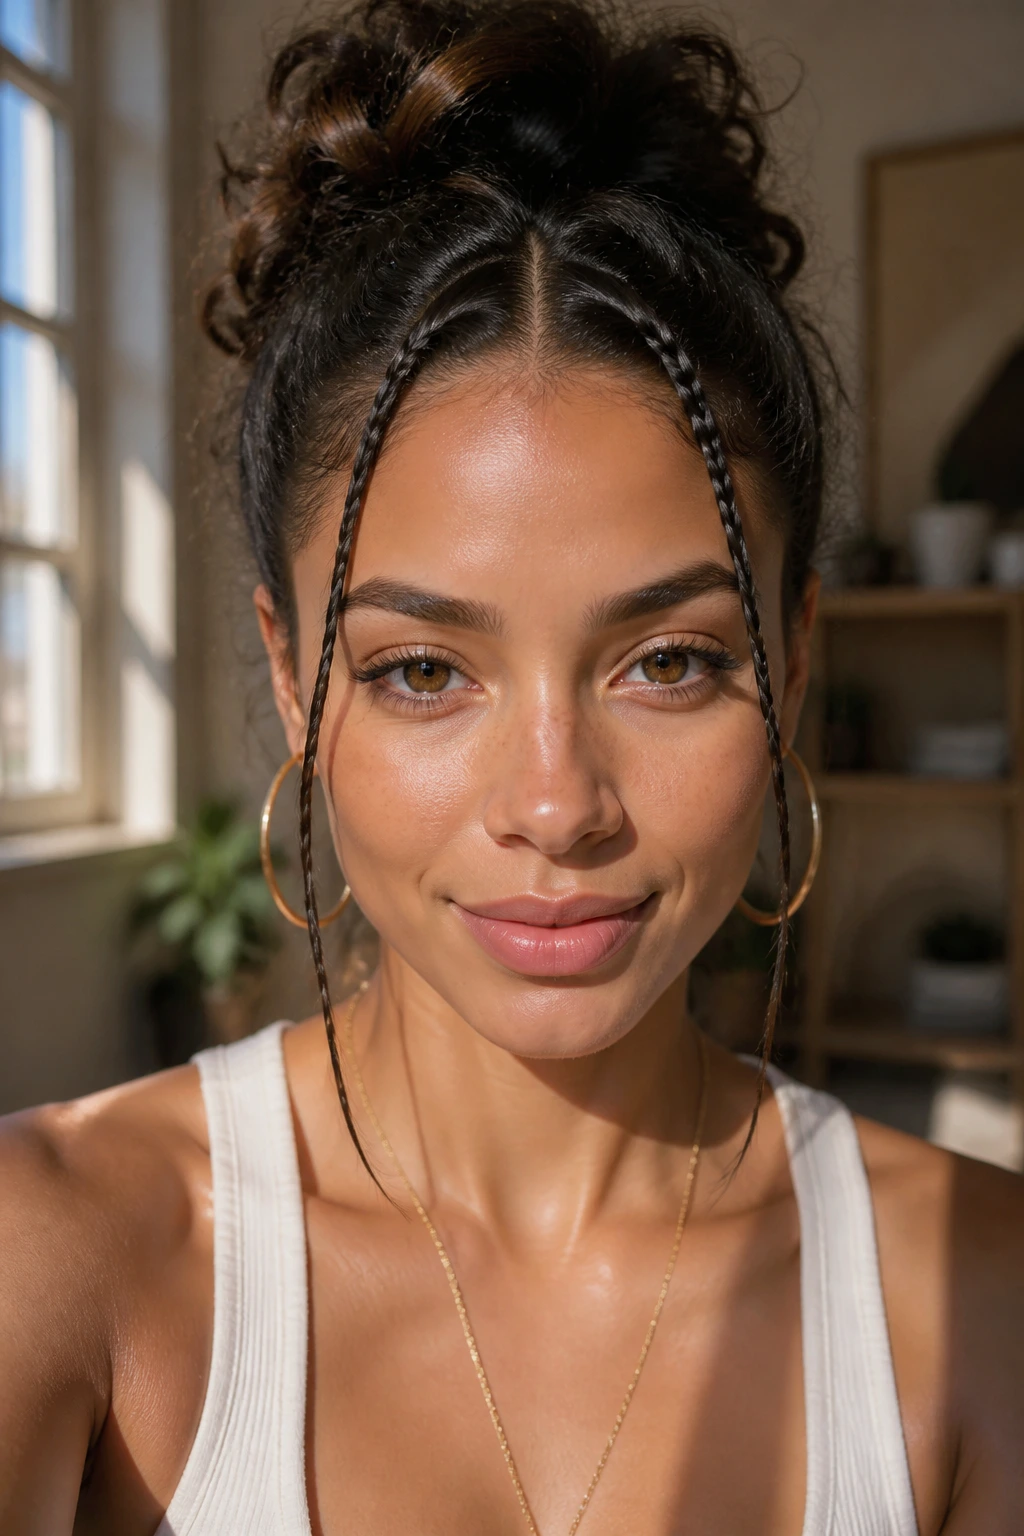
Sometimes, the smallest change makes the biggest difference. Taking two small sections of hair at your hairline—either from your bangs or just from the front—and braiding them tightly back provides an immediate frame for your face. It clears your line of vision and gives you a style that looks bohemian and sweet, even if you are wearing a basic t-shirt and jeans.
Styling Variations
- Use clear silicone elastics to keep the ends discreet.
- Try a “fishtail” braid instead of a standard three-strand braid for a more intricate, refined look.
- If you have highlights, the contrast between the braided and unbraided sections will make the color look more dimensional and intentional.
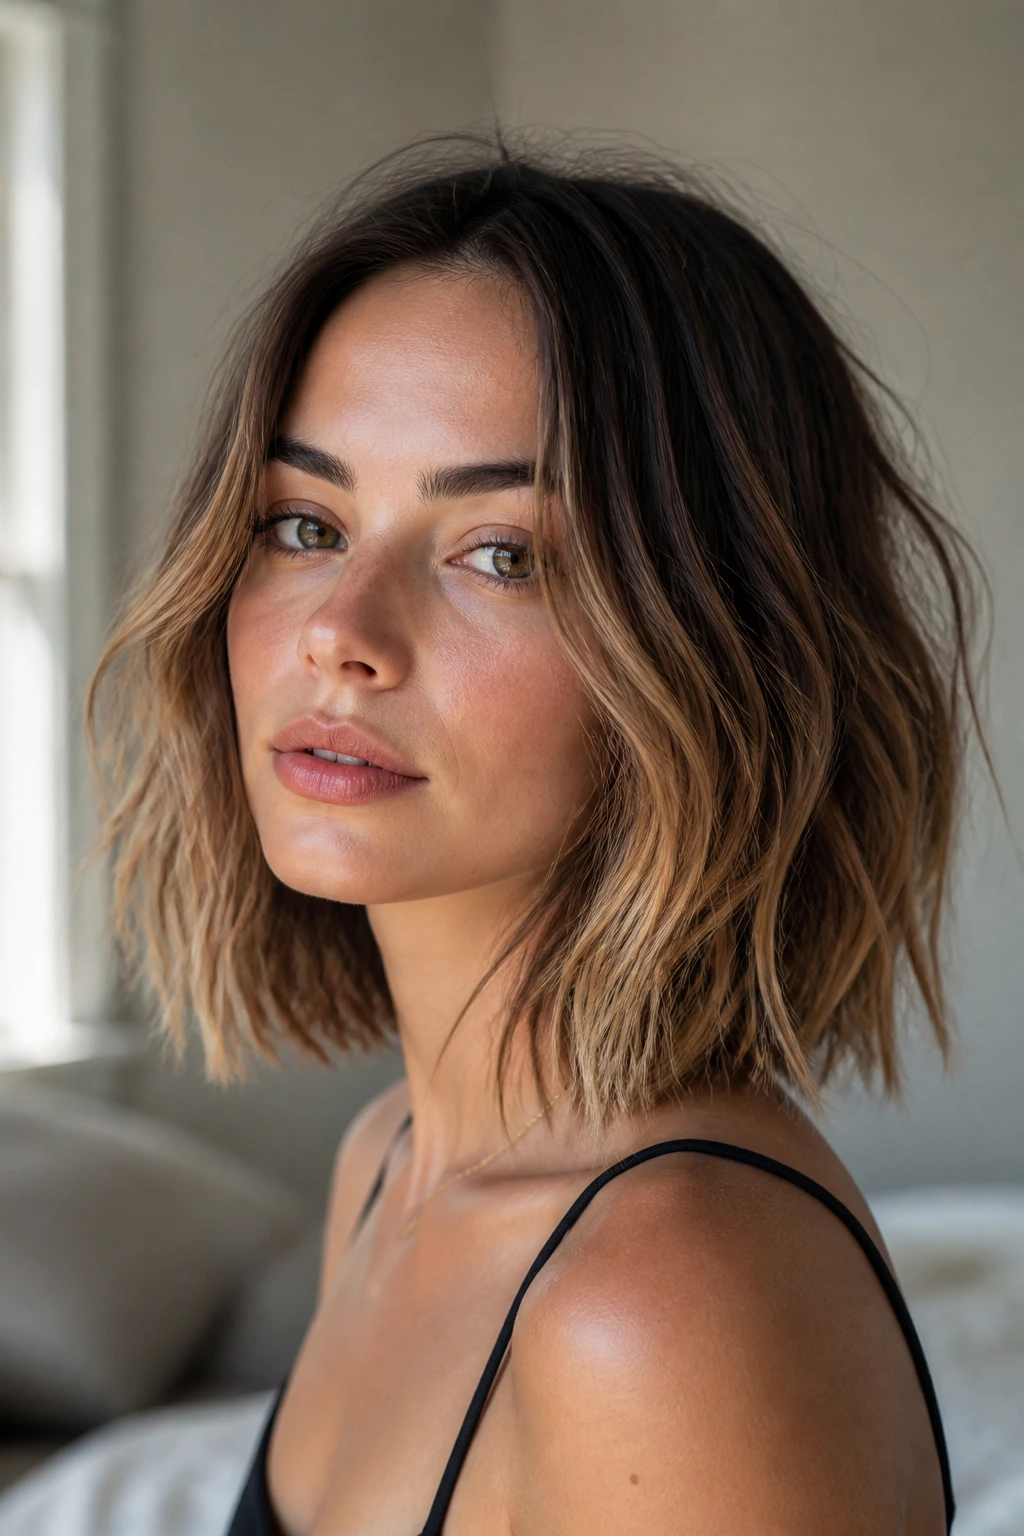
9. The Textured Shag

The shag cut has made a massive comeback, and for good reason: it is the easiest haircut to maintain if you have any natural wave to your hair. It relies on layers of varying lengths to create instant volume and movement. When you style this, you want to accentuate the layers with a texturizing paste, allowing the ends to flip out and the crown to look lived-in.
Managing the Layers
Don’t be afraid to use a diffuser attachment on your blow dryer. It helps lift the roots and keeps the hair from pulling downward, which is the enemy of a good shag. A shag cut is meant to look slightly chaotic; embrace the flyaways as a sign of your natural hair texture doing its job.
10. The Scarf-Wrapped Updo
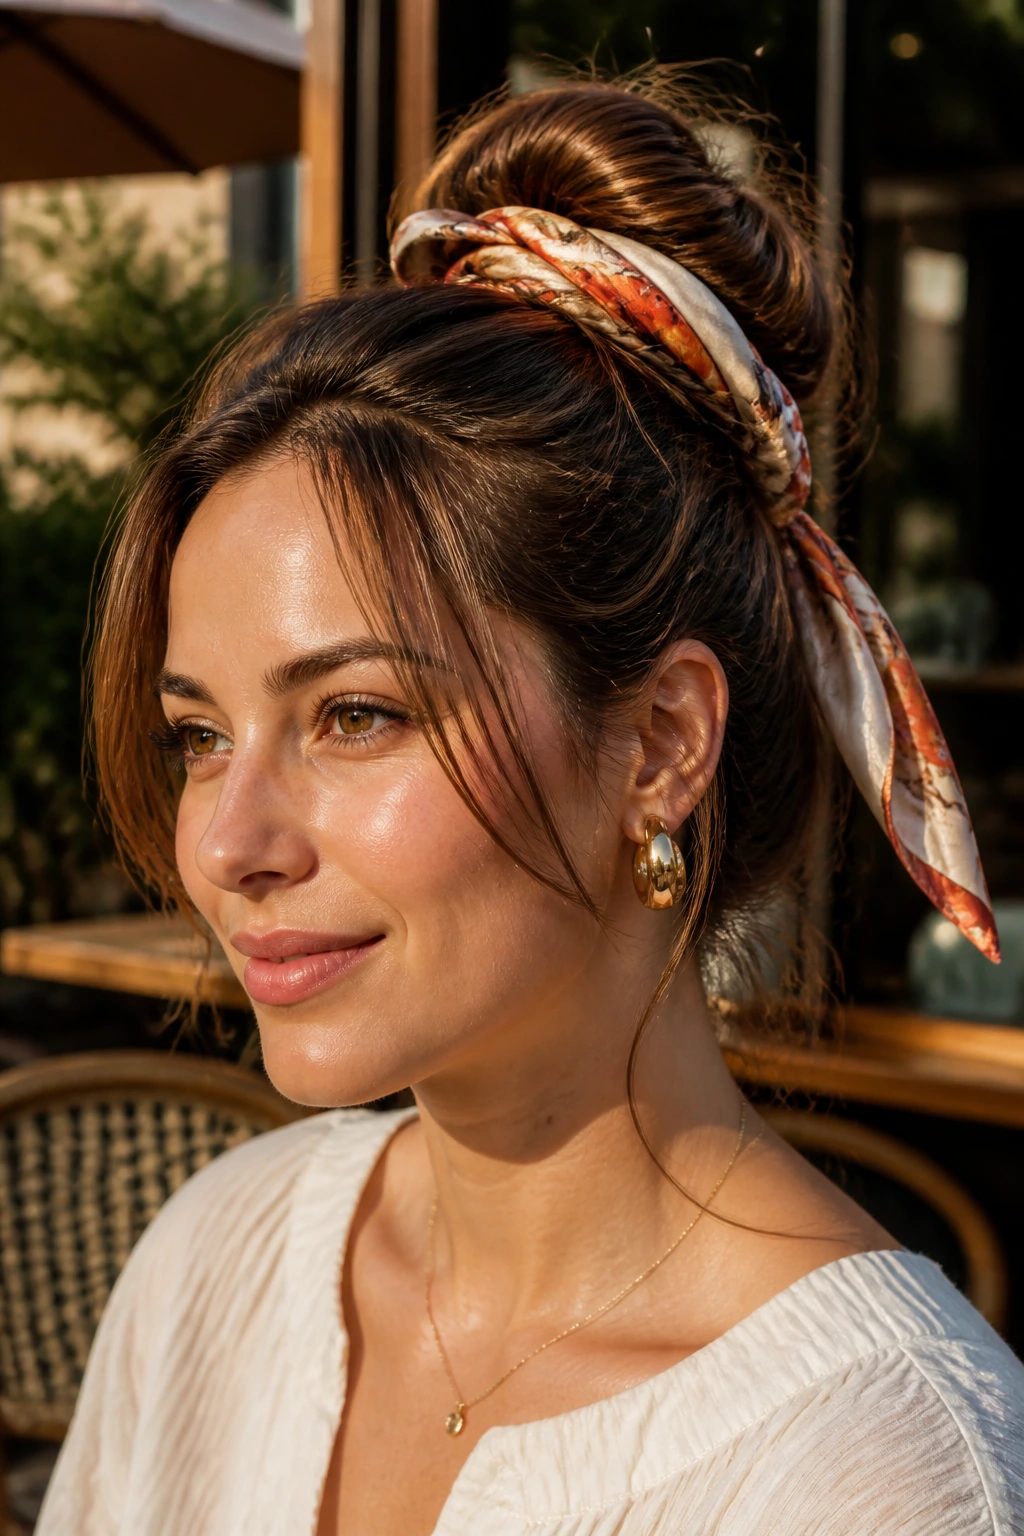
When all else fails, hide the bad hair day with a silk or patterned scarf. Wrapping a scarf into your ponytail or around a messy bun adds a flash of color and texture that makes it look like you planned your entire outfit around your hair. It is the quickest way to look polished in under sixty seconds.
How to Style the Scarf
Fold your scarf into a long, thin strip. Tie it around your ponytail base, then weave the long ends into a braid, or simply let the ends hang down alongside your hair. If you are doing a bun, wrap the scarf around the bun itself and tuck the ends in to create a fabric-heavy, structured look. This is especially helpful during humid weather when your hair refuses to stay sleek.
11. The Blunt Bob with Curtain Bangs
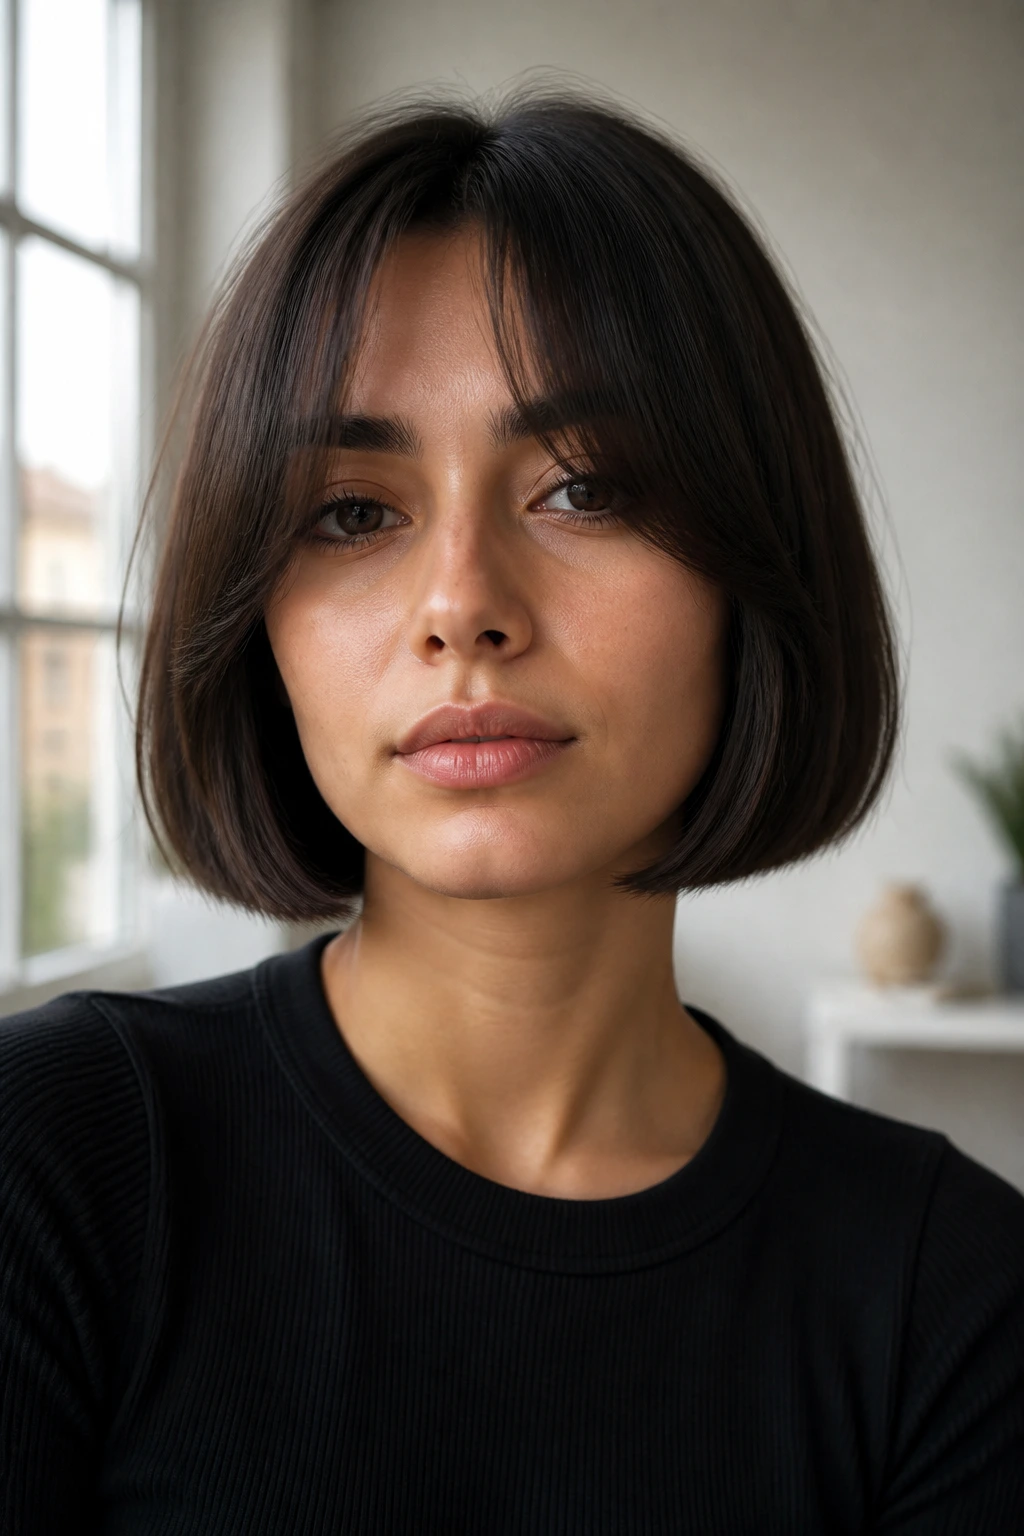
If you are willing to commit to a cut, a blunt bob paired with longer, sweeping curtain bangs is arguably the most stylish look you can have right now. The bluntness of the bob feels modern and clean, while the bangs add a soft, retro vibe that is incredibly easy to style. You don’t need a round brush; a quick flick of the wrist with a flat iron is enough to give the bangs that perfect, swooping shape.
Daily Maintenance
- Use a smoothing serum on the ends to keep the blunt line looking sharp and dense.
- Trim your bangs every four to six weeks to keep them hitting right at the cheekbone.
- This cut looks better the more “done” the texture is; try a light mousse for hold without the crunch.
12. The Half-Down Top Knot with Beads

Adding a bit of hardware to your hair can take it from basic to edgy in seconds. Take that same half-up style we discussed earlier and thread a couple of small wooden or metal beads onto the loose ends of your hair or into a small braid. It’s an unexpected detail that shows you pay attention to the little things.
Choosing Your Hardware
Avoid heavy metal clips that pull on your hair strands; look for lightweight plastic or coated metal options. Small charms, jump rings, or even tiny colorful elastic bands can act as jewelry for your hair. This is an excellent way to transition a daytime look into something that feels more deliberate for an evening event.
13. The Perfectly Imperfect Low Ponytail
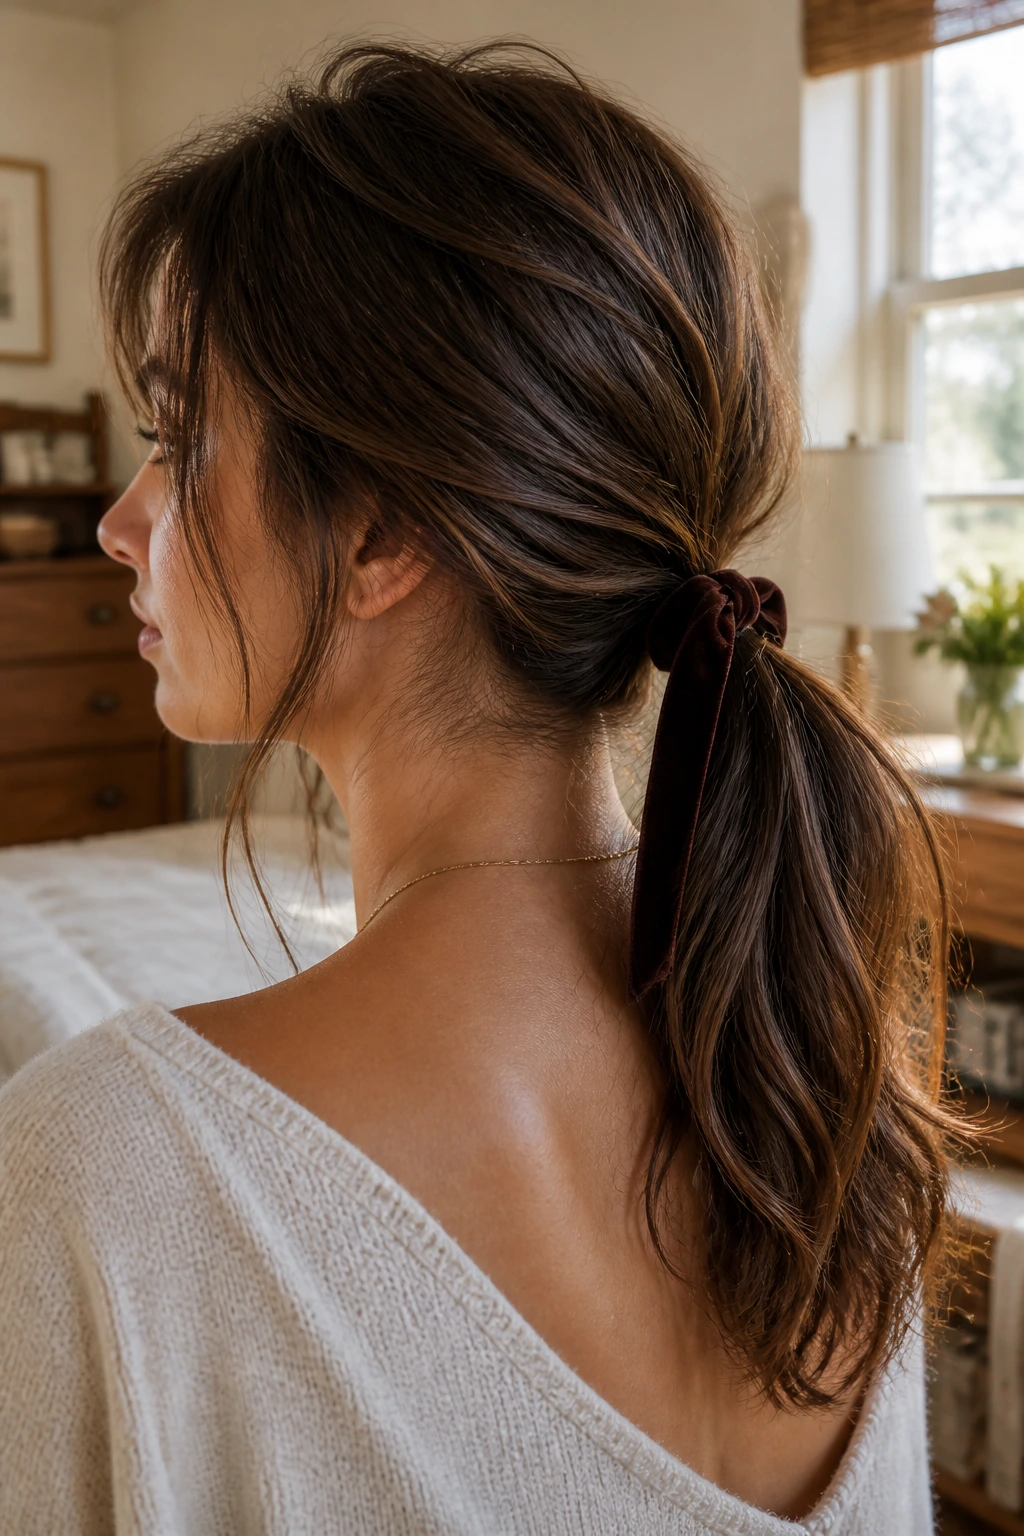
The low ponytail is often seen as a “lazy” style, but it becomes “sassy” when you add texture and volume. Before pulling your hair back, use a dry texturizer from roots to ends. Then, pull your hair into a low pony but don’t pull it tight—let it sit a bit loose at the nape of your neck, with a few pieces falling out around the ears.
Elevating the Low Pony
Use a high-quality velvet ribbon instead of a plastic hair tie. The contrast between the velvet and your hair creates a visual focal point that makes the simple style look deliberate. If you have any length, a slight bend from a curling wand at the very end of the ponytail makes it look finished rather than accidental.
14. The Wispy Side-Swept Bang
If you are hesitant to cut full bangs, a long, wispy side-swept fringe is the perfect gateway. It frames the face and creates a soft, feminine look without the high maintenance of thick, blunt bangs. It works with almost every hair texture, as the length is long enough to have a natural weight but short enough to be styled with a quick blow-dry.
Keeping the Bangs Fresh
Bangs tend to get oily faster than the rest of your hair because they sit against your forehead. A tiny dusting of dry shampoo on the underside of your bangs at the end of the day can refresh the entire look, allowing you to go another day between washes. Don’t over-brush; let the wisps fall where they naturally want to go.
15. The Crimped Detail
Crimping is back, but not in the way it was in the nineties. Instead of crimping your entire head, focus on just two or three small sections hidden underneath the top layer. It adds an unexpected volume and a hint of texture that makes your hair look thicker and more dynamic without being overwhelming.
Where to Place the Crimps
Focus the crimping iron at the roots of the hidden layers. This acts as a foundation, pushing the top layer of hair up and away from your scalp. It creates a subtle, secret volume that nobody can quite identify but everyone notices. Use a heat protectant spray beforehand—always—to keep the hair from feeling fried.
16. The Sleek Center Part with Low Bun
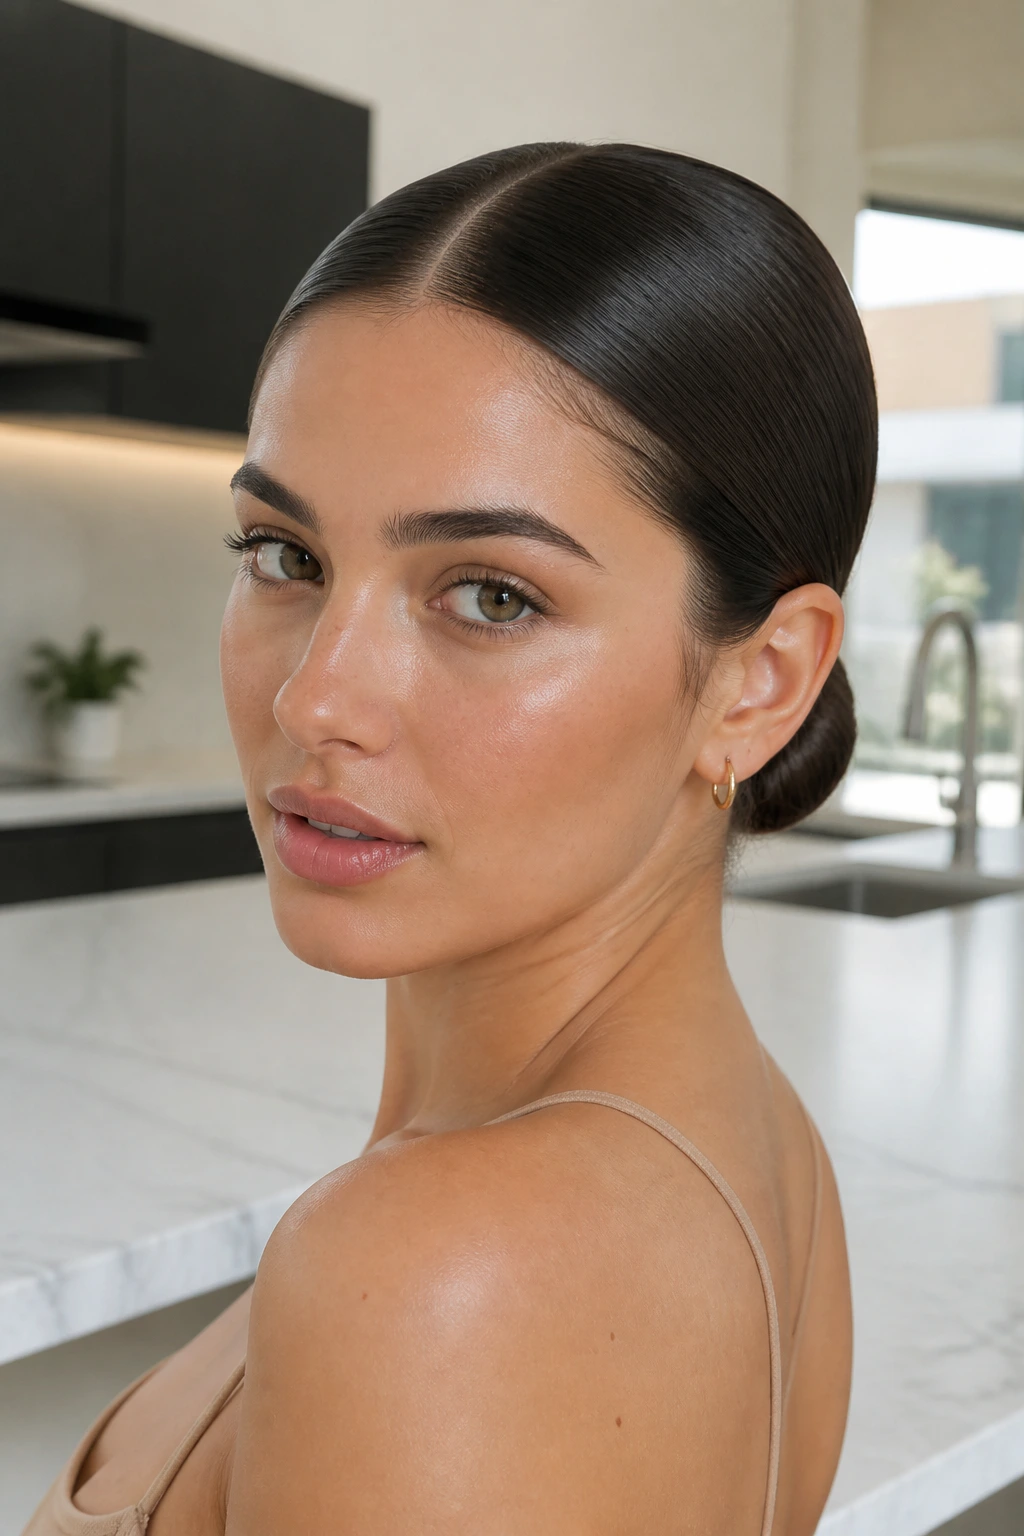
Minimalism is a classic for a reason. A sharp, perfect center part paired with a very low, tight bun at the nape of the neck is the epitome of “sassy, not messy.” It is an intentional, structured look that highlights your face and neck. This is best achieved by using a rat-tail comb to get that line perfectly straight.
The Finishing Touches
Use a shine spray to finish the look. It will help catch the light and make the hair look healthy and intentional. If you have shorter layers that won’t stay in the bun, use a dab of styling paste to slick them down toward your ears for a clean, cohesive look.
17. The High-Volume Natural Afro
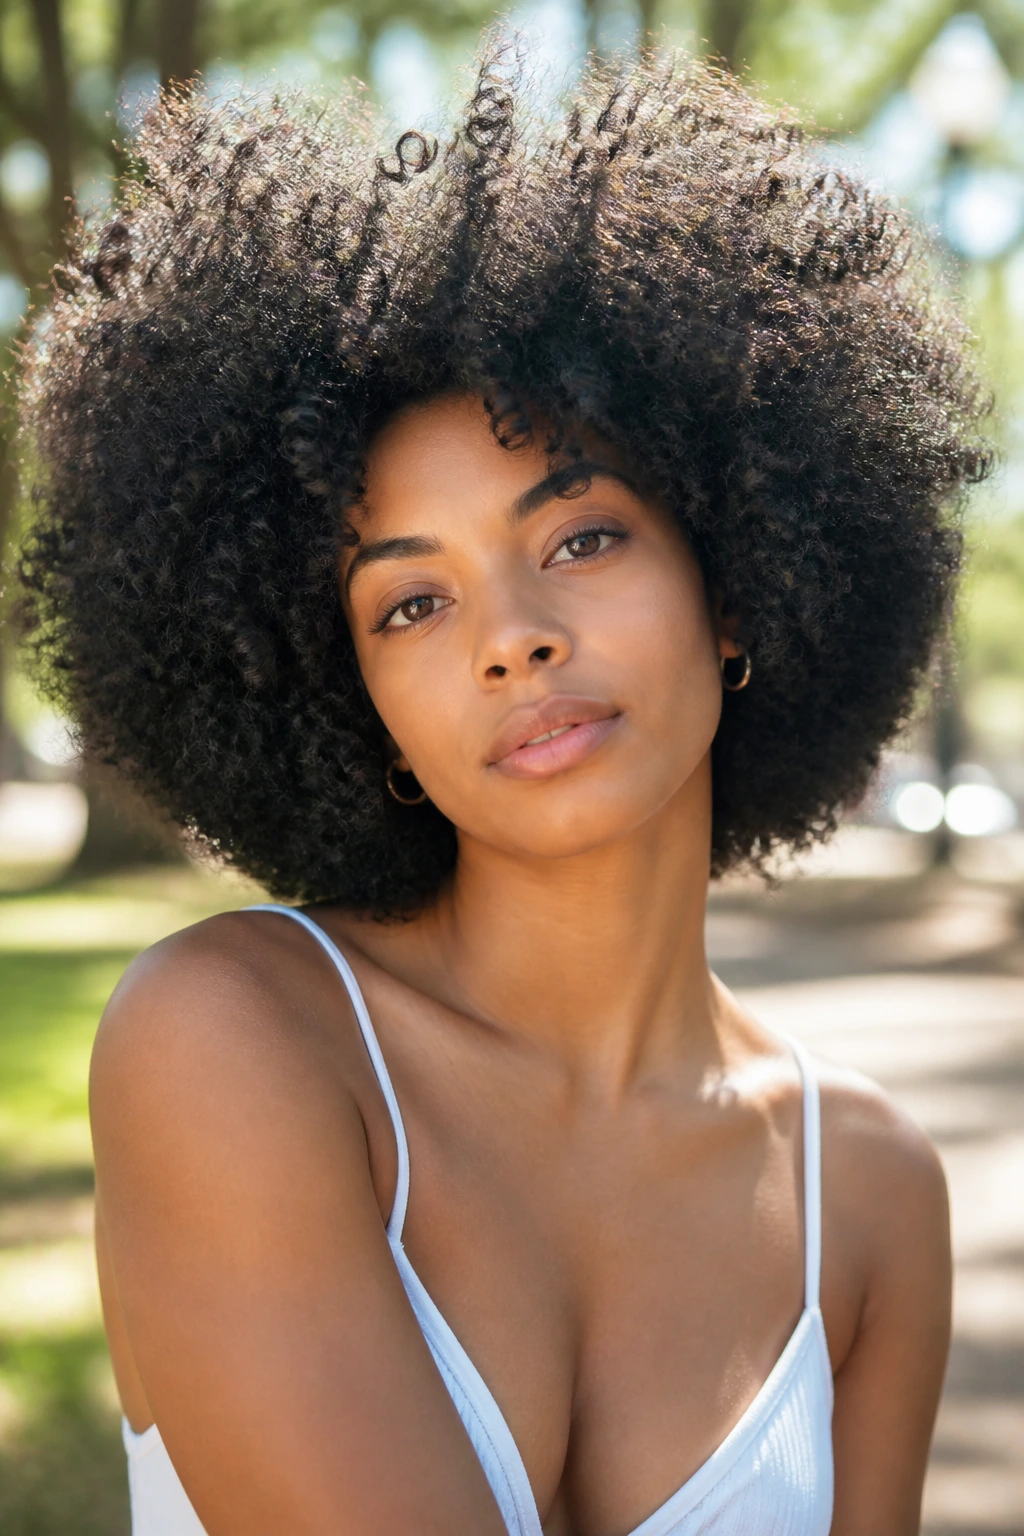
For those with tight coils, the sassiest look is one that celebrates your natural volume. Using a pick to lift the hair from the roots creates a halo of texture that is stunning. It is a bold, proud style that demands attention. To keep the shape defined, a curl cream that provides moisture without weighing the hair down is essential.
Maintaining the Shape
At night, use a silk bonnet or pillowcase to keep the friction down. This is the best way to ensure you don’t have to restart your styling process every single morning. A little bit of oil on your fingertips as you fluff the hair can help add shine and reduce frizz, keeping the shape looking intentional and healthy throughout the day.
18. The Half-Back Twisted Knot
Instead of a top knot, try a twist. Gather the top section of your hair as if you are going for a half-up style, but instead of pulling it into a pony, twist the section tightly until it begins to coil on itself. Pin it down into a small, tight knot. It looks more sophisticated and intricate than a standard bun, yet it takes the same amount of time.
Why This Works
The twist creates a different kind of tension and texture that a messy bun can’t replicate. It looks like you have carefully curated your hairstyle. This works particularly well for hair that has a bit of natural wave, as the twist captures those waves and turns them into a cohesive design element.
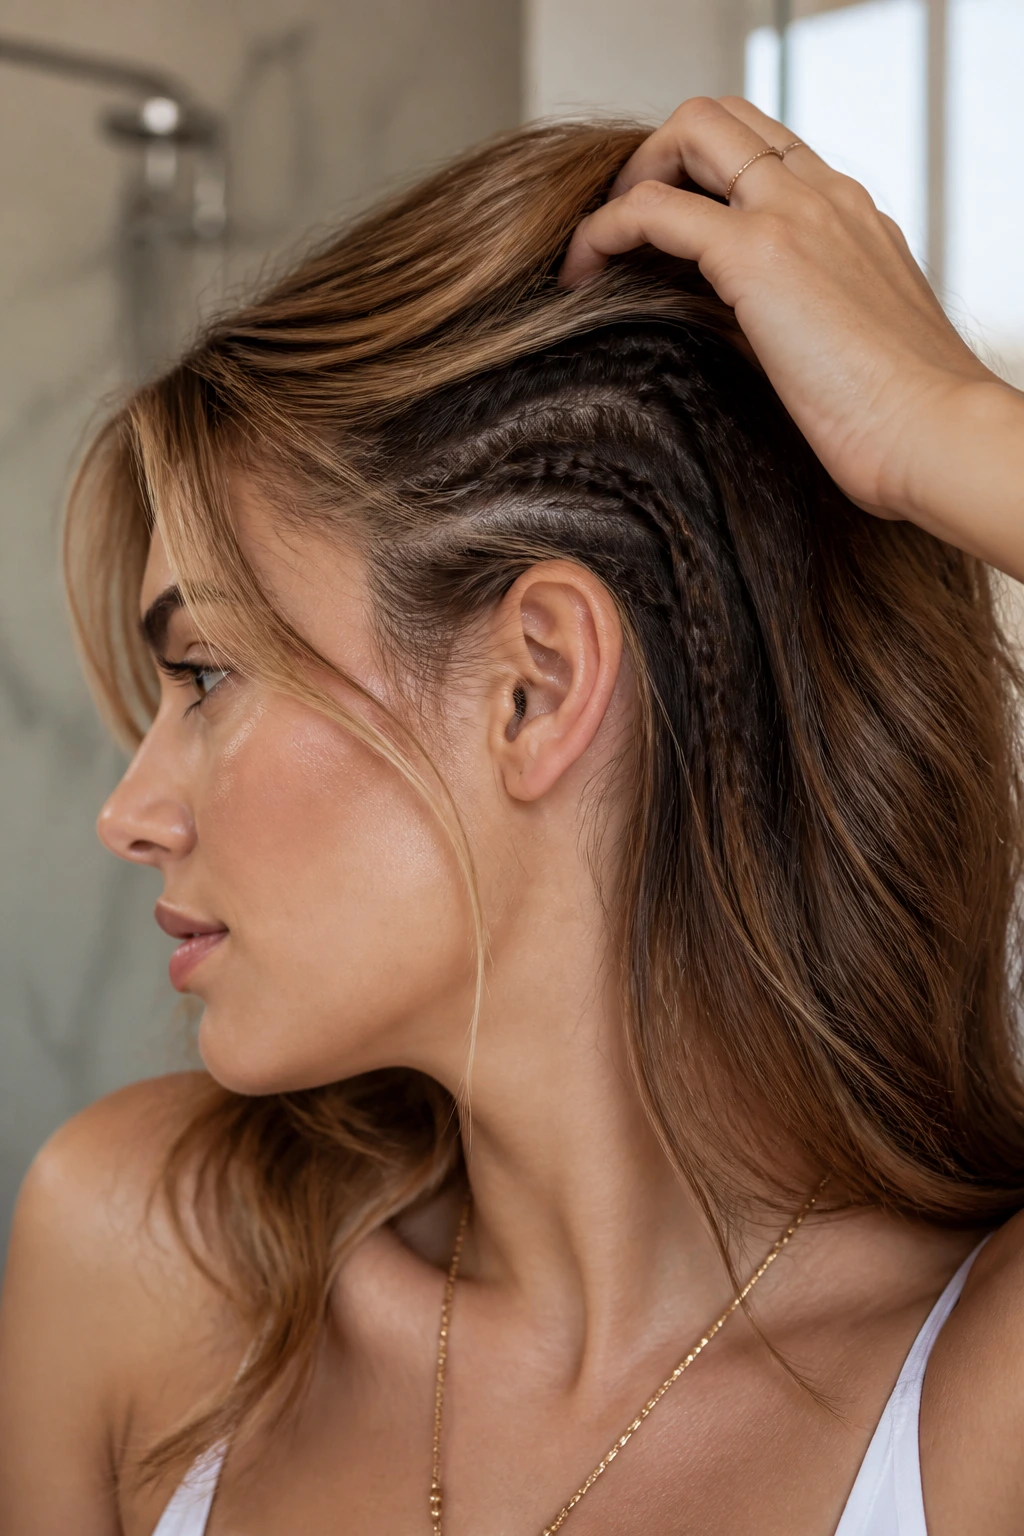
19. The Faux-Hawk Braids
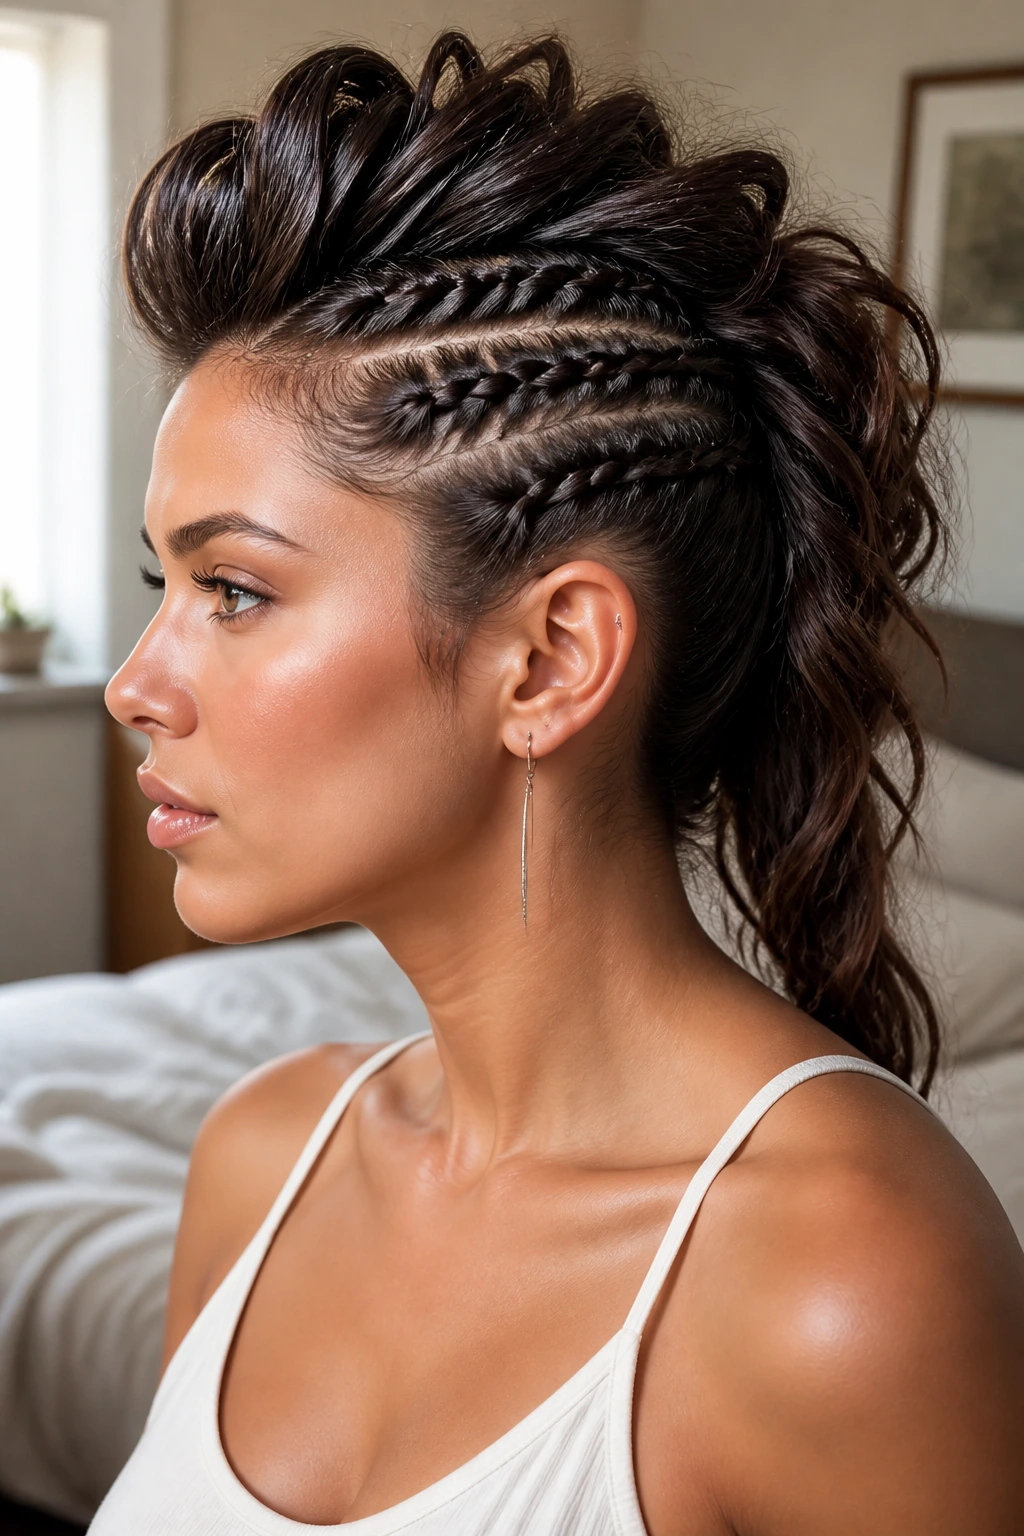
If you want to look edgy without shaving the sides of your head, use Dutch braids along the sides of your scalp to pull the hair toward the center. Leave the middle section loose and voluminous. It creates the silhouette of a mohawk while keeping your hair long and flowing.
Getting the Tension Right
You need your braids to be tight against the scalp to get the “hawk” effect. Use a light pomade on your fingers as you braid; it will give you more control and ensure the braids stay smooth. If you are doing this by yourself, using a handheld mirror to check the back is critical to ensuring your parts are symmetrical.
20. The Long Layers with a Flip
For those with long hair, it is easy to get stuck in a rut. Try blow-drying the ends of your layers away from your face with a large round brush. This creates a “flick” or “flip” at the ends that feels very glamorous and playful. It gives the hair a sense of movement and bounce that feels like a throwback to a more polished era of styling.
The Round Brush Technique
The trick is to catch the ends of the hair when they are about 80% dry. Twist the brush outward as you pull it through to the end. Hold it for five seconds with the heat, then give it a “cool shot” from your dryer to lock in the shape. This extra step is what makes the flip stay all day rather than falling flat in thirty minutes.
21. The Messy French Twist
The French twist has a reputation for being stiff and formal, but a “messy” version is the ultimate sassy look. Gather your hair at the back and twist it up, but don’t worry about smoothing every single strand. Let the ends stick out of the top and allow a few face-framing pieces to fall free. Use a decorative clip to hold the twist in place.
The Utility of the Clip
Choose a clip that feels substantial. A metal claw clip is not only practical but also serves as an accessory. By leaving some of the ends loose, you take the pressure off the style and make it feel more like a daytime option than a formal gown choice.
22. The Wet-Look Braid
Combine the “wet look” with a braid for something that feels truly runway-ready. Use a medium-hold gel to slick your hair back into a tight ponytail, then braid the ponytail itself. The slickness of the base contrasts with the texture of the braid, creating a style that is both sharp and intricate.
Why It’s Perfect for Everyday
This style is indestructible. Once you have gelled it and braided it, that hair is not going anywhere, regardless of wind, humidity, or errands. It is the ultimate “power style” for days when you have too much on your plate to worry about whether your hair is holding up.
Final Thoughts
Sassy hair is ultimately about the relationship you have with your reflection. When you choose a style that feels like a bold version of yourself, you stop fighting your hair and start enjoying it. Whether it is a simple braid, a sharp center part, or a voluminous afro, the best look is the one that gives you that extra boost of confidence the moment you step out the door. Don’t be afraid to experiment with these styles on your own terms. Your hair is the one accessory you wear every single day—make sure it’s one that makes you feel exactly how you want to feel.