Finding a hairstyle that actually stays put while you’re sweating through a HIIT session or running a five-miler is its own kind of athletic challenge. You need something that won’t unravel mid-burpee, won’t whip you in the face during a jog, and—let’s be honest—won’t look like a disaster once you’re done. Weaving styles, specifically those incorporating braids, are the gold standard for high-intensity activity because they lock every strand in place without the constant need to adjust clips or tighten elastics. They hold firm, they look intentional, and they transition surprisingly well from the gym floor to the rest of your day.
If you’ve ever stopped your flow mid-pose because your ponytail was sagging or spent thirty seconds re-doing a bun between sets, you know the struggle. Weaving techniques distribute tension more evenly than standard elastics, which often cause localized hair breakage. When you braid your hair, you are essentially creating a self-securing structure that mimics the way athletic gear performs—it moves with you rather than against you.
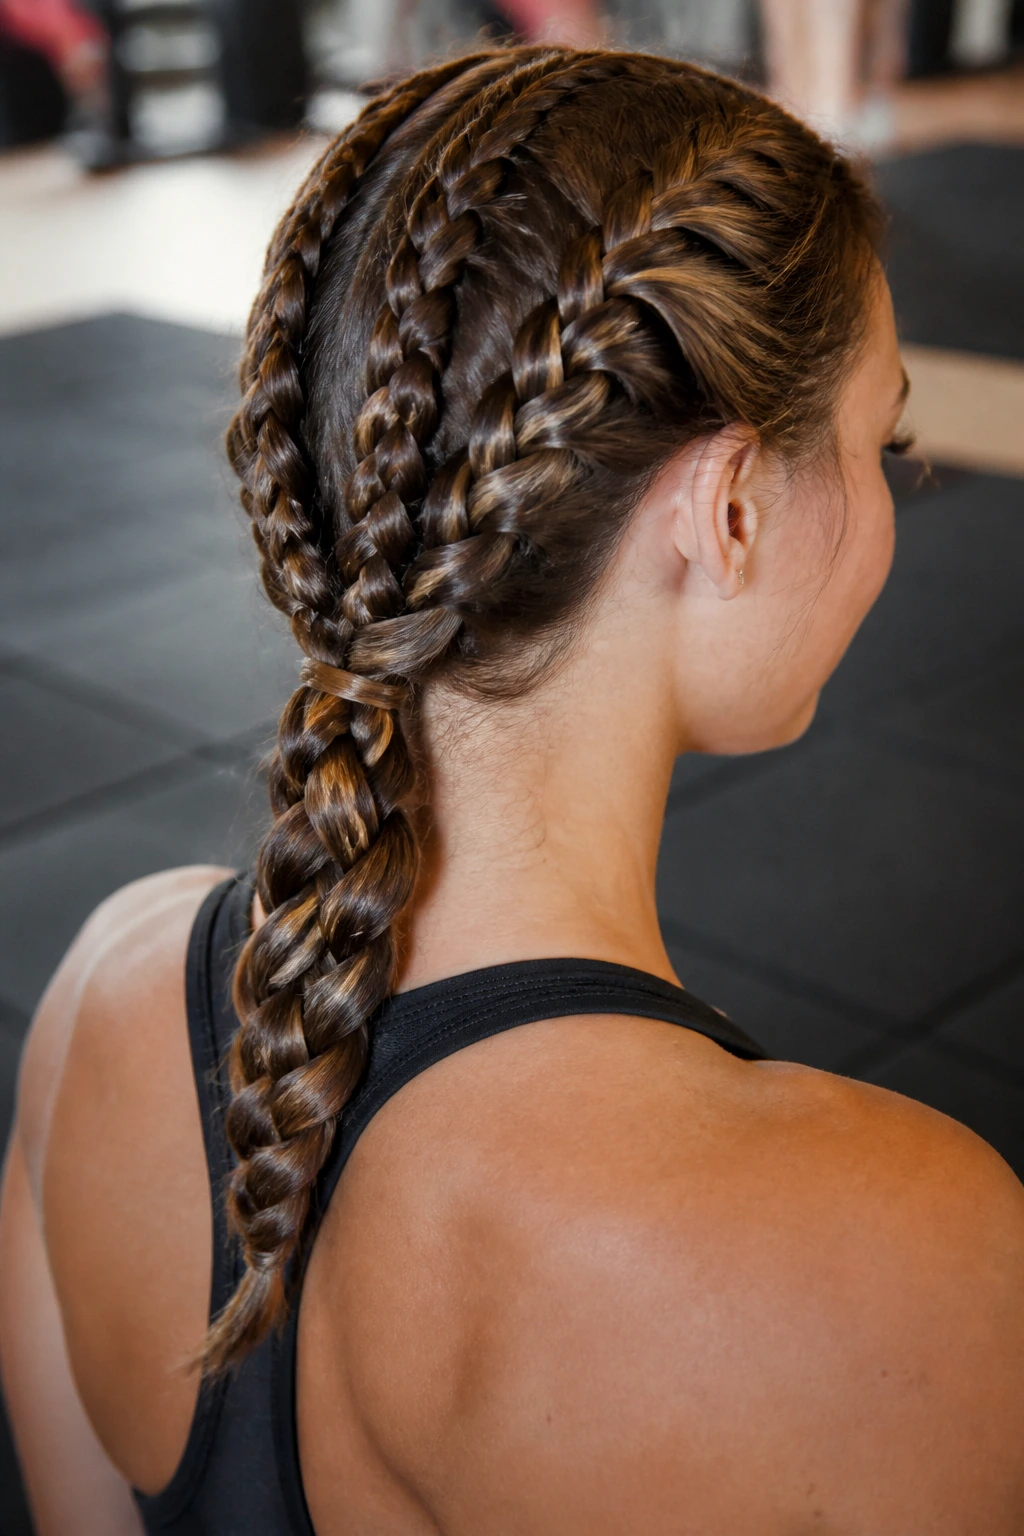
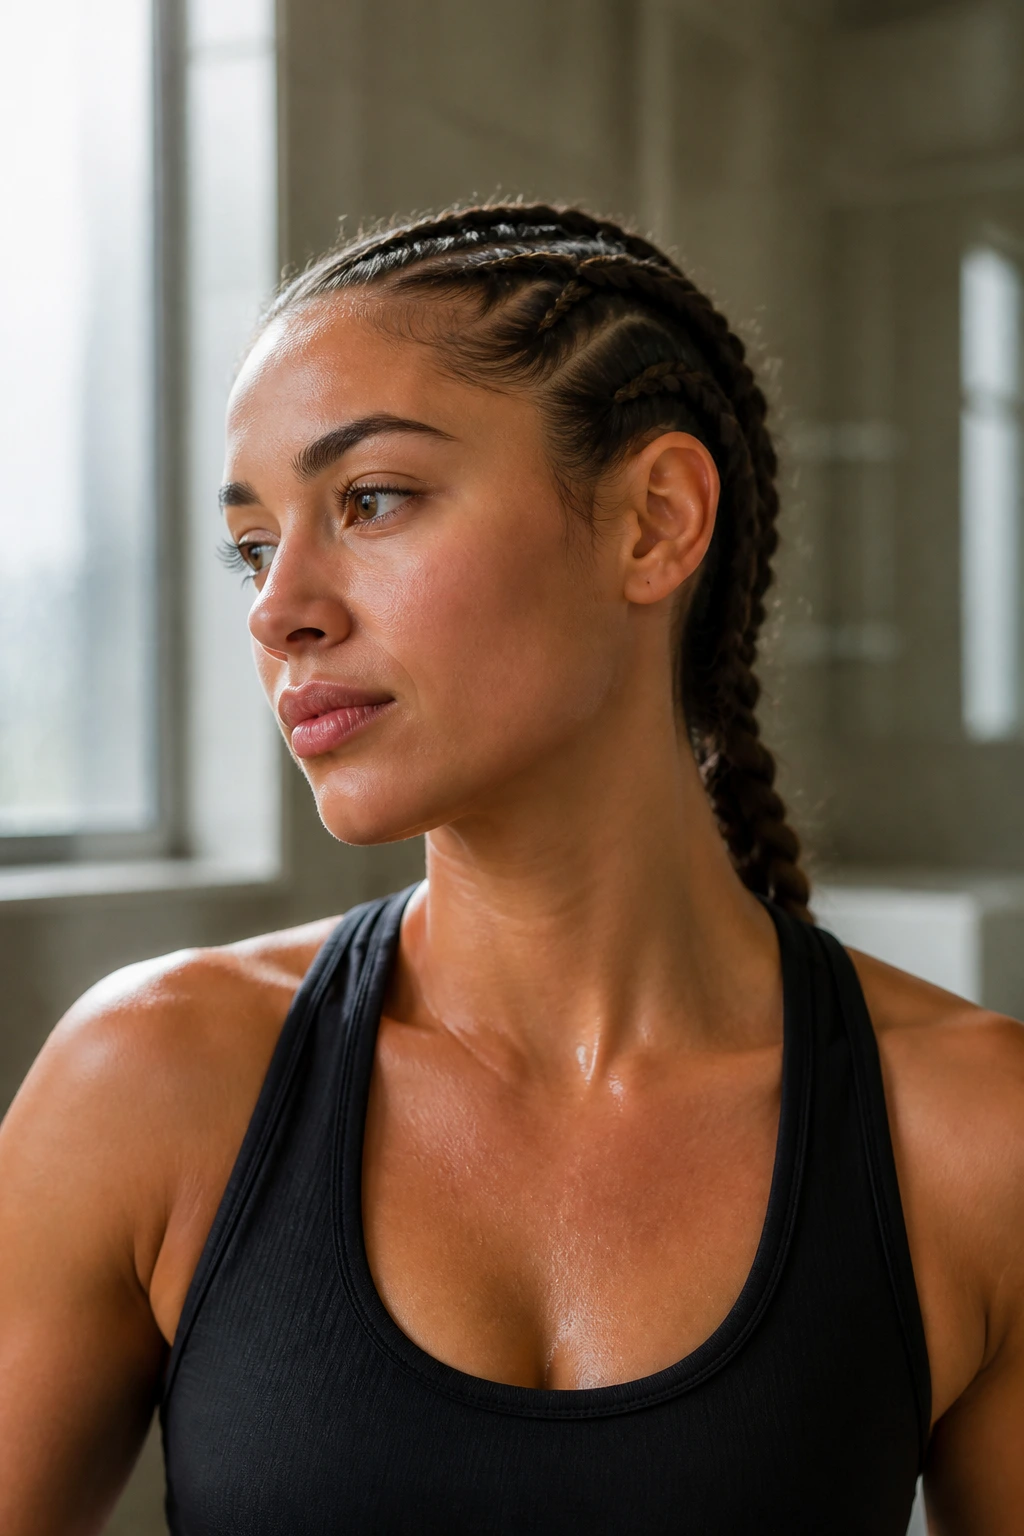
1. The Classic Dual Dutch Braid
This is the workhorse of workout hair. By crossing the hair sections under rather than over, you create a raised, dense braid that sits firmly against the scalp. It doesn’t move. Because the weave is so secure, it’s arguably the most reliable choice for high-impact sports like soccer or boxing.
Why It Works for High-Impact Movement
Dutch braids are built for durability because the tension is distributed evenly from the hairline back to the nape. Unlike a French braid, which can loosen as the day goes on, the Dutch technique anchors the hair tightly against the skull. This prevents the “sagging” effect that happens when you’re jumping or moving quickly.
How to Achieve the Look
- Start by parting your hair down the center from your forehead to the nape of your neck.
- Secure one side with a clip so it doesn’t get in your way.
- Begin at the hairline, taking a small section and splitting it into three.
- Cross the outer strands under the middle strand.
- As you move backward, add a small piece of loose hair to each outer strand before crossing it under.
- Repeat until you reach the nape, then finish with a simple three-strand plait.
- Pro Tip: If you have fine or slippery hair, mist it with a bit of texturizing spray before you start. It provides the grip necessary to keep those sections from sliding out while you weave.
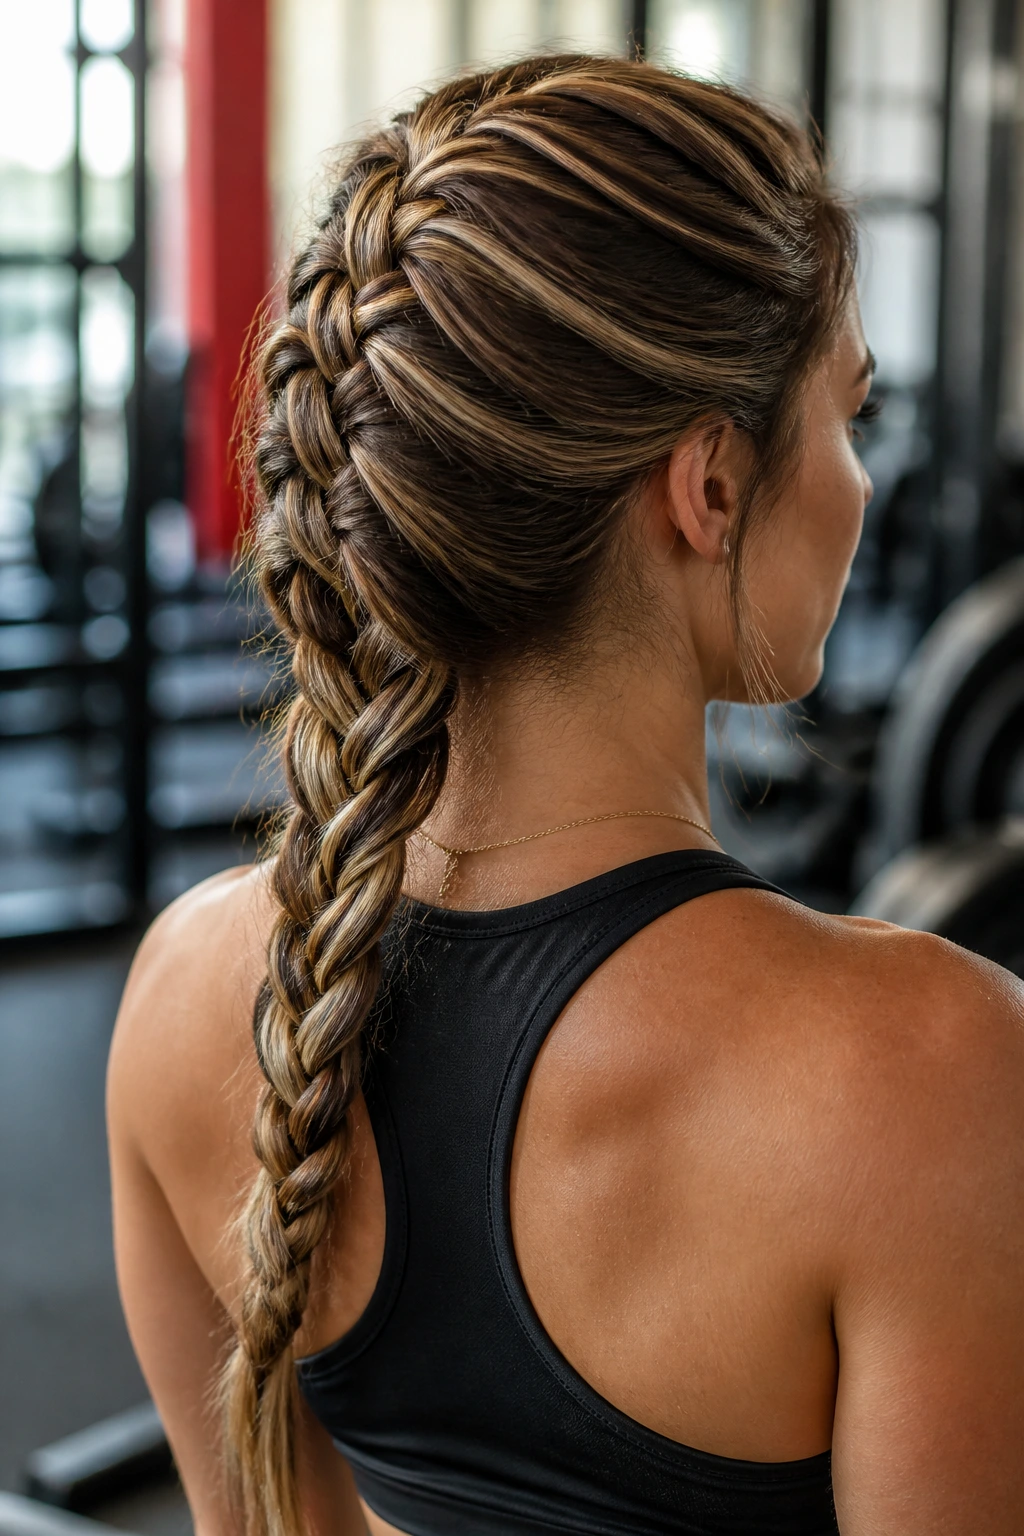
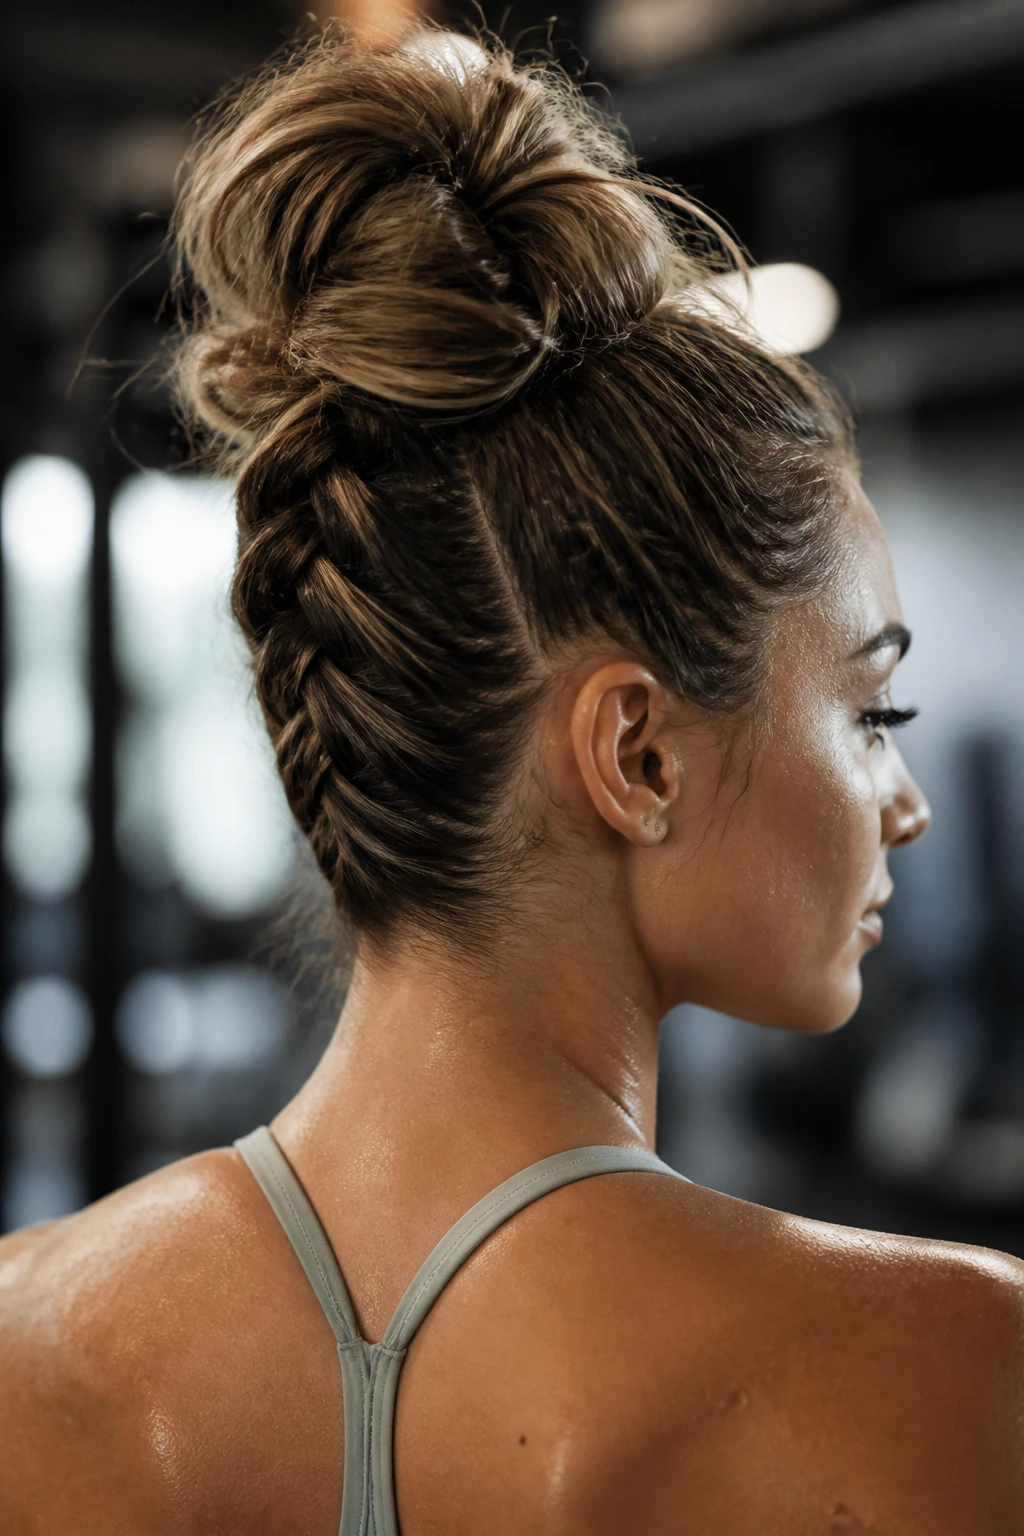
2. The High-Volume Fishtail Ponytail
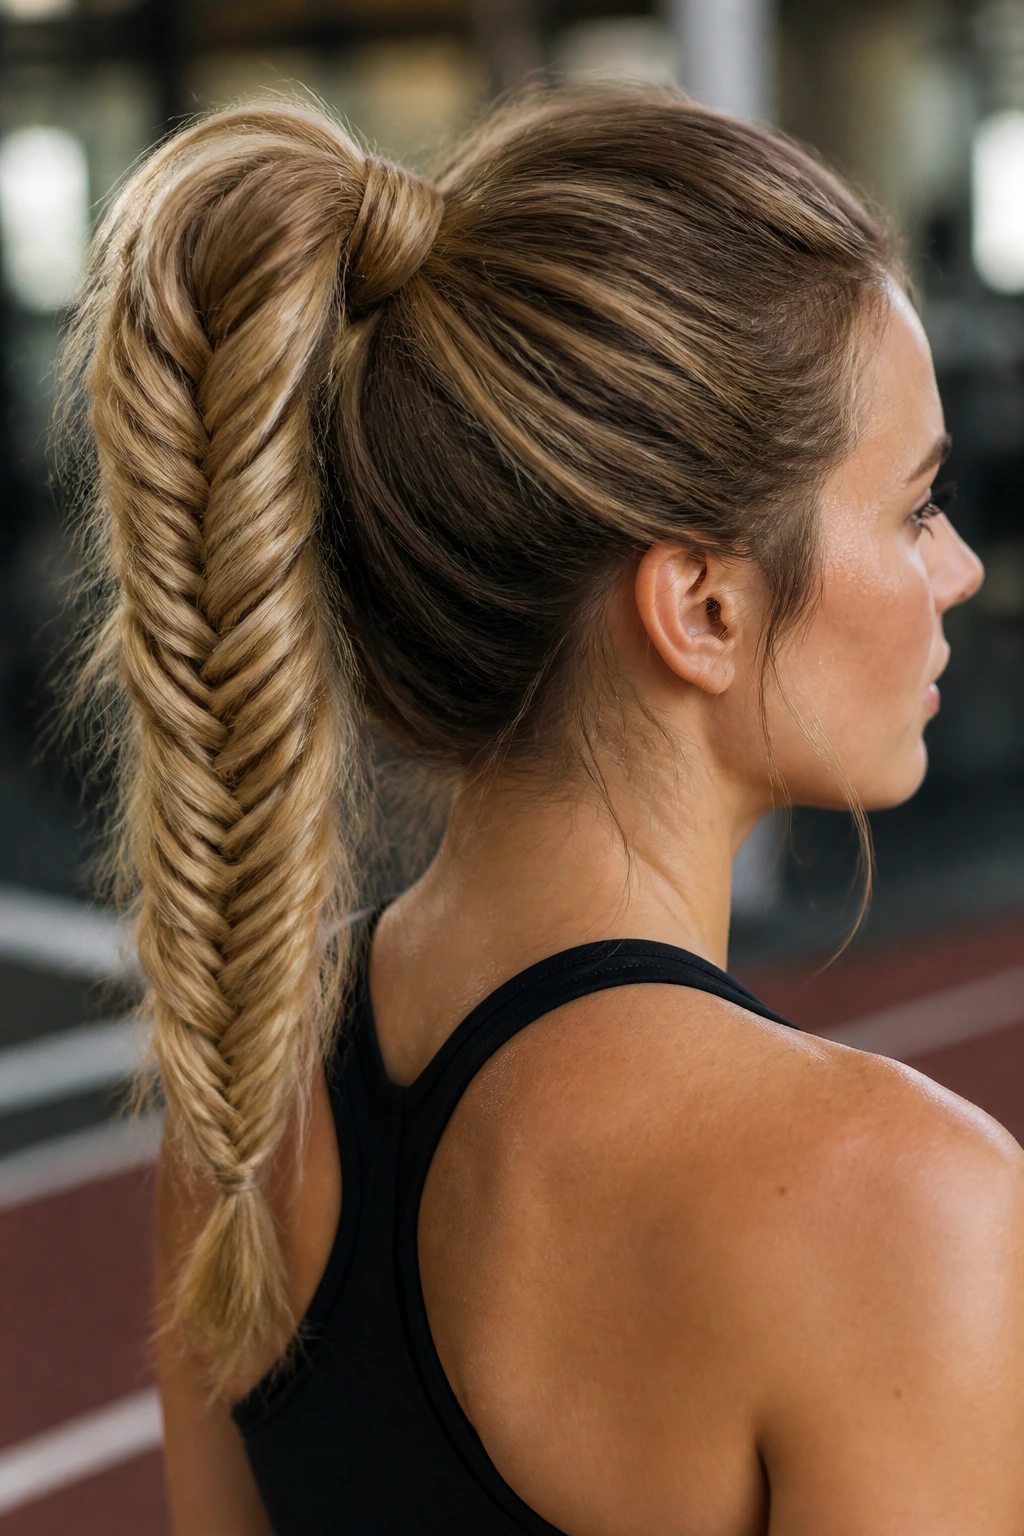
A fishtail braid is deceptively strong. Because the pattern relies on small, tightly woven segments, it’s much less likely to “poof” out or unravel during cardio. Pulling it into a high ponytail before weaving keeps the weight off your neck, which is essential for staying cool during hot yoga or heavy lifting.
The Mechanics of the Weave
The fishtail is built by alternating tiny slivers of hair across the center, which essentially locks the strands into a braid that is tighter than a standard plait. When you pull the base of this braid into a high ponytail, you eliminate the friction that usually causes flyaways. It is a sleek, aerodynamic choice for long-distance running.
Key Considerations for Secure Braiding
- Secure your hair into a ponytail first—use a snag-free hair tie.
- Split the ponytail into two equal sections.
- Take a tiny piece from the outer edge of one section and cross it over to the inner side of the other.
- Maintain constant tension. If you stop pulling, the weave loosens, and you will find yourself fixing it mid-workout.
- Secure the very end with a small clear elastic.
- Warning: Do not attempt to “pancake” or pull apart the loops of the braid if you plan on doing intense movement. Keeping the weave tight is what ensures it won’t fall apart.
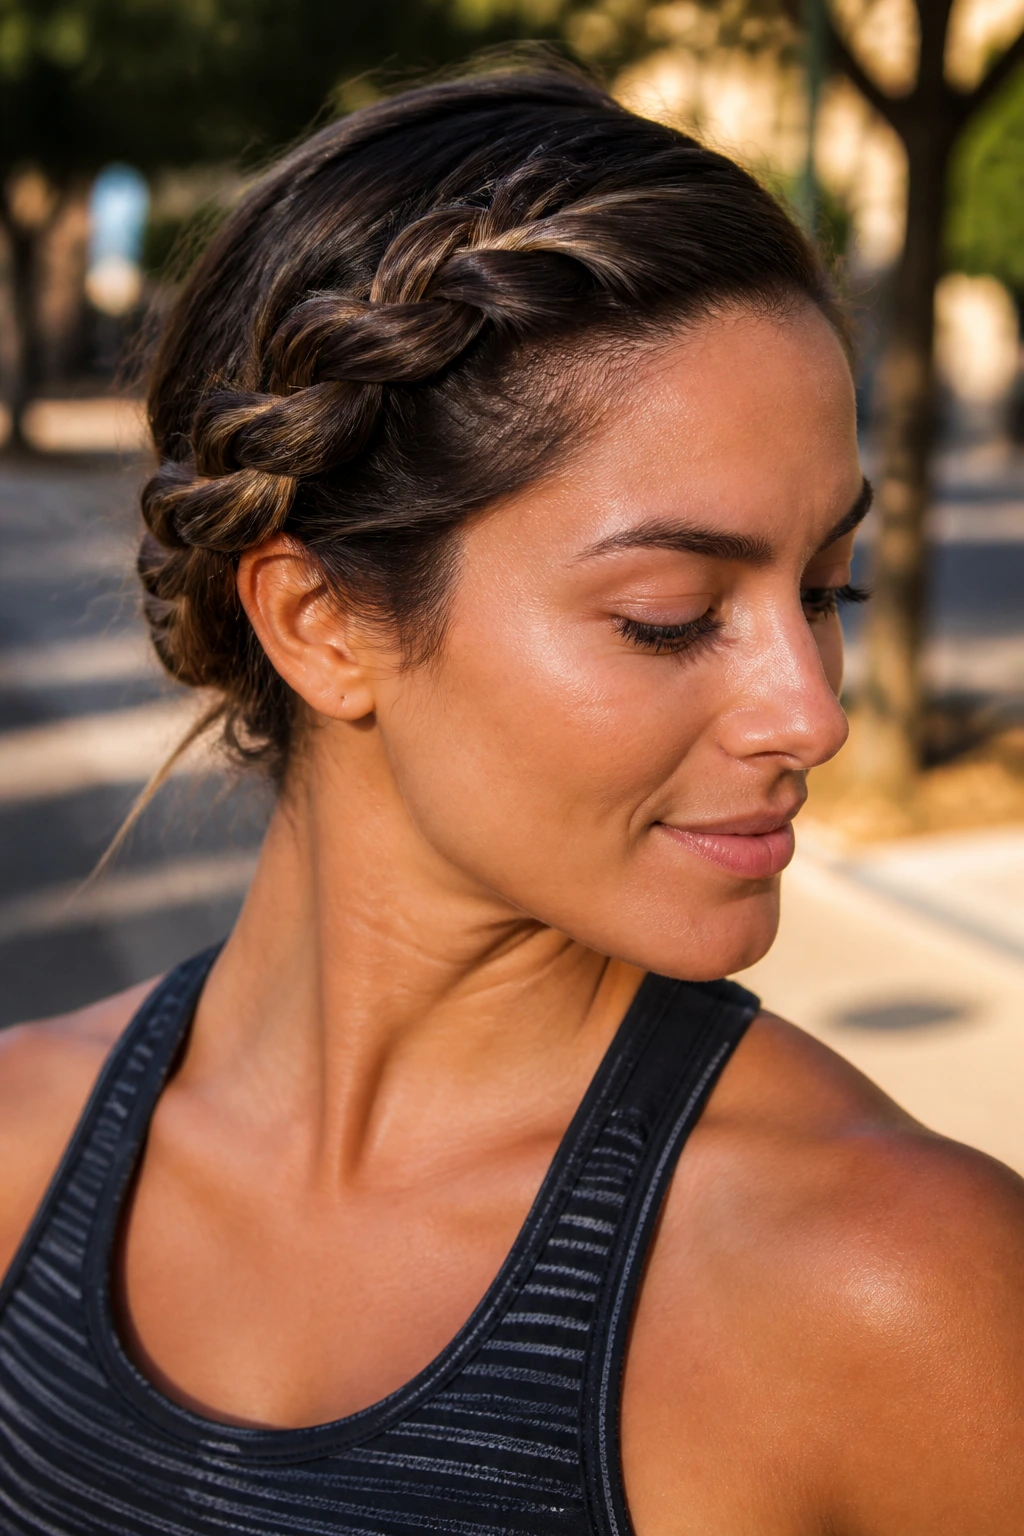
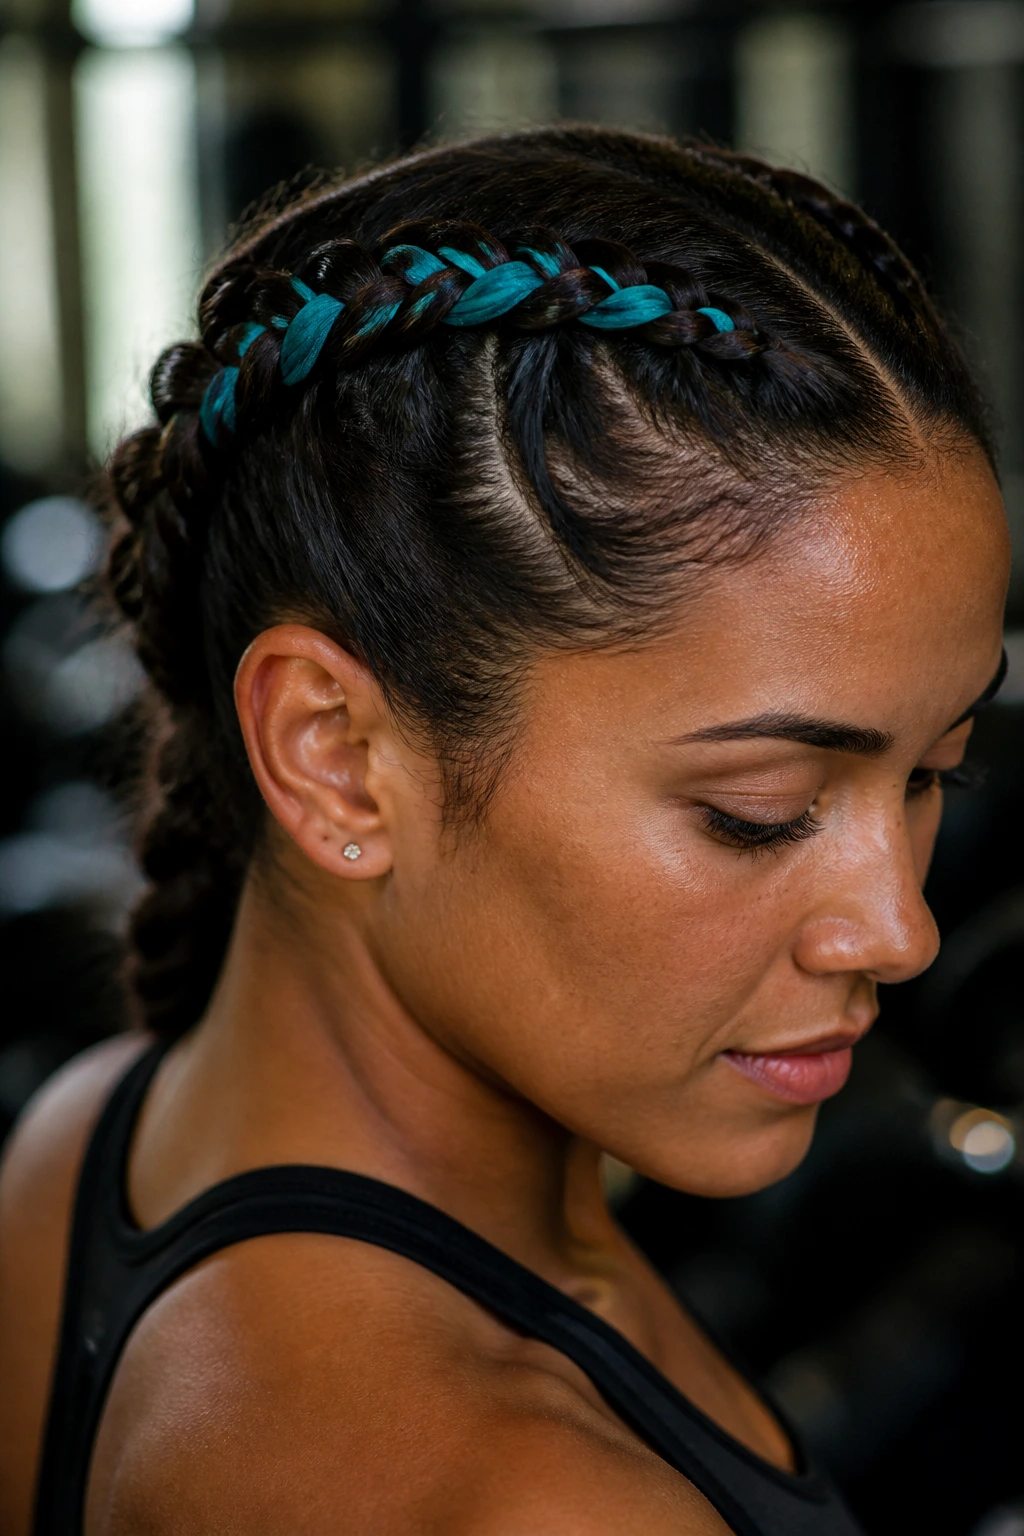
3. The Crown Braid Wrap
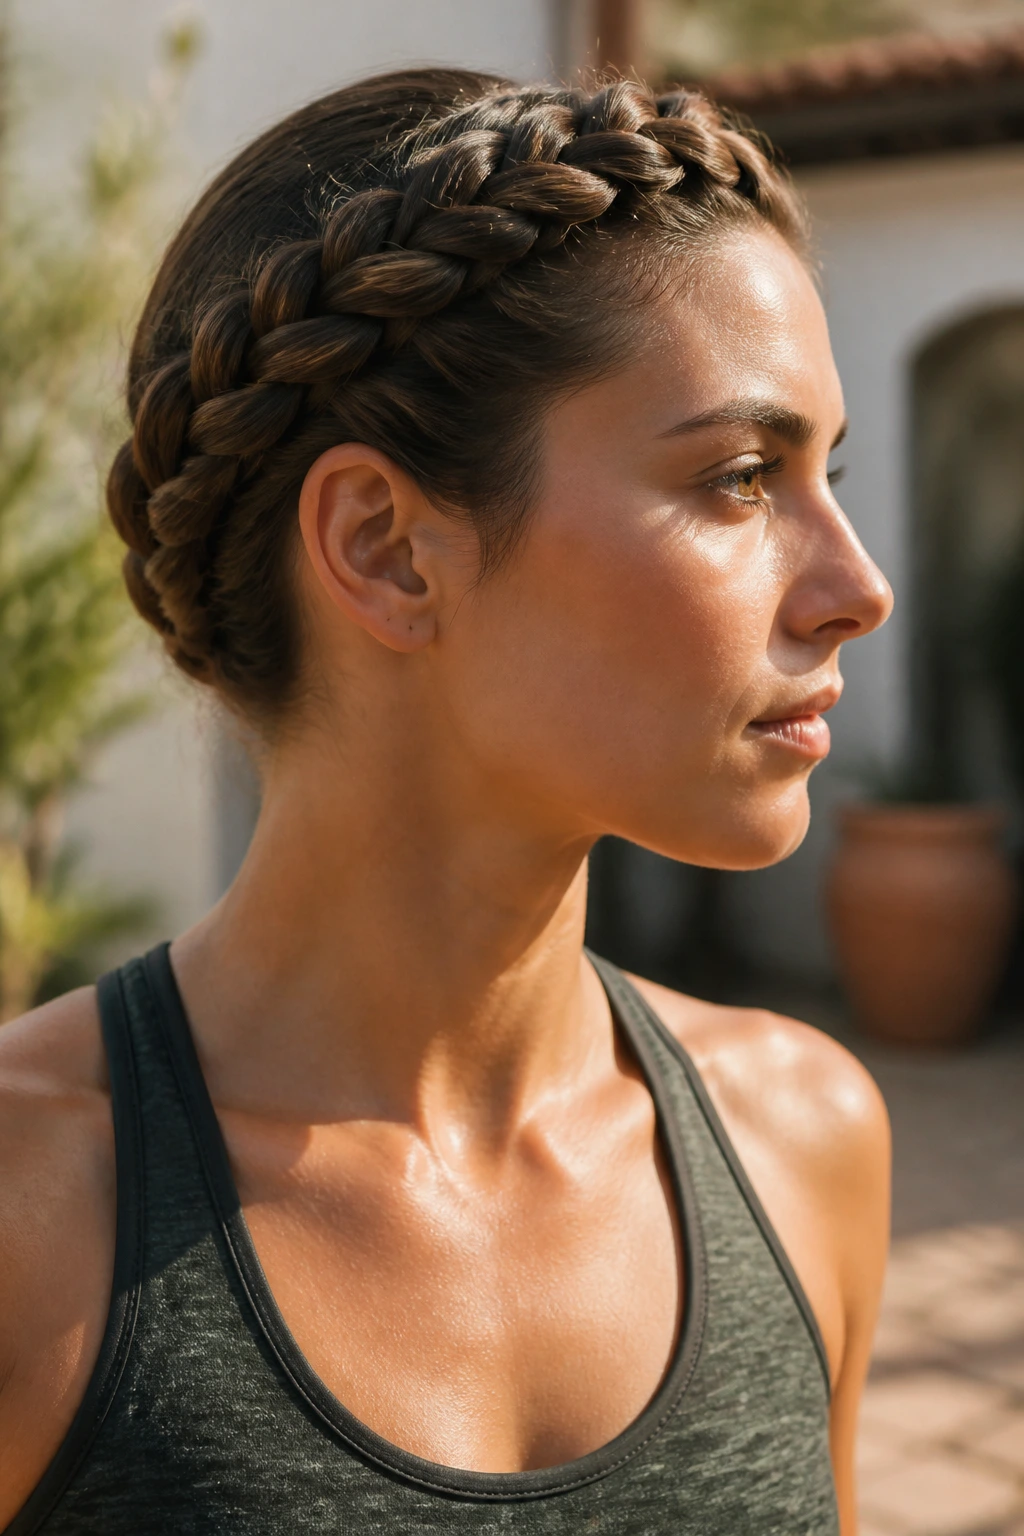
If you need your hair completely off your face and neck, wrapping a single, long braid around your head is the ultimate solution. It stays in place regardless of how much you invert or pivot, making it a favorite for gymnastics, dance, or floor-based training.
How It Keeps You Cool
By pinning the hair close to the skull, you allow maximum airflow to your neck and ears. This is crucial during sessions where you’re working up a heavy sweat. Because the hair is physically woven into a circular pattern, there are no loose ends to whip around your eyes or stick to your damp skin.
Essential Pinning Techniques
- Start a Dutch braid behind one ear and weave along your hairline.
- Keep the tension firm. If you braid too loosely, the “crown” will droop as you move.
- When you reach the start, tuck the tail underneath the beginning of the braid.
- Use U-shaped pins, not standard bobby pins. They lock into the weave much better.
- Observation: If you have shorter layers, don’t worry about them being perfectly slick. A few wisps are inevitable and actually help the braid look more relaxed.
4. The Boxer Braid Knot
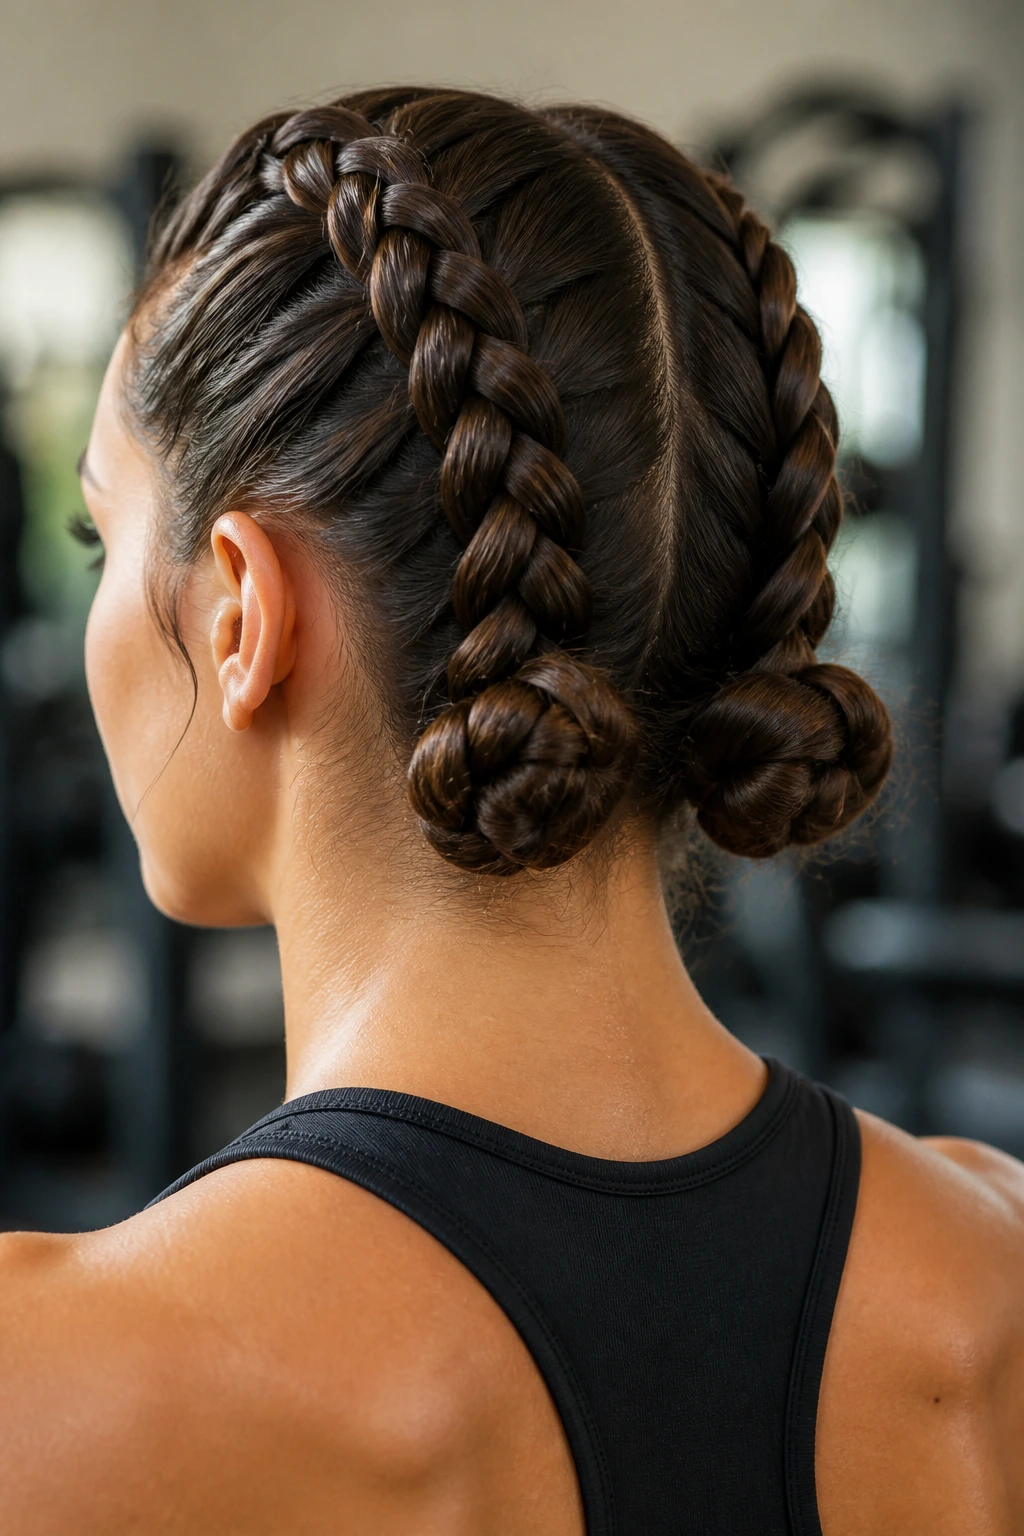
Take the standard dual Dutch braids and instead of letting them hang, wind them into two tight buns at the nape of your neck. This prevents the ends of the braids from swinging around, which is a major distraction during bench presses or sit-ups.
Why This Style Succeeds Under Pressure
Combining the structural integrity of a Dutch braid with the stability of a bun creates a double-locked hairstyle. The braid anchors the hair to the scalp, and the bun keeps the ends from acting as a pendulum. It is virtually indestructible.
Step-by-Step Security
- Create your two Dutch braids as usual.
- Once you reach the nape, continue braiding until you run out of hair.
- Roll each braid upward into a small, tight knot at the base of your skull.
- Secure with two strong, durable hair elastics—don’t rely on pins alone here, as they can slip during high-sweat activities.
- Tip: If your braids are very long, wind them around the base of the tie twice for extra hold.
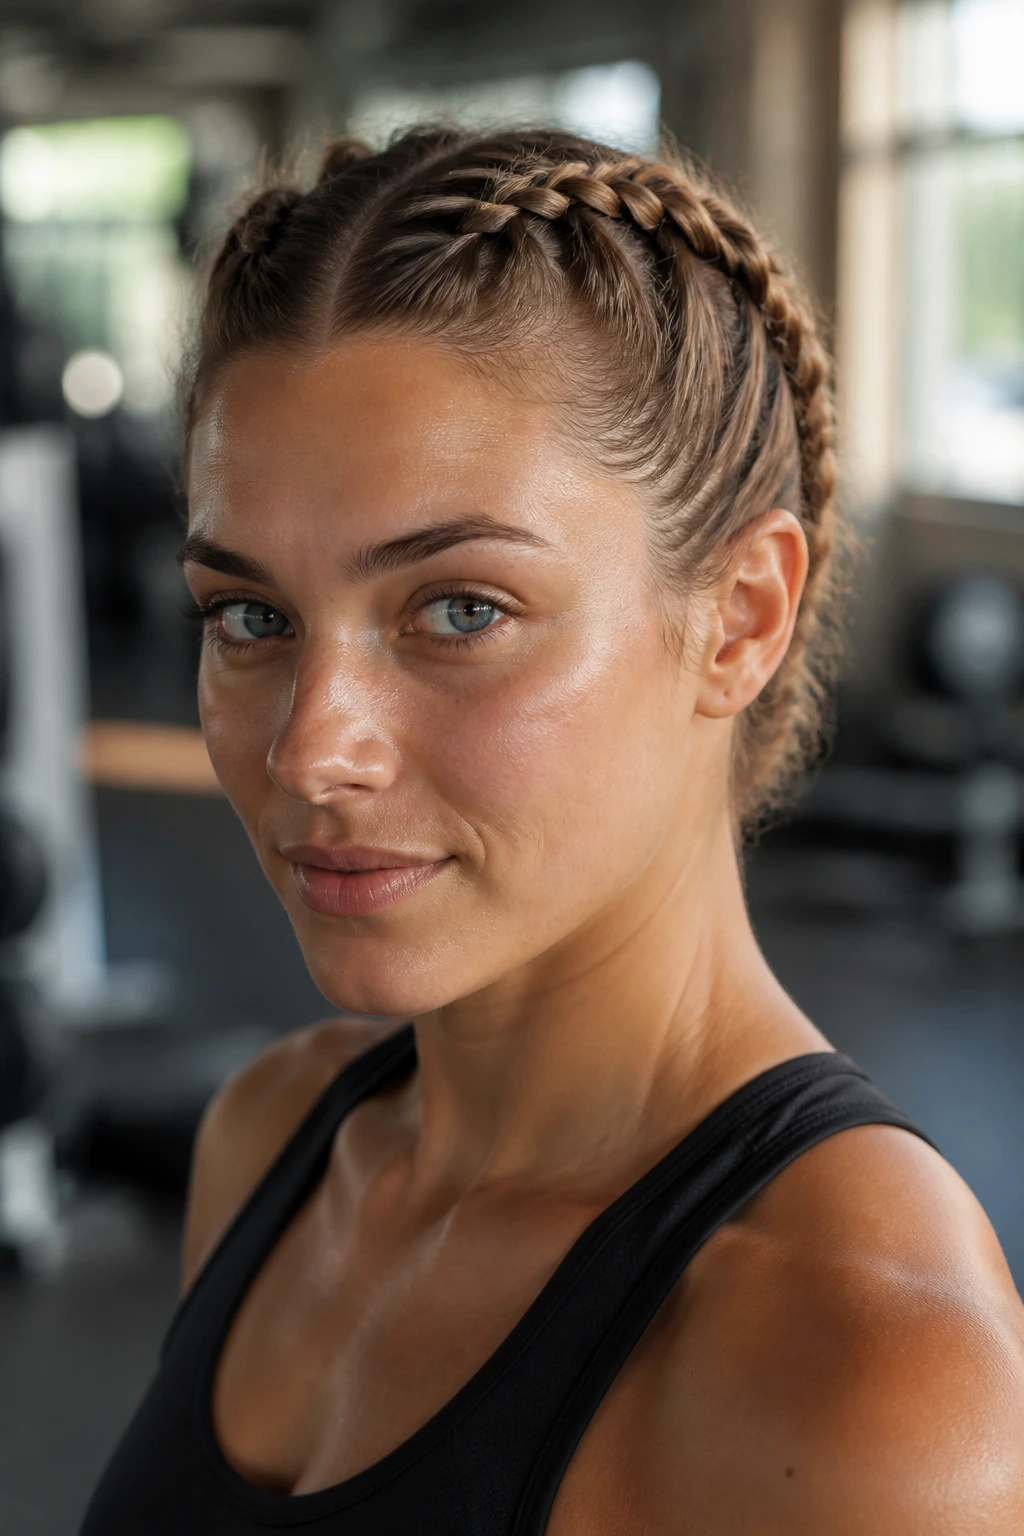
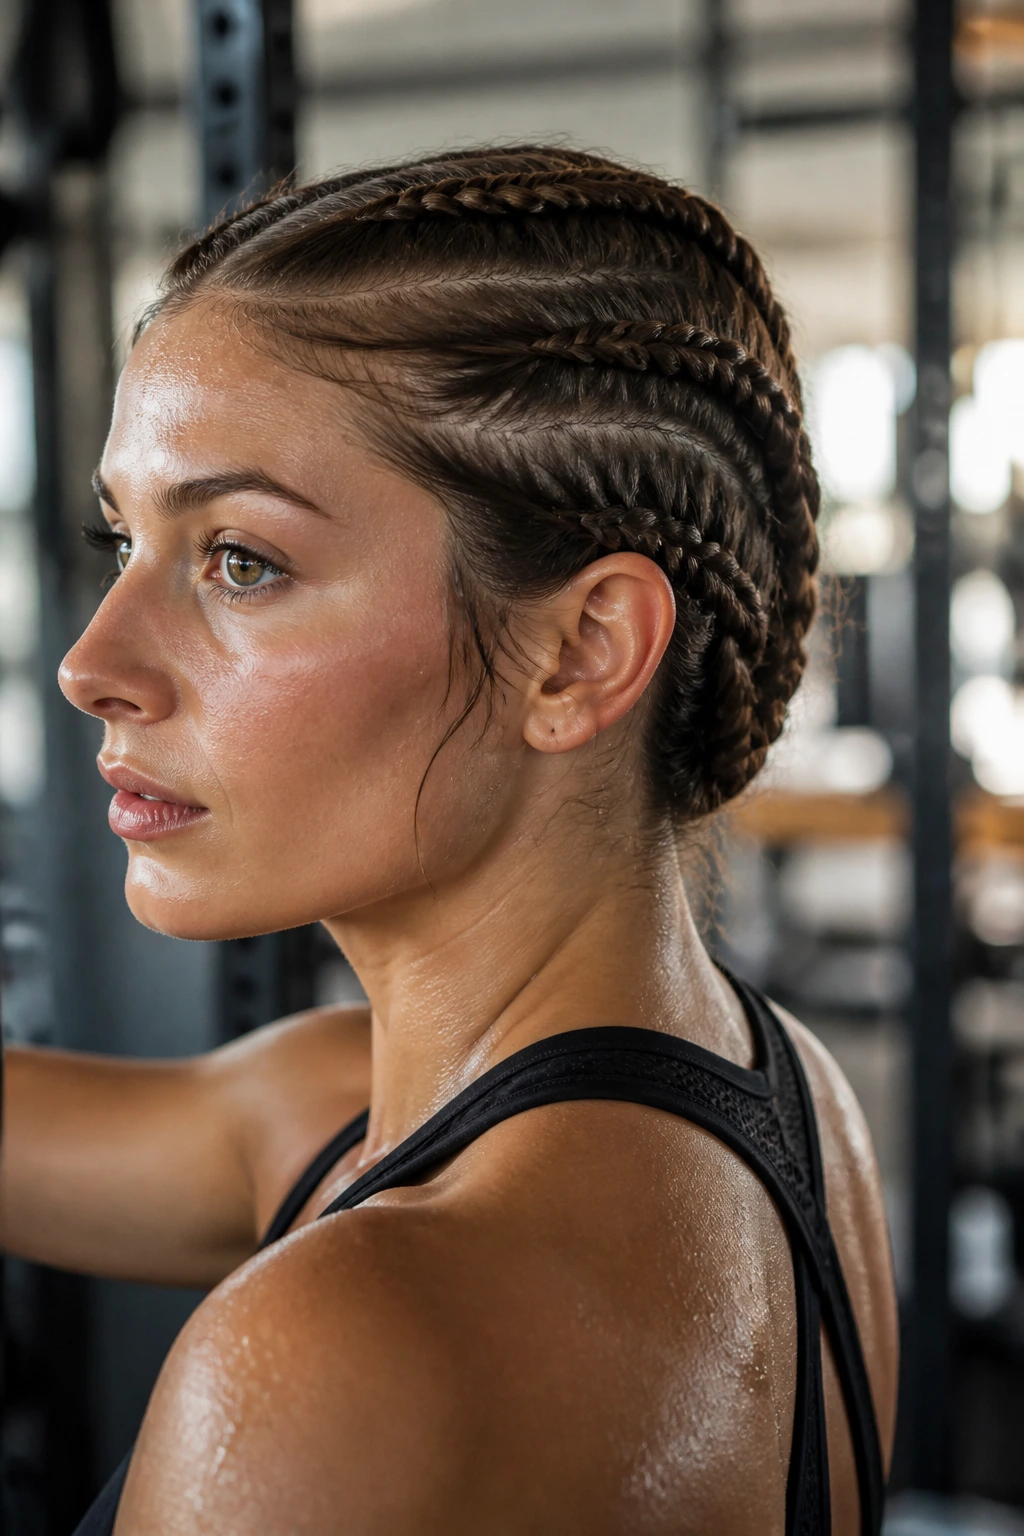
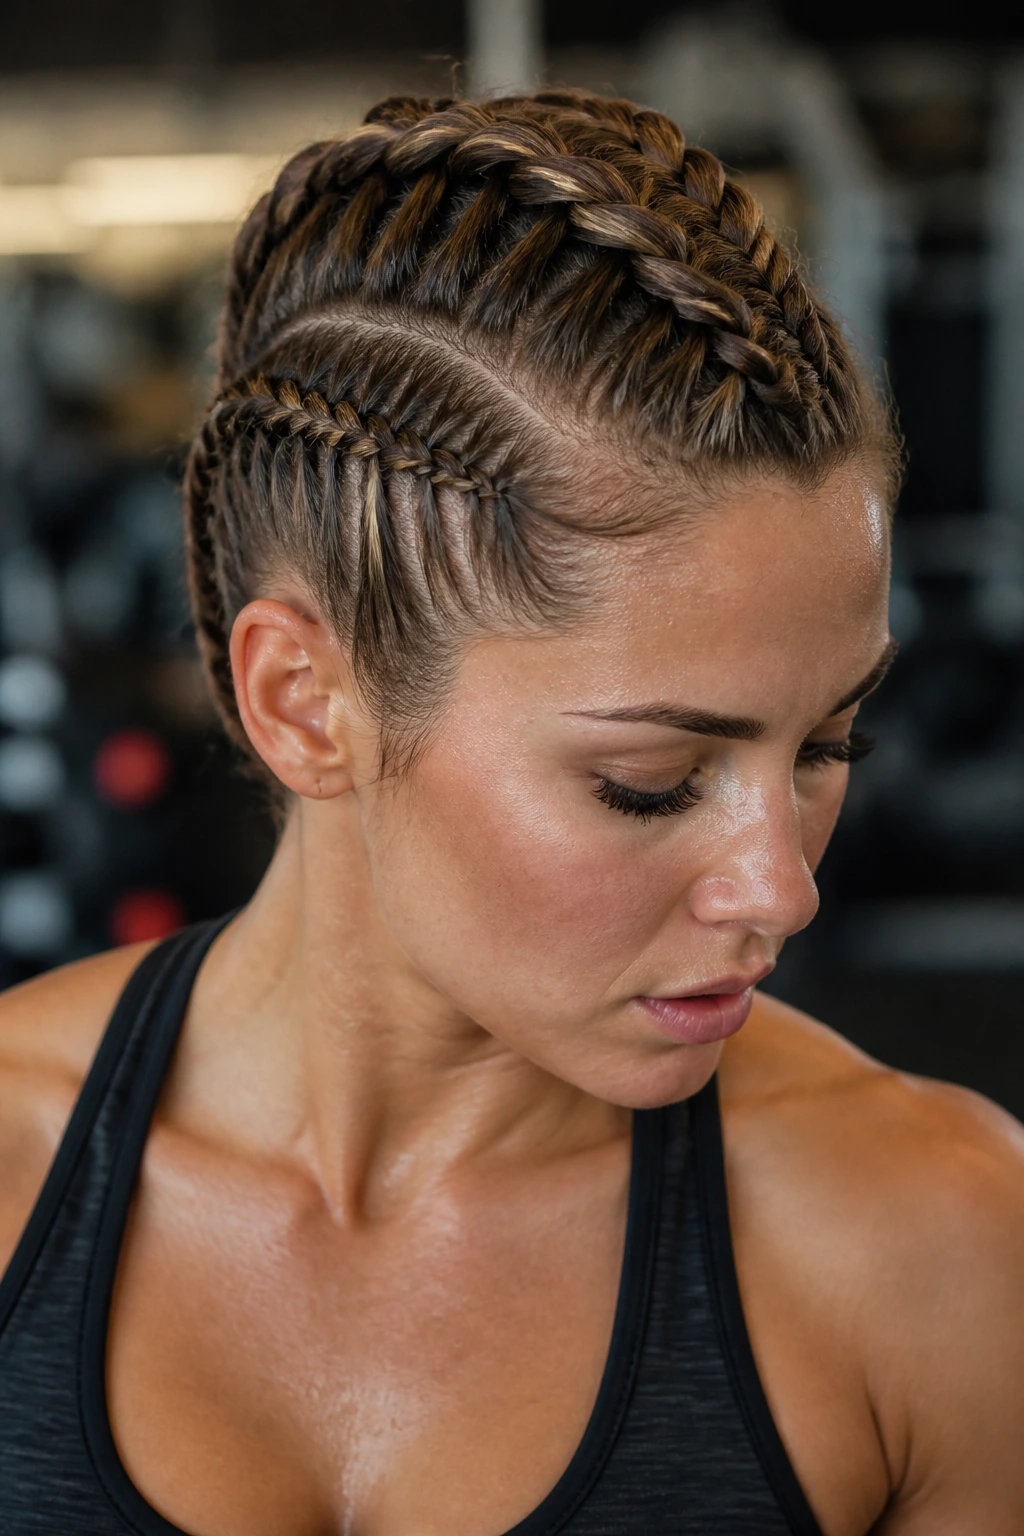
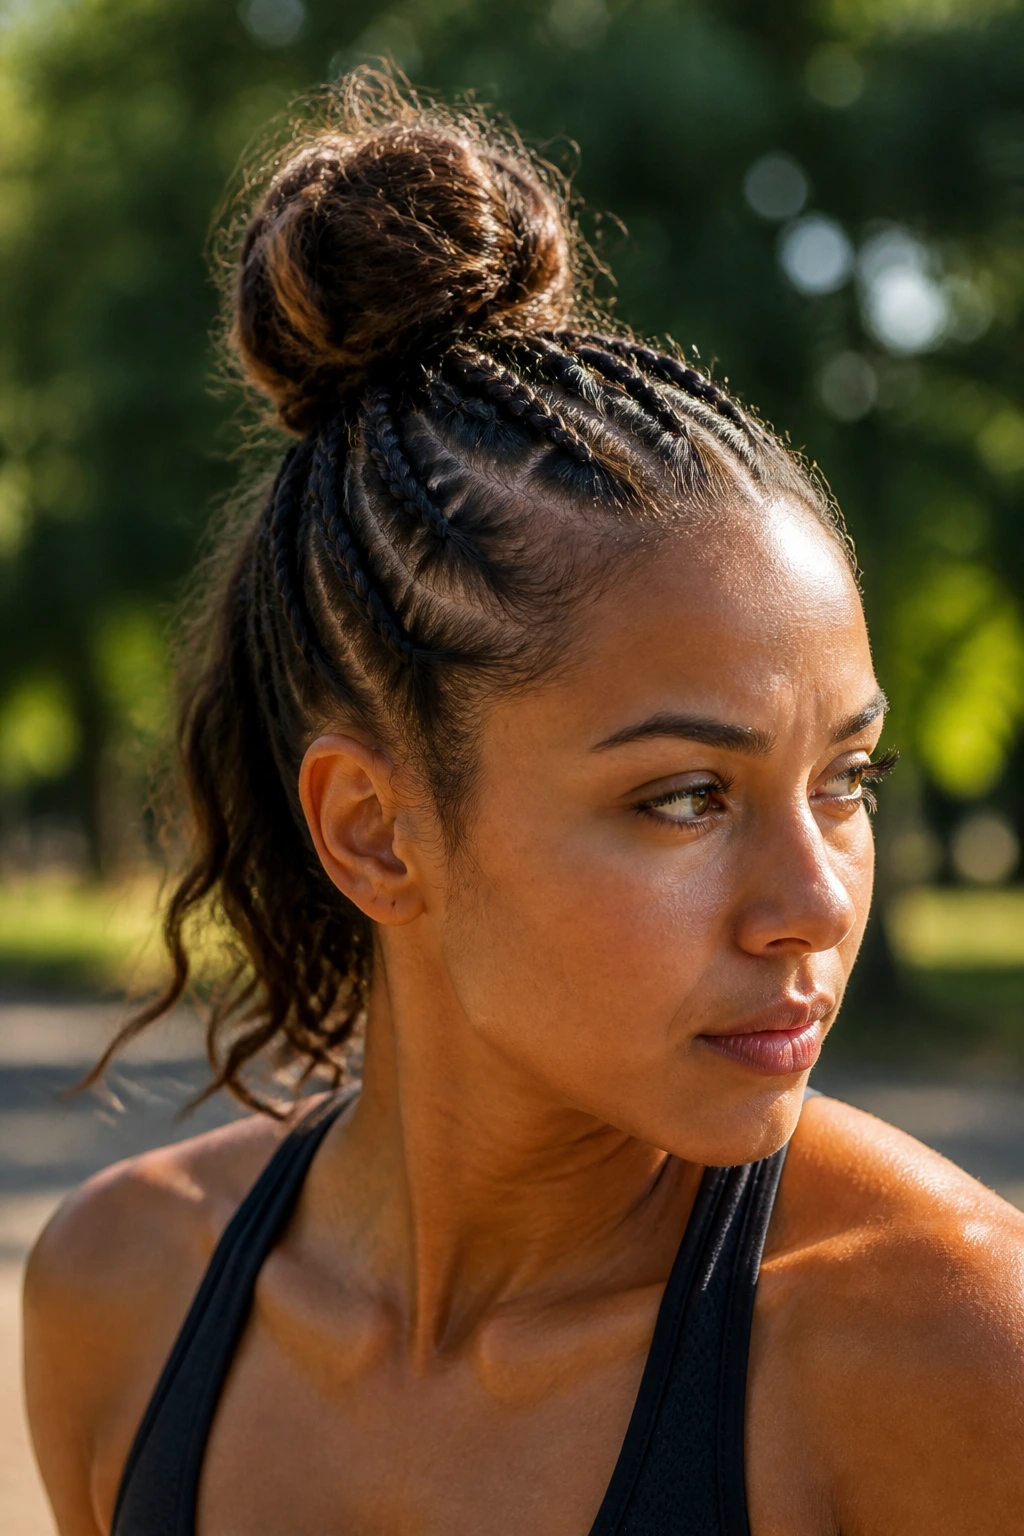
5. The Top-Knot Cornrow Hybrid
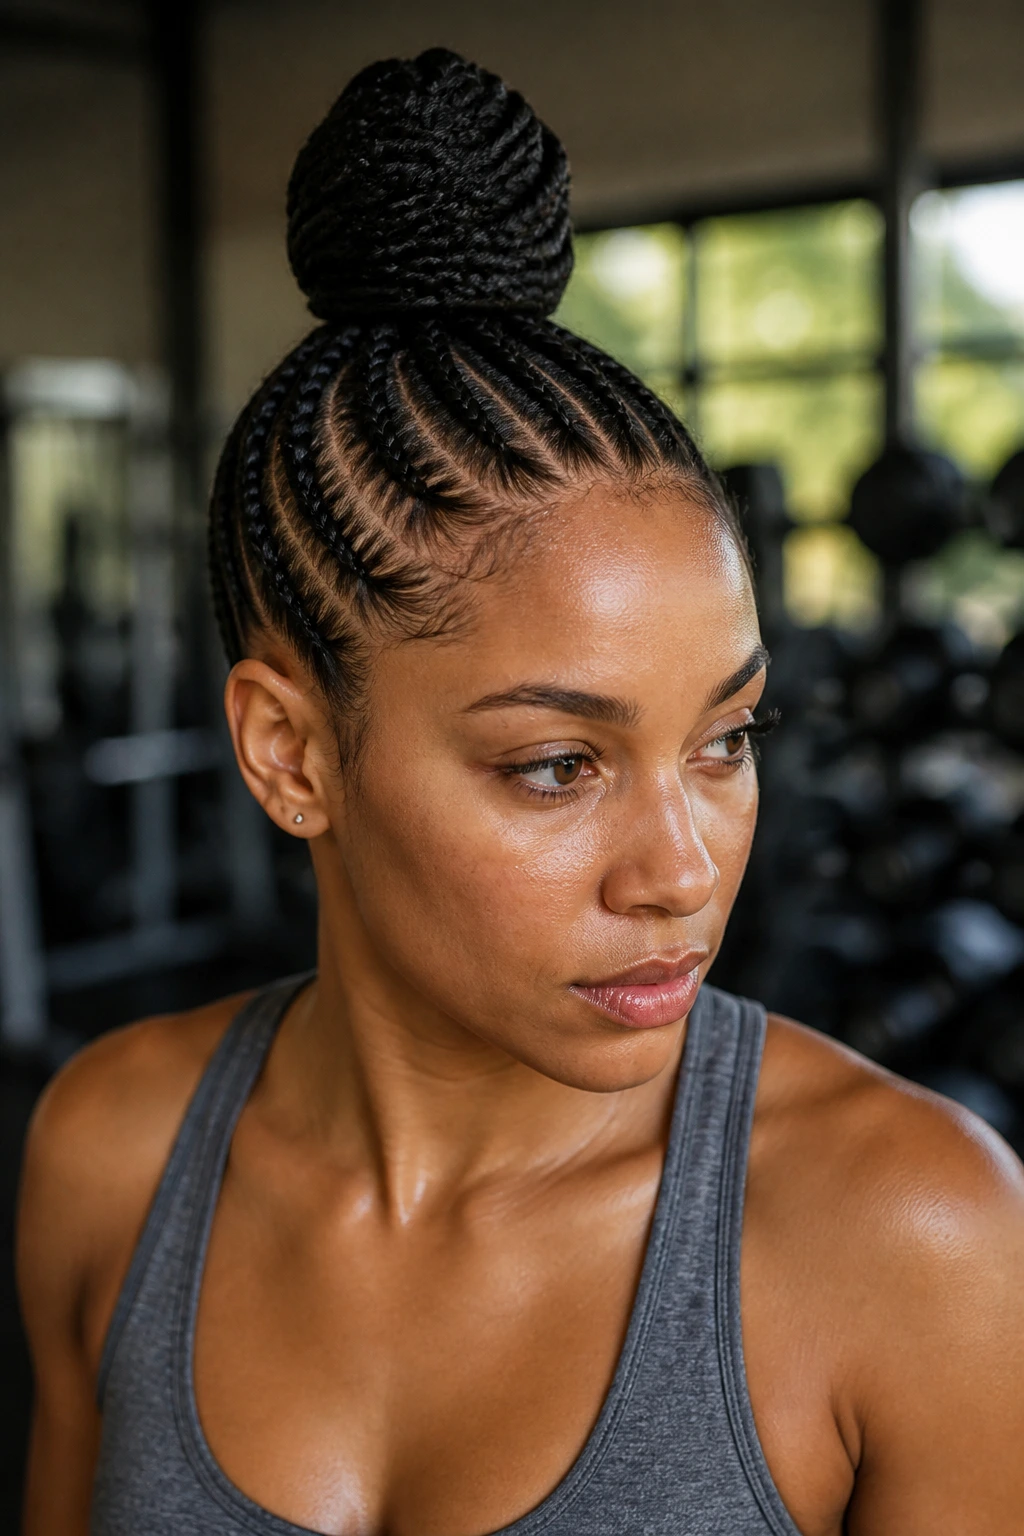
This style combines a few cornrows running from the forehead into a single, high top-knot. It is sleek, edgy, and keeps every single hair follicle away from your face. It works exceptionally well for high-intensity intervals where you don’t want a single strand touching your brow.
Managing Tension
The key to a good cornrow style is starting with damp hair or a bit of styling pomade. This keeps the hair uniform and prevents breakage at the root. Because the rows are woven so close to the scalp, they don’t shift when you move your head, even when you’re doing quick lateral movements.
Building the Structure
- Section the hair into 3 to 5 vertical strips from the hairline to the crown.
- Braid each strip tightly against the scalp.
- Once you reach the crown, gather the ends of all the braids along with the remaining hair into a high ponytail.
- Twist the ponytail into a firm knot and secure it with a spiral-style hair coil.
- Expert Insight: Using a spiral coil is better than a fabric elastic here because it grips the bun without needing as much tension, reducing the risk of a headache during a long workout.
6. The Side-Swept Rope Braid
If you prefer a style that feels a bit more “finished” but is still entirely functional, the rope braid is a great pick. It’s created by twisting two sections of hair in the same direction, then crossing them over each other. It’s incredibly fast to do, yet it holds tighter than a standard three-strand braid.
Why the Rope Braid is Underrated
The twist-on-twist action of a rope braid creates a very dense, heavy structure. Unlike a loose plait, a rope braid doesn’t really have “gaps.” This makes it much harder for individual hairs to pop out during movement. It’s perfect for moderate-intensity workouts like Pilates or steady-state cycling.
Mastering the Twist
- Pull your hair into a ponytail to the side of your head.
- Split the ponytail into two equal parts.
- Twist both parts clockwise, then cross them counter-clockwise over one another.
- Keep repeating this motion all the way to the end.
- Secure with a sturdy elastic.
- Warning: If you don’t twist the individual sections tightly enough before crossing them, the braid will unspool. The tension in the individual twists is what provides the strength.
7. The Pull-Through “Braid”
Technically, this isn’t a braid at all—it’s a series of tied-off elastics—but it mimics the look of a thick, woven plait. It is perhaps the most secure option for people with fine or layered hair who struggle to keep traditional braids from falling out.
The Power of Segmented Hold
By securing the hair every two inches, you are creating a system of redundancy. If one elastic breaks, the whole thing doesn’t collapse. This makes it an ideal style for long, grueling sessions where you can’t be bothered to fix your hair.
Execution for Maximum Security
- Start with a high ponytail and secure with a small elastic.
- Divide the ponytail into two sections and bring them together underneath the first, securing with another elastic.
- Pull the segments gently to create volume.
- Repeat this down the length of your ponytail.
- Pro Tip: Use clear silicone elastics, but double them up on each section if you are doing high-intensity cardio. They can snap under the pressure of thick, heavy hair.
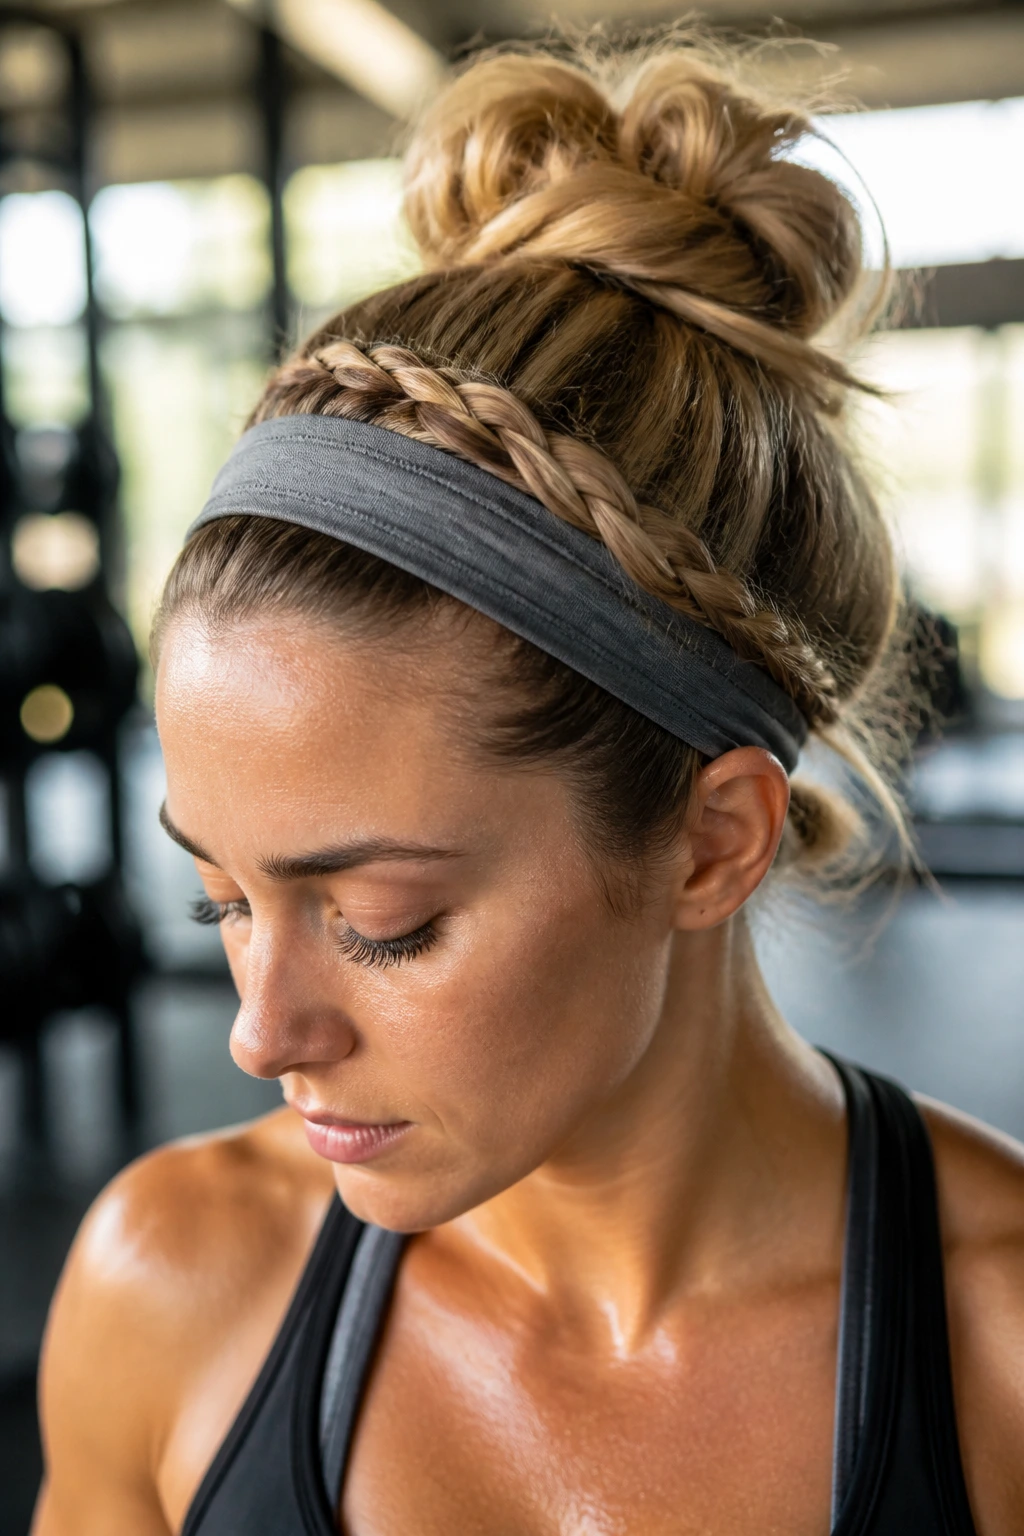
8. The Half-Up Dutch Crown
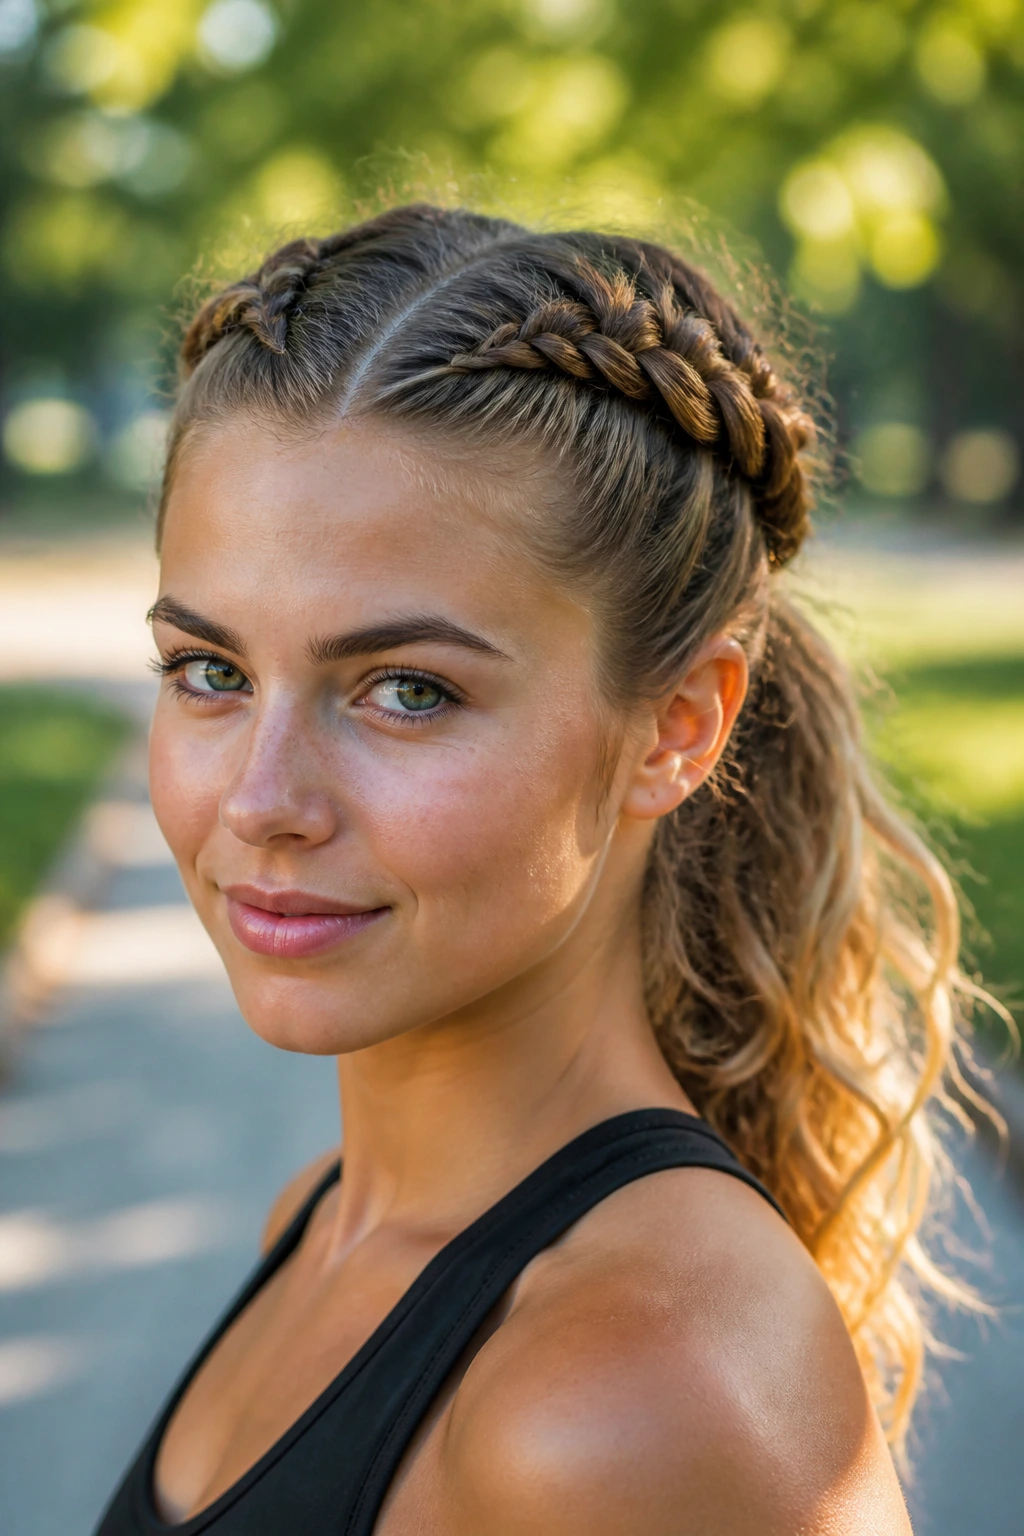
If you don’t like all your hair pulled back, this style creates a “headband” of Dutch braids around the top of your head while leaving the rest of your hair in a ponytail or bun. It keeps the hair out of your eyes while still giving you some movement in the back.
Balancing Style and Function
This is excellent for outdoor activities like hiking or tennis where you want to keep sweat out of your eyes but don’t want a completely “slicked back” look. The braid acts as a physical barrier against sweat dripping into your face.
The Anchor Point
- Start a Dutch braid at one temple and weave it toward the crown.
- Do the same on the other side.
- Join them together at the back of the head.
- Secure the remaining length into a ponytail or braid.
- Observation: This style relies on the tension of the two braids meeting in the middle. If they feel loose, pull them slightly tighter before pinning them together.
9. The Low-Nape Interlaced Braid
For those who prefer a low profile, this style focuses on a series of small, interlaced braids that feed into one single, thick braid at the nape of the neck. It’s very elegant and keeps the hair away from your back, which is essential if you are doing floor work.
Why Low-Nape Works
Keeping the bulk of your hair at the nape prevents it from interfering with your range of motion. If you are doing shoulder presses or back-focused movements, a high ponytail can get in the way. A low braid stays completely clear of your equipment and your neck.
Weaving Tips
- Create three small Dutch braids along the back of your head, starting from the hairline.
- Combine all three at the nape and finish with one large braid.
- This creates a very structured, dense, and “armored” feel that is excellent for high-intensity training.
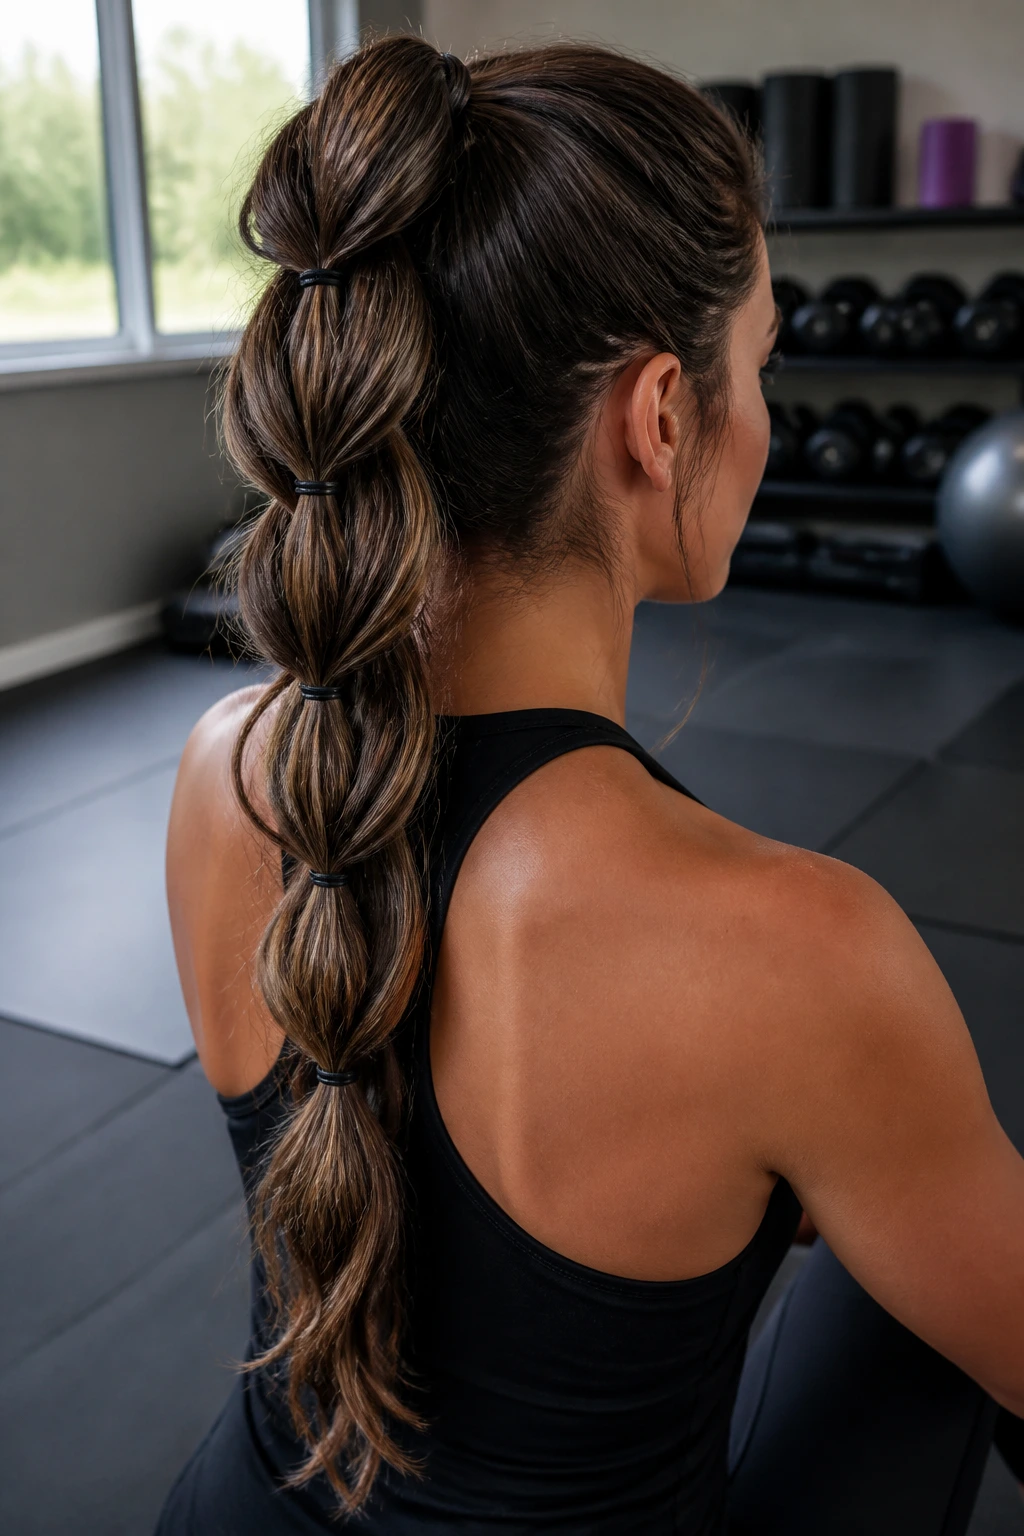
10. The Bubble-Braid Ponytail
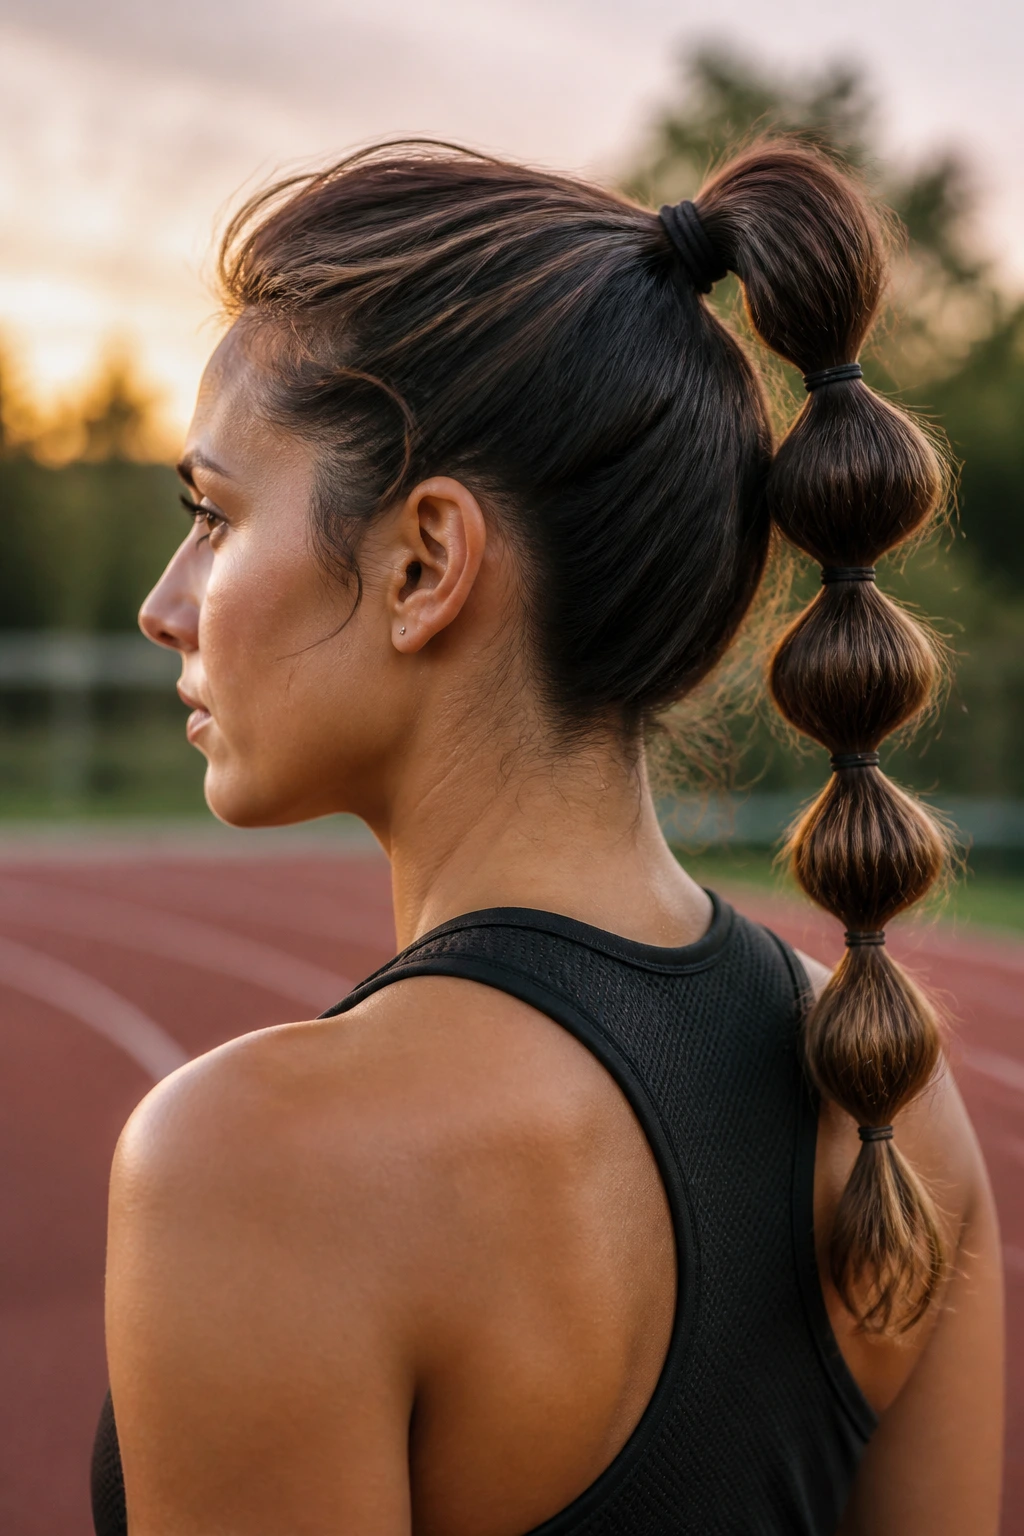
Similar to the pull-through, the bubble braid uses elastics to create a uniform, round look. It is incredibly easy to maintain and looks intentional even after it gets a little messy from your workout.
Why It’s Great for Beginners
If you aren’t skilled at intricate weaving, the bubble braid provides the security of a braid with the ease of a ponytail. It’s perfect for those who want their hair locked down without the time-consuming effort of intricate braiding.
Creating the “Bubbles”
- Pull hair into a high ponytail.
- Place elastics every 2 inches down the length.
- Gently pull the hair between the elastics to make it “bubble” out.
- Important: Don’t make the bubbles too big. Small, tight bubbles hold their shape better than loose, floppy ones during a heavy workout session.
11. The Side-Dutch Waterfall Braid
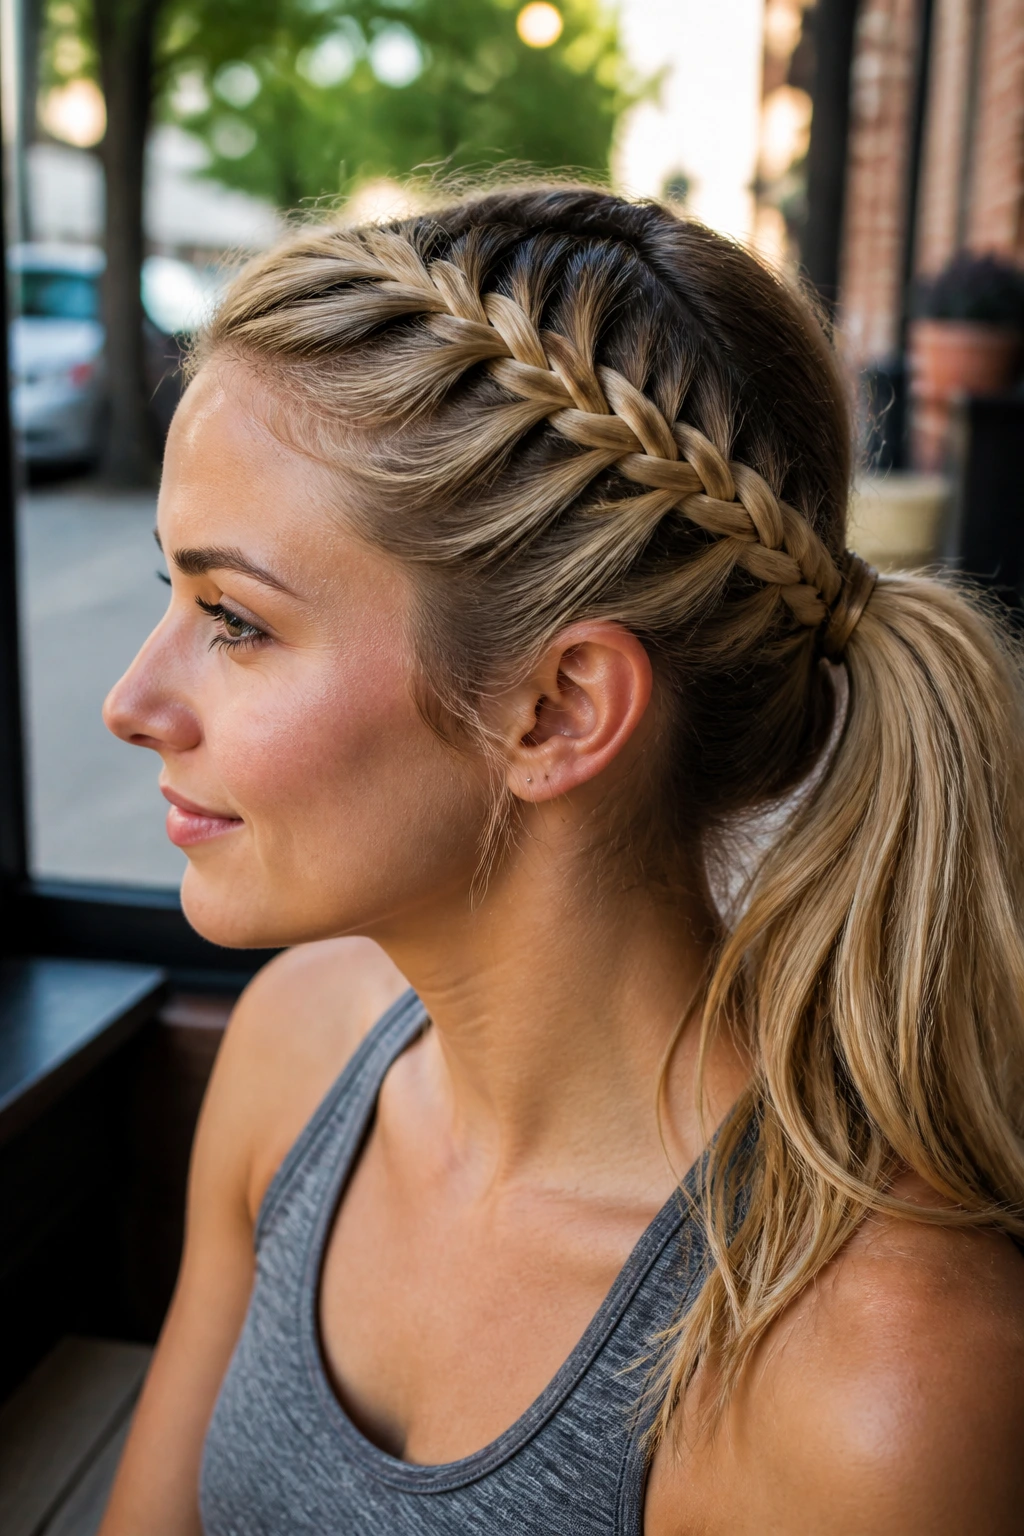
This style weaves a braid along one side of the head, feeding into a ponytail. It’s great for short-to-medium length hair that might be too short to hold a full crown braid.
Securing the Front
The side-Dutch is primarily designed to keep the fringe and layers away from your face. By weaving the hair tightly across the temple, you lock down the pieces that usually fall into your eyes when you tilt your head down.
Performance Tip
- Braid from the hairline toward the ear.
- As you move toward the back, incorporate the braid into your ponytail.
- Use a bit of hairspray on your fingertips before you braid to ensure the small hairs around your temples stay tucked into the weave.
12. The Multi-Strand Fishtail
For those with extremely thick hair, a standard three-strand braid might feel too bulky or unmanageable. A four-strand fishtail allows you to distribute the weight more evenly and create a flatter, more aerodynamic profile.
Why More Strands Mean More Control
The more sections you have in your weave, the more “locked” the braid becomes. A four-strand fishtail is significantly harder to pull apart than a standard three-strand plait. This is the heavy-duty option for extreme training conditions.
Handling the Weave
- It takes a little practice to keep four strands organized.
- Think of it as crossing the two outer strands through the middle of the two inner ones.
- Once you get the rhythm, it moves quickly, and the resulting braid is extremely tight.
13. The Headband Braid with Messy Bun
If you are worried about breakage, use a soft fabric headband as part of your weave. Braid the hair directly into the band to ensure that your hair is pulled back without too much pressure on the roots.
The Benefit of Soft Materials
By incorporating a fabric band, you avoid the tension of tight elastics that can lead to thinning at the hairline over time. It creates a “cushioned” braid that is far gentler on your scalp while remaining just as secure during a workout.
How to Execute
- Place the headband around your head like a crown.
- Start braiding small sections of hair into the headband as you work your way around.
- Pull the ends into a bun at the top of your head.
14. The Scarf-Integrated Braid
Weaving a thin, athletic-friendly scarf into your braid is not just about looks. The fabric provides extra grip and strength. If you have fine hair that struggles to hold a braid, the fabric adds the friction necessary to keep the weave from unraveling.
Choosing the Right Fabric
- Use a lightweight, synthetic material that wicks moisture. Cotton will get heavy and damp with sweat.
- Fold the scarf into a thin strip before you start.
- This style adds a layer of protection against the salt and sweat that can dry out your hair.
15. The Triple-Threat Pigtails
Divide your hair into three equal horizontal sections from front to back. Braid each section separately and then join them together at the nape. This creates a very flat, very secure “matrix” of braids that is nearly impossible to shake loose.
Structural Integrity
- This is the most secure option on the list.
- By layering three distinct braid patterns, you create a complex, interwoven structure that resists movement from every angle.
- It is perfect for activities involving lots of inversions, like yoga or rock climbing.
16. The Faux-Hawk Braid
Braid the hair along the center of the head, moving from the forehead to the nape, but leave the sides tighter and closer to the scalp. This creates the illusion of a mohawk while keeping the hair completely secure and contained.
The Athletic Advantage
- This style keeps hair away from the sides of the face, which is vital for peripheral vision.
- The tight weave along the sides prevents flyaways, while the center braid can be slightly thicker.
17. The Zig-Zag Part Dutch Braid
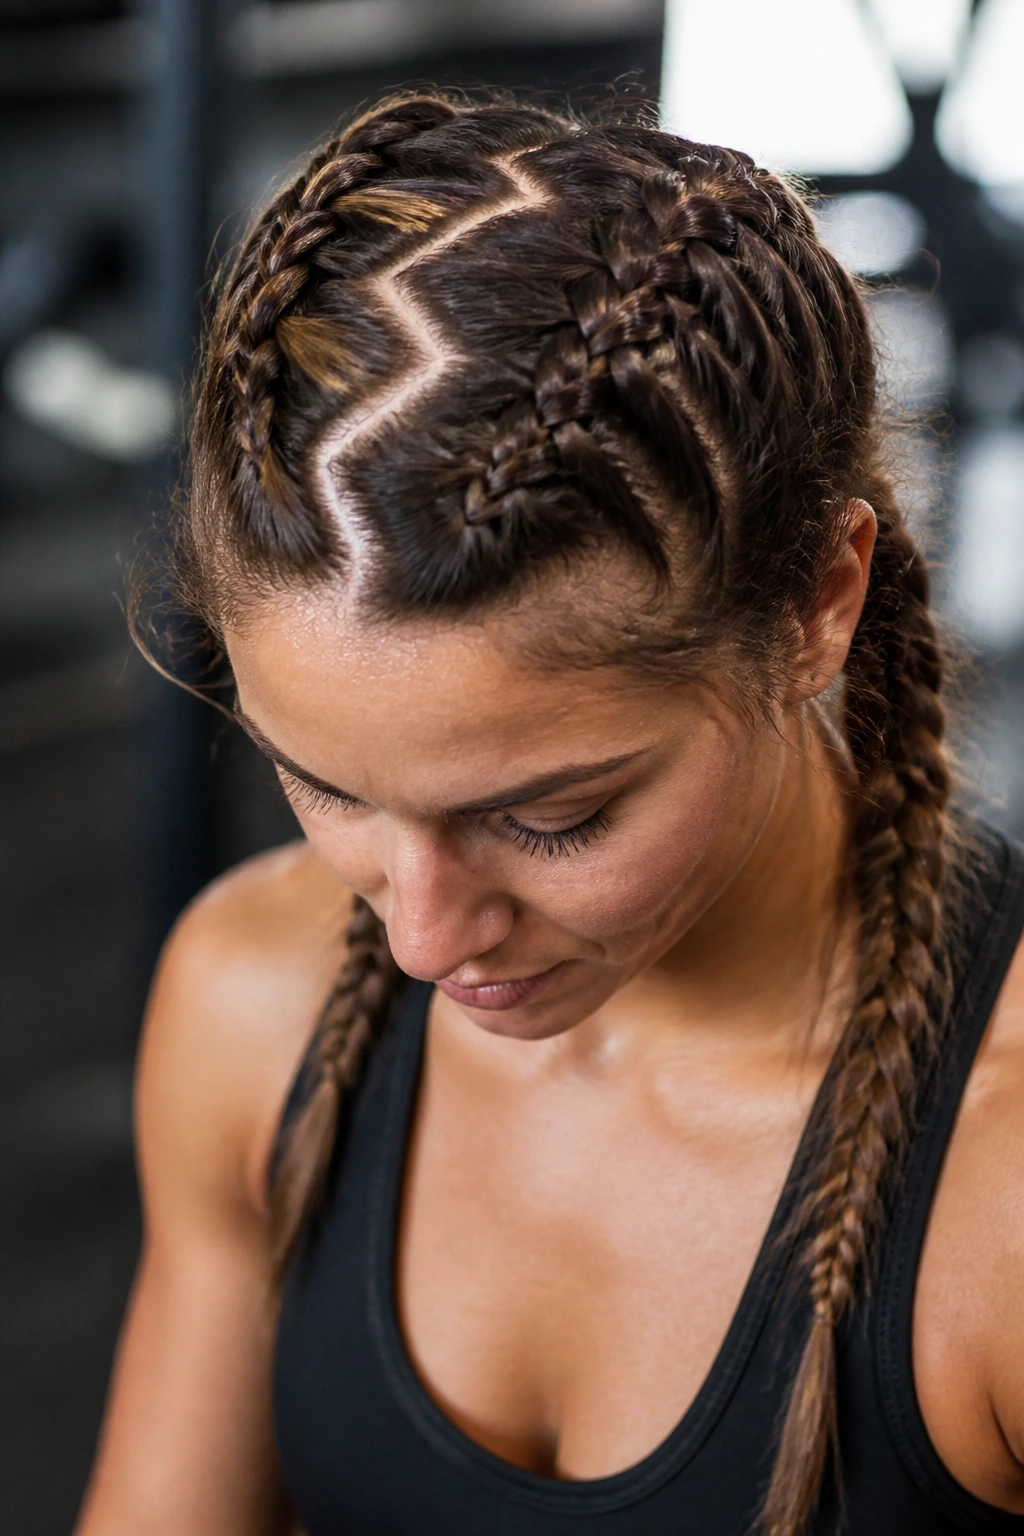
By creating a zig-zag part before you start your Dutch braids, you ensure that there is no single line of tension on your scalp. This is a subtle trick for preventing that “tight-scalp” headache that often comes from keeping your hair in the same position for a long time.
Why Varying the Tension Matters
- Hair health is about avoiding constant, repetitive strain on the same follicles.
- A zig-zag part breaks up the tension and makes the braids feel a little less “pinned back” and more comfortable for long training sessions.
18. The “Undercut” Braid
If you have long hair but want to feel like it’s short, braid the hair at the nape of your neck upward toward the crown, then fold the remaining length into a high, messy bun. It feels incredibly light and keeps your neck entirely free of hair.
The Weight-Distribution Trick
- Moving the weight of the braid from the bottom to the top makes the entire style feel lighter during a workout.
- It also keeps your neck cool, which is essential for endurance activities.
19. The Tight-Knit Side Braid
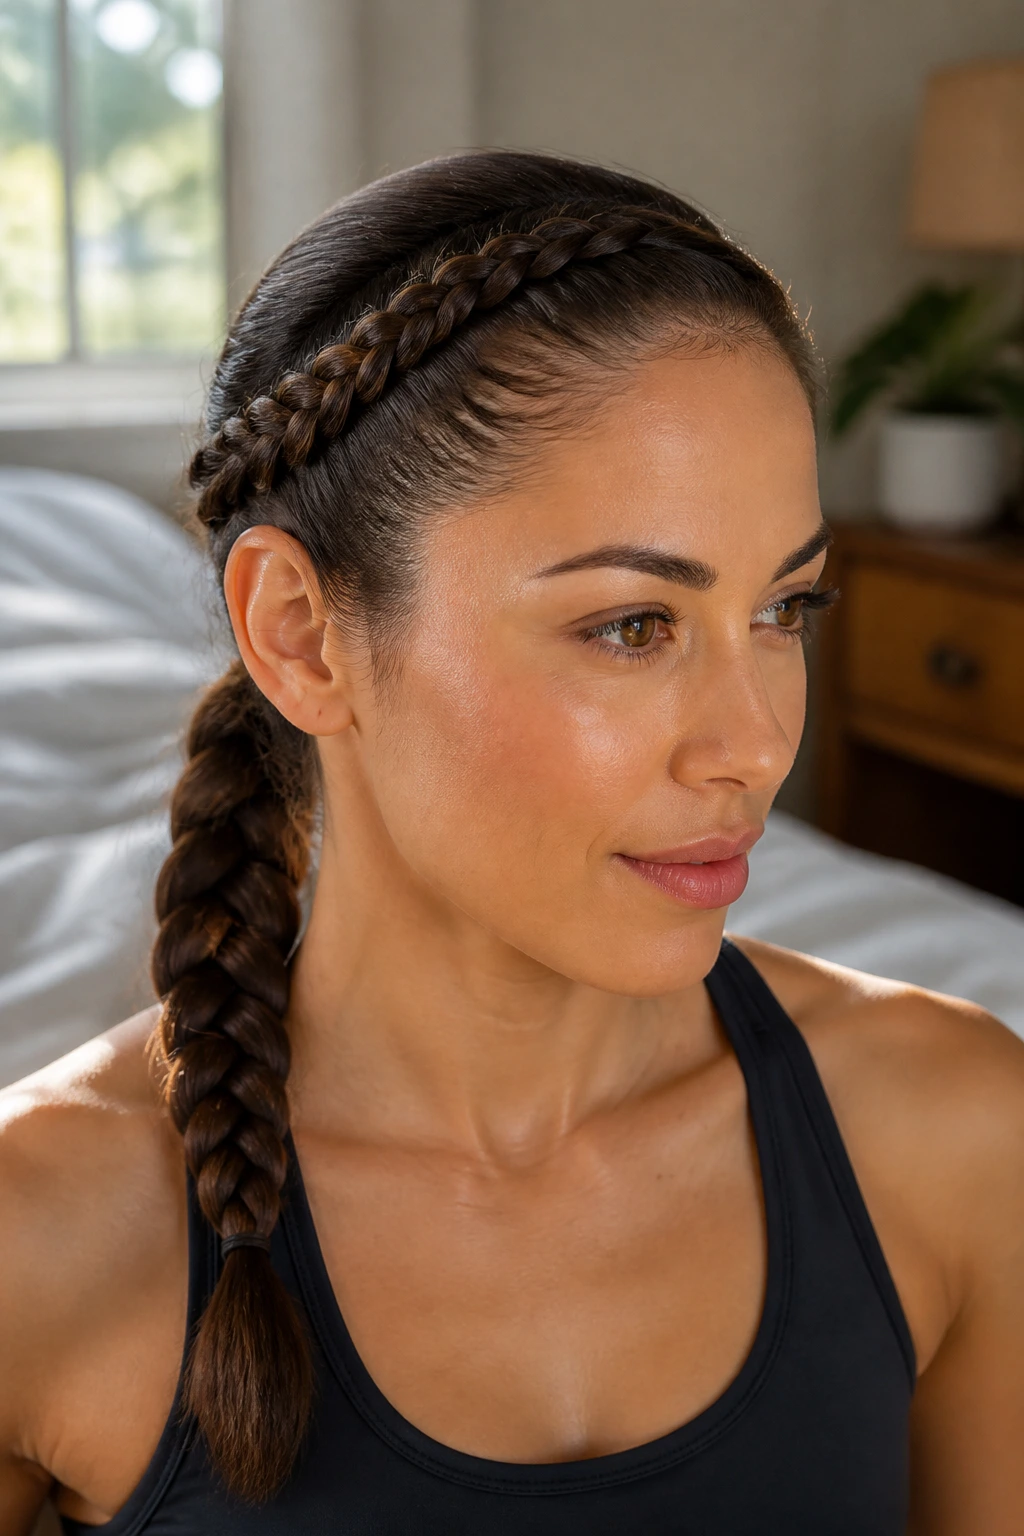
Start a standard French braid at the temple and work it down the side of the head, staying very close to the hairline. It’s a clean, simple look that works for almost any sport and takes less than two minutes to execute.
Focus on the Anchor
- The secret to this style is the first three inches.
- Get those right, and the rest of the braid will naturally follow the curve of your head.
- It’s the ultimate “grab and go” style for when you are short on time.
20. The Crown Braid with Ribbon
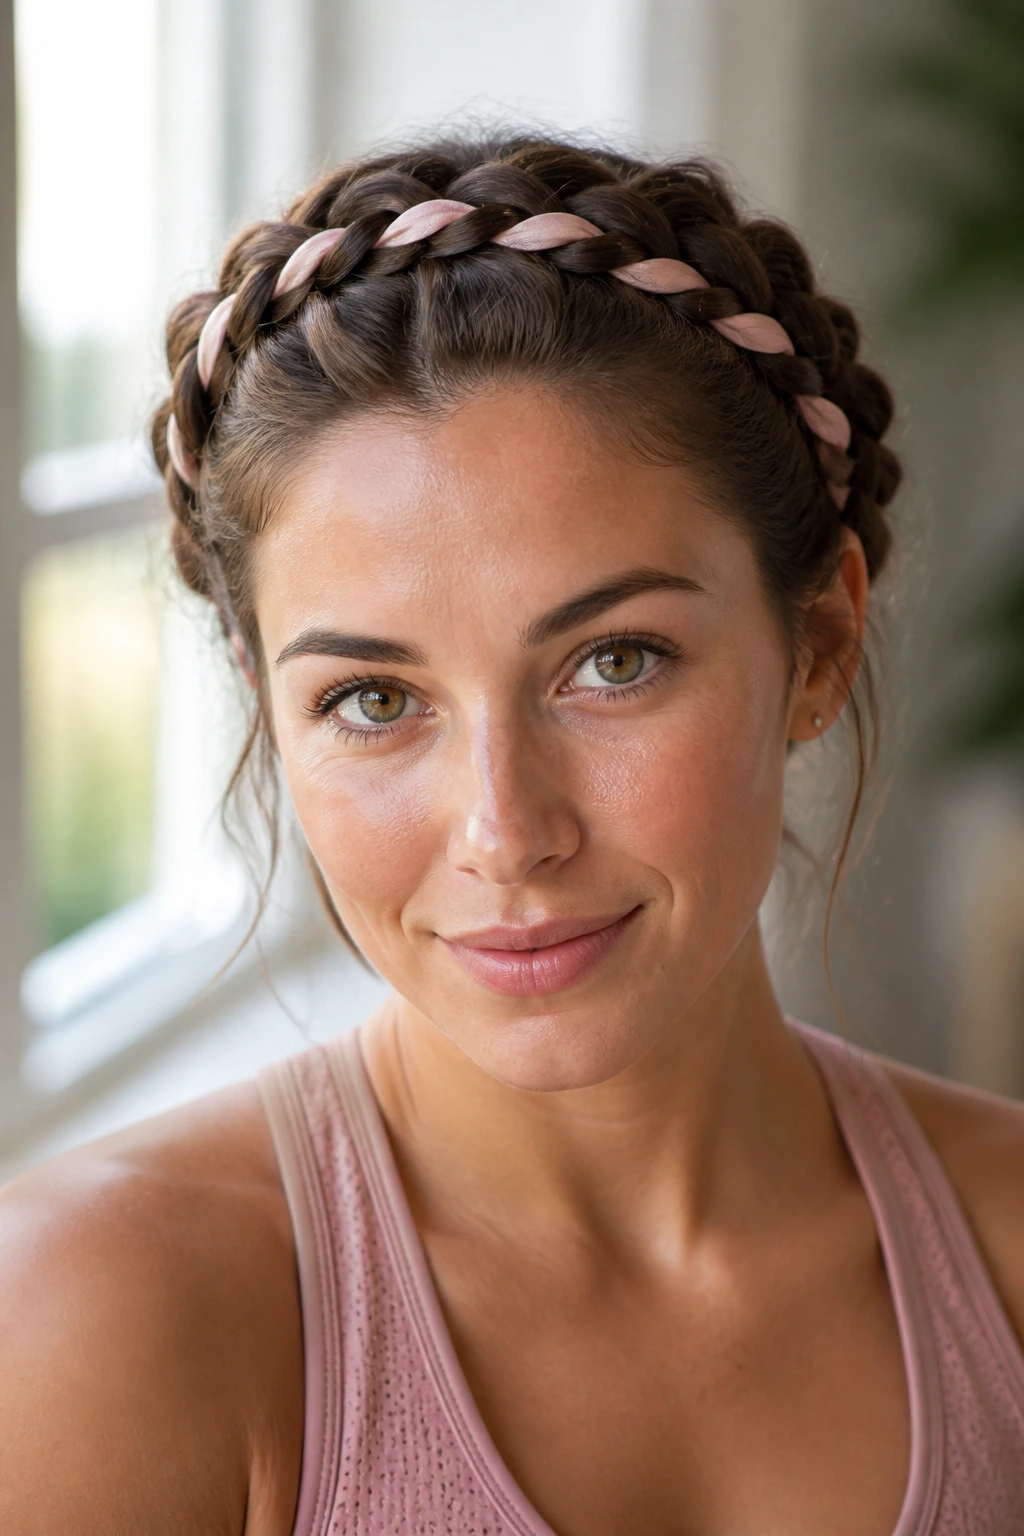
Similar to the scarf braid, using a thin ribbon provides extra structure. The ribbon acts as a tether, pulling the braid closer to the scalp. It is especially useful for those with very long hair that tends to get heavy when it’s wet with sweat.
Fabric Friction
- The ribbon provides a “grip” that hair alone lacks.
- It prevents the braid from sliding backward, which is the most common failure point for crown braids.
21. The Half-Braided Top Knot
Braid the top section of your hair—from the hairline to the crown—into a series of small, tight cornrows. Gather those into a bun along with the rest of your hair. This is the perfect compromise for those who want their face clear but don’t want to braid the entire length of their hair.
Efficiency and Speed
- You only need to braid the first few inches, which makes this a very fast option for your morning routine.
- The bun takes care of the length, keeping it contained and out of the way.
22. The Double-Wrapped Rope Braid
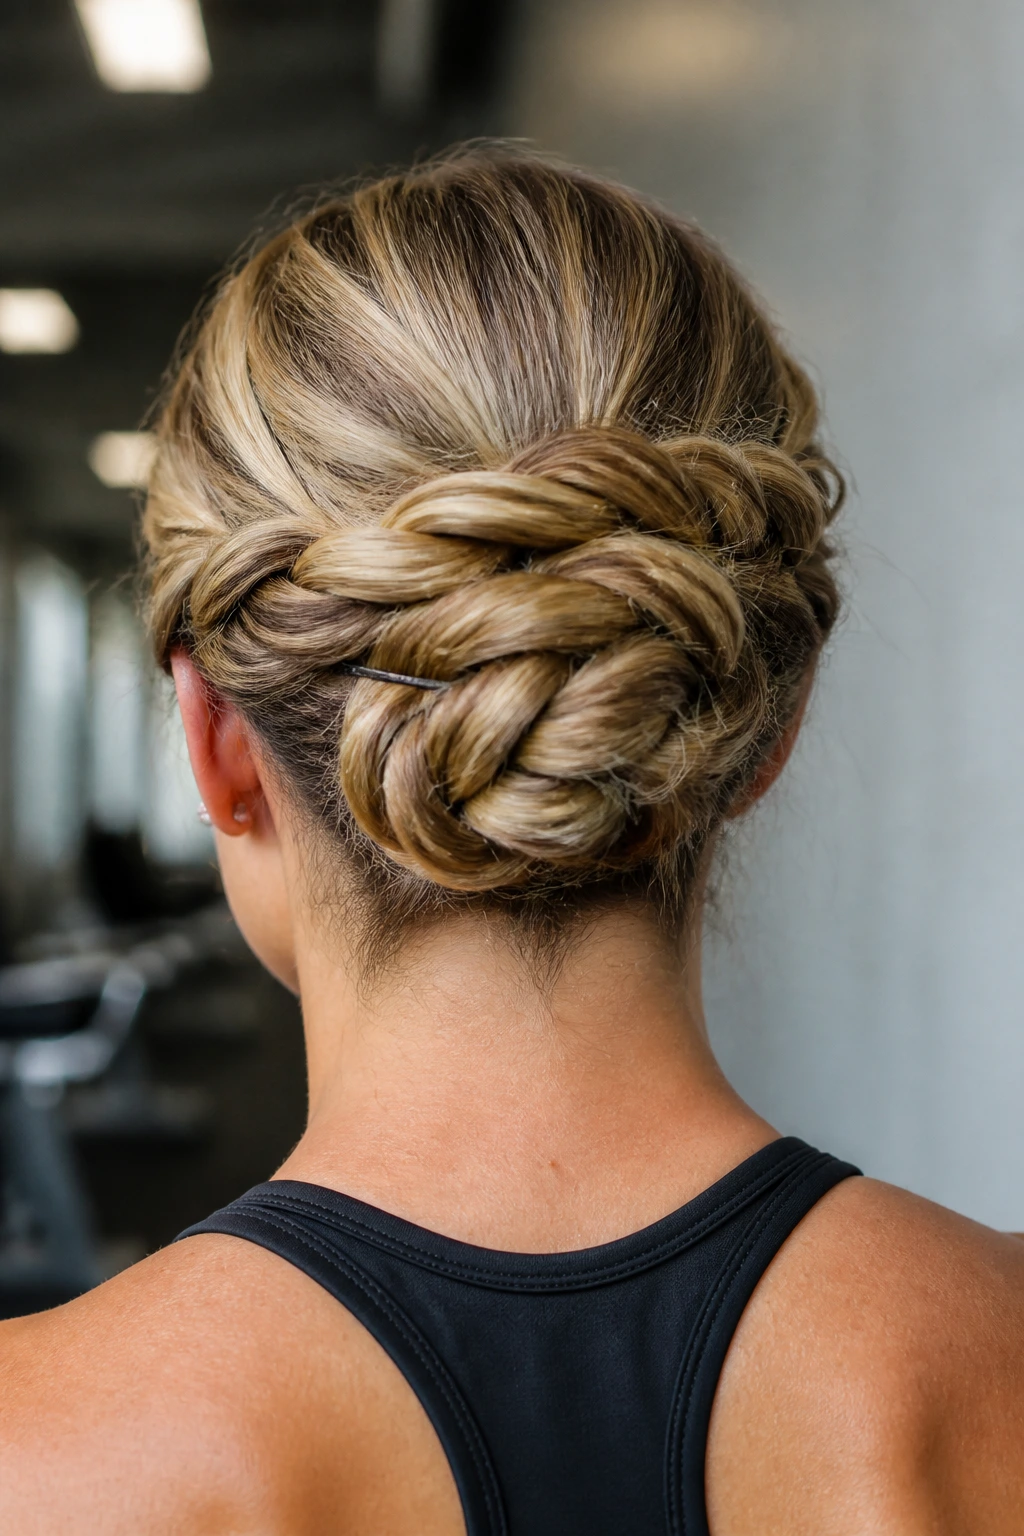
Take your two rope braids and wrap them around each other at the back of your head. Secure with bobby pins. This creates a dense, heavy coil that won’t move even if you are doing high-speed sprint work.
The Stability of the Coil
- Once the ropes are wrapped and pinned, they become a single, immovable object.
- It’s one of the most professional-looking styles that actually holds up to serious physical demands.
Final Thoughts
When you’re choosing a weave for your workout, the primary goal should always be structural integrity. Look for styles that anchor the hair close to the scalp, distribute tension across the entire head, and eliminate loose ends that can whip around or stick to your skin. Remember, the best workout hair is the kind you can do in under five minutes, secure firmly with durable materials, and leave alone until you’re back in the locker room. Don’t be afraid to experiment with adding a bit of product or using stronger elastics—sometimes a little extra grip is the difference between a focused workout and a constant battle with your hair. Most importantly, keep the braid tight, keep the parts clean, and let your hair handle the movement with you.