Finding a hairstyle that balances effort and impact is the holy grail of morning routines. Most of us want something that looks like it took thirty minutes but actually required less than ten. When your hair feels right, the rest of your look tends to fall into place. Whether you are dealing with second-day texture, a hectic commute, or just a desire to keep hair off your neck, the right technique changes the game entirely.
1. The Undone French Twist
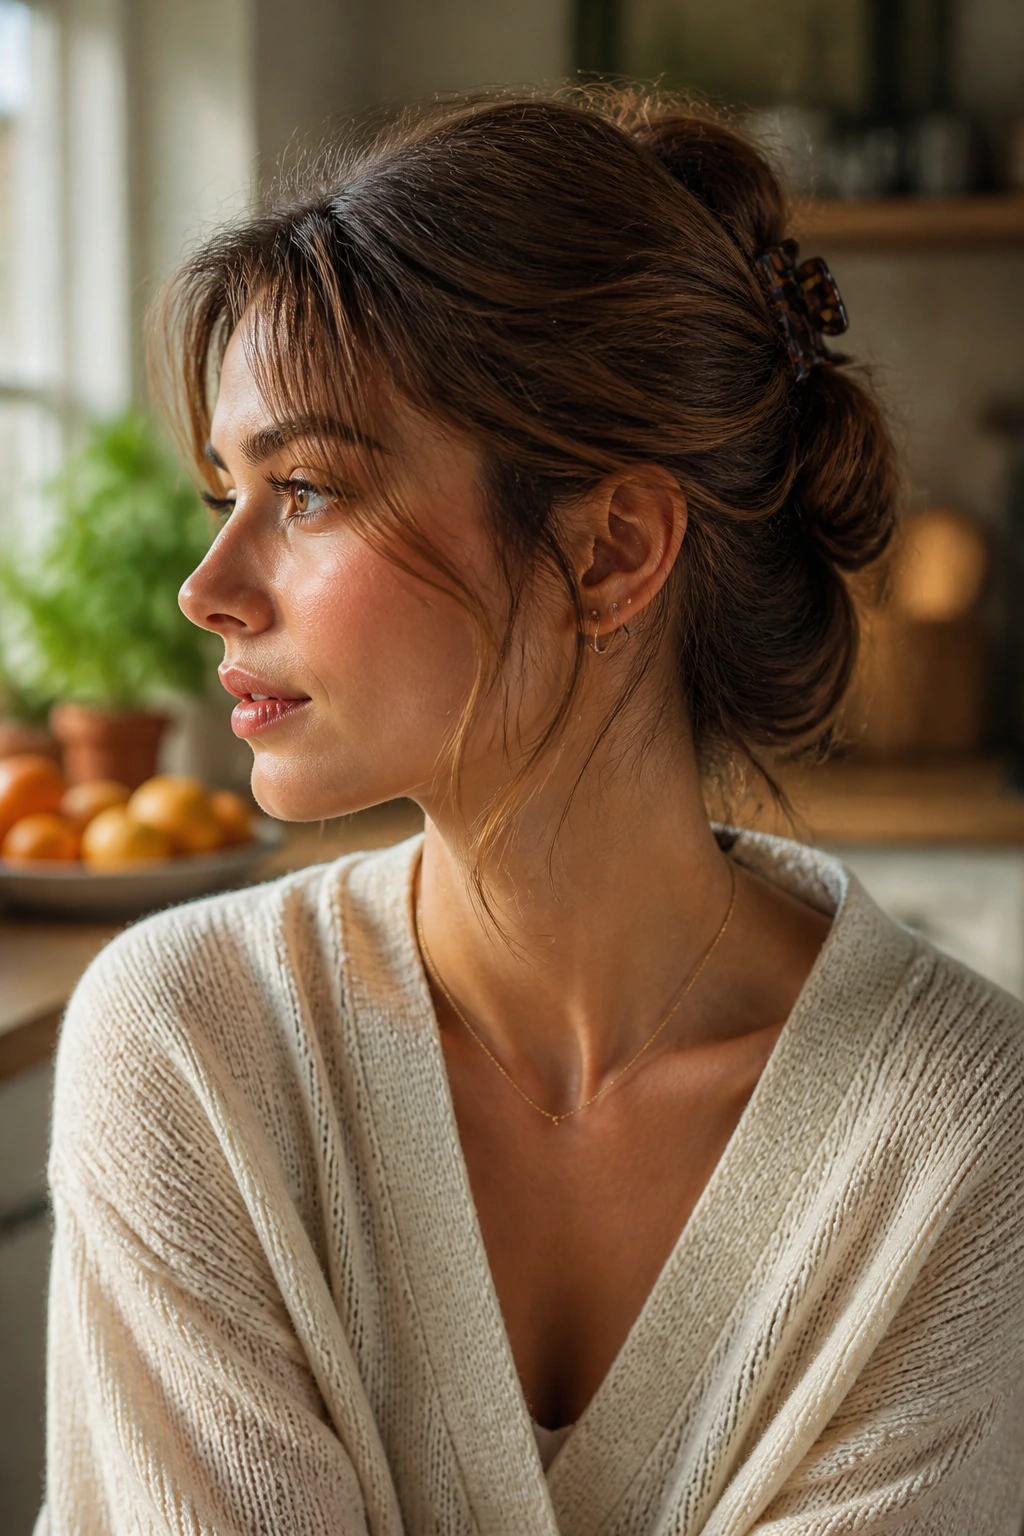
The French twist is often associated with formal galas or stuffy offices, but the secret to wearing it every day is to reject the idea of perfection. You do not need a hairspray-laden, rock-hard shell of hair to make this work. Instead, start with a light texturizing spray to give your strands some grip—clean, silky hair is actually the enemy of a good updo.
Mastering the Casual Roll
Gather your hair at the nape of your neck as if you are making a low ponytail. Begin twisting the hair upward, keeping it relatively loose. Tuck the tail of the hair into the twist itself, and secure it with a large, matte-finish claw clip rather than a dozen hidden bobby pins. Leave a few wispy strands around your face to soften the silhouette. The goal is to look like you just twisted it up while waiting for your coffee to brew.
Why This Style Succeeds
- It keeps hair completely off the neck during warmer months.
- A claw clip provides a secure hold without the tension headaches associated with tight hair ties.
- It transitions perfectly from a casual morning at home to a professional environment.
Pro tip: If you have layers that keep falling out, hit them with a quick blast of dry shampoo before twisting. The added friction keeps the hair in place far better than any smoothing serum.
2. The Classic Silk Scarf Wrap
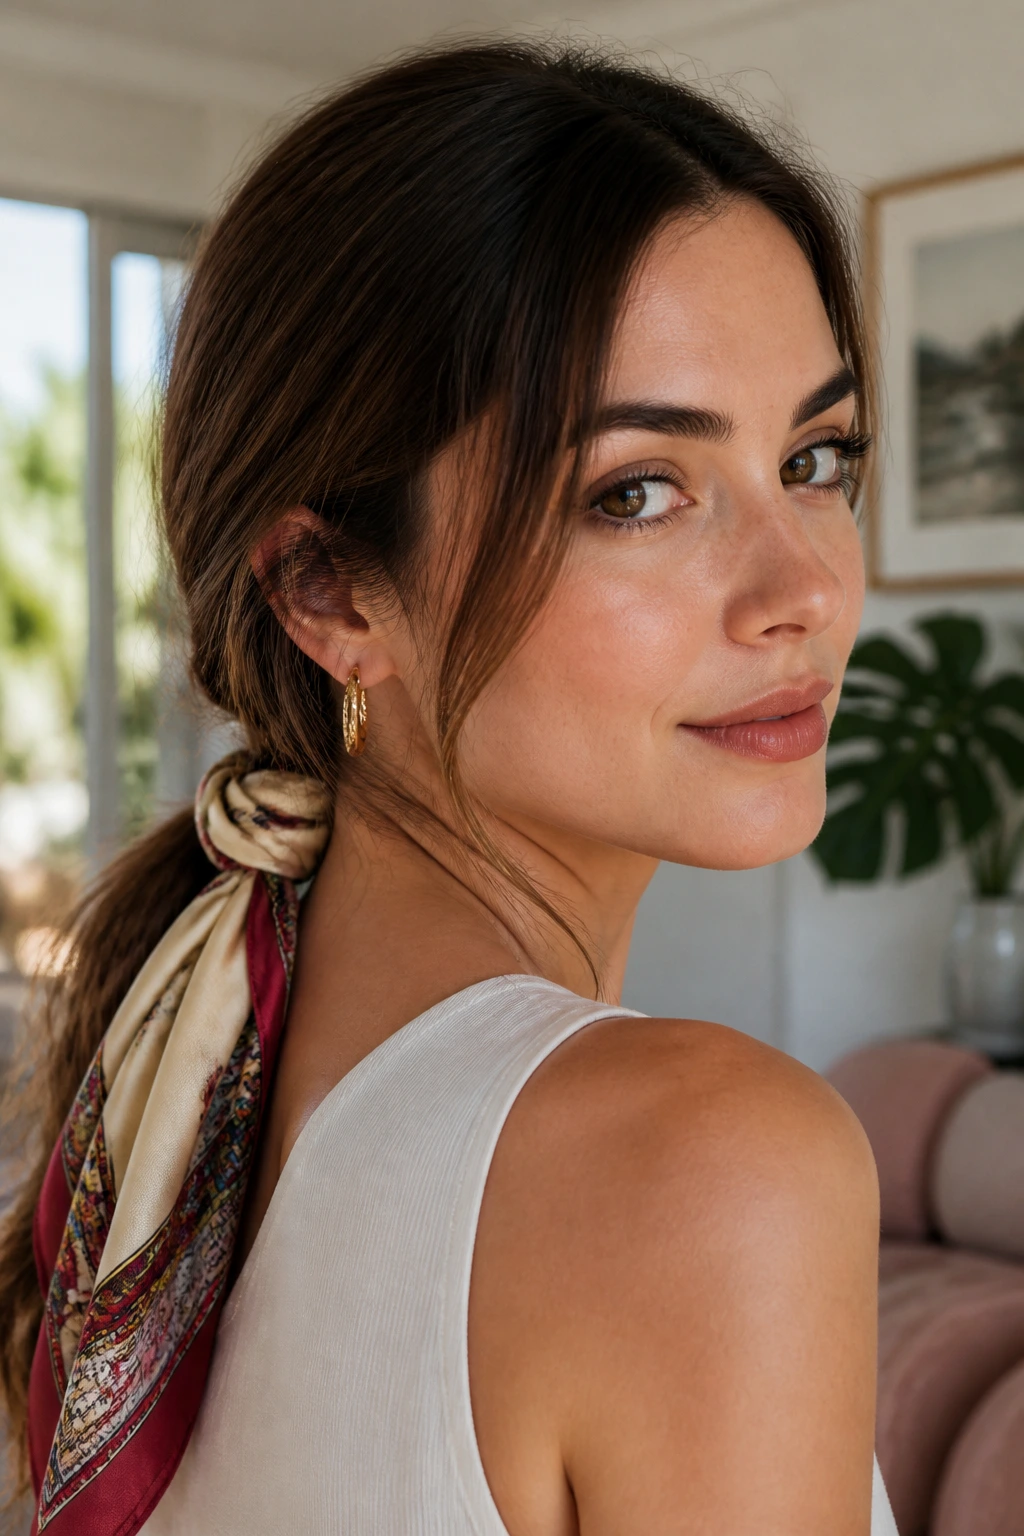
When you are dealing with a bad hair day or simply want to add a punch of color to your outfit, a silk or satin scarf is an unbeatable tool. This is not about wrapping your hair like a turban in a rigid fashion; it is about integrating the fabric into your natural style. You can weave a scarf into a low braid, tie it around the base of a ponytail, or use it as a headband to push back bangs that refuse to cooperate.
How to Style the Scarf
Fold your scarf into a long, thin band. If you are wearing a ponytail, tie the scarf over the elastic so that the ends hang down the back, mingling with your hair. If you prefer a headband style, fold it wide and place it at your hairline, tying it underneath your hair at the nape of the neck. Always opt for silk or satin to minimize friction, which helps prevent the breakage that cotton elastics often cause.
The Benefits for Hair Health
- Satin and silk materials prevent the frizz-inducing friction common with synthetic hair ties.
- They hide greasy roots effectively while looking intentional and styled.
- They allow for endless versatility; you can match your scarf to your outfit’s color palette.
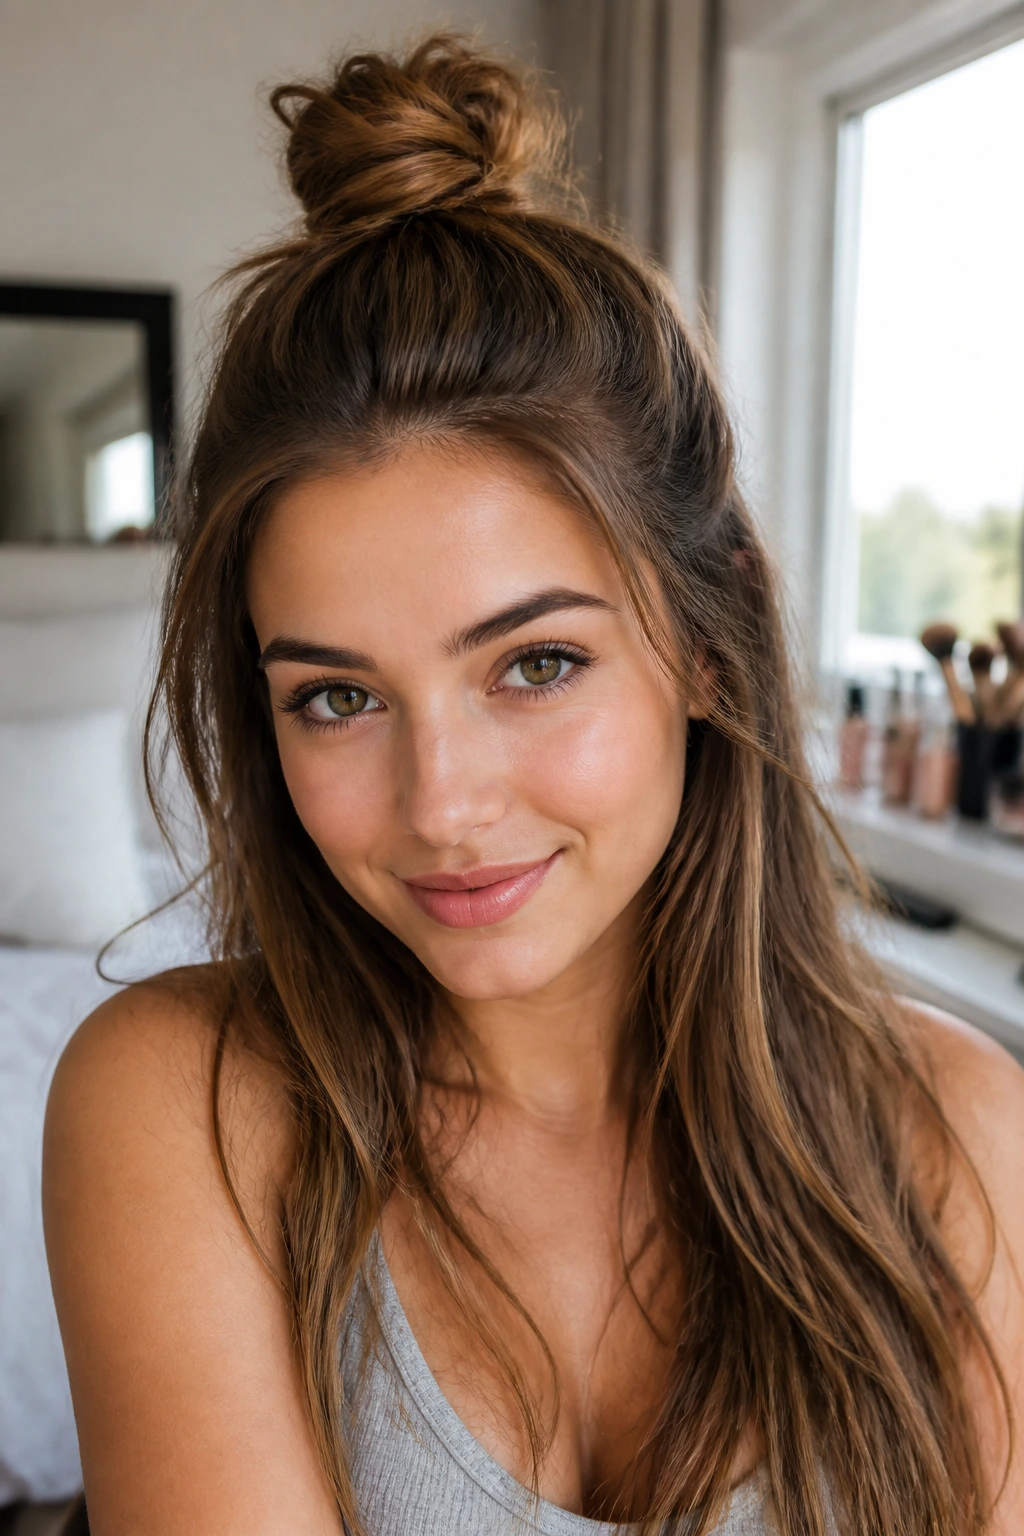
3. The Messy Top Knot
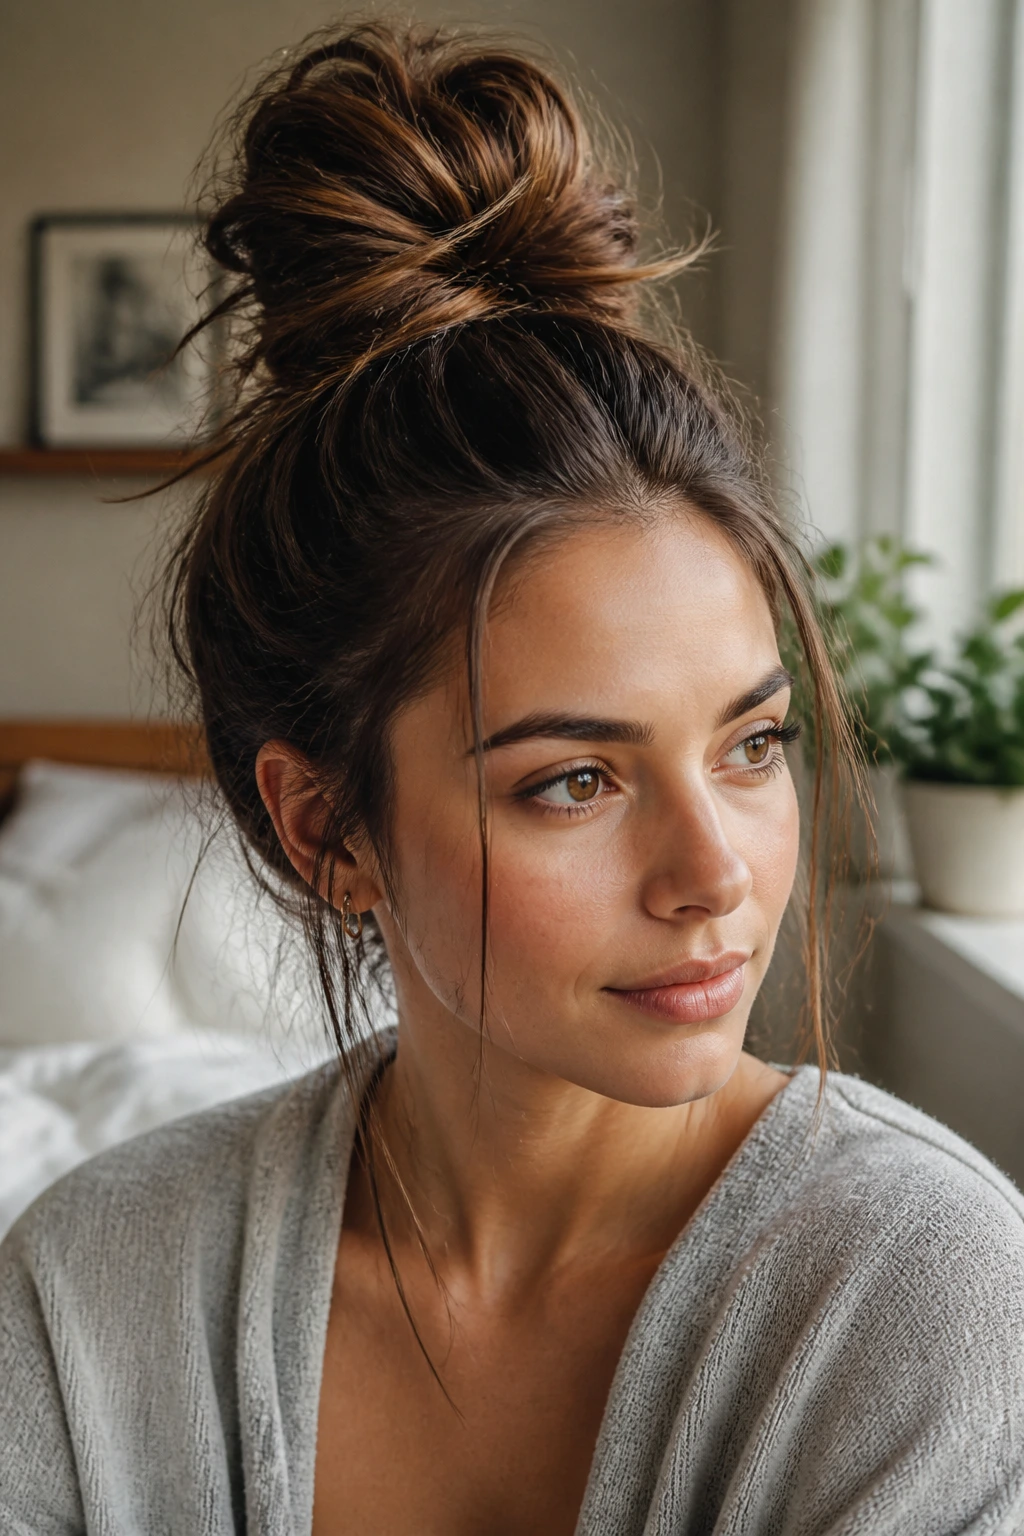
The top knot has endured as a staple for a reason: it is the ultimate “get it done” hairstyle. However, the difference between a chic top knot and one that looks like you just rolled out of bed lies in the placement and the finish. Most people place their knot too low on the head, which can drag down the features. Aim for the crown of your head, where the angle is more flattering.
Building the Perfect Base
Gather your hair high on your head, using your fingers instead of a brush to maintain some natural volume and bumpiness. Pull the hair through an elastic halfway, then twist the remaining length around the base. Secure it with a second elastic or a few large pins. Tug gently at the sections around your face and the knot itself to loosen it. You want it to look lived-in, not stiffly constructed.
Common Mistakes to Avoid
- Tying it too tight: A sleek, pulled-back top knot can cause traction alopecia over time. Keep it loose enough that you don’t feel a pull at your scalp.
- Neglecting the texture: If your hair is too straight and fine, the knot will look skimpy. Always use a little sea salt spray or dry shampoo to fluff the hair before you start pulling it up.
4. The Half-Up Claw Clip Look
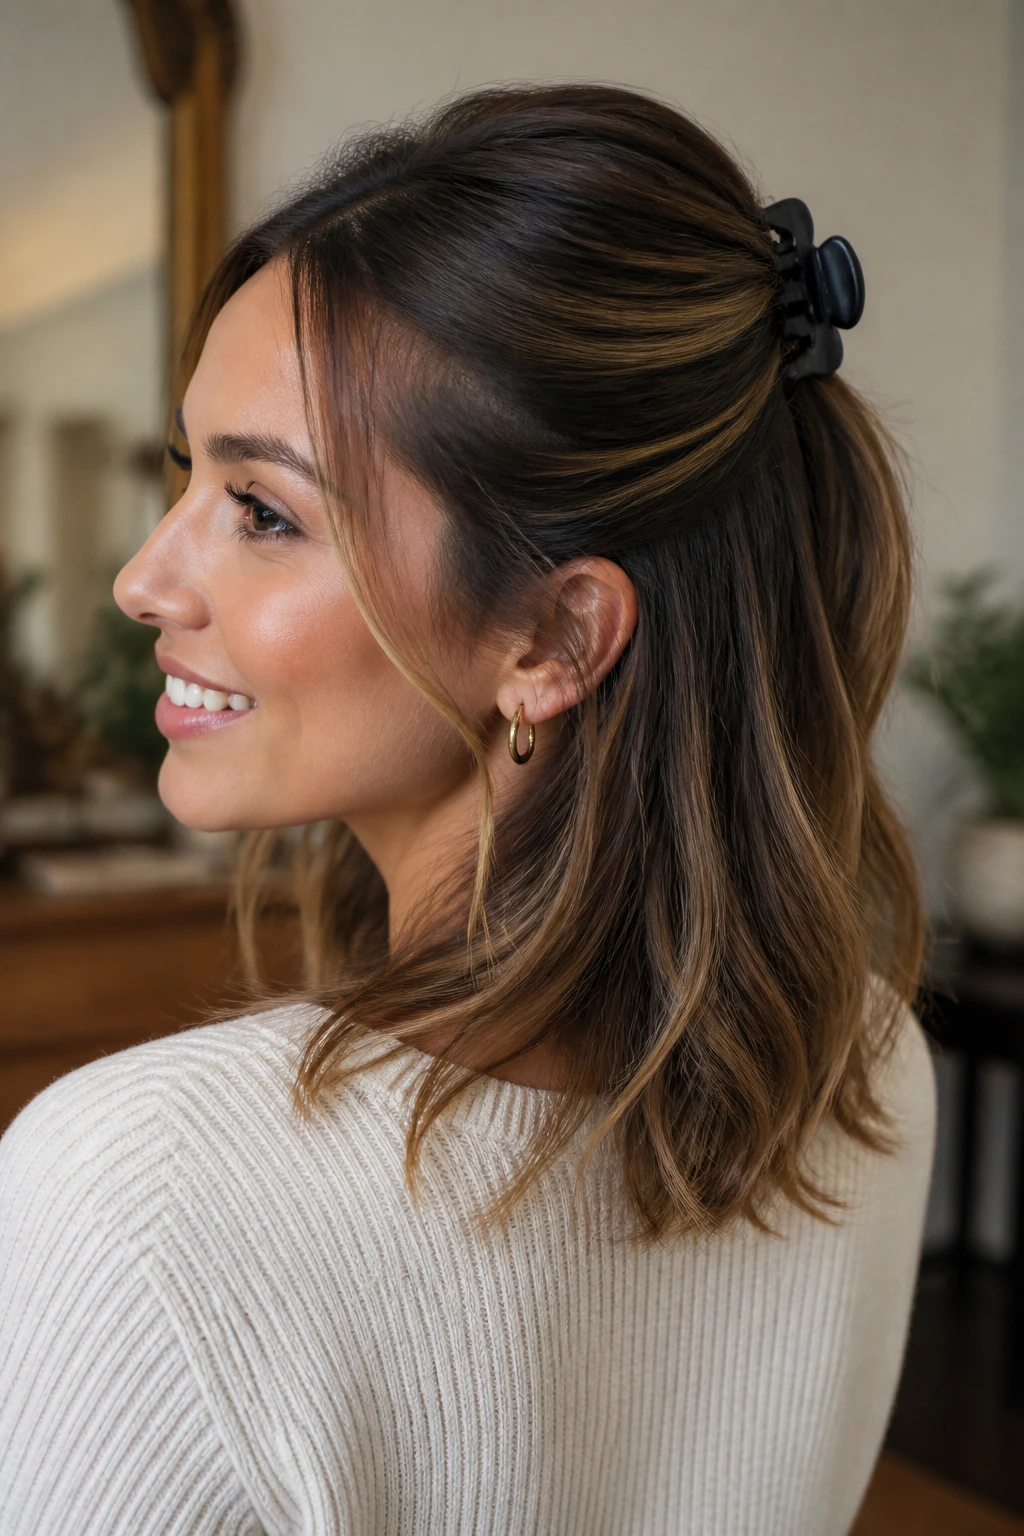
This is the modern successor to the school-girl barrette. It is fast, easy, and works across almost every hair length, from chin-length bobs to long, layered tresses. The beauty of the claw clip is that it does not create the sharp, damaging dent that a tight ponytail holder does.
Achieving the Half-Up Sweep
Section off the top half of your hair—the part that starts from your temples and goes back to the crown. Give this section a slight twist before gathering it at the back. Instead of pulling it tight, push the hair slightly forward before clipping it to create a bit of volume at the top. This prevents the “flat head” look that often plagues this style.
Why It’s a Daily Go-To
- It keeps hair out of your eyes while maintaining the length you like to show off.
- It is incredibly quick to execute, making it ideal for those mornings when you are running late.
- It works with almost any outfit, from an oversized sweater to a structured blazer.
5. The Low, Twisted Ponytail

If you find the standard ponytail a bit boring, a simple twist can upgrade the entire look. The low ponytail is sophisticated and sits perfectly at the base of the skull. By adding a twist, you add a layer of detail that makes it look like you put more effort into your hair than you actually did.
Creating the Twist
Part your hair in the middle or on the side, depending on your preference. Take a two-inch section from the front of your hairline on each side and twist them backward toward the nape of your neck. Bring both twisted sections together with the rest of your hair and secure the entire bundle with a fabric-covered elastic. You can wrap a small strand of hair around the elastic to hide it for a more polished effect.
When to Use This Style
- When you have a meeting or event where you need to look put-together but don’t want to spend time on a complex hairstyle.
- When your hair is between washes and you need to smooth down the front sections without washing the whole head.
6. The Braided Headband
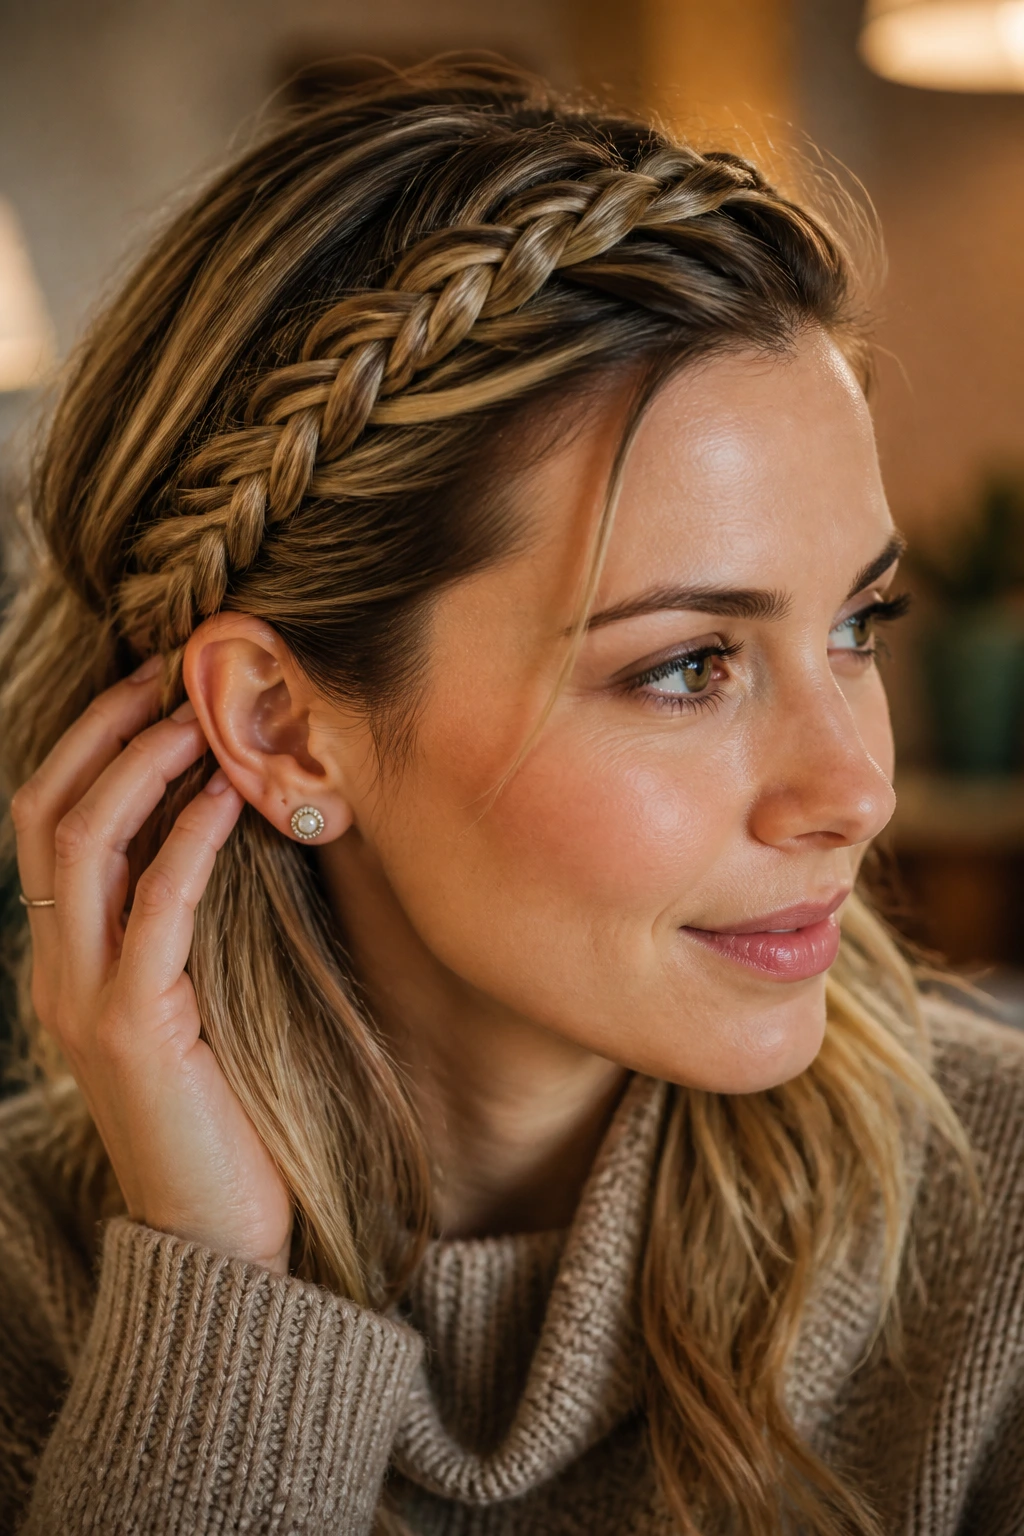
This is a fantastic option if you have medium-to-long hair and want to keep your bangs or front layers off your face. It takes a little bit of practice, but once you get the hang of a simple Dutch or French braid, it becomes a five-minute habit. You are essentially creating a natural accessory out of your own hair.
The Step-by-Step Approach
Start by parting your hair deeper on one side. Take a section of hair from the side with more volume and begin a French braid, pulling in small pieces of hair as you work your way across your hairline toward the opposite ear. Once you reach the other side, secure the end of the braid with a tiny clear elastic and pin it behind your ear, tucking it under the loose hair.
Tips for Success
- Use grit: If your hair is freshly washed and slippery, use a little texturizing powder along the part to give your fingers something to hold onto.
- Loosen the braid: After pinning it in place, gently tug at the loops of the braid to make it look fuller and more relaxed.
7. The Slicked-Back Bun
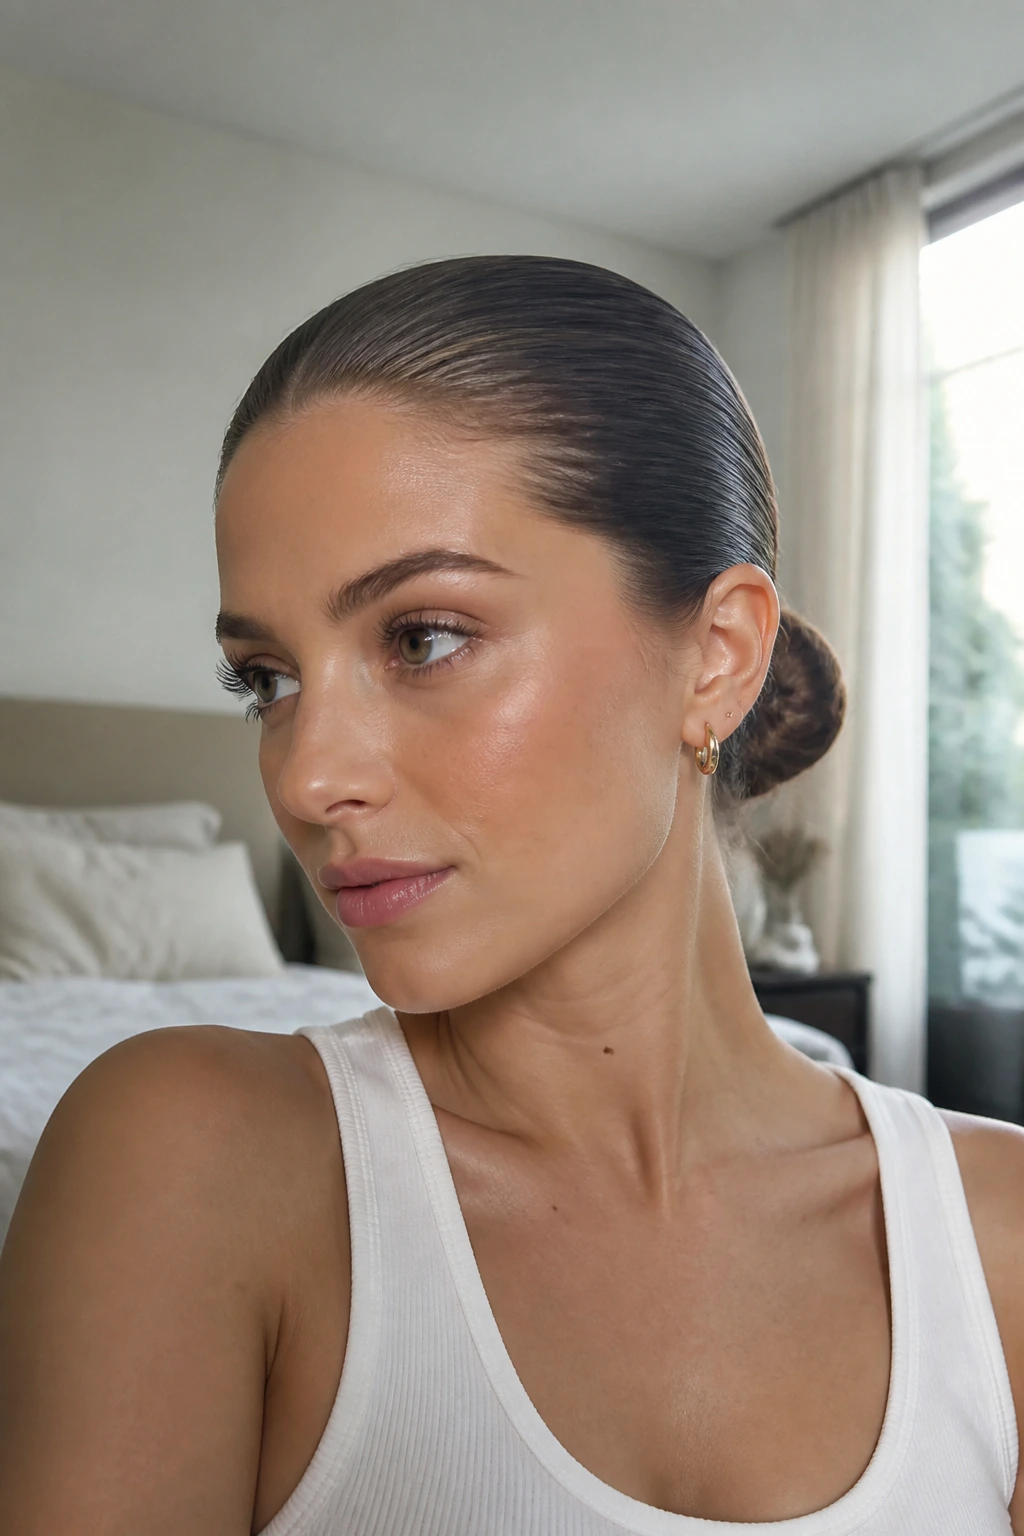
Sometimes you just need to lean into the “clean girl” aesthetic. This style is perfect for hair that is on its second or third day post-wash. The key here is to use a bit of product—either a lightweight pomade or a drop of hair oil—to smooth out any flyaways while pulling the hair into a sleek, low knot at the nape of your neck.
Getting the Sleek Finish
Brush your hair back from your forehead, using a boar-bristle brush to distribute natural oils and create that glass-like shine. Gather the hair low and twist it into a tight bun. Secure it with a strong hair tie. The secret is the brush. If you don’t have a good brush, you won’t get that clean, smooth look that makes this style so popular.
Why This Style Works
- It is the ultimate solution for greasy roots.
- It looks intentionally polished, even if your hair is quite dirty.
- It pairs well with statement earrings, as it keeps your ears and neck completely clear.
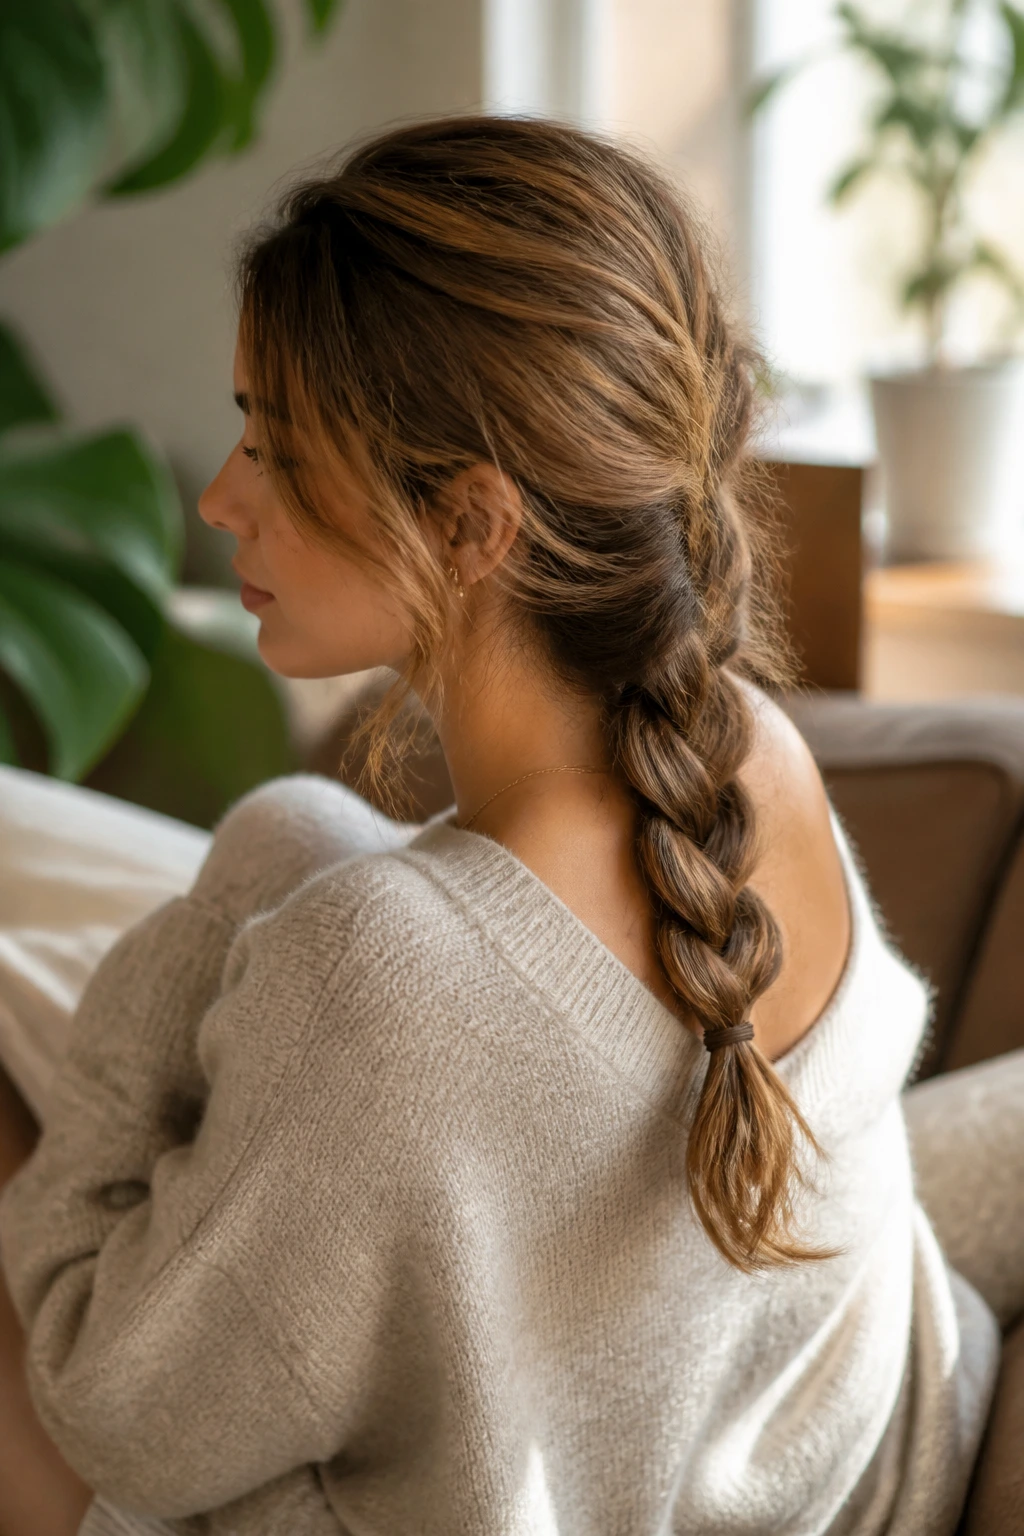
8. The Messy Bubble Braid
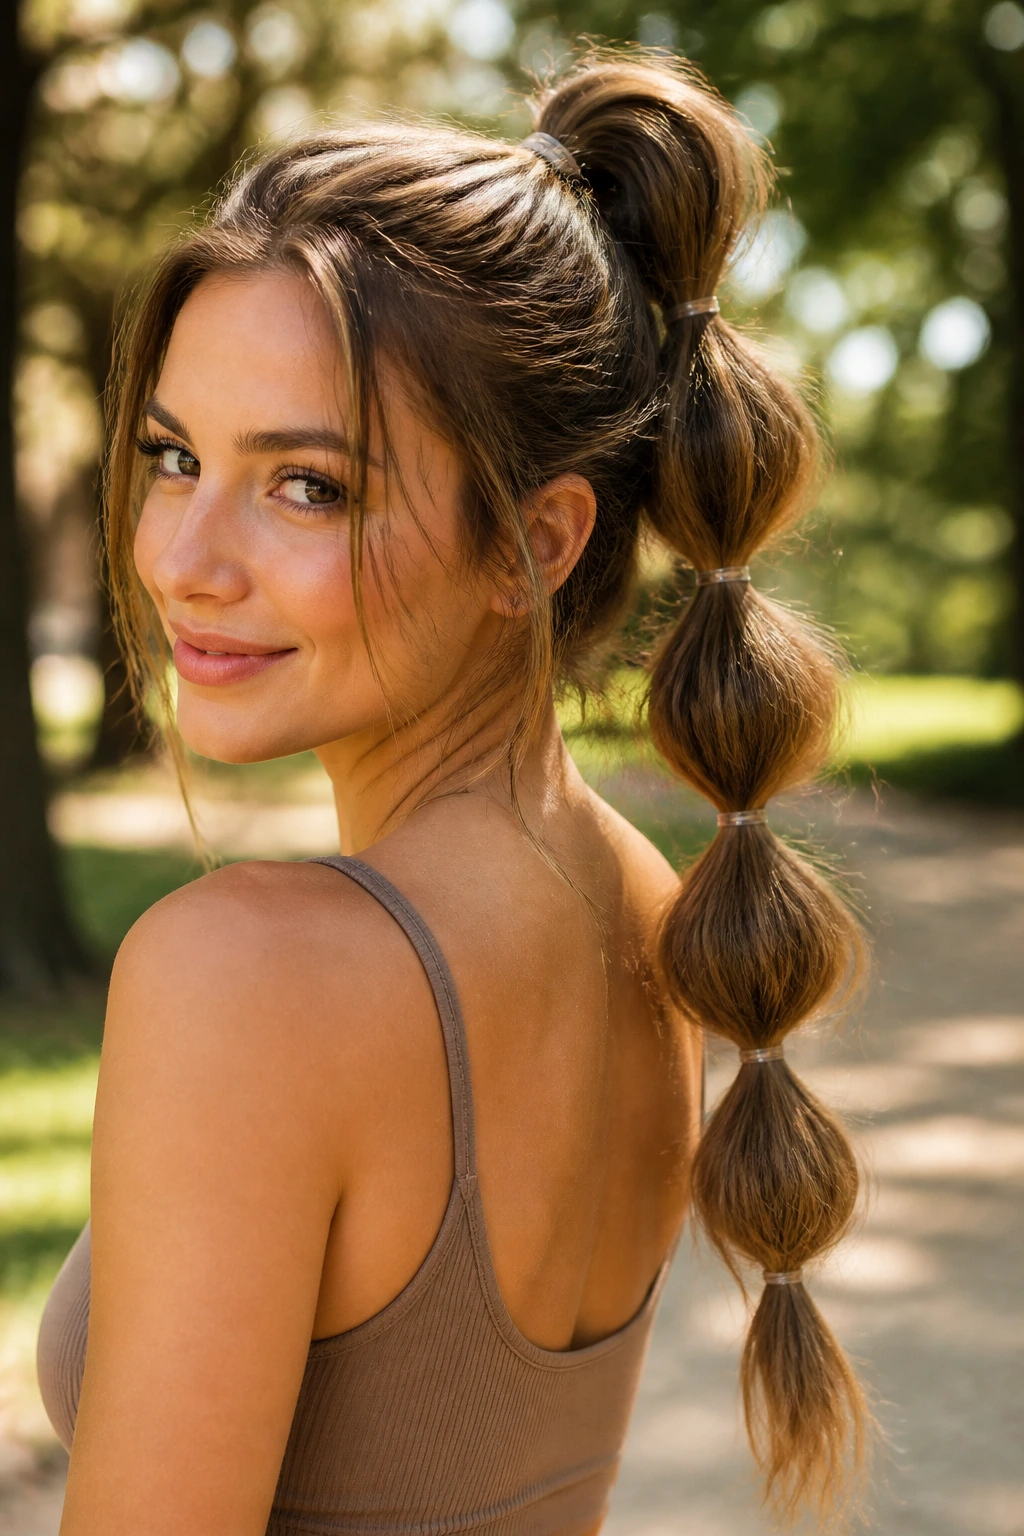
The bubble braid looks much more complicated than it actually is. It’s essentially a series of ponytails stacked on top of each other. It’s playful, voluminous, and great for hair that has a bit of natural wave or texture to it.
How to Build the Bubbles
Start by putting your hair into a high ponytail. Every two or three inches down the length of the ponytail, place another small, clear elastic. Between each elastic, pull and tug at the hair to create a rounded, “bubble” shape. Continue this all the way to the ends of your hair. The more you pull at the sections, the more volume you create.
Why It’s a Favorite
- It works wonders on thin hair that needs the illusion of extra thickness.
- It is a conversation starter and looks far more artistic than a standard braid.
- You can vary the size of the bubbles for a different look every time.
9. The Ribbon-Tie Pony
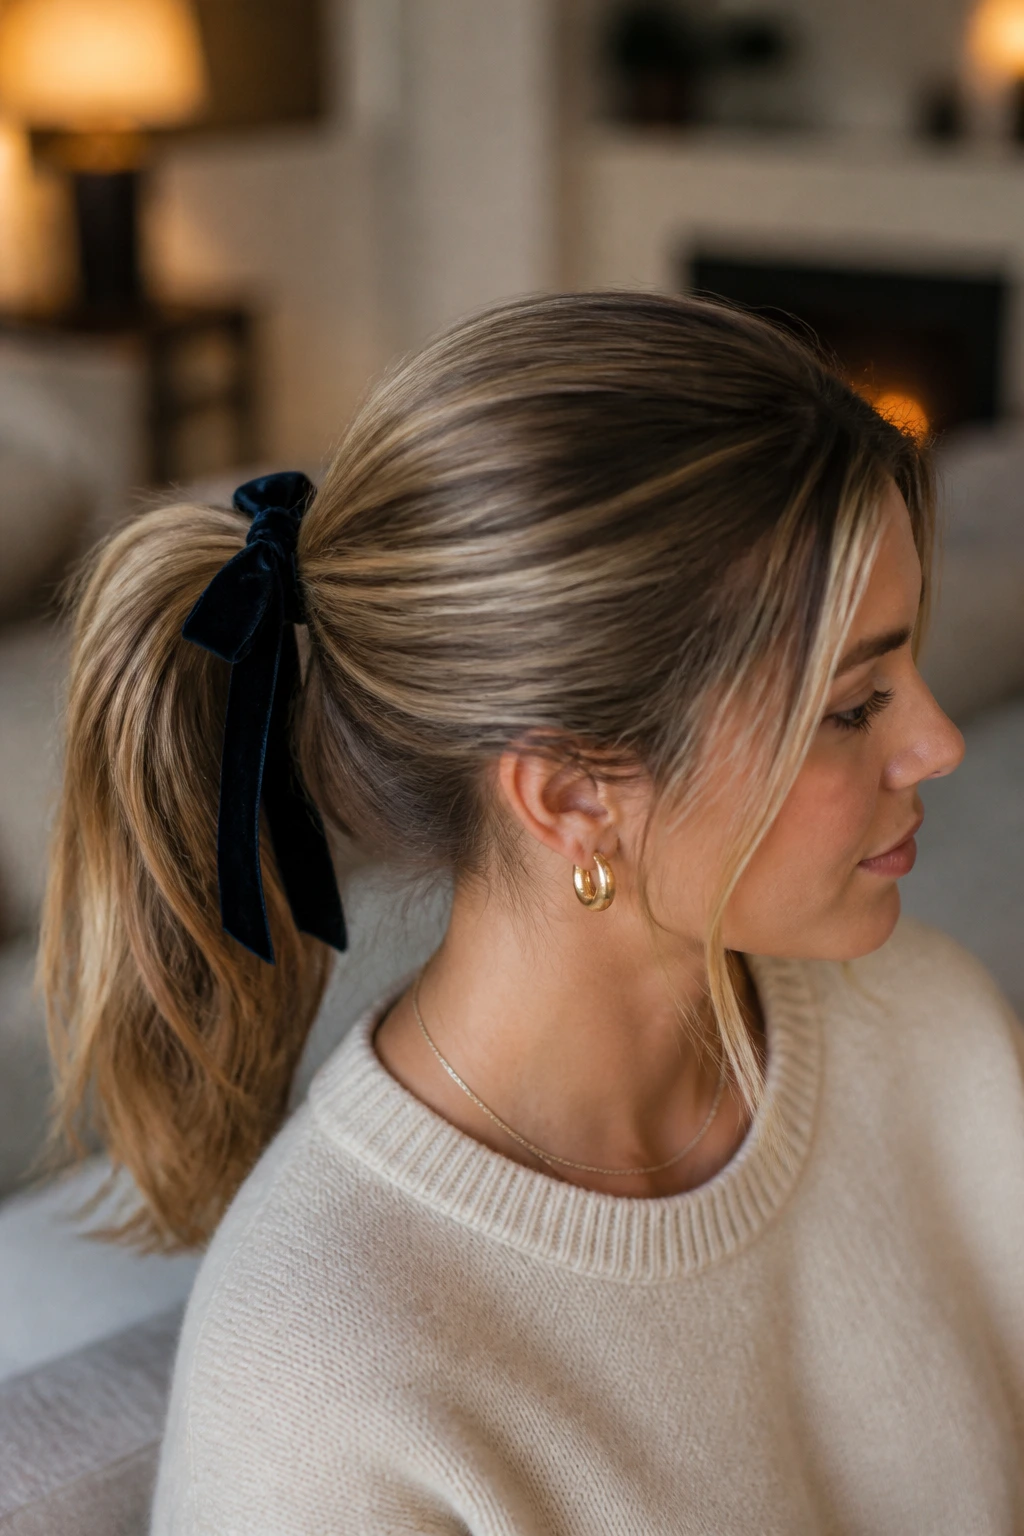
Ribbons have made a comeback, and for good reason. A simple velvet or silk ribbon tied around a ponytail instantly makes the most basic style look purposeful. It is the easiest way to dress up your hair without needing any styling tools like irons or blow-dryers.
Styling the Ribbon
Pull your hair back into a mid-height ponytail. Secure it with a thin elastic first, then take a piece of ribbon—about 12 to 18 inches long—and tie it over the elastic. You can tie it in a simple knot or a bow. If you want a more romantic look, leave the ends of the ribbon long so they cascade down with your hair.
Why It’s Effective
- It adds a pop of color or texture to any outfit.
- It’s very gentle on the hair, especially if you avoid tying it too tightly.
- It takes less than thirty seconds to add to an existing ponytail.
10. The Tucked-Under Faux Bob
If you have long hair but are craving a shorter look for a few hours, the faux bob is your best friend. This style gives you the illusion of a chin-length cut without the commitment of a haircut. It is surprisingly elegant and looks great with a turtleneck or collared shirt.
Creating the Illusion
Create a loose, low ponytail at the very end of your hair. Roll the ponytail under toward your neck and tuck it securely against the nape, pinning it in place with several bobby pins. Pull a few pieces out around your face to frame it. The goal is to hide the length of the ponytail entirely beneath the bulk of your hair.
Tips for Success
- Use a mirror to ensure you are hiding the ponytail ends properly.
- If you have very long, thick hair, you may need a larger claw clip or a strong headband to help keep the rolled hair against your neck.
11. The Half-Up Top Knot
This is a hybrid of the half-up style and the top knot. It’s casual, trendy, and keeps your front pieces from hitting your face. It is especially popular for those who have bangs that they are trying to grow out, as it keeps the fringe secured away from the eyes while allowing the rest of the hair to flow free.
Assembling the Style
Section off the top section of your hair at the crown. Instead of pinning it down, twist it into a small, messy bun and secure it with a small elastic. Leave the rest of your hair down. You can choose to leave the bun very tight and sleek, or messy and loose depending on your vibe for the day.
Best Hair Types for This Style
- It is ideal for wavy or curly hair, as it showcases the texture of the hair left down.
- It works well on fine hair because the half-up bun adds volume to the crown.
12. The Side-Swept Braided Pony
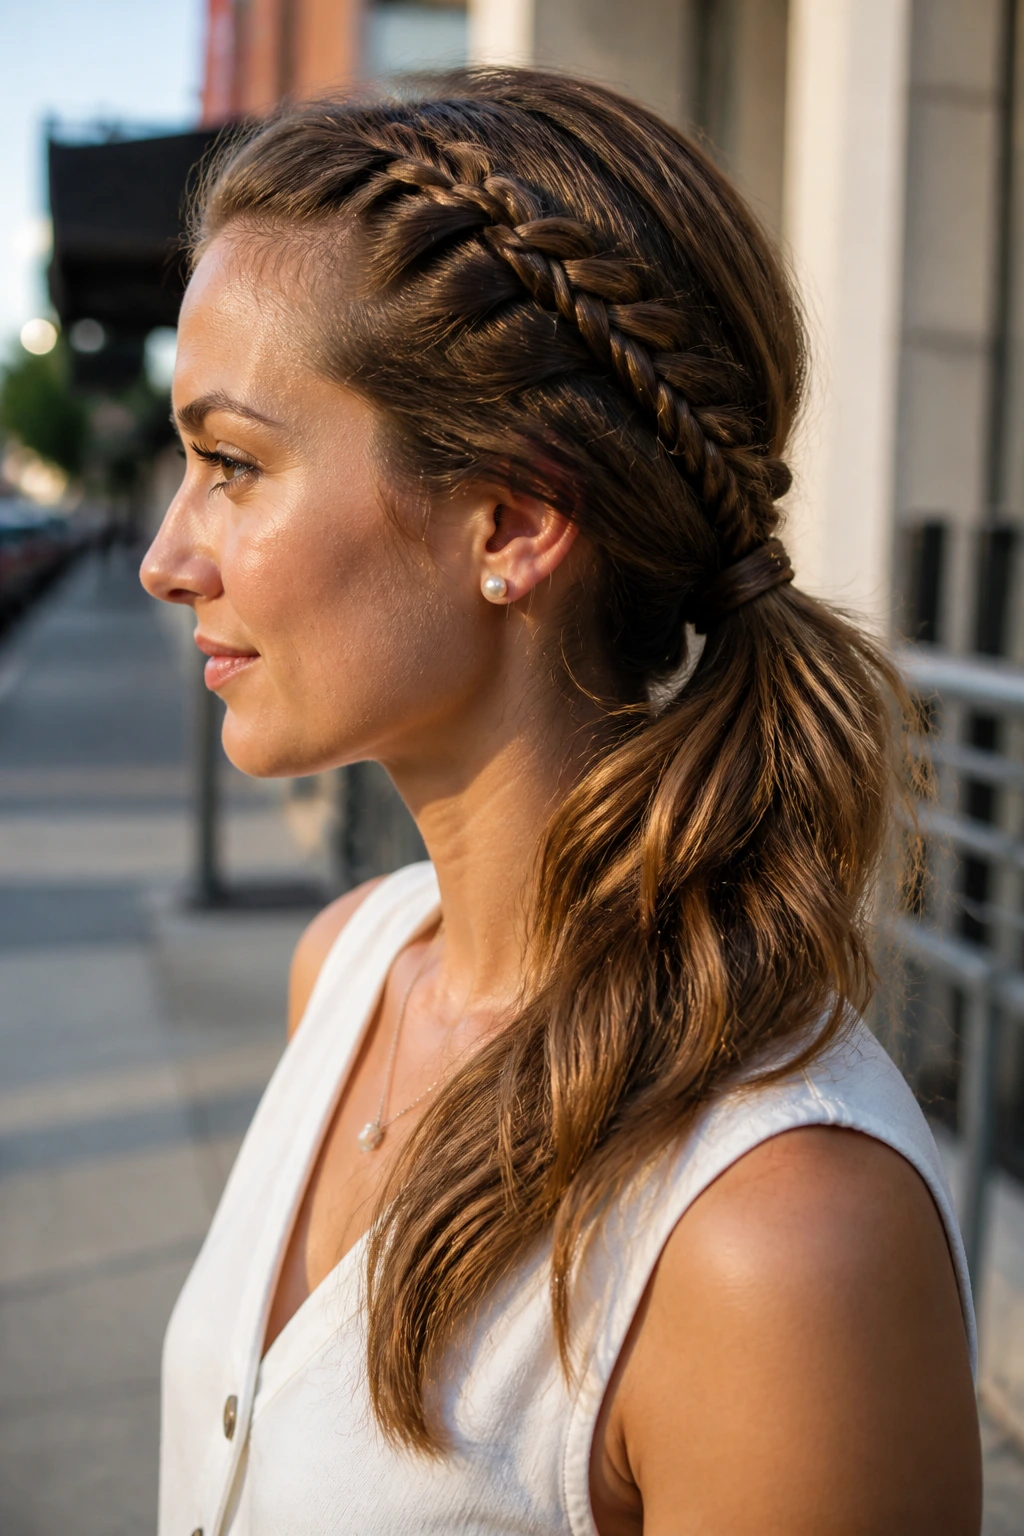
A side-swept style feels inherently more styled and intentional than a centered one. By incorporating a small braid into the side of your ponytail, you elevate a simple look into something that looks like it came from a tutorial. It is a fantastic way to handle layers that might otherwise fall out of a ponytail.
Building the Style
Part your hair to the side. Take a small section of hair near your part and create a French or Dutch braid that travels along your hairline toward the back of your head. Once you reach the temple area, stop adding hair to the braid and gather the rest of your hair into a side ponytail, incorporating the end of the braid. Secure with an elastic and hide it with a strand of hair.
Why It Works
- The braid acts as an anchor, keeping loose layers and flyaways secure.
- It emphasizes your facial features by drawing attention to one side of the face.
- It’s a great way to transition from a professional day look to an evening out.
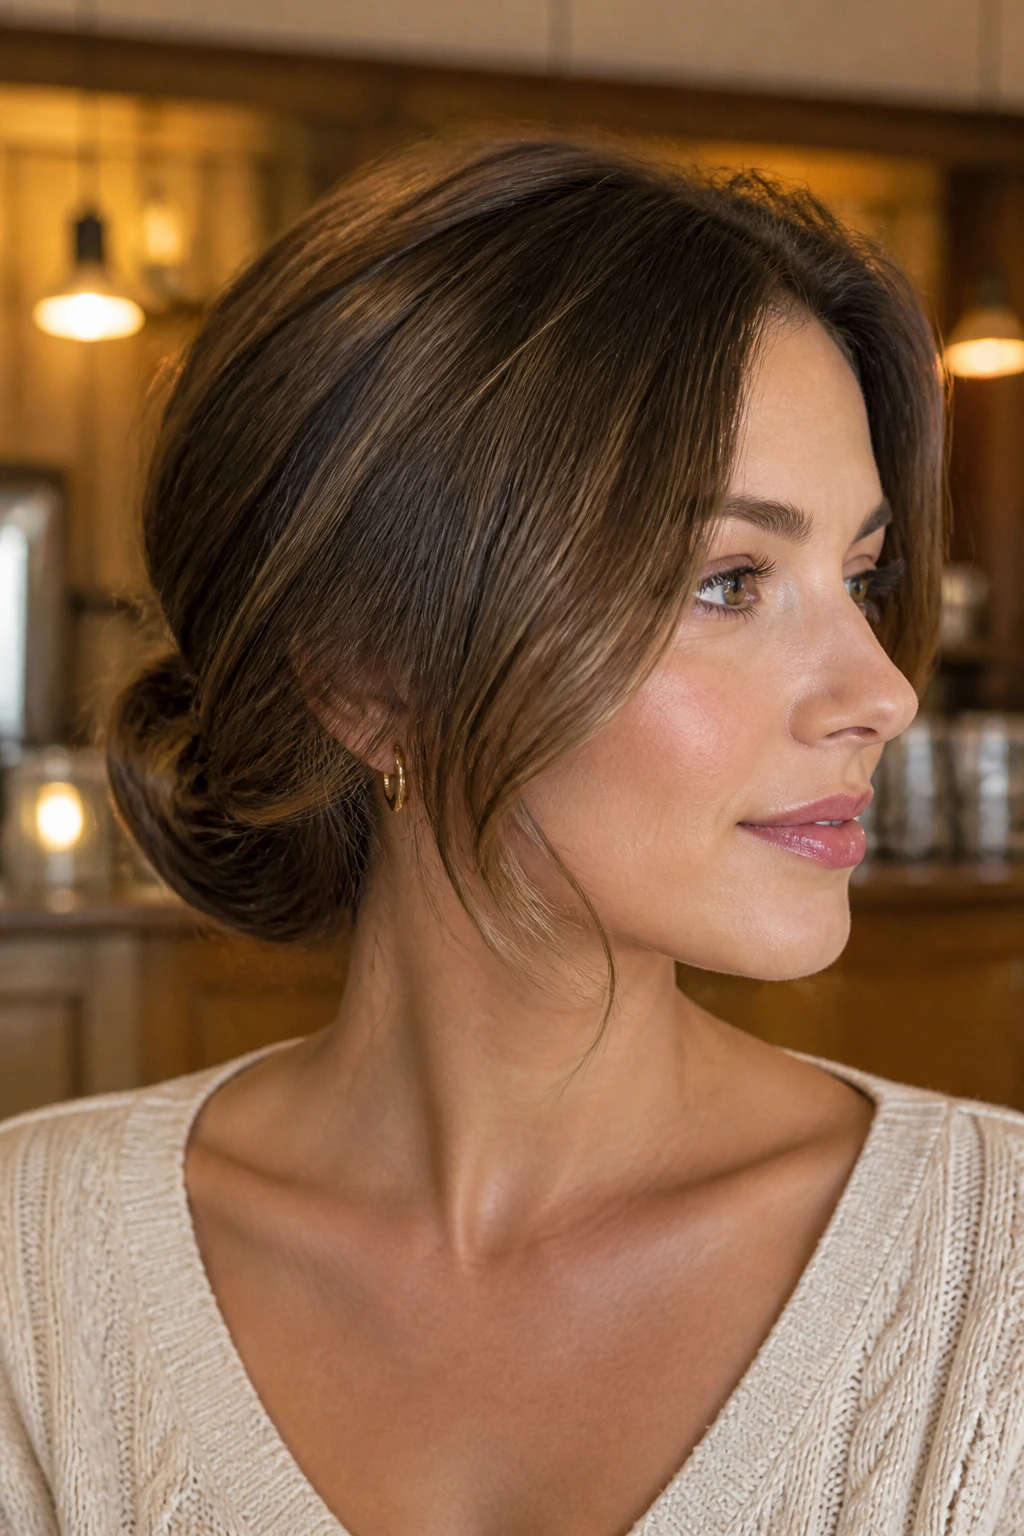
13. The Low Messy Bun
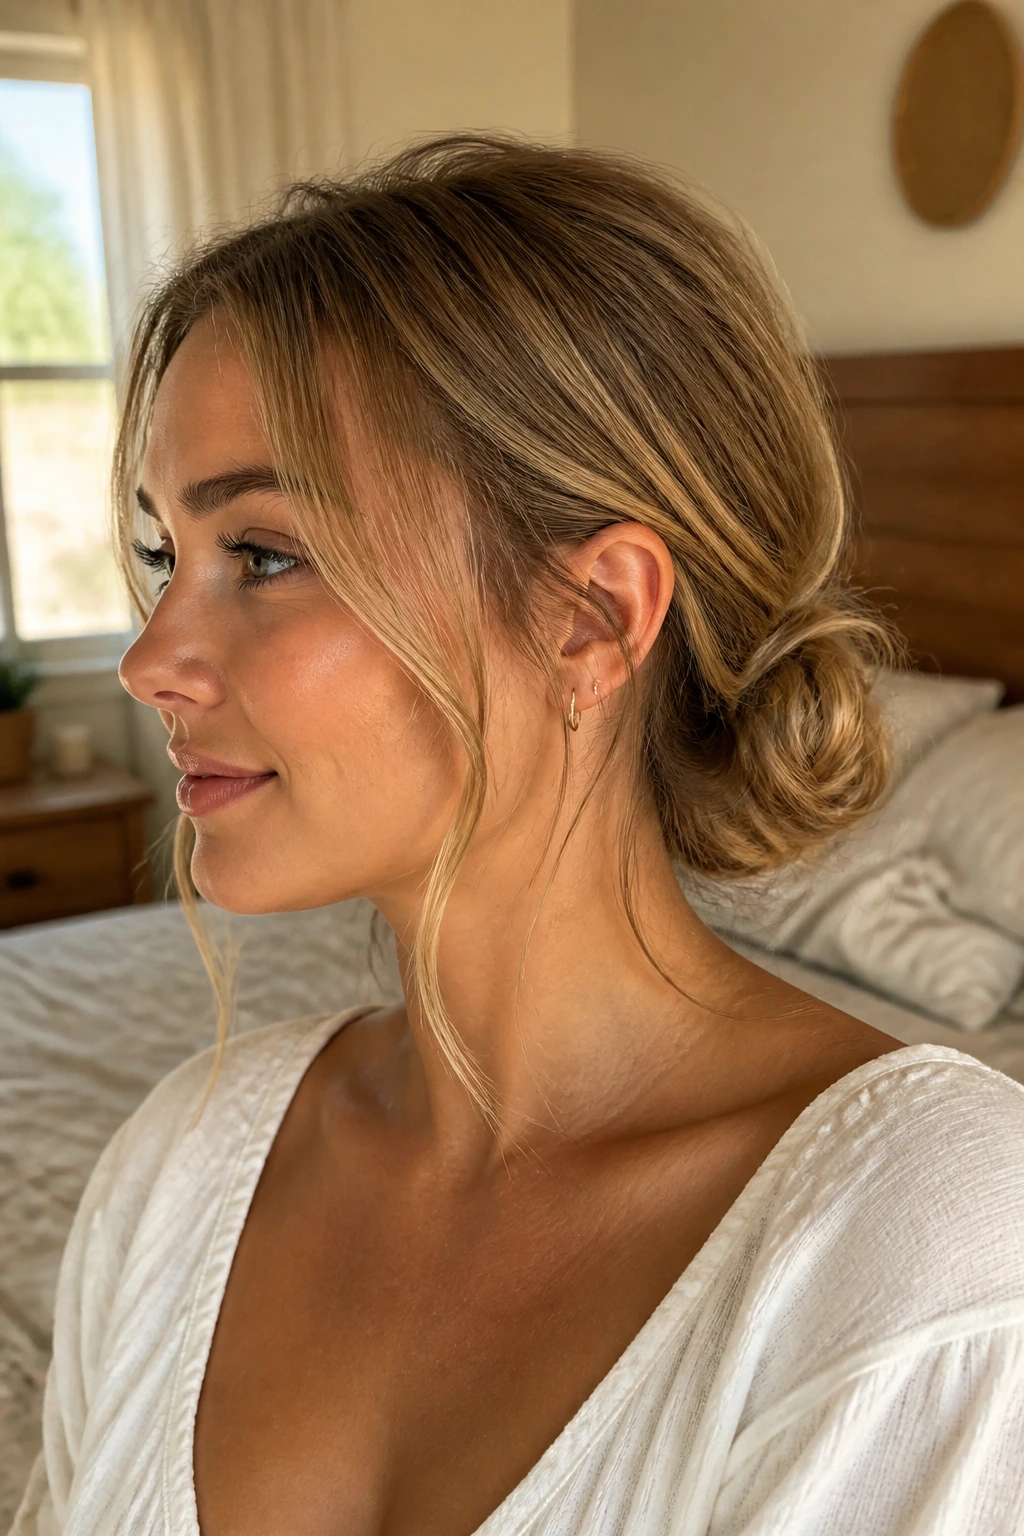
This is the “grown-up” version of the top knot. It sits comfortably at the nape of the neck and feels more relaxed, more artistic, and arguably more versatile. It is the perfect style for a long day where you want comfort above all else.
Crafting the Low Bun
Gather your hair at the nape of your neck. Instead of wrapping it tightly, loop it through your hair elastic, leaving the ends loose. Twist the remaining hair and tuck it into the elastic loop. Don’t worry about perfection; the messiness is part of the charm. If it looks too perfect, pull at a few strands near your ears.
Common Benefits
- It doesn’t put as much stress on your hairline as a high knot.
- It feels very secure for people with longer, heavier hair.
- It is a classic look that never feels dated, regardless of shifting styles.
14. The Pinned-Back Fringe
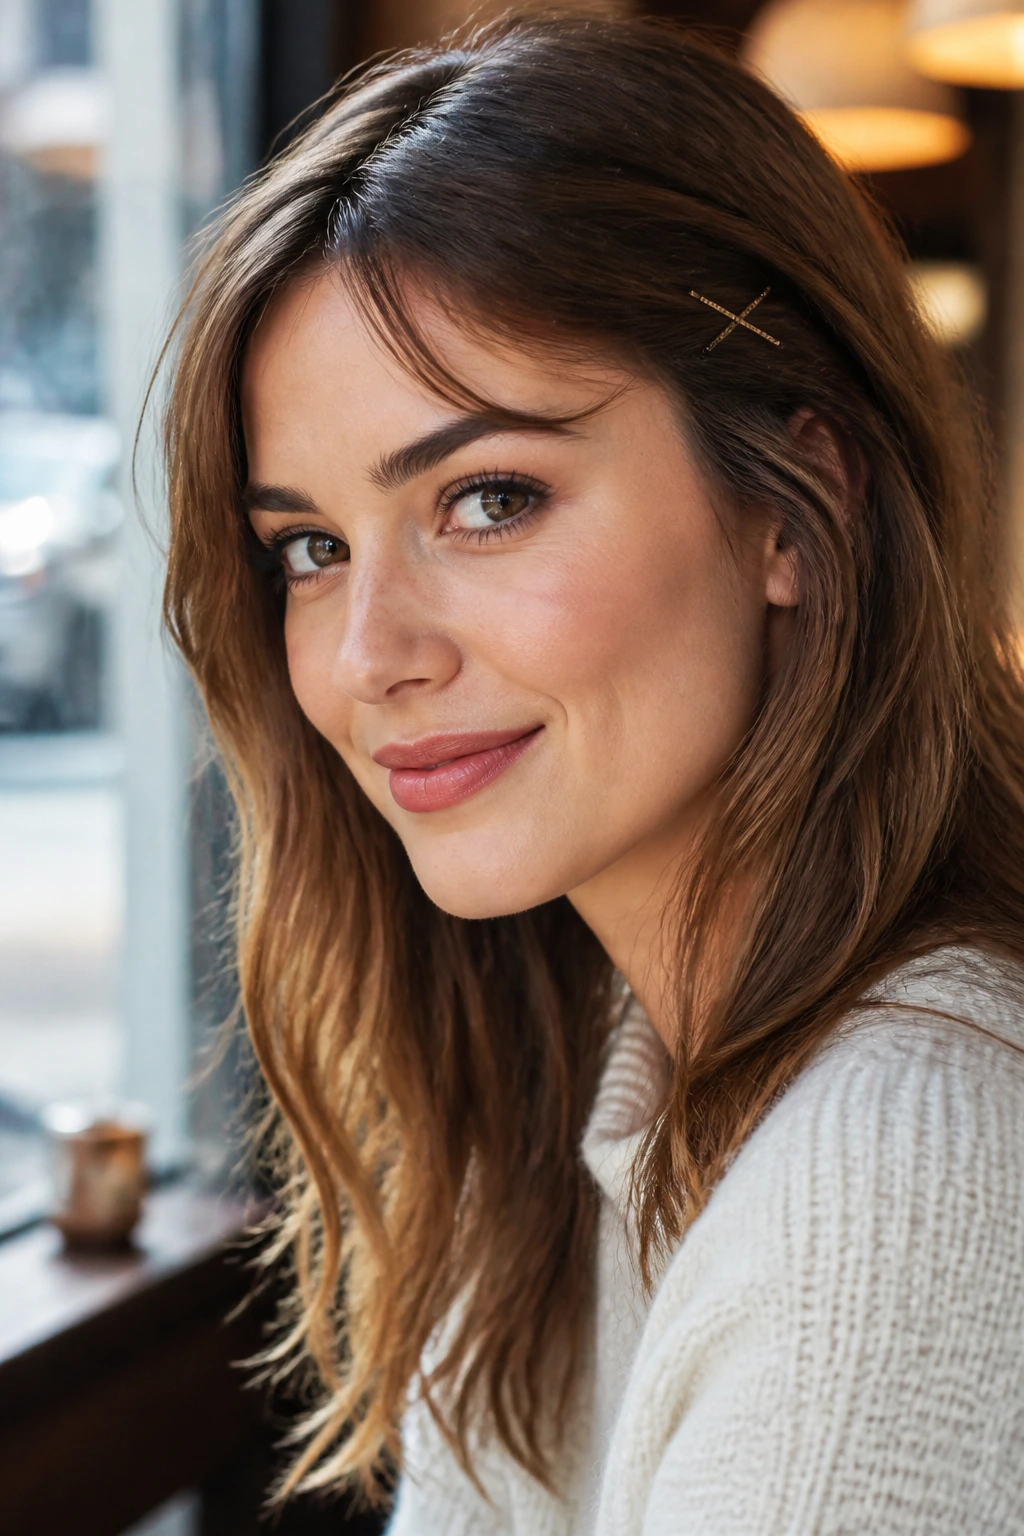
If you have bangs or short face-framing layers that are currently in an awkward growing-out phase, you know the struggle. Pinned-back fringe is the ultimate solution. Using two or three decorative bobby pins or a small clip to pull these sections back and secure them against your head creates a clean, intentional look.
How to Style It
Divide your bangs into two sections or sweep them all to one side. Give them a slight twist, pull them back toward your temple, and secure them with pins. You can cross the bobby pins to create an “X” shape for a more modern, decorative effect.
When to Use This Style
- When you don’t have time to style your bangs but need them out of your face.
- When you want to highlight your cheekbones or your eye makeup for the day.
15. The Loose, Low Braid
A classic three-strand braid at the nape of the neck is the definition of effortless beauty. While a tight, polished braid can look a bit school-girl, a loose, slightly deconstructed braid looks editorial. The secret is to braid it fairly tightly first, then pull the loops of the braid outward to loosen it up.
Perfecting the Braid
Tie your hair into a low, loose ponytail first, then braid the ponytail. Once you secure the end, cut the top elastic (if you want it to look more natural) or leave it in for security. Tug on the loops of the braid starting from the bottom and working your way up. This makes the braid look two or three times thicker than it actually is.
Why It’s a Daily Staple
- It keeps hair contained and protected from the elements.
- It’s incredibly comfortable for a long day of sitting or moving.
- It works on almost any hair texture, from pin-straight to tightly coiled.
16. The Half-Up Top Knot with Waves
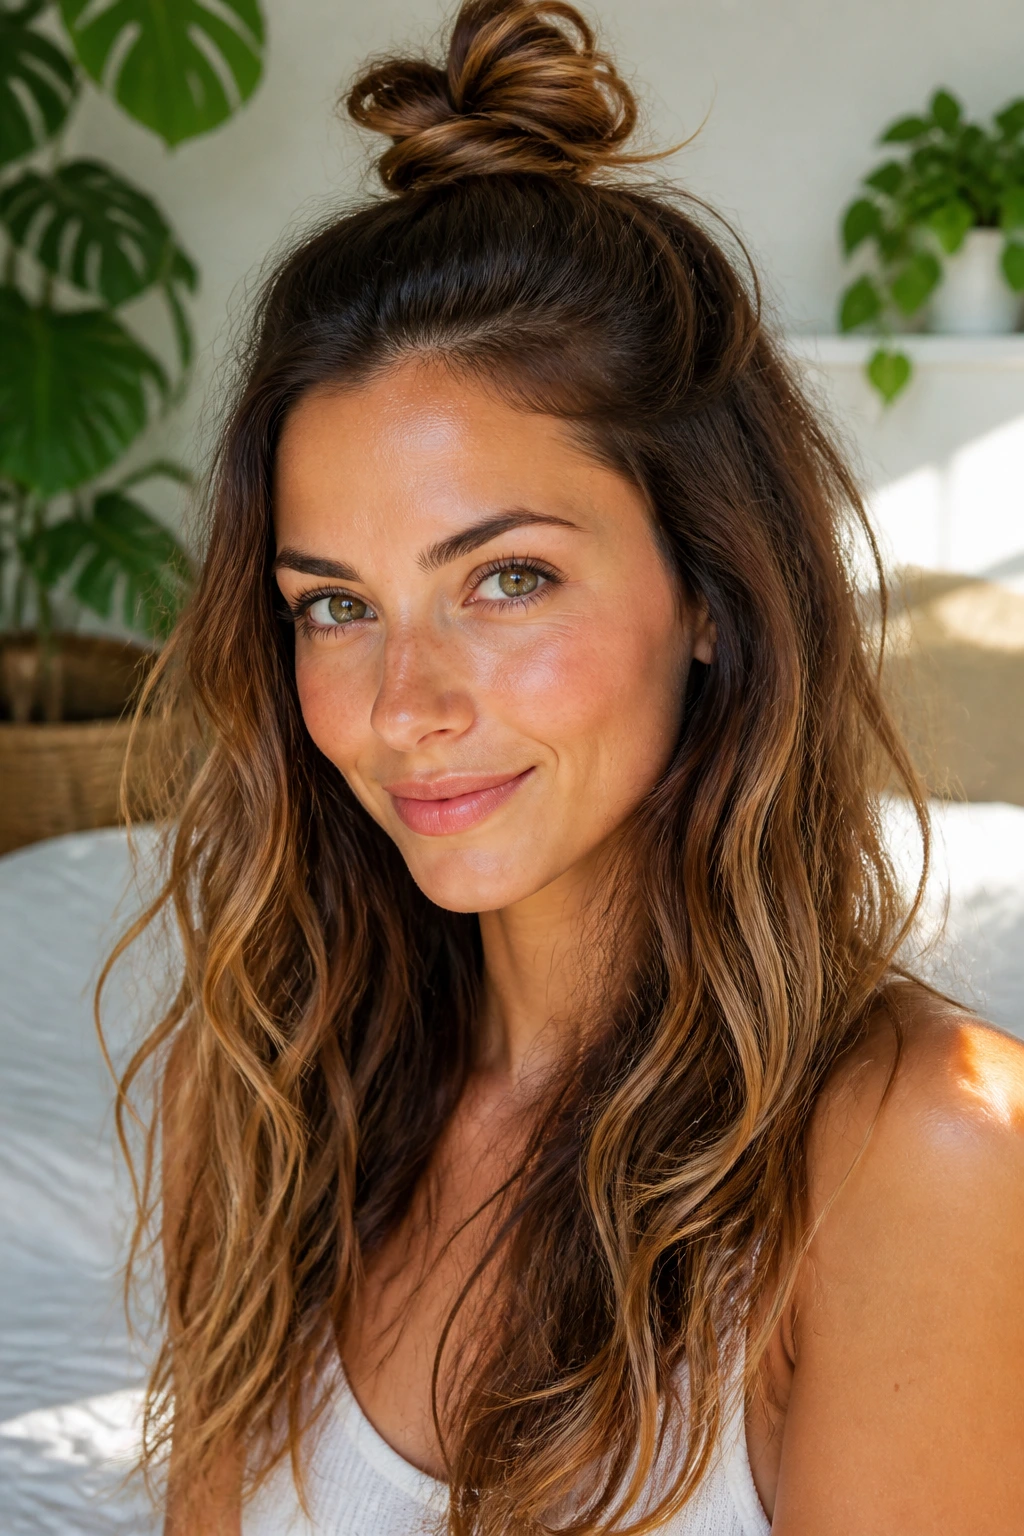
If you have some natural wave to your hair, this is the style that really makes it sing. By adding the top knot, you are drawing attention to the texture of the hair left down. This is particularly effective if you use a little bit of sea salt spray to enhance the waves while the hair is damp.
Tips for Styling
Take the top section and create a small, tight bun. Because the hair is wavy, the knot will have more volume and a more relaxed, bohemian feel. If your hair is straight, use a curling wand to add a few loose waves before pinning the top knot. The contrast between the bun and the flowing waves creates a nice sense of balance.
Why This Style Succeeds
- It looks deliberate and well-styled, even if you did it in five minutes.
- It is a great way to showcase a haircut with layers or a fresh color treatment.
17. The Low Ponytail with a Wrap
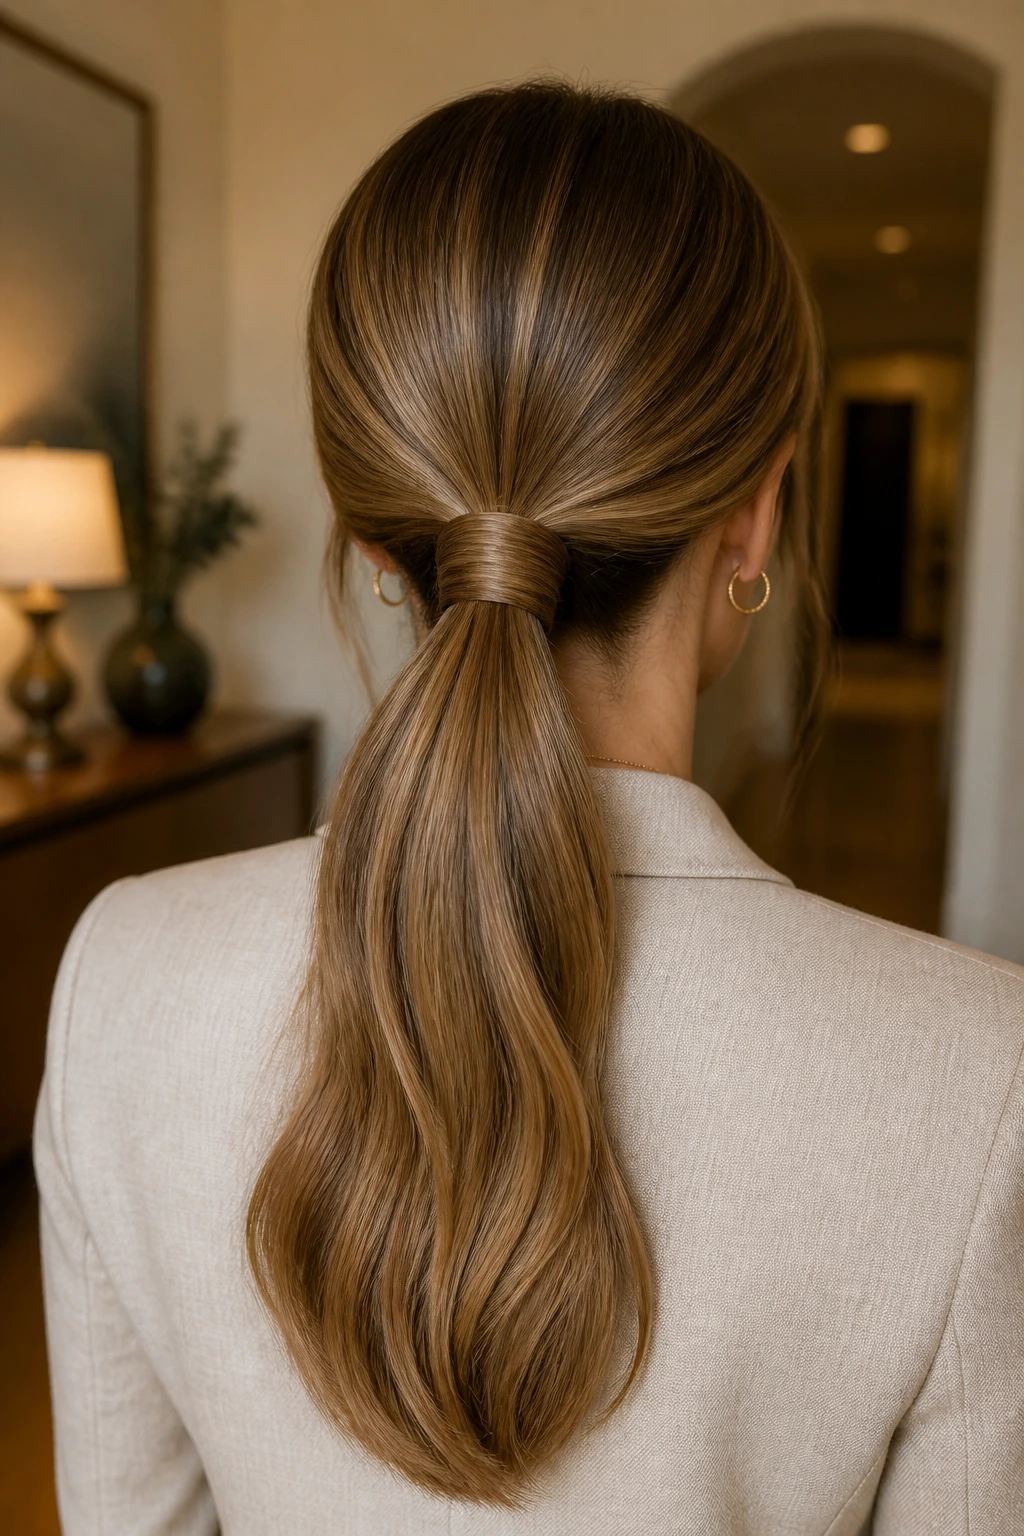
A ponytail wrap—where you take a small section of hair and wind it around the elastic—is a simple trick that completely changes the appearance of a basic ponytail. It hides the elastic band, which is the single biggest “cheapening” factor of a ponytail. It’s amazing how much more professional a ponytail looks when you can’t see the rubber band.
The Wrapping Technique
After you secure your ponytail with an elastic, grab a thin section of hair from the underside of the ponytail. Wrap this section tightly around the base until the elastic is completely covered. Pin the end of the strand underneath the ponytail with a small, discreet bobby pin. Try to use a bobby pin that matches your hair color as closely as possible.
The Result
- Your hairstyle suddenly looks like it was created by a stylist.
- It elevates a casual look to something that can work in a more formal setting.
- It’s a great way to make your hair look thicker and fuller at the base.
18. The Loose Headband Tuck
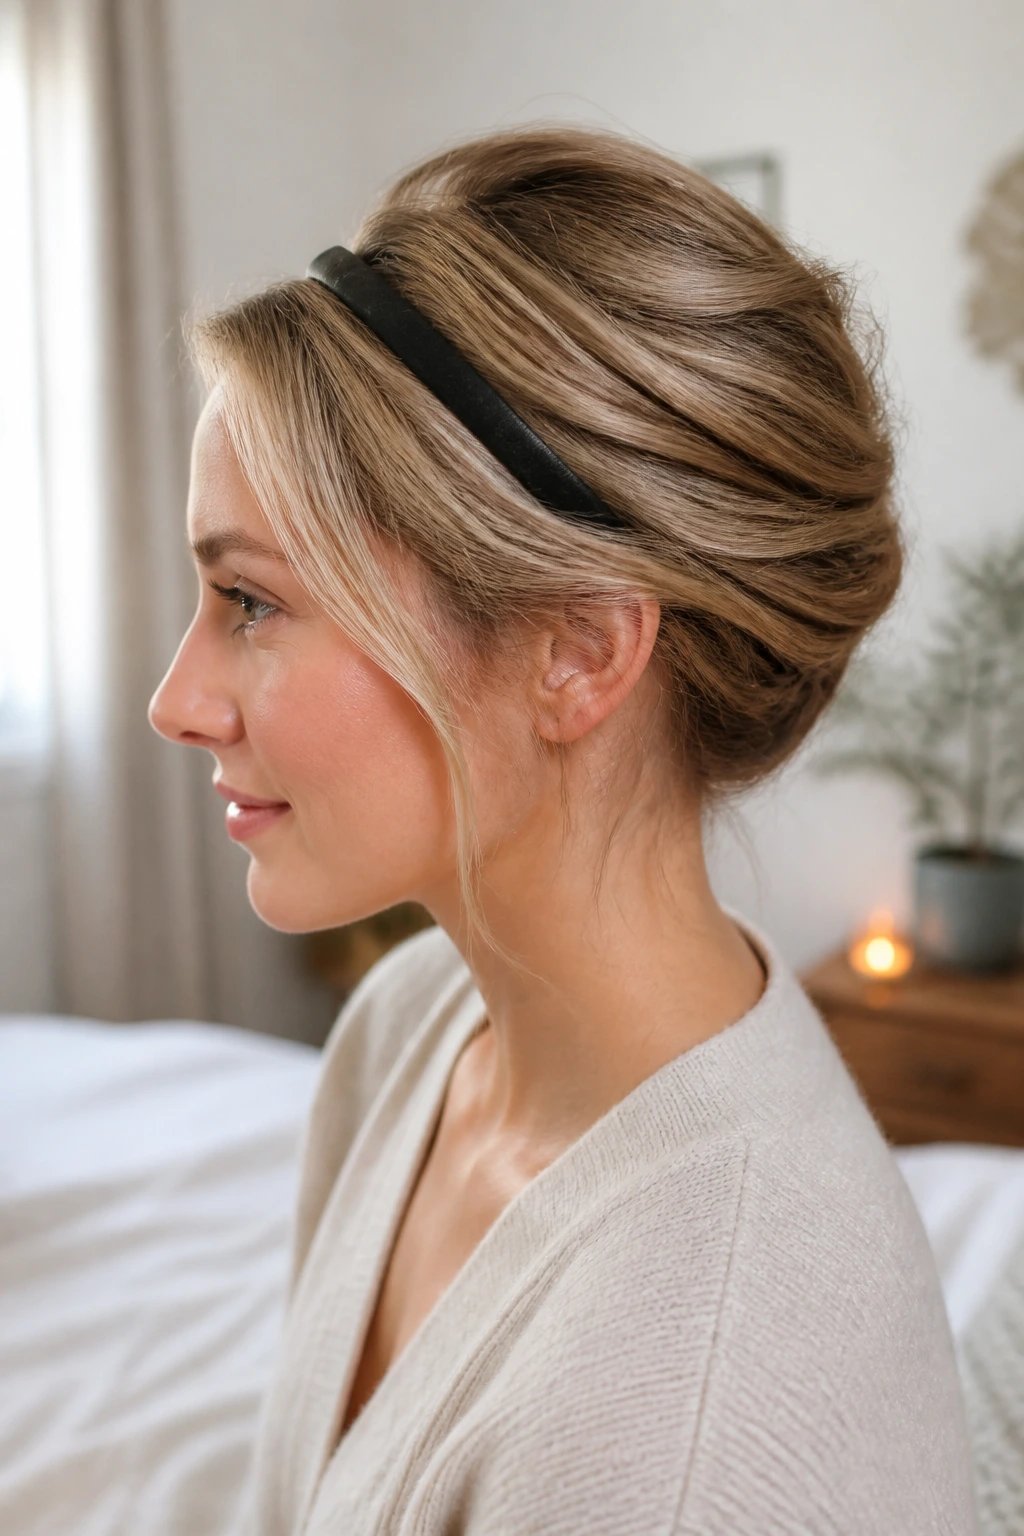
This is a classic “tuck and roll” hairstyle that is perfect for shorter or medium-length hair. It uses an elastic headband as the base, and you simply tuck your hair up and into the band until all the length is secured. It looks incredibly polished and elegant, almost like a vintage 1920s updo.
How to Achieve the Tuck
Place a stretchy headband over your hair so it sits around your forehead or at your hairline. Starting from one side, begin tucking your hair into the band, looping it over and through. Continue working your way around your head, tucking every section of hair until the length is completely hidden. Secure any loose ends with bobby pins.
Why It’s a Hidden Gem
- It is one of the few updos that actually works well on shorter hair, including bobs.
- It is extremely comfortable because the elastic headband does most of the heavy lifting.
- It is a great way to get a chic updo without needing hair ties or complicated knotting techniques.
Final Thoughts
The common thread through all these styles is the move away from perfection. Modern hair is defined by texture, ease, and the ability to look good even when it’s not freshly washed. Your hair shouldn’t feel like a chore or a source of stress in the morning. Instead, think of these hairstyles as tools in your kit—quick, simple ways to feel put-together regardless of what the day has in store for you.
Choose a technique that makes you feel confident, and don’t be afraid to leave a few strands loose or to let the style get a little messy as the day wears on. After all, the best accessory you can wear is the one that feels the most like you. Whether you prefer the sleekness of a low bun or the playfulness of a bubble braid, focus on what fits your lifestyle and hair type. You don’t need a professional salon experience to have a good hair day; you just need a few reliable methods and a little bit of practice.