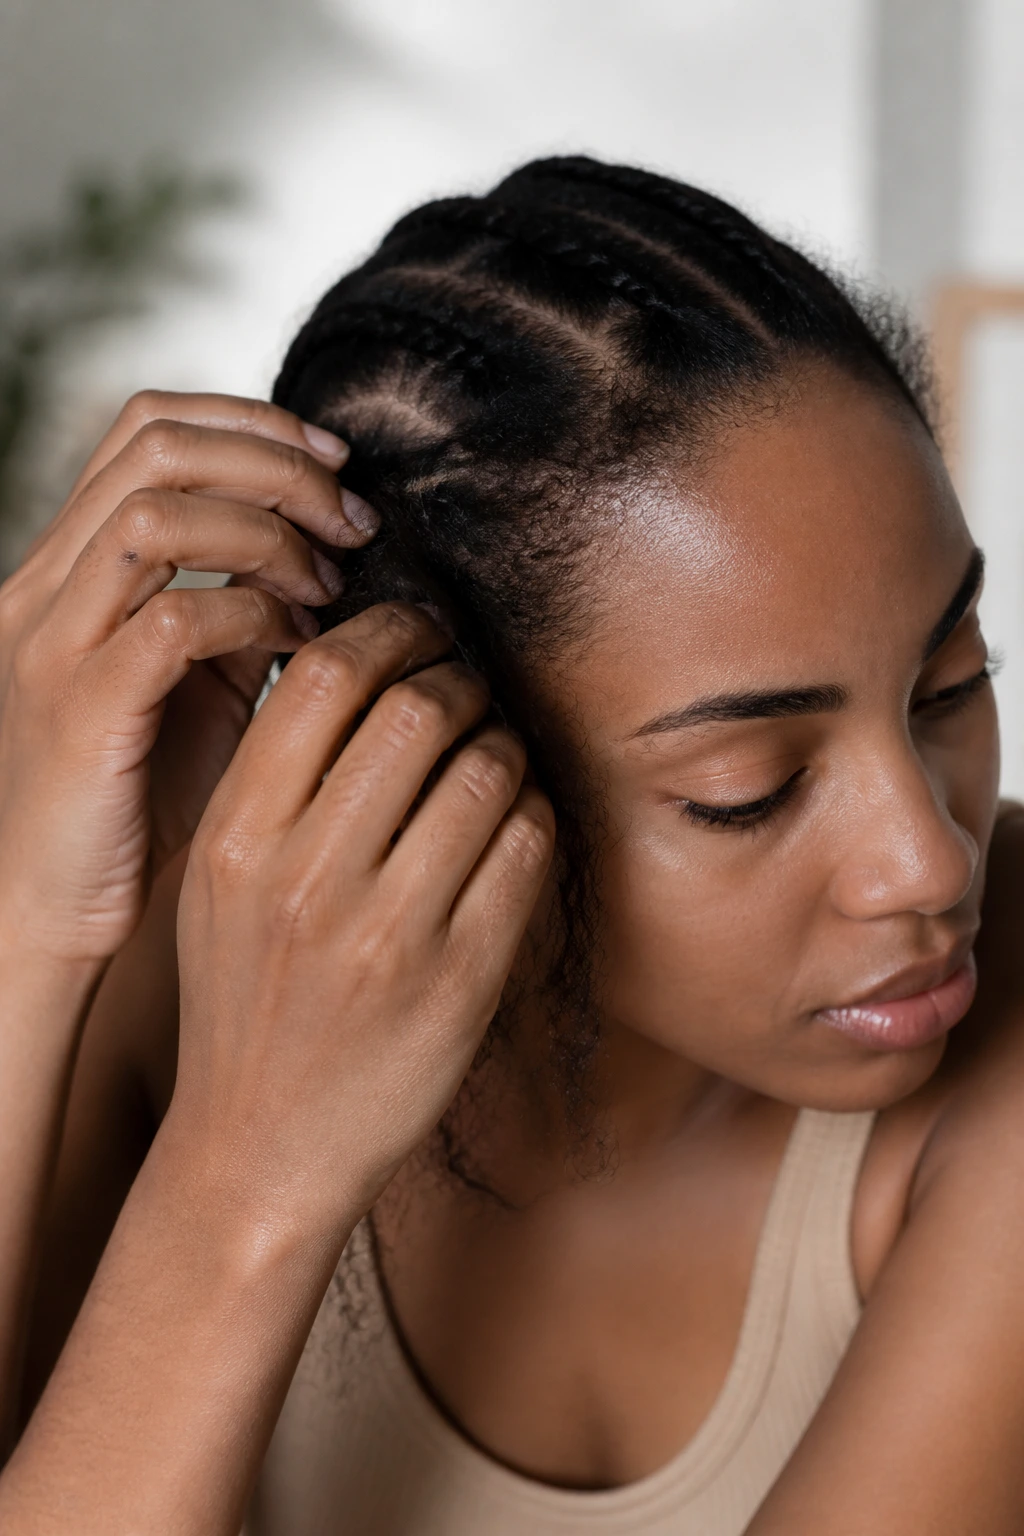
Fine, thin hair can feel like a losing battle when you want a protective style that looks thick, full, and intentional. Most people with finer hair textures assume that tight, heavy braids are out of the question—or worse, that they will end up with thinning edges and scalp strain. This is a common misconception, but it usually stems from the wrong installation techniques rather than the hair itself. When you approach styling with a focus on tension control and strategic volume, you can achieve a polished, durable look that protects your natural strands instead of stressing them.
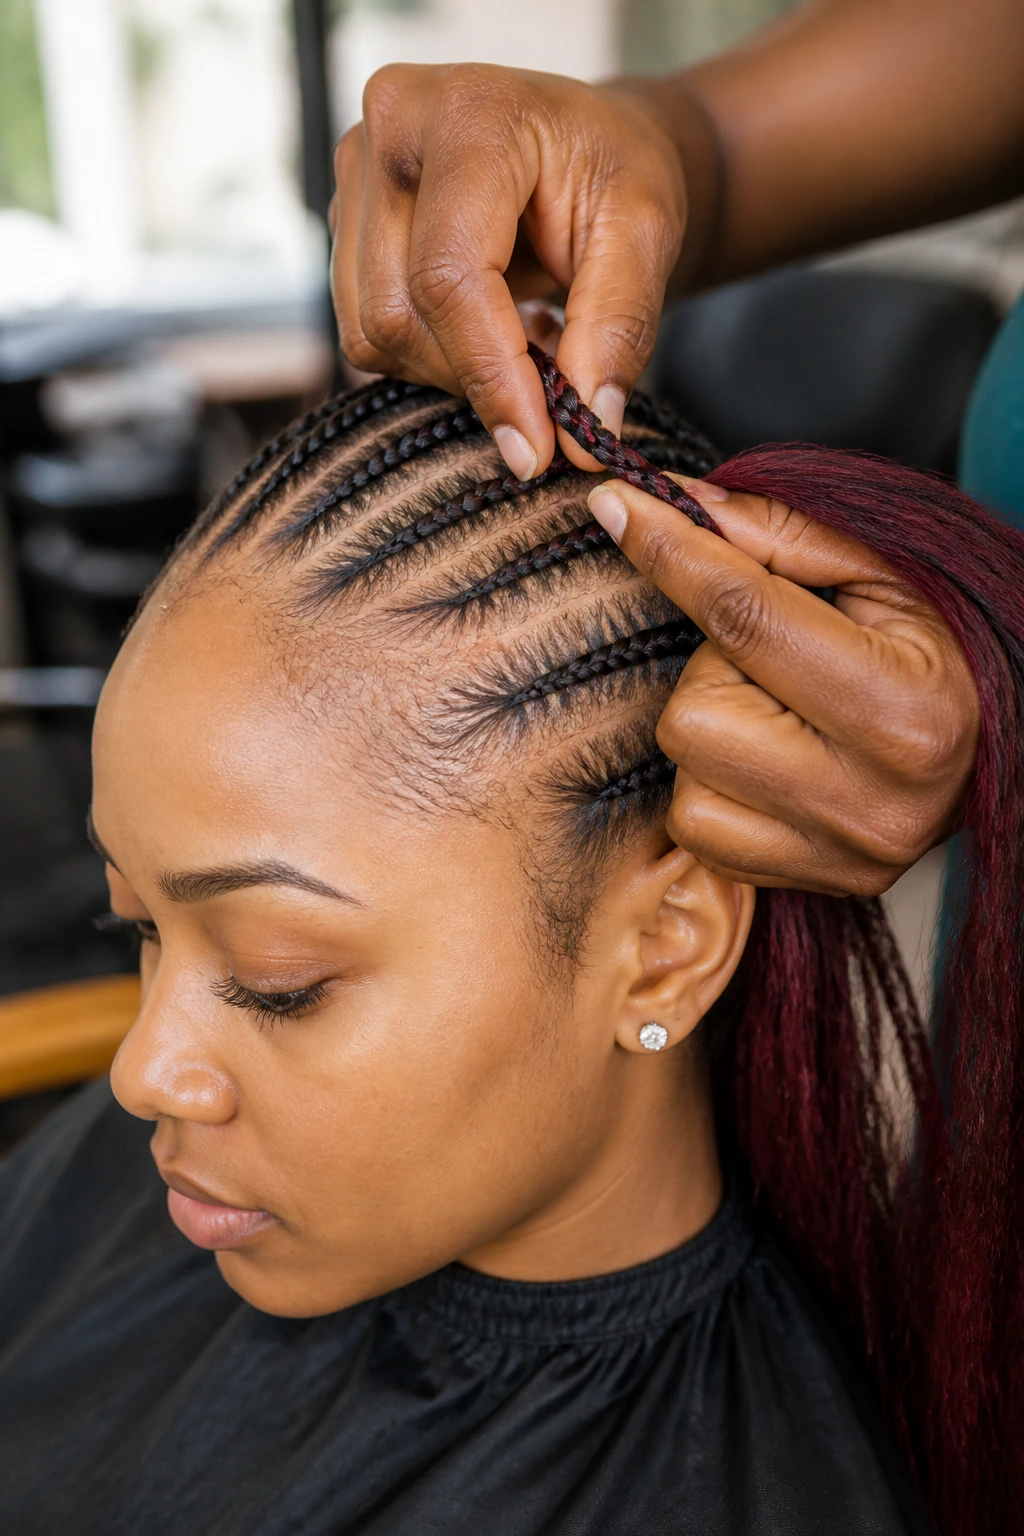
Ghana braids, often called feed-in cornrows, are particularly well-suited for delicate strands. Because you gradually incorporate extension hair as you move down the scalp, the braid starts small and thin near your hairline, reducing the initial weight and tugging that typically causes breakage. By focusing on smaller, tighter sections at the base and building weight slowly, you create the illusion of fullness without overwhelming your delicate roots. Whether you are aiming for a classic straight-back style or something more complex, the trick lies in how you prep, partition, and braid.
1. The Low-Tension Feed-In Method
Many people assume that “tight” equals “neat,” but this is a dangerous myth for those with fine hair. When your braids are installed with too much tension, the follicle can become inflamed, leading to a condition called traction alopecia. With fine hair, you must insist on a low-tension installation. This means your braider should prioritize the weight distribution of the extensions rather than the tightness of the base braid.
Why This Technique Protects Your Edges
The feed-in method works by starting with only your natural hair at the very front of the hairline. By slowly adding small amounts of synthetic hair as you move toward the crown, you ensure that the point of highest strain is never carrying the full weight of the braid. This is crucial for finer textures because it prevents that heavy, sagging feeling that often leads to hair snapping off right at the front.
How to Achieve a Soft Grip
- Ask for a “gentle grip” during the initial braiding process.
- Avoid using extreme styling gels that dry out the hair shaft, as these can make fine strands brittle.
- Ensure the extension hair is properly tapered or stretched before installation to prevent tangles that cause tugging. Pro tip: If you feel an immediate pulling sensation behind your ears or near your temples after the style is finished, the braids are too tight. A good style should feel secure but never painful.
2. Strategic Parting for Added Density
The way you section your hair before you even pick up the extensions determines the finished thickness. For fine hair, bigger parts often reveal too much scalp, which can make the hair look sparse. Opting for smaller, more frequent parts allows you to create more braids overall, which creates a denser appearance across the entire scalp.
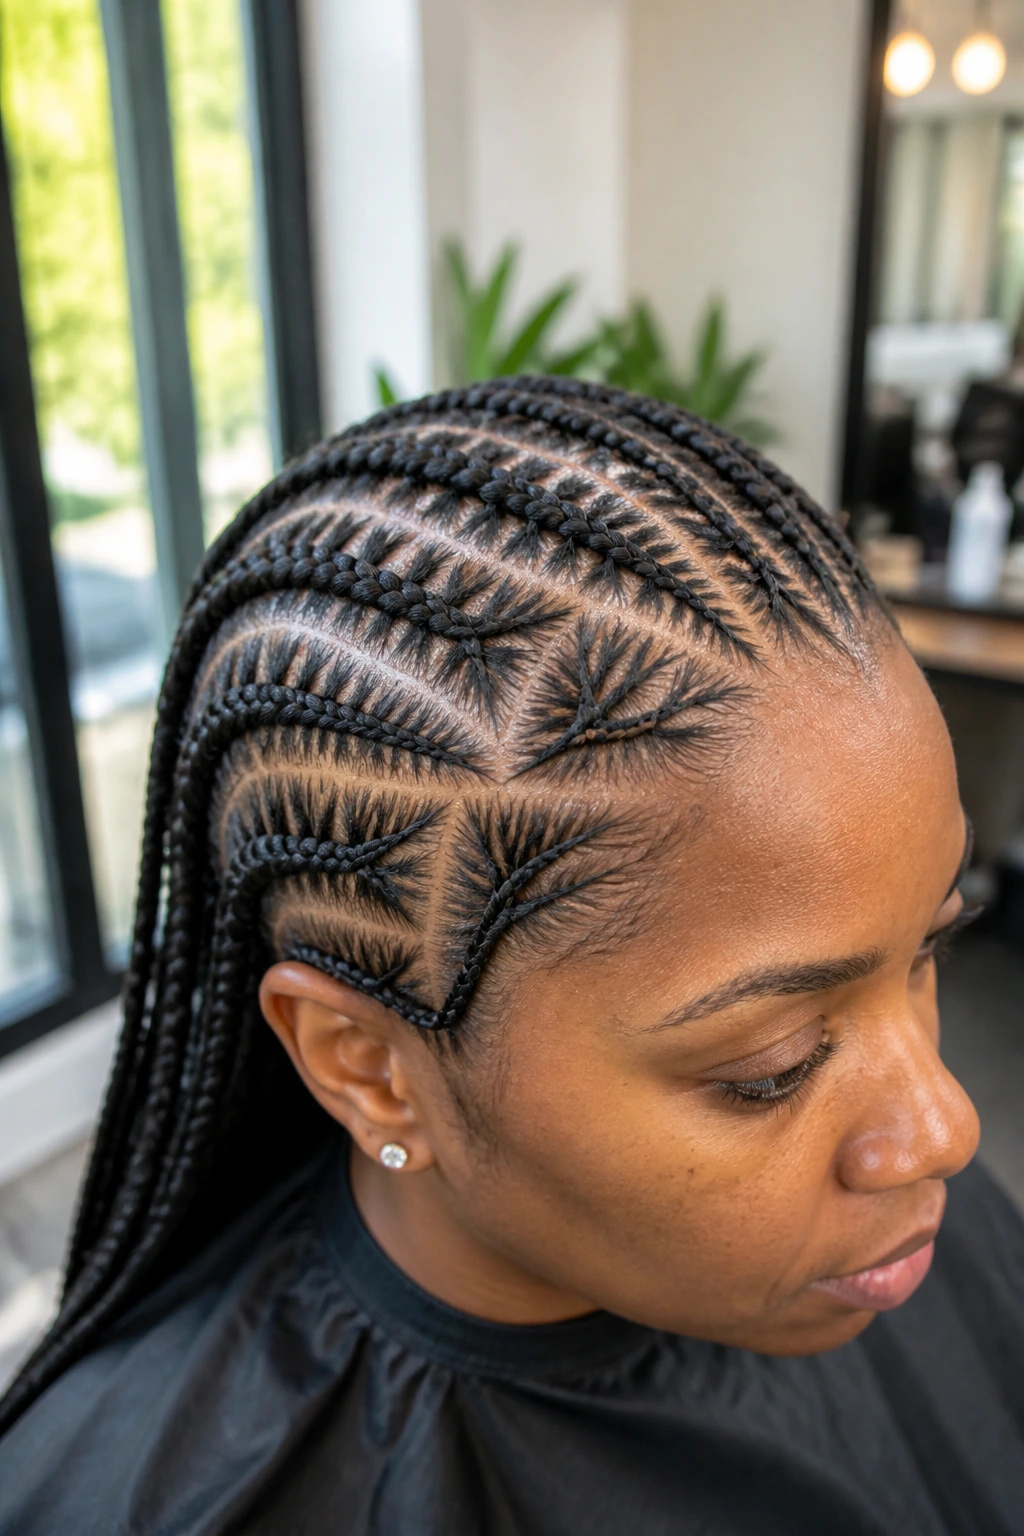
Using Geometric Patterns
Triangular, diamond, or curved parts are not just for aesthetics—they can actually help hide sparse areas. By staggering the start points of your braids, you minimize the amount of exposed scalp between rows. This creates a fuller, more “layered” look that effectively masks areas where your hair might be naturally thin.
The Importance of Precision
When parting, use a fine-tooth metal rat-tail comb to ensure perfectly clean lines. While it might seem like a small detail, precise parting reduces the amount of loose hair that gets caught in neighboring sections. Every single strand should have a home; loose, messy parts are the quickest way to create unnecessary friction and eventual breakage for fine hair types.
3. Choosing the Right Extension Weight

Not all braiding hair is created equal. If you use a heavy, jumbo-sized pack of synthetic hair on fine strands, the result will be a style that literally hangs off your head and pulls at your roots. Lightweight, pre-stretched kanekalon hair is the industry standard for a reason. It offers the volume you want without the extra drag that comes with cheaper, heavier fibers.
The Benefit of Pre-Stretched Hair
Pre-stretched hair has tapered ends, which makes it blend seamlessly with your natural hair. This is particularly vital for fine textures because it creates a soft, natural taper rather than a blunt, heavy-looking end. You want the braid to look like a natural extension of your own hair, not like an accessory bolted onto your head.
Avoiding “Jumbo” Overload
While giant braids are a popular aesthetic, they are rarely the best choice for someone with fine, delicate strands. Every time you add a large bundle of synthetic hair to a small base, you are creating a recipe for long-term root damage. Stick to medium or small sizing to keep the style comfortable and sustainable.
4. Prep Your Hair for Resilience
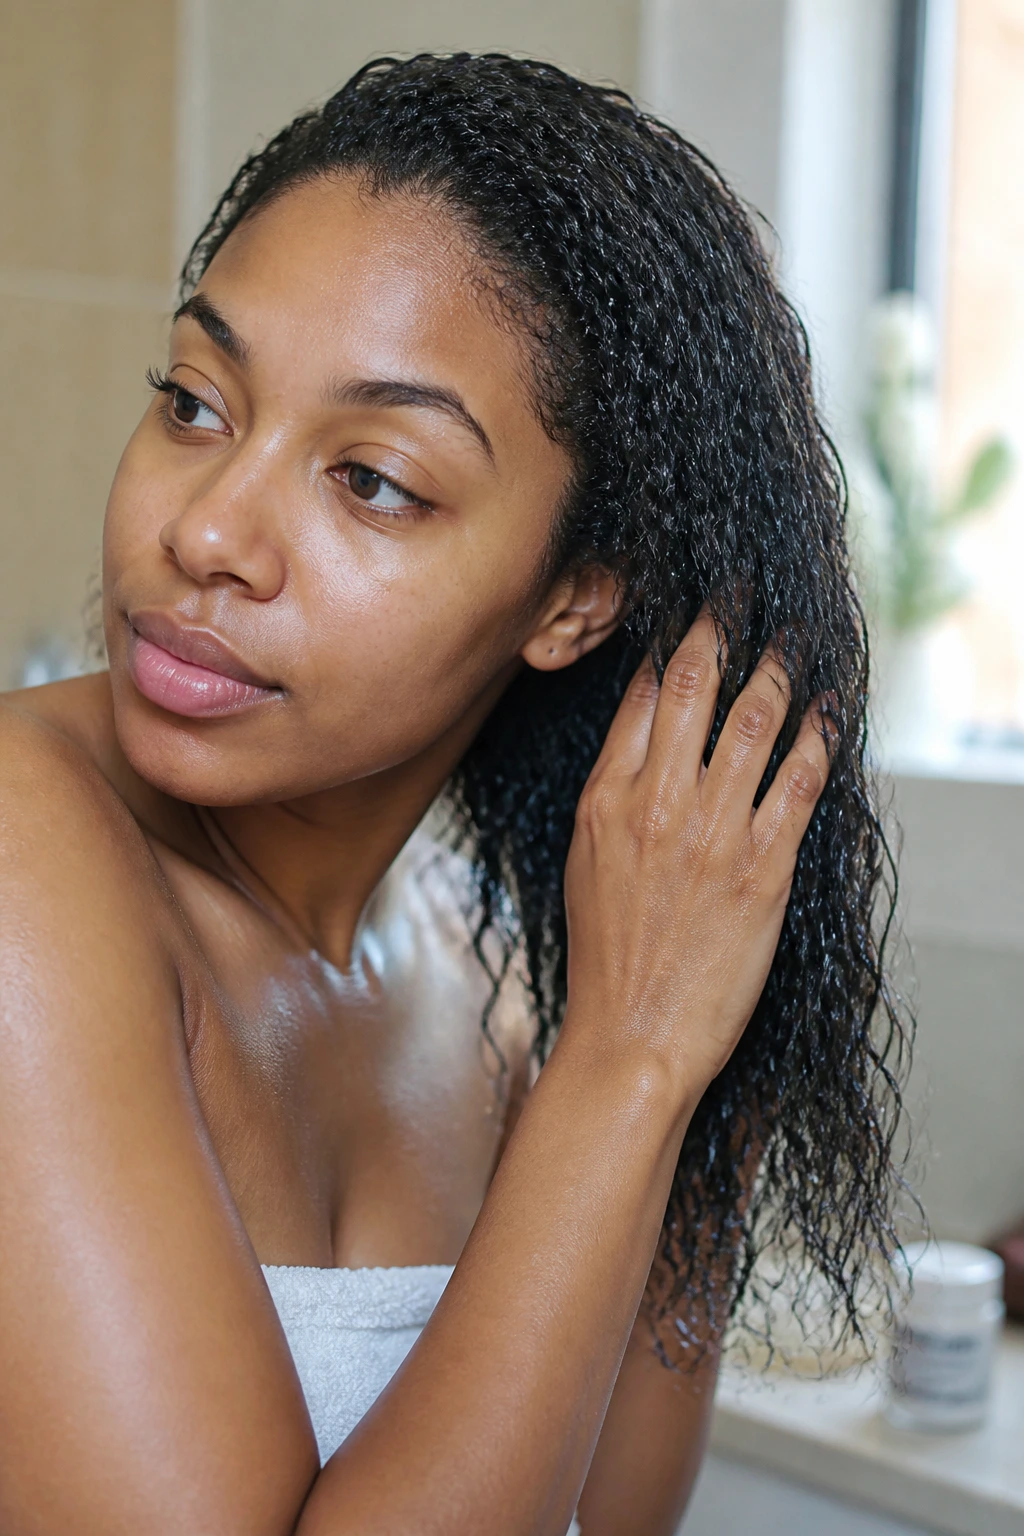
You cannot expect fine hair to survive a protective style if it is already dry, brittle, or tangled. Before you even sit in the chair, your hair needs a deep-conditioning treatment to ensure it is as flexible as possible. A hydrated hair strand is an elastic one; it can handle the manipulation of braiding much better than a dry, dusty strand.
Moisture as a Shield
Focus on a protein-free deep conditioner a few days before your appointment. While protein is great for structural support, it can sometimes make fine hair feel stiff or straw-like. You want your hair to be soft and pliable. Once you have conditioned, keep your hair in a protective state until your braider is ready to work.
The Pre-Braiding Checklist
- Wash with a clarifying shampoo to remove any buildup that could weigh down fine strands.
- Use a lightweight leave-in conditioner that won’t leave a greasy residue.
- Detangle with a wide-tooth comb from the ends up to ensure zero breakage during the styling process.
5. The Invisible Knot-Less Starting Point
The classic “knot” method involves looping the synthetic hair around your natural hair at the root, which creates a thick, bulbous base. For fine hair, this is a disaster waiting to happen. The knot creates a pressure point that almost always leads to breakage. Instead, opt for a seamless, knot-less start.
Why Knots Are the Enemy of Fine Hair
A knot adds an artificial anchor point that is much heavier than your natural root. When your hair starts to grow out, that heavy knot pulls downward, causing the hair around the root to thin out or snap completely. The knot-less method, by contrast, weaves the synthetic hair into your own strands without any bulky loops.
The Illusion of Natural Growth
By starting your braids with just your own hair and adding the extension hair two or three inches down, you mimic the way hair naturally grows from the scalp. This looks significantly more realistic and eliminates the “tension bump” that most people complain about after getting their hair done. It is the most professional way to wear cornrows.
6. Managing the Hairline with Care
Your hairline is the most fragile part of your head. When wearing Ghana braids, it is tempting to pull every tiny baby hair into the braid to get that “snatched” look. Don’t do this. Leave the delicate, wispy hairs at the very front of your hairline alone. They aren’t meant to support the weight of heavy synthetic hair.
The Role of Edge Control
If you feel the need to style your edges, use a water-based edge control that doesn’t contain alcohol. Alcohol is a drying agent that will turn your fine, fragile hairline hairs into brittle little spikes. Apply only a tiny amount to the very tips, and never allow the product to sit directly on the skin for days at a time.
Sleeping Habits for Edge Protection
Even the best-installed braids will fail if you sleep on them roughly. Use a high-quality silk or satin bonnet every single night. The friction from a cotton pillowcase will grab your fine hair and pull at it while you toss and turn, leading to significant thinning around the temple area. A bonnet is not optional; it is essential equipment.
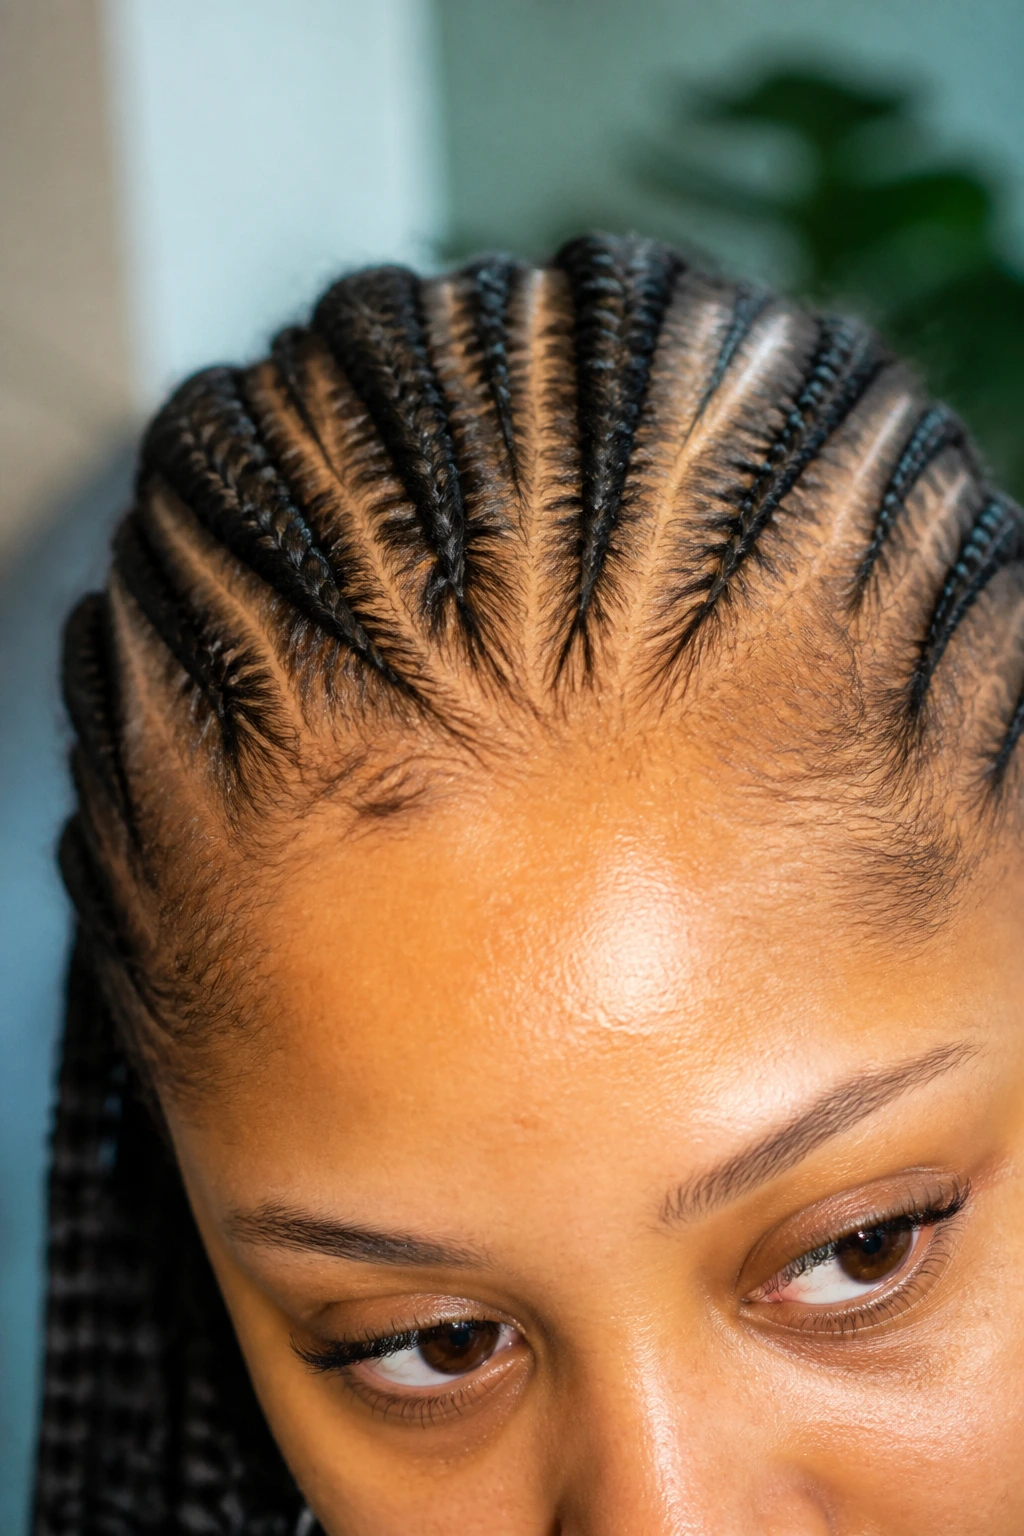
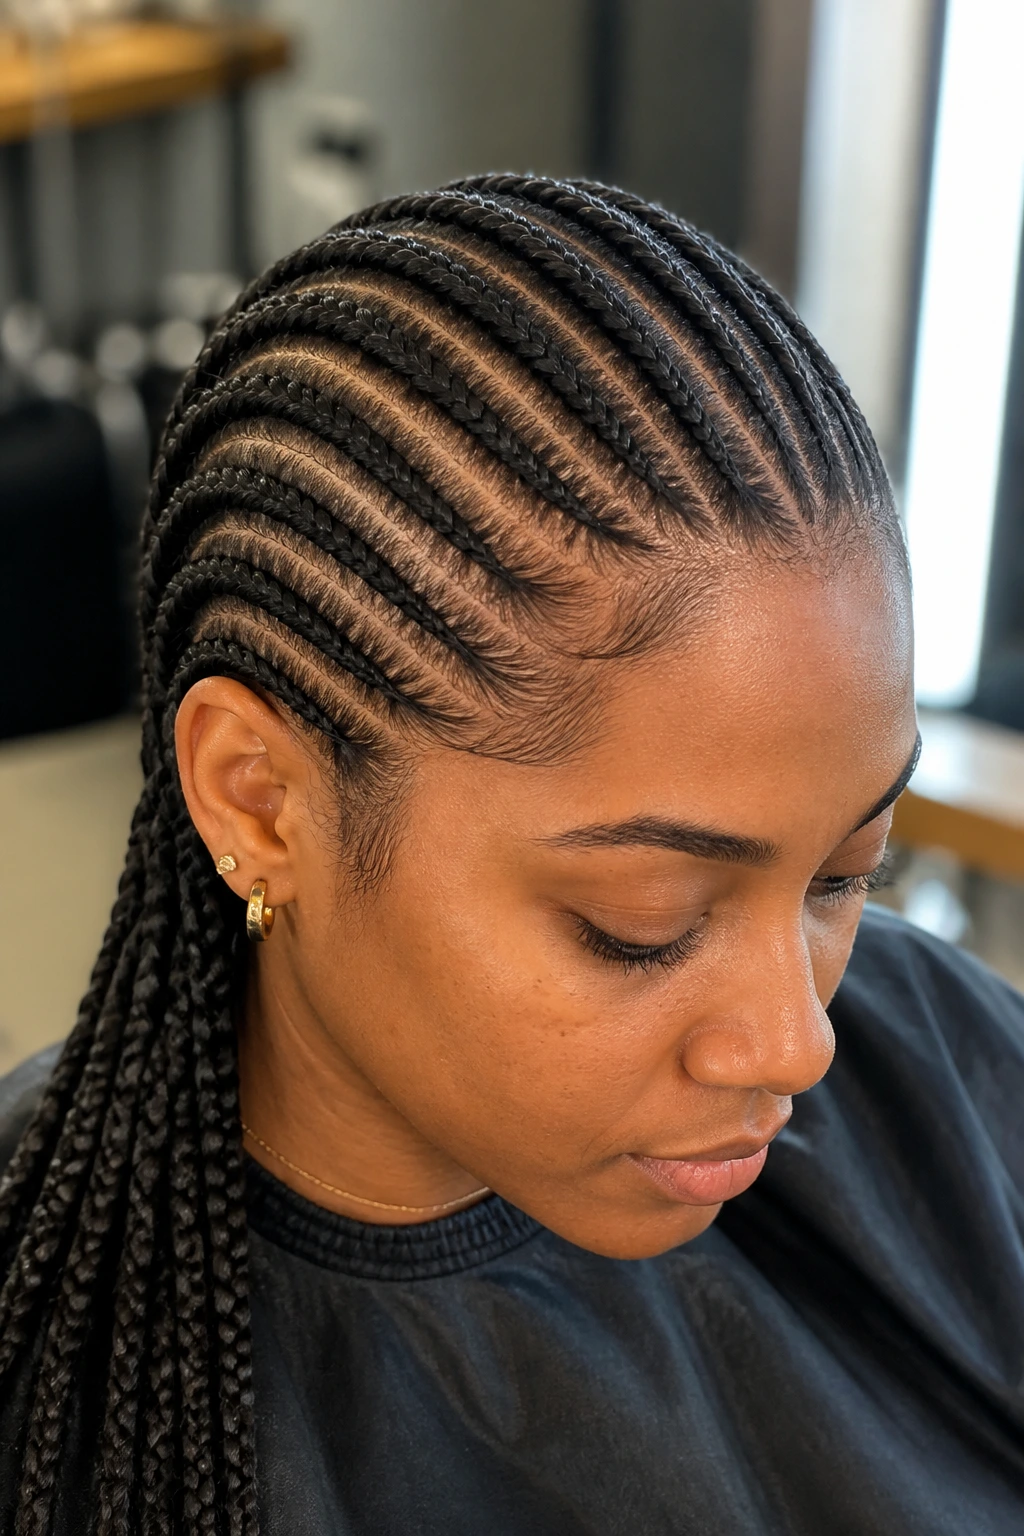
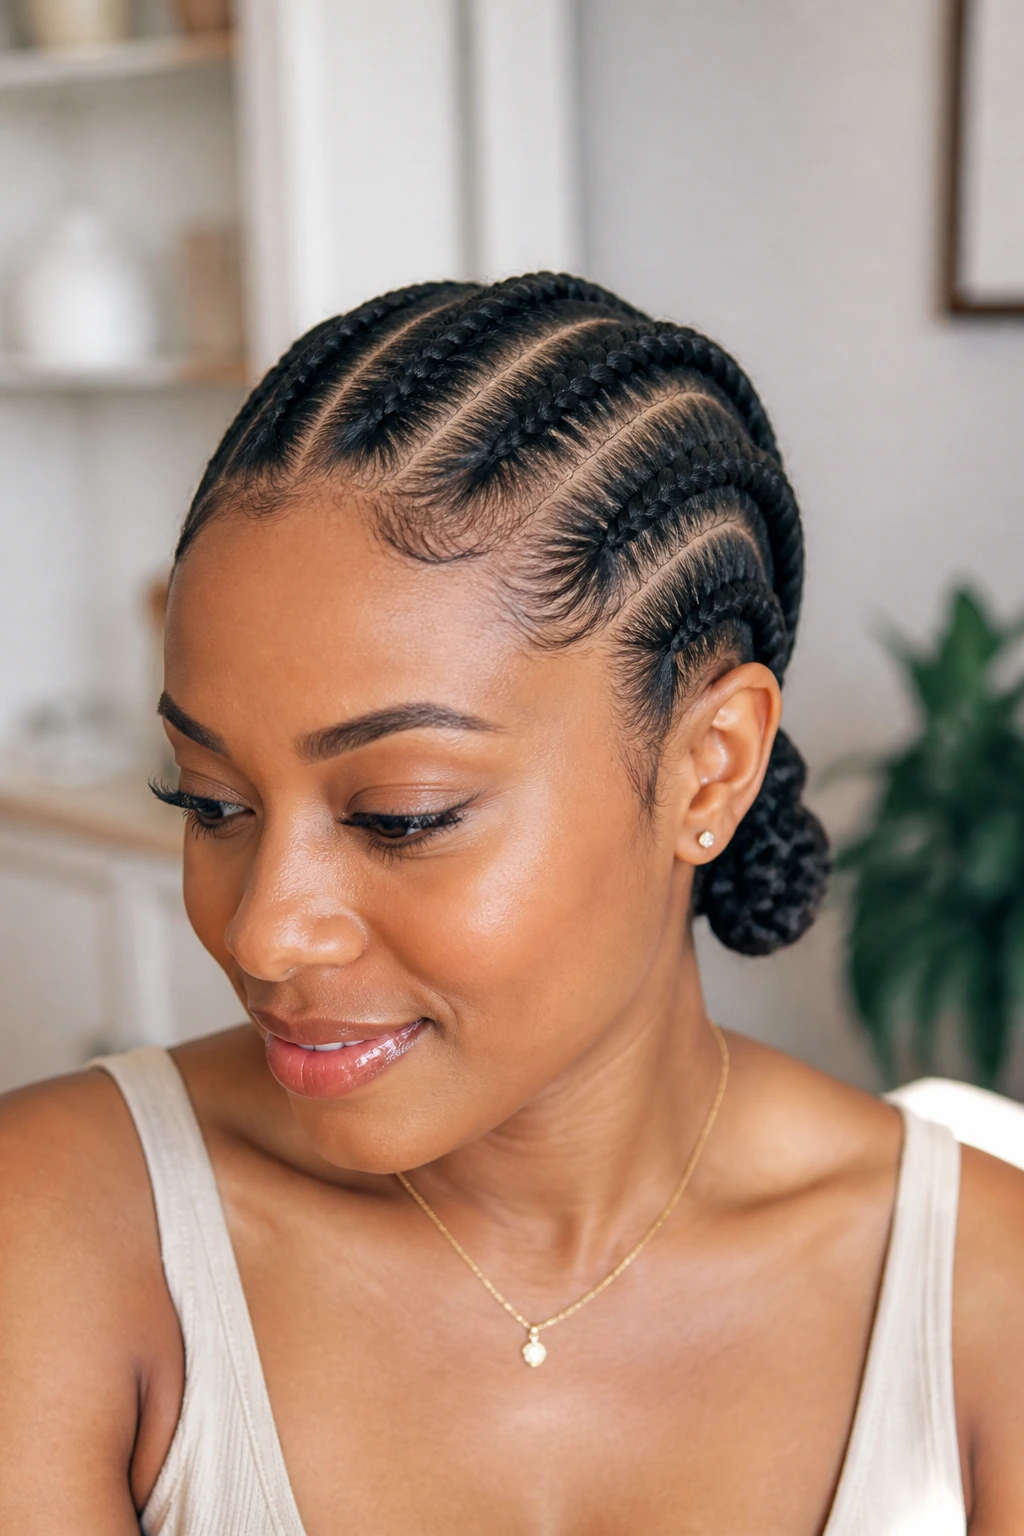
7. Straight-Back Classic Ghana Braids

There is a reason this style remains a staple. The straight-back approach is the most efficient way to keep your hair protected for an extended period. With fine hair, you want to keep the rows fairly even. Avoid the temptation to make the rows too wide, as this exposes too much scalp and makes the hair appear thinner than it actually is.
Styling the Straight-Back Look
You can play with the number of braids to change the aesthetic. Six to eight straight-back braids offer a clean, professional look that works in almost any setting. If you want more volume, increase the count to twelve. The more braids you have, the more you can manipulate the hair to cover the scalp effectively.
Maintenance of the Straight-Back Style
- Keep your scalp moisturized with a light oil, like jojoba or almond oil.
- Avoid heavy greases that will clog your pores and trap dirt.
- Wear a silk headscarf when exercising to keep the braids from moving around too much, which causes frizz.
8. The Low-Bun Updo Variation
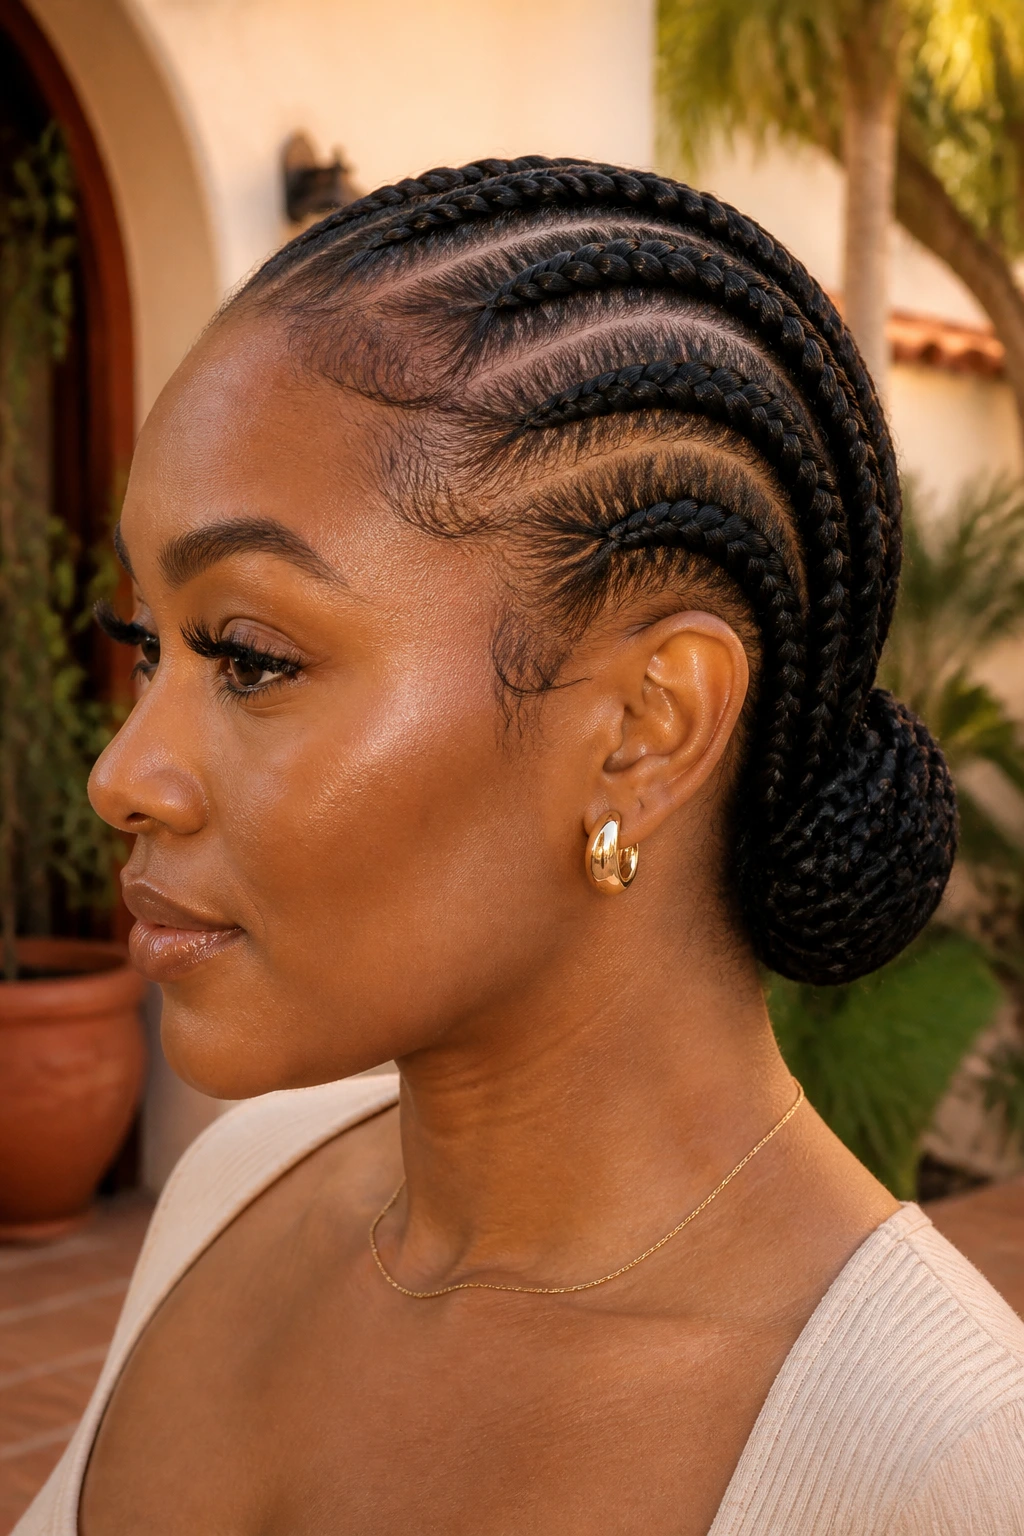
If you have fine hair, a low bun is a fantastic way to protect the ends of your braids while also pulling the hair away from your neck. This prevents the braids from snagging on collars or scarves, which is a common way that fine hair experiences mid-shaft breakage. A low bun is the height of sophistication and very easy to achieve.
How to Style Without Tension
Gather your finished Ghana braids into a loose ponytail at the nape of your neck. Secure them with a snag-free hair tie, ensuring you don’t wrap it too tightly. Take the lengths of the braids and wrap them around the base to form a bun. Use bobby pins that match your hair color to secure the ends—but be gentle when sliding them in.
Why This Style Lasts Longer
By pulling the hair into a bun, you reduce the surface area exposed to the air. This keeps your braids looking fresher for a longer period. It also stops the braids from “rubbing” against each other, which reduces the amount of frizz that accumulates over time.
9. Mixing Colors for Visual Depth
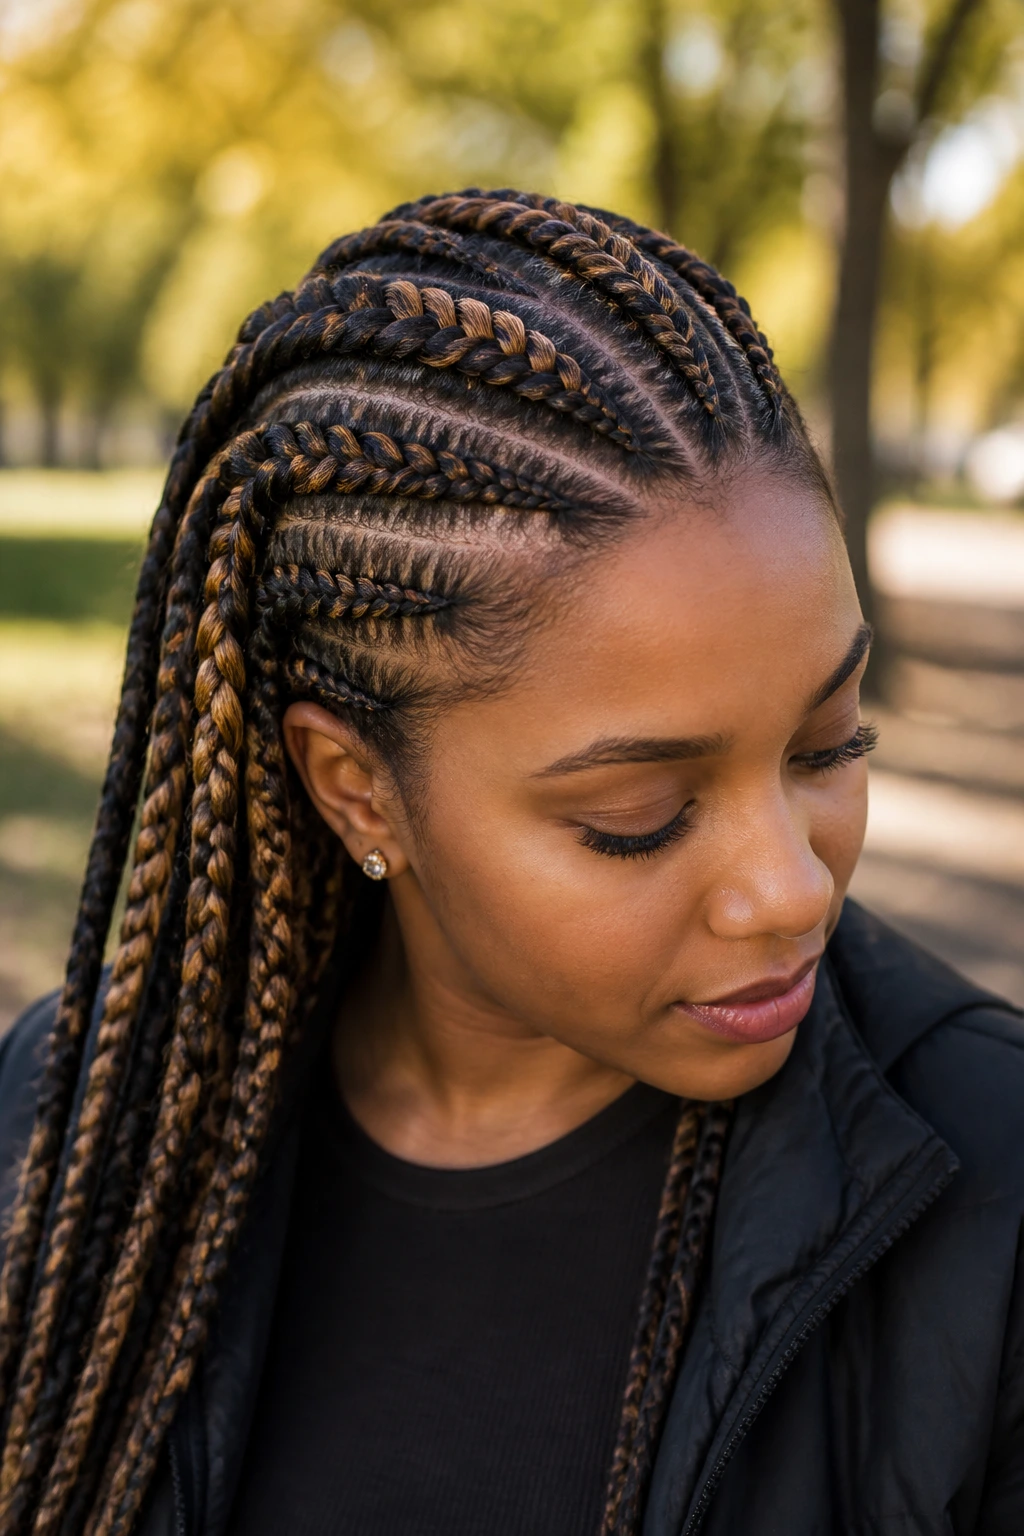
If you are worried about your fine hair looking thin, color is your best friend. Using extensions that are a slightly different shade than your natural hair—perhaps a mix of your natural color and a slightly lighter brown—can create the illusion of depth and dimension. This prevents the “flat” look that often plagues fine hair types.
Choosing Your Dimension
Select a color that complements your skin tone. Honey-blonde highlights woven into a darker base color create a multi-dimensional look that distracts the eye from the scalp. This technique is used by colorists all the time to add “body” to thin hair; it works exactly the same way when incorporated into braided styles.
The “Volume” Effect of Highlights
The lighter tones create high points and low points in your hair texture. When these are braided together, they look thicker and more voluminous than a single, solid color. Even if you don’t want a drastic change, adding just a few subtle highlights can change the entire personality of your hairstyle.
10. Accessorizing with Gold Cuffs

Sometimes, the best way to handle fine hair is to draw attention to the quality of the work rather than the density of the strands. Adding a few strategically placed gold or silver hair cuffs can elevate a simple cornrow style to something that feels intentional and high-end. This is a great trick for people who feel their hair doesn’t have enough “heft.”
Where to Place Them
Place your cuffs at the ends of the braids or near the nape of the neck. Avoid placing them too close to the roots, where they could pull on your delicate fine hairs. Cuffs are essentially lightweight jewelry; treat them as such and ensure they don’t have sharp edges that could tear your hair.
Keeping It Balanced
Less is more. If you add fifty cuffs to your head, you are adding weight—and with fine hair, every extra ounce matters. Stick to three or four strategically placed cuffs per braid style. This maintains the clean, “polished” aesthetic without making the style heavy or prone to tangles.
11. The Side-Parted Look
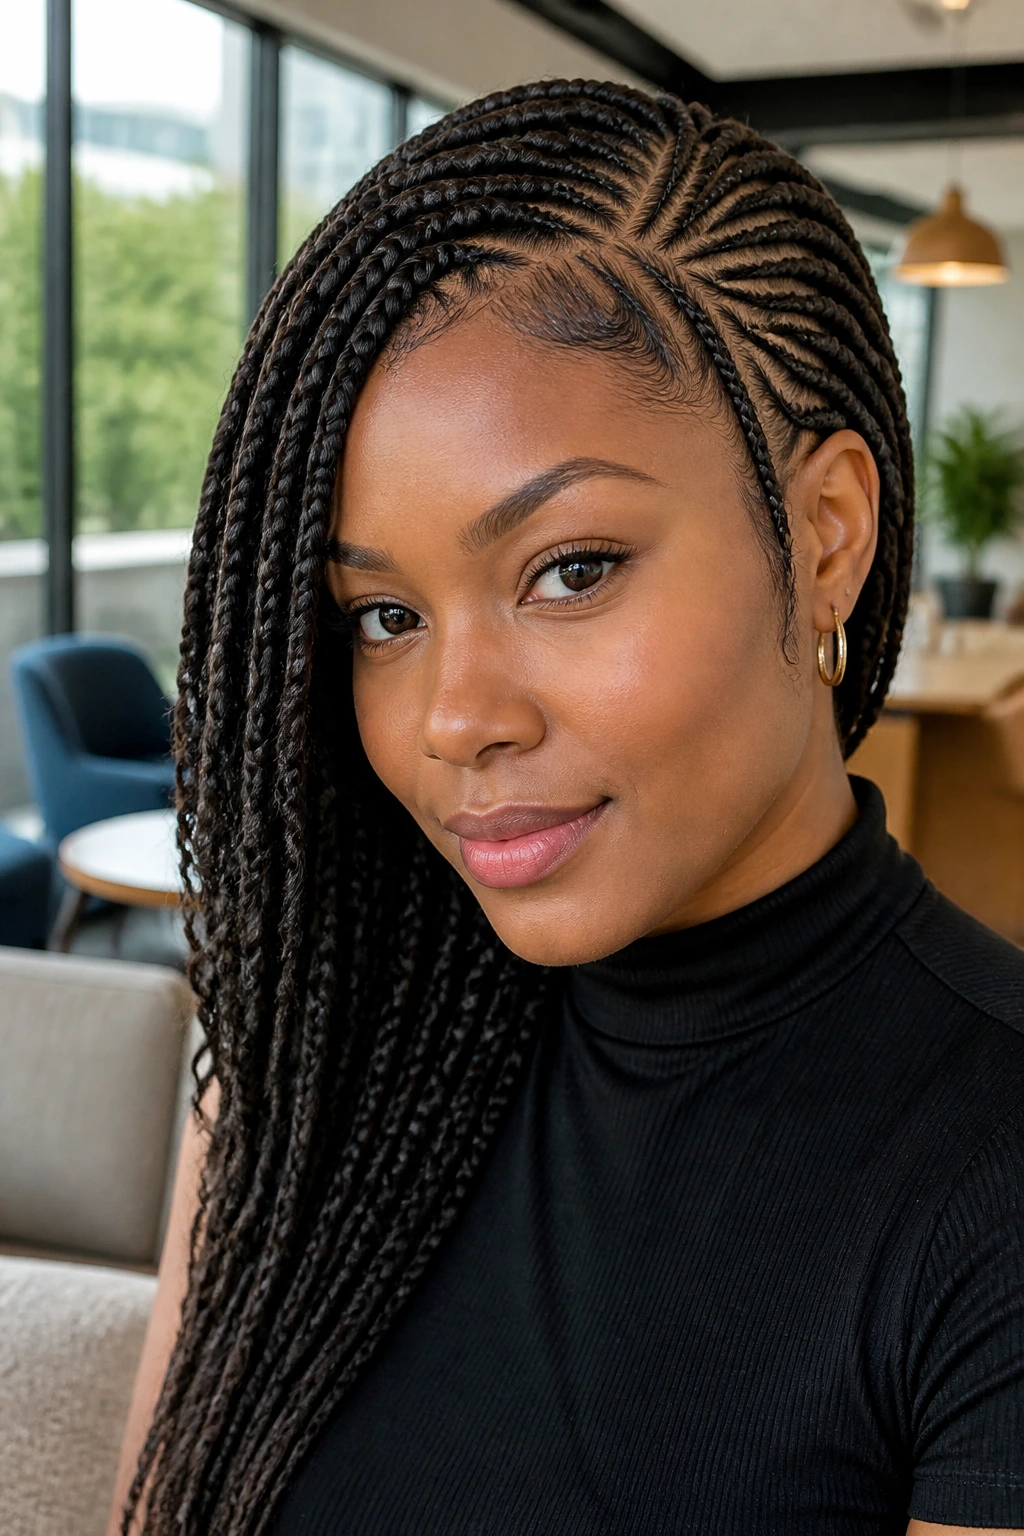
A side part instantly changes the framing of your face. For those with fine hair, a side-parted Ghana braid style can make the hair on the “heavy” side look thicker. By shifting the volume to one side, you create a sweeping effect that covers more of your scalp and draws the eye to your cheekbones.
How to Execute the Part
Work with your braider to ensure the part is deep and clean. You can even alternate the direction of the braids on the smaller side to add visual interest. This style is incredibly versatile and looks just as good in a professional meeting as it does at a weekend brunch.
Framing the Face
The braids near the face should be small and delicate. If they are too thick, they will overpower your features. Use the feed-in method to keep these front-facing braids small and slim, allowing them to frame your face softly rather than creating a wall of hair around your forehead.
12. Scalp Care During the Style

Your scalp needs to breathe, even when it’s covered in braids. Fine hair is often accompanied by a delicate scalp that can easily get irritated by heavy products. Focus your maintenance on keeping the skin clean. Use a witch hazel or micellar water spray on a cotton pad to gently wipe your parts every few days.
Avoiding Buildup
The biggest enemy of a long-lasting braided style is itchy, clogged pores. Because fine hair doesn’t hold as much oil as thicker textures, it’s easy to over-compensate with heavy hair grease. Do not do this. Use a lightweight, spray-on oil that is designed specifically for braided styles, and only apply it sparingly.
The Cooling Sensation
If your scalp feels tight or itchy, a tea tree oil spray can offer immediate relief. It cools the scalp and has natural antifungal properties that keep your skin healthy under the extensions. Just be careful not to spray too much, as you want to avoid dripping product onto your forehead or face.
13. Avoiding the “Triangle” Look
A common issue with cornrows on fine hair is the “triangle” at the end of the braid. This happens when the braider adds too much hair at once or doesn’t feed it in evenly. It creates a bulky, triangular piece of hair that sticks out and looks unnatural. You want your braids to remain uniform in size from the root to the tip.
Consistent Feed-In Technique
The secret is to add the extension hair in tiny, consistent increments. If you feed in a large chunk of hair every three stitches, the braid will become lumpy. If you feed in a tiny amount every single stitch, the braid remains smooth and cylindrical.
Correcting the Shape
If you notice a bump in your braid, it is likely because too much synthetic hair was added too quickly. There isn’t much you can do to fix this once the braid is finished, so the best approach is to be observant during the first ten minutes of the appointment. If the braid looks lumpy, ask the braider to adjust their technique before they get too far.
14. The Transition Period: Removing Safely
Removal is where most of the damage occurs for people with fine hair. We have all been tempted to just snip the braids off at the ends and pull, but this is a mistake. Fine hair tangles easily, and if you haven’t been keeping your roots clean, there will be a significant amount of buildup and shedding trapped in the base of the braid.
Patience is a Virtue
Set aside at least two hours to take your braids down. Do not rush. Use a detangling spray or a light oil to saturate the roots as you unbraid. This helps the natural hair separate from the synthetic extension hair without causing snap-back breakage.
Clearing the Shedding
Remember that it is normal to lose hair when taking down braids—you have been “holding” onto your natural daily shed hair for the duration of the style. Do not panic when you see a bundle of hair in your comb. Focus on gently working through any knots before you even consider washing your hair.
15. The “Half-Up, Half-Down” Style
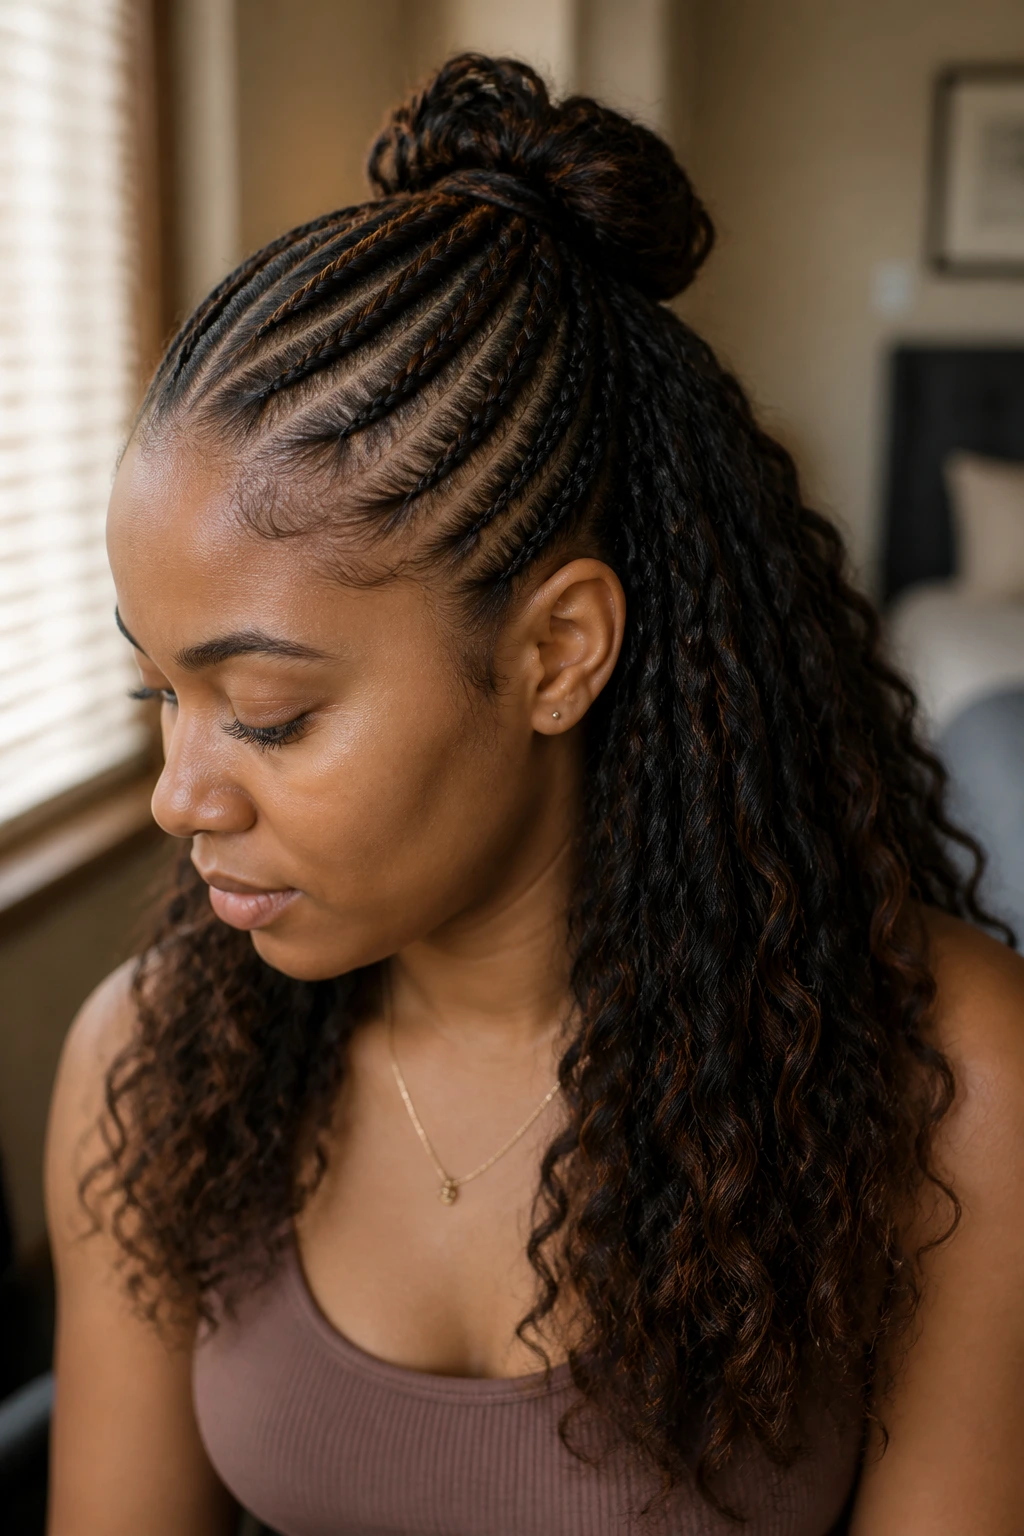
This is a great option for those who want the look of long, flowing hair without the weight of a full head of braids. By only braiding the top half of your hair and leaving the rest out, you reduce the total tension on your scalp by half. It’s a chic, modern take on traditional cornrows.
Managing the Transition
The point where the braids meet the loose hair needs to be very secure. Ensure your braider knots or secures the ends of the braids tightly so they don’t unravel. You can add a small cuff at the connection point to make it look intentional and stylish.
Styling the Loose Ends
If you choose to use curly synthetic hair for the loose portion, make sure it is a high-quality fiber that doesn’t matte easily. Fine hair can get tangled in synthetic curls very quickly. Using a bit of hair mousse on the synthetic curls will help them stay defined and keep them from tangling with your natural strands.
16. Why Less is More for Longevity
You might think that keeping your braids in for eight weeks is a sign of a “good” style, but for fine hair, that is pushing the limit. Fine hair starts to look “fuzzy” or “worn” much faster than coarser textures. If you leave the style in for too long, the new growth at your roots will become matted with the extensions, making the takedown process much more difficult and damaging.
The Four-to-Six Week Rule
For fine hair, aim for a four-to-six-week limit. This allows you to protect your hair while still giving your scalp and roots regular “breathing room.” Removing the braids within this window ensures that your natural hair stays healthy and free of build-up-induced knots.
Assessing Your Scalp
If you see signs of excessive dryness or if your parts are starting to lose their definition, it’s a sign that the style has run its course. It is better to take the style down early and give your hair a week of deep conditioning before your next appointment than to force a style that has already started to fray.
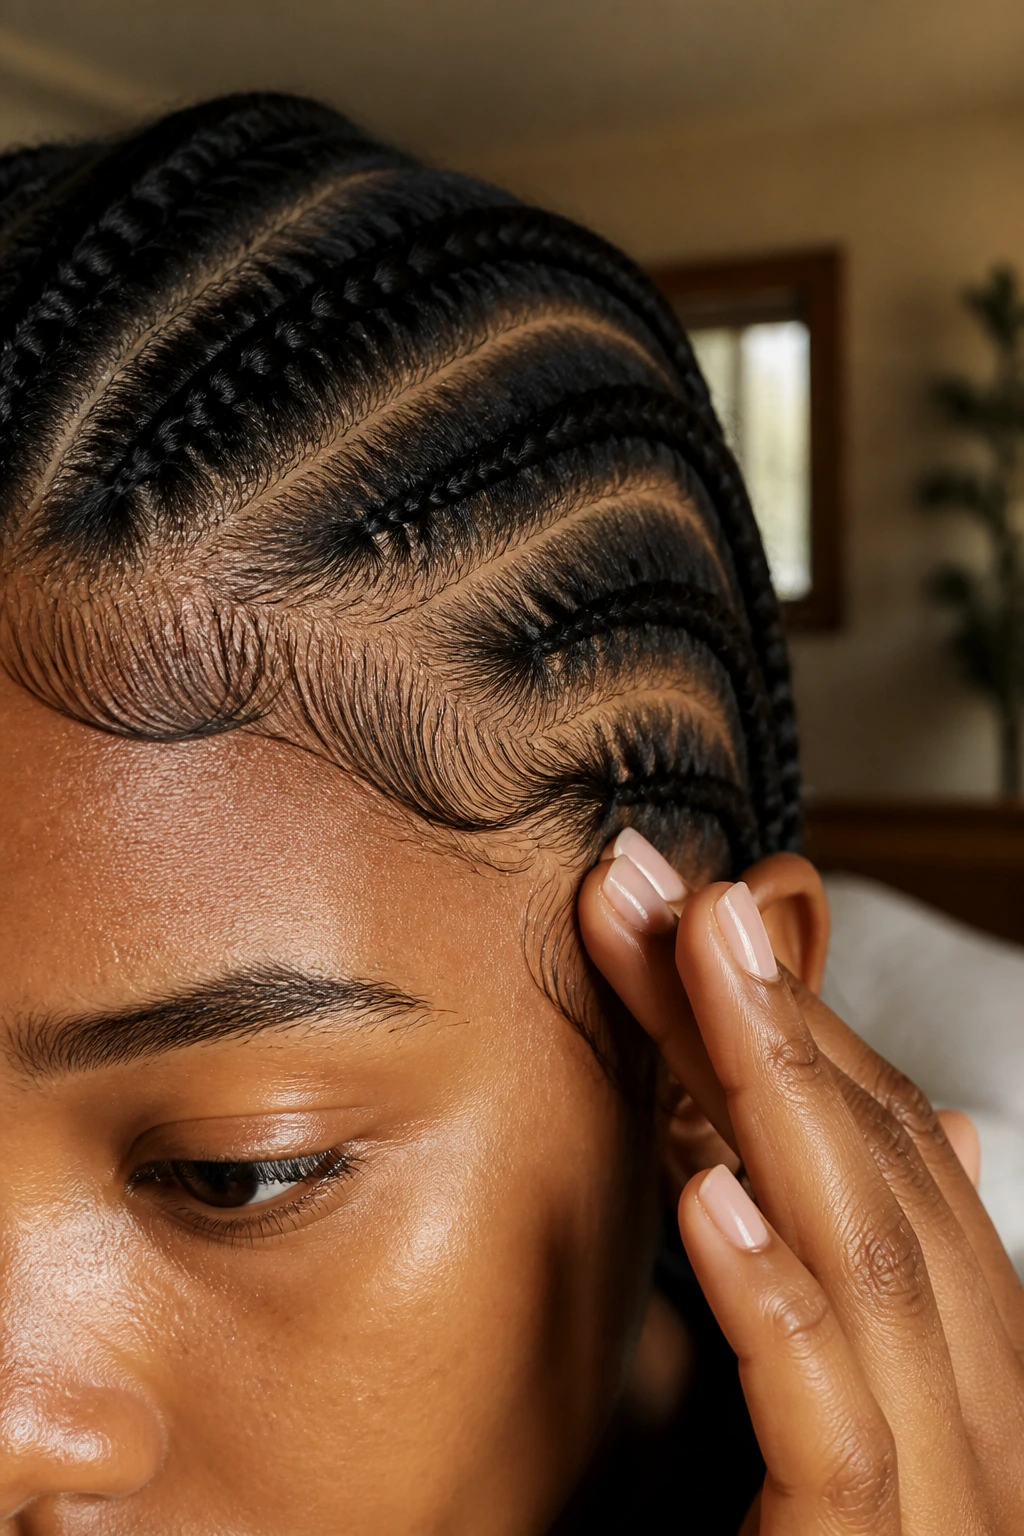
17. The Natural-Look Taper

The most professional-looking Ghana braids are those that taper off naturally at the end. When a braider uses the right technique, the braid gets progressively thinner toward the ends. This is the hallmark of high-quality work. If the braids end in a chunky, blunt tip, they will look synthetic and heavy—the opposite of what you want for fine hair.
Communicating with Your Stylist
Show your braider a picture of what you want, but explicitly ask for “tapered ends.” Many stylists are used to making ends thick to save time, but a tapered end is lighter and lasts longer without unravelling. It is a sign of a meticulous stylist.
The Length Factor
For fine hair, avoid extremely long braids—think waist-length or longer. The weight of that much extra hair will put unnecessary stress on your roots and cause the braids to swing and pull every time you move. Shoulder or mid-back length is usually the sweet spot for comfort and style.
18. Embracing the Scalp-Covering Technique
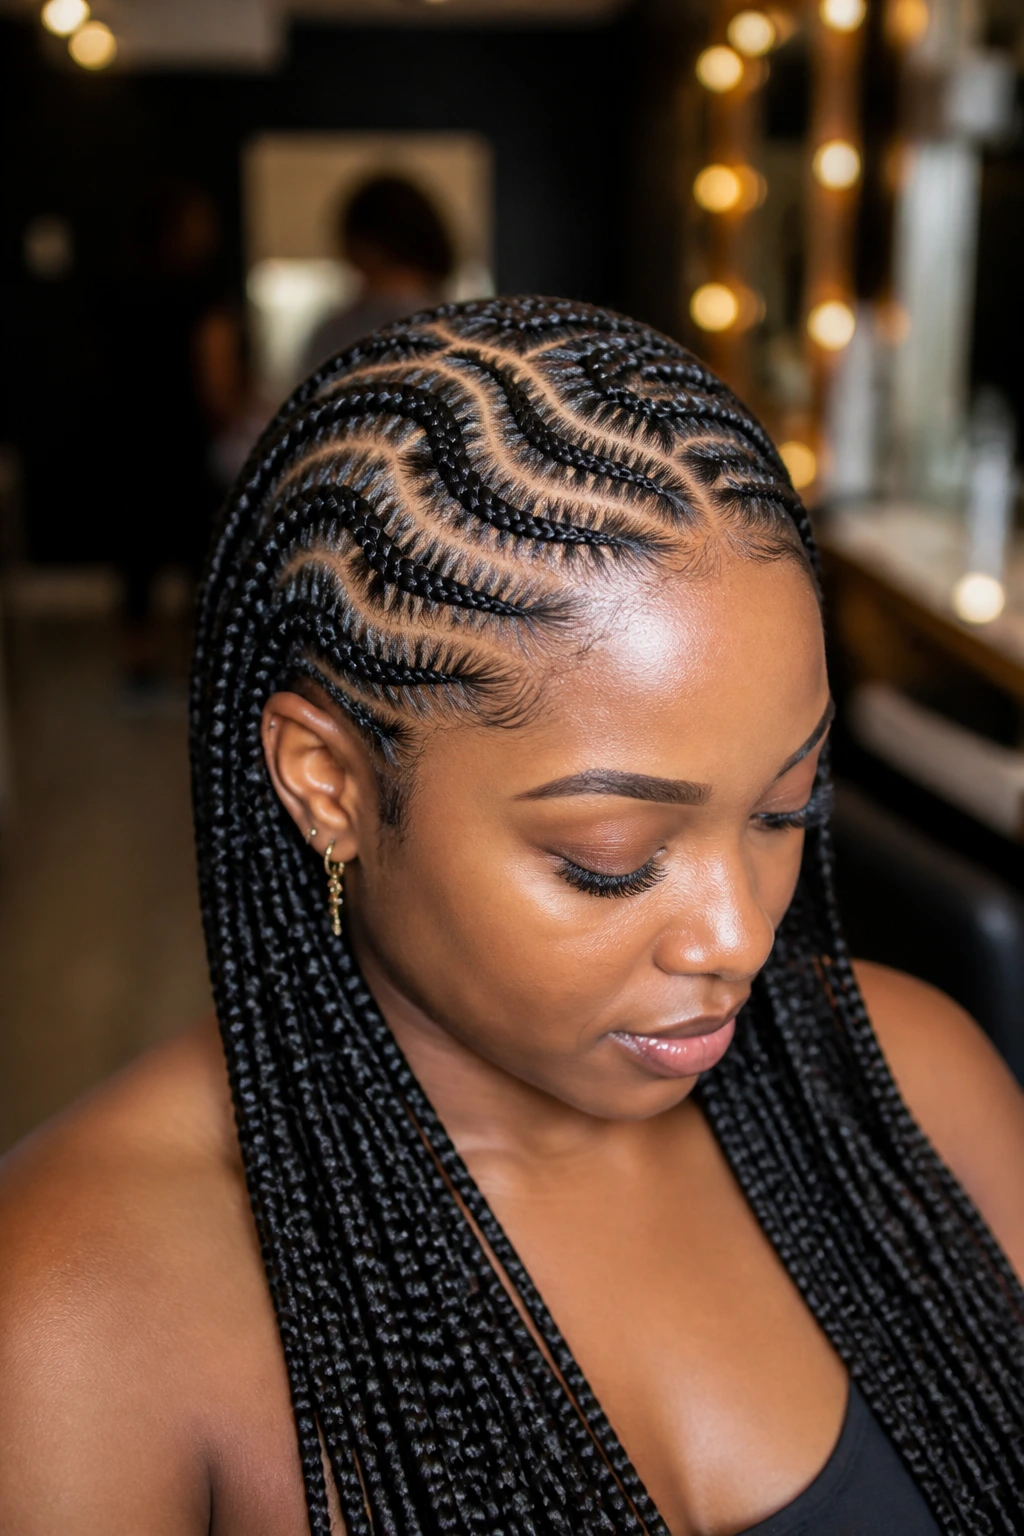
If you are specifically looking for a way to hide thinning spots, ask your stylist to use a “fuller-coverage” parting technique. This means instead of straight rows, they use zig-zags or curved lines. These shapes don’t follow the scalp as directly as straight lines, which makes it harder for the eye to see exactly where the scalp is and where the braid begins.
The Illusion of Volume
This technique is a total game-changer. It makes the entire head of braids look like one cohesive unit of hair rather than a series of individual tracks. It’s particularly effective for people with thinning along the center part or the crown.
Final Prep Checklist
- Always bring your own high-quality extensions to ensure the color and weight are exactly what you need.
- Don’t be afraid to speak up if a section feels too tight during the process.
- Trust that fine hair can look absolutely incredible in Ghana braids, provided you treat the root with the respect it deserves.
Final Thoughts
Ultimately, wearing Ghana braids with fine hair isn’t about finding a miracle cure for texture—it’s about choosing the right installation method that respects the physical limitations of your hair. When you prioritize low tension, proper preparation, and the right weight of synthetic fiber, you end up with a style that is as healthy as it is beautiful. Don’t be discouraged if it takes a few tries to find a stylist who understands the specific needs of fine hair.
The best protective styles are the ones you forget you’re wearing. If your braids feel light, look natural, and don’t require you to adjust your scalp every ten minutes, you have found the right approach. Remember to keep your scalp clean, protect your edges at night with silk, and give your hair a well-deserved break between styles. Fine hair can handle braids—it just needs a gentler touch.