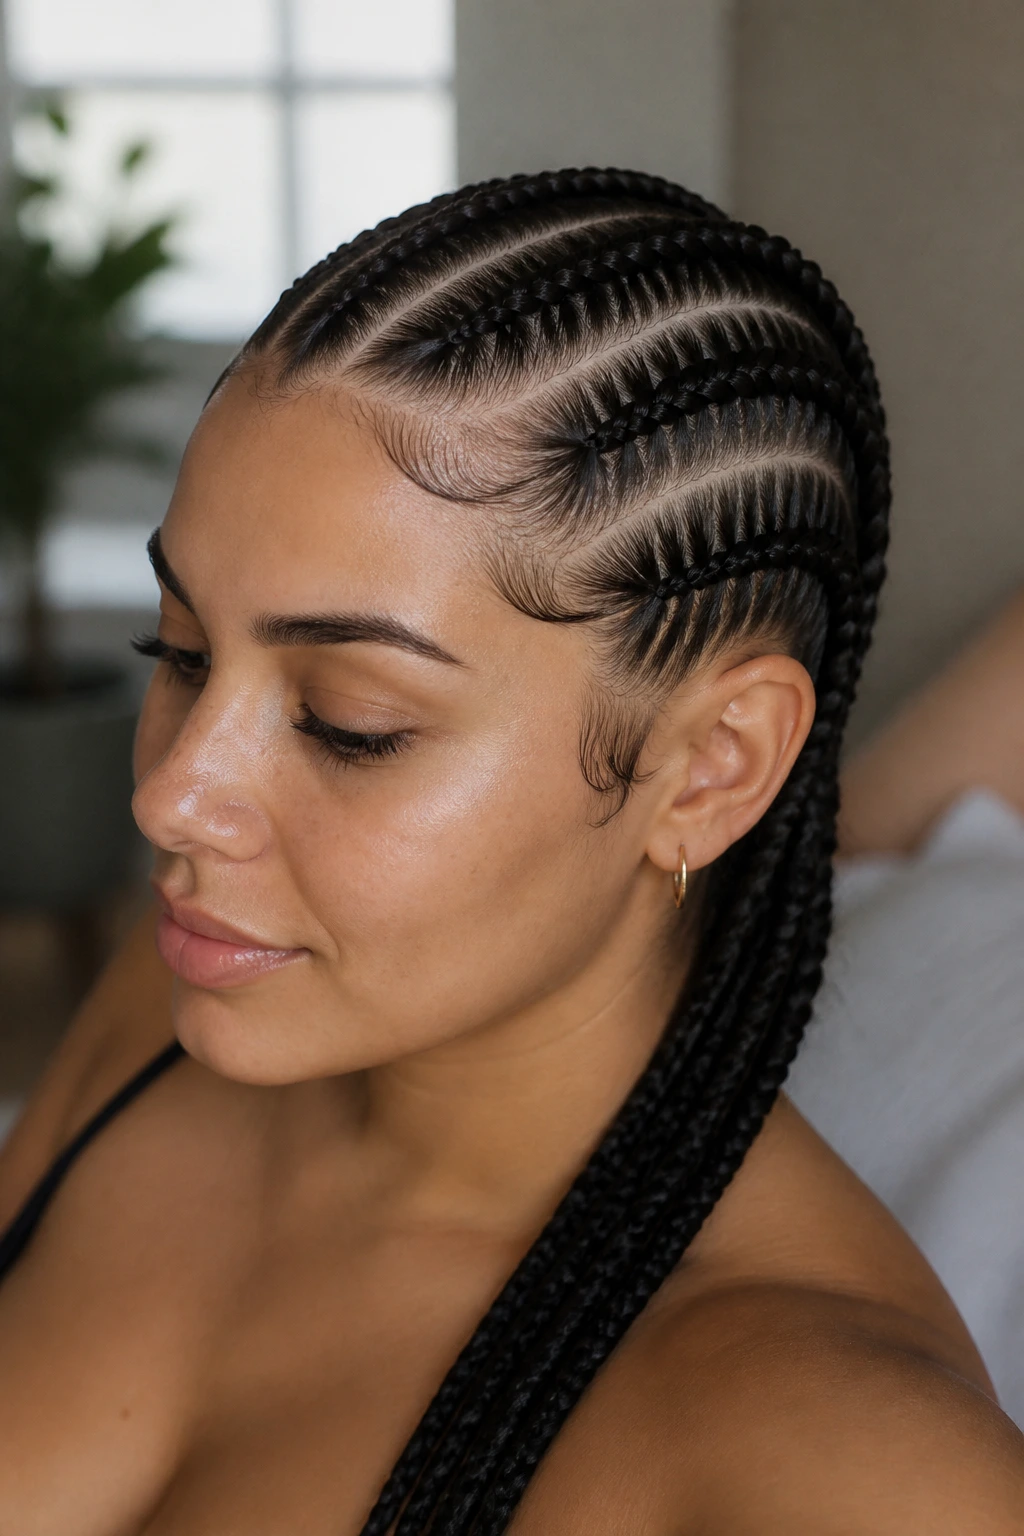
Cornrow styles have long been a cornerstone of protective styling, but there is a specific, sleek energy that comes with the “four braids” look. When you are working with the unique texture and density often found in Latina hair—which can range from fine and silky to coarse and tightly coiled—the tension and parting techniques become everything. Those four clean, symmetrical lines running from your forehead to your nape offer a balance of structure and simplicity that few other styles can match.
Many people assume cornrows are one-size-fits-all, but the four-braid configuration is particularly forgiving for those who want a low-maintenance look that still feels intentional. Whether you are aiming for a crisp, sporty vibe or a polished look that can handle a day at the office and a night out, these four thick, sturdy plaits serve as the perfect foundation. It is less about creating an elaborate pattern and more about the precision of your parts and the smoothness of your grip.
Getting the best result starts long before your fingers touch the hair. Latina hair types can be prone to frizz when handled dry, and the weight of four large braids can pull at the scalp if the foundation is not solid. By focusing on hydration and the right parting technique, you can elevate a simple four-braid style into something that looks like it came straight out of a high-end salon.
Preparing Your Hair for Maximum Smoothness
Before you even think about sectioning, your hair needs to be in the right state. Working on dry, tangled hair is a recipe for breakage and uneven braids. You want your hair to be soft, pliable, and slightly damp to ensure the cleanest lines possible. Start by washing your hair with a hydrating shampoo and applying a generous amount of conditioner, focusing on detangling from the ends up to the roots.
The Importance of Proper Detangling
You cannot achieve a crisp part if there is a knot hiding in your hair. Use a wide-tooth comb or a detangling brush while your hair is saturated with conditioner. If you leave even small tangles near the scalp, the braid will bulge, and your parts will end up looking jagged instead of sharp. Take your time here; this stage is the unsung hero of a long-lasting style.
Choosing the Right Styling Products
Once your hair is clean and detangled, you need a product that provides hold without leaving a flaky residue. A light gel or a edge-control cream works wonders for Latina hair textures. Avoid heavy, waxy pomades that can weigh the hair down and make it look greasy. Look for products that contain humectants like glycerin or aloe vera, as these help keep the hair smooth and flexible while you braid.
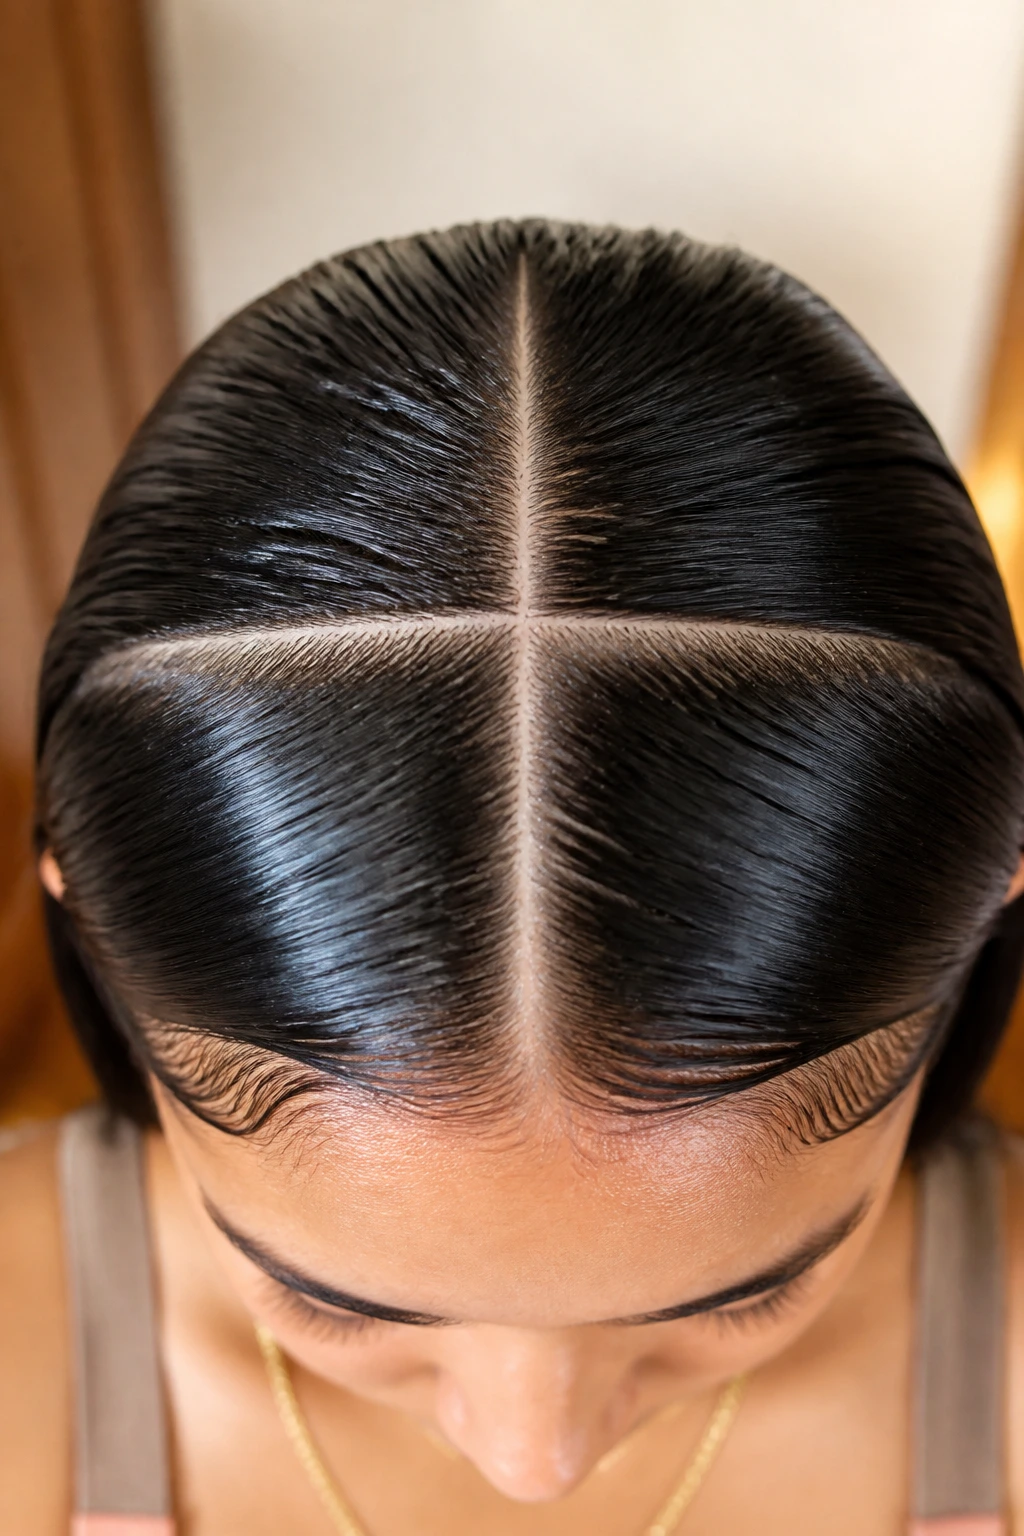
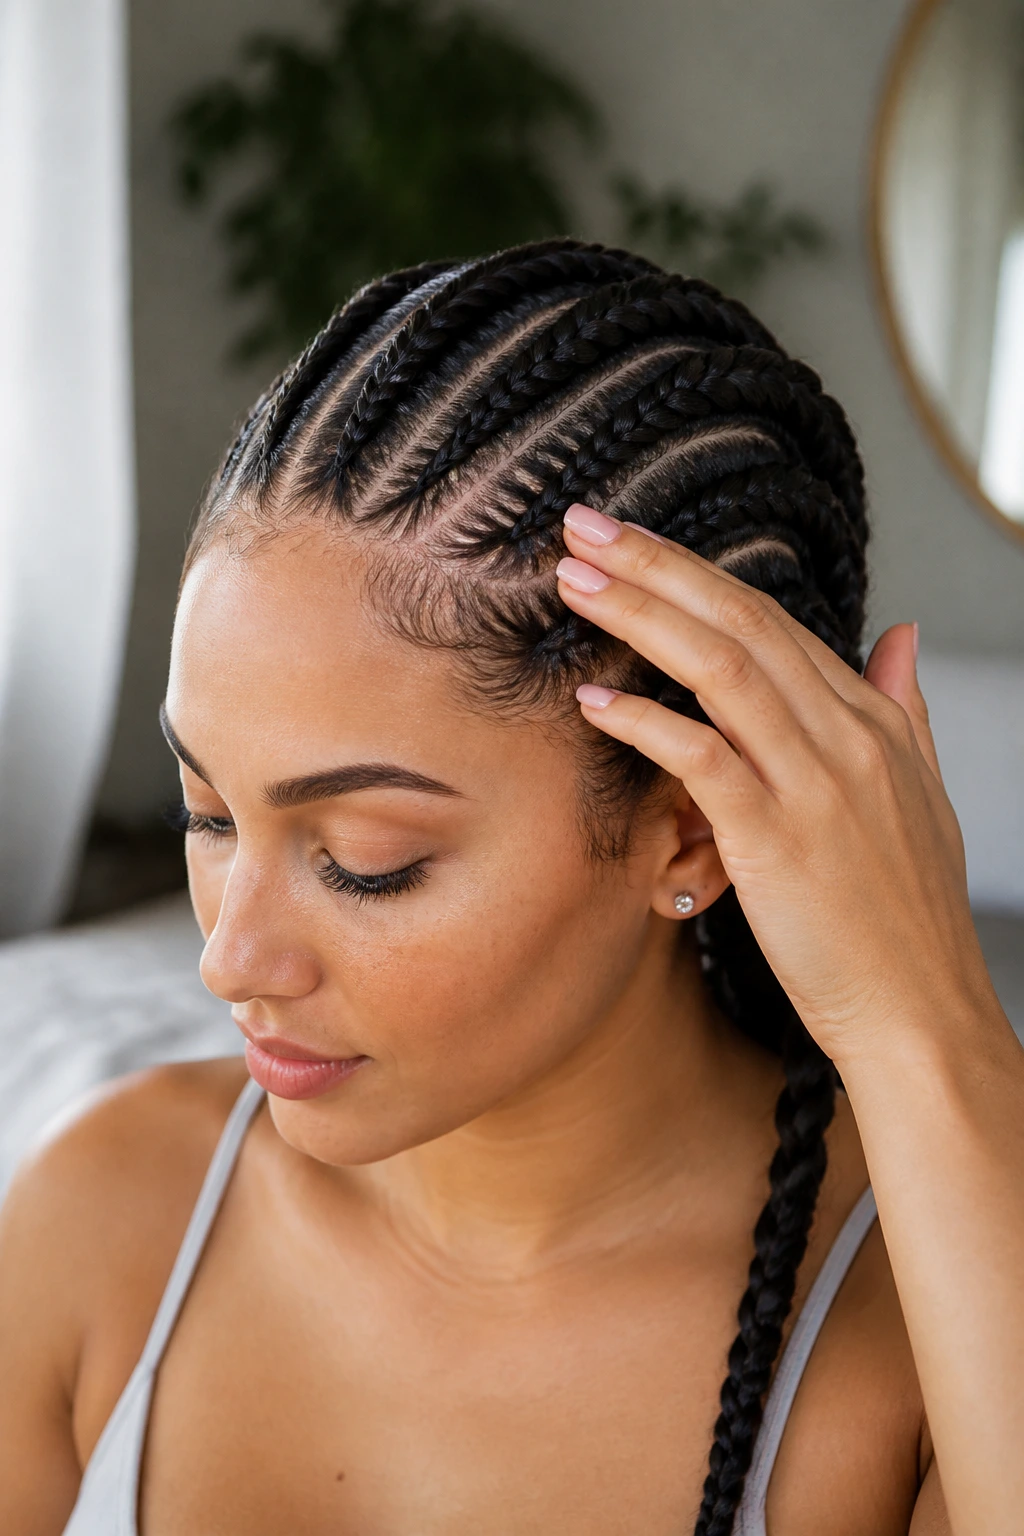
Establishing Perfectly Straight Parts
The magic of a four-braid style lies entirely in the symmetry. If your parts are crooked, the braids will never sit correctly. Use a metal-tail comb to ensure the lines are razor-sharp. Start by creating a center part, then divide each side into two equal sections. This gives you four distinct, clean strips of hair.
Measuring for Symmetry
Do not just eyeball your sections. Use the bridge of your nose as your center anchor point. From there, take your comb and draw a straight line back toward the crown of your head. If you find it difficult to keep the line straight, use a small hand mirror to check the back of your head as you work. Symmetry is the difference between a messy weekend style and a professional-looking protective set.
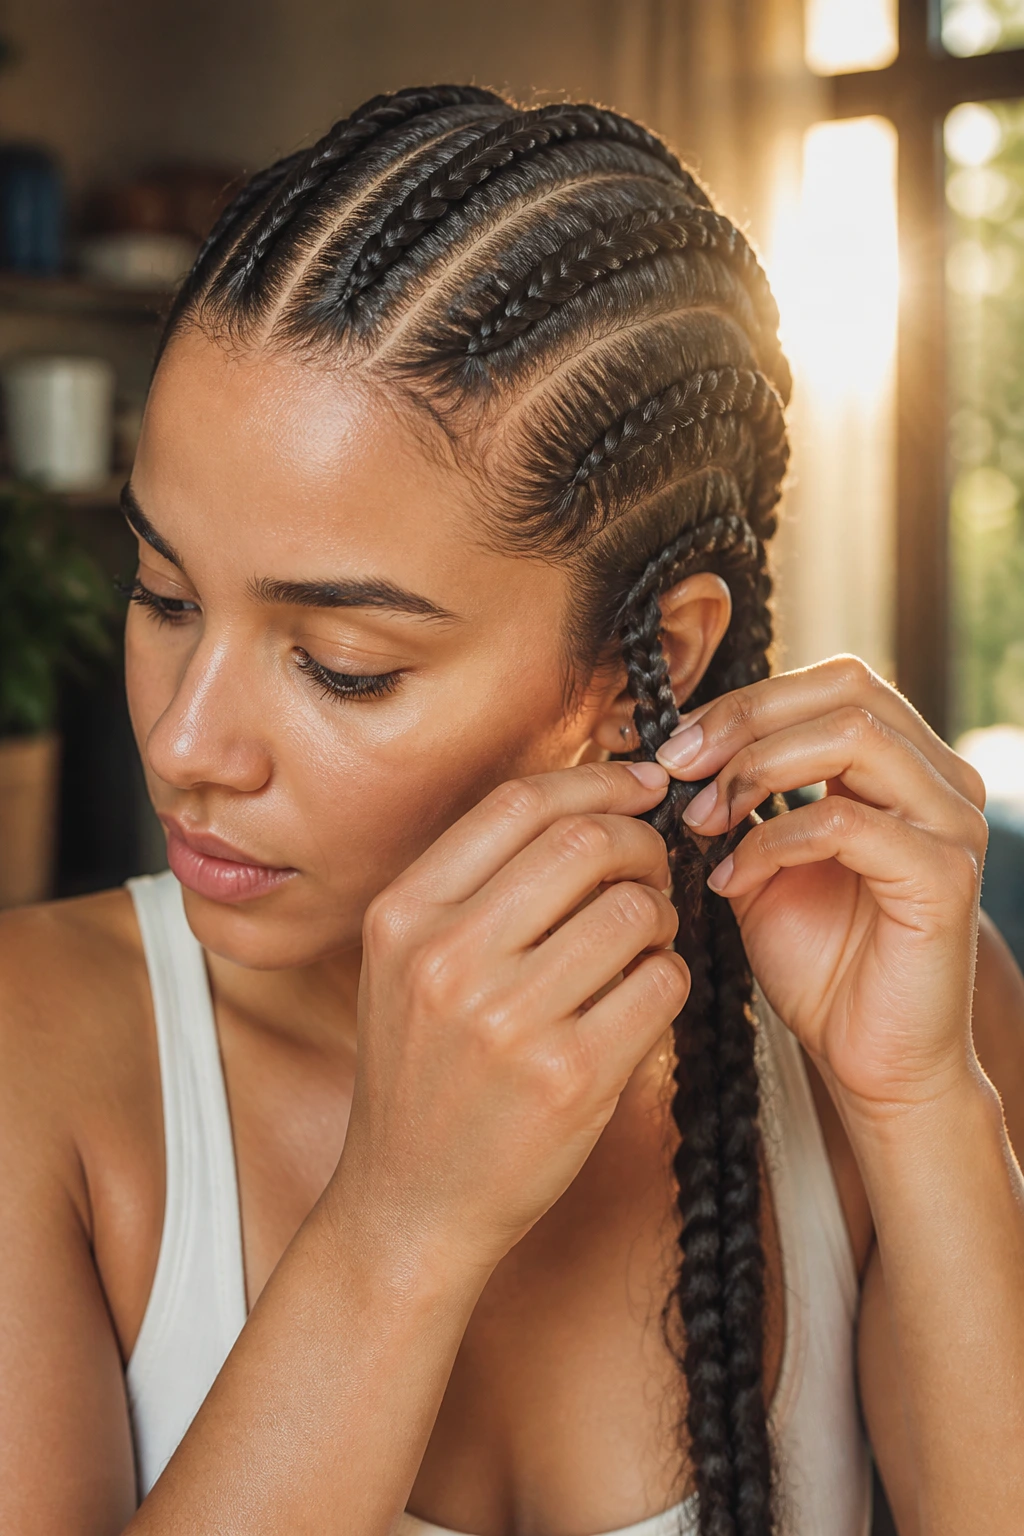
Securing Sections Before You Braid
After you have created your four sections, use small hair clips or elastic bands to hold three of them out of the way. This keeps you from accidentally grabbing hair from a neighboring section, which is the most common reason for messy-looking cornrows. Working on one isolated section at a time allows you to focus purely on the tension and the pattern of the braid.
Managing Tension for Latina Hair Textures
Latina hair often has a high degree of elasticity, which means it can snap back and cause tension if you pull too hard. The goal is to keep the braid firm enough to stay put without putting undue stress on your hairline. If you notice your skin pulling or feel a “tight” sensation, you are braiding too tightly. This can lead to traction alopecia over time, which is the last thing you want for a protective style.
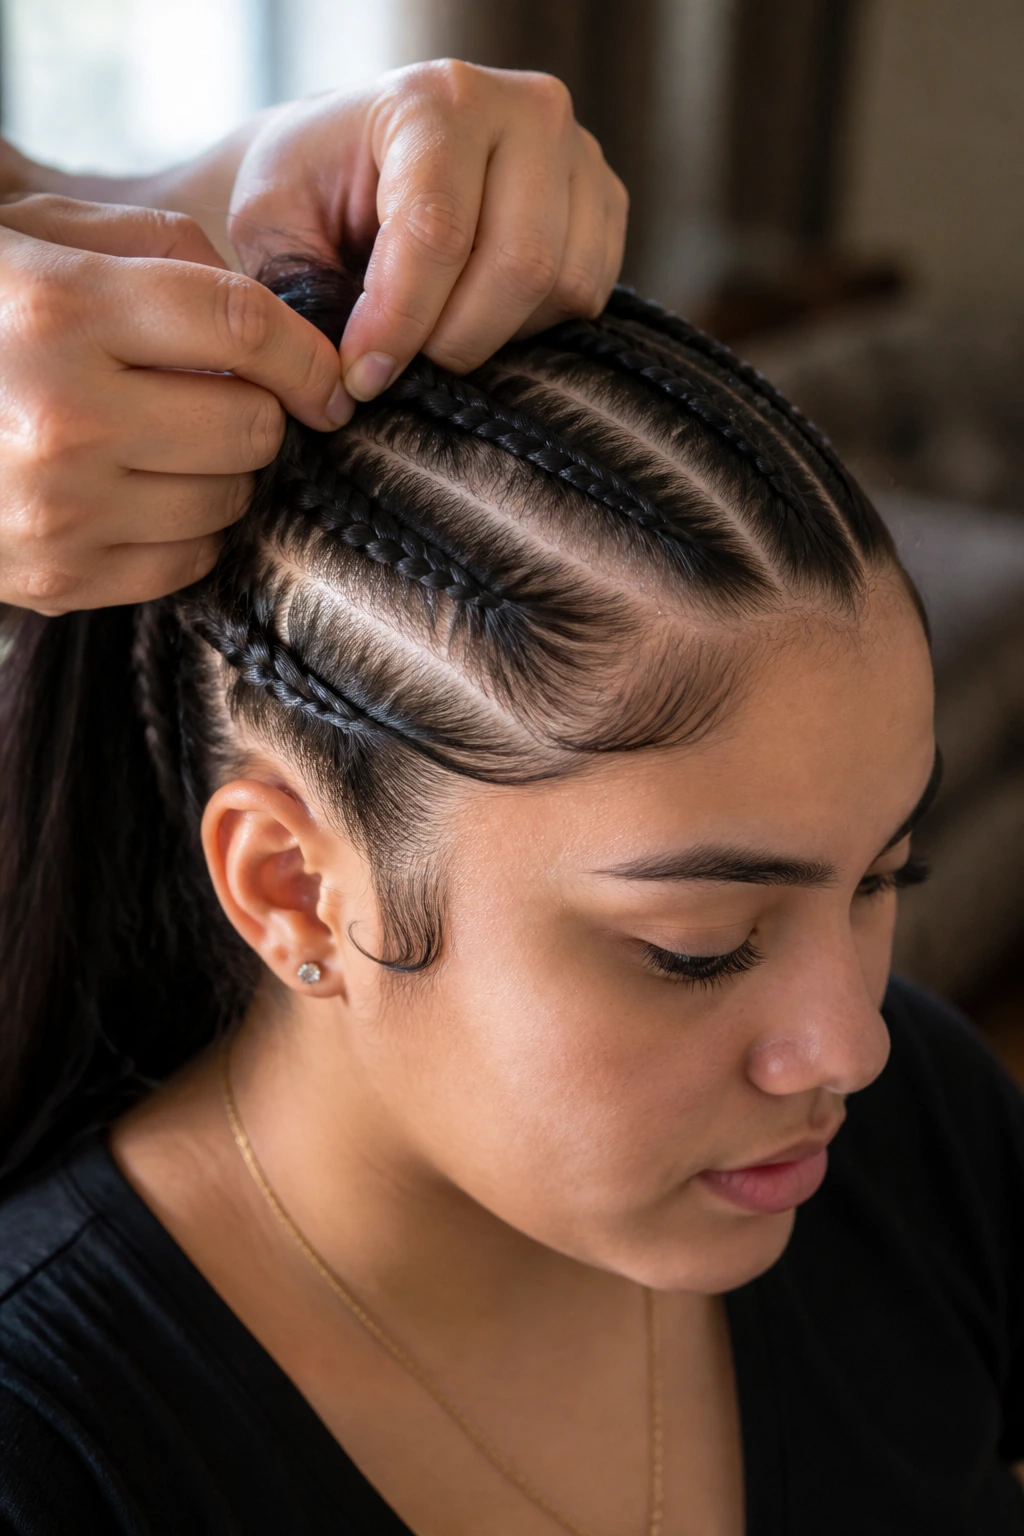
The Grip Technique
Hold your section between your thumb, index, and middle fingers. As you cross the hair, pull it through firmly but gently. Keep your hands close to the scalp. If you braid too far away from the head, the cornrow will sag, and you will end up with a “floating” braid rather than one that lies flat against your skin.
Recognizing Warning Signs
If you are doing your own hair and your arms start to burn or your hands cramp, take a break. Rushing the process often leads to inconsistent tension. If you notice small bumps or redness around your hairline, loosen your grip immediately. Your braids should feel secure, but they should never feel painful.
Incorporating Synthetic Hair for Length

While you can certainly braid your natural hair, many people prefer to add synthetic braiding hair to create that sleek, uniform thickness that lasts for weeks. When choosing hair, look for “pre-stretched” options. This saves you an immense amount of prep time and ensures the ends of your braids will have a natural taper rather than a blunt, choppy cut.
Matching Texture to Your Natural Hair
Select synthetic hair that mimics the shine and texture of your natural strands. If your hair is very fine and silky, avoid high-shine synthetic hair that might look too glossy by comparison. A matte finish or a “yaki” texture usually blends much more seamlessly, making the transition from your roots to the synthetic extension invisible to the eye.
Blending the Synthetic Piece
To start the braid, attach the synthetic hair to your natural hair near the scalp using a simple knot or by wrapping it around the base of your natural section. As you progress, integrate your natural hair slowly into the braid so the extension is locked in. If you leave your natural hair out, it will eventually frizzy and ruin the smooth look of the braid.
Maintaining the Crispness of Your Lines
Once the braids are finished, your job is only halfway done. The biggest challenge with four-braid styles is keeping the parts looking sharp. Use a small amount of light oil or a finishing spray to smooth down any flyaways that pop up along your parts. Do not over-saturate the hair, as this will cause the braids to unravel prematurely.
Dealing with Baby Hairs
Latina hair often has delicate baby hairs around the hairline that need special care. Use a soft-bristled toothbrush and a bit of edge control to swoop them into place. This small detail adds a level of polish that makes the entire style look intentional. It bridges the gap between the scalp and the braid, giving your face a framed, finished appearance.
The Role of a Silk Scarf
Never go to sleep without a protective covering. A silk or satin bonnet or scarf is mandatory for keeping the friction down while you move at night. This keeps your braids from becoming fuzzy and helps your edge work stay laid for days. If you skip this step, you will be re-doing your edges every single morning.
Troubleshooting Common Braiding Mistakes
Even the most experienced braider runs into issues. If you finish your braids and realize they are uneven in size, it is usually because you didn’t distribute the hair evenly at the start. If this happens, don’t panic. You can often go back and gently pull at the loops of the braid to give the thinner one a bit more volume, balancing the appearance of the set.
Fixing a Loose Braid
If a braid feels too loose at the nape of your neck, it usually means your grip loosened toward the end. You don’t have to take the whole thing out. Simply undo the last few inches, re-tighten the tension, and braid it back down. A little bit of practice with a mirror behind you makes this much easier to manage.
Managing Scalp Itch
Braids can sometimes cause the scalp to itch, especially if you have sensitive skin. Use a soothing scalp oil with tea tree or peppermint to calm any irritation. Apply it directly to the exposed parts of your scalp using a dropper. Avoid rubbing the oil into the braids themselves, as this can cause them to loosen.
Styling Variations for the Four-Braid Look
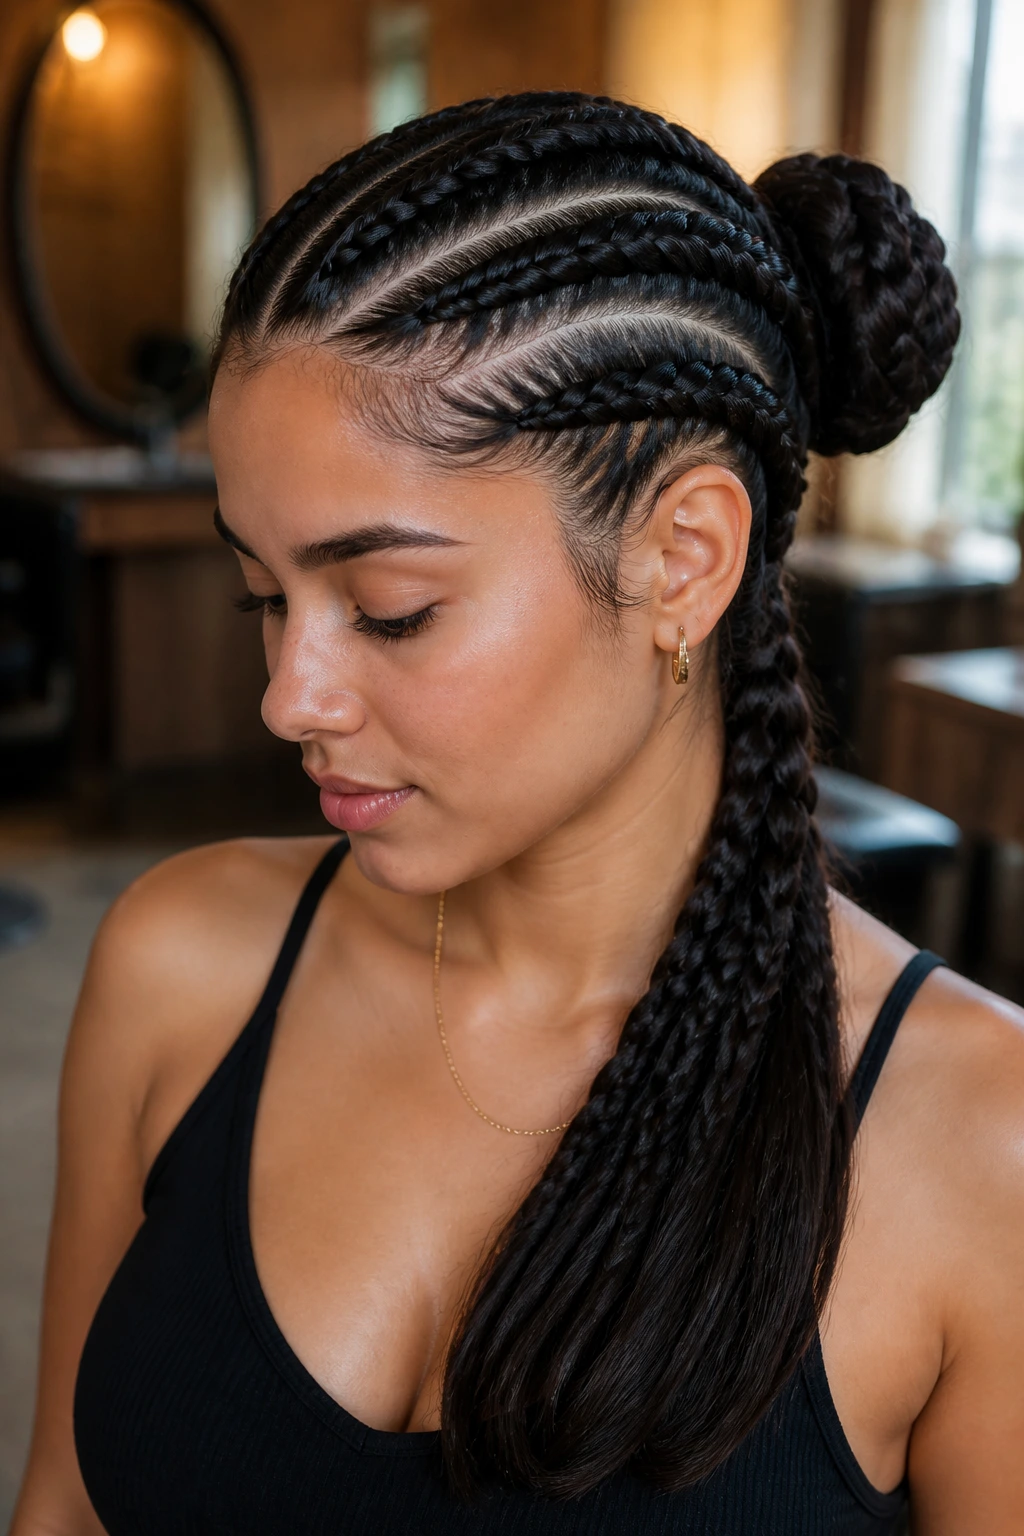
You are not stuck with just one look once the braids are in. You can pull all four braids into a low ponytail for a sophisticated, sleek appearance that keeps hair off your neck. Alternatively, you can pin the ends of the braids up into a bun. The versatility of a four-braid base is one of its greatest strengths.
Accessorizing Your Braids
Adding gold or silver cuffs to your braids is a popular way to dress them up. Because the four-braid style is so clean and simple, it serves as the perfect canvas for metal hardware. Just be careful not to add too many, or the weight of the cuffs will pull on the braids and cause them to sag throughout the day.
Transitioning to Casual Settings
For a more relaxed vibe, leave the ends of your braids loose. If you used synthetic hair, you can dip the ends in hot water to seal them so they don’t unravel. This gives the style a soft, natural finish that looks great whether you are at the gym or meeting friends for coffee.
Washing and Refreshing Your Scalp
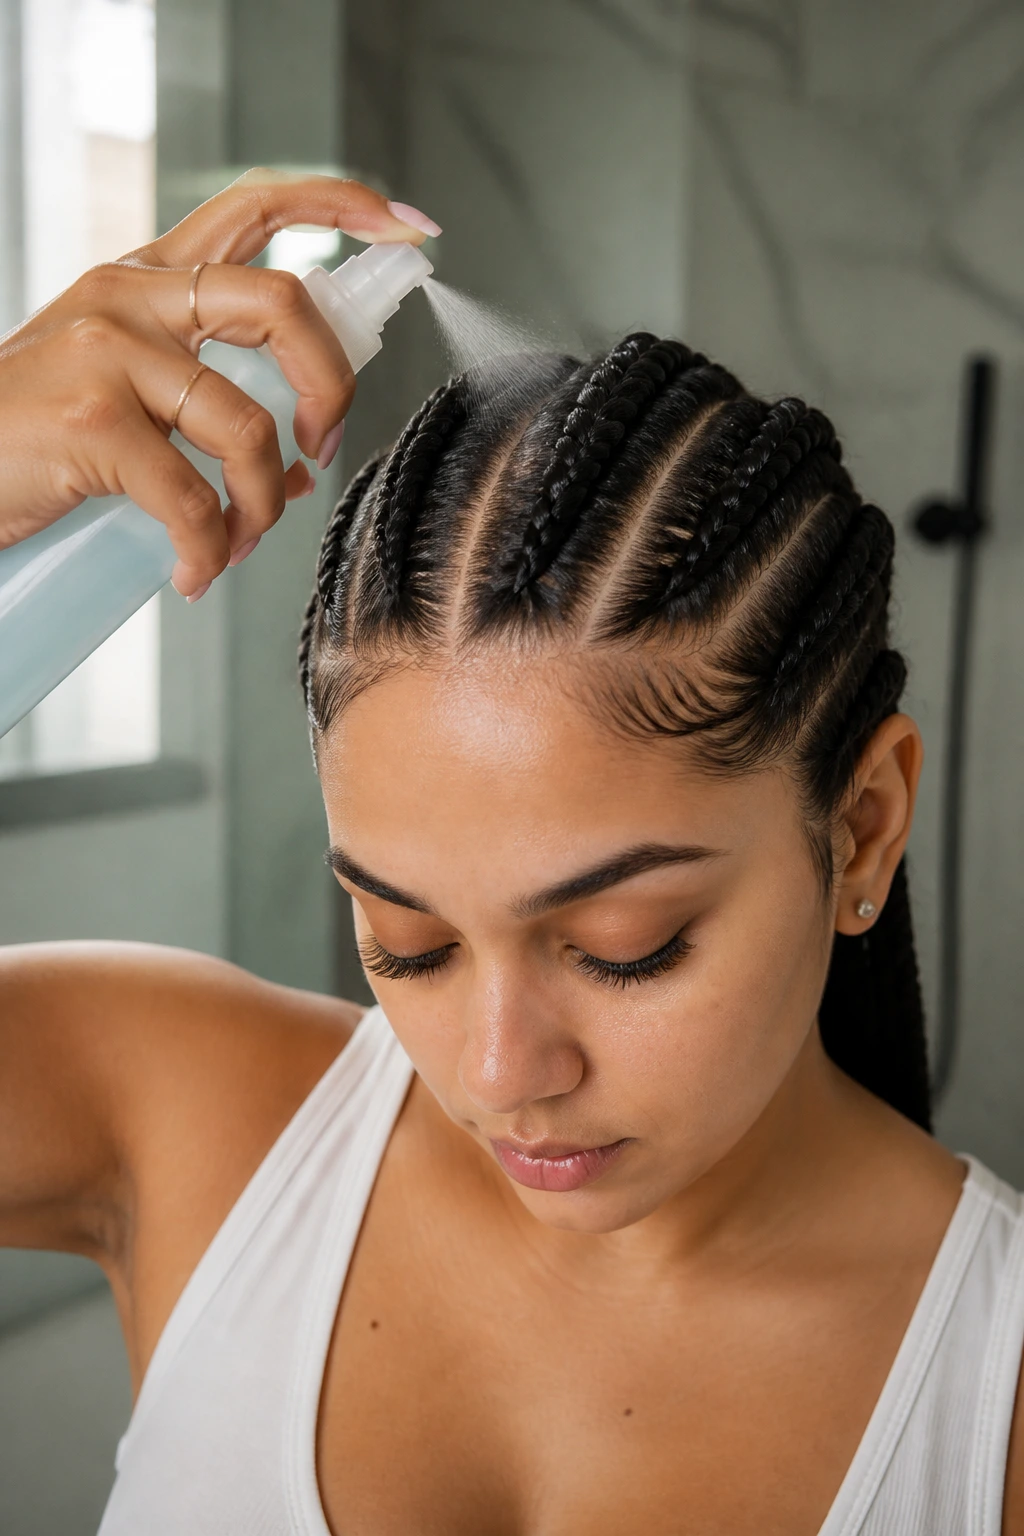
One of the most common questions is how to keep the scalp clean without ruining the braids. You don’t need to wash your entire head every few days. Instead, use a spray bottle with a mix of water and a gentle shampoo. Mist your scalp lightly, scrub with your fingertips, and rinse carefully.
Drying Properly
Drying is just as important as washing. If you leave your braids damp, you risk mold or mildew growth inside the hair, which is definitely not the goal. Use a hooded dryer if you have one, or sit under a fan for a while. Make sure the roots are completely dry before you put on a scarf or go to bed.
Extending the Style’s Life
If your braids start to look a little fuzzy after a week, you can refresh them with a bit of mousse. Apply a generous amount of mousse over the length of the braids and wrap your head with a silk scarf for about twenty minutes. The mousse helps flatten the flyaways and gives the braids a “freshly done” look without having to redo them entirely.
Understanding Scalp Health During Protective Styling
Protective styles like cornrows are meant to give your hair a break, but they should never be a source of stress for your scalp. Latina hair can sometimes be fine, and constant tension will lead to thinning around the temples and the nape of the neck. Always prioritize comfort over having the “tightest” possible braid.
Avoiding Buildup
Product buildup is the enemy of scalp health. If you are using gels and sprays every day, your scalp will eventually get clogged. This can lead to flakes and discomfort. Stick to lighter products, and if you feel like you have significant buildup, use a diluted apple cider vinegar rinse to clear the roots without needing a full shampoo.
The Importance of Nighttime Routine
Consistency is what makes the style last. A silk pillowcase is a great backup, but a full head wrap is superior for keeping the braids from moving. By minimizing friction, you are not just protecting the style; you are protecting the integrity of your natural hair strands, which is the whole point of a protective style.
When to Take the Braids Down
Even if the style still looks good, there is a limit to how long you should keep braids in. For most people, four to six weeks is the maximum. Beyond that, your natural growth starts to tangle at the base of the braids. This is where damage and breakage happen. Don’t push your luck; taking the braids down at the right time is just as important as the installation process.
The Removal Process
Always remove braids slowly. Use a seam ripper or a pointed comb to gently open the knot at the end of the braid. Do not pull or rip the synthetic hair out, as this will tear your natural hair along with it. Once the extension is out, use your fingers to gently detangle the braid.
Post-Removal Care
After taking down your braids, your hair will be in a fragile state. It has been held in a static position for weeks. Don’t rush into a harsh shampoo. Start with a deep conditioning treatment to reintroduce moisture and protein to your strands. Your hair will be thirsty, and this is the perfect time to give it exactly what it needs to bounce back to its natural texture.
Final Thoughts
Mastering the four-braid cornrow on Latina hair is a journey of precision, tension control, and proper maintenance. It is a style that rewards the patient, rewarding you with a sleek, manageable look that stands the test of time. By focusing on the health of your scalp and the quality of your parts, you ensure that your protective styling serves its purpose rather than causing unnecessary damage.
The beauty of this style lies in its ability to be both simple and bold. Whether you are adding synthetic hair for length or working strictly with your natural locks, the structure remains the same. Keep your parts sharp, your tension light, and your scalp hydrated, and you will find that this classic approach to braiding remains one of the most reliable tools in your hair care arsenal for seasons to come.