Short hair often gets a bad rap when it comes to styling, especially when people think of intricate, fairytale-inspired updos. We tend to assume that unless you have mermaid-length locks, the world of ornate, crown-like styles is strictly off-limits. That is a mistake. In practice, the right combination of technique and a bit of styling product can turn a bob or a lob into a stunning, regal display that feels plucked straight from a storybook. Princess braids are essentially about creating soft, romantic, and voluminous shapes that frame the face, and there is absolutely no reason your hair length should stop you from achieving that effect.
Whether you are prepping for a formal occasion or just want to feel a bit more elevated on a Tuesday, these styles rely on texture, strategic pinning, and the illusion of fullness. You do not need inches of length to create the intricate loops, twists, and interwoven sections that define the princess aesthetic. It is more about working with what you have—using small sections, utilizing dry texturizing spray, and knowing how to hide the ends of your braids to create a seamless, cohesive look.
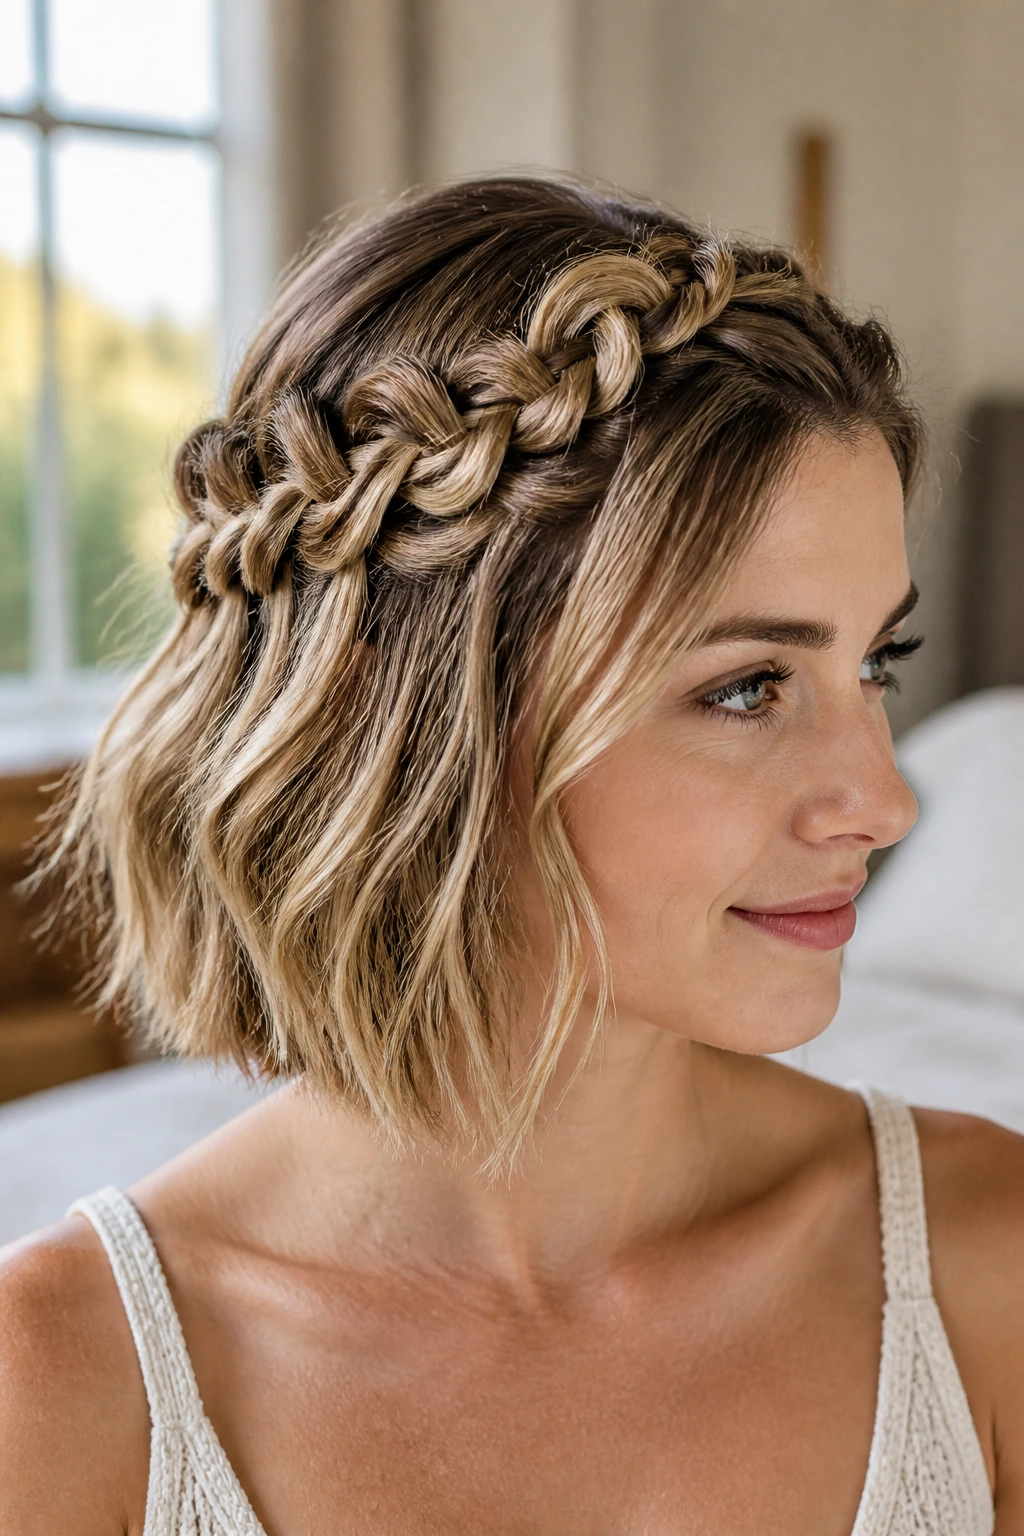
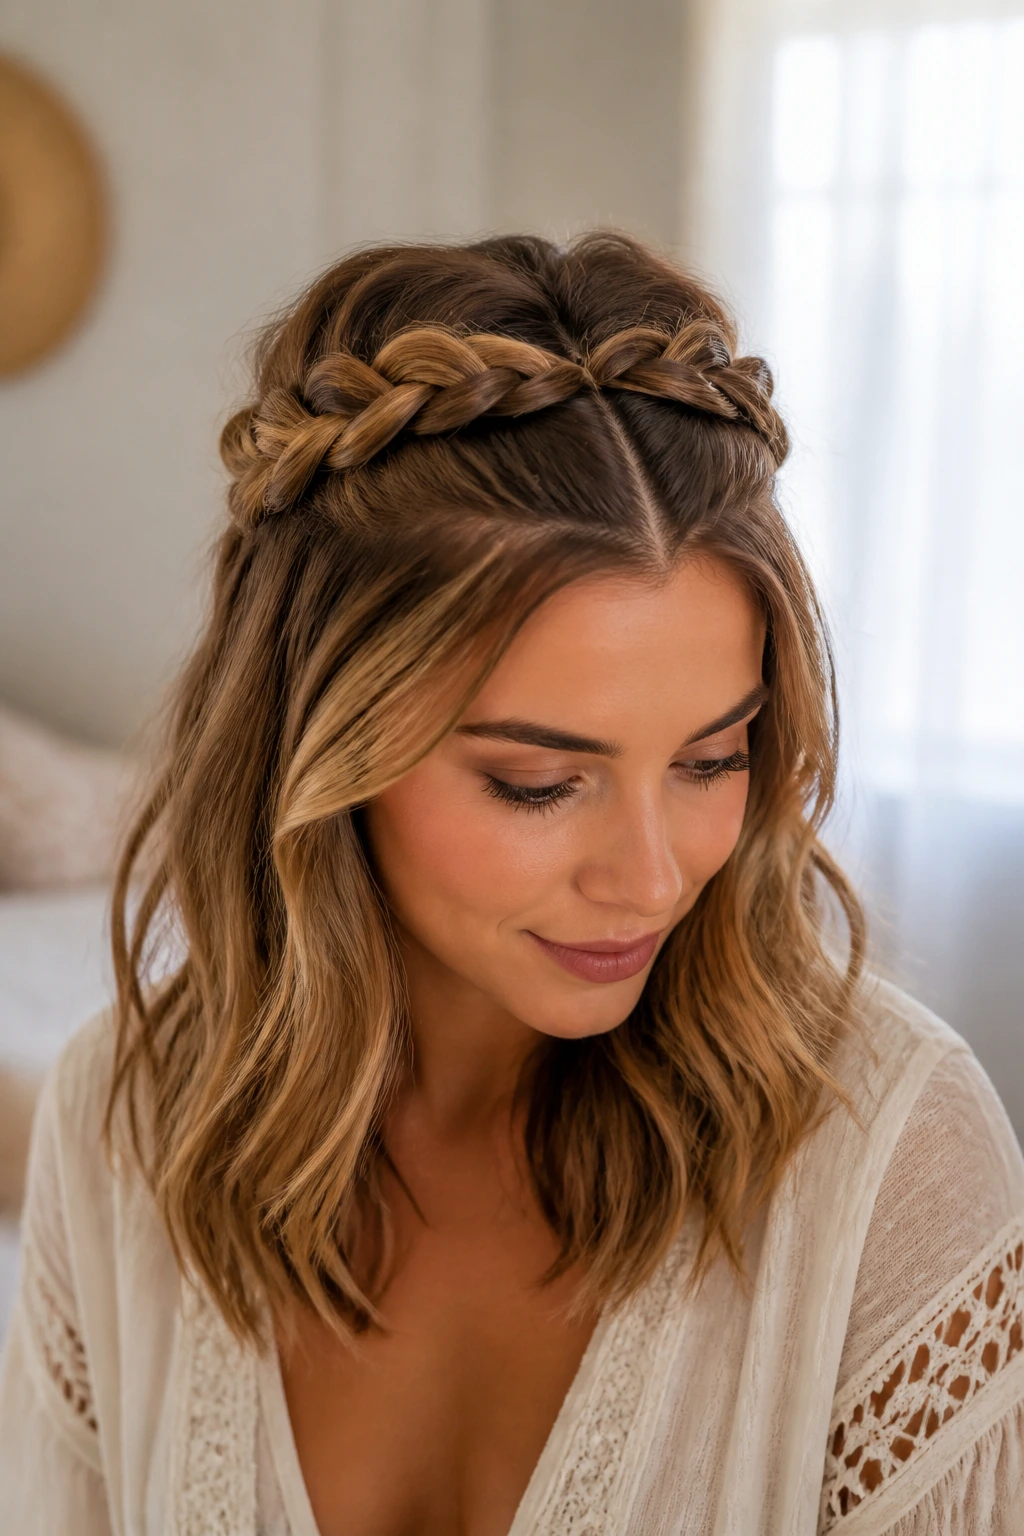
1. The Classic Half-Up Crown Braid
This style is the quintessential princess look, balancing loose, flowing locks with a structured, romantic crown. Even if your hair is only chin-length, you can pull the top sections back into two small, delicate Dutch braids that meet in the middle of your head. The secret here is to gently “pancake” your braids—pulling at the edges of the loops to make them appear twice as wide and thick as they actually are.
How to Achieve the Volume
You want to start by prepping clean hair with a lightweight mousse or sea salt spray. This adds the necessary grit so your braids don’t slip out within ten minutes. Once the braids meet at the back, tuck the ends under and pin them securely with bobby pins that match your hair color. If you have shorter layers, don’t worry about them falling out around your face; they just add to the soft, ethereal vibe.
Why This Style Works
- It pulls hair away from the face, showcasing your features.
- It creates the appearance of longer, thicker hair at the crown.
- It’s versatile enough to wear with both straight and wavy textures.
Pro tip: Use clear elastic bands to secure the ends of the braids before pinning them; this prevents the braid from unraveling while you’re trying to position it.
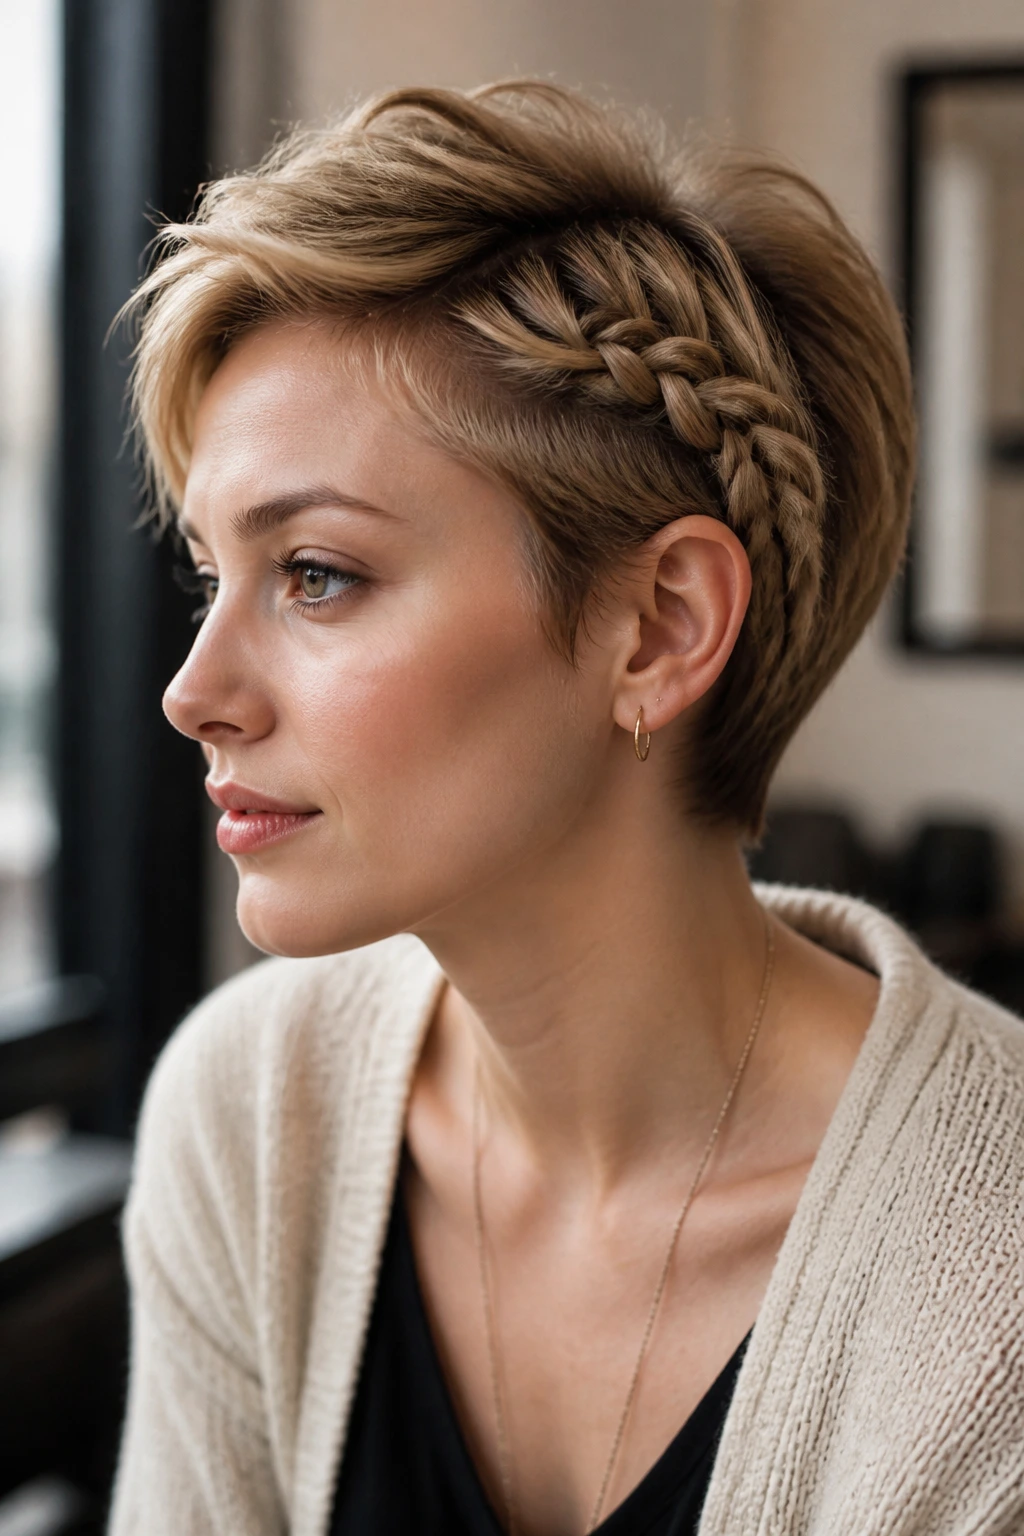
2. Twisted Halo for Pixie Cuts
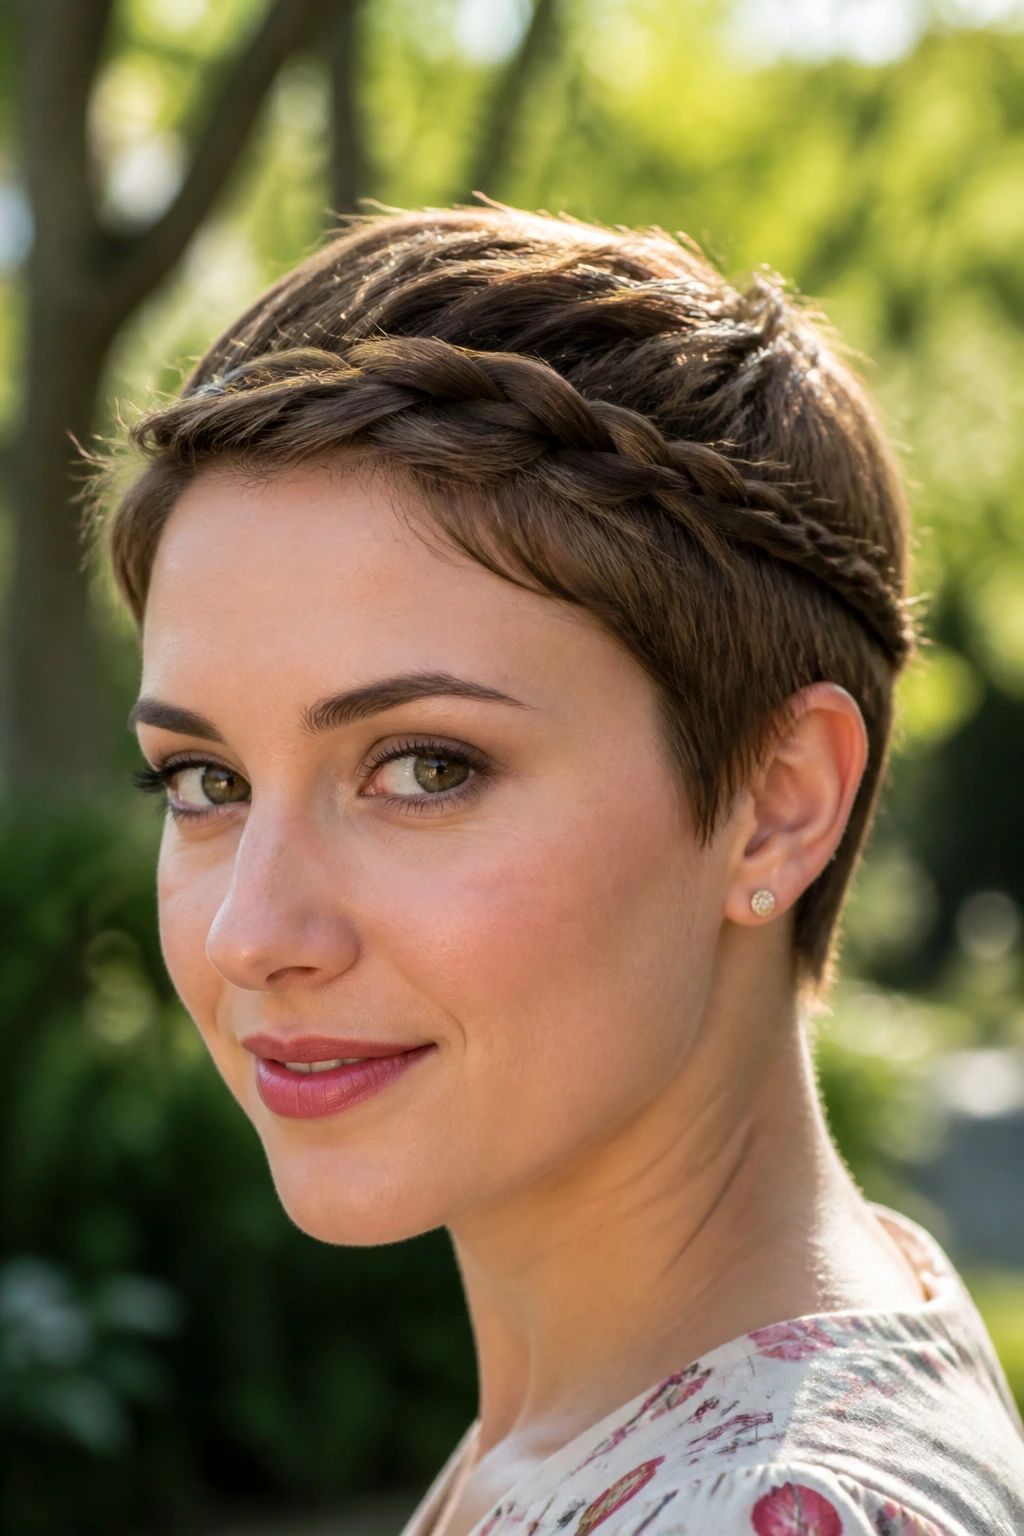
For those sporting an exceptionally short pixie, a traditional braid is often physically impossible. Enter the twisted halo. Instead of weaving three strands together, you take two small sections of hair at the hairline and twist them over one another, adding more hair as you work your way around the side of your head. It mimics the look of a braid but is much easier to manage when you don’t have enough length to weave.
Styling the Twists
Start by creating a deep side part. Take a one-inch section near your forehead and begin your twist. As you bring the twist toward your ear, incorporate small, thin pieces from the rest of your hair to ensure it stays close to your scalp. Use a flexible hold hairspray to keep flyaways at bay, as shorter hair tends to have more rebellious strands than longer styles.
The Finishing Touch
Once you reach the temple or just behind the ear, secure the twist with a decorative clip or a jeweled bobby pin. This adds that essential princess sparkle. The beauty of this style is its simplicity; it looks like you spent half an hour in front of a mirror, when in reality, it takes about four minutes.
3. Side-Swept Waterfall Braid
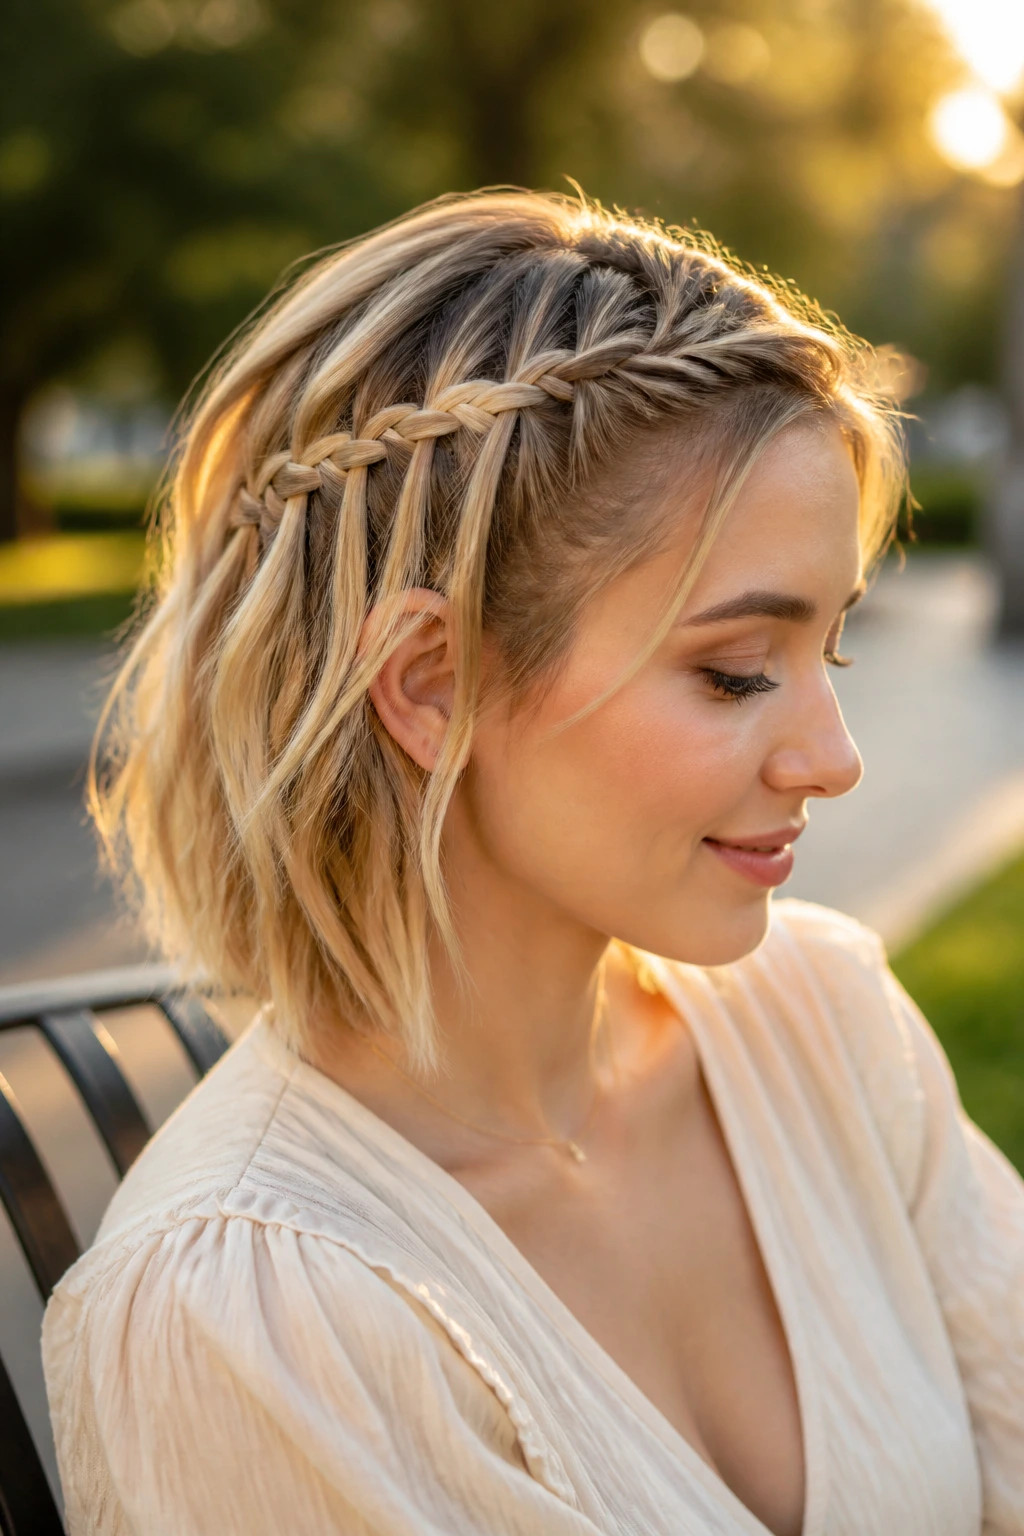
Waterfall braids are notoriously elegant, but they are often dismissed as “long hair only” territory. On short hair, the waterfall effect—where strands are dropped from the braid to create a cascading look—is actually more pronounced and creates a lovely architectural detail. Because the hair isn’t long enough to drape down your back, it forms a small, decorative band across the side of your head.
The Mechanics of the Cascade
Begin your braid at the part. As you weave, you are going to drop the bottom strand of your three-strand braid every time you reach the middle, picking up a new piece from the top to continue. It feels slightly counter-intuitive at first, but with a bit of practice, it becomes muscle memory. Keep your braid tight and close to the scalp to ensure it holds its shape on shorter layers.
Managing Short Layers
If your hair is layered, you might find that some ends pop out. Don’t fight them. Use a drop of smoothing oil to calm the ends and let them sit naturally within the braid. This style is meant to look effortless and soft, not rigid or perfect.
4. The Knotted Faux-Braid
Sometimes you don’t actually need to braid at all. A series of small, secure knots can mimic the texture of a thick, intricate braid. This is an incredible option for short hair because it requires very little length to create that textured, woven look. You essentially create a line of small ponytails and knot them together, tucking the tails into the next section.
Building the Texture
Gather a small section of hair at the front and secure it with a tiny elastic. Take another section right behind it, divide it in two, wrap it around the first section, and secure it with another elastic. Continue this process until you reach the back of your head. You’ll be left with a row of beautifully intricate-looking knots that look far more complicated than they actually are.
Perfect for Texture
This style holds up incredibly well on second-day hair. If your hair is freshly washed and feels too slippery, spritz it with a little dry shampoo to give it some grip. It provides the “princess” vibe through its ornate, repeating pattern.
5. Double Dutch Braids Into Space Buns
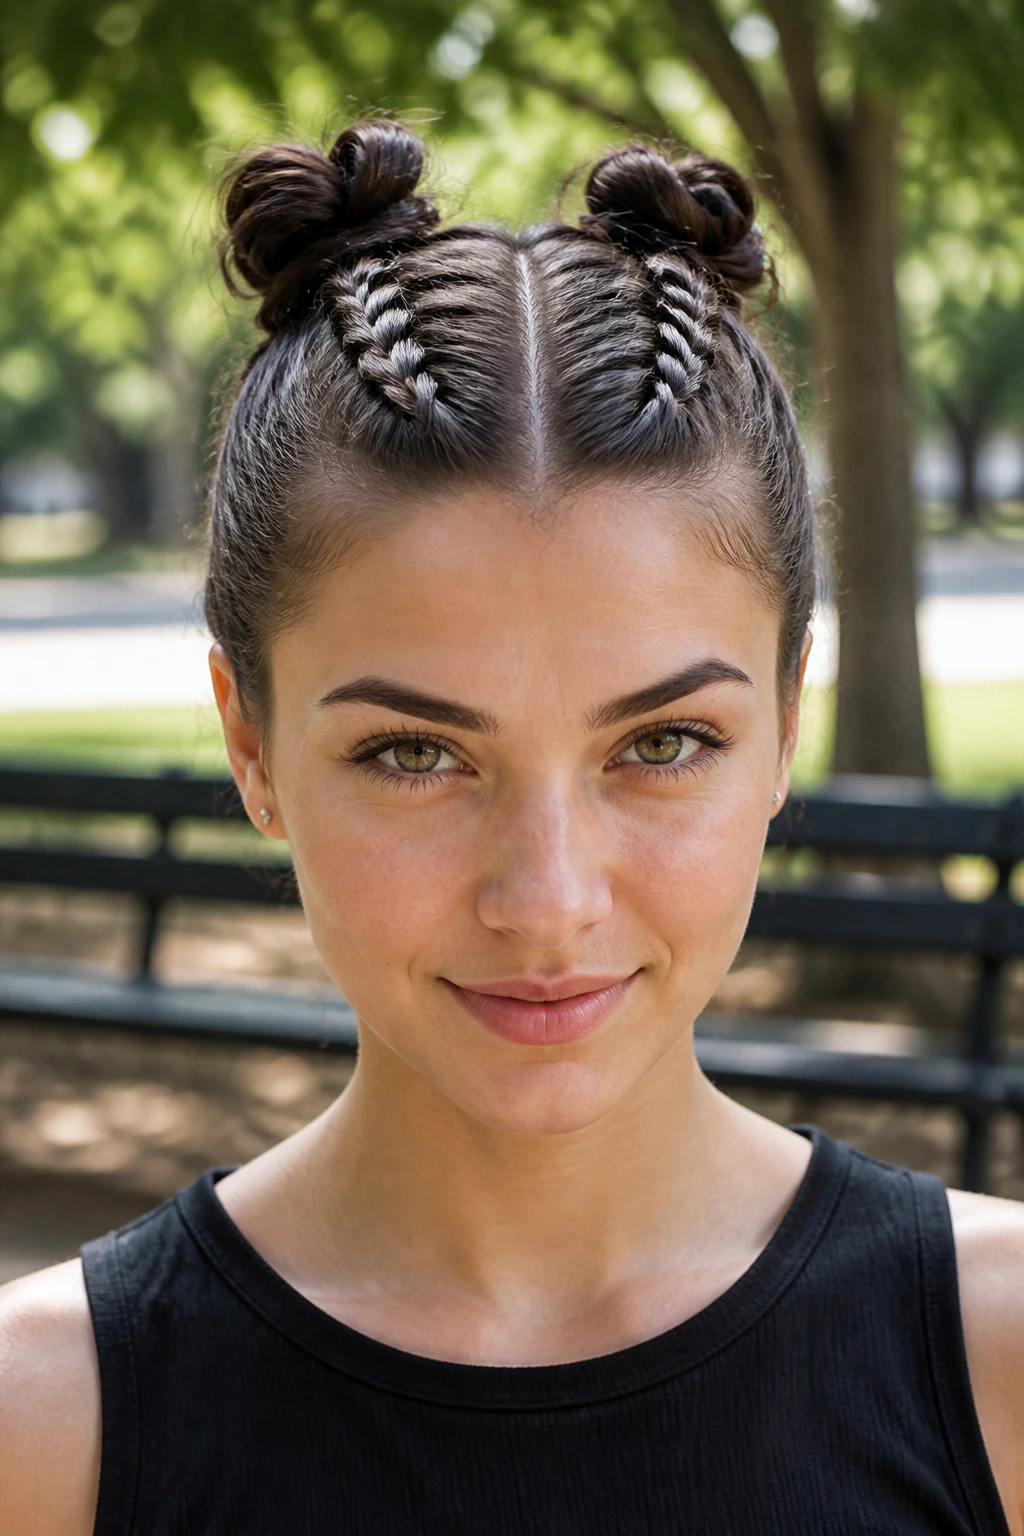
Who says princess braids have to be formal? A more playful, modern take on the look involves two tight Dutch braids that start at the hairline and move toward the crown, terminating in two small, messy buns. This keeps the hair off your neck and creates a super-cute silhouette that works perfectly with bobs and lobs.
Why It’s a Princess Staple
- It’s extremely secure for active days.
- It shows off your neck and collarbone.
- It is one of the few styles that works better on shorter, layered hair than on long, heavy hair.
Pro tip: If your buns feel a bit too small, use a tiny bit of teasing or backcombing to puff them up before pinning. You’re aiming for volume, not sleekness.
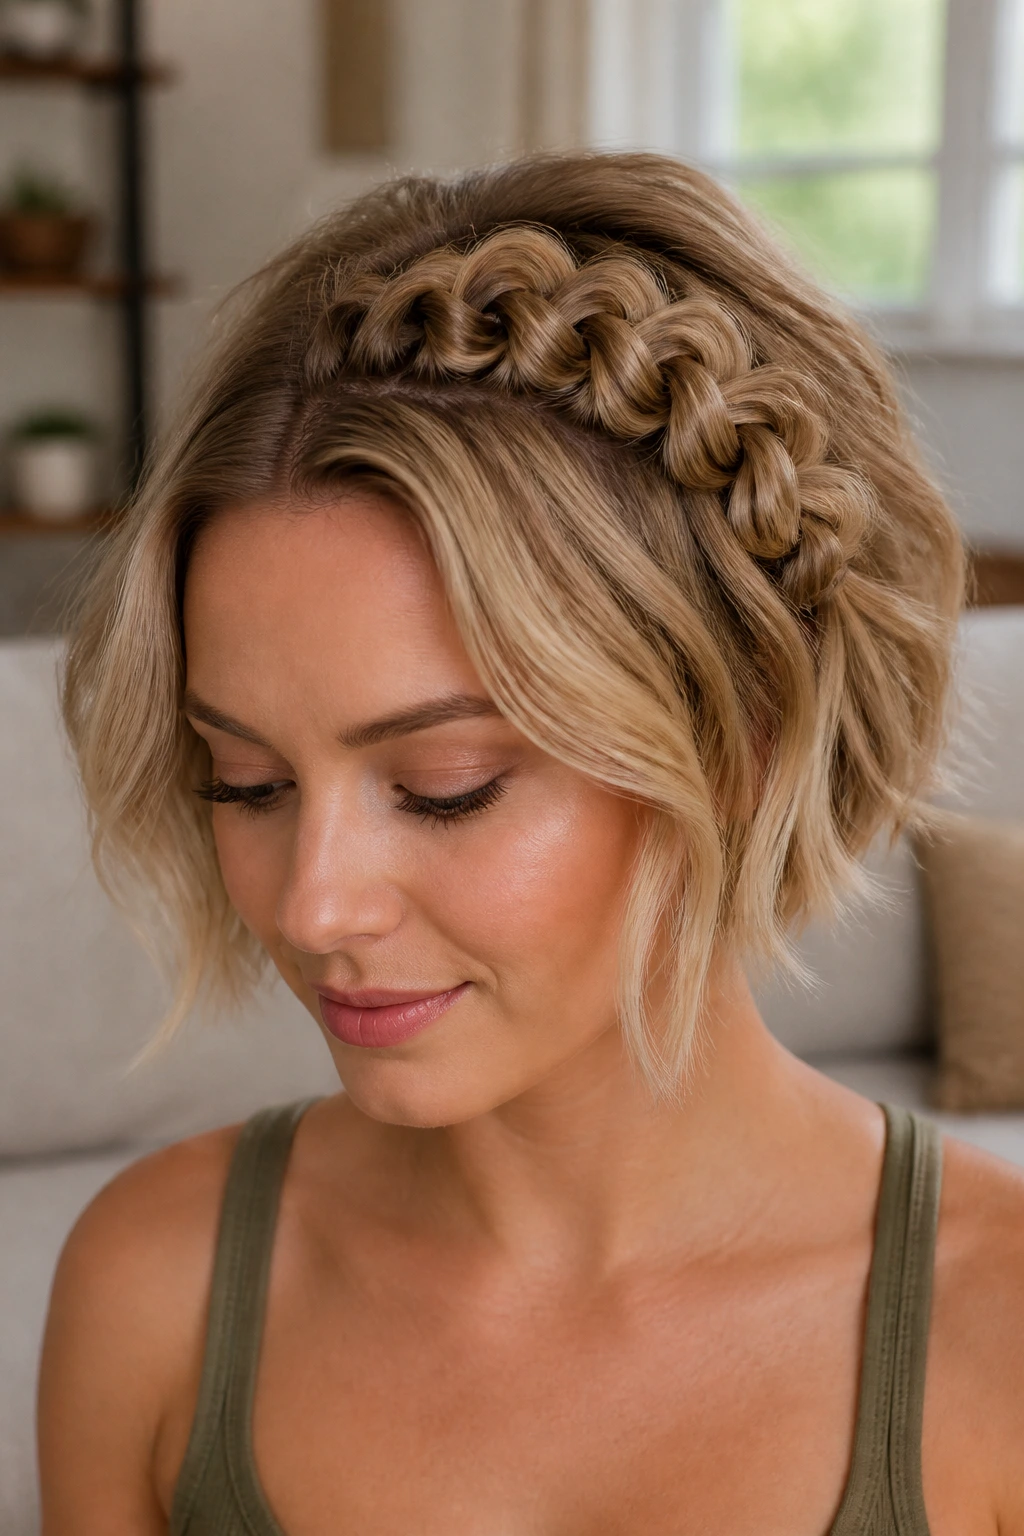
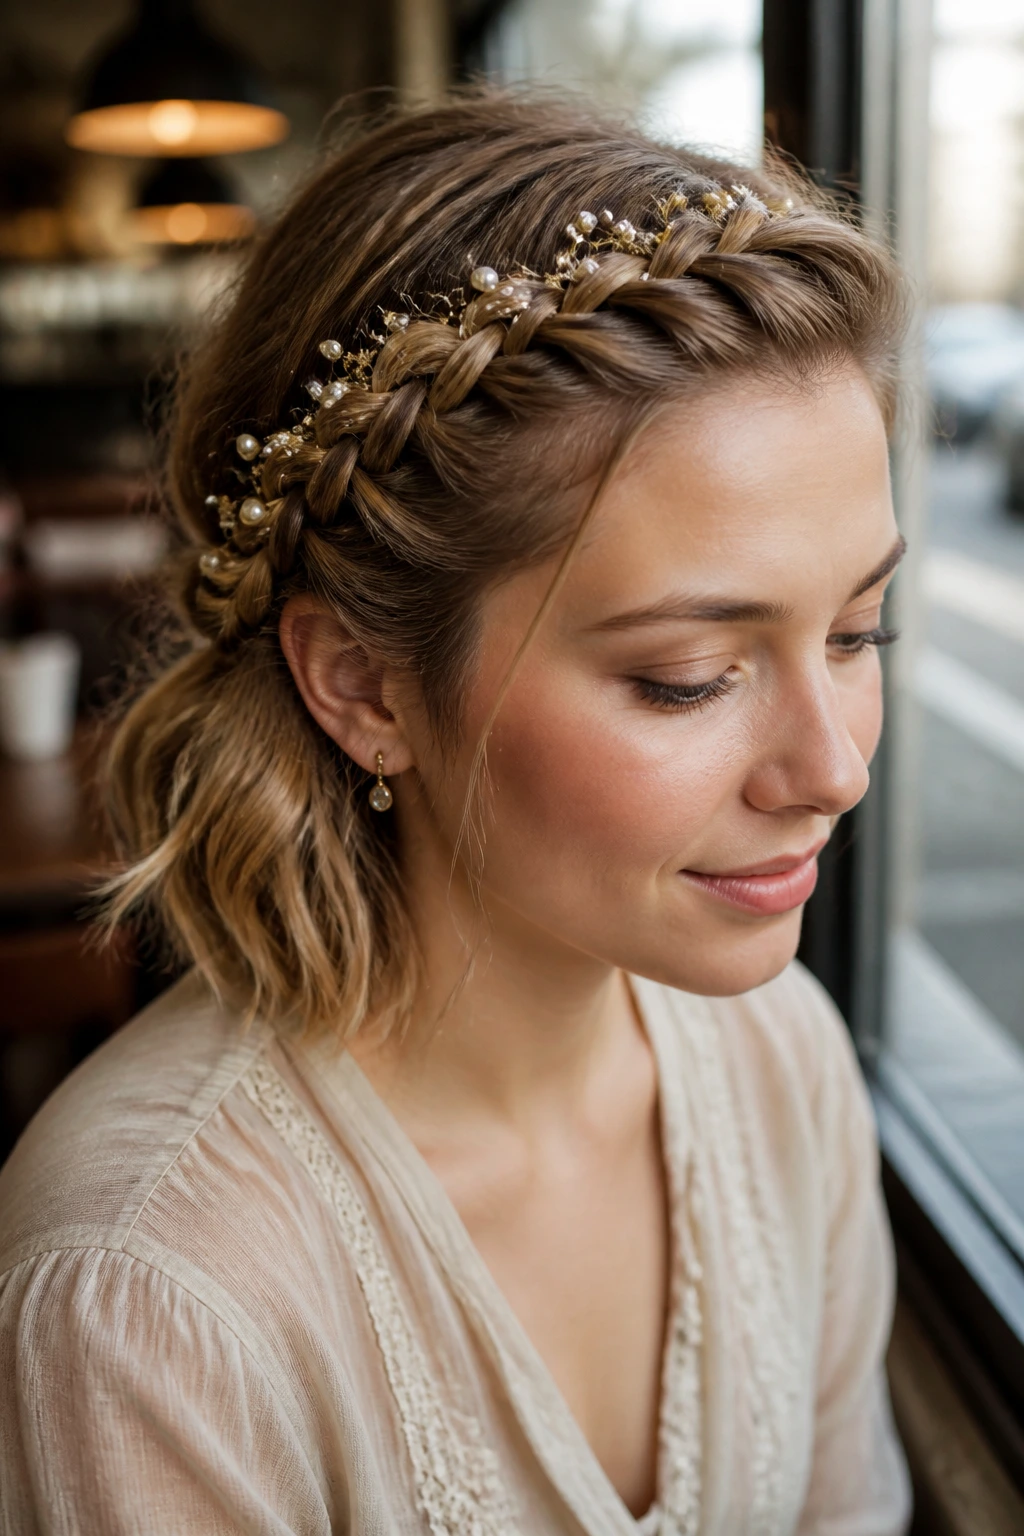
6. The Grecian Goddess Headband Braid
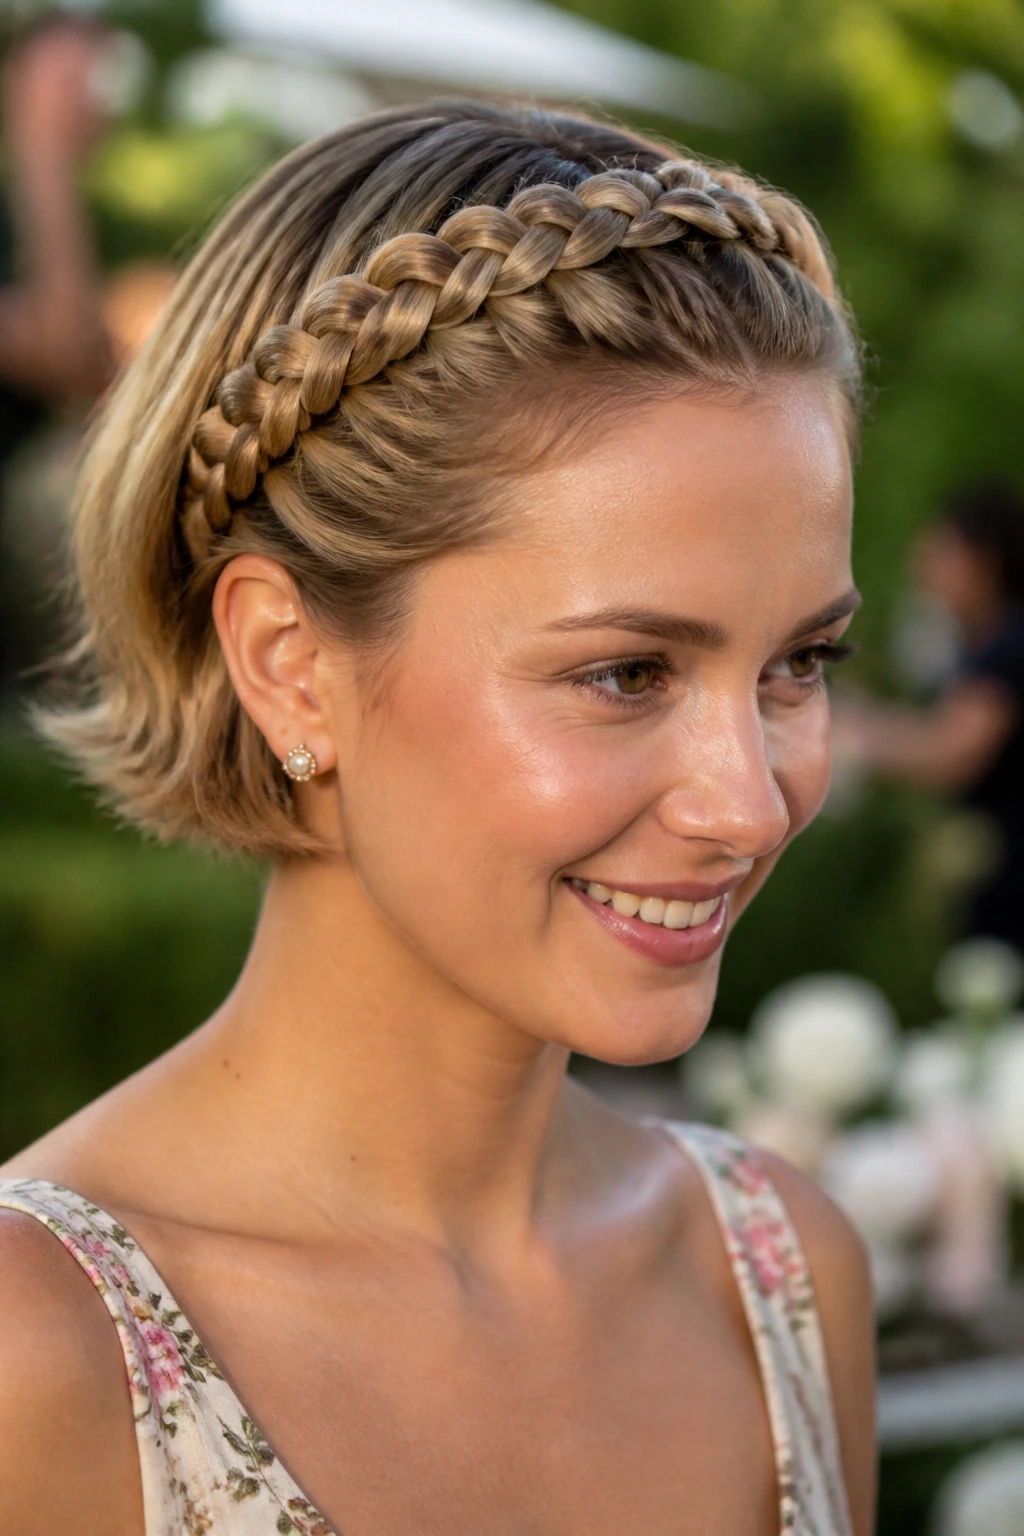
This style uses your own hair to create a headband. It involves a Dutch braid that runs from one temple to the other, creating a literal crown of hair. On short hair, you won’t have enough length to wrap it all the way around your head, but a semi-halo that spans from one ear to the other is arguably more flattering for shorter cuts.
Achieving the Uniform Look
The key here is consistency in your strand size. If you pick up sections of different thicknesses, the braid will look uneven and lumpy, which detracts from the regal effect. Keep your hand position low, close to your scalp, and make sure you’re braiding in the direction you want the “headband” to sit.
When to Use This Style
This is the ultimate choice for weddings or garden parties. It pairs beautifully with delicate floral pins or small pearls threaded through the braid. Even with a simple bob, this adds a level of sophistication that feels genuinely special.
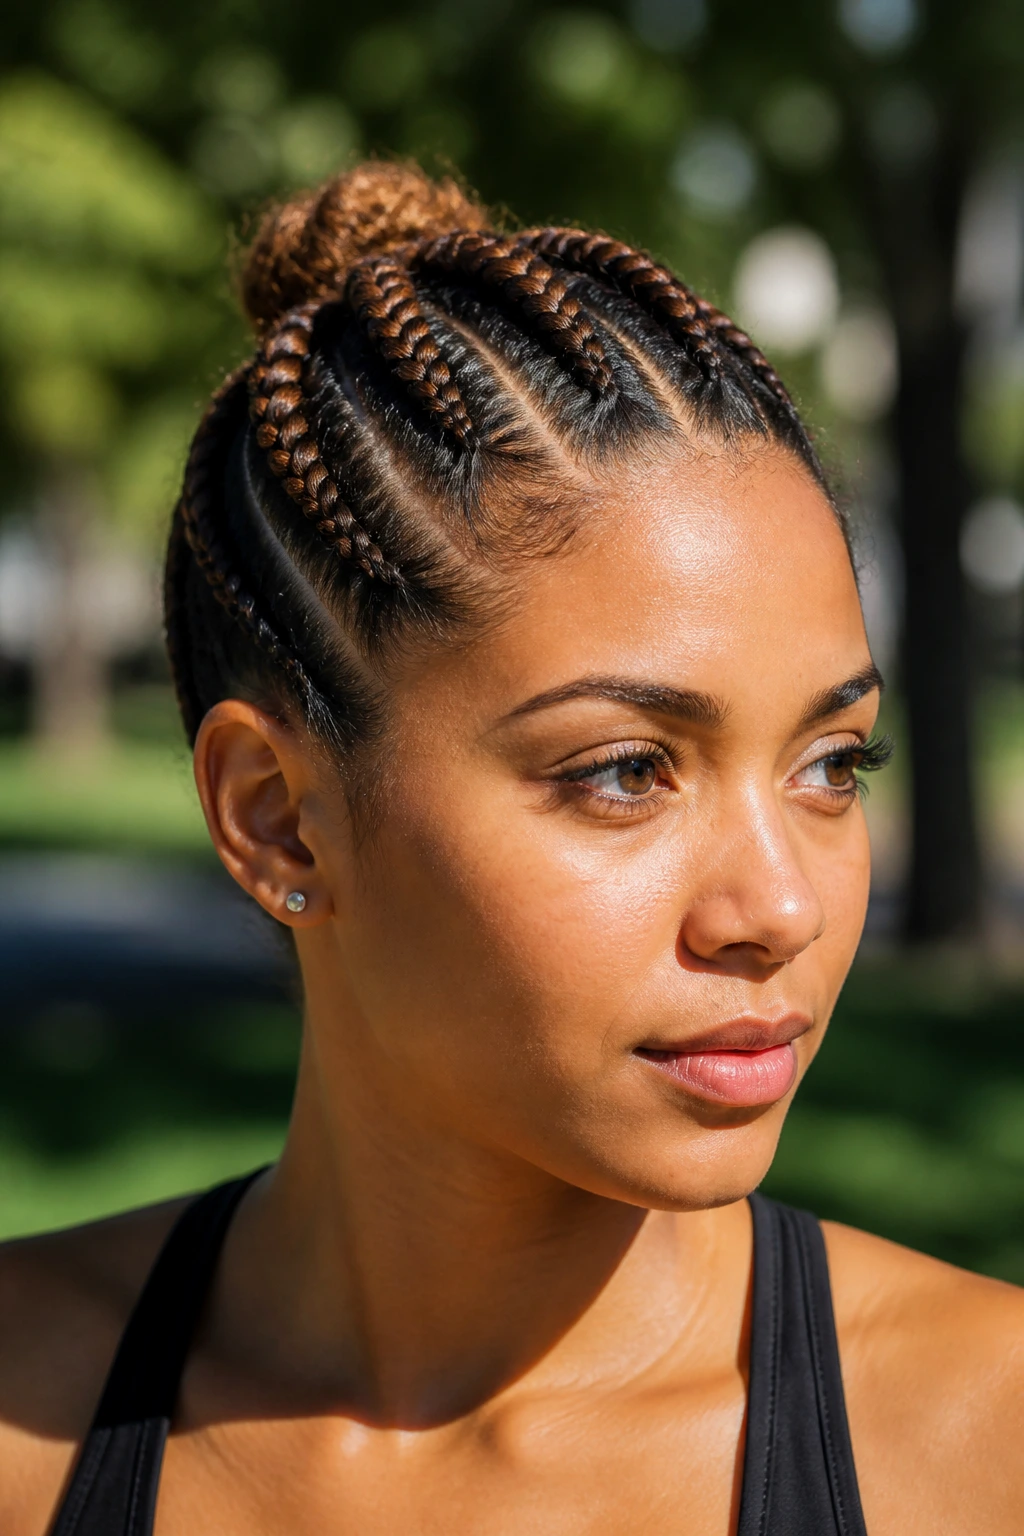
7. Faux-Hawk Braided Plait
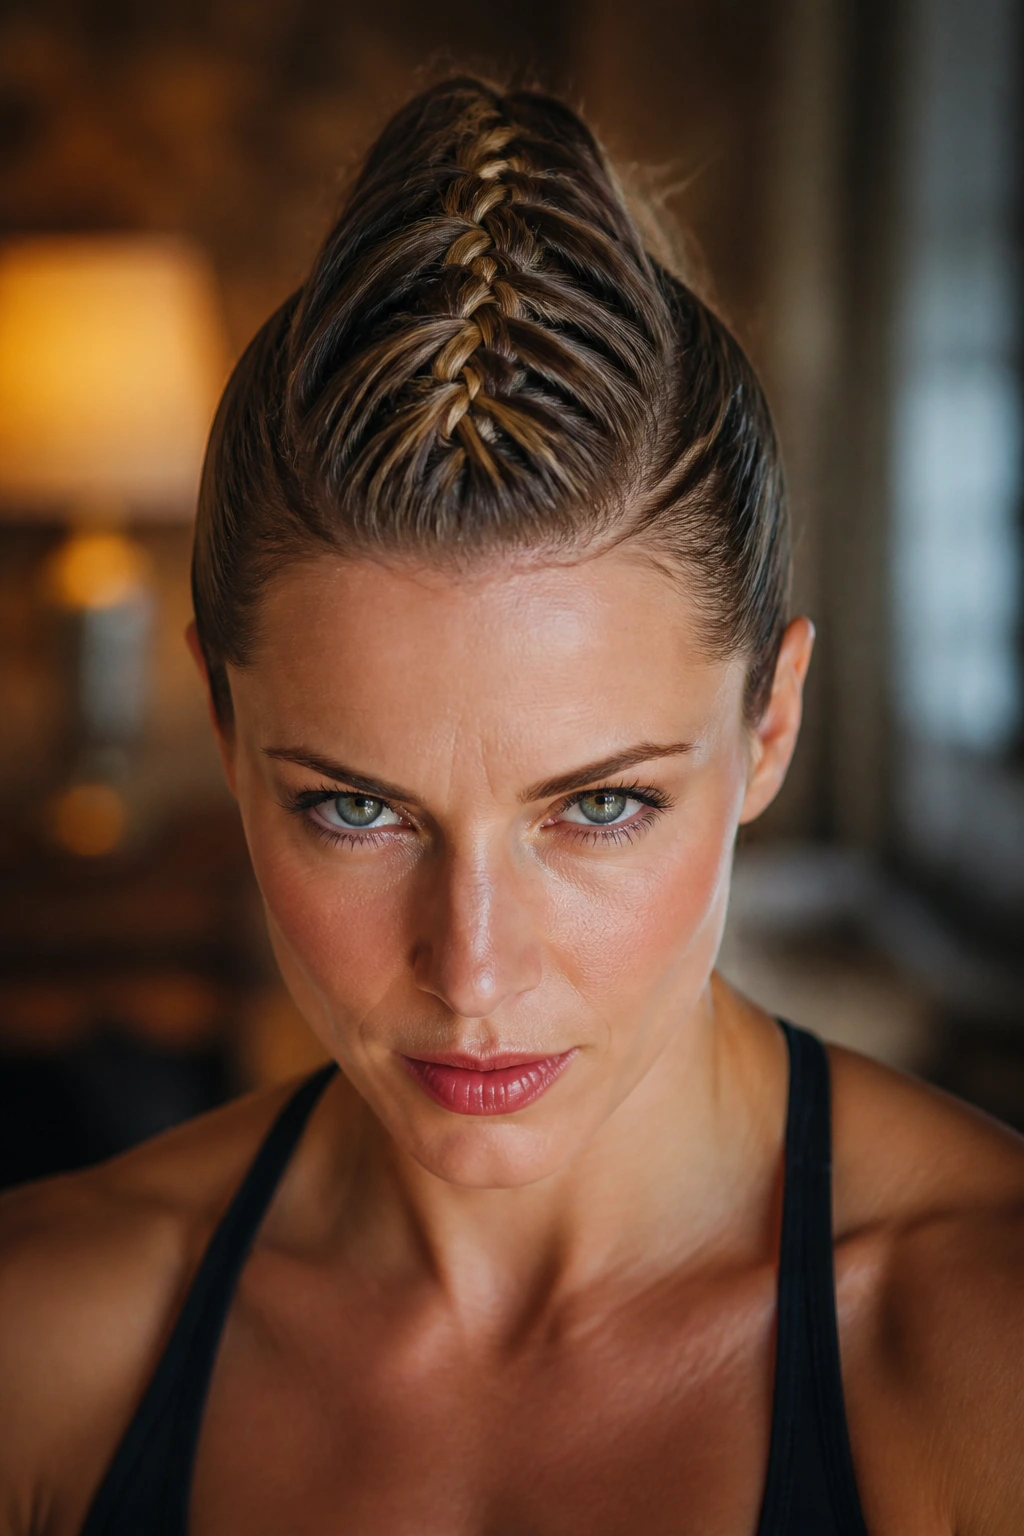
Princesses aren’t always about delicate, flowing beauty; sometimes, they are warriors. A faux-hawk braid uses a central French braid or Dutch braid down the middle of your head to create height and texture. For short hair, this creates a dramatic, vertical volume that mimics a much more complex updo.
Designing the Hawk
Part your hair into three sections: a center strip and two sides. Focus all your attention on the center strip, braiding it back toward the crown. Secure the end with an elastic, then pin the sides of your hair back toward the braid to create a smooth, tapered look.
The Visual Impact
By pulling the sides back tightly, you make the central braid pop, giving the illusion of a much longer, fuller hairstyle. It’s an edgy, regal look that works for anyone who wants to command a room.
8. The Pull-Through Crown
If you struggle with traditional three-strand braiding, the pull-through technique is your savior. You aren’t actually braiding; you’re creating a series of small, connected ponytails and pulling them through one another to create the appearance of a thick, chunky plait. This is arguably the best “cheat” for short hair because you don’t need length to weave—you only need enough length to secure a small ponytail.
Building the Pull-Through
- Create a small ponytail at the front of your head.
- Create a second one right behind it.
- Split the front ponytail in two and wrap it around the second ponytail, securing the ends with a new elastic.
- Repeat this as far back as your hair length allows.
The Volume Benefit
Once you’ve finished, go back and pull at the sides of each “loop” you’ve created. Because you aren’t limited by the mechanics of a braid, you can make these loops as large as you want, giving your short hair a massive boost in volume.
9. The Messy Boho Crown
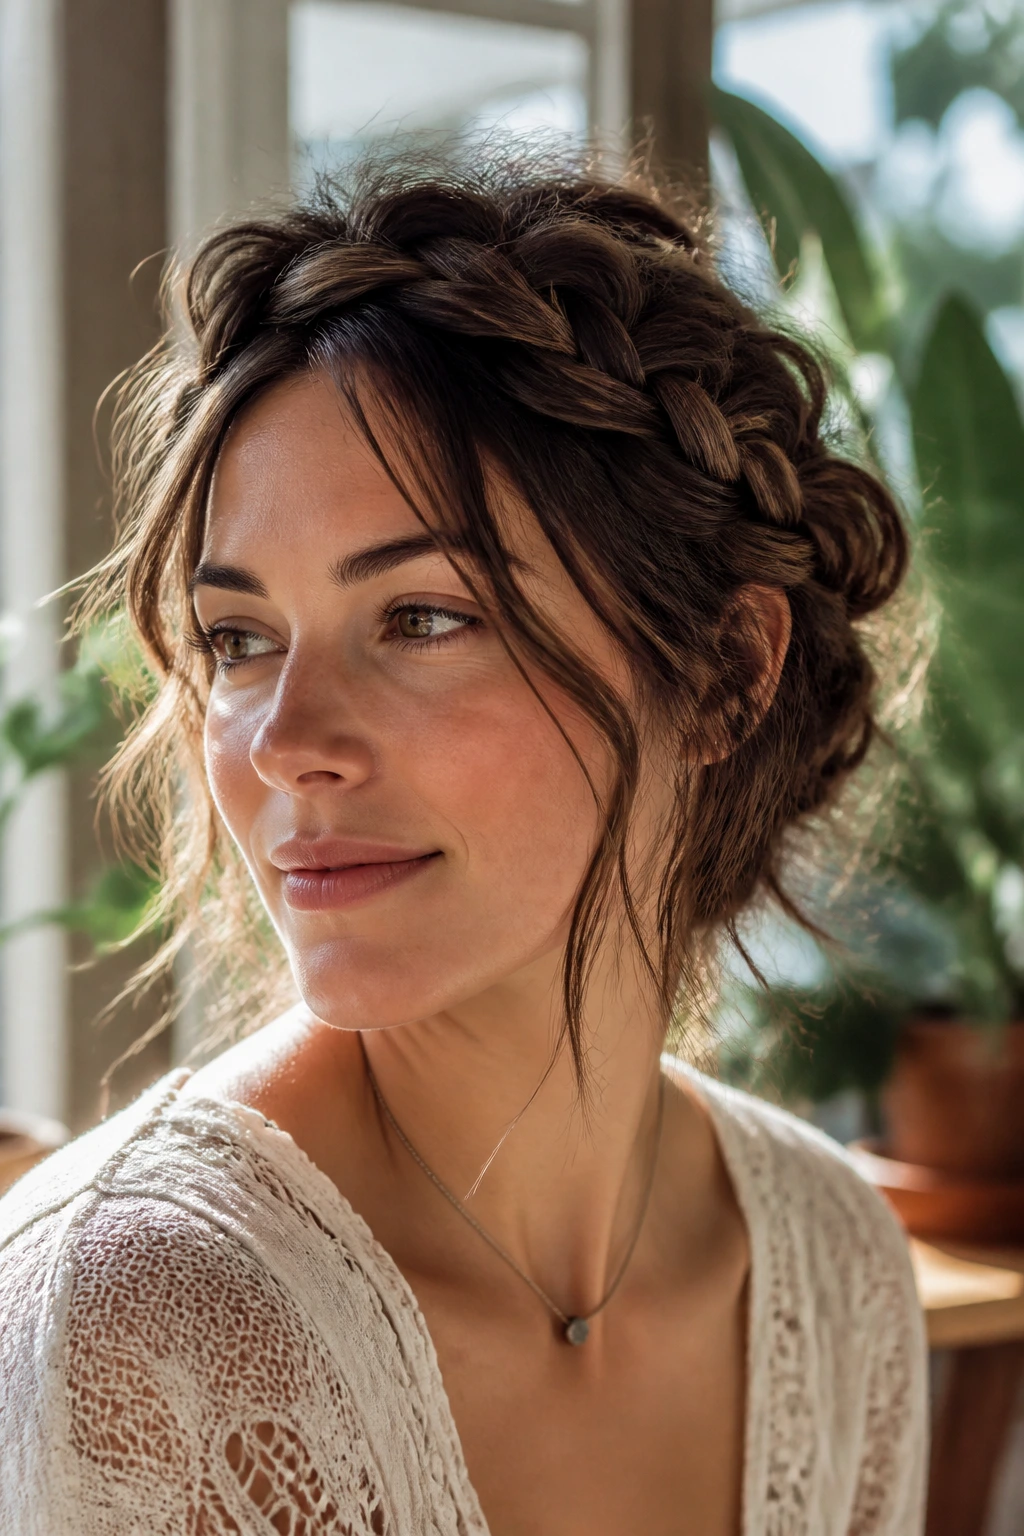
Boho princess vibes are all about imperfection. A loose, messy braid that isn’t pulled tight creates a soft, romantic frame for your face. For short hair, this often means creating a braid that sits a little further back from the hairline, allowing a few wispy, face-framing pieces to escape naturally.
Why Less Is More
The mistake most people make is trying to braid too tight. If your hair is short, tight braids can look severe. By keeping the braid loose, you allow the hair to look thicker and more lived-in. This style is meant to look like you’ve been frolicking through a meadow, even if you’ve actually just been sitting at a desk all day.
Styling the Escapees
Use a small curling iron on the loose strands around your face to give them a soft bend. This adds to the whimsical, storybook character aesthetic that defines the princess braid look.
10. The Braided Side-Part Pixie
Sometimes, the simplest way to get a braid into short hair is to just braid one side of the part. This is an incredibly common style for those who want to keep the rest of their hair down and styled with natural texture. It keeps the hair out of your eyes and adds an interesting detail to an otherwise simple haircut.
Keeping the Braid Defined
Because this is a singular focal point, make sure the braid is neat. A small Dutch braid starting at the part and ending just behind the ear is the perfect length for almost any short cut. Secure it with a hidden bobby pin under a layer of hair, and you’re done.
Integrating with Texture
Let the rest of your hair be a bit wilder. Use a texturizing paste to give your loose hair some movement. The contrast between the sleek, controlled braid and the loose, textured hair makes the whole look intentional and chic.
11. The Twisted Tassel Updo
If you have just enough length to pull your hair into a tiny, low knot at the nape of your neck, you have enough length for a twisted tassel updo. Instead of braiding, you twist small sections of hair and pin them in a crisscross pattern around your low knot. The result is a series of overlapping twists that look remarkably like a complex, braided weave.
Handling the Ends
Since your ends might be short, they will act like little “tassels” poking out of the twist. Embrace this. The texture of the ends adds to the visual complexity of the updo. Secure each twist with a single bobby pin, and if your hair is particularly fine, use a bit of volumizing powder before you start.
Why This Feels Regal
This style mimics the Victorian updos that required immense length and complex styling. By breaking it down into smaller, individual twists, you capture the aesthetic of that era without needing the impossible hair length to achieve it.
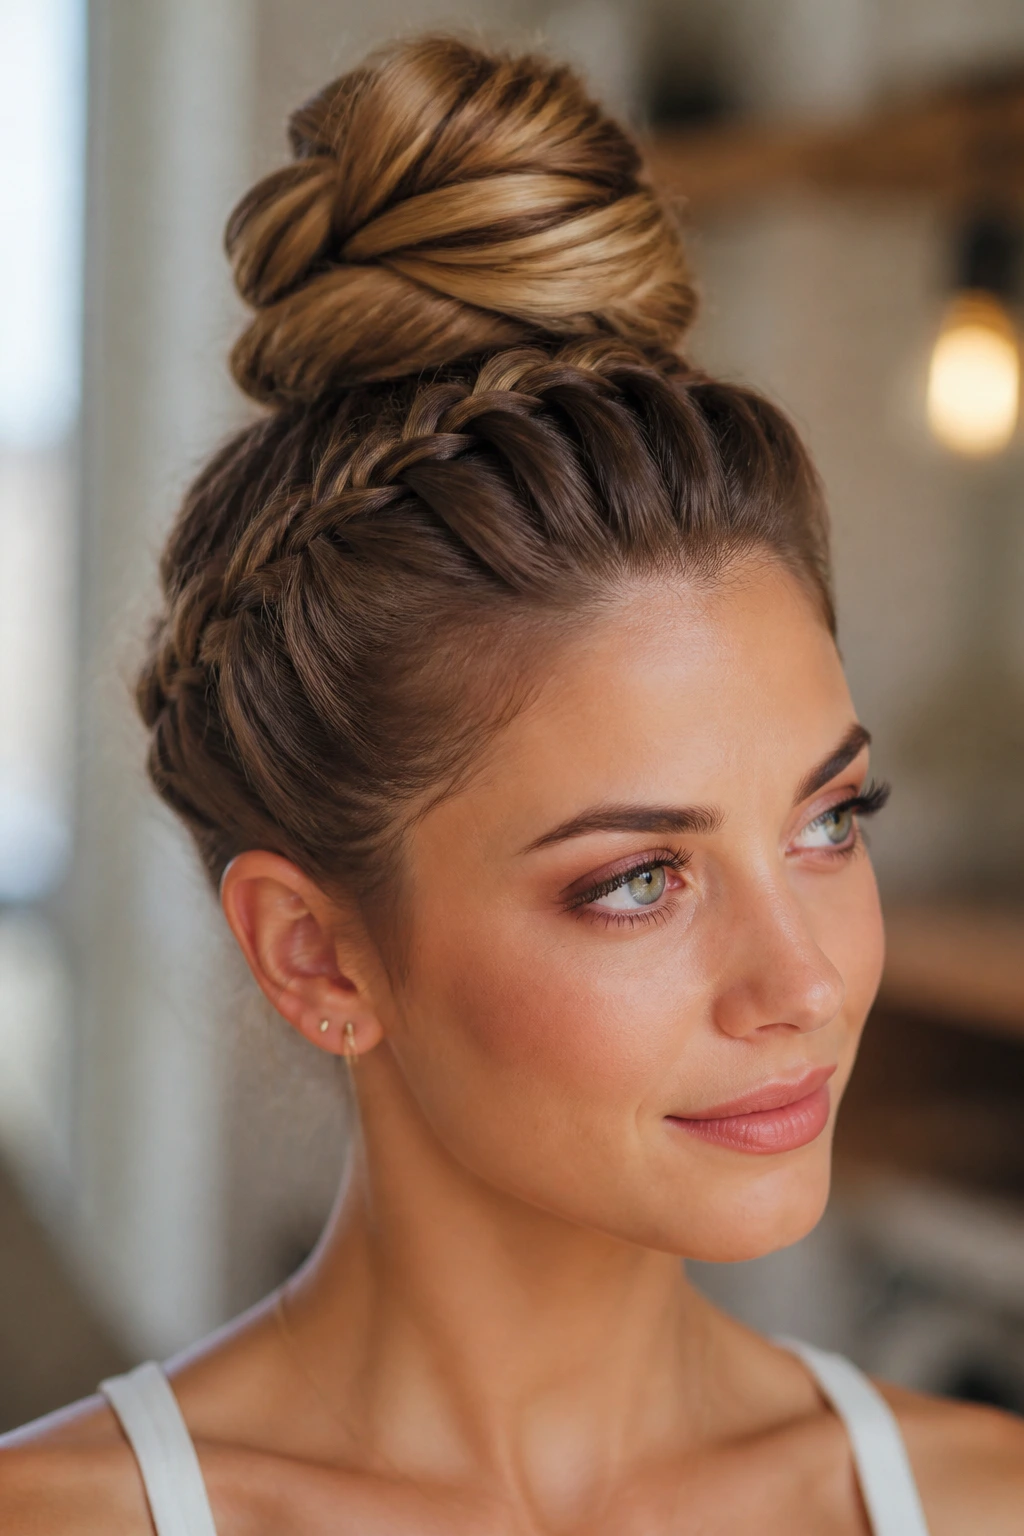
12. Braided Micro-Bun
A micro-bun at the crown of your head, surrounded by a delicate braid, is the height of “princess” aesthetics. This works well for bobs that have enough length at the top to be pulled up while leaving the sides loose. It’s a very clean, polished look that screams “royal duty.”
Structuring the Micro-Bun
Gather the top third of your hair into a tiny bun at the crown. Take the hair surrounding the bun and create a small, tight Dutch braid that circles the base of the bun. It’s an incredibly precise style, so use a mirror to ensure your lines are clean.
The Groomed Finish
This look is all about neatness. Use a light-hold gel or pomade to ensure the roots are smooth. This is the one style where flyaways are not your friend; you want this to look as sharp as possible.
13. The Headband Braid with Waves
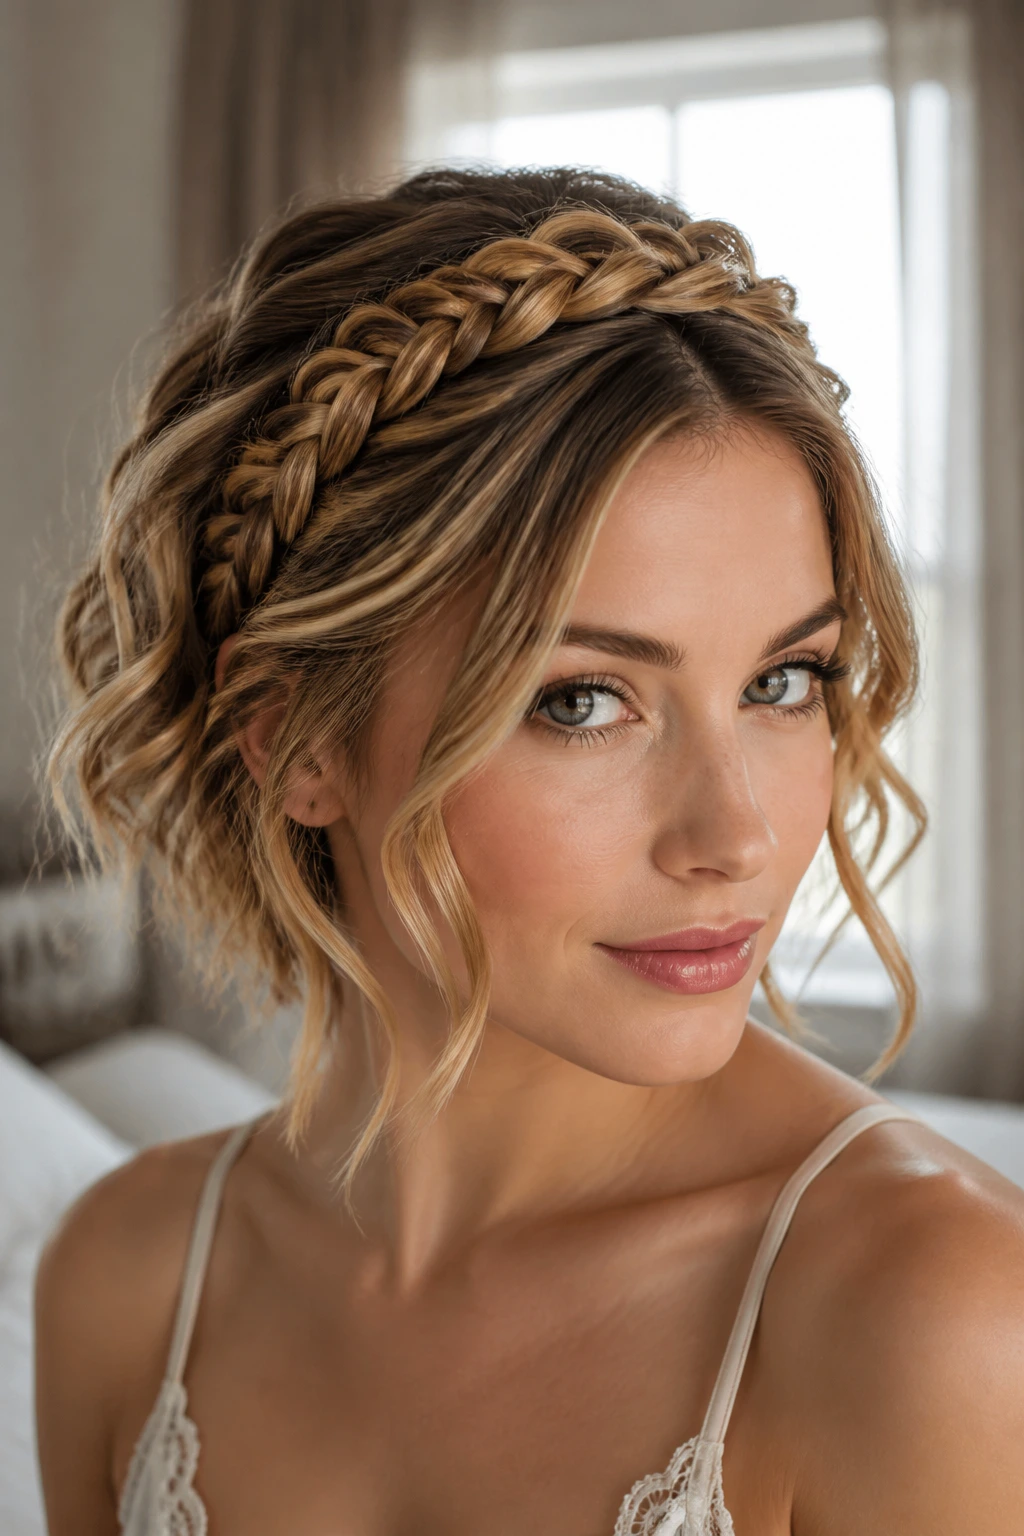
If you have a lob that sits right at the collarbone, you are in the “sweet spot” for princess braids. A headband braid combined with soft, beachy waves is a winning combination. The waves give the hair the fullness it needs, while the braid acts as the crown.
Getting the Wave Right
Before you braid, curl your hair with a one-inch iron. Let the curls cool completely before you start the braid—this is crucial. If you braid while the hair is still warm, the curl will lose its shape, and you’ll end up with flat hair. Once the braid is in, use your fingers to gently shake out the curls.
Combining Elements
The braid should be the star, but the waves provide the volume that makes it look like a “full” hairstyle. This is a very popular look for formal events because it feels both sophisticated and comfortable.
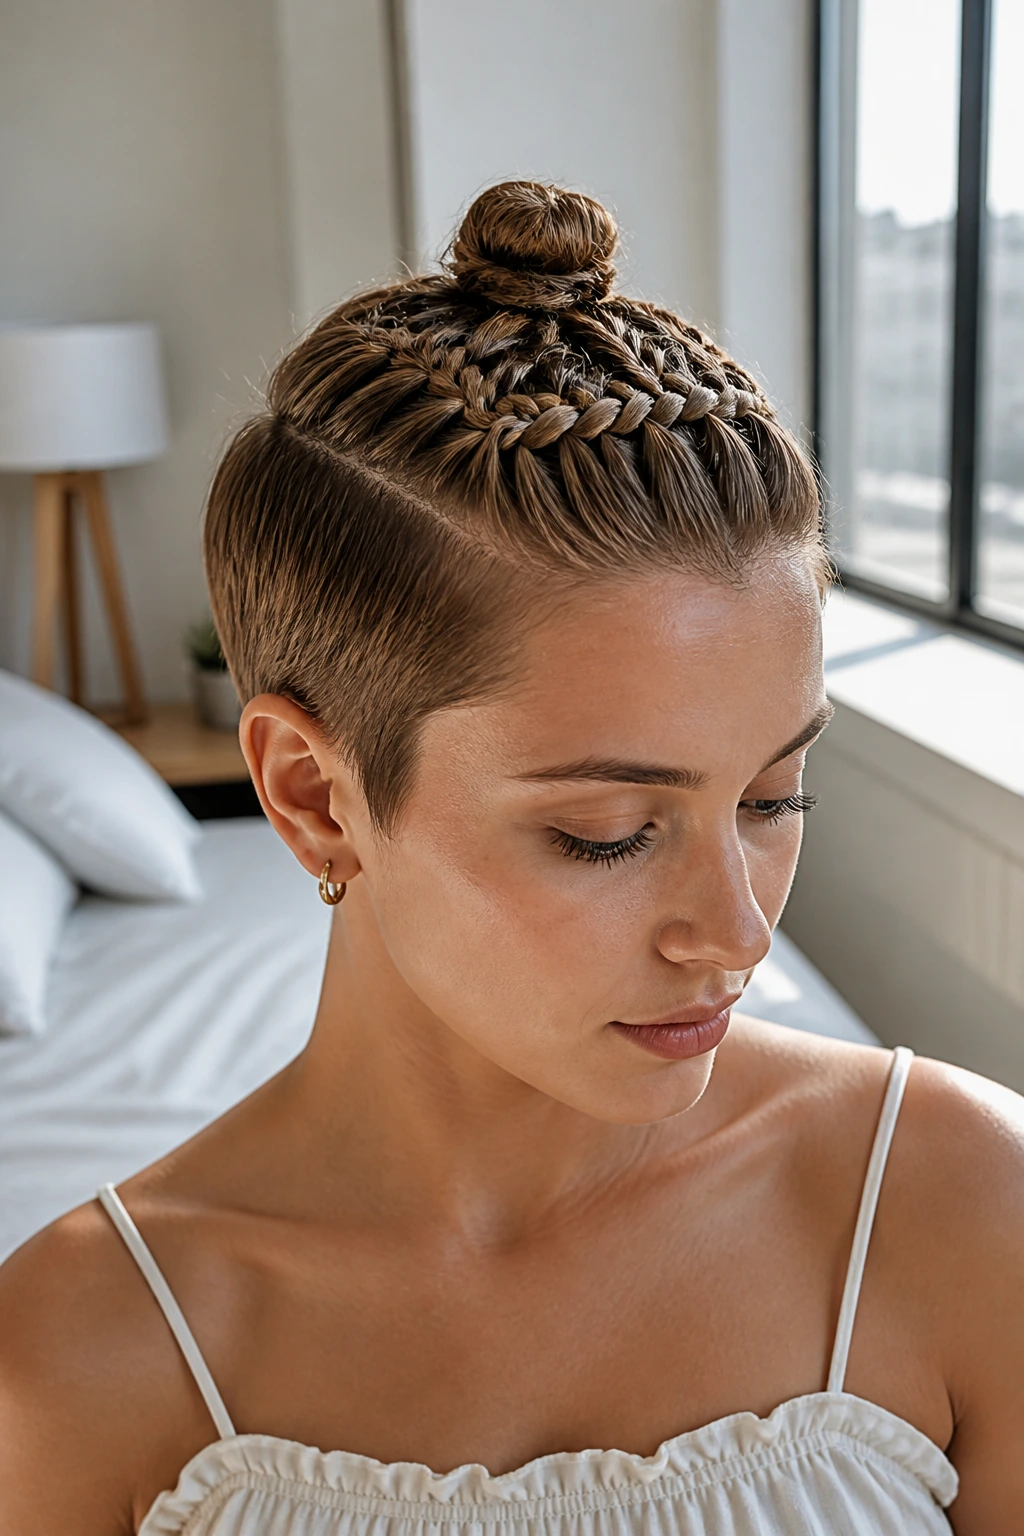
14. The Multi-Braided Mohawk
This is for the person who really wants to make a statement. Instead of one large braid, you create three or four tiny, tight braids running from the front of your hairline to the crown. It creates a “row” of braids that looks very regal and intentional.
Precision is Key
You are going to need a fine-tooth comb to get those parts perfectly straight. Divide the front section of your hair into three or four vertical rows. Braid each row tightly, and then gather the ends into a small, pinned bun or tuck them under the rest of your hair.
The Visual Geometry
The geometric repetition of the braids creates an incredibly structured, high-fashion look. It’s a fantastic way to deal with shorter hair that tends to get unruly, as it keeps every single strand locked down in a pattern.
15. The “Infinity” Braid Wrap
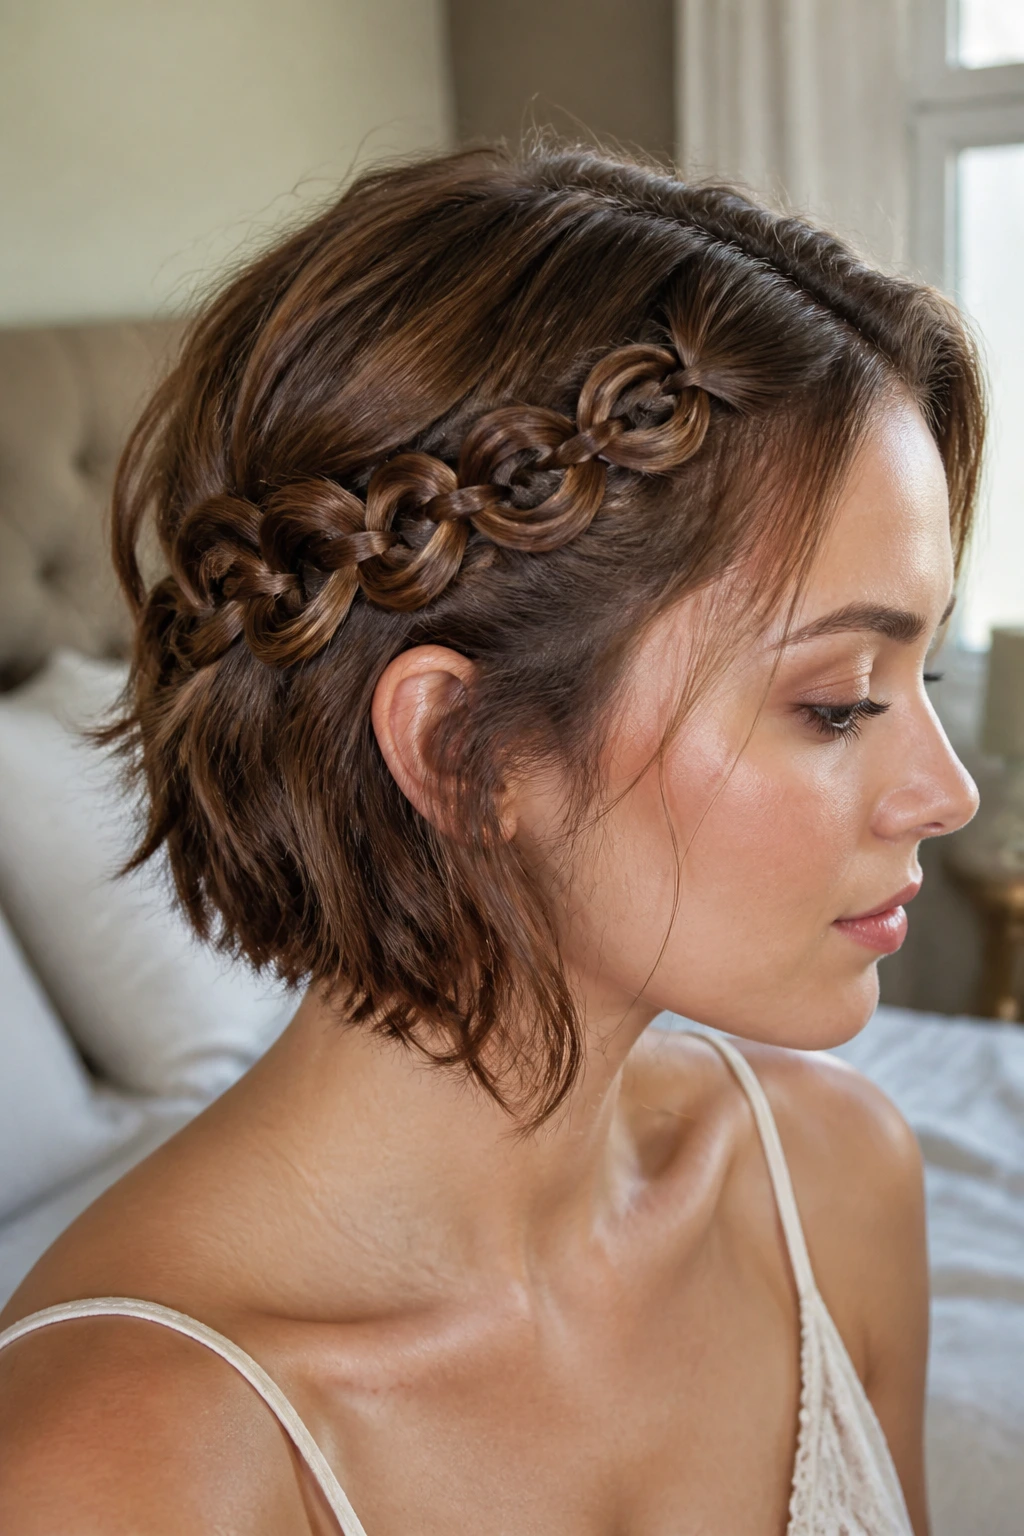
This technique involves taking a thin section of hair and creating a loop that mimics the infinity symbol. On short hair, you do this by pinning small segments of hair in a way that overlaps and loops. It requires patience and a good supply of hairpins, but it looks like a piece of art.
How to Loop
Take a section, loop it over itself, and pin it. Take the next section, loop it through the first, and pin it. Continue this across the side of your head. It’s essentially “faux braiding” with loops.
The Final Result
It looks incredibly soft and romantic, perfect for a fairy-themed event. Because it relies on pinning rather than traditional braiding mechanics, it is significantly easier to execute if your hair is too short to pass through a traditional three-strand weave.
16. The Embellished Dutch Side-Braid
Sometimes, the braid itself is just the foundation for your accessories. A simple Dutch braid on one side of your head, adorned with small pins, clips, or even ribbon, can look like a masterpiece. The key here is the accessories.
Choosing Your Embellishments
Don’t reach for the giant, distracting hair clips. Instead, opt for delicate items: thin, gold wire, pearls, or tiny, subtle hair jewels. These allow the structure of the braid to remain visible while elevating the style to “princess” levels.
The Role of Color
If you have highlights or balayage, this braid will look even better. The contrast between your dark roots and lighter ends creates a marbled effect in the braid that adds visual depth you just don’t get with single-process color.
17. The Twisted Top Knot
A top knot is common, but a twisted, braided-in top knot is a different story. If you have enough hair to pull into a high ponytail, you have enough to create a twisted top knot. Incorporate a small, thin braid into the base of the knot for a bit of extra detail.
Managing the Height
Use a small doughnut or a bun-filler if your hair is too thin to create a substantial knot on its own. Wrap the braid around the base of the bun to hide the elastic and add that extra bit of “princess” detail.
Longevity Tips
This style is great for the gym or a long day out. It keeps your hair completely out of your face and holds up for hours. Just ensure you use enough pins to secure the base of the bun so it doesn’t wobble while you move.
18. Braided Face-Framing Tendrils
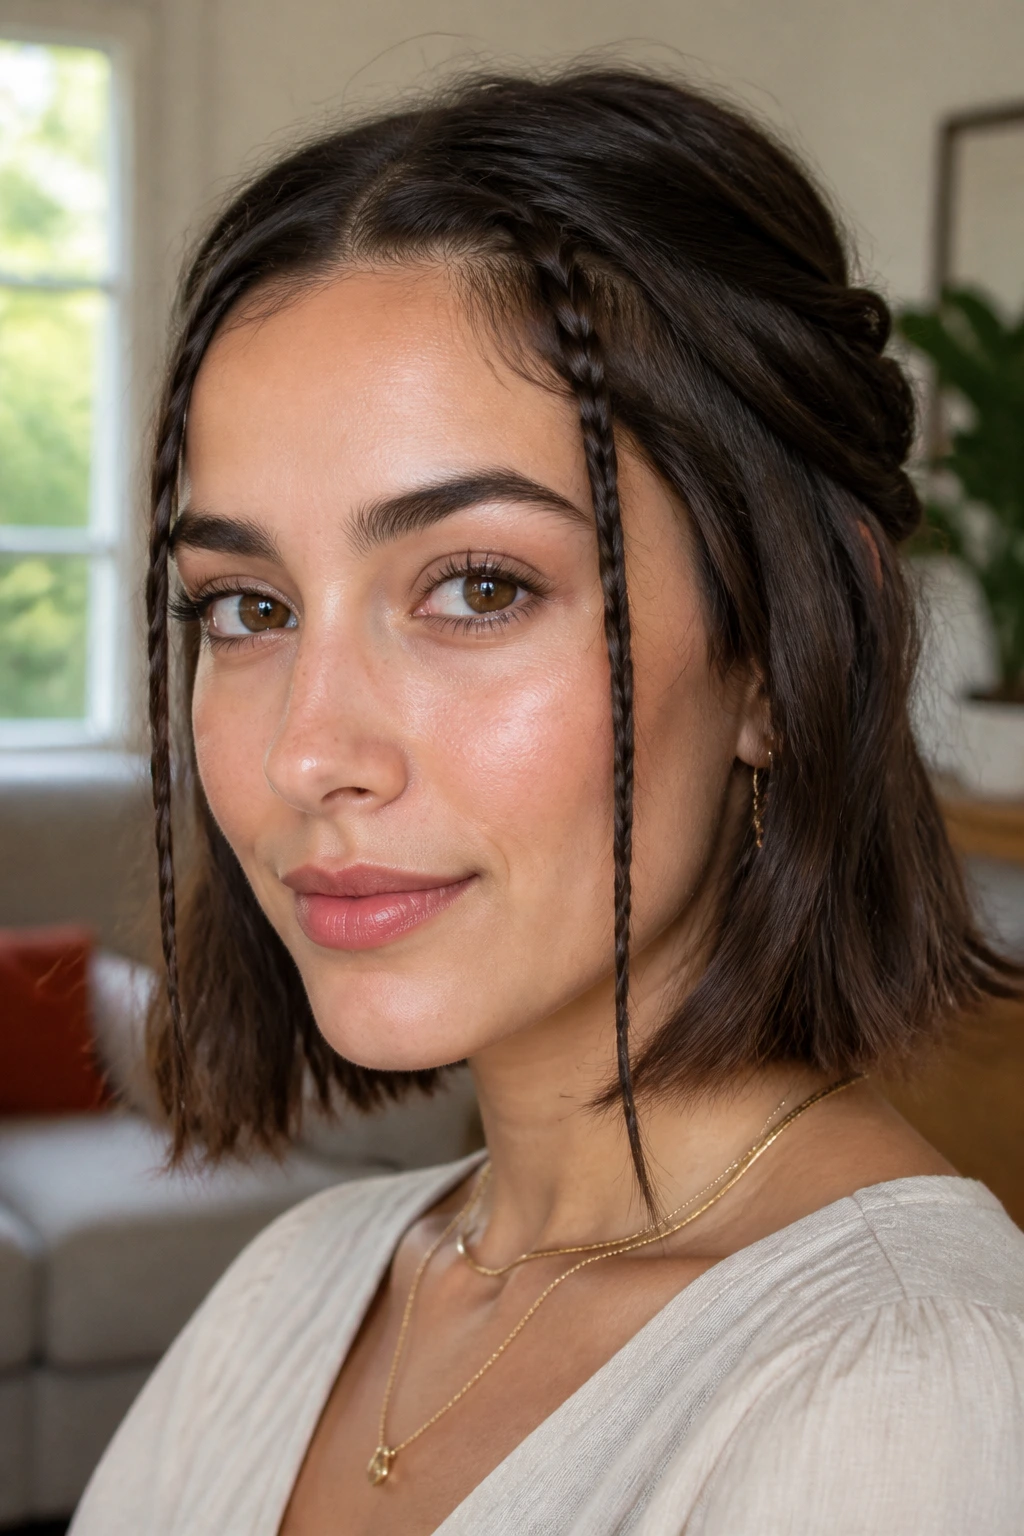
If you’re wearing your hair down, you can still have princess braids. Just take two small sections of hair at your hairline and braid them back, pinning them at the back of your head. It’s the easiest way to incorporate the look into an everyday, down-hair style.
The “Boho-Princess” Look
This works best if the rest of your hair has a bit of a wave. It draws all the attention to your face while keeping the rest of your look relaxed. It’s a very soft, flattering style that suits almost everyone, regardless of their hair type or thickness.
Why It’s Understated
Sometimes you don’t want a massive, architectural updo. This style offers a nod to the princess aesthetic without being over-the-top. It’s elegant, simple, and takes less than two minutes.
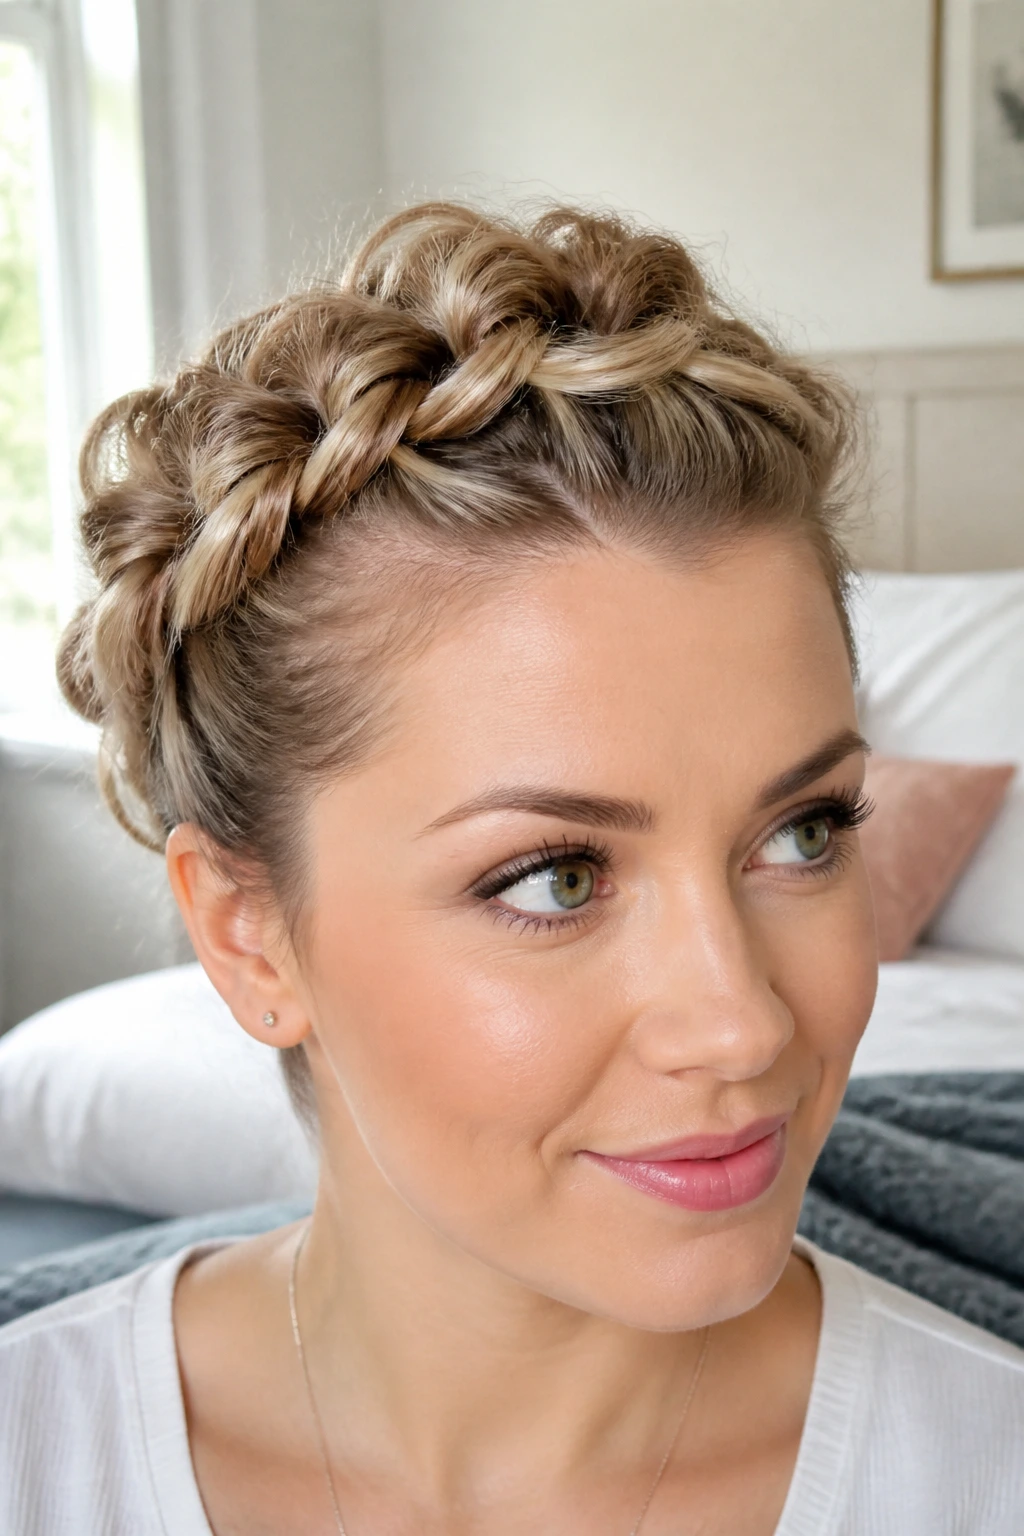
19. The Knotted Half-Up Crown
This is a variation on the classic crown but uses knots instead of braids for a more textured, modern feel. The knots create a unique, bumpy pattern that looks very cool against short, layered hair.
The Knotted Difference
Knots tend to hold better in shorter, layered hair than braids do because they don’t rely on the hair being a uniform length to stay together. Each knot is individually secured, which means if one “braid” piece slips, the whole thing doesn’t unravel.
The Visual Texture
The texture of a knotted style is visually fascinating. It catches the light differently than a braid, making your hair look more dimensional. This is a great choice if your hair is a bit flat or thin.
20. The Zig-Zag Braid
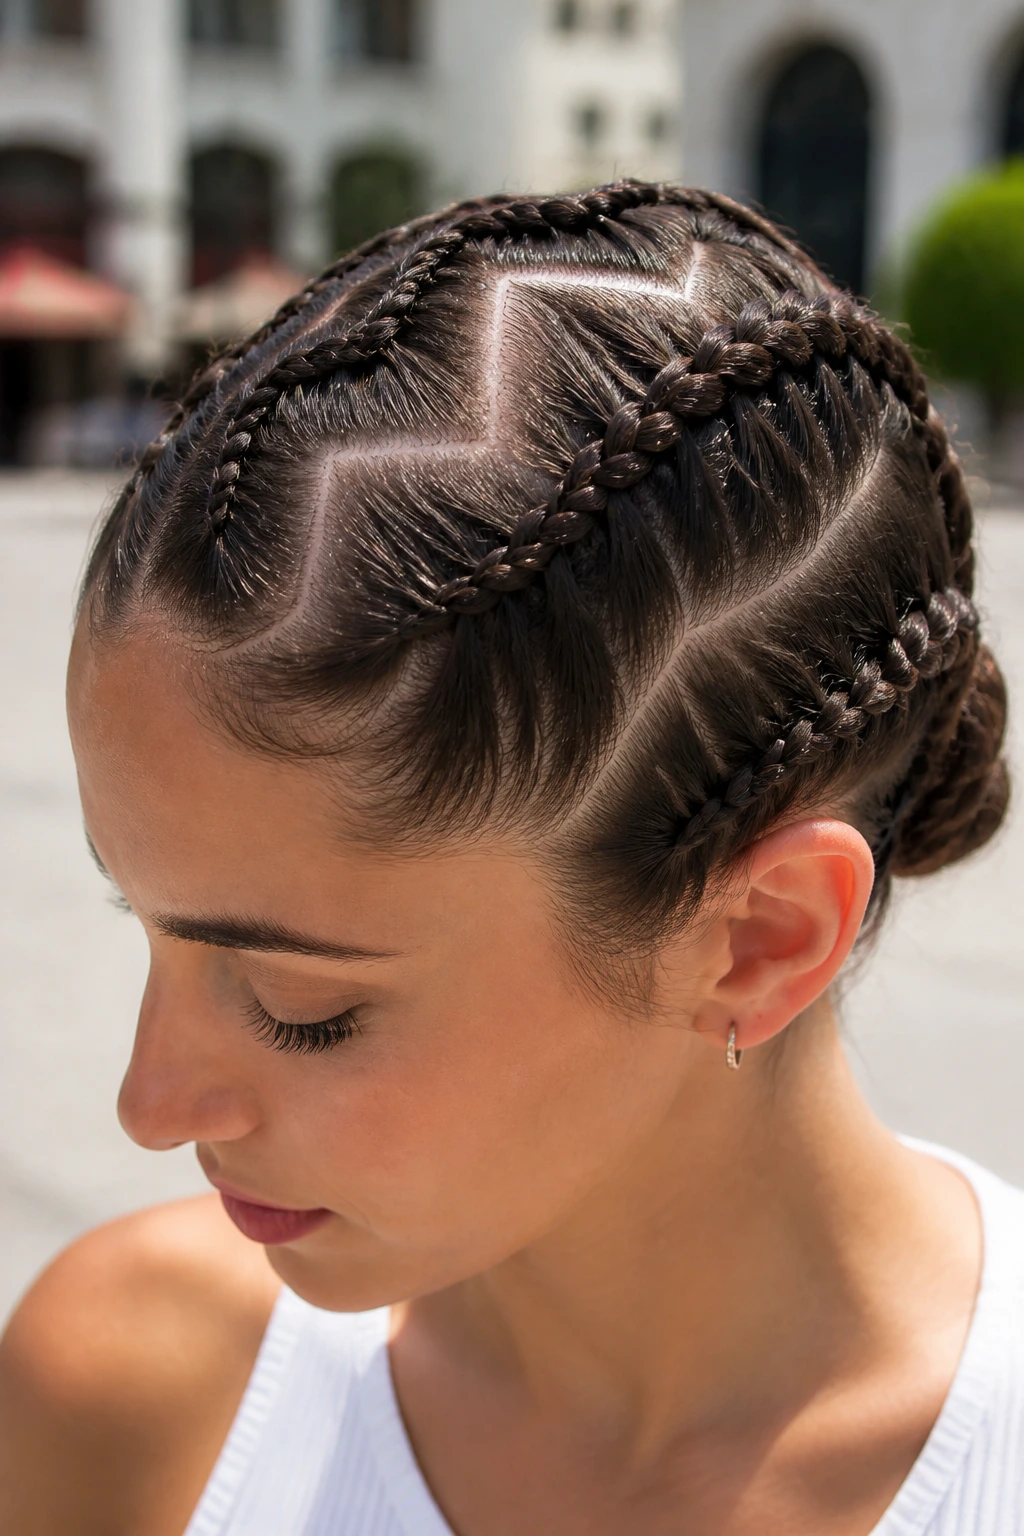
For a more modern, playful take on the princess look, try a zig-zag braid. This involves creating a part in a zig-zag pattern and braiding along the lines. It’s an unusual, eye-catching style that shows off your personality.
The Technical Challenge
This requires some precision with your part. Use the tail of a rattail comb to create a clean, sharp line. Once you’ve established the zig-zag, braid along the lines, pulling the hair tight to keep the pattern visible.
Where to Wear It
This is a fun, vibrant look that is perfect for concerts or casual weekends. It’s definitely not a traditional “princess” look, but it has that same level of intricate detail that makes a style stand out from the crowd.
21. The Crown Braid with Ribbon
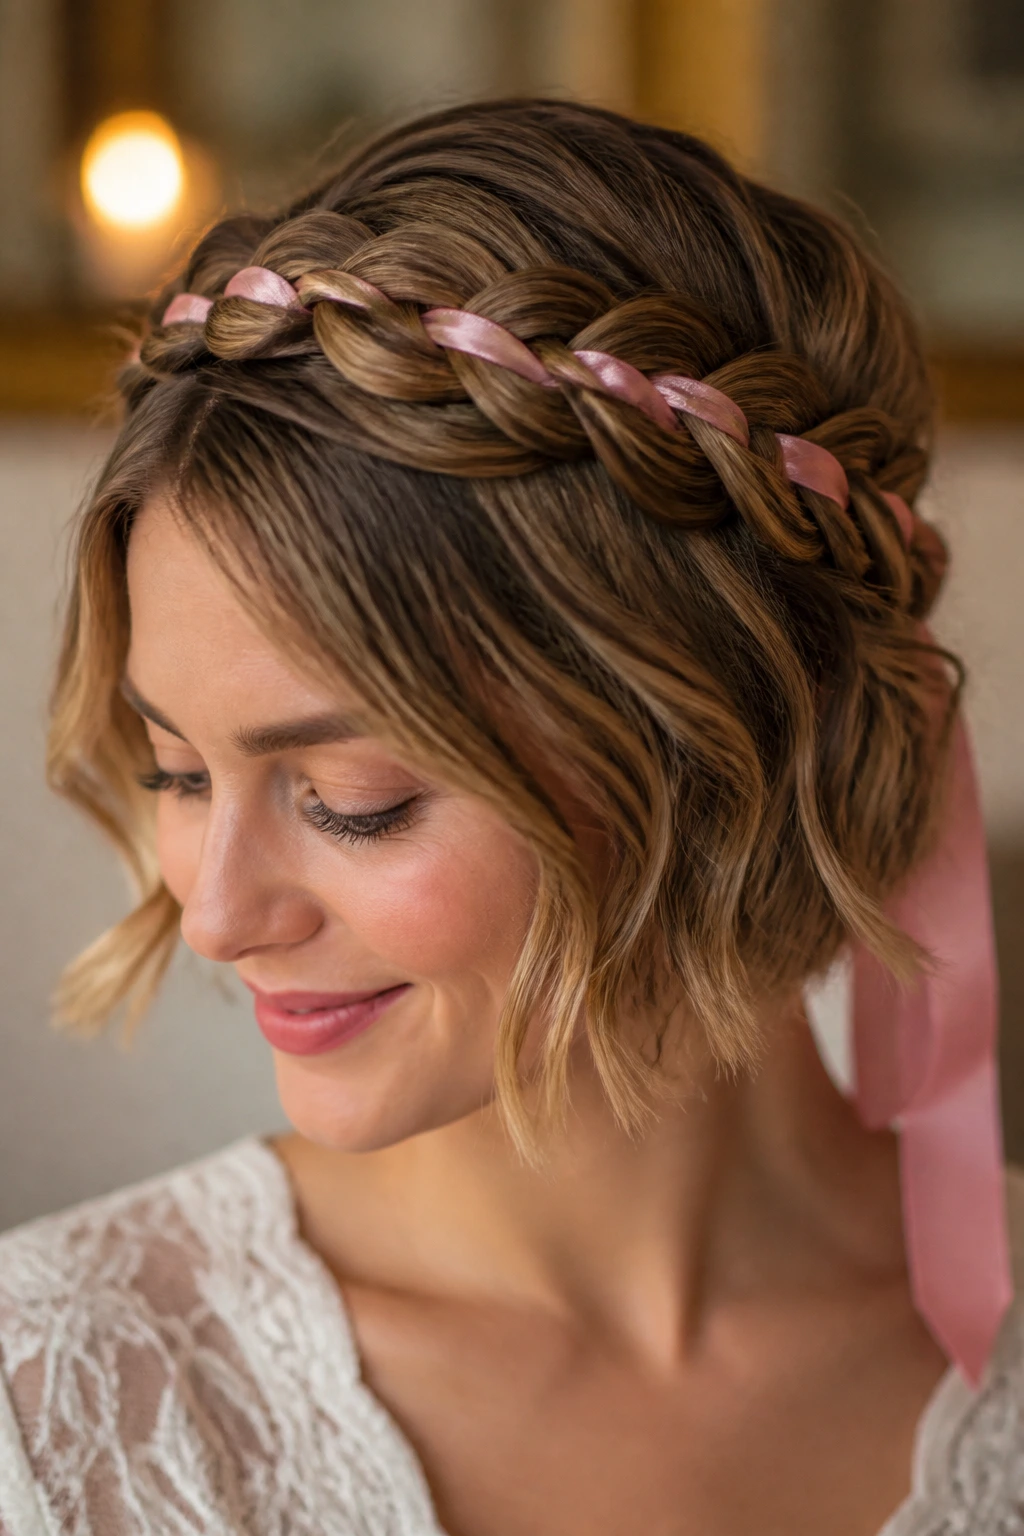
Threading a thin silk or velvet ribbon through your braid can instantly make it look more regal. This is a classic trick used for centuries to add color and volume to thin or short braids.
Threading the Ribbon
Use a large-eye needle to pull the ribbon through the center of your braid. Start at the top, weave it in, and secure it at the bottom. It adds a pop of color that matches your outfit and makes your braid look twice as thick as it is.
Choice of Material
Stick to silk or velvet. Avoid cheap polyester ribbons; they slip too easily and look a bit tacky. A nice, high-quality ribbon makes the whole style look like a professional updo.
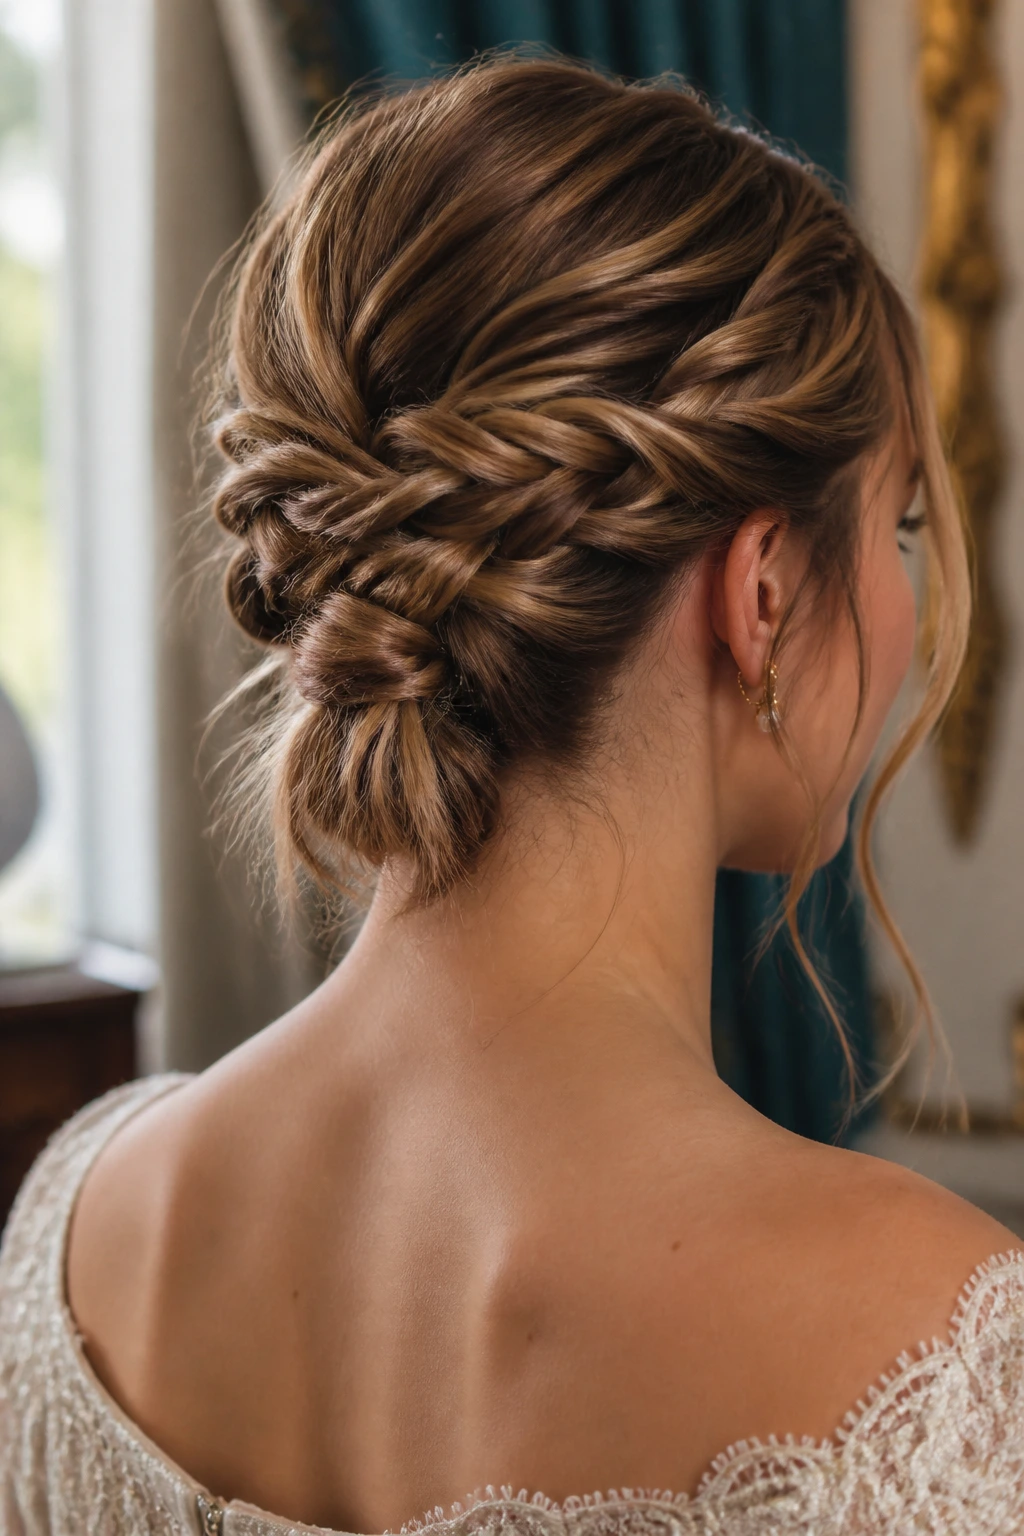
22. The Low-Slung Twisted Crown
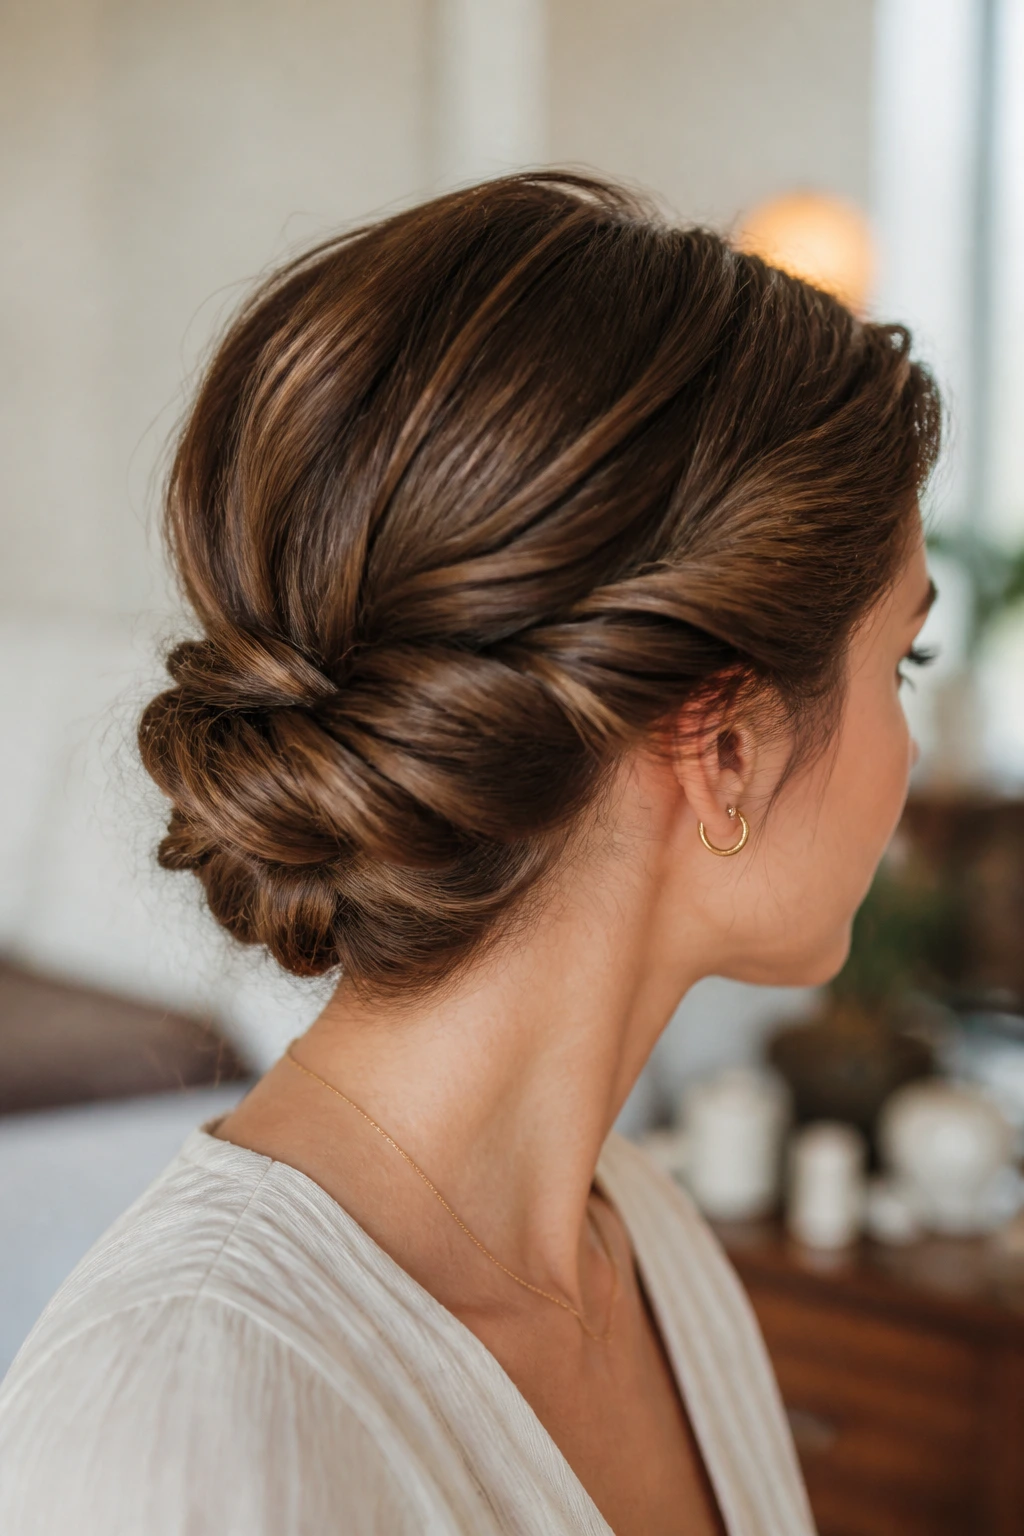
Finally, we have the low-slung crown, which sits just above the nape of your neck. This is incredibly flattering for those with a bob, as it pulls the hair back into a structured shape without requiring a ton of length.
Achieving the Shape
Sweep your hair back into a low, loose ponytail, then twist sections and pin them into a circular shape at the base. It creates a crown effect at the back of your head rather than the front, which is a lovely, unexpected twist on the style.
The Final Verdict
This is an incredibly romantic, sophisticated style that works for almost any evening occasion. It feels polished and intentional, and it makes your bob look like it has a secret length you didn’t know was there.
Final Thoughts
Princess braids for short hair are truly about the illusion of length and the beauty of texture. Do not let the length of your locks dictate the limit of your creativity. By using tools like texturizing spray, strategic pinning, and incorporating accessories like ribbons or pins, you can transform even a short bob into a work of art.
The secret to mastering these looks is practice. Your first attempt at a Dutch braid on short hair might feel clumsy, but once you get the hang of how the hair behaves at your specific length, you’ll be able to whip up these styles in minutes. Remember to embrace the layers and the loose ends—they are part of what makes a short-hair princess braid look so soft and charming. Stay patient with the process, use your mirror, and don’t be afraid to let a few strands fall free.