Crown braids possess a rare, structural elegance that effortlessly elevates any look from casual to intentional. There is a distinct quiet confidence in wearing your hair off your face in a circlet of woven strands, especially when you are heading out for an evening where you want to feel both put-together and relaxed. Whether you are aiming for a soft, bohemian aesthetic or something tight, polished, and structured, the crown braid adapts to the setting. It is the kind of hairstyle that suggests you spent hours in a salon chair, even though you might have mastered the technique in twenty minutes at your own vanity.
The versatility here is the true secret. You can integrate a Dutch braid for volume, weave in silk ribbons for texture, or keep the aesthetic minimalist and clean. Regardless of the texture of your hair—fine, thick, curly, or pin-straight—there is a way to construct a crown that holds throughout a three-course dinner and the lingering conversation that follows.
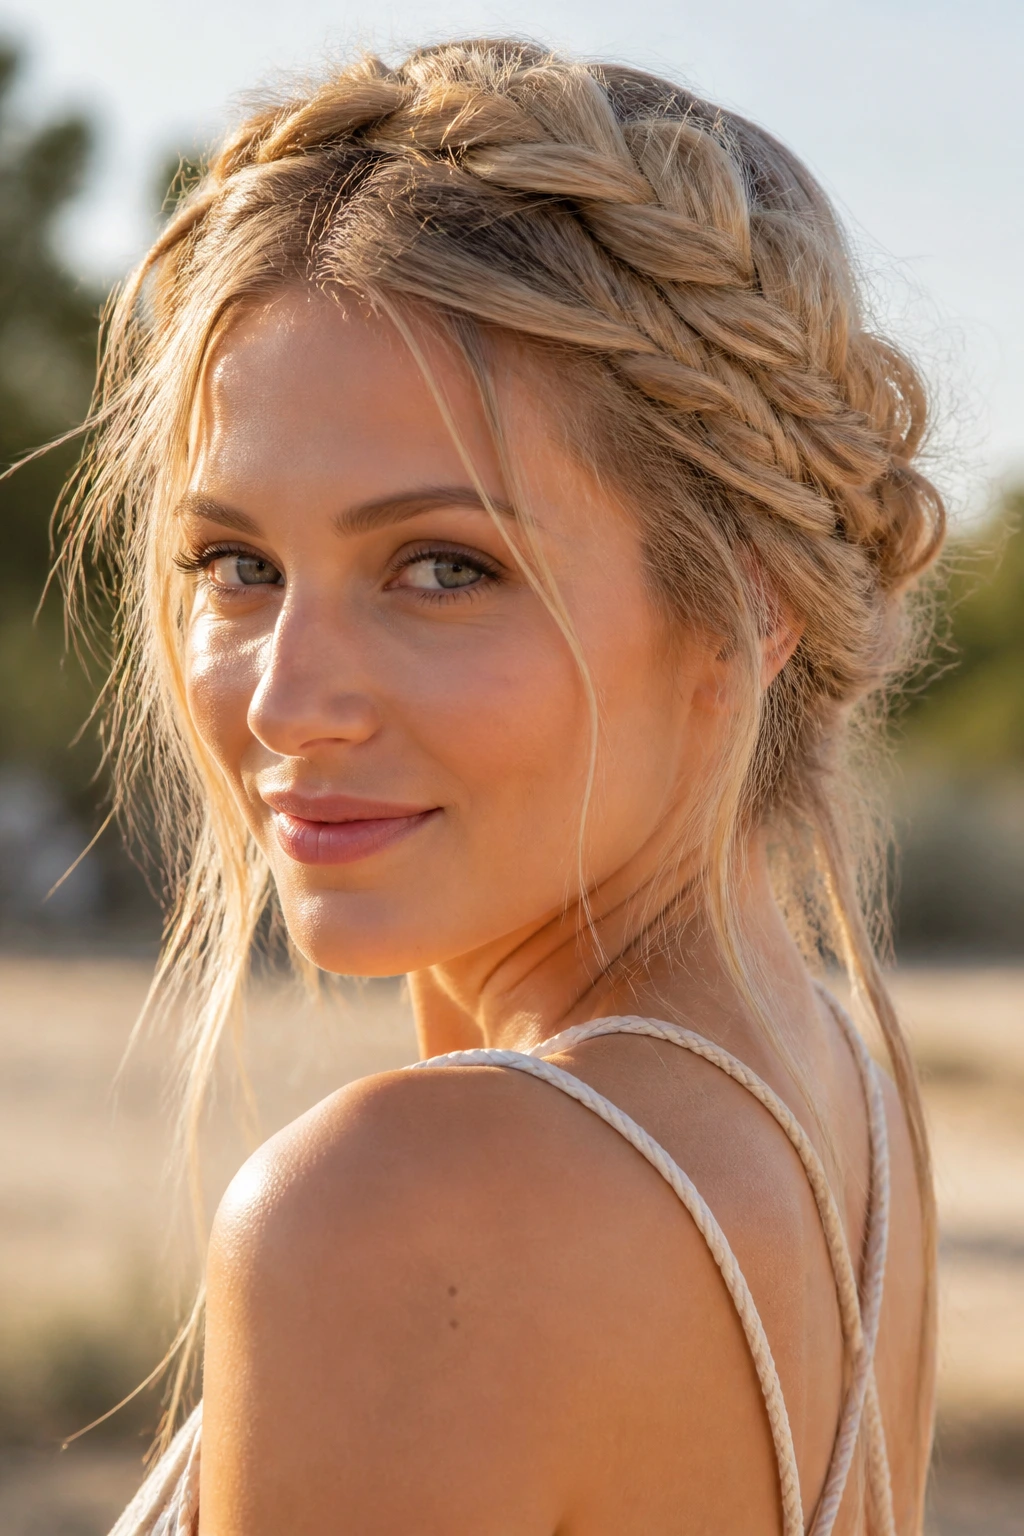
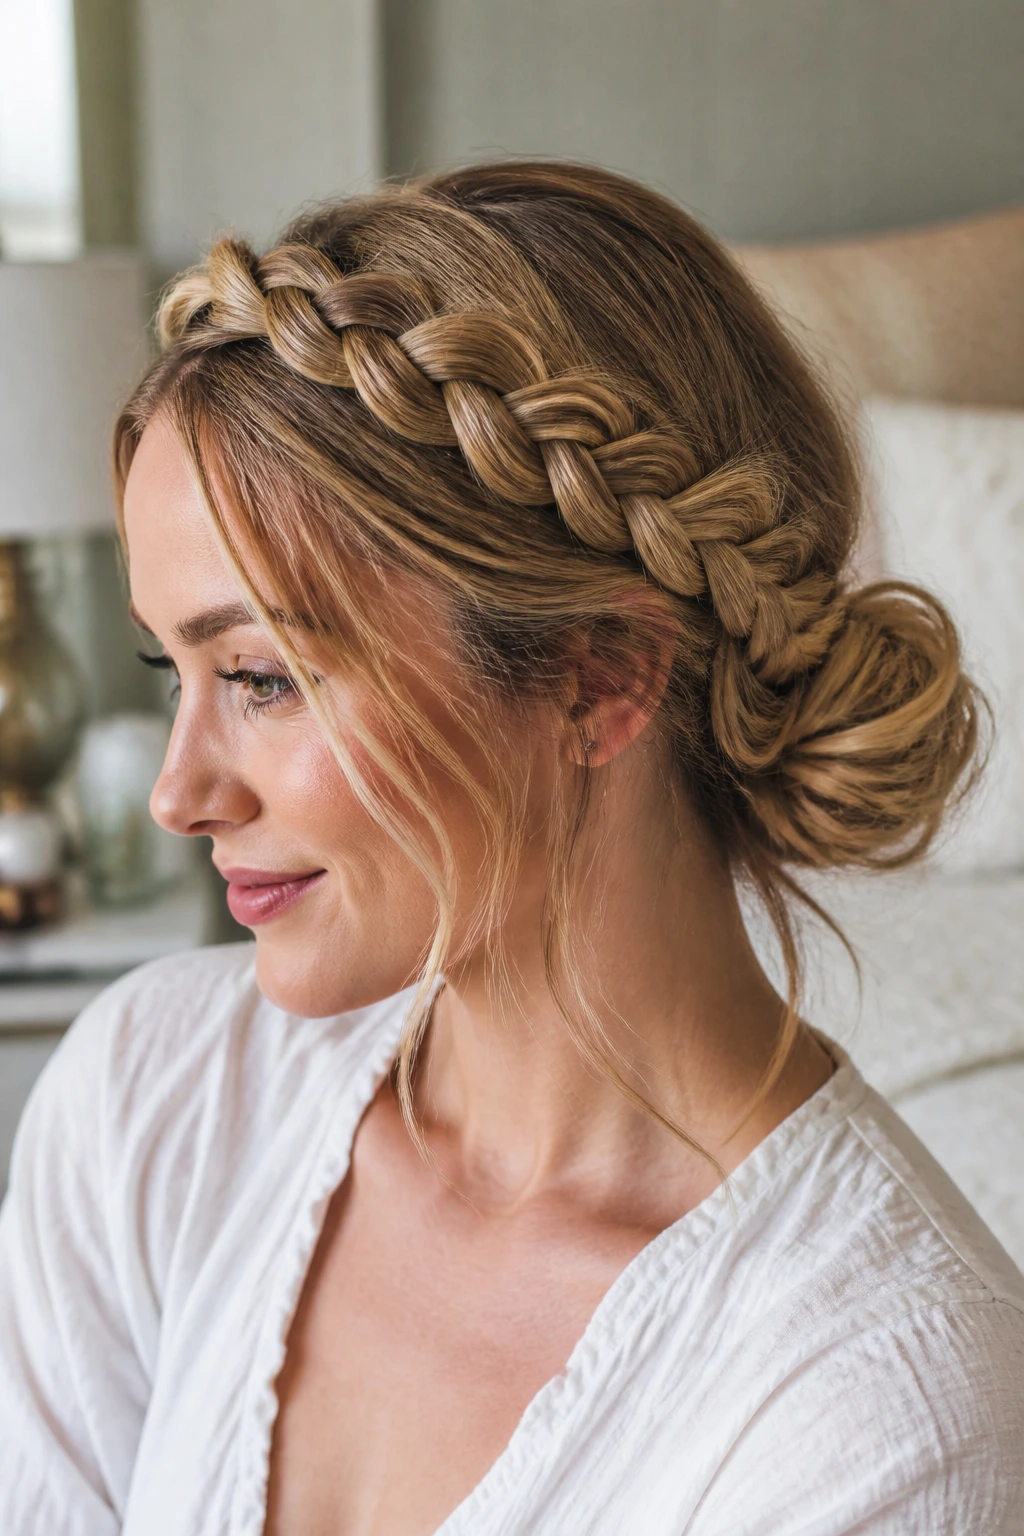
1. The Classic Bohemian Loose Crown
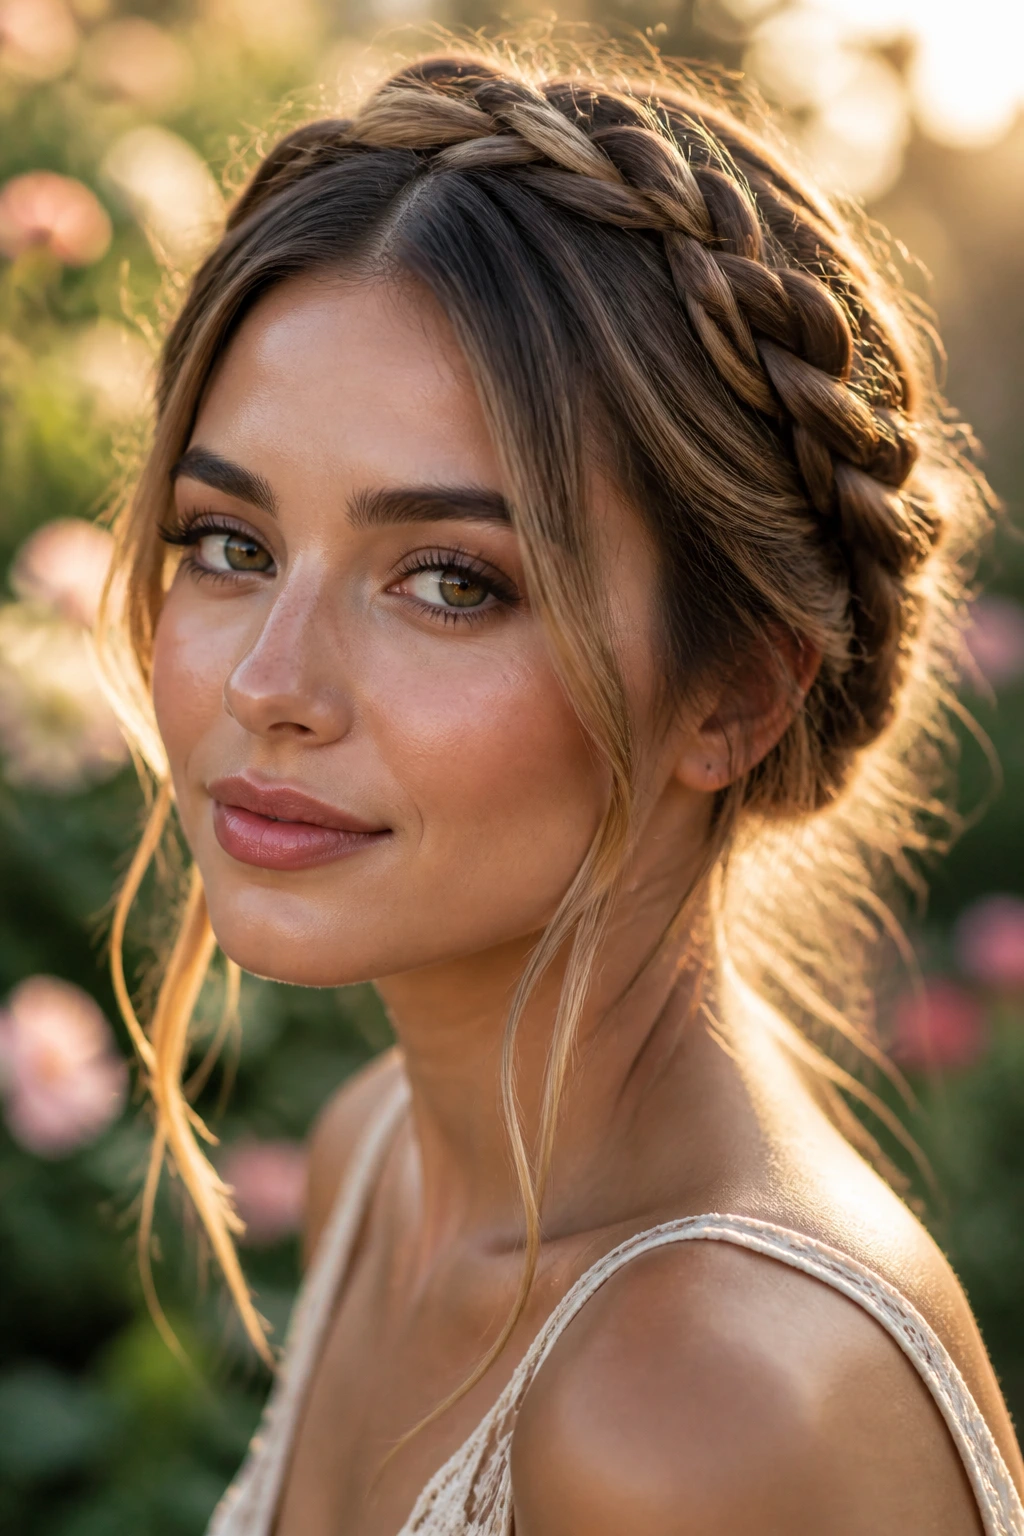
This style relies on soft, undone texture rather than precision. You want to start by creating a center or deep side part and then braiding two separate sections of hair starting from the temples. By working in a loose, relaxed manner, you ensure the final shape doesn’t look too stiff or formal.
Why It Works for Date Night
The slightly messy finish feels romantic and approachable, perfectly suited for an intimate dinner. It avoids the “ballet recital” look by keeping a few tendrils around the face to soften the jawline.
Pro Tips for the Perfect Loose Look
- Texturize first: Apply a dry texture spray or a light sea salt mist before you start braiding to give your hair the “grip” it needs to stay in place without tight tension.
- Pancake the braid: Once you have secured the ends, go back and gently pull at the loops of the braid to double the width and add that sought-after volume.
- Hide the ends: Use U-shaped pins instead of elastic bands to tuck the ends of your braids beneath the opposite side. It makes the transition seamless and invisible.
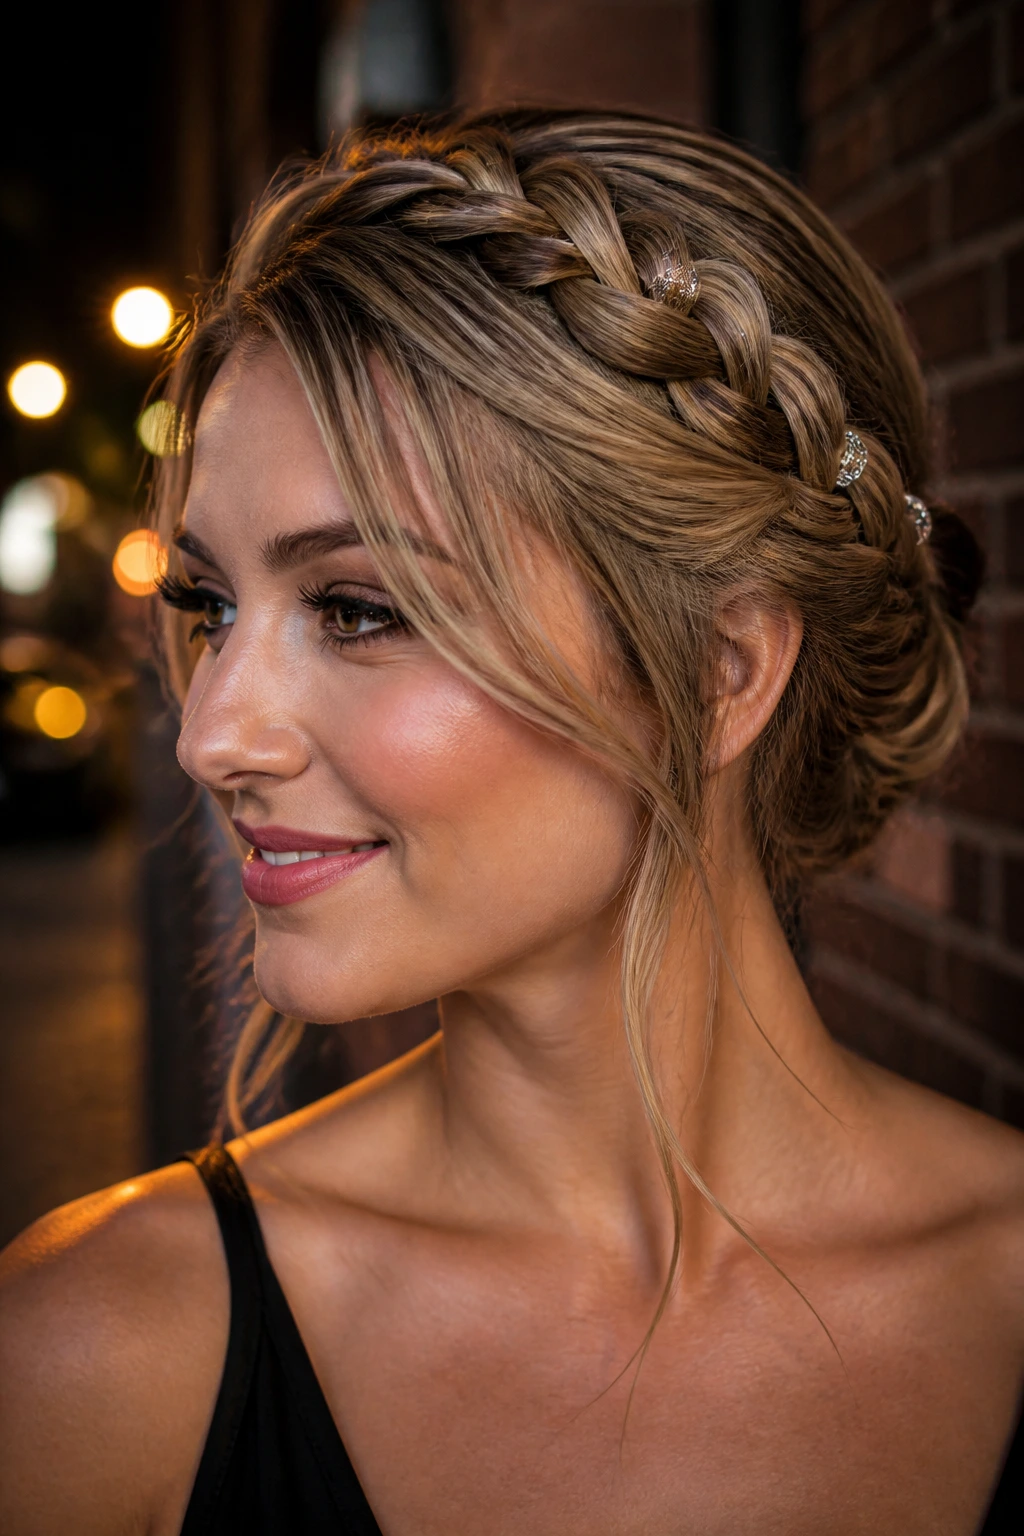
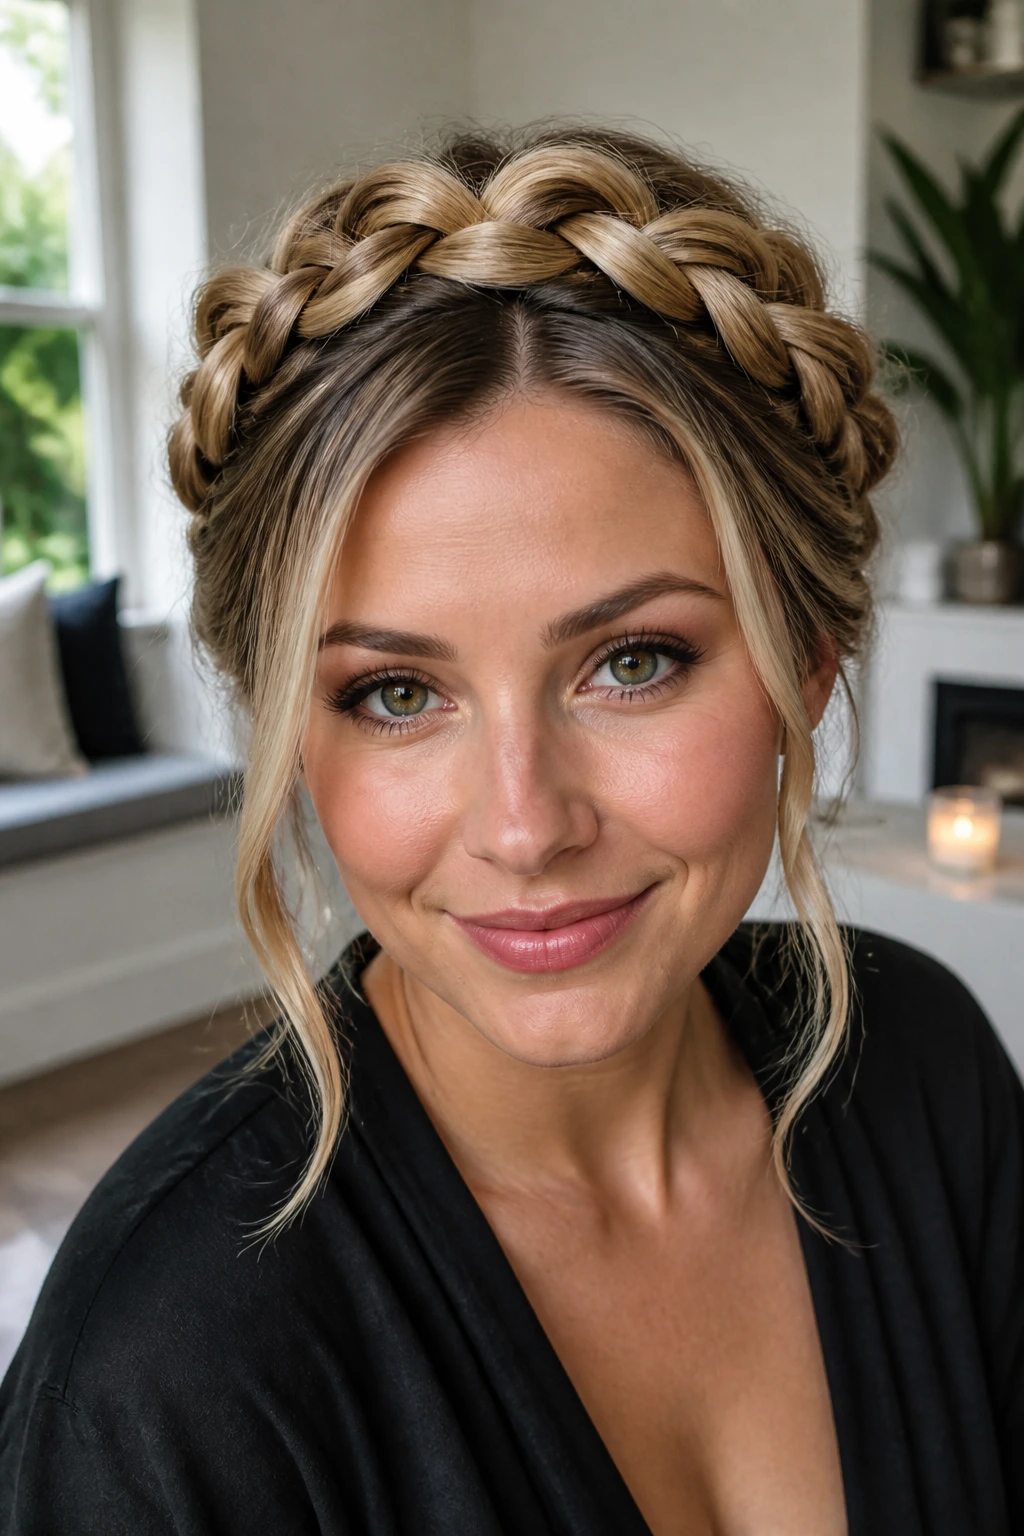
2. The Sleek Dutch Halo Braid
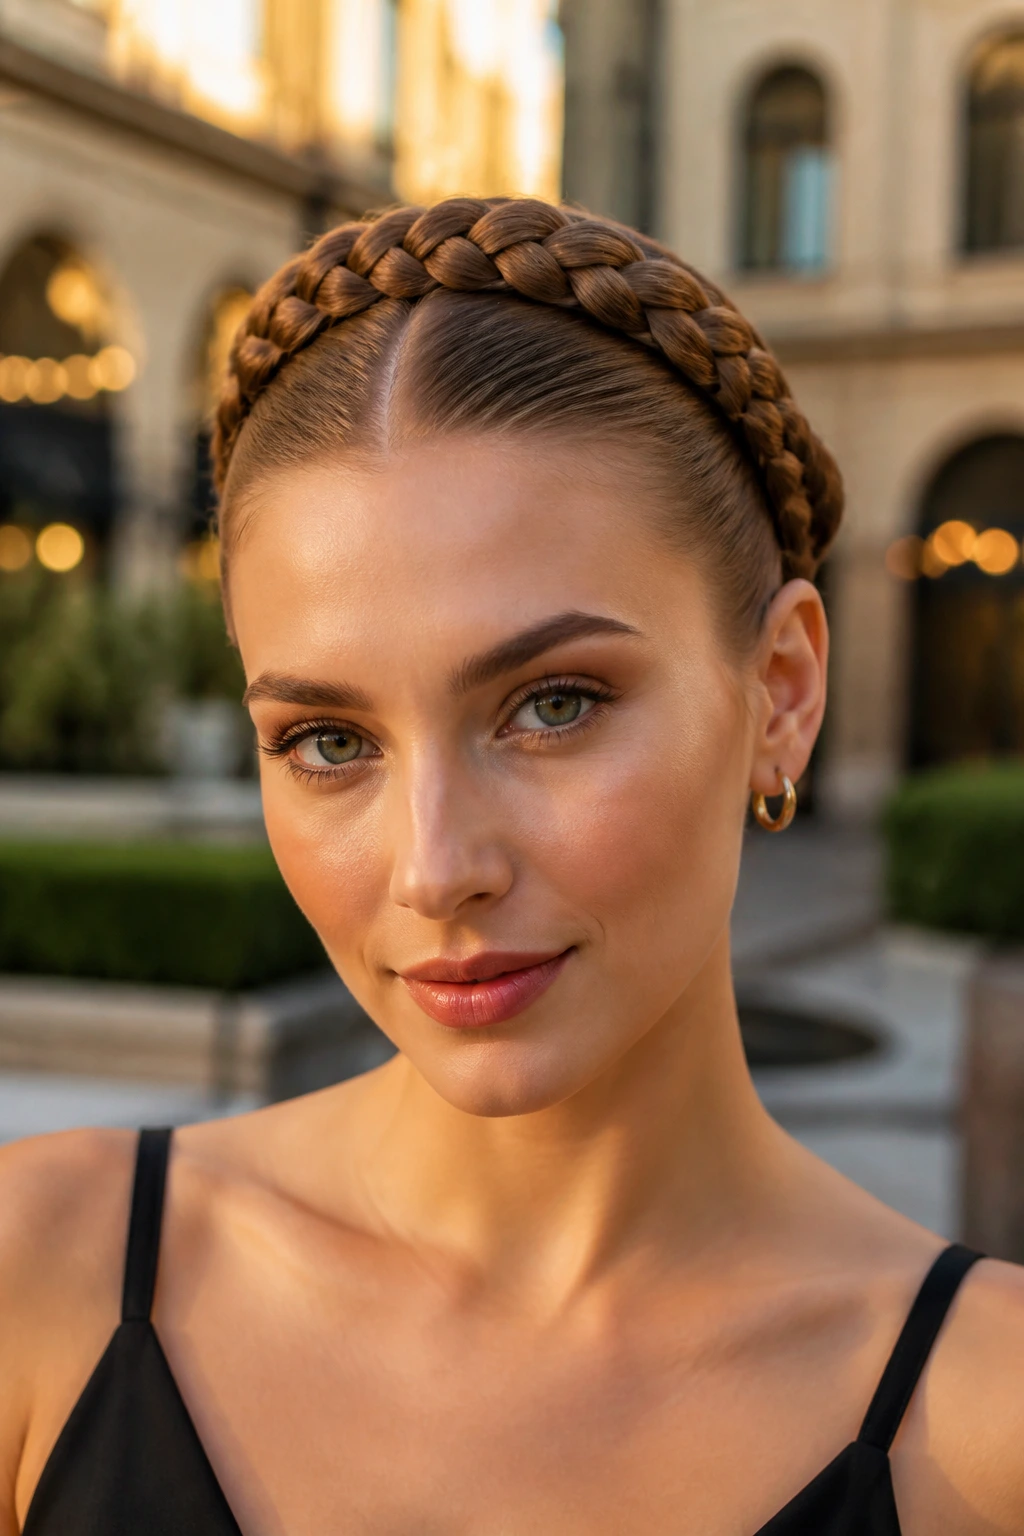
If you prefer a look that stays put regardless of the weather, the Dutch halo is your best friend. Unlike a standard plait, the Dutch technique crosses sections under each other, which makes the braid pop off the surface of the head rather than sinking into it.
Why It Stays Secure
Because the braid is built tightly against the scalp, it acts like a headband. You won’t have to worry about loose pieces falling into your eyes while you’re trying to enjoy a movie or a walk in the breeze.
Finishing the Look
Make sure to tuck the tails of your braids under the start of the opposite braid. Secure them with two or three bobby pins that match your hair color exactly. A light-hold, flexible hairspray will keep flyaways in check without making the hair look crunchy or stiff.
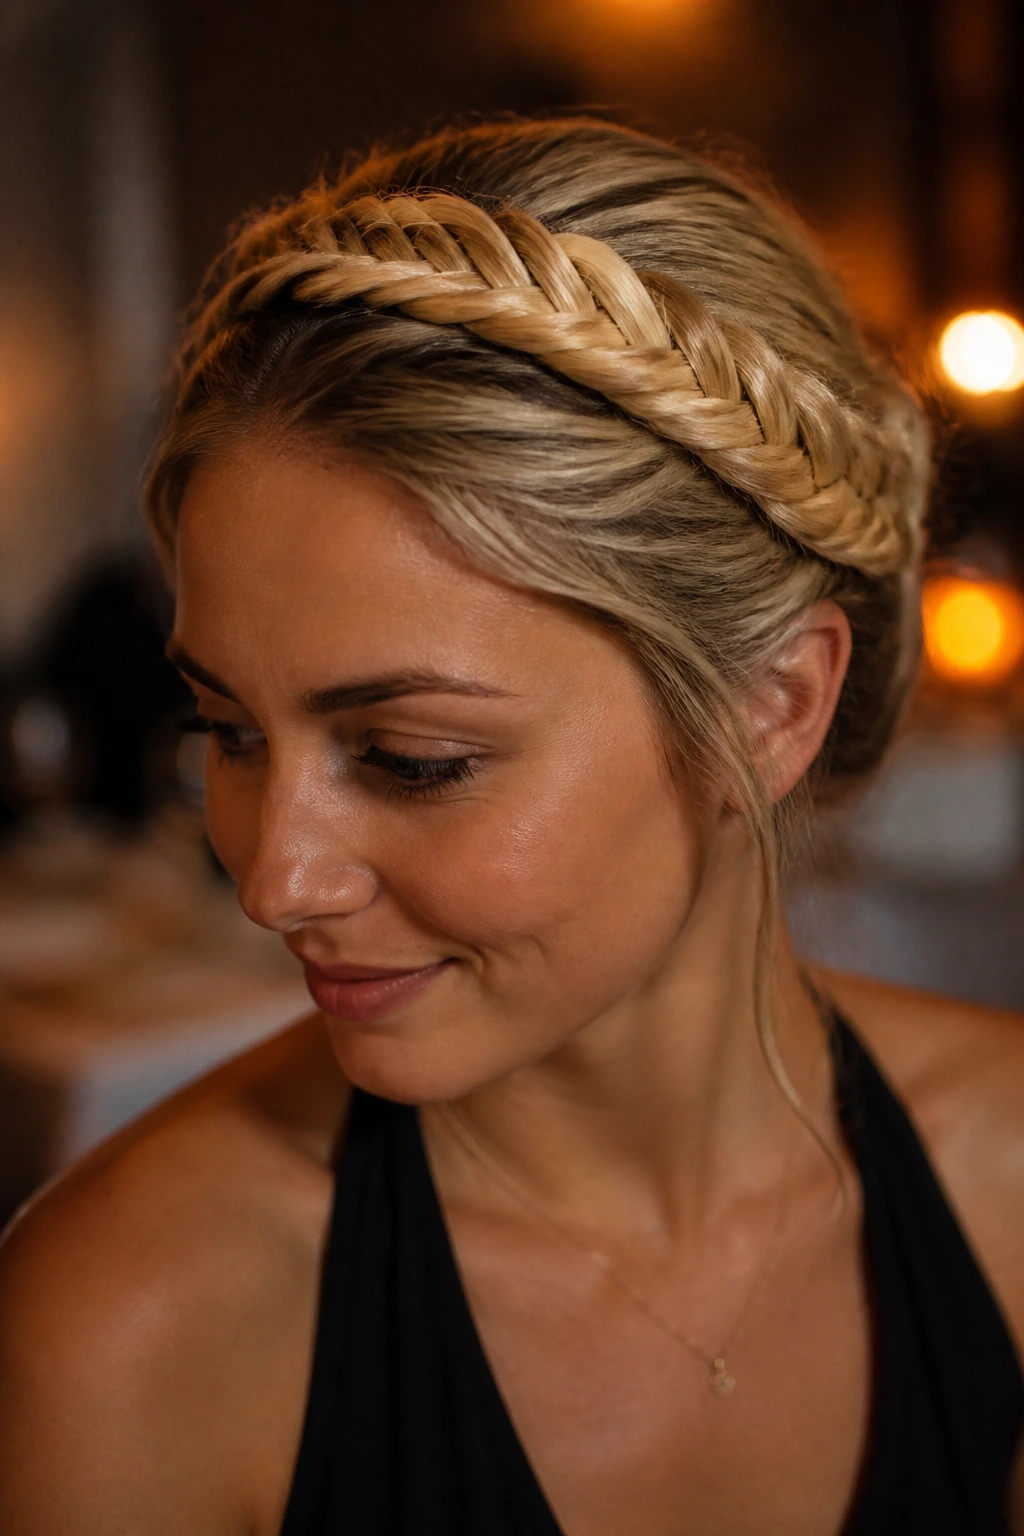
3. The Fishtail Crown with Floral Accents
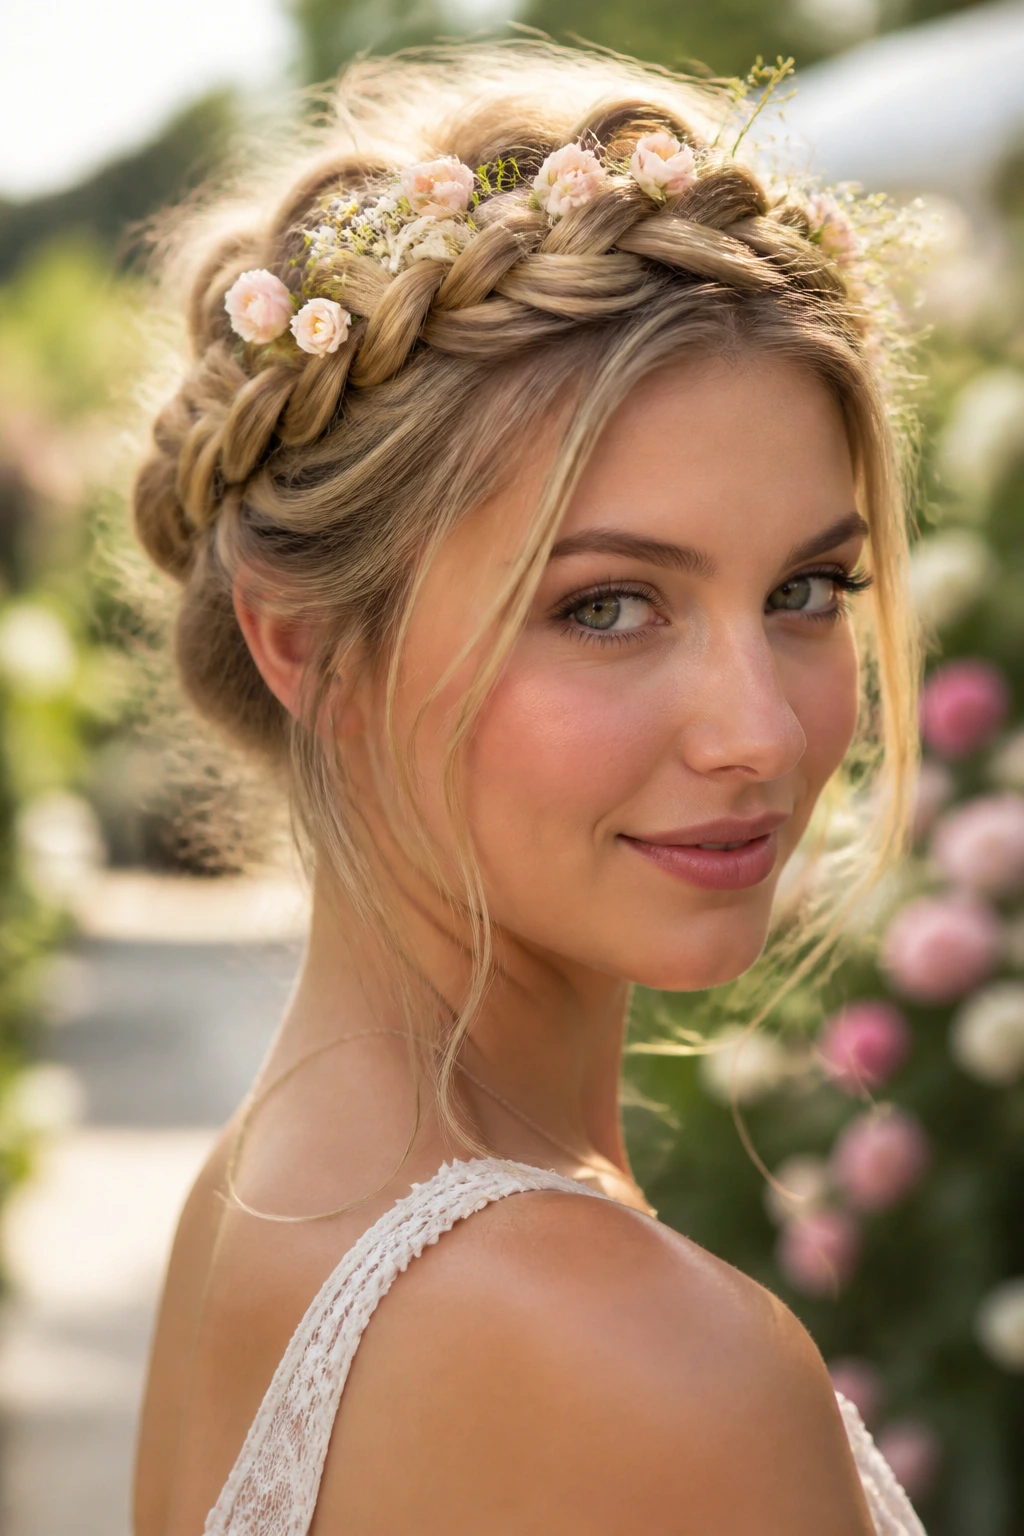
Fishtail braids are notoriously tedious, but the payoff is a complex, intricate texture that looks far more sophisticated than a standard three-strand weave. For a date night, adding a few tiny, fresh blooms tucked into the crevices of the braid brings a whimsical, garden-party vibe to your look.
Achieving the Intricacy
Start by sectioning the top of your hair into two halves. Instead of standard braiding, you are continuously crossing tiny strands from the outer edge of one section into the center. It takes patience, but the result is a tight, woven pattern that catches the light beautifully.
How to Style Your Additions
- Choose durable flowers: Waxflower, baby’s breath, or tiny spray roses are perfect because they don’t wilt quickly.
- Placement matters: Space them unevenly along the crown to avoid looking like you are wearing a store-bought plastic accessory.
- Preparation: Snip the stems to about one inch and use a tiny dab of floral tape or a clear elastic if you need to build a small stem extension to secure them into the braid.
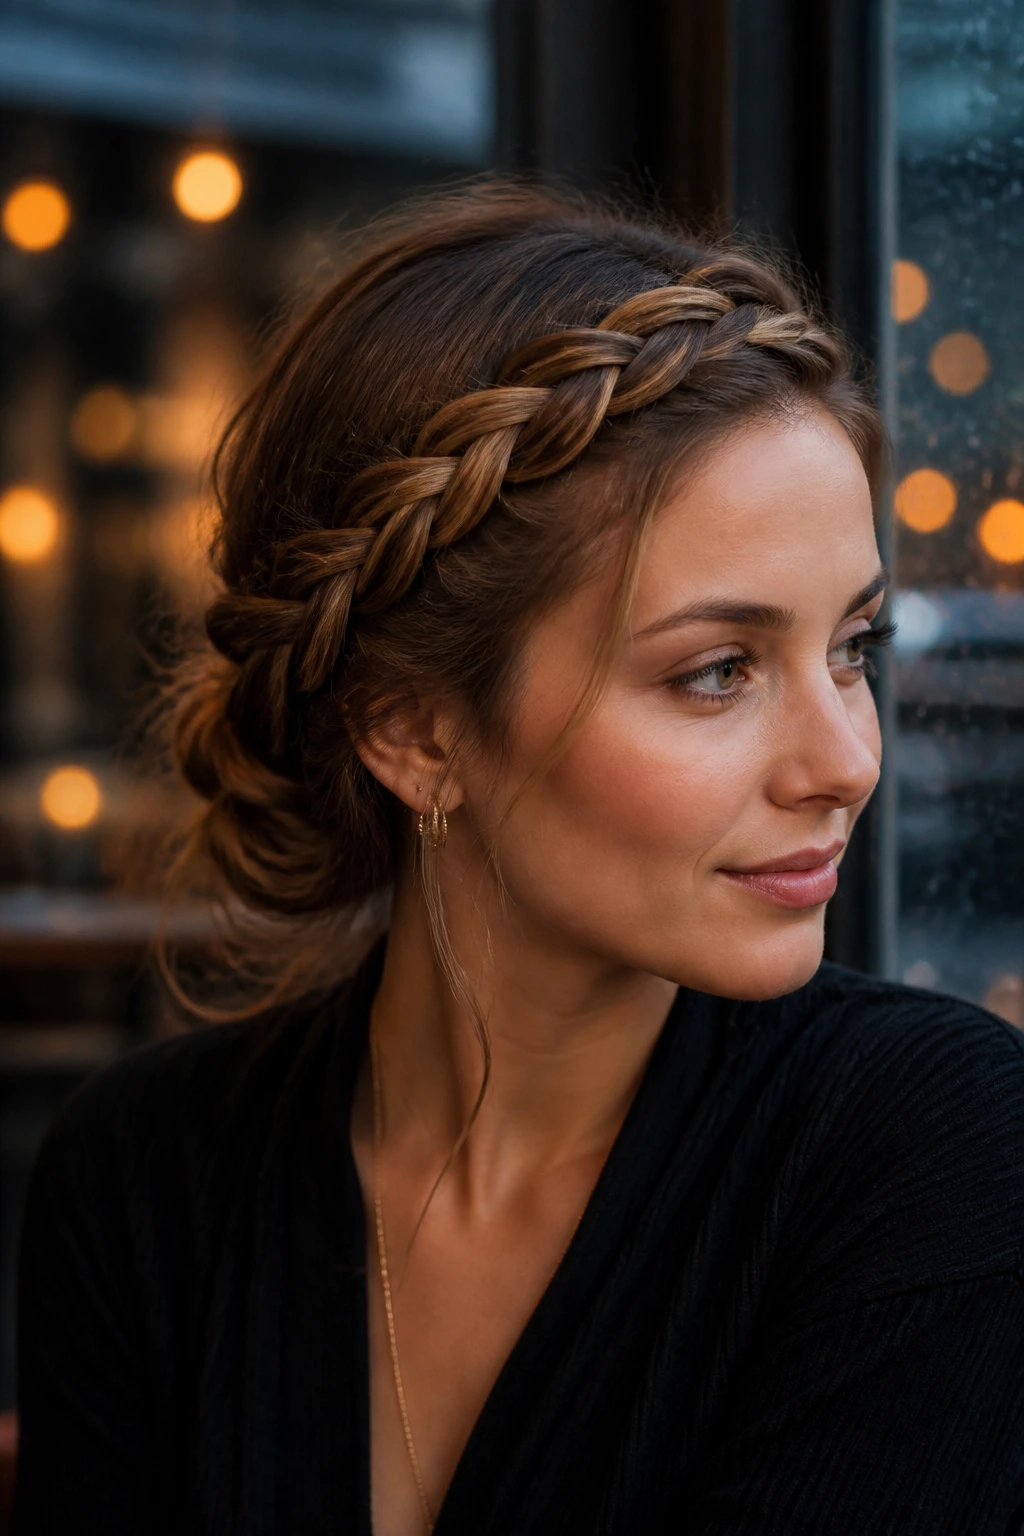
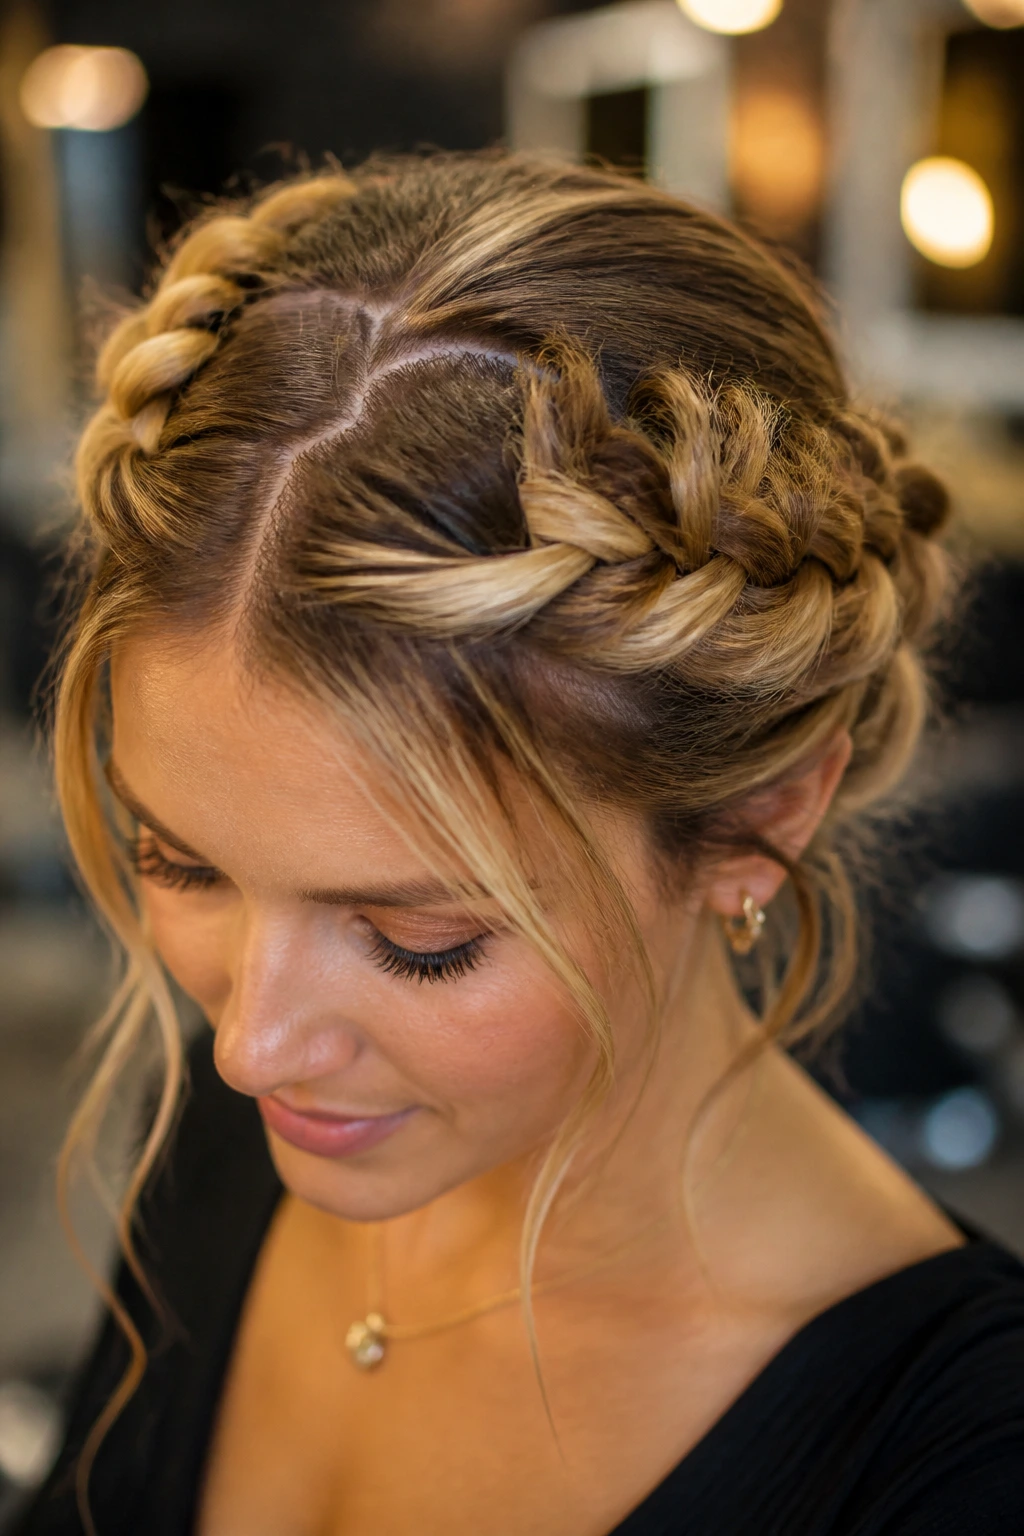
4. The Double-Braid Half-Crown

Sometimes you want the security of a crown braid but aren’t ready to commit to pulling every single strand away from your neck. The double-braid half-crown offers the best of both worlds, keeping the front of your hair pristine while allowing the back to flow in soft, romantic waves.
The Construction Technique
Create a small, tight braid on either side of your head starting just above the ears. Connect them at the crown of your head, pinning them so they overlap slightly. By stacking two braids, you get more visual interest and a sense of depth that a single braid simply cannot provide.
Best Hair Textures for This Style
This style works particularly well for those with layered cuts. If you have shorter face-framing pieces, leave them loose and use a curling iron to give them a slight bend. It frames the face and prevents the crown section from looking too harsh against your natural hairline.
5. The Messy Waterfall Crown
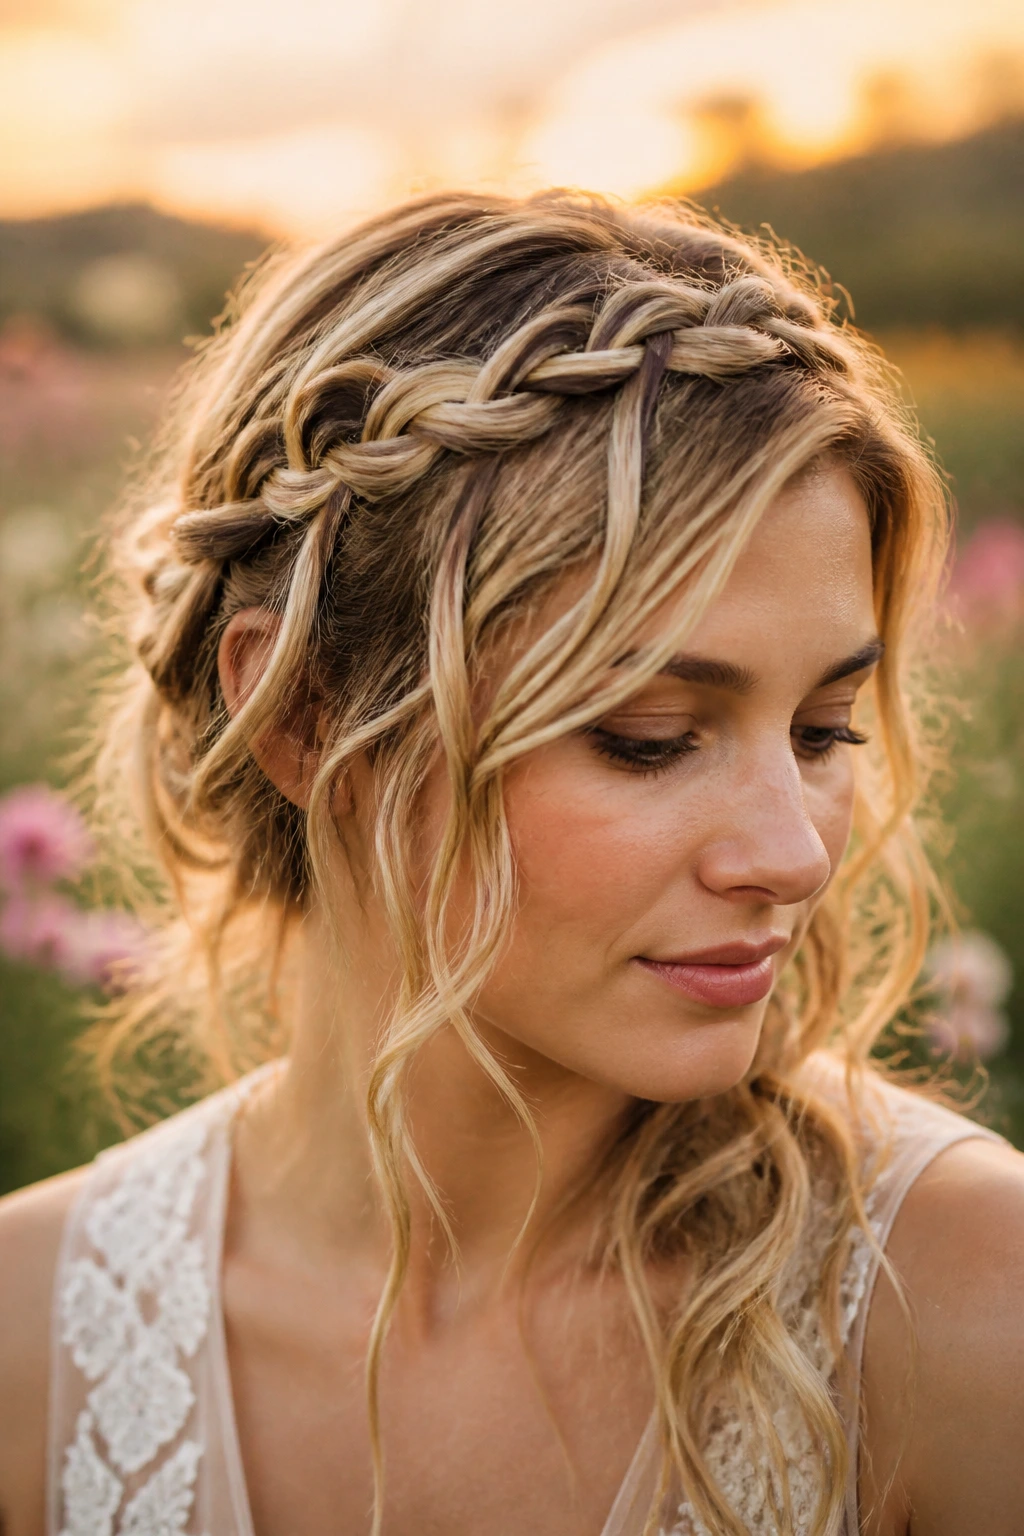
A waterfall braid is unique because it allows sections of hair to “drop out” of the braid as you go. By wrapping this effect around the head, you create a crown that feels ethereal and airy, almost like a floral crown made entirely of your own hair.
The Mechanism of the Drop
As you braid along the hairline, you leave one strand behind with every crossing, picking up a new strand from the back to continue the weave. It creates a cascading effect that looks complicated but is actually quite simple once you develop a rhythm.
What to Watch For
Be careful not to pull the “dropped” strands too tight. You want them to have a natural, loose hang. This style is best suited for hair that has a bit of wave or curl, as the texture helps the dropped strands blend into the rest of your hair rather than sticking out stiffly.
6. The Side-Swept Braided Diadem
If you want to draw attention to your neckline, a side-swept diadem is an excellent choice. By starting the crown braid at one temple and sweeping it low across the forehead or just behind the hairline, you create an asymmetrical silhouette that feels very high-fashion.
Why Symmetry Is Overrated
An asymmetrical crown adds an element of surprise to your look. It pulls the eye across your face, highlighting your cheekbones and ears—which, if you are wearing statement earrings, makes this the perfect pairing.
Managing the Tension
Because this is a side-swept look, the weight of the hair will naturally want to pull the braid down toward the heavier side. Use a horizontal bobby pin every two inches to “anchor” the braid against the back of your head. This prevents the “slumping” effect that can ruin a side crown by the end of the night.
7. The Rope-Twist Halo
Not everyone is a master of the three-strand plait. A rope twist is the perfect alternative. By taking two sections of hair and twisting them around each other, you create a beautiful, corded effect that looks exceptionally polished when wrapped around the head.
The Simplicity Factor
Rope twists are significantly faster to execute than traditional braids. If you are running behind on your prep time, this is your go-to style. It offers a clean, structural look that pairs well with minimalist jewelry and a simple dress.
Keeping the Twist Tight
The secret to a long-lasting rope halo is to twist each individual section in one direction—say, clockwise—before wrapping them around each other in the opposite direction, counter-clockwise. This “counter-twist” acts like a spring, keeping the rope braid from unraveling while you are out for dinner.
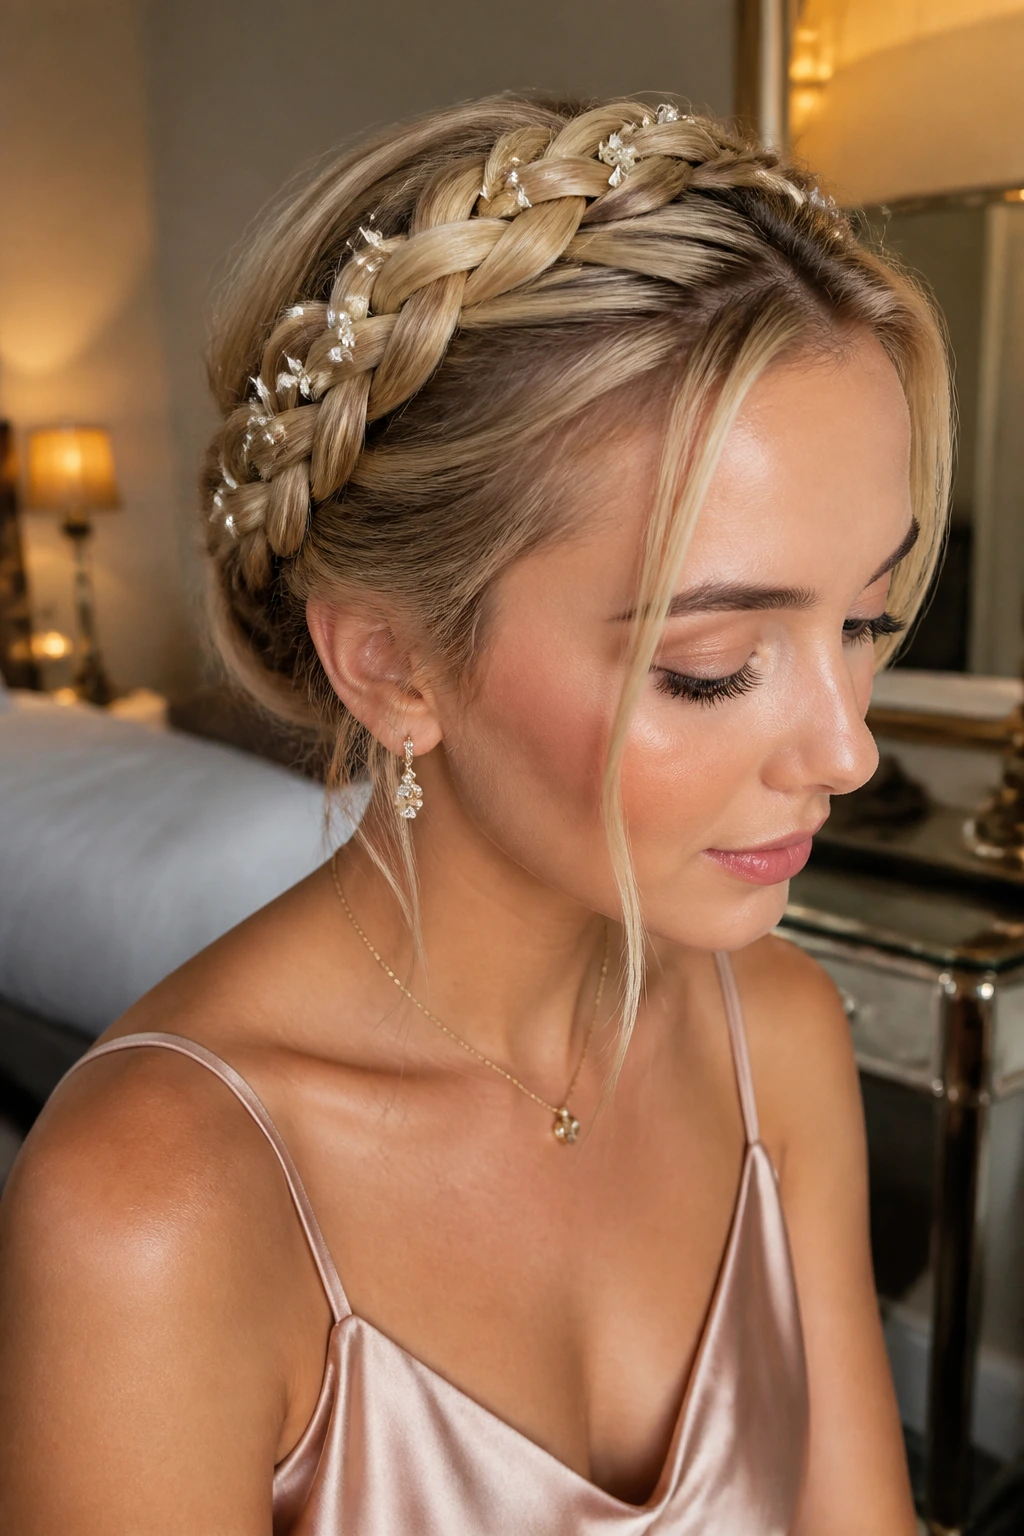
8. The Crown Braid with Silk Ribbon
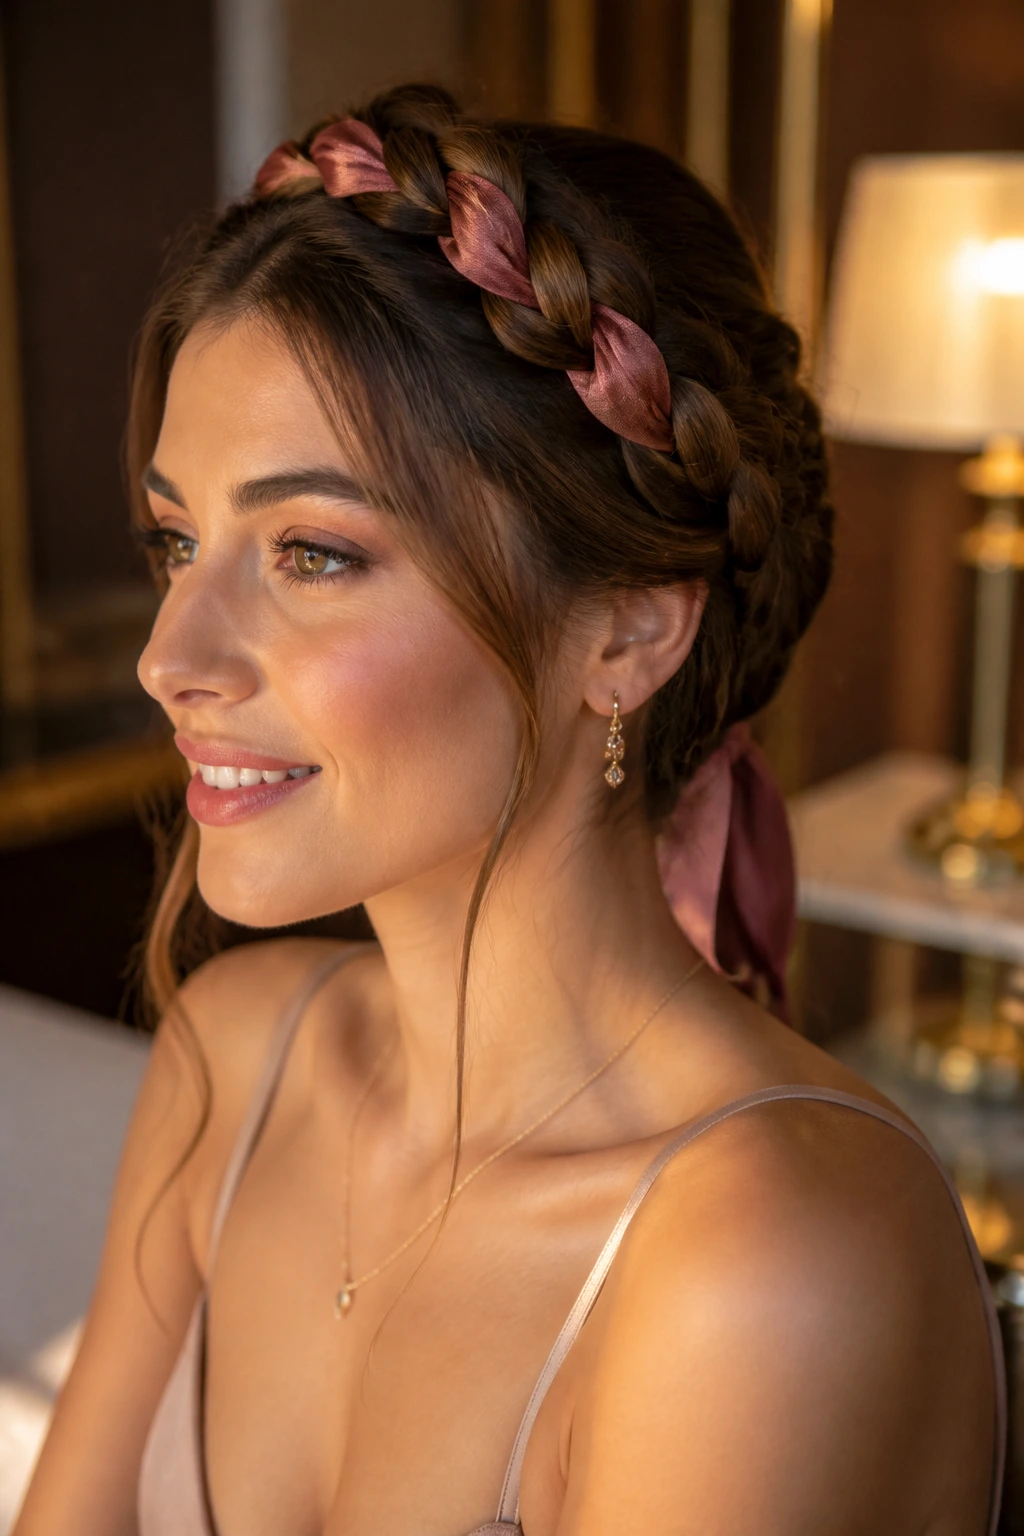
Incorporating a velvet or silk ribbon into your braid adds a pop of color that can match your outfit or lipstick. It also provides a little extra bulk, which is fantastic if your hair is on the finer side and you struggle to get your crown braid to look substantial.
How to Feed the Ribbon
Tie the ribbon to a small clear elastic, anchor it at the base of your braid, and integrate it into one of the three strands as you weave. As you braid, the ribbon will naturally spiral around the crown of your head, creating a high-contrast look that feels very refined.
Choosing Your Ribbon
Avoid satin ribbons that are too slick, as they will slide out of your hair within an hour. Opt for a slightly textured grosgrain or a high-quality velvet ribbon. These materials grip the hair fiber and provide the friction necessary to keep your braid secure all evening long.
9. The Textured Faux-Hawk Crown

This is a bold, modern take on the crown braid. By keeping the center section of the crown high and slightly teased, you create a faux-hawk effect that gives you a bit of height. It is a great choice if you are wearing a high-neck garment and want to elongate your silhouette.
The Teasing Technique
Before you start braiding, tease the roots of your crown section with a fine-tooth comb and a light dusting of volume powder. This gives you a permanent “bump” that the braids can anchor into, ensuring the crown doesn’t go flat after you walk out the door.
Why It’s Perfect for Bold Personalities
This isn’t a “soft and sweet” look. It’s edgy. It works beautifully with leather jackets, dark makeup, or a sharp-shouldered blazer. If you want your hair to make as much of a statement as your outfit, this is the style to choose.
10. The Braided Headband Tuck
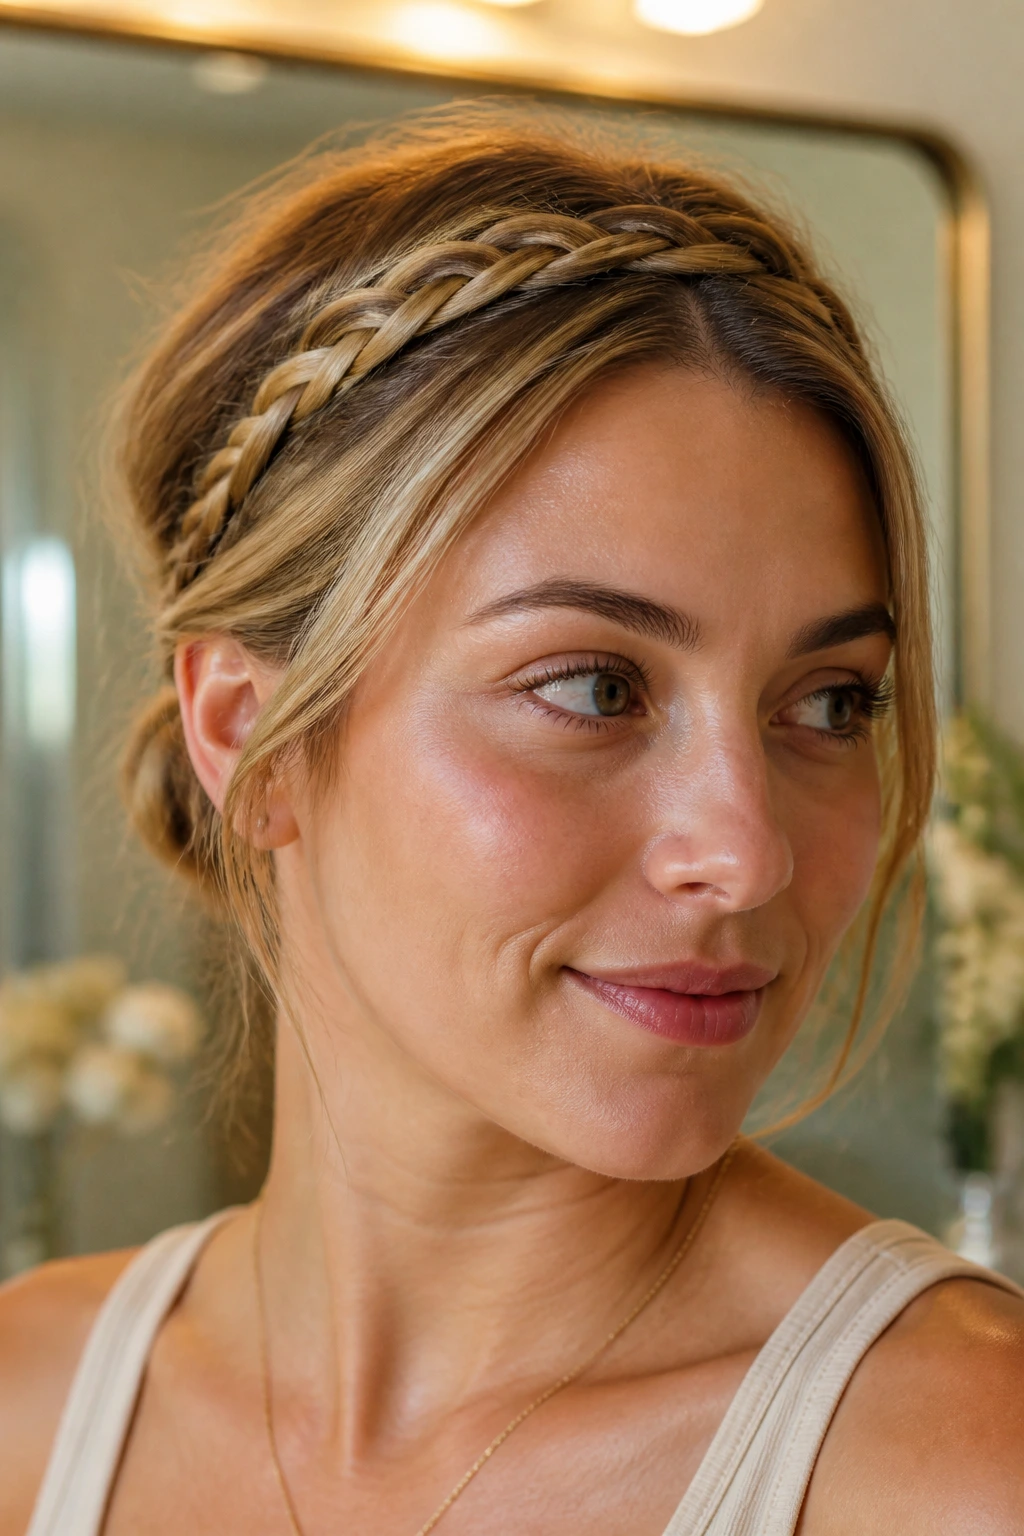
Sometimes the most effective crown is the simplest one. By braiding two small sections just behind your ears and pulling them across the top of your head, you create the appearance of a headband. Tuck the ends behind the ears on the opposite side to finish the look.
Ease of Maintenance
You can do this in the car or a bathroom stall in under three minutes. It is the ultimate “emergency date night” hair fix. Because it only uses a small portion of your hair, the rest of your locks can remain loose, providing a sense of comfort.
Hiding the Pins
Since you are pinning the braids behind your ears, you can use the hair behind your ears to cover the pins. This makes it look as though your hair is magically staying in place, which is exactly the kind of polished mystery that makes for a great date night.
11. The Wrapped Fishtail Circlet
Fishtail braids usually lie flat, but if you create a fishtail with a massive amount of tension and wrap it in a circle, you get a thick, ropey crown that looks like a sculpture. It is incredibly durable and creates a very distinct, intricate pattern that stands out in dim restaurant lighting.
Managing the Length
If your hair is very long, you might have enough to circle your head twice. If not, do not worry—two smaller fishtails meeting at the back of the head provide the same aesthetic impact without the stress of trying to wrap a single braid all the way around.
Texture Tips
Fishtail braids thrive on hair that is slightly “dirty”—meaning, hair that hasn’t been washed in a day or two. The natural oils help the strands stick together. If your hair is freshly washed, use a heavy-duty texturizing spray to simulate that necessary grip.
12. The Triple-Threat Braid

Take three distinct braids—perhaps a Dutch braid, a simple three-strand, and a rope twist—and weave them into a single, massive crown. It sounds complicated, but it is just a matter of layering different textures.
Why Variety Looks Professional
When you mix braid types, you create visual movement. A plain three-strand braid can look boring, but a three-strand braid nestled next to a chunky Dutch braid looks like a curated piece of art. It adds a “depth of field” to your hairstyle that keeps people looking.
Balancing the Weight
Three braids are heavy. Ensure your foundation is solid. Use a strong styling paste on your roots before you begin, and don’t be afraid to use a few extra bobby pins at the nape of your neck to distribute the weight evenly so your head doesn’t feel pulled in one direction.
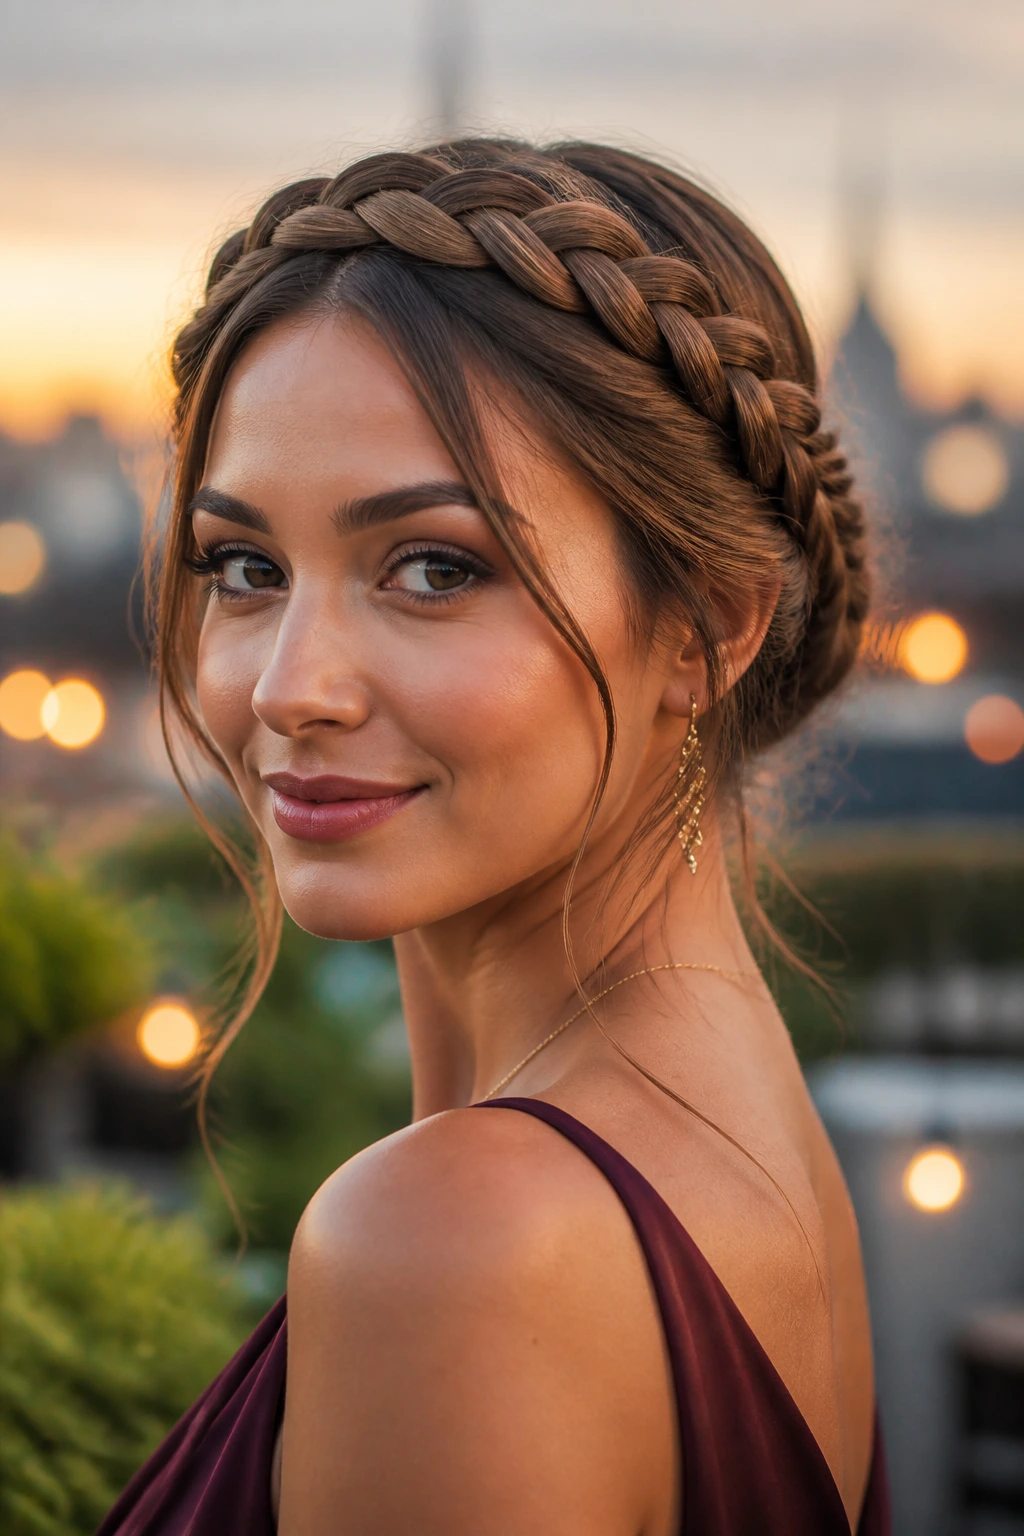
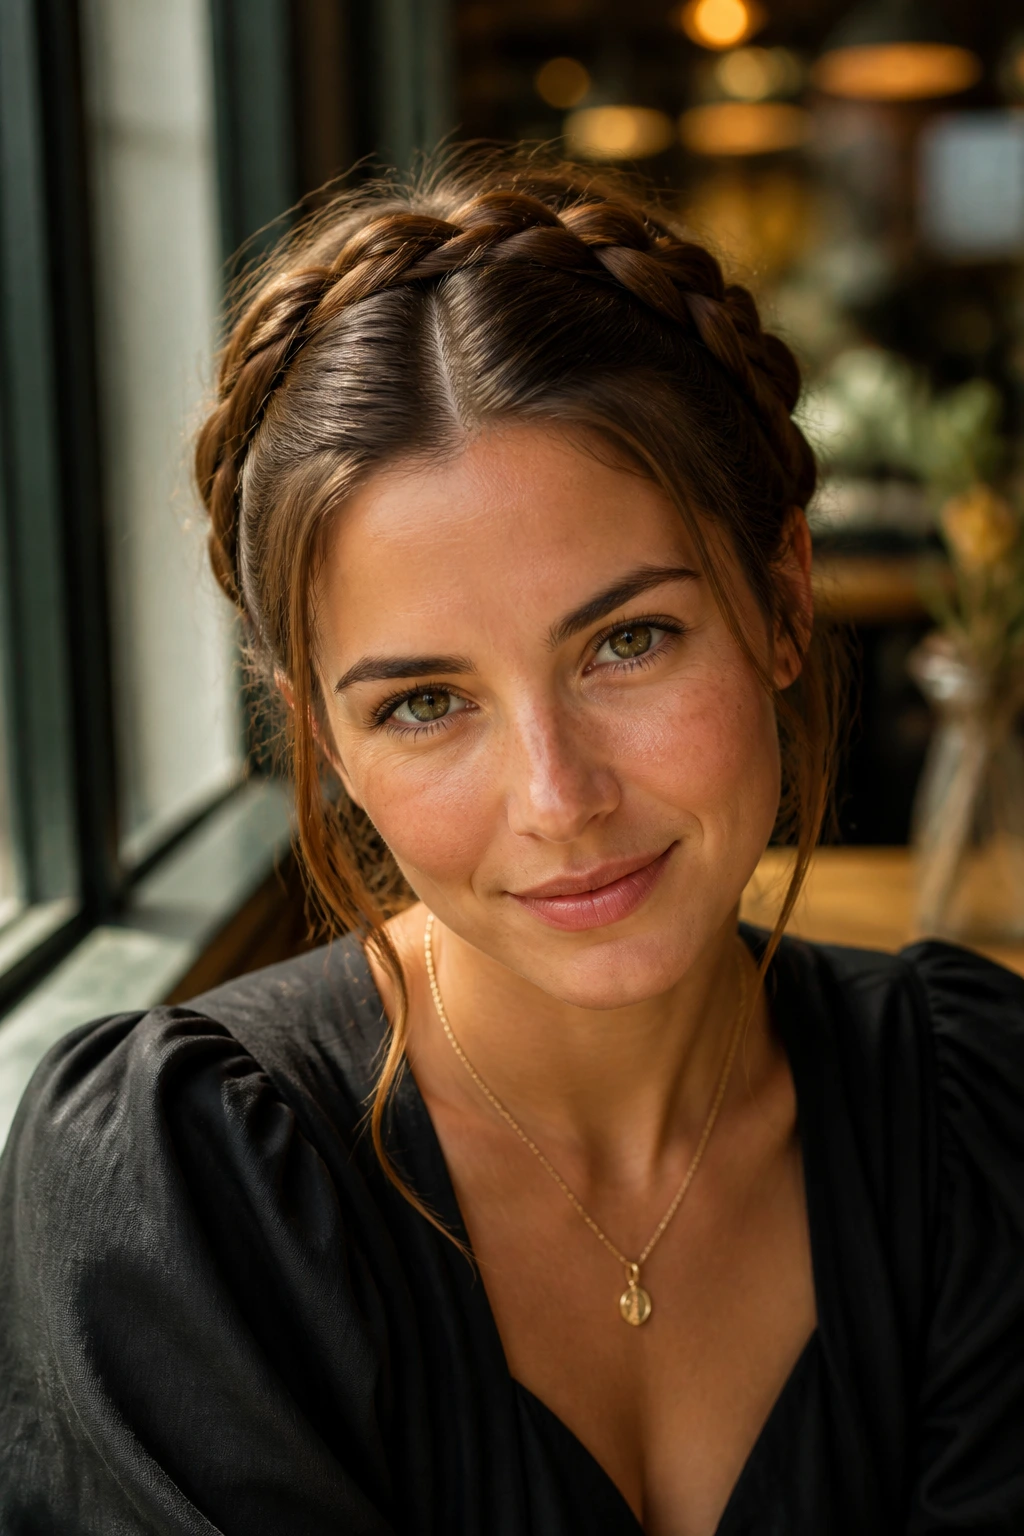
13. The Grecian-Inspired Crown

This style is all about softness and drape. You want the braid to sit slightly back from your hairline, almost like a laurel wreath. Keep the front strands loose and frame your face with them, using a large-barrel iron to create soft, romantic waves.
Achieving the “Goddess” Vibe
The key here is the arc of the braid. It should mimic the shape of your head but sit about an inch or two back. This creates a very flattering line that opens up your face and makes the eyes the focal point.
Pairing with Accessories
This is the perfect crown for wearing with a pair of gold hoop earrings or a delicate necklace. Because the hair is off the face, your accessories have room to breathe, and the style doesn’t compete with your jewelry.
14. The Undercut Braided Crown
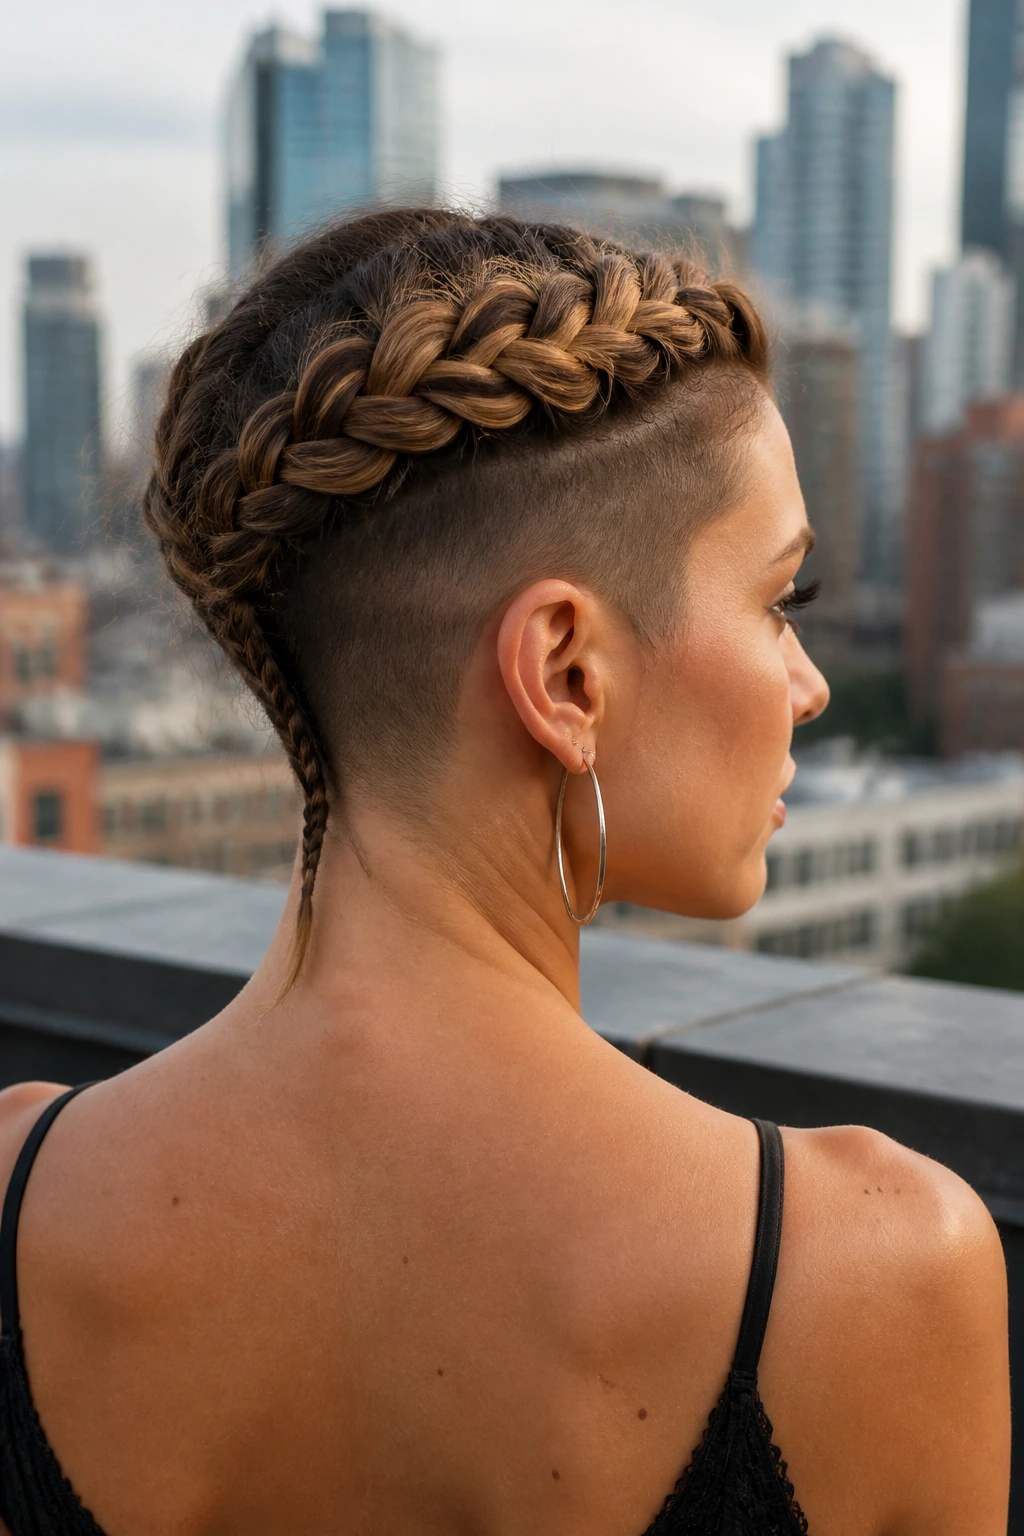
If you are feeling adventurous, or if you have a shorter layer near the nape of your neck, incorporate it into a small “reverse” braid that travels up to meet your main crown. It is a hidden detail that adds a bit of grit to a traditionally feminine style.
Why Details Matter
The best hairstyles are the ones that reveal themselves upon closer inspection. A standard crown braid is beautiful, but one that incorporates a small, tight reverse braid near the neckline shows an attention to detail that elevates the look.
Tips for Success
Keep the reverse braid small. If it is too thick, it will disrupt the line of your primary crown. Use it to pull in the stray, shorter hairs that usually escape from a ponytail, effectively “locking” your style in place while adding a unique structural feature.
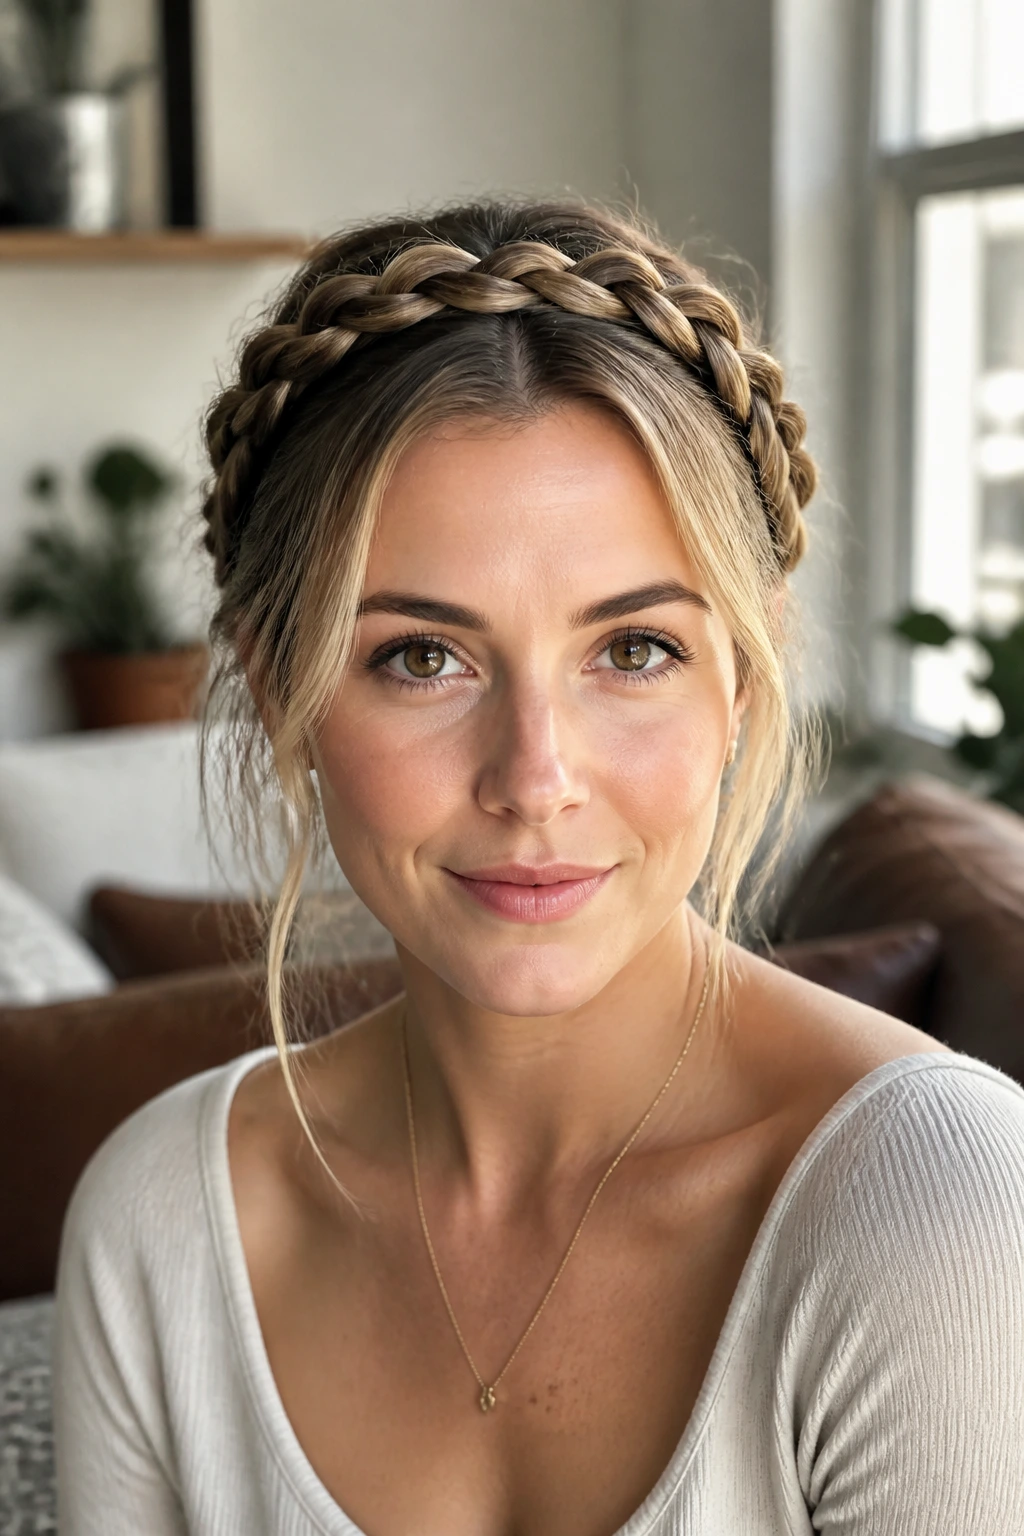
15. The Crown Braid for Short Hair
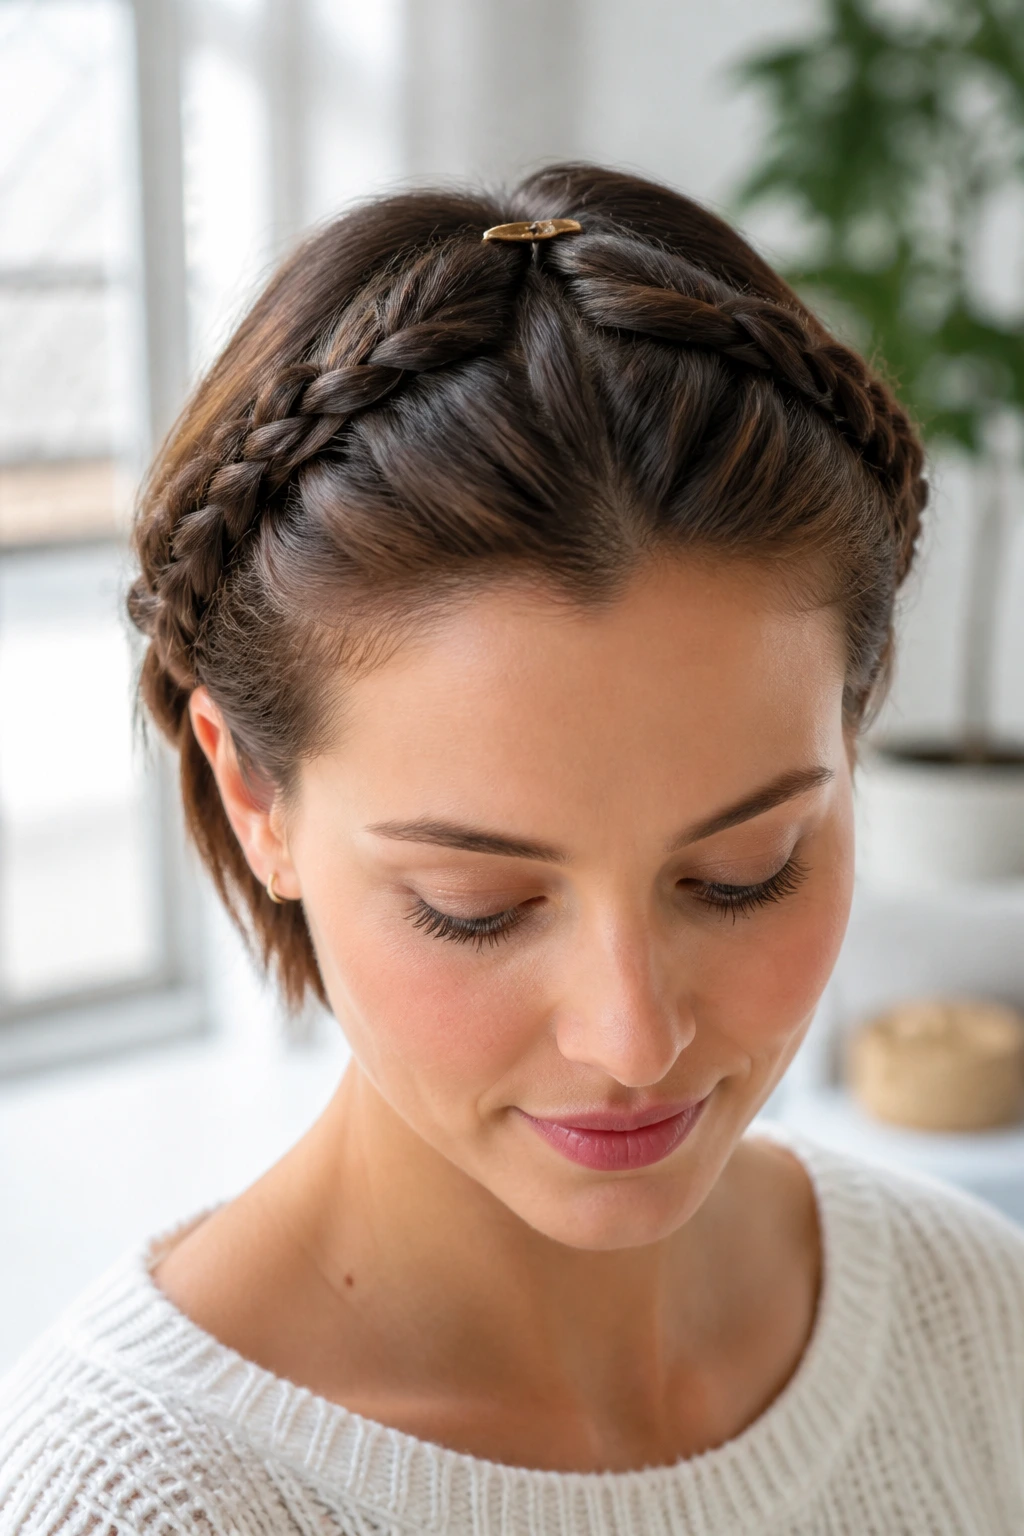
Think your hair is too short for a crown? Think again. You can create a crown by using two small Dutch braids that meet at the top of your head, essentially creating a headband with your own hair.
The Illusion of Length
By focusing the braids at the front of your hairline, you create the silhouette of a crown without needing the length to wrap all the way around the head. It’s a clever way to fake the look of a full crown while still keeping your hair chic and short.
How to Blend
If the braids don’t quite meet, use a decorative barrette to bridge the gap. A small gold clip or a piece of jewelry connecting the two ends of the braid turns a “limitation” into a deliberate design choice.
16. The Twisted Waterfall Half-Up
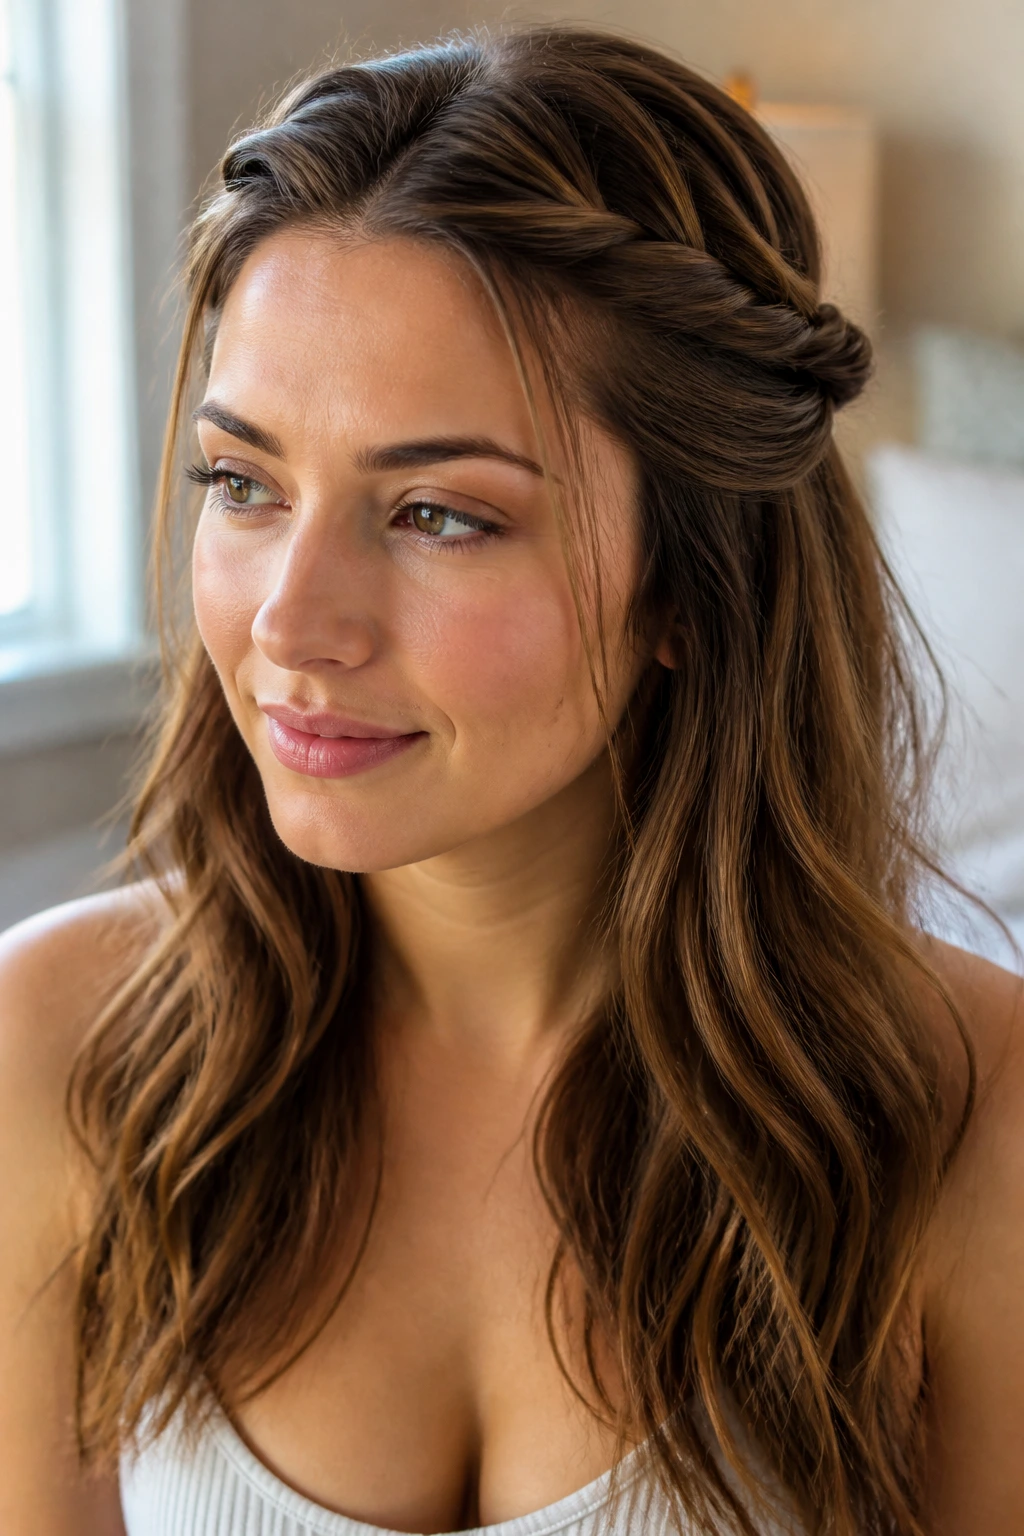
By twisting sections of hair along the hairline and securing them into the crown, you can create the visual of a braid without having to actually plait anything. It’s a “lazy” crown that looks just as good as the real thing.
Why This Wins
It’s gentle on the hair. Braids, especially tight ones, can cause breakage if worn too often. Twisting is much more forgiving on the cuticle and takes half the time to style.
The Security Check
Twists have a tendency to loosen up faster than braids. Use a small clear elastic to secure each twist before pinning it to the crown. This ensures that even if a pin slips, the twist remains a cohesive unit.
17. The Boho-Chic Fishtail Halo
If you are attending an outdoor or more casual date night, the fishtail halo is the ultimate choice. It looks best when it’s loose and slightly unkempt.
Mastering the Mess
Don’t worry about perfection. If a few strands escape, tuck them behind your ears. If the braid looks uneven, pull it apart until it looks organic. This is a style that thrives on imperfection.
What to Wear With It
This style pairs beautifully with flowy fabrics, floral prints, or a simple white dress. It has a very earthy, grounded feel that makes it perfect for a date that involves being out in nature or in a relaxed, comfortable environment.
18. The Crown Braid with Beaded Cuffs
Hair jewelry is having a moment, and using metal or beaded cuffs within your braid is a quick way to add a bit of sparkle for a night out.
Strategic Placement
Place the cuffs at the intersection points of your braid. It keeps them stable and ensures they don’t slide down your hair length as you move.
Avoid Overdoing It
One or two cuffs are elegant; six or seven look like you’re trying to decorate a tree. Keep it restrained to ensure the hair remains the focus of the style.
19. The Dutch Braid Pompadour
Bring the braid forward, right onto the hairline, and puff it up. This creates a volume-heavy look that feels like a modern take on the classic pompadour.
Managing the Volume
You need a good root-lifting spray for this. If your hair is naturally flat, the braid will sag. Give it the lift it needs at the base, and use a flexible hairspray to lock the shape in place.
The Face-Framing Rule
Since this style pulls all the hair back, make sure you have some soft pieces around your ears or nape to balance the volume. It prevents the style from looking too severe or “pinned back.”
20. The Zig-Zag Crown
Change your parting to a zig-zag before you begin the braid. It’s a subtle detail that makes the crown feel like it’s weaving in and out of the scalp in a more intentional, structural way.
Why It Changes the Look
A straight part can look a bit “done.” A zig-zag part breaks up the lines of the hair and creates a more textured base. It’s a small change that makes the entire crown braid feel more lived-in and natural.
The Parting Trick
Use the tail of a rattail comb to create precise zig-zags. Do this before you add any product, so the hair is easy to manipulate. Once the part is set, you can go in with your texturizer and start the braid.
21. The Crown Braid with Jeweled Pins
Instead of floral accents, use pins with pearls or crystals. They offer a more refined, sophisticated look suitable for a high-end dinner or a night at the theater.
Choosing the Right Pins
Look for pins that have a secure, tight tension. You don’t want them falling out halfway through your appetizer. A pin with a slight “hook” or wavy texture will hold much better in a braid than a straight, smooth pin.
When to Add Them
Add the pins as the final step. Braid your hair, secure the crown, and then strategically place the pins along the braid to highlight the pattern.
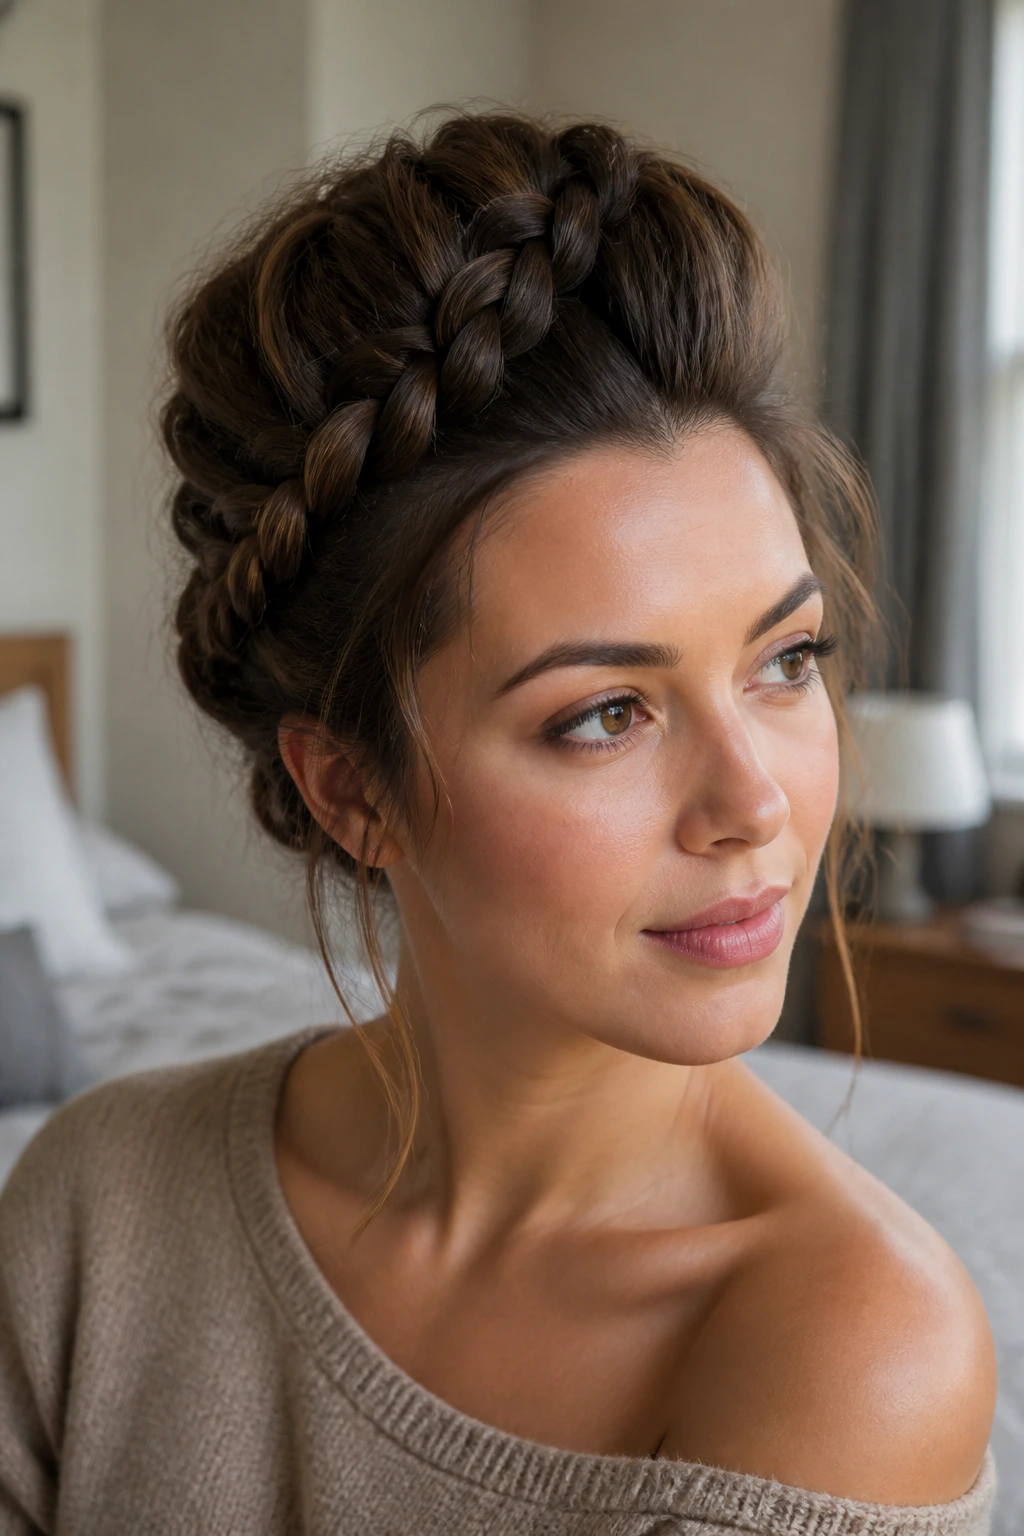
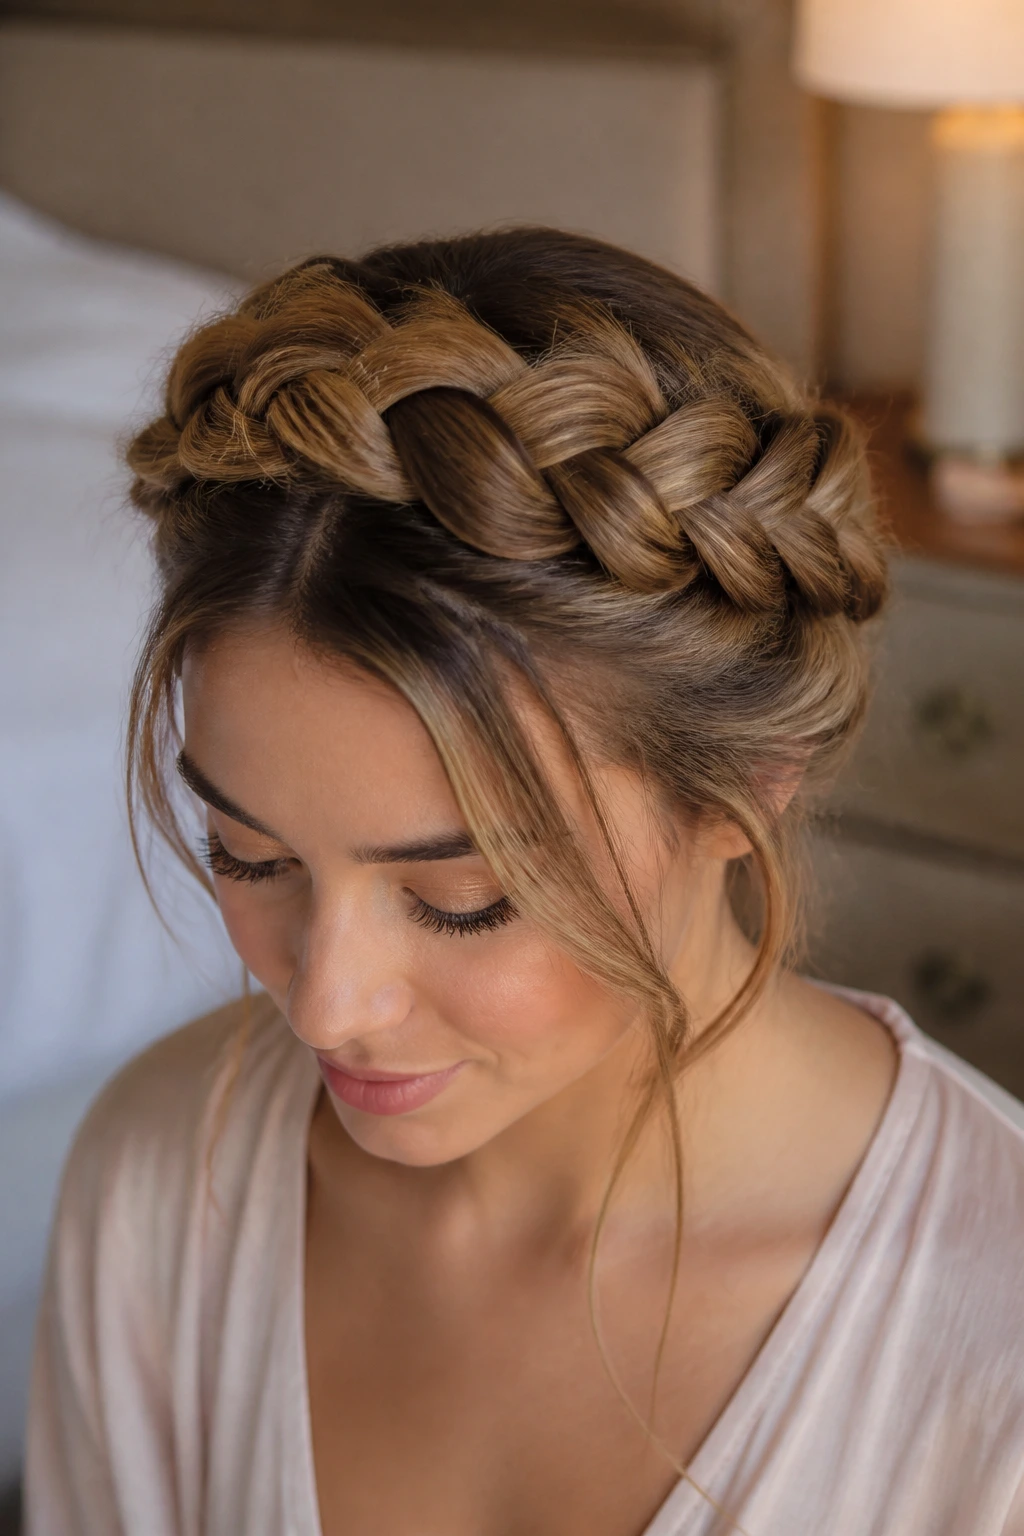
22. The Double Dutch Crown
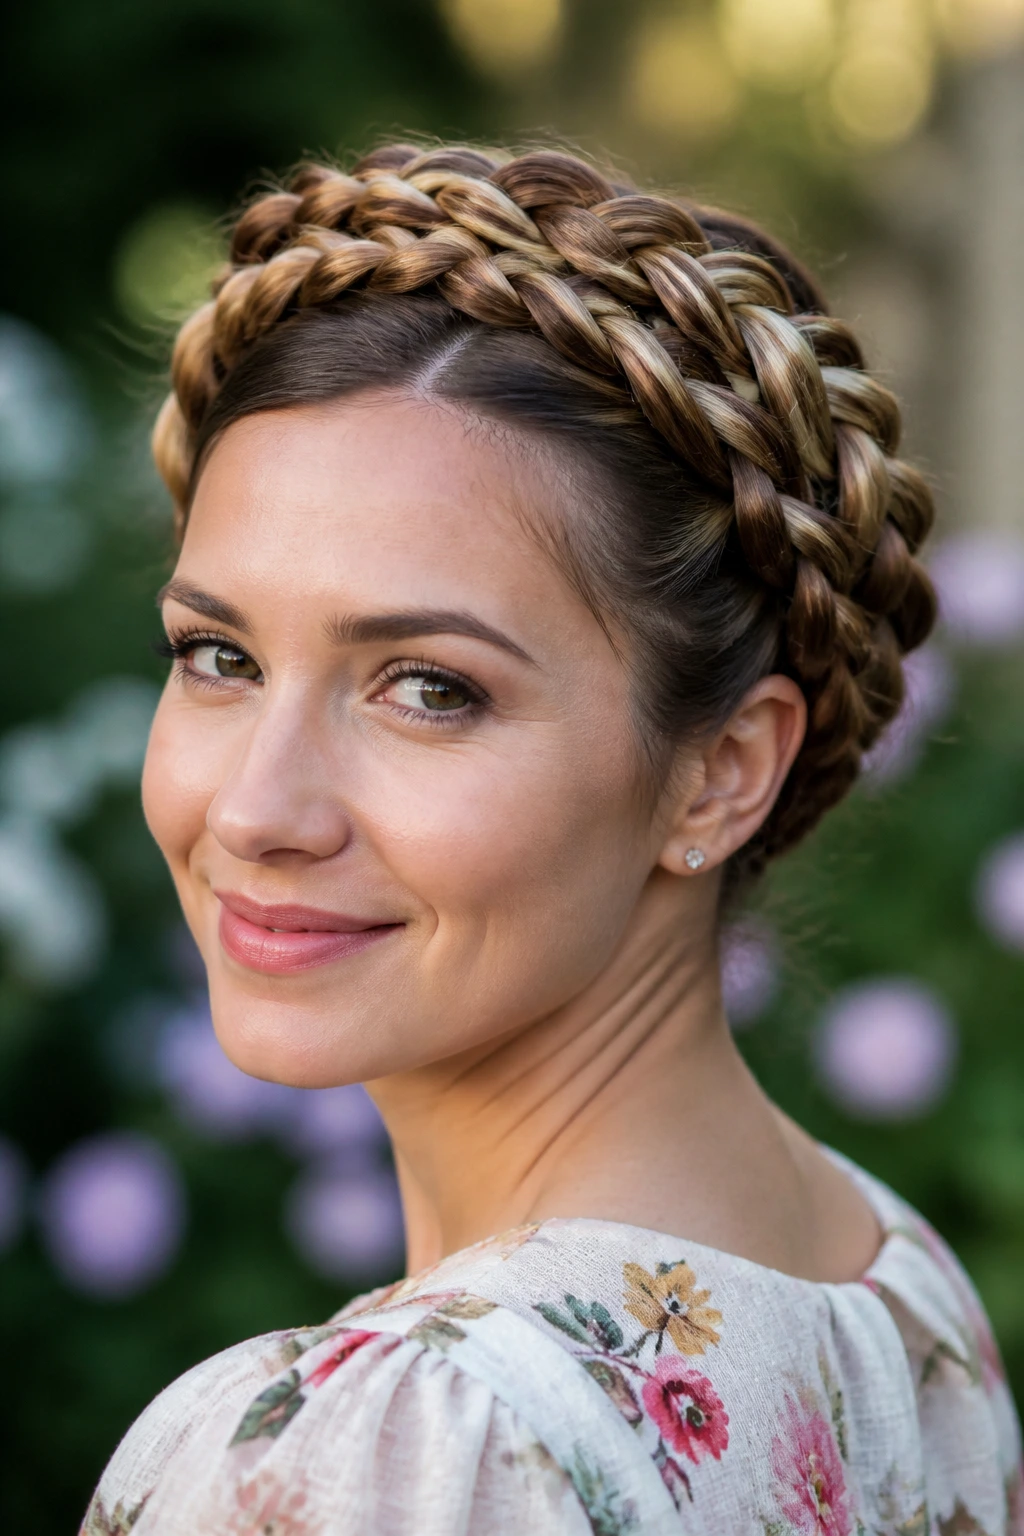
If you want something that screams “I know how to braid,” the double Dutch crown is the way to go. It is a large, thick, prominent braid that circles the entire head, leaving no hair behind.
The Impact Factor
This is a high-impact style. It is striking, clean, and very impressive. If you have thick, long hair, this will look incredible.
Braiding for Depth
Because you are using all of your hair, the braid will naturally become very thick by the time you wrap it around to the back. You may need to use a slightly thinner section at the start so that by the time you reach the end, the braid doesn’t become overwhelming.
23. The Faux-Crown Headband
If you aren’t confident in your ability to braid the back of your head, just braid the front! Take two sections from each temple, braid them, and pull them over the top like a headband, pinning them behind the ears.
The “Cheat” Method
This creates the exact silhouette of a crown braid without the frustration of trying to weave hair at the back of your head. It’s a 100% successful technique that never fails.
Blending the Back
Since the back of your hair is left loose, you can curl it or wear it straight. If you have any baby hairs at the nape of your neck, leave them loose to make the style look more natural.
24. The Crown Braid with a Ponytail
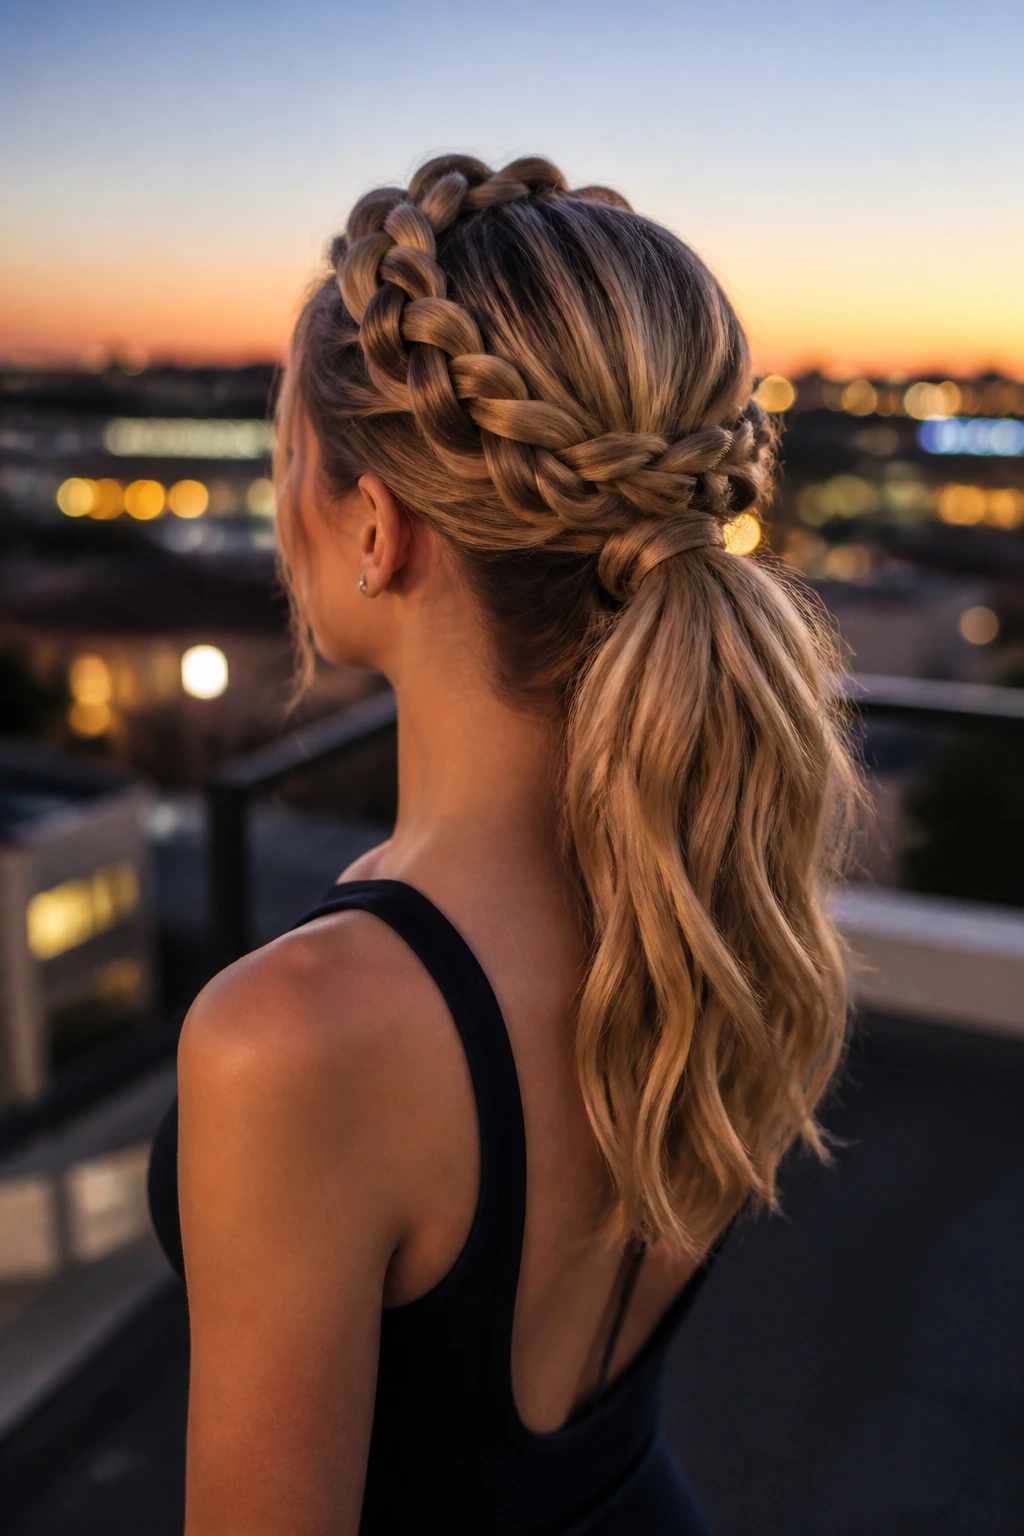
Integrate your crown braid into a ponytail at the back. It’s a sporty-chic look that is perfect for an active date.
The Transition Point
The trick is to make the transition between the braid and the ponytail look clean. Wrap a small piece of hair around the elastic to hide it. It makes the style look much more intentional.
Why It’s Functional
A crown braid keeps your face clear, while the ponytail keeps your hair from getting tangled. It is the ultimate style for a date that involves movement, wind, or just a long night out where you don’t want to mess with your hair.
25. The Braided Bun Combination
Braid your hair into a crown and gather the remaining length into a low, messy bun at the nape of your neck. It’s elegant, secure, and very sophisticated.
Balance of Textures
The tightness of the crown contrasts beautifully with the softness of the messy bun. It creates a balanced look that is both structured and relaxed.
Making It Last
Use a few long U-pins to secure the bun. Unlike bobby pins, U-pins can hold a large volume of hair without visible effort. They disappear into the bun and provide a very secure hold.
26. The Two-Tone Crown
If you have highlights or an ombré, your crown braid will show off those color differences in a really cool way. The weave makes the colors swirl together, creating a unique pattern that single-tone hair doesn’t have.
Highlighting the Colors
Don’t worry about keeping the colors perfectly separated. Let them mix. The swirl of different shades within the braid is exactly what makes this style stand out.
Enhancing the Effect
Use a shine spray once the braid is complete. It will catch the light on the different shades, making the texture of the braid even more visible.
27. The Crown Braid with a Center Part
A center part creates a very symmetrical, balanced crown. It’s a classic, clean look that frames the face perfectly.
Why Symmetry Works
Some people find the center part a bit severe, but in a braid, it becomes very regal. It’s a very “high fashion” look that works well with a simple outfit.
Softening the Look
If you feel the center part is too much, pull a few small strands out at the front. The braid provides the structure, and the loose strands provide the softness.
28. The Crown Braid with Hidden Pins
If you want the braid to look like it’s floating, you need to master the art of the hidden pin. Use pins that match your hair color, and pin from inside the braid loops rather than on the outside.
The Floating Illusion
When you pin from the inside, the metal is completely hidden. It looks like the hair is defying gravity and staying in place on its own.
The Testing Phase
Before you leave the house, give your hair a gentle shake. If anything feels loose, add another pin from the inside. A “floating” braid is only great if it stays where you put it.
Final Thoughts
The beauty of the crown braid lies in its adaptability. It can be as simple as a three-strand twist or as complex as a woven halo of multiple braids. Regardless of which version you choose, the key is preparation—ensure your hair has the right texture and grip before you begin.
Practice is the only way to move from “frustrated” to “fluent” with these styles. Do not be discouraged if your first attempt feels a bit loose or messy; often, that slight imperfection is exactly what makes the style feel human and elegant rather than mechanical. Take your time, focus on your tension, and enjoy the confidence that comes with a hairstyle that stays polished from the first glass of wine to the very end of the night.