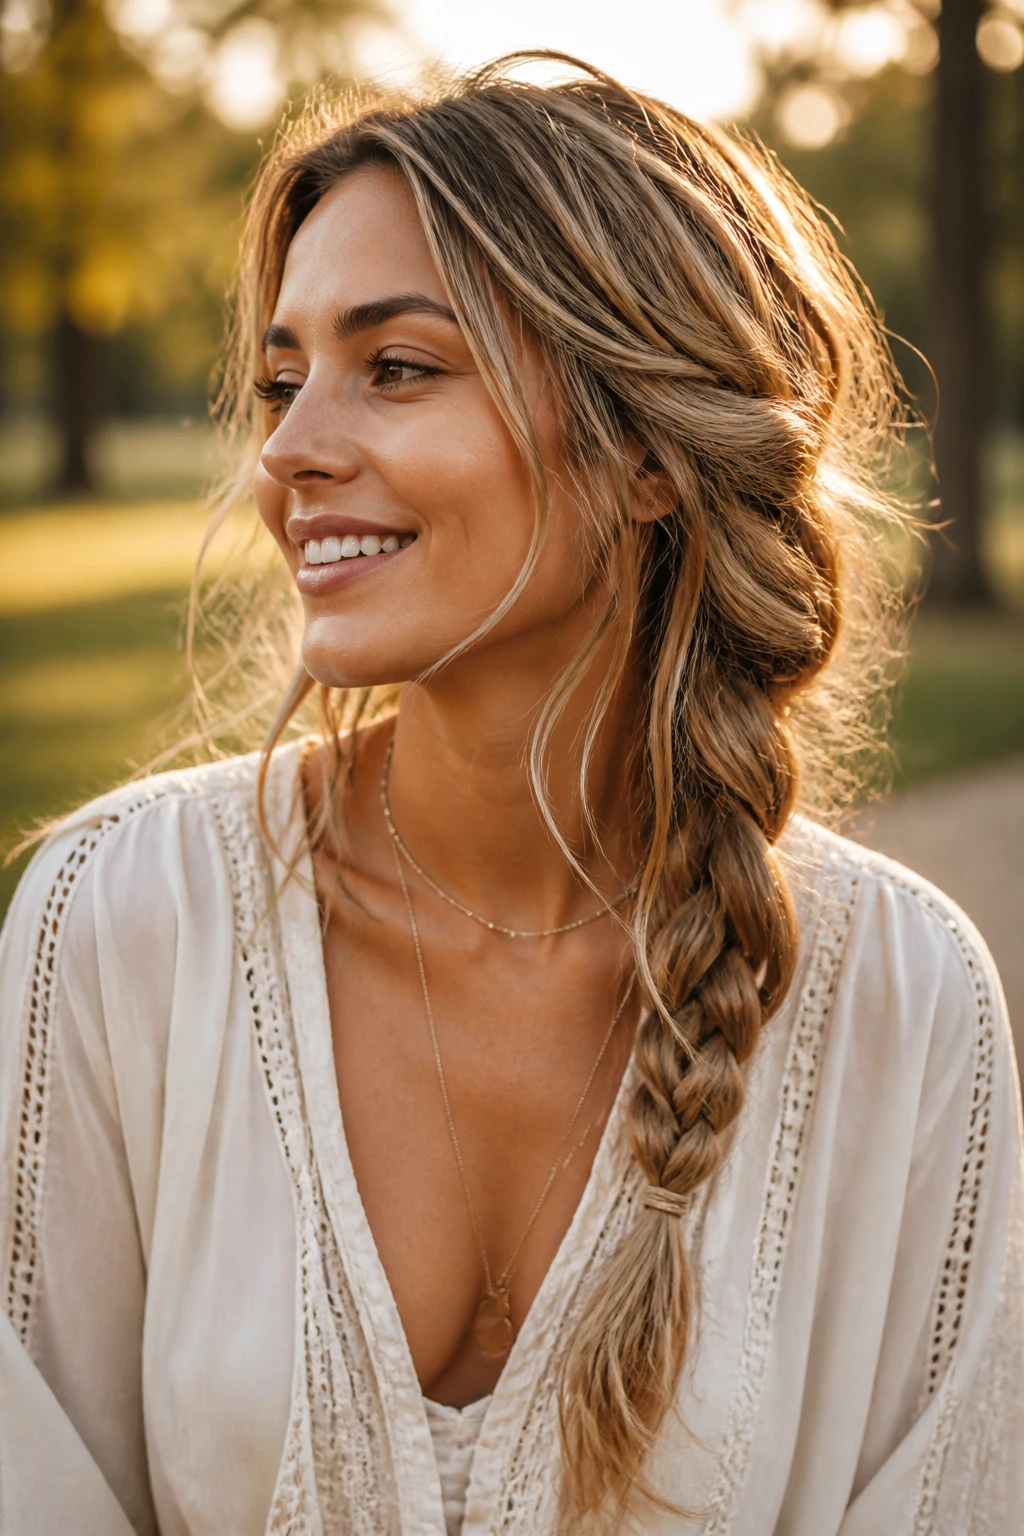
Braided hairstyles for straight hair have a reputation for being difficult to manage, primarily because the hair texture is so prone to slipping. If you have ever spent thirty minutes weaving an intricate crown braid only to have it unravel into a frizzy, loose mess by lunchtime, you know the frustration. The secret isn’t just in the braiding technique—it is in the preparation. Without a bit of grip, straight hair is simply too silky to hold tight tension.
Before we look at the specific patterns, understand that texture is your greatest ally. Start by using a texturizing spray or a light dusting of dry shampoo at the roots. Even on clean hair, this added grit prevents the strands from sliding past one another. When the hair has a matte, slightly sticky feel, the braid stays locked in place without requiring an entire bottle of extra-hold hairspray.
Once your base is prepped, the possibilities for intricate patterns open up significantly. Straight hair actually shows off the geometric definition of a braid better than any other texture. You can see the clean lines, the individual strands, and the deliberate structure of each loop. Whether you are aiming for a tight, formal look or a soft, romantic aesthetic, these twenty patterns provide a range of styles that honor the sleek nature of your hair while giving it the structure it craves.
1. Classic Three-Strand French Braid
This is the fundamental building block of all braiding, and it remains the best way to keep straight hair contained during active days. The key difference between a French braid on straight hair versus curly hair is the tension. You need to pull each section taut as you weave it to prevent the “sag” that happens when the hair strands are too smooth.
The Technique for Maximum Hold
- Start by gathering a small section at the hairline, dividing it into three equal parts.
- Cross the right strand over the center, then the left over the center.
- As you continue down, add a small piece of hair from the outside into your current strand before crossing it over.
- Pro Tip: Keep your hands close to the scalp as you weave. If you hold your hands too far away, you lose the tension, and the braid will inevitably loosen.
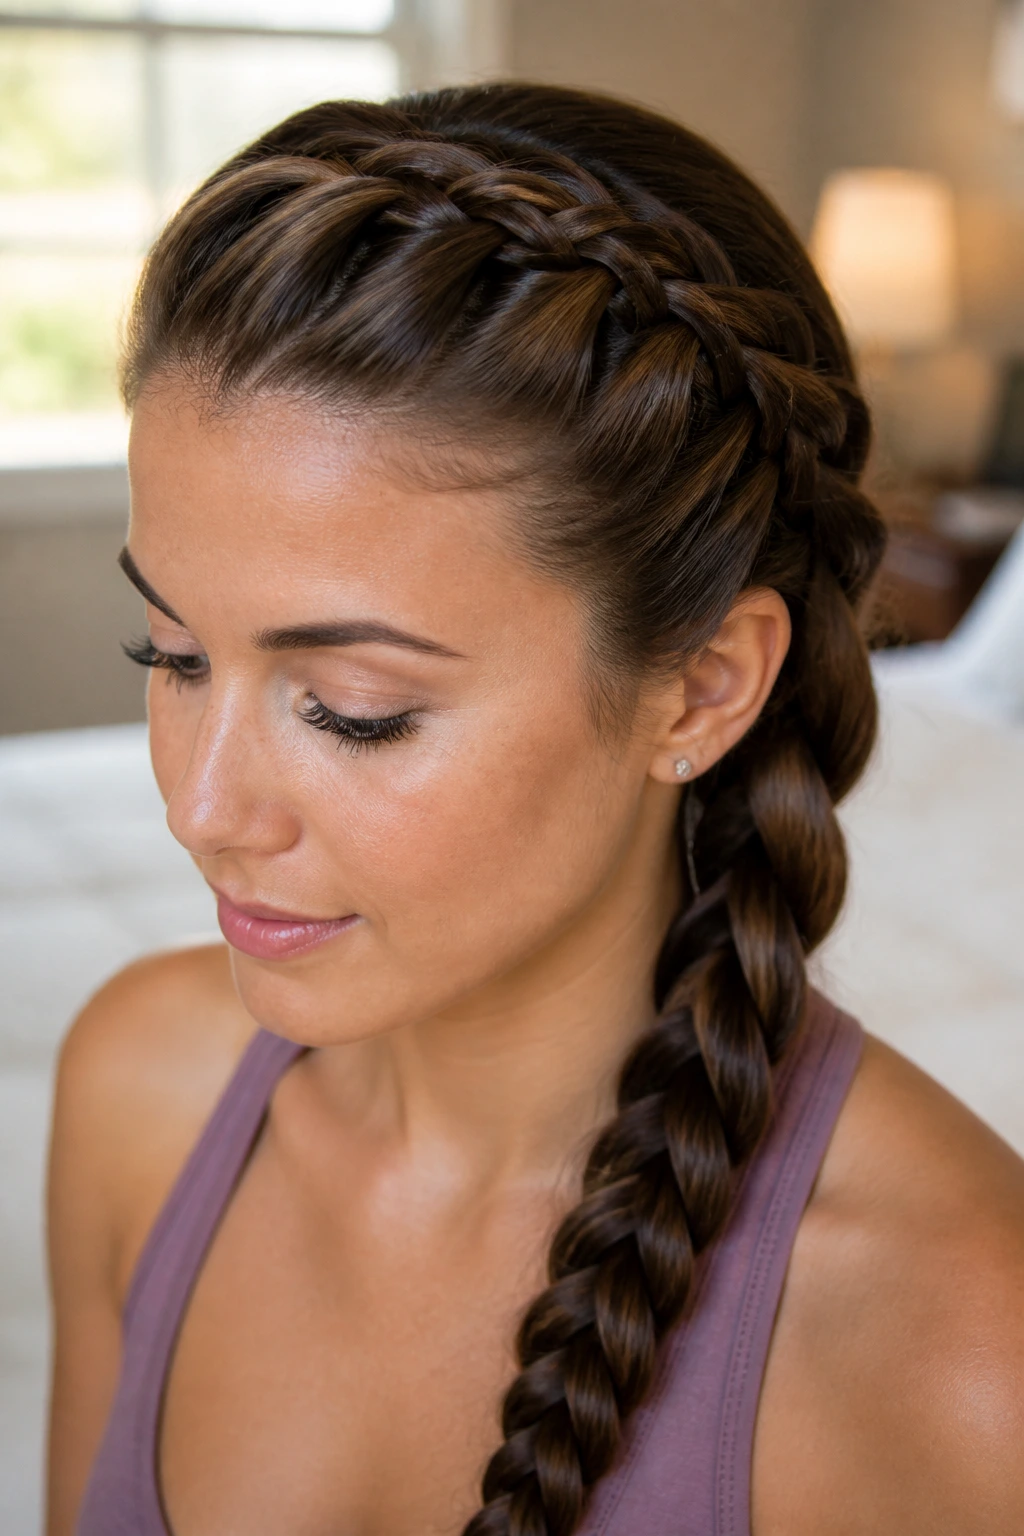
2. Dutch Braids with a Deep Part
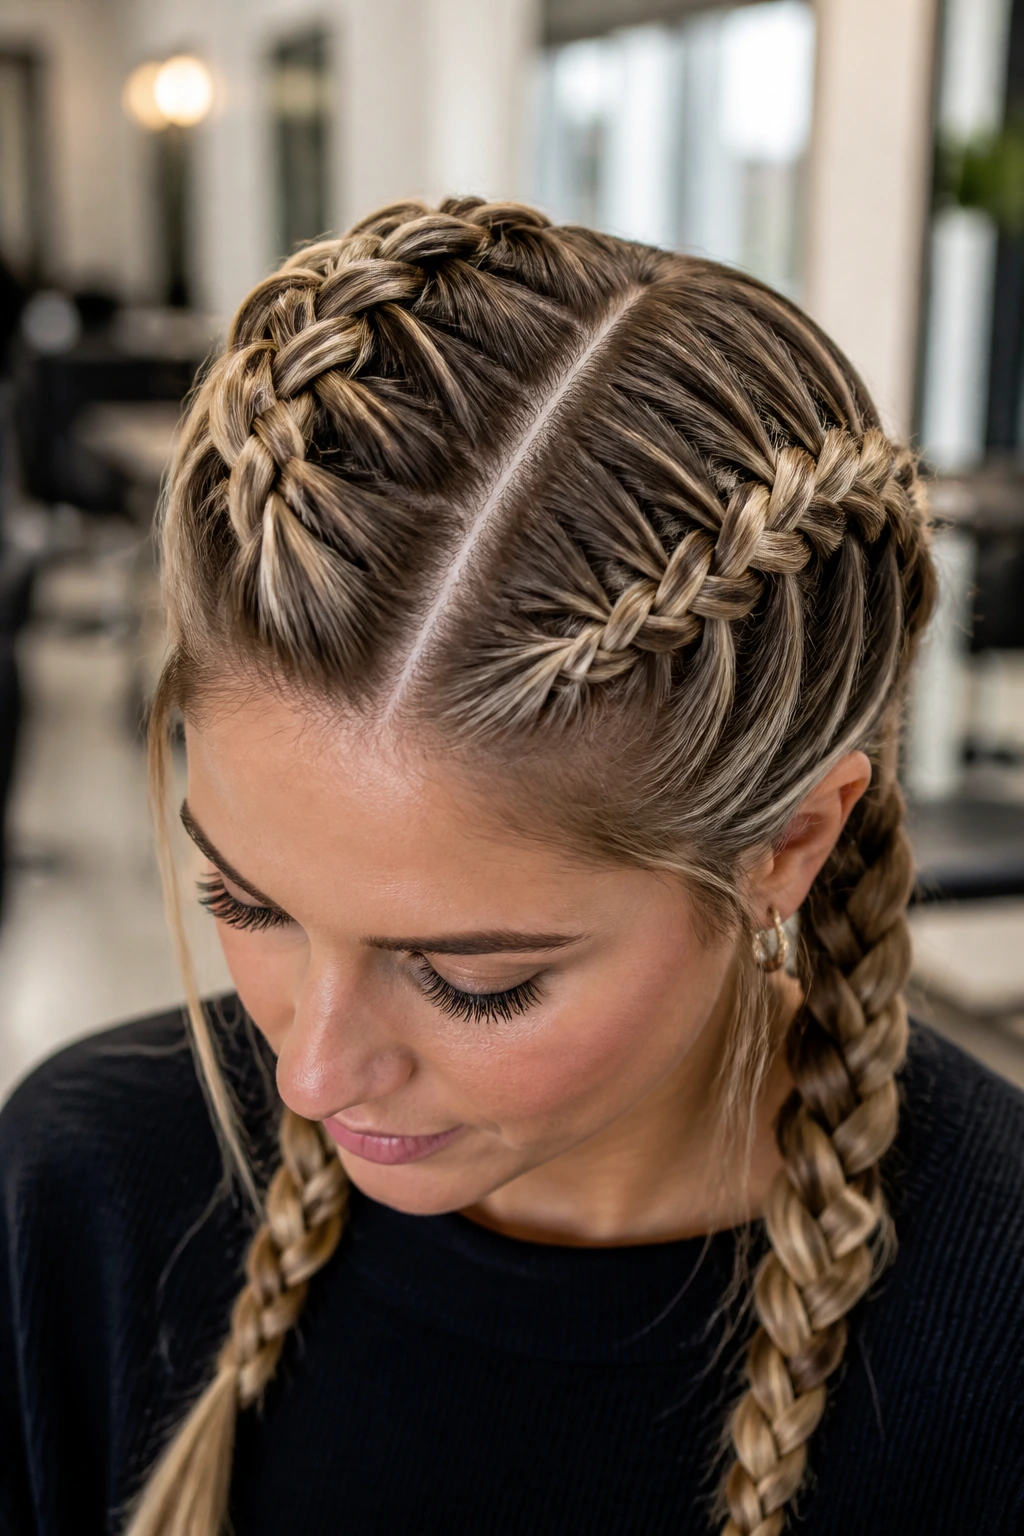
Dutch braids—often called inside-out braids—create a 3D effect that looks like it is sitting on top of the head rather than woven into it. Because the outer strands are crossed under the center strand instead of over, the braid pops out beautifully against a sleek, straight background.
Why This Style Works for Straight Hair
When you create a deep side part, you can direct the flow of the hair, which helps frame the face more naturally. Since straight hair can sometimes look flat, the raised profile of a Dutch braid adds necessary volume. By pancake-ing—gently pulling on the outer edges of the loops—you can create a wide, textured appearance that looks far thicker than the hair actually is.
3. The Fishtail Crown
Fishtail braids rely on tiny, precise sections, which is why they look so clean on straight, fine hair. Unlike a traditional braid, the fishtail creates a woven, almost fabric-like texture. If you have straight hair, this style is your best friend because it doesn’t require a lot of volume to look finished.
Achieving the Perfect Weave
- Divide your hair into two main sections.
- Take a very thin piece from the outside of the right section and cross it over to the inside of the left section.
- Repeat on the opposite side.
- Important: Consistency is everything here. If you take a thick section once, the braid will look uneven. Keep every pulled strand roughly the width of a pencil lead.
4. Half-Up Waterfall Braid
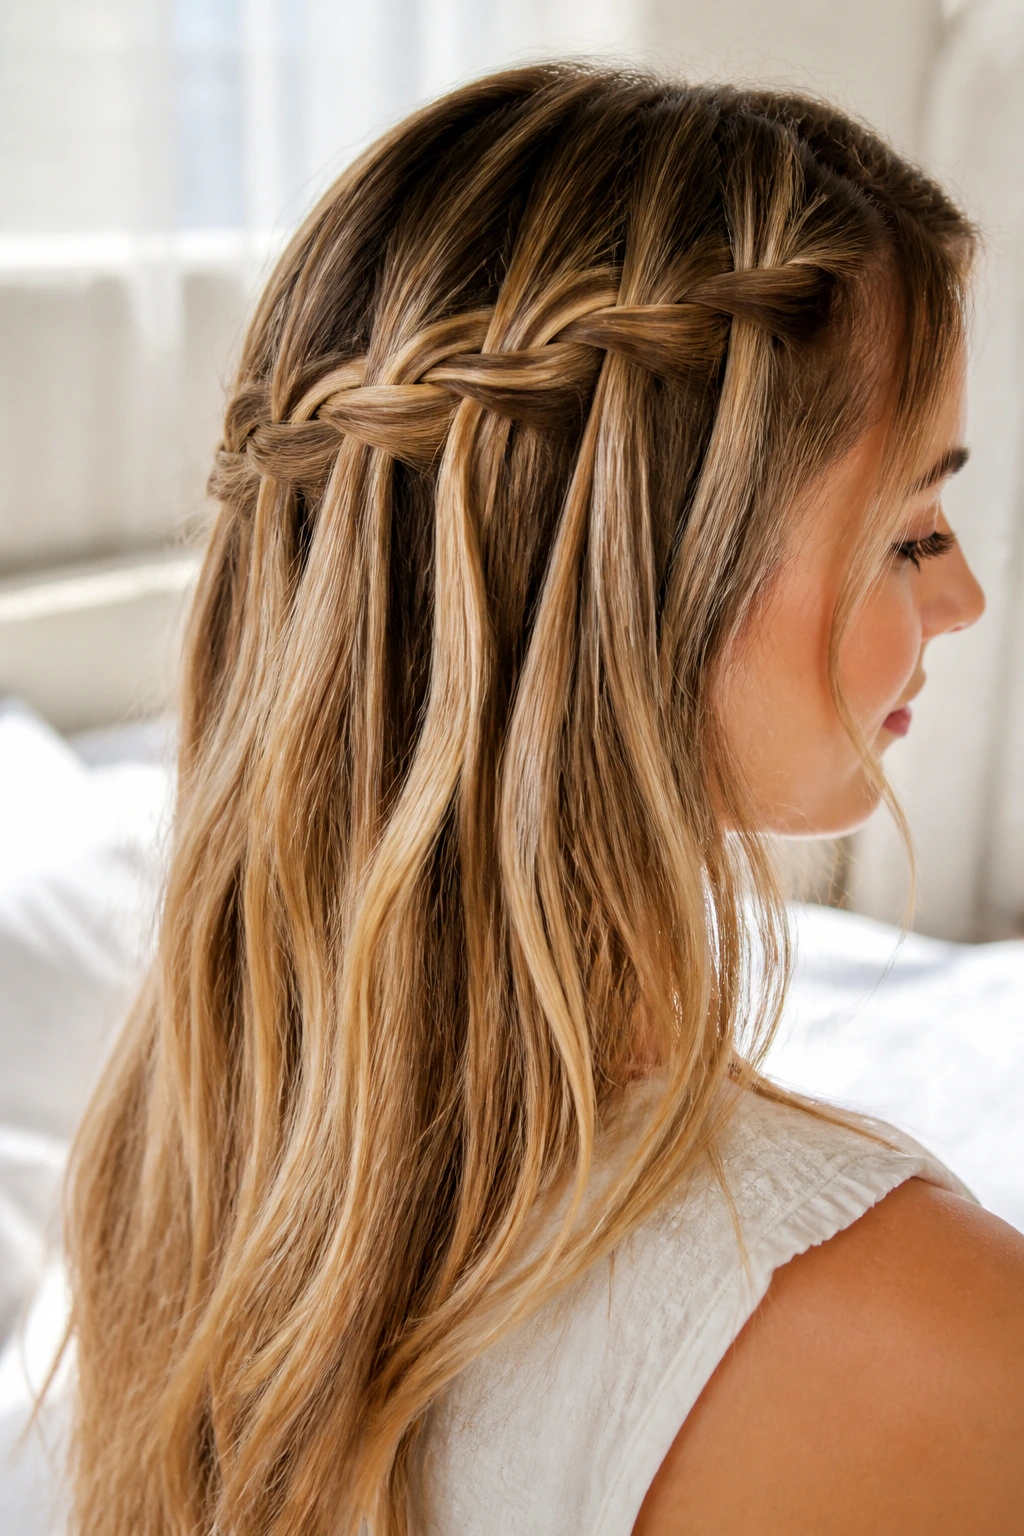
If you want to keep your hair down but still want the detail of a braid, the waterfall is the most elegant solution. It creates a cascading effect where strands are dropped through the braid instead of being tucked away. It is essentially a French braid that leaves every other strand hanging loose.
How to Style It
- Begin a French braid at the temple.
- Every time you cross a strand over the top, drop the strand that was originally in your hand.
- Pick up a new, small section of hair from underneath to continue the pattern.
- This creates a series of loops that frame the back of the head. It is incredibly effective for showing off the shine of straight, healthy hair.
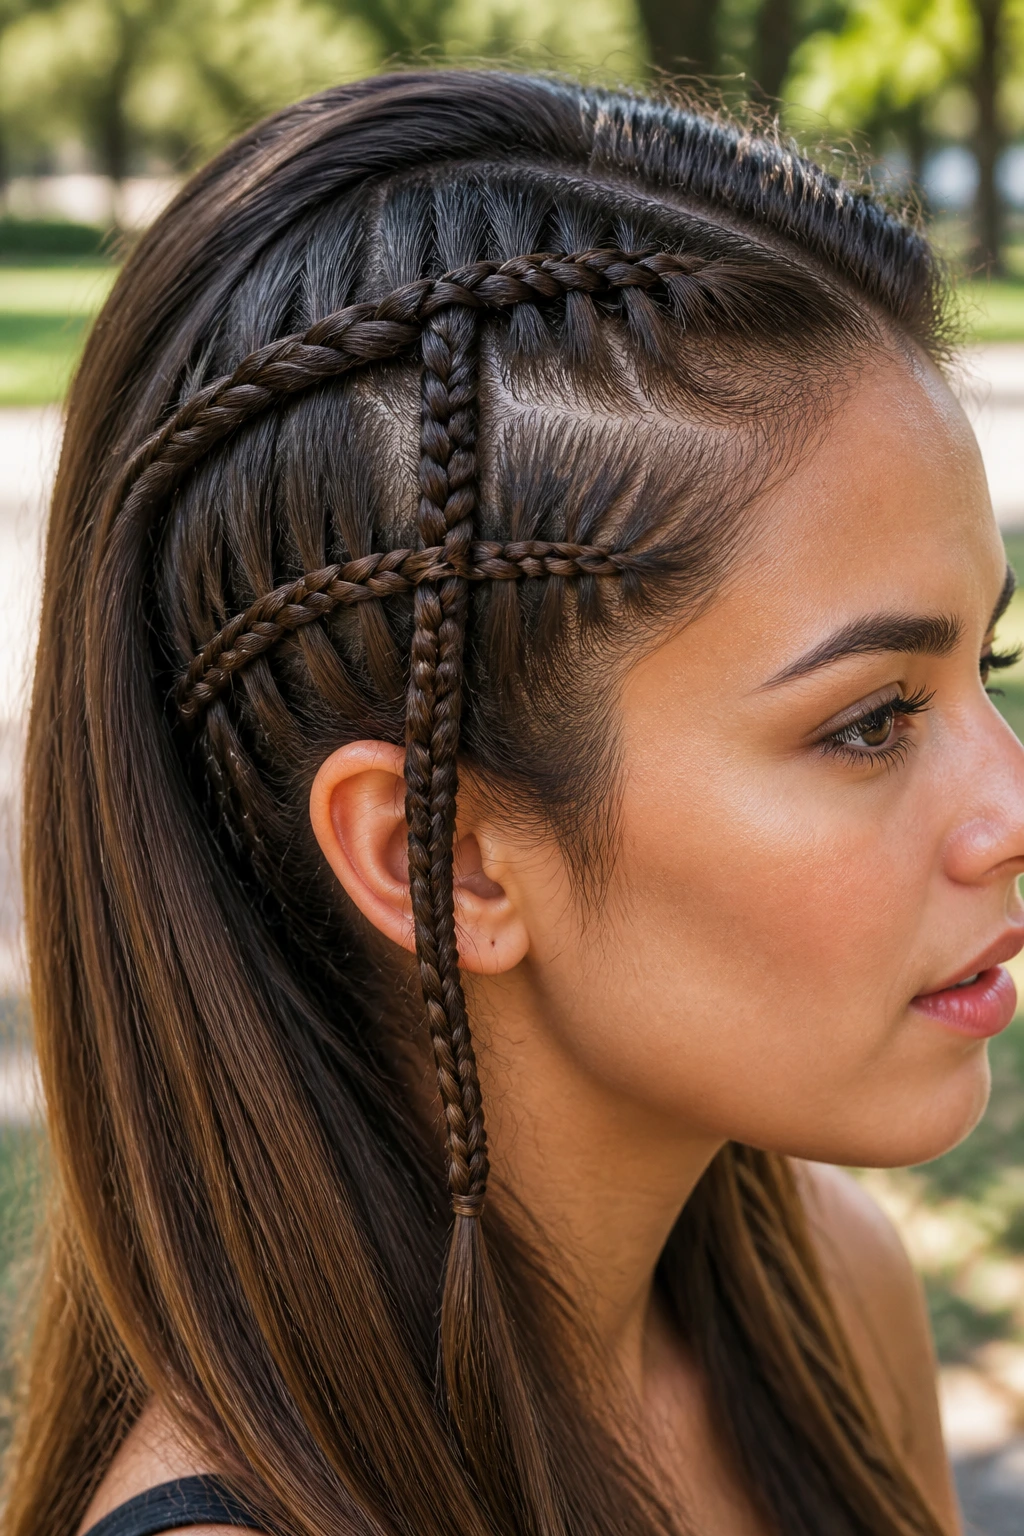
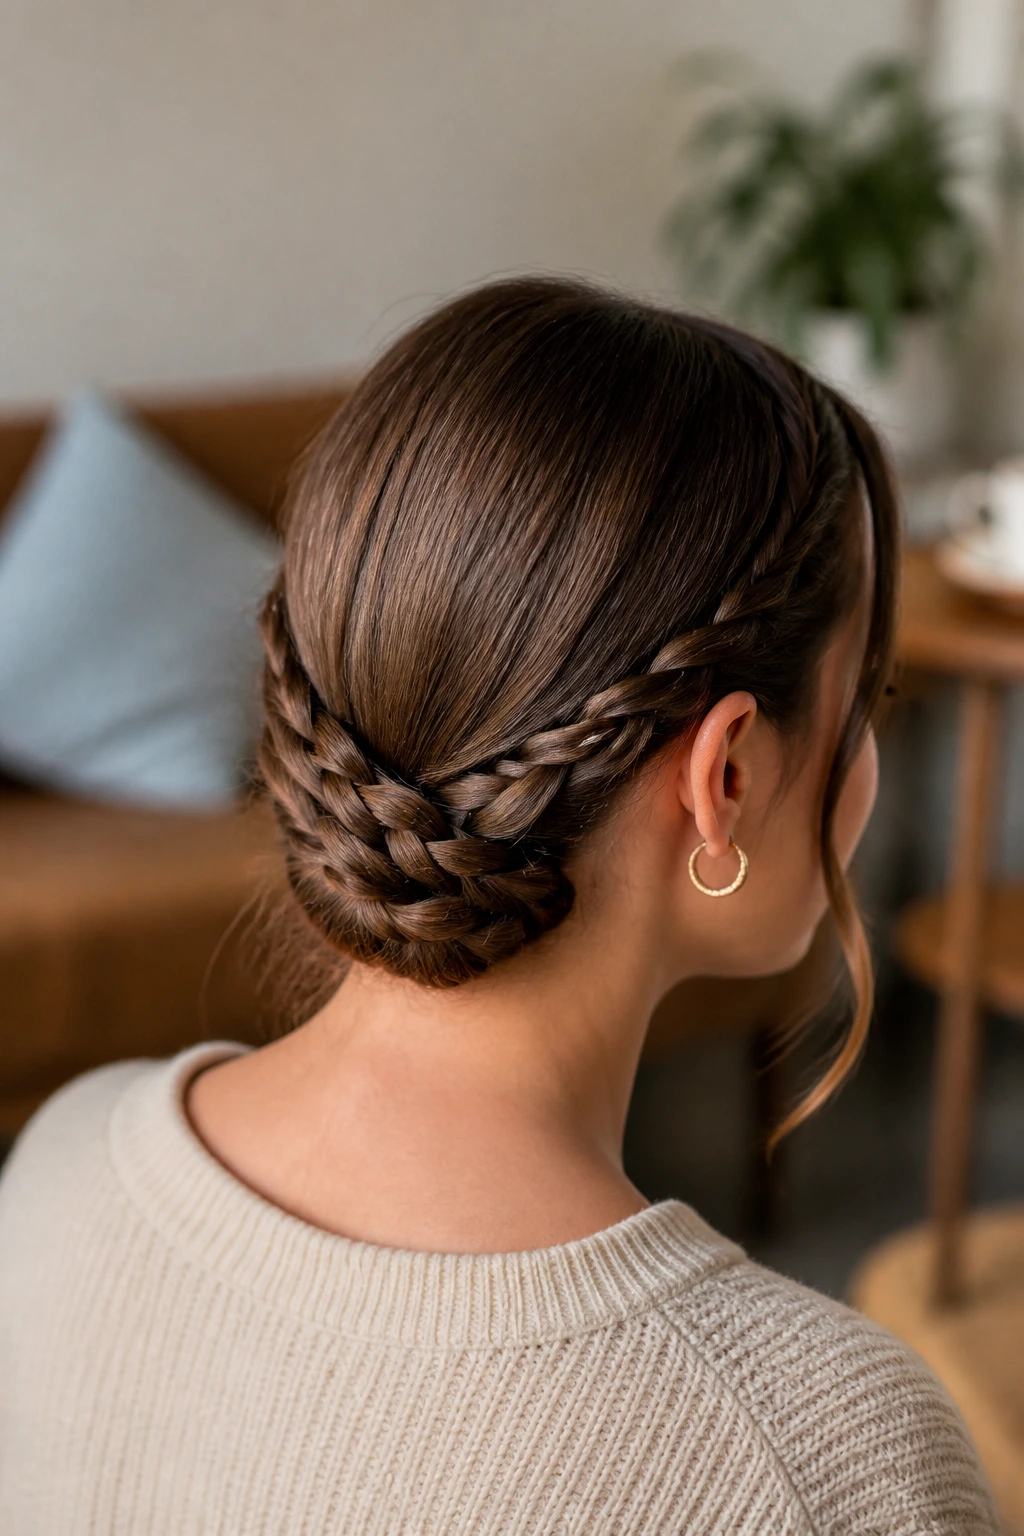
5. Tight Cornrow-Inspired Side Sweeps
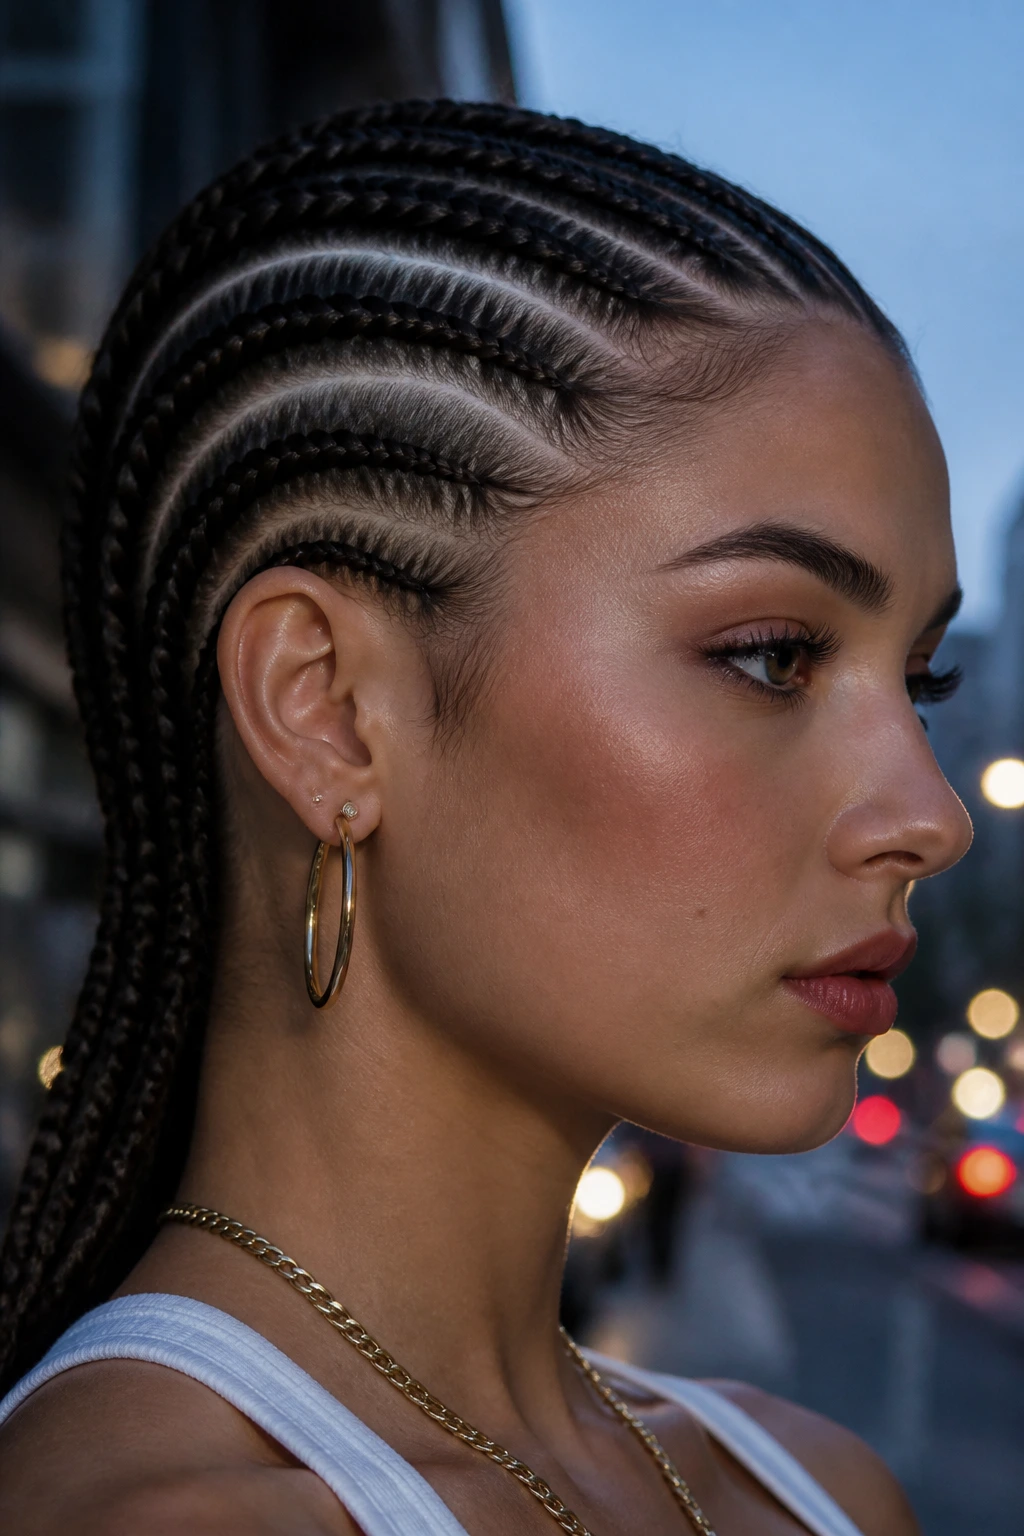
Cornrows aren’t just for textured hair; they are an incredible way to manage straight hair if you want a sharp, edgy look. By braiding close to the scalp in rows starting from the hairline and moving toward the nape, you create a look that is virtually indestructible throughout the day.
Why It Lasts Longer
The extreme tightness of the braid against the scalp prevents the hair from shifting. Because straight hair is naturally slippery, the scalp acts as a guide, holding the braid in place. Use a small amount of pomade on your fingers as you work to keep flyaways completely flat and sealed into the braid.
6. The Messy Bohemian Side Braid
Sometimes, you don’t want the braid to look perfect. The “messy” boho style is perfect for straight hair that has a bit of wave or bend added to it with a curling iron beforehand. If your hair is stick-straight, add some dry texture spray to keep it from looking too “done.”
How to Get the Bohemian Feel
- Start with a loose braid to the side.
- Do not pull the hair tight as you cross the strands.
- Once finished, pull sections of the braid outward to loosen it significantly.
- Leave out pieces around the face and use a curling wand on them to soften the overall appearance.
7. Double-Braided High Ponytail
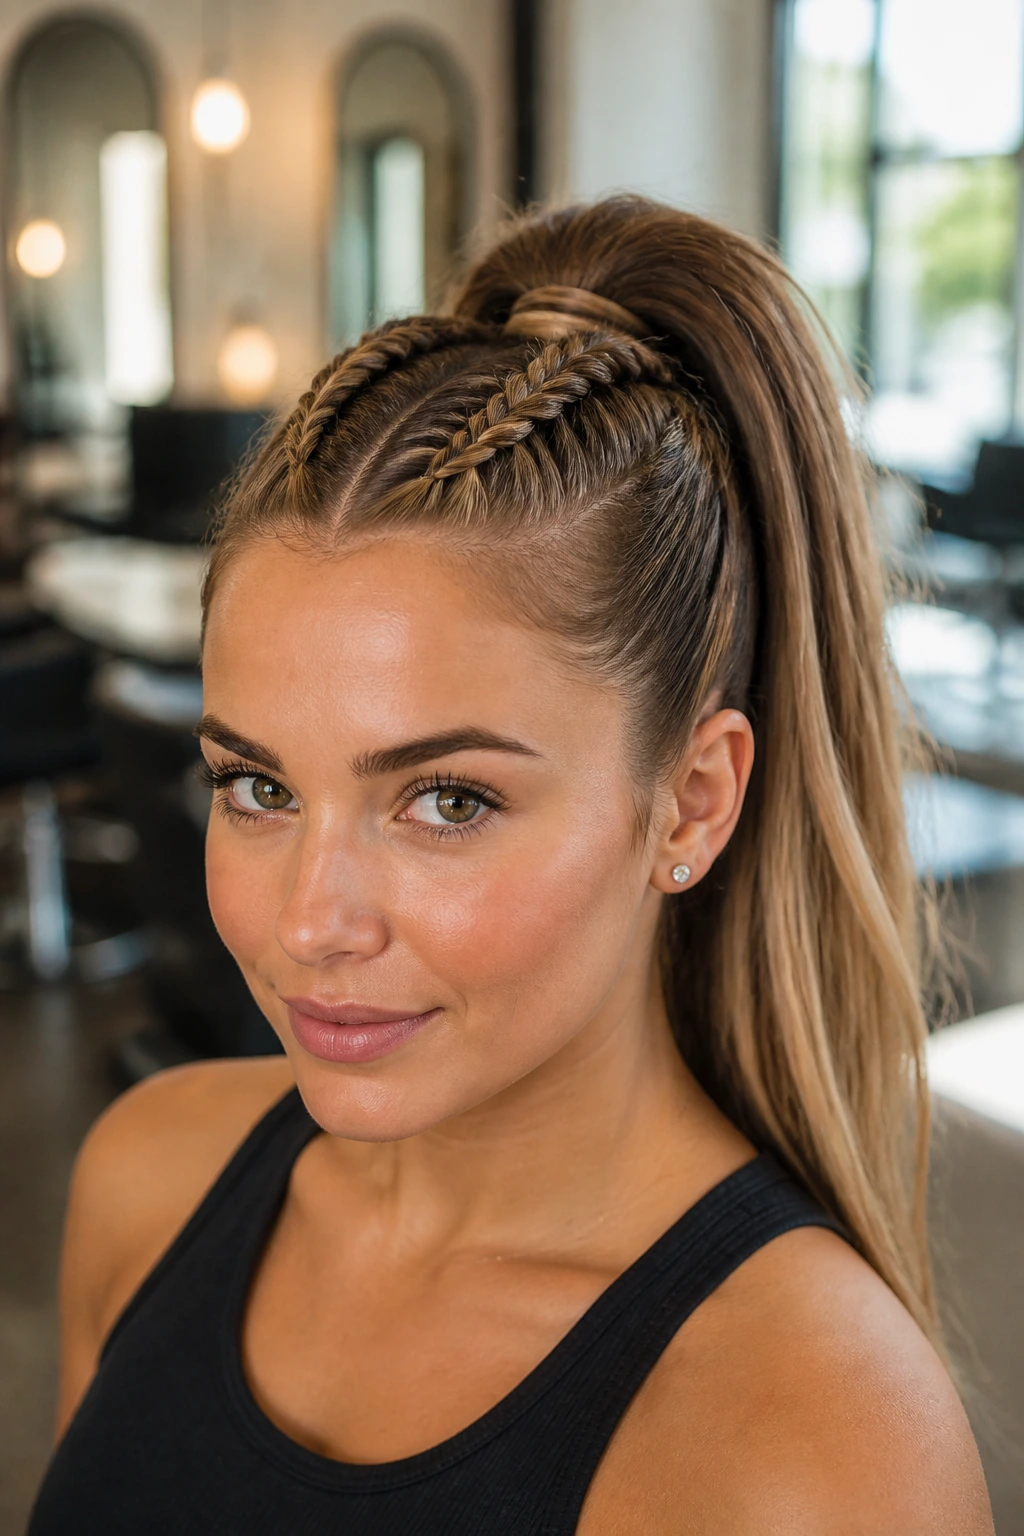
Combine the practicality of a ponytail with the complexity of braiding. By creating two small Dutch braids starting from the forehead and feeding them directly into a high, sleek ponytail, you eliminate the problem of bangs or shorter face-framing pieces falling into your eyes.
Why It’s a Great Daily Option
- It keeps the face clear.
- It elevates a standard ponytail to something intentional.
- The braids act as a transition from the crown to the base of the pony, creating a smooth visual line.
- Use a clear elastic to secure the braids, then wrap a small strand of hair around the main ponytail elastic to hide it for a polished finish.
8. Five-Strand Accent Braid
A five-strand braid is visually complex, looking like a woven tapestry. On straight hair, the different strands create a beautiful checkerboard pattern. It takes a little practice to keep five strands separate, but the end result is far more impressive than a simple three-strand plait.
The Mechanism of the Weave
- Lay five strands flat in your hand.
- Weave the outside strand over and under the subsequent strands.
- Continue alternating the weaving direction.
- Note: This style works best when you keep the tension uniform across all five strands. If you find one strand feels looser than the others, simply tug gently on that specific piece to pull it taut.
9. Rope Braid Twist
Rope braids—often called twists—are the fastest way to look like you spent an hour on your hair when it actually took three minutes. You simply divide the hair into two parts, twist each part in the same direction, and then cross them over each other in the opposite direction.
Troubleshooting the Slippage
Because straight hair wants to uncoil, the rope braid is the most notorious for falling apart. To solve this, apply a light-hold hairspray directly to the strands before you start twisting. This gives the hair enough friction to stay in the twisted position. If you stop the twist, it stays put.
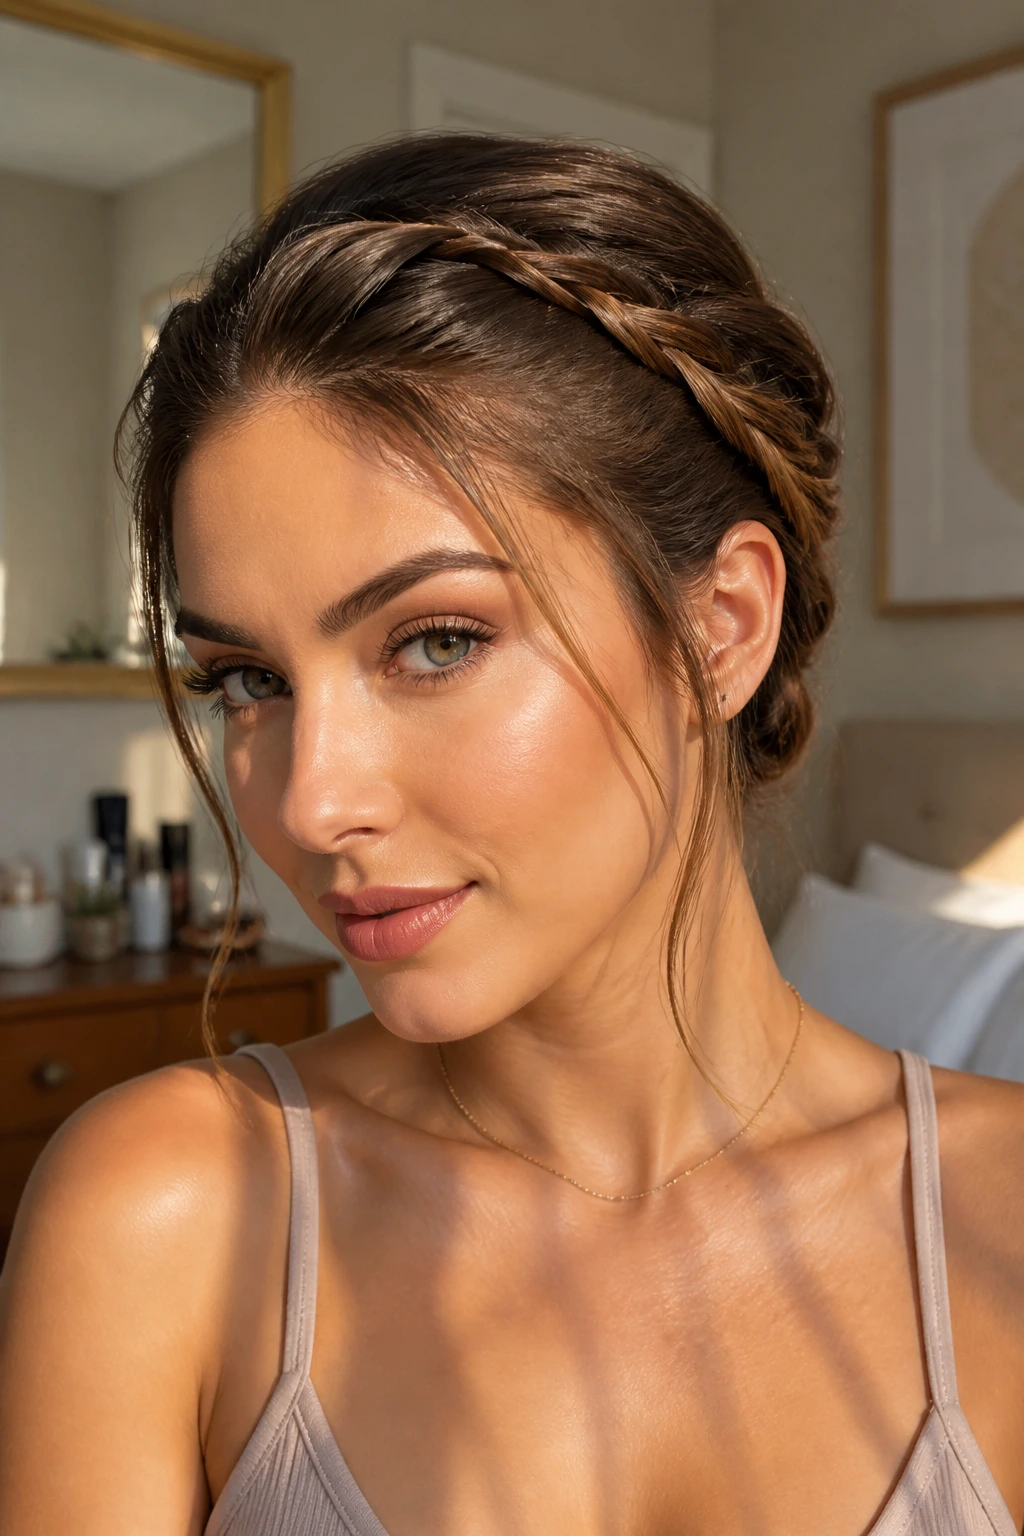
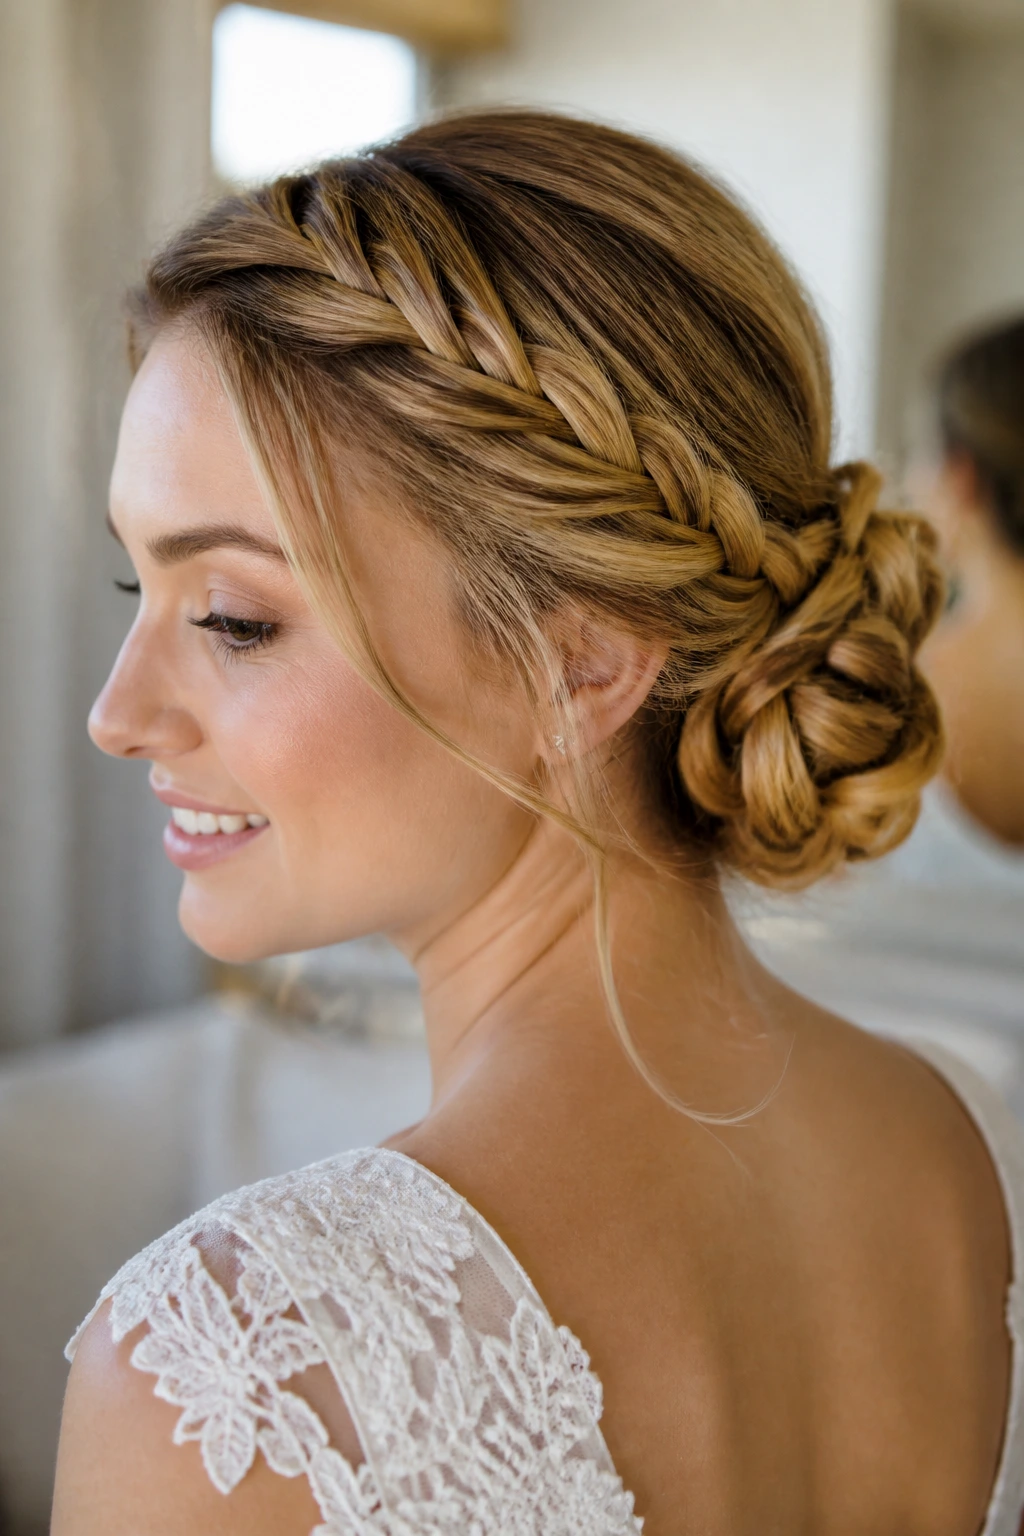
10. The Milkmaid Crown Braid
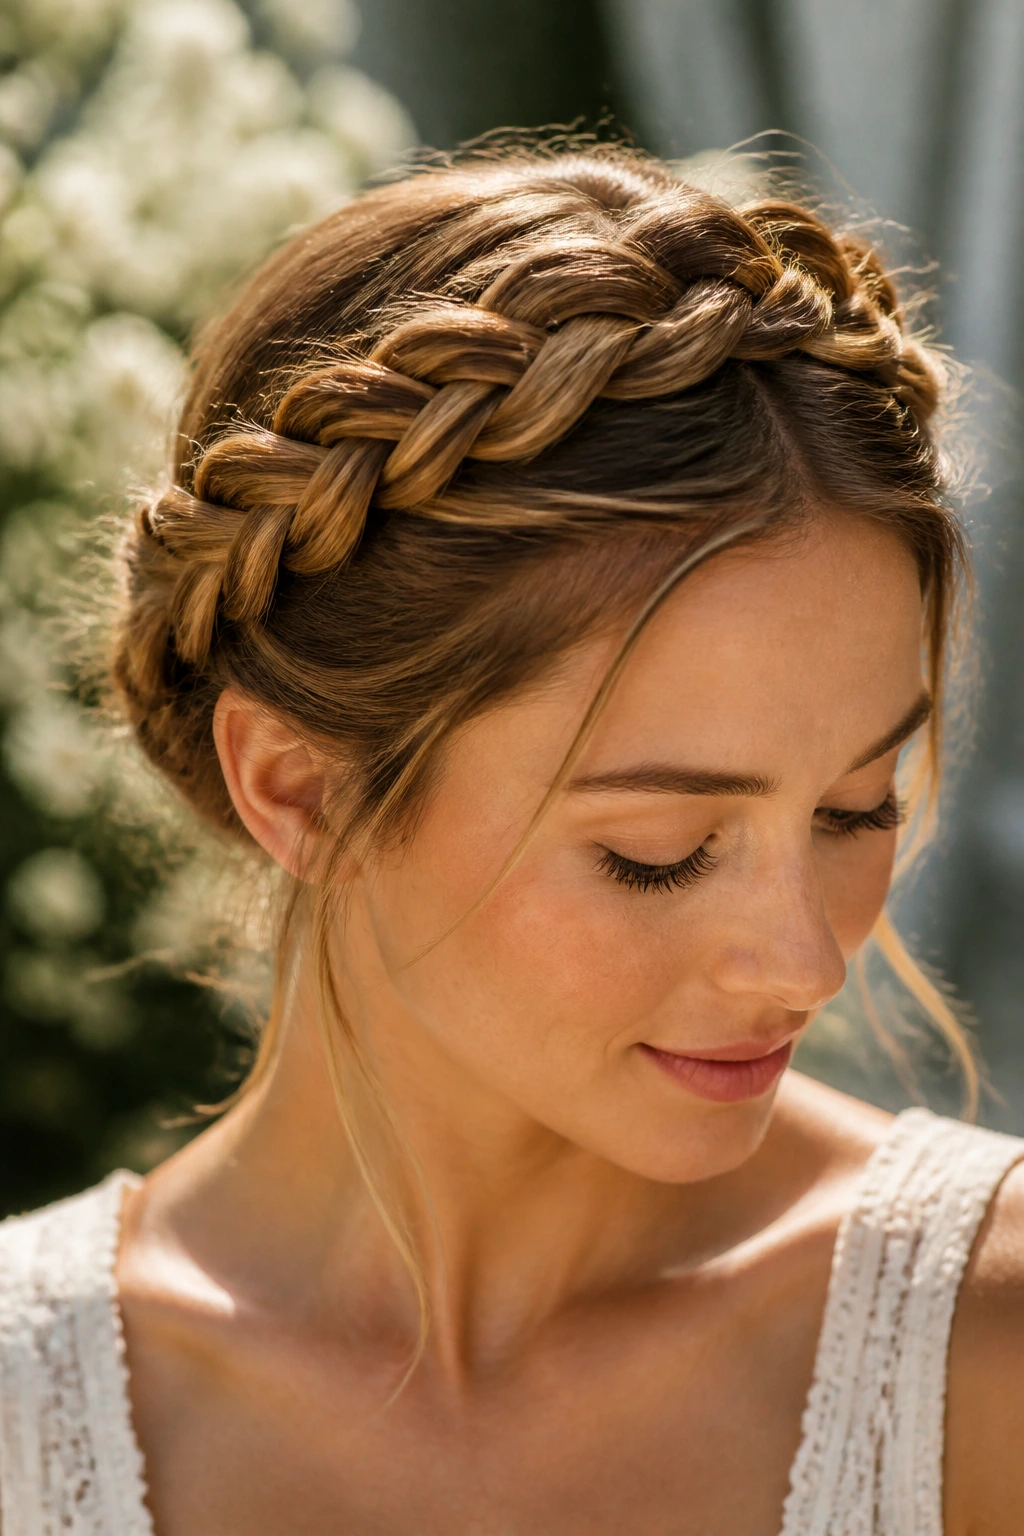
This style is essentially two braids wrapped around the head like a crown. It is arguably the most romantic braid pattern, and it works wonderfully on straight hair because the lack of excess bulk makes the braid look dainty and refined rather than heavy or overwhelming.
The Assembly
- Part your hair down the middle and create two pigtail braids.
- Bring the right braid over the top of your head and pin it behind your left ear.
- Do the same with the left braid, tucking the ends neatly beneath the first braid.
- Use U-pins rather than standard bobby pins to keep the braids flush against your head.
11. Pull-Through Braid
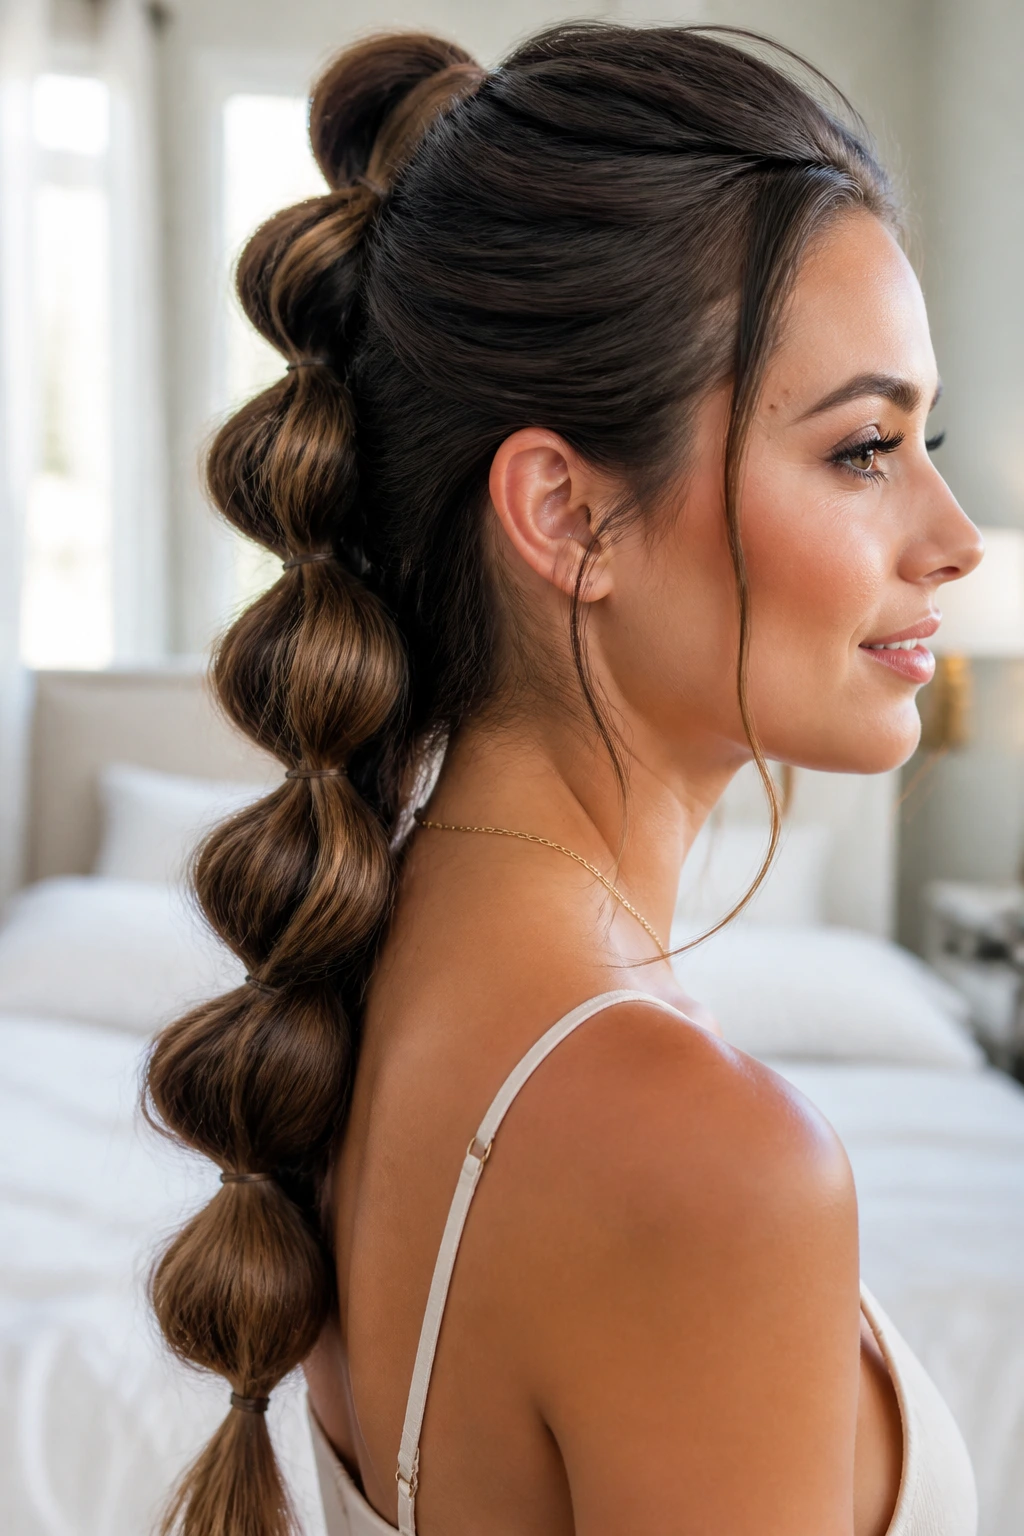
If you have fine or thin hair, the pull-through braid is the gold standard. It is not actually a braid at all; it is a series of ponytails pulled through one another. This technique creates incredible volume and mimics the look of a very thick braid.
Why It’s Better for Thin Hair
- You can pull at the edges of each section to create the illusion of width.
- It doesn’t require any dexterity with multiple strands.
- Each section is secured by its own elastic, which guarantees the braid won’t sag or slide throughout the day.
- It holds for hours, even without tons of hairspray.
12. Ladder Braid
The ladder braid involves creating two horizontal cornrows and then weaving a third braid vertically through the gaps between them. It looks incredibly intricate, but the vertical braid is essentially just a series of small pull-through sections.
Tips for Success
- Ensure your base cornrows are very secure.
- Use a tail comb to pick up the hair for the vertical section to keep it clean.
- Keep the tension balanced. If you pull the horizontal braids too tightly, you won’t have enough space to pull the vertical strands through easily.
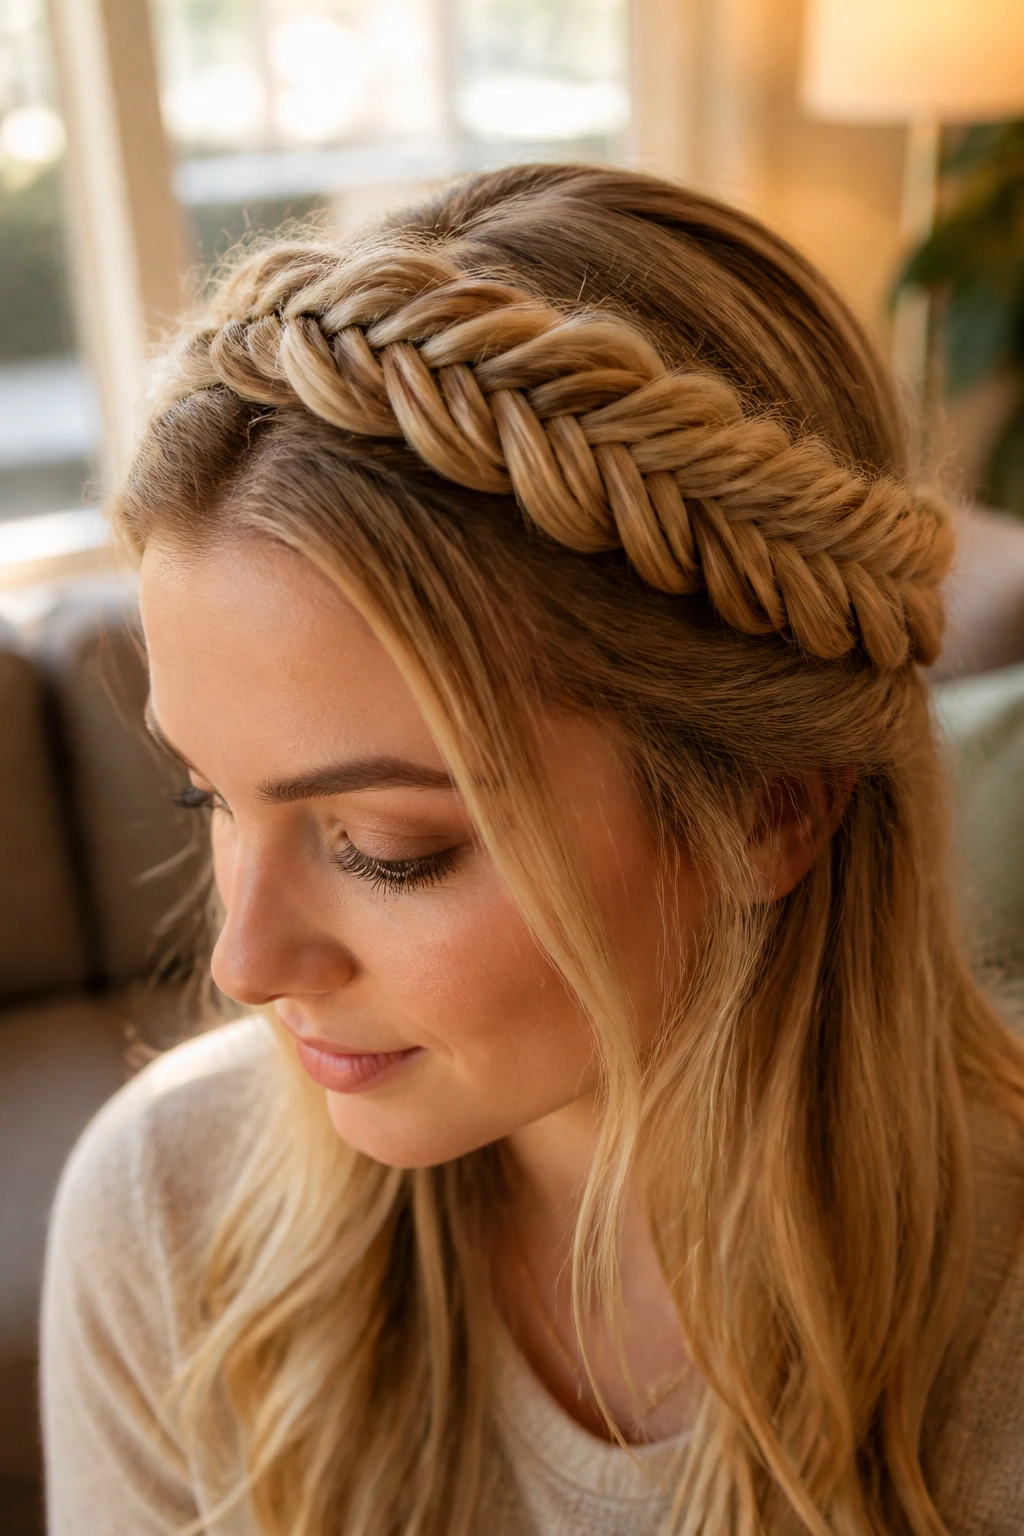
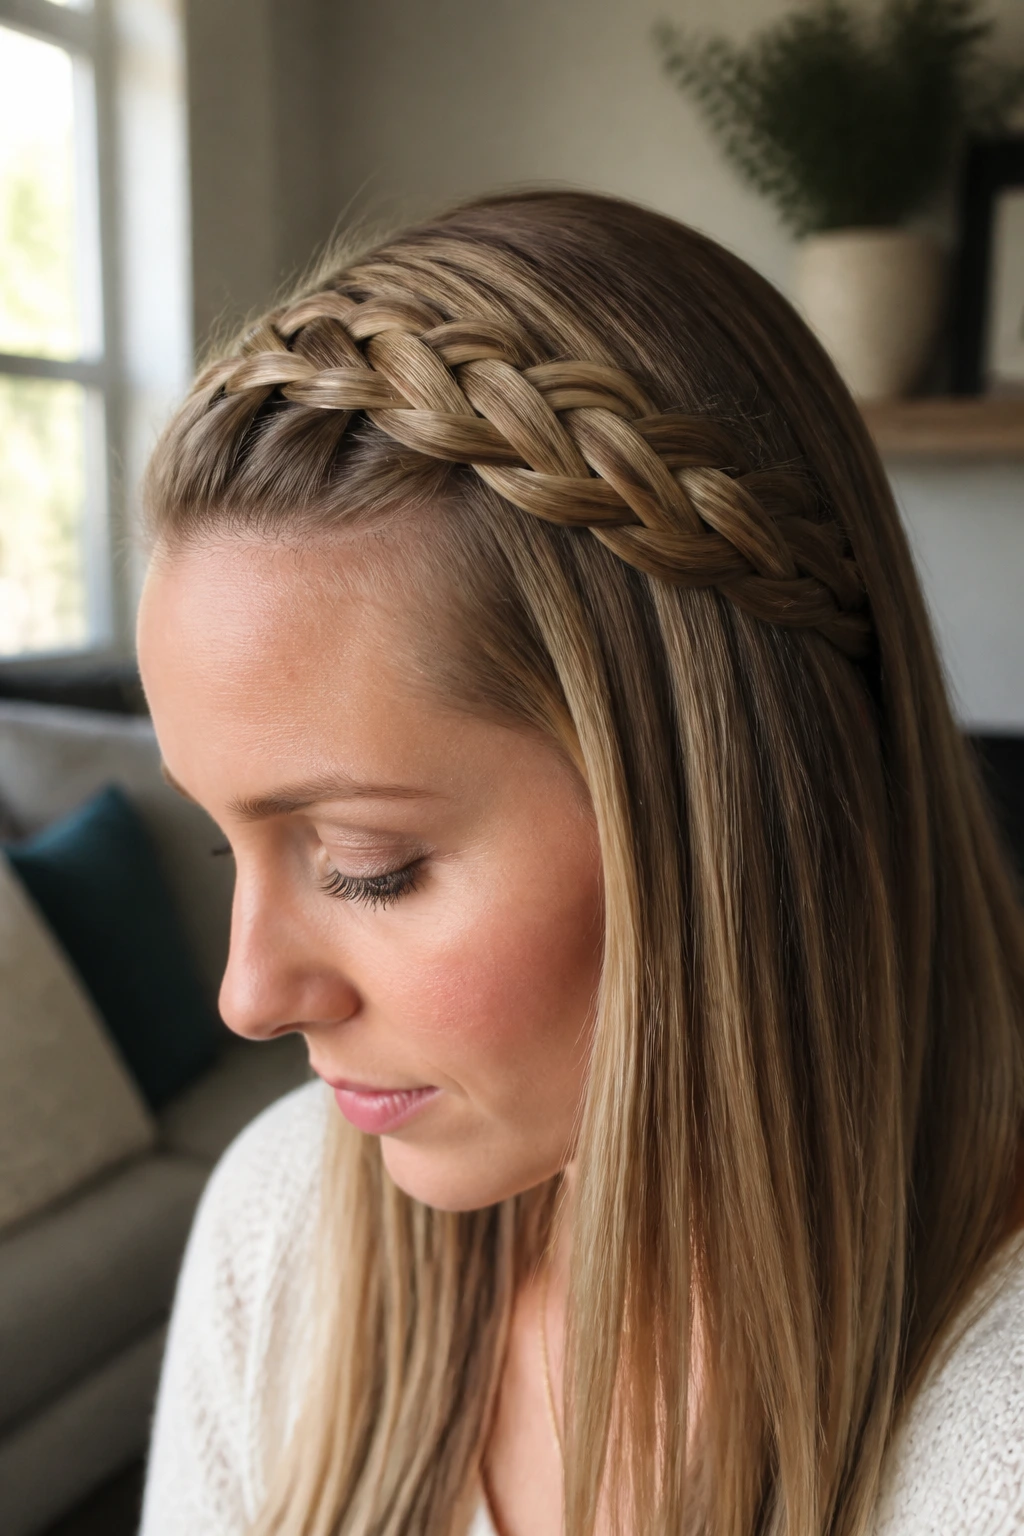
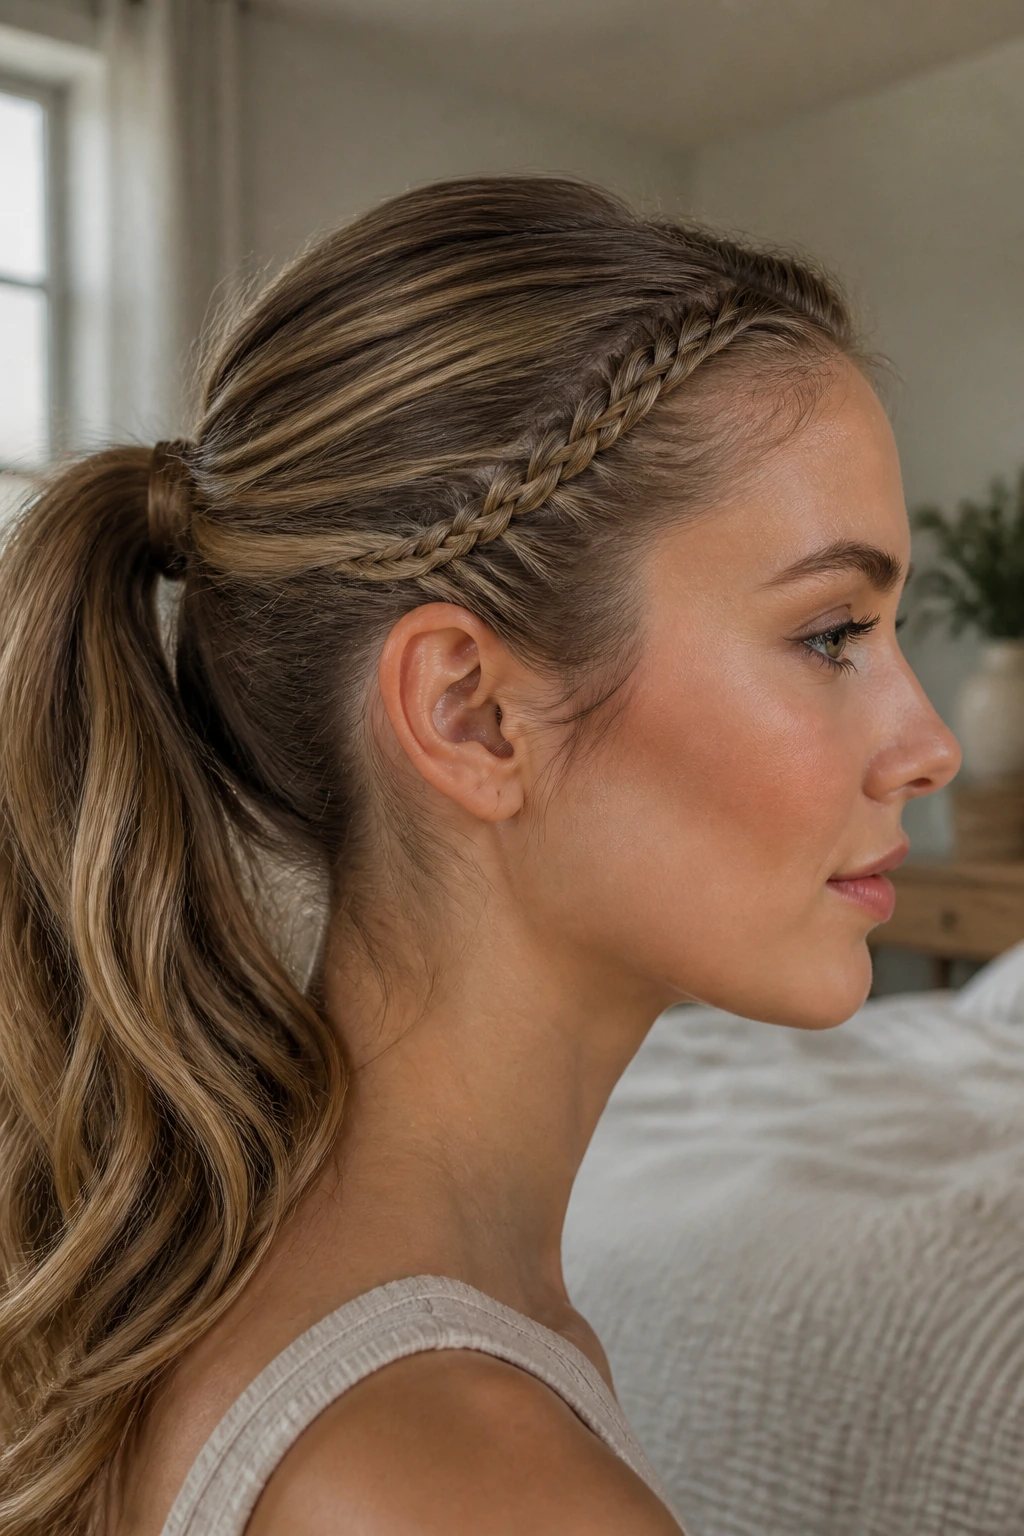
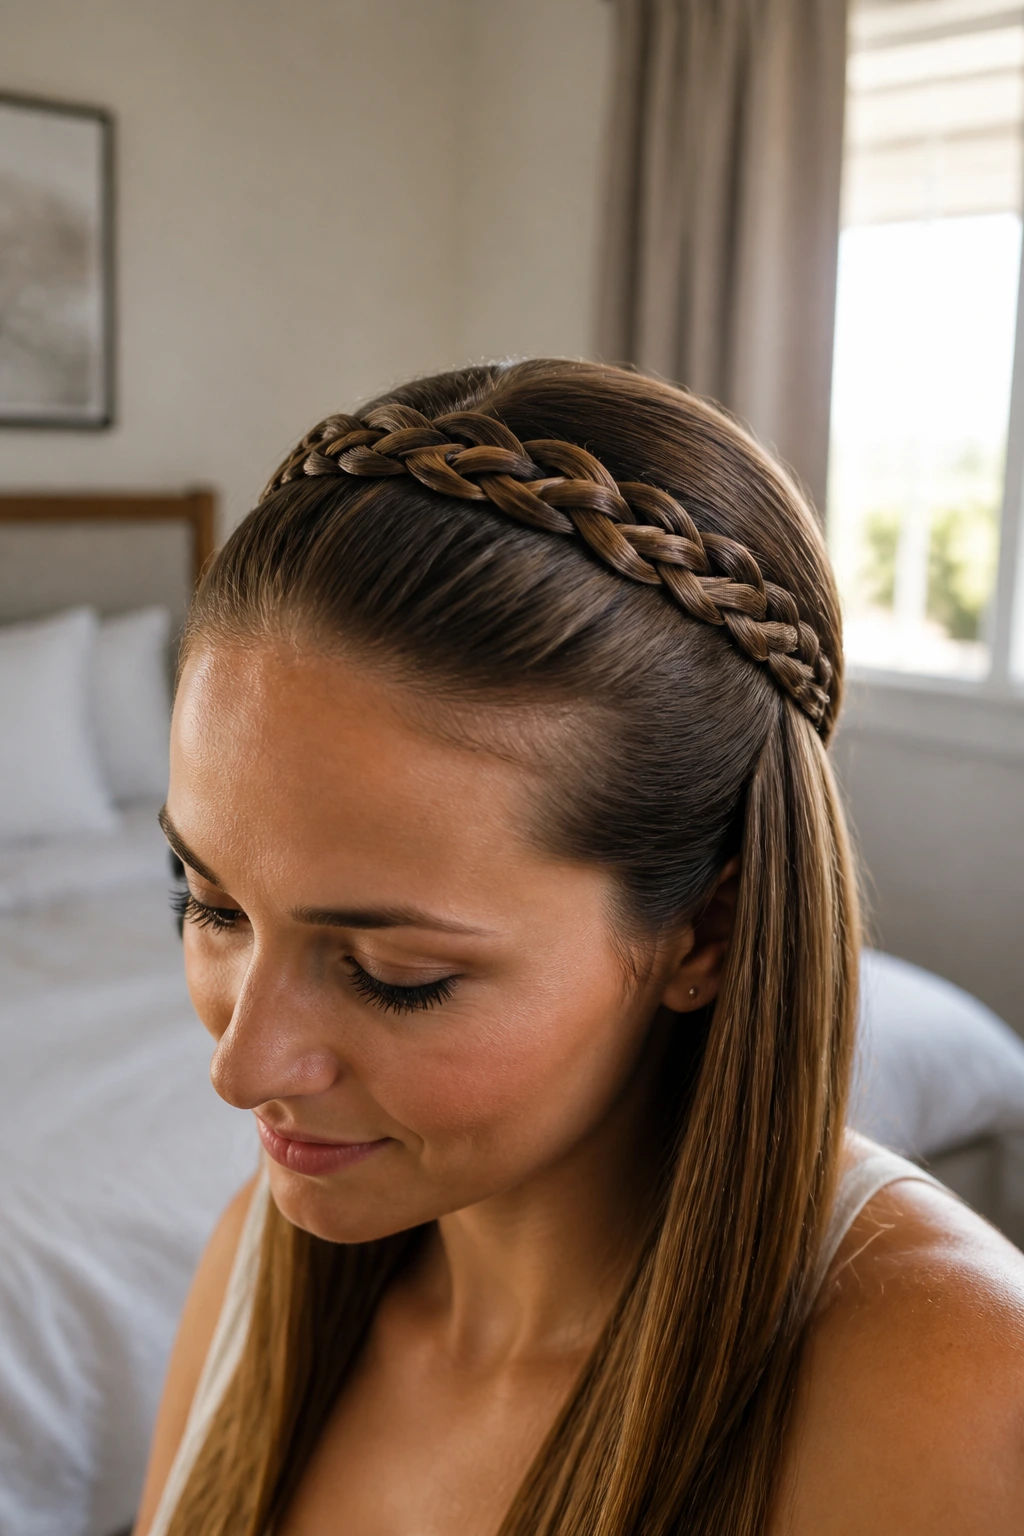
13. The Headband Braid
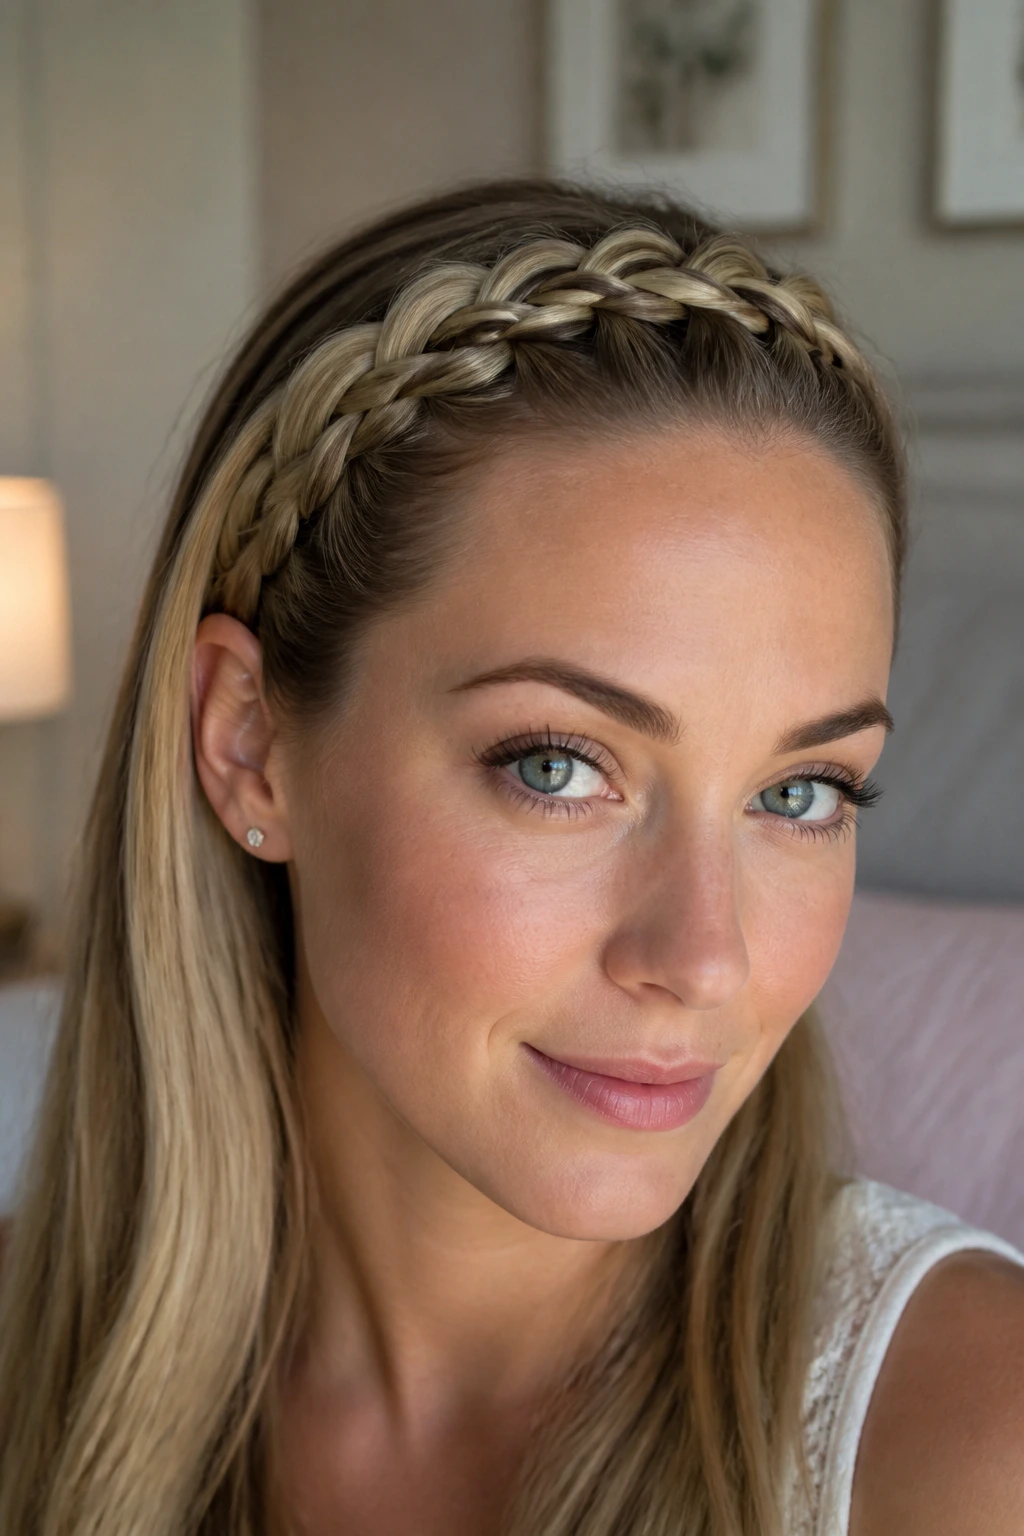
Create a braid that functions as a functional accessory. By starting at one ear and braiding all the way across to the other ear, you create a “headband” that keeps your hair out of your face all day. It is perfect for growing out bangs.
How to Style It
- French braid along the hairline, picking up hair only from the top.
- Once you reach the opposite temple, stop adding hair.
- Finish with a regular three-strand braid and pin it discreetly behind the ear.
- Use a small amount of pomade to smooth down any shorter hairs that don’t make it into the braid.
14. Upside-Down Braided Bun
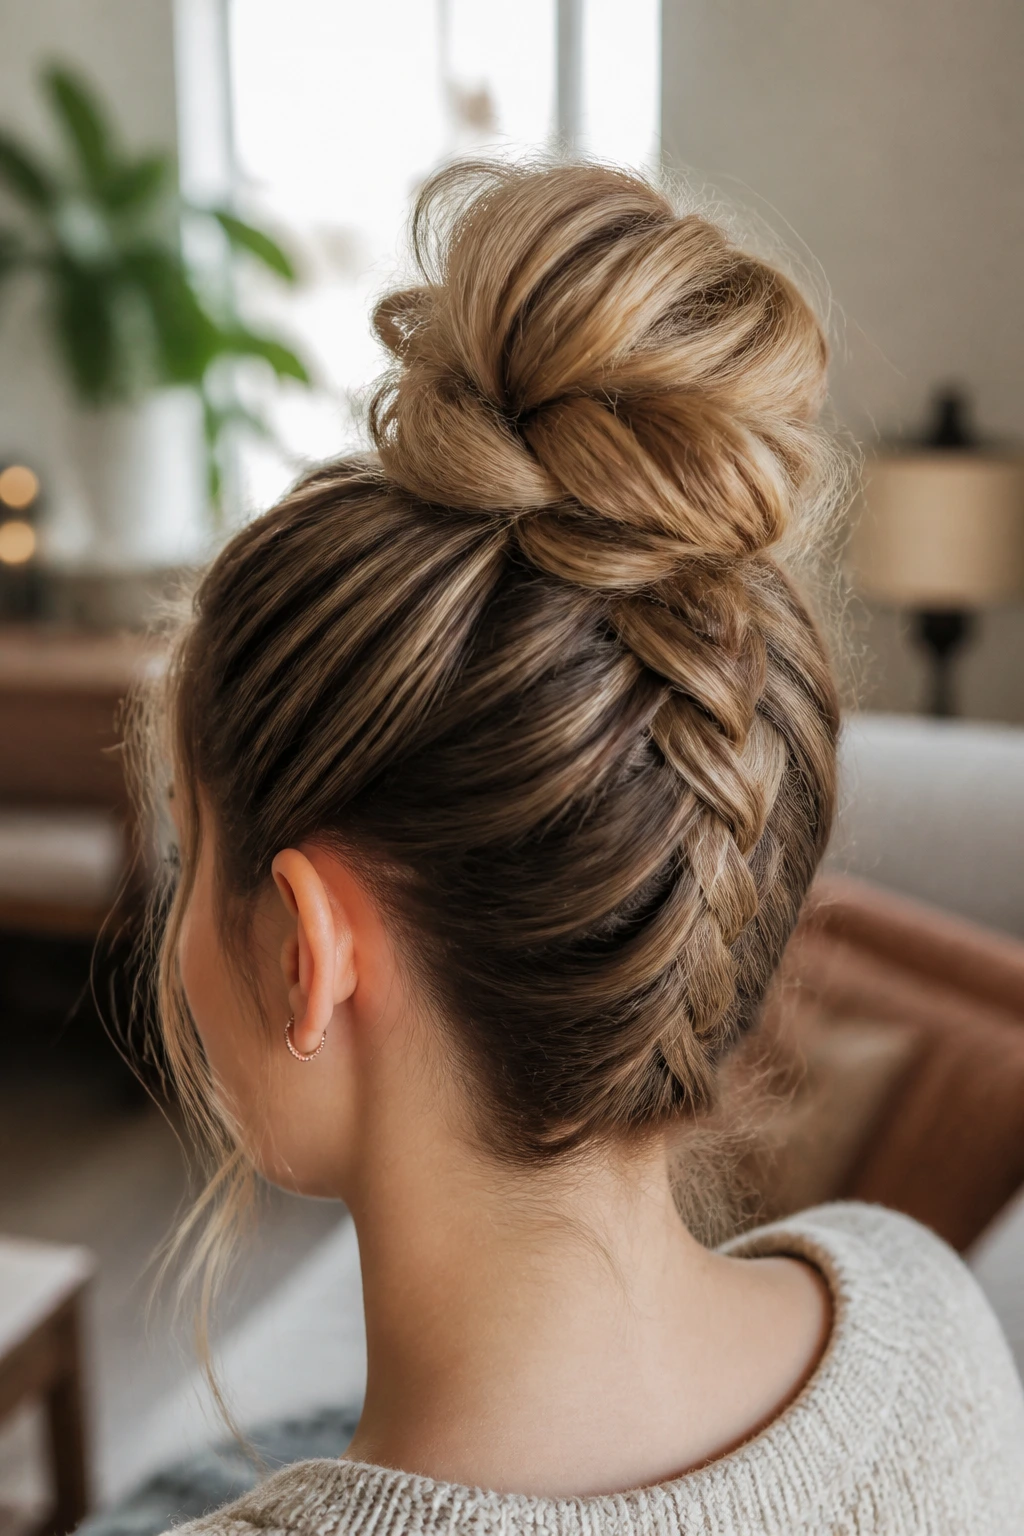
Flip your head over and start a French braid at the nape of the neck, moving upward toward the crown. Once you reach the crown, gather the remaining hair into a messy bun. This is a surprise detail that looks sophisticated from the back.
The Practicality of the Upside-Down Method
Doing this on straight hair is much easier than on curly hair because there is less tangling at the roots. Since you are moving against the grain of the hair, it creates a nice lifting effect at the roots, which gives the resulting bun a bit more volume.
15. The Faux-Hawk Braid
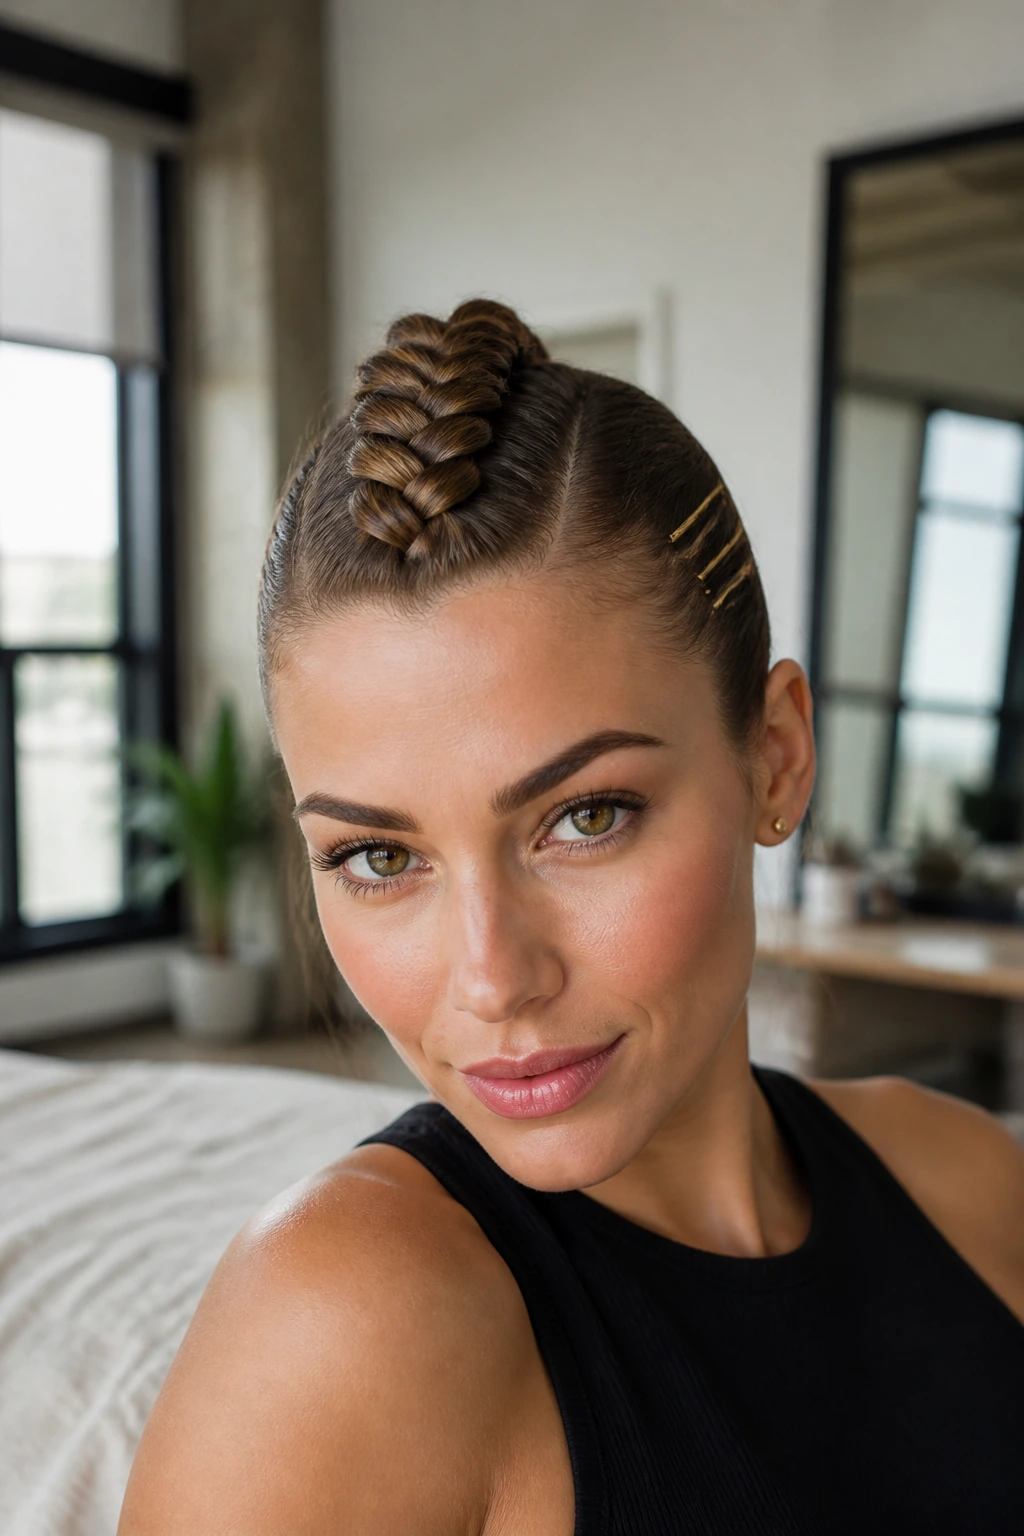
For a bold, fashion-forward look, gather the center section of your hair—from the forehead to the crown—and braid it tightly into a raised Dutch braid. Keep the sides sleek and smooth, perhaps pinning them back with gold bobby pins for contrast.
Why This Works
The stark contrast between the intricate, raised braid and the smooth, pinned-back sides highlights the versatility of straight hair. You are essentially using the braid as a centerpiece, making the hair texture feel like a design choice rather than an inconvenience.
16. Lace Braid
A lace braid is essentially a French braid where you only add hair from one side. This creates a delicate, decorative edge that looks beautiful when paired with a loose ponytail or a half-up style. It is subtle and elegant, perfect for occasions where you want something more than a simple braid but less than a full updo.
Mastering the Edge
- Keep the added sections very thin.
- The thinner the sections you pick up, the more “lacey” the braid will look.
- Use a light wax to keep the edges of the braid crisp, as straight hair can have a tendency to fray slightly if the ends are not perfectly tucked.
17. The Mermaid Braid
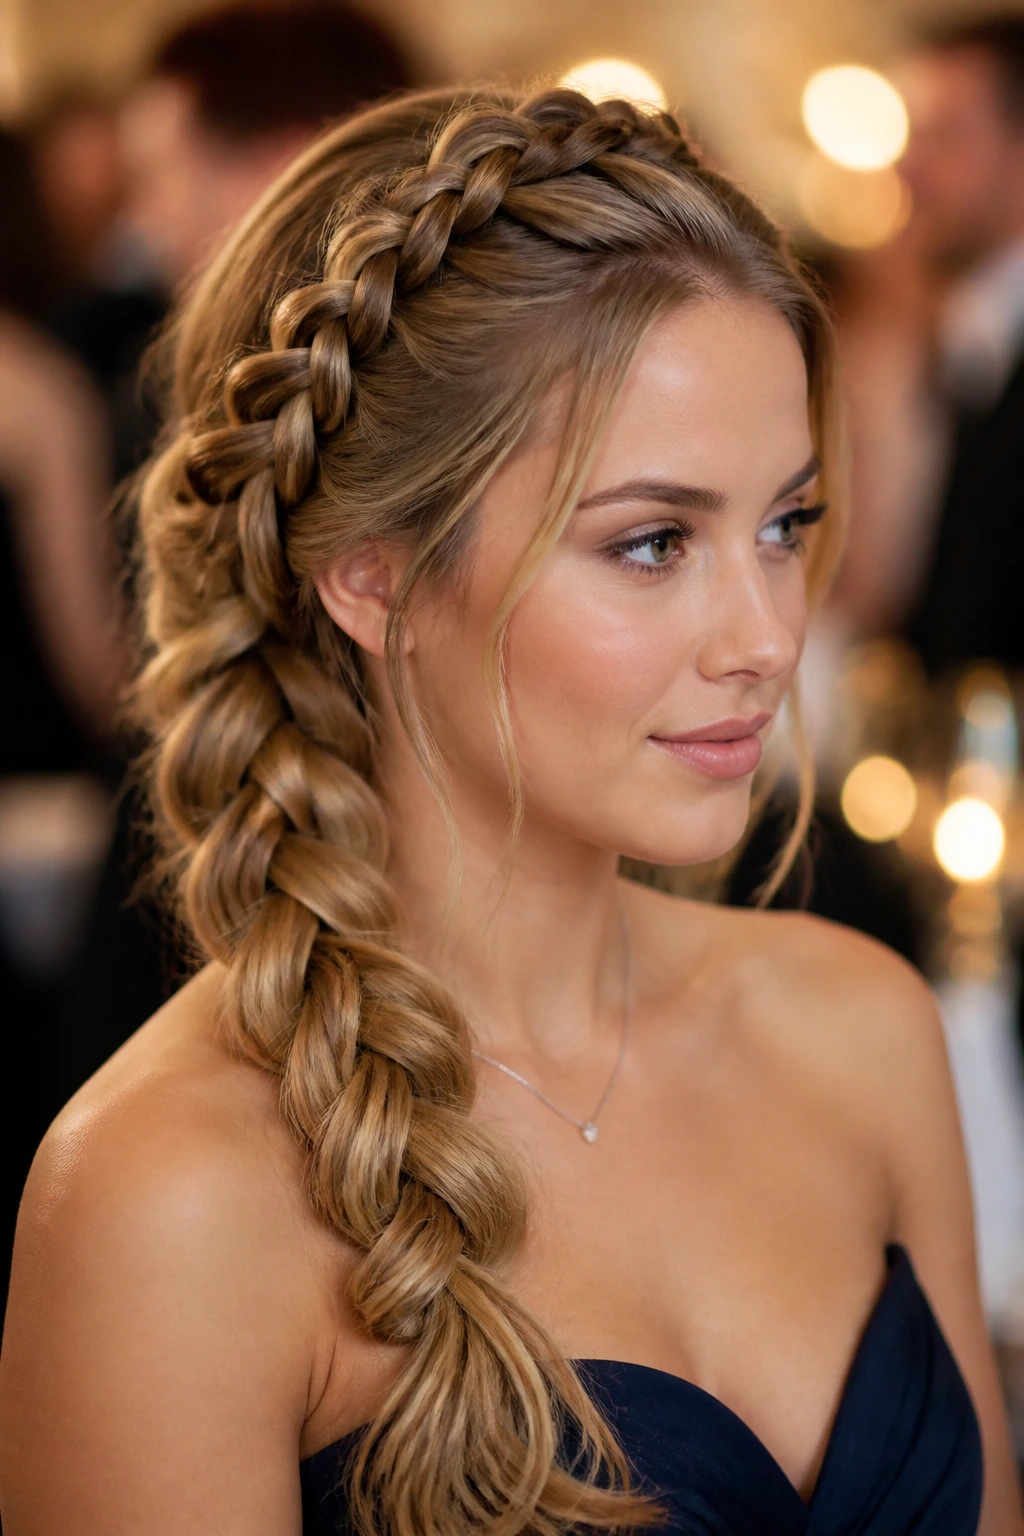
A mermaid braid is a combination of a smaller, tighter braid woven over a larger, looser braid. It creates a layered, complex look that is stunning for events. Because it involves layering, it works very well on straight hair, which lacks the bulk that might make this style look too heavy.
Building the Layers
- Start with a small, tight Dutch braid along the top of your head.
- Then, incorporate that into a larger, looser French braid that covers the rest of the hair.
- This creates a beautiful, dimensional effect where you can clearly see the two distinct patterns.
18. Braided Chignon
The chignon is a classic low bun, and adding a braid transforms it into a bridal-worthy style. Braid the front sections of your hair, then sweep those braids back into a low, tucked bun at the nape of the neck.
Finishing the Look
- Keep the braids slightly loose for a softer aesthetic.
- Tuck the ends of the braids under the bun and pin them with hairpins.
- If you have layers, use a small dab of styling cream to smooth them into the bun so the transition is seamless.
19. Infinity Braid
The infinity braid is named for the “8” pattern you create with your fingers. It is a stunning, sophisticated braid that looks very different from a standard plait. It sits flatter against the head, making it a great option for a sleek, formal look.
How to Achieve the “8” Pattern
- Divide your hair into two sections.
- Wrap one strand around the other in a figure-eight motion.
- Continue this pattern, pulling hair in from the sides as you go.
- The finished look is highly structural and holds remarkably well on straight hair, as the interlocking loops prevent the strands from slipping.
20. The Wrapped Pigtail Braid
Sometimes, two is better than one. Create two low pigtail braids and then cross them at the back of the head, pinning them into place. This is a very youthful, playful style that works perfectly with the natural swing of straight hair.
The Final Touch
- If your hair is long, wrap the braids around each other for a braided bun effect.
- If your hair is shorter, simply pinning them flat against the nape creates a secure, low-profile style that keeps the hair off the neck.
- Use small, clear elastic bands so they do not distract from the pattern of the braid.
Final Thoughts
Working with straight hair often feels like a battle against gravity and friction, but these twenty patterns prove that with the right technique, you can master even the most complex styles. Remember that the key is in the preparation—texturizing your hair before you begin is not an optional step; it is the foundation of a successful braid. Once you have that necessary grit, your hair will hold tension, allowing you to create sharp lines and defined loops that are the envy of every hair texture.
Don’t be afraid to experiment with the tension. If you find your braids are falling flat, tighten them; if they look too severe, use the “pancake” technique to widen the loops. Your hair is a blank canvas, and with a little bit of practice, you will find that these patterns become second nature. Enjoy the process of playing with the structure and the sleek, polished finish that only straight hair can provide.