



There is a distinct, undeniable magic that happens when high-intensity light hits highly pigmented, dark hair. For those with Asian hair textures—which are traditionally characterized by a thicker shaft diameter, a rounder cross-section, and a dense concentration of dark melanin—the contrast of reflective, metallic elements against the natural glass-like shine of the strands is nothing short of striking. While lighter hair types often absorb glitter into their overall color scheme, dark hair acts as a high-contrast canvas. Every single speck of glitter pops with maximum intensity.
But styling Asian hair comes with its own specific physical realities. The hair cuticle is thicker and more tightly packed than in other hair types, which often makes the hair incredibly smooth, slippery, and sometimes stubborn when it comes to holding volume or gripping styling products. If you have ever tried to slick back a part or keep a braid tight, you know that the sheer weight and silky texture of the hair can work against you. Applying glitter isn’t just about dumping sparkle onto your scalp; it requires a strategic understanding of how to make adhesive mediums adhere to a highly resilient hair shaft.
This is where the art of the glitter root comes into play. By pairing precise parting techniques with the right styling gels and cosmetic-grade glitters, you can transform what is often a frustratingly flat part line into a brilliant focal point. Whether you are prepping for an outdoor festival, a holiday gathering, or simply want to experiment with high-impact self-expression, understanding how glitter interacts with your specific hair structure is the key to a look that stays secure from afternoon to midnight. Let’s look at how to master this technique, followed by eighteen distinct styling ideas designed specifically to elevate and celebrate the beauty of Asian hair.
Preparing Thick Dark Hair for Glitter Application
Before you even touch a jar of glitter, the groundwork must be laid. Silky, low-porosity strands are notoriously difficult to coat because products tend to slide right off the smooth cuticle. If your hair is freshly washed and squeaky clean, the glitter paste you apply will likely migrate down the hair shaft or flake off onto your forehead within an hour.
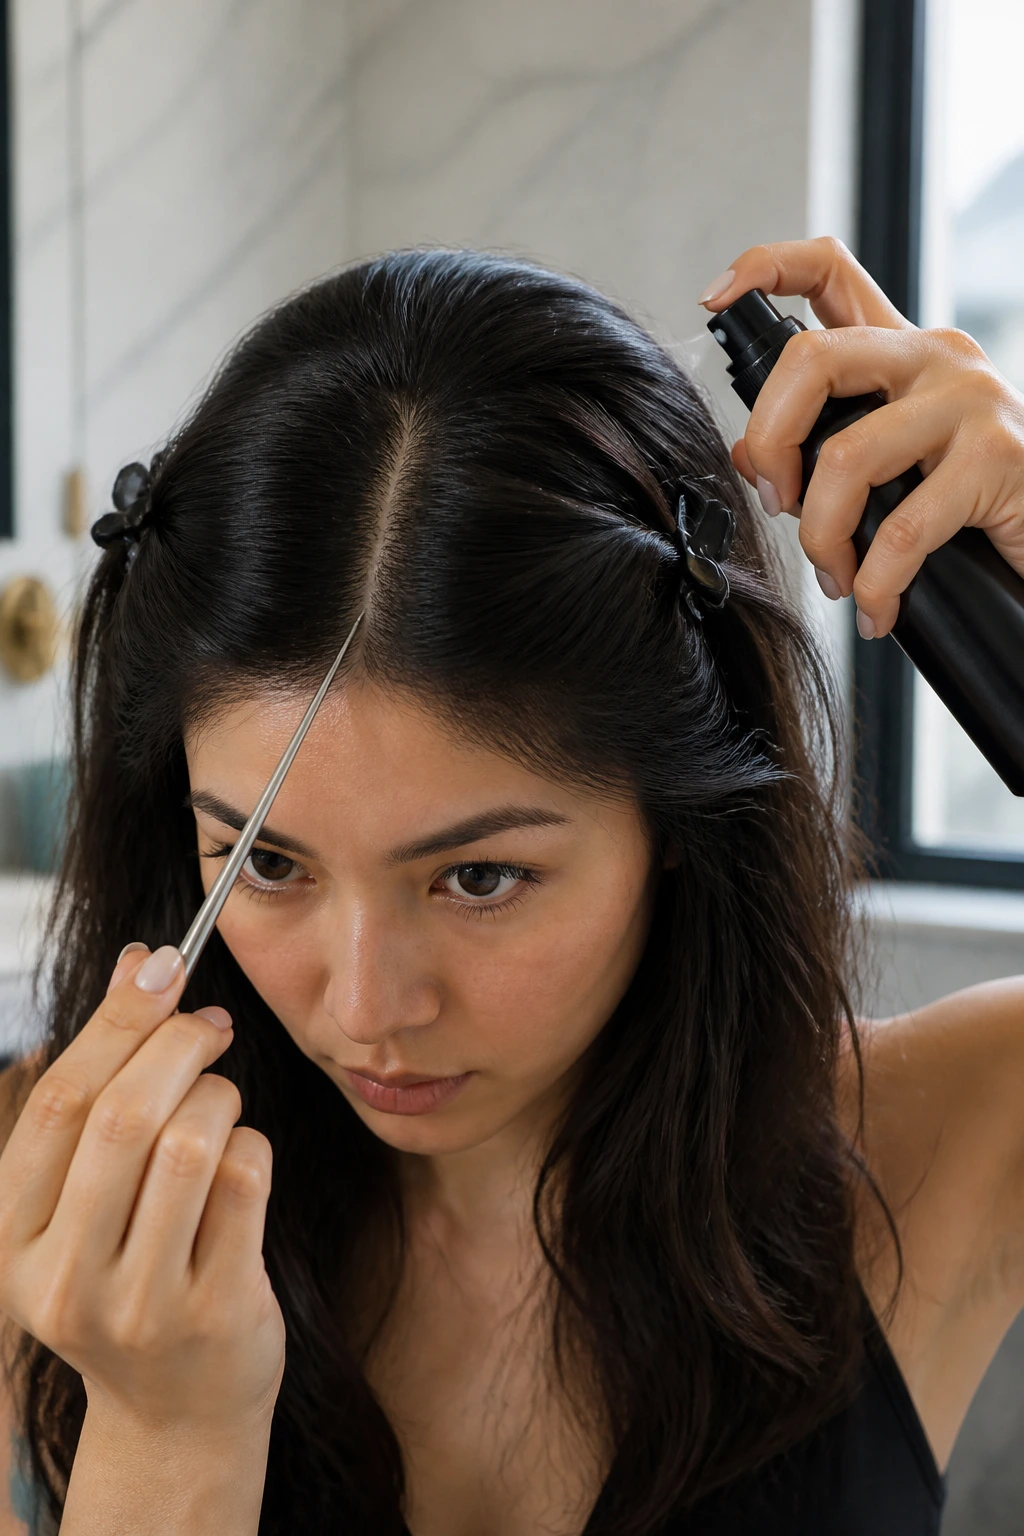
To prevent this, you need to create a slightly textured foundation. Start by working on second-day hair, or use a high-quality texturizing spray directly at the roots where you plan to create your part. This tiny bit of grit gives the styling gel something to cling to.
Next, focus on the part itself. Because dark hair provides such a stark contrast, any unevenness in your parting will be amplified once the glitter is applied. Use a metal-tipped rat-tail comb to trace a crisp, clean line along your scalp. Secure the rest of your hair completely out of the way using sectioning clips before you begin the application process. This prevents stray glitter from invading the lengths of your hair where you want to keep the texture clean and touchable.
Choosing the Right Adhesive for Heavy Hair Strands
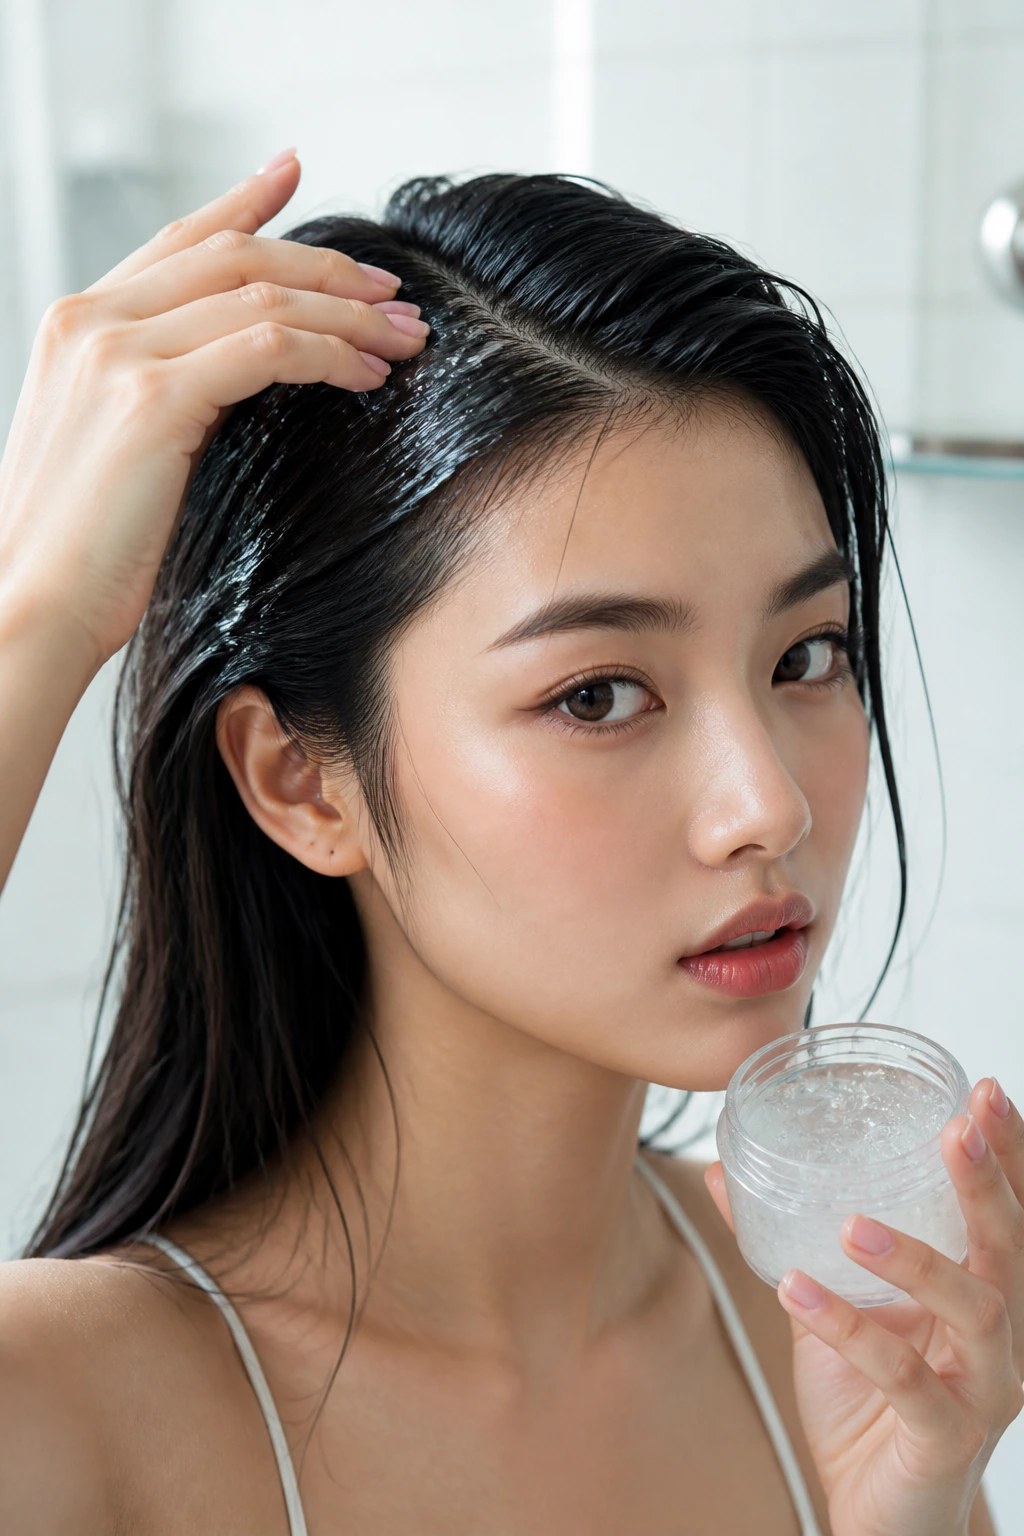
The biggest mistake people make is using the wrong adhesive medium. Craft glue is an absolute disaster for your scalp, while cheap hairsprays lack the physical weight to hold chunky glitter against heavy, coarse hair strands. You need a medium that offers a balance of strong hold, flexibility, and easy washability.
A high-hold, alcohol-free clear hair gel is generally the best vehicle for glitter. Look for formulas containing aloe vera or panthenol, which keep the gel from drying into a stiff, flaky white crust. The gel must remain completely transparent as it dries so that the underlying dark tone of your hair still peeks through, creating that coveted three-dimensional depth.
Alternatively, a heavy-weight hair pomade works exceptionally well for ultra-thick hair. Pomades do not dry down as quickly as gels, giving you more time to paint on your design and reposition individual chunky sequins. Whichever medium you choose, mix your glitter and adhesive in a small plastic bowl first, aiming for a thick, paste-like consistency. Applying the mixture with a flat, synthetic makeup brush—like a foundation or concealer brush—will give you the ultimate control over placement and density.
1. Classic Space Buns with Chunky Silver Glitter
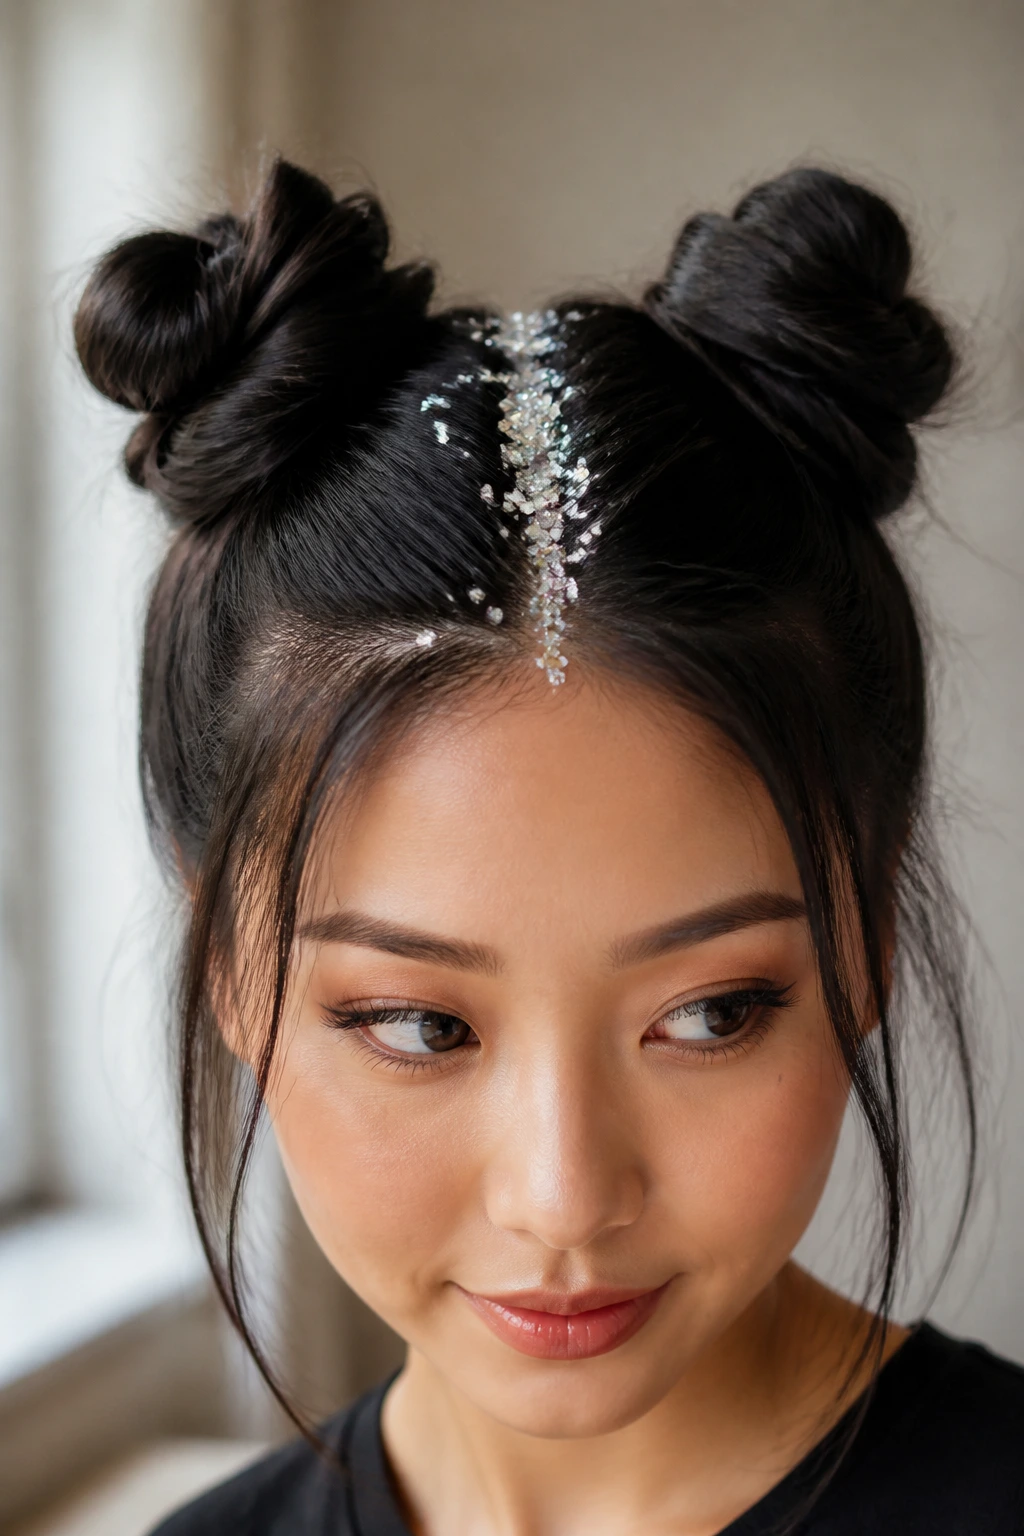
This style is a staple for a reason. Double buns sit high on the head, pulling the hair upward and exposing a wide, central path from the hairline all the way to the crown. The stark contrast of chunky silver glitter against deep black hair creates an instantly recognizable, high-impact look that balances playfulness with clean symmetry.
Why Silver Pops on Dark Hair
Silver has a cool undertone that naturally complements the cool, blue-black undertones often found in natural Asian hair. When you apply chunky hexagonal silver glitter along the center part, it acts like a mirror, catching light from every direction and framing your face with bright, metallic reflections.
Key Styling Details
- Part your hair perfectly down the center using a steel pin comb.
- Secure the buns with thick elastic bands to prevent the heavy hair from sagging.
- Apply the silver glitter paste in a tapering pattern, making it thickest at the hairline and letting it scatter gently as it reaches the base of the buns. Pro tip: Use cosmetic-grade glitter of varying sizes—micro-fine mixed with large hexagons—to create a textured, celestial effect rather than a flat sheet of silver.
2. Dutch Braid Parting with Rose Gold Flecks
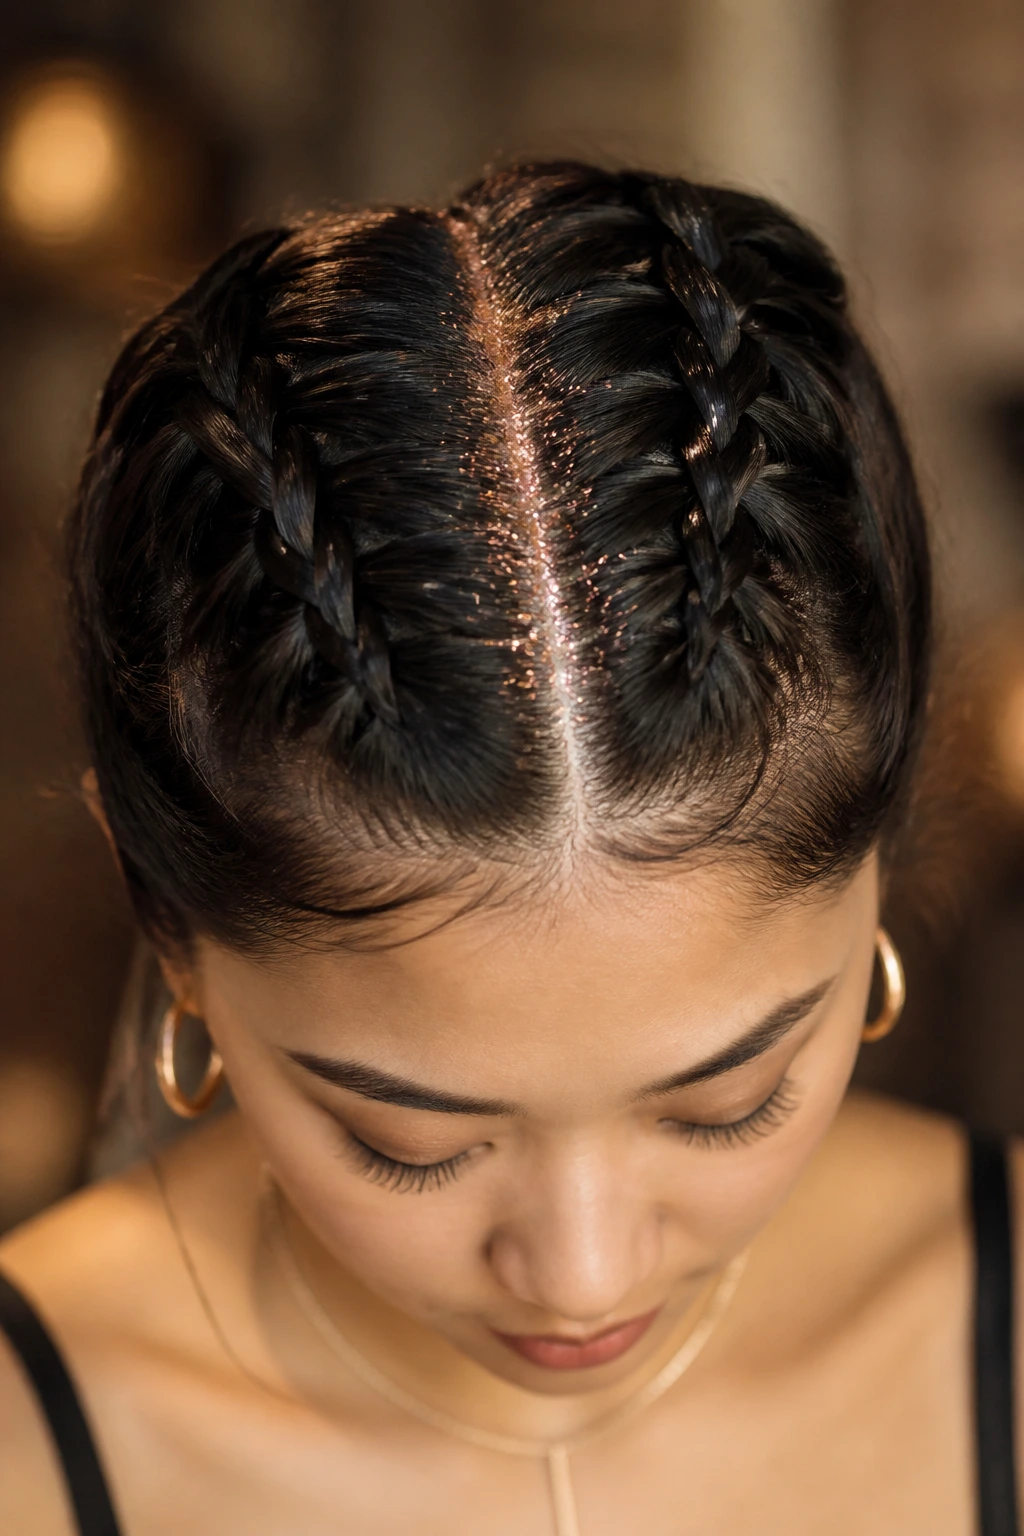
Braiding thick hair requires tension, but the results are incredibly structured and elegant. By creating two tight Dutch braids close to the center part, you expose a narrow channel of scalp and root hair. Filling this channel with rose gold flecks adds a warm, metallic contrast that softens the overall look while highlighting the intricate weaving of the braids.
Unlike cooler metallic shades, rose gold brings a subtle warmth that looks exceptionally beautiful on warm-toned dark brown or espresso hair. The soft pink and gold tones catch the light with a gentler, more candlelit glow than bright silver. This makes the style feel slightly more organic and sophisticated, perfect for evening events where you want to sparkle without looking overly theatrical.
To execute this, braid your hair tightly, keeping your hands close to the scalp to ensure the braids do not slip. Once the braids are secured at the nape of your neck or turned into low buns, mix your rose gold glitter with a medium-hold gel. Paint the glitter directly into the valley of the center part, letting a few flecks wander slightly onto the first few turns of the braids to integrate the sparkle naturally into the hairstyle.
3. Sleek Low Ponytail with Holographic Gold Dust
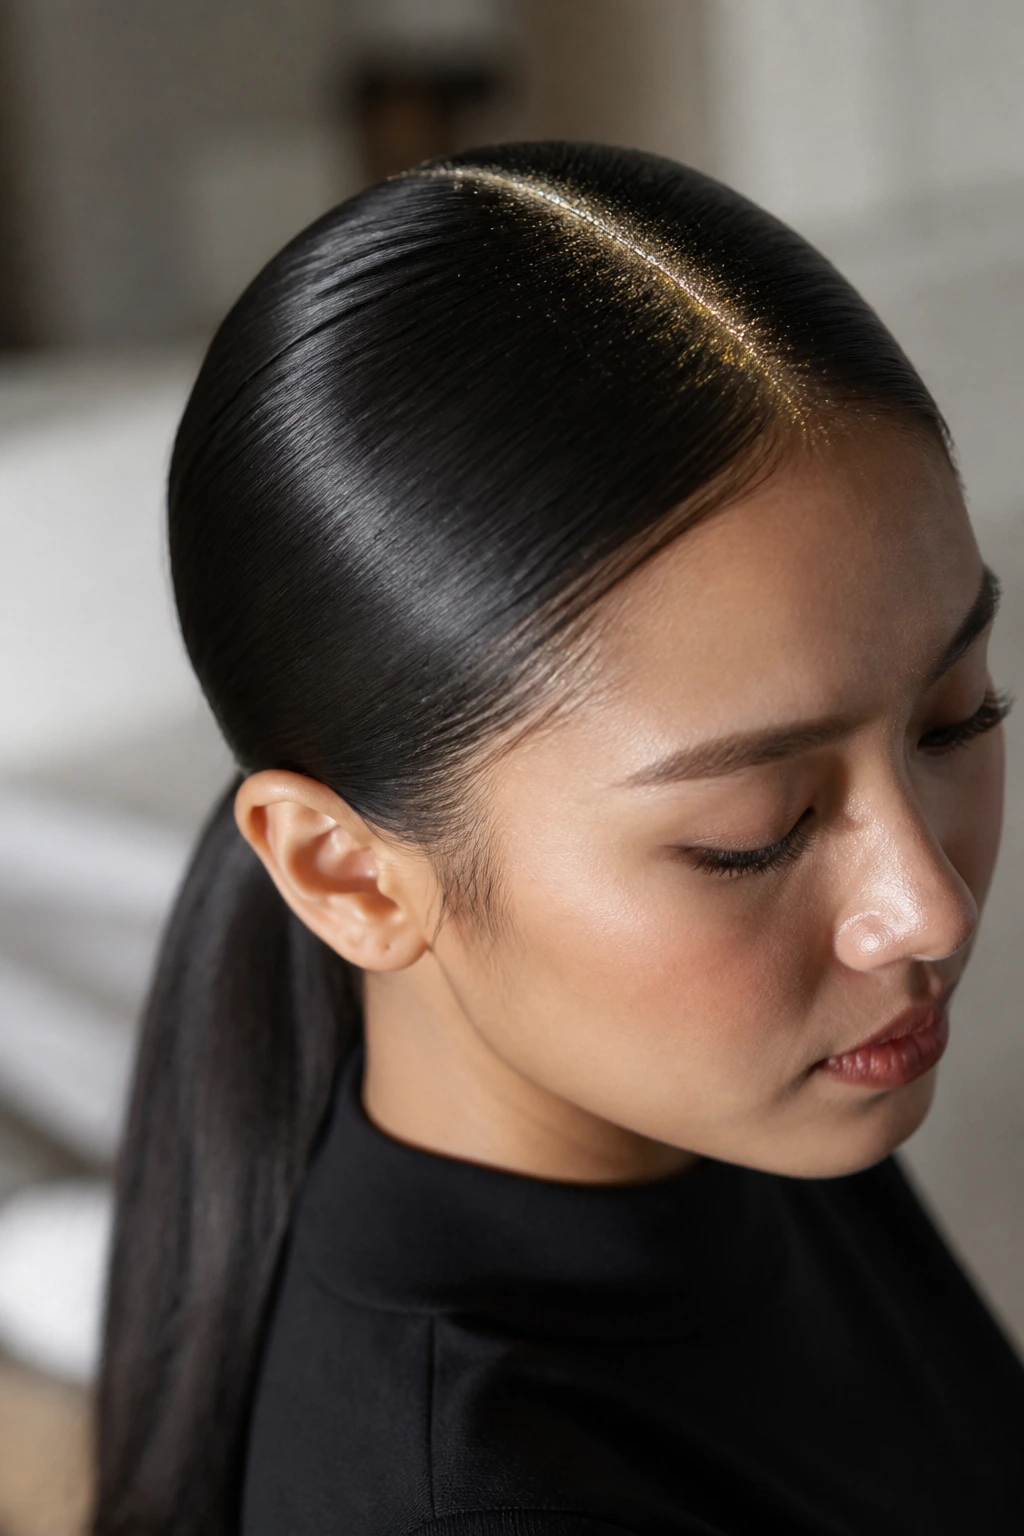
Can a glitter hairstyle look genuinely sophisticated? Absolutely. By keeping the hair incredibly sleek, flat, and gathered into a low, polished ponytail, you can use fine holographic gold dust to create a minimalist stripe of shimmer that looks modern and intentional.
How to Achieve the Sleek Finish
The key to this style is control. You want zero flyaways and a surface that looks like polished patent leather. This requires a double-glaze technique: first, slick the hair down with a lightweight styling oil, then lock it in place with a high-shine hairspray before applying your glitter.
The Application Process
- Blow-dry your hair straight, directing the airflow downward to flatten the cuticle.
- Create a deep, sharp side part or a crisp center part.
- Gather the hair tightly at the nape of your neck and secure it with a bungee hair elastic.
- Paint a narrow, precise line of fine holographic gold glitter directly along the parting line.
How to Get the Most From Holographic Dust
Using ultra-fine glitter rather than chunky sequins is crucial here. The holographic particles will shift from green to red to gold as you move, creating a subtle, shimmering transition that highlights the precision of your part without looking messy.
4. Double Half-Up Top Knots with Chunky Star Sequins
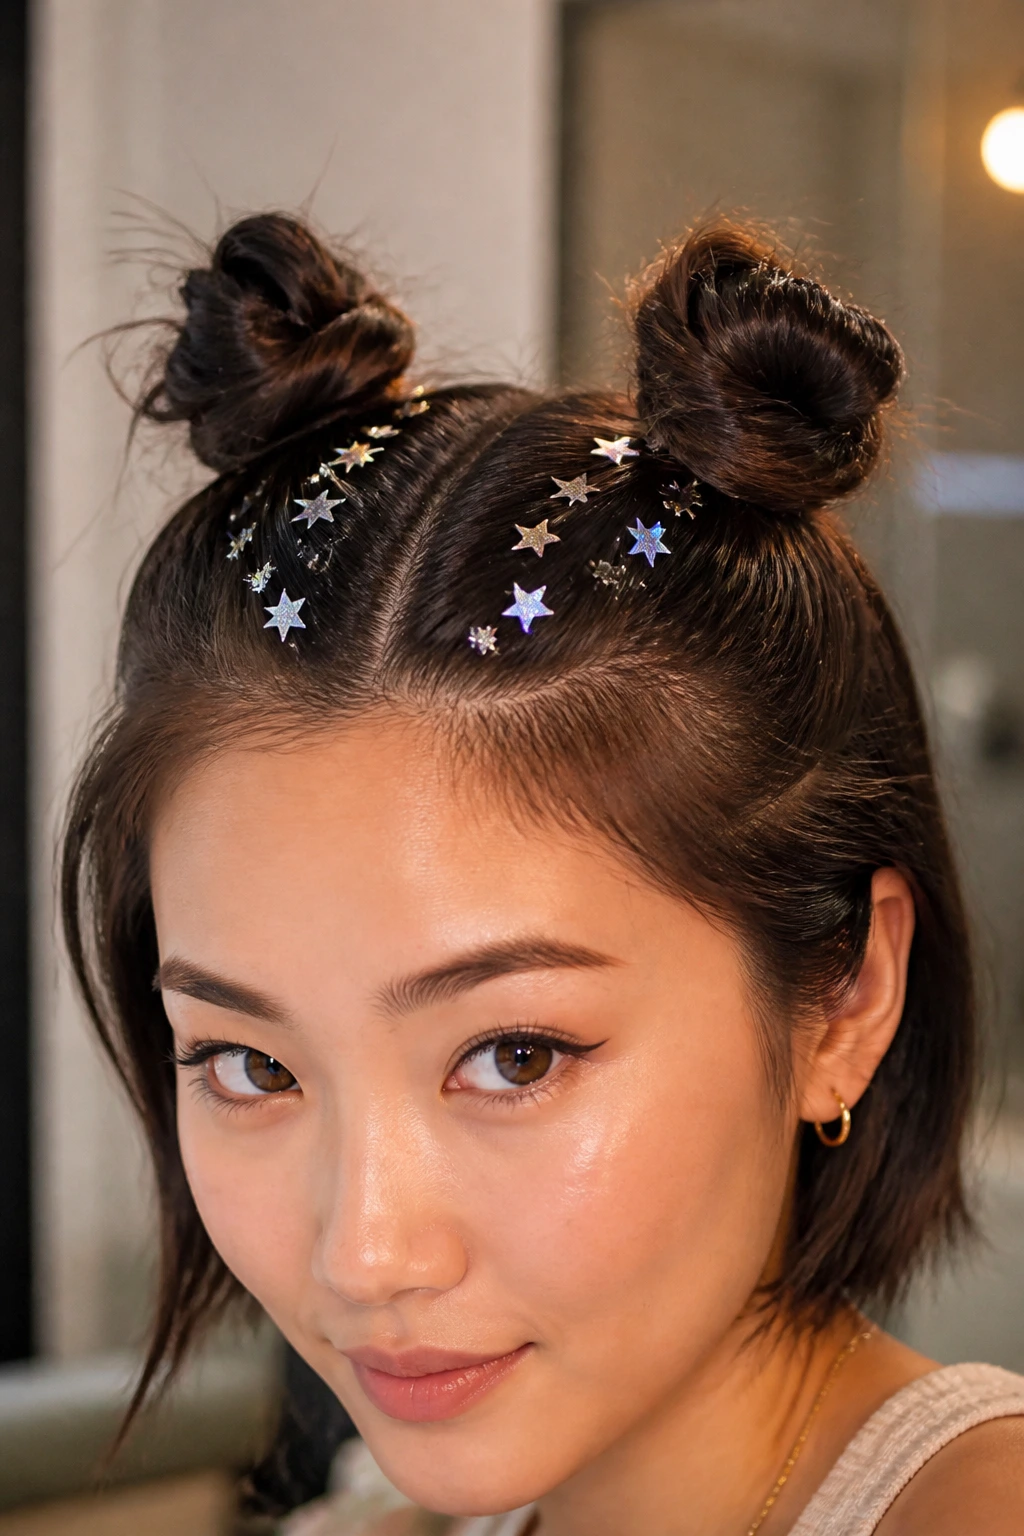
For those with shorter hair, like a lob or a blunt bob, full space buns can be tough to secure. This half-up variation solves that problem by gathering only the top section of hair into two small knots, leaving the rest to frame your shoulders. It is a fantastic option for showcasing your hair’s natural thickness while playing with whimsical shapes.
The Mechanics of Star Placement
- Section off the top crown portion of your hair into two equal halves.
- Twist each section into a tight knot and secure with bobby pins.
- Apply a base layer of fine silver or iridescent glitter gel along the parts.
- Use a pair of tweezers to hand-place individual chunky star sequins along the root line. This hand-placed method ensures the stars do not clump together or sit awkwardly on the scalp. It gives the style a clean, customized feel that looks like professional festival hair.
5. Zig-Zag Part with Mixed Multi-Colored Glitter
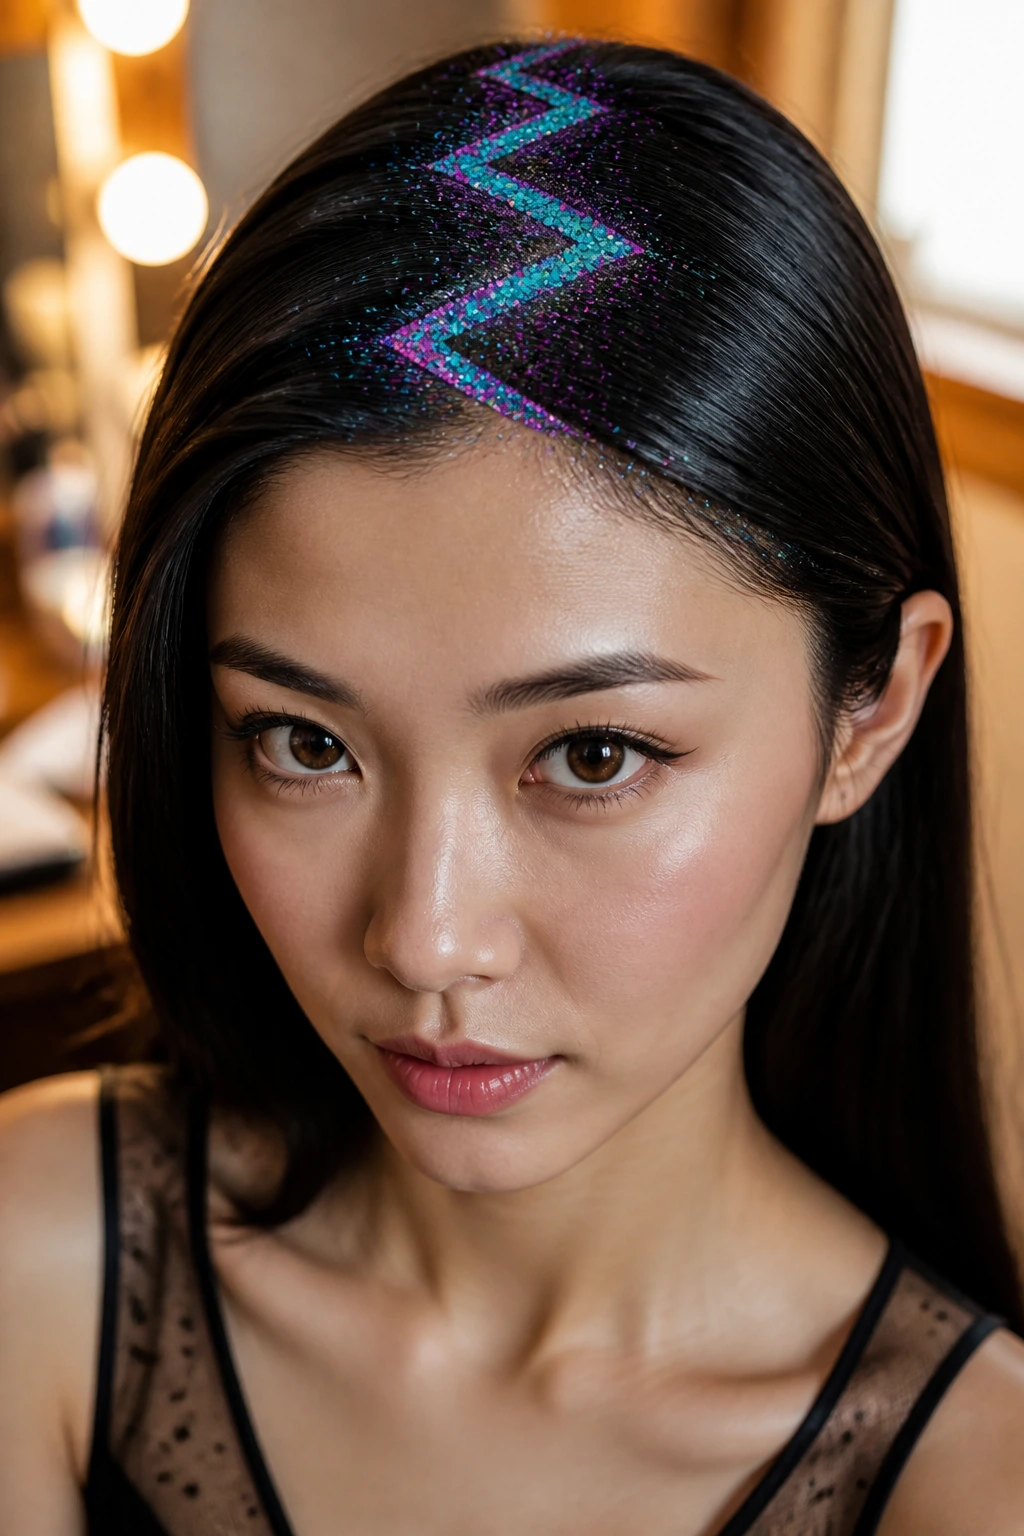
The zig-zag part is a classic throw-back style that has experienced a massive resurgence. It is inherently dynamic, breaking up the symmetry of the face and creating fun, geometric lines. When you fill those sharp angles with a mixture of multi-colored glitters, the visual result is incredibly vibrant.
Because Asian hair is naturally straight and heavy, it holds a zig-zag part exceptionally well once the hair is styled. You do not have to fight natural curls or waves to keep the lines sharp. Start by combing all your hair straight back, then use the tip of your comb to draw a sharp zig-zag line from your forehead to your crown, pulling the hair to alternating sides as you go.
Once your geometric part is established, apply a generous layer of mixed-color glitter gel. A blend of turquoise, magenta, and purple glitter works beautifully on dark hair, as these cool-toned jewel shades harmonize naturally with dark pigment. Because the part itself is irregular, do not worry about keeping the glitter application perfectly uniform—let it spill slightly onto the roots on either side of the zig-zag to emphasize the playful, erratic shape of the parting line.
6. High Pigtails with Neon UV-Reactive Glitter
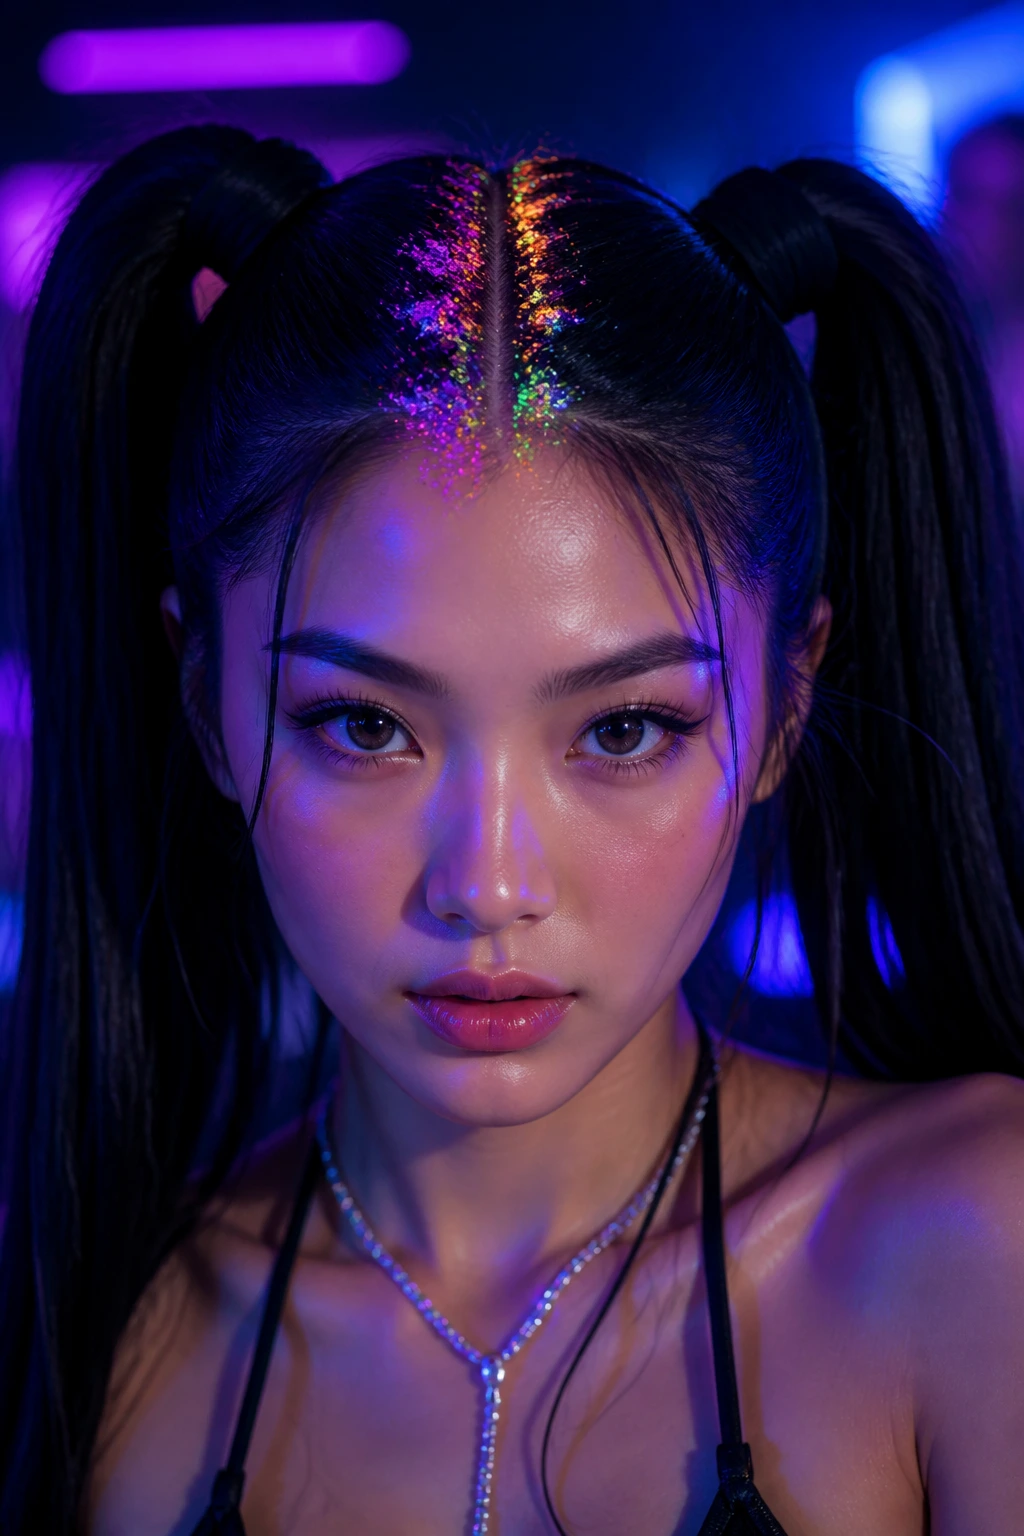
High pigtails are bold, energetic, and undeniably fun. If you are heading to an event with blacklights, pairing this style with neon, UV-reactive glitter ensures your hair will glow in the dark. The natural density of Asian hair gives high pigtails incredible swing and volume, making them look full and bouncy.
Unlike standard metallic glitters that rely on natural light reflection, neon UV glitters are highly saturated pigments that pop even in low light. Under blacklight, they emit a bright fluorescent glow. This creates an amazing contrast: the pitch-black mass of your pigtails frames your face, while the glowing neon parting line acts as a vibrant crown.
To style, gather your hair into two high, symmetrical ponytails at the crown of your head. Use a hook elastic to get them as tight and high as possible without causing discomfort. Apply a thick layer of neon pink, green, or yellow glitter gel along the center part. For an extra touch of detail, wrap a small strand of hair around the base of each pigtail to hide the elastics, keeping the focus entirely on the glowing roots.
7. Pixie Cut Side-Swept Part with Fine Champagne Shimmer
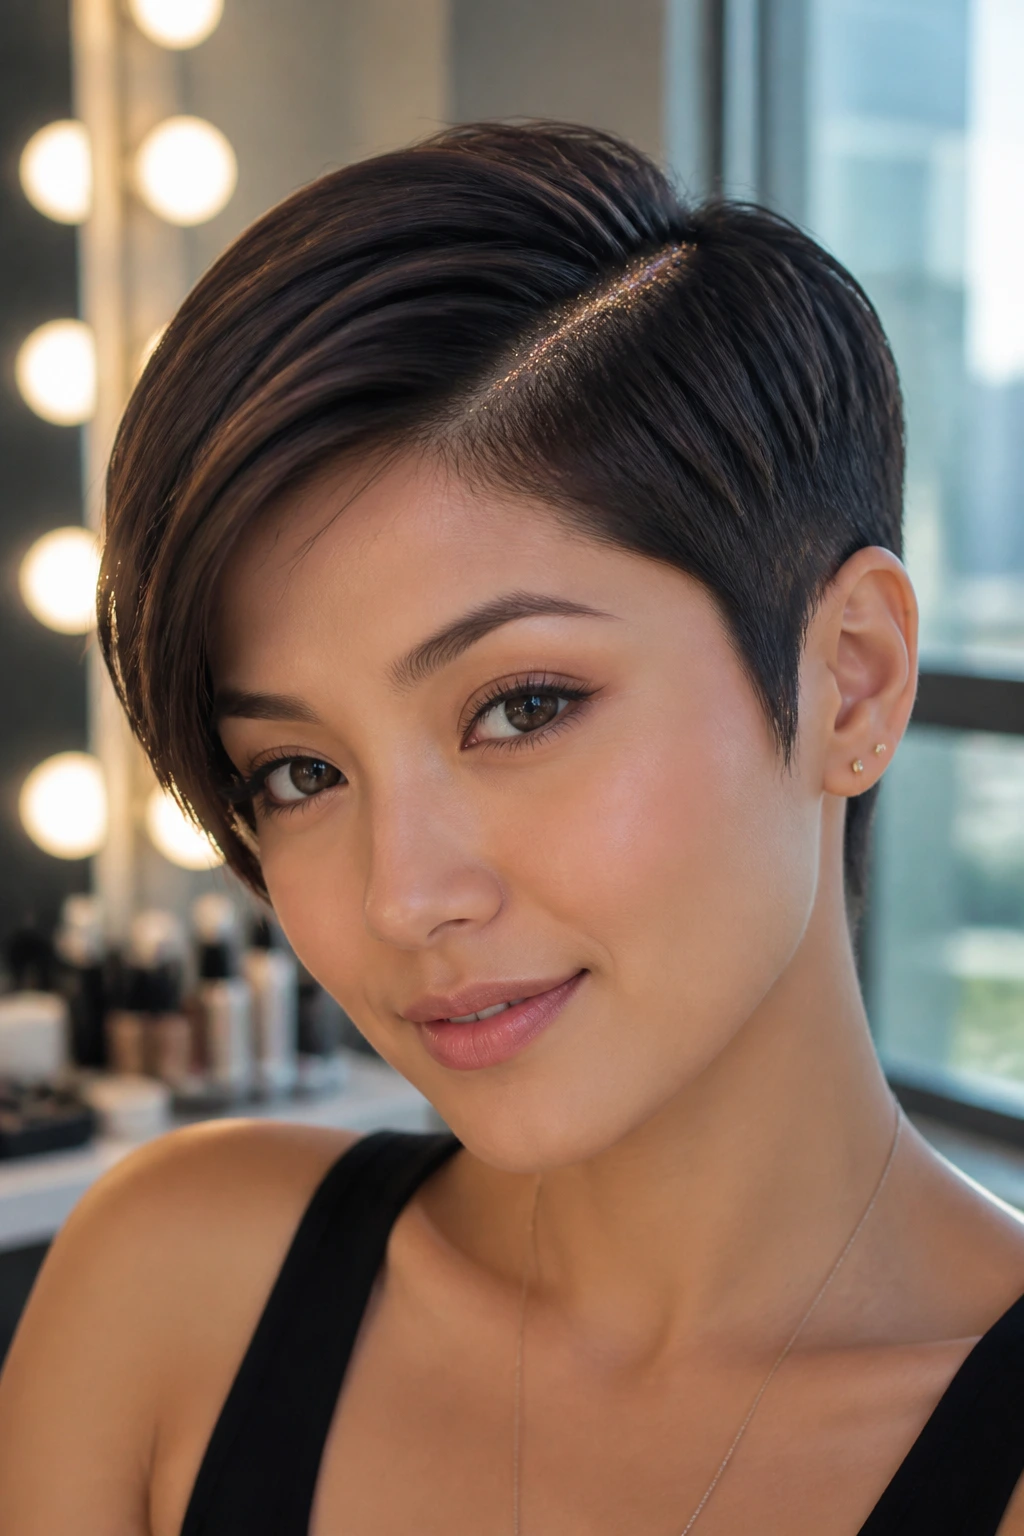
If you have a short pixie cut, you might think glitter roots are off-limits. In reality, a pixie cut offers the perfect canvas for a sophisticated, asymmetrical glitter application. A deep side-swept part highlighted with a fine, champagne-toned shimmer looks elegant and chic.
Styling Short, Sleek Strands
The challenge with short hair is keeping the glitter from migrating into the rest of your style. You want to maintain the clean, cropped shape of your haircut while adding a touch of festive detail along your parting line.
Quick Styling Steps
- Apply a small amount of styling pomade to your hands and sweep your pixie cut to one side.
- Use a comb to define a sharp, clean side part just above the temple.
- Paint a very thin, delicate line of fine champagne glitter gel along the parting.
- Mist the area with a firm-hold hairspray to lock the shimmer in place. Pro tip: Choose a champagne or soft platinum shade. These colors offer a softer, more subtle contrast than stark silver, making the look feel integrated and refined rather than harsh.
8. Bubble Ponytail Parting with Copper Foil Flakes
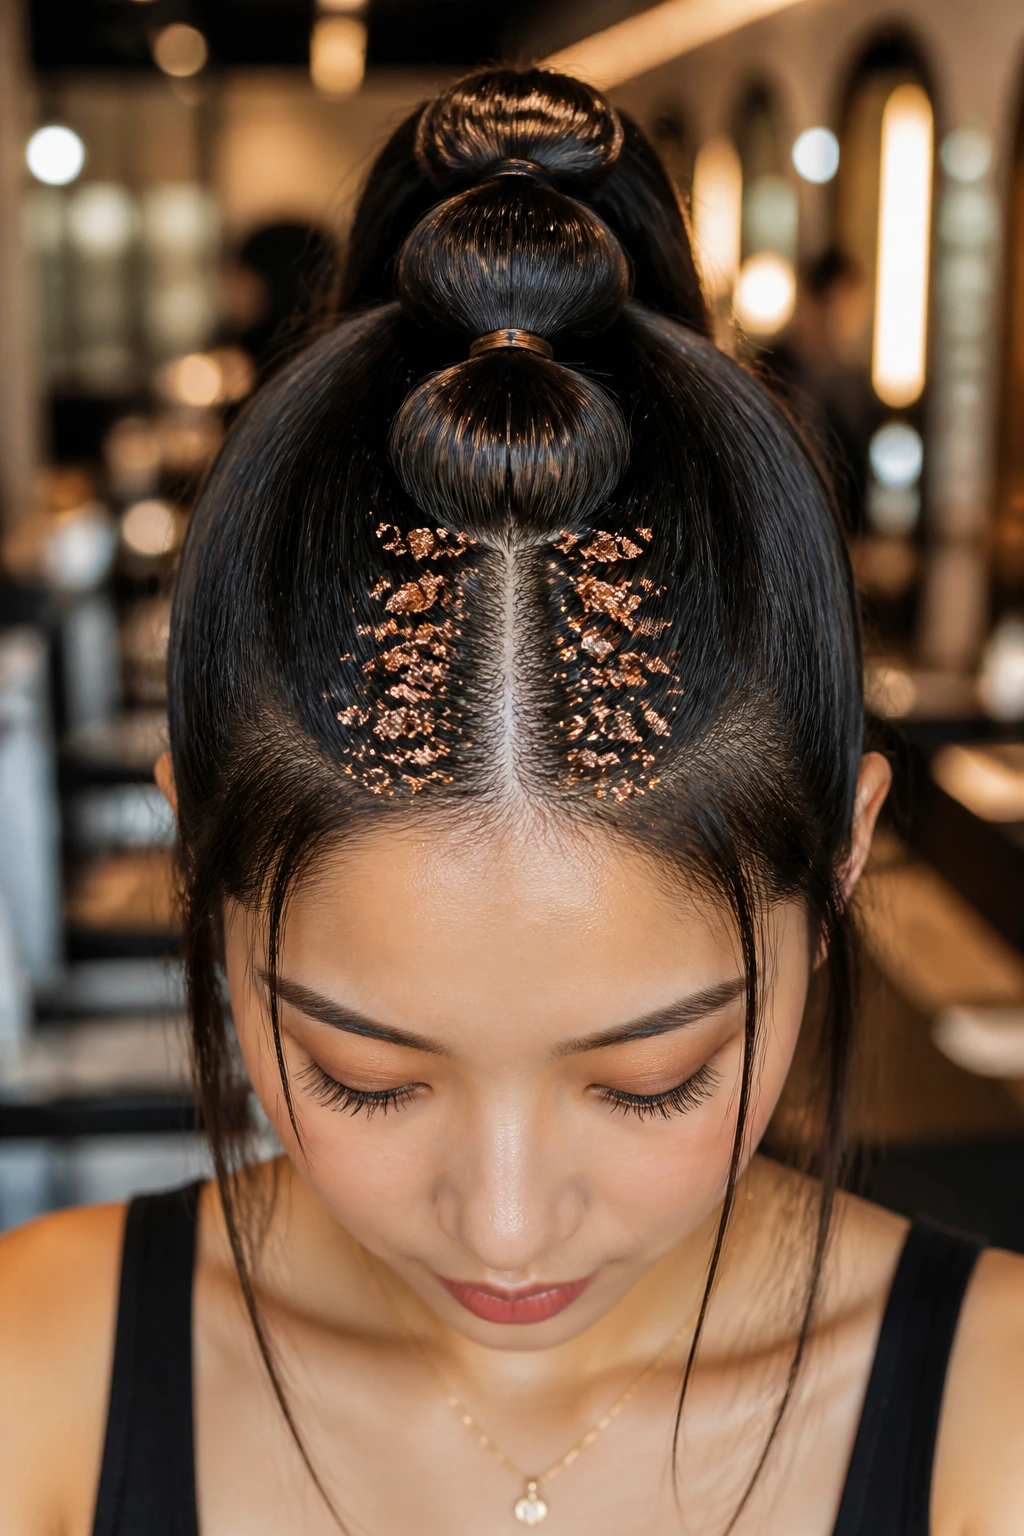
The bubble ponytail is a highly graphic hairstyle that looks fantastic on thick, long hair. By sectioning a high ponytail into multiple “bubbles” using clear elastics, you create a beautiful, segmented silhouette. Adding metallic copper foil flakes along your parting line brings a warm, organic texture to this highly structured look.
Unlike uniform glitter shapes, foil flakes are irregular and metallic. They catch the light with a molten, liquid-like shine that looks incredibly rich against dark hair. The warm, coppery orange tones contrast beautifully with the deep black of your strands, reminiscent of polished metal against dark stone.
To create this look, first slick your hair back into a high, secure ponytail. Once the ponytail is set, use clear elastics to section the length of the tail every few inches, pulling the hair outward between each elastic to create full, rounded bubbles. Once the styling is complete, mix your copper foil flakes into a high-shine clear gel and paint them onto your roots. Concentrate the flakes near your forehead and let them thin out as they move toward the base of your high ponytail.
9. Crown Braid Halo with Chunky Iridescent Hexagons
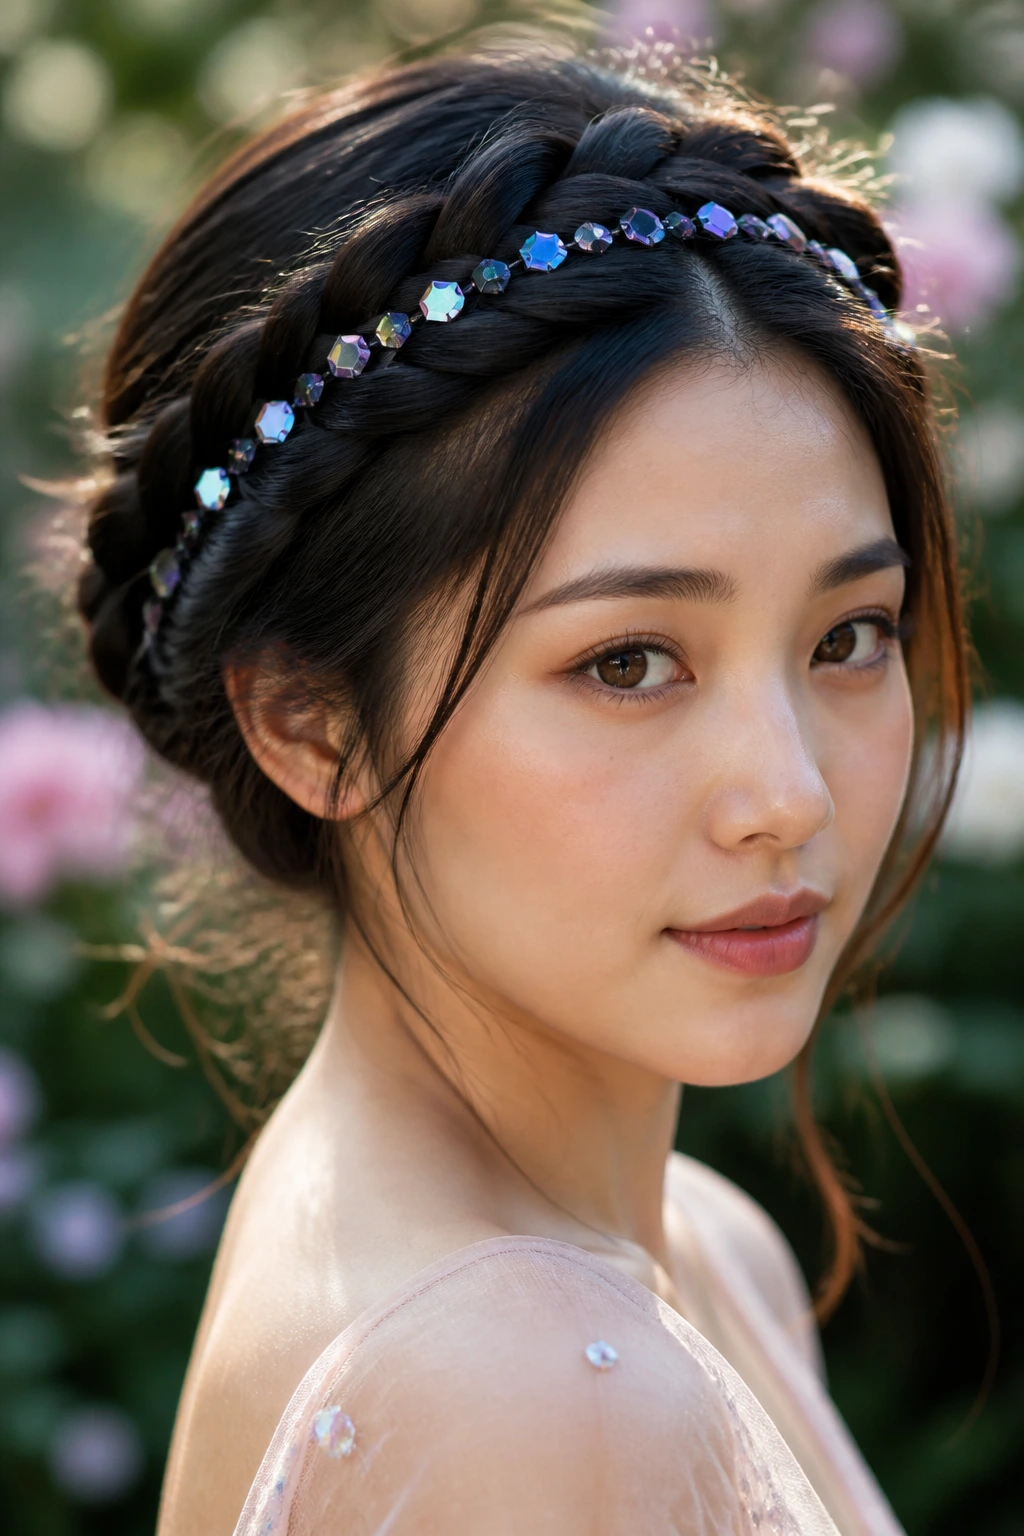
For a style that feels romantic and ethereal, a crown braid is unmatched. This look wraps your hair around your head like a halo, exposing the entire perimeter of your hairline. Placing chunky iridescent hexagons along the base of the braid creates a magical, glowing frame for your face.
The Magic of Iridescent Glitter
Iridescent glitter features a translucent base that shifts color depending on how the light hits it. Against dark hair, the translucent backing disappears, leaving only the glowing shifts of green, blue, and violet visible on the surface.
How to Style the Halo
- Part your hair down the center or slightly to the side.
- Create a Dutch braid starting from one ear, wrapping it around the front of your head, and securing it at the starting point.
- Gently pancake the braid by pulling lightly on the outer loops to add volume and thickness.
- Paint the iridescent glitter gel along the hairline just beneath the braid.
Why This Style Works So Well
Because the braid sits closely against the head, the glitter acts as a highlighting border. The chunky hexagons mimic small, sparkling jewels tucked into your hair, making this style perfect for outdoor gatherings or festive occasions.
10. Micro-Braid Accents with Turquoise Mermaid Glitter
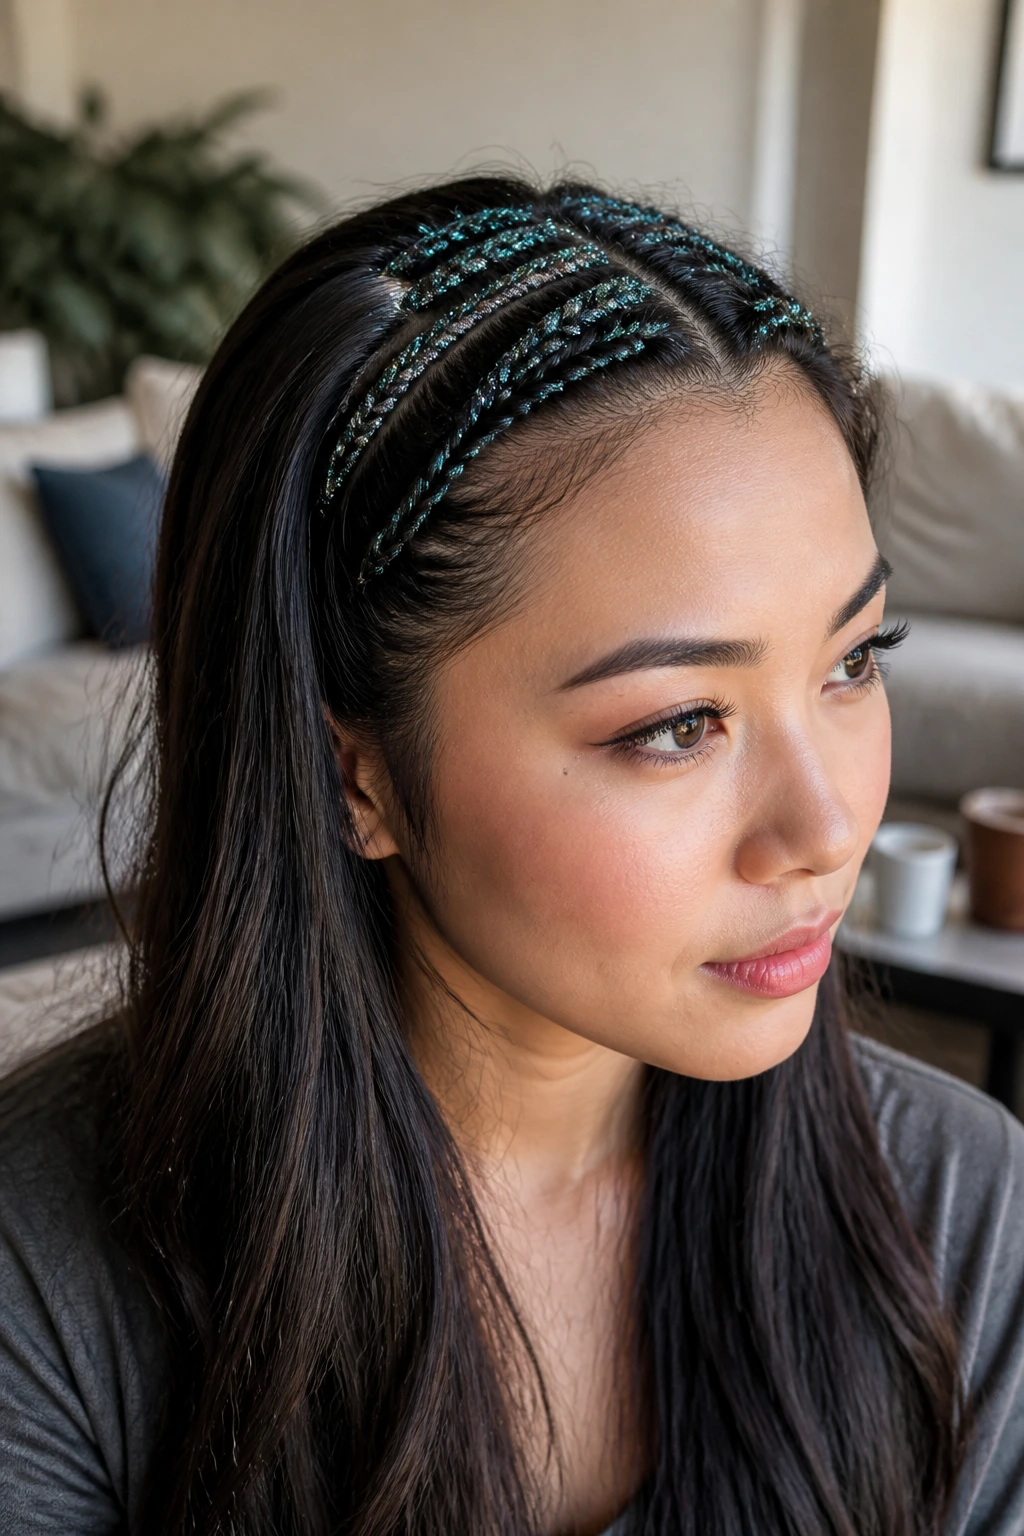
If you love leaving your hair down but still want the festive touch of glitter roots, micro-braids are the perfect compromise. By braiding a few tiny sections right along your part line, you create small, textured channels that are perfect for housing bright, colorful glitter.
The Mermaid Aesthetic
- Create a slightly off-center part in your natural hair.
- Braid two or three micro-braids right along the part line, securing them with tiny clear elastics.
- Mix a vibrant turquoise glitter with a clear, wet-look hair gel.
- Paint the turquoise mixture directly over the micro-braids, filling the gaps between the plaits. The turquoise pigment stands out brilliantly against dark hair, evoking a cool, ocean-inspired vibe. The braids help to anchor the glitter, keeping it contained to a specific, styled zone rather than letting it scatter randomly through your loose hair.
11. Messy High Bun with Scattered Lavender Flakes
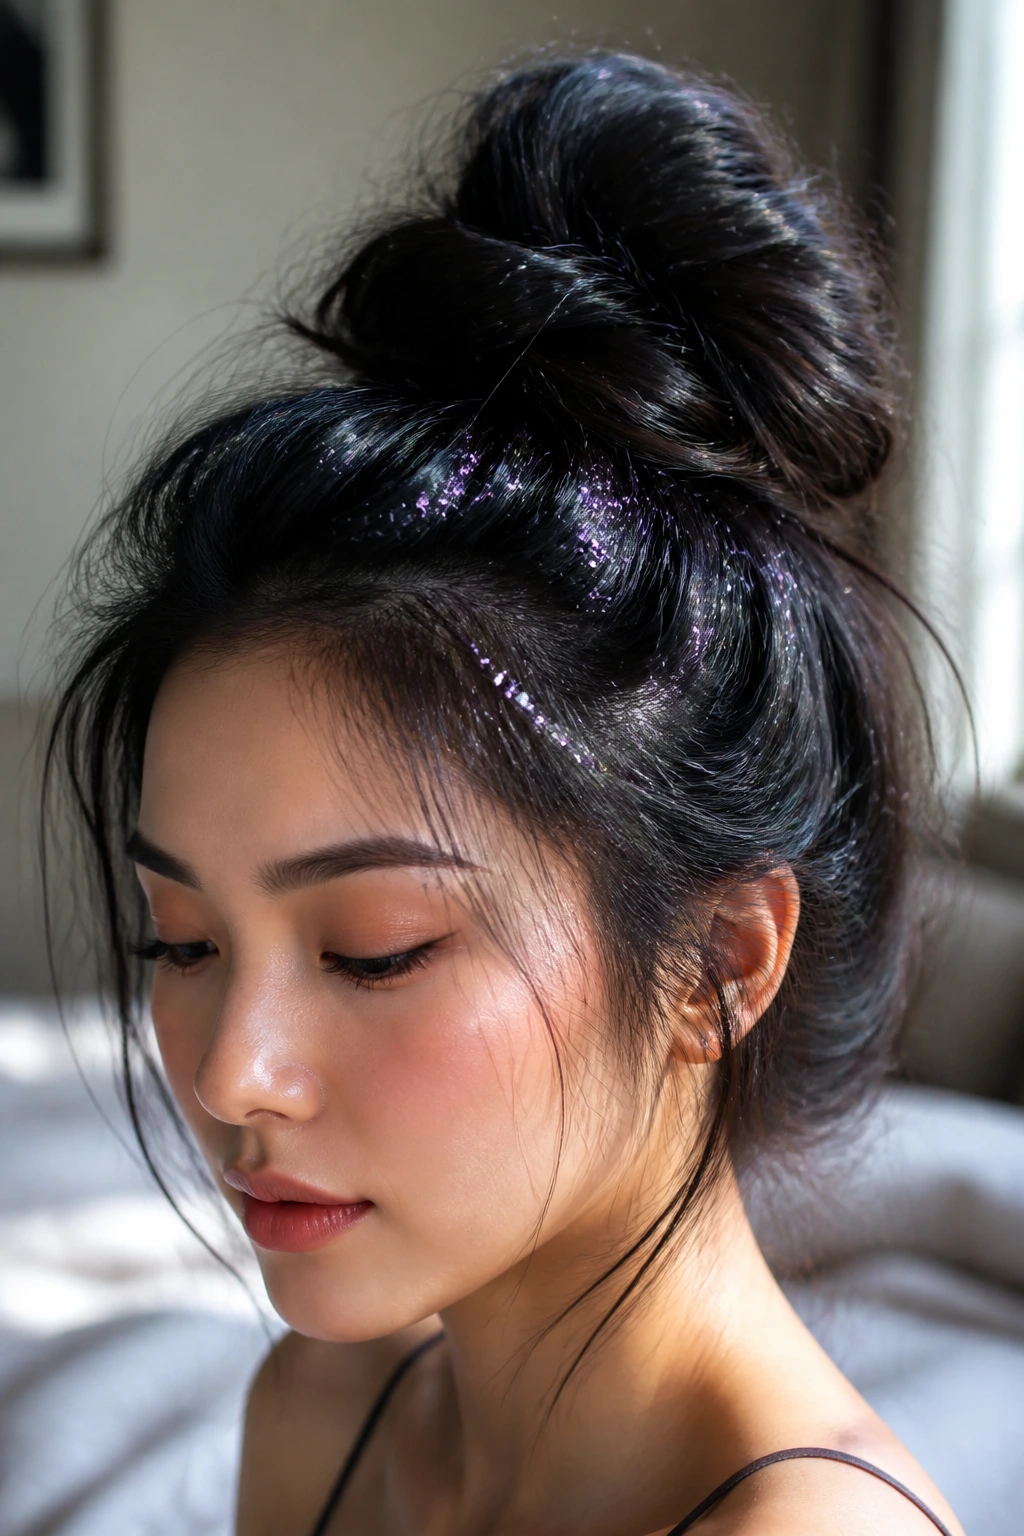
For a look that feels effortless and relaxed, a messy high bun is always a great choice. By intentionally keeping the texture soft and slightly undone, you can use scattered lavender glitter flakes to add a touch of playful color without making the style look too rigid or over-processed.
Lavender is a cool-toned, soft pastel that looks incredibly pretty against dark hair. It provides a gentle pop of color that is eye-catching without being overly aggressive. Because the hairstyle itself is casual, the glitter application should mimic that relaxed energy.
Instead of painting a solid, dense line of glitter, use a fluffy brush to sweep a light mist of lavender glitter gel along your roots. Let the glitter scatter naturally, with a few pieces sitting closer to your hairline and others drifting toward the base of the bun. This creates a soft, diffused effect that looks like you ran your fingers through a cloud of stardust before tossing your hair up.
12. Wet-Look Slicked Back Roots with Metallic Gunmetal Glitter
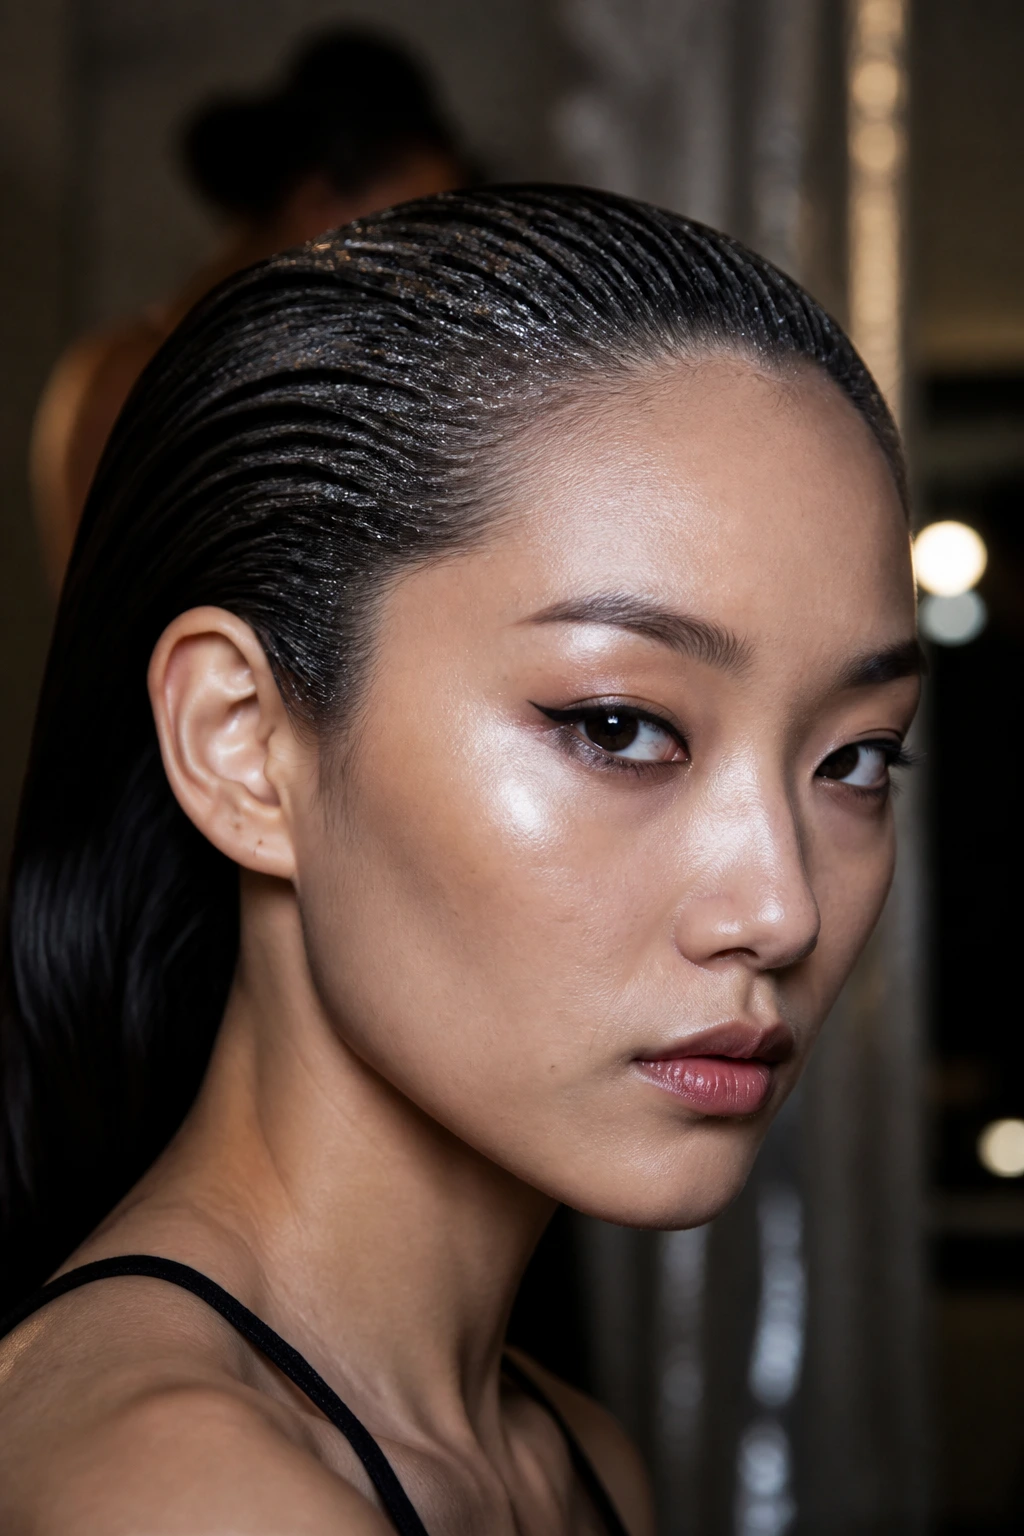
This style is perfect for those who appreciate high-fashion, editorial looks. By slicking all your hair straight back with a heavy-hold gel, you create a shiny, wet-look texture that looks incredibly striking. Adding metallic gunmetal glitter along the roots elevates this sleek aesthetic.
Gunmetal is a dark, smoky gray with a metallic finish. Because it is close in tone to natural dark hair, it creates a subtle, sophisticated shimmer rather than a high-contrast pop. It looks incredibly expensive and polished, making it a fantastic choice for evening events or parties where you want to make a stylish statement.
To achieve this, apply a generous amount of strong-hold clear gel from your hairline back to your crown. Use a fine-tooth comb to slick the hair flat against your scalp, ensuring there are no bumps or stray hairs. While the gel is still wet, press the gunmetal glitter directly into the top of your head, starting thick at the hairline and fading it out as it blends into the lengths of your hair.
13. Fishtail Pigtails with Pastel Pink Chunky Hearts
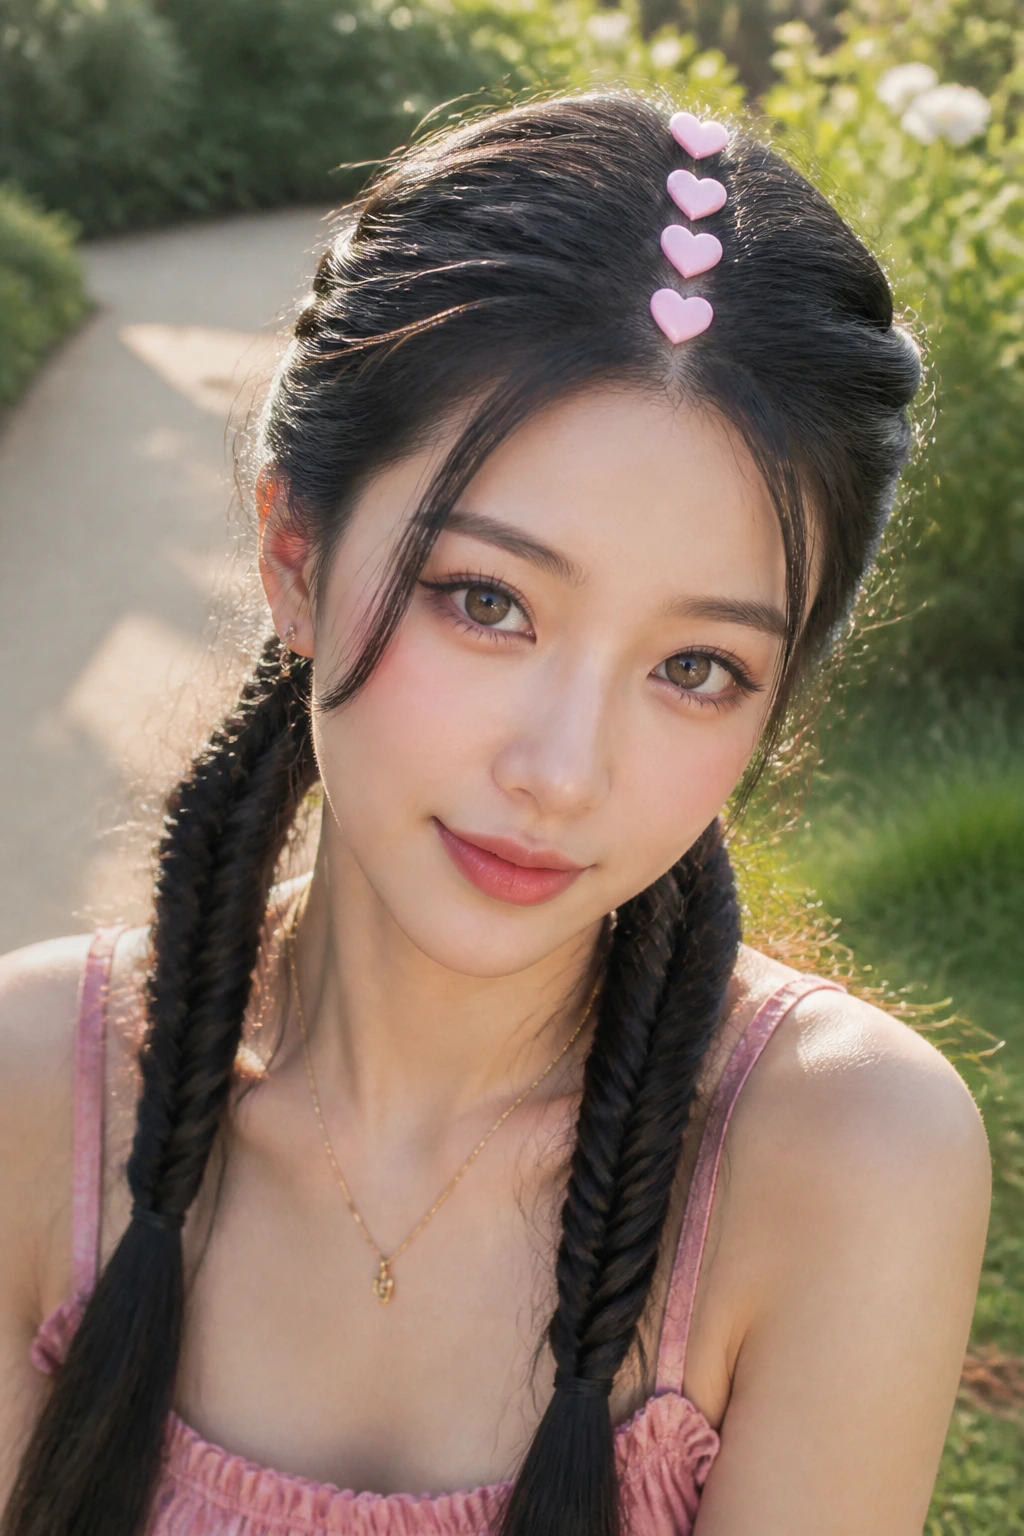
Fishtail braids offer a more intricate, textured look than standard three-strand braids. When styled into low pigtails, they frame your face beautifully. Pairing this detailed braiding style with pastel pink chunky hearts along your center part creates a sweet, playful look.
The Charm of Pastel Pink
Pastel pink is a high-contrast color against dark hair, making it immediately noticeable. The soft, powdery tone of the pink prevents it from looking too harsh, while the heart-shaped sequins add a fun, whimsical detail to the overall style.
Step-by-Step Styling
- Part your hair down the center from your forehead to the nape of your neck.
- Braid each side into a tight fishtail braid, pulling small sections from the outside to create the detailed pattern.
- Mix fine pink glitter gel and paint it along your center part.
- Use a damp fingertip or tweezers to press the chunky heart sequins along the part line. Pro tip: Space the hearts out slightly rather than overlapping them. This allows the individual heart shapes to remain distinct and recognizable against the dark background of your hair.
14. Half-Up Bow Hairstyle with Royal Blue Sparkles
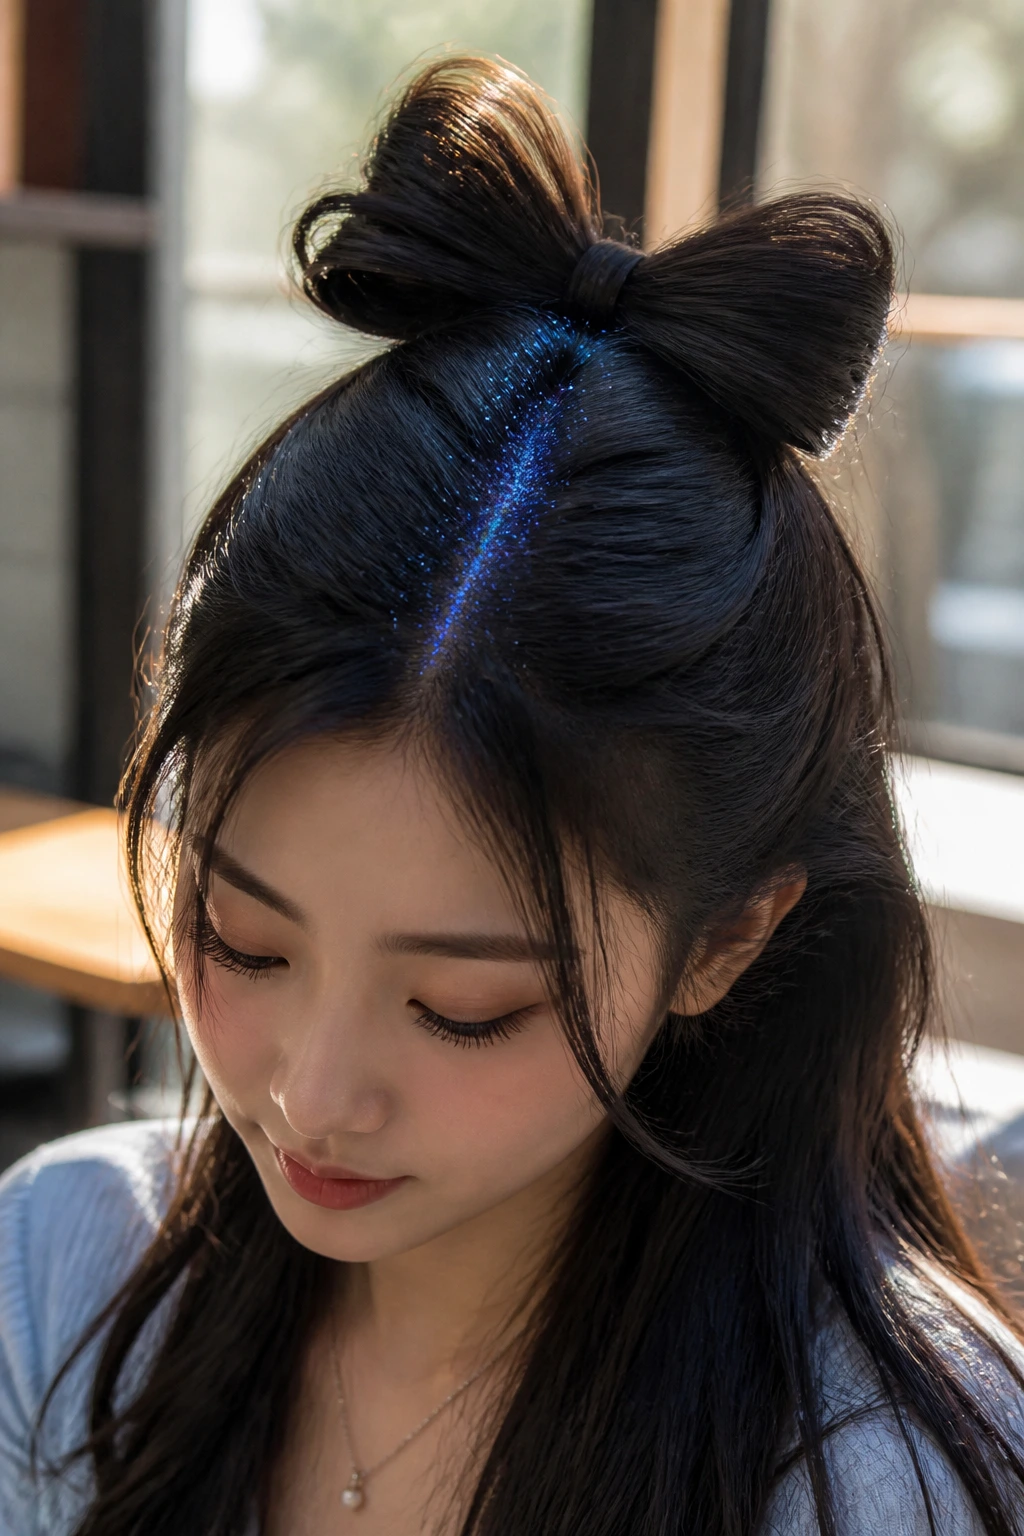
A half-up style featuring a hair bow made from your own strands is a beautiful, sculptural option. It looks incredibly detailed and impressive, yet it is surprisingly simple to execute with thick hair. Highlighting this unique shape with royal blue sparkles adds a rich, jewel-toned depth to the look.
Royal blue is a stunning color choice for dark hair. Because blue has a cool undertone, it blends harmoniously with black or dark brown hair while still offering a vibrant, electric pop of color when the light catches the metallic particles.
To create the bow, gather the top half of your hair into a loop at the back of your head. Split the loop in half to create the two sides of the bow, then wrap a small strand of hair over the center to create the knot, securing everything with bobby pins. Once the bow is secure, apply your royal blue glitter gel along your center part, leading directly to the base of your beautiful hair bow.
15. Deep Side Part Bob with Ultra-Fine Silver Shimmer
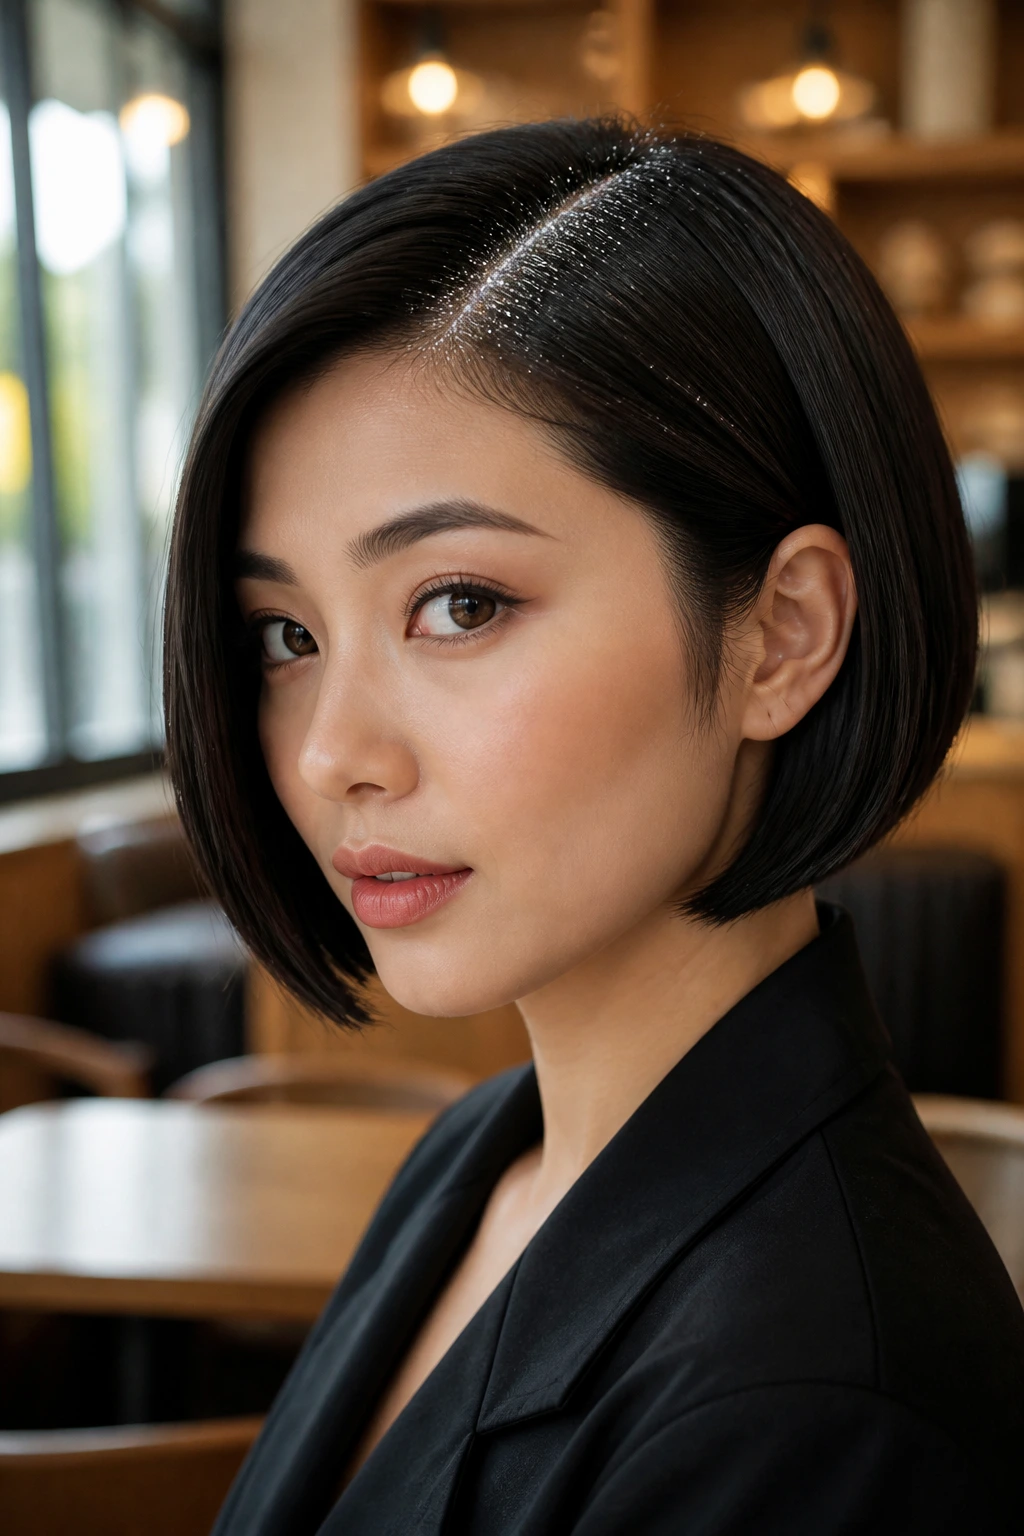
For those with a blunt, chin-length bob, a deep side part is a fantastic way to add drama and volume. It creates an asymmetrical silhouette that highlights your jawline. Accenting this deep part with an ultra-fine silver shimmer looks sleek, modern, and incredibly chic.
Because a bob is a very structured haircut, the glitter application should reflect that clean precision. Using ultra-fine shimmer rather than chunky glitter keeps the style looking sophisticated and prevents it from feeling too heavy or cluttered.
Start by creating a sharp side part directly above the arch of your eyebrow. Slick down the smaller side of the part behind your ear to emphasize the asymmetry. Using a small, flat brush, paint a very fine, precise line of silver shimmer gel right along the parting line. The result is a delicate, metallic accent that catches the light beautifully whenever you turn your head.
16. Cornrow Partings with Emerald Green Chunky Glitter
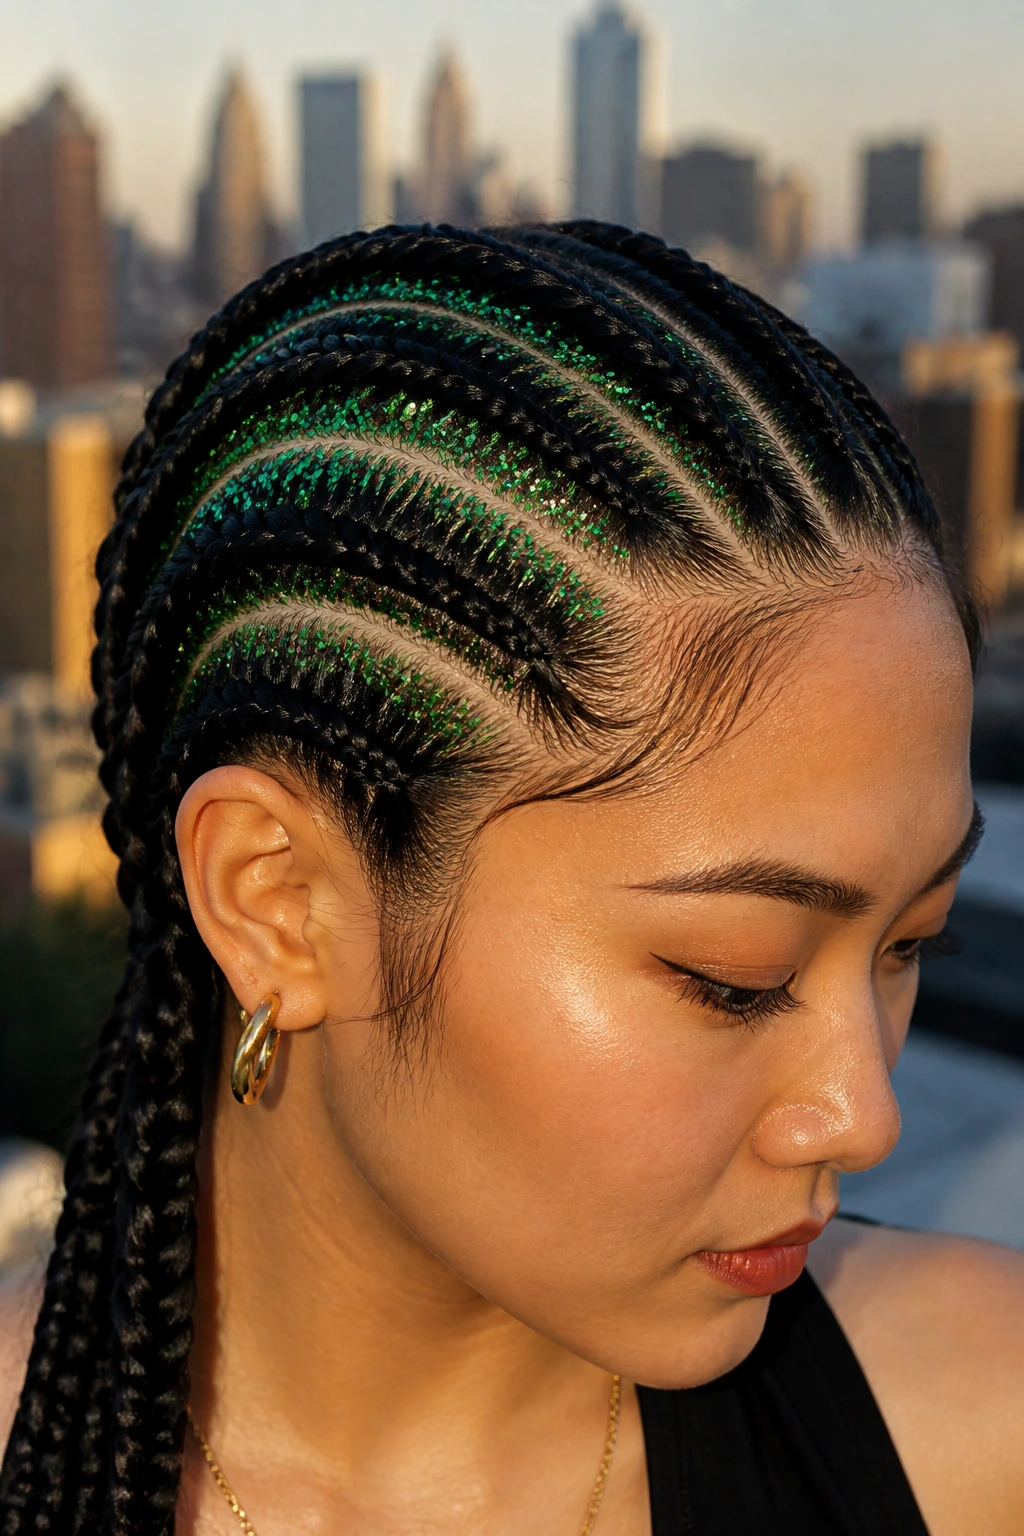
Cornrows are highly structured braids that run flat against the scalp, exposing clean channels of skin and hair roots. If you choose to style your hair into a few protective cornrows along the side of your head, filling those exposed parts with emerald green chunky glitter creates an incredibly bold look.
Emerald green is a rich, jewel-toned shade that looks exceptionally beautiful against dark hair. It offers a deep, mysterious pop of color that feels sophisticated and vibrant, reminiscent of lush foliage or precious gemstones.
Braid your cornrows tightly along the side of your head, keeping the lines clean and even. Once the braids are secured, mix your emerald green glitter with a strong-hold clear gel. Paint the glitter directly into the exposed parting lines between the braids, using the braids themselves as natural borders to keep the glitter application clean and precise.
17. Voluminous Shag with Scattered Gold Starbursts
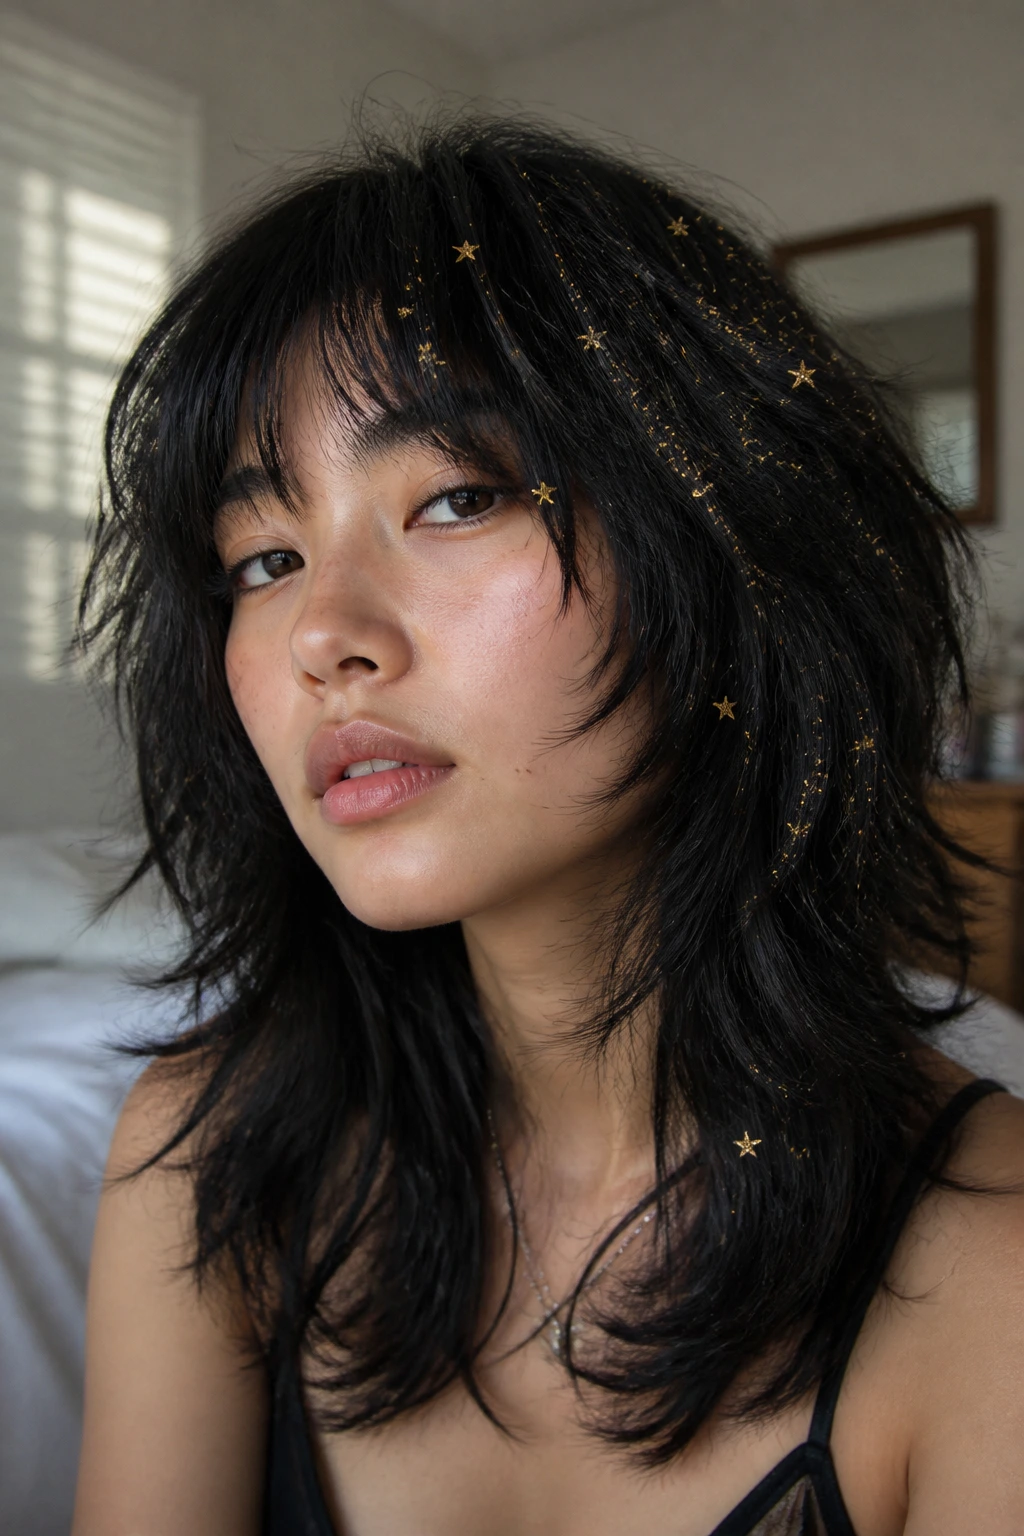
The shag haircut is all about texture, layers, and movement. If you have a shag with lots of choppy layers and a natural wave, you can use scattered gold starburst glitters to highlight the dynamic texture of your haircut.
Unlike sleek styles that require neat parting lines, a shag looks best when the glitter application feels organic and effortless. You want the glitter to look like it was scattered naturally through your layers rather than painted on in a straight line.
Apply a texturizing volume powder to your roots to lift the hair and create a messy, lived-in texture. Instead of painting a solid line of gel, apply small dabs of styling paste randomly around your crown and temples. Press the gold starburst glitters into these tacky spots, letting them sit at different heights and angles throughout your voluminous layers.
18. Braided Space Bun Mohawk with Holographic Unicorn Glitter
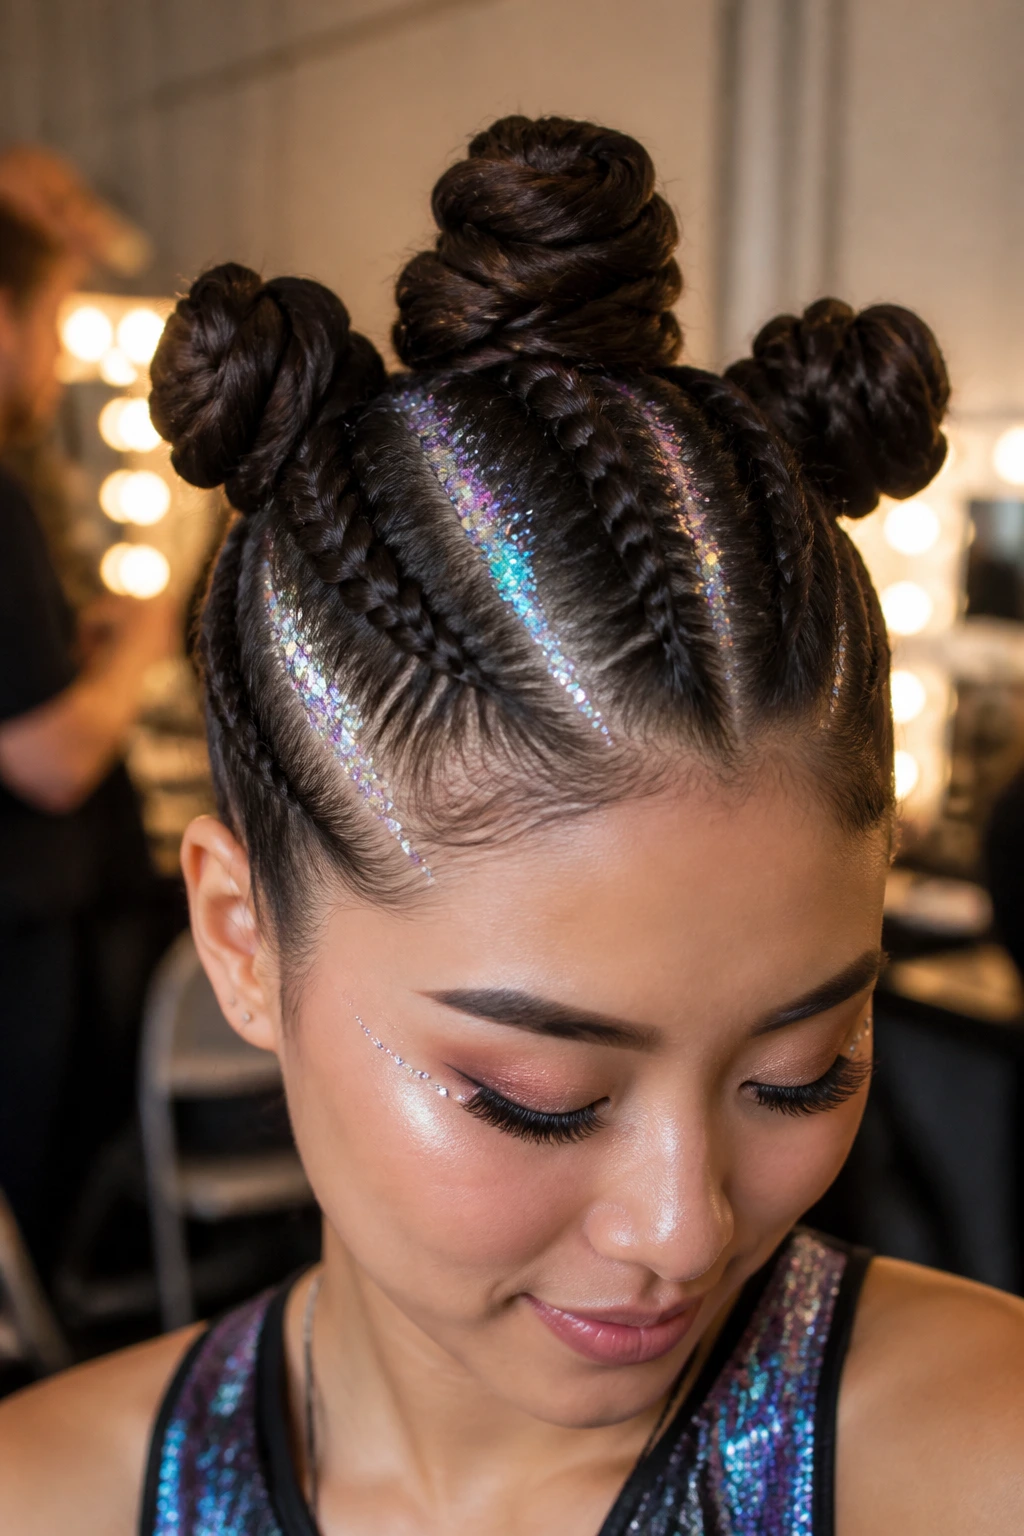
If you want a show-stopping hairstyle that combines multiple elements, this is the one. By creating three Dutch braids starting from your hairline and running back to your crown, you can twist the ends into three high space buns, creating a cool mohawk silhouette. Highlighting the parts with holographic unicorn glitter completes the fantasy look.
Holographic unicorn glitter features a mix of pastel pinks, purples, blues, and silvers that shift color constantly. Against the dark base of your hair, this multi-toned shift looks incredibly vibrant and magical, ensuring your hairstyle stands out from every angle.
Braid three even Dutch braids from your forehead to the crown of your head. Twist the ends of each braid into a tight, circular bun and secure with bobby pins. Apply your holographic glitter gel generously along the two parting lines that separate the three braids. This highlights the complex structure of the braids and creates a stunning, multi-dimensional crown of sparkle.
| Hairstyle | Best Glitter Type | Recommended Occasion | Hair Length Needed |
|---|---|---|---|
| Classic Space Buns | Chunky Silver Hexagons | Festivals / Concerts | Medium to Long |
| Dutch Braid Parting | Rose Gold Flecks | Evening Events / Parties | Medium to Long |
| Sleek Low Ponytail | Holographic Gold Dust | Modern Sophisticated | Any Length |
| Double Half-Up Knots | Chunky Star Sequins | Casual Festivals | Short to Medium (Lob) |
| Zig-Zag Part | Mixed Multi-Colored | Fun Theme Parties | Medium to Long |
| High Pigtails | Neon UV-Reactive | Nightclubs / Rave Events | Medium to Long |
| Pixie Cut Side Part | Fine Champagne Shimmer | Chic Cocktail Parties | Very Short (Pixie) |
| Bubble Ponytail | Copper Foil Flakes | High-Fashion / Editorial | Long |
| Crown Braid Halo | Chunky Iridescent | Outdoor / Romantic Events | Long |
| Micro-Braid Accents | Turquoise Mermaid | Beach / Summer Events | Medium to Long |
| Messy High Bun | Scattered Lavender Flakes | Casual / Playful Outings | Medium to Long |
| Slicked Back Roots | Metallic Gunmetal | High-Fashion Evening | Short to Medium |
| Fishtail Pigtails | Pastel Pink Hearts | Whimsical / Playful | Medium to Long |
| Half-Up Bow Style | Royal Blue Sparkles | Creative Parties | Medium to Long |
| Deep Side Part Bob | Ultra-Fine Silver | Sleek Modern Outings | Short (Bob) |
| Cornrow Partings | Emerald Green Chunky | Bold Protective Style | Any Length |
| Voluminous Shag | Scattered Gold Stars | Grungy / Textured Events | Short to Medium |
| Braided Mohawk Buns | Holographic Unicorn | Ultimate Show-Stopping | Medium to Long |
How to Wash Glitter Out of Low-Porosity Hair
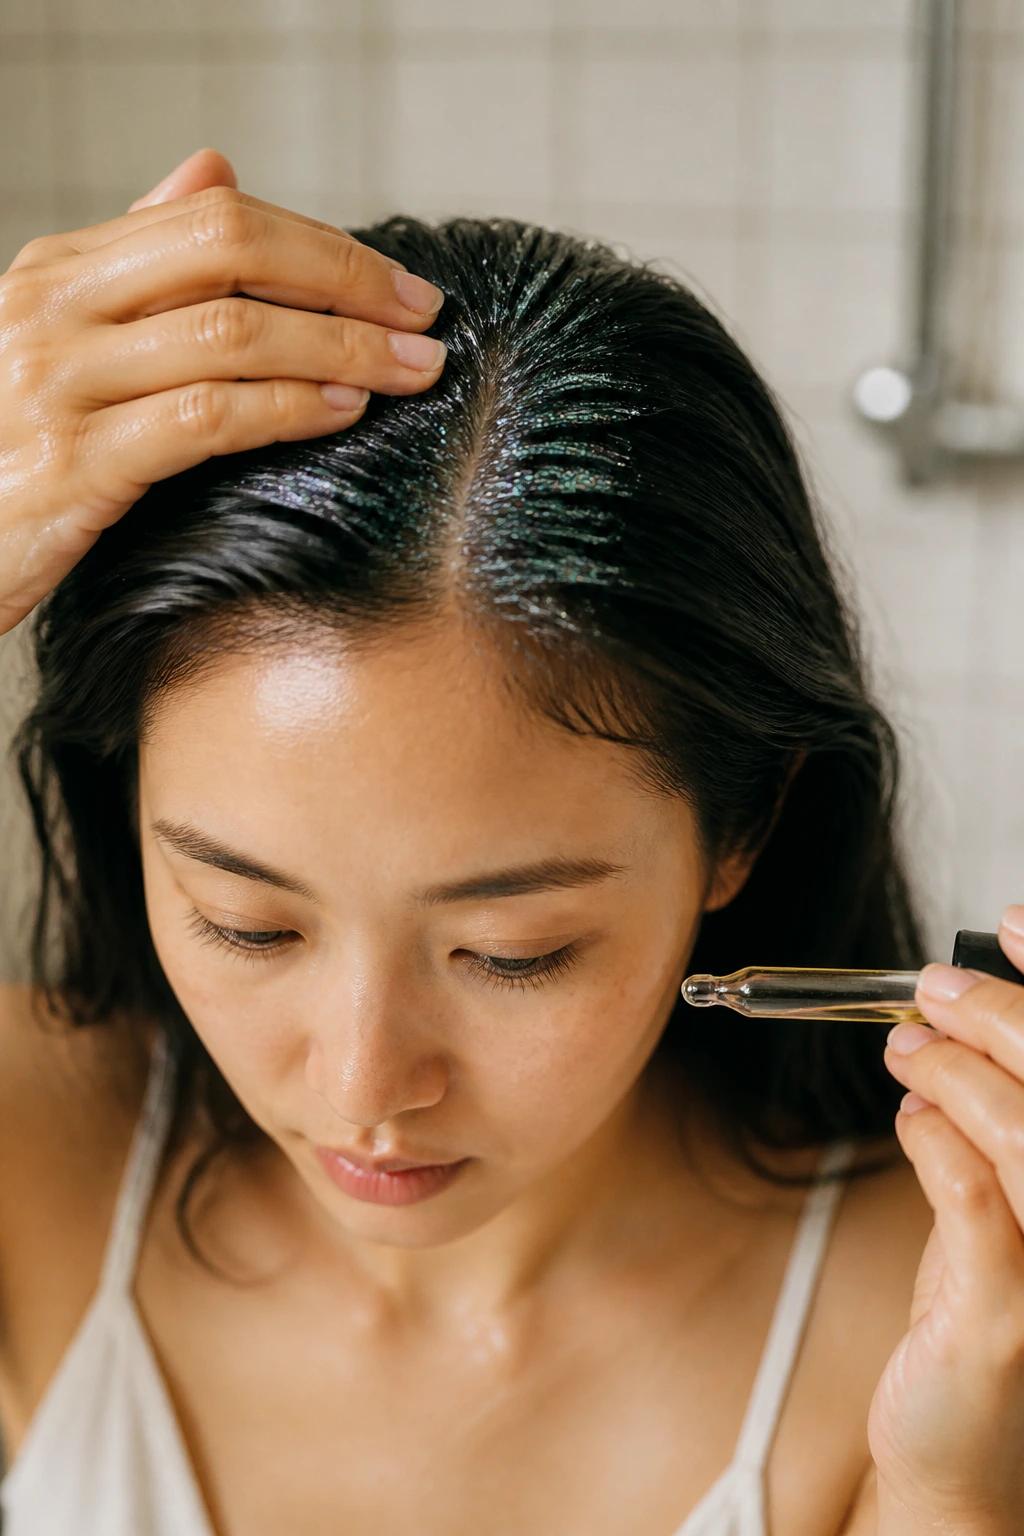
Applying glitter is an absolute joy, but removing it can feel like a daunting task, especially if you have low-porosity Asian hair. Because the hair cuticle is tightly sealed, heavy styling gels and fine glitter particles can cling to the hair shaft like cement, making them difficult to wash out with standard shampoo alone.
The worst thing you can do is go straight into the shower and start scrubbing with water. Water will cause the styling gel to dissolve, but it will also wash the glitter down your face and neck, causing it to stick to your skin and migrate into your eyes. Instead, you need a smart, dry-removal strategy.
Before you turn on the faucet, apply a generous amount of a natural oil—such as coconut oil, olive oil, or a silicone-heavy hair serum—directly over the glitter-coated areas. Oil works beautifully to break down the styling gel and coat the glitter particles, making them slippery. Use your fingertips to gently massage the oil into your roots, loosening the glitter from your hair shafts. Once the glitter is thoroughly saturated with oil, use a fine-tooth comb to gently sweep through the roots, lifting the glitter away and wiping it onto a paper towel.
After you have combed out the majority of the glitter, head to the shower. Apply a clarifying shampoo directly to your dry or slightly damp scalp before rinsing. Massage the shampoo thoroughly to emulsify the remaining oil and styling gel, then rinse with warm water. Follow with a deep conditioning treatment to restore moisture to your scalp and hair, leaving your strands squeaky clean, soft, and completely glitter-free.
Protecting Your Scalp From Glitter Irritation
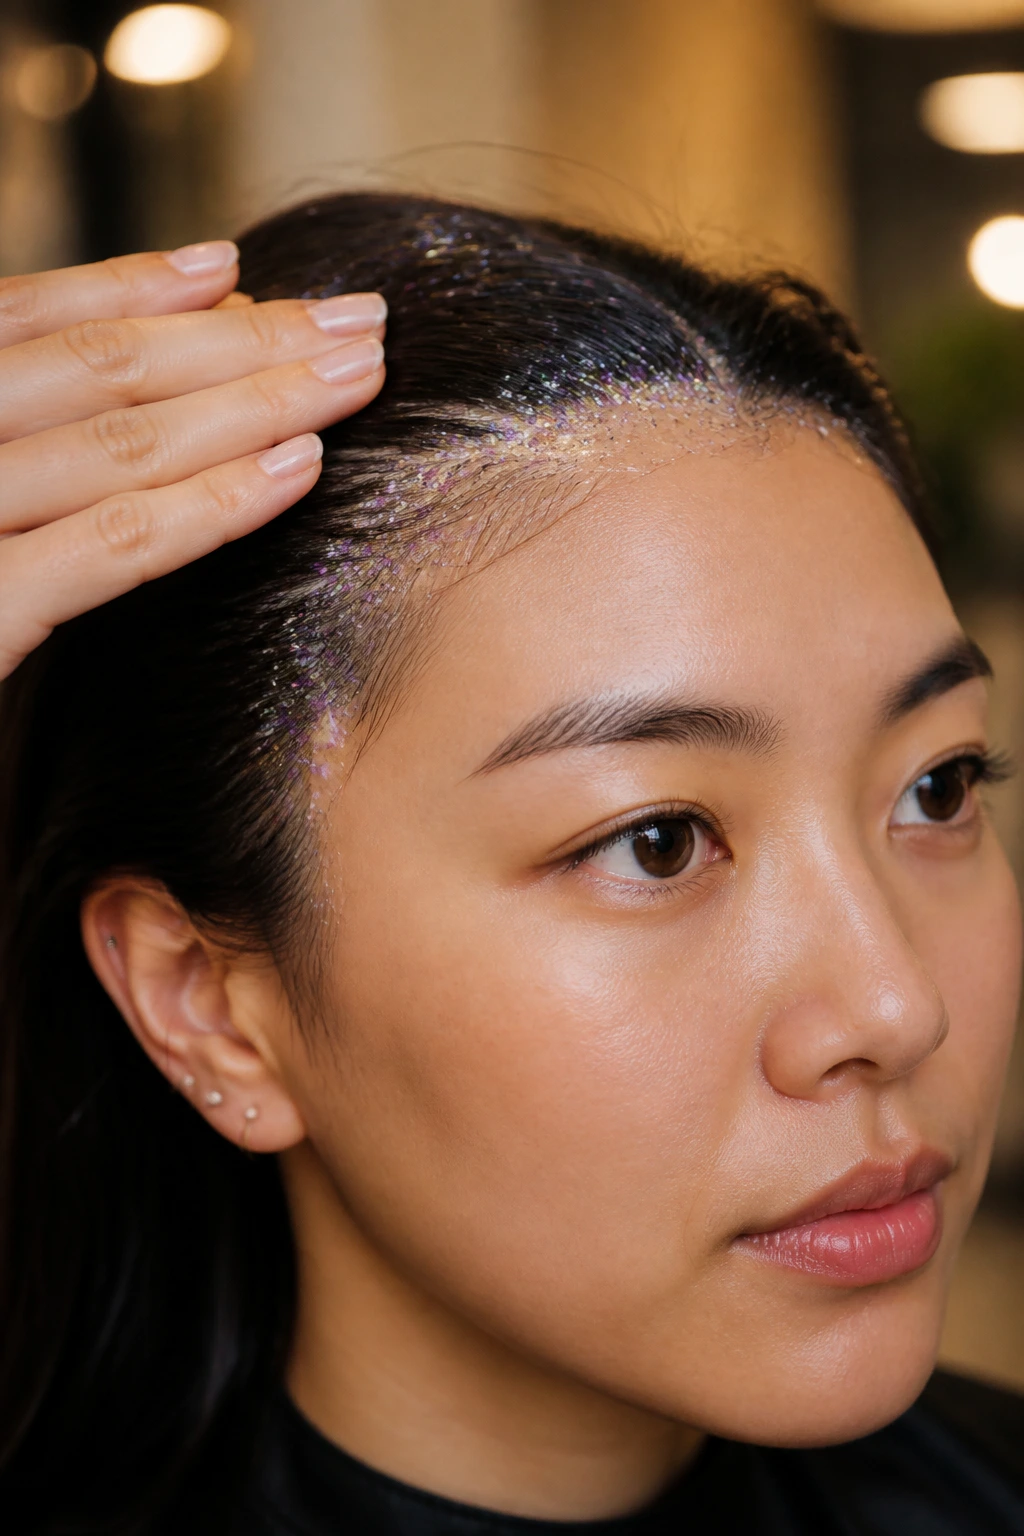
While glitter roots look incredibly beautiful, scalp health should always be a priority. The skin on your scalp is sensitive, and applying heavy styling products and metallic particles can sometimes cause irritation, itching, or redness if proper precautions are not taken.
First and foremost, always use cosmetic-grade glitter. Never use craft glitter from an art supply store. Craft glitter is made from metallic plastic that is cut with sharp, jagged edges that can micro-cut your scalp and cause severe irritation. Cosmetic glitter, on the other hand, is rounded and designed specifically to be safe for skin contact.
Additionally, always create a barrier between the glitter and your skin. Never apply loose glitter directly to a dry scalp. By mixing the glitter into a soothing gel—such as pure aloe vera gel or a hair gel formulated for sensitive skin—you create a protective layer that cushions your scalp from the metallic particles. If you have an extremely sensitive scalp, do a patch test with your chosen gel and glitter mixture on the inside of your elbow before applying it to your head.
The Bottom Line
Glitter roots are a beautiful, high-impact way to celebrate the natural depth and thickness of Asian hair. By understanding the unique structural properties of your hair and pairing them with clean parting techniques, strong-hold adhesives, and beautiful color choices, you can create a wide variety of stunning looks that are perfect for any occasion.
Remember to have fun with your styling choices, experiment with different colors and shapes, and always prioritize your hair and scalp health by using cosmetic-grade products and removing them with care. With these techniques, you can rock your glitter roots with complete confidence.
