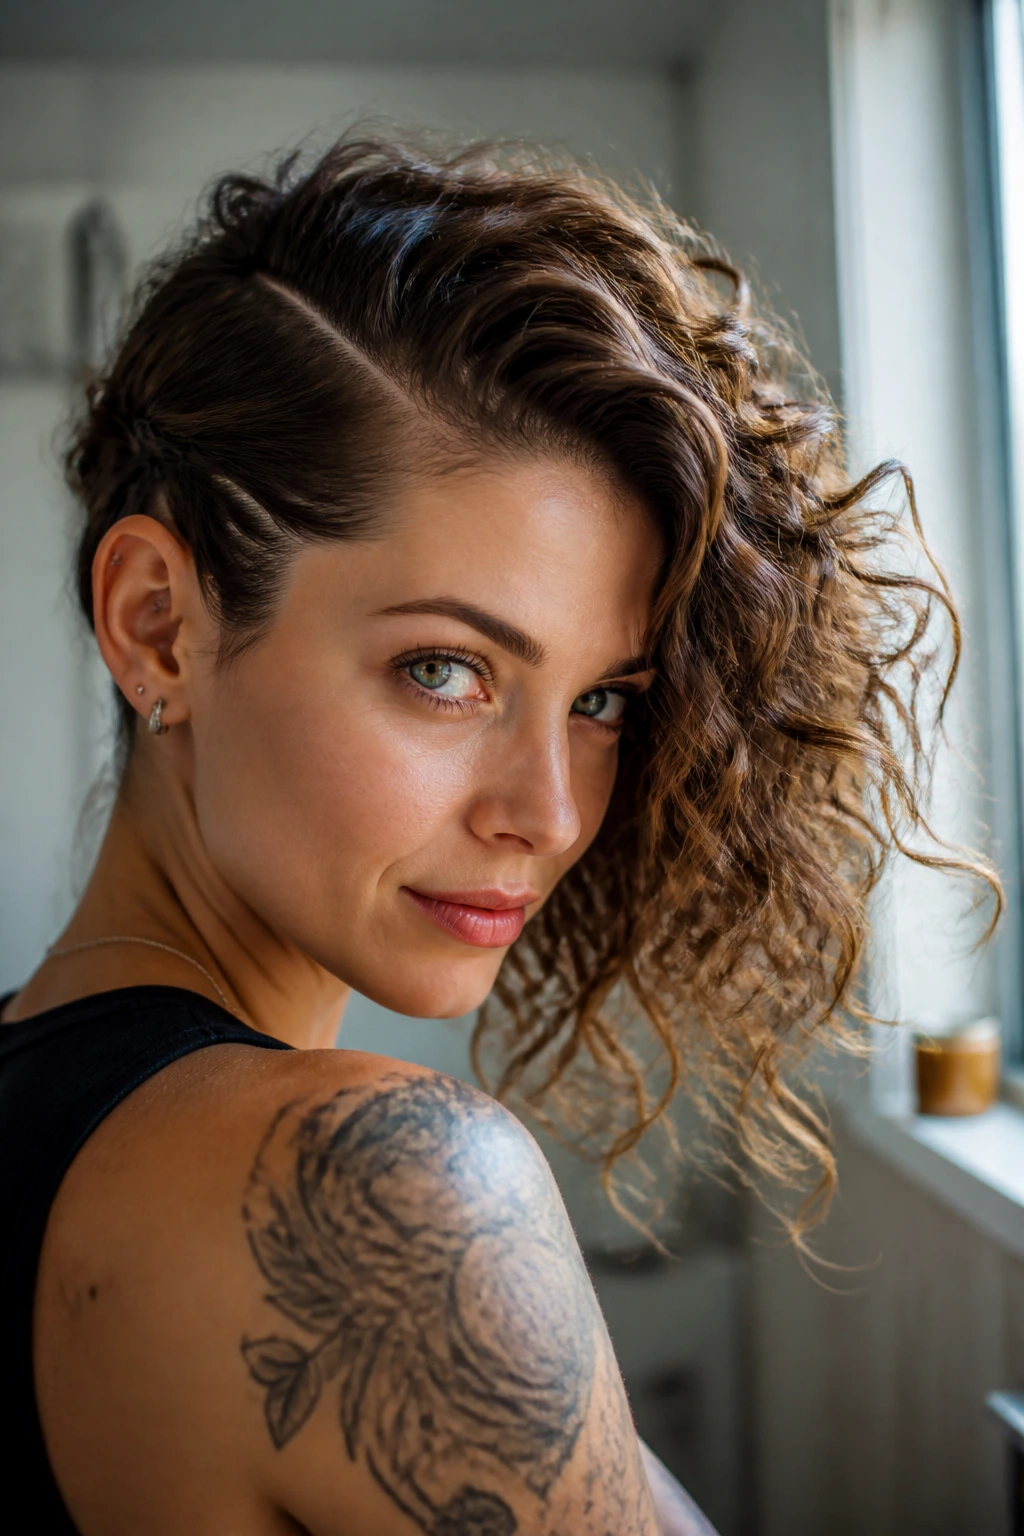
If you have naturally wavy hair, you have likely spent your life caught between two worlds—too textured to be straight, but perhaps not quite “curly” enough to fit into the standard definitions of ringlet-heavy styles. This middle ground is actually a superpower, especially when you are looking to experiment with bolder, structural shapes like the mohawk. A mohawk on wavy hair isn’t just a look; it is an architectural decision that plays to your texture’s natural volume rather than fighting against it.
You don’t need the tightest coils to pull off a striking, edgy, or even sophisticated mohawk. Because wavy hair has a certain softness and a tendency to expand when cut or styled properly, it can build a mohawk that feels sculptural, voluminous, and inherently more organic than the stiff, spiked versions seen on straight hair. Whether you are aiming for a classic punk silhouette or a soft, romantic interpretation of the style, the secret lies in knowing how to leverage your natural wave pattern. Let’s break down twenty distinct ways to bring this look to life.
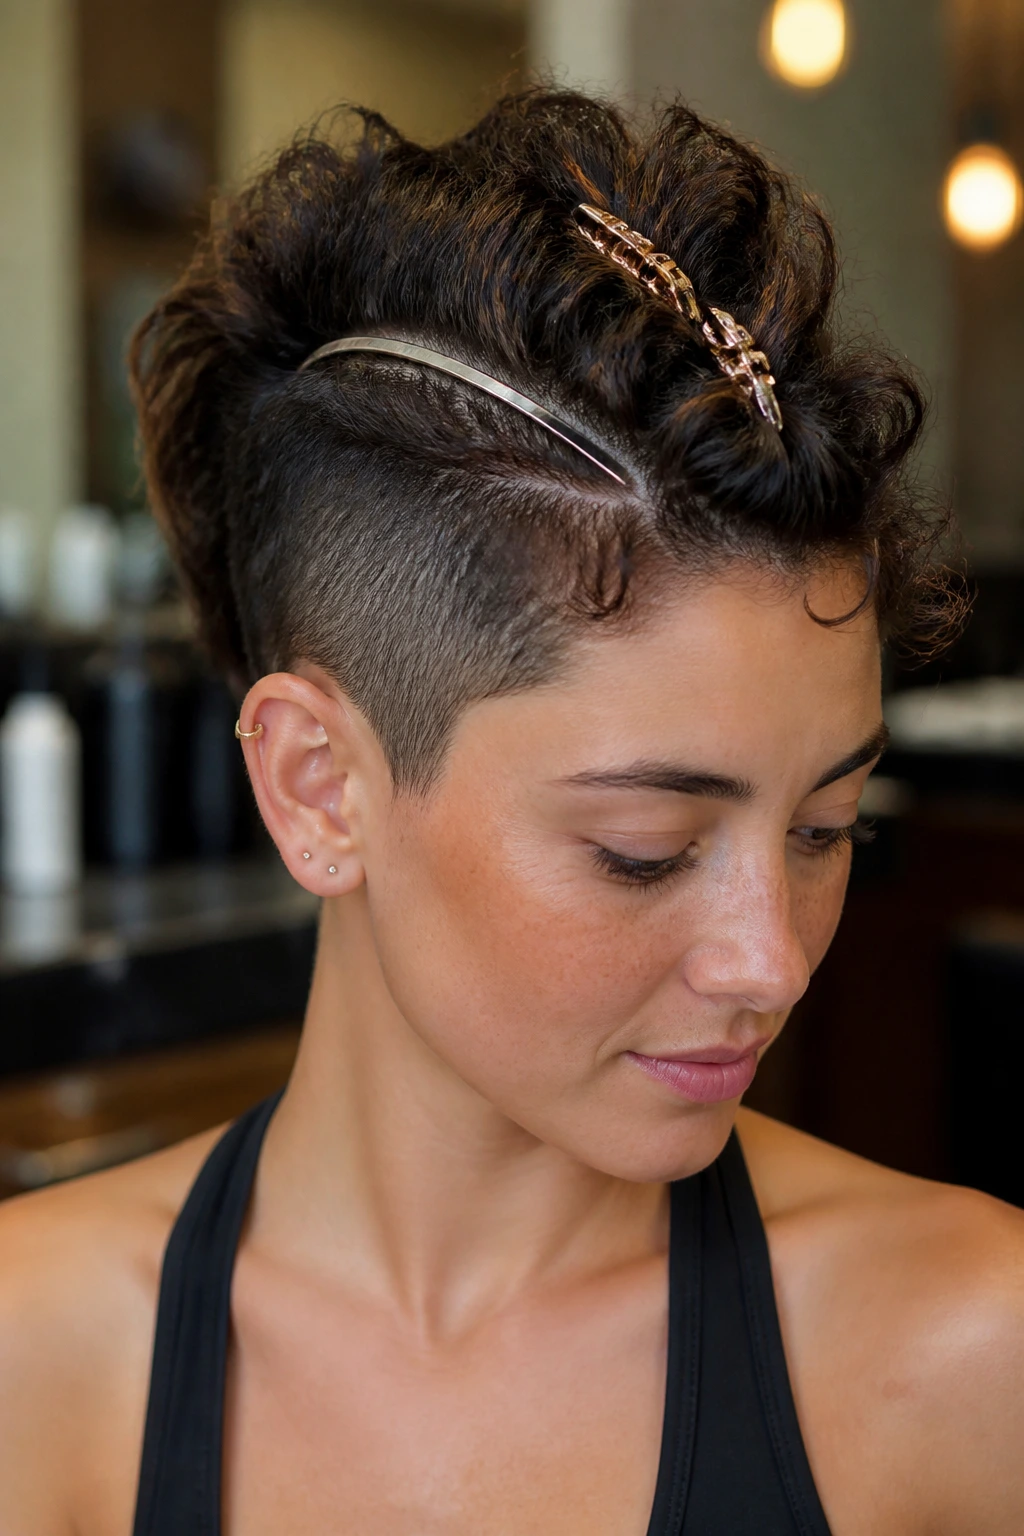
1. The Soft Undercut Shag Mohawk

This style is for the person who wants the edge of a mohawk without the severity of a full shave. By keeping the hair on the sides relatively short but not buzzed down to the skin, you maintain a frame for your face that feels grounded and approachable. The key here is the “shag” aspect, which involves layering the hair in the center section to encourage more movement and wave.
Why It Works for Wavy Textures
Wavy hair often loses its definition when it gets too long, but by pulling the weight up into the center and keeping the sides shorter, you allow the waves to bounce freely.
- Use a salt spray on damp hair to boost the natural texture.
- Focus on layering the center section at different lengths to create a messy, lived-in feel.
- Ask your stylist for a tapered fade rather than a harsh line to keep the transition soft.
2. The Sleek Side-Slicked Faux Hawk
If you aren’t ready for the commitment of clippers, this is your entry point. This style relies on the power of product and bobby pins to create the illusion of a mohawk. You gather the hair on one or both sides of your head and pull it tight against the scalp, securing it with pins or braids, while letting the top section run wild.
Mastering the Hold
The trick to making this look authentic is ensuring your sides are as flat as possible.
- Use a firm-hold styling gel or a strong-hold pomade to slick down the sides.
- Let the top section air dry with a curl-defining cream to ensure the waves are distinct.
- Secure the center section with invisible hair ties or small, strategic pins if you need extra height.
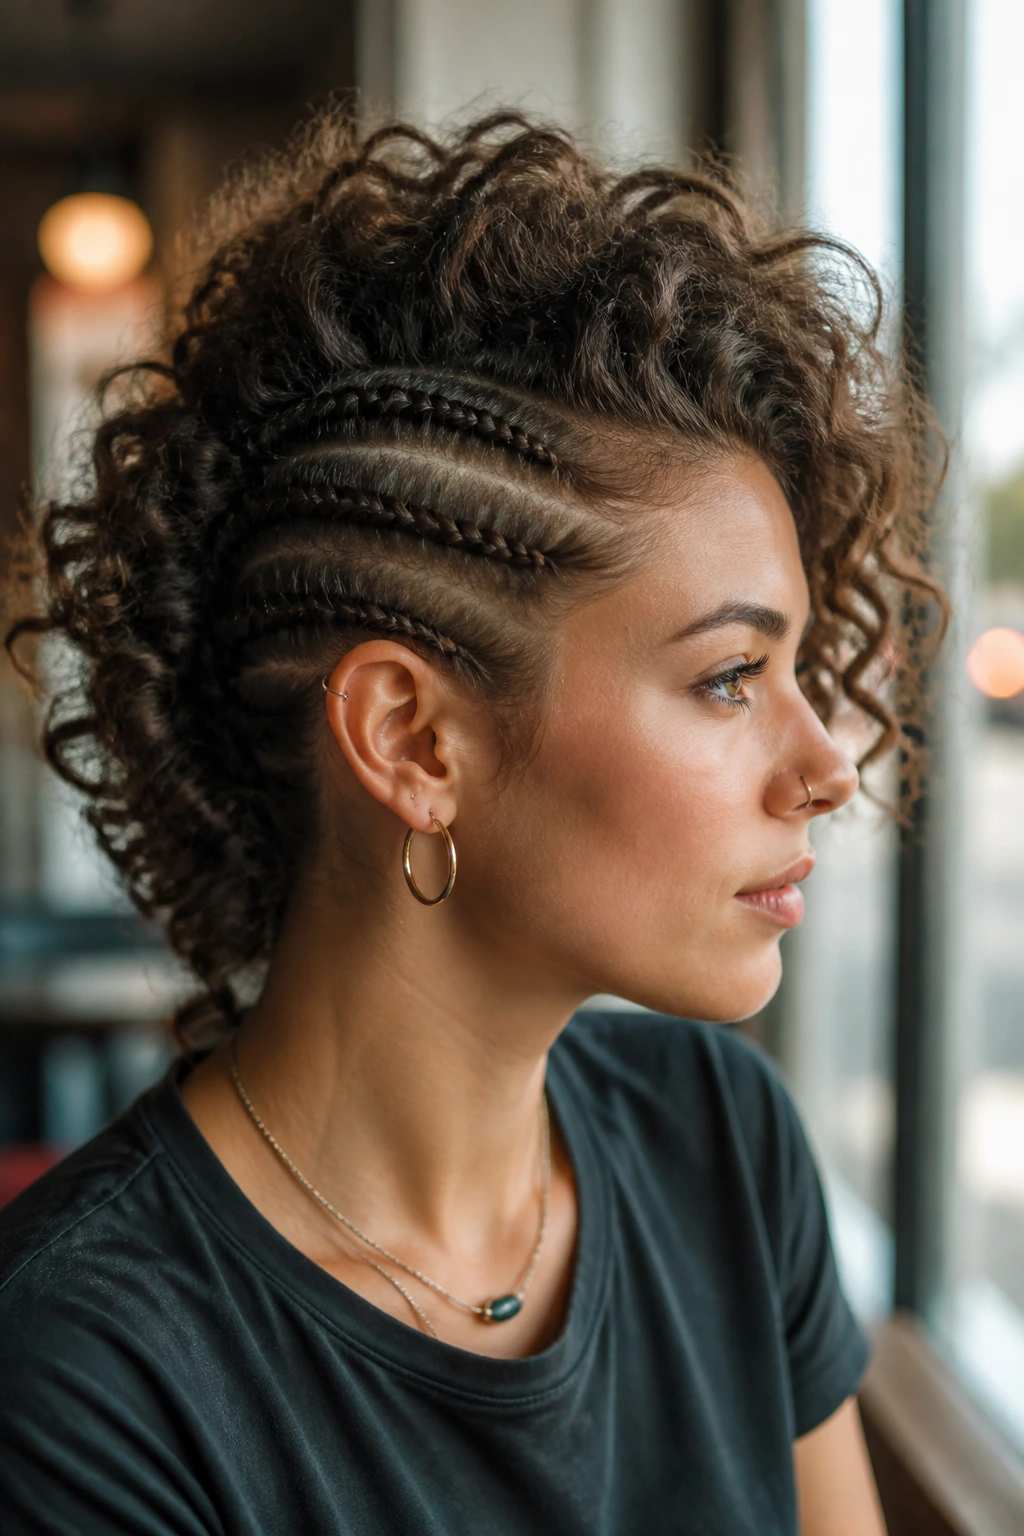
3. The Braided Side-Panel Mohawk
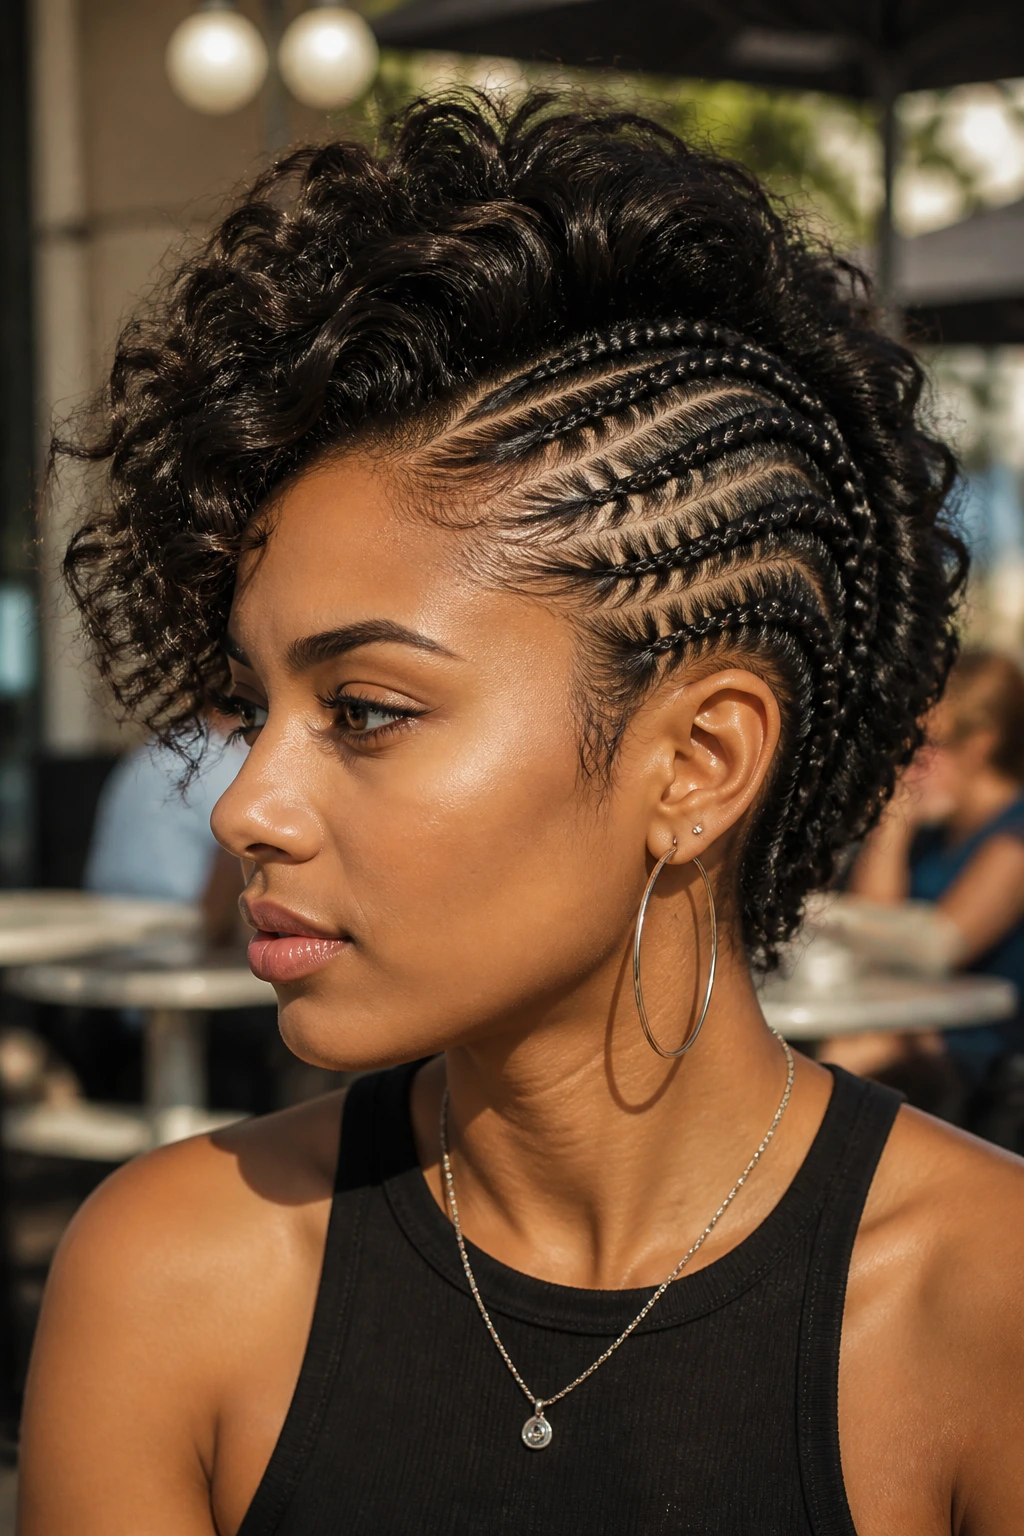
Braiding the sides of your head toward the center creates a clean, intricate contrast against the loose, wavy texture on top. This is a brilliant way to manage unruly hair on the sides while keeping the focus on your crown. It looks like a high-maintenance style, but once you master the cornrow or Dutch braid technique, it becomes quite efficient.
Tips for Success
- Apply a light-hold pomade to the sides before braiding to minimize frizz and flyaways.
- Keep the braids tight to the scalp to emphasize the height of the central wavy section.
- If your hair is too thin to create a lot of volume on top, use a texturizing powder at the roots of the central section to give it a boost.
4. The Curly-Wave Pompadour Mohawk
This variation takes the classic rockabilly pompadour and stretches it into a mohawk shape. It is incredibly dramatic and works exceptionally well for formal events or nights out. The front section is lifted high and rolled back, transitioning into a cascade of waves that run down the middle of the head.
Achieving the Height
- Use a round brush while blow-drying the front section to create a strong foundation of volume.
- Backcomb the roots of the center section gently to ensure the structure holds throughout the day.
- Finish with a medium-hold hairspray that won’t make your hair feel crunchy or stiff.
5. The Voluminous Afro-Textured Wavy Mohawk
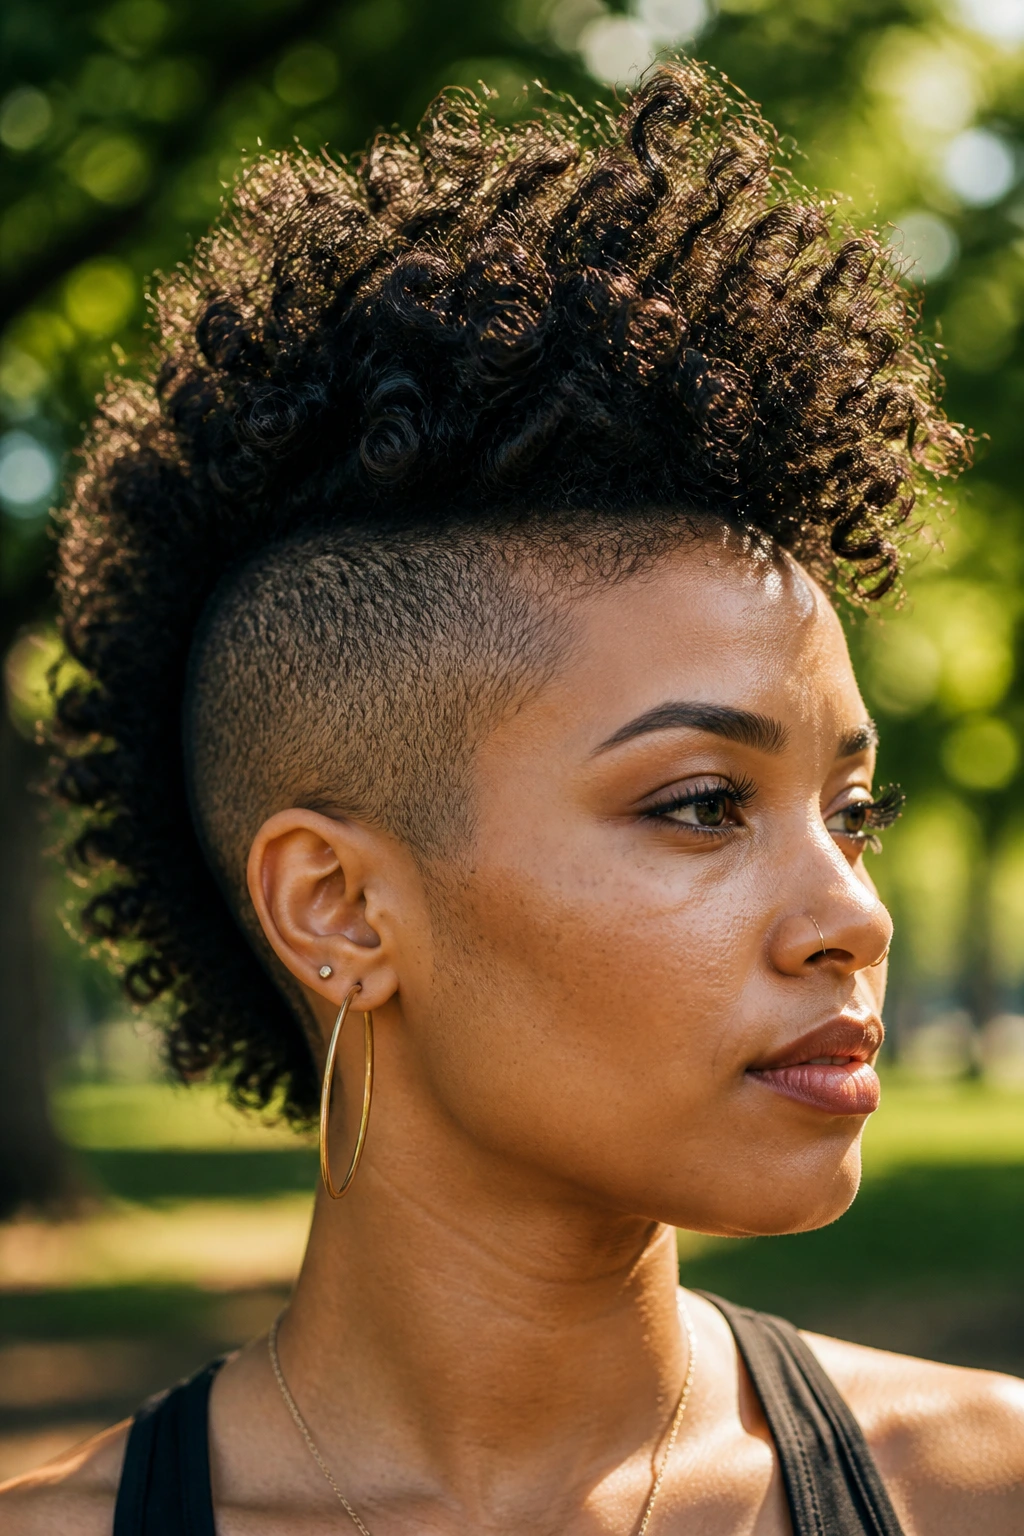
If your waves are closer to tight spirals, you have the ideal hair type for a high-volume mohawk. In this style, the sides are buzzed down to the skin, and the top is grown out into a dense, vertical crown. The result is a stunning silhouette that highlights your bone structure.
Essential Care for the Crown
- Keep the center section hydrated with leave-in conditioners to prevent the tips from drying out.
- Use a pick or a wide-tooth comb to gently fluff the roots for maximum height.
- If you find the ends are getting messy, a light oil treatment will keep them defined and shiny.
6. The Multi-Colored Pastel Mohawk
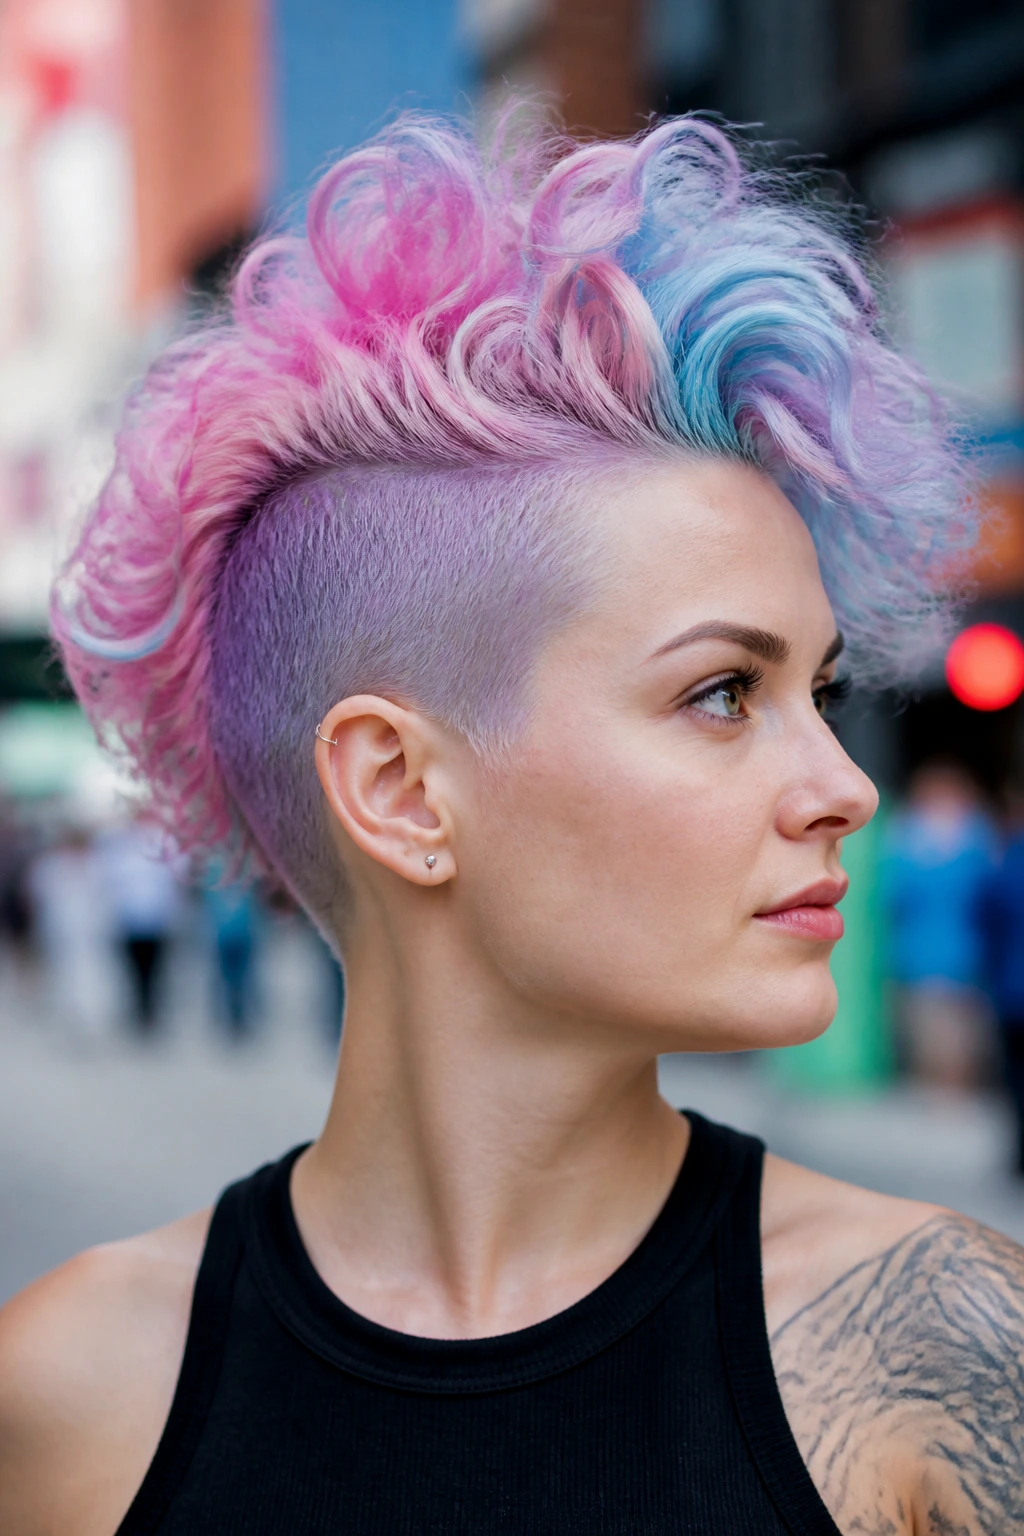
Color changes everything. If you are going for a bold mohawk, adding a wash of pastel pink, blue, or lavender can emphasize the texture of your waves by creating depth and movement that monochromatic hair sometimes hides.
Why Color Matters
- Light colors tend to show texture better than dark, flat colors.
- Use a color-safe curl cream to keep the hue vibrant while managing the wave.
- If you are worried about damage, use temporary hair chalks to test the look before committing to a permanent dye.
7. The Half-Shaved Undercut Design
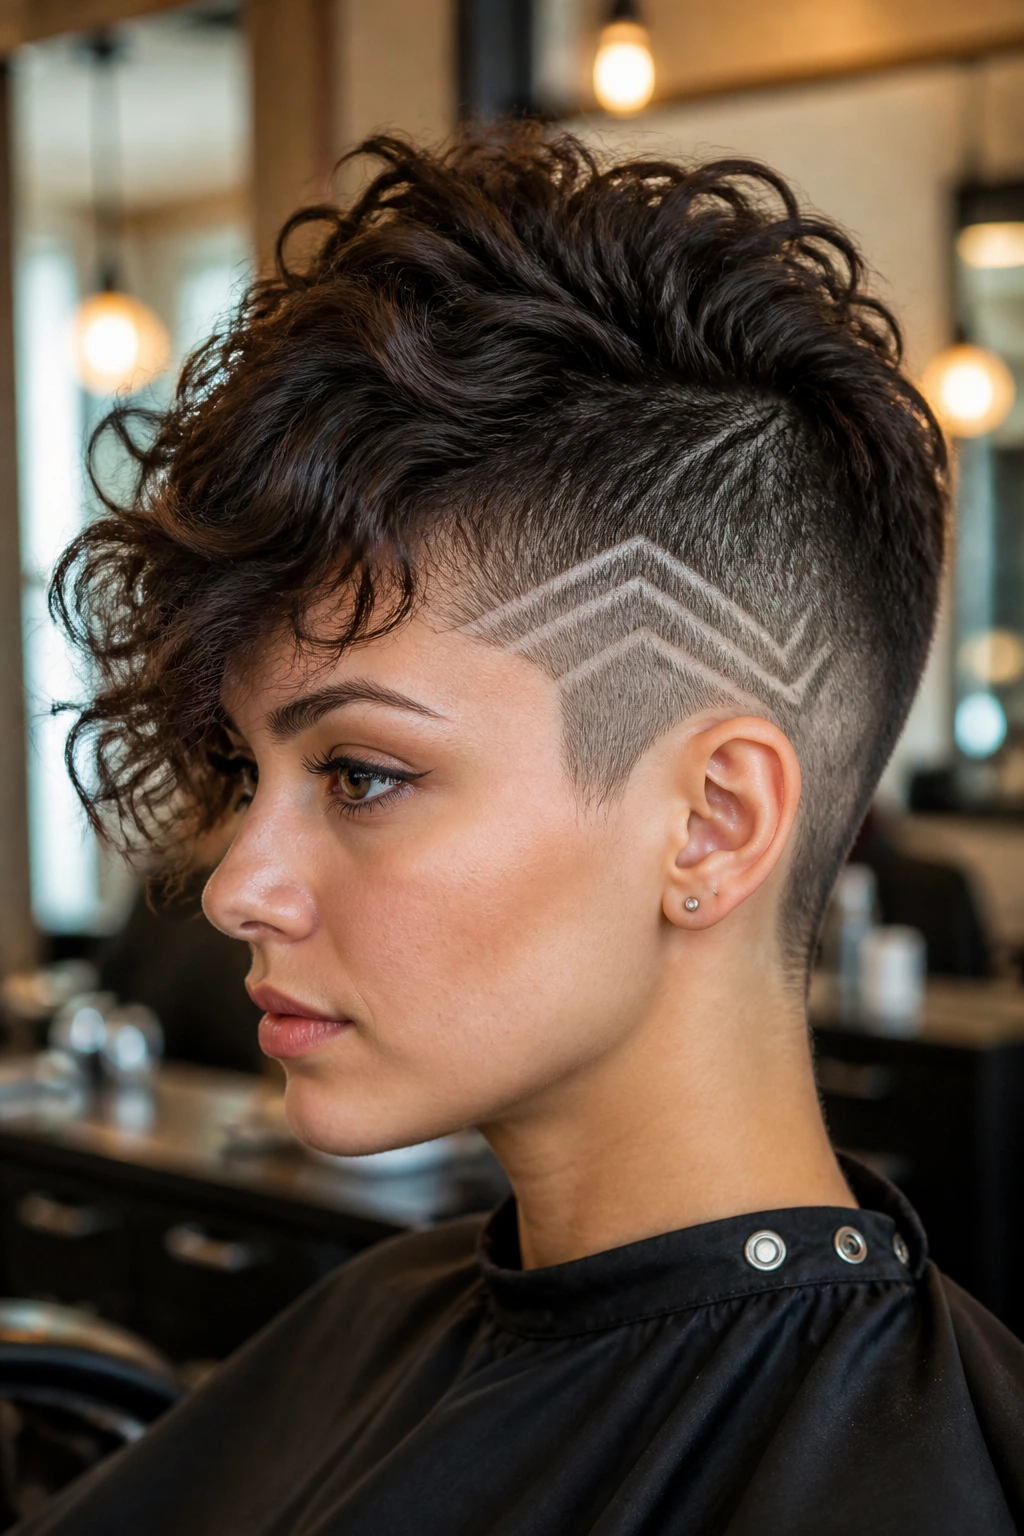
Why stop at just a fade? Adding a geometric pattern into the buzzed side panels of your mohawk turns the haircut into a piece of art. This works particularly well with wavy hair because the contrast between the sharp, clean lines on the side and the soft, organic flow on top is visually jarring in a really interesting way.
How to Maintain the Design
- The lines will grow out quickly, so plan for a trim every two to three weeks.
- Keep the top section well-moisturized to avoid that “neglected” look that can sometimes accompany edgy cuts.
- Use a shine serum on the top section to ensure it catches the light, drawing more attention to the texture contrast.
8. The Tight-Knot Faux Mohawk
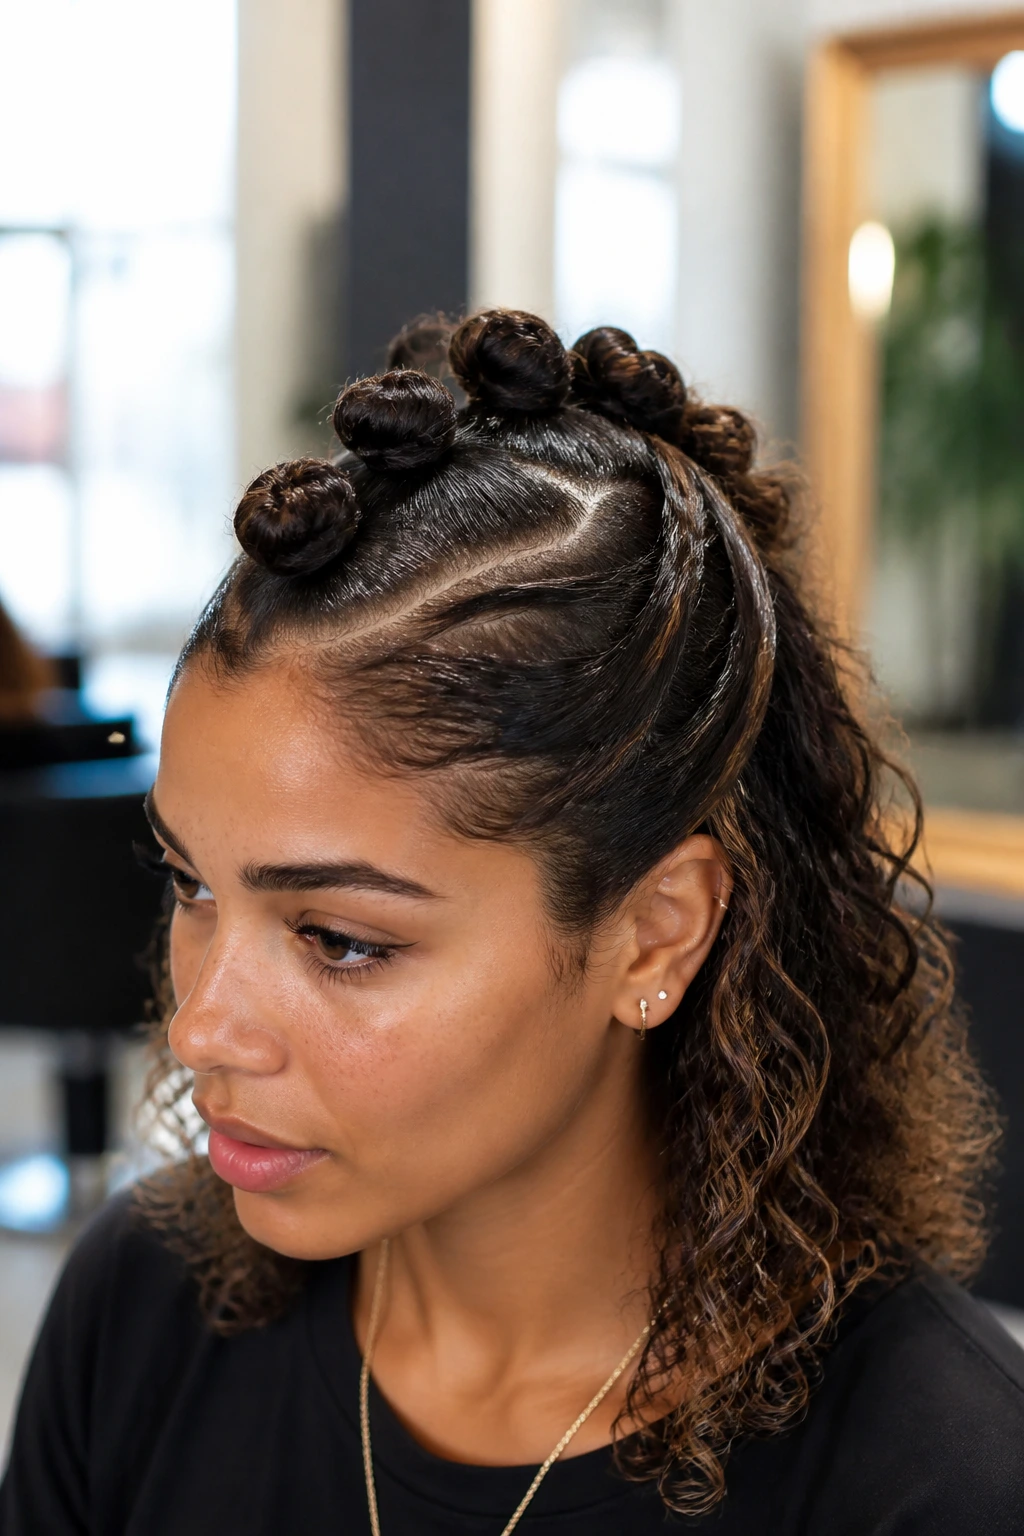
This is a low-effort style that mimics the structure of a mohawk by creating a series of small, tight buns or knots running down the center of the head. It is ideal for wavy hair because the texture of the hair helps the knots stay in place without needing an excessive amount of pins.
Creating the Knots
- Section your hair into 3 to 5 equal parts down the center.
- Twist each section into a small, tight bun.
- Secure with a small elastic and tug on the edges of each bun to make them look larger and more voluminous.
9. The Long-Layered Flowing Mohawk
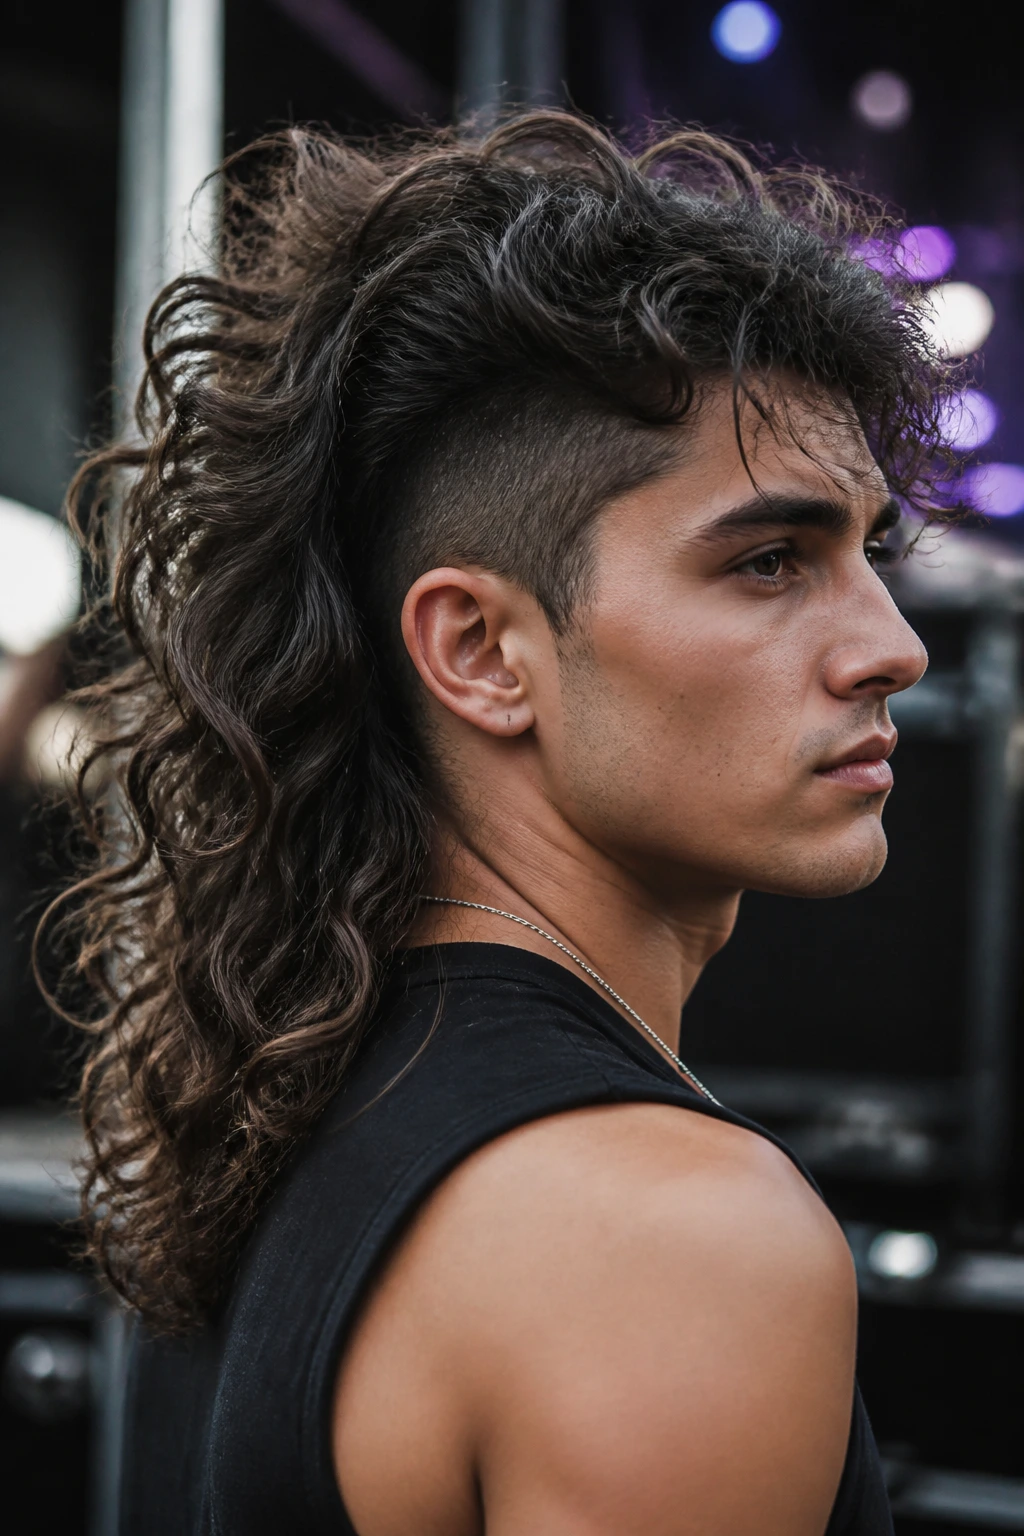
For those who want to keep some length, this style features a longer, shaggier center section. The waves have room to fully form, creating a dramatic, cascading look that feels like a cross between a 1970s rockstar cut and a traditional mohawk.
Balancing Length and Volume
- Use a diffuser attachment on your blow-dryer to encourage the waves to set without frizzing.
- Avoid using heavy products; they will weigh the waves down and destroy the silhouette.
- A light mousse applied to wet hair provides the best balance of hold and bounce for this length.
10. The Pixie-Mohawk Hybrid

This is perfect for someone with shorter, naturally wavy hair. It blends the ease of a pixie cut with the attitude of a mohawk. The sides are cropped short, and the top is styled upward, allowing the waves to create a natural, slightly unkempt look that is very easy to manage.
The Daily Routine
- Apply a small amount of texture paste to your damp hair and massage it into the roots.
- Let it air dry, and don’t touch it once it starts to set.
- If it looks too perfect, ruffle it with your fingers to break up the sections and create more movement.
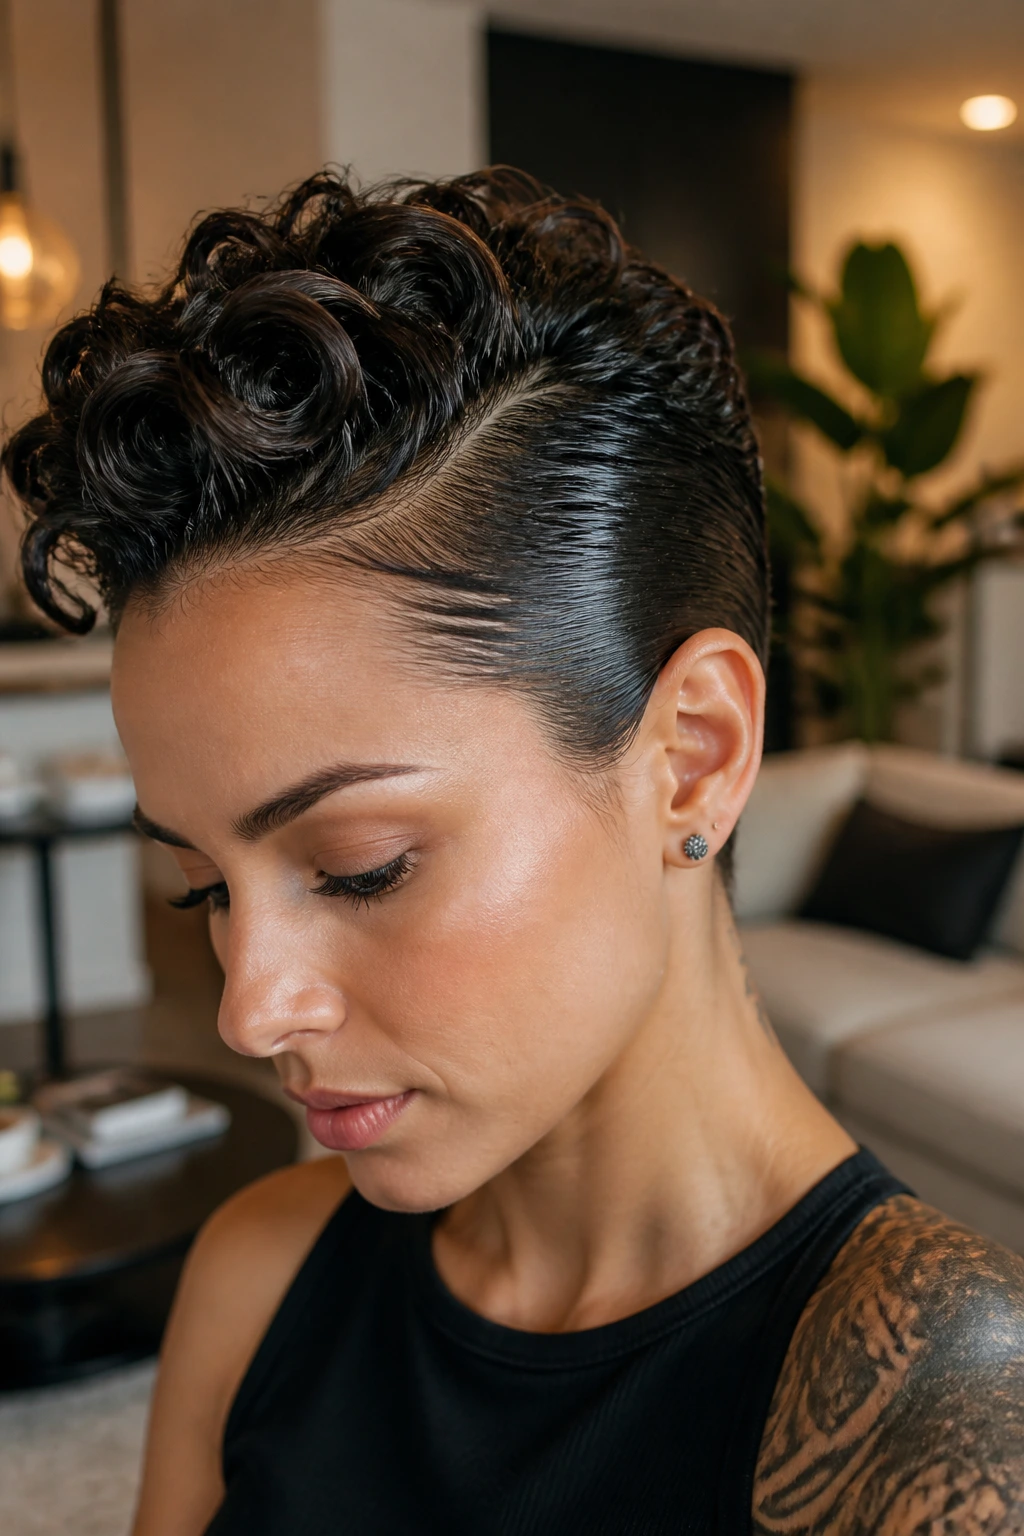
11. The Wet-Look Sculpted Mohawk
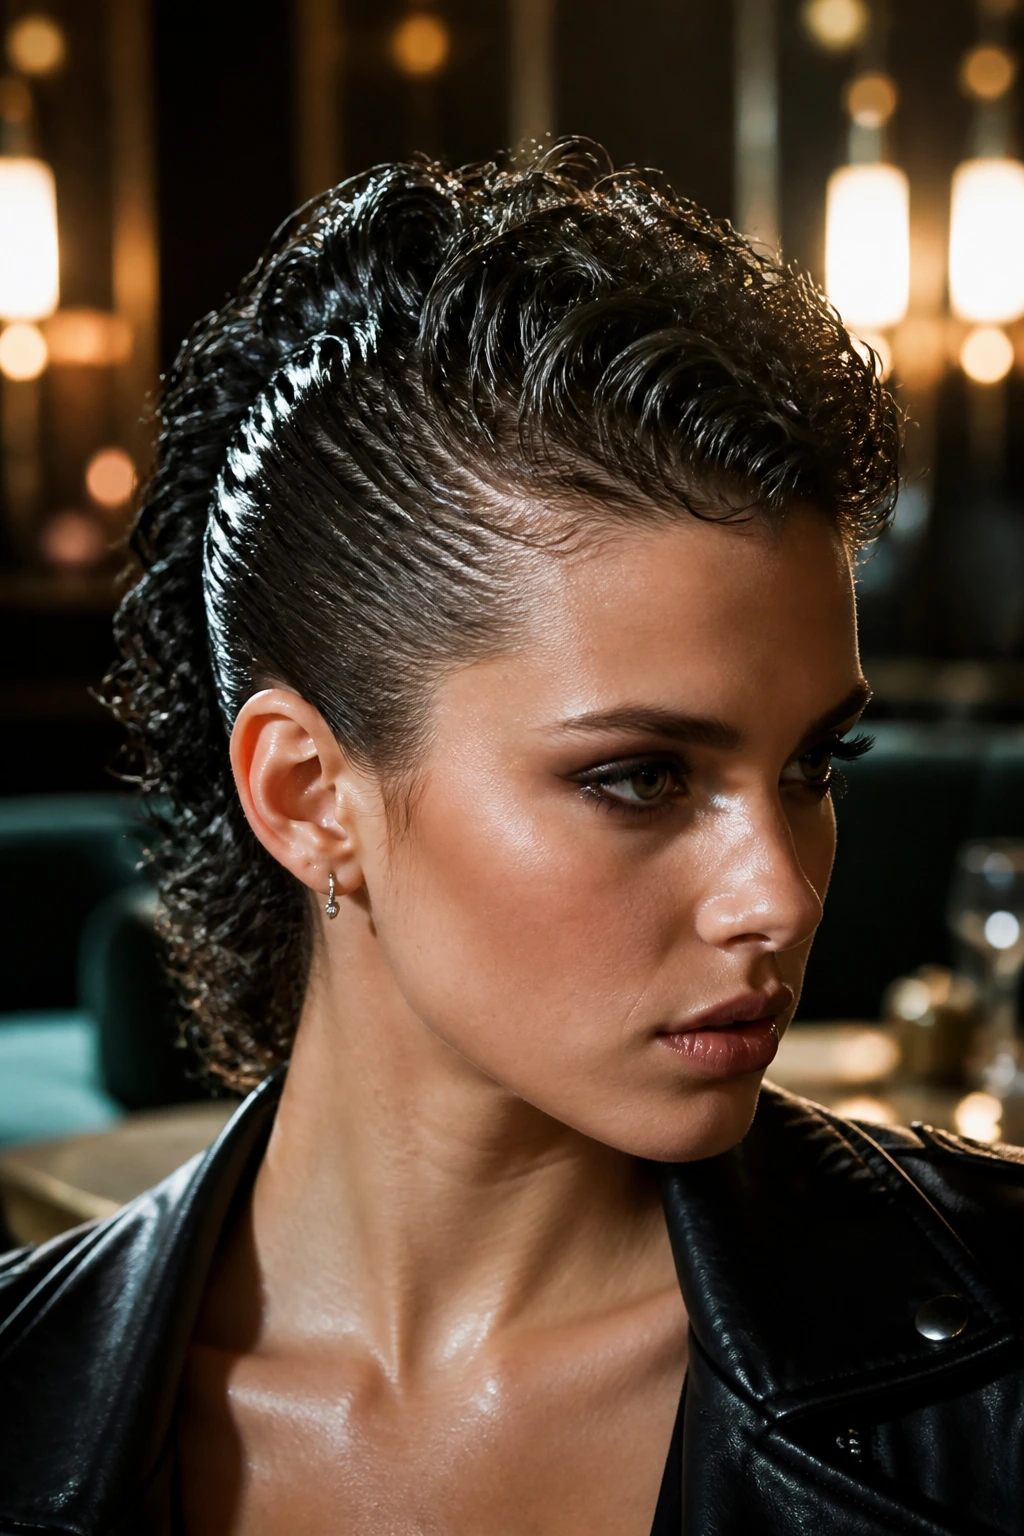
Perfect for an evening event or an editorial photo, the wet-look mohawk is all about precision. By applying a high-shine pomade or gel to your wavy hair and sculpting the waves into a deliberate, structured line down the center, you create a sophisticated and modern take on the classic punk look.
Managing the Wet Finish
- Work with damp hair; applying gel to dry hair often leads to flakes.
- Use a fine-tooth comb to distribute the product evenly from root to tip.
- Ensure the sides are completely slicked back so the focus remains entirely on the sculpted center.
12. The Two-Tone Contrast Mohawk
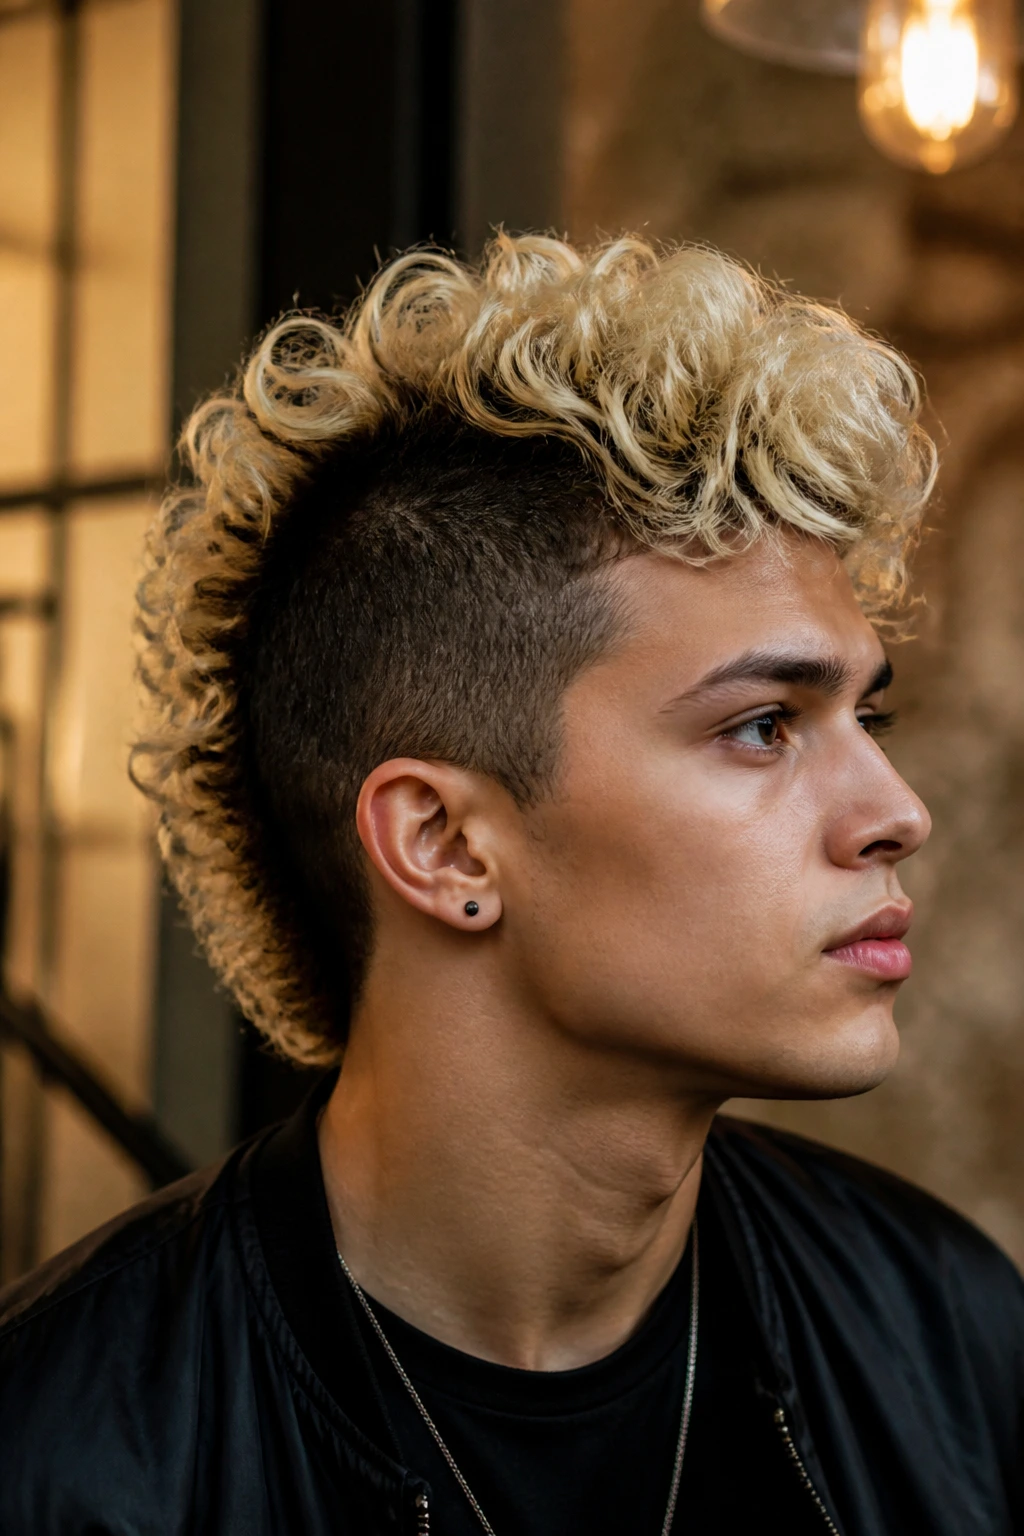
If you want to play with color, try bleaching the top center section while keeping the sides your natural color. The blonde, wavy texture will pop against darker, short sides, making the mohawk look much higher and more defined than it actually is.
Keeping the Blonde Healthy
- Bleached hair is prone to dryness; use a deep conditioning mask once a week.
- Purple shampoo is non-negotiable to keep the brassy tones away.
- Use heat-protectant sprays if you plan on using any styling tools to accentuate the waves.
13. The Braided-Under Mohawk
If you are worried about the commitment of a shave, you can create the appearance of a mohawk by braiding the sides back toward the nape of the neck, but leaving a large section of hair loose in the center. It’s essentially a mohawk that you can “undo” at the end of the day.
The Benefits
- You get all the style with zero permanent changes to your hair length.
- It’s a great way to test-drive the look before heading to the barber.
- It helps you understand how much volume you can actually get on top of your head.
14. The Spiky Bedhead Mohawk
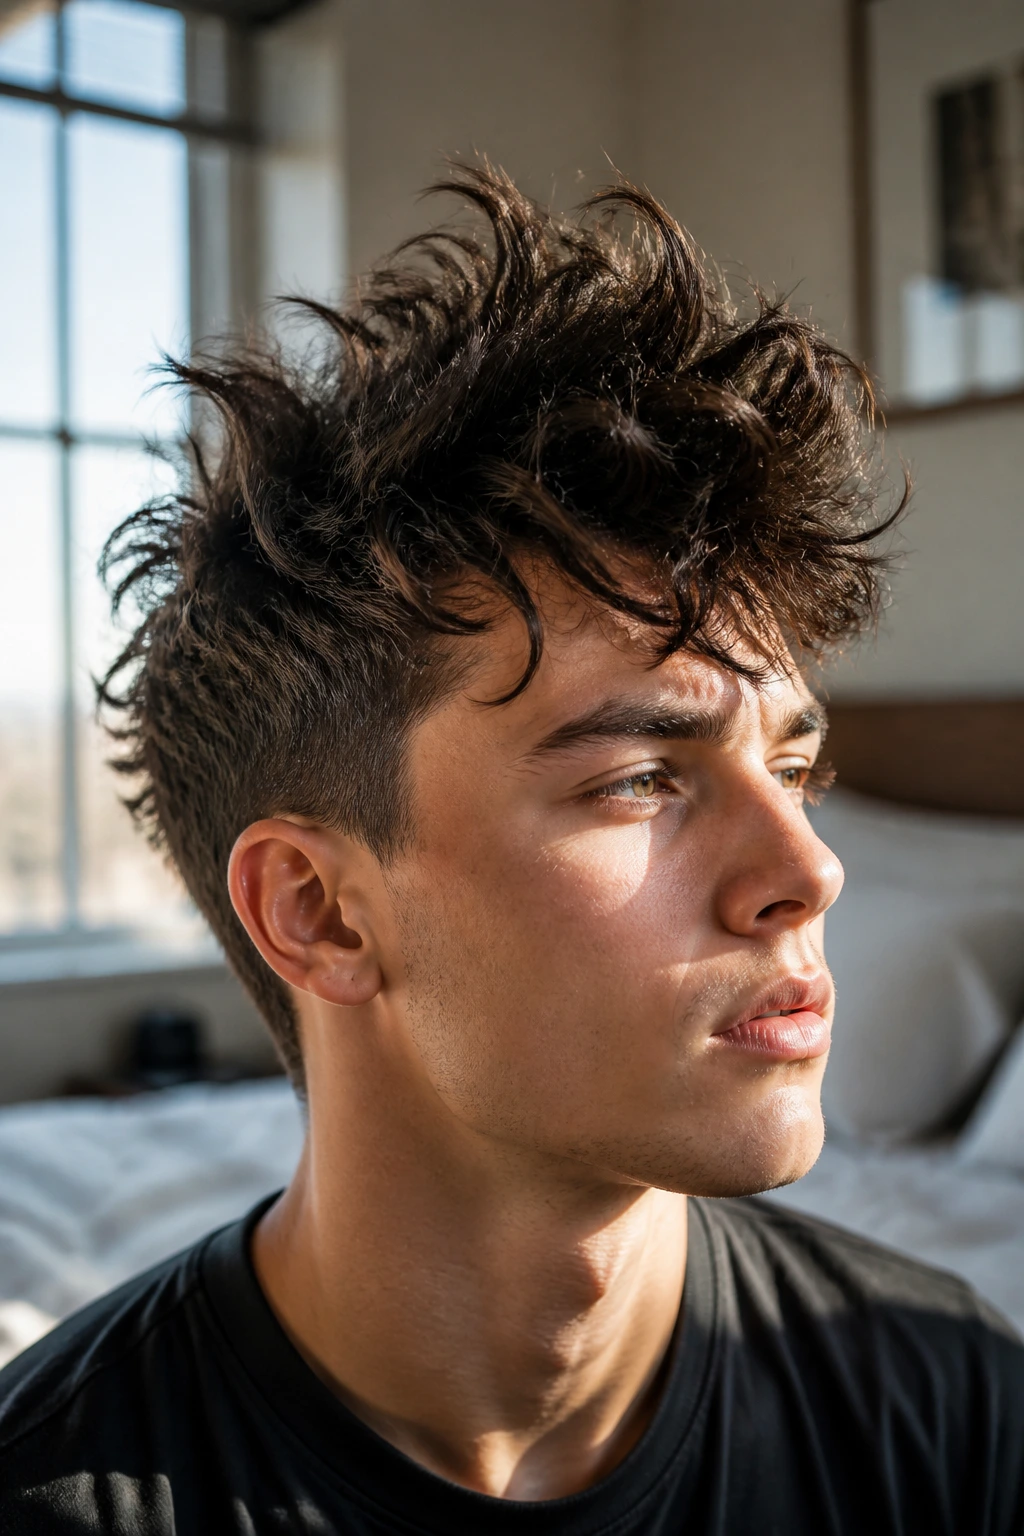
Wavy hair has a natural tendency to clump into spikes if the product is right. By using a strong-hold pomade, you can pull your waves up into a series of soft, messy spikes that aren’t as rigid as traditional punk spikes but have just as much attitude.
How to Style
- Apply product to dry hair to maintain better control over the direction of the spikes.
- Focus on the pieces right at the crown of your head, as this is where the eye will be drawn first.
- Don’t worry about symmetry; the best bedhead looks are intentionally asymmetrical.
15. The Hidden-Undercut Mohawk
This is the ultimate professional-yet-rebellious style. You have a full head of wavy hair, but when you pull the top into a high ponytail or a bun, the sides are buzzed short. It’s a mohawk that you can hide under your normal hair whenever you need to blend in.
Why It’s Unique
- It’s perfect for office environments where you might want to switch your vibe after hours.
- You can experiment with intricate designs on the side because they are only visible when you choose.
- It provides a lightweight feel in warmer weather by removing the bulk of the hair on the sides.
16. The Crimp-Texture Mohawk
The 90s crimp is back, and it works surprisingly well for wavy hair. By crimping the central section before pinning it into a mohawk, you add massive volume and a totally different texture that holds a shape much better than loose waves ever could.
Style Tips
- Use a crimping iron only on the roots to add lift, or all the way down for a more extreme look.
- Crimping creates more friction, which is great for keeping bobby pins in place.
- Don’t forget to protect your hair from heat before using a hot tool.
17. The Twisted-Side Faux Mohawk
Instead of braiding, try twisting the hair along the sides of the head. It creates a cleaner look than a braid and takes significantly less time. The tight, sleek twists contrast beautifully with the wild, wavy texture of the center section.
The Twist Method
- Grab small sections of hair at the hairline and twist them back toward the center.
- Secure with bobby pins, hiding them underneath the loose waves of the top section.
- Repeat until you reach the nape of your neck.
18. The Neon-Root Mohawk
If you want to highlight the height of your mohawk, color the roots of your hair a bright, neon shade while leaving the rest a more natural color. As the hair grows and stands up, the neon roots will create a vibrant halo effect that makes your texture appear much denser.
Maintenance Tips
- Root touch-ups are necessary every four to six weeks.
- Use a dry shampoo that adds volume to keep the roots standing tall.
- Avoid washing your hair in very hot water, as this will bleed the neon color into your natural hair.
19. The Deep-Parting Mohawk
If your waves are very pronounced, you can create a one-sided mohawk by doing a severe deep part on one side and sweeping all your hair over to the other. By pinning the side with less hair very tightly, you create a natural lift that mimics the volume of a mohawk.
Finding the Balance
- Use a root-lifting spray on the side with more hair to ensure it doesn’t fall flat.
- This is one of the quickest styles to achieve, making it a great go-to for busy mornings.
- A good teasing brush is your best friend for this style.
20. The Mohawk with Accessories
Sometimes, the best way to define a mohawk on wavy hair is with accessories. Thin, metallic headbands or small, decorative clips can be used to hold the waves in place while emphasizing the center section. It turns a casual look into a deliberate style choice.
Choosing the Right Pieces
- Avoid heavy accessories that will slide down your hair; stick to lightweight materials.
- Metallic clips work best to hold small sections of hair tight to the scalp.
- If you use a headband, make sure it’s textured or has a rubber grip so it doesn’t slip off your wavy strands.
Final Thoughts
Wavy hair possesses an inherent “messiness” that makes it arguably the best texture for a mohawk. While straight hair mohawks often struggle to look soft, and curly hair mohawks can sometimes be too dense, wavy hair sits in that perfect, versatile middle. The key to mastering any of these styles is to work with your natural movement rather than trying to force it into a rigid, artificial shape.
If you are just starting out, begin with a faux-hawk using pins and product. It gives you a feel for how your hair behaves when pulled into a center-focus style. Once you feel comfortable with the shape, you can start experimenting with fades, undercuts, or even color. Remember, the goal of a mohawk is self-expression, so don’t be afraid to let your waves do exactly what they want to do—sometimes the best-looking styles are the ones you didn’t overthink.