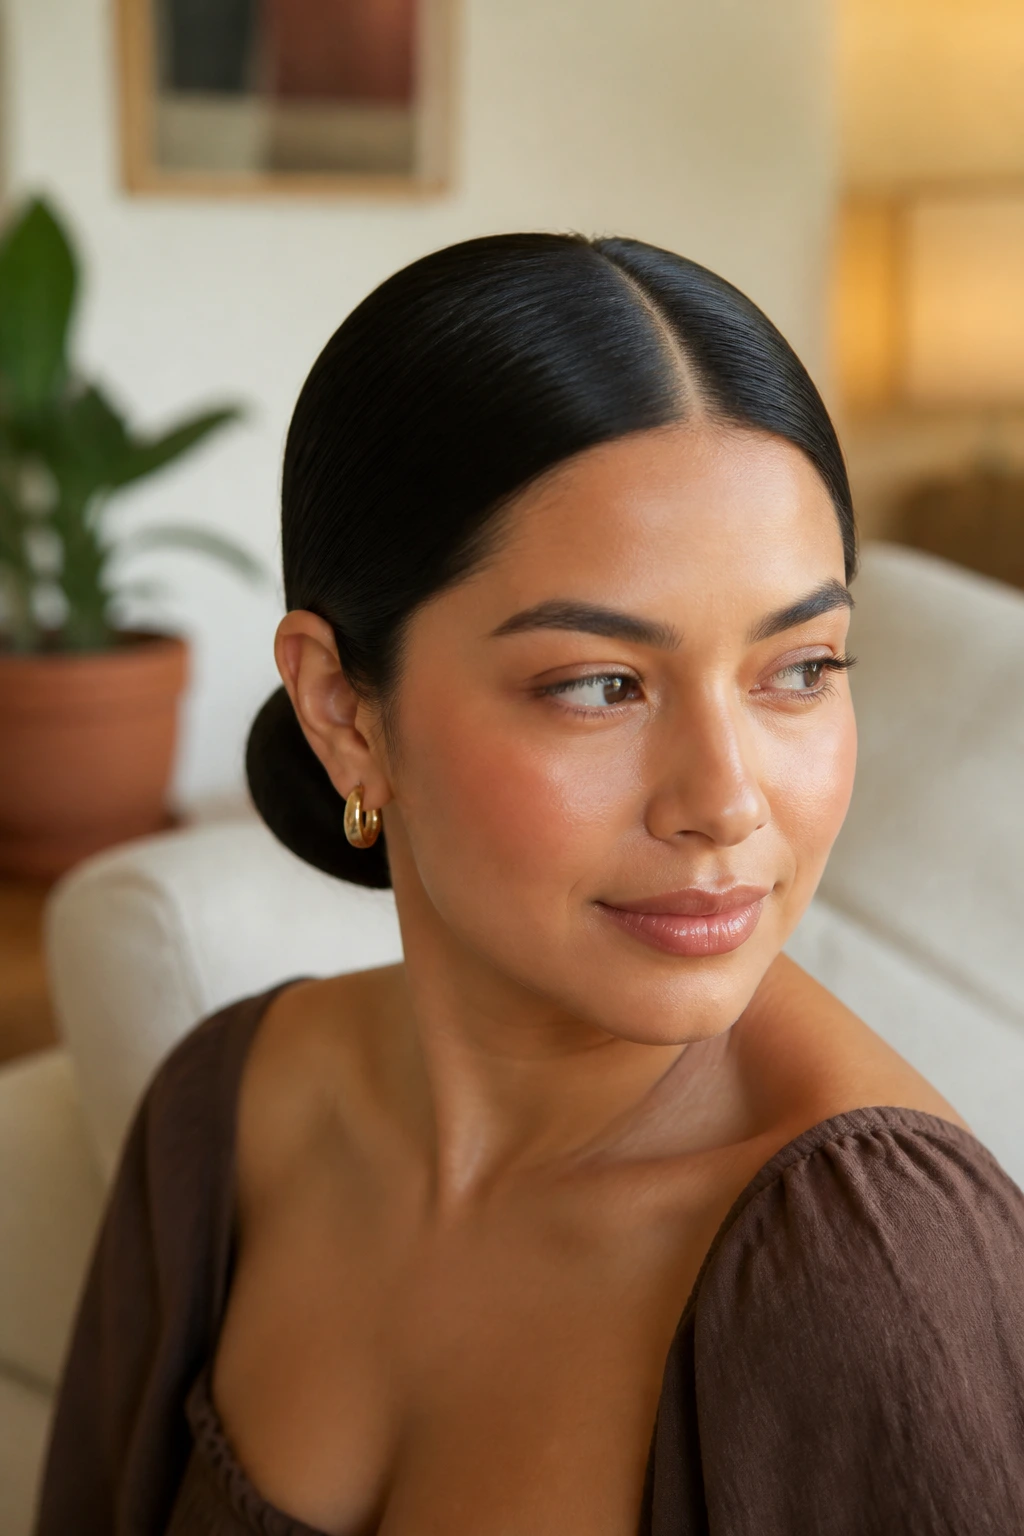
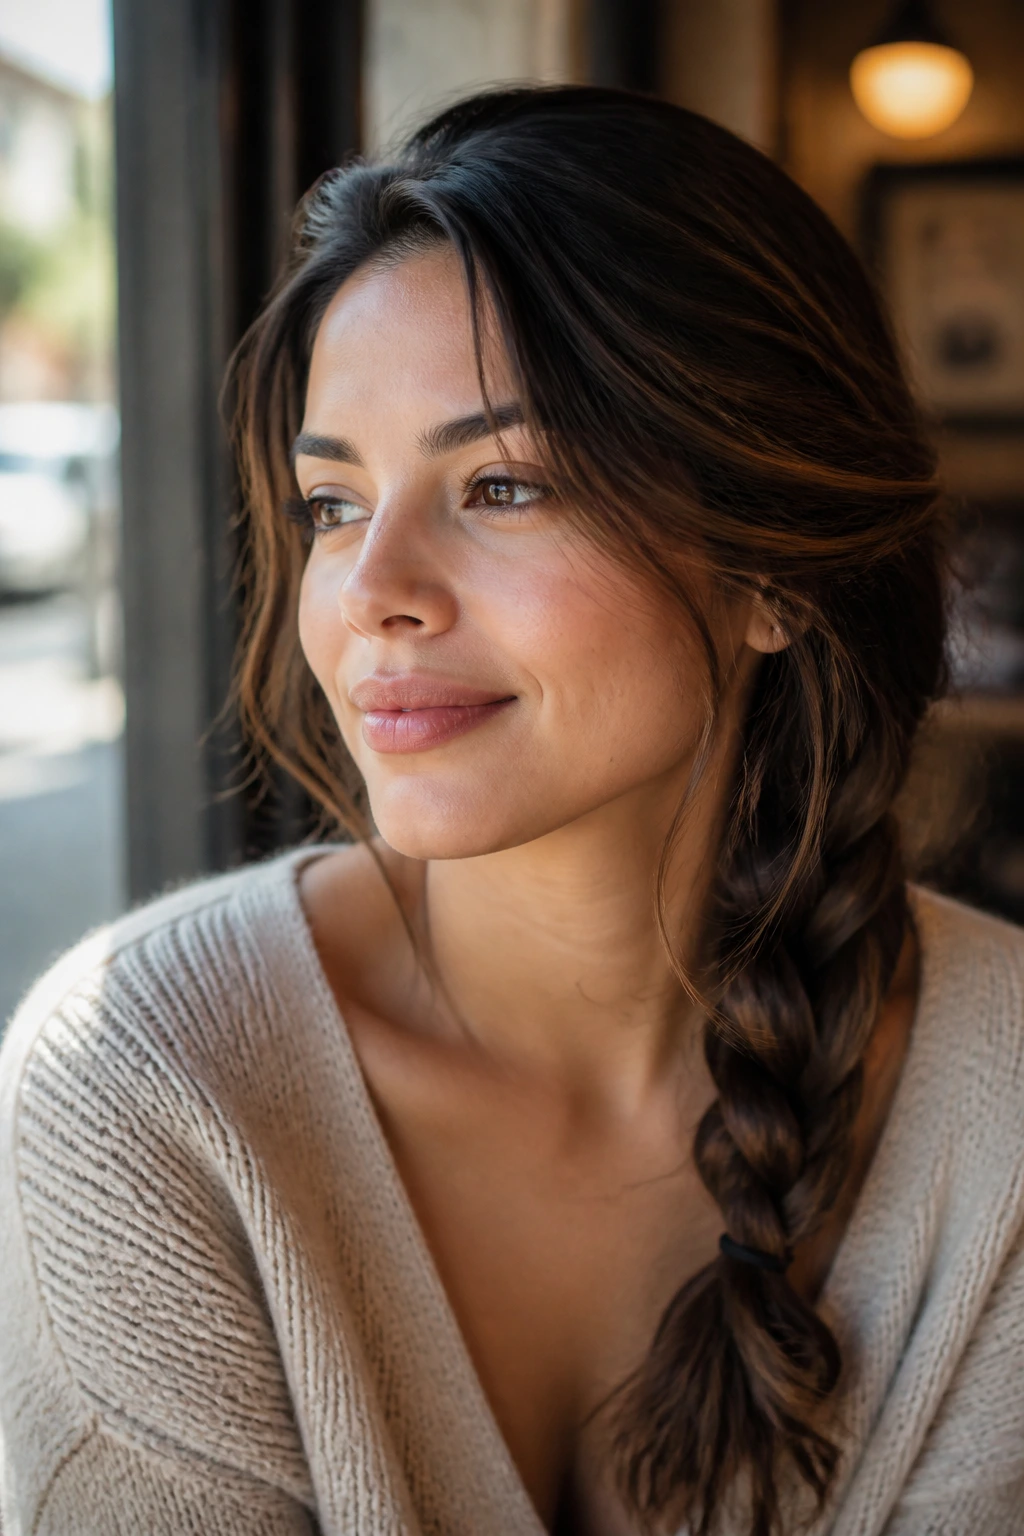
When you wake up and the humidity has already decided your hair’s fate, you need options that don’t require an hour of blow-drying or precise heat styling. For those of us with thicker textures, natural waves, or coils, “lazy” doesn’t mean boring. It means finding those styles that embrace the natural weight and volume of Latina hair while keeping things low-maintenance. We aren’t talking about styles that fall apart by noon. We’re talking about looks that actually thrive when they’re a little bit lived-in, frizzy, or messy.
Managing density and volume is a unique challenge. You want to work with the hair you have, not fight against it every single morning. Most of the styles below are designed to be completed in five minutes or less, often using nothing more than a scrunchie, a few pins, or a bit of leave-in cream. Whether you are running out the door for a grocery run or trying to look put-together for an impromptu meeting, these styles are the tactical advantage you need for those mornings when the snooze button was just too tempting.
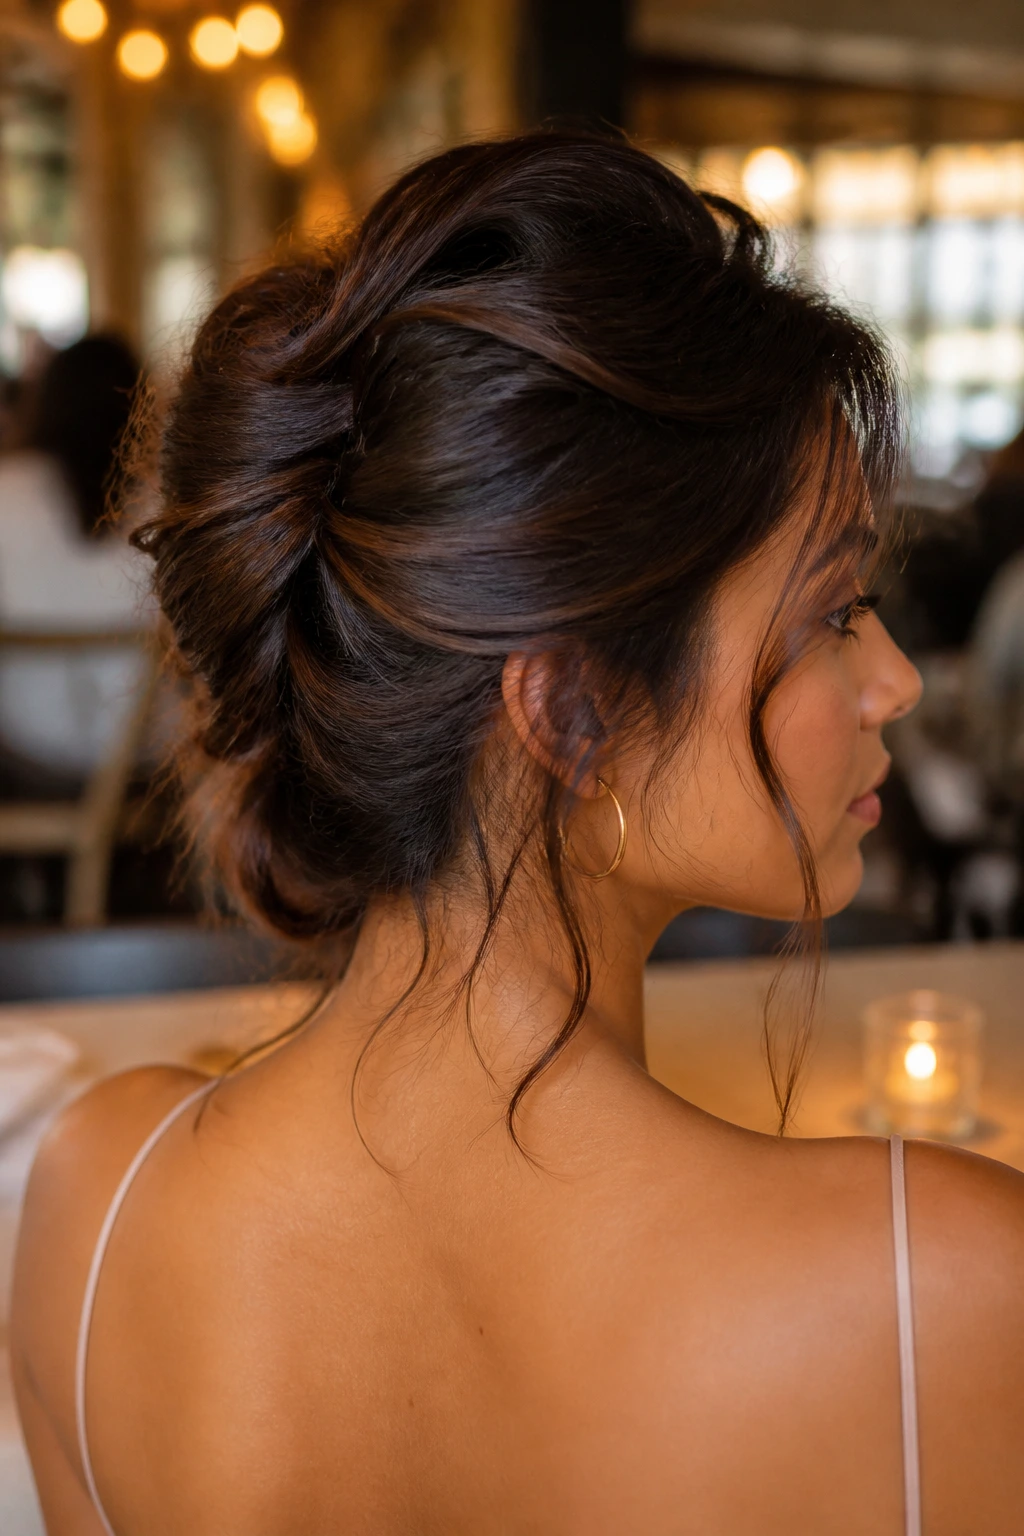
1. The High-Volume Messy Top Knot
This is the ultimate savior for second-day hair that has lost its shape but gained the perfect amount of grit. The key here is not to aim for a perfect circle but to create a wide, fluffy bun that shows off your hair’s natural texture. Use a silk scrunchie to protect your ends and pull the hair up to the very crown of your head to lift the roots.
Why It Works for Thicker Textures
The extra volume in your hair acts as a natural cushion, meaning the bun stays upright without needing a dozen bobby pins. If you have layers, let them fall around your face; they frame the jawline beautifully and keep the look from appearing too tight or severe. Pulling a few strands out at the temples creates a softer, more intentional appearance.
How to Style It
- Flip your head upside down and gather all your hair at the highest point of your head.
- Twist the hair loosely, keeping the base of the ponytail wide.
- Wrap the hair into a loose coil and secure it with a soft scrunchie, leaving the ends poking out for a more relaxed finish.
- Give the bun a gentle tug outward to expand the size, and mist with a touch of leave-in spray if your ends are looking a bit dry.
2. The Low Sleek Chignon with a Middle Part
Sometimes, the most “lazy” move is to go for a look that seems high-effort but is actually just a matter of control. A low, sleek chignon is perfect for when your hair is naturally oily or you’ve applied a deep-conditioning mask and need to keep it tucked away. The middle part adds a sharp, architectural element that balances out a rounded face shape.
Master the Tucked Look
The secret to this look is using a fine-tooth comb and a little bit of hair oil to tame flyaways at the crown. You don’t need to get it perfectly flat; just enough so the transition from the scalp to the nape of your neck looks smooth. It’s elegant, professional, and stays secure through long days.
Quick Prep Tips
- Apply a dime-sized amount of lightweight hair oil from root to mid-shaft to add shine and weight.
- Create a crisp center part using the handle of your comb.
- Gather your hair into a low ponytail and twist the length into a rope before coiling it into a bun.
- Secure with a small claw clip rather than an elastic for less tension on your hairline.
3. The Claw Clip Half-Up Half-Down
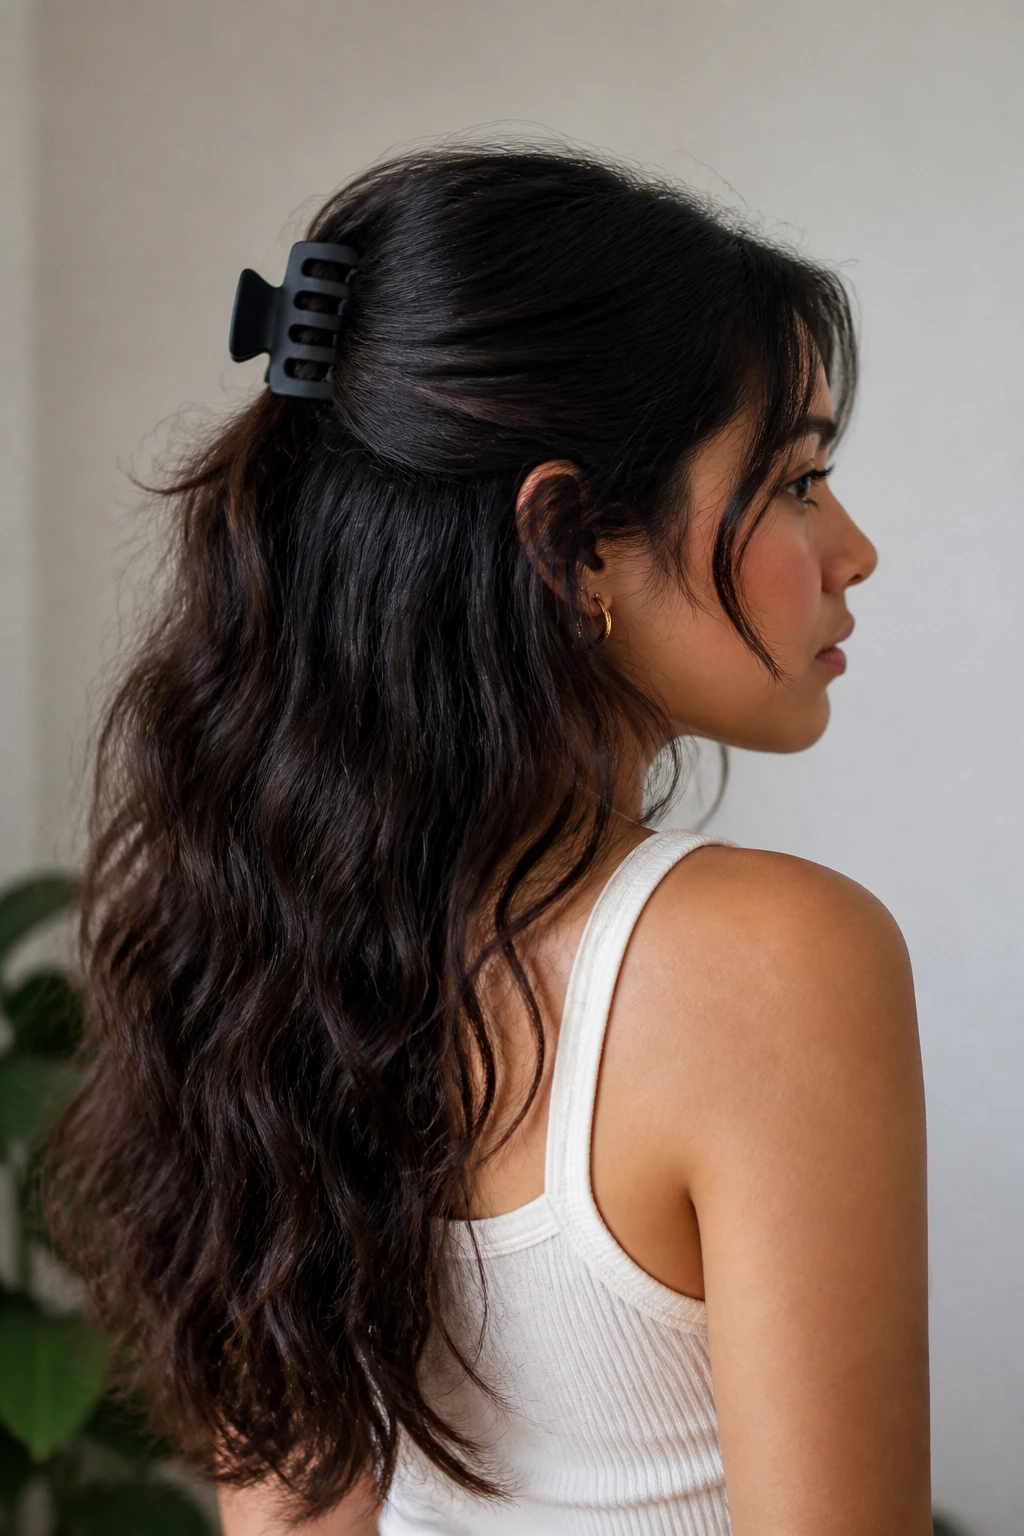
The claw clip has made a massive comeback, and for good reason—it’s the fastest way to get hair out of your eyes without creating the harsh crease that traditional hair ties leave. For textured hair, a large claw clip is essential. Small ones will snap under the weight of the hair, so invest in a sturdy, oversized matte clip.
Choosing the Right Clip
Matte-finish clips provide much better grip than glossy plastic, which tends to slide right out of healthy, thick hair. When choosing a size, always go one size larger than you think you need. This allows you to gather more hair without the clip feeling like it is pulling at your scalp.
The Five-Second Technique
- Take the top section of your hair, starting from the arches of your eyebrows and moving back toward the crown.
- Gather the hair and twist it once, then fold it against the back of your head.
- Open your claw clip and secure it over the folded section.
- If your hair is very thick, try using two smaller clips stacked vertically for extra stability.
4. The Deep Side-Part Low Pony
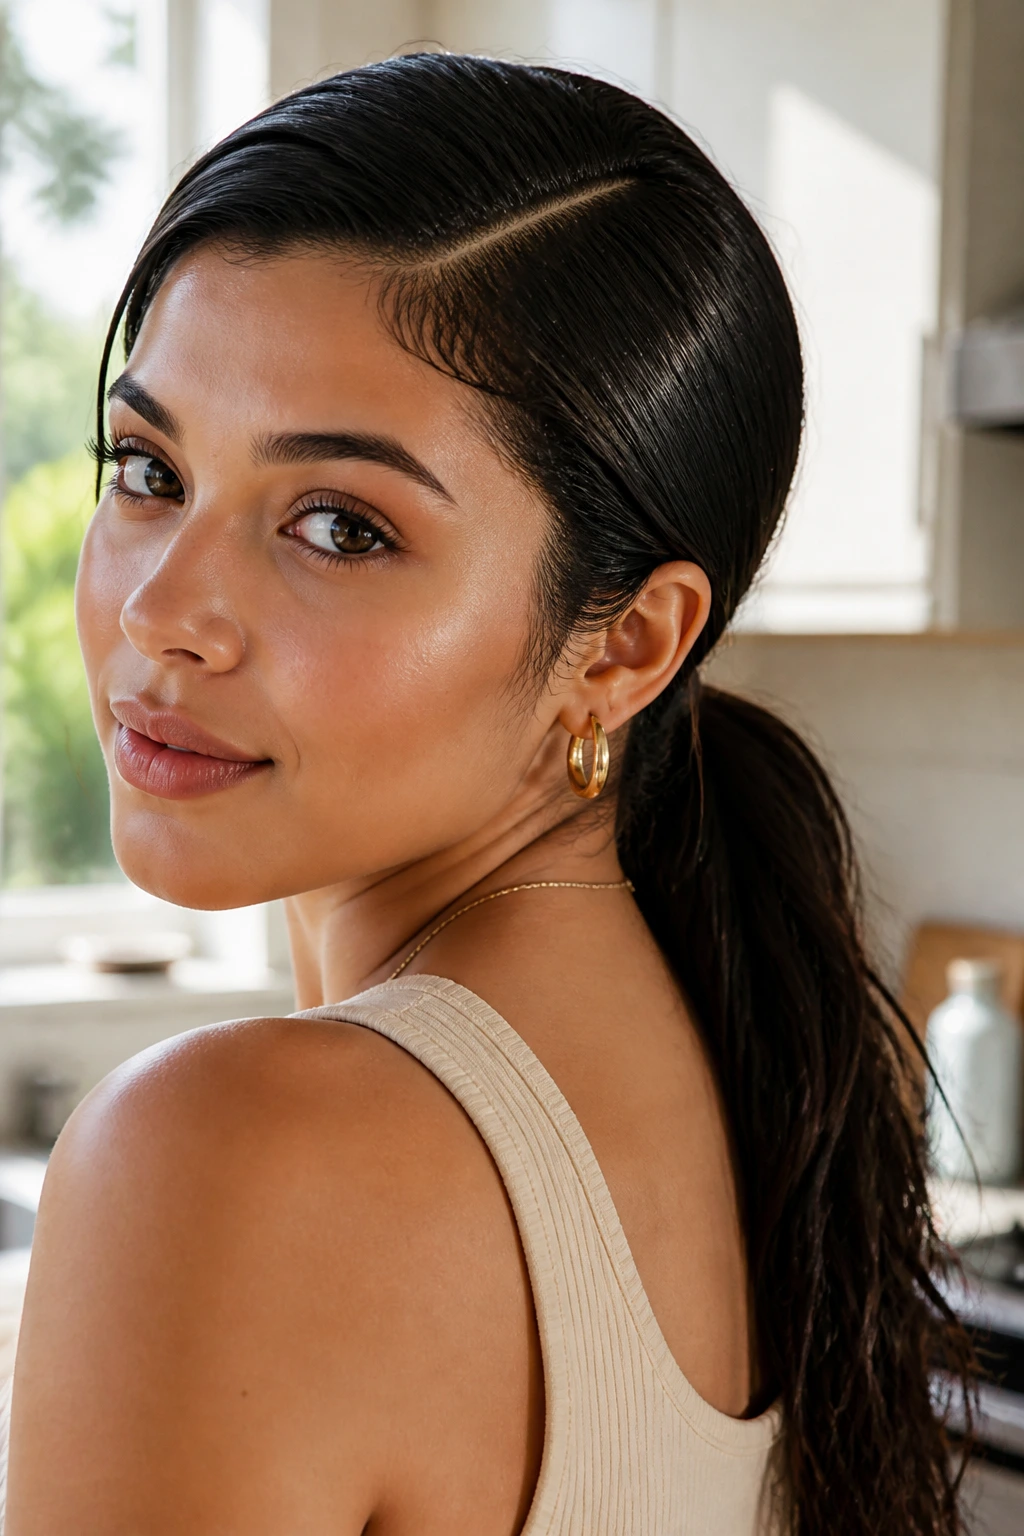
When your hair is feeling particularly heavy, a deep side part creates the illusion of more volume on one side while keeping the rest of the hair sleek and manageable. This is a classic style that feels slightly more sophisticated than a standard ponytail but takes the exact same amount of time.
Why This Works for Latinas
The deep part naturally draws attention to the eyes and cheekbones, which is why this style is a staple in editorial shoots. It works exceptionally well if you have a face-framing highlight or “money piece,” as the weight of the hair will show off the color transition without you having to style it with heat.
Essential Adjustments
- Use a boar bristle brush to sweep your hair toward the nape of your neck, ensuring the side part stays crisp.
- Secure the pony low, right above the nape, to avoid the “weight” of the hair pulling on your scalp throughout the day.
- Take a tiny piece of hair from the underside of the ponytail and wrap it around your hair tie, pinning it underneath for a seamless look.
5. The Messy Braided Crown
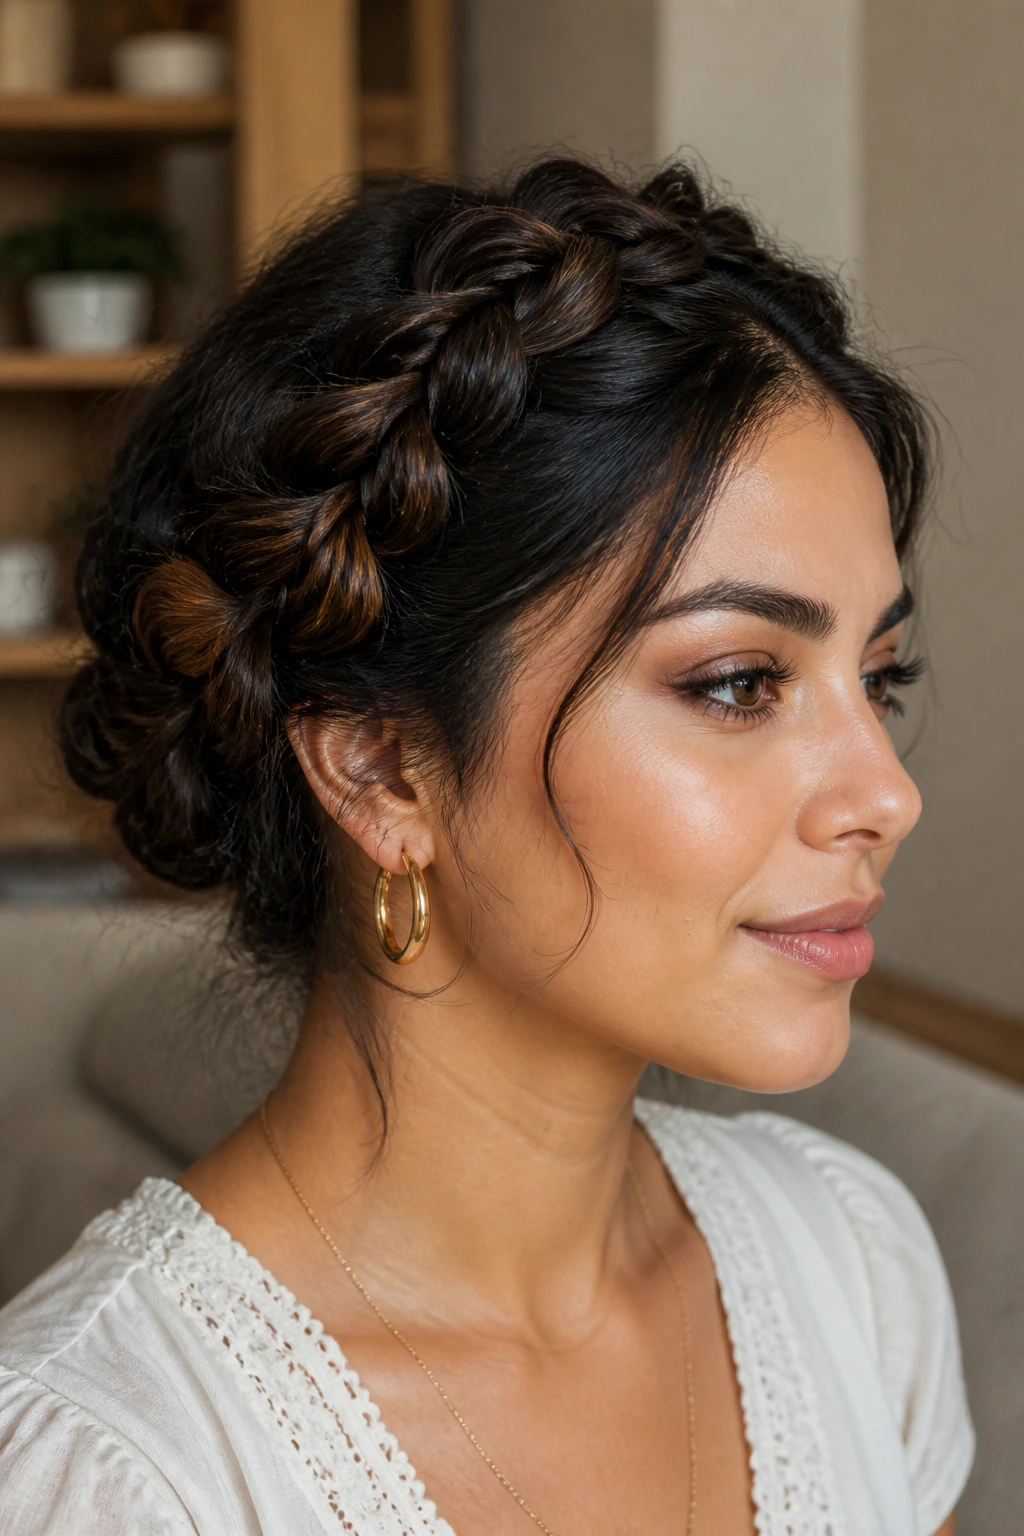
If you are dealing with frizz, stop fighting it and braid it in. A single, loose Dutch braid started at the temple and carried around the head is the perfect way to look put-together while actually protecting your hair from further tangling. This style is best done on second-day hair because the texture gives the braid something to grip onto.
The “Pancaking” Method
To get that thick, voluminous braid look, you have to “pancake” the loops. Once the braid is secured, go back through the individual sections and gently pull them outward with your fingers. This gives the illusion that your hair is twice as thick as it actually is, and it makes the braid look soft and romantic rather than tight and military.
Managing the Ends
- If your braid is too short to go all the way around, stop at the back of your head and secure it with a clear elastic.
- Use a textured pomade on your fingertips while braiding to keep shorter layers from popping out.
- If you have bangs or shorter face-framing pieces, leave them out and let them air dry naturally for a soft finish.
6. The “Scarf-in-a-Tangle” Updo
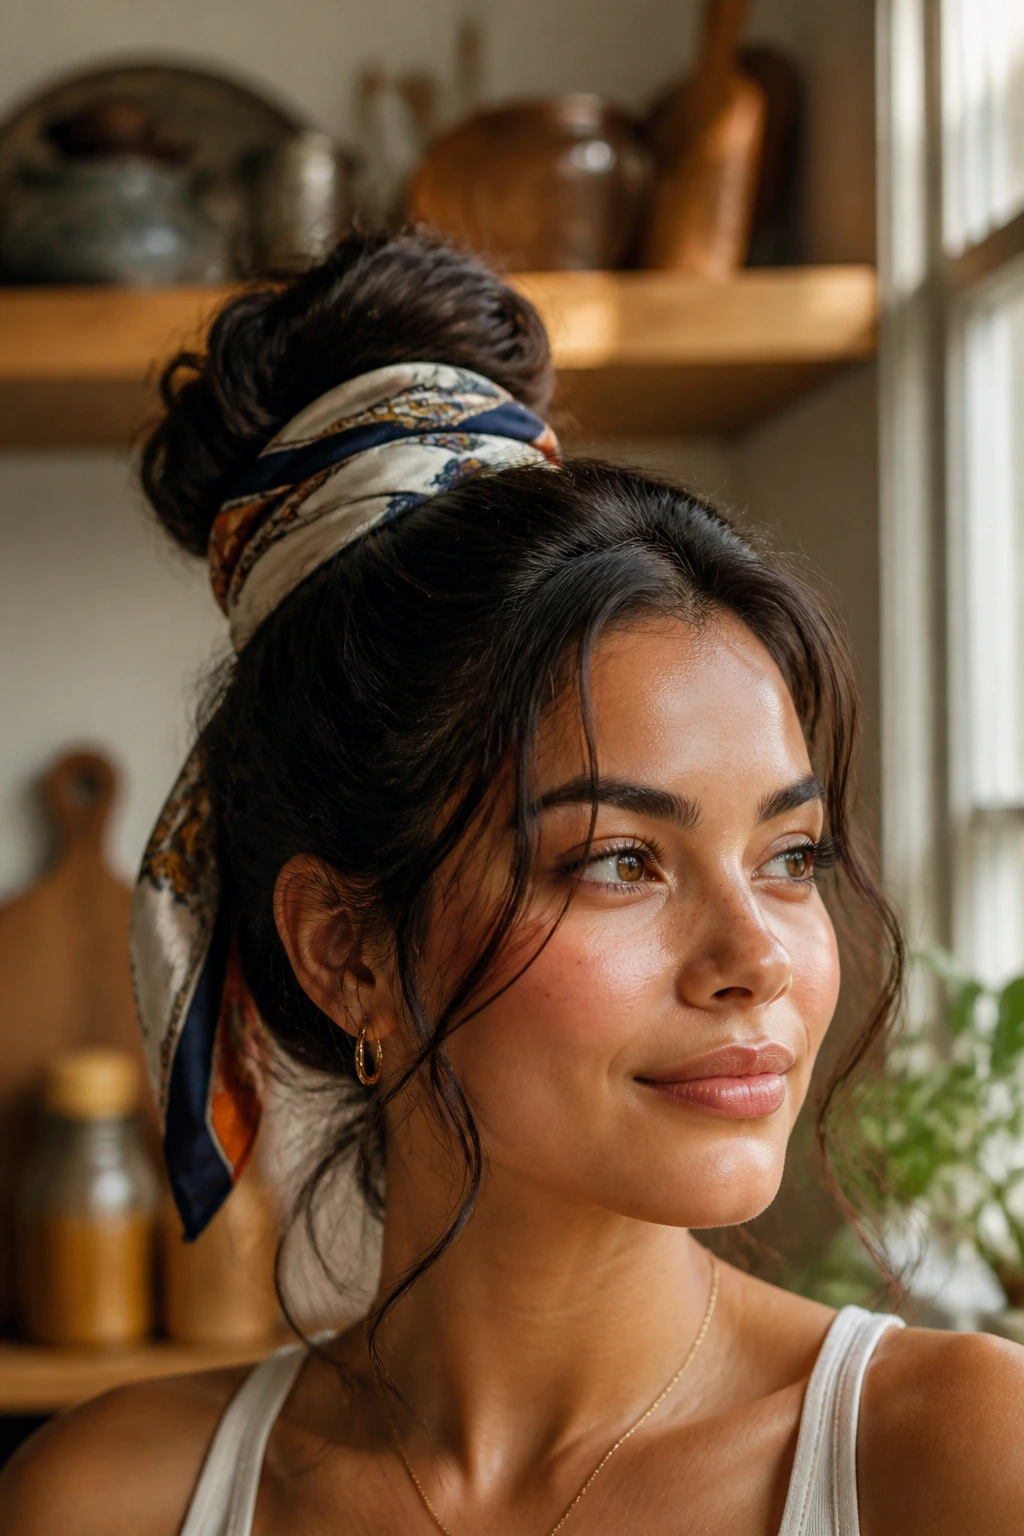
Sometimes the easiest way to deal with a bad hair day is to cover the base of the hair with a colorful accessory. A silk or satin scarf tied around a simple bun is a fantastic way to add personality to an otherwise messy, unwashed look. This is also great for preventing damage, as the fabric adds a layer of protection.
Fabric Matters
Avoid cotton scarves, as they can cause friction and lead to more frizz. Silk or satin creates a smooth surface that glides over your hair, keeping it hydrated and tangle-free. Plus, the bright patterns of a Latin-inspired scarf can brighten your complexion even when you feel like you aren’t wearing any makeup.
Style Application
- Tie your hair into a loose, messy bun at the back of your head.
- Fold your scarf into a long, narrow strip.
- Wrap the scarf around the base of the bun and tie it in a double knot, letting the tails hang down or tucking them into the bun for a cleaner look.
7. The High Pony with a Bubble Twist
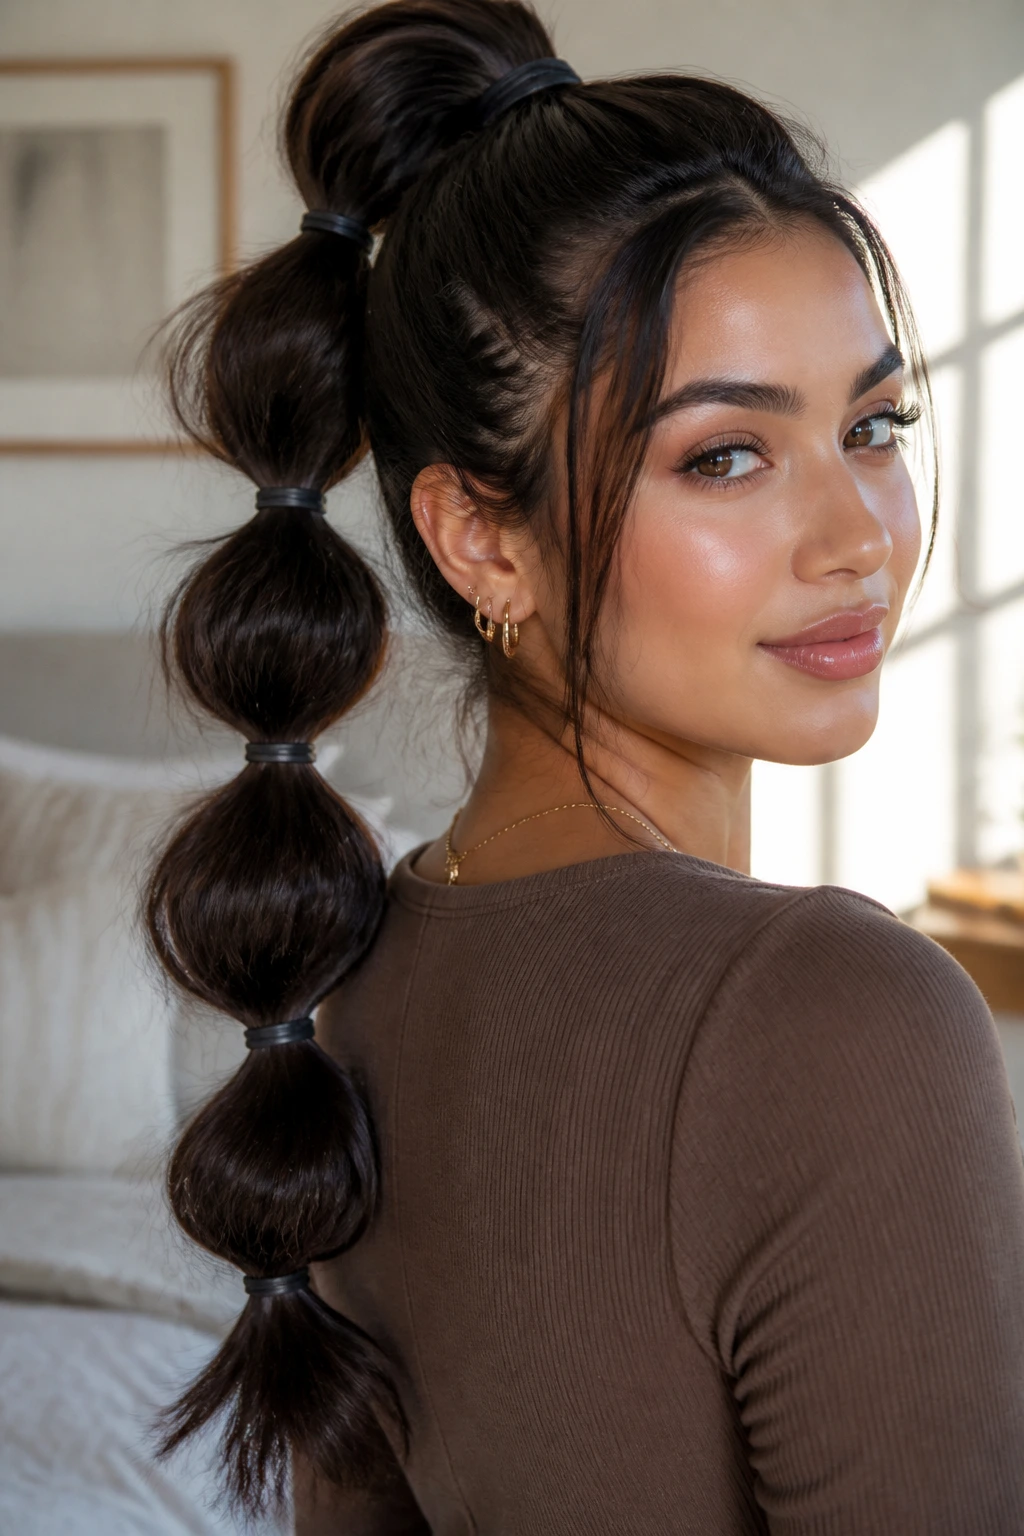
If you have long, thick hair, the weight can sometimes make a high ponytail feel like it’s dragging your face down. The “bubble” technique solves this by adding volume down the length of the pony without requiring heat. It’s a fun, youthful look that takes minutes and keeps your hair controlled.
Getting the Bubble Right
The key is to space your elastics evenly and then pull at the hair between each band. If you pull too hard, the bubble collapses; you want to gently tease the hair outward. You don’t need to aim for symmetry; a slightly uneven, organic bubble look feels much more natural and modern.
Simple Steps
- Pull your hair into a high ponytail and secure it firmly.
- Every two to three inches down the length of your ponytail, add another small elastic band.
- After securing each band, gently tug the hair between the bands outward to create a rounded “bubble” shape.
- Use clear elastics to make the focus about the texture of your hair rather than the hardware.
8. The Twisted Side Sweep
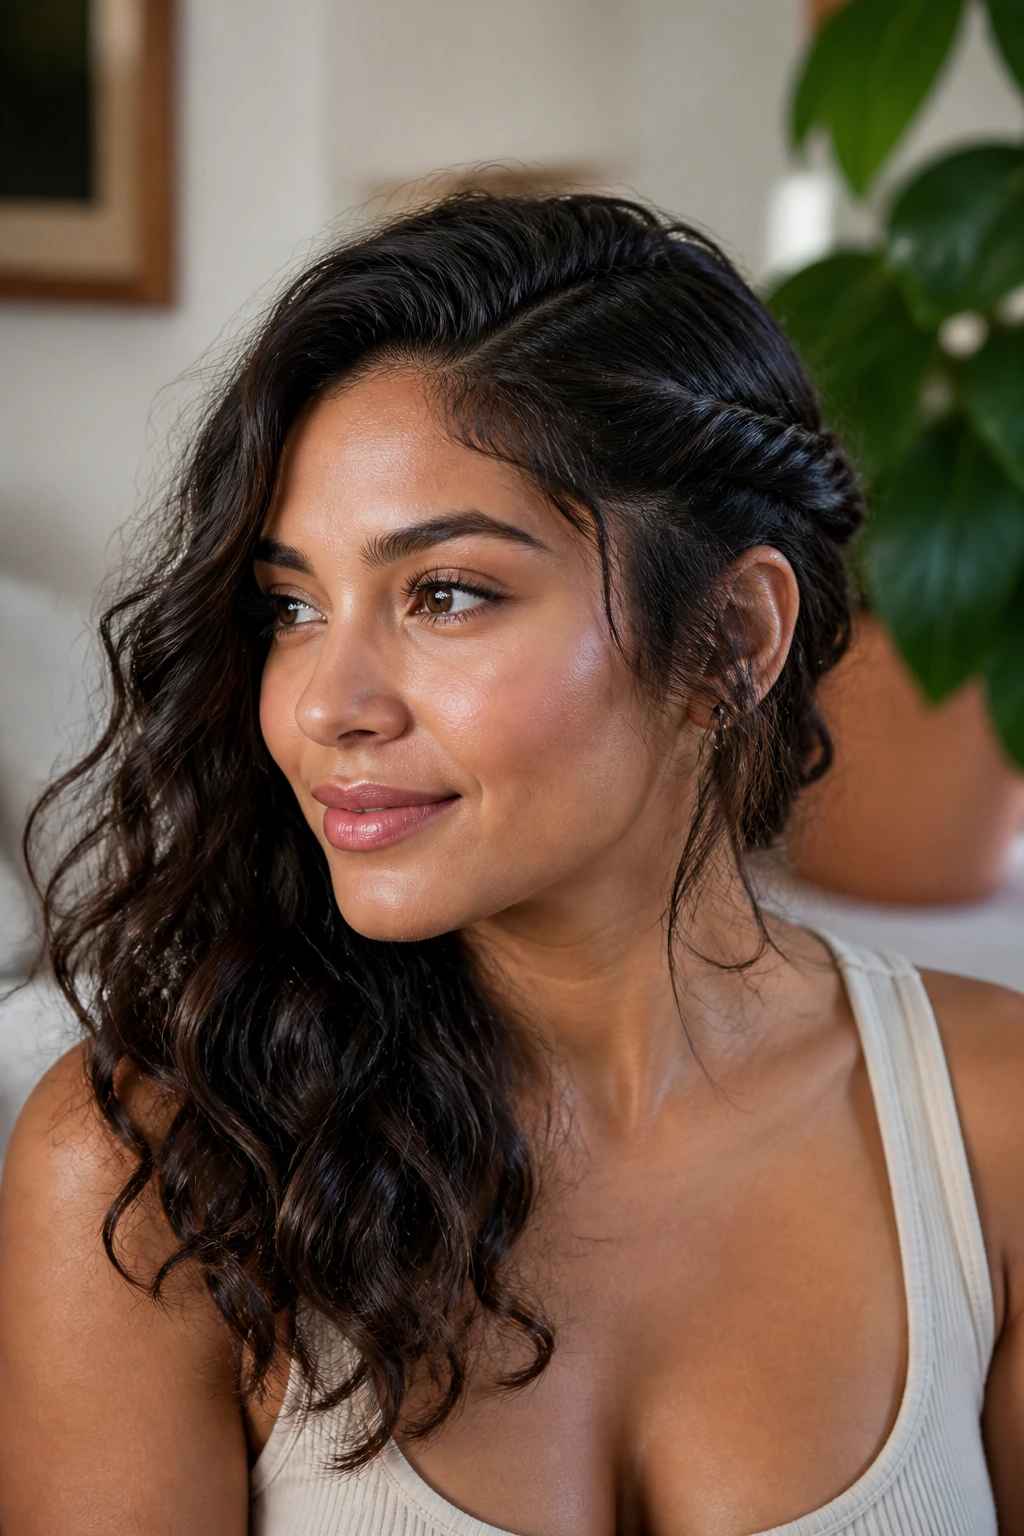
For days when you want your hair down but need to keep it out of your face, a simple twist on one side of the head is the perfect compromise. This style works best with natural curls or waves, as the twist blends seamlessly into the rest of your hair’s texture.
The Texture Secret
You don’t want the twist to be too tight. A loose, slightly messy roll is much more flattering and allows the hair’s natural volume to shine through. Using a small amount of sea salt spray before you start can give your hair the grip it needs to keep the twist from unraveling.
Finishing the Twist
- Section a two-inch piece of hair from your hairline on one side.
- Twist the hair back away from your face, adding small pieces of hair as you go, similar to a French braid but easier.
- Once you reach behind your ear, pin it securely with a bobby pin that matches your hair color.
- Let the rest of your hair flow naturally, perhaps shaking it out with your fingers for added bounce.
9. The Low Double-Braid
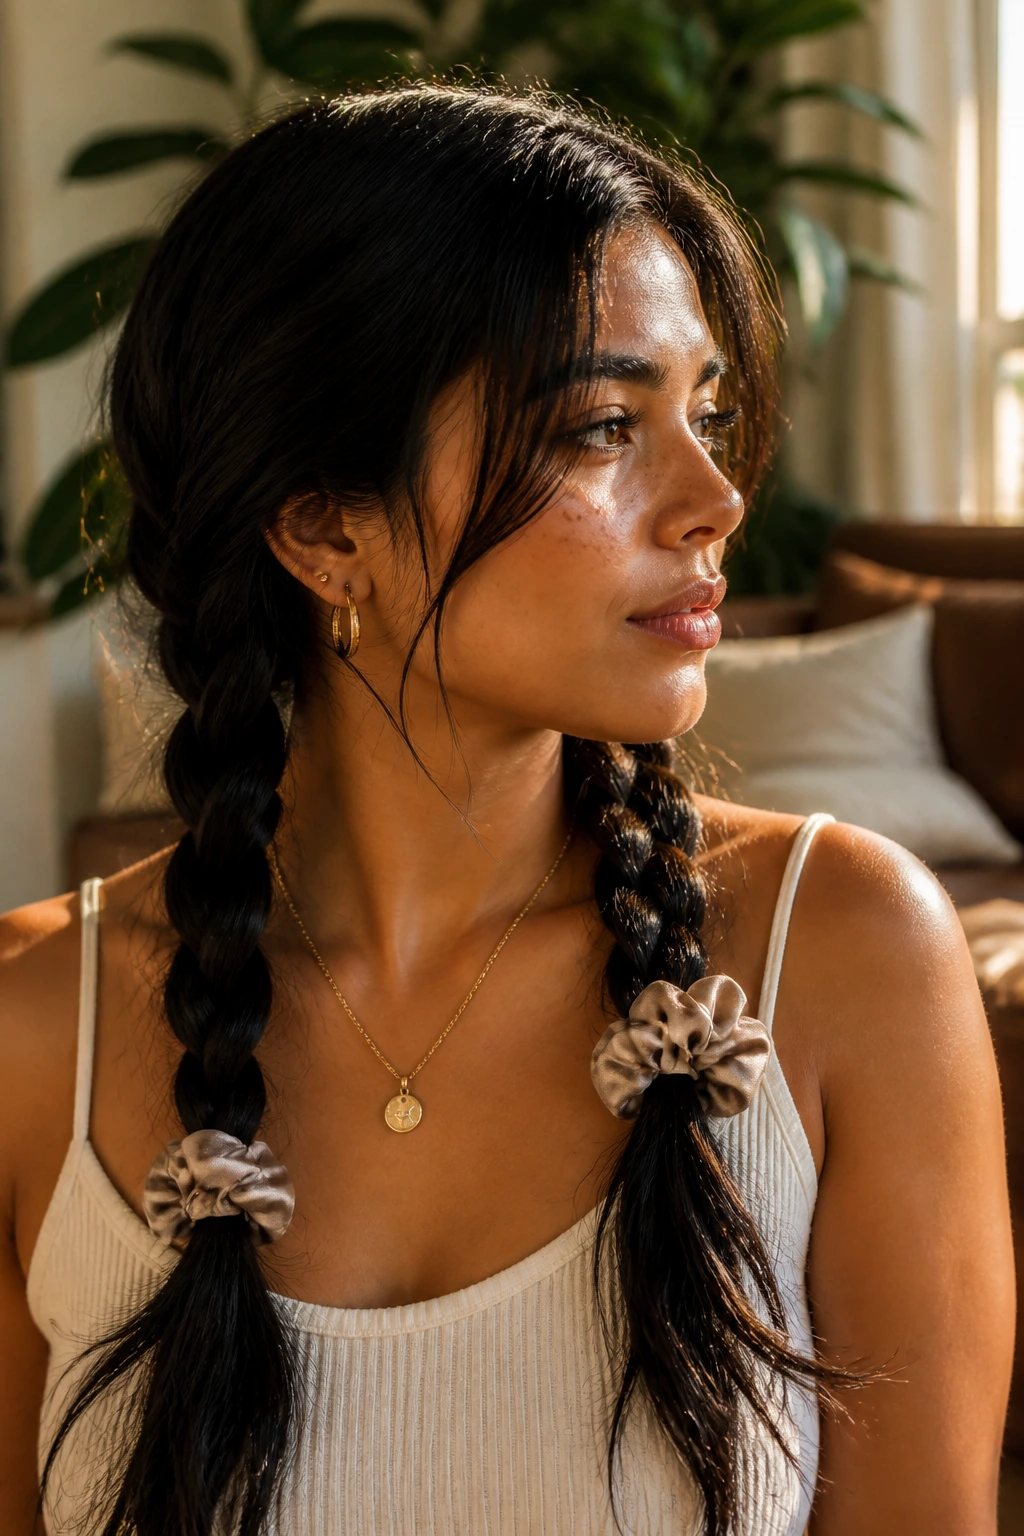
This style is effectively the “pigtail” grown up. By taking two low sections of hair and braiding them loosely at the nape of your neck, you remove the bulk from your shoulders while keeping the hair protected and manageable. It’s incredibly comfortable for lounging or working from home.
Why It Works for Latina Hair
Thick, heavy hair is much easier to manage when it is segmented. Trying to braid all your hair at once can be a physical workout, but splitting it into two sections makes the process much more manageable. You can also leave the braids slightly loose for a “tousled” look that feels intentional and chic.
Styling Variation
- Split your hair down the center or slightly off-center.
- Create two loose, three-strand braids starting from behind the ears.
- Secure with soft scrunchies at the ends.
- If you have excess time, leave the braids in for a few hours, then take them out for effortless, heat-free beach waves.
10. The Slicked-Back “Gym” Look
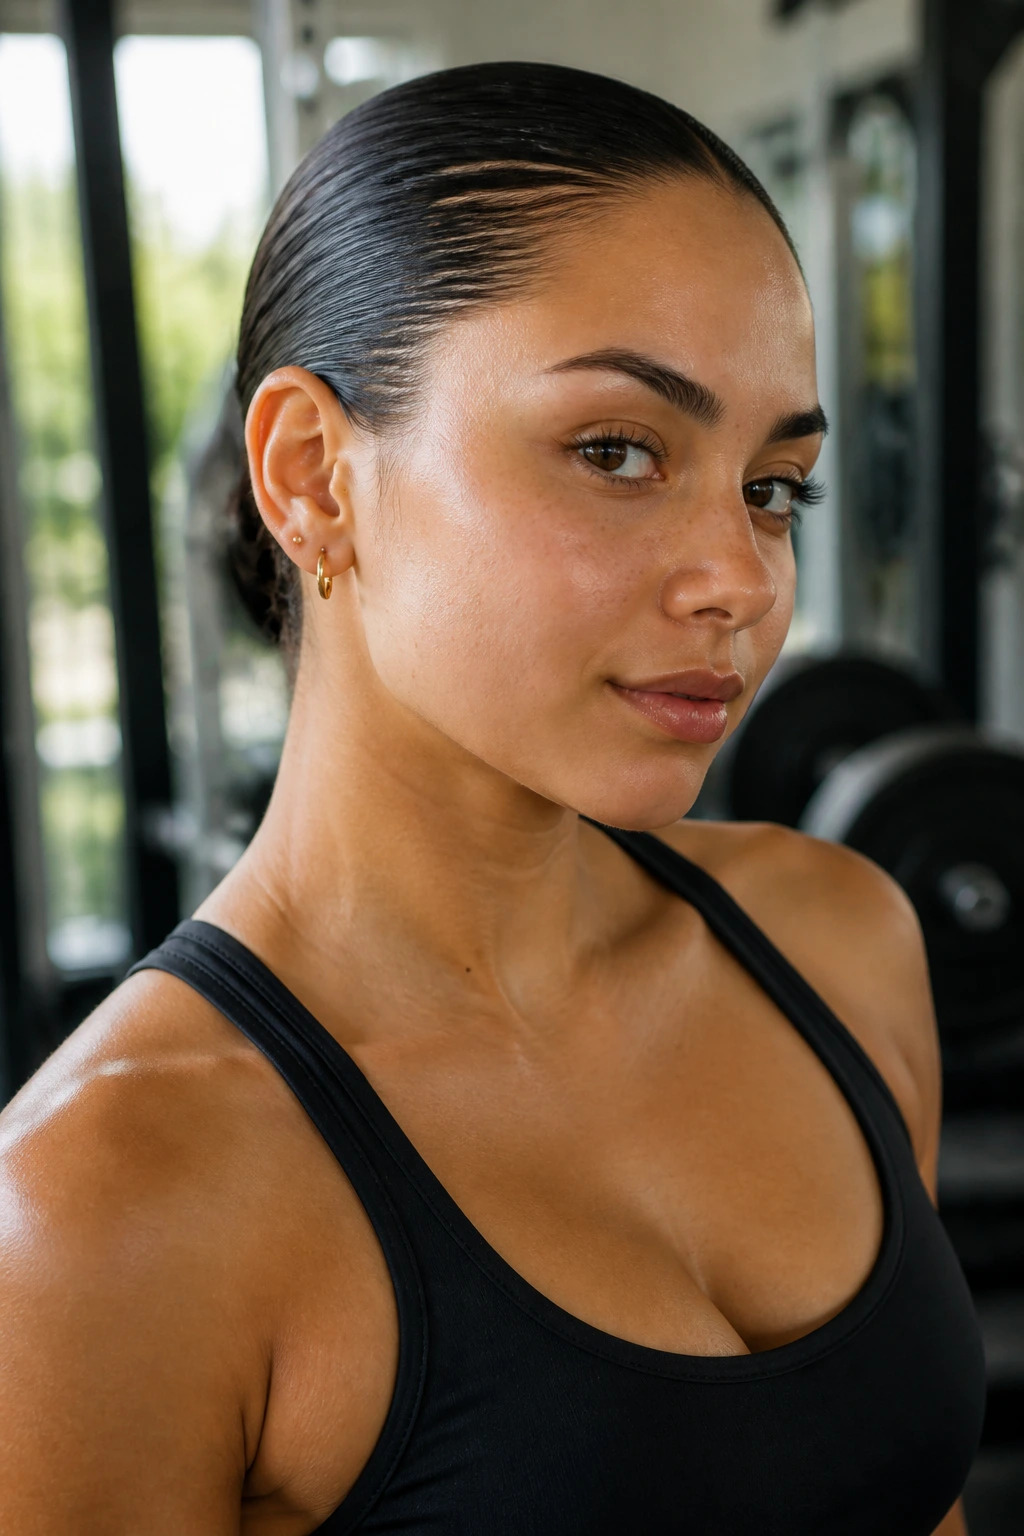
This is the ultimate lazy-girl hack. If you have been sweating or your hair is just unruly, slicking it back with a bit of gel or hair cream can transform an unwashed look into a high-fashion, “clean girl” aesthetic. It’s sharp, confident, and takes zero effort.
The Power of Gel
Use a medium-hold styling gel rather than a heavy wax. You want the hair to look shiny and healthy, not crunchy or crusty. A little bit of argan oil mixed with the gel can provide a gorgeous sheen that makes even messy hair look like it was styled with intention.
Technique for the Best Finish
- Apply a liberal amount of product to the front sections of your hair.
- Use a brush to pull the hair back away from the hairline, ensuring there are no bumps or “bubbles” at the roots.
- Tie it into a tight, low ponytail and let the rest of your hair be natural, or twist it into a bun.
11. The Twisted High Bun
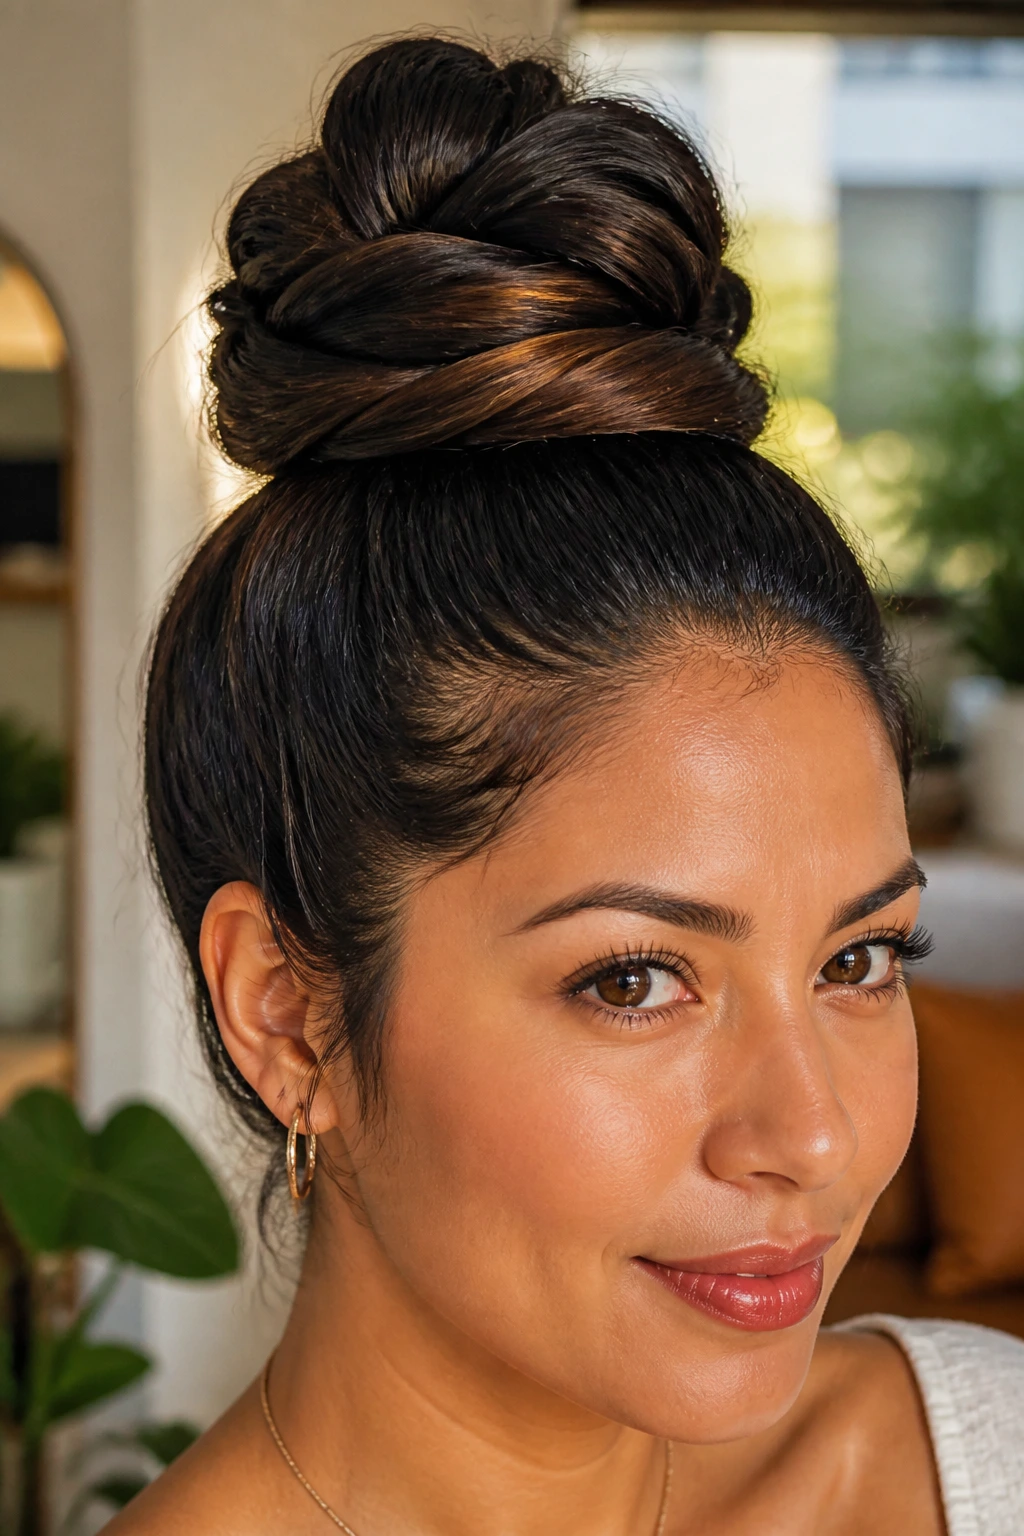
Instead of just winding your hair into a donut shape, twist your ponytail into a tight rope before wrapping it. This creates a more defined, textured bun that looks like you spent time styling it. It’s excellent for long hair that has a lot of volume, as the twist keeps the bun from feeling too heavy.
Texture and Definition
The tighter the initial rope twist, the more defined the bun will look. For those with tighter curls, this method is particularly effective because the natural curl pattern will create a beautiful, textured finish that a standard bun would lack.
Secure for Success
- Create a high, firm ponytail.
- Split the ponytail into two equal sections.
- Twist both sections individually in the same direction, then wrap them around each other.
- Coil this “rope” around the base and secure it with a sturdy hair pin.
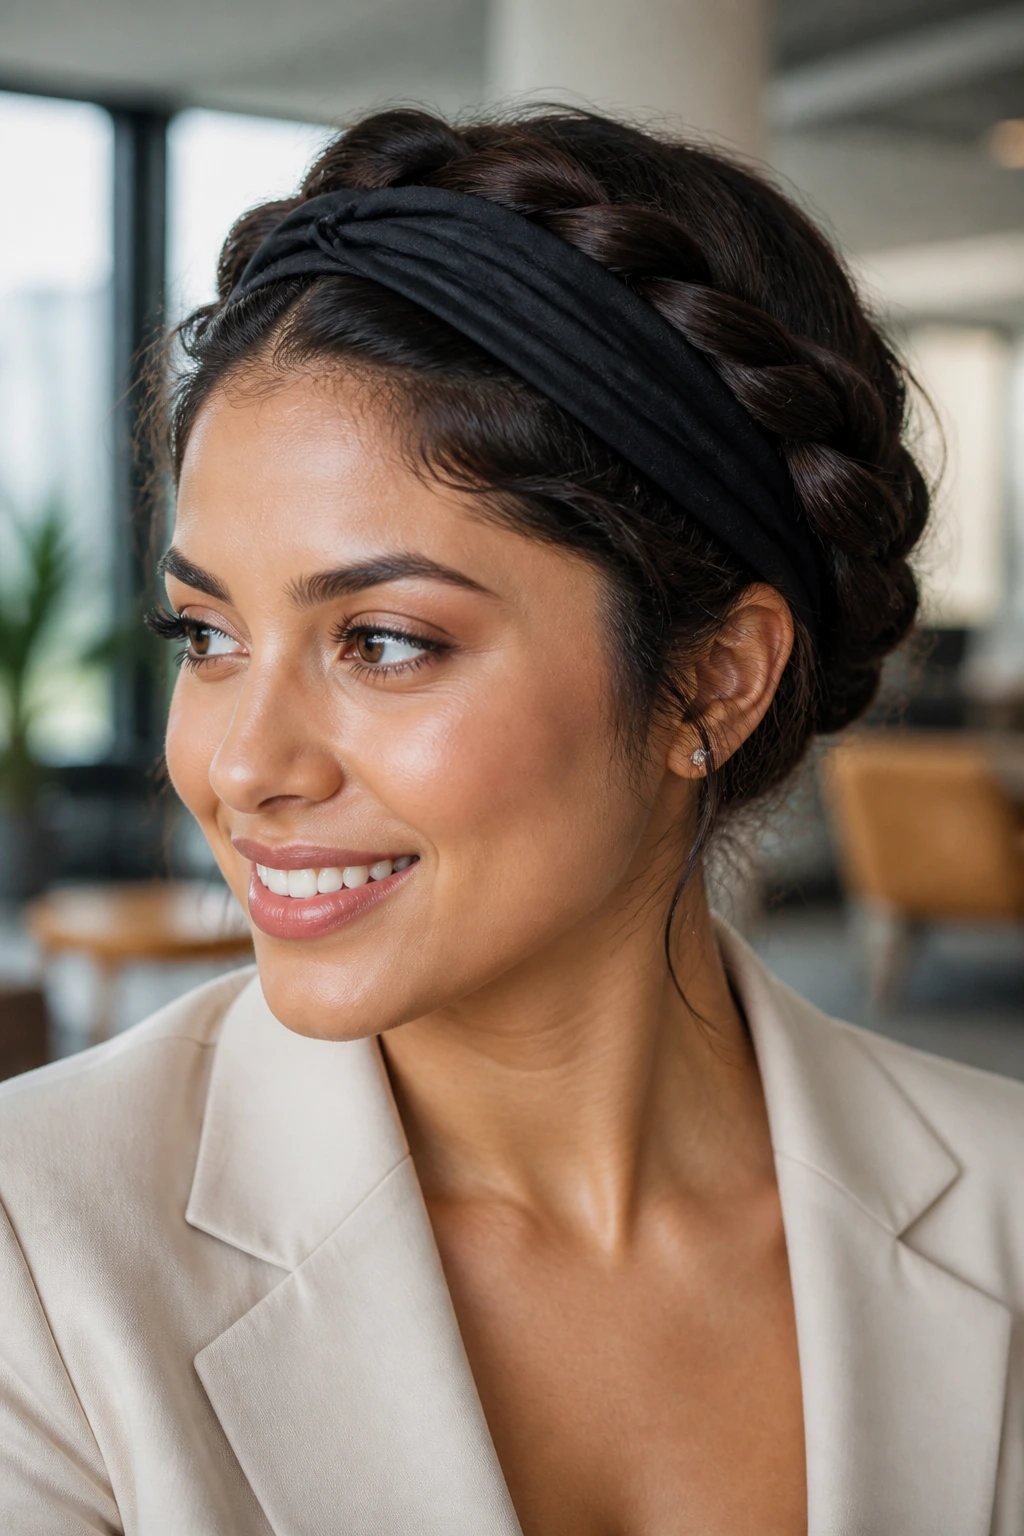
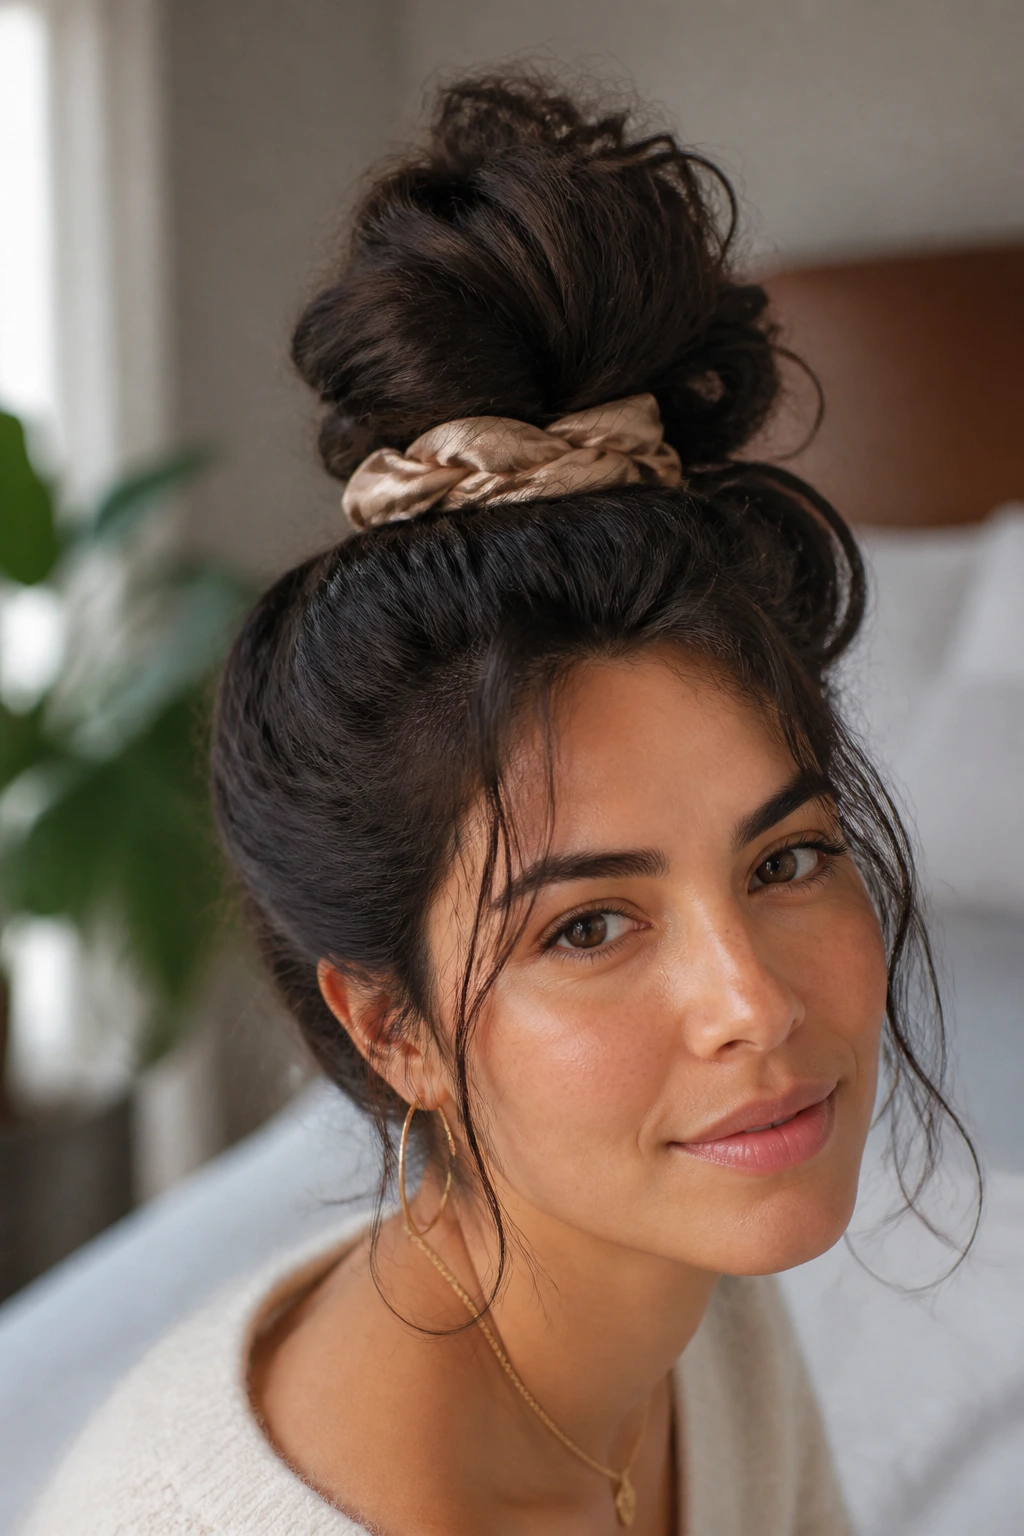
12. The Headband Tuck
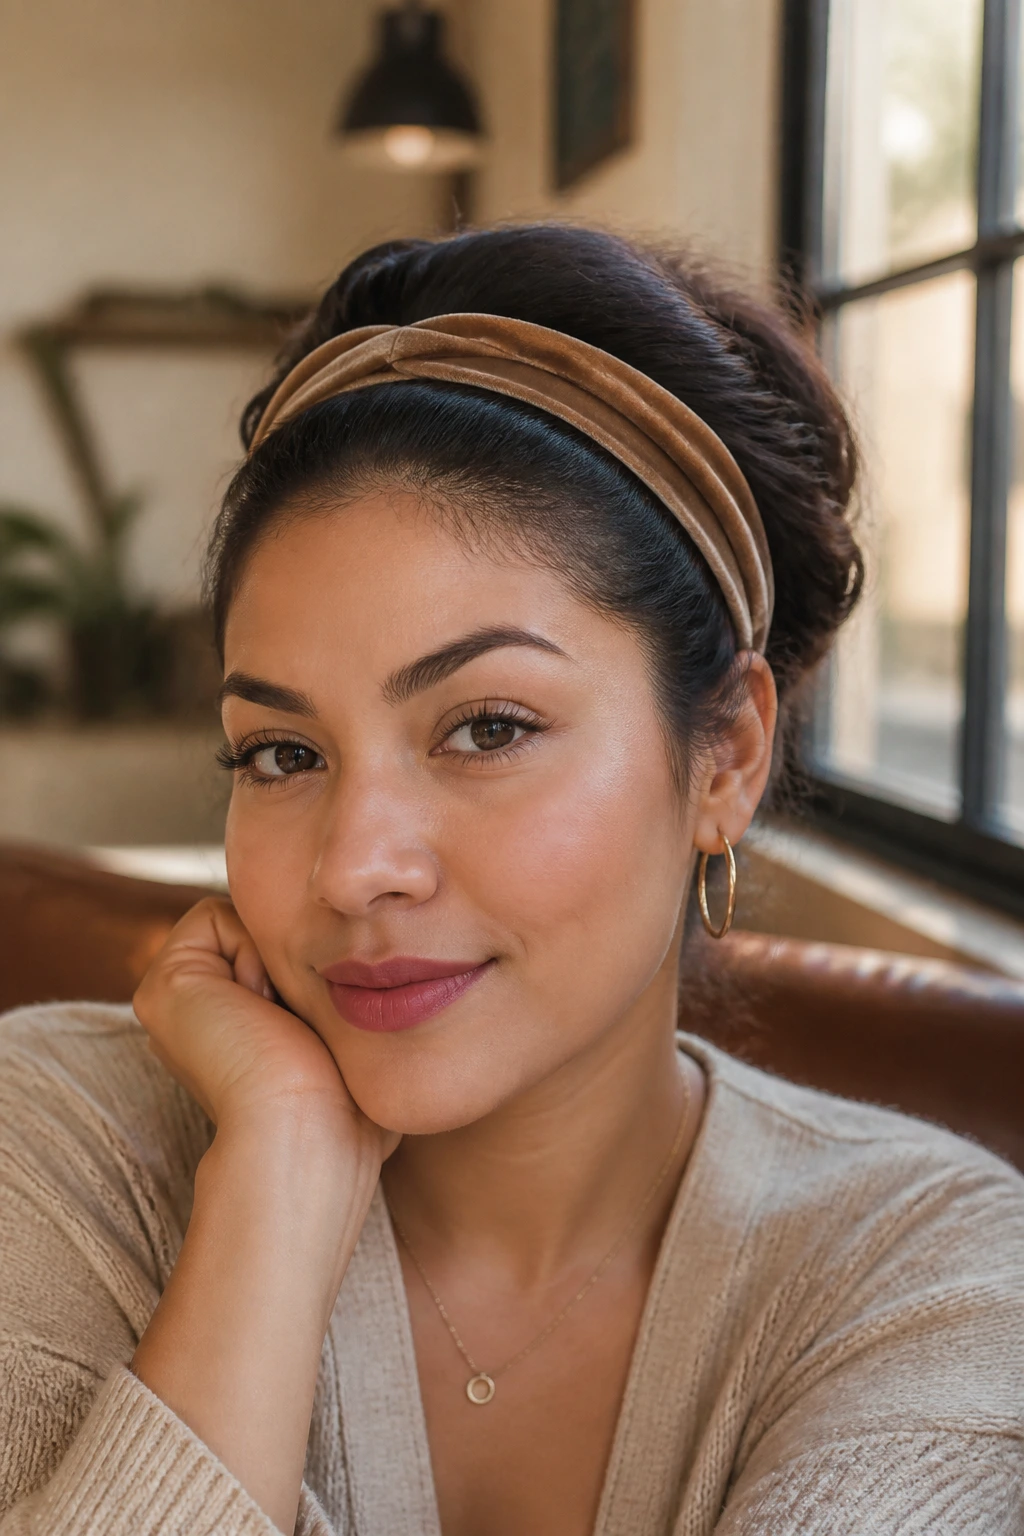
This is a classic style that feels a bit vintage and is incredibly effective at hiding oily roots or frizzy hair. By using an elastic headband, you can tuck your hair up and into the band, creating a soft, voluminous updo that takes about thirty seconds to execute.
Finding the Right Headband
Look for a headband with a soft, velvet-lined, or fabric underside to prevent slipping. If your headband is too loose, the tuck will fall apart within minutes. A snug fit is crucial for ensuring the style stays throughout the day.
The Tuck Method
- Place the headband over your head, sitting it across your forehead or slightly back toward your hairline.
- Starting from the front, tuck small sections of your hair up and over the band.
- Continue tucking the hair all the way around until you reach the back, ensuring all ends are hidden neatly under the band.
13. The Half-Up “Top Knot”
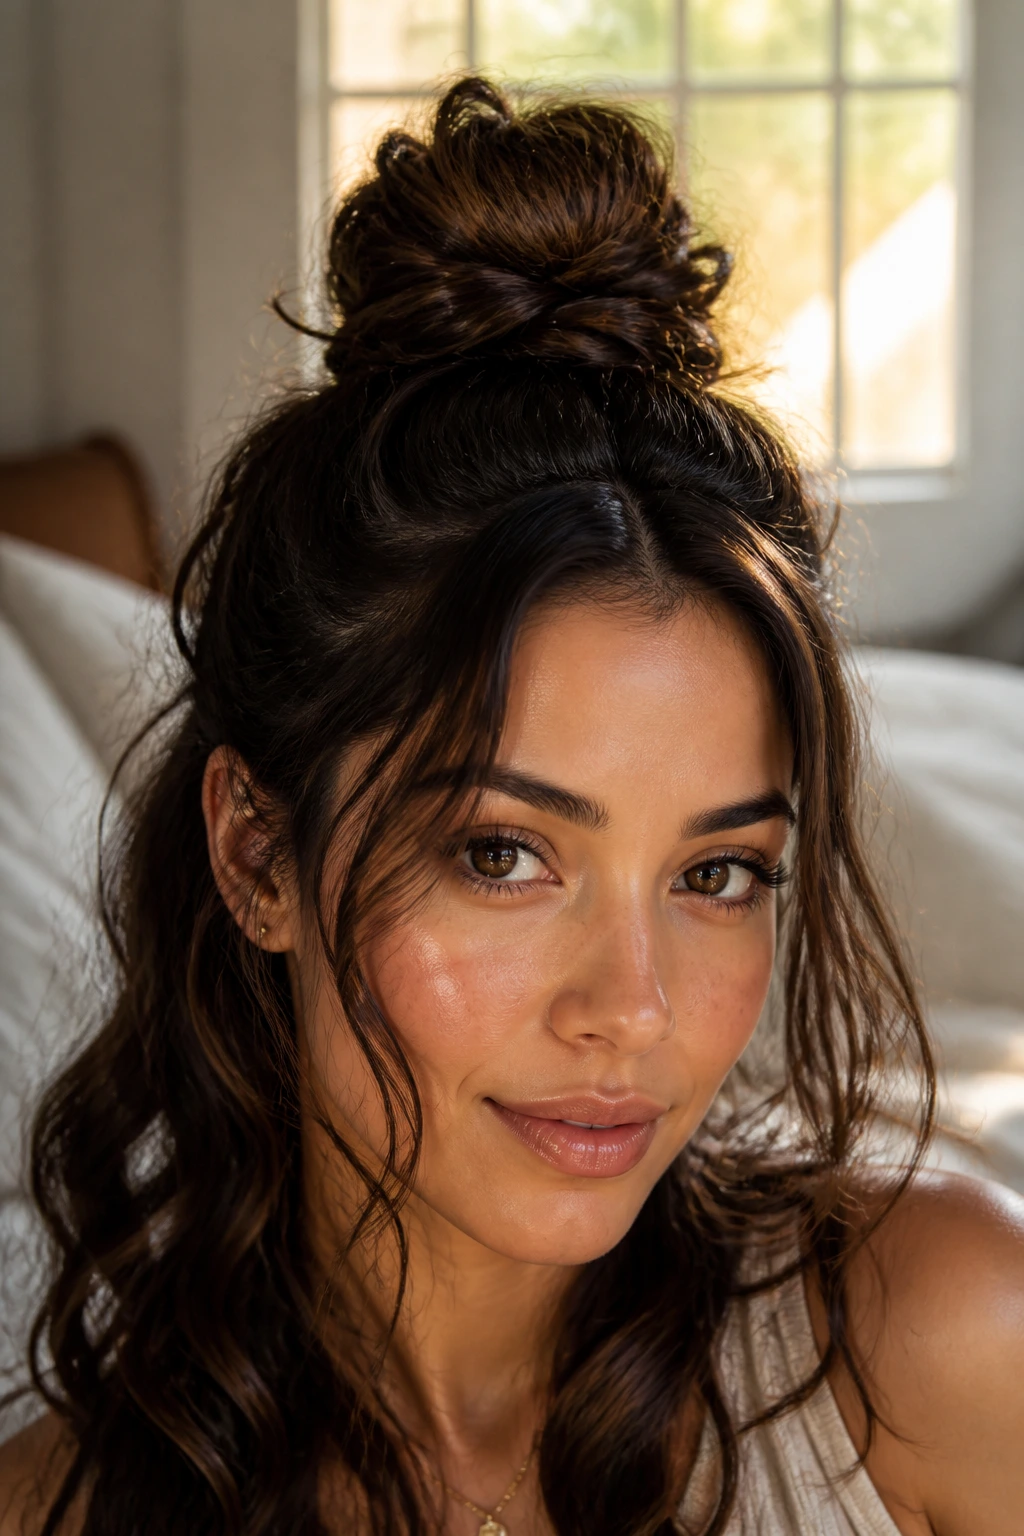
For those days when you can’t decide between wearing your hair down or up, the half-up top knot gives you the best of both worlds. You get the volume and frame-framing effect of loose hair, with the comfort and style of a high bun.
The Golden Ratio
The key to this look is only taking the hair from the crown—don’t go too low or you’ll lose the volume that makes your hair look great down. You want the bun to be centered, not too far back or too close to the hairline.
Making It Look Polished
- Take a small section of hair at the top of your head, about the size of a tennis ball.
- Twist it into a small bun at the center of your head.
- Leave the rest of your hair natural or wavy.
- If your bun looks too small, pull at the loops to create a fuller, wider shape.
14. The Low Side-Swept Braid
This style is incredibly soft and flattering for almost every face shape. By sweeping all your hair to one side and creating a loose, side-swept braid, you create a look that is both relaxed and intentionally beautiful. It is perfect for when you have slightly damp hair and need to get out the door.
Why It’s Perfect for Lazy Days
You don’t need to be perfect with the braid. Because it’s off to the side, it naturally falls over the shoulder, hiding any imperfections or uneven sections in the back. The loose, slightly messy nature of the braid is the point—it’s supposed to look like you woke up like that.
Finishing Touches
- Part your hair on the side and brush it all over to the opposite side.
- Start a loose braid behind your ear.
- If you have layers, let them fall around your face for a soft, dreamy look.
- Use a decorative clip at the end to add a little bit of flair without extra effort.
15. The “Messy” Low Pony with a Scarf Tie
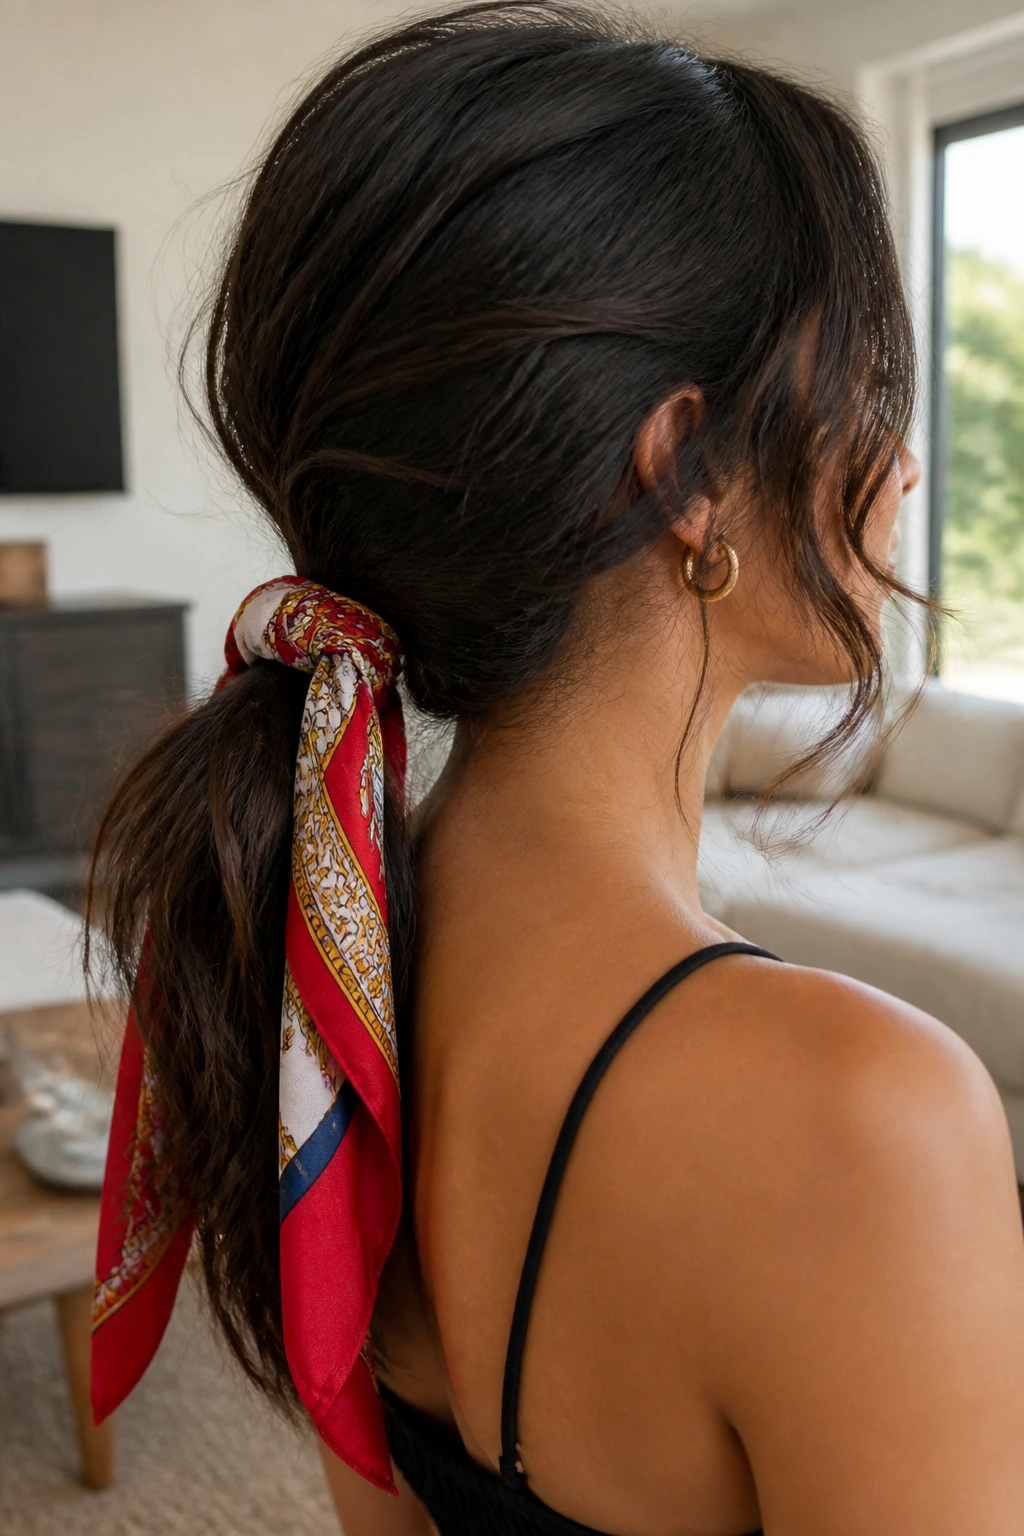
A low ponytail is the baseline of lazy styling, but adding a silk scarf tie changes the entire energy of the look. It’s no longer just a “I didn’t wash my hair” pony; it’s an intentional accessory choice. This is perfect for when you are wearing a simple outfit and want your hair to do a bit of the heavy lifting.
The Color Factor
Choose a scarf that has a pop of color that complements your wardrobe. Latins with darker hair tones look particularly stunning with vibrant oranges, teals, or deep floral patterns. The contrast between your dark hair and the bright fabric is a simple way to look styled with zero effort.
How to Tie It
- Gather your hair into a low ponytail and secure it with a simple elastic first.
- Wrap your scarf around the elastic and tie it in a bow.
- Keep the tails long so they drape down against your back.
- If the ponytail feels too flat, gently tug at the top of your head to add a little bit of volume.
16. The Faux-Hawk Updo
If you have a lot of volume and natural curls, a faux-hawk is a brilliant way to showcase that texture while keeping it contained. By using pins to gather your hair into a series of small, vertical sections along the center of your head, you create a high-fashion look that feels edgy and modern.
Why This Works
You are not trying to make your hair look straight or flat. Instead, you are pushing it toward the center, which utilizes the volume you already have. It’s a great way to deal with day-three curls that need a bit of a reset but don’t require a full wash.
Styling Tips
- Apply a touch of curl-defining cream to your fingertips.
- Take small sections of hair from each side of your head and pin them toward the center.
- Continue this from the nape of your neck to your forehead.
- Let the curls sit high on top for a full, voluminous finish.
17. The Twisted Headband Updo
Similar to the tuck, this uses a headband but focuses on twisting the hair around it rather than tucking it in. This gives a slightly more defined, structural look that is perfect for professional environments where you need to look put-together.
The Twist Technique
It is much easier than it looks. By sectioning the hair and twisting it around the band, you ensure that even the shortest layers stay tucked away. This is a life-saver for hair that is prone to humidity-induced frizz.
Getting the Look
- Place a thick, sturdy headband on your head.
- Take small, two-inch sections of hair starting at the temples.
- Wrap the section over and under the band, securing it firmly.
- Work your way around until all hair is incorporated, finishing at the back.
18. The “Undone” French Twist
The classic French twist has a reputation for being stiff and formal, but an “undone” version is perfect for a lazy day. By not aiming for perfection and letting a few pieces fall free, you transform this formal staple into a relaxed, everyday style.
The Secret to the Undone Look
Use a large hair fork or a few big pins instead of a dozen tiny bobby pins. The key is to gather your hair loosely and twist it up, tucking the ends inside. It shouldn’t feel tight; if you can shake your head gently and the pins don’t dig into your scalp, you’ve done it right.
Styling the Free Pieces
- Gather your hair at the back and twist it upward.
- Tuck the ends in and secure with a large clip.
- Let the face-framing pieces fall naturally and don’t worry about trying to pin them back.
- The messiness is what makes it feel modern and approachable.
19. The Low Bun with Face-Framing Braids
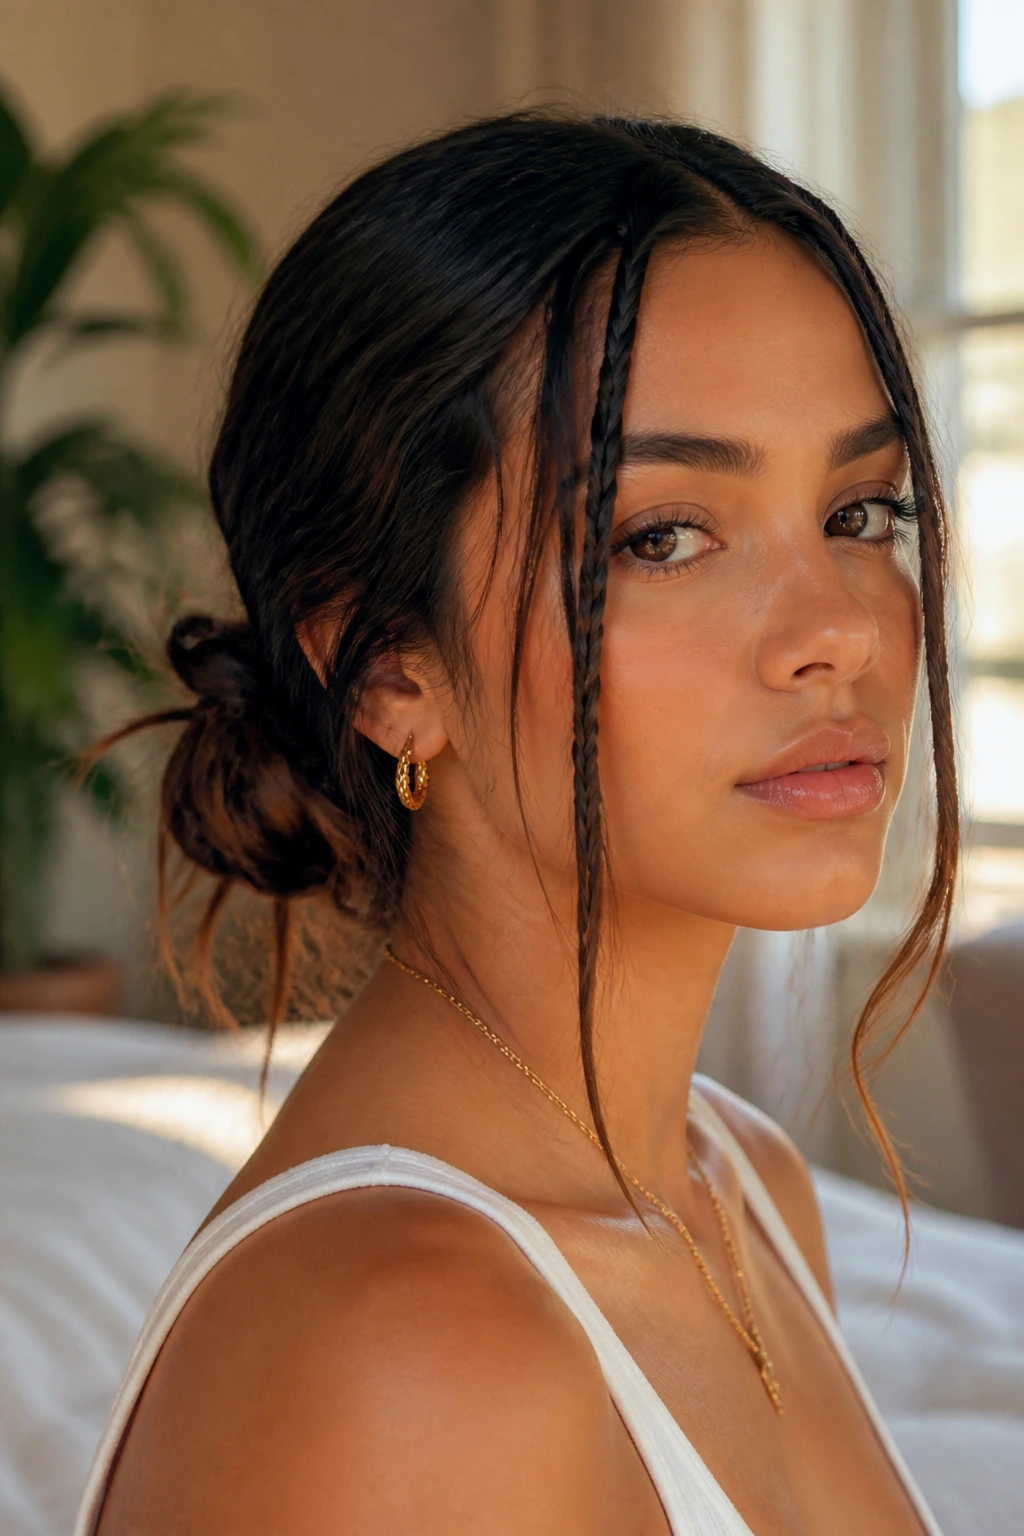
This is a small detail that makes a massive impact. A low bun is the base, but adding two tiny, thin braids at the front of your face frames your features and adds a touch of bohemian flair. It turns a standard lazy-day style into a intentional “look.”
Why It’s a Winner
It takes less than two minutes, but it completely changes your appearance. By framing your face, you draw attention to your features and create a balanced look that feels soft and feminine. It’s a great style to use when you have bangs or short layers that are otherwise difficult to manage.
Execution
- Part your hair down the center.
- Take two small sections at the front and braid them loosely.
- Pull the rest of your hair into a low, messy bun at the back.
- Pin the ends of the braids into the bun for a clean, cohesive finish.
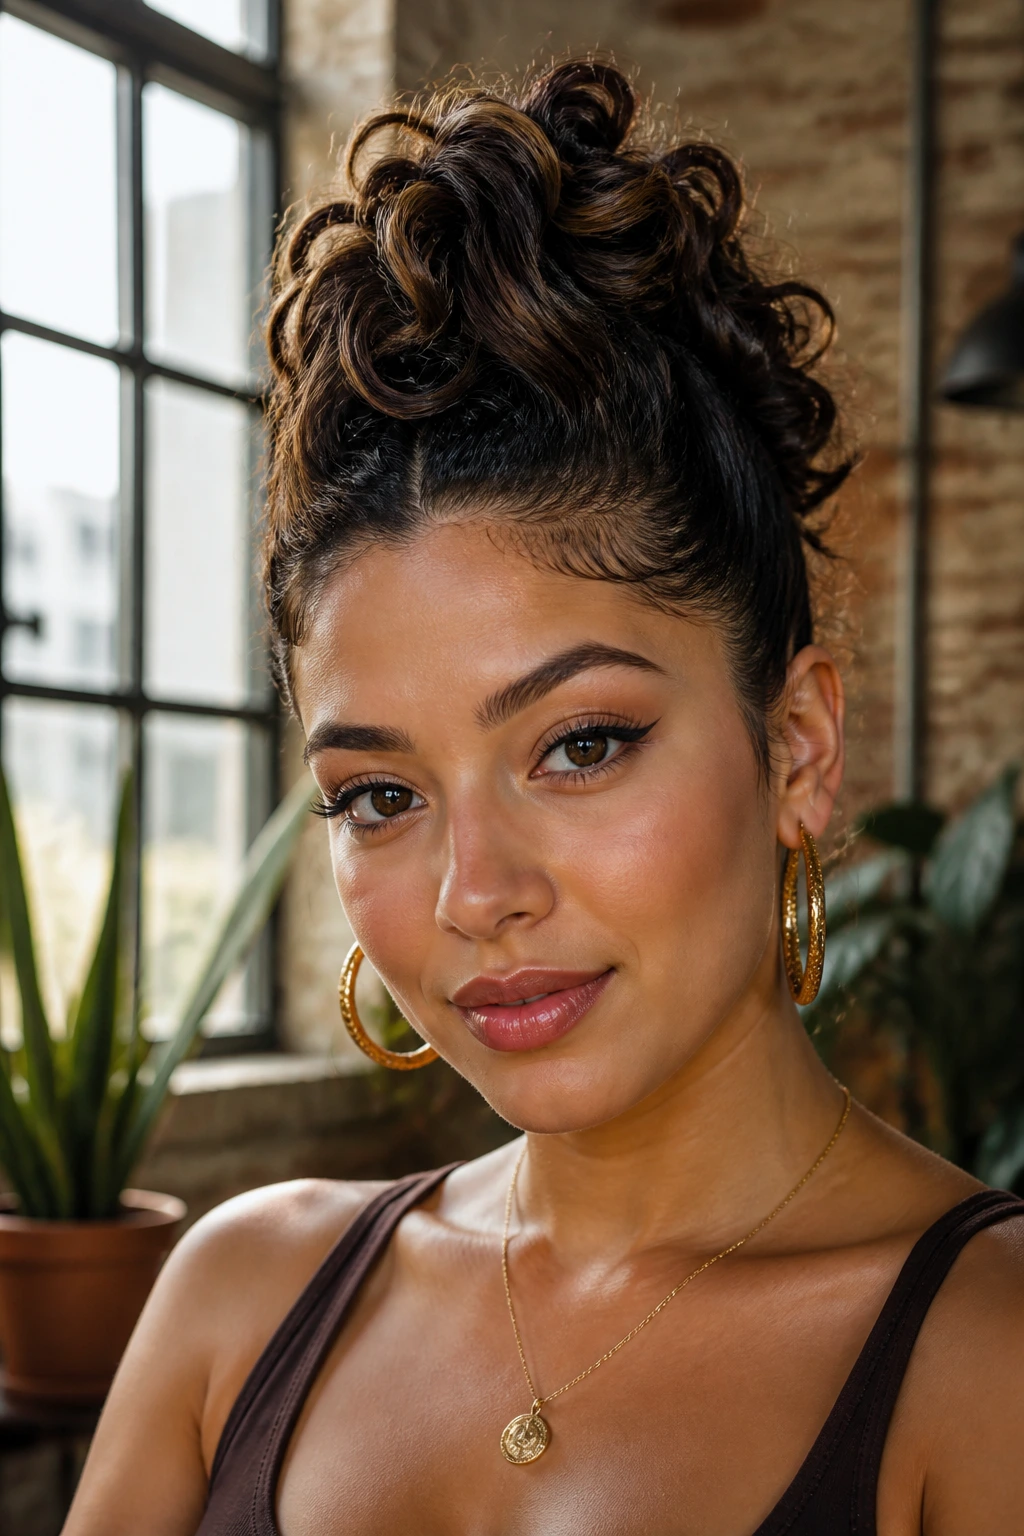
20. The High-Volume Loose Knot
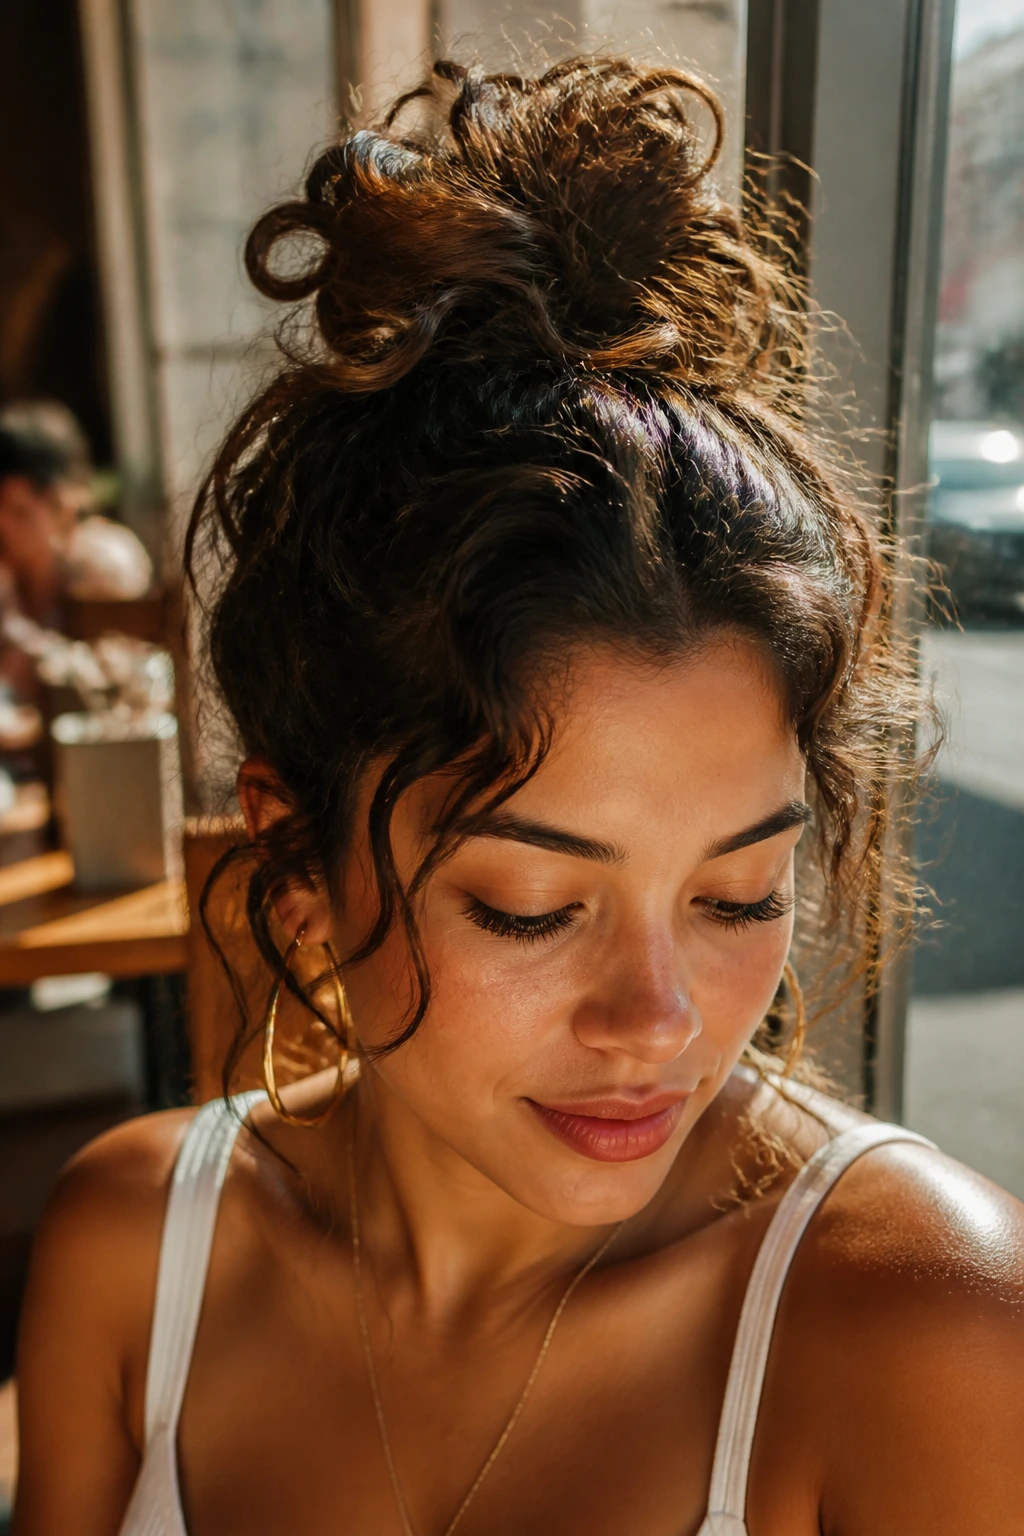
When you have zero time, don’t overthink it. A high-volume, loose knot is exactly what it sounds like: you gather your hair, tie it in a loose knot, and pin it. It relies on your hair’s natural texture to do all the heavy lifting.
The Beauty of Imperfection
This style is not about sleekness; it is about embracing the chaos of thick, wavy, or curly hair. Let the ends stick out, let the flyaways stay where they are, and focus on the volume at the crown. It’s the ultimate lazy-day move because it doesn’t try to be anything it isn’t.
Tips for Success
- Use a large, open hair pin to secure the base of the knot.
- The looser the knot, the more volume you get.
- If you have bangs, let them do their own thing—don’t try to force them into the knot.
Final Thoughts
At the end of the day, lazy hairstyles for Latina hair are really about working with your natural texture rather than against it. Whether it is a quick claw-clip updo or a loose braid, the best styles are those that allow your hair to breathe and move. Do not worry about perfection; often, the most effortless look is the one that has a little bit of personality and movement to it. Keep a few scrunchies and a good matte claw clip in your bag, and you will always be prepared for those mornings when time is not on your side. The best style is always the one that makes you feel comfortable and confident in your own skin.