Managing thick hair in a high school setting often feels like a full-time job. You have volume that doesn’t quit, a weight that can literally pull at your scalp, and a texture that seems to have a personality of its own. Many of the styles that look effortless on people with fine hair just don’t translate the same way when your hair is dense and heavy. However, once you learn how to work with your natural volume rather than against it, that thickness becomes your greatest asset. It provides the base for styles that hold shape, resist flatness, and look inherently full without needing a mountain of product.
The secret isn’t just in the styling; it’s in the preparation. With thick hair, the way you layer or texturize your cut dictates whether you look like you’re carrying a heavy helmet or sporting a vibrant, manageable mane. Most of these styles rely on removing bulk where it isn’t needed—specifically around the nape of the neck or the crown—to allow the hair to fall in a way that feels natural and light. Whether you’re racing to make it to first period or prepping for a formal dance, these looks are designed to keep your hair under control while letting that thick, healthy texture shine.
1. The Textured Long Shag
This cut is a lifesaver for those who want to keep length but cannot stand the constant weight. By incorporating heavy layers, you effectively “debulk” the hair, creating movement that otherwise wouldn’t exist. A shag typically focuses on shorter, choppy layers around the crown and longer, thinning layers through the ends.
Why It Works for Thickness
When hair is all one length, the bottom becomes bulky, creating an unwanted triangular shape. The shag breaks that line, allowing the hair to sit flat against your shoulders while maintaining plenty of body. You can style this with a simple sea salt spray to enhance the natural wave, which often shows up more once the weight of the hair is redistributed.
Styling Tips for the Shag
- Focus your blow-dryer on the roots to get volume where you want it.
- Use a texturizing cream to define the ends rather than a heavy oil.
- Avoid flat-ironing the entire length, as it can make the layers look sparse and thin. Pro tip: Ask your stylist to use thinning shears or a razor on the mid-lengths only, never at the very tips, to prevent a frayed, unhealthy appearance.
2. Sleek High Pony with Wrapped Base
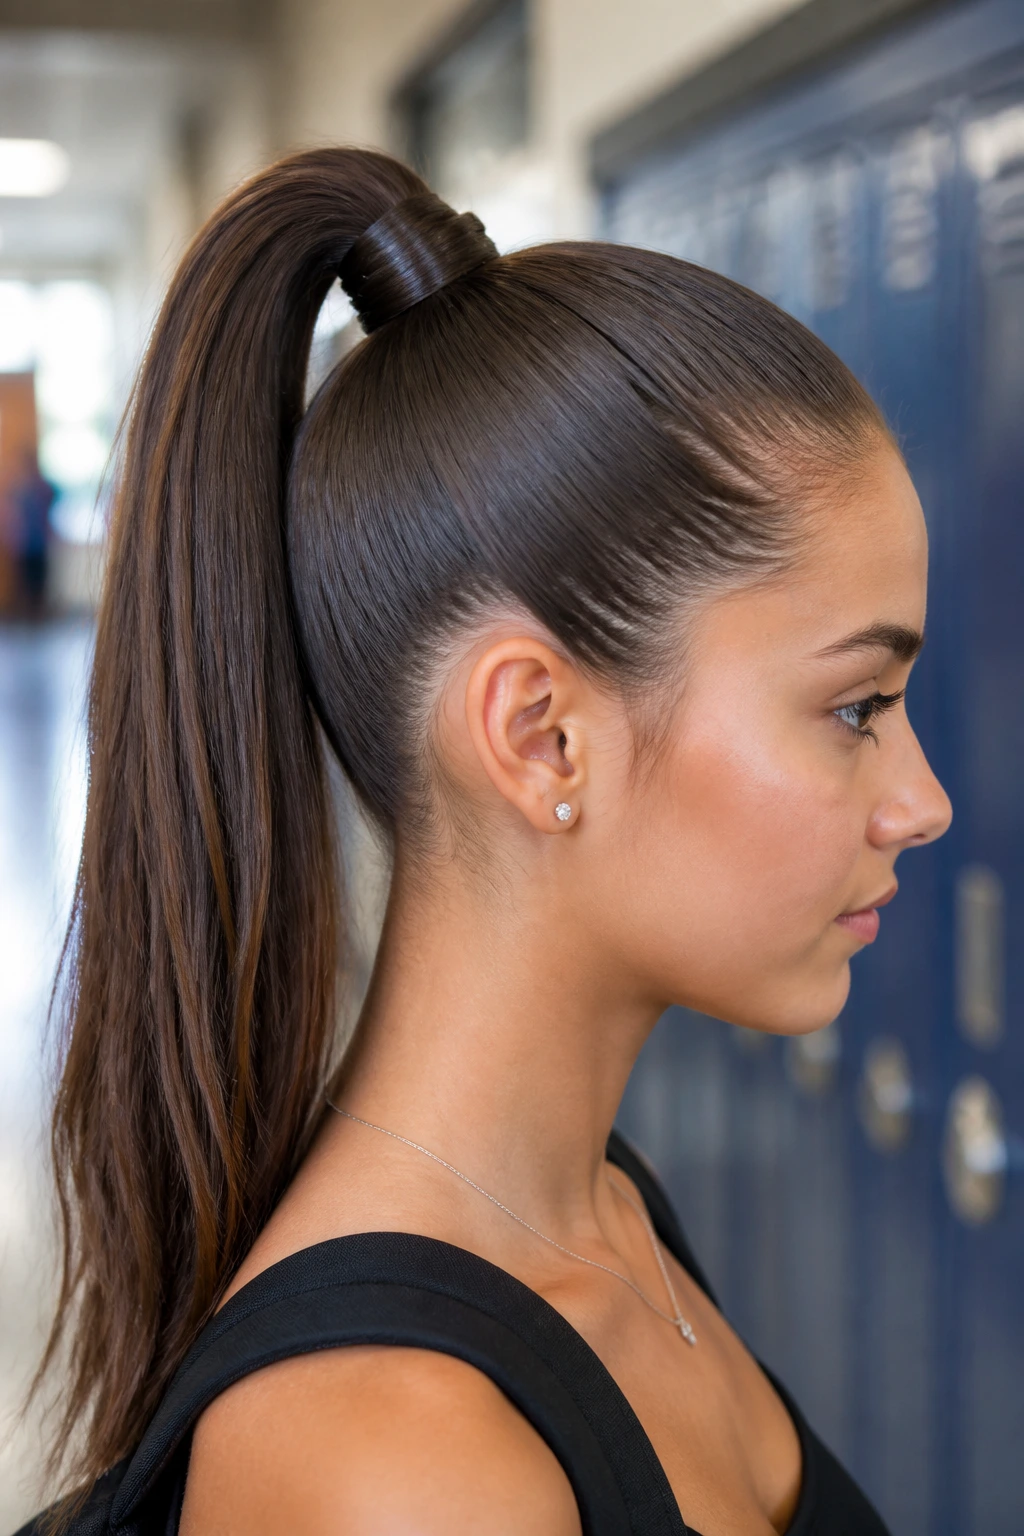
A high ponytail is the standard for busy school mornings, but with thick hair, it can lead to a literal headache if you don’t secure it correctly. The key here is not just gathering the hair; it is balancing the weight.
How to Get the Look
Gather your hair at the crown, ensuring the underside is smooth and tight. Use a thick, snag-free elastic that can actually accommodate the volume of your ponytail. Once secured, take a small section of hair from the bottom of the pony and wrap it around the elastic until it is completely hidden. Secure this with a bobby pin pushed upward into the base of the ponytail to keep it tucked away.
Making It Last
Thick hair tends to slide, causing a ponytail to droop within an hour. A clever trick is to use two hair ties instead of one, or use a “hook” hair tie which offers a much stronger hold without needing to twist the band excessively. If you want that sleek, shiny look, a tiny drop of lightweight serum rubbed into your palms and smoothed over the top will tame any flyaways that inevitably pop up during a long school day.
3. The Deconstructed Messy Bun
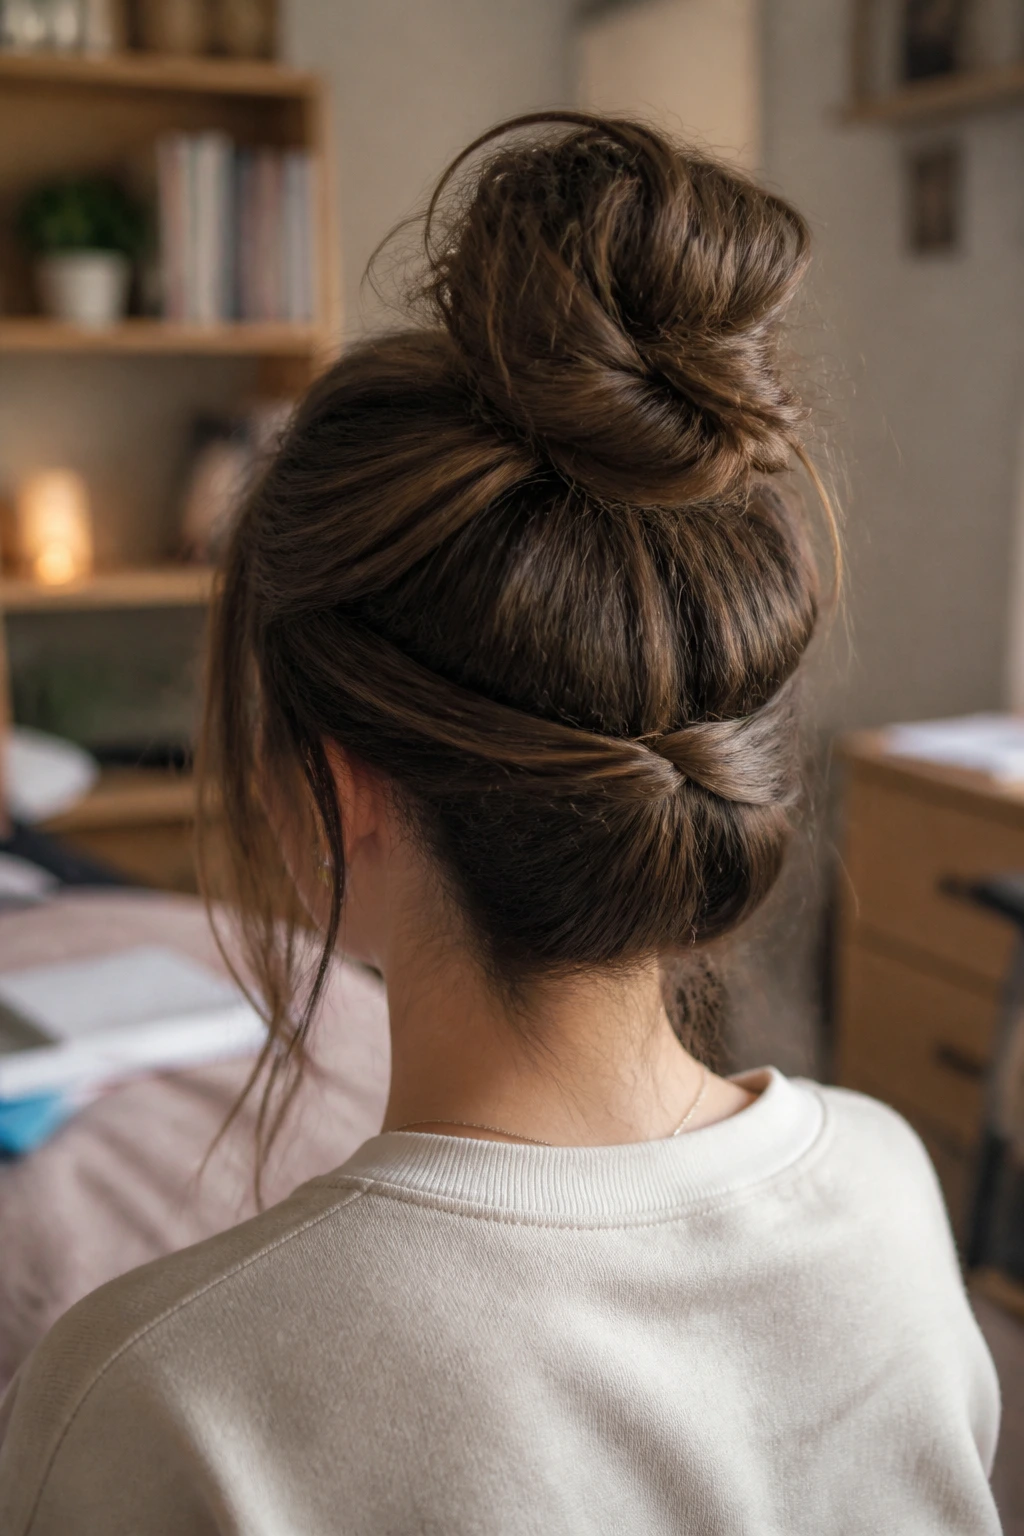
The classic bun often falls apart when you have too much hair. The weight causes it to sag, or the sheer volume makes the bun look like an oversized, tangled lump on the back of your head. The deconstructed method solves this by breaking the hair into smaller, manageable segments.
Why This Style Succeeds
Instead of trying to pull all your hair into one giant twist, divide your hair into two sections. Tie the top section into a loose knot, and then wrap the bottom section around it. This distributes the weight across two points of tension rather than one.
Refining the Bun
- Use U-shaped pins instead of standard bobby pins; they hold much more weight and are easier to shove into dense hair.
- Pull out a few face-framing pieces to soften the look, which prevents the severe, “pulled-back-too-tight” appearance that can happen with thick hair.
- Avoid using hair ties with metal connectors, as these are notorious for catching and snapping strands during the wrapping process.
4. Deep Side-Parted Lob
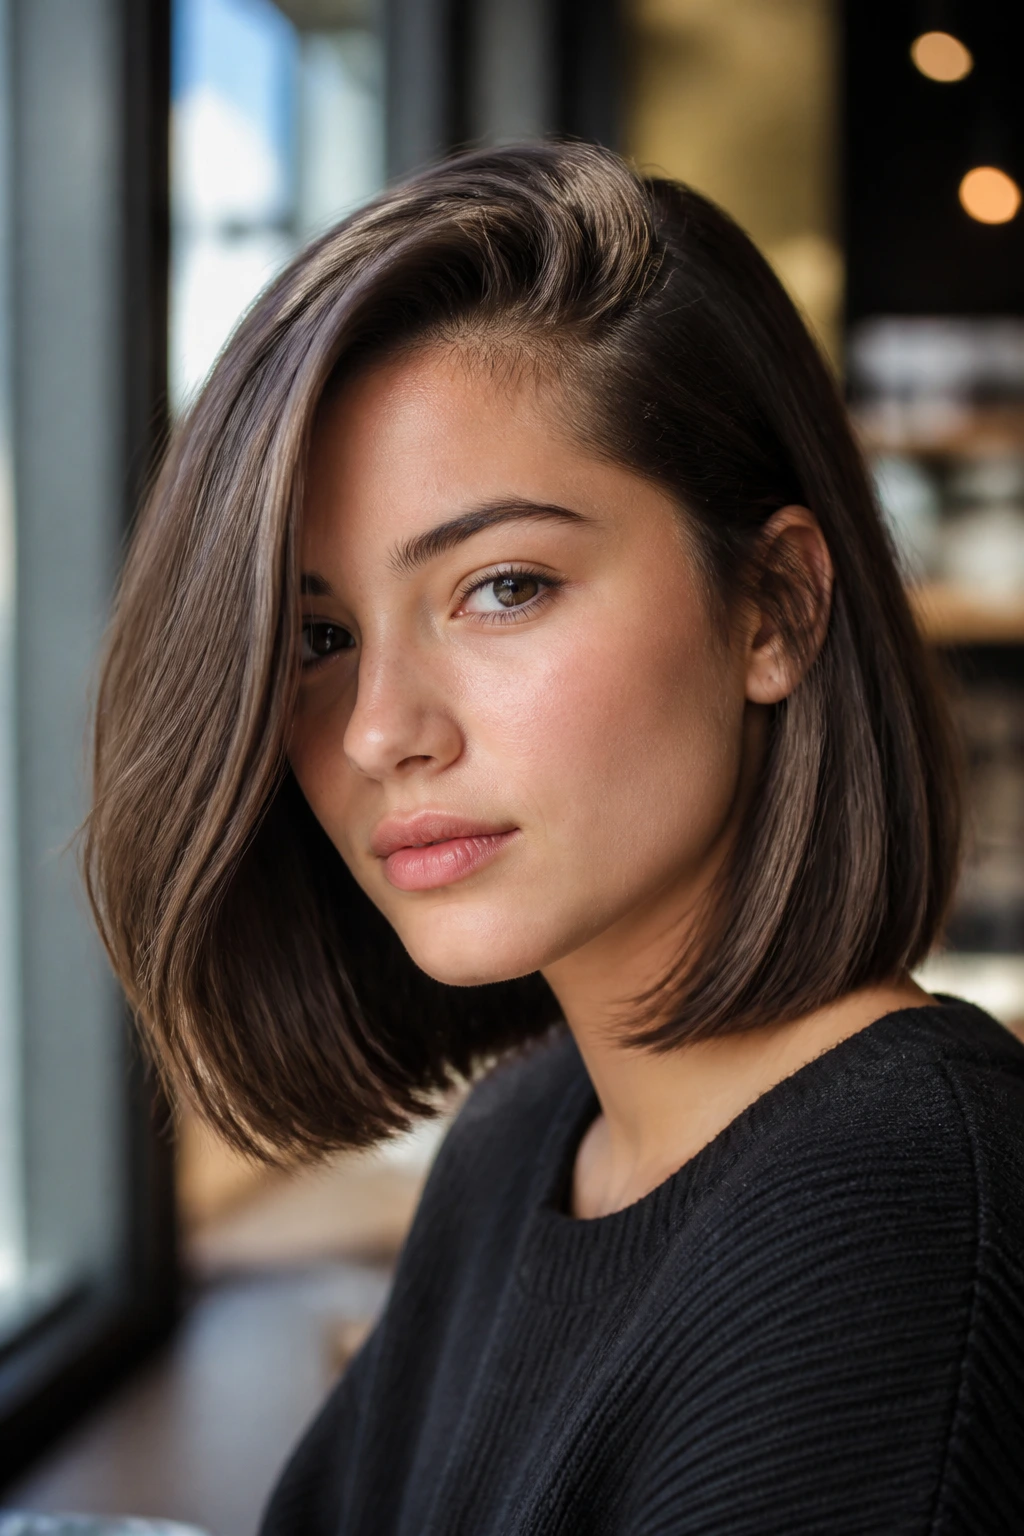
The long bob, or “lob,” is often avoided by those with thick hair because they fear the “triangle effect.” When cut correctly, however, a lob is incredibly sophisticated and easy to maintain. The secret is the length—keep it at least collarbone-length or longer to allow the weight of the hair to keep the volume directed downward rather than outward.
The Power of the Deep Part
A deep side part instantly shifts the focus of your face and helps manage the volume on one side. By flipping a significant portion of your hair to one side, you create a natural lift at the root without needing backcombing or harsh chemical root lifters.
Maintenance Notes
- This style requires a trim every six to eight weeks to prevent the ends from getting ragged and heavy.
- If you notice it getting too “poofy” toward the end of the day, keep a small, portable smoothing brush in your locker to redistribute the natural oils from your scalp to the ends.
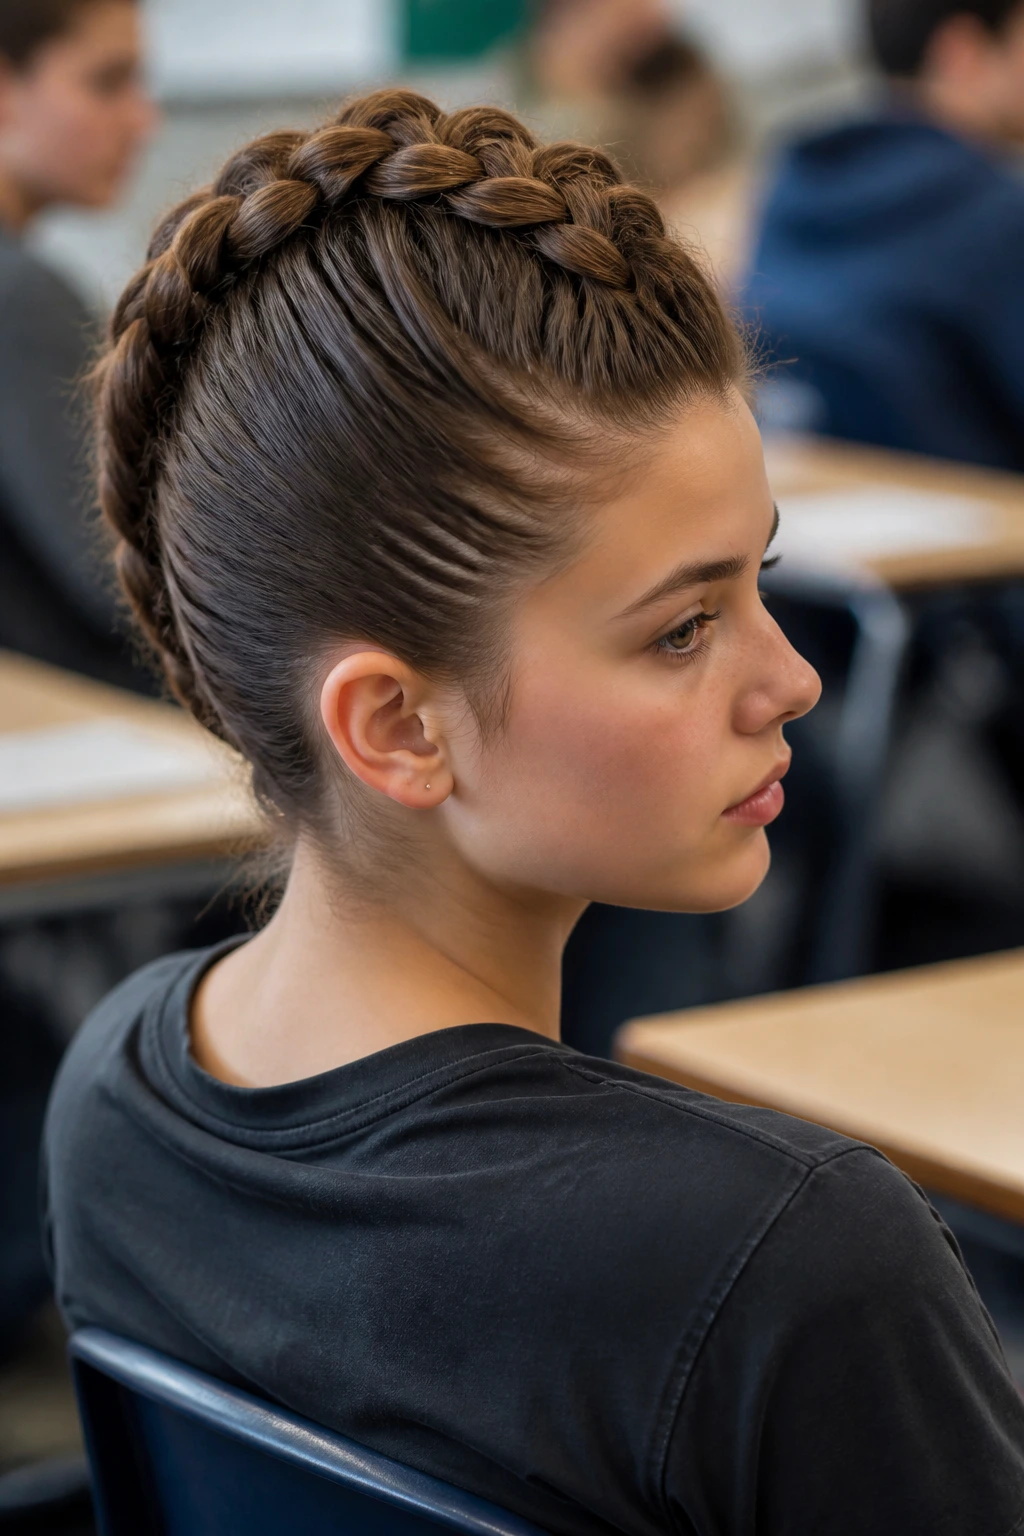
5. Braided Crown
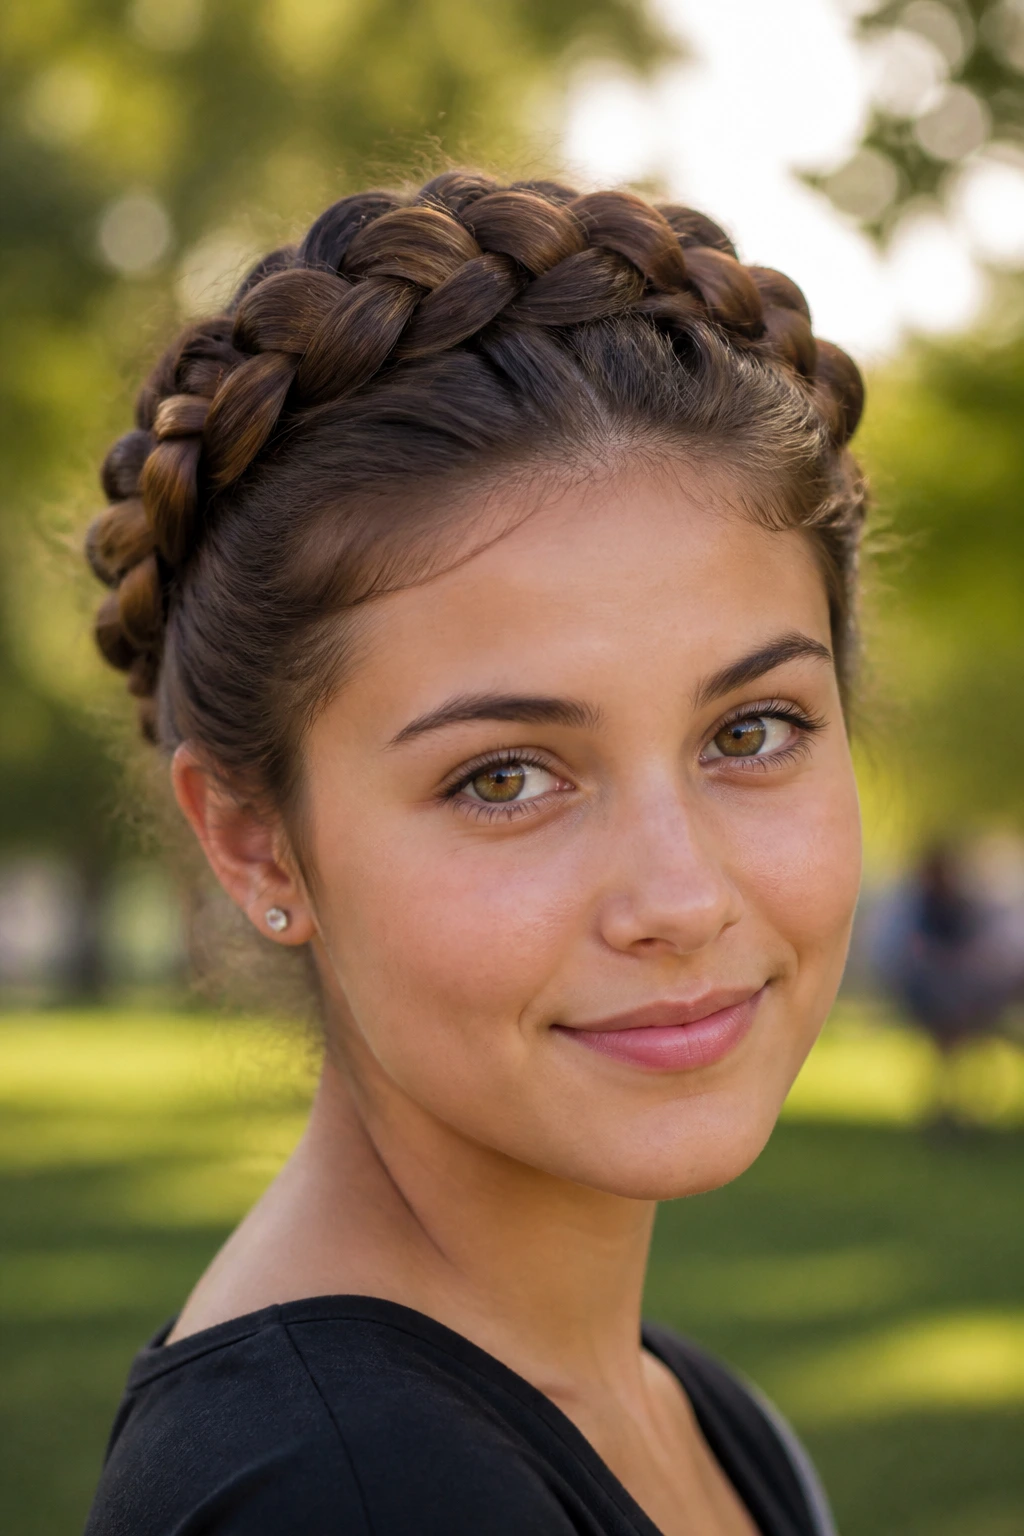
If you are tired of your hair falling into your face during exams or gym class, a braided crown is the ultimate functional solution. It keeps every single strand locked away, and it actually looks like you put in far more effort than you really did.
Technique for Thick Hair
Start with a Dutch braid (where you cross the strands under instead of over) starting behind one ear. Work your way around your head, adding hair as you go, and secure the ends with a clear elastic tucked neatly under the braid. If your hair is exceptionally thick, you might find that one braid is too bulky; in that case, try two smaller French braids that meet in the back.
Styling Variation
You can leave the ends loose for a more boho, relaxed feel, or tuck them under to keep the nape of the neck cool. This style is surprisingly durable and can often last through an entire day of school, including athletic activities.
6. Half-Up Top Knot
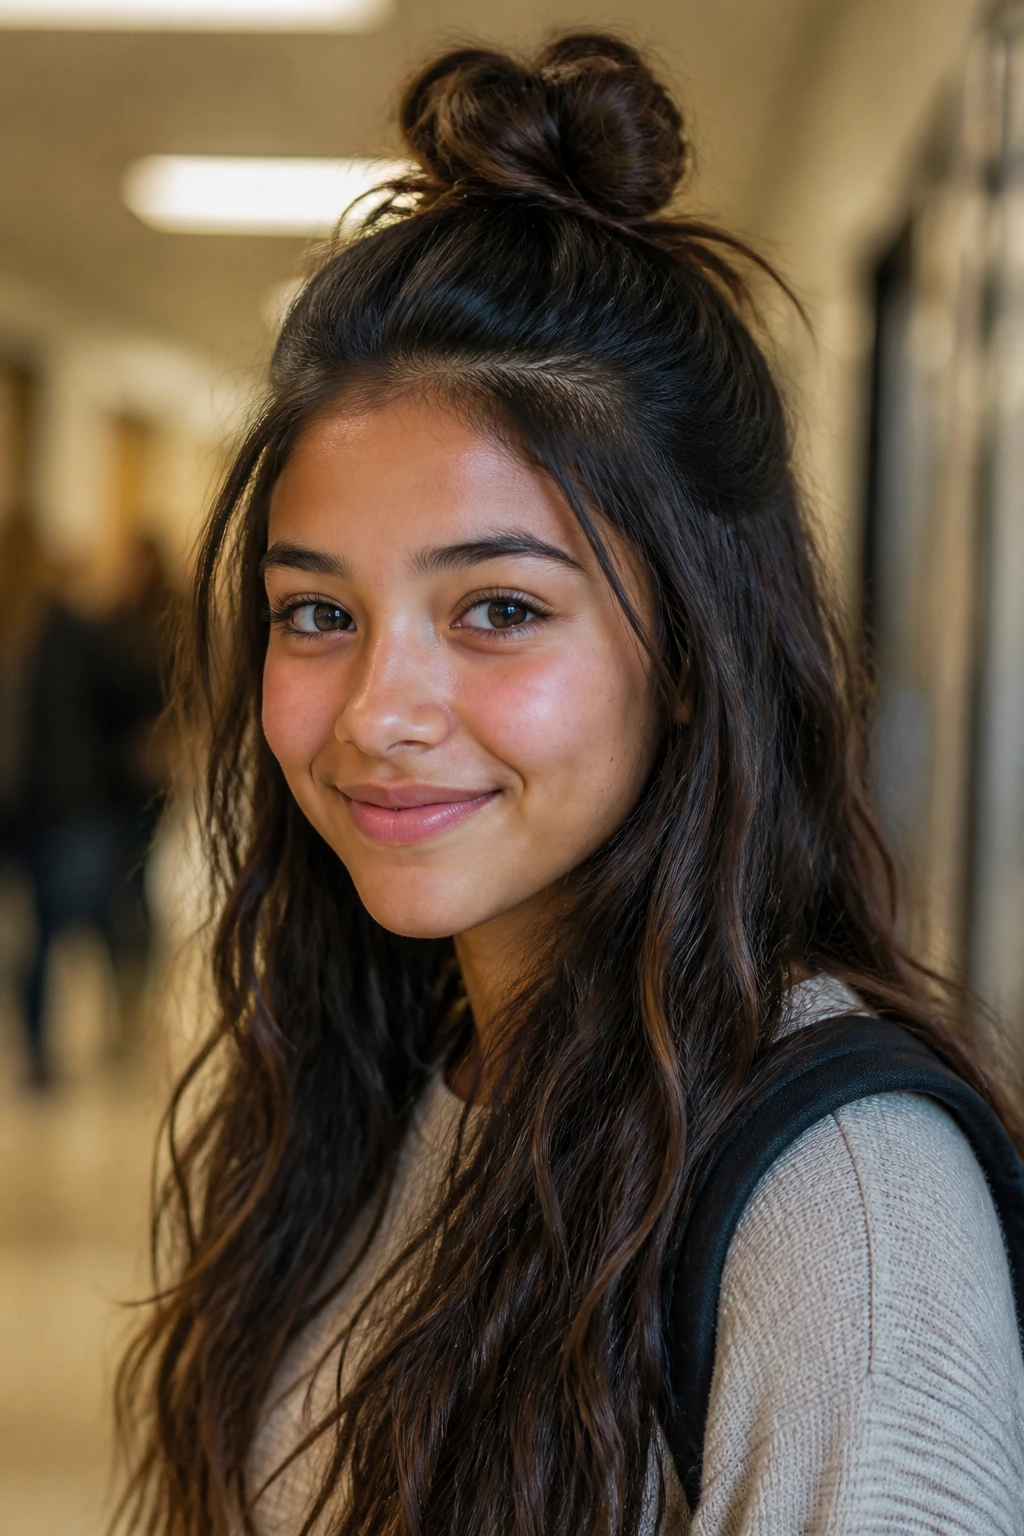
This is the “best of both worlds” hairstyle. It keeps the hair out of your eyes while still letting you show off the length and volume that you probably worked hard to grow.
Managing the Volume
When pulling the top section up, be very selective about how much hair you grab. If you grab too much, the top knot will overwhelm your head; if you grab too little, it will look flimsy against the mass of hair left down. Aim for a section that starts at your temples and meets at the top of your crown.
Elevating the Knot
Don’t just wrap the hair into a tight ball. Twist the section into a “rope” first, then wrap it around itself. This creates a clean, intentional aesthetic rather than a messy scramble. If the knot feels heavy, secure it with a large, decorative clip instead of an elastic, which can help distribute the weight more comfortably against your scalp.
7. The Sleek Straight Look
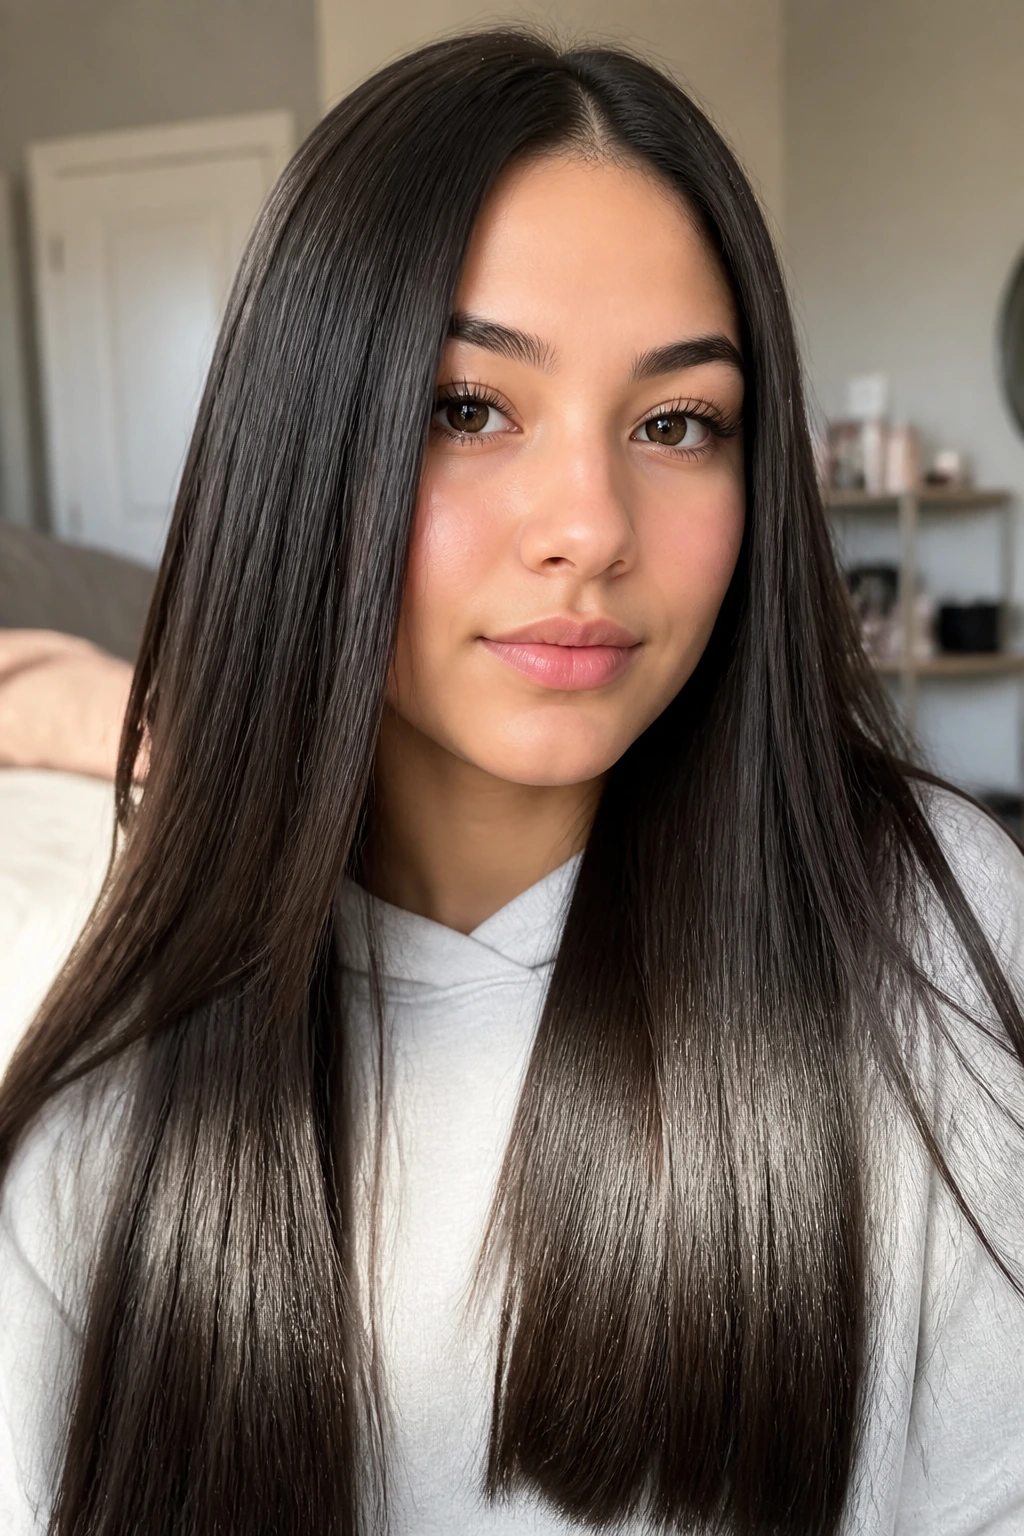
Sometimes, you just want to let the hair hang straight. For thick hair, this requires a bit of patience and the right tools. The biggest enemy here is humidity, which turns straight, thick hair into a frizz-filled cloud within minutes.
The Secret to Longevity
Start with a leave-in conditioner that focuses on humidity resistance. When blow-drying, use a boar-bristle brush to maintain tension on the hair; this pulls the cuticle tight and prevents the “puffiness” that occurs when the hair is dried haphazardly.
The Final Polish
Once the hair is completely dry, run a flat iron through small, thin sections. Never run a flat iron through thick sections, as the heat won’t reach the center of the hair, meaning you have to pass over the same piece multiple times, causing unnecessary damage. A tiny bit of anti-frizz serum on the ends will keep things polished until the final bell rings.
8. Low Side Braid

For those days when your hair feels particularly heavy, a low side braid is a gentle way to keep everything organized. It moves the weight of your hair to one shoulder, which is much more comfortable than having a mass of hair resting against your back.
Keeping It Secure
Thick hair can cause braids to loosen and unravel very quickly. To combat this, start with a “texturizing” base. If your hair is freshly washed and slippery, use a bit of dry shampoo or texturizing powder at the roots and through the lengths to give the hair some “grip.”
Aesthetic Touches
Don’t be afraid to pull at the loops of the braid once you’ve finished. This creates a “pancake” effect that makes the braid look fuller and more intentional, effectively showing off how much hair you actually have without the style looking messy.
9. Waterfall Braids
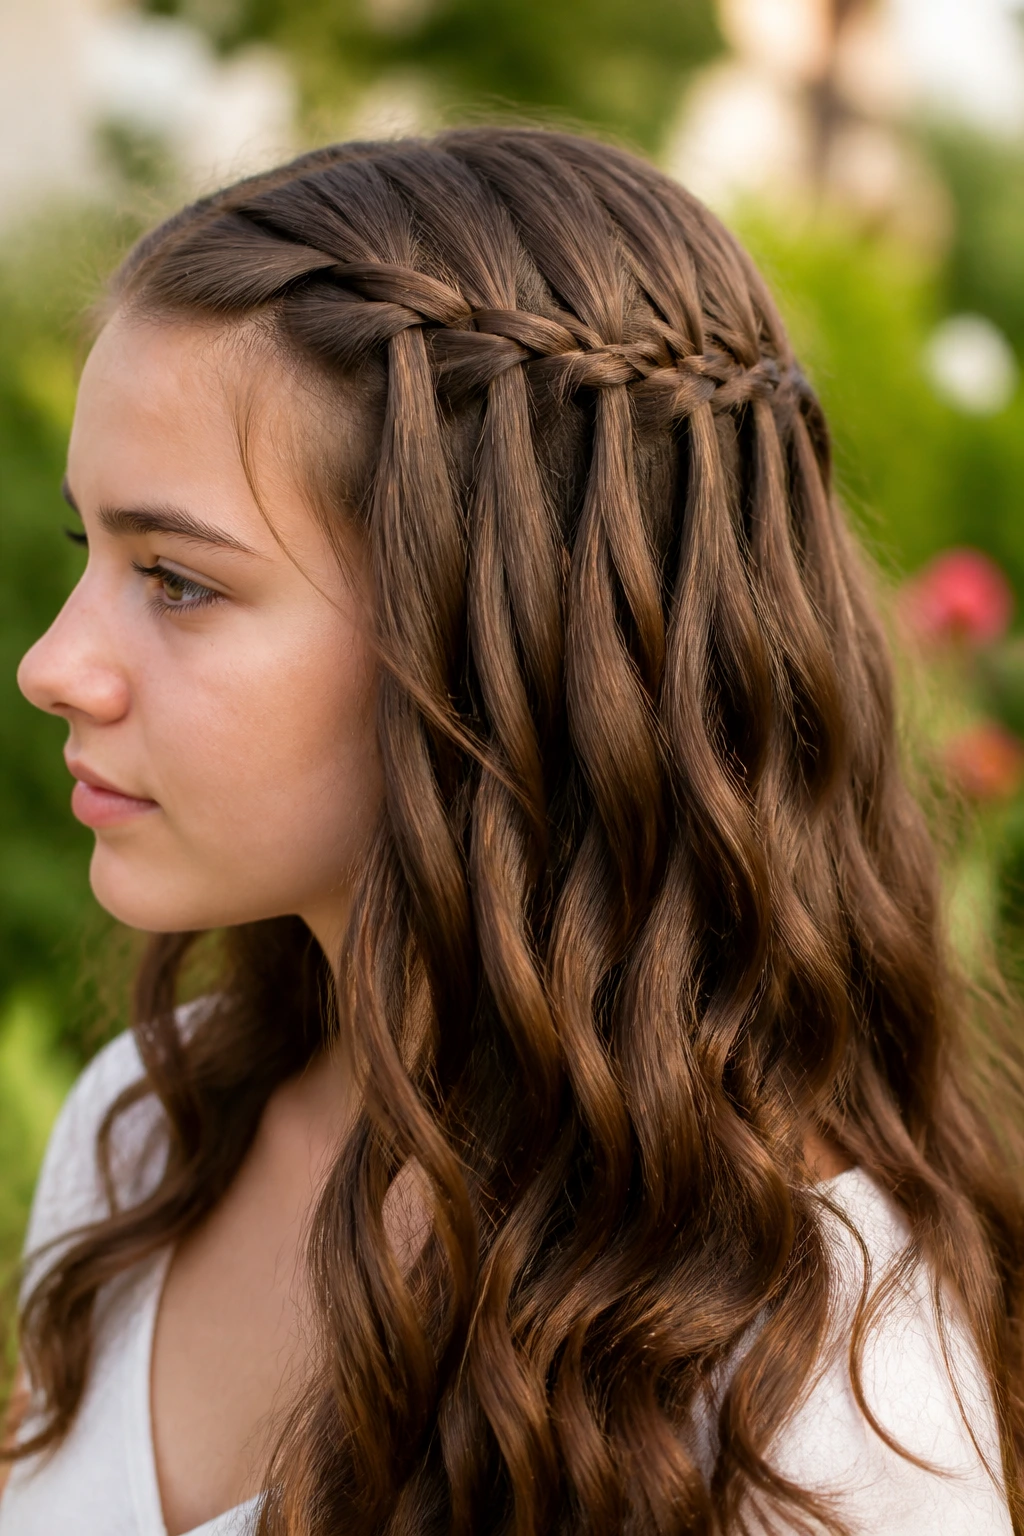
Waterfall braids are a stunning way to incorporate a bit of detail into your everyday look. They are perfect for thick hair because the density of your hair makes the “waterfall” effect look much more pronounced and dramatic than it does on fine hair.
How to Execute
The waterfall braid involves dropping a strand of hair after every “over” move, essentially leaving a stream of loose hair below the braid line. Because you have more hair to work with, the gaps between your strands will look perfectly spaced, creating a very professional, polished finish.
Styling Tip
Pair this with loose waves. Since you already have the volume, a quick pass with a large-barrel curling iron on the loose ends will give you a soft, romantic look that holds up beautifully throughout the day.
10. The Slicked-Back Wet Look
This is a modern, slightly edgier style that works wonders for thick hair because the gel or pomade acts as a weight, keeping everything locked firmly in place. It is perfect for those days when your hair is refusing to cooperate or is in need of a wash.
Achieving the Texture
Apply a generous amount of strong-hold styling gel or mousse to damp hair. Use a wide-tooth comb to distribute the product evenly from root to tip. Then, brush the hair back away from your face. You can tuck it behind your ears or leave it to set naturally.
Why This Style Wins
Because thick hair has so much body, it holds the “slicked” shape better than thinner hair, which might just fall flat against the skull. This look is inherently confident and requires zero touch-ups during the day.
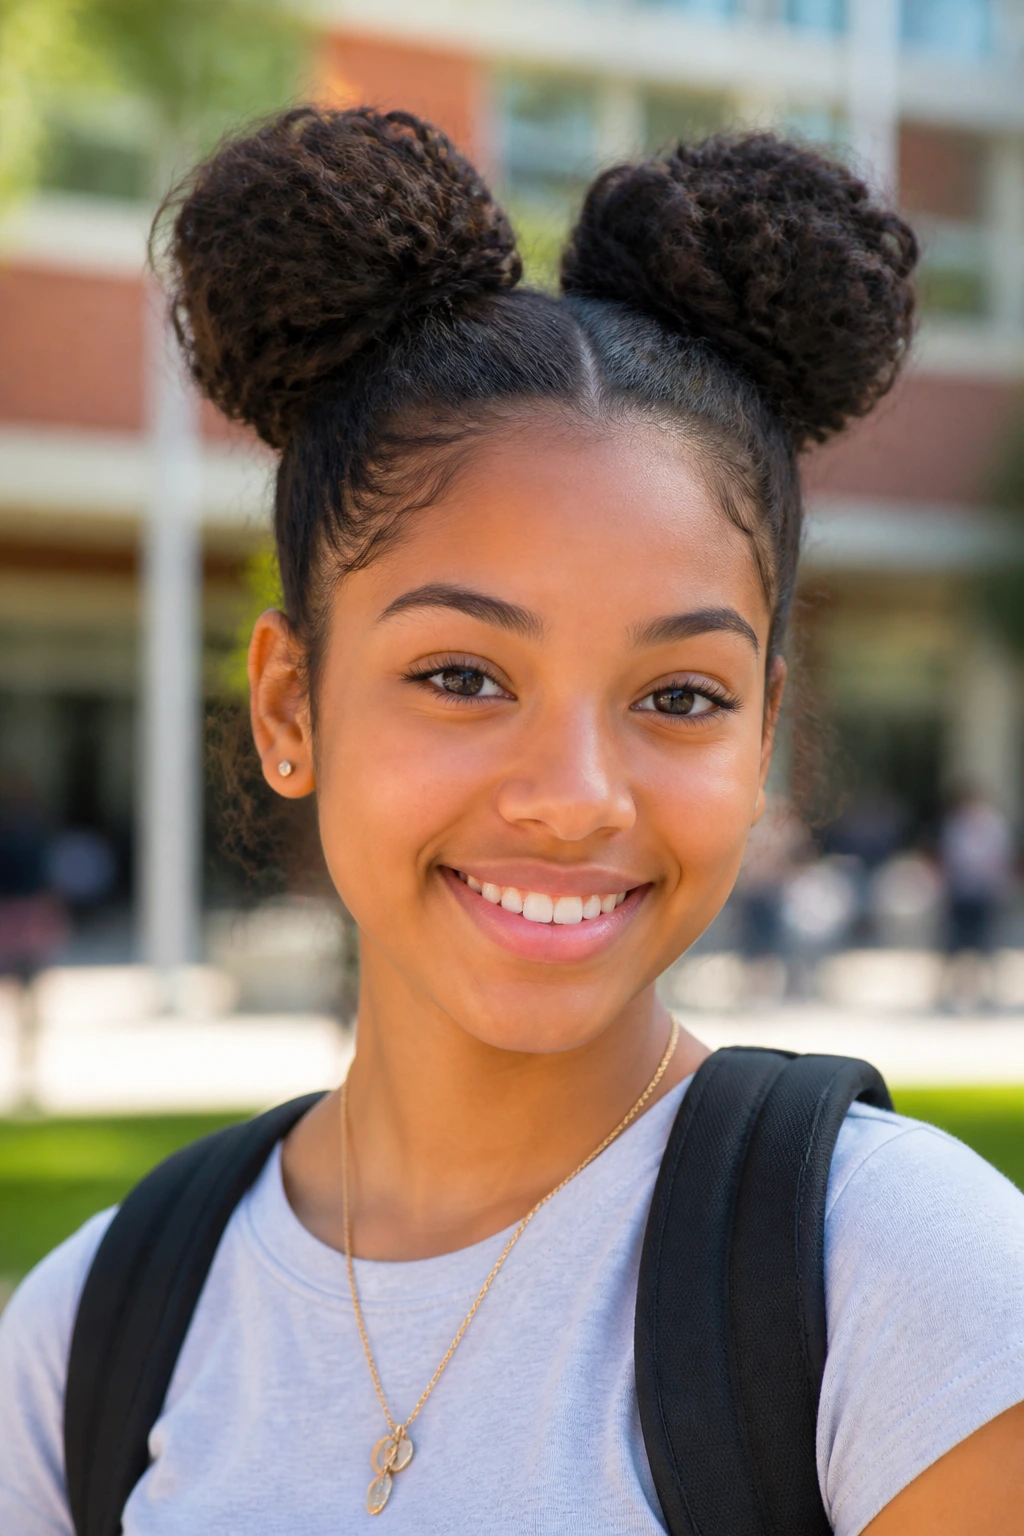
11. High Space Buns
Space buns are playful, youthful, and surprisingly effective at handling a lot of hair. By splitting the hair into two, you essentially halve the weight you are dealing with on each side, making them much easier to secure.
The Sectioning Trick
Use a tail comb to create a perfectly straight middle part. If your part is crooked, the buns will look uneven, which is very noticeable with high-volume hair. Make sure you tie them off with strong elastics to ensure they don’t bounce around as you walk between classes.
Customizing the Buns
You can make these as polished or as messy as you like. For a cleaner look, twist the hair tightly into the bun. For a fun, “festival” vibe, tease the ends before pinning them, creating a wider, fuzzier bun that highlights the thickness of your texture.
12. Loose Waves with Hidden Pins
If you prefer to wear your hair down, the biggest challenge is keeping it out of your eyes while maintaining that loose, natural flow. Hidden pins—also known as “invisible” bobby pins—are your best friends.
The Strategy
Take two small sections from the front, pull them back to the center of your head, and secure them with a clear elastic. Then, take a decorative clip or a few bobby pins to pull the section slightly loose, creating a “boho” arch. This keeps the bulk of your hair off your face while keeping the volume at the back of your head fully intact.
Handling the Ends
Use a 1.5-inch curling iron to add just a bit of movement. With thick hair, you don’t need tight ringlets; you need soft bends. Focus the heat only on the mid-lengths, and leave the ends out to get that relaxed, “I woke up like this” look.
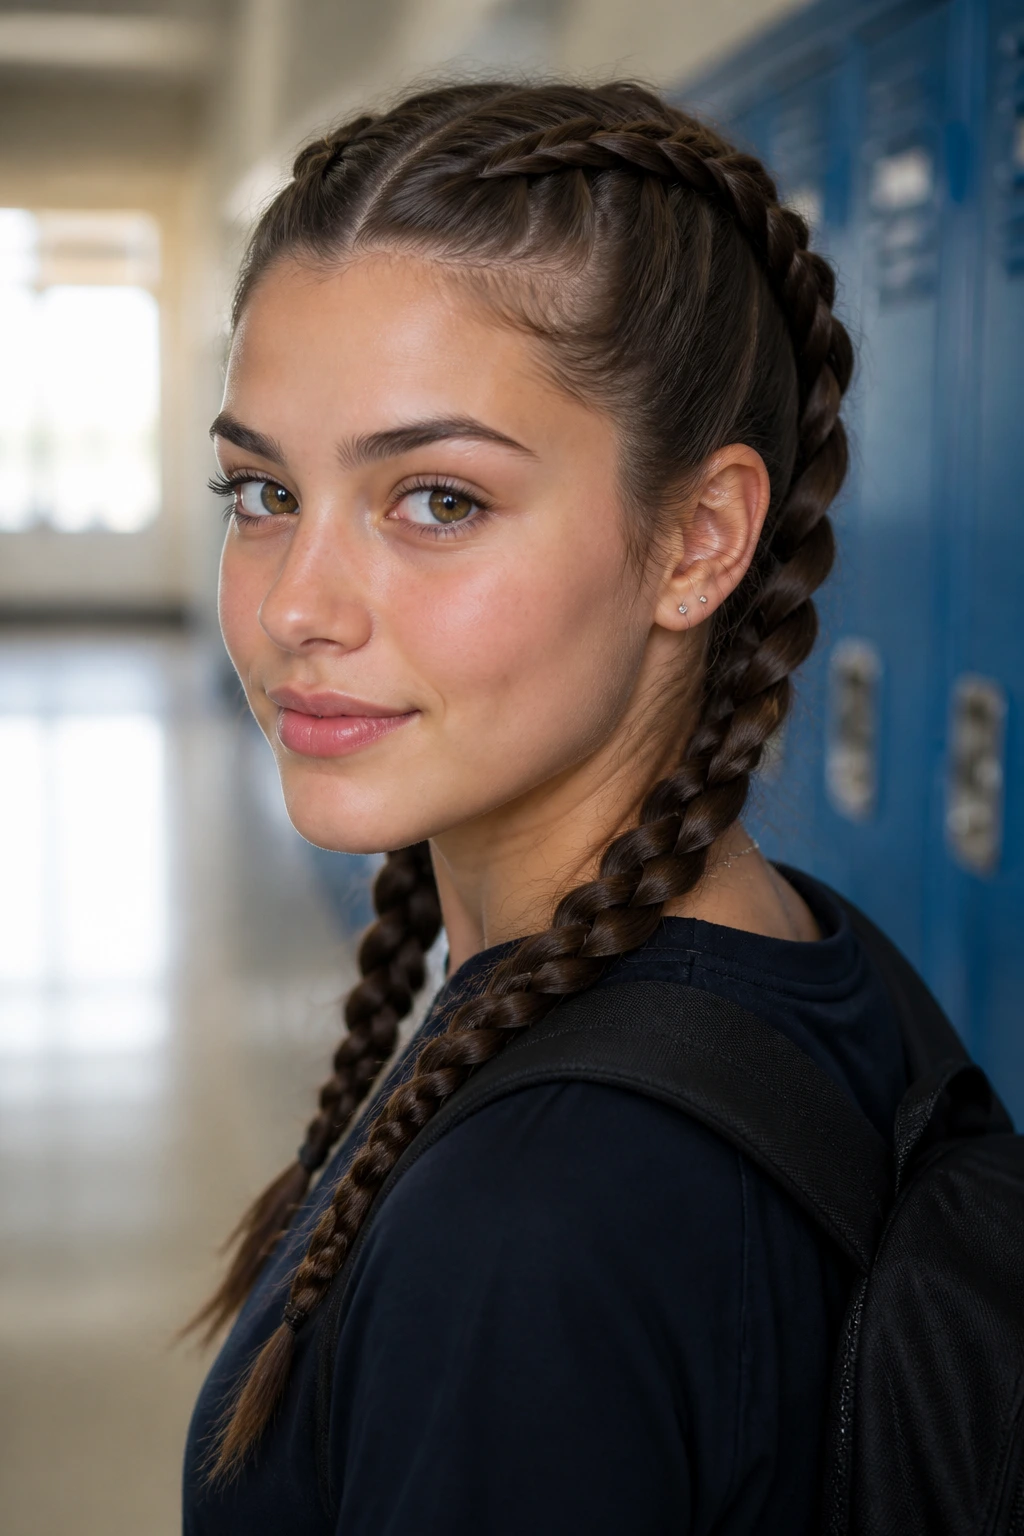
13. Double Dutch Braids
Double Dutch braids are arguably the most durable hairstyle for a long school day. They are tight, secure, and effectively tuck away every single strand, which is perfect for gym days or long shifts in the library.
Why They Work
The under-braid technique creates a raised, 3D effect. On thick hair, these braids look massive and incredibly detailed. You don’t have to worry about the hair poking out, because the sheer density of your strands creates a solid, uniform braid.
Pro-Level Advice
If you want the braids to look like they belong in a professional magazine shoot, pull on the edges of the braid segments as you go—not after you finish. This ensures the volume is evenly distributed and that the braid doesn’t get lopsided, which can happen if you tug on the links too forcefully.
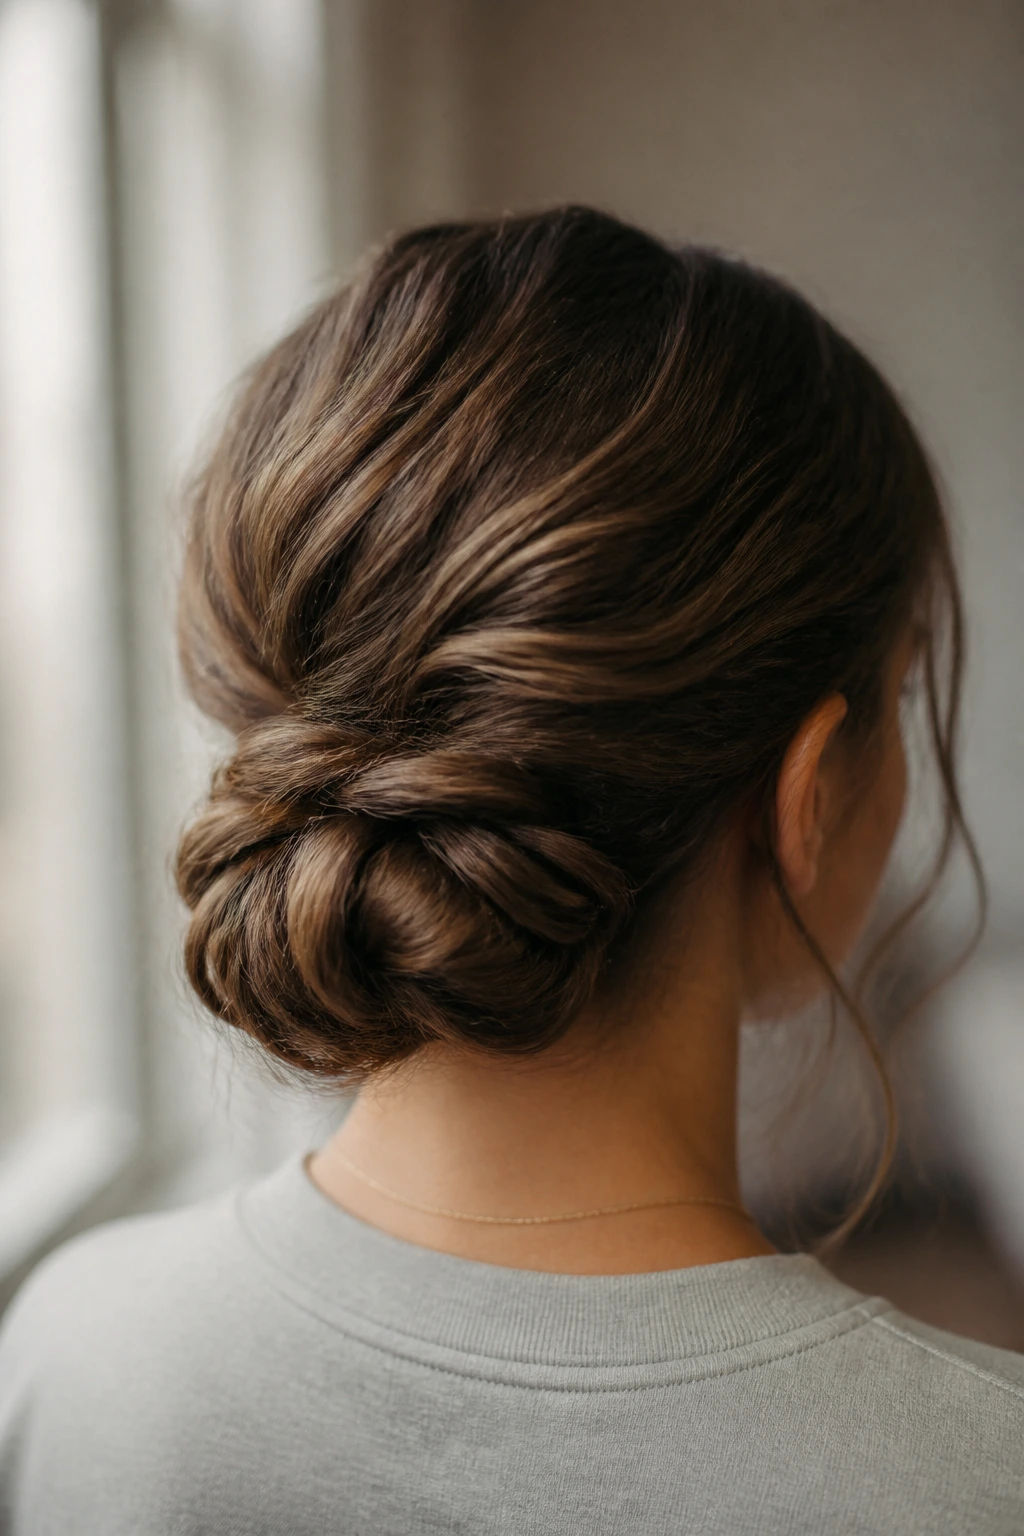
14. Low Messy Chignon
The chignon is a timeless, elegant style that feels slightly more “grown-up” than a standard bun. By keeping it low at the nape of the neck, you avoid the neck strain that often accompanies high-volume hair styles.
The Technique
Sweep your hair into a low ponytail. Instead of pulling the hair all the way through on the last loop, leave it in a half-loop. Take the remaining tail, wrap it around the base to hide the elastic, and pin it securely underneath.
Why It’s Great for Thick Hair
The density of your hair gives the chignon natural volume, meaning it won’t look “deflated” like it might on someone with finer strands. You don’t need a hair donut or extra padding; your own hair provides all the structure the style needs.
15. The Faux-Hawk Braid
If you have a rebellious streak and want a style that feels a bit more daring, the faux-hawk braid is a fantastic way to showcase your thick hair. It involves braiding the center section of your head into a high, voluminous row, while the sides are kept slick and smooth.
Creating the Hawk
Focus on a “mohawk” section that runs from your hairline to the crown. French braid this section, pushing the braid upward so it sits high and proud. Once you reach the crown, gather the rest of your hair into a high ponytail, letting the braid blend into the base.
Managing the Sides
Use a strong-hold pomade to keep the hair on the sides of your head completely flat. The contrast between the high, textured braid in the center and the smooth, sleek sides creates a visually striking look that handles thick hair beautifully.
16. The Wrapped Ponytail

This is a small upgrade to the standard ponytail that looks intentional and clean. It’s perfect for a presentation or a day where you need to look put-together with minimal effort.
How to Wrap
Pull your hair into a ponytail, but before you secure it, pull out a 1-inch section from underneath. Tie the ponytail with a clear band. Wrap that 1-inch section around the band until you reach the end, then tuck the very end into the band. It’s simple, effective, and hides the cheap-looking elastic.
Why It Lasts
Because you are using the hair itself as the “tie,” you aren’t reliant on a single piece of rubber. If the elastic starts to stretch, the wrapped hair acts as a secondary support, keeping the ponytail tight and high throughout the day.
17. The Bubble Ponytail

This style is essentially a ponytail with extra elastics placed every two inches down the length. It is a fantastic way to manage the weight of long, thick hair while creating a fun, modern aesthetic.
The “Bubble” Technique
After tying your hair into a high pony, place an elastic every two inches. After you place each elastic, use your fingers to pull at the hair between the elastics, creating a “bubble” shape. This makes your ponytail look significantly thicker and more interesting than a standard, plain length.
Pro Tips for Success
- Use matching elastics if you want a clean look, or vibrant, colorful ones if you want to make a statement.
- If your hair is too heavy, the “bubbles” might sag. To fix this, use a small bobby pin to anchor the base of each bubble to the ponytail structure beneath it.
18. Half-Up Headband Braid

A headband braid is a classic, feminine look that keeps your hair out of your face without requiring a tight, restrictive ponytail. It’s perfect for those who want the look of a braid but want to leave the rest of their hair loose and voluminous.
Creating the Band
Start at one temple and French braid a small section of hair along your hairline, working toward the opposite ear. Once you reach the ear, pin the end of the braid behind your other hair so the connection is hidden.
Why This Style Rocks
This is a great style for school because it handles the “fringe” or “bangs” area that often gets frizzy or annoying during the day. Since you have thick hair, the braid will hold its own weight and stay in place without needing an excessive amount of hairspray, leaving your hair feeling soft and touchable.
Final Thoughts
The most common mistake people with thick hair make is trying to hide their volume. Whether it is over-thinning at the salon or using products that weigh everything down, many end up fighting a losing battle. Embracing the density means choosing styles that value structure and distribution. By using the right techniques—like segmenting your hair into braids, utilizing the weight of the hair for sleek looks, or using layers to create movement—you can turn your thick hair into a versatile accessory rather than a daily struggle.
Experimentation is part of the process. Some days, a high, structured style will feel right, and other days, a loose, flowing look will be more comfortable. Always keep a set of sturdy, non-metal elastics and a few U-shaped pins in your bag; having the right tools on hand is often the difference between a style that survives a full school day and one that falls flat by lunch. Stick with styles that distribute weight evenly, and you will find that your thick hair is actually one of the most reliable features of your personal style.