The morning mirror ritual often feels like a battlefield. You want something that looks polished enough for a meeting, rugged enough for a commute, and simple enough to master before your coffee kicks in. We often fall into the trap of doing the same ponytail or messy bun for weeks on end, convinced that variety requires a shelf full of styling products and a professional degree in cosmetology. Truth is, your hair is one of the most versatile accessories you own, and learning how to manipulate it without turning into a frazzled mess is a skill that pays off every single day of the week.
Most of the time, the difference between a hairstyle that feels like a chore and one that feels like a signature look comes down to two things: texture and placement. If you start your day with limp, unwashed hair, no amount of pinning will make it look intentional. If you have a clean base, however, even a simple tuck can look like a deliberate style choice. We are moving past the era of the overly stiff, hairsprayed updos and toward a more relaxed, texture-heavy approach to styling. It is about working with your hair’s natural movement rather than fighting against it.
When you look at these styles, try not to think of them as rigid tutorials you have to replicate perfectly. Think of them as blueprints. If a style calls for a braid but your hair is too short, a twist often works better. If you have heavy, thick locks that don’t hold a curl, focus on styles that prioritize tension and structure rather than softness. The goal here is to build a repertoire that makes your morning routine feel like a creative outlet instead of an obligation. Let’s dive into a rotation of looks that will keep your daily wear fresh, functional, and entirely your own.
1. The Low Slung Texture Bun
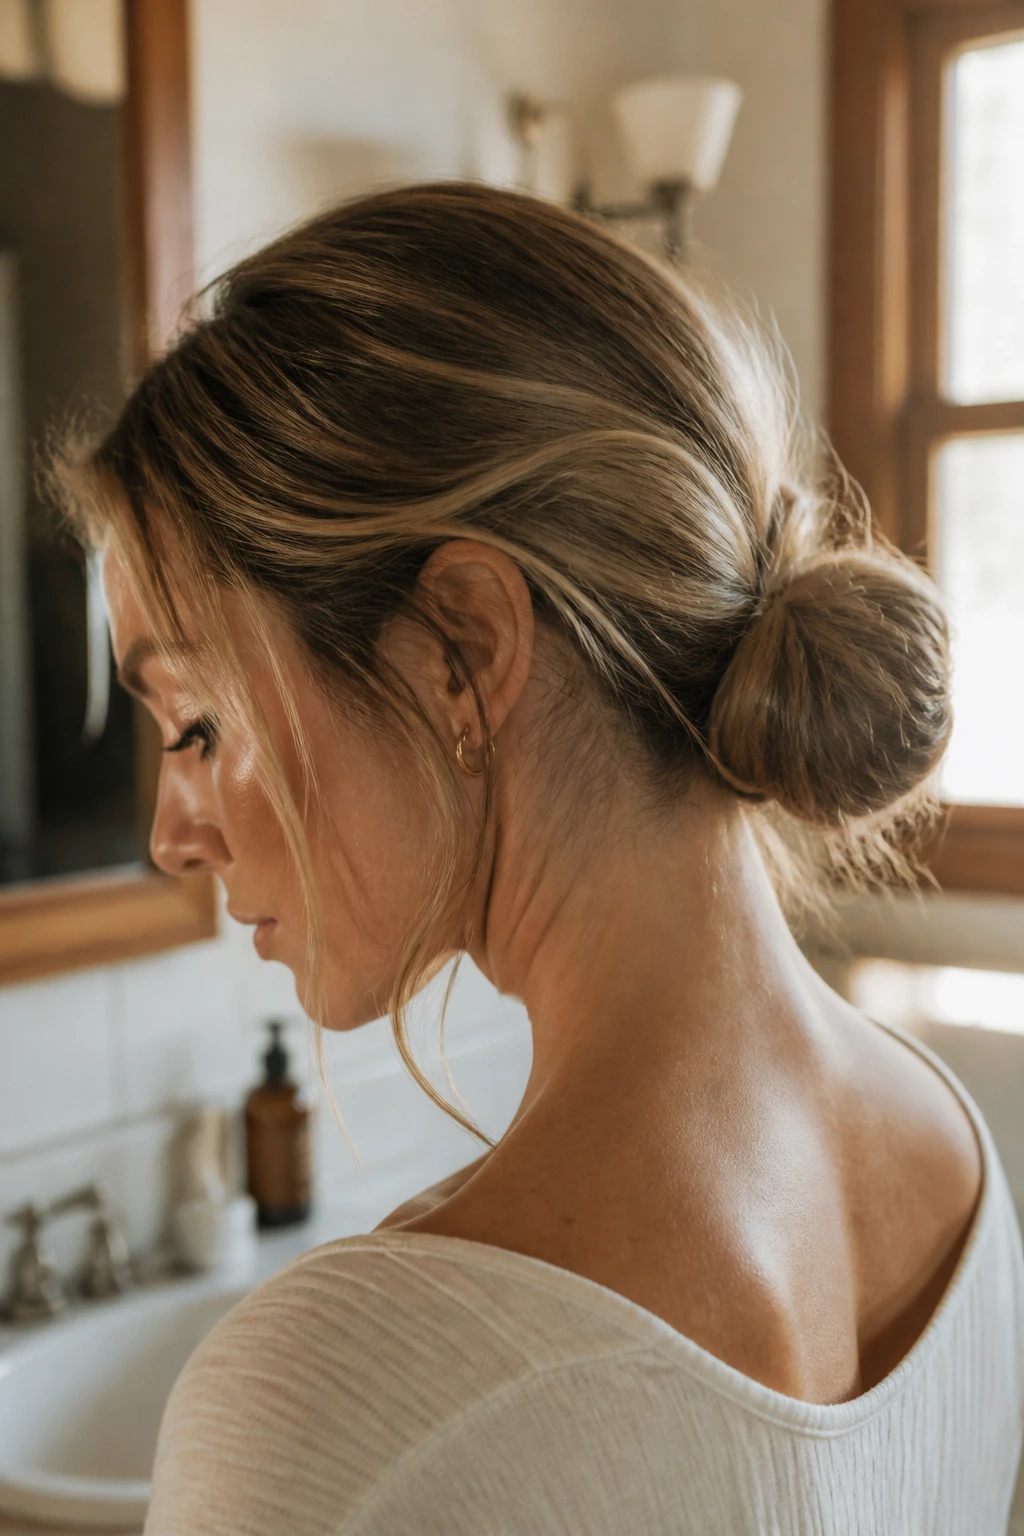
This is not your average gym bun. The secret here is a bit of grit—either from a texture spray or just day-two hair—that allows the strands to hold onto each other without needing a mountain of pins. You start by pulling your hair into a low ponytail, but instead of pulling the ends all the way through on the final loop, you leave them tucked to create a soft, rounded shape.
Achieving the Perfect Shape
- Use a clear elastic that matches your hair color to keep the focus on the texture.
- Once the base is secure, use your fingers to pull at the crown of your head to create volume.
- Leave two small sections of hair around your temples to frame your face softly.
- Secure the stray ends with one or two hidden bobby pins for a cleaner look.
Pro tip: If your hair is prone to slipping out, use a light-hold dry shampoo before you start to give your strands extra grip.
2. The Classic French Twist Update
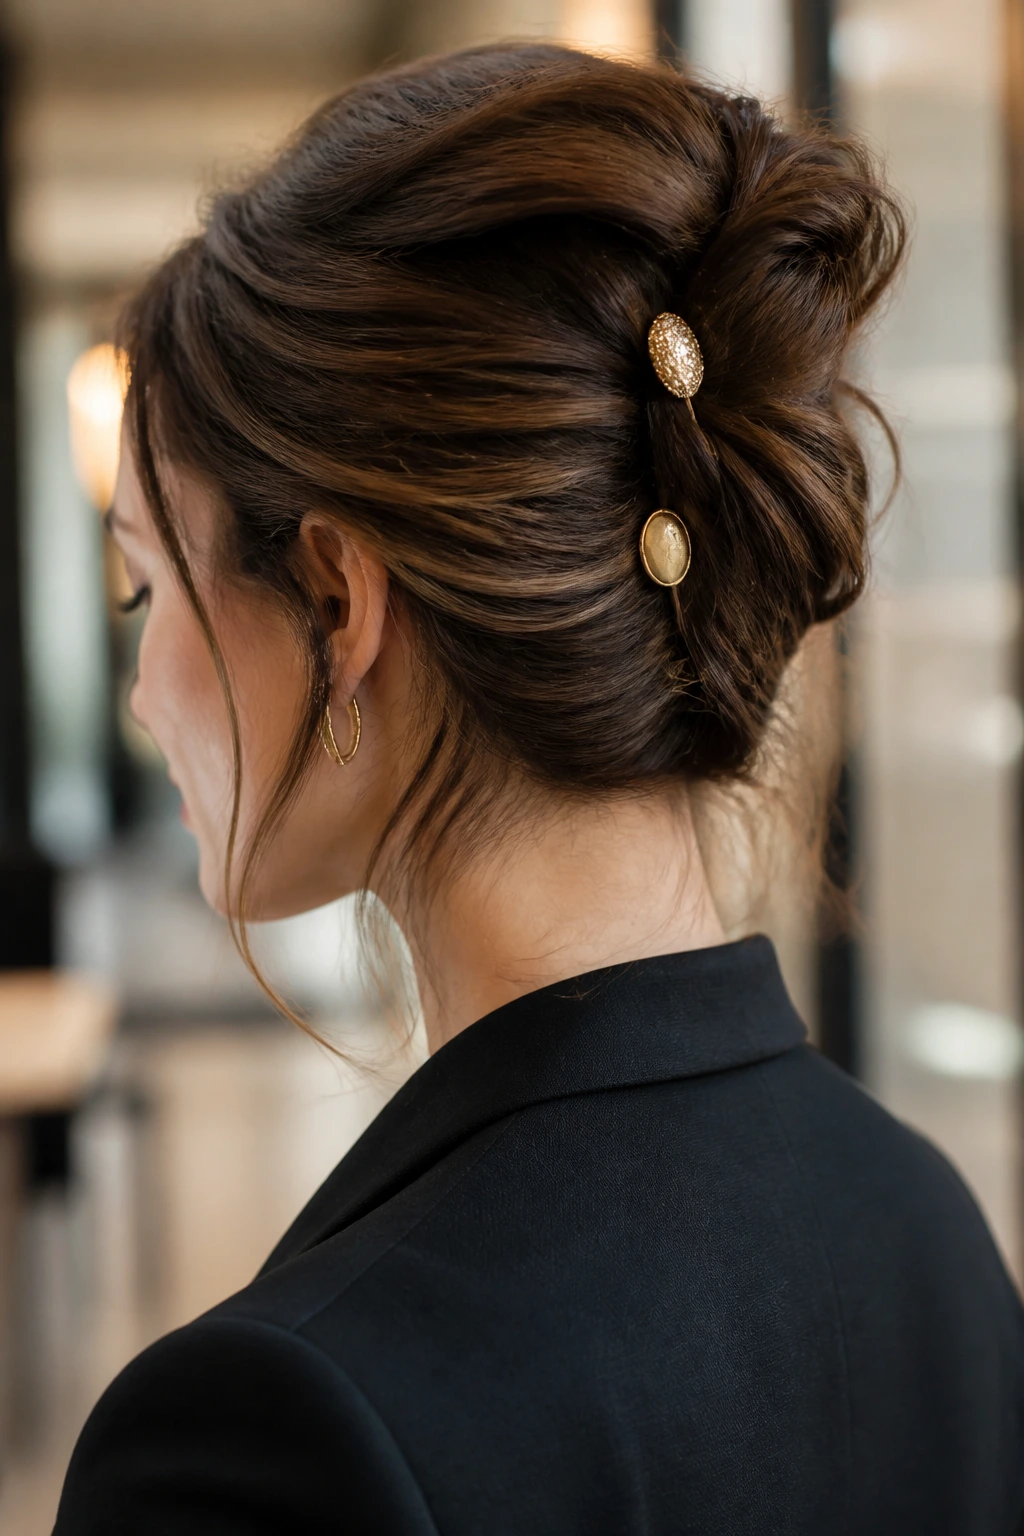
The French twist has a reputation for being overly formal, but when you do it with a loose, hand-raked technique, it becomes the ultimate office-to-dinner style. You do not need a perfect seam down the back of your head; in fact, a bit of asymmetry makes it look much more modern and less like a vintage catalog image.
Why It Works for Busy Mornings
It creates an instant sense of sophistication without requiring heat styling. By gathering the hair to one side and twisting it upward, you build a structure that naturally stays in place once anchored by a few large, decorative hairpins. You can leave the ends poking out at the top for a bit of playful edge, or tuck them deeply inside for a streamlined appearance.
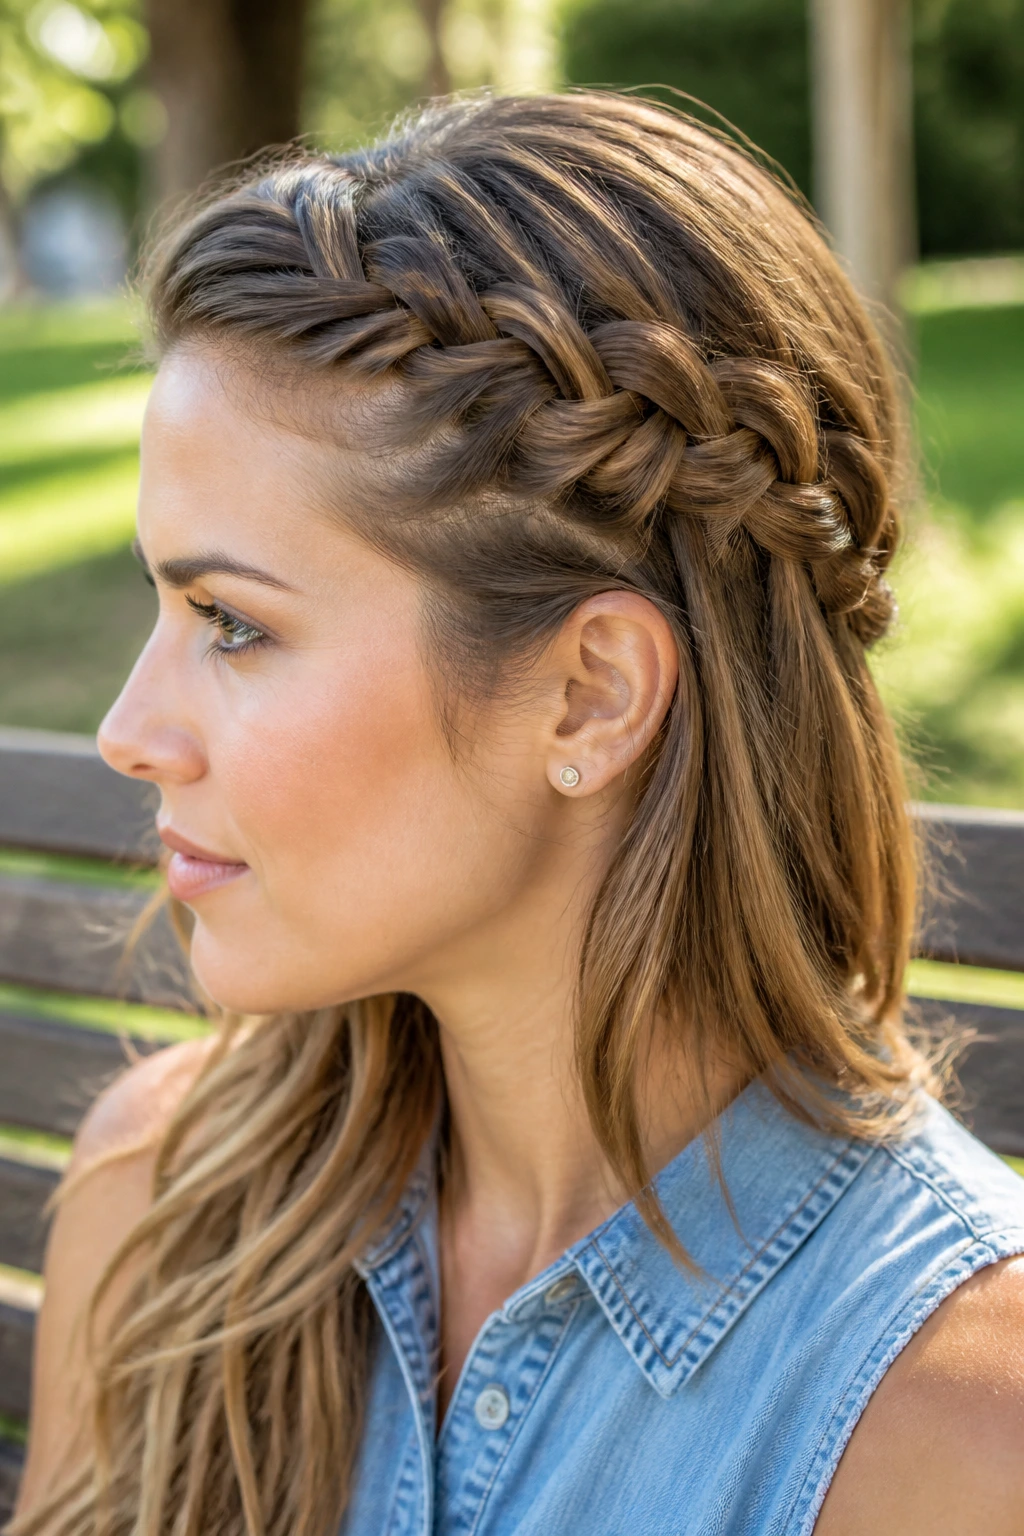
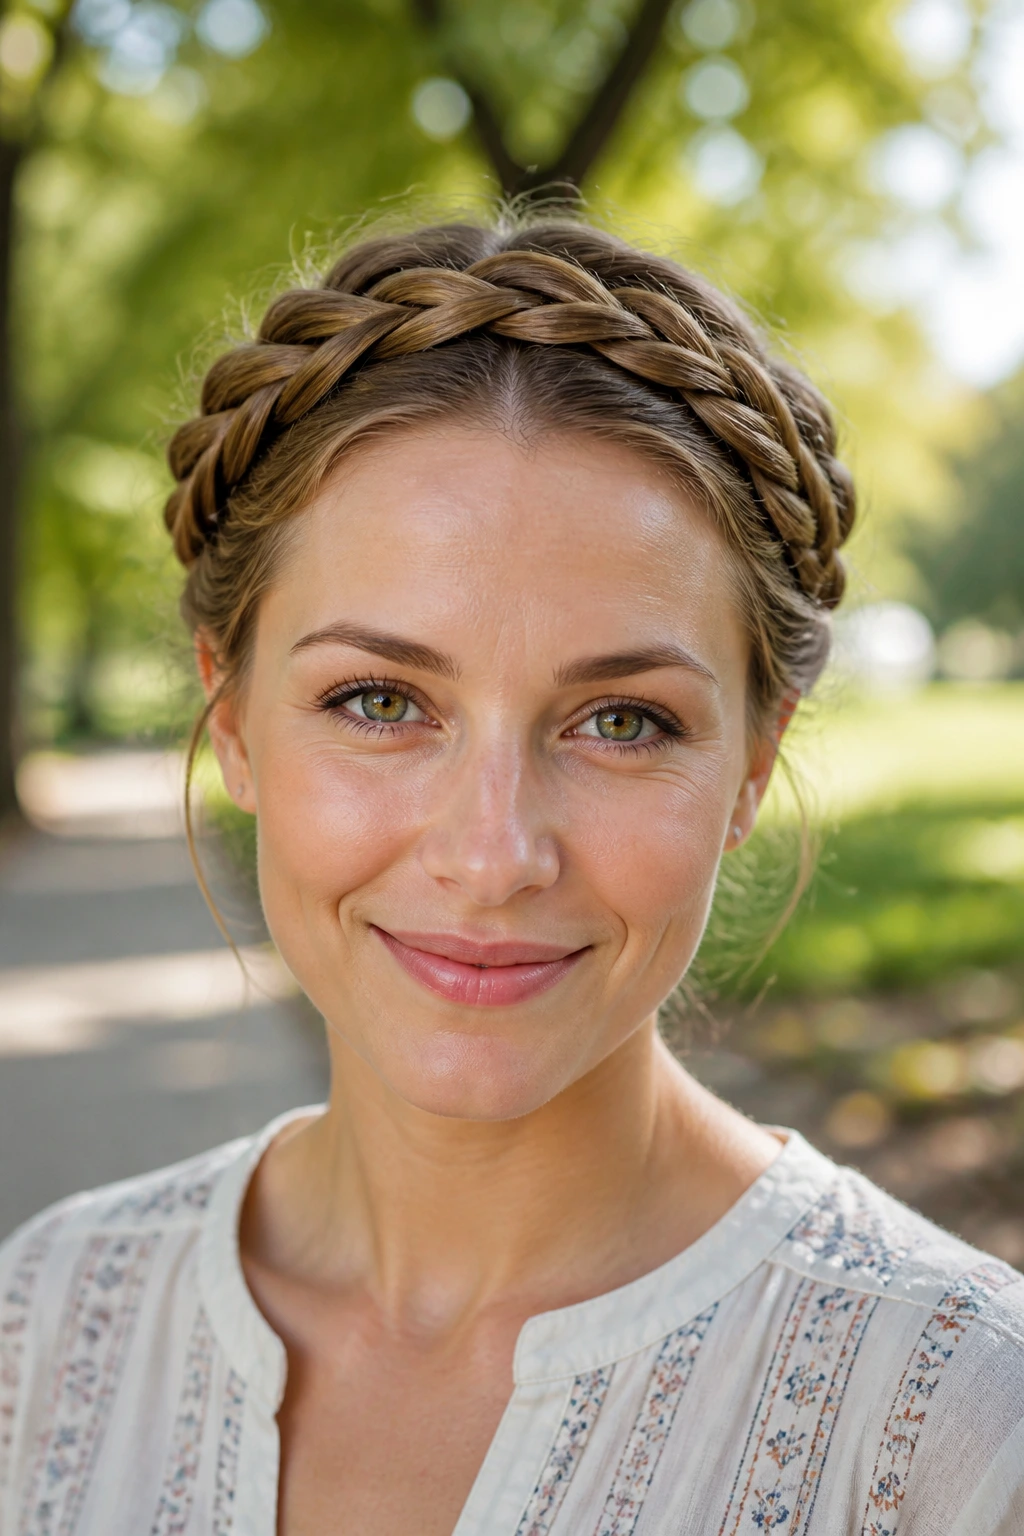
3. The Braided Half-Crown
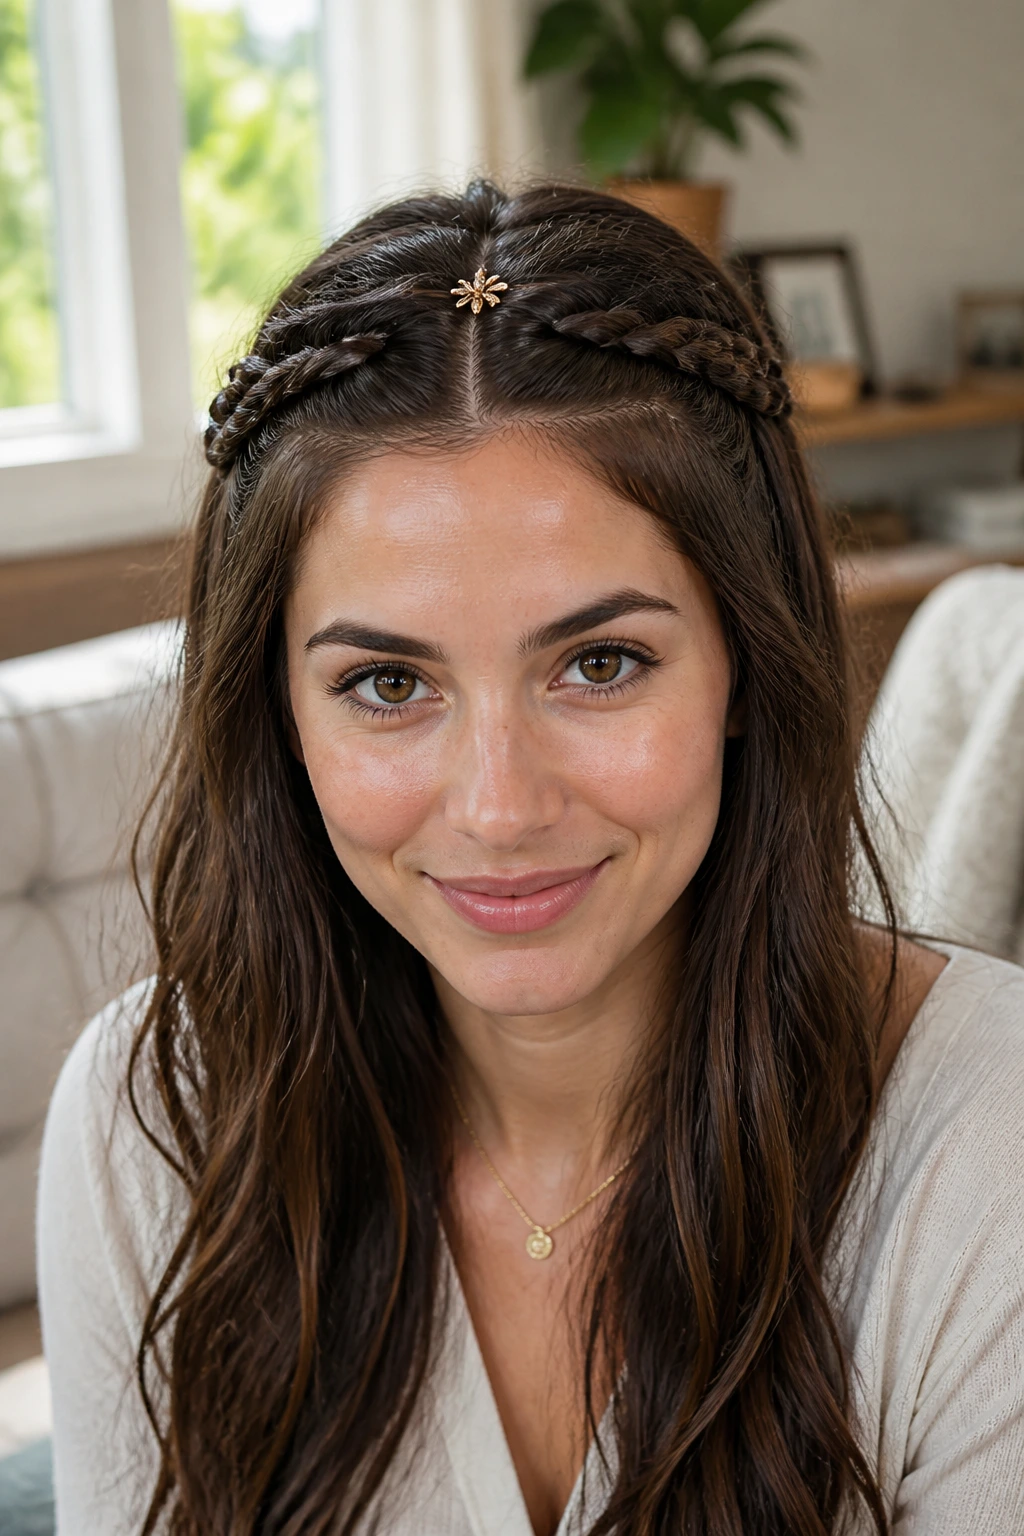
If you want to keep your hair out of your eyes but still want to show off your length, this is a lifesaver. By taking a small section from each temple and braiding them backward until they meet in the middle of your head, you create a natural headband effect that feels both bohemian and practical.
Making It Look Intentional
Instead of pulling the braids tight, gently tug on the edges of each loop once the braid is secured. This technique, often called “pancaking,” makes the braid look twice as thick as it actually is. Use a decorative clip to join the two braids in the center of your head, hiding the ends of the elastics.
4. The Slicked-Back Low Pony
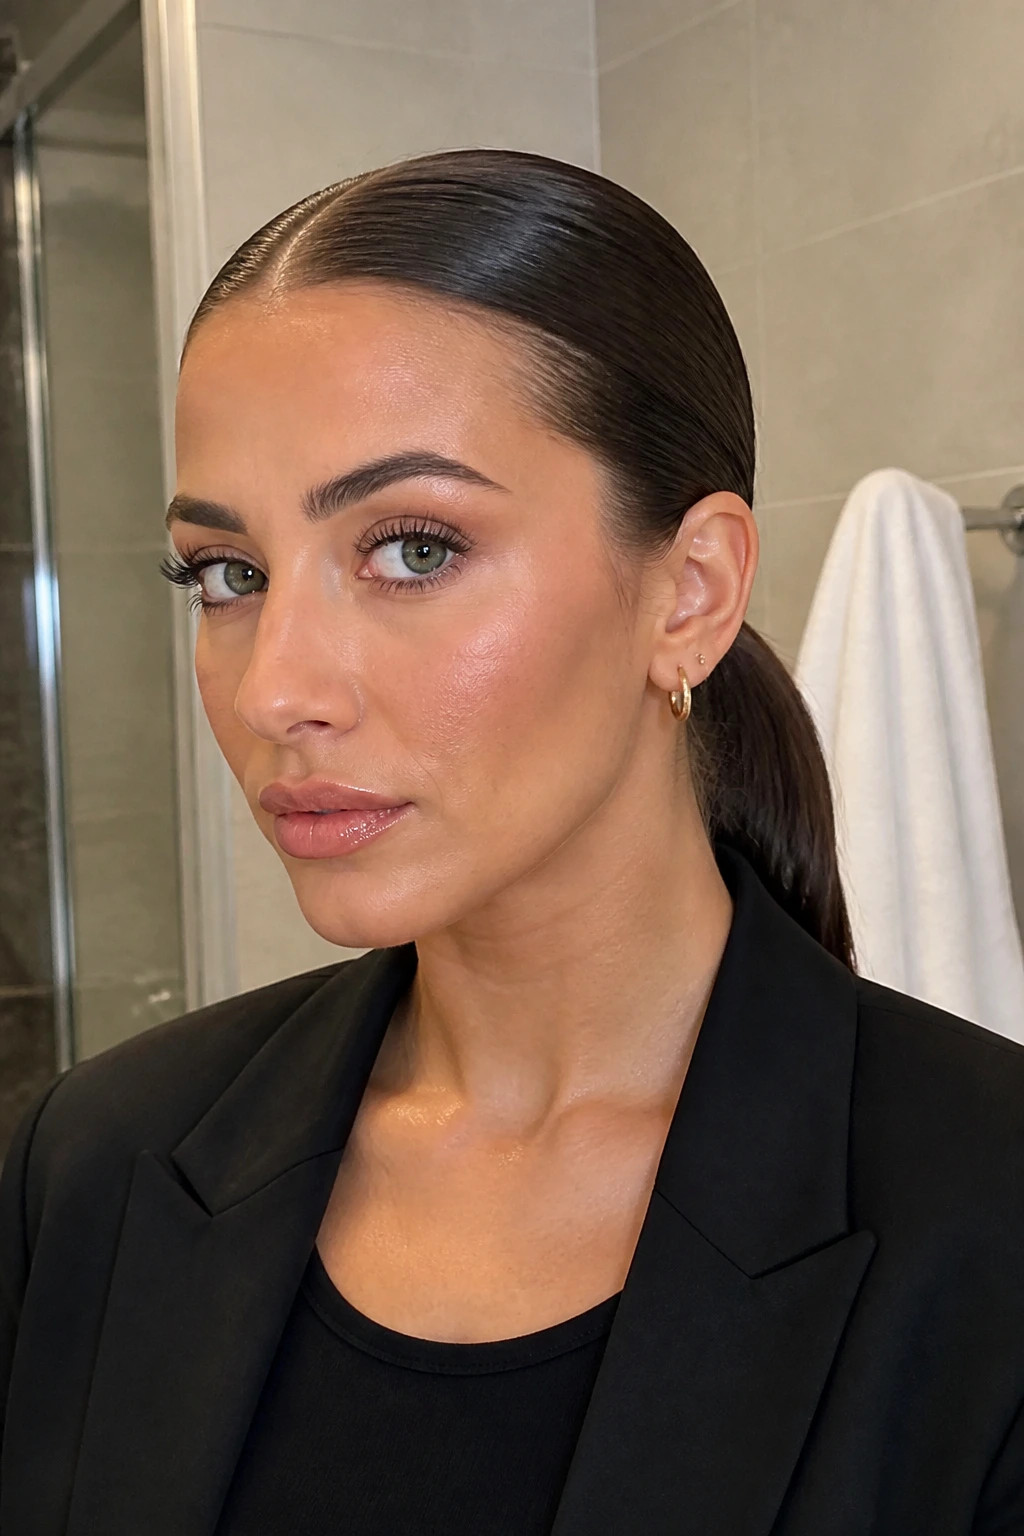
There is a profound confidence in a perfectly slicked-back ponytail. This style thrives on precision. Use a smoothing cream or a light pomade to ensure that every strand is lying flat against your scalp, then secure it at the nape of your neck.
Key Tools for Success
- A fine-tooth comb is mandatory for that crisp, parted look.
- A boar-bristle brush helps distribute oils for a natural, healthy-looking sheen.
- Wrap a small strand of hair around your elastic band to hide the hardware; it makes the whole style look expensive.
Wait, what about flyaways? If you have shorter layers that insist on escaping, a tiny bit of hairspray on an old toothbrush can tame those stray hairs without making the rest of your head look greasy.
5. The Messy Top Knot
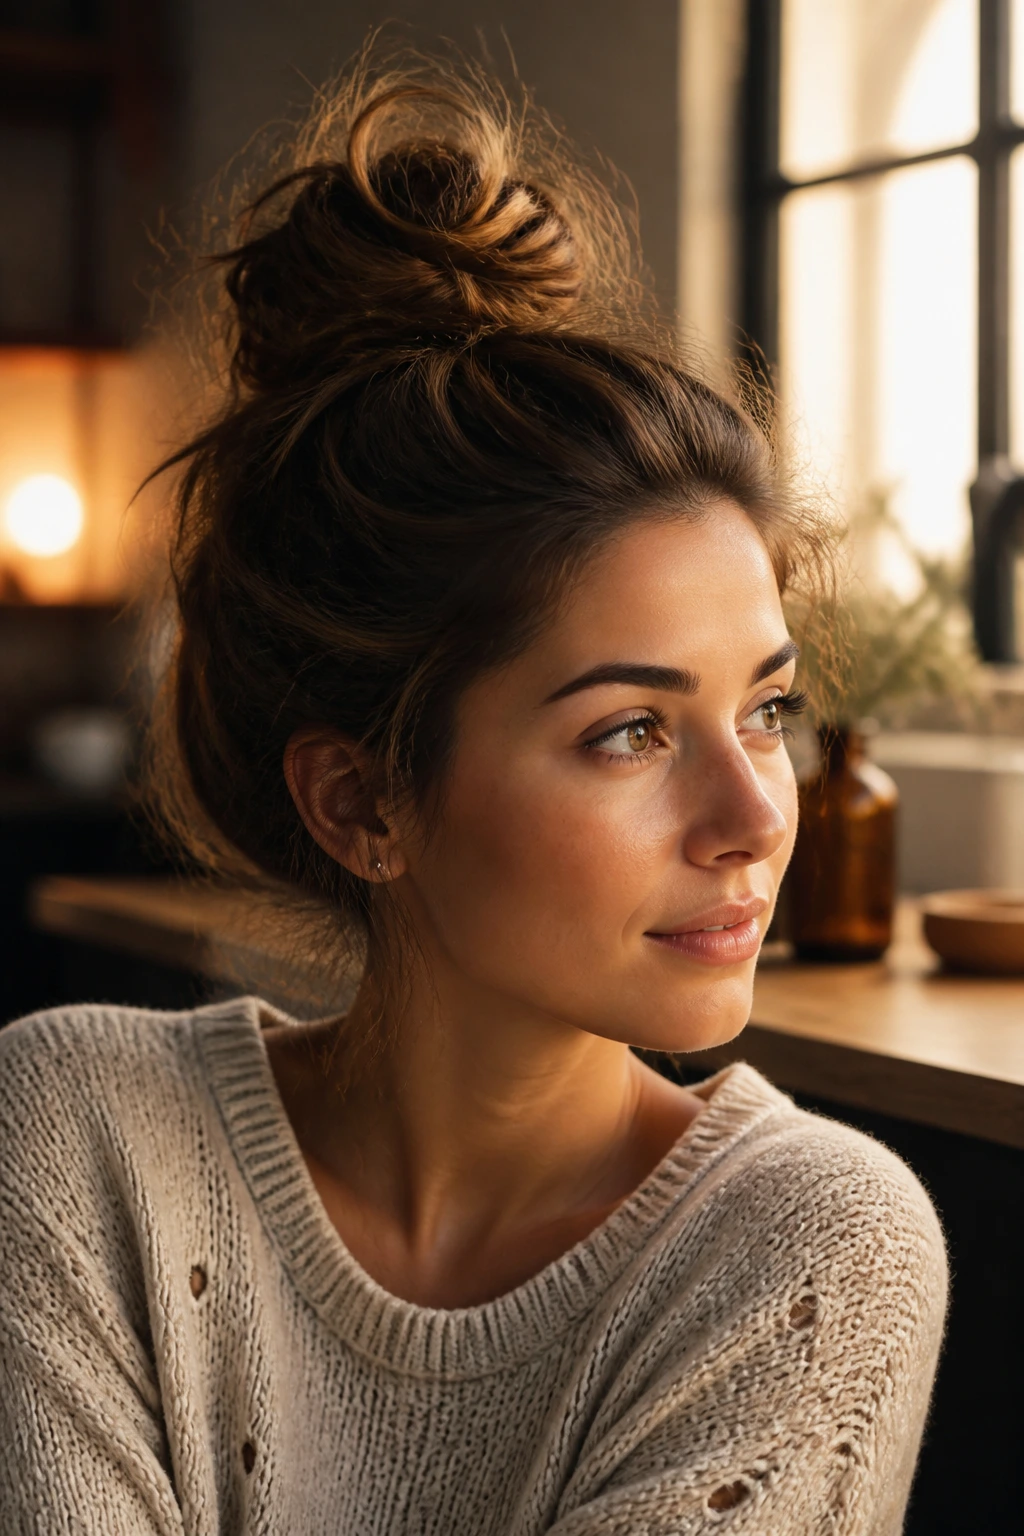
The messy bun is a classic for a reason, but the most common mistake people make is pulling too tight. The goal is a look that feels like you just happened to pin it up and it stayed that way by pure magic.
Why You Should Embrace the Chaos
A top knot draws the eye upward, which can be incredibly flattering if you are wearing a high-collared shirt or chunky jewelry. Focus on securing the center of the bun while leaving the edges soft and slightly fuzzy. If you need to add volume, a light back-combing session at the roots before you twist the hair will do wonders.
6. The Side-Swept Dutch Braid
Dutch braids are generally easier to see while you are doing them than French braids, making them a great entry point for beginners. By braiding the hair close to the scalp starting from one temple and sweeping it across to the opposite ear, you create a decorative frame that looks much more complicated than it really is.
How to Style It
- Part your hair deeply on one side.
- Start the braid at the heavy side of the part.
- Feed hair into the braid only from the top, allowing the bottom to remain loose for a waterfall effect.
- Secure at the end with a small, clear elastic and tuck it under the bulk of your hair to hide it.
7. The Double-Clip Accent
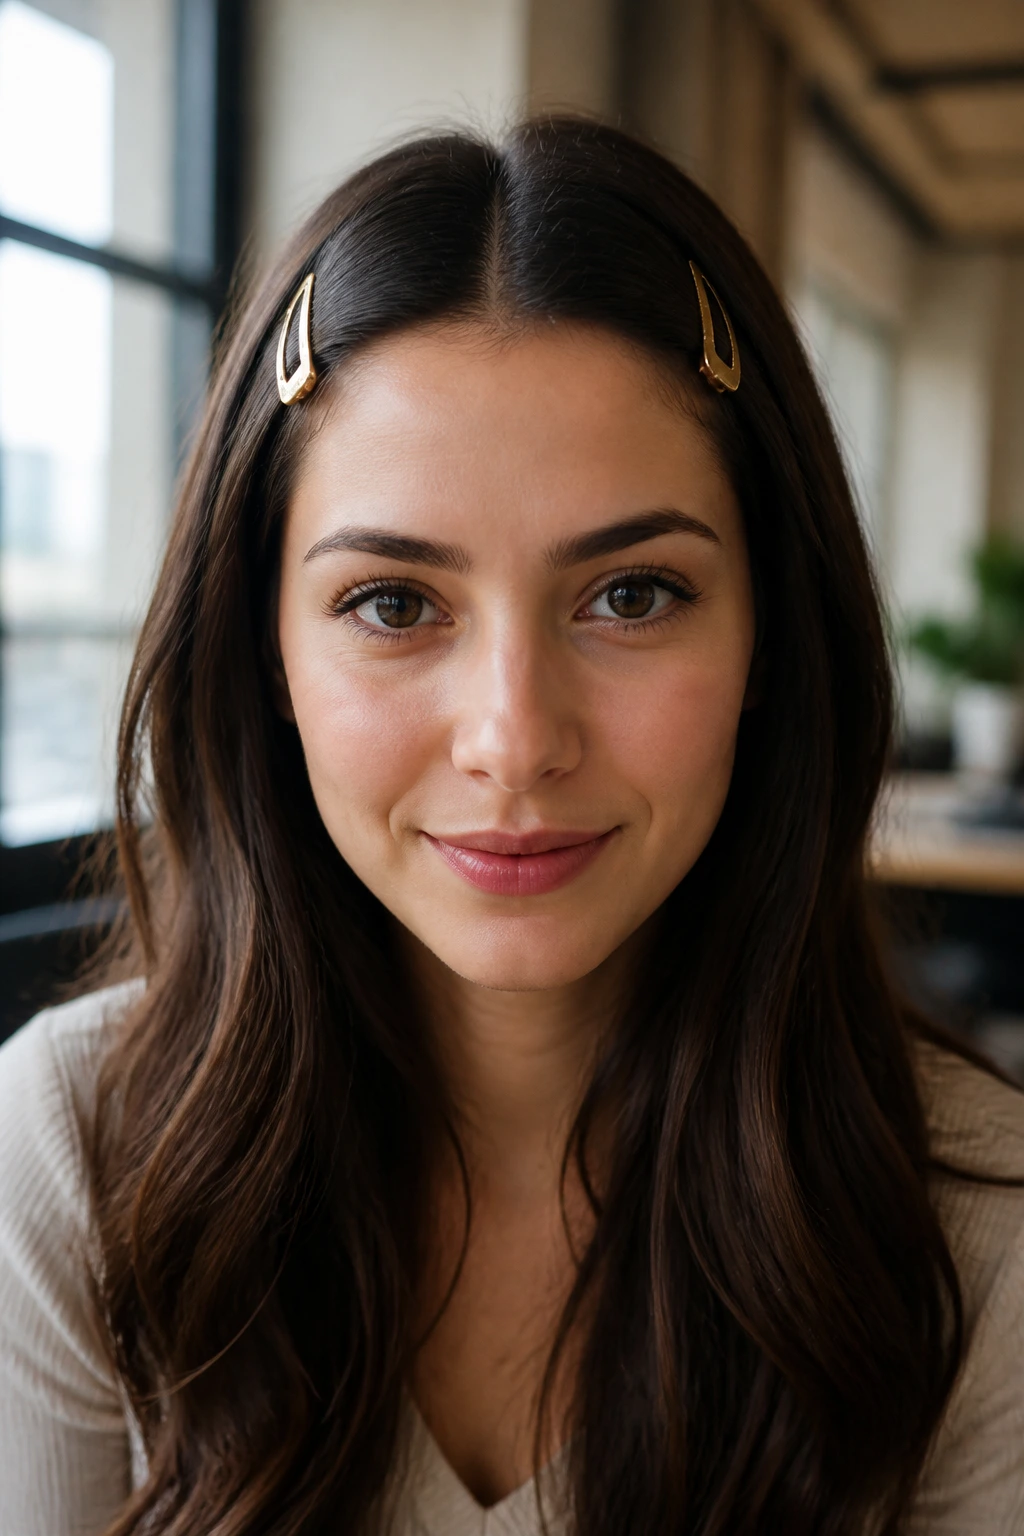
Sometimes, you do not have time to braid or twist. You just need to keep the hair out of your face. Two matching metal clips—perhaps gold or tortoiseshell—placed strategically above your temples can change the entire mood of a simple blowout.
Why This Style Succeeds
It is about symmetry. By placing the clips in the exact same spot on both sides, you create an intentional frame that makes your hair look styled even when it is just down and loose. It takes approximately six seconds to execute, which makes it perfect for those mornings when the alarm clock failed you.
8. The Twisted Crown
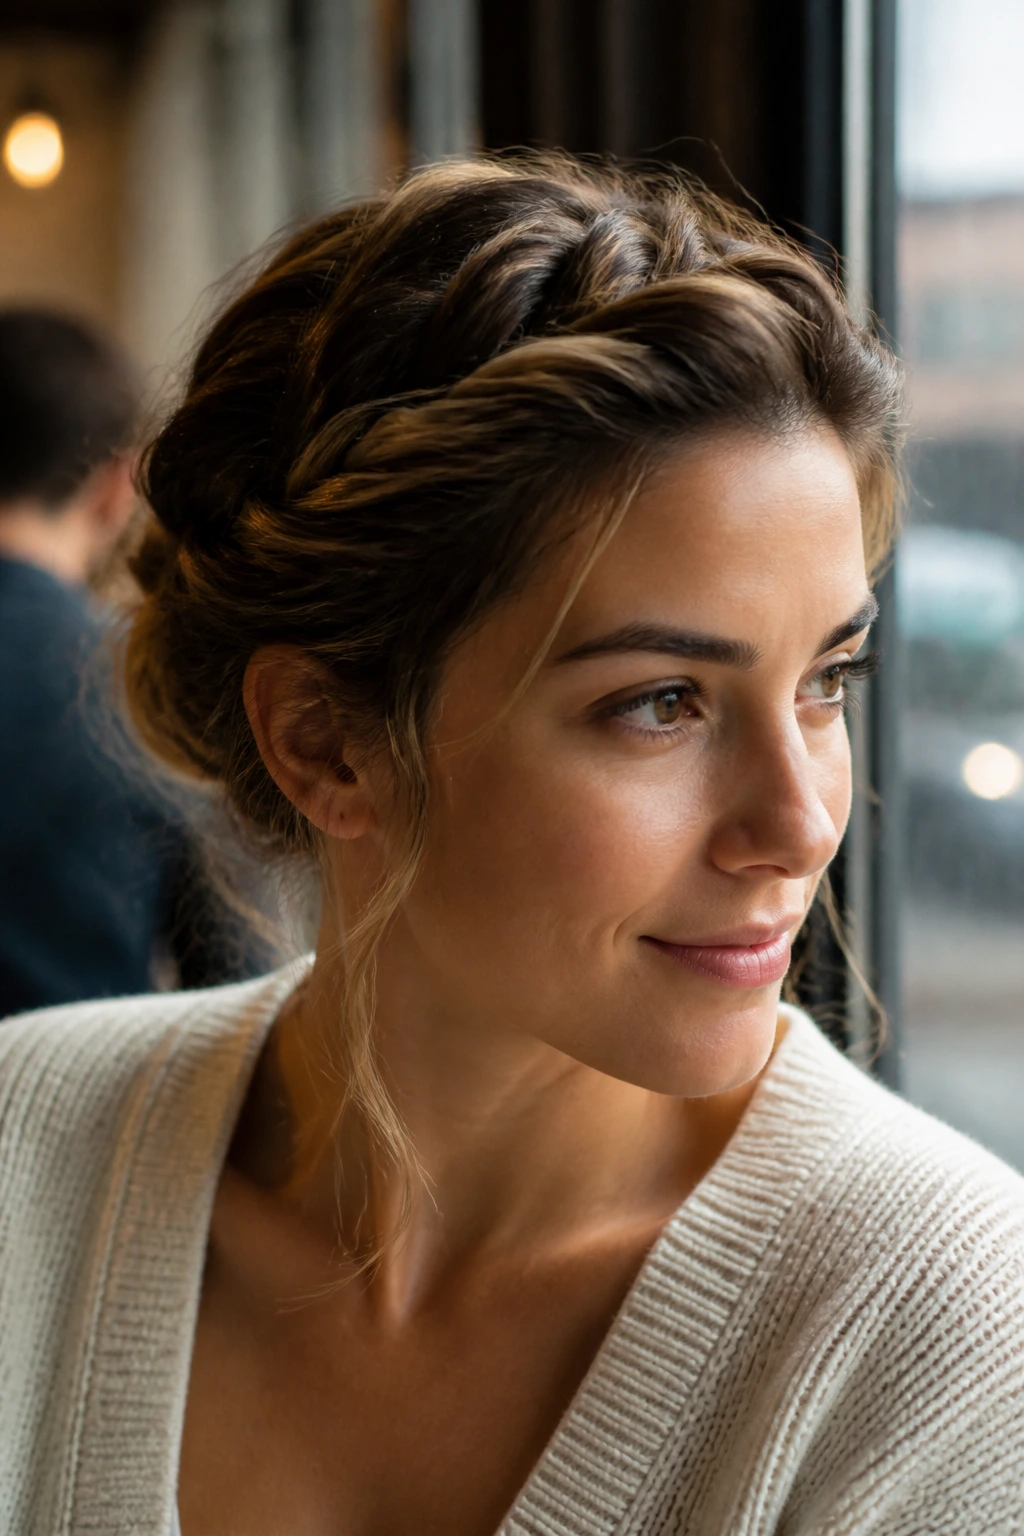
This is a more relaxed version of a halo braid. You take two thick sections of hair at the front and twist them firmly toward the back of your head, securing them with pins. It is a fantastic way to handle bangs that are growing out or layers that are causing trouble around your face.
The Science of the Twist
The key is to twist toward your face before pinning back. This creates a soft, rounded shape that avoids the “tightly pulled back” look that can sometimes feel harsh. By pinning them low near the nape of your neck, you keep the back of the style looking cohesive and polished.
9. The Low Side Ponytail
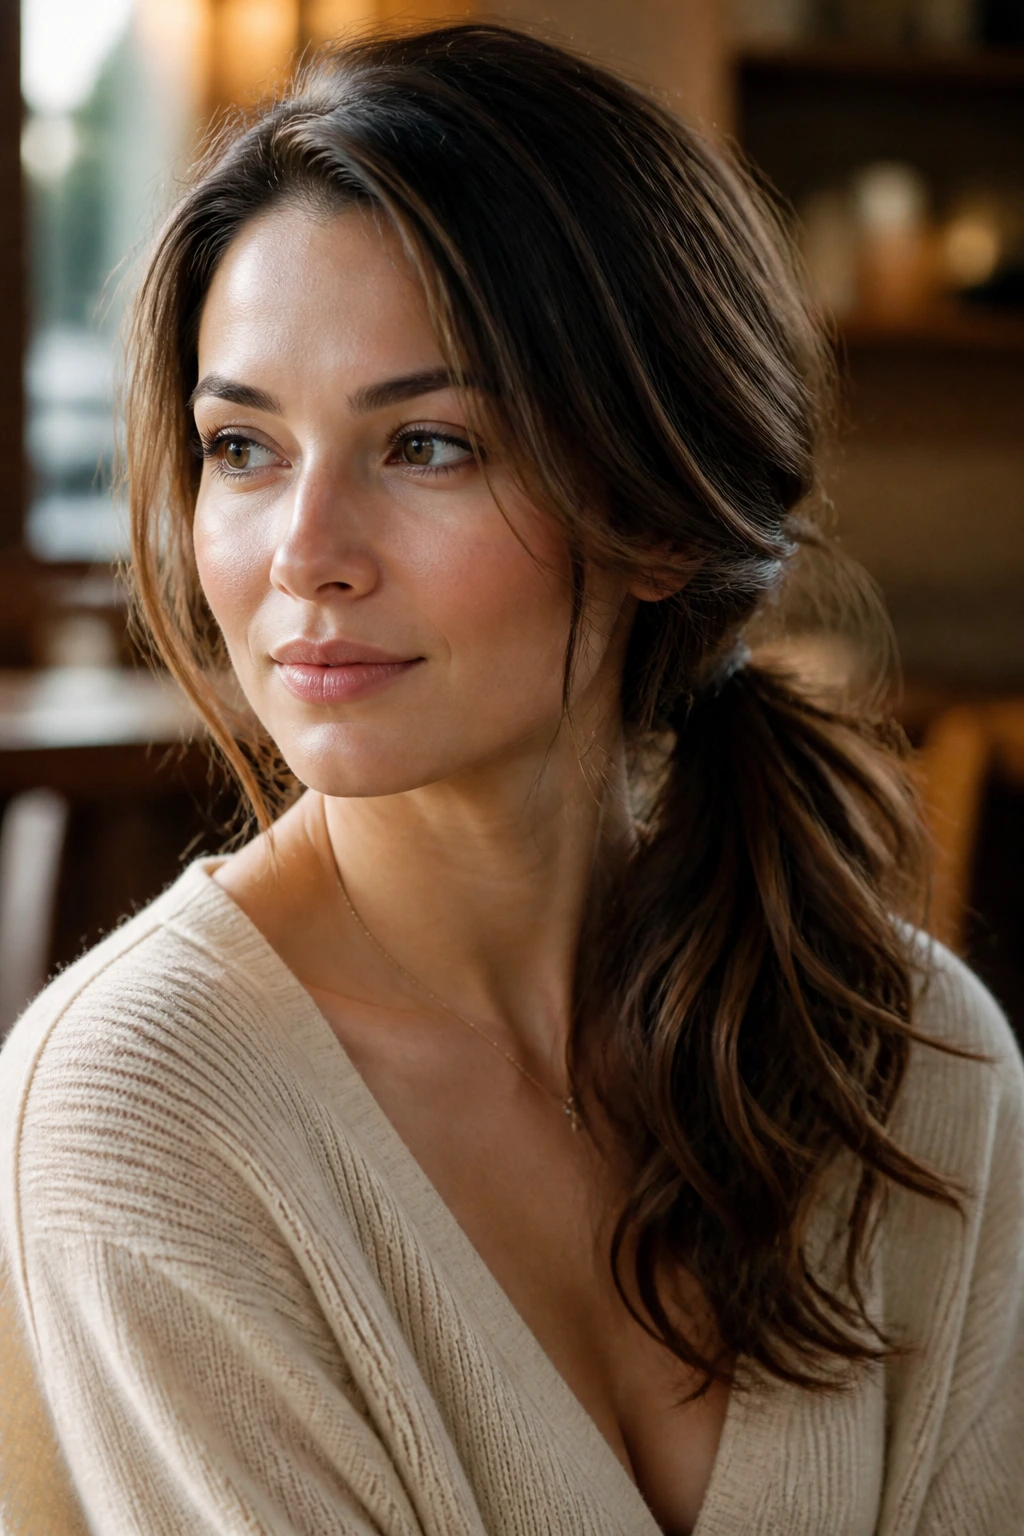
If you are tired of the center-parted, high-ponytail aesthetic, move it to the side. A low side pony feels inherently more romantic and works beautifully with wavy or curly hair textures.
When to Choose This Look
This style is ideal for days when you have a bit of wave in your hair that you want to highlight. By pulling it to the side, you allow the natural curl pattern to frame your face more effectively than a standard ponytail ever could. Add a velvet ribbon at the base for an extra touch of texture.
10. The Waterfall Half-Up
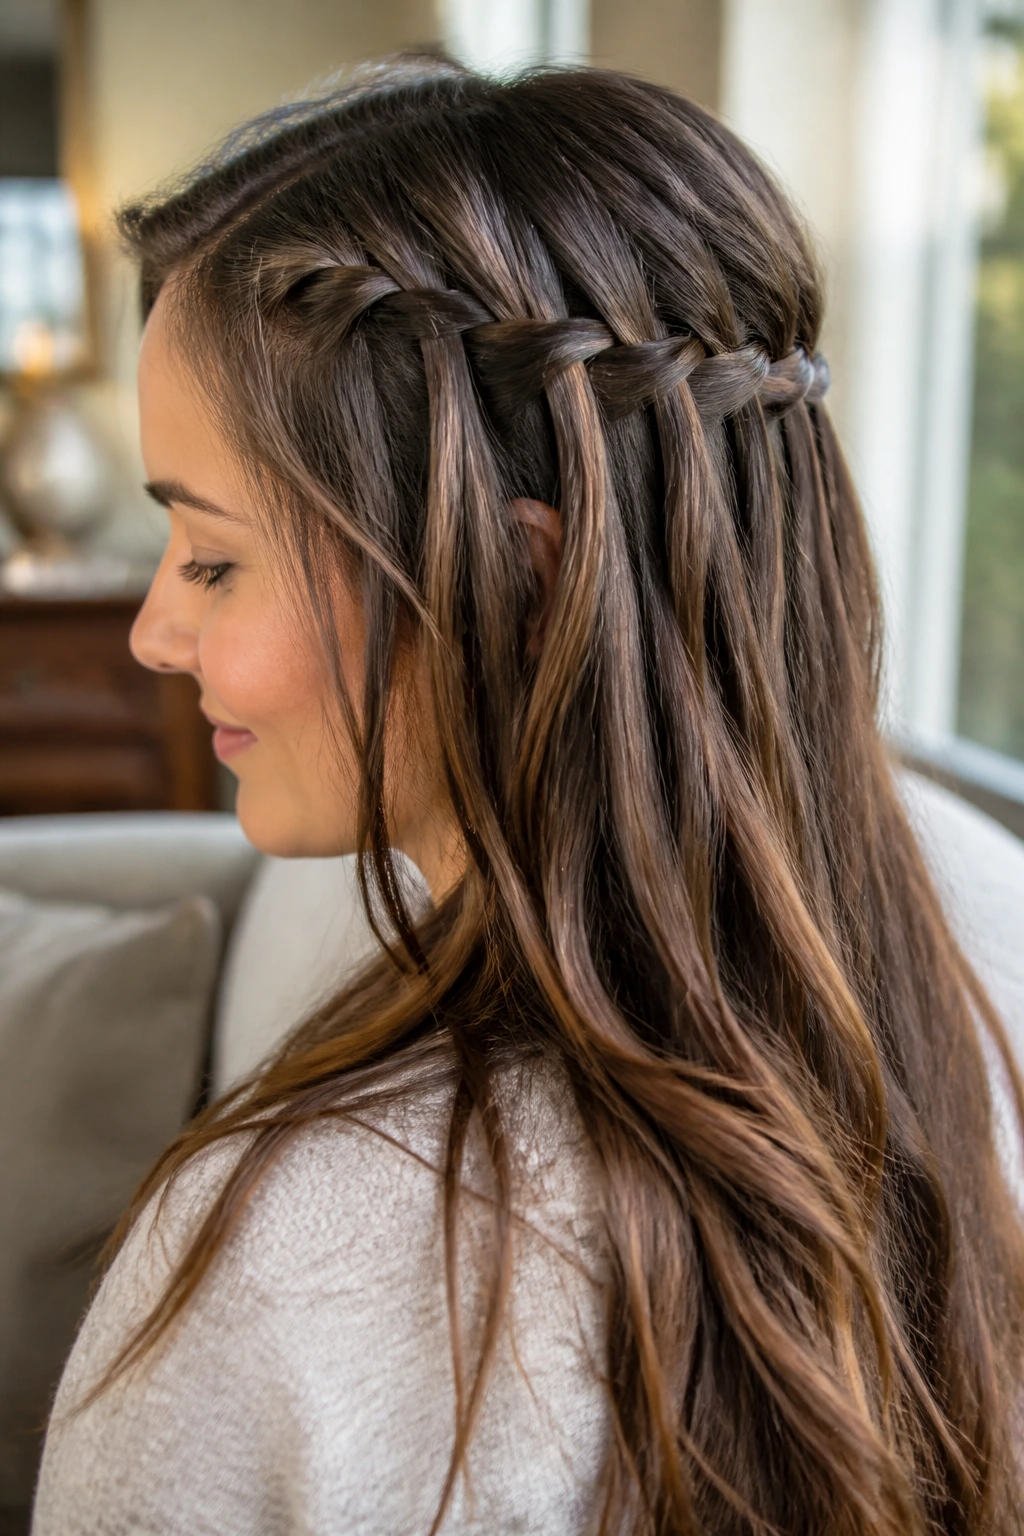
The waterfall technique involves leaving strands of hair hanging down as you braid, creating a series of cascading loops. It sounds daunting, but once you practice the pattern of dropping one strand and picking up a new one, it becomes muscle memory.
Perfecting the Cascades
- Take a section at the front and start a regular braid.
- Drop the bottom section after each cross.
- Pick up a new piece of hair from the top to replace the dropped section.
- Continue this process until you reach the back, then pin the end of the braid under the top layer of hair.
11. The Wrapped Chignon
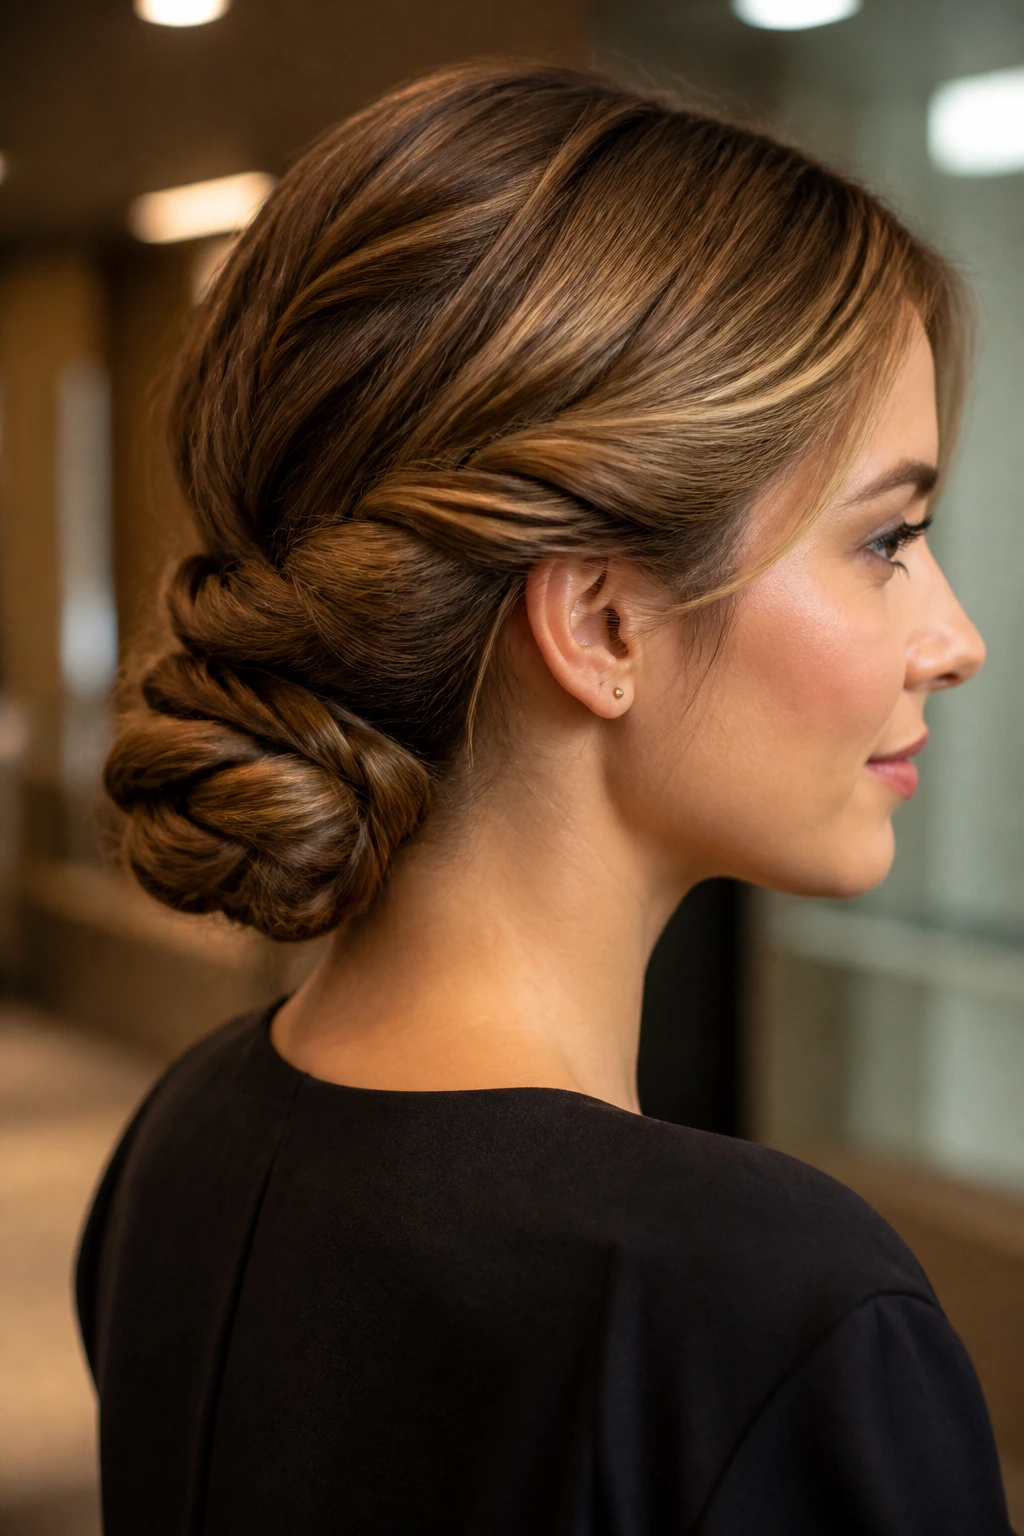
The chignon is the sophisticated older sister of the bun. It sits lower and feels more structured, usually centered at the nape of the neck. To wrap it, you divide your hair into three loose sections, braid or twist them individually, and then pin them into a compact knot.
Why This Is Great for Texture
If your hair is thick or heavy, a single bun can feel too bulky and might slip. By breaking the hair into three smaller, lighter components, you create a more secure and aesthetically pleasing arrangement that stays put through an entire workday.
12. The Headband Tuck
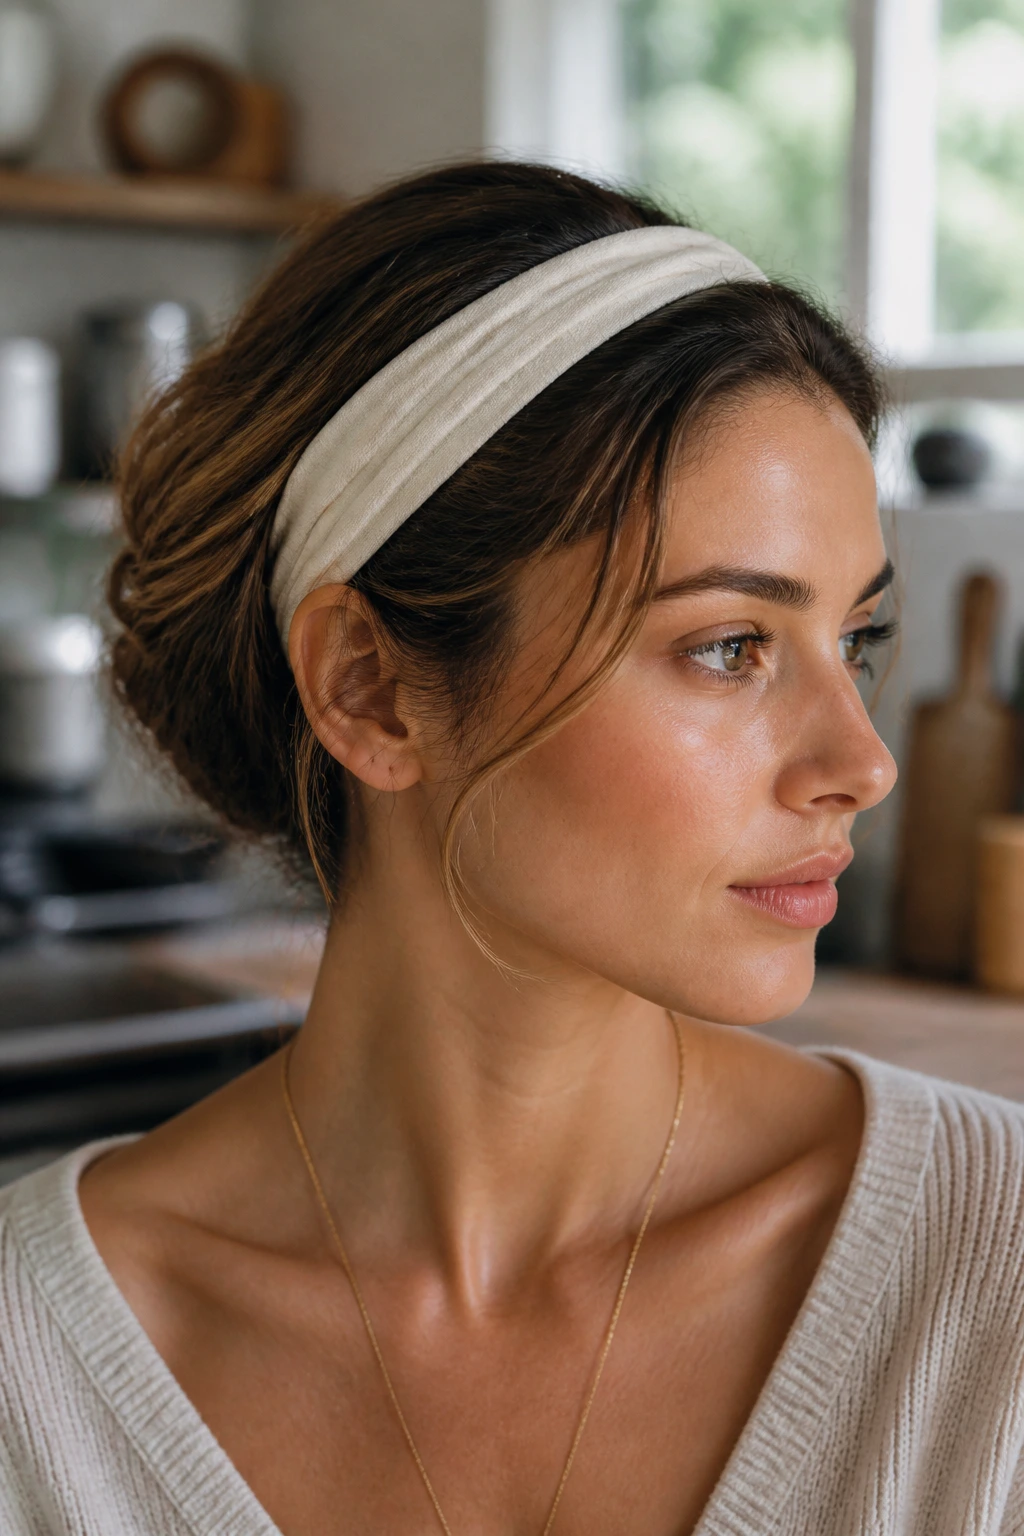
You do not need a fancy headband for this one—a simple elastic band that sits flat against the head works perfectly. You tuck your hair into the band, looping it over and through until you reach the back.
Why It’s a Game Changer
It works regardless of hair length. Even if you have a bob or a lob, you can achieve the look of an elaborate, pinned-up style in under a minute. It creates a soft, voluminous look around the back of the head that is essentially impossible to mess up.
13. The Half-Up Top Knot
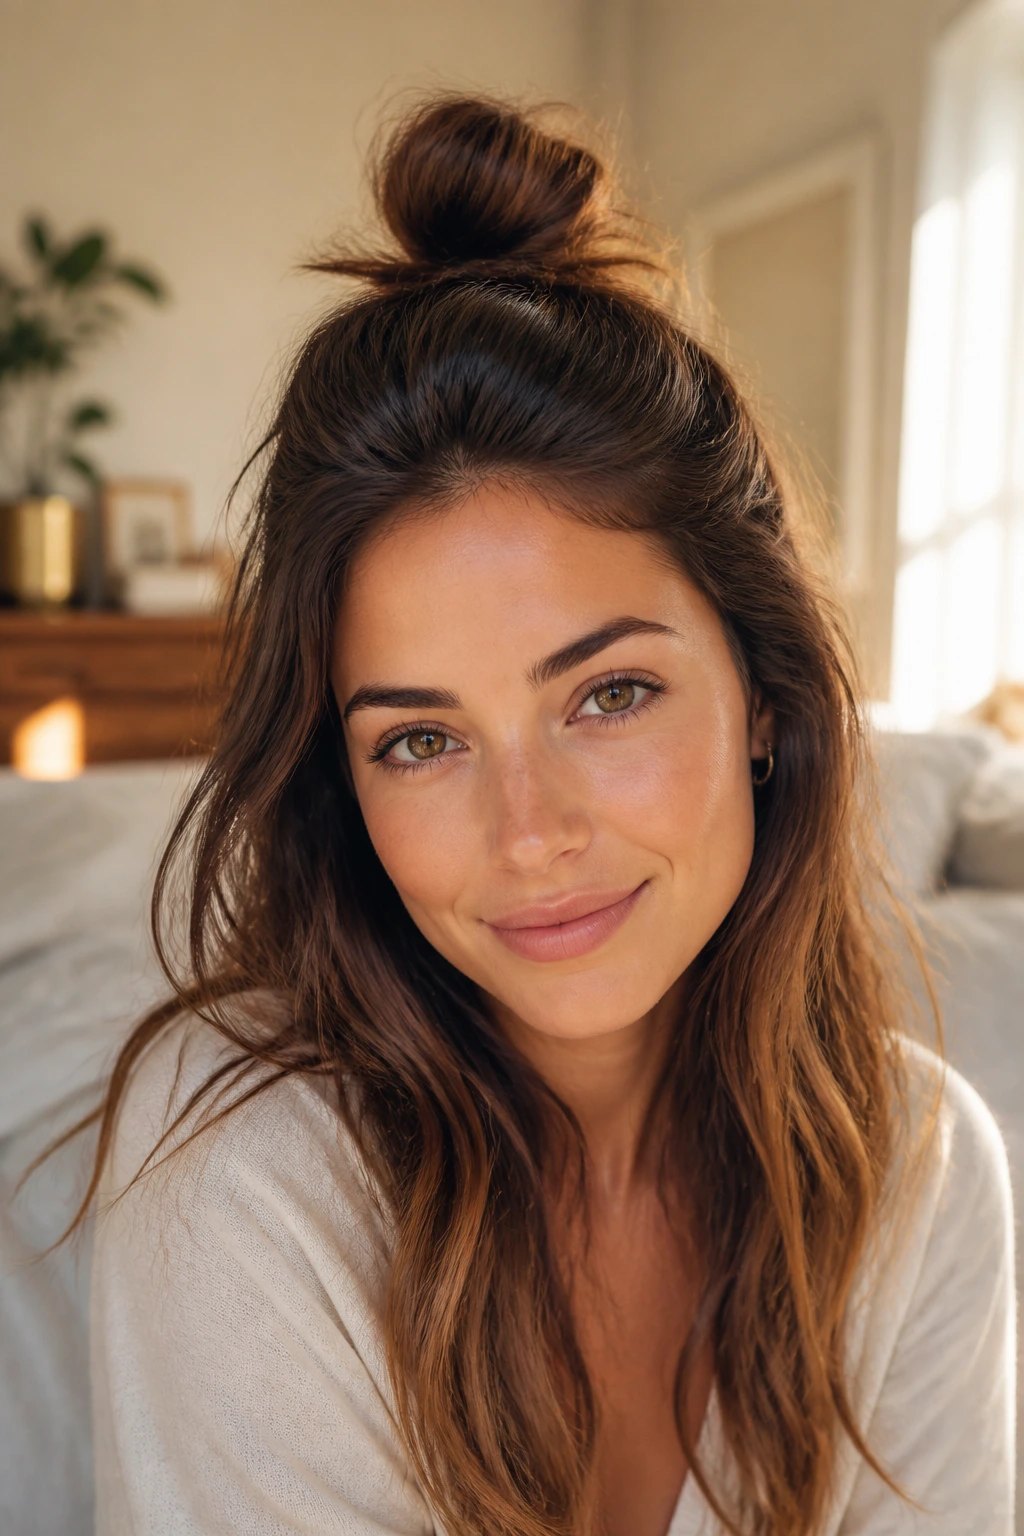
Can’t decide between up or down? This is the middle ground. Gather the top third of your hair—the part that usually gets in your face—and twist it into a high, messy knot, leaving the bottom two-thirds flowing freely.
Styling Tips for Balance
- Keep the bun small. If it is too big, it can look like an antenna.
- Use a textured spray on the loose hair to make the transition between the knot and the length feel seamless.
- This style is surprisingly versatile; it looks just as good with a button-down shirt as it does with a weekend sweater.
14. The Pinned-Back Layers
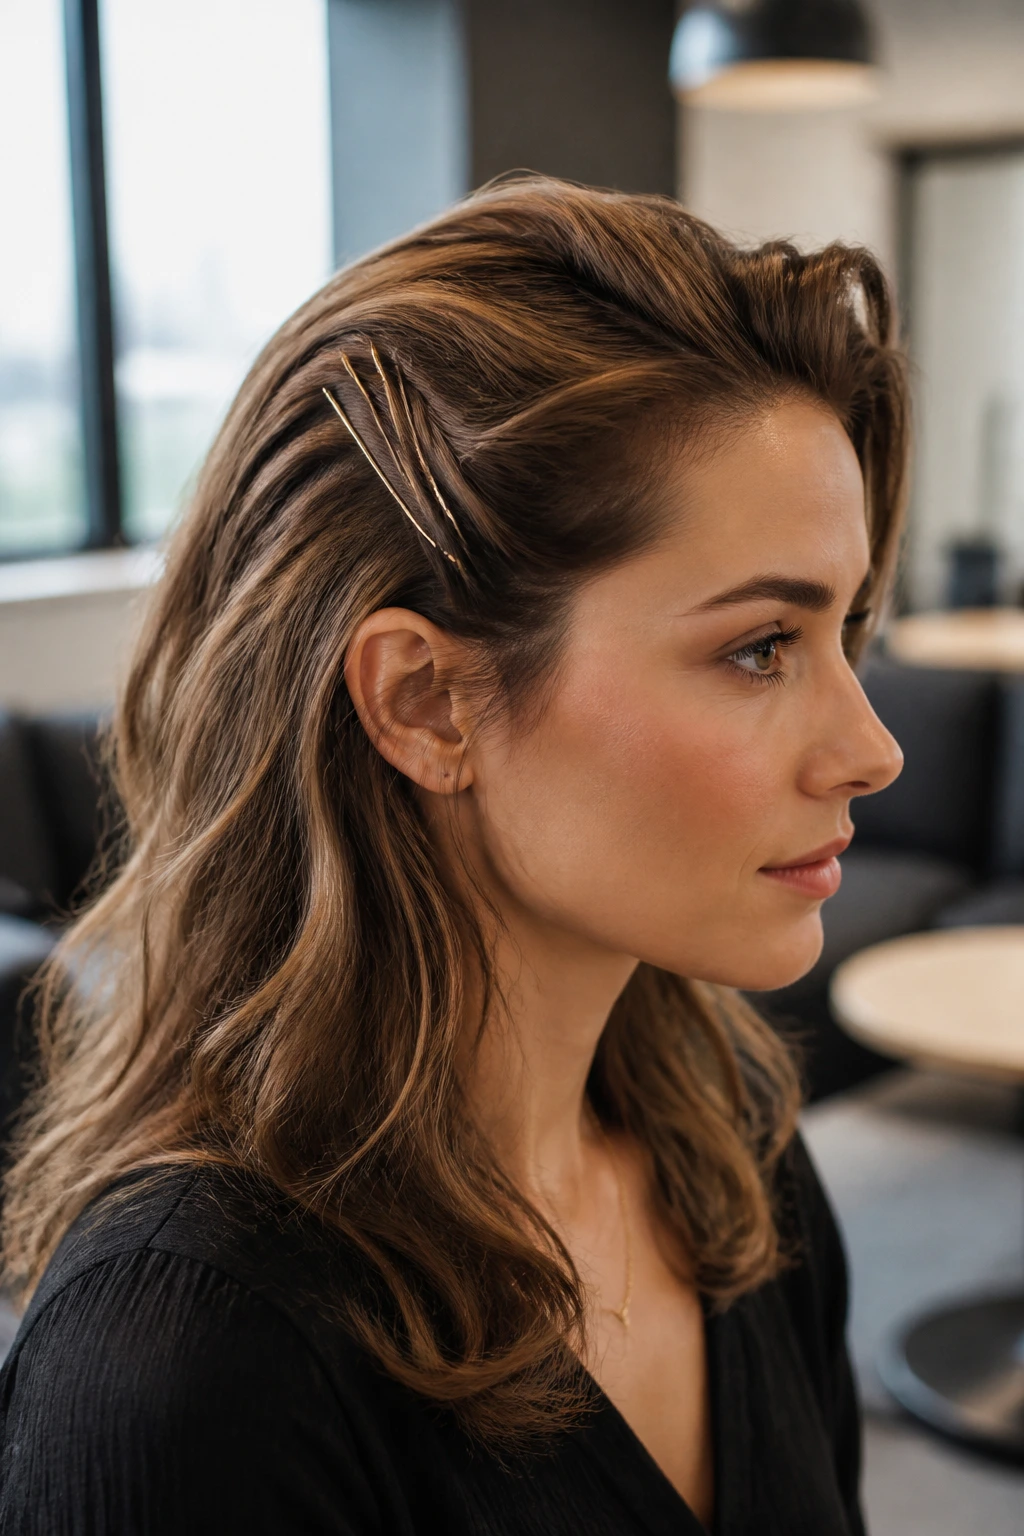
If your layers are currently at an awkward stage, use a series of pins to control them. Don’t worry about hiding the pins. Modern hair styling has embraced the visible clip—use colorful, patterned, or gold bobby pins to turn a utility task into a fashion statement.
Creating a Pattern
Don’t just pin one hair back. Use three or four pins in a row, slightly overlapping them at a 45-degree angle. This transforms a practical fix into a deliberate geometric detail that adds a pop of interest to an otherwise simple look.
15. The Bubble Ponytail
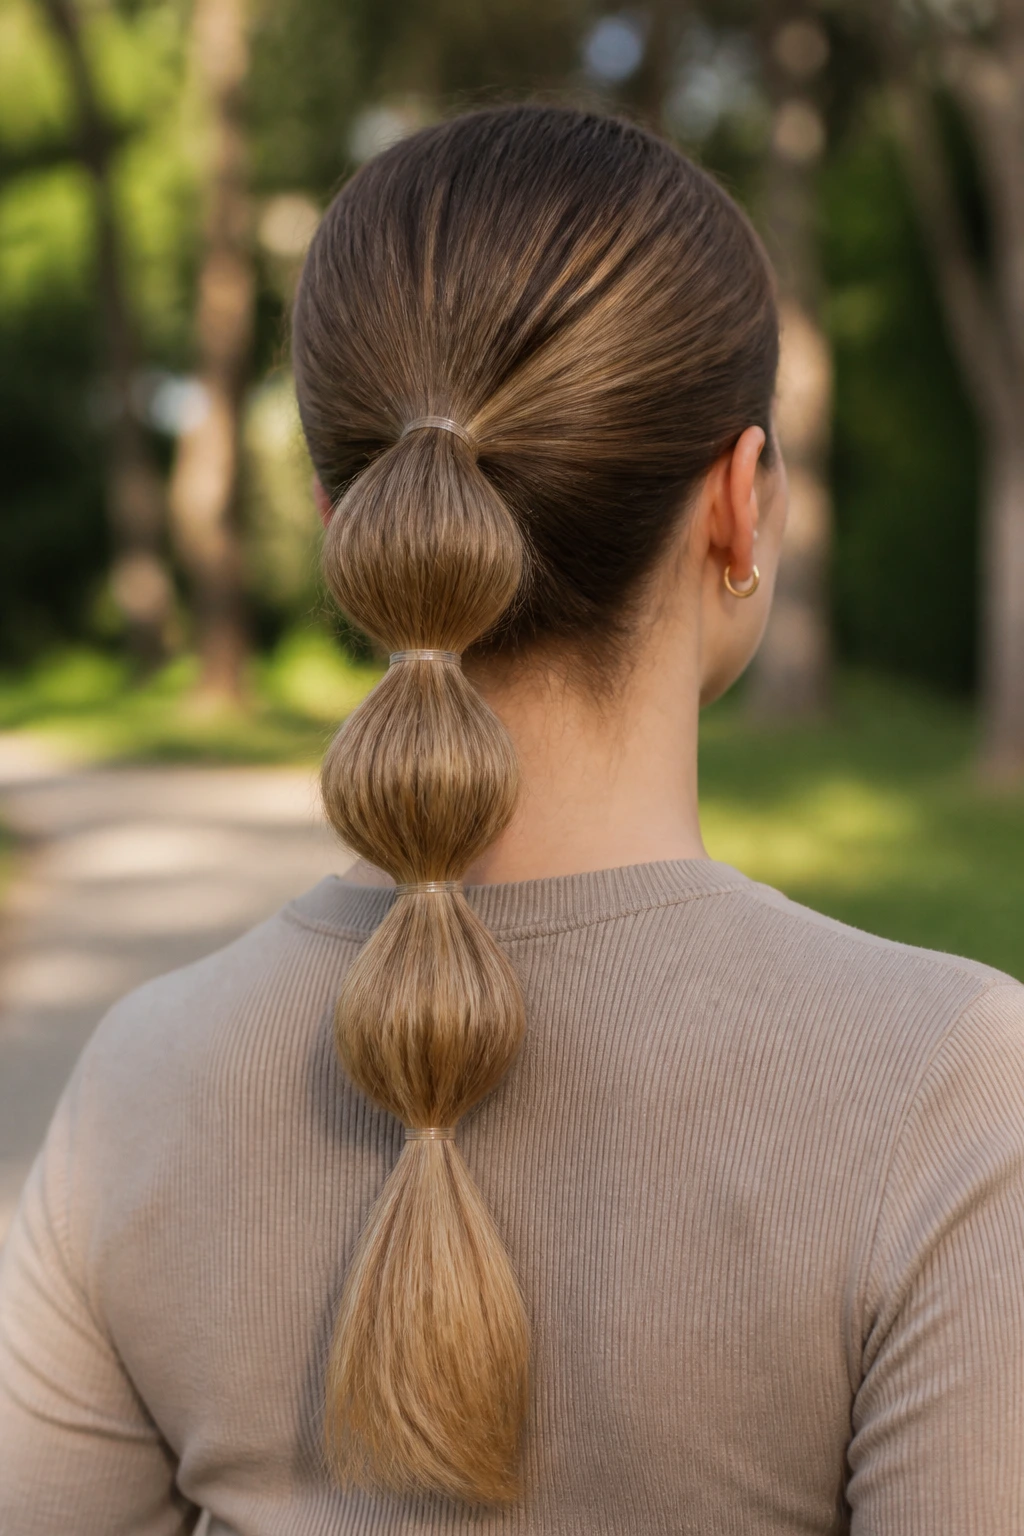
This is a fun way to fake the look of elaborate braiding. You tie your hair into a ponytail, then add additional elastics every two inches down the length of the tail. Between each elastic, pull and fluff the hair to create a rounded “bubble” effect.
Troubleshooting the Bubbles
If the bubbles are looking flat, it is because you aren’t pulling hard enough. Be aggressive with your tugging. Use your fingers to stretch the hair out until the section between the elastics looks like a series of soft, airy spheres.
16. The Low Messy Braided Pony
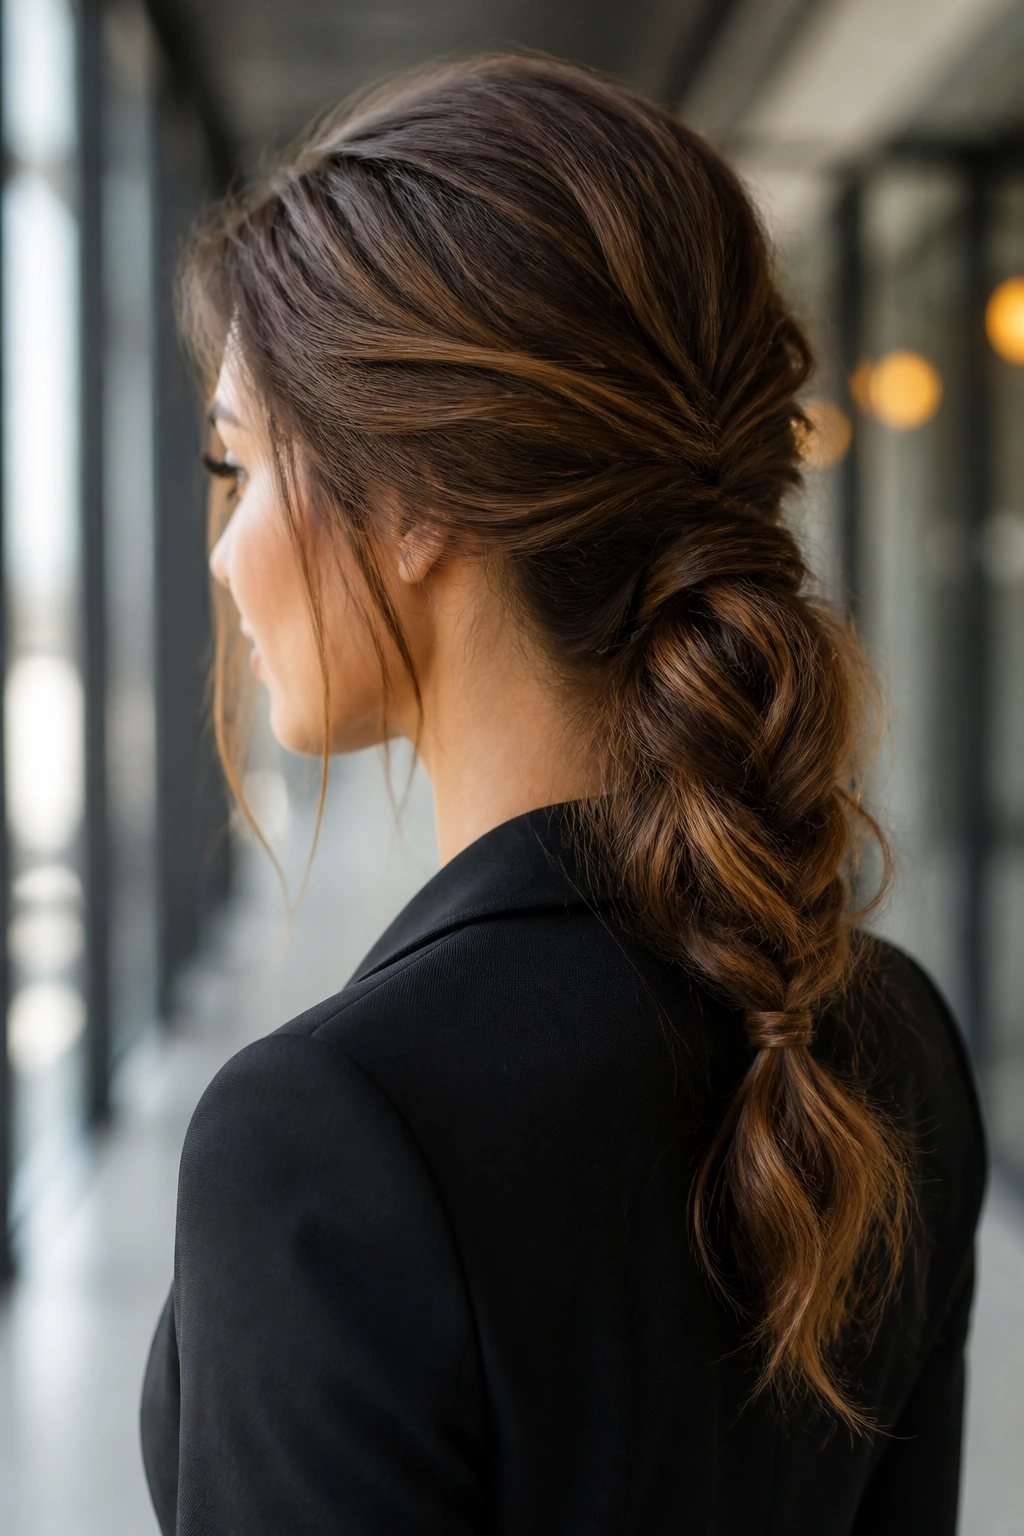
Take your standard low ponytail and braid the tail. It’s that simple. But to elevate it, use your fingers to pull at the loops of the braid once you’ve secured the end.
Why It Works for Professional Settings
A plain ponytail can sometimes look too casual, but a braided one implies you put in the extra thirty seconds of effort. It keeps the hair contained, which is a major benefit if you are working in a windy climate or just trying to avoid tangles during a busy afternoon.
17. The Sleek Center-Parted Low Bun
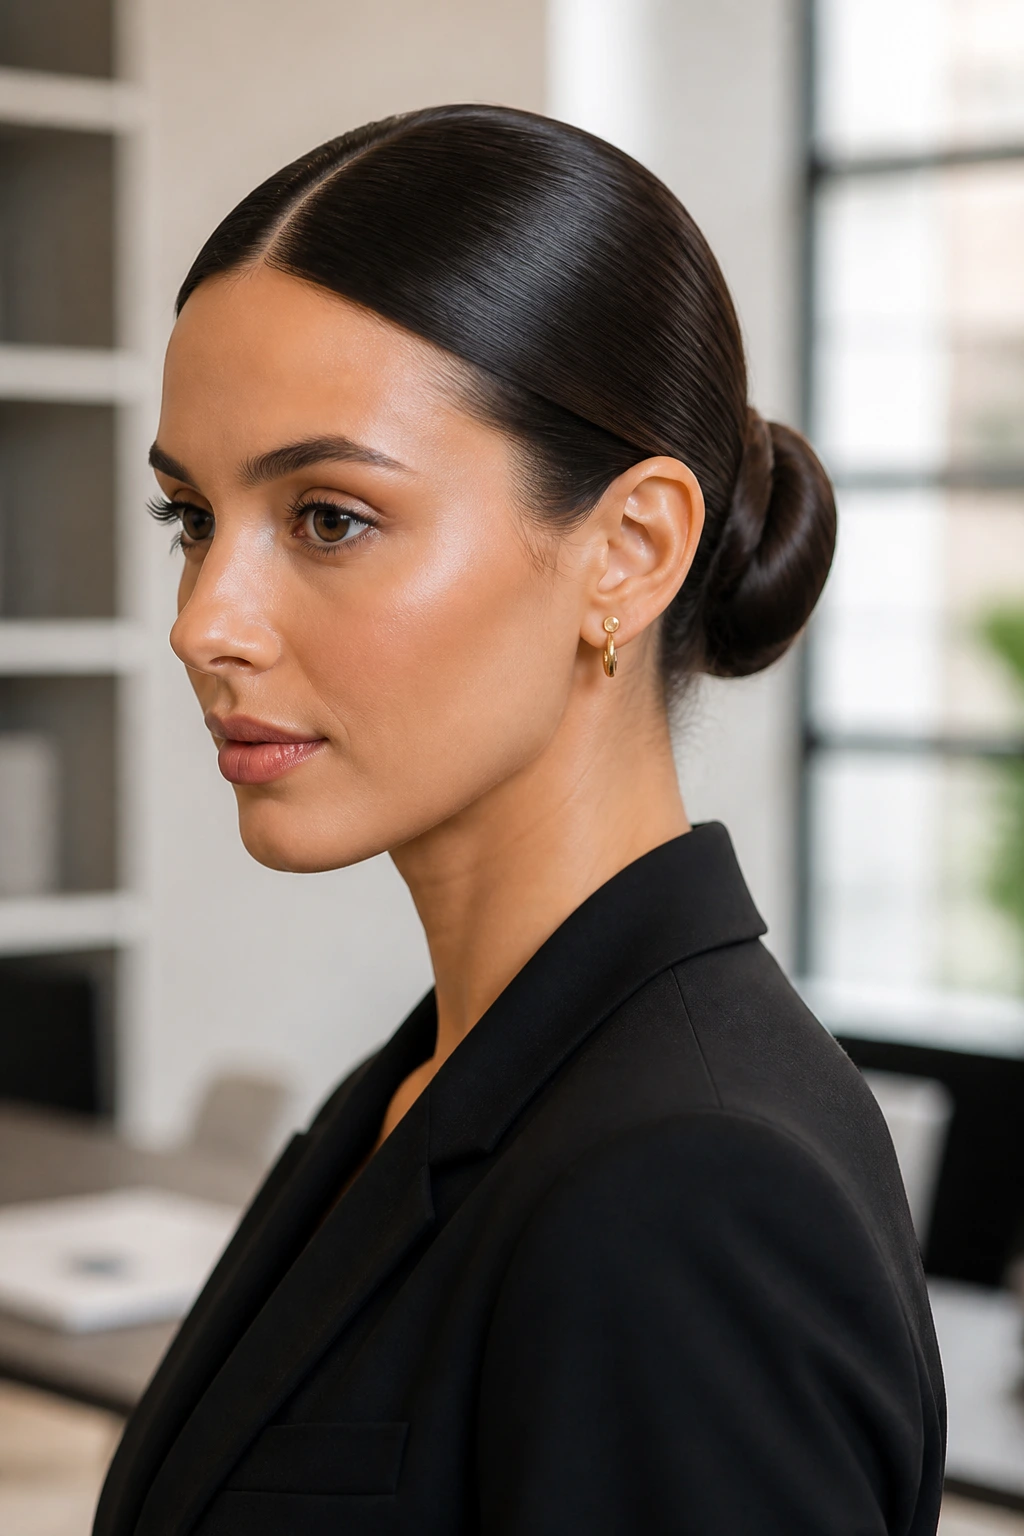
Minimalism is a powerful aesthetic. If you have the right facial structure for a center part, slicking your hair back into a tight, low bun creates a clean, architectural look that screams competence.
Achieving the Minimalist Look
This style is unforgiving, so use a high-quality styling gel or a bit of hair oil to ensure there are no stray bumps. It is all about the finish. If you have the patience, brushing the hair thoroughly before gathering it into the elastic is the key to that mirror-like reflection.
18. The Scarf-Integrated Braid
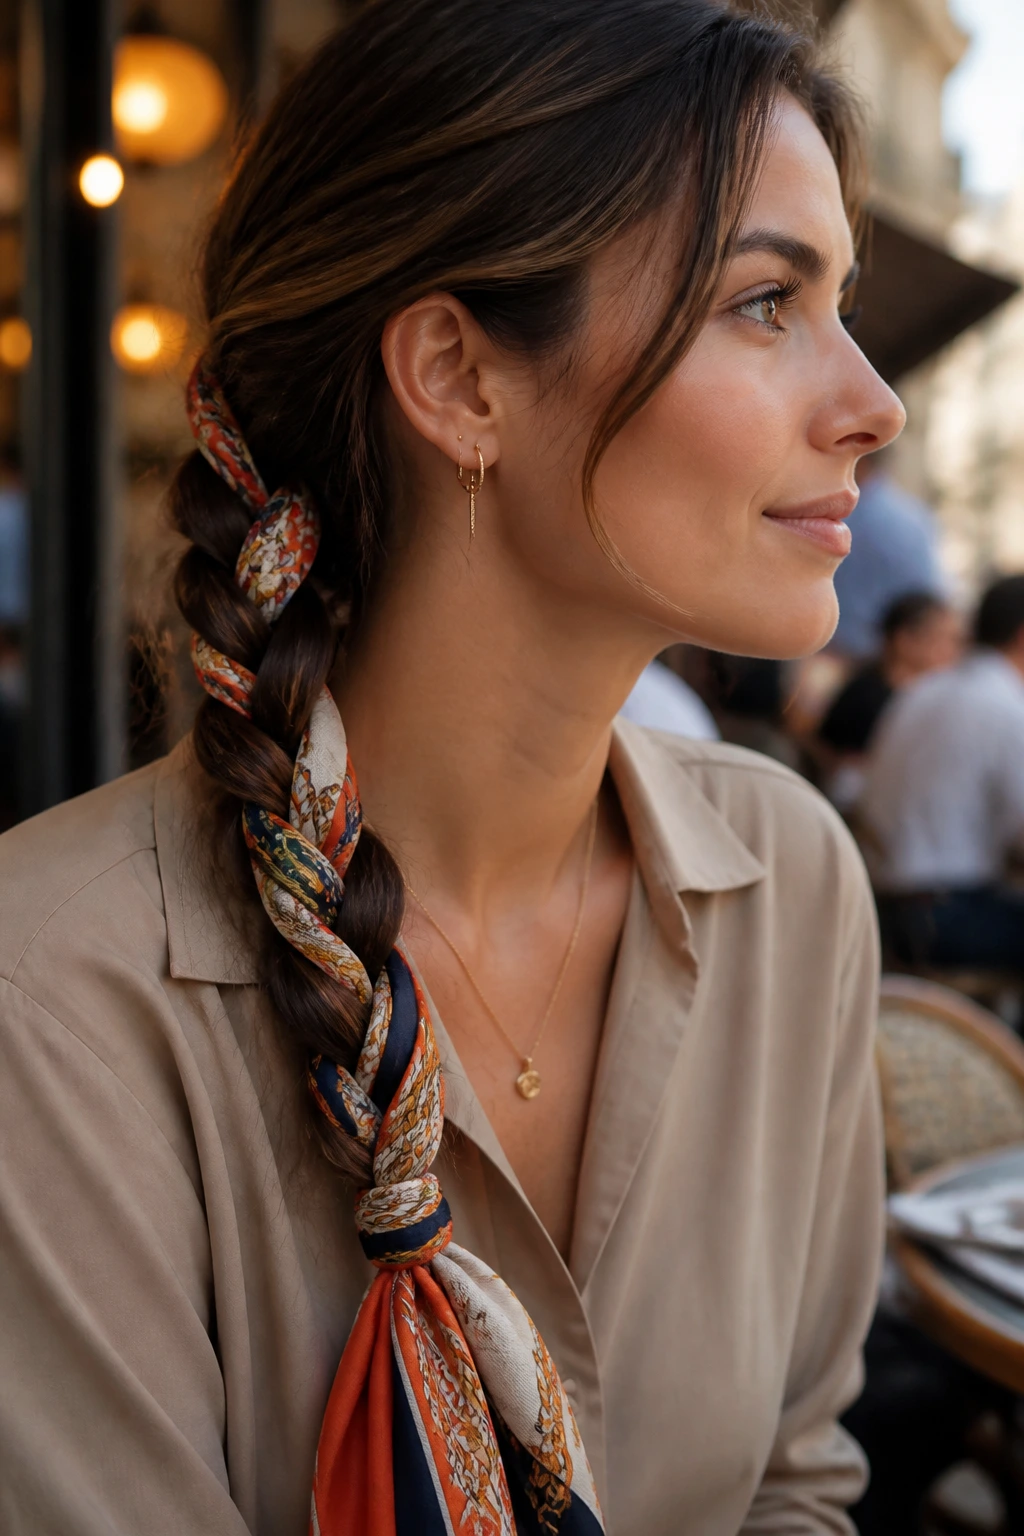
A silk scarf is perhaps the most underrated hair tool. Incorporating one into a simple three-strand braid adds color, texture, and volume. You tie the scarf at the base of your ponytail, then treat the two ends of the scarf as part of your hair sections.
Choosing Your Scarf
Avoid bulky cotton fabrics, as they will make the braid heavy and difficult to manage. A thin silk or synthetic satin ribbon works best. It provides just enough friction to hold the braid in place, meaning you might not even need an elastic at the bottom—a simple knot in the scarf will do.
19. The Faux-Hawk Twist
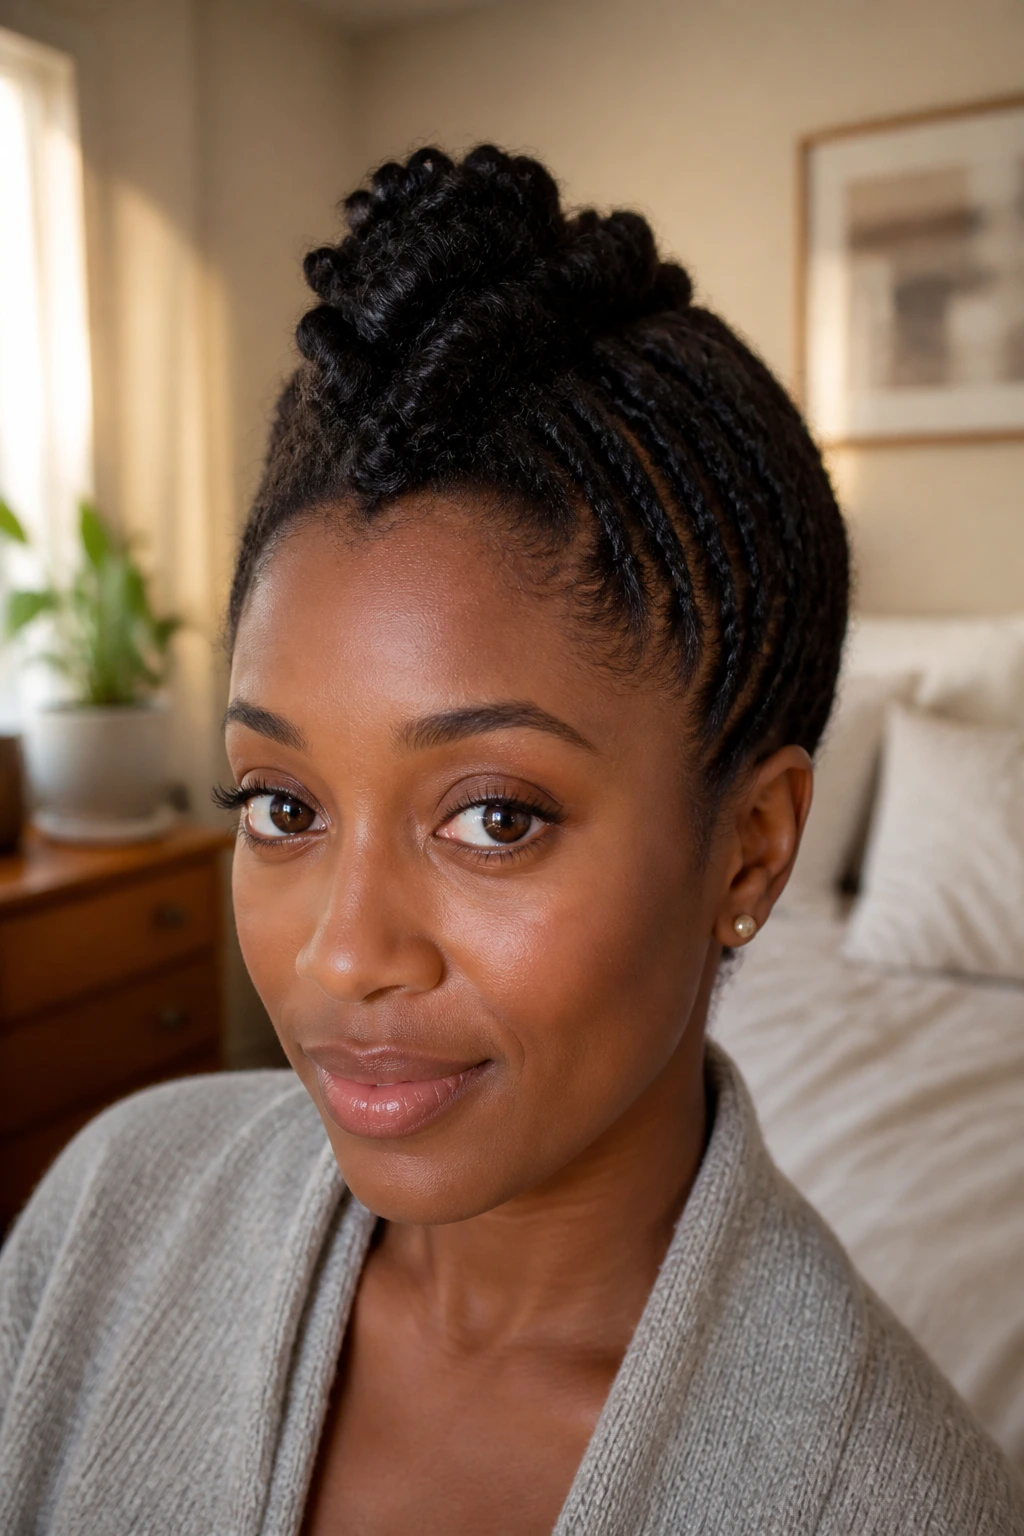
This style creates volume at the crown, which is incredibly flattering. You take the hair along the center strip of your head and twist it forward or upward, pinning it into place to create a dramatic, elevated silhouette while leaving the sides relatively flat.
Why It’s Unique
It provides a bit of height without the need for a teasing comb. By pinning in sections, you create a tiered look that keeps your hair secure but interesting to look at from the side. It works especially well for those with curly hair who want to show off their texture in a controlled way.
20. The Side-Pinned Curls
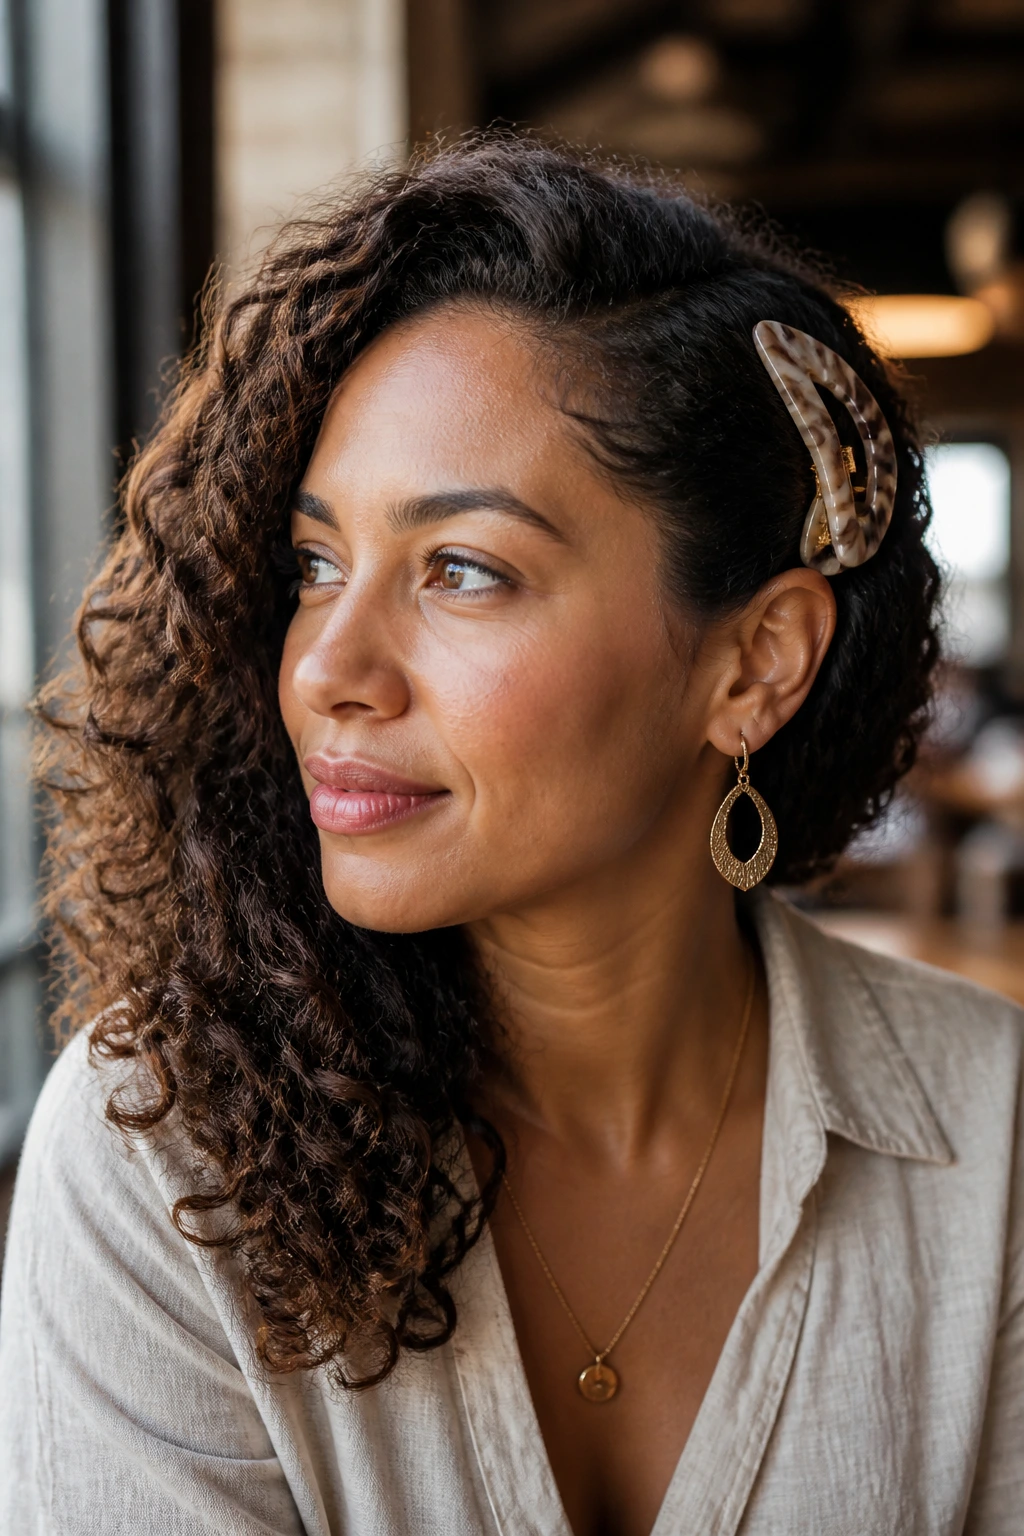
If you have natural curls or waves, don’t try to hide them. Simply pin one side back behind your ear with a large statement clip, allowing the other side to drape naturally over your shoulder.
The Power of Asymmetry
This is the ultimate confidence move. It feels like you are showing off your natural texture rather than trying to tame it into submission. Because one side is pinned back, you create a focal point for earrings, making this a great option for a day when you want to wear jewelry.
21. The Low Twisted Loop
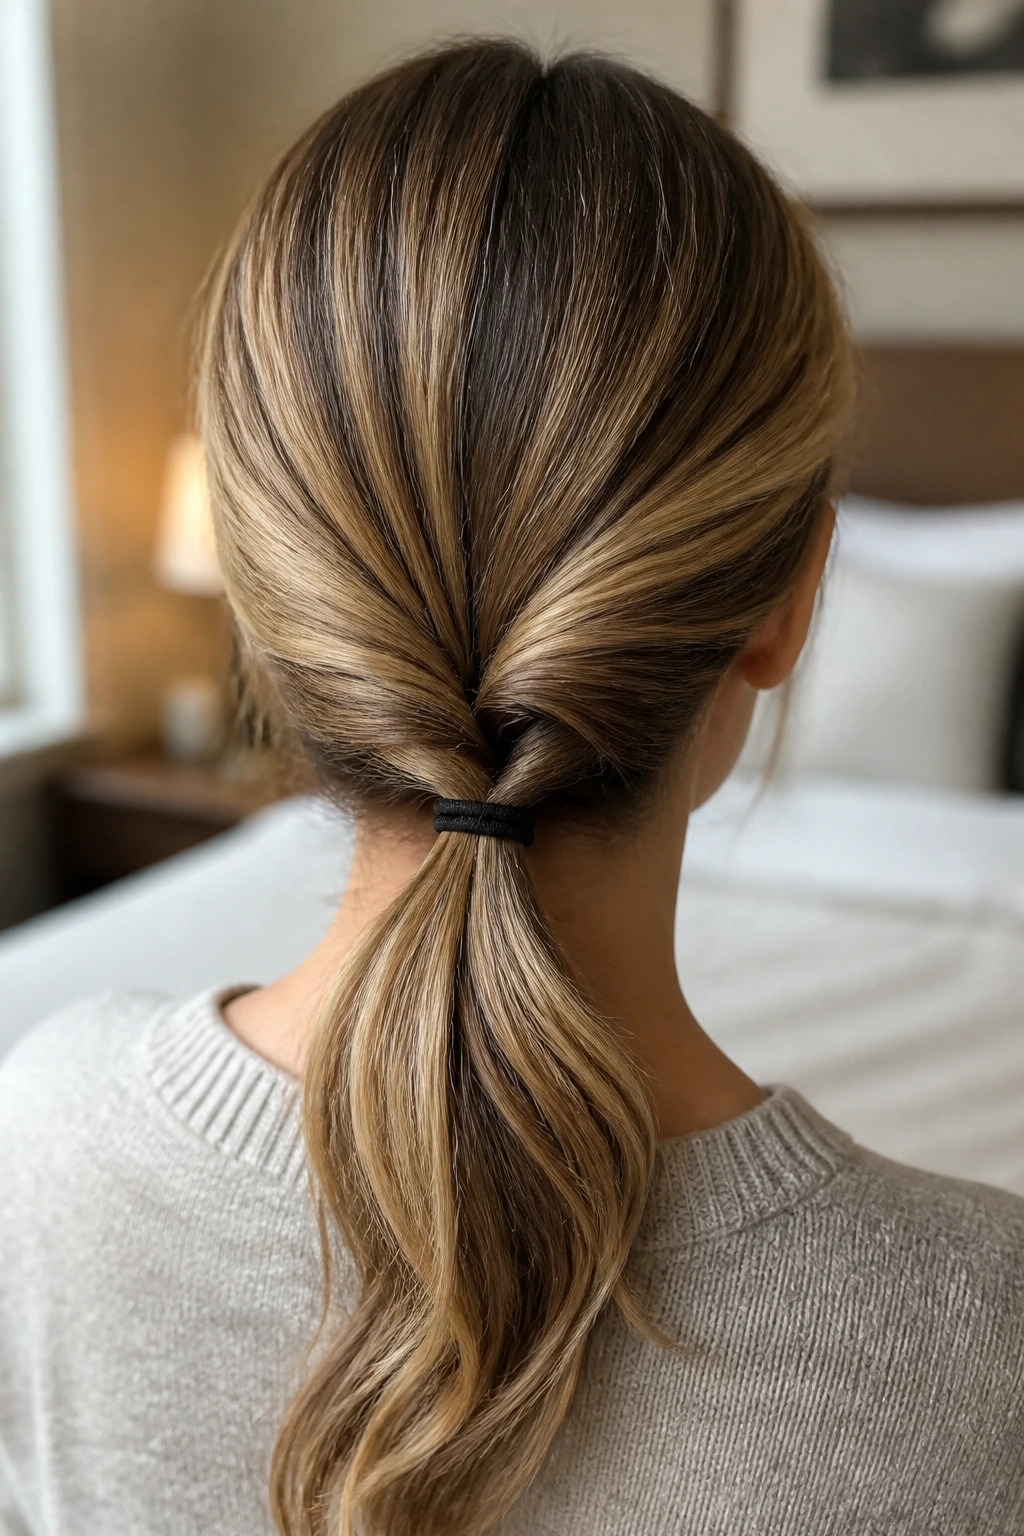
Similar to the chignon, this style involves pulling the hair into a low ponytail and then feeding the tail back through a gap above the elastic. It is called a “topsy-tail” in some circles, and it adds an instant twist detail that makes the hair look like it was professionally styled.
Getting the Tension Right
If you pull too hard, the twist will look pinched and messy. Use a gentle touch when creating the hole above the elastic. Once you loop the tail through, tighten the elastic by pulling the two loose ends of the ponytail, which will cinch the twist and hold it securely against your head.
22. The Crown Braid (Simplified)
You do not have to be a master braider to do a crown braid. You can create two separate braids, one on each side, and pin them over the top of your head in an overlapping fashion.
Why This Style Lasts
By using two separate pieces, you distribute the weight. This prevents the “pulling” sensation that often comes with a single, massive braid wrapped around the skull. Tuck the ends of each braid deeply into the other to hide the tails, and you have a style that will stay intact from your morning coffee until you take it down in the evening.
Final Thoughts
At the end of the day, your hair is just hair. It grows, it changes, and it responds to how you treat it. The most common pitfall people face when trying to diversify their look is the expectation of perfection. If a style falls apart by three in the afternoon, it is not a failure; it is just a chance to try something different. The more you experiment, the more you will learn about what works for your specific texture and length.
Consistency in your hair health—using gentle detanglers and avoiding excessive heat—is what eventually makes styling easier. When your strands are healthy, they naturally hold onto styles longer and behave better. Don’t be afraid to keep a few high-quality clips and a reliable, flexible-hold hairspray in your bag. The best hairstyles are the ones that give you the freedom to move through your day without constantly checking the mirror. Try one of these this week, tweak it until it feels like you, and enjoy the confidence that comes with having a look that feels completely put together.