Waking up before the sun to catch the bus or get to class on time is a universal struggle, and styling your hair often becomes the first casualty of a frantic morning. You have five minutes, a dry shampoo bottle that is suspiciously light, and a motivation level hovering somewhere near zero. That is precisely when a go-to repertoire of reliable, low-effort hairstyles becomes your most valuable asset. The goal is not just to look pulled together, but to feel comfortable enough to focus on your lectures without constant adjustments.
We are talking about styles that bridge the gap between “just rolled out of bed” and “I definitely spent an hour on this.” These methods prioritize durability, speed, and the reality of navigating crowded hallways. Whether you are dealing with second-day texture, an unruly cowlick, or just the need to keep everything out of your face during an exam, there is a way to handle it without complicated tools or professional training. Let us look at twenty-five ways to reclaim your morning routine while keeping your look sharp and authentic.
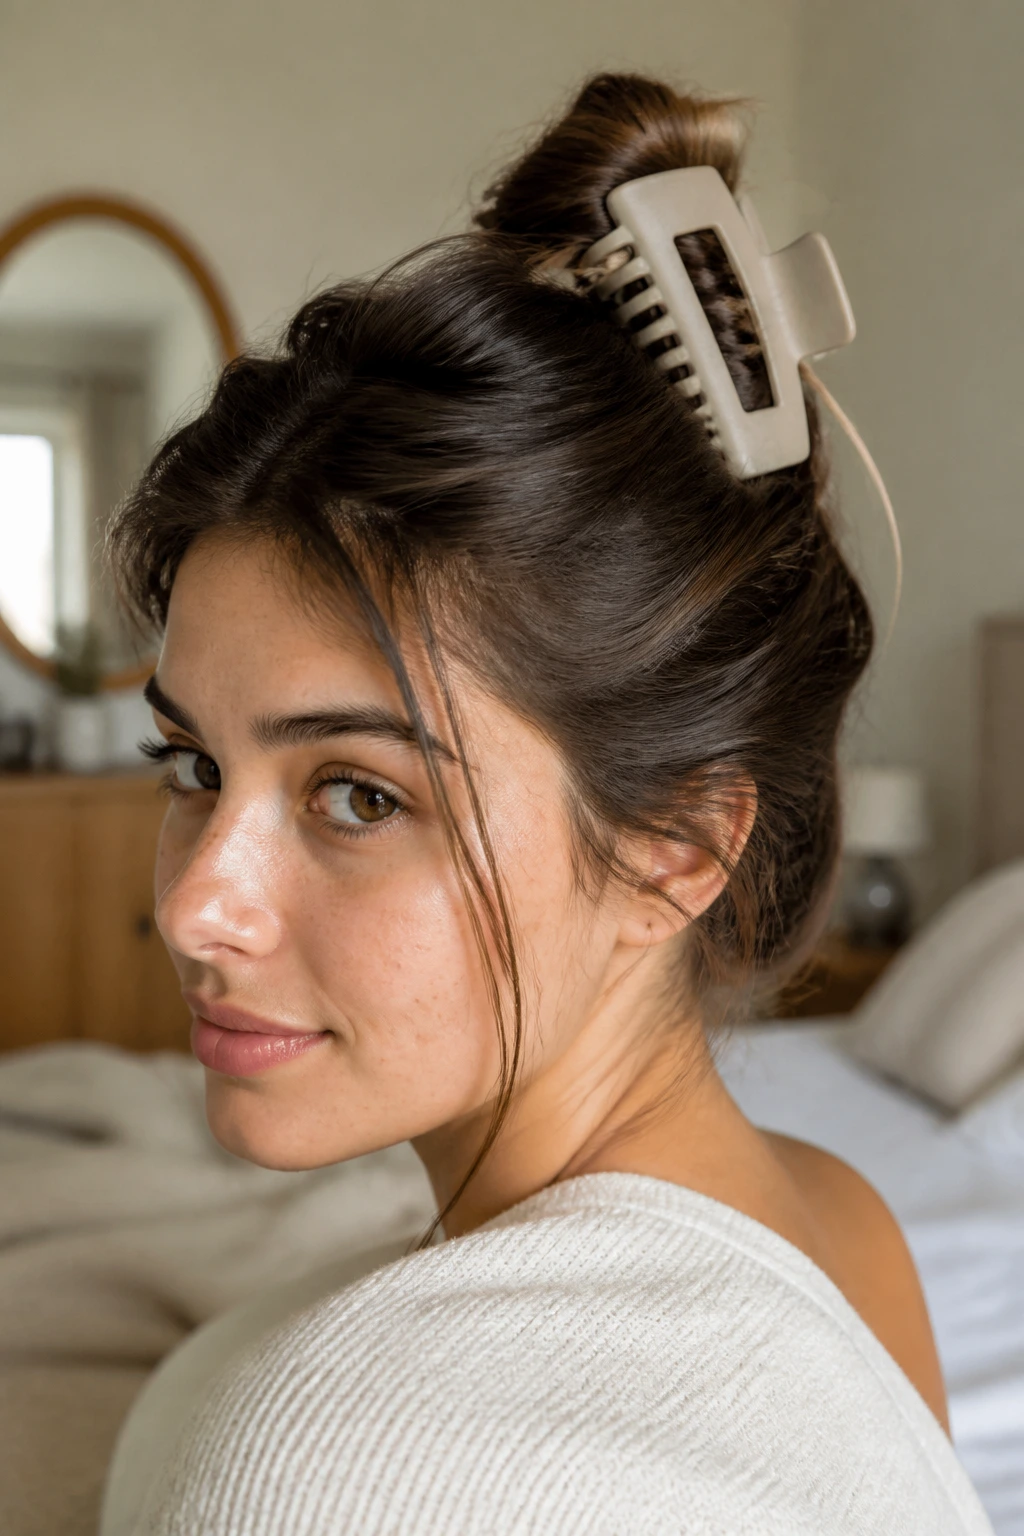
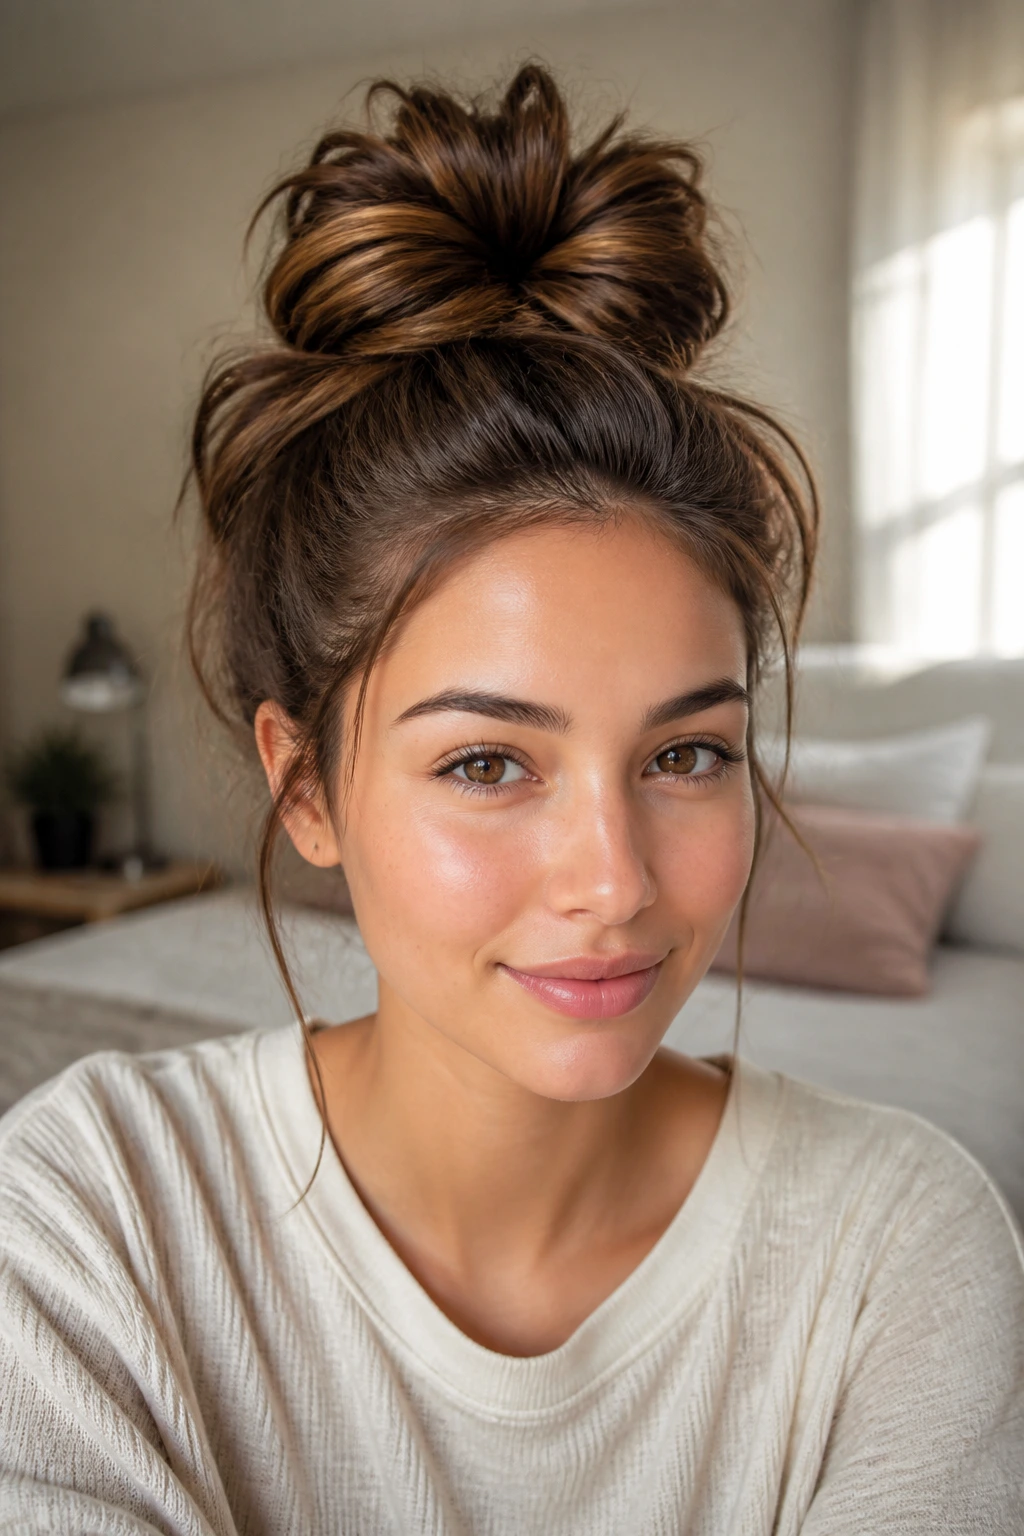
1. The High-Volume Messy Bun
This is the classic for a reason—it hides almost any hair disaster while looking intentionally chic. The trick is to avoid brushing your hair perfectly flat before starting. Leave a little bit of root volume and use a texturizing spray if your hair feels too “clean” and slippery to hold.
The Secret to the Perfect Shape
- Flip your head upside down and gather your hair at the very crown of your head.
- Pull it through a hair tie halfway, then twist the base and pull the ends through again to create a loop.
- Gently pull at the edges of the bun to puff it out until it reaches your desired size.
- Pro tip: Use small bobby pins to tuck in any stray pieces that are hanging too low, but leave a few wisps around your ears for a softer look.
2. The Twisted Half-Up Crown
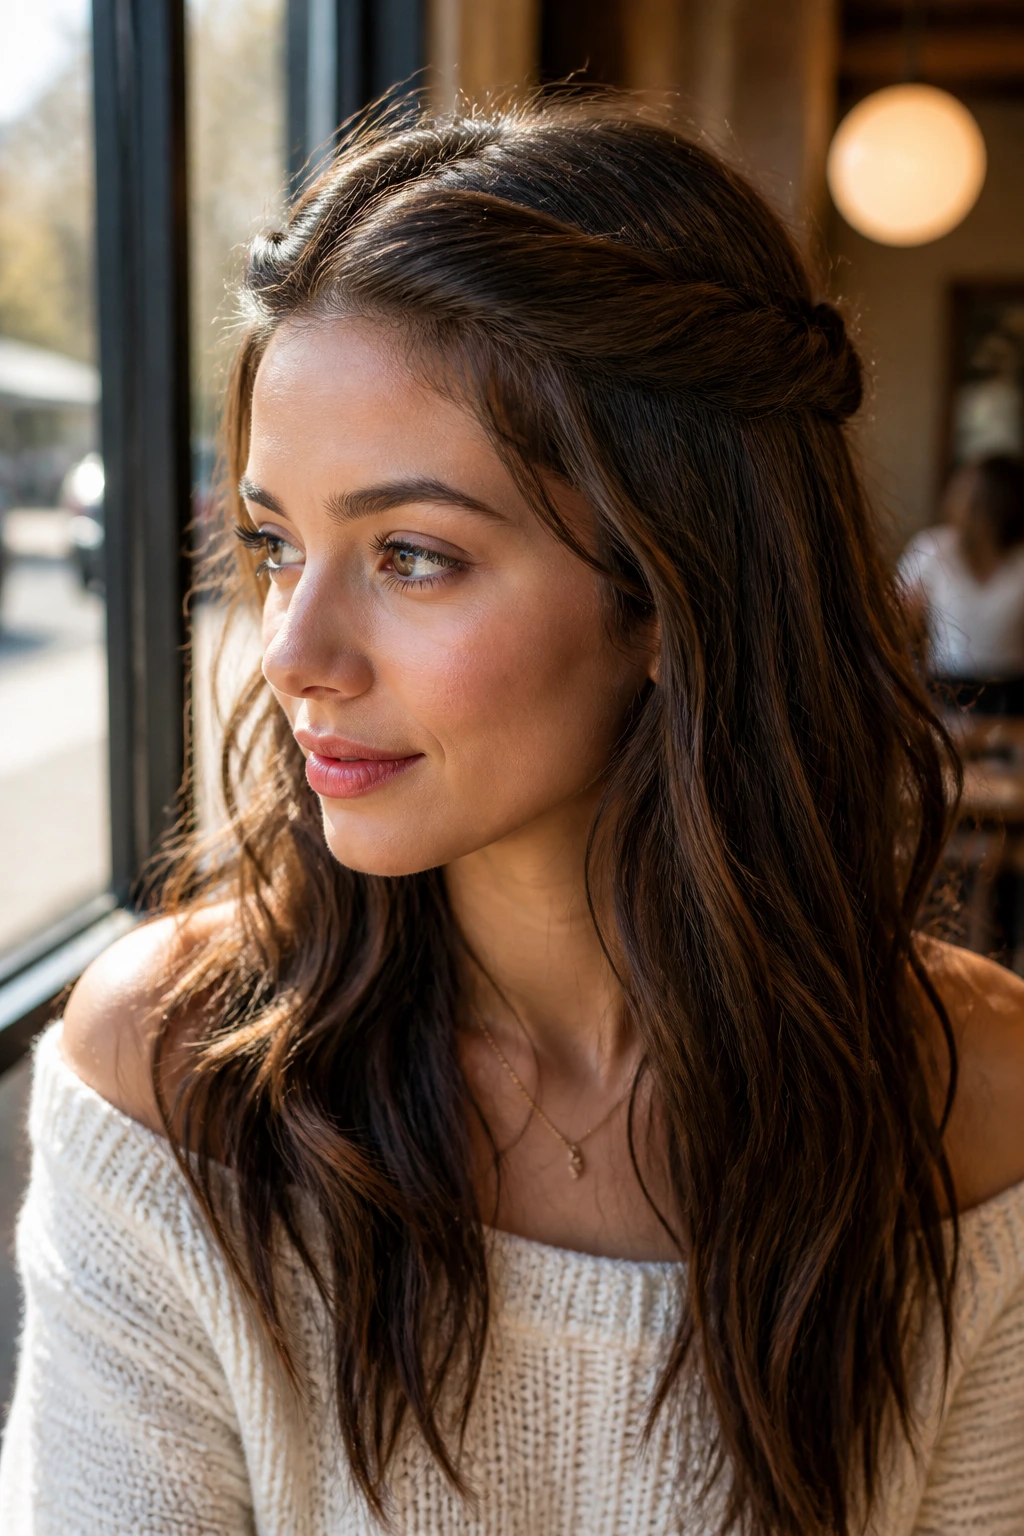
If you want to keep hair off your face but don’t want the full commitment of a ponytail, this twist is incredibly fast. It works on both straight and wavy textures and adds a touch of structure that elevates a simple casual outfit.
How to Style It
- Take a two-inch section of hair from each side, right near your temples.
- Twist each section away from your face until you reach the back of your head.
- Secure both twists in the center with a clear elastic or a small claw clip.
- Gently tug on the twists to make them look thicker and more lived-in.
3. The Braided Headband
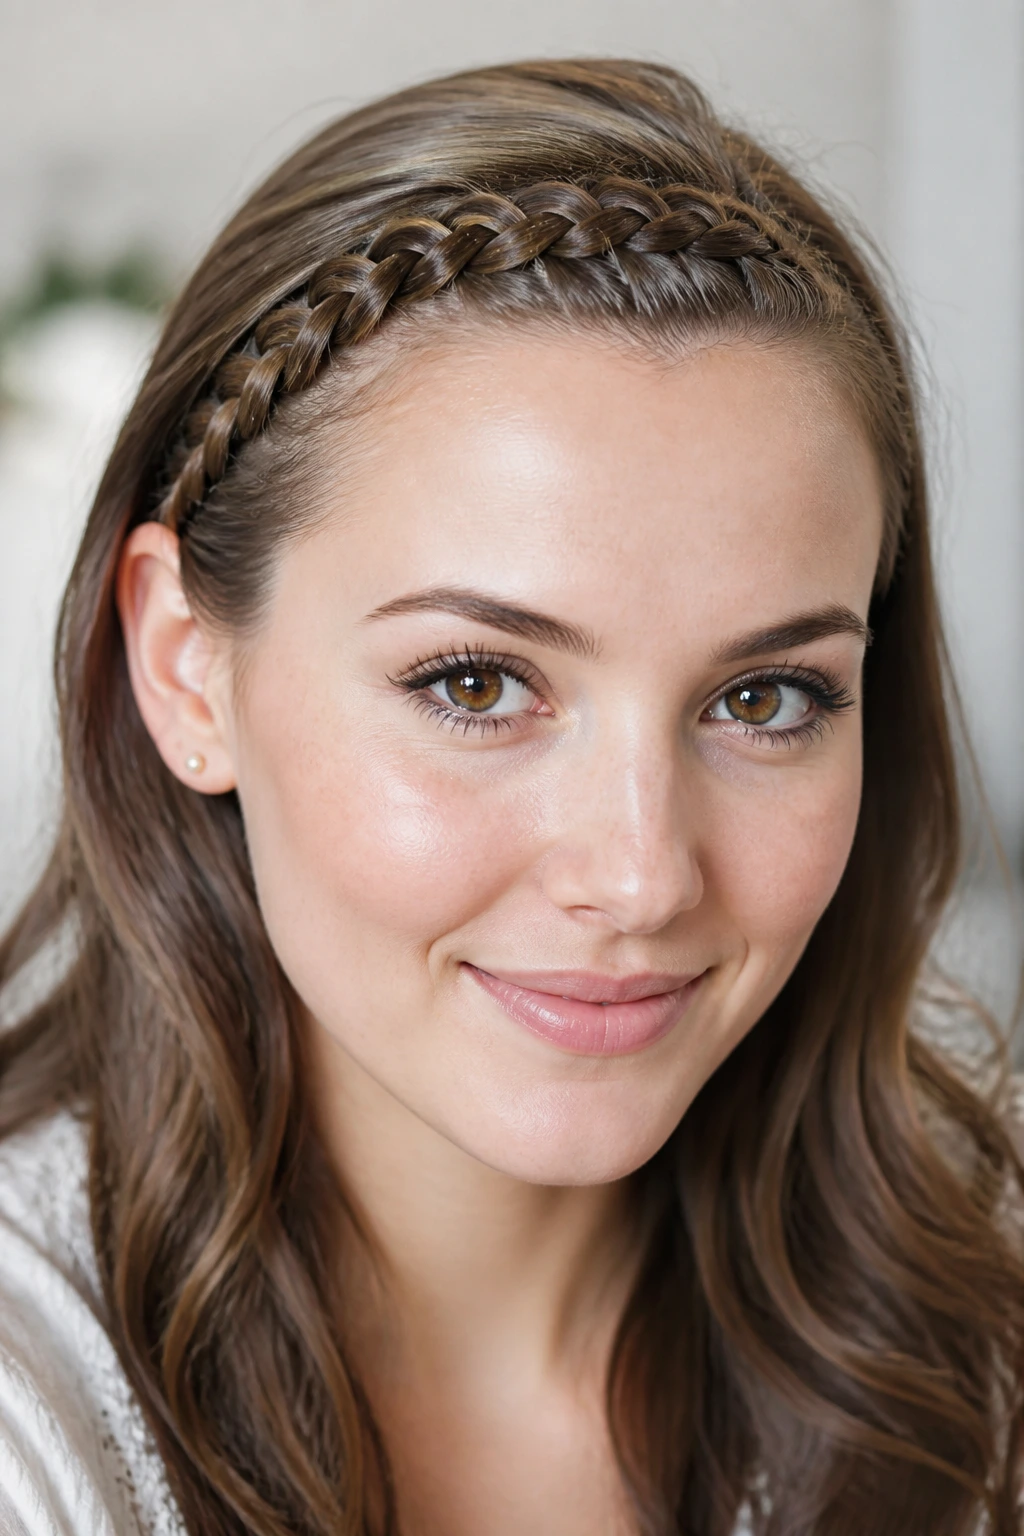
This is a lifesaver when your bangs are at that awkward growing-out length. Instead of pinning them back and looking like you’re doing a spa treatment, a small braid blends them seamlessly into the rest of your hair.
Making It Work
Start a Dutch braid right at your hairline, pulling in small pieces as you move across your forehead. Once you reach the opposite ear, secure it behind your ear with a bobby pin tucked underneath a larger section of hair so it stays hidden. If your hair is prone to frizz, a tiny dab of lightweight hair oil on the braid will keep it looking polished throughout the day.
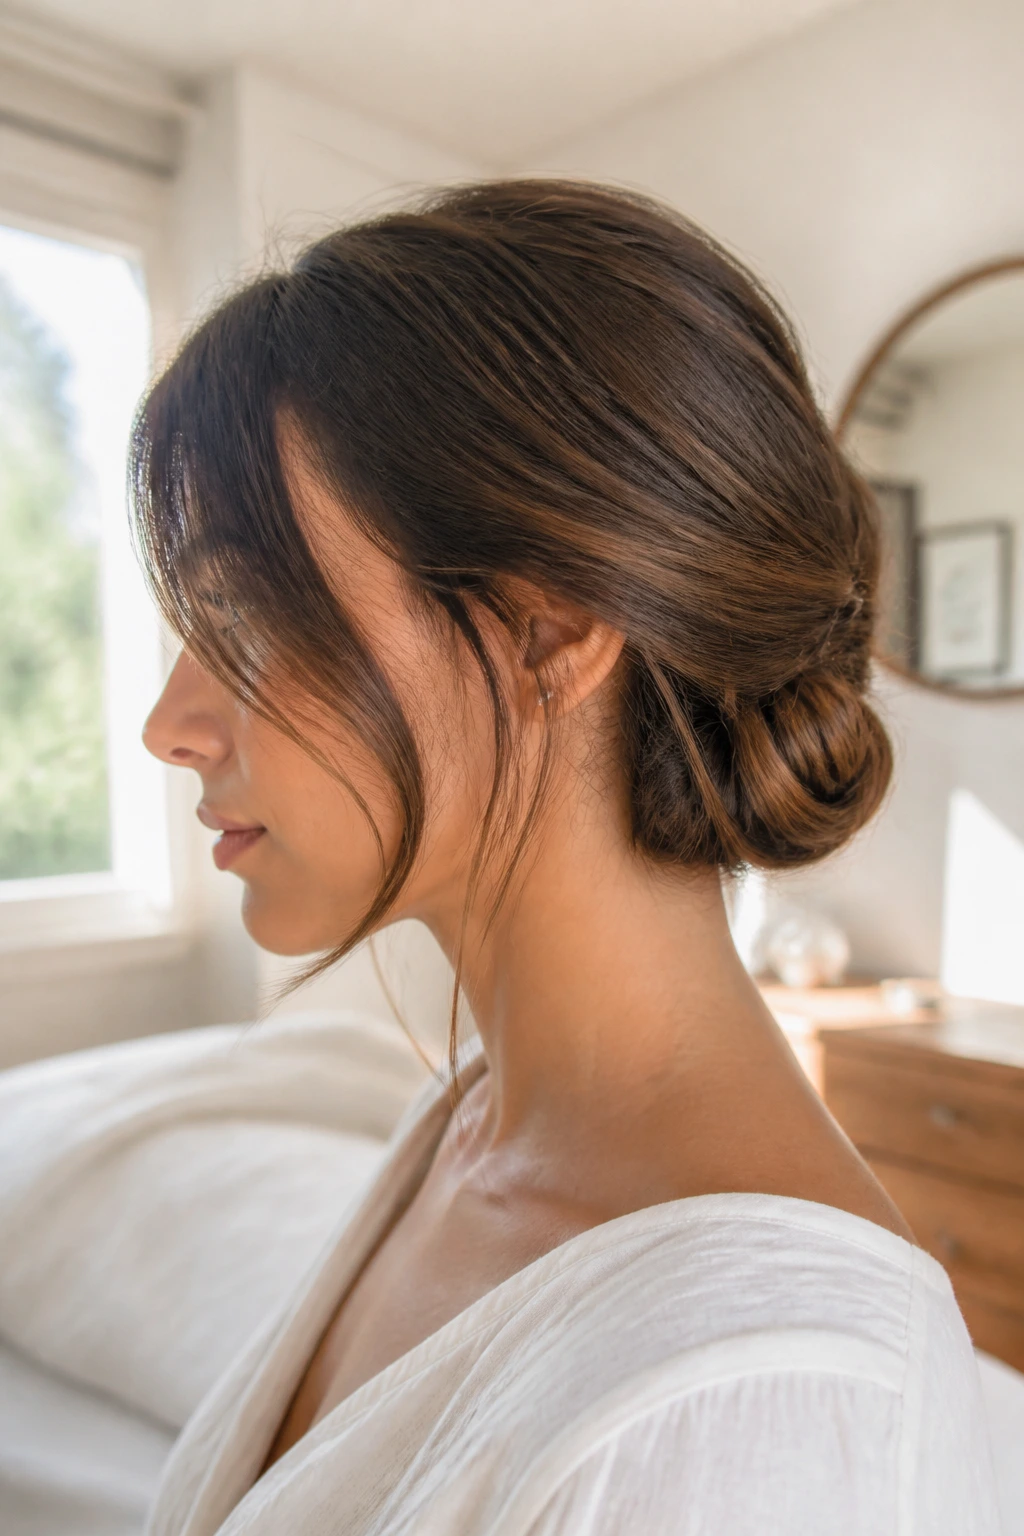
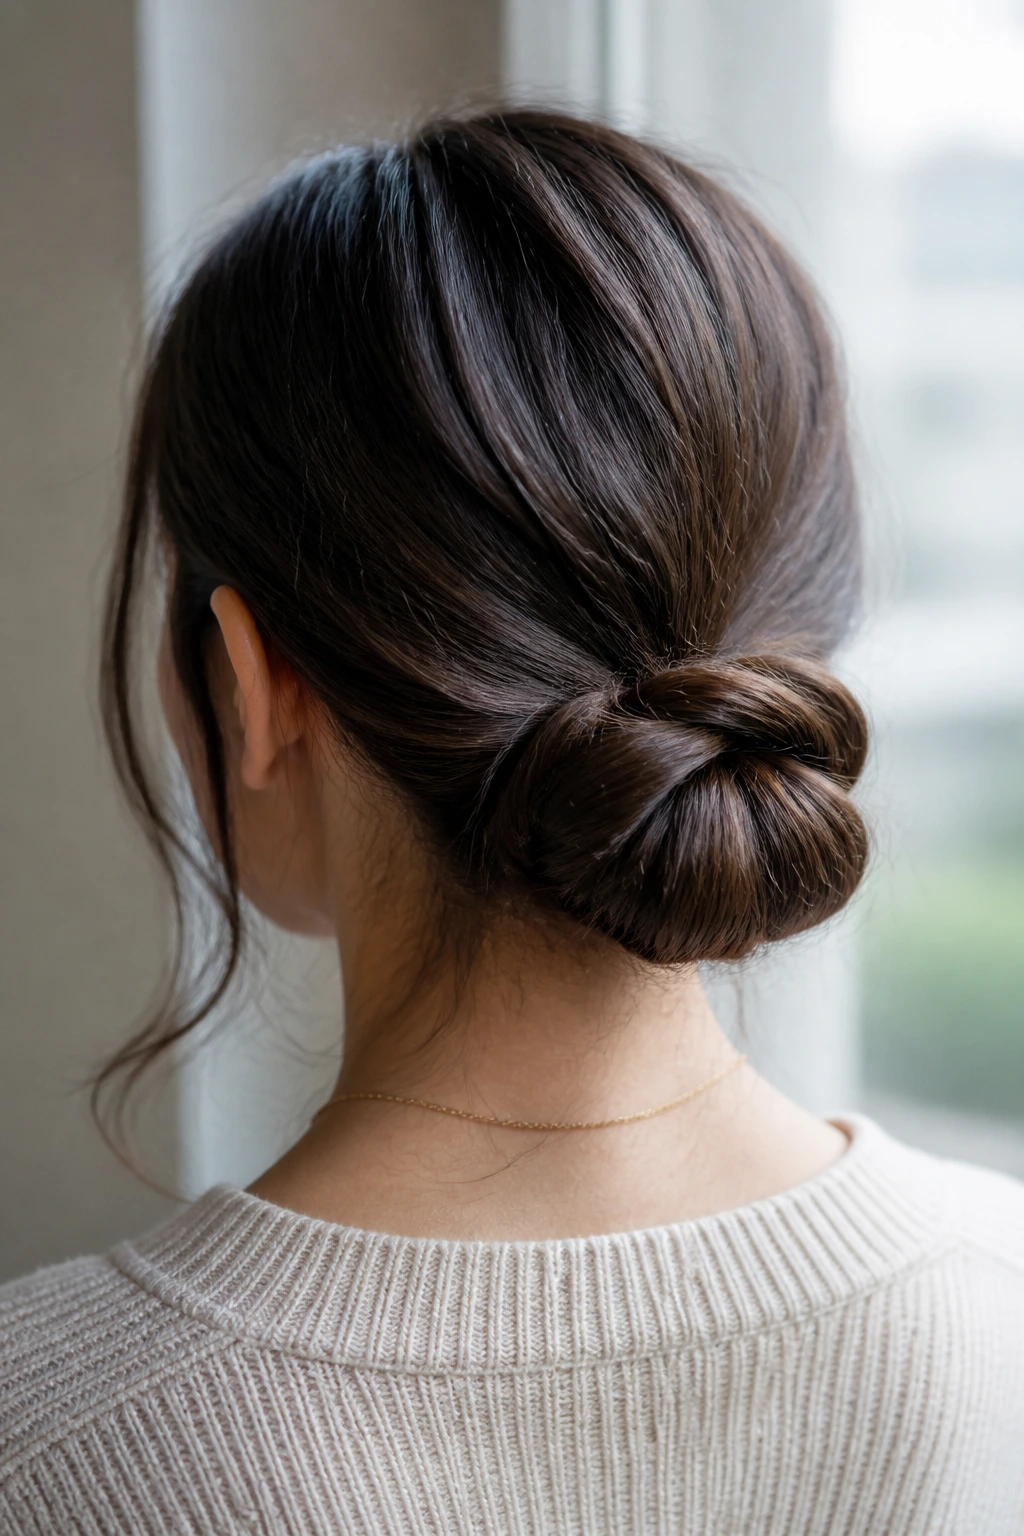
4. The Messy Low Chignon
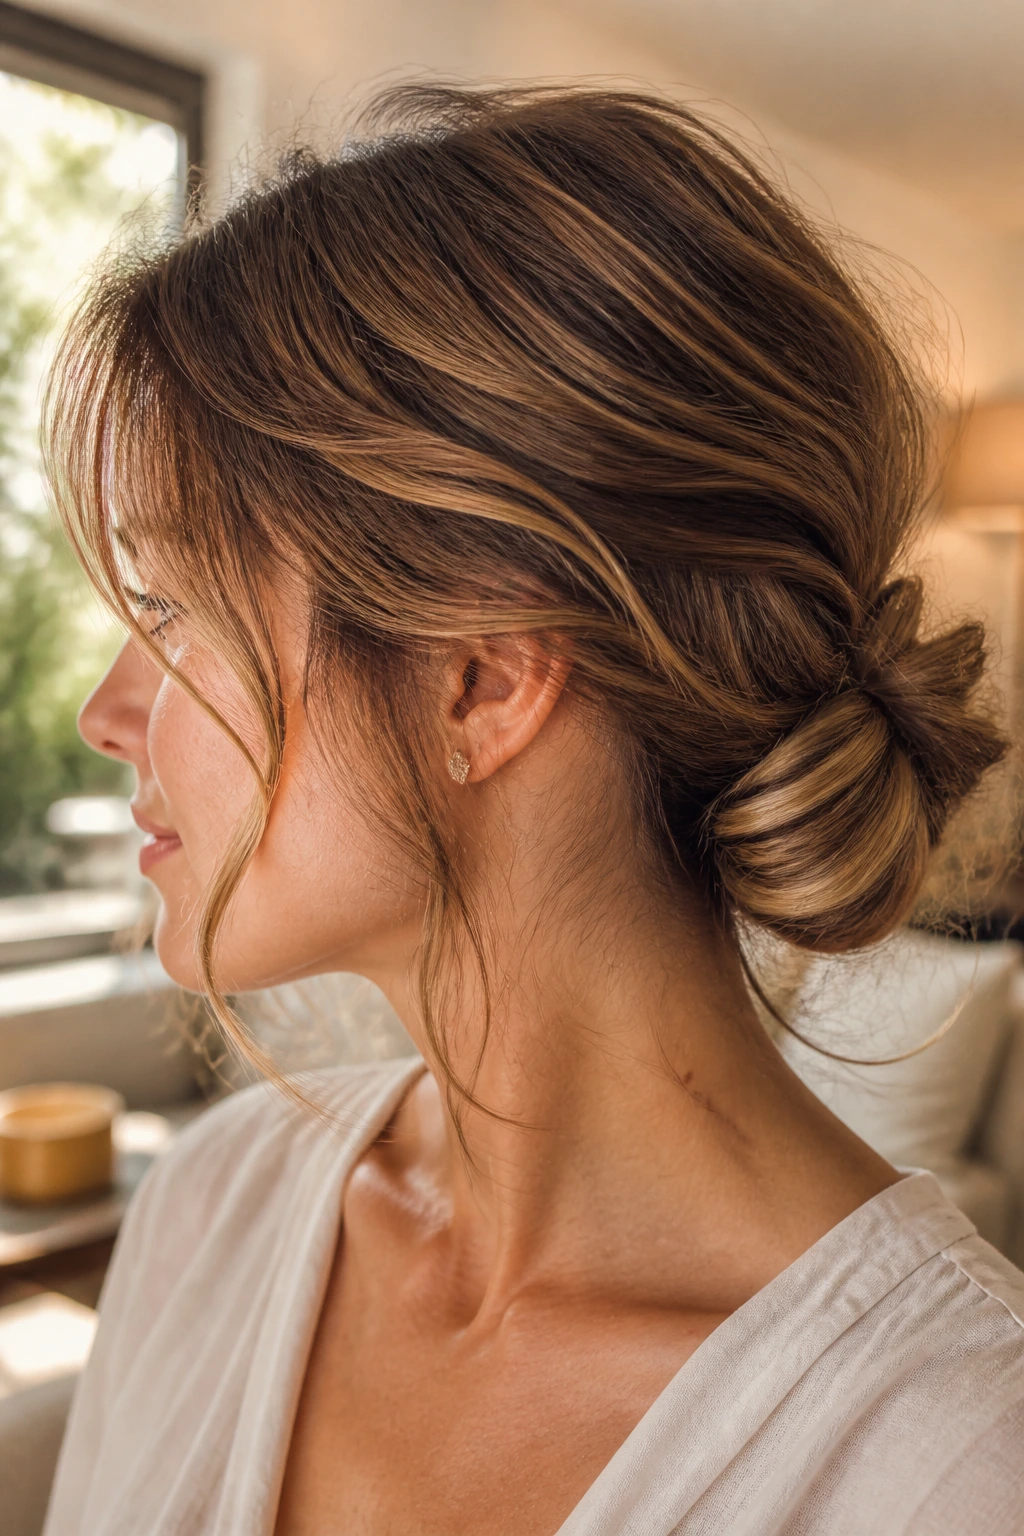
The low chignon is the sophisticated older sibling of the messy bun, and it is surprisingly easy to master. It keeps hair off your neck during warmer months and looks very elegant with a collared shirt or a simple sweater.
- Gather your hair at the nape of your neck and secure it in a low ponytail.
- Instead of pulling the hair all the way through on the last loop, leave it in a folded “loop” shape.
- Take the remaining ends, wrap them around the base of the elastic, and pin them into place.
- Let a few face-framing pieces fall naturally; do not try to make it symmetrical.
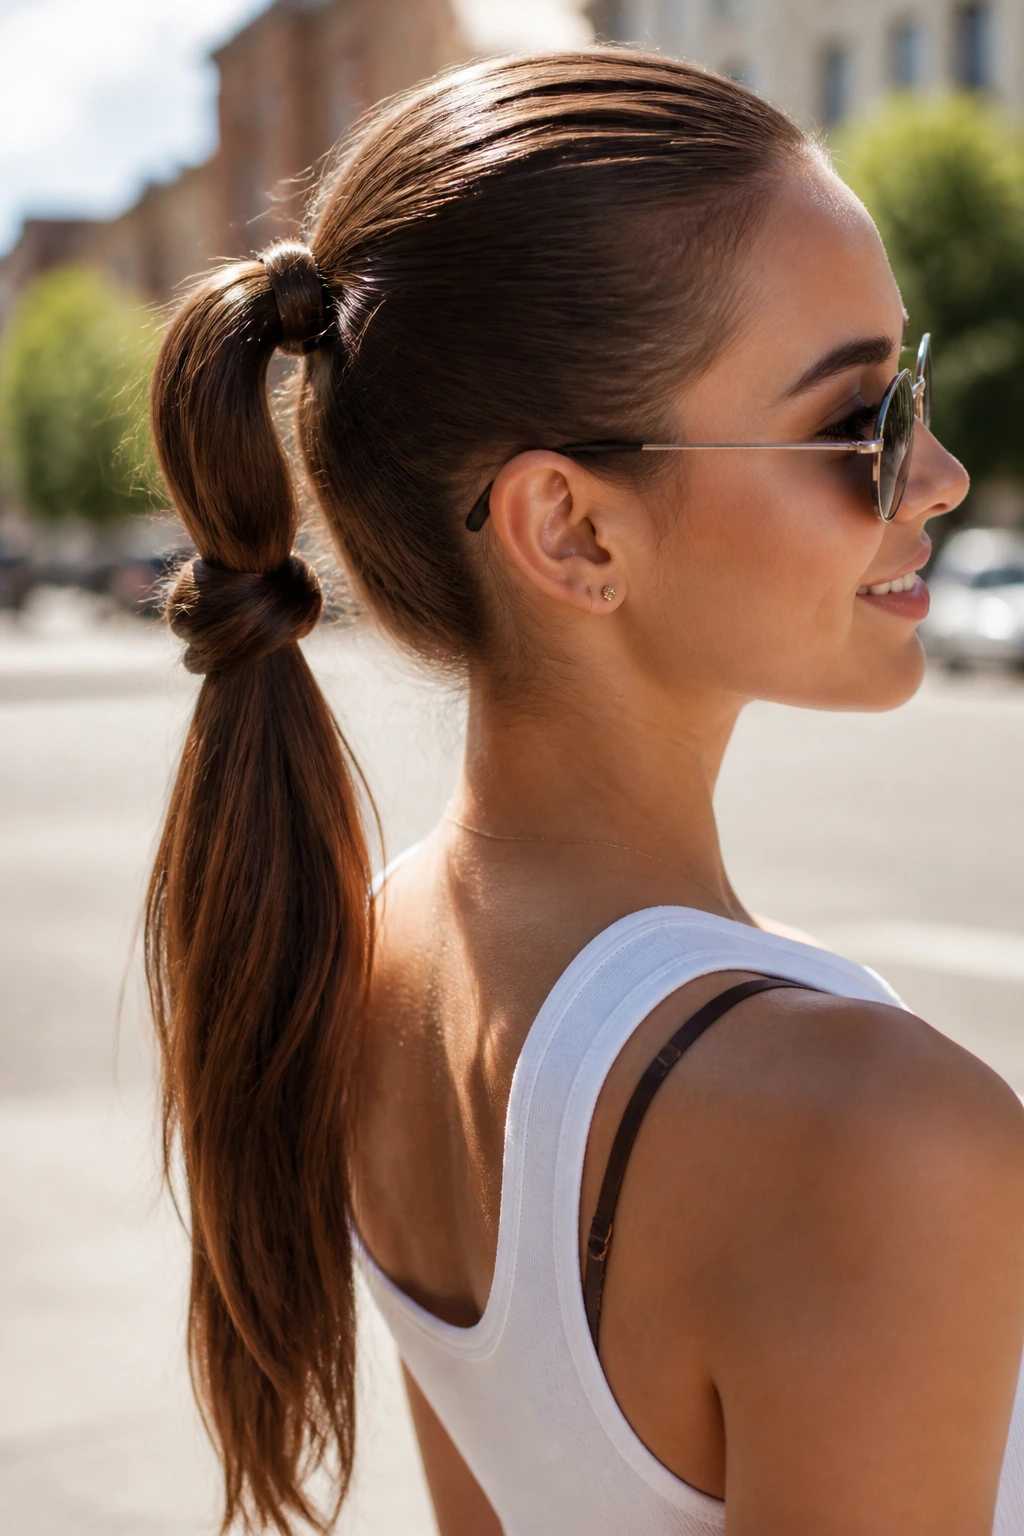
5. The Sleek High Ponytail
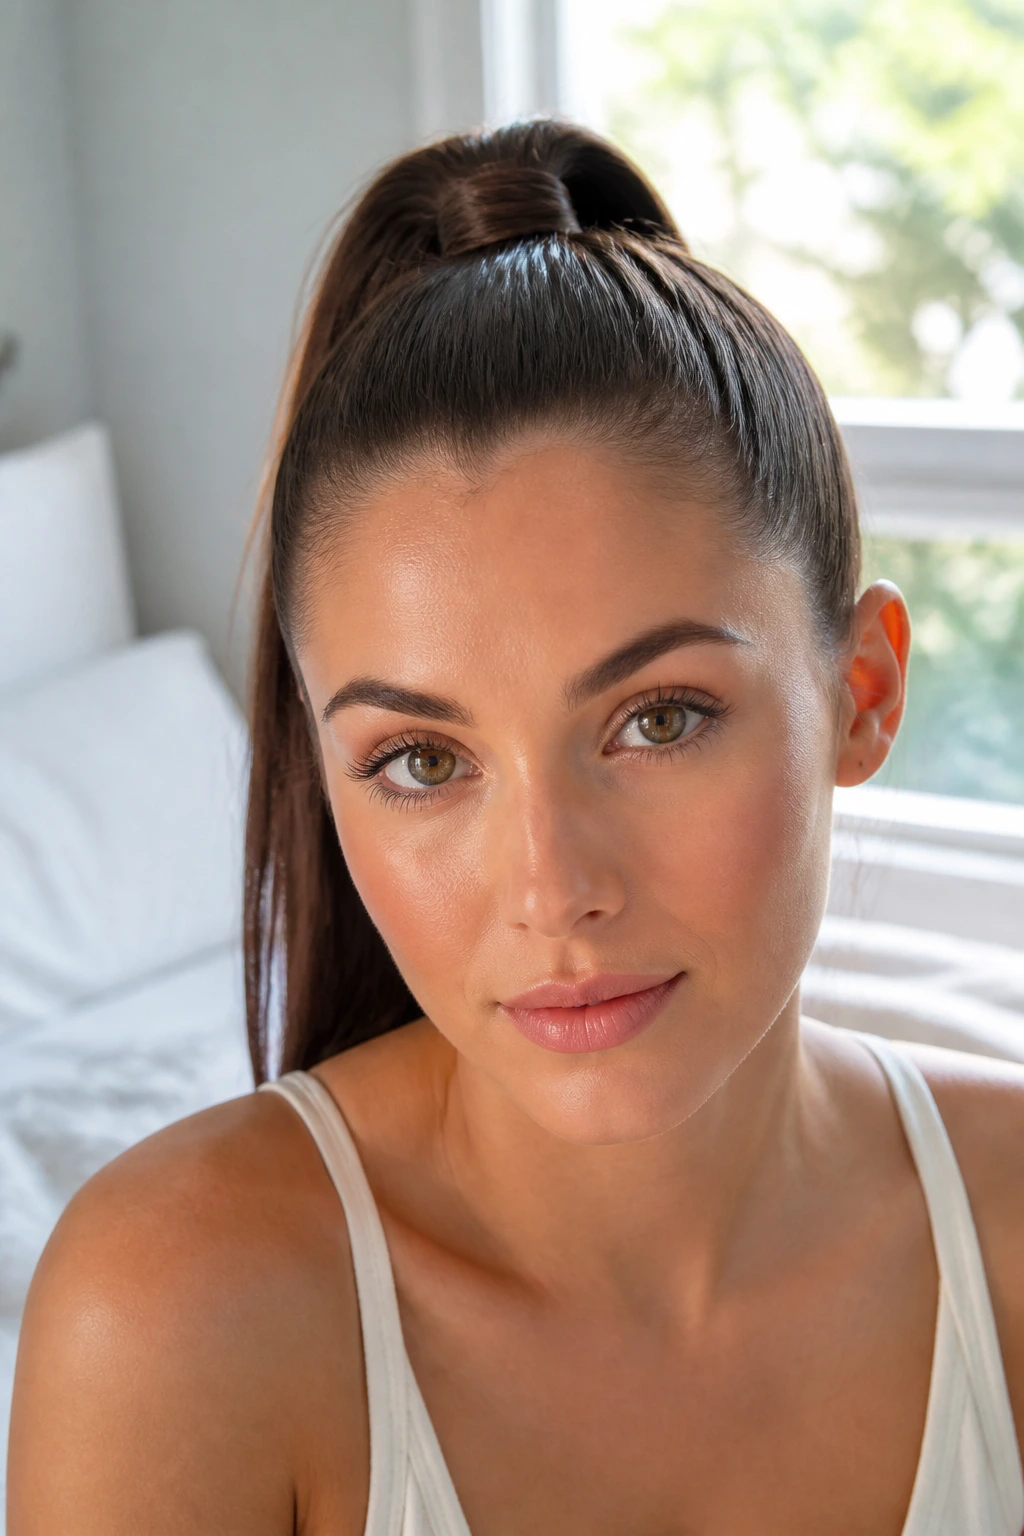
Sometimes, you just need total control. A high, sleek ponytail looks crisp and stays put through gym class or long study sessions. The key to making it look intentional—and not just like a “gym hair” style—is hiding the elastic.
The Elastic-Hiding Trick
After securing your ponytail with a standard hair tie, take a thin strand of hair from the underside of the ponytail. Wrap it tightly around the base to cover the elastic completely. Use a bobby pin to tuck the very end of that strand into the underside of the ponytail. This one simple step instantly transforms the look from basic to polished.
6. The Double-Knotted Pony
If you are bored of standard ponytails, the double-knot adds visual interest without requiring any heat styling. It creates a sort of woven texture that looks far more intricate than it actually is.
The Process
Divide your ponytail into two equal sections. Tie them together in a simple overhand knot—like you are starting to tie a shoelace. Then, do it again with the remaining ends. Secure the bottom with a clear elastic, and you have a textured, knotted pony that holds remarkably well without needing tons of hairspray.
7. The Half-Top Knot
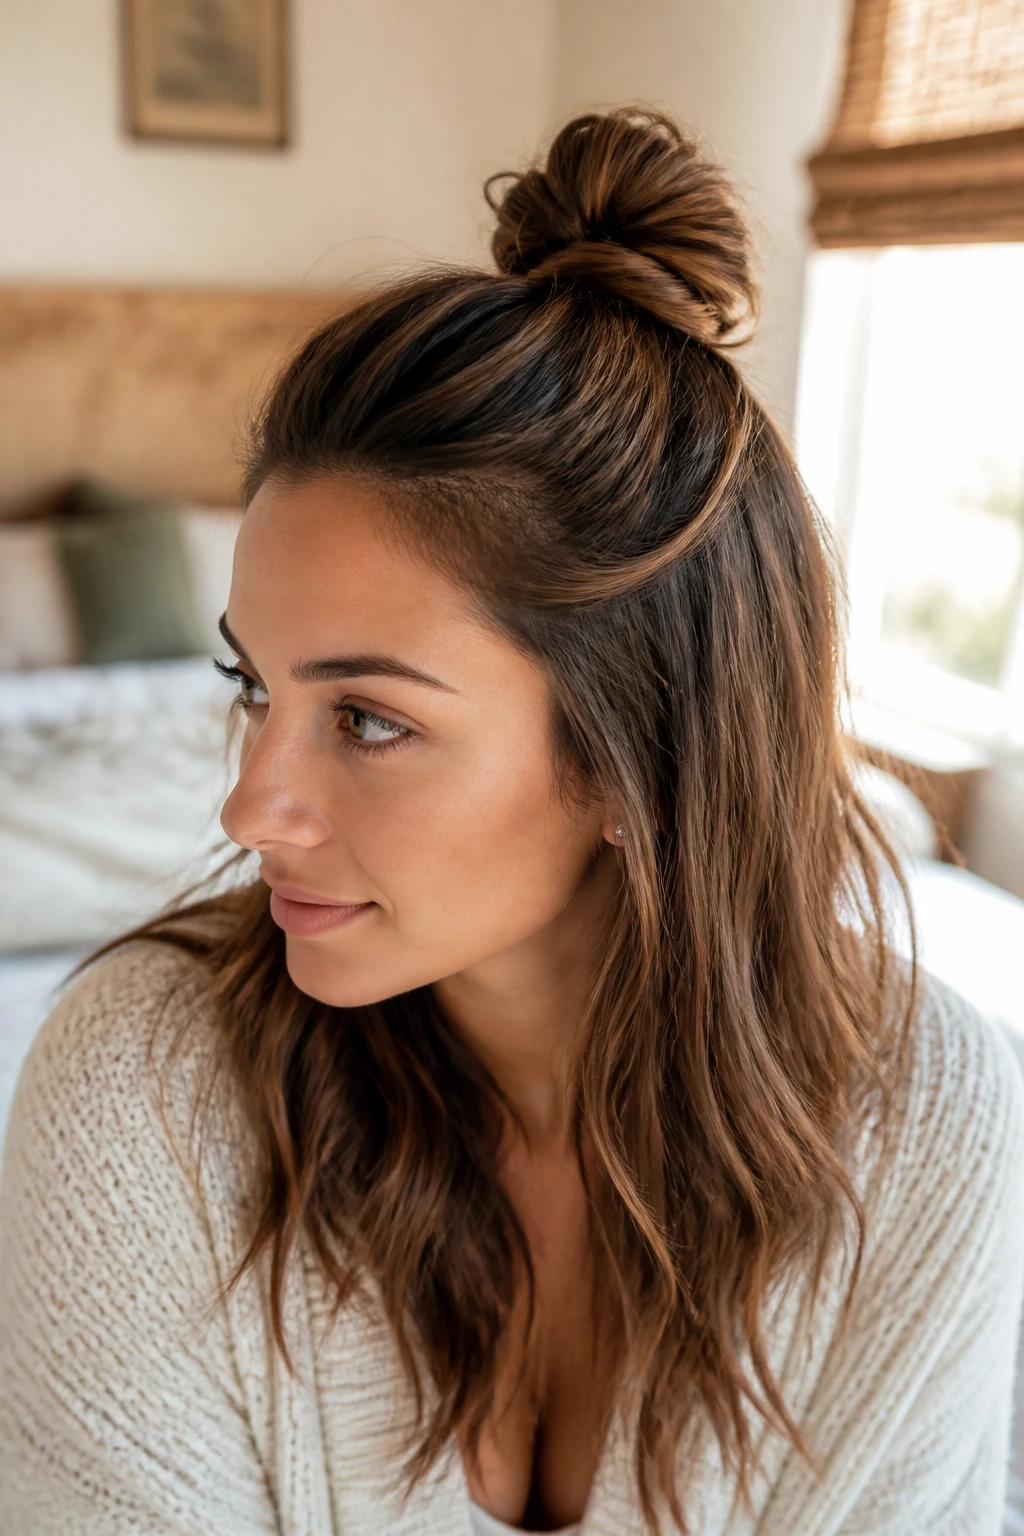
This style is the middle ground between a messy bun and a full down-do. It is perfect for those days when your hair is feeling a bit flat at the roots. By lifting that top section, you add volume exactly where you need it most.
- Section off the top third of your hair, starting from the temples.
- Gather it into a ponytail and twist it into a tight, small bun.
- Secure it with an elastic, but keep it small and tight to the head.
- The rest of your hair can remain natural, messy, or lightly waved.
8. The Scarf-Woven Braid

When you are running late and your hair is not cooperating, a colorful scarf is your best friend. It hides flyaways, covers unwashed roots, and adds a pop of color to your outfit.
How to Style
Tie your hair into a ponytail and wrap a long, thin scarf around the elastic. Incorporate the ends of the scarf into your three-strand braid as you go down. The scarf adds volume to the braid, making it look much thicker than a standard braid would. Tie it off at the bottom and fluff the braid edges for a relaxed, bohemian vibe.
9. The Bubble Braid
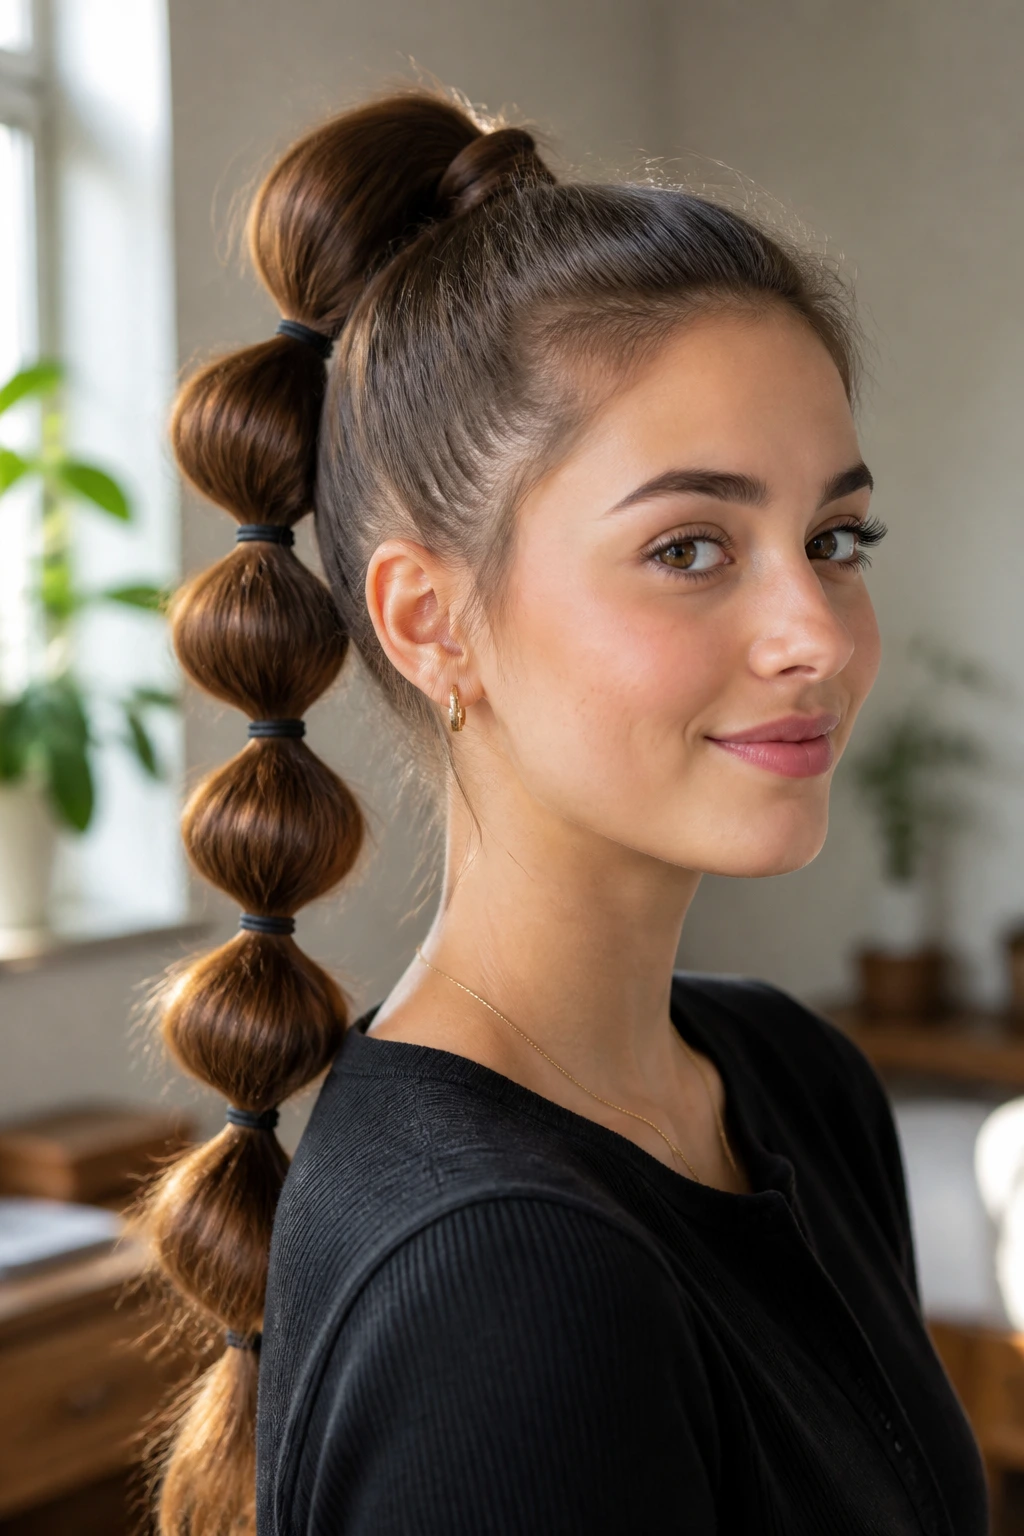
The bubble braid is a fantastic way to make long hair look styled without knowing how to actually braid. It is essentially a series of ponytails stacked on top of each other, and it is surprisingly sturdy.
- Start with a high ponytail and secure it.
- Place another elastic about two inches down, and use your fingers to pull at the hair between the elastics to create “bubbles.”
- Continue this process until you reach the ends of your hair.
- Pro tip: If you have thin hair, spray a little dry shampoo on the sections before you “bubble” them to give them more grip and texture.
10. The Side-Swept Dutch Braid
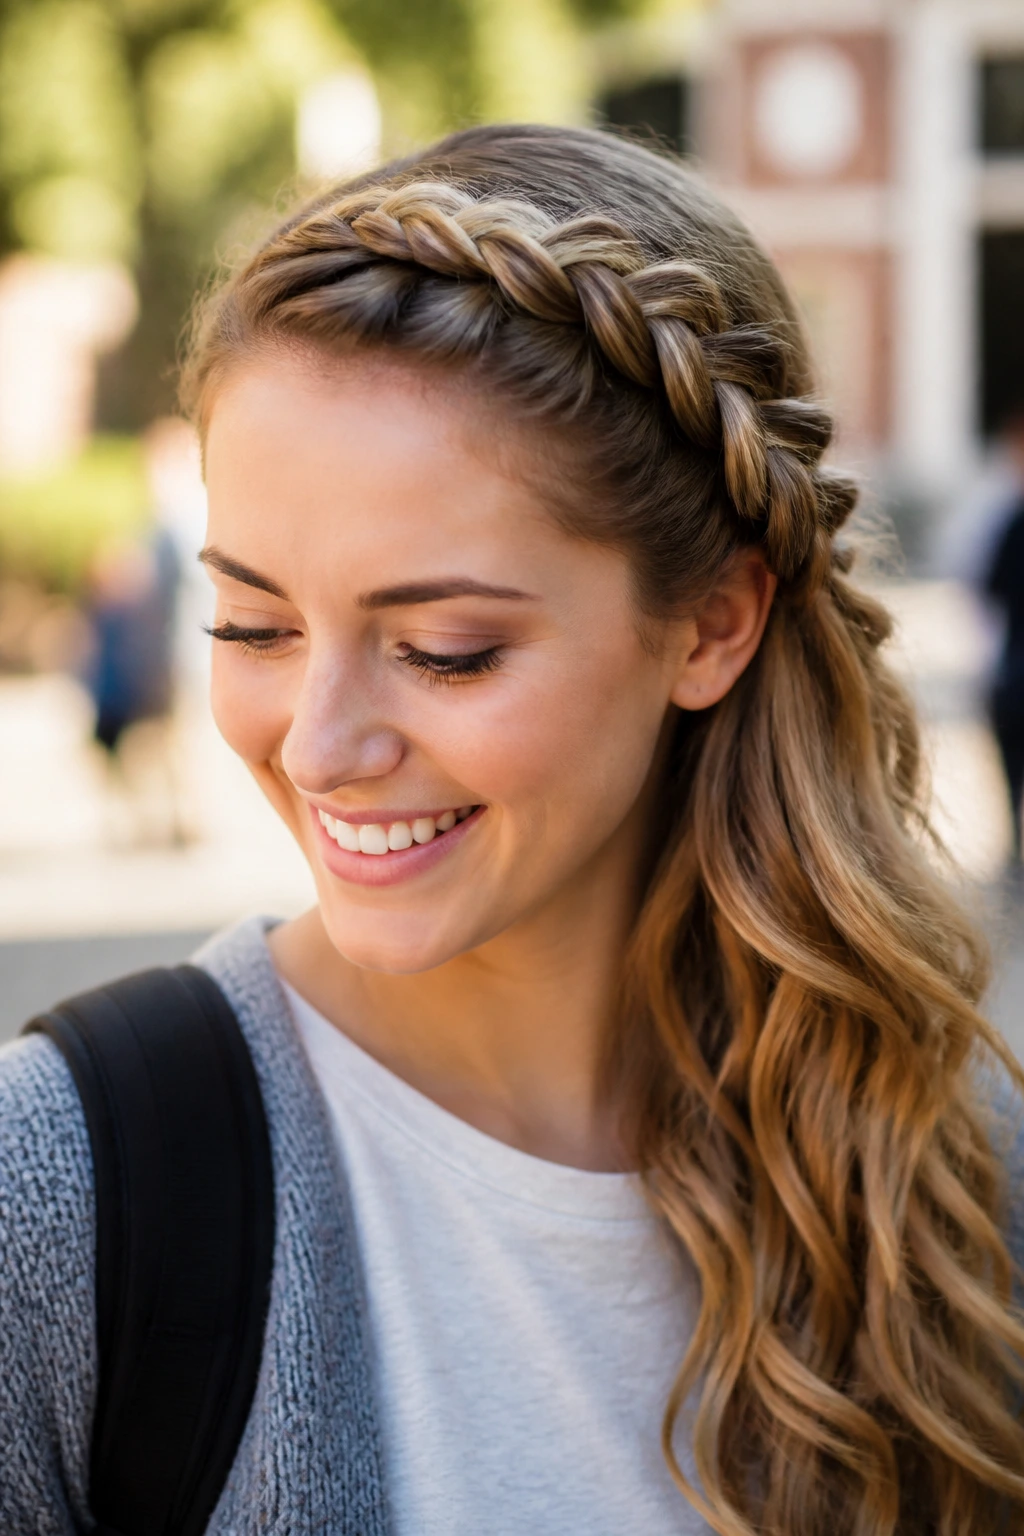
A side-swept braid is a classic for a reason; it looks great with everything from hoodies to sundresses. Starting the braid at the hairline ensures that no loose hairs fall into your eyes while you are walking between buildings.
Why This Works
Unlike a standard French braid, a Dutch braid sits on top of the hair, making it more visible and defined. It is the perfect style for second-day hair because the natural oils provide the exact amount of grip needed to keep the braid tight and clean. If it feels too stiff, just pull gently on the sides of the braid loops to loosen them once you are finished.
11. The Claw-Clip Twist
The return of the claw clip has been a blessing for busy mornings. It is arguably the fastest hairstyle on this list, taking roughly ten seconds from start to finish. It also causes less breakage than tight elastics.
- Gather all your hair as if you are going to put it in a ponytail.
- Twist the hair upward toward the crown of your head.
- Fold the remaining ends down over the twist.
- Clamp it securely with a large claw clip.
12. The Space Bun Half-Up
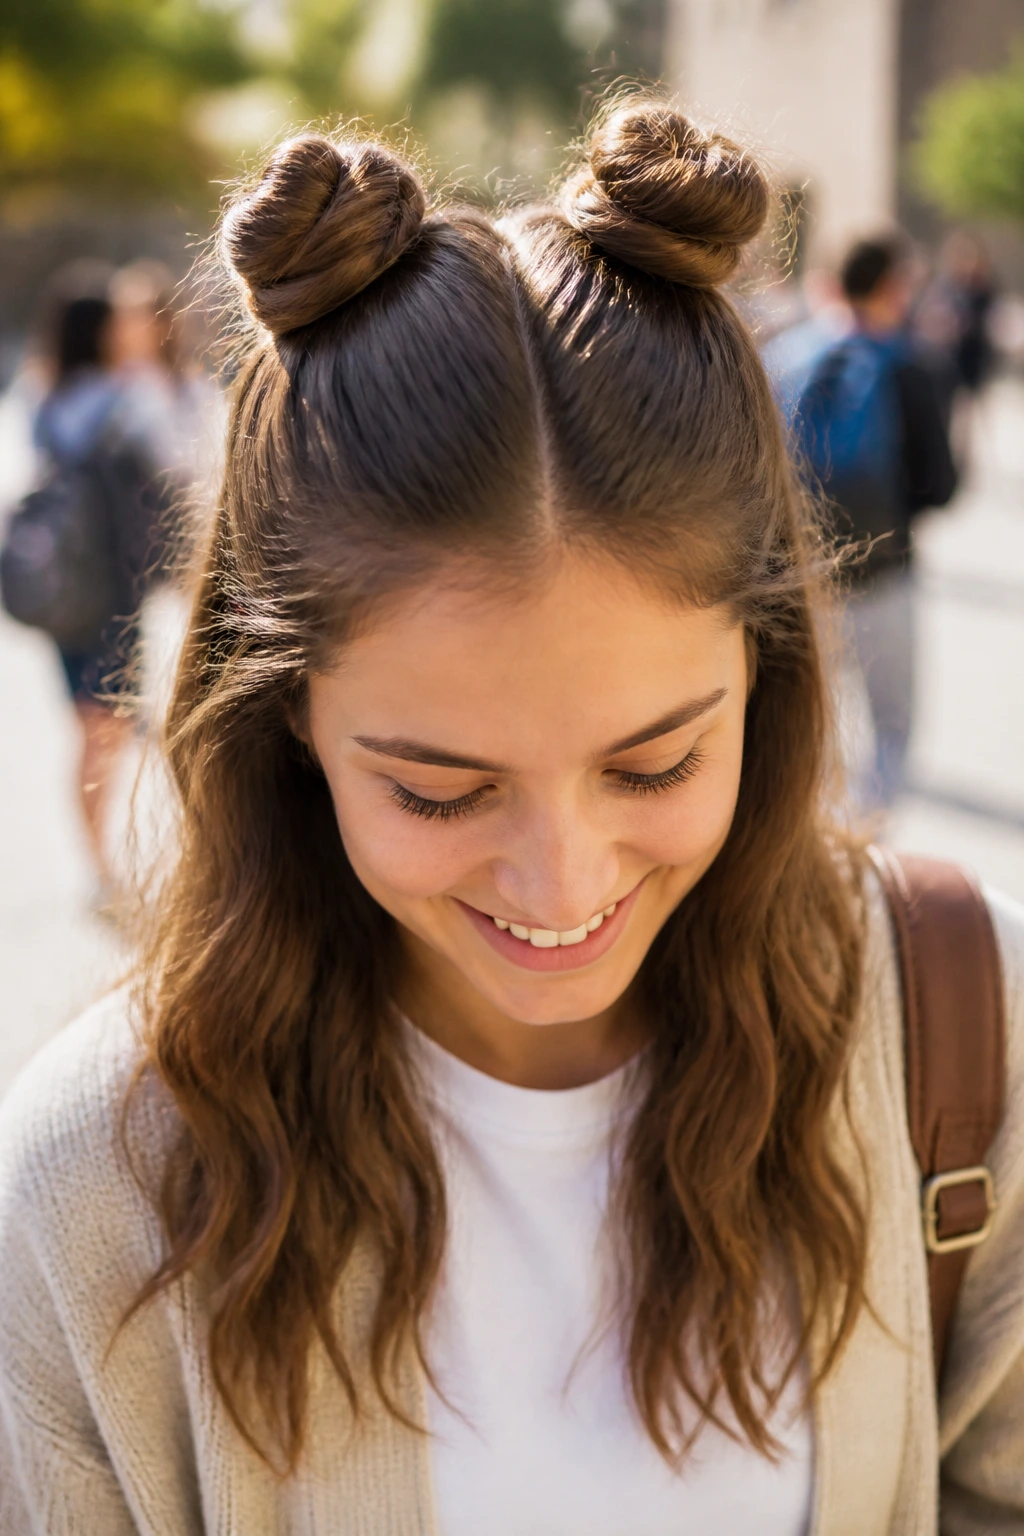
If you want something a bit more fun and youthful, space buns are a great choice. The half-up version is slightly more wearable for school than full space buns, especially if you have a lot of hair.
Making Them Even
Use a comb to part your hair down the center to ensure the two buns are placed symmetrically. You want them to sit on the top corners of your head. Secure each little bun with a small, discreet elastic and pin down any loose strands. It’s an energetic look that stays perfectly out of your face all day long.
13. The Pinned-Back Bangs
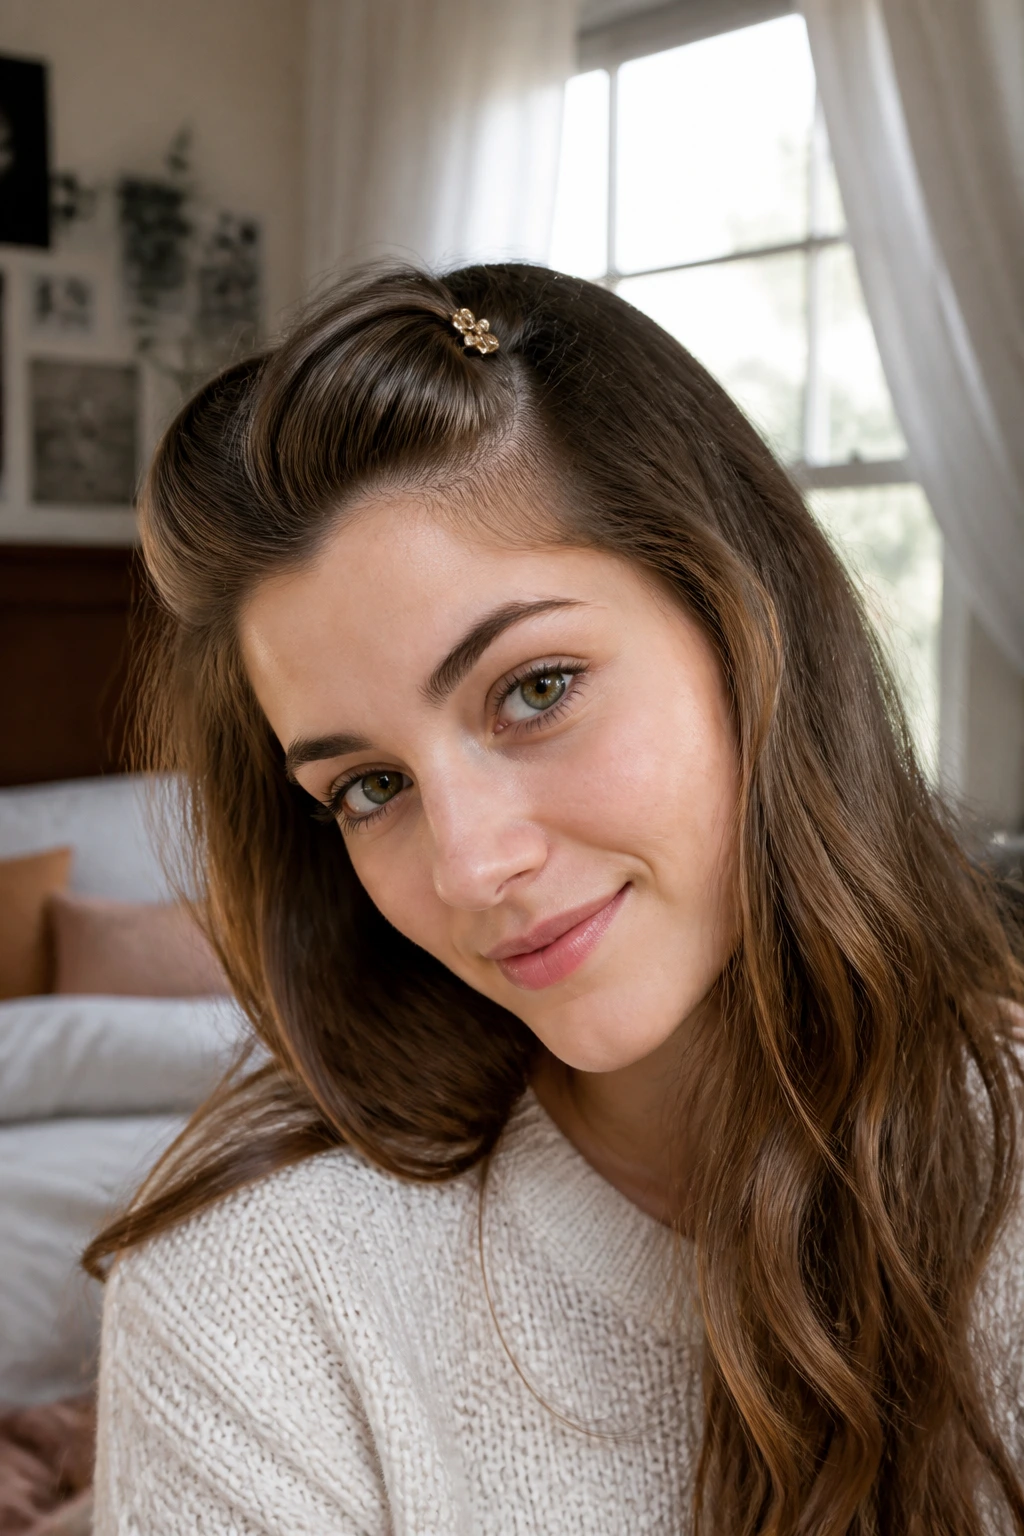
When you have bangs that just won’t behave, the best strategy is to embrace the “pinned back” look. Instead of trying to force them flat, use a decorative bobby pin or a small gold clip to pull them back in a gentle wave.
It changes your entire profile and keeps your face clear. If you have some volume in your bangs, push them up slightly before pinning to create a small “quiff” effect. This adds a little bit of height and prevents that severe, plastered-to-the-forehead look that can happen with plain pins.
14. The Low Side Ponytail
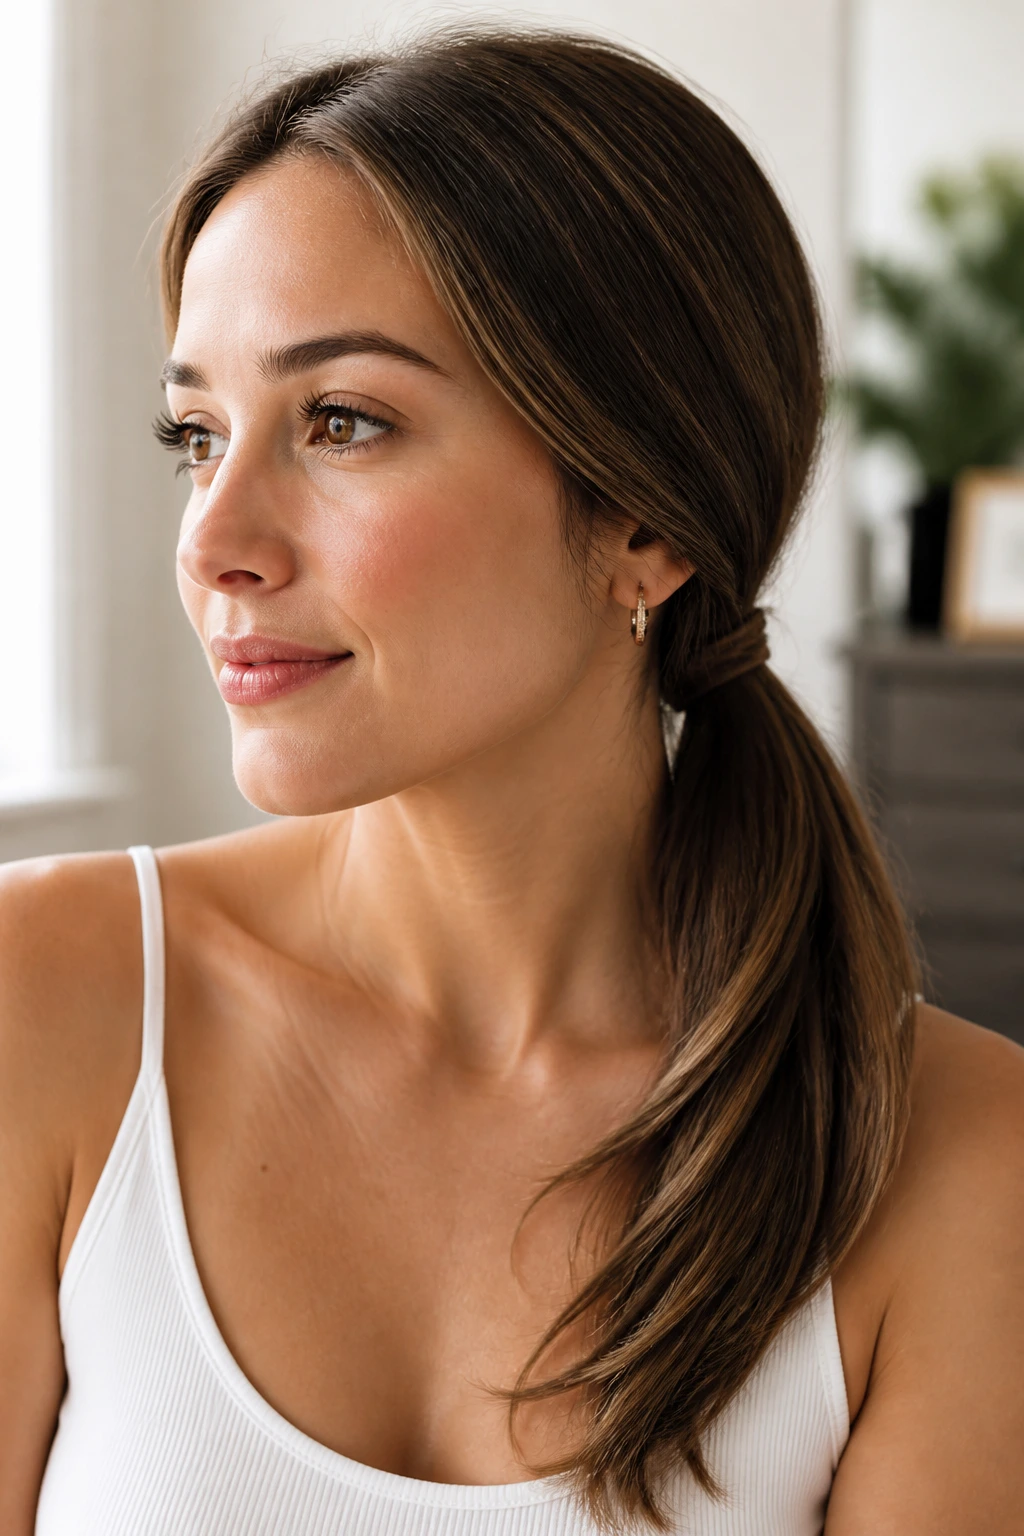
Sometimes a high ponytail is too sporty and a messy bun is too casual. A low side ponytail is the perfect “in-between” look. It’s elegant, very easy to do, and works beautifully with curly or wavy hair.
- Sweep your hair to one side, just behind your ear.
- Secure with an elastic at the nape of the neck.
- To elevate it, take a small piece of hair from the pony, wrap it around the elastic, and pin it underneath.
- The side-swept nature of this style makes it look like you put in extra effort, even when you didn’t.
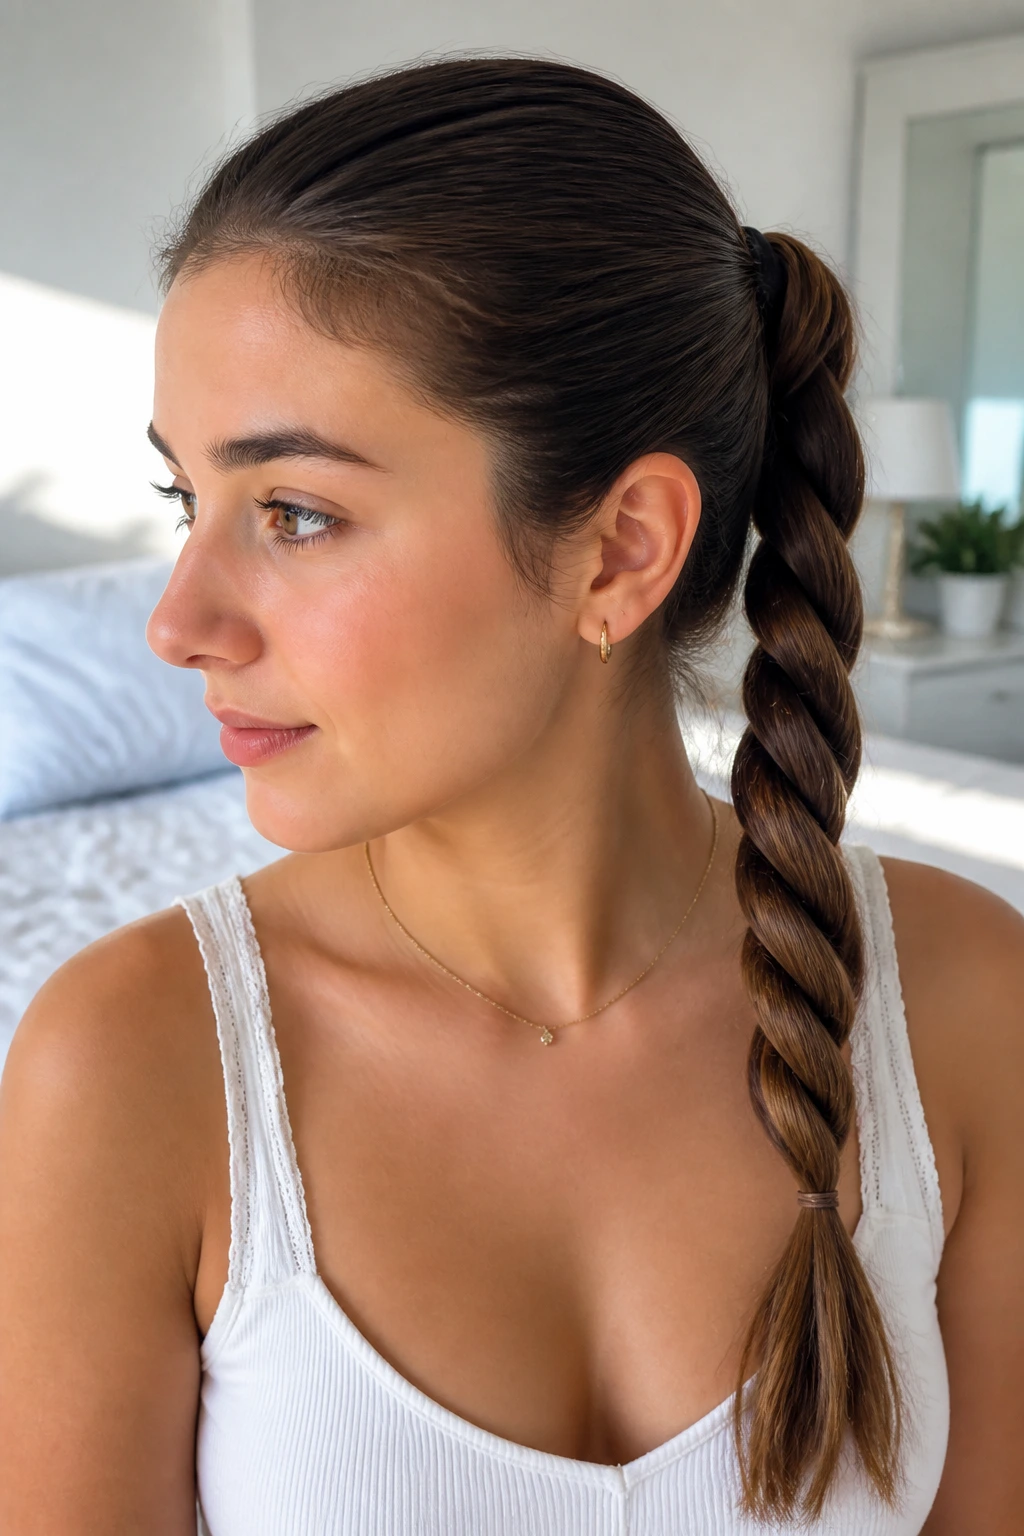
15. The Rope-Twist Ponytail
The rope twist is a cleaner, more modern alternative to the traditional braid. It is essentially just twisting two sections of hair around each other and then wrapping them together in the opposite direction.
The Technique
Secure a ponytail first, then divide it into two equal sections. Twist each section individually to the right, then wrap them around each other to the left. Secure the bottom with a small clear band. It’s incredibly fast and creates a look that is smooth, sophisticated, and perfect for when you need to look put-together for a presentation.
16. The Faux-Hawk Braid
If you want to add a bit of edge to your look without cutting your hair, the faux-hawk braid is the way to go. You are essentially creating a series of small, tight braids down the center of your head, starting from the forehead.
- Section a strip of hair down the middle of your head.
- Braid or twist that section tightly to the head, pinning as you go.
- Gather the rest of your hair into a ponytail or leave it down, depending on how “dramatic” you want the look to be.
- It adds a lot of height and texture to the top of the head, which is great for thinning or very fine hair.
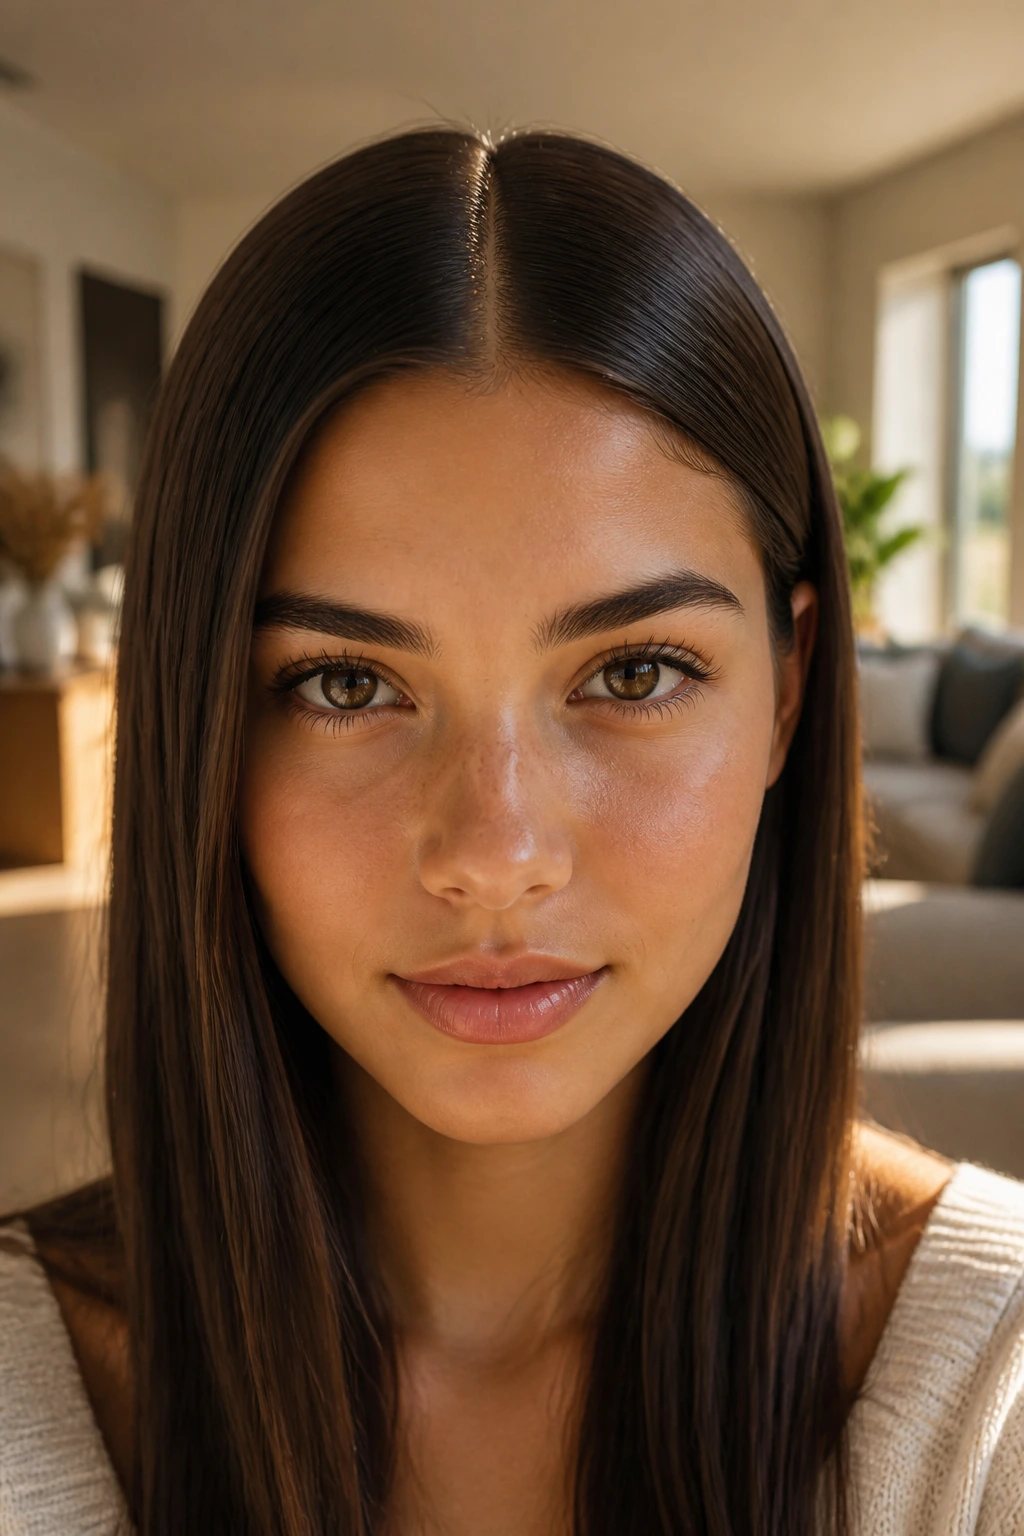
17. The Sleek Center Part
Sometimes, the best hairstyle is the simplest one. A sharp, perfectly straight center part, combined with a little smoothing cream, looks incredibly polished.
Getting the Look
Use the tail of a rattail comb to get the straightest line possible from your forehead to your crown. If you have any baby hairs that won’t lay flat, a tiny bit of hairspray on a clean toothbrush will smooth them down instantly. It’s a minimalist look that pairs well with statement earrings or a bold outfit.
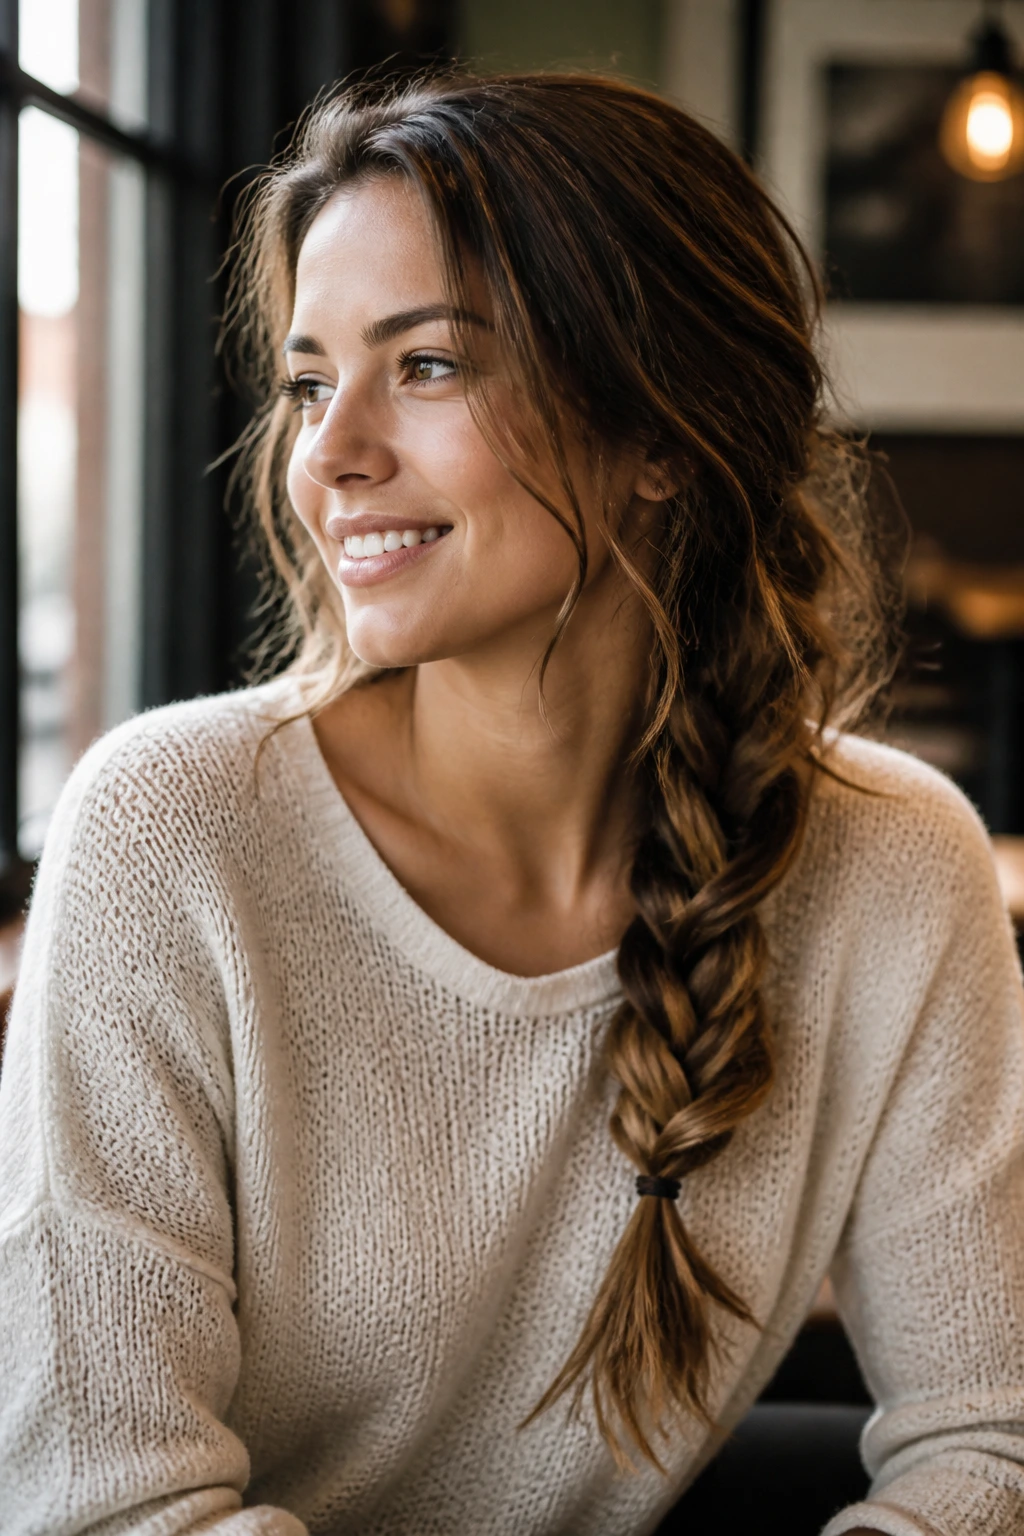
18. The Loose Side Braid
A loose, “messy” side braid is ideal for a long day of classes where you might be leaning back in chairs or carrying a heavy backpack. Because it is already meant to be a bit loose, it won’t look bad if it starts to come undone by the end of the day.
The secret is to braid it fairly tightly first, then pull on the loops to loosen it up once you’ve secured the end. This prevents the whole thing from sliding out of place, while still giving you that full, relaxed aesthetic that is so popular.
19. The Ribbon Wrap
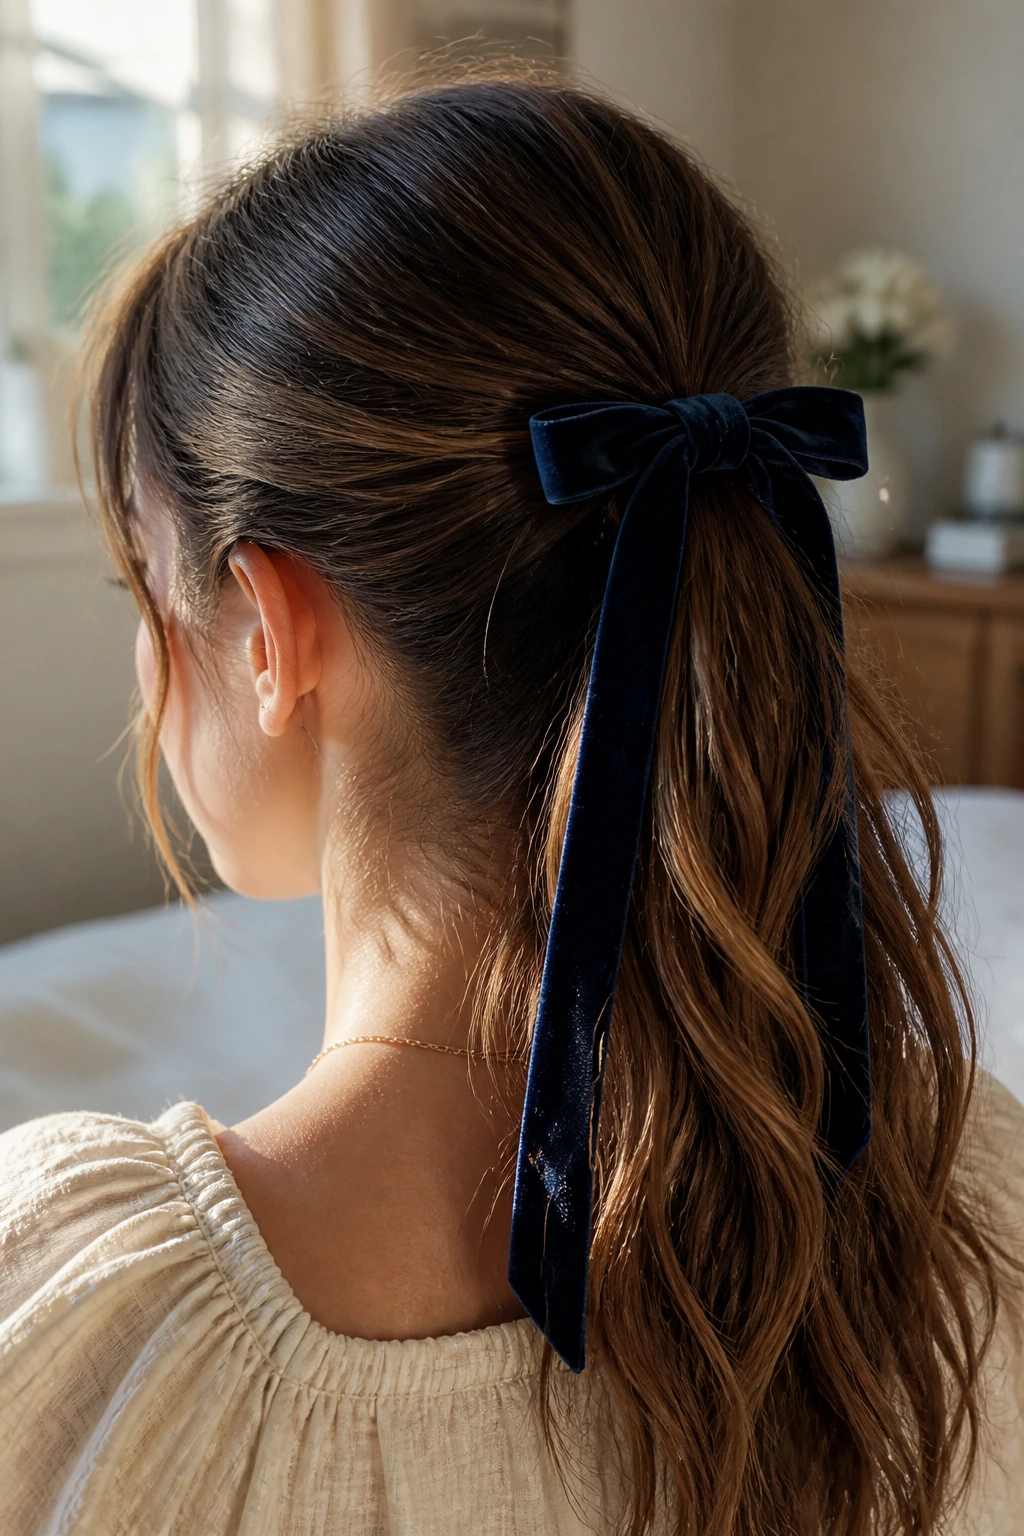
If you have a collection of velvet or silk ribbons, you have the ultimate school day accessory. A ribbon can turn a boring ponytail into a thoughtful style in about thirty seconds.
- Tie your hair into a ponytail.
- Take a ribbon that is roughly two feet long.
- Tie it around the elastic in a simple bow.
- Let the long tails of the ribbon hang down with your hair.
- It feels very retro and adds a soft, feminine touch that is very low-maintenance.
20. The Tuck-Under Bob
Do you ever wish you could see what you would look like with a shorter haircut? You can fake a bob by tucking your long hair underneath itself and pinning it at the nape of your neck.
The Faux-Bob
Keep your hair relatively straight for this one to work best. Pull your hair into a low, loose ponytail. Fold the ponytail under toward your neck and use several bobby pins to secure it against the back of your head. Pull a few face-framing pieces out so it looks natural and not too stiff. It is a great way to change your look entirely without visiting a salon.
21. The Crown Braid
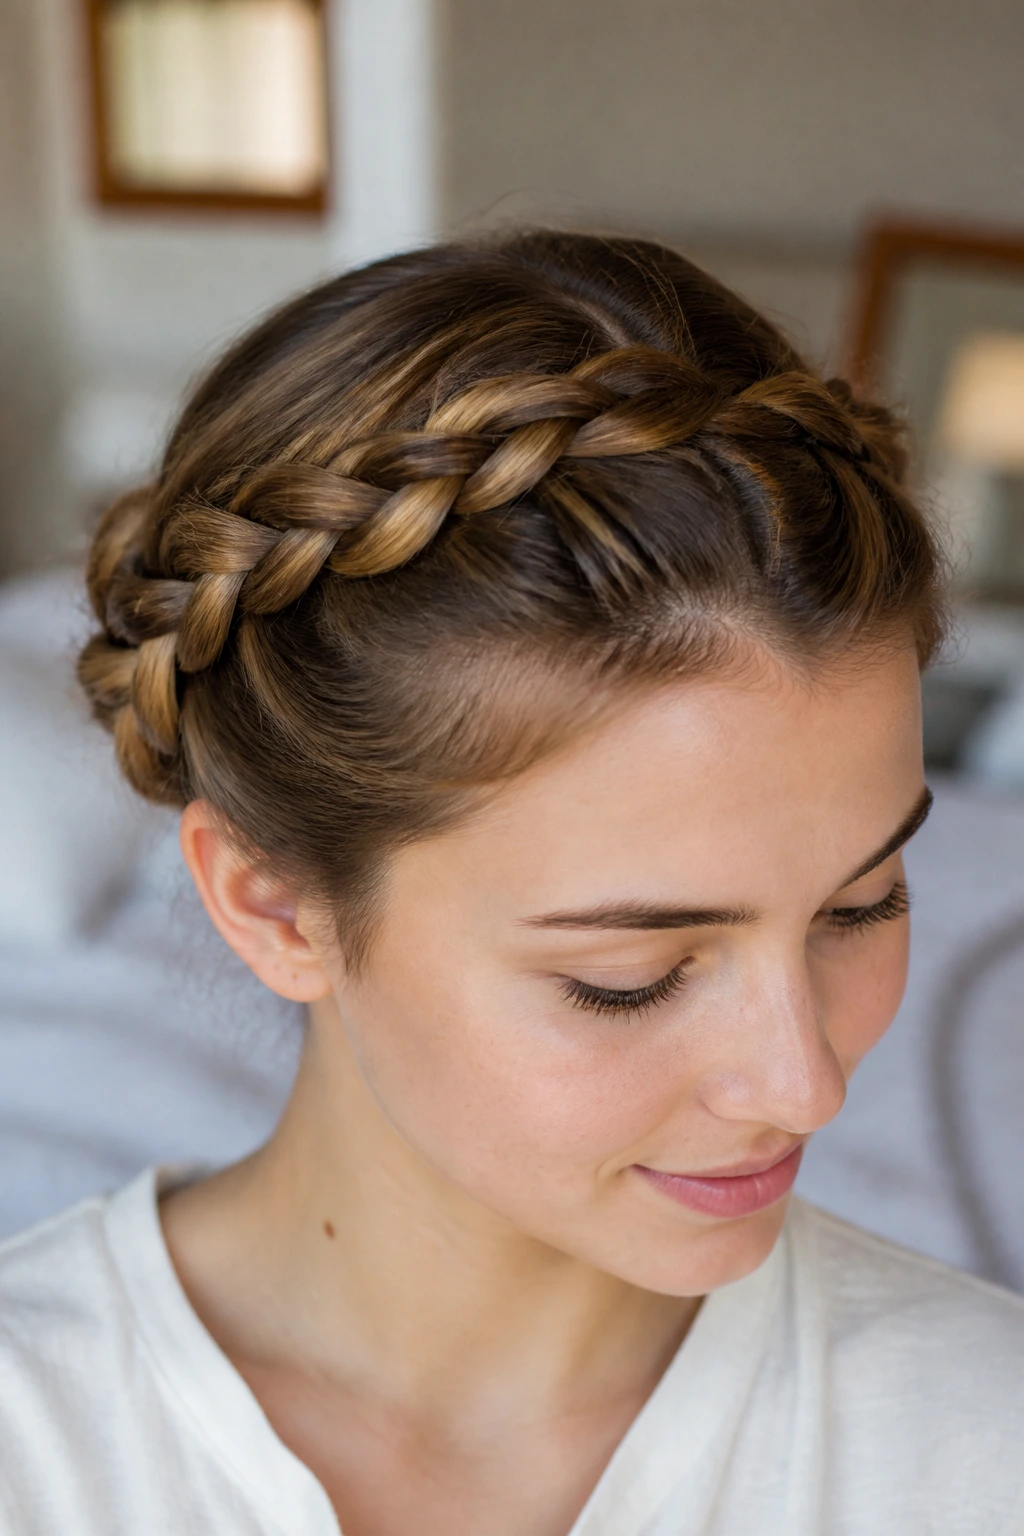
This looks like it takes twenty minutes, but if you have medium-to-long hair, it can actually be quite fast. You are essentially doing two pigtail braids and then pinning them up and over the top of your head.
- Part your hair down the middle and create two pigtail braids.
- Cross the left braid over the top of your head to the right side and pin it behind your ear.
- Do the same with the right braid, crossing it over the left.
- Tuck the ends underneath so they are hidden.
22. The High-Volume Half-Pony
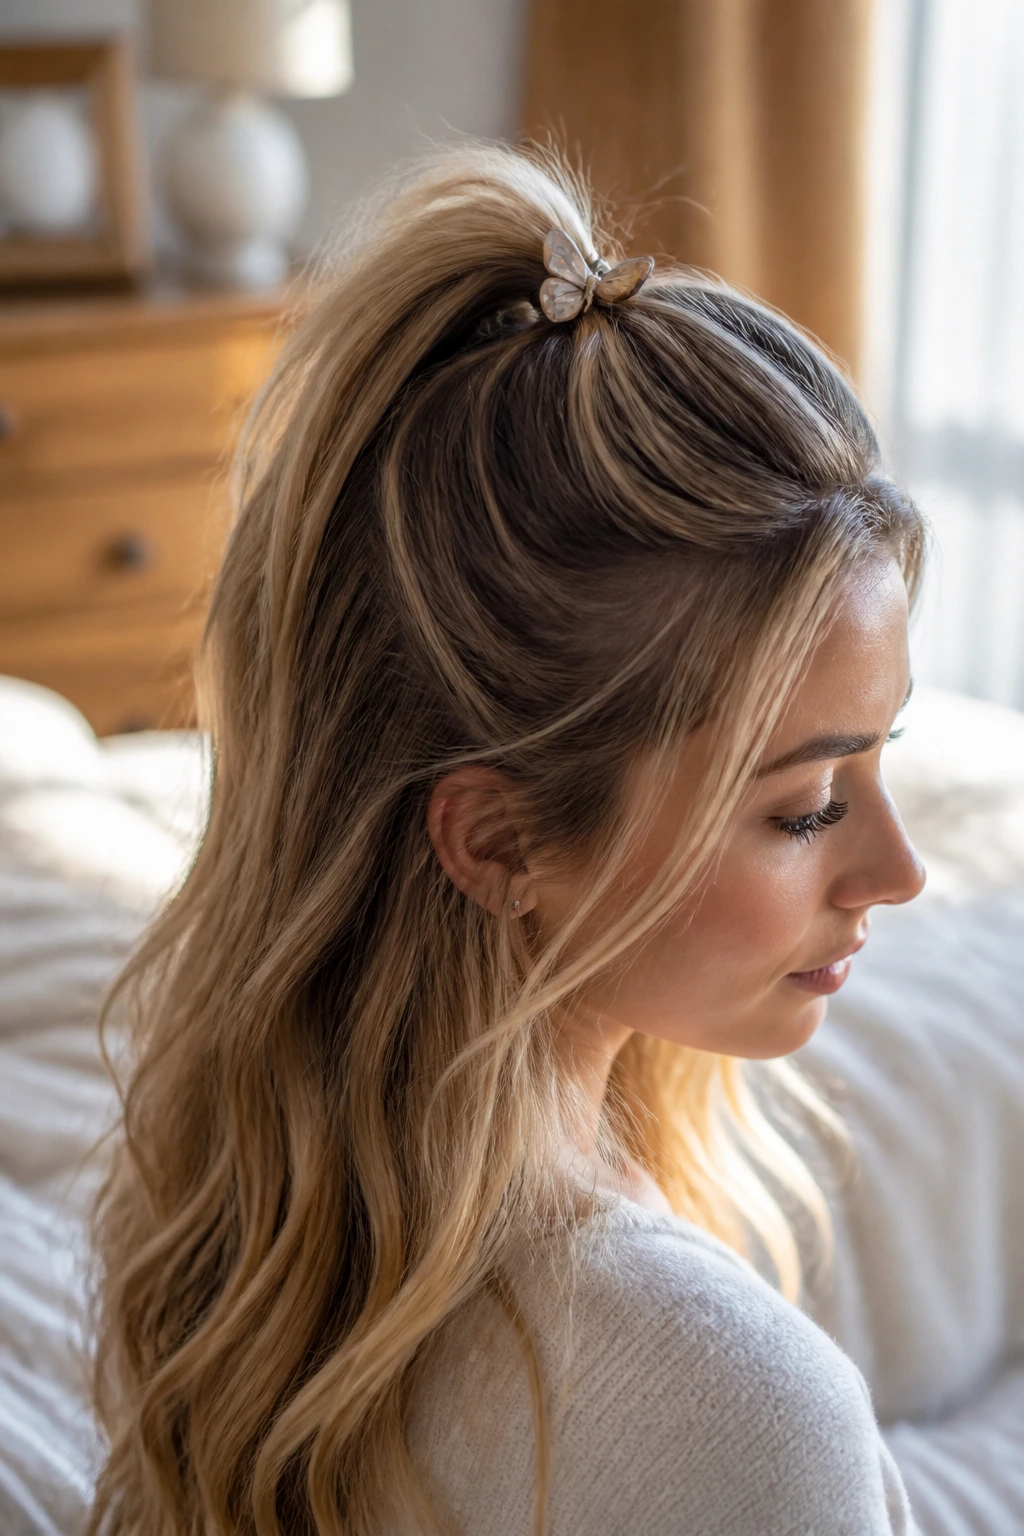
If you hate flat hair, this technique uses a small hidden clip to double the perceived volume of a half-up pony. It’s all about the mechanics of the hair section.
The Secret Lift
Instead of just pulling hair back, tease the hair at the crown before you secure it. Once you pull that top section back, use a small butterfly clip to pin the hair into place under the top layer of hair you’ve left down. This props the ponytail up, giving you instant height that won’t fall flat by second period.
23. The Knotted Low Bun
This is an elevated take on the standard low bun. By tying the hair into a series of knots before pinning it into a bun shape, you create a much tighter, more intricate-looking structure.
It holds much better for active days than a traditional “wrapped” bun. Since the hair is knotted, it doesn’t rely as heavily on the strength of the elastic, which makes it perfect if you have heavy, thick hair that tends to snap standard hair ties.
24. The Beanie-Ready Low Pony
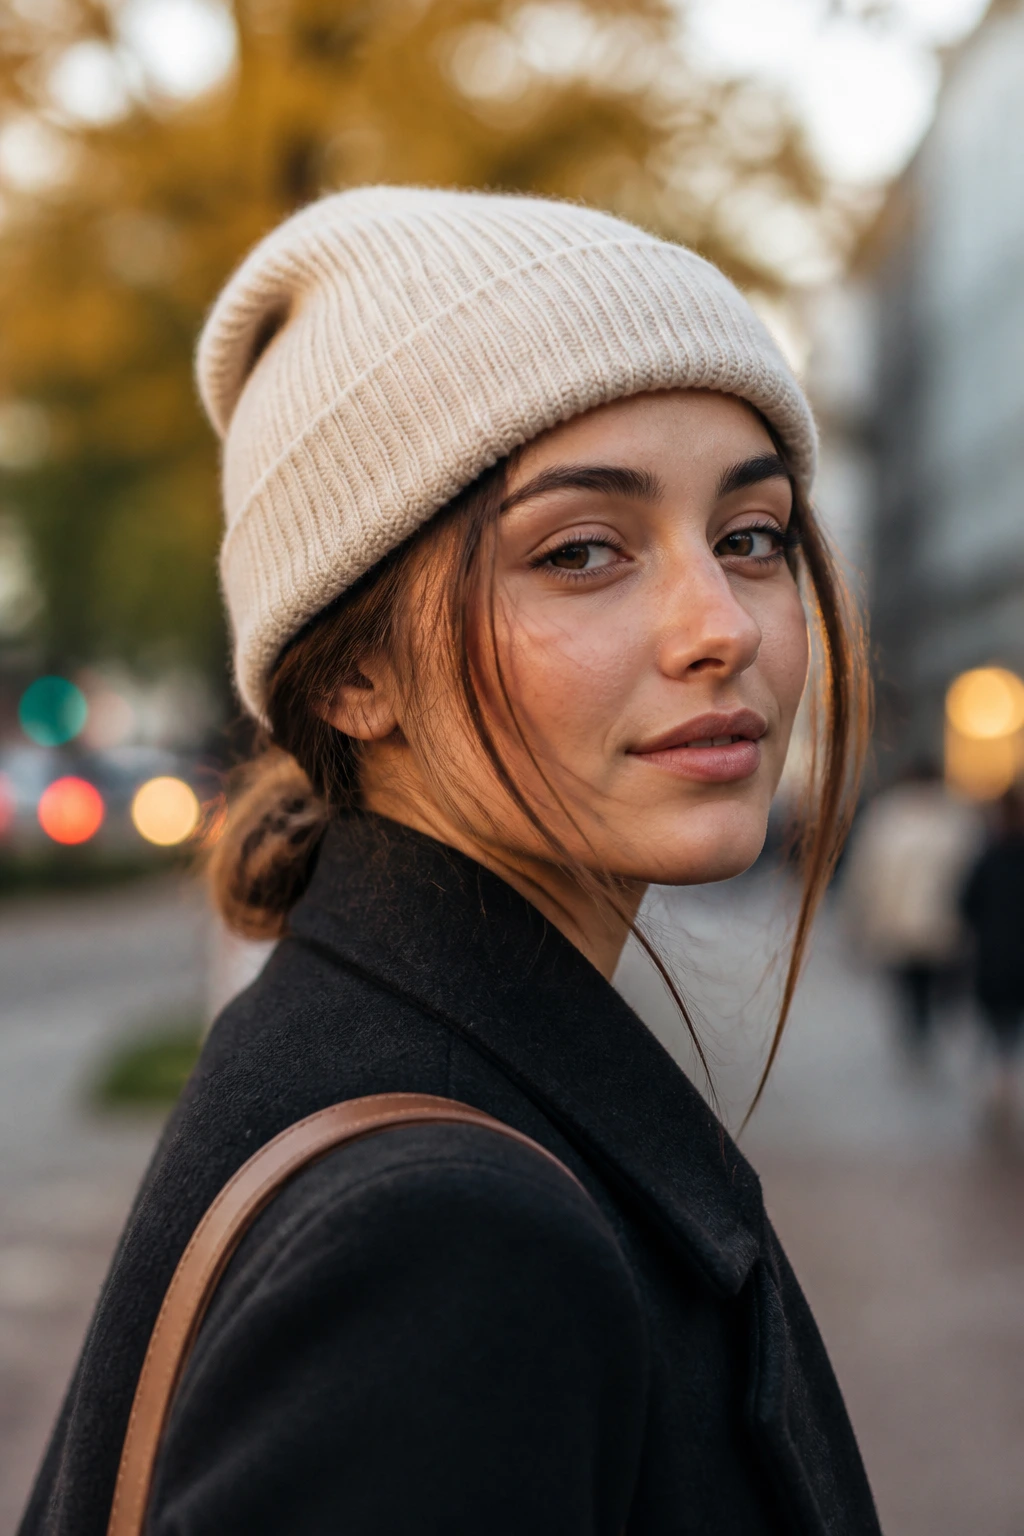
During colder months, a beanie is often part of the daily uniform. The problem is that most ponytails look weird under a hat. The solution is to keep your ponytail extremely low—almost touching your neck—so it doesn’t push the hat up or sit at an awkward angle.
- Gather hair at the very base of the neck.
- Secure with a snag-free elastic.
- Pull on your beanie, ensuring the ponytail stays underneath the rim.
- Leave a few strands out near your face to soften the look, as beanies can sometimes make you feel like you are disappearing into your clothes.
25. The Texturized Wet Look
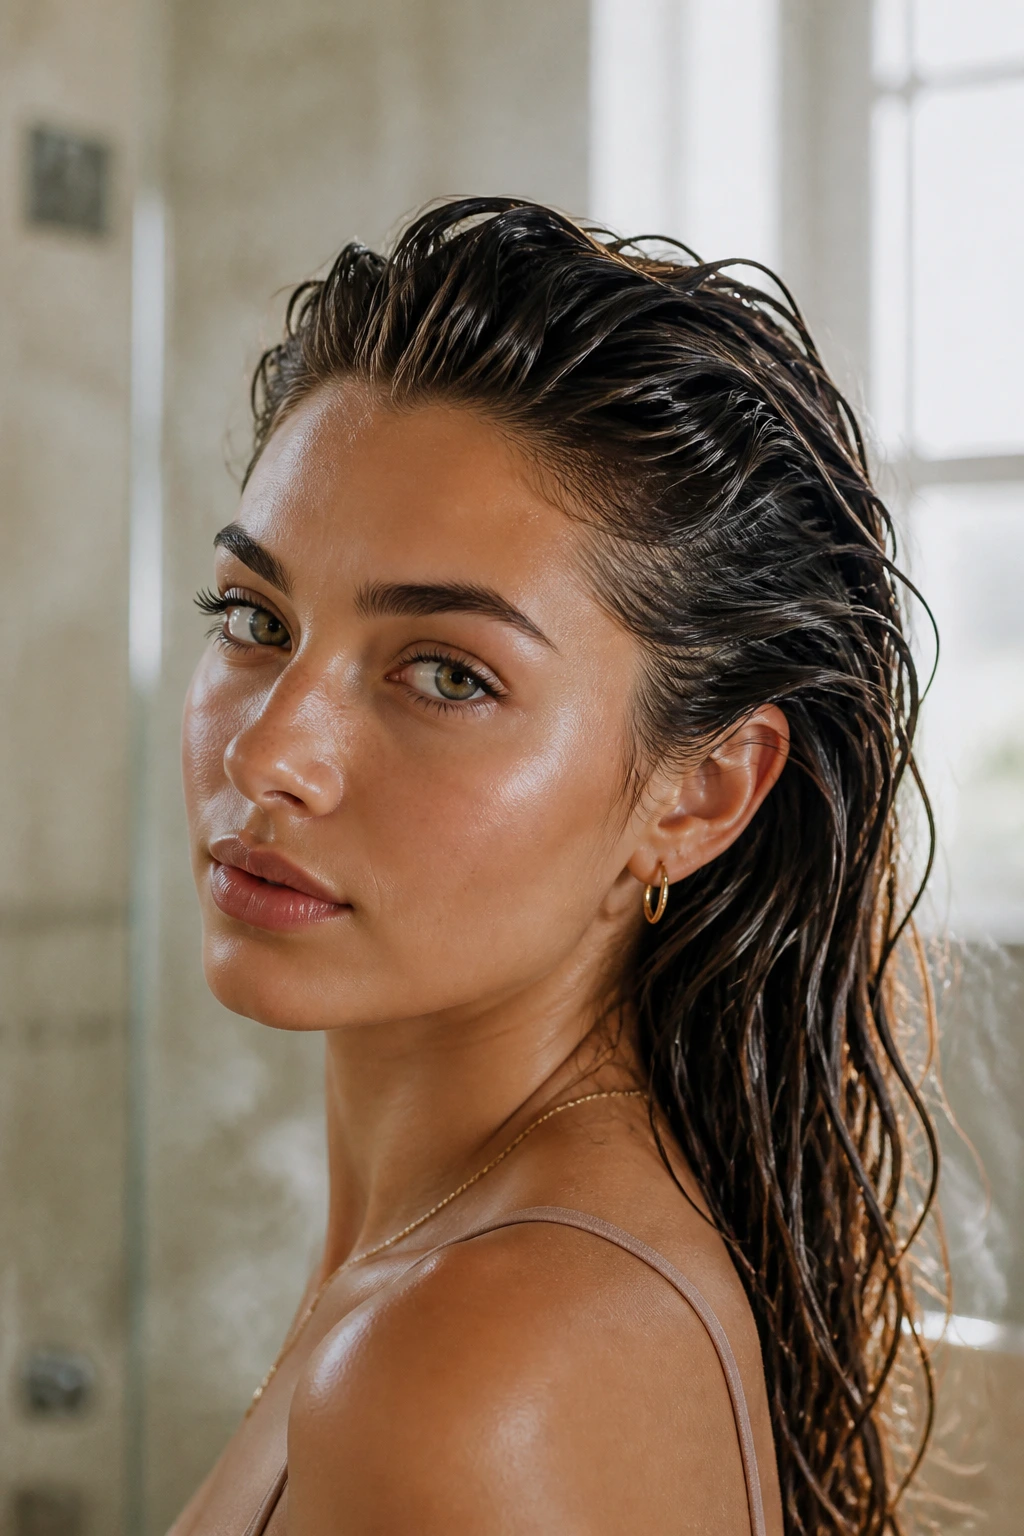
For days when you have zero time to dry your hair, work with the moisture instead of against it. The “wet look” is a legitimate style, and it looks best when your hair is slightly damp.
Achieving the Polish
Apply a small amount of styling gel or leave-in conditioner to damp hair. Comb it back with a wide-tooth comb to create clean lines. Let it air dry; the product will keep it looking “deliberately” wet rather than “I just stepped out of the shower.” It’s an incredibly sleek, high-fashion look that takes almost no effort to execute.
Final Thoughts
The secret to a successful school-day hairstyle is knowing which styles work for the specific texture and length you have today. You do not need to master all twenty-five; picking four or five that you can do with your eyes closed will save you hours of stress over the school year. Keep a few essential tools—bobby pins, a snag-free elastic, and a small claw clip—in your bag at all times for those moments when you need to pivot your look during a break.
Authenticity matters more than perfection. If a style ends up looking a bit messier than you intended, own it. Most of the time, the “undone” look is actually the one people find most approachable and effortless. Prioritize the health of your hair by alternating between these styles so you aren’t pulling on the same hair follicles every single morning. Your routine should be something that supports your day, not a chore that starts it off on the wrong foot.