When you step into your Baddie era, your hair isn’t just an accessory; it’s a non-verbal declaration of intent. For those of us blessed with naturally straight hair, the “baddie” aesthetic is a playground of sharp lines, high-gloss finishes, and gravity-defying volume. You don’t need to be a professional stylist to pull these looks off, but you do need an understanding of how to manipulate texture and hold to keep your style from falling flat by noon.
The baddie look is characterized by an unwavering sense of confidence. Whether you’re leaning into the Y2K resurgence with playful clips or going full “CEO energy” with a sleek, wet-look bob, the goal is intentionality. Every strand should be placed for a reason. If you’ve spent years just washing and air-drying, it is time to pivot toward a more structured approach. We aren’t looking for “messy” here; we are looking for curated, polished, and powerful.
Straight hair is uniquely suited to these styles because it offers a clean, architectural canvas. You can sharpen a middle part to slice through a crowd, or use flat-iron techniques to create a liquid glass finish that catches every light source in the room. Let’s look at the specific styles that define the current era of bold, aesthetic hair and how you can actually make them work for your specific hair type.
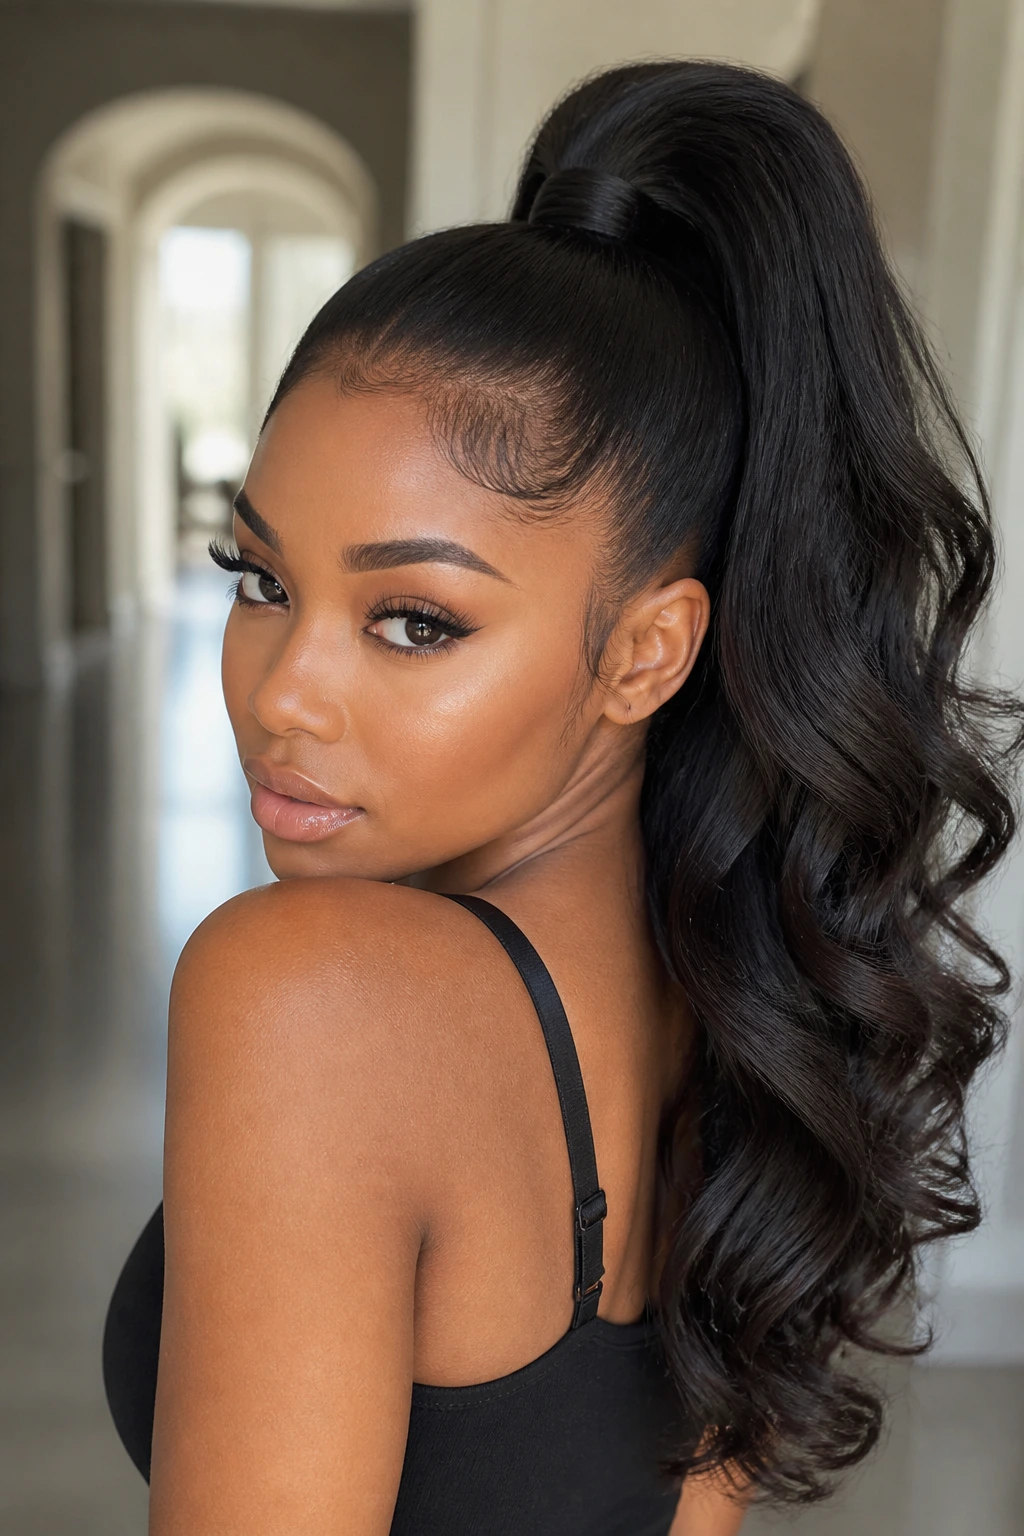
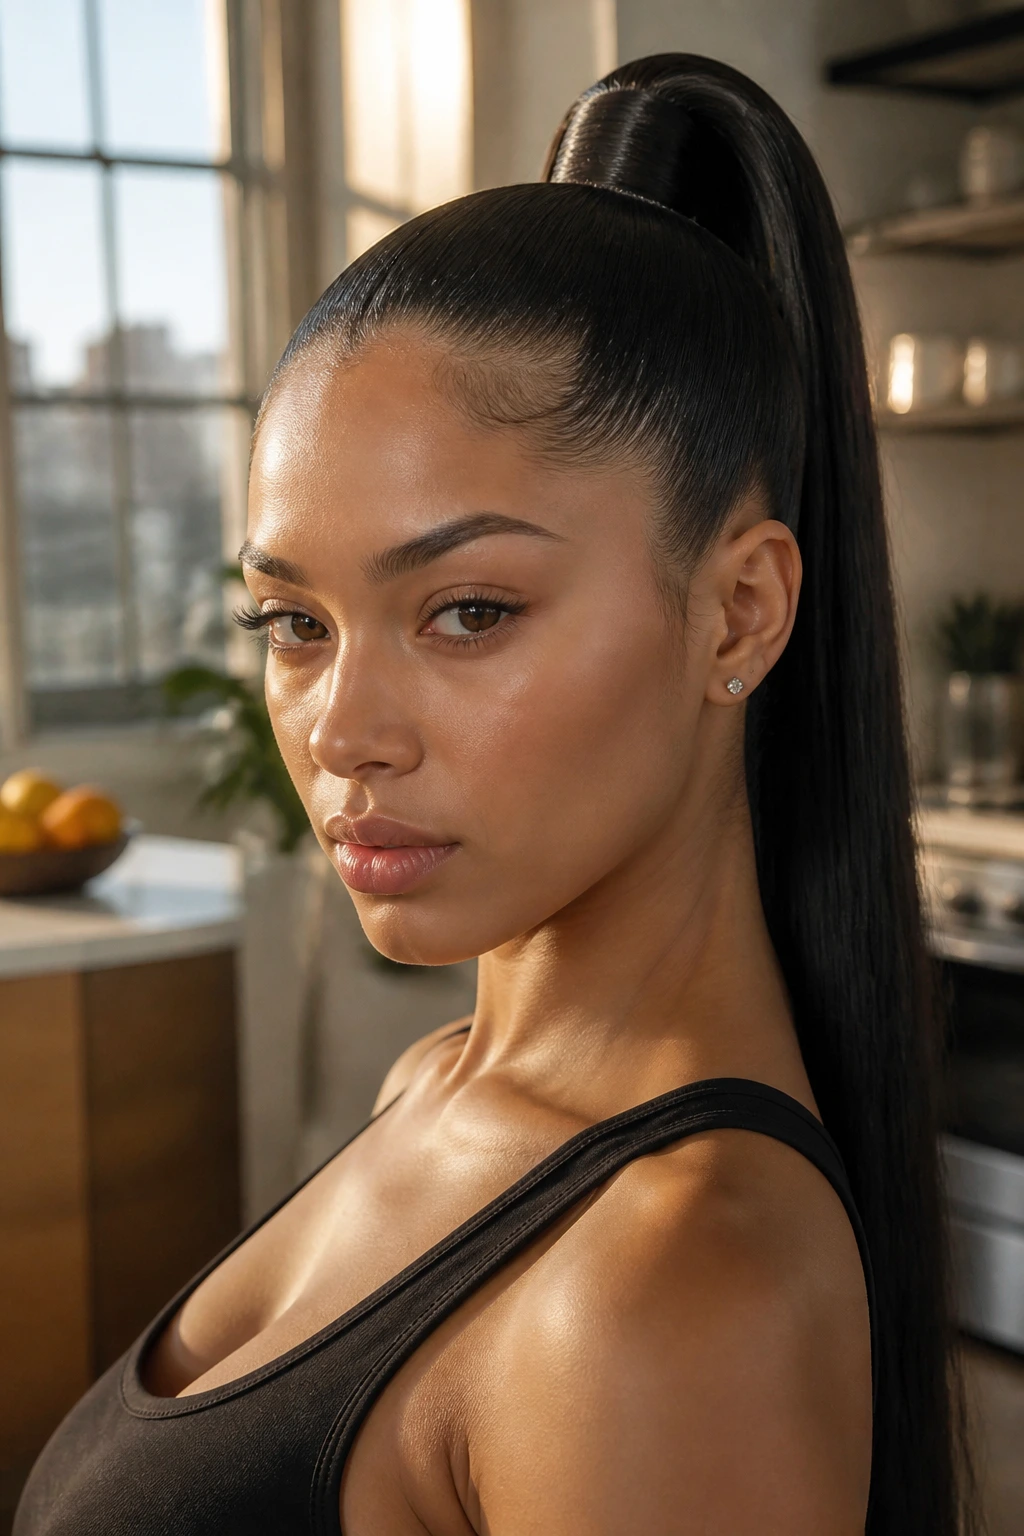
1. The Ultra-Slick High Ponytail
This is the gold standard for a reason. It is the architectural foundation of the entire baddie aesthetic because it pulls everything upward and backward, emphasizing your cheekbones and brows. To get this right, you need a high-quality styling gel—avoid the crunchy stuff that flakes—and a firm-bristle boar brush.
Achieving the Perfect Tension
- Start with clean, dry hair. If your hair is too soft or freshly washed, it won’t hold the tension.
- Apply a generous amount of styling cream or light-hold gel to your roots.
- Use a boar-bristle brush to pull the hair toward the crown of your head in smooth, even strokes.
- Secure it with a heavy-duty snag-free elastic. Pro tip: Wrap a small one-inch section of hair around the base of your ponytail and secure it with a bobby pin to hide the elastic. It makes the style look infinitely more expensive.
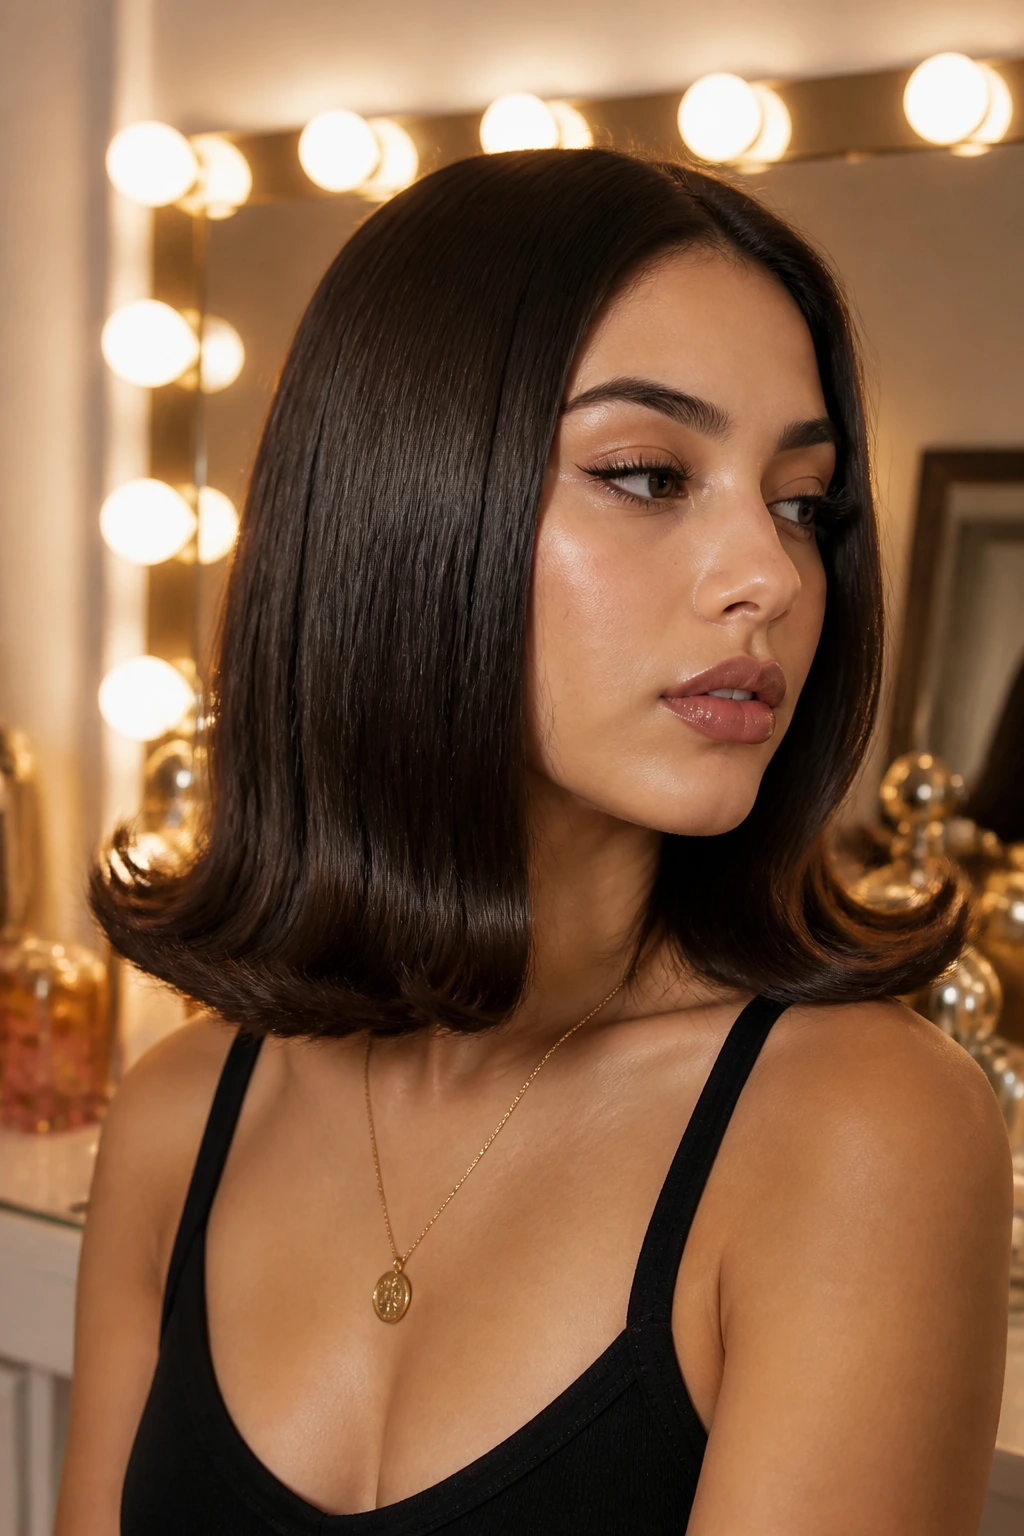
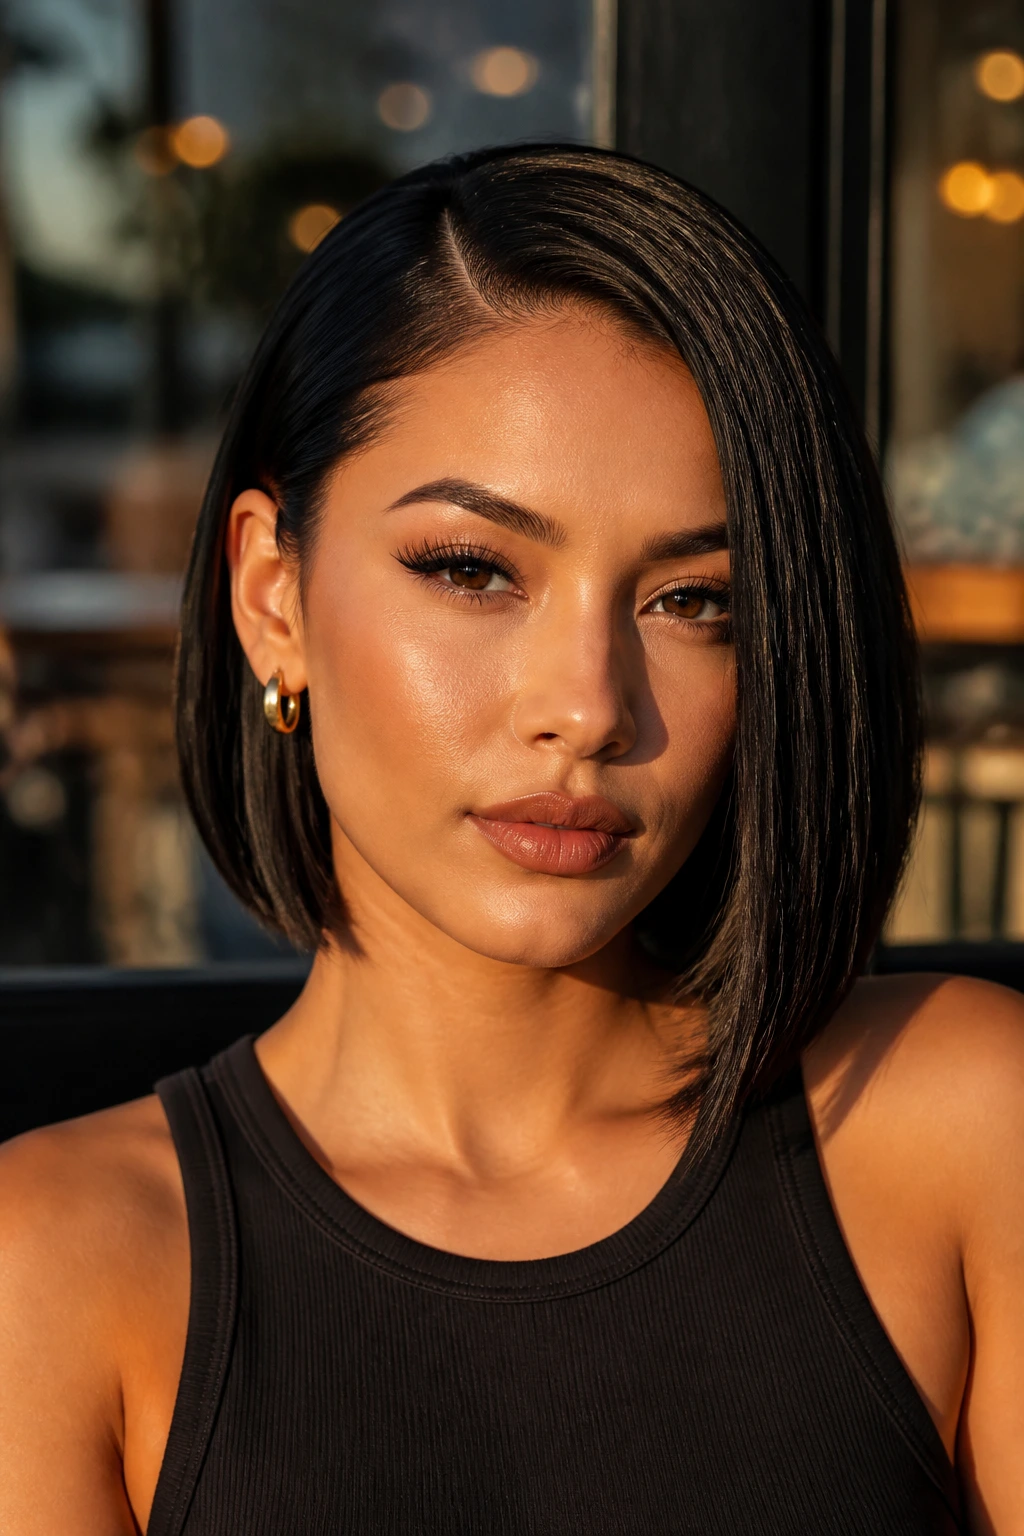
2. The Liquid Glass Straight Bob
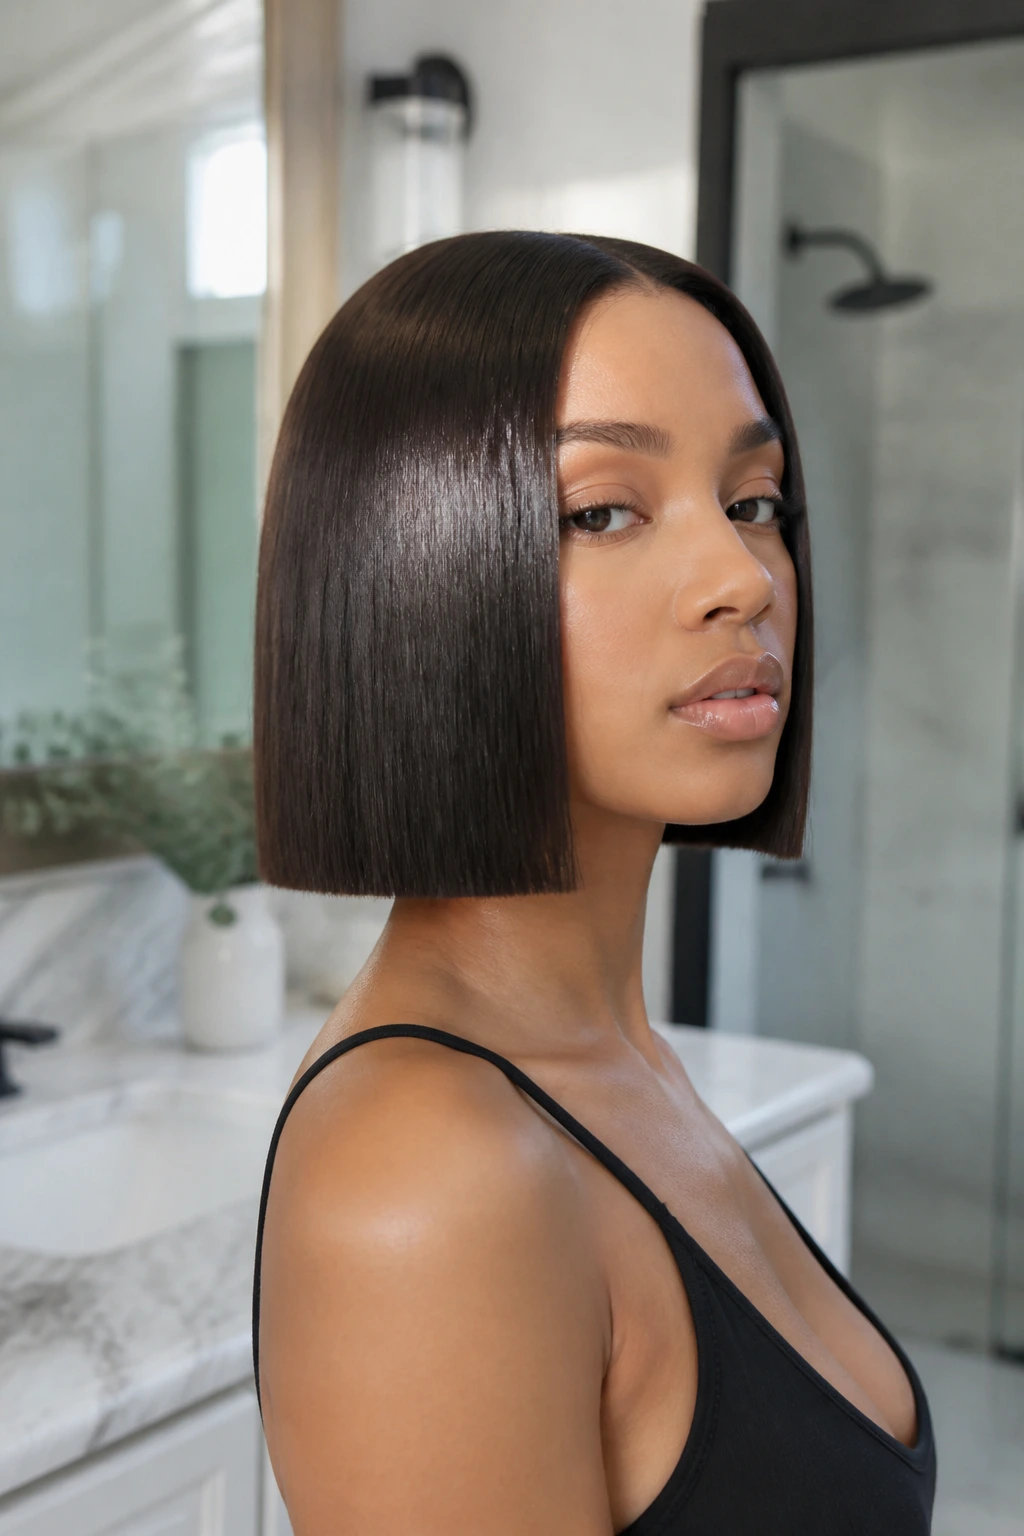
Nothing screams “I have my life together” like a razor-sharp, blunt bob that reflects light like a mirror. The secret here is not just the cut, but the finish. You need a flat iron with ceramic or tourmaline plates that can maintain a consistent temperature, preventing uneven heat spots that cause frizz.
Mastering the Finish
- Use a heat protectant spray on every single layer, not just the top.
- Work in small, half-inch sections. If the section is too thick, the heat won’t penetrate evenly.
- Follow the flat iron with a fine-tooth comb to ensure each strand is perfectly parallel to the one next to it.
- Apply a pea-sized amount of lightweight shine serum, focusing only on the mid-lengths and ends. Do not touch your roots with oil, or you will lose the volume needed to keep the bob looking modern and airy.
3. The Deep Side-Part With Face-Framing Tendrils
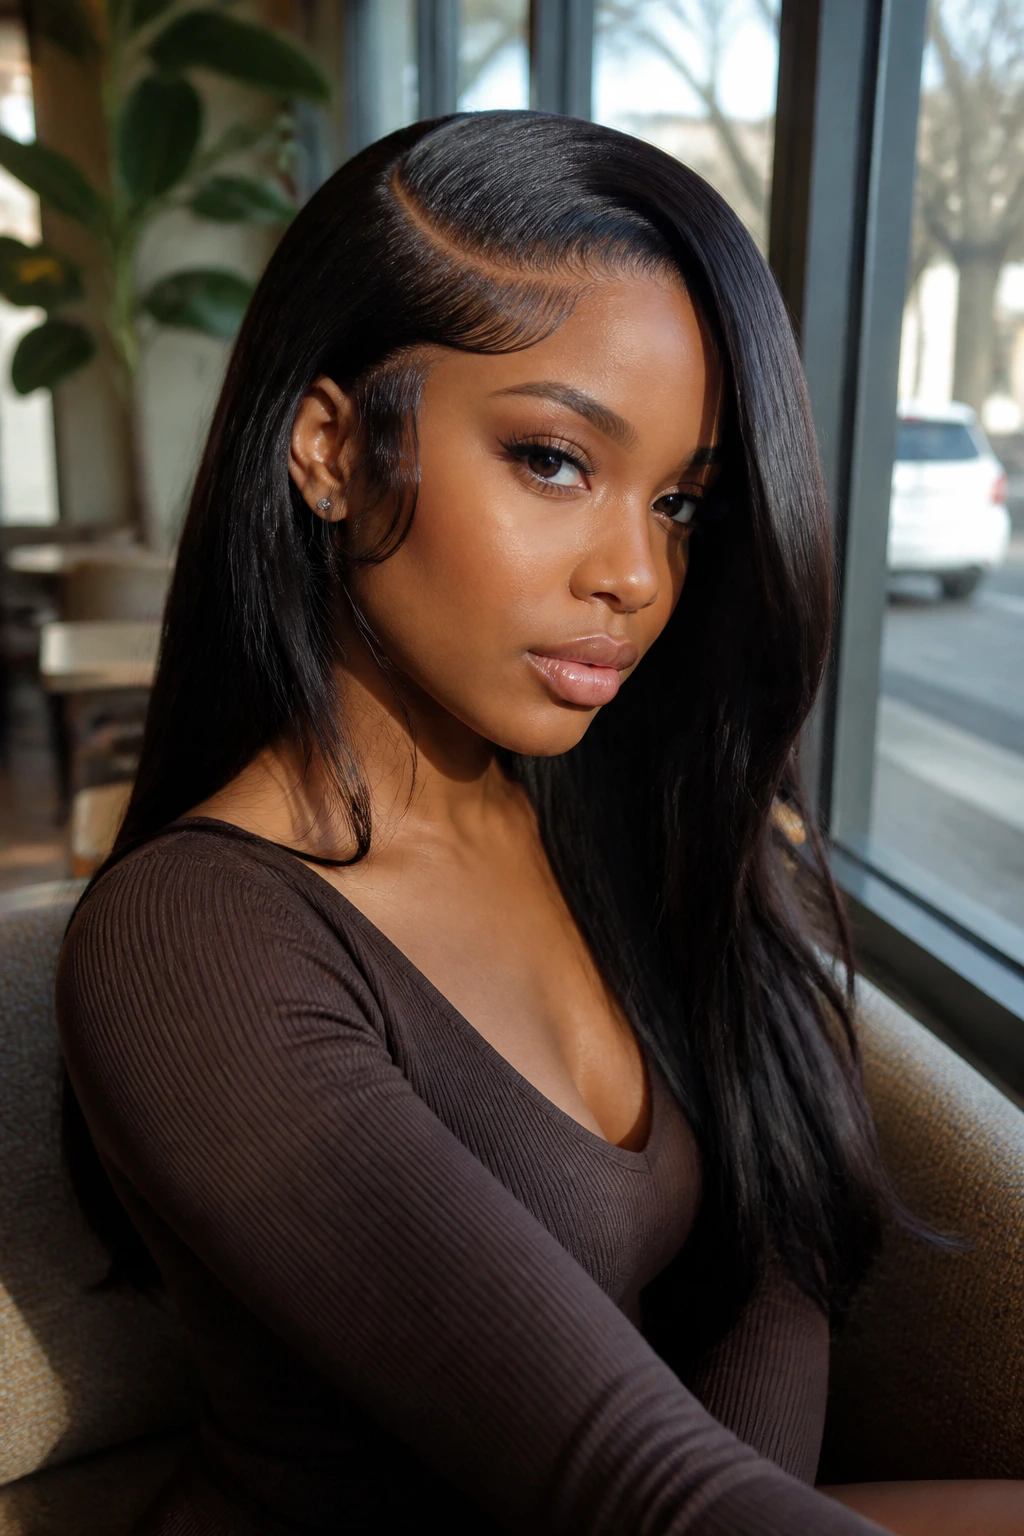
The side part is back, and it’s sharper than ever. By over-directing your hair to one side, you create an instant, dramatic curtain that softens the face while maintaining a bold, edgy silhouette. This style pairs beautifully with “baby hairs” or subtle wisps framing the temples.
Creating the Silhouette
- Use the arch of your eyebrow as a guide for the deepest part.
- Use a tail comb to create a perfectly straight line—precision is the key to making this look intentional rather than accidental.
- Once parted, use a light-hold pomade to tuck the smaller side behind your ear securely.
- Take two thin strands at the front and use a curling wand for a loose, gentle “s” curve to add dimension.
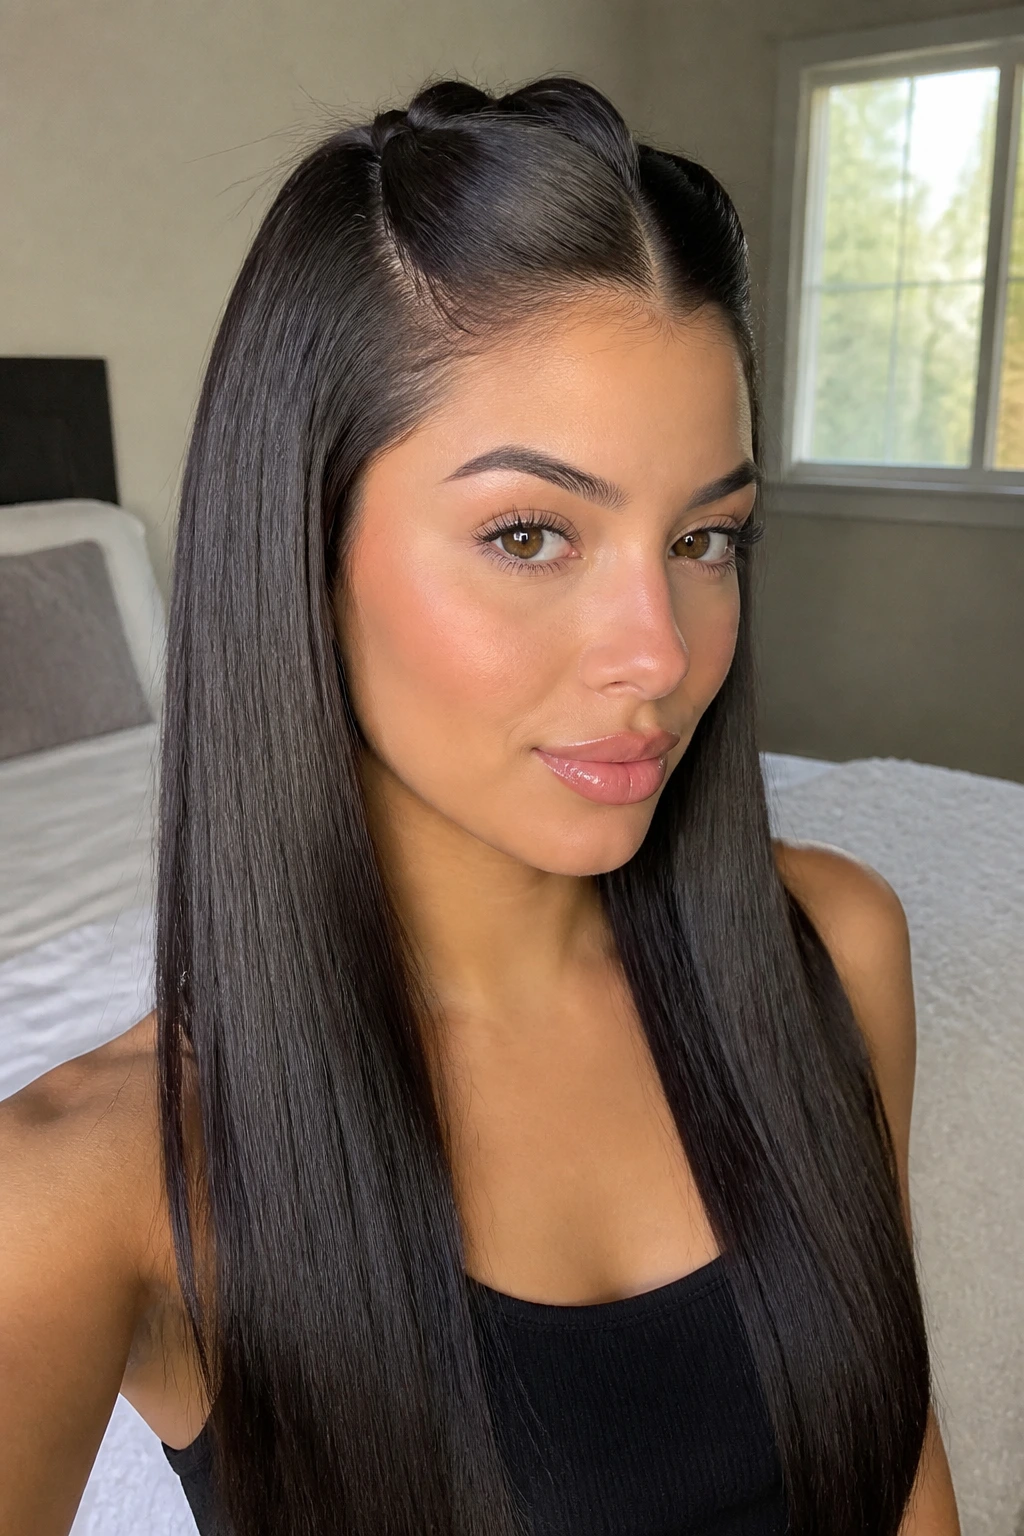
4. The Half-Up High Bun

This is a playful, aggressive take on the traditional half-up style. Instead of a soft, loose bun, we are talking about a tight, sculptural top-knot that sits right at the top of your head. It’s a perfect look for when you want to show off your length while keeping the hair out of your face for a “fierce” aesthetic.
Constructing the Knot
- Section off the top third of your hair.
- Gather it into a high ponytail and secure it with a small elastic.
- Twist the length of the ponytail tightly until it naturally coils into a bun shape.
- Secure with two or three large bobby pins that match your hair color.
- Use a touch of dry texture spray on the loose hair at the back to prevent it from looking too “flat” or plastered to your scalp.
5. The Y2K Spiky Claw Clip Updo
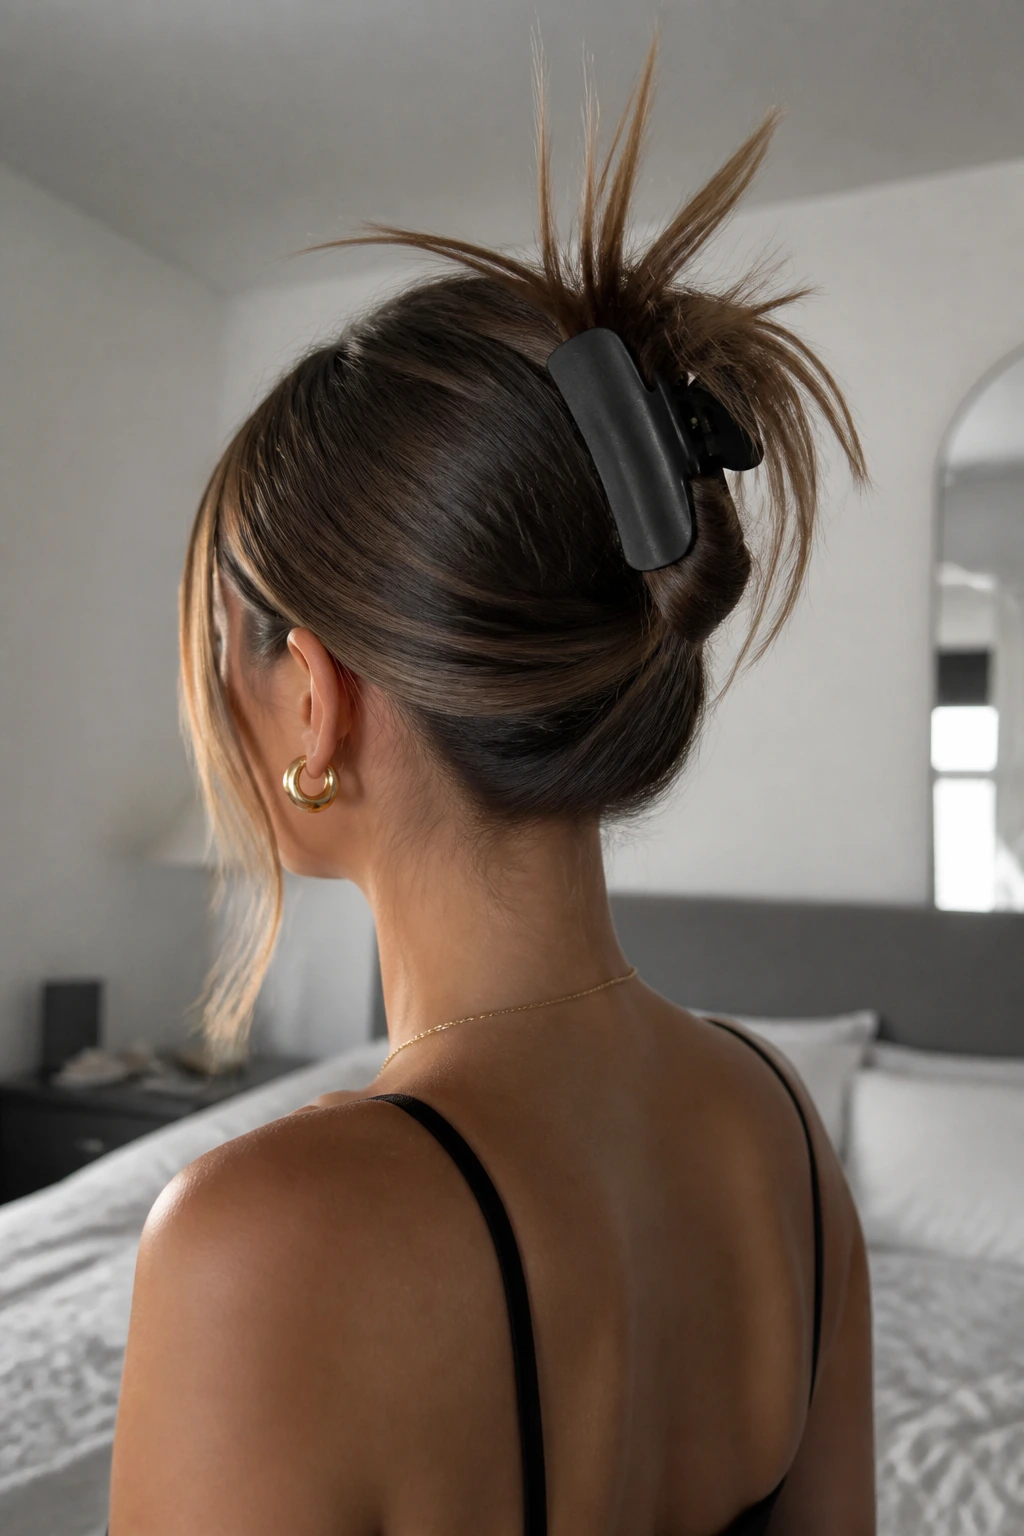
If you’ve noticed a resurgence in early-2000s aesthetics, you’ve seen this style. It is the perfect balance of “effortless” and “high-maintenance.” The look relies on letting the ends of your hair poke out of the claw clip like tiny, deliberate spikes.
The Mechanics of the Clip
- Gather your hair into a ponytail at the back of the head.
- Twist the hair upward, but stop before you tuck the ends in.
- Secure the twist with a large, matte-finish claw clip.
- Let the loose ends spill out over the top of the clip.
- Use a strong-hold hairspray to define the ends and keep them pointing outward. This style works best with a blunt cut, as it makes the ends look intentionally structural.
6. The Sleek Center Part With Hidden Pins
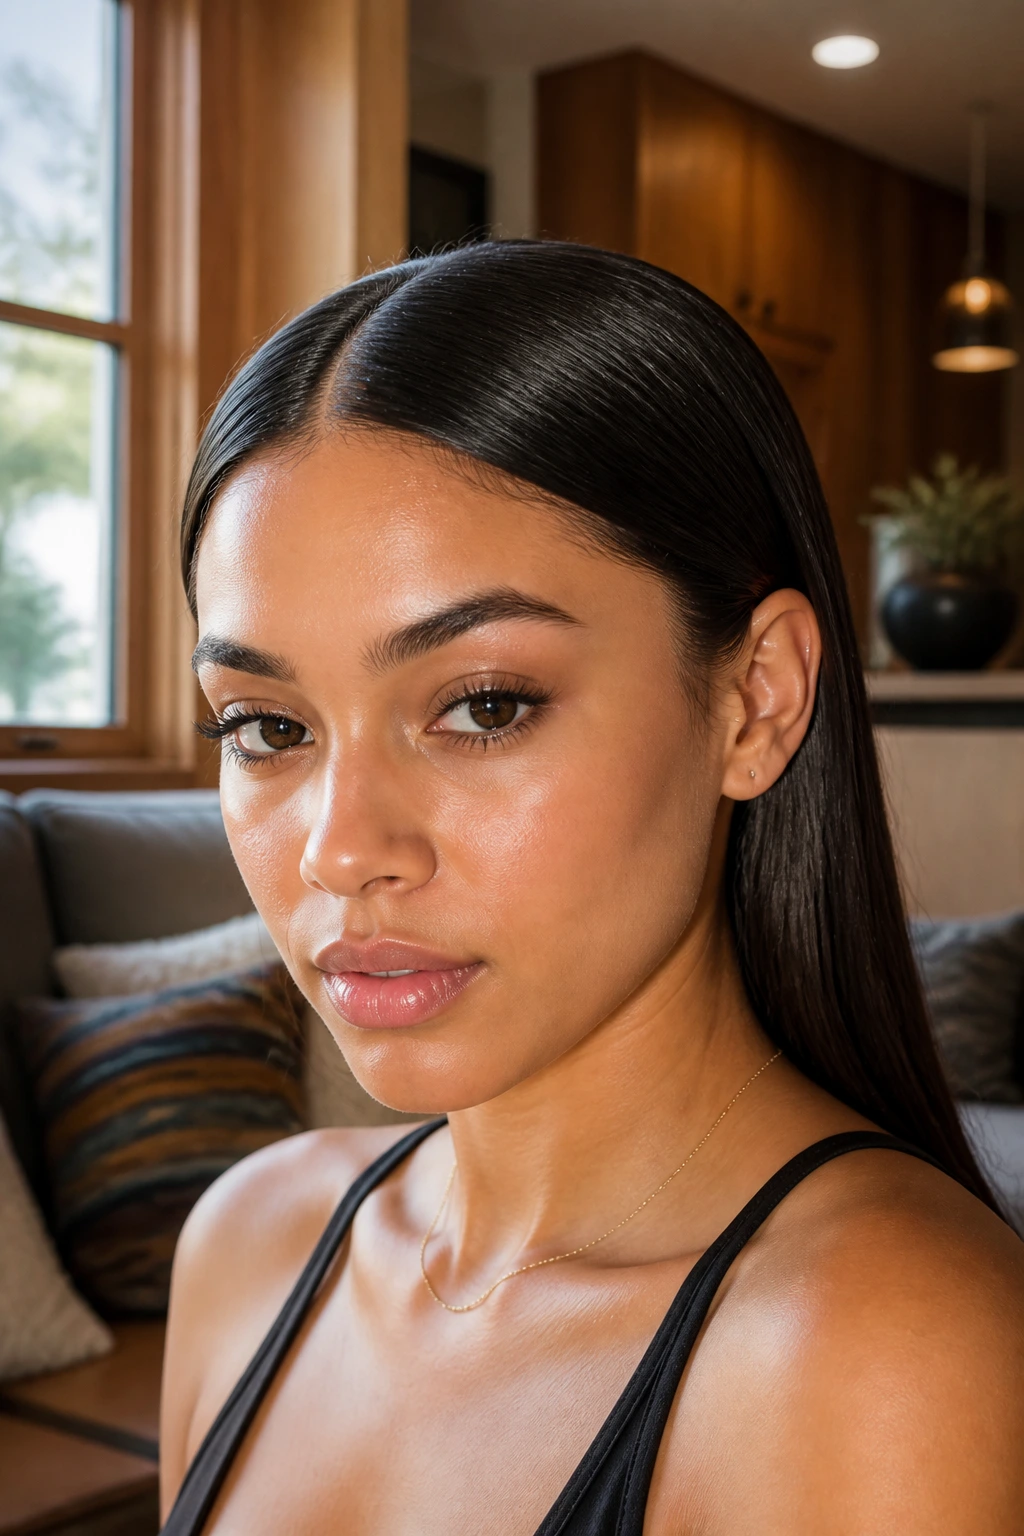
Sometimes the most “baddie” look is the simplest one. A crisp center part with all your hair tucked behind the ears is minimal, clean, and incredibly powerful. The trick is to use hidden pins to keep your hair from falling forward.
Why It Works
- The center part creates an immediate sense of symmetry that draws attention to the eyes.
- Use bobby pins at the back of your ears to “lock” the hair in place.
- If your hair has a tendency to pouf, use a light hair wax on your fingertips to smooth the hair directly behind the hairline.
- Keep the ends slightly rounded under with a large round brush or a flat iron to prevent the style from looking “stringy.”
7. The Bubble Ponytail
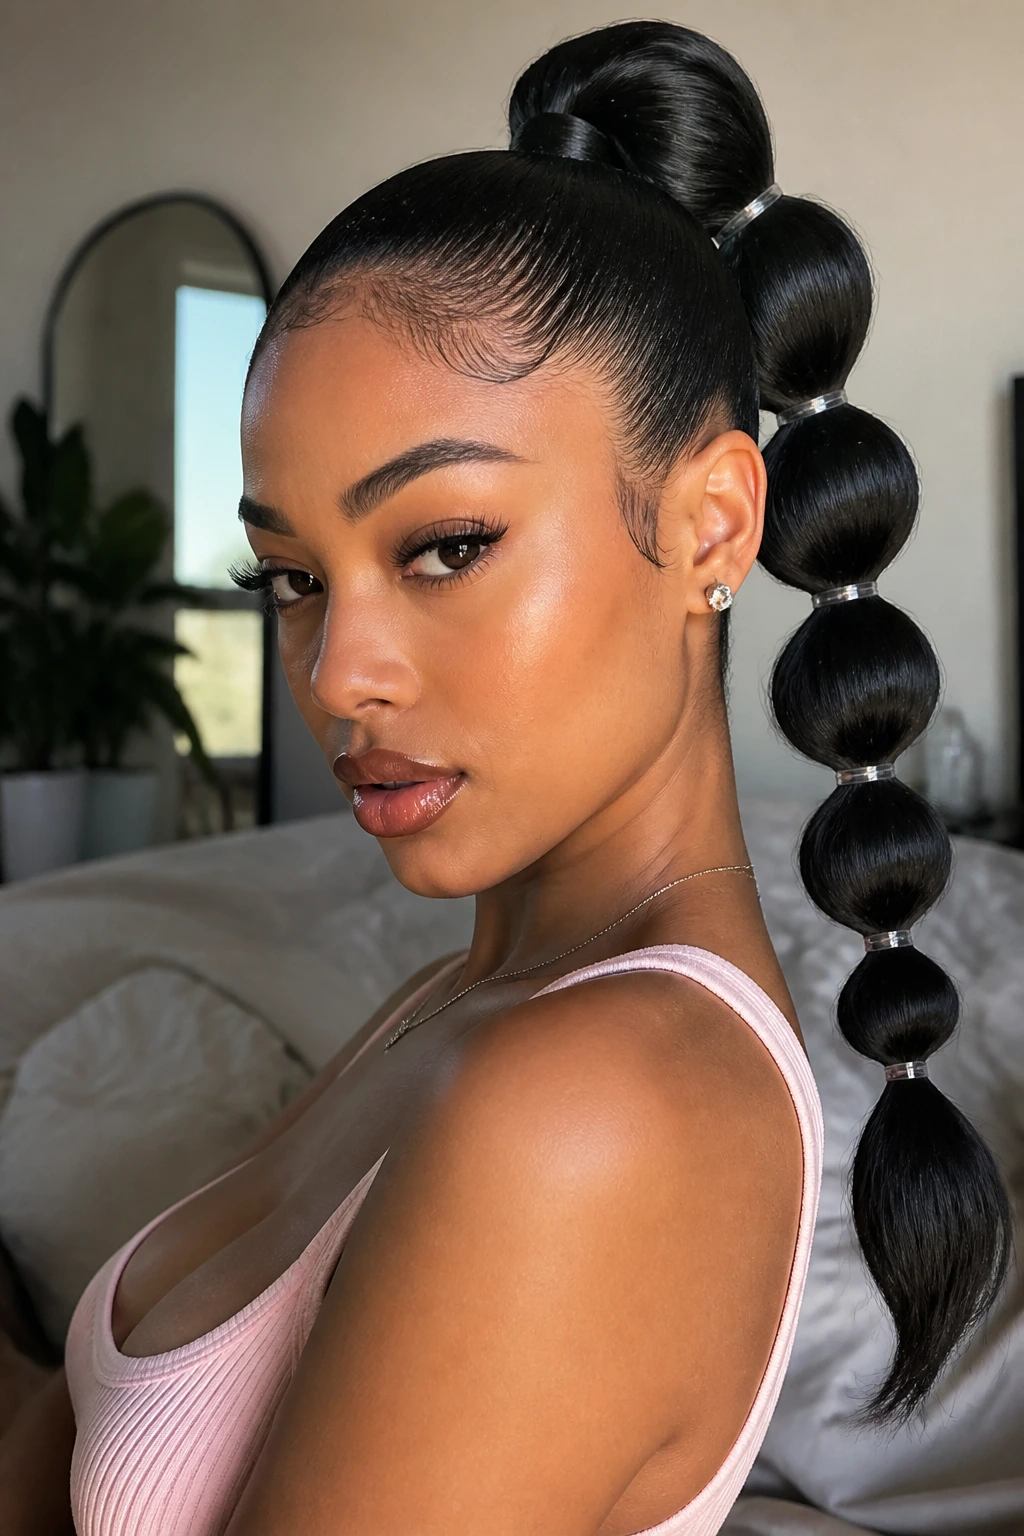
This style turns your straight hair into a series of geometric, puffed segments. It’s structural, it’s fun, and it’s incredibly effective at elongating the look of your hair. You will need a pack of clear or color-coordinated small elastic bands.
Step-by-Step Shaping
- Start with a high, sleek ponytail.
- Place an elastic about two inches down from the base.
- Gently pull at the hair between the two elastics to puff it out into a “bubble.”
- Repeat this process down the entire length of your ponytail.
- Make sure to keep the distance between the elastics consistent—consistency is the visual anchor of this style.
8. The Crimped Aesthetic
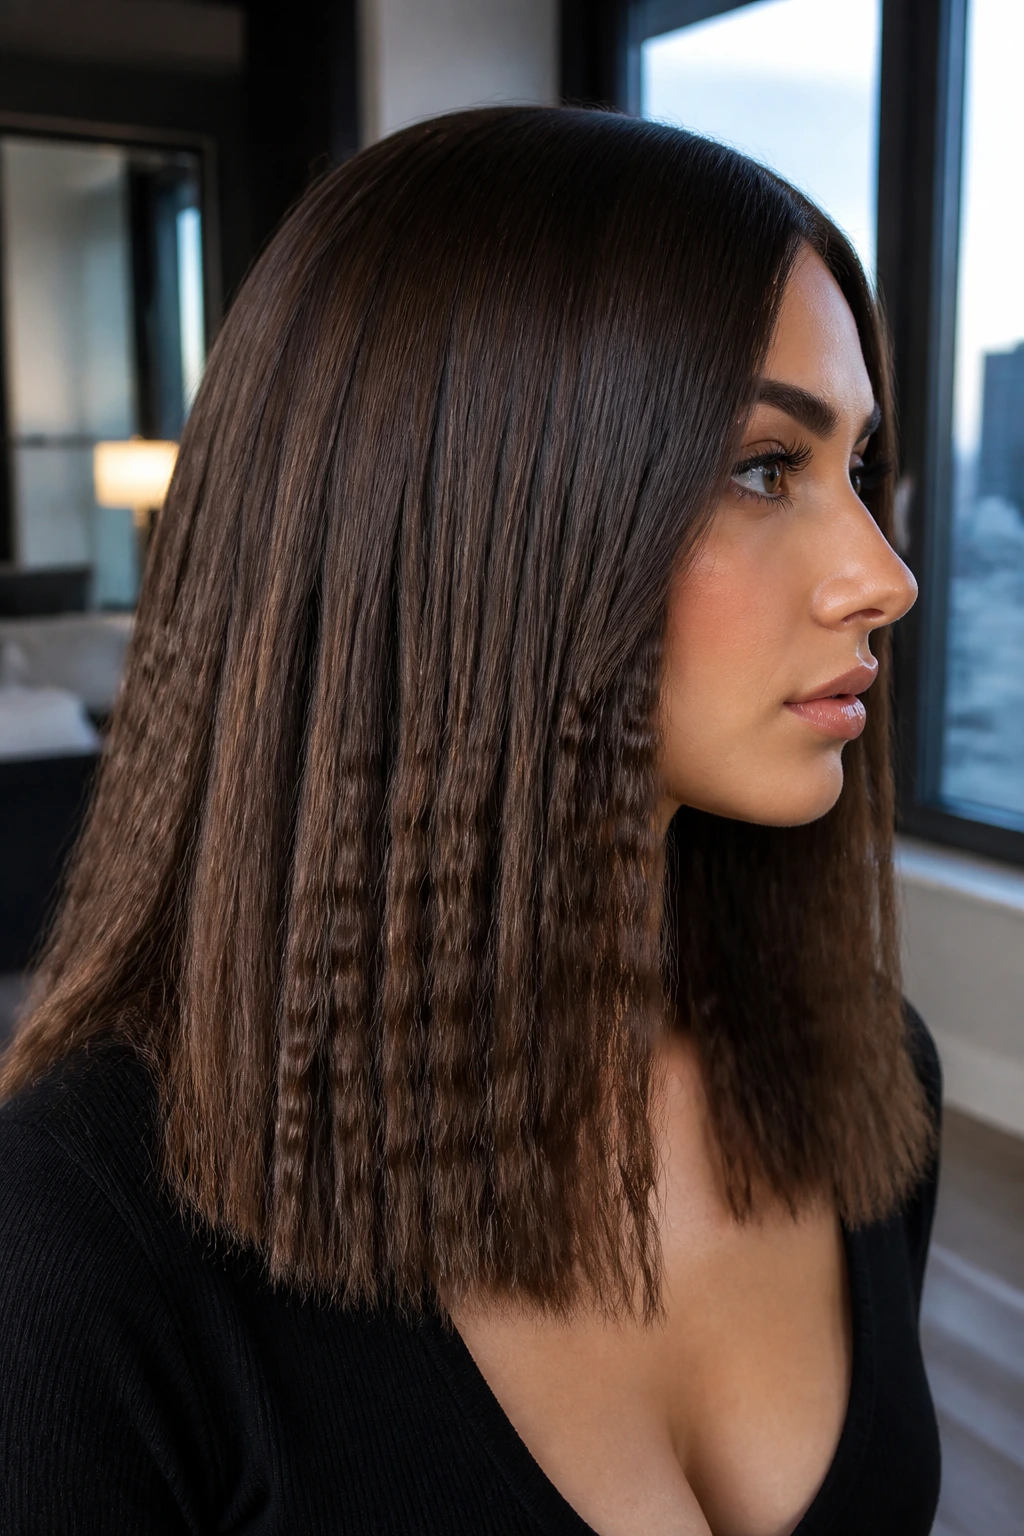
Crimping has returned, but it’s no longer the frizzy nightmare of the past. Modern crimping is used to add volume at the roots or to create a matte, textured look on straight hair that feels entirely modern.
Getting the Texture Right
- Use a triple-barrel iron on small, staggered sections.
- Focus the texture on the middle sections of your hair, leaving the top layer smooth to cover the “crimped” base.
- This technique is perfect for adding volume if your straight hair feels thin.
- Finish with a matte texturizing powder at the roots for a gritty, “undone” baddie vibe.
9. The Wet-Look Slicked Back
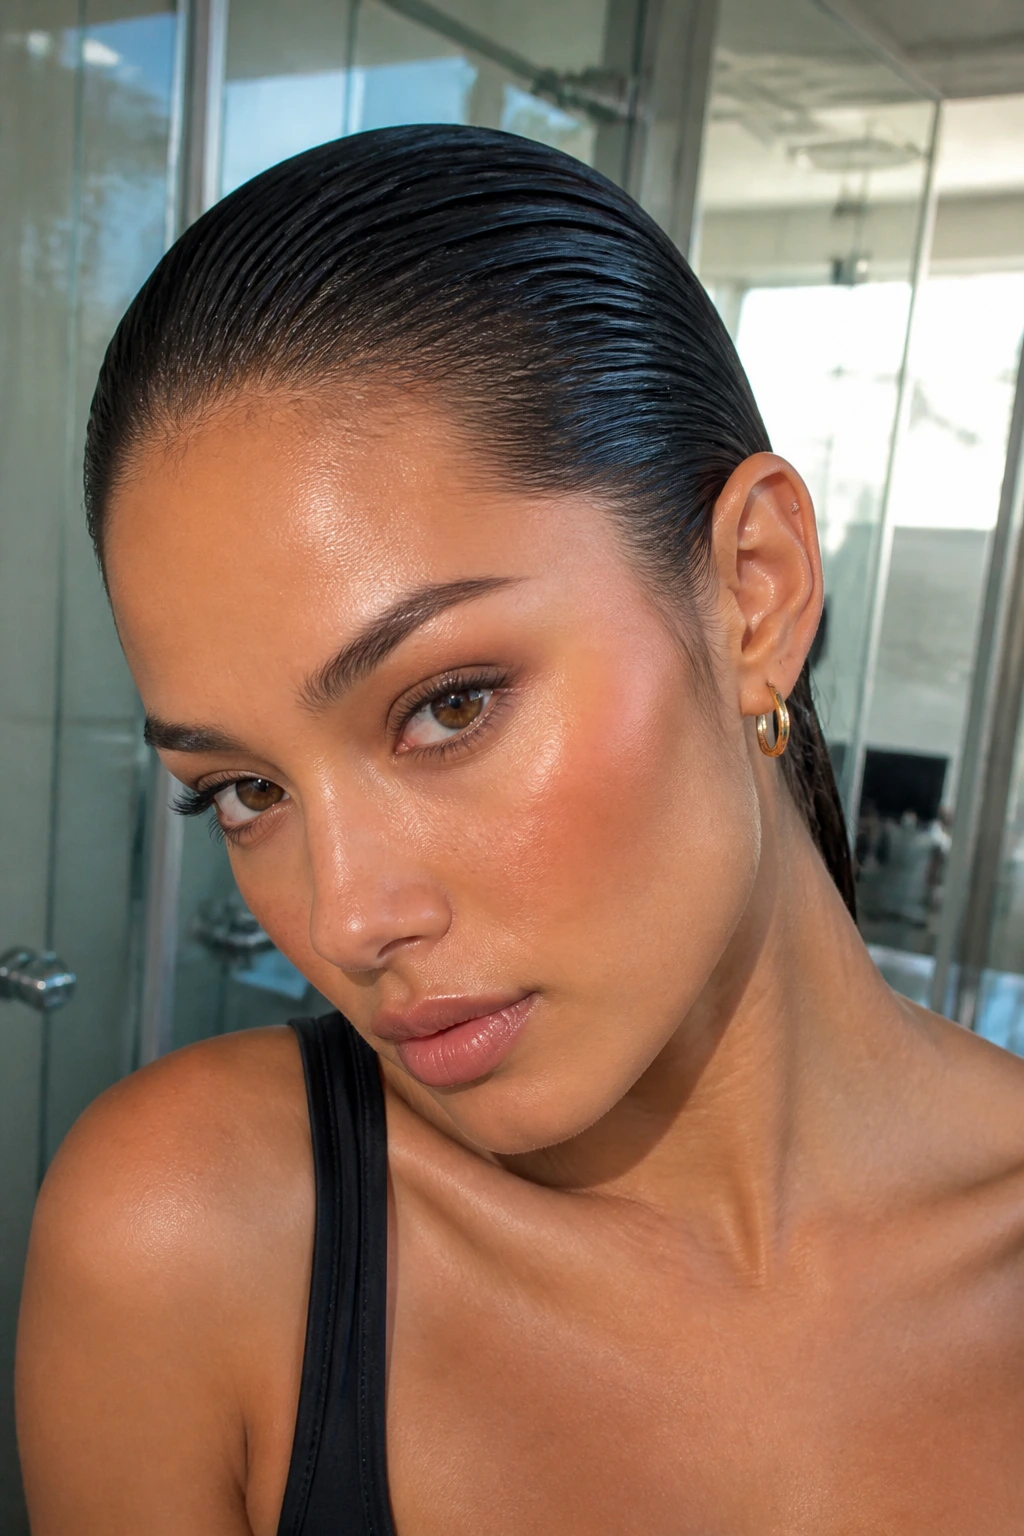
This is a high-fashion look that requires confidence. You need to commit to the product—if you go light, it will look greasy rather than “wet.” Using a blend of water-based pomade and a touch of light-hold oil provides the perfect, high-gloss shine that mimics a post-shower look that stays locked all day.
The Product Ratio
- Combine a quarter-sized amount of water-based pomade with three drops of smoothing oil.
- Work this through your hair starting at the hairline and pushing everything straight back.
- Avoid the ends if you want a cleaner look, or coat the whole head if you want the full-drenched aesthetic.
- Use a fine-tooth comb to create deliberate tracks or “ridges” in the hair as you pull it back—this adds a layer of sophistication.
10. The Space Buns With Face-Framing Strands

Space buns aren’t just for festivals; when worn high and tight with perfectly straight hair, they scream 90s-meets-baddie. The key is to keep the buns small and compact rather than oversized and fluffy.
Creating Symmetry
- Divide your hair into two even sections with a crisp part.
- Secure two high pigtails.
- Wrap each pigtail into a tight, neat bun.
- Leave two thin, perfectly straight strands out at the front to frame the face.
- Use a flat iron on those two strands so they are poker-straight, creating a sharp contrast to the buns.
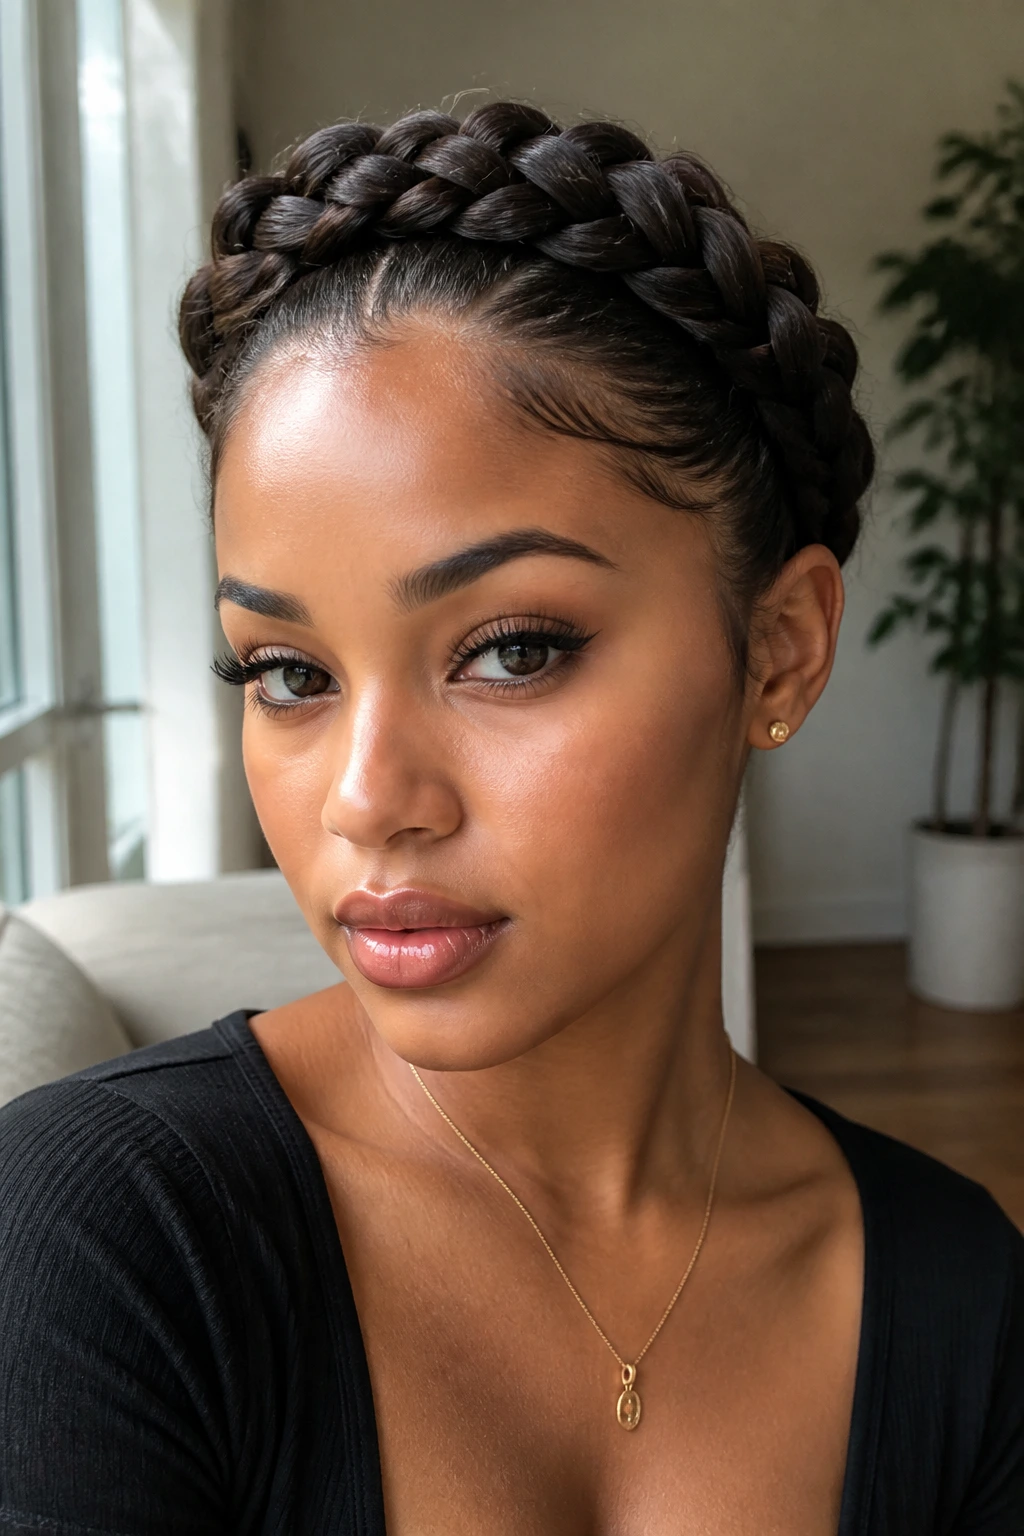
11. The Double-Braided Crown
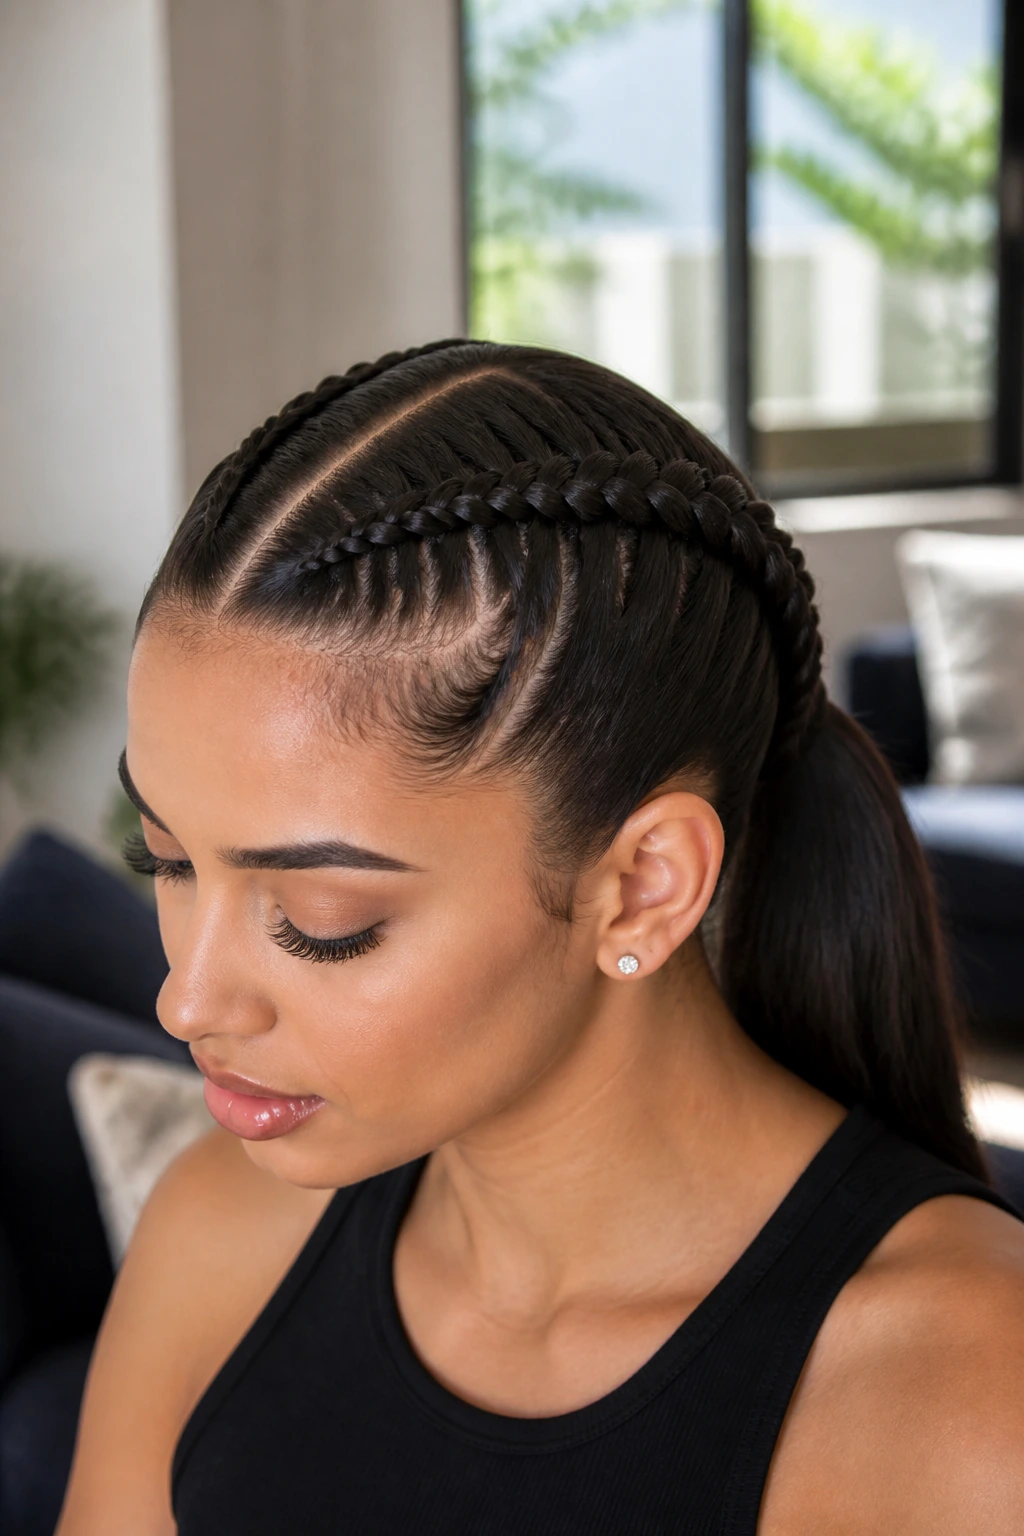
Braiding straight hair can be tricky because it doesn’t have a lot of natural grip. To make this work, use a little bit of texturizing spray before you start. This look involves two tight, Dutch-style braids that frame the face and transition into a sleek, straight ponytail at the back.
Managing the Tension
- Start your braids at the forehead and work them down toward the nape of the neck.
- Pull the sections under rather than over to create a “popped” braid effect that sits on top of the hair.
- Once you reach the nape, secure the braids and the rest of your hair into a ponytail.
- Use a small, thin braid-locking elastic to keep the transition smooth.
12. The Retro Flip Ends
This style is all about the “C” curve. By flipping your ends outward, you create a sophisticated, slightly nostalgic look that pairs perfectly with modern makeup trends like winged liner and bold brows.
Using the Right Tools
- You will need a large-barrel round brush or a flat iron with rounded edges.
- As you pull the hair through, flick your wrist outward at the very end.
- Hold for two seconds to set the curve.
- Use a light-hold hairspray to ensure the “flip” doesn’t drop throughout the day.
- This style looks best on hair that has a uniform, blunt length.
13. The Half-Up With High-Pony Extensions

If your natural hair isn’t long enough for a dramatic half-up ponytail, use extensions. A baddie aesthetic often embraces length, and clip-in extensions are the easiest way to add volume and drama to your half-up style without the permanent commitment.
Blending for a Seamless Look
- Tease the hair at the base of your crown before clipping in the extension.
- Ensure the extension matches your hair texture and color perfectly.
- Once the extension is in, gather the hair into a high ponytail and secure.
- Wrap a piece of the hair around the elastic so the clip or the track is completely invisible.
14. The Headband-Style Braid
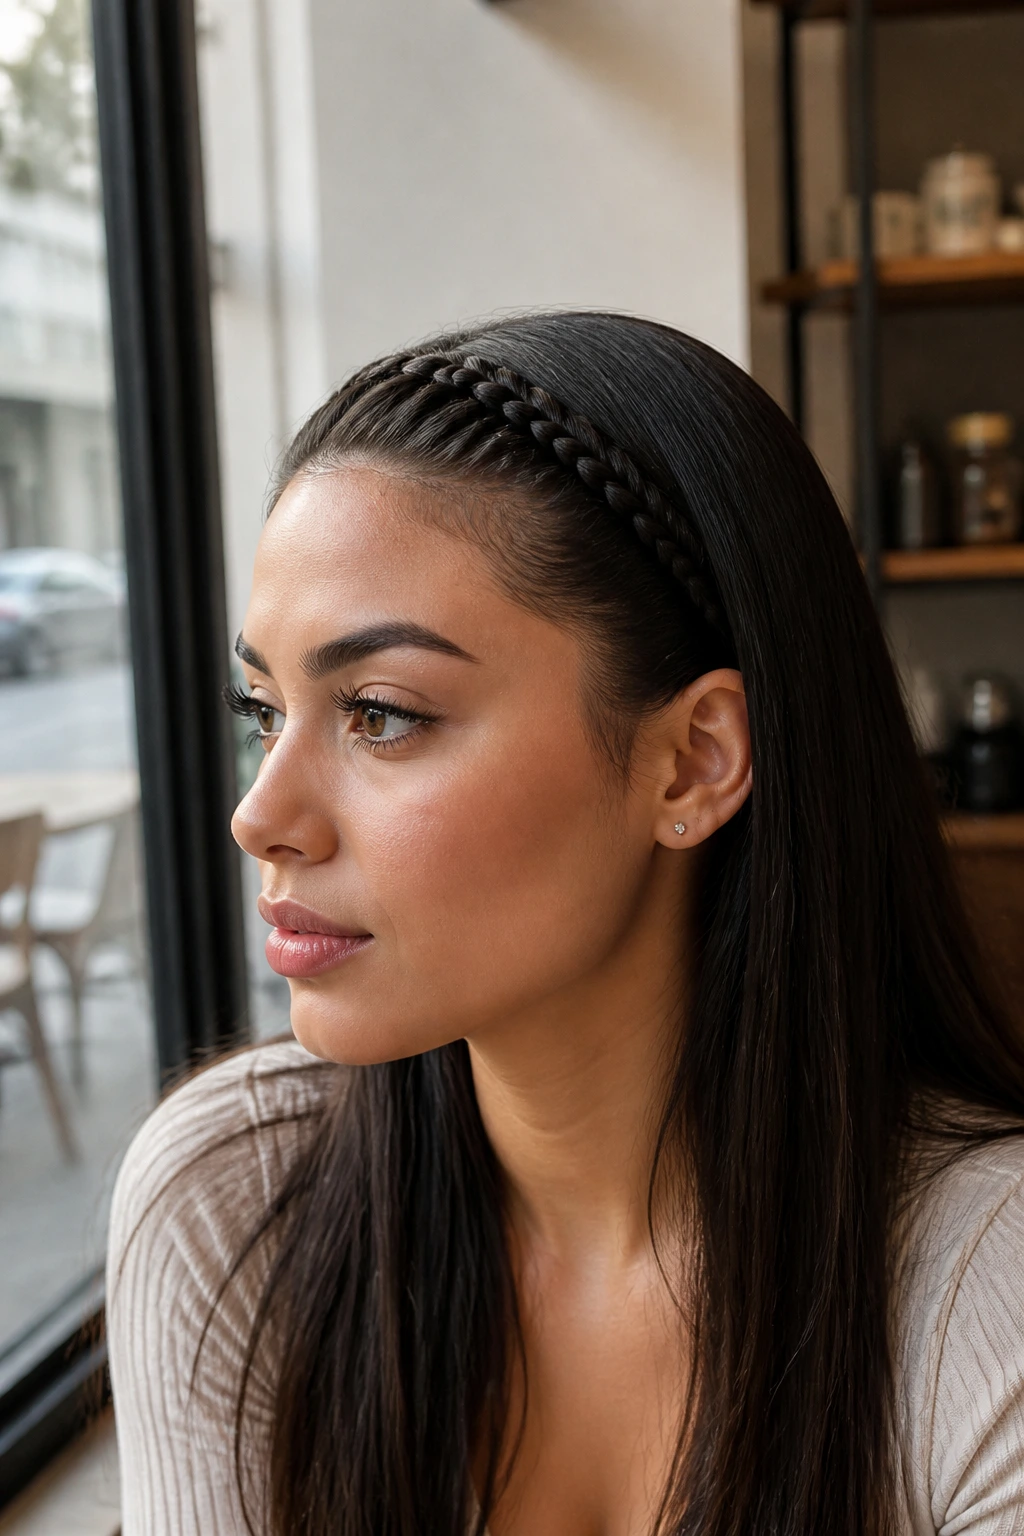
Instead of wearing a literal headband, use a thin, tight braid that mimics the placement of a headband. This keeps your hair pushed back and highlights your facial features while adding an element of detail that feels deliberate and groomed.
Creating the Faux Band
- Section off a one-inch strip of hair along your hairline.
- French braid it from one ear to the other.
- Secure the end of the braid behind your ear with a small, discreet pin.
- Keep the remaining hair behind the braid sleek and straight.
- This is a fantastic “baddie” style for days when you want a put-together look that feels slightly more bohemian.
15. The Deep Side-Part With Volume
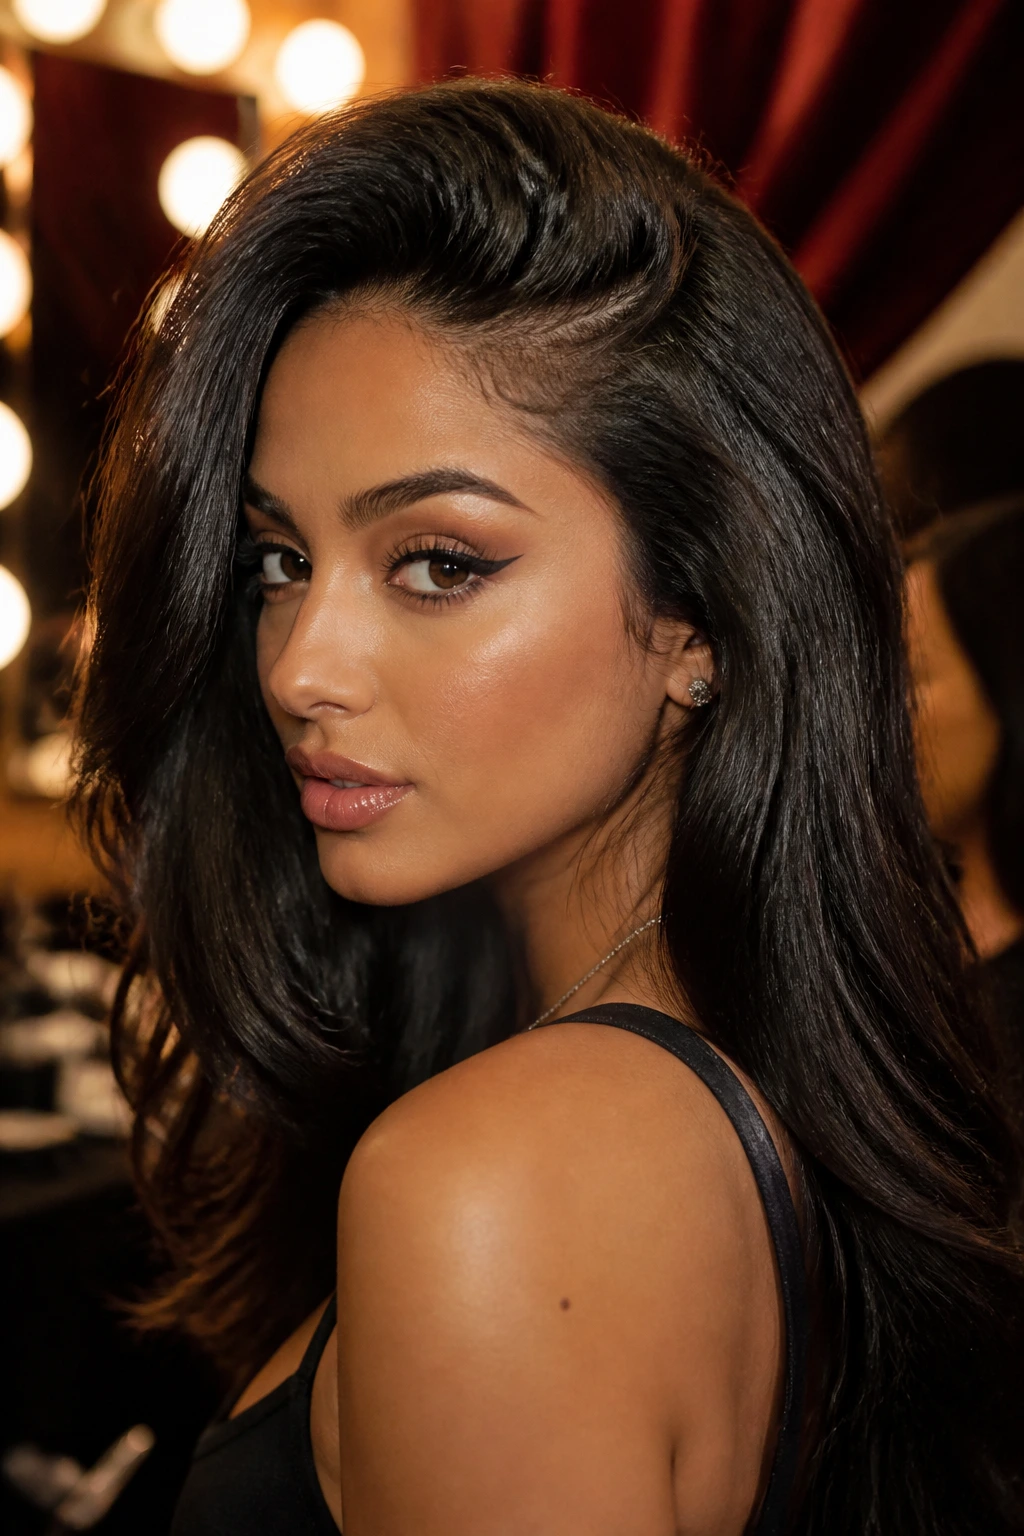
Volume is usually the enemy of the “slick” baddie look, but this style uses volume strategically. By giving the hair a deep side part and teasing the roots of the larger side, you create a glamorous, “red carpet” version of the baddie aesthetic.
Teasing Technique
- Lift a small section of hair at the crown.
- Use a teasing comb to push the hair down toward the roots only on the underside.
- Smooth the top layer back over the tease to hide it.
- This provides height and drama without making the hair look messy or frizzy.
- Finish with a strong-hold spray to keep the lift from falling over time.
16. The “Invisible” Part
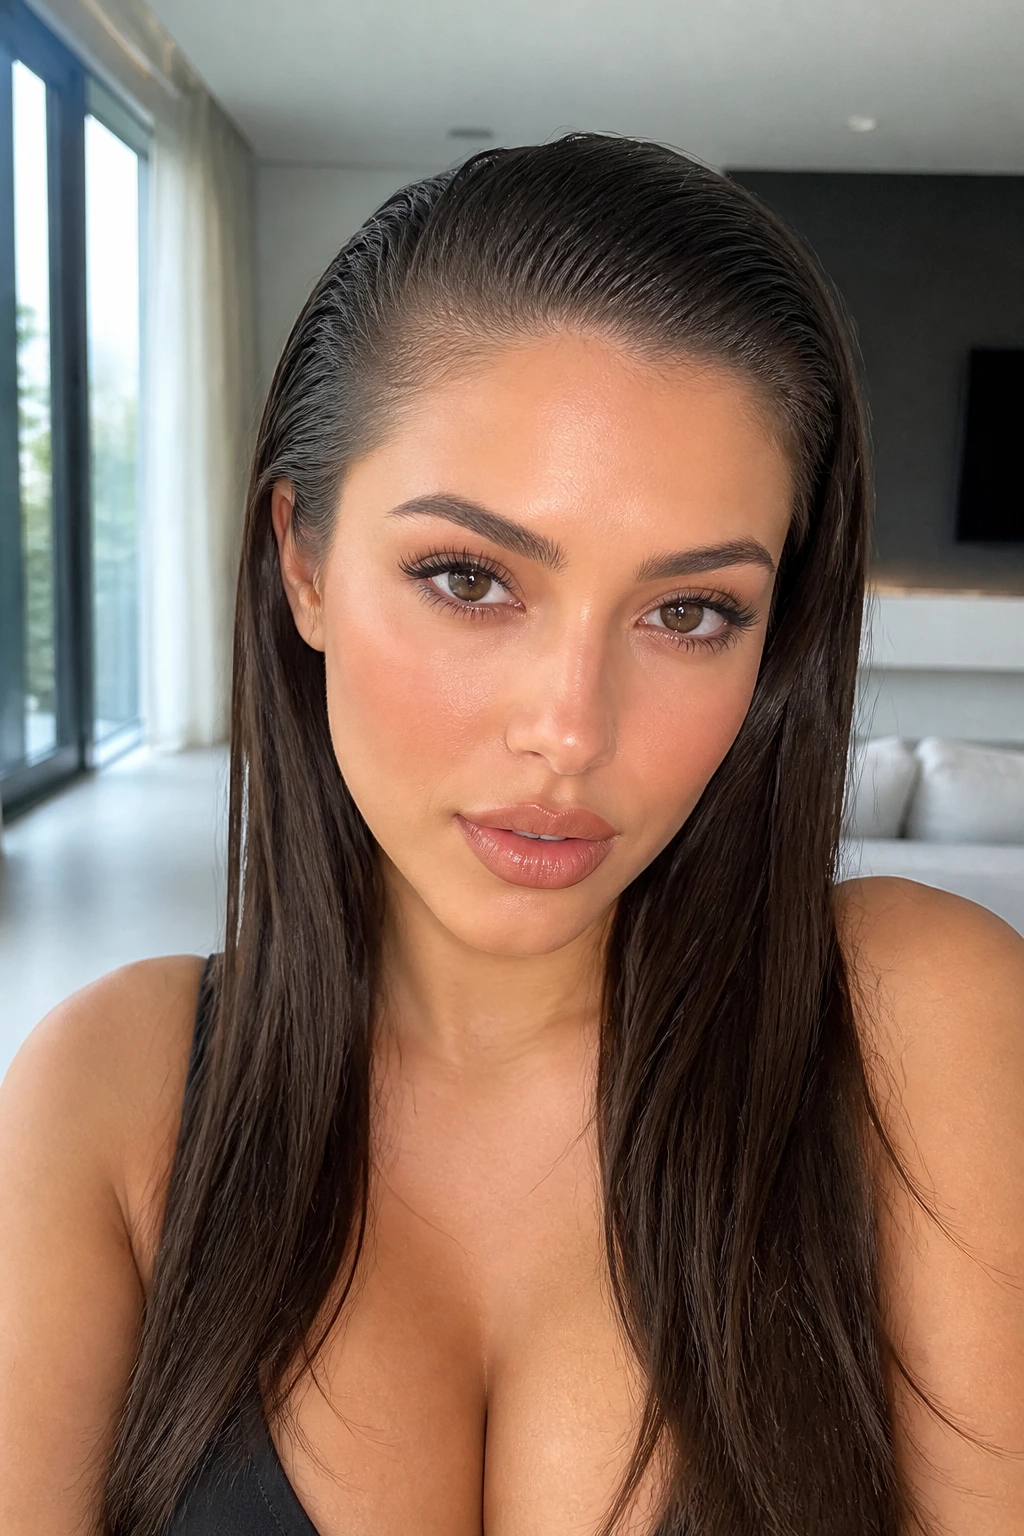
An invisible part—where the hair is brushed back so cleanly that the scalp is barely visible—creates a stark, high-fashion aesthetic. It requires a lot of product, but the result is a fierce, no-nonsense look that focuses entirely on your facial structure.
Mastering the Brush-Back
- Apply a generous amount of styling mousse to damp hair.
- Use a wide-tooth comb to distribute it evenly.
- Use a boar-bristle brush to push all hair straight back while using a blow dryer to set it.
- Once dry, apply a light-hold pomade to keep the hair pressed against the scalp.
- The look is meant to appear structured and static—almost like a sculpture.
17. The High-Volume Ponytail with Curled Ends
If the “glass straight” look feels too severe, soften it by adding a heavy, polished curl to just the very ends of a high, tight ponytail. It creates a striking contrast between the severe, flat roots and the bouncy, glamorous ends.
The Curling Method
- Secure your high ponytail.
- Use a 1.5-inch curling iron to curl just the last four inches of the ponytail.
- Once the curls are cool, brush them out gently so they merge into one uniform, luxurious wave.
- This creates a refined, “expensive” look that balances the edge of the high ponytail with the softness of the curls.
18. The Sleek Low Bun
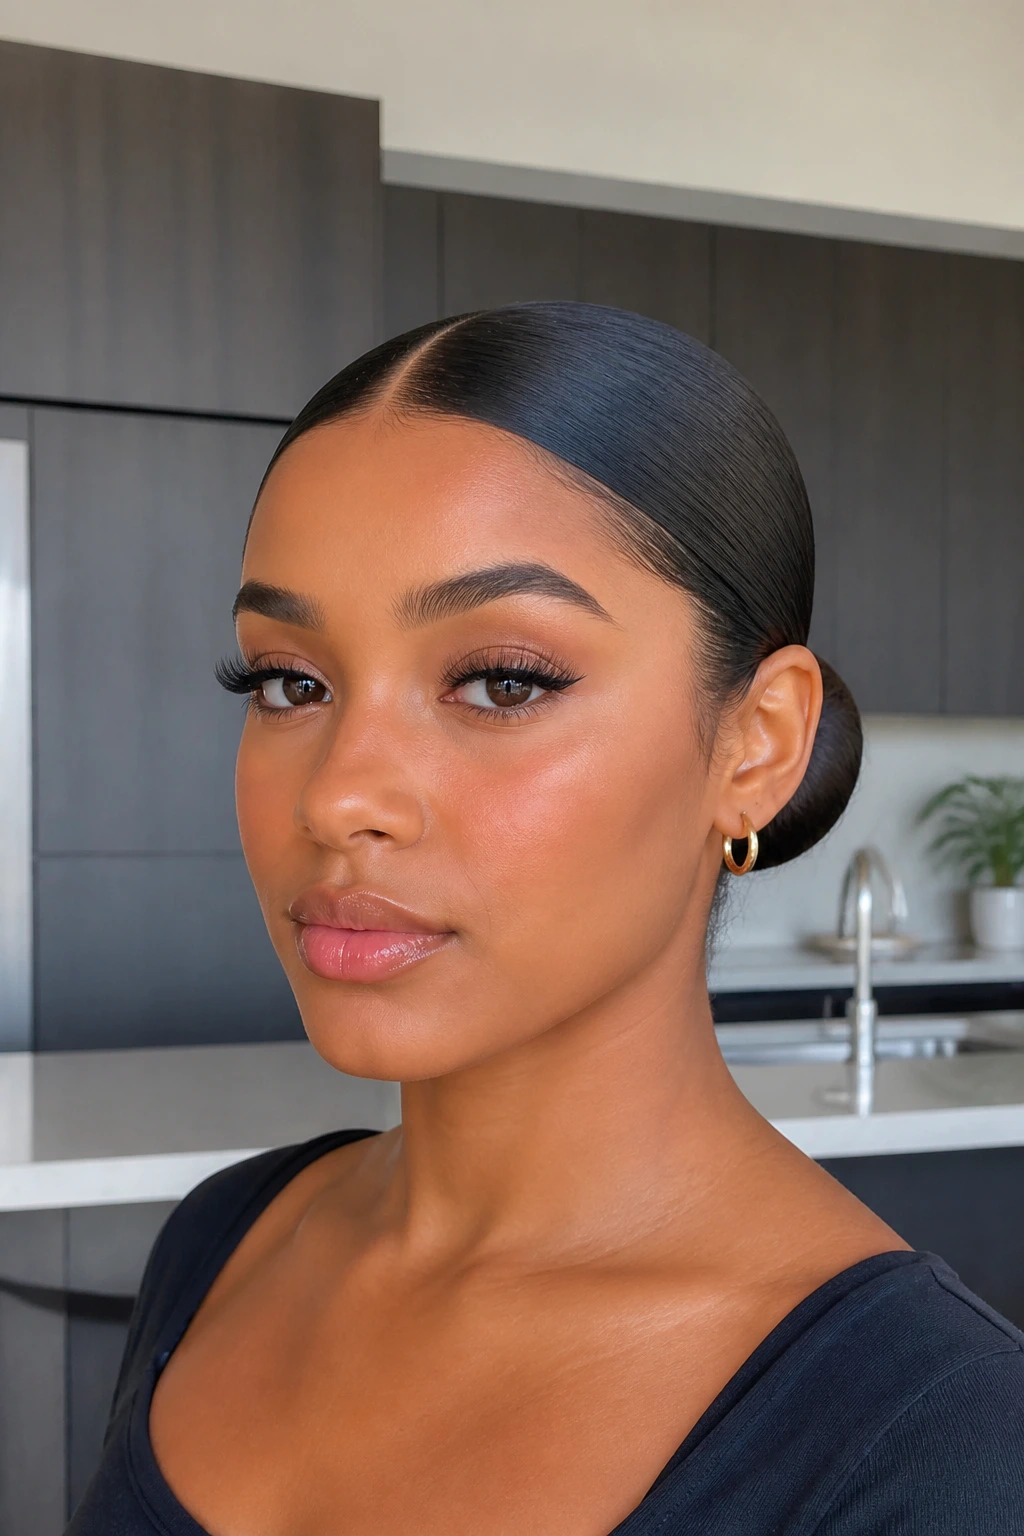
The low bun is often overlooked, but when pulled ultra-tight and parted exactly down the middle, it is the definition of “clean girl” baddie. It is an ideal style for a busy day when you need to look sharp without spending an hour in front of the mirror.
Achieving the Smooth Look
- Use a tail comb for a perfectly centered part.
- Brush your hair down toward the nape of the neck.
- Secure with a sturdy elastic.
- Twist the ponytail into a tight, neat bun.
- Use a small amount of pomade on your palms to smooth down any stray hairs around the hairline.
19. The “Pinned-Back” Front Sections
This style involves pulling back the two front sections of your hair and pinning them at the back of your head. It’s a clean way to keep your hair out of your eyes while showcasing your straight, shiny length.
Strategic Pinning
- Take two-inch sections from the front on each side.
- Pull them back toward the center of your head.
- Cross them over each other and pin them securely.
- This creates a beautiful, minimalist silhouette that works for almost every face shape.
- Use decorative pins—gold or pearl—if you want to lean further into the aesthetic.
20. The High-Contrast Tucked Bob
Take your bob to the next level by tucking one side behind your ear and leaving the other side to hang straight down, framing your face. The asymmetry is intentional, edgy, and very easy to achieve.
Why Asymmetry Works
- It adds an unexpected visual break to the symmetry of a traditional bob.
- It’s the perfect way to show off a single statement earring.
- Use a strong-hold cream to keep the tucked side from popping out.
- This style looks particularly good on chin-length bobs.
21. The Crown Braid Wrap
For a more detailed, “intricate” baddie look, incorporate a braid that wraps around the head. While this feels more complex, it’s quite achievable with straight hair if you use a little bit of texturizing spray for grip.
Executing the Wrap
- Create a Dutch braid starting at one temple.
- Continue the braid along your hairline toward the other side.
- Tuck the end of the braid underneath the starting point and pin.
- It’s a regal, commanding look that pairs well with minimalist jewelry.
22. The Perfectly Straight, Long Pony with a Statement Bow
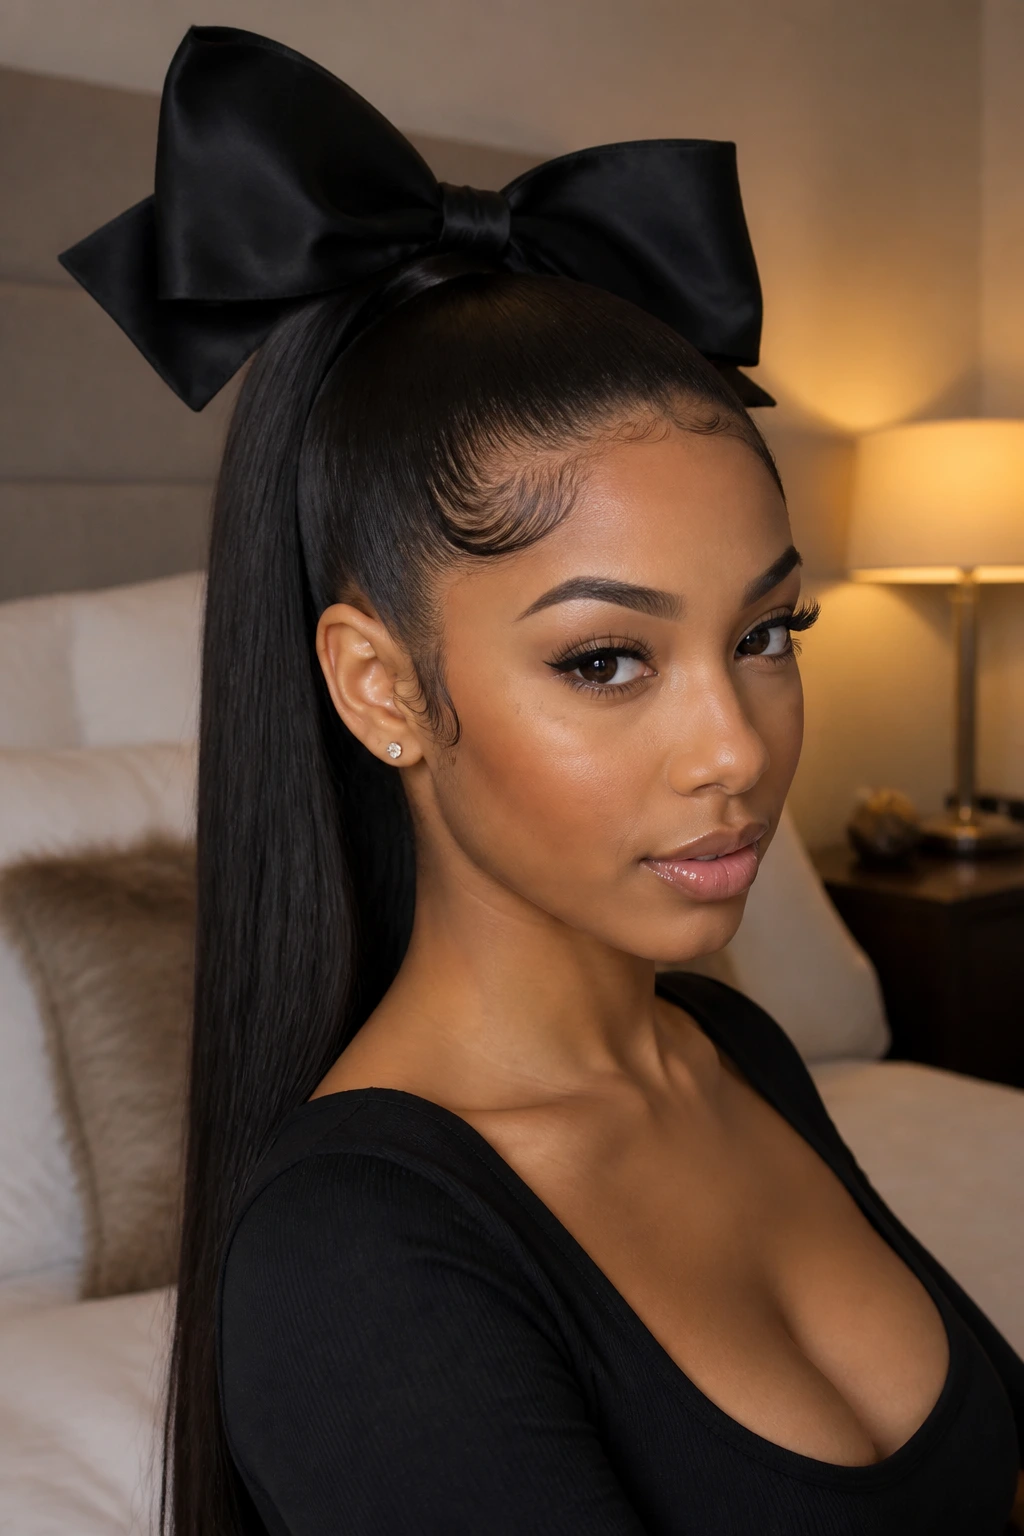
Finally, the statement bow. It takes a long, simple, straight ponytail and adds a dash of personality. It’s fun, it’s feminine, and it’s a staple of the “baddie” aesthetic that values the mix of sharp style and bold accessories.
Choosing the Accessory
- Ensure your ponytail is brushed perfectly straight and free of tangles.
- Use an oversized ribbon—silk or velvet works best—and tie it directly over your hair elastic.
- The size of the bow is the key to the aesthetic; don’t be afraid to go big.
- Keep the hair in the ponytail sleek and free of frizz to let the bow be the focal point.
Final Thoughts
The most important part of any of these styles is the prep work. Straight hair needs to be healthy to truly shine, so do not neglect your heat protectants and high-quality smoothing products. The “baddie” era isn’t about being perfect 24/7; it is about choosing a look that aligns with how you want to present yourself to the world and executing it with enough precision to make it your own.
Experiment with these styles to see which ones resonate with your personal style. You might find that the ultra-sleek high ponytail becomes your daily staple, or you might prefer the retro flip for occasions that call for a bit more flair. Regardless of which you choose, carry the look with the confidence that defines the era. The best hair is the hair you wear with your head held high.