



The morning school run is already a race against the clock. When late October arrives, that race gets even more complicated. Children want to bring the spirit of the season into their classrooms, but full costumes are highly impractical for sitting at a desk, playing at recess, or taking a math test. Hair is the perfect middle ground. It lets kids show off their festive spirit without breaking school dress codes or causing a distraction in class.
Getting this right requires a balance. You need hairstyles that are secure enough to survive gym class, simple enough to create in ten minutes, and comfortable enough that your child won’t rip them out by lunchtime. Nobody wants a crying child at 7:30 a.m. because a hair clip is pinching their scalp.
You do not need to be a professional hairstylist to pull these off. With a few basic supplies—like orange pipe cleaners, temporary hair chalk, and inexpensive plastic spiders—you can create memorable, comfortable styles. Let’s look at twenty-five practical, creative ideas that work beautifully for school days.
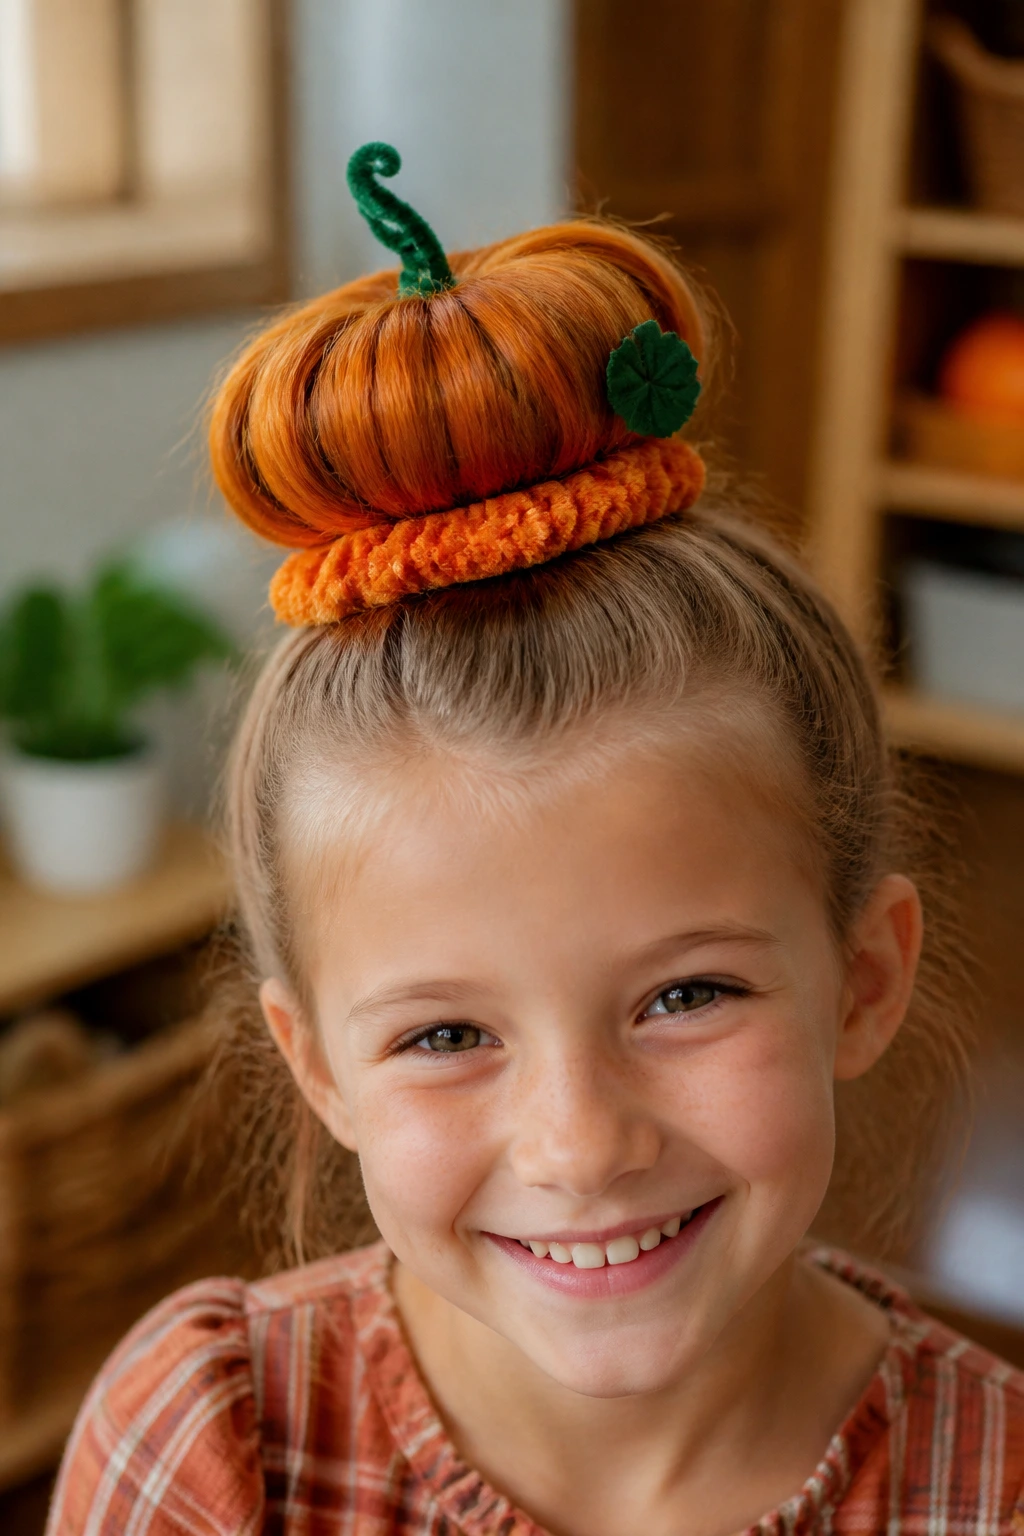
1. Pumpkin Spice High Bun
This style turns a standard ballerina bun into a bright, round pumpkin. It works best on medium to long hair that has enough volume to wrap around a standard foam bun maker. By using a bright orange scrunchie or orange yarn, you can quickly build the base of the pumpkin shape without needing messy temporary sprays.
How to Shape the Pumpkin
To get the perfect round shape, slide a foam bun helper over a high ponytail. Spread the hair evenly over the foam to cover it completely, then secure it at the base with a thin elastic. Wrap an orange ribbon or a thick orange scrunchie around the base to give it that signature autumn color.
Essential Supplies
- One medium-sized foam bun helper
- Two strong elastic hair bands
- One green pipe cleaner (for the stem)
- A small leaf-shaped hair clip or green ribbon Pro tip: Avoid using heavy plastic toy pumpkins for the stem; a lightweight green pipe cleaner twisted around the top elastic stays secure all day without weighing the hair down.
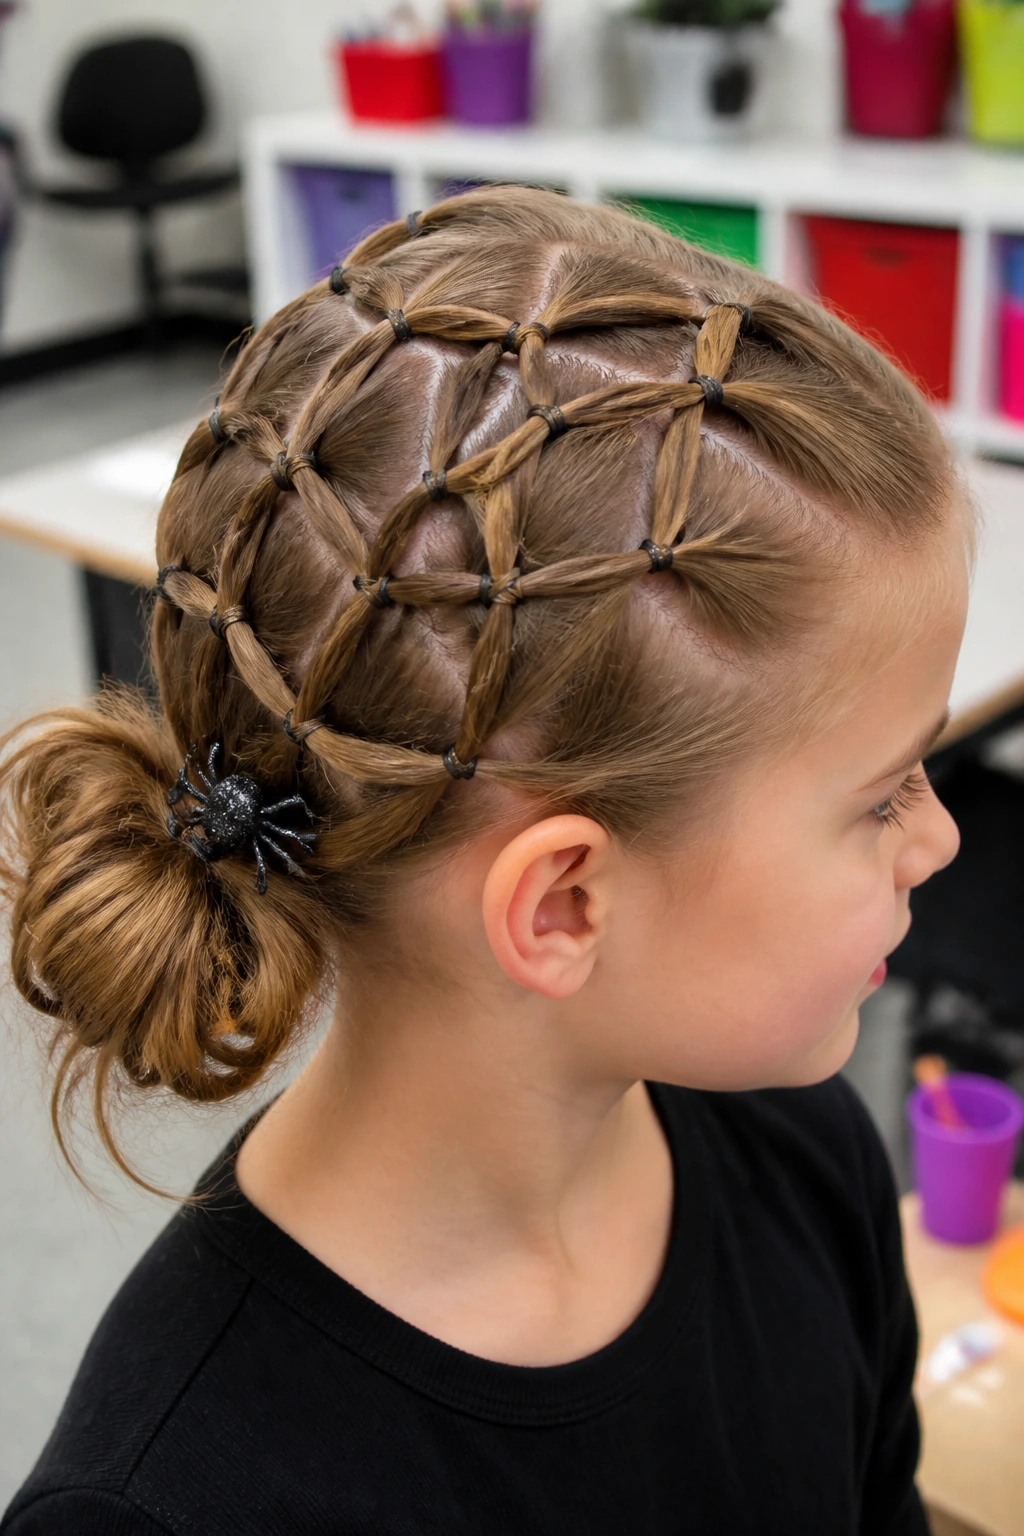
2. Spooky Spiderweb Braids
A spiderweb pattern looks incredibly complex but relies on basic parting techniques. By sectioning the hair at the crown into small pigtails and connecting them, you create a web-like grid across the scalp. This style lies flat against the head, making it extremely comfortable for children who dislike bulky clips or hanging accessories.
Start by parting three small triangles of hair at the front hairline, securing each with a small black elastic band. Split the middle ponytail in half, joining the left half to the left ponytail and the right half to the right ponytail with new elastics about two inches further back. Repeat this process as you move toward the back of the head to weave the web.
You can finish the look by pulling the remaining hair into a low ponytail or a messy bun. Slide a small, lightweight plastic spider clip onto the “web” section near the back to complete the look.
3. Cat Ears Hair Buns
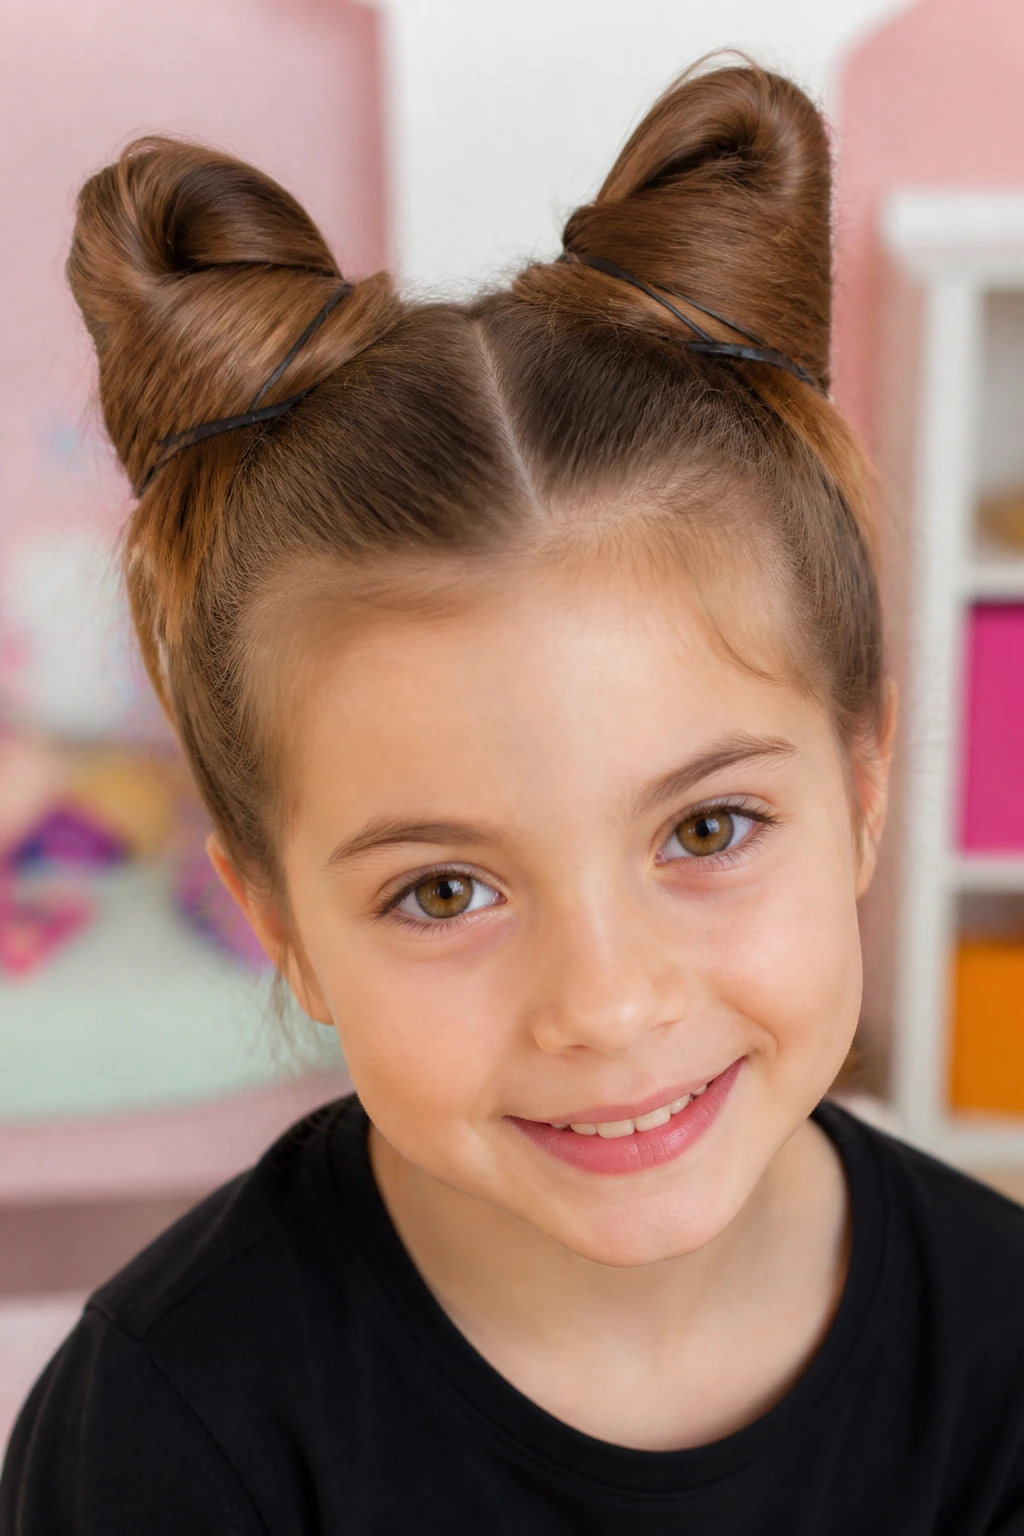
This is a fantastic option for children with shorter or medium-length hair who want a cute, recognizable style. Instead of buying plastic headbands that pinch behind the ears, you can sculpt the hair itself into two pointed triangles.
How do you get the hair to stay in a point without using half a can of industrial hairspray? The secret lies in using small, clear elastics and a few strategically placed bobby pins.
How to Secure the Points
Start by parting the hair down the middle and pulling each side into a very high pigtail on the top of the head. On the final loop of the elastic, do not pull the hair all the way through; leave it in a small loop. Gently pinch the top of the loop to form a point, then slide a bobby pin upward through the center of the bun to hold that triangular shape.
Quick Style Facts
- Ideal hair type: Fine to medium hair with some grip
- Time required: Under ten minutes
- Durability: High, holds up well during physical activity
- Key tool: U-shaped hairpins for gentle holding power
4. Witch’s Broomstick Ponytail
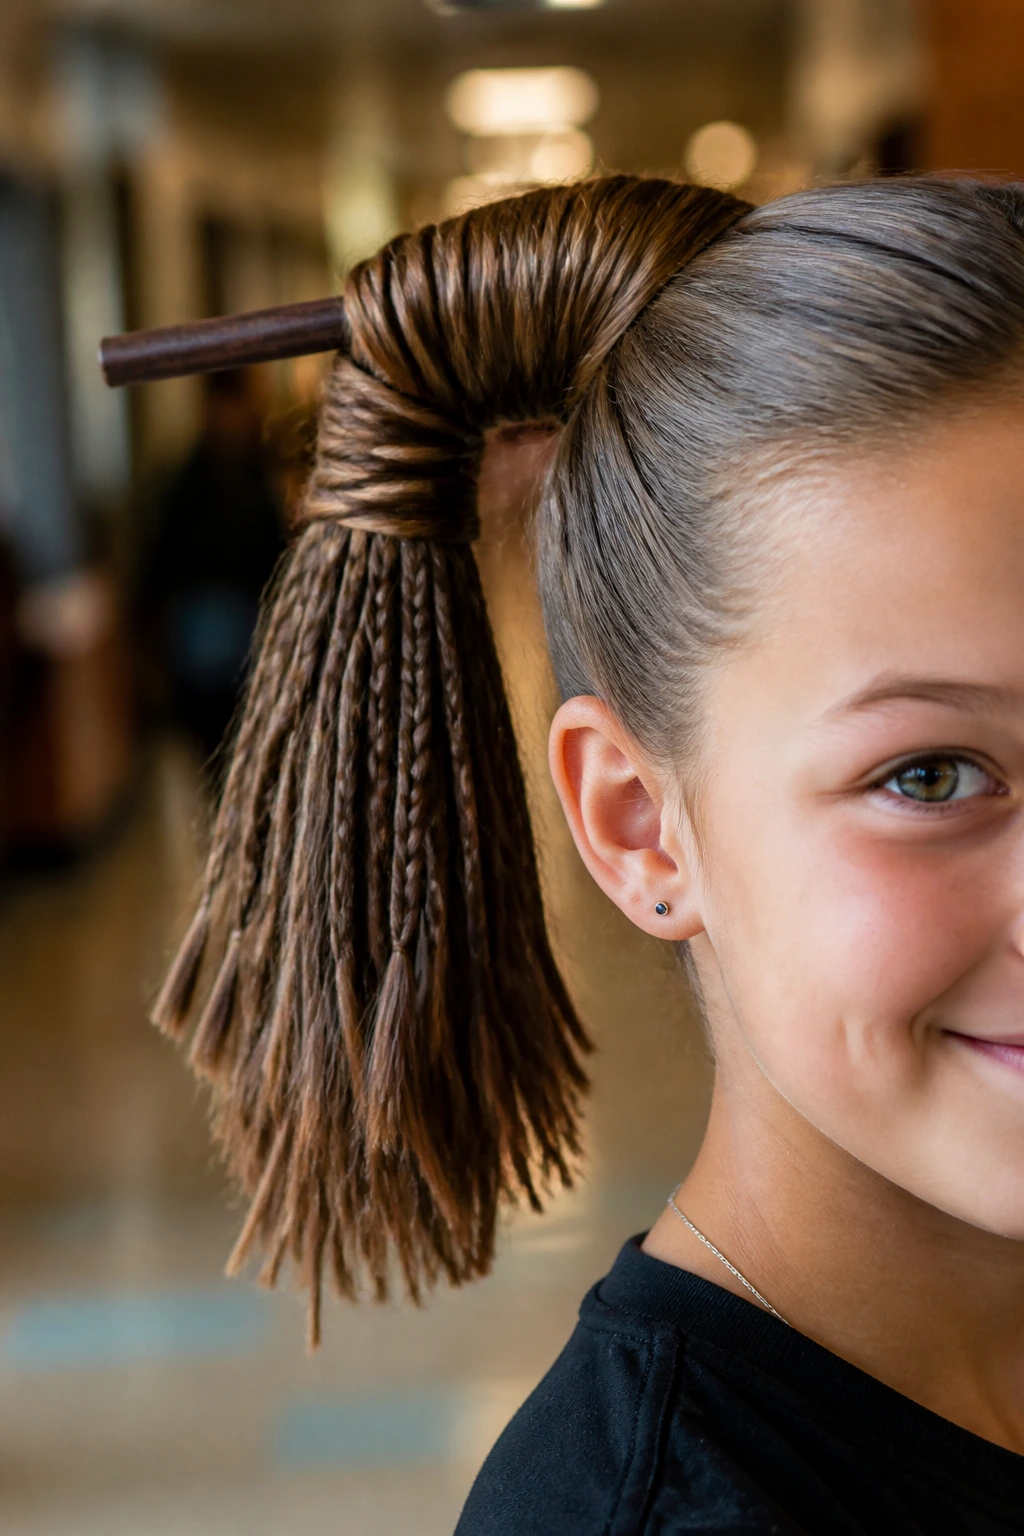
This whimsical style takes a classic high ponytail and structures it to look like a rustic broomstick. It is highly practical because it keeps all hair entirely out of the face during school hours.
You will need a straight stick—a clean chopstick or a brown twig works perfectly—and a few brown hair elastics. Wrap the top of the ponytail around the stick, then use a light braiding pattern on the lower portion of the ponytail to mimic the straw bristles of a broom.
- Section the ponytail into several micro-braids.
- Secure the bottom of the braids together with a single band.
- Gently tug the sides of the braids to make them look textured and dry.
- Wrap a piece of brown twine around the top elastic to hide it. Pro tip: Make sure the stick is rounded and smooth at the ends so it does not poke other children during group activities or carpet time.
5. Monster Eyeball Hair Ties
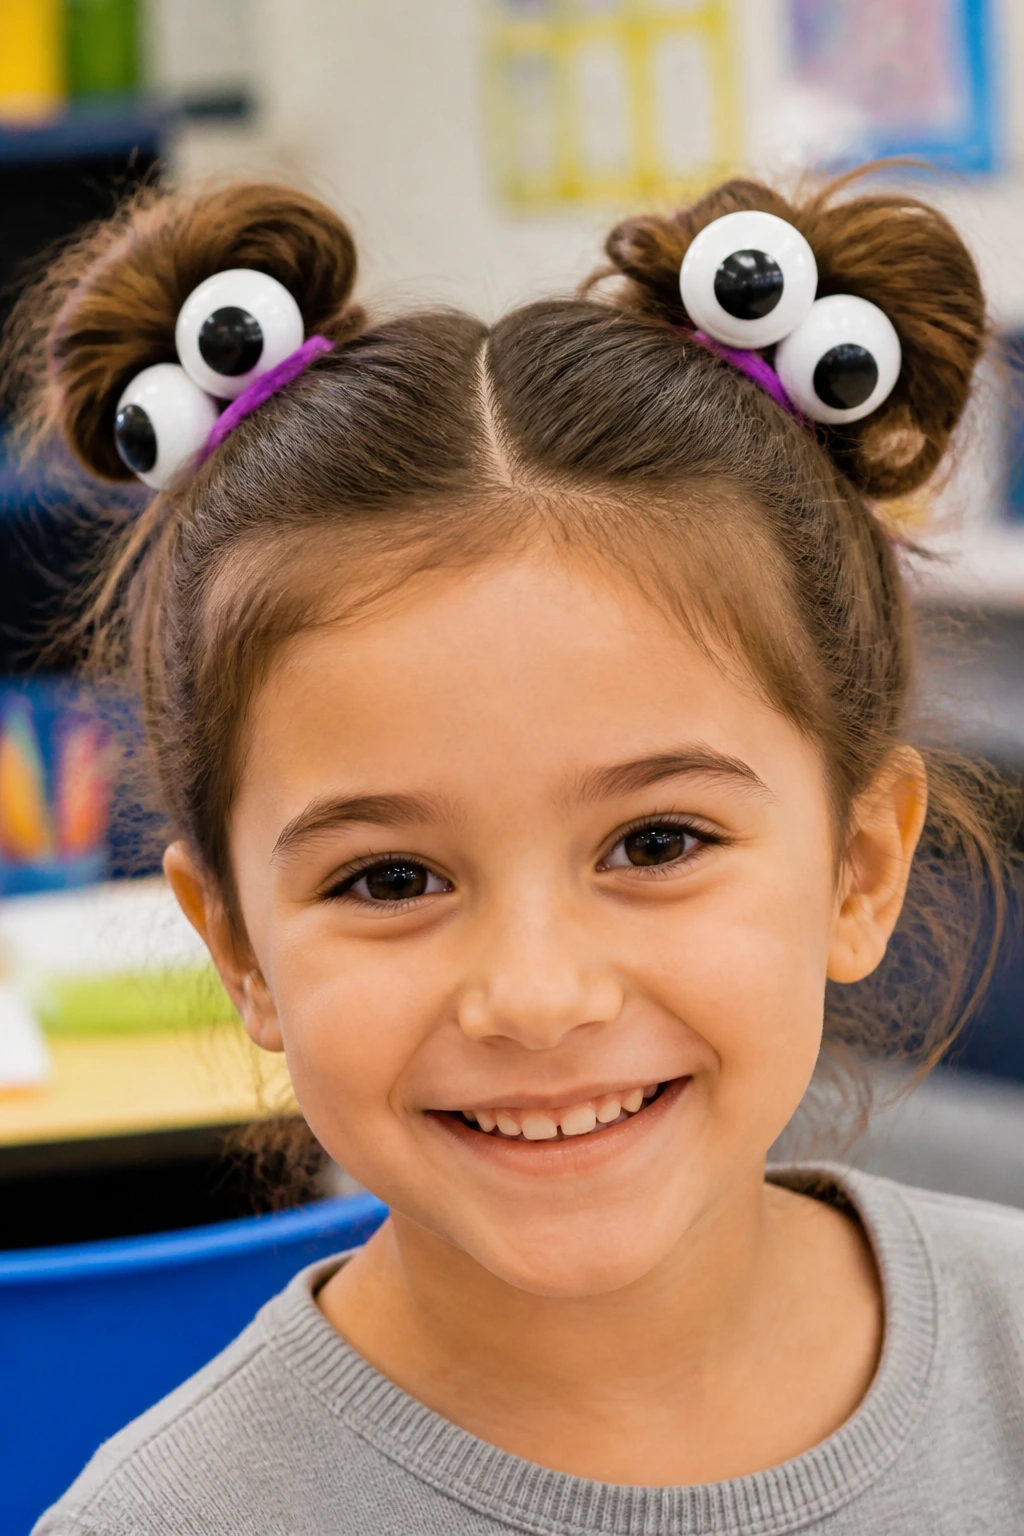
This style is perfect for those chaotic mornings when you have exactly three minutes before the school bus arrives. It uses standard space buns or pigtails but adds a highly visible, funny element using oversized googly eyes.
You can make these ahead of time by hot-gluing plastic googly eyes directly onto plain black elastic hair ties. When morning comes, simply twist your child’s hair into two high, messy buns and wrap the custom eyeball elastics around the base. The eyes will bounce and wiggle every time your child moves their head.
Because the decoration is built directly into the hair tie, there are no heavy clips to slide out or sharp edges to worry about. It is an excellent, low-stress option for preschool and kindergarten-aged children.
6. Ghostly White Ribbon Braid
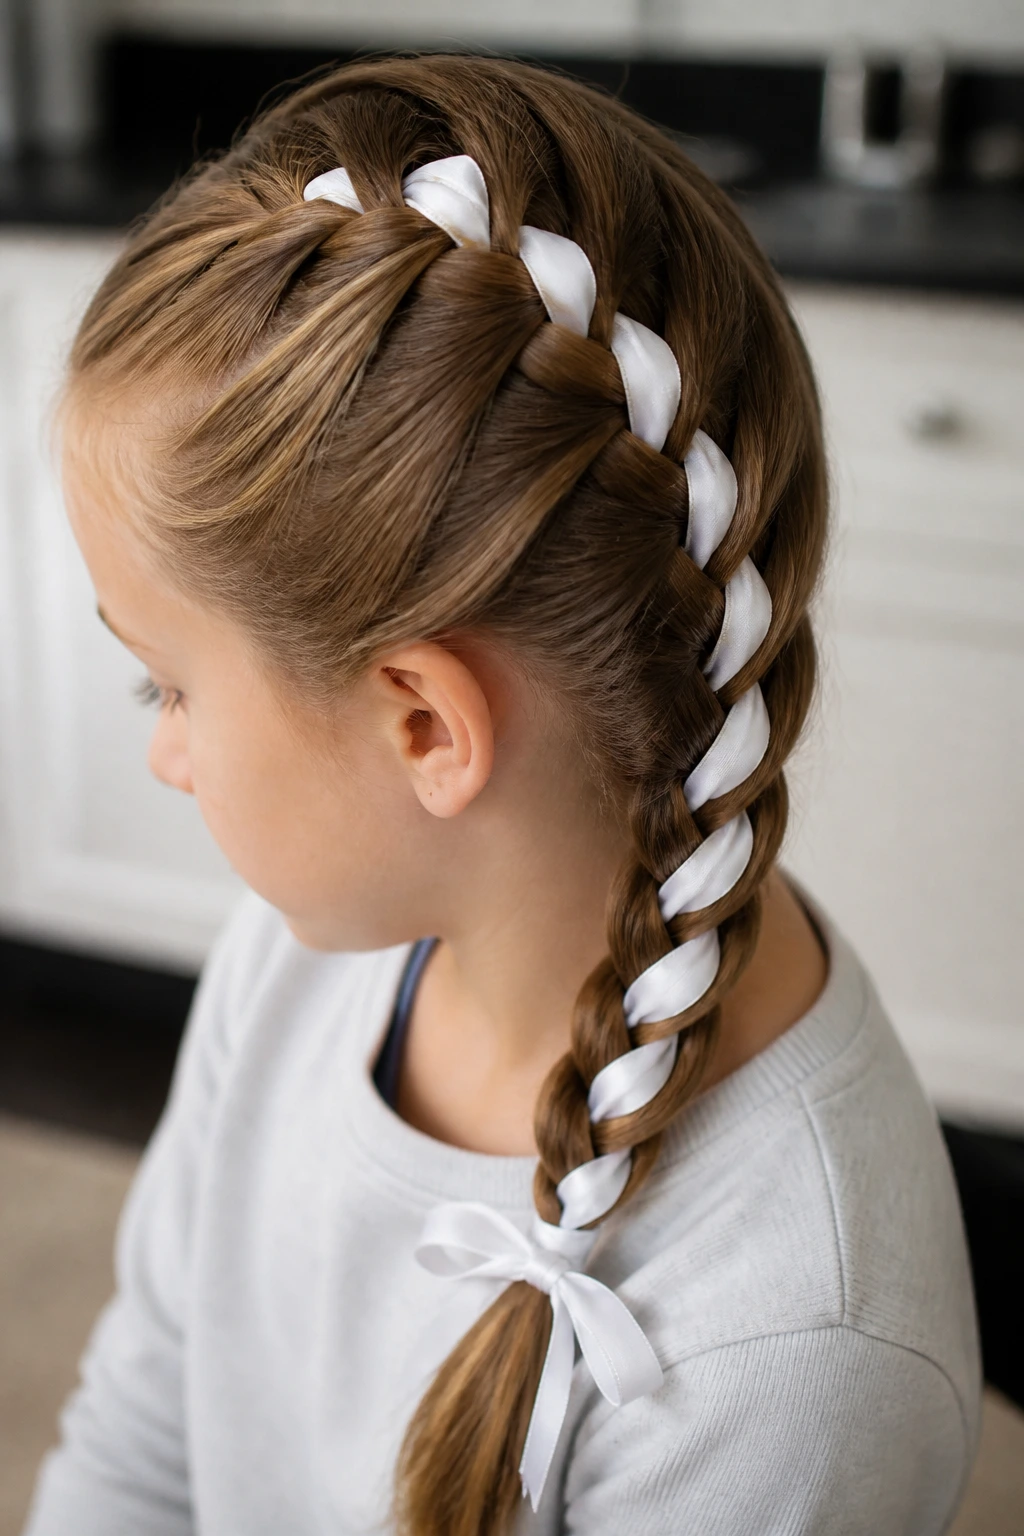
Many schools discourage temporary hair chalk or colored sprays because they can rub off on classroom chairs and clothing. A white ribbon braid offers a clean, mess-free alternative that still brings a spooky, ghostly vibe to the school day.
Unlike colored chalk, which can dry out fine hair and leave a dusty residue on shoulders, a satin white ribbon adds a smooth, glossy contrast that holds its shape from morning until the afternoon dismissal bell.
This style works best with a traditional French braid or a Dutch side braid. Secure a long piece of white ribbon to the starting section of the braid using a small bobby pin, then treat the ribbon as one of the three hair strands as you weave down the head. At the bottom, tie the excess ribbon into a small bow to secure the end.
7. Monster Mash Space Buns
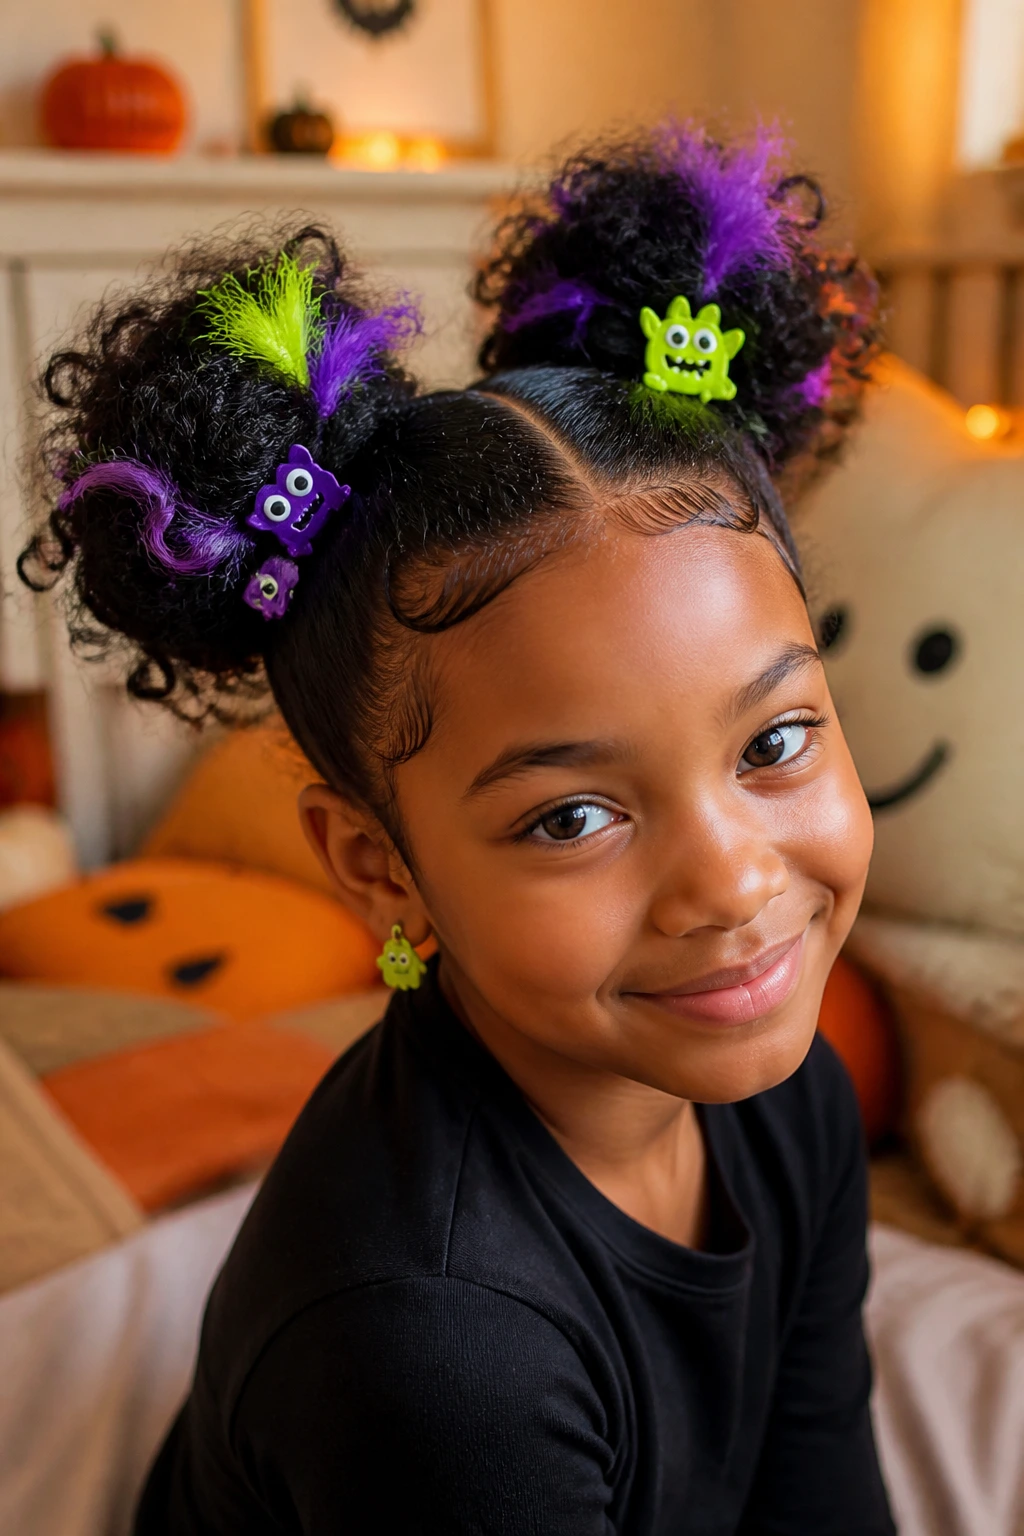
This style is all about bright, mismatched colors and playful textures. It works beautifully on thick or curly hair that naturally holds volume, allowing you to create two large, fluffy buns on either side of the head.
Adding the Monster Elements
Once the buns are secured, you can add various colorful hairpins that look like monster horns, tiny felt teeth, or miniature hats. Using temporary clip-in colored hair extensions in bright neon green or deep purple adds that classic monster aesthetic without any chemical dye.
Recommended Tools
- Neon green or purple clip-in hair tresses
- Strong, thick hair bands
- U-shaped open hairpins
- A fine-tooth comb for clean parting Pro tip: Spray a tiny bit of water or detangler on the part before sectioning to keep the lines clean and prevent stray hairs from tangles.
8. Bat-Winged Half-Up Style
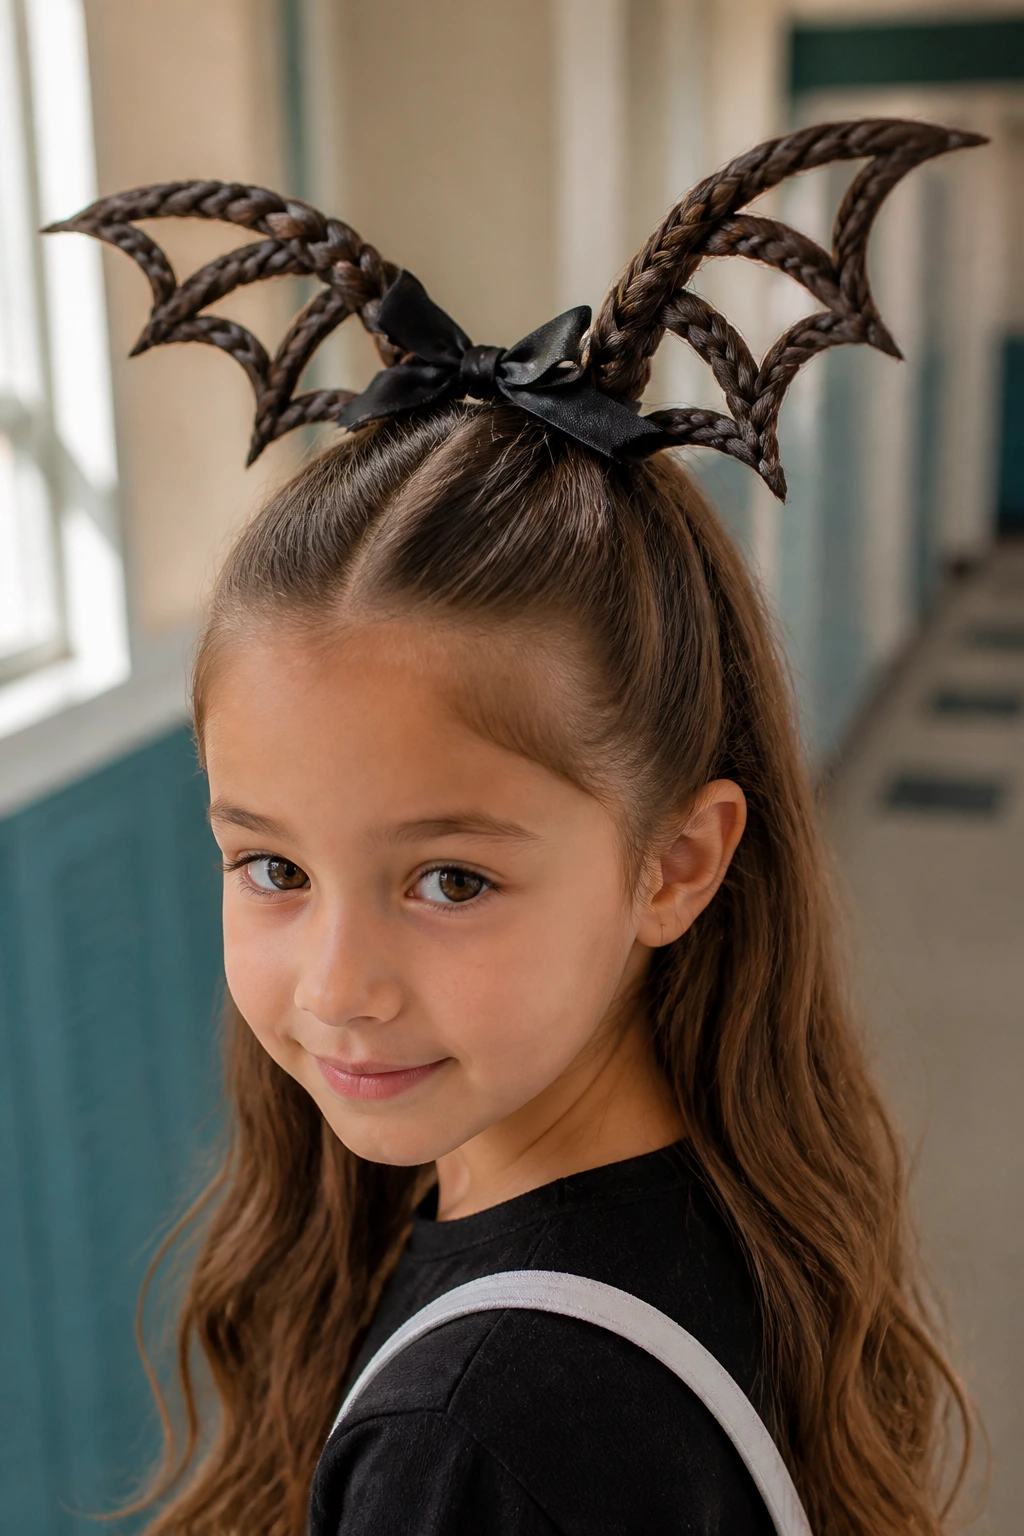
This look uses a half-up ponytail structured to mimic the silhouette of a bat in flight. It is elegant enough for older children while still maintaining a clear holiday theme.
Start by parting the hair horizontally from ear to ear, pulling the top section into a neat pony. Divide this top ponytail into two equal sections. Using a small amount of styling wax or gel, braid each section tightly for about three inches, then secure them together at the back of the head.
The resulting shape forms a sharp, V-like angle that resembles bat wings. You can finish the look by wrapping a black ribbon around the center joint, allowing the rest of the hair to flow naturally down the back.
9. The Mummy Wrap Ponytail
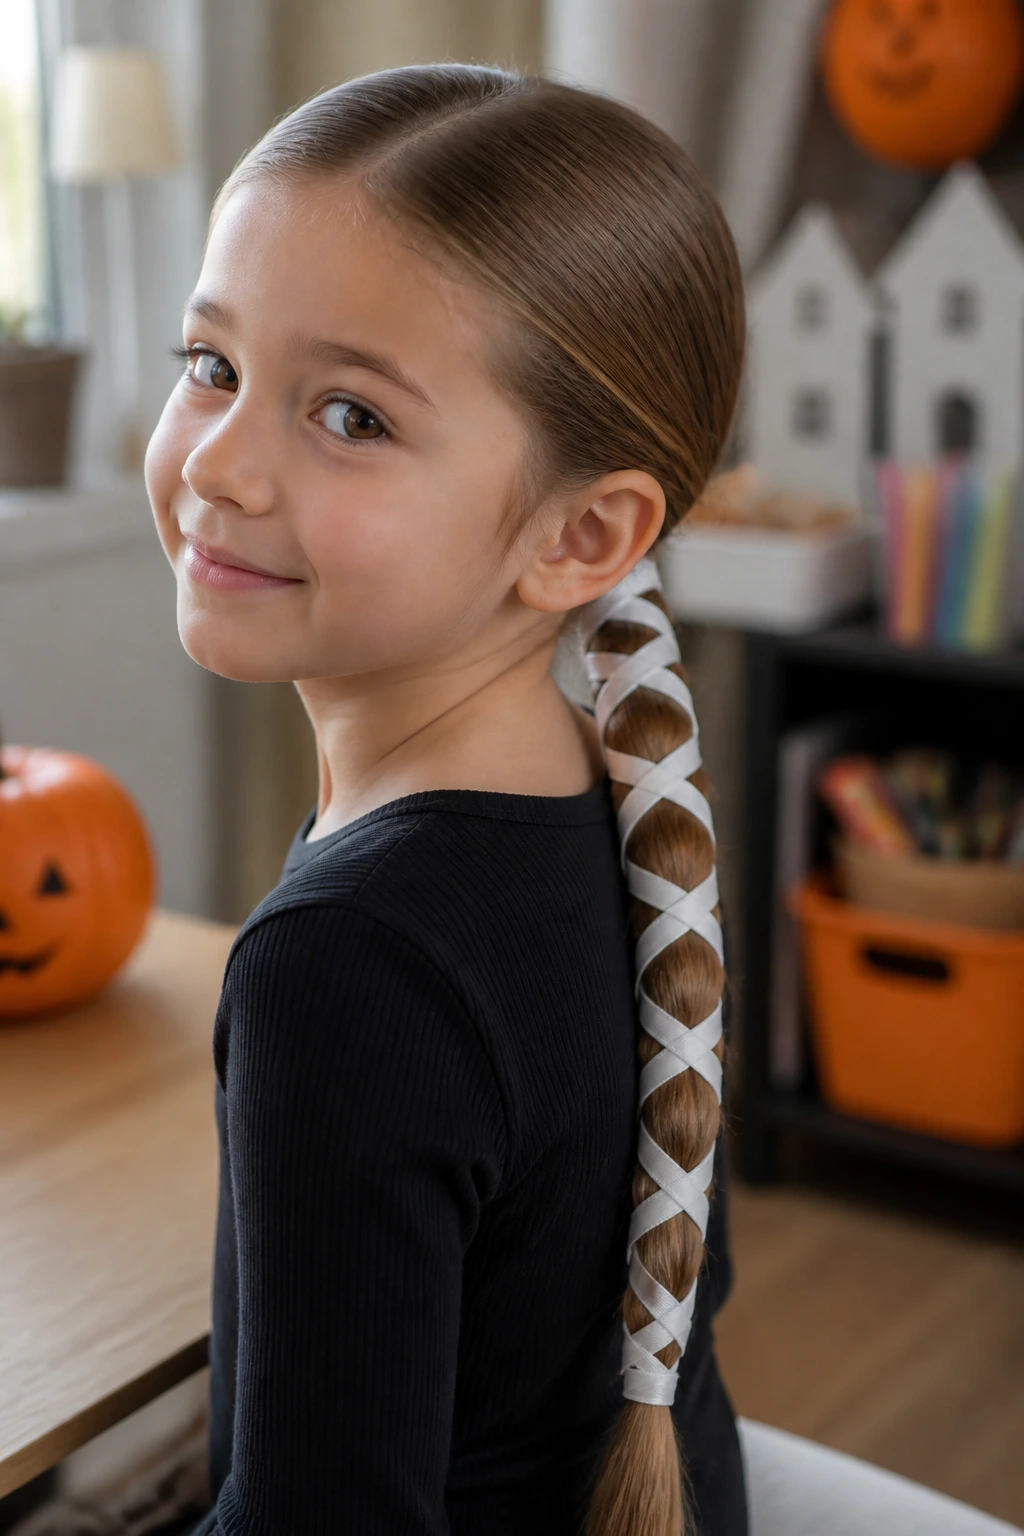
This style mimics the ancient, bandaged look of a mummy using white bias tape or thick cotton ribbon. It is exceptionally secure, making it a great choice for days when your child has physical education classes.
Is it difficult to wrap without the ribbon slipping down the ponytail? Not if you use a interlocking wrapping technique.
Securing the Gauze
Start by securing the hair into a low, tight ponytail. Tie the end of a white cotton ribbon around the top elastic, then wind it downward in a crisscross pattern toward the bottom of the ponytail. To prevent slipping, loop the ribbon under a small section of hair every three or four turns before continuing down the length.
Quick Styling Tips
- Best ribbon material: Textured cotton or bias tape (glossy satin slips too easily)
- Wrap density: Leave about an inch of hair visible between wraps for contrast
- End security: Tie a simple knot at the bottom and tuck the tail under the last loop
10. Snake Hairpin Medusa Look
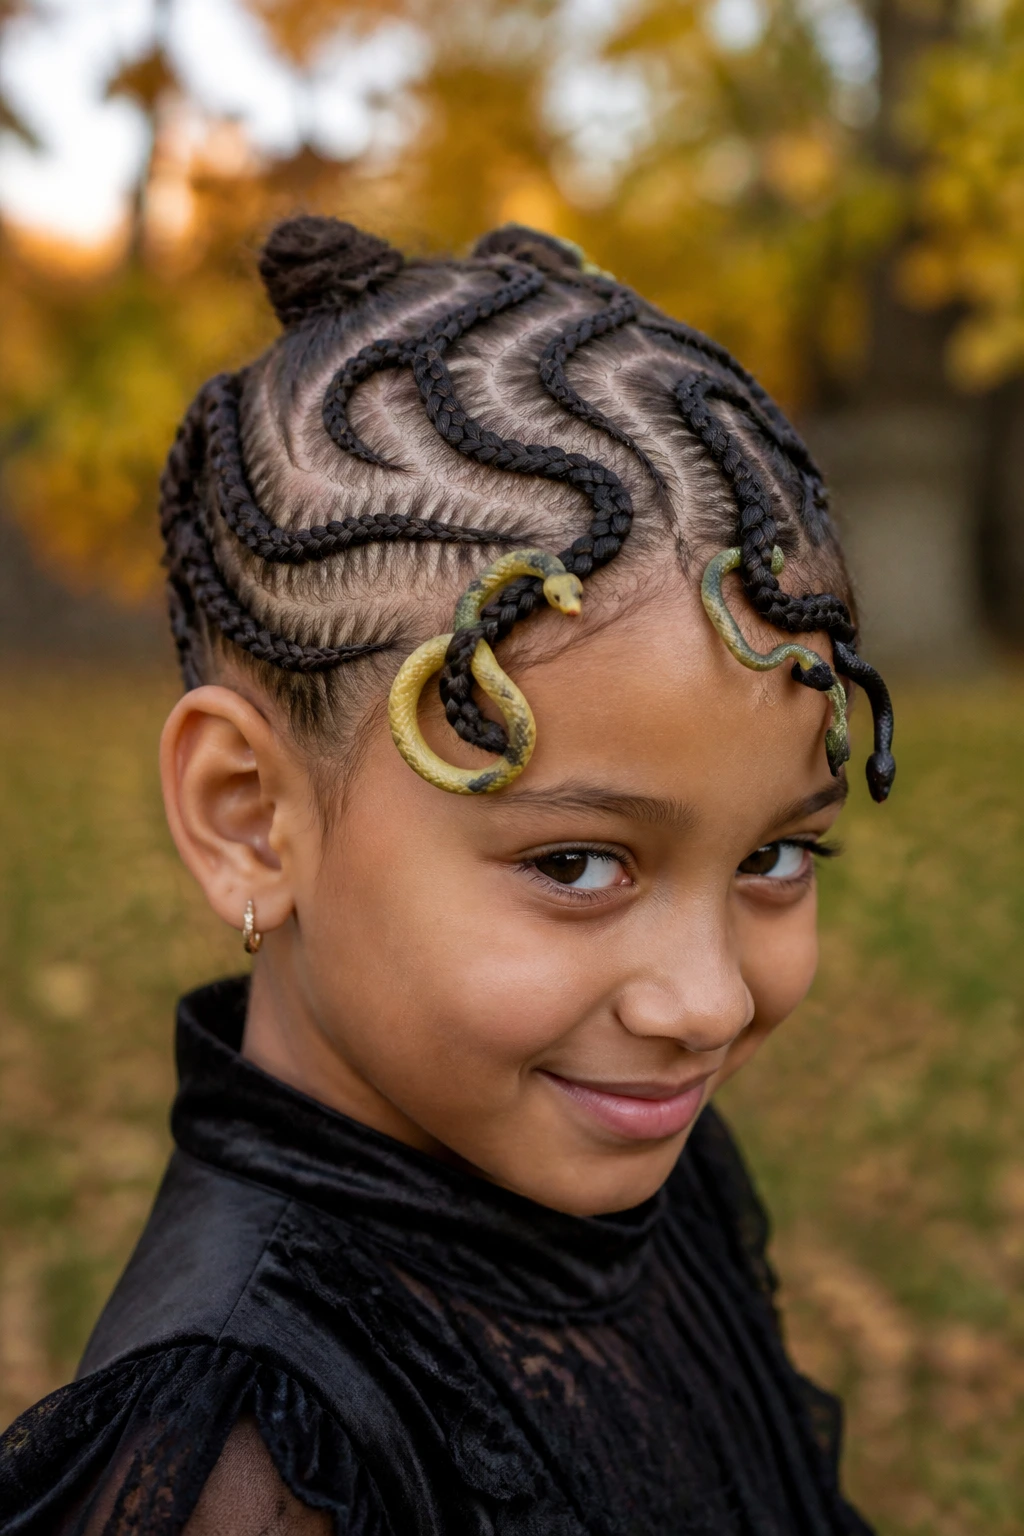
If your child loves Greek mythology or creepy crawlies, this Medusa-inspired look is a fantastic choice. It uses multiple small braids twisted across the head to resemble a nest of active snakes.
For this look, divide the hair into six to eight small sections. Braid each section tightly from root to tip, securing the ends with small, clear elastics. Pull the braids back across the scalp, pinning them down in curving, S-shaped patterns using bobby pins.
- Use plastic toy snakes with wire centers.
- Wrap the snakes gently around two or three of the braids.
- Position the snake heads so they peek out near the front hairline.
- Keep the braids close to the scalp to prevent them from catching on playground equipment. Pro tip: Look for toy snakes made of soft, flexible rubber rather than hard plastic, as they are much easier to pin down and far more comfortable to wear against the scalp.
11. Candy Corn Three-Tier Pigtails
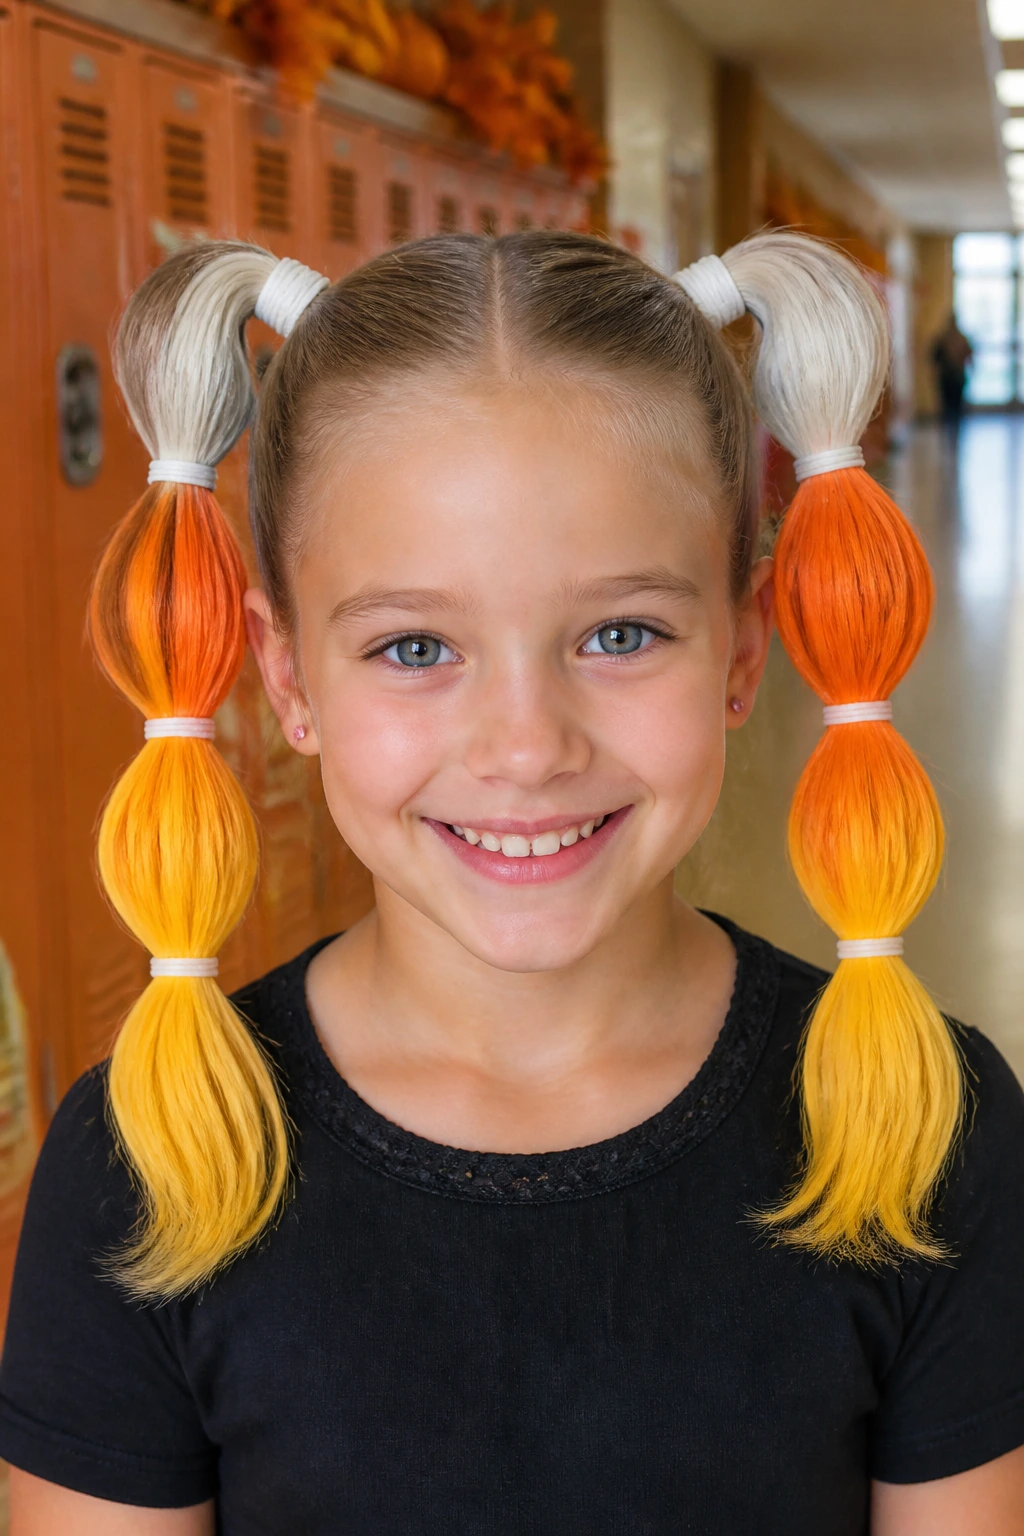
This colorful style uses the classic yellow, orange, and white color scheme of candy corn. It is a brilliant way to use colored hair elastics to create a recognizable pattern without needing any messy products.
Start by parting the hair into two high pigtails. Divide each pigtail vertically into three equal sections. Secure the top section with a bright white elastic band, the middle section with an orange band, and the bottom section with a yellow band.
To make the colors pop, you can wrap colored embroidery floss or ribbon around each section of the pigtail. This creates distinct blocks of color that mimic the layers of the classic autumn candy. It is a neat, tidy look that stays put through hours of classroom activity.
12. Frankenstein Bolt Hair Clips
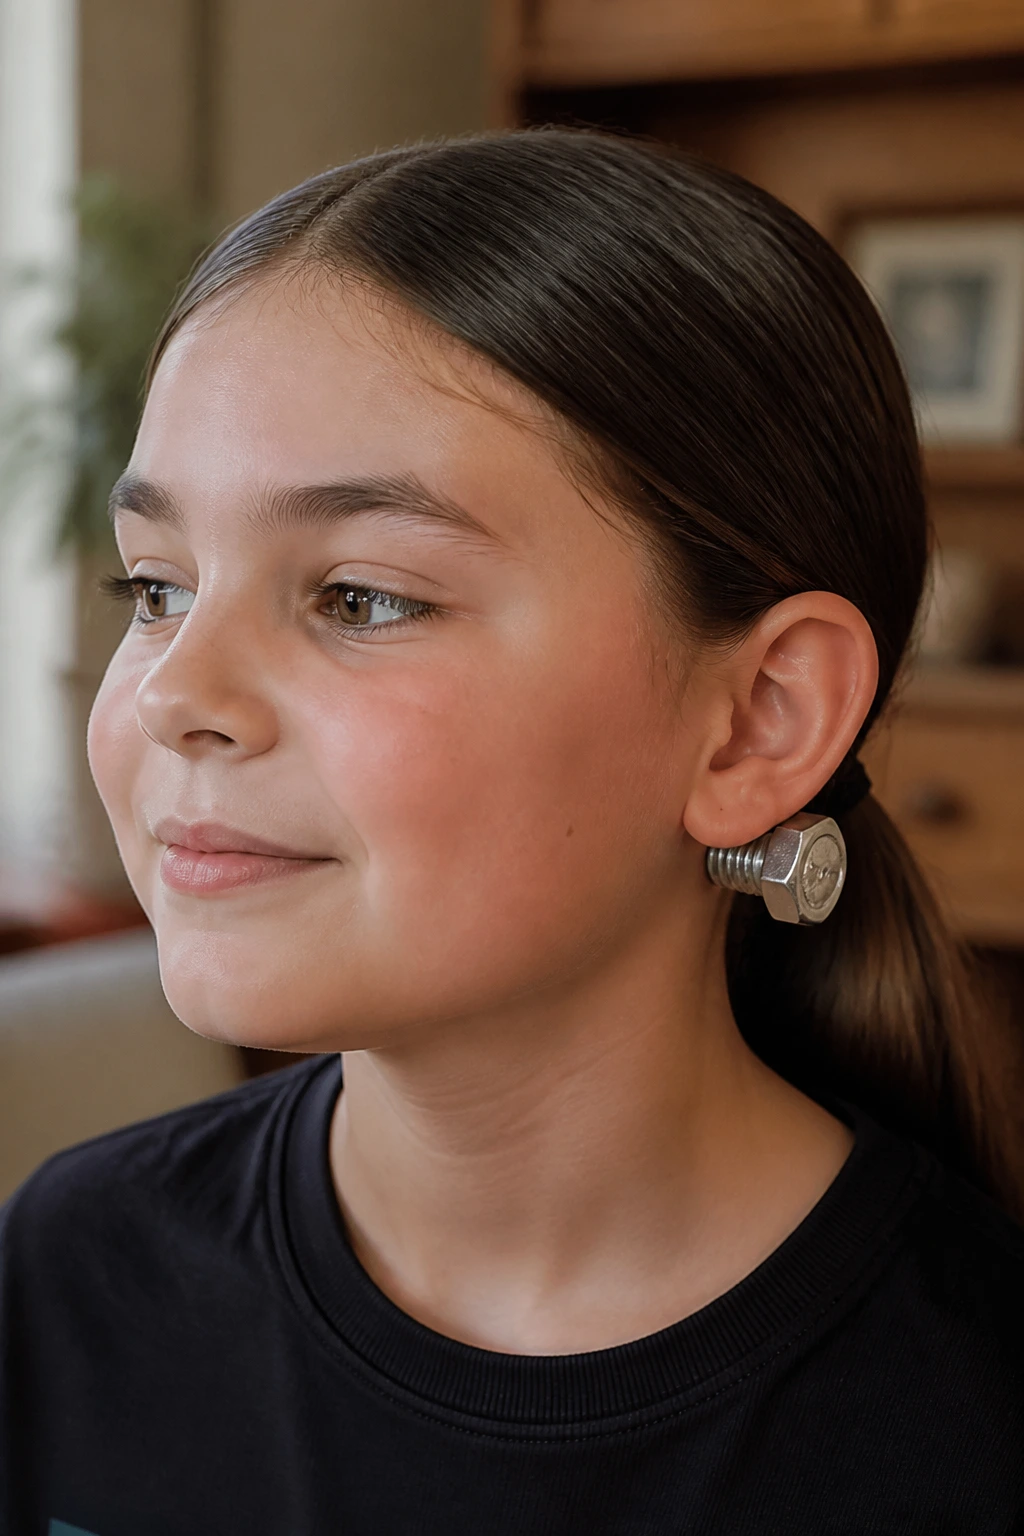
This style plays on the iconic look of Frankenstein’s monster. It works best on very sleek, straight hair or short hair cut close to the head, where the “bolts” can be clearly seen on either side of the neck.
Unlike bulky costume headbands, which can cause headaches after an hour of wear, lightweight metallic bolt clips attach directly to the hair just behind the ears.
To create this look, pull the hair into a sleek low ponytail or a neat half-up style. Attach one silver-colored bolt clip to the hair on each side of the head, positioning them just above the ear lobe. This gives the illusion of the classic neck bolts while keeping the weight off your child’s ears and temples.
13. Creepy Crawly Bobby Pin Accent
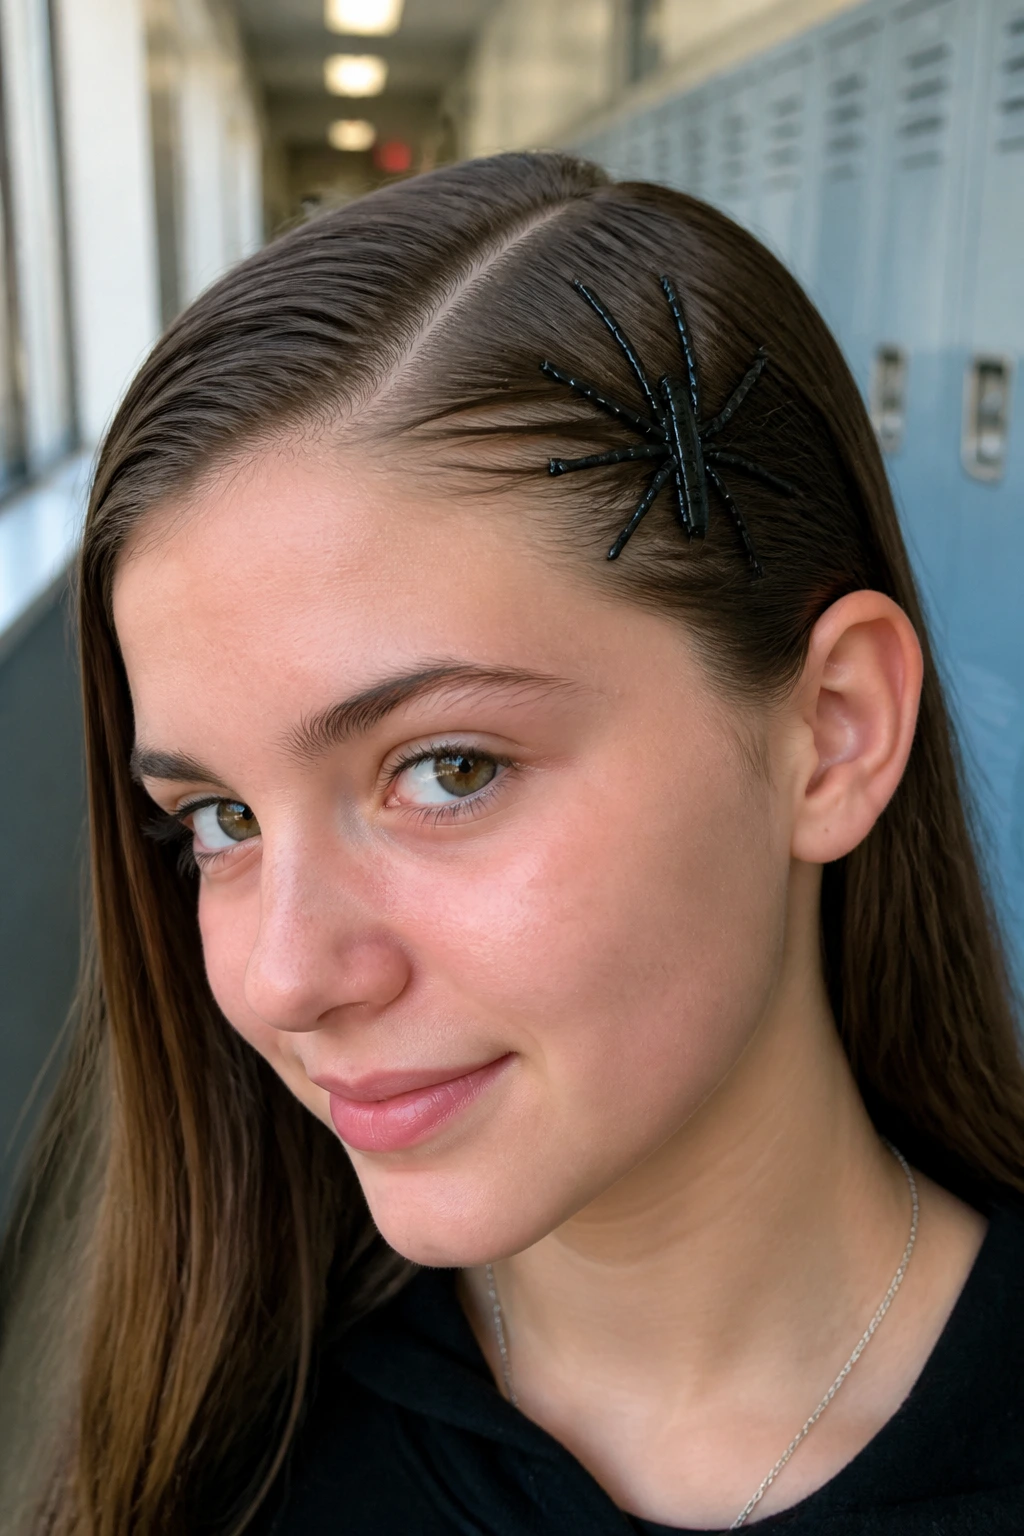
For older kids who want a more understated, stylish look, this bobby pin arrangement is perfect. It uses a series of black pins arranged in geometric shapes to look like spiders climbing up the side of the head.
Creating the Spider Shape
Choose a side part and slick down one side of the hair with a little gel or hair wax. Slide four black bobby pins into the hair close together, pointing upward to form the spider’s body. Then, slide smaller pins horizontally out from the sides to represent the legs.
Styling Elements
- Gel type: Light-hold, non-flaking gel
- Pin color: Contrast with hair color (black pins for blonde hair, silver/gold for dark hair)
- Placement: Just above the ear on the shallower side of the part Pro tip: Use high-quality bobby pins with rubberized tips to protect your child’s scalp from scratches during application.
14. Sparkly Pixie Dust Part
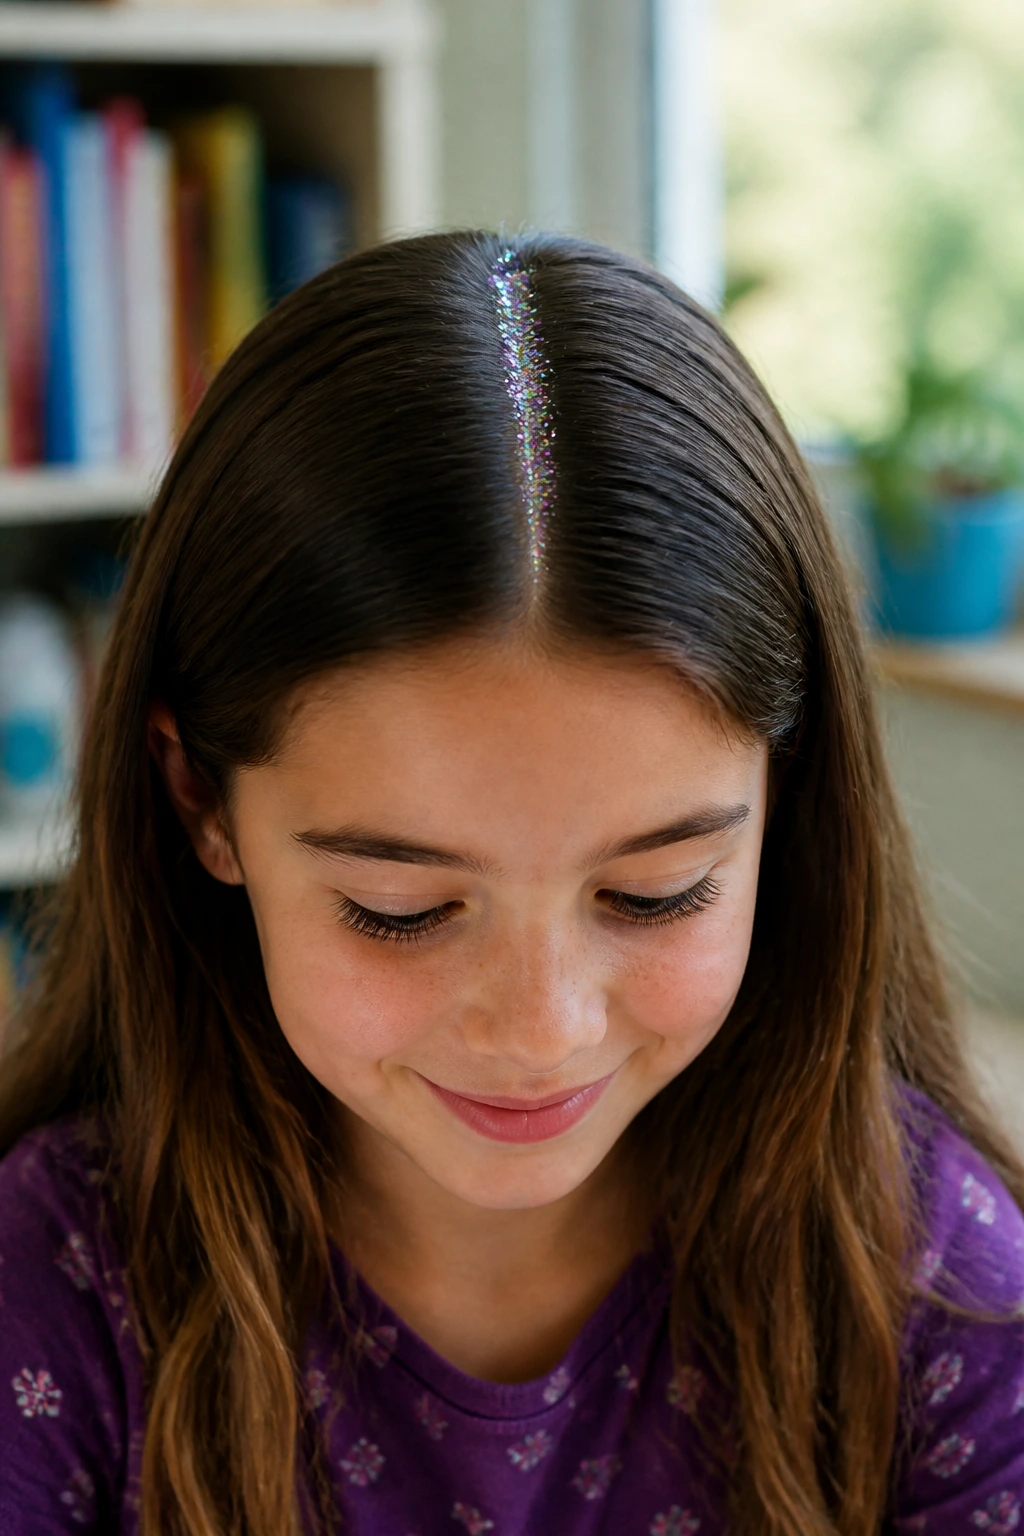
This style is inspired by magical creatures and forest fairies. It adds a touch of shimmer to a standard middle part, making it a great option for school picture days or classroom parties.
Many parents avoid hair glitter because it is notoriously difficult to wash out. However, if you apply a base of hair gel first, the glitter sticks to the gel rather than the hair shaft, making it much easier to rinse out in the shower.
Mix a small amount of fine cosmetic glitter into a clear, water-soluble hair gel. Use a clean paintbrush to apply a thin line of the glitter gel directly along the hair part. This keeps the sparkle contained to one clean line, preventing it from spreading all over your child’s face and clothes.
15. Skeleton Hand Claw Clip Half-Up
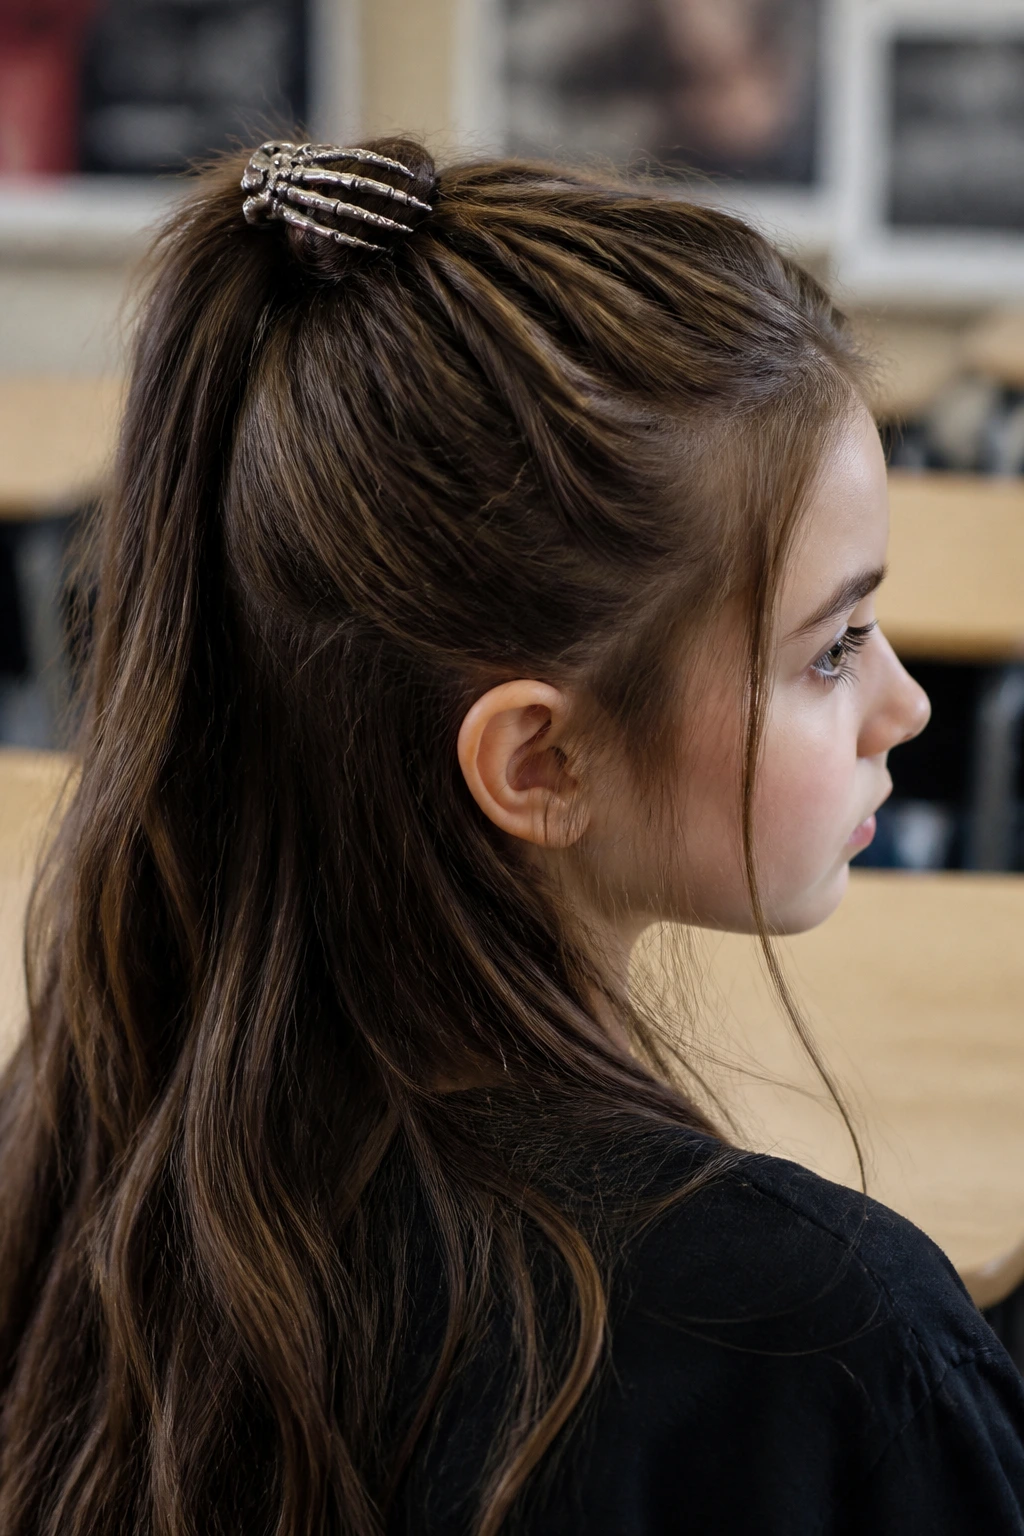
This look is effortless to create and has a wonderful, gothic-inspired aesthetic. It relies on a specific type of hair accessory: a claw clip shaped like a skeleton hand.
How do you keep a heavy plastic clip from sliding down fine hair? The key is to create a small braid first to give the clip something secure to grip onto.
Securing the Clip
Pull the top section of hair into a half-up ponytail. Braid this section tightly for about two inches, then secure it with a clear elastic. Clip the skeleton hand claw clip directly over the elastic, ensuring the plastic “fingers” wrap around both the braid and the flat hair underneath.
Style Features
- Effort level: Extremely low, takes under two minutes
- Visual impact: High, very recognizable silhouette
- Comfort: High, does not pull on the scalp when anchored to a braid
16. Devil Horn Hair Tufts
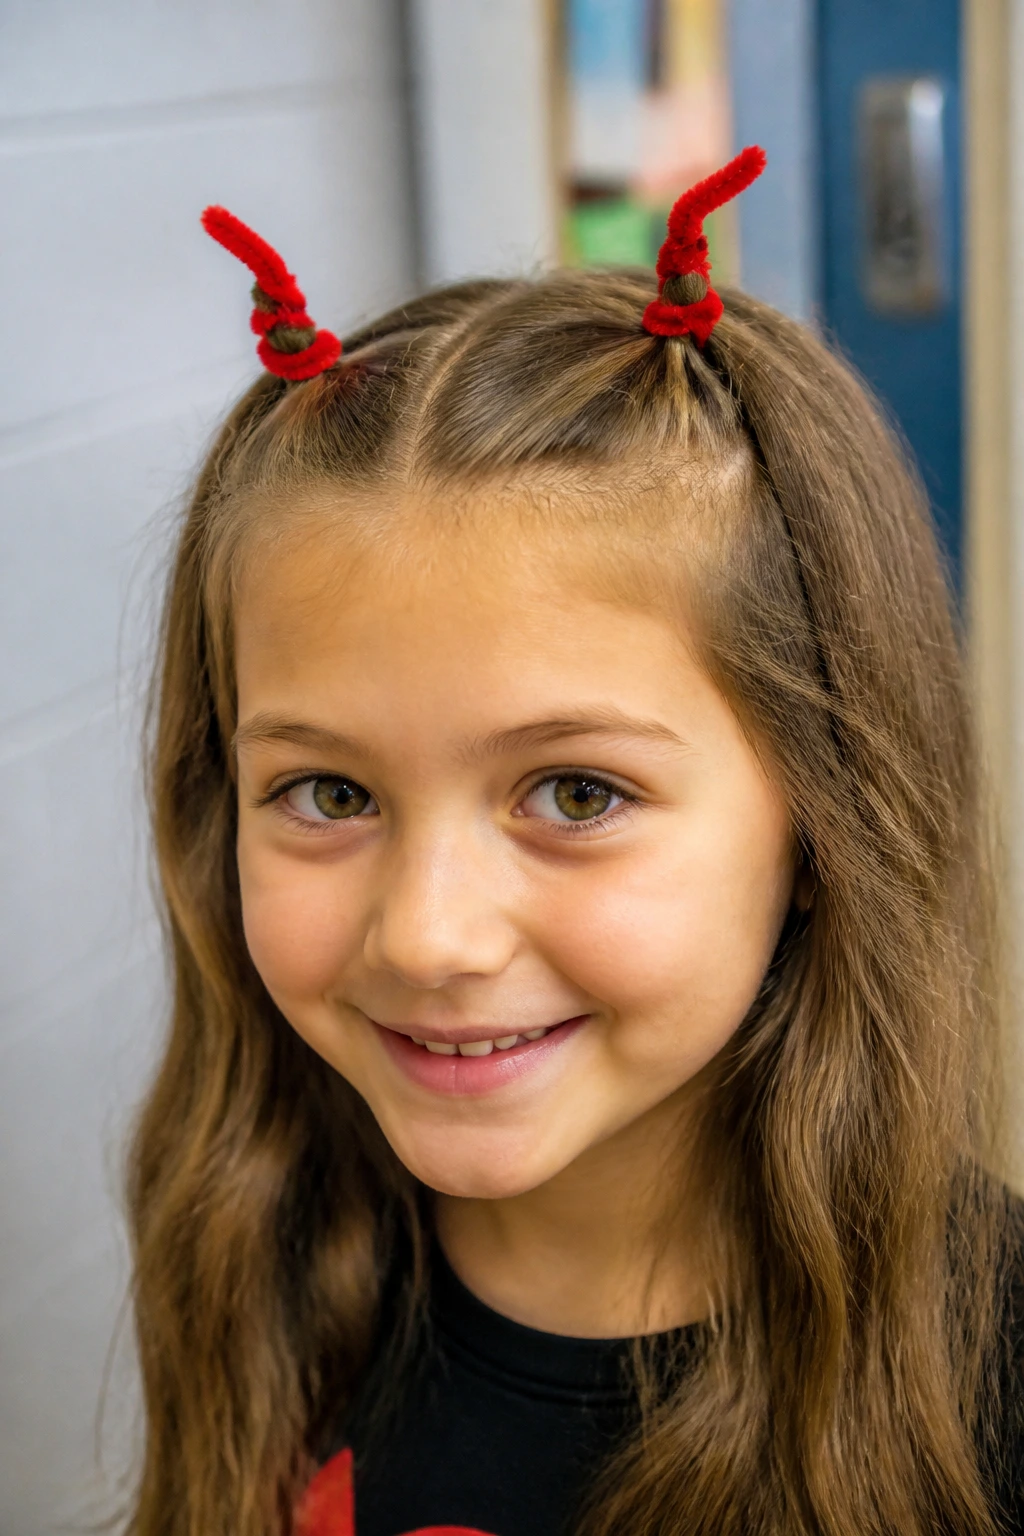
This playful style uses two small sections of hair at the front hairline to create mini “horns.” It is a fun, lightweight alternative to wearing a heavy plastic headband.
To create the horns, section off two small squares of hair right at the front corners of the forehead. Wrap each section tightly with a red pipe cleaner, winding upward from the scalp to form a stiff, pointed cone.
- Twist the excess pipe cleaner back down to the base.
- Gently wrap the hair around the pipe cleaner core.
- Secure the ends at the base with a small bobby pin.
- Mist lightly with hairspray to keep stray flyaways in place. Pro tip: If your child has very fine hair, backcomb the section slightly before wrapping it around the pipe cleaner to add traction and volume.
17. Black Cat Braided Crown
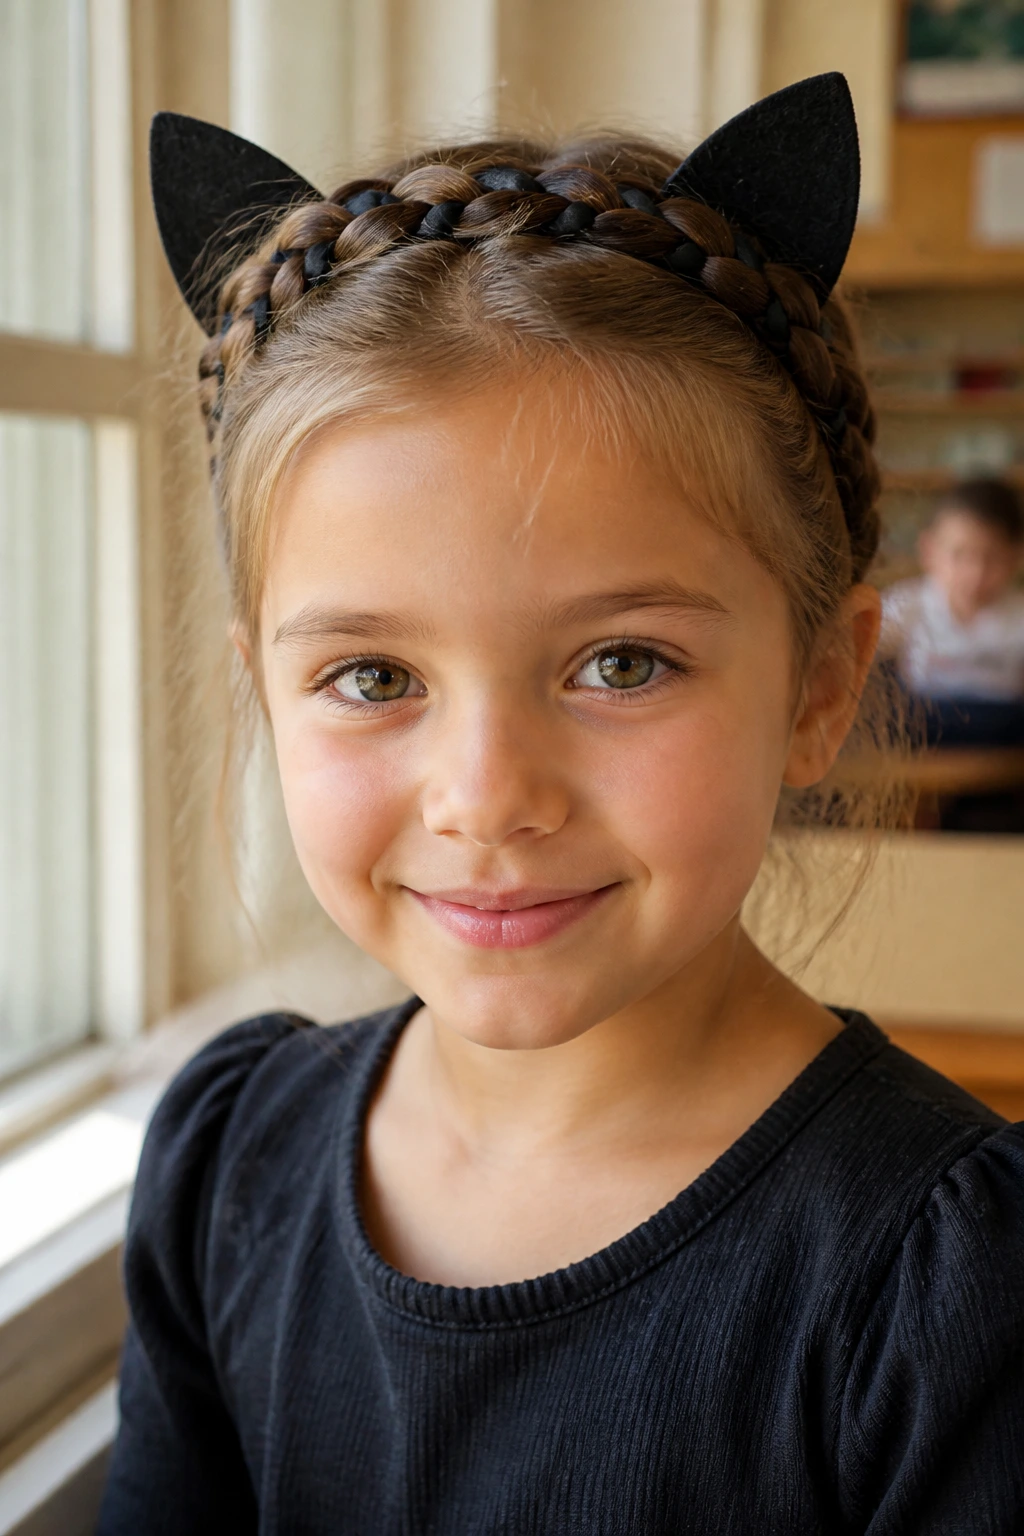
This style is beautiful, classic, and perfect for school. It weaves black ribbon into a crown braid, creating the silhouette of a sleek black cat sitting on top of the head.
Start by parting the hair down the center and creating two simple braids on either side of the head. Weave a thin black ribbon into each braid as you go. Cross the braids over the top of the head, pinning them flat to form a continuous crown.
To complete the cat look, attach two small black felt cat ears to bobby pins and slide them into the crown braid on either side. This keeps the look delicate and pretty while still being undeniably festive.
18. Poison Apple Ribbon Bun
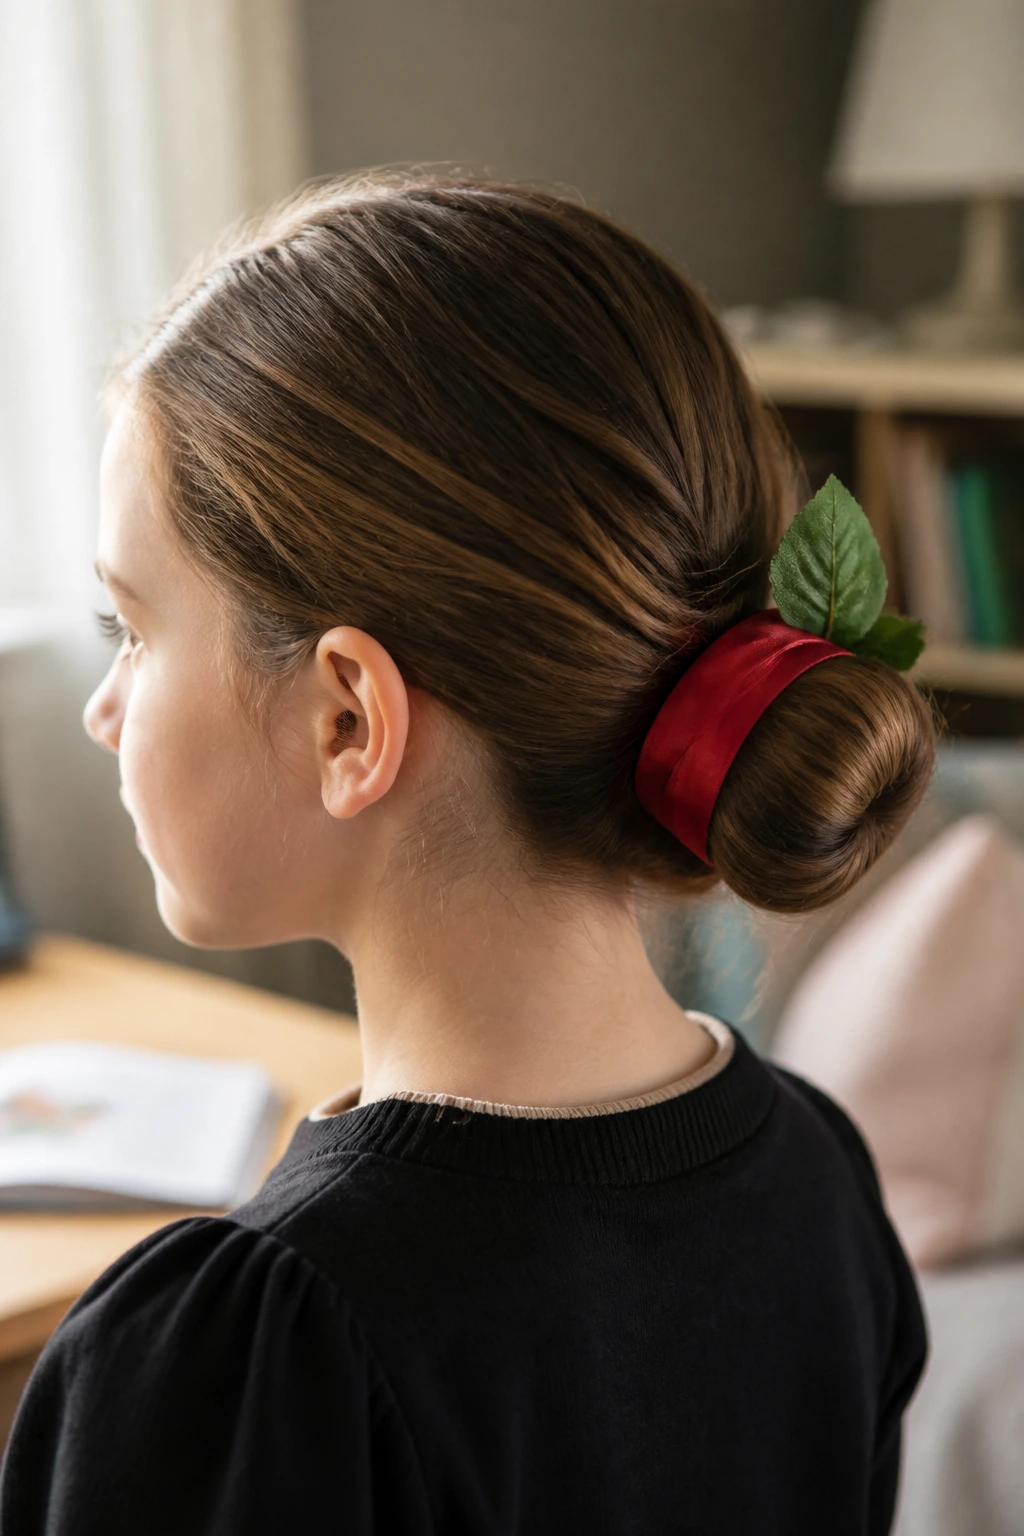
This style is inspired by classic fairy tales. It takes a standard low bun and wraps it in a deep red ribbon, with a single green leaf accent peeking out from the top.
Unlike bright neon styles, this look uses deep jewel tones for a richer, more classic autumn feel. It is elegant enough for older students while still being fun.
Pull the hair into a low, neat bun at the nape of the neck. Wrap a wide, dark red satin ribbon around the bun, securing it with a bow at the base. Tuck a small green silk leaf (you can snip one off a fake flower stem) under the top of the ribbon to represent the apple stem.
19. Vampire Bat Hair Bow
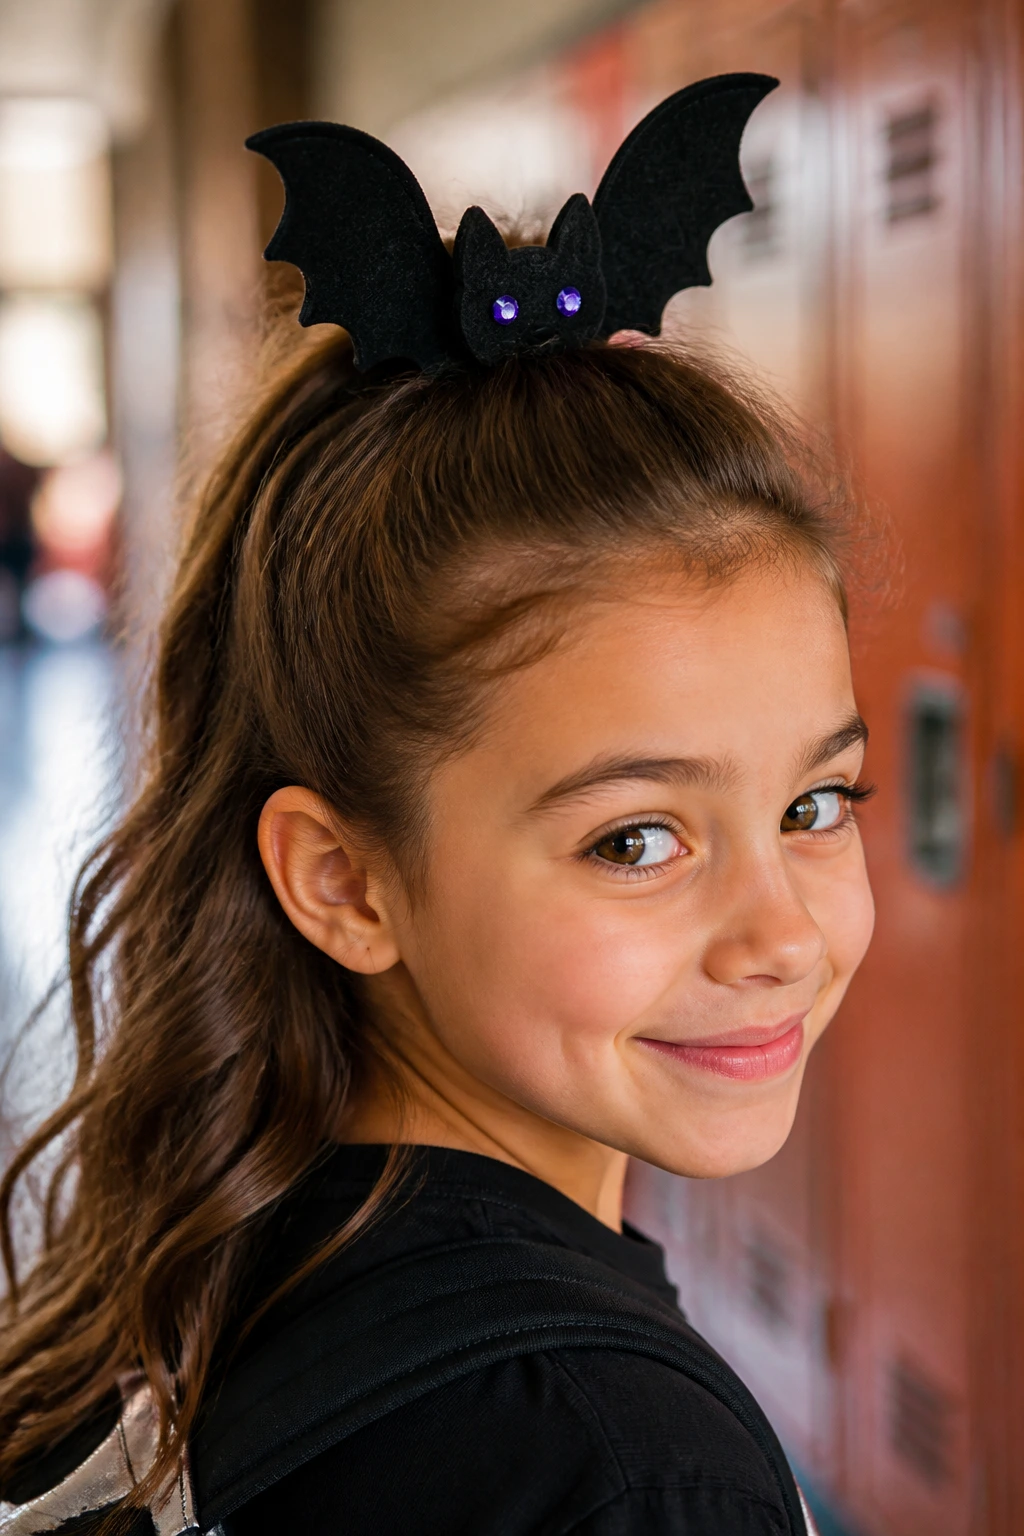
This style uses a black hair bow structured to look like a sleeping vampire bat. It is a fantastic option for children who want a festive look but prefer to wear their hair down.
Creating the Bat Shape
You can make this accessory at home using black felt and a plain alligator clip. Cut the felt into the shape of bat wings, then glue a small black bow to the center. Clip this custom accessory onto a half-up ponytail or to the side of a simple side part.
Quick Facts
- Material: Soft felt (keeps the accessory lightweight and flexible)
- Attachment type: Alligator clip for easy placement and removal
- Time to make: Ten minutes the night before
- Versatility: Works on any hair length or texture Pro tip: Glue a small purple or red rhinestone to the center of the bow to represent the bat’s eyes for a touch of sparkle.
20. Alien Antenna Puff Balls
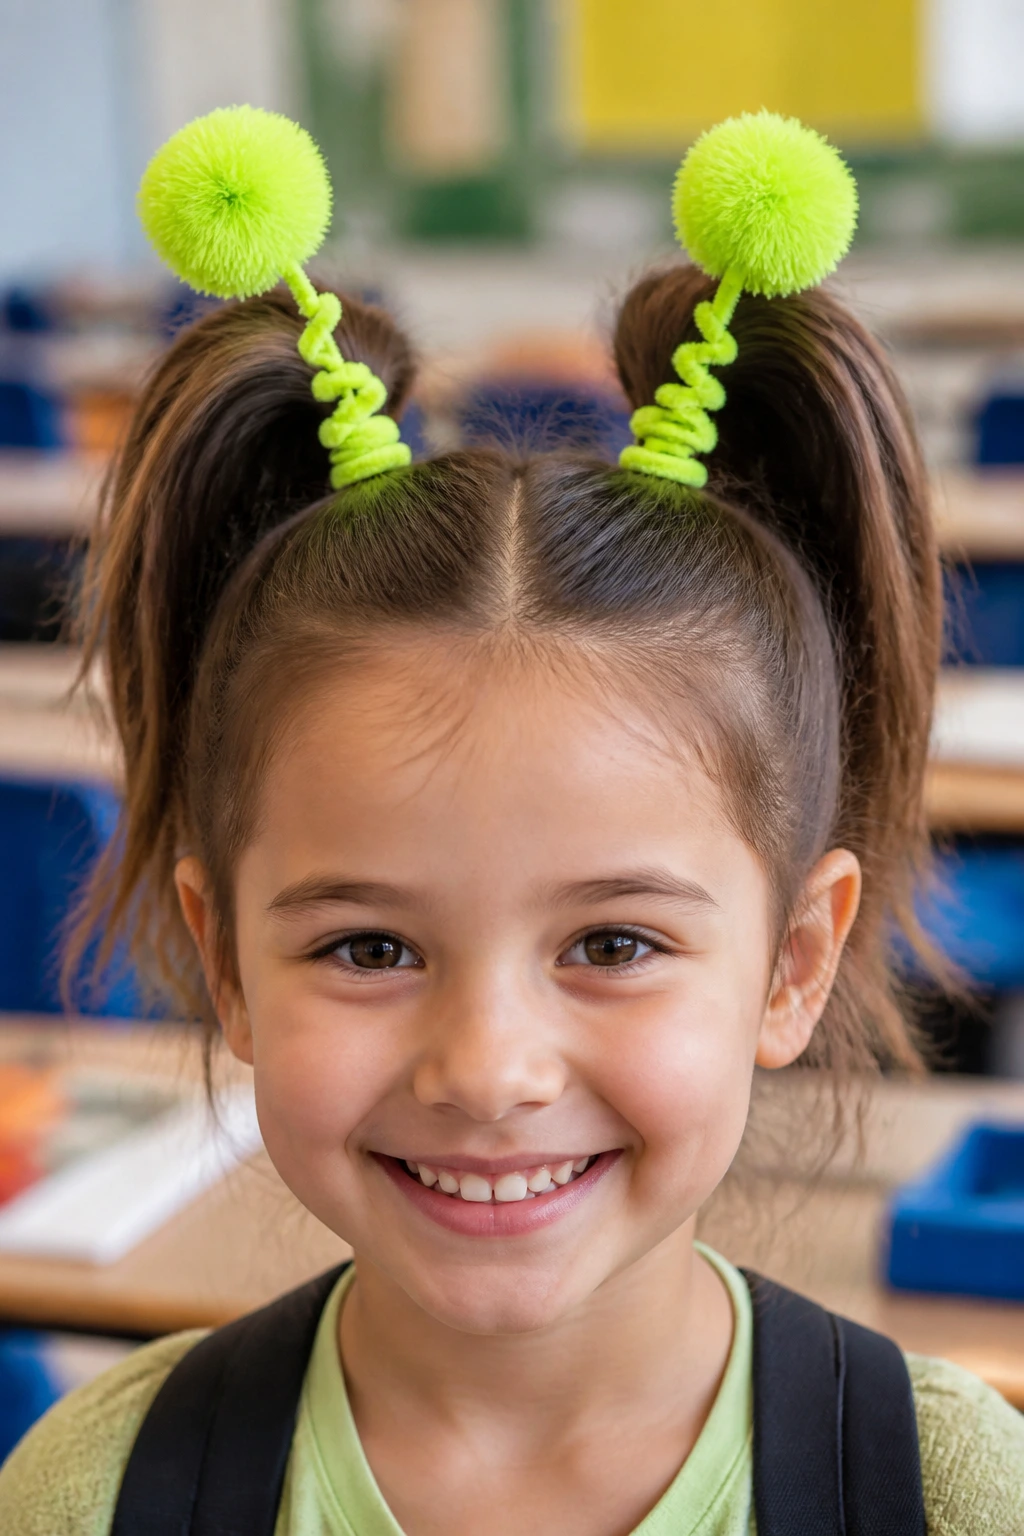
If your child loves space and science fiction, these alien antennas are a must-try. This style uses two high puff balls that bounce playfully when your child walks.
Start by pulling the hair into two very high pigtails on the top of the head. Wrap neon green pipe cleaners around the base of each pigtail, leaving about three inches of the pipe cleaner standing straight up in the air.
Attach a lightweight neon pom-pom to the top of each pipe cleaner using a dab of hot glue. This creates a fun, bouncy antenna effect that is completely weightless and incredibly comfortable for a long day at school.
21. Scarecrow Messy Side Braid
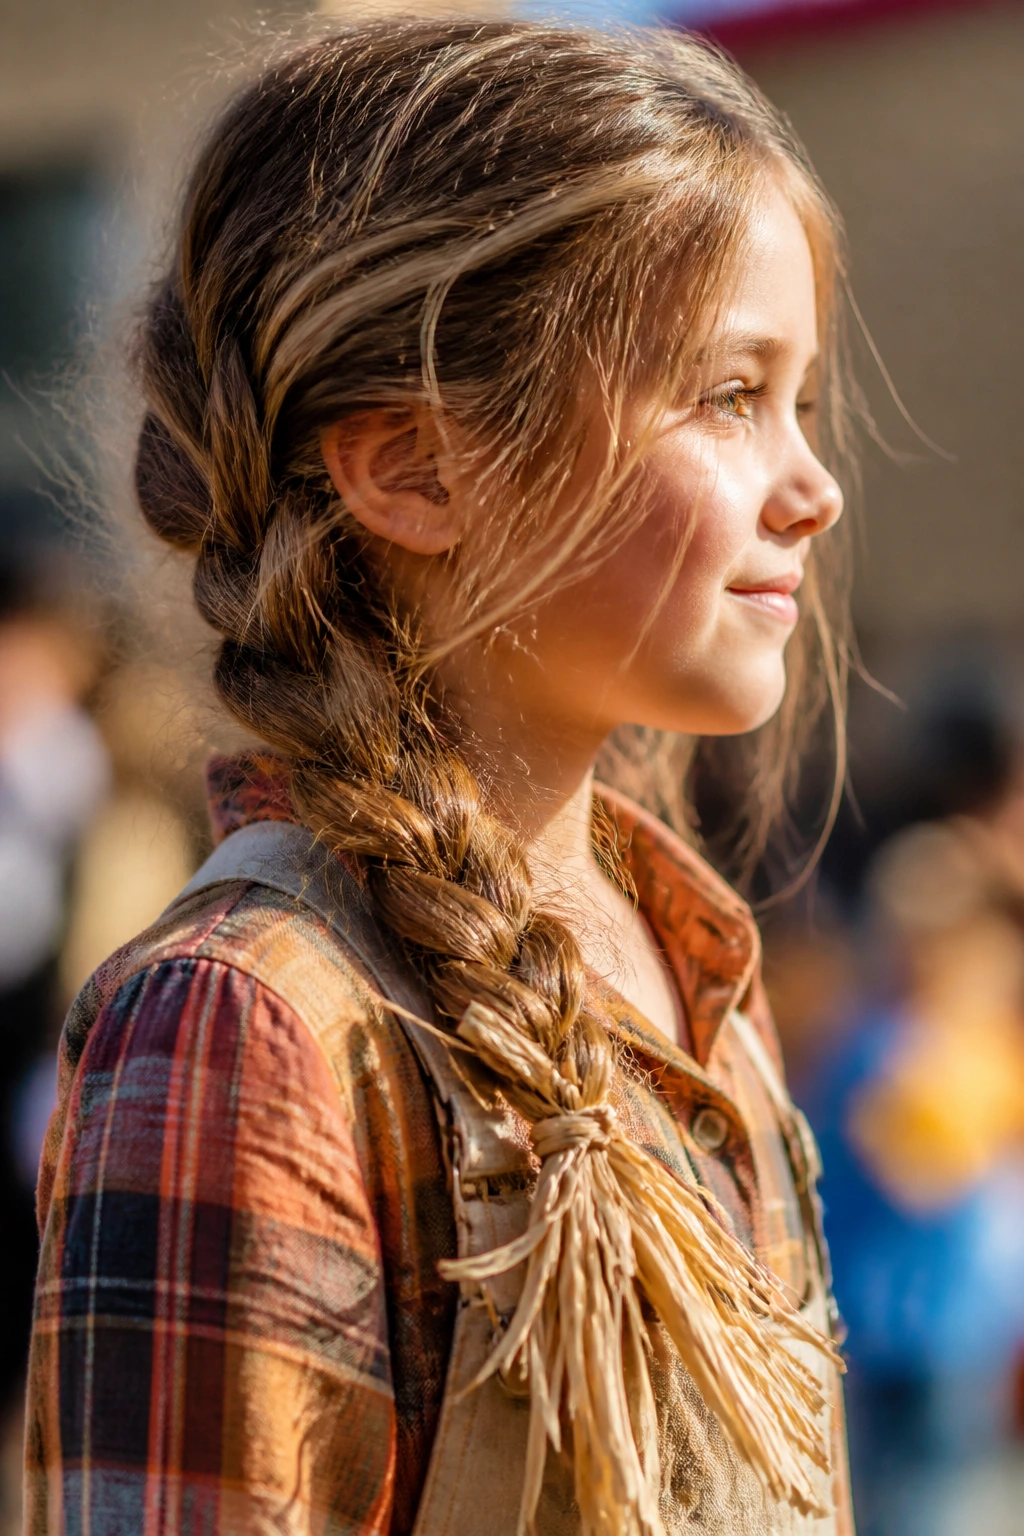
This style is cozy, rustic, and incredibly easy to achieve. It embraces a slightly messy, textured look, making it perfect for kids who tend to get active and messy on the playground.
How do you get that rustic, straw-like texture without damaging the hair? A little sea salt spray or texturizing powder is all you need to create that windswept scarecrow look.
Texturizing the Hair
Spray a small amount of texturizing spray through the lengths of the hair. Pull all the hair to one side and weave it into a loose, casual three-strand braid. Allow a few pieces to fall out naturally around the face to frame it.
Style Details
- Braid style: Loose, slightly undone three-strand side braid
- Accent: Tie a piece of raffia or brown twine around the end of the braid
- Hat compatibility: Works beautifully under a simple straw hat or beanie
22. Zombie Green Temporary Streak Braid
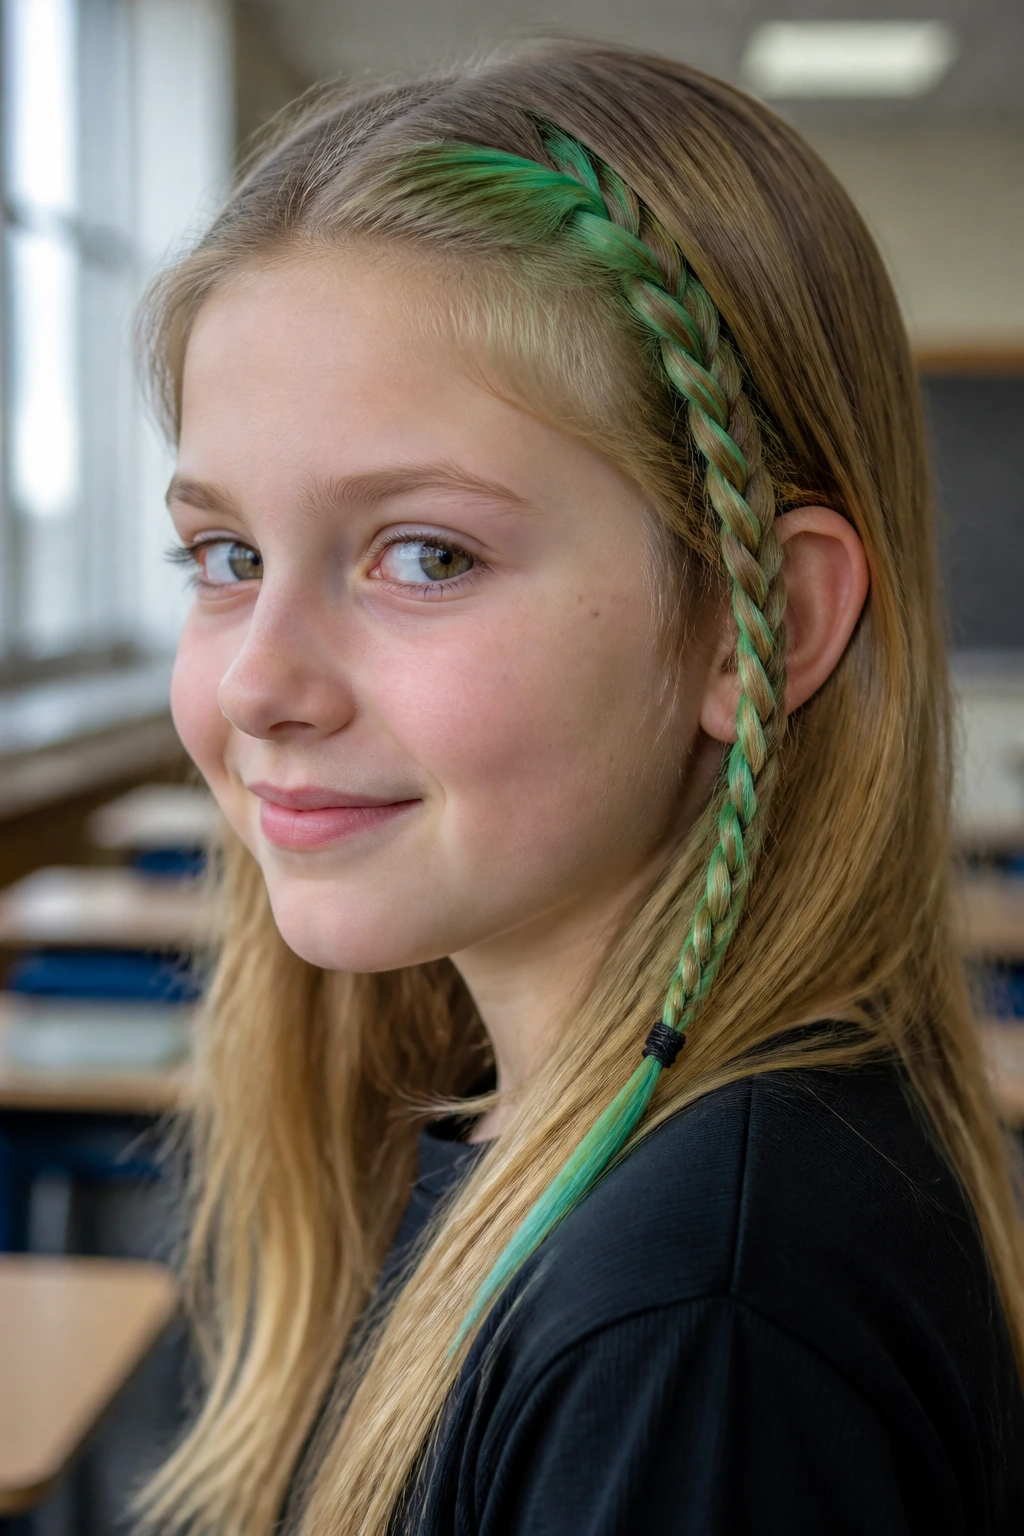
This style uses temporary, wash-out hair mascara to add a bright streak of zombie green to a single braid. It is a fantastic option for kids who want a bold color change without the commitment.
Unlike chalk sprays, which can get messy and transfer to clothing, hair mascara dries completely matte and stays locked onto the hair strand until you wash it out with shampoo.
Brush a small section of hair near the front temple with green hair mascara, letting it dry for two minutes. Once dry, weave that colored section into a simple accent braid that runs down the side of the face. This keeps the bright color contained and looking neat throughout the school day.
23. Owl Face French Braids
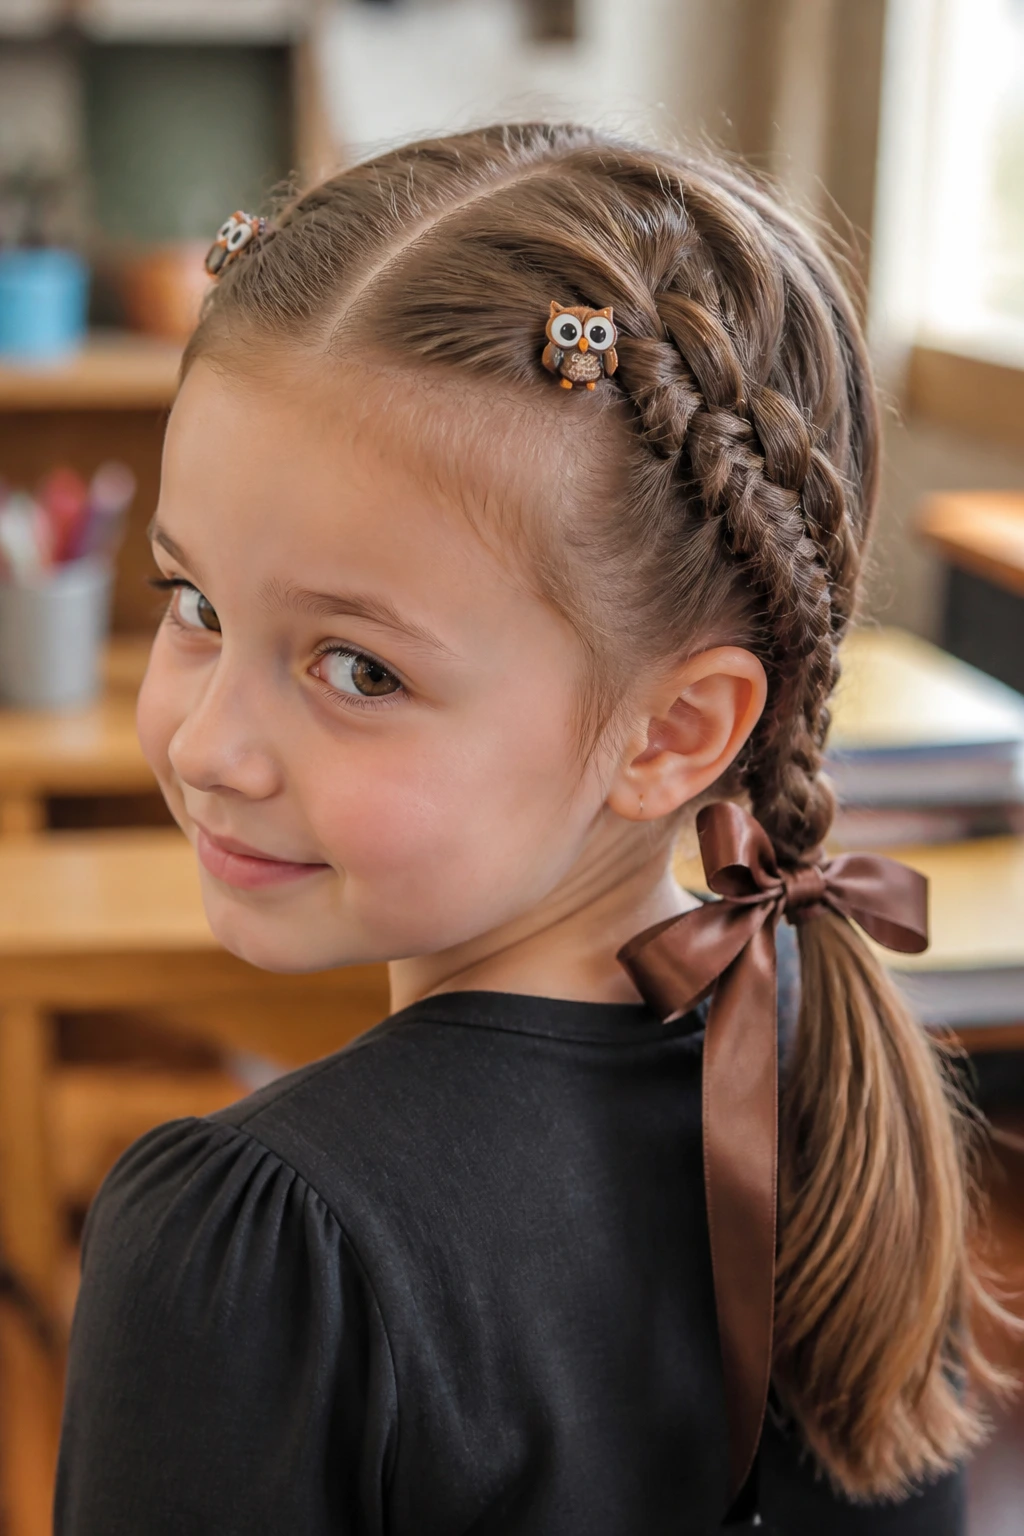
This clever style uses two parallel French braids that curve slightly to outline the face of an owl. It is a gorgeous, artistic option for children with long, thick hair.
Start by parting the hair down the center. Create a French braid on each side, but instead of braiding straight back, curve the braids slightly outward around the ears before bringing them back together at the nape of the neck.
- Secure the two braids together into a single low ponytail.
- Tuck two round, owl-eye hair clips at the start of each braid.
- Use a brown or bronze ribbon to tie the final ponytail.
- Gently pull the loops of the braids outward to look like feathers. Pro tip: Use a rat-tail comb to map out the curved parts before you begin braiding to ensure the owl-face shape is symmetrical on both sides.
24. Floating Ghost Bobby Pins
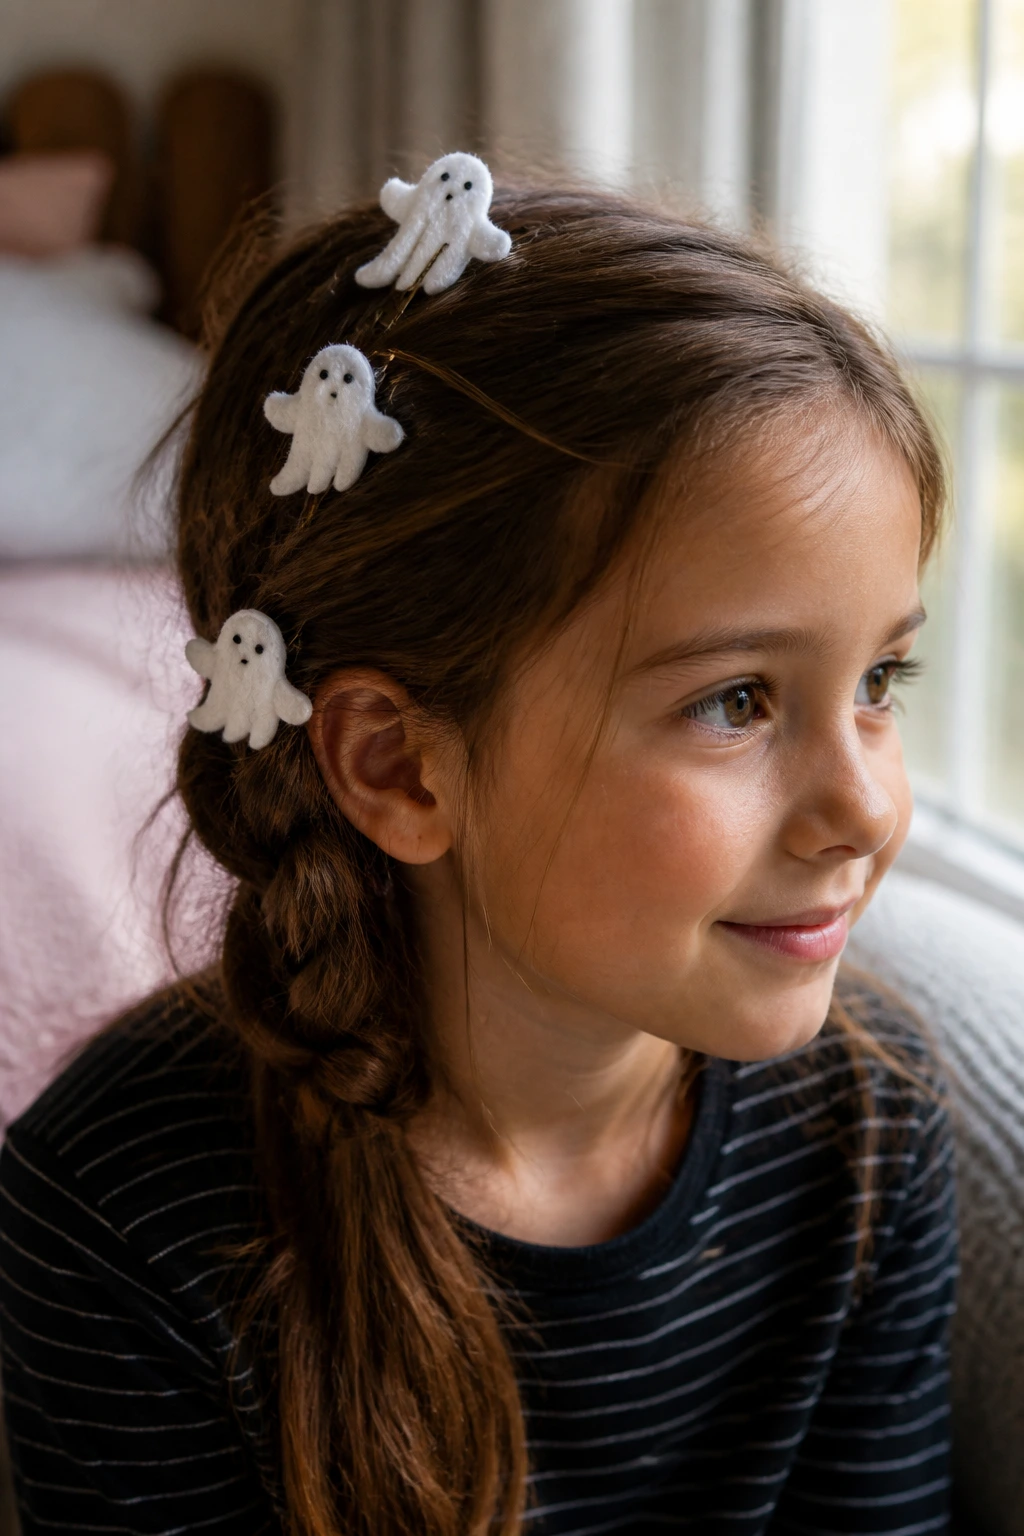
This minimalist style uses small, white felt ghosts attached to bobby pins. When slid into the hair, the ghosts appear to be floating around your child’s head.
This is an exceptionally quiet, sweet style that works beautifully on very fine or short hair where heavy clips would simply slide out.
To make these, cut tiny ghost shapes out of white stiff felt and draw simple faces on them with a black marker. Glue each ghost to the flat side of a white bobby pin. Slide these pins into a simple half-up style or along the side of a braid, giving the illusion of tiny ghosts hovering in the hair.
25. Spider Nest Messy Bun
This is a fun, slightly creepy style that turns a classic messy bun into a cozy home for a family of plastic spiders. It is highly textured and takes less than five minutes to put together.
Arranging the Spiders
Pull the hair into a high, loose messy bun, letting a few strands fall free. Take three or four small plastic spider rings (snip the ring portion off with scissors to leave just the flat spider body) and attach them to bobby pins. Slide the pins deep into the bun so the spiders appear to be crawling out of the hair.
Recommended Products
- Lightweight plastic spider rings (with the ring loop removed)
- Strong, texturizing dry shampoo
- Matte black bobby pins
- Clear hair elastics Pro tip: Space the spiders out unevenly across the bun; a random arrangement looks much more realistic and creepy than a neat, symmetrical line.
Wrapping Up
When it comes to school-day hairstyles, the best approach is always the one that makes your child feel confident while keeping them comfortable. Halloween is a wonderful opportunity for creativity, but school days still require practicality. Avoid heavy accessories, overly tight braids, or products that will flake, itch, or rub off on school property.
Keep your supplies simple. A small kit of colored hair ties, a few pipe cleaners, and some lightweight felt shapes can easily carry you through the autumn season. Most importantly, have fun with it. These small, playful touches in the morning can turn an ordinary school day into a festive, memorable celebration.
