



The alarm blares on a Tuesday morning, and your child suddenly announces that it is Crazy Hair Day at school. The bus arrives in exactly forty minutes. Panic might start to creep in as you look at your sleeping child’s tangled bedhead, but there is no need to worry. You do not need professional styling tools, hours of spare time, or a degree in structural engineering to pull off a memorable look.
The secret to surviving these high-stakes spirit days lies in using common household items as anchors. Paper plates, empty soda cans, pipe cleaners, and cheap plastic toys can quickly transform a standard ponytail or bun into a work of art. The goal is to build structural height and whimsical shapes before your coffee even finishes brewing.
Over years of helping families prepare for school events, I have learned that the best styles are the ones that stay secure during recess. A towering sculpture of hair is only successful if it does not collapse on the school bus. By focusing on strong elastic bands, strategically placed bobby pins, and lightweight materials, you can create a secure, comfortable style that looks incredibly complex but takes less than fifteen minutes to assemble.
Here is a collection of creative, rapid-fire ideas to help you tackle the morning rush with confidence and style.
1. The Paper Plate Donut
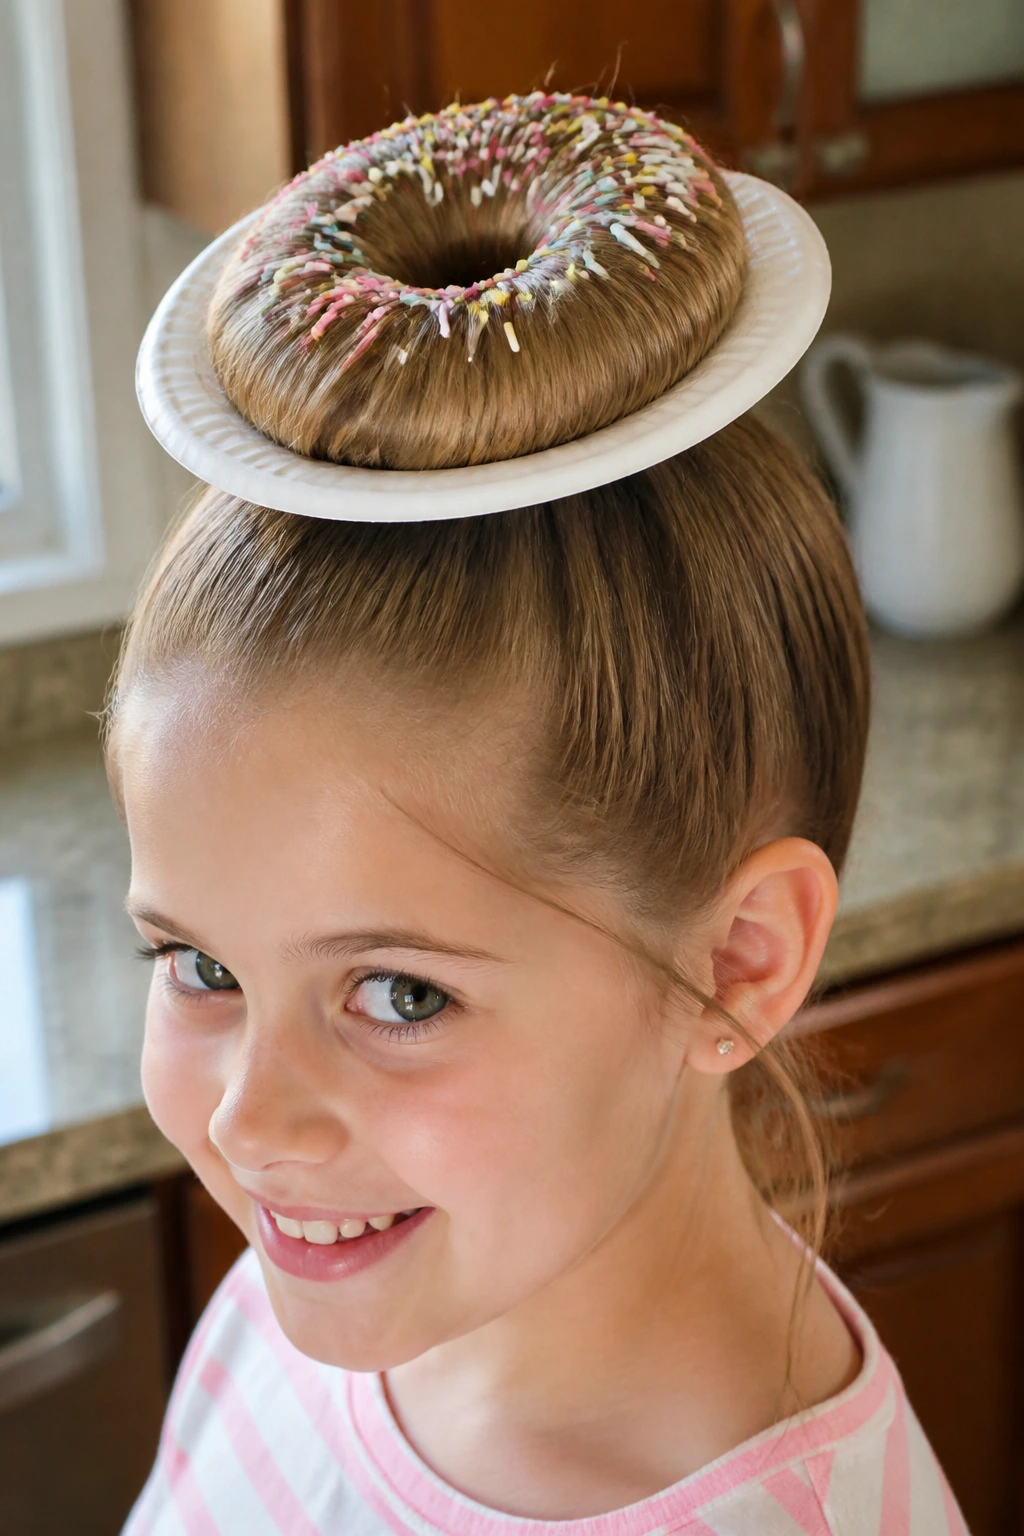
The kitchen pantry holds the secret to one of the most popular school spirit hairstyles of all time. With just a standard paper plate and a few bobby pins, you can turn a basic high bun into a classic bakery treat. This style works best on medium to long hair that has enough volume to wrap around a central form.
How to Build the Pastry Base
To make this look convincing, you need to prep the plate before it ever touches the head. Take a small paper plate and cut a circular hole right through the center, making it just wide enough for a ponytail to pass through. You want the plate to sit flat against the crown of the head, acting as a literal saucer for the hair donut.
Key Materials for This Build
- One small paper plate with a central hole cut out
- A brown or pink thick hair donut mesh form
- A few colored bobby pins that look like decorative sprinkles
- A strong, high-tension elastic hair tie
Pro tip: Draw a colorful frosting pattern around the paper plate with markers before assembling the style to make the “plate” look realistic.
2. The Plastic Bottle Soda Pour
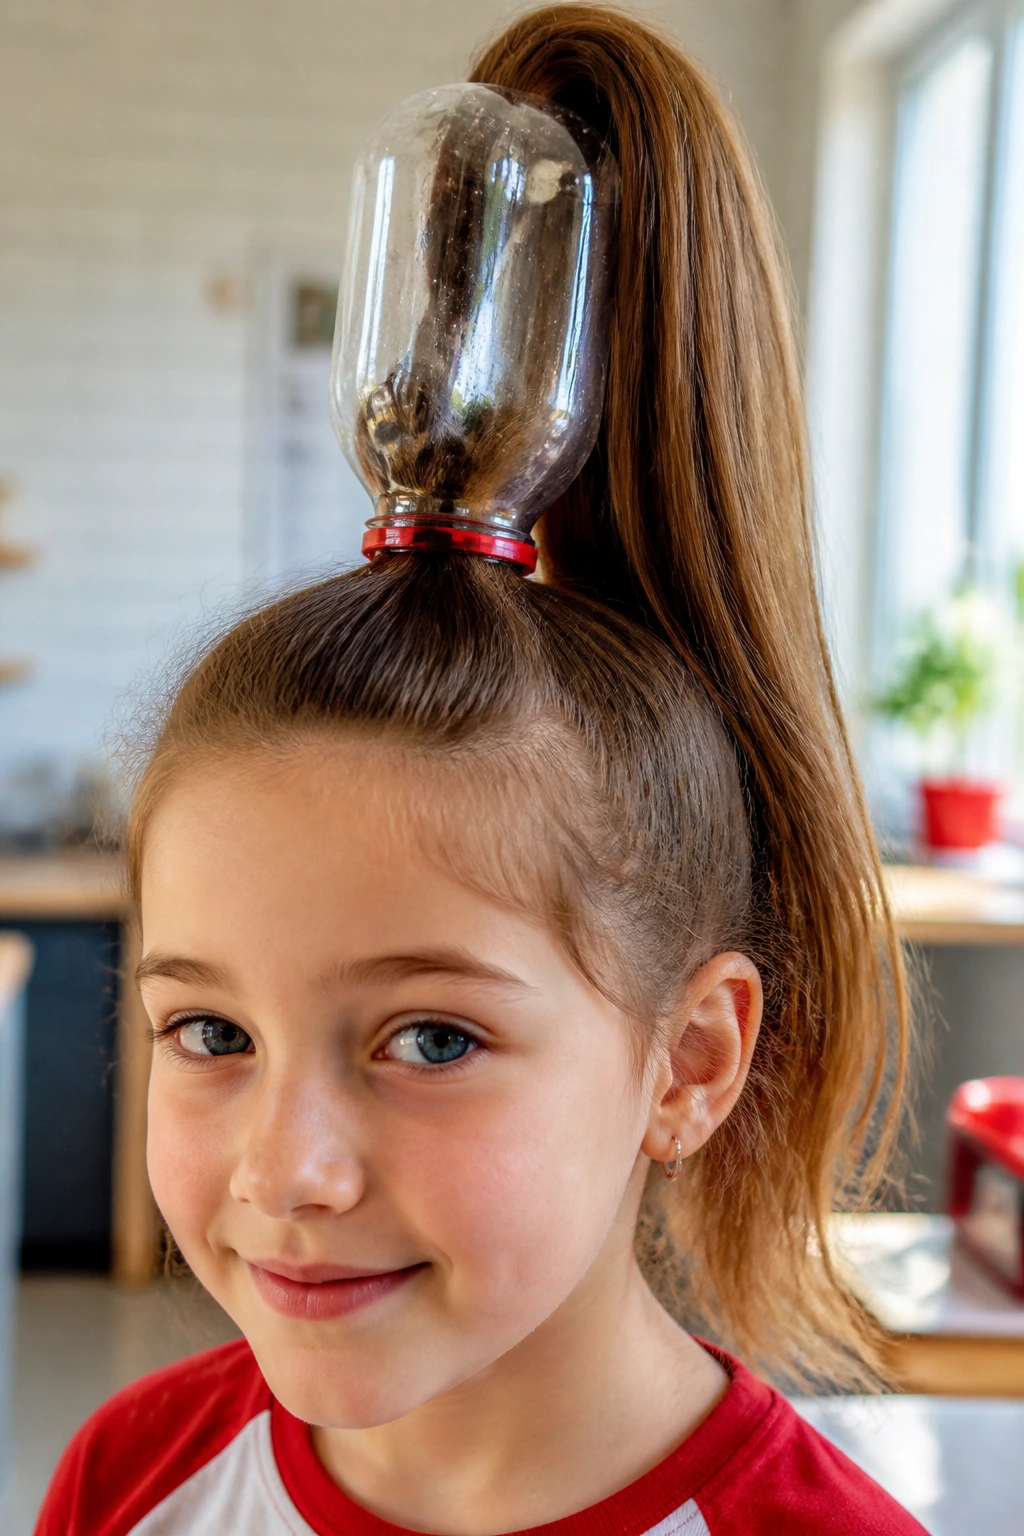
If you want a style that literally defies gravity, look no further than an empty aluminum can or a lightweight plastic soda bottle. This classic trick creates the illusion that a beverage is cascading directly onto your child’s head. It looks astonishingly complex, but it relies on a very simple hidden wire structure.
First, slide a long, sturdy pipe cleaner or craft wire down through the mouth of an empty, clean plastic bottle. Secure the other end of that wire firmly around the base of a high ponytail close to the scalp. Now, pull the ponytail hair straight up, slide it through the bottle, and let it drape over the top of the bottle’s mouth so it covers the plastic.
Secure the ends of the hair with a small elastic band near the shoulders, making it look like a stream of liquid pouring out of the bottle. You can even spray the cascading hair with temporary hair color spray to match the label of the beverage bottle you chose.
3. The Pipe Cleaner Spider Web
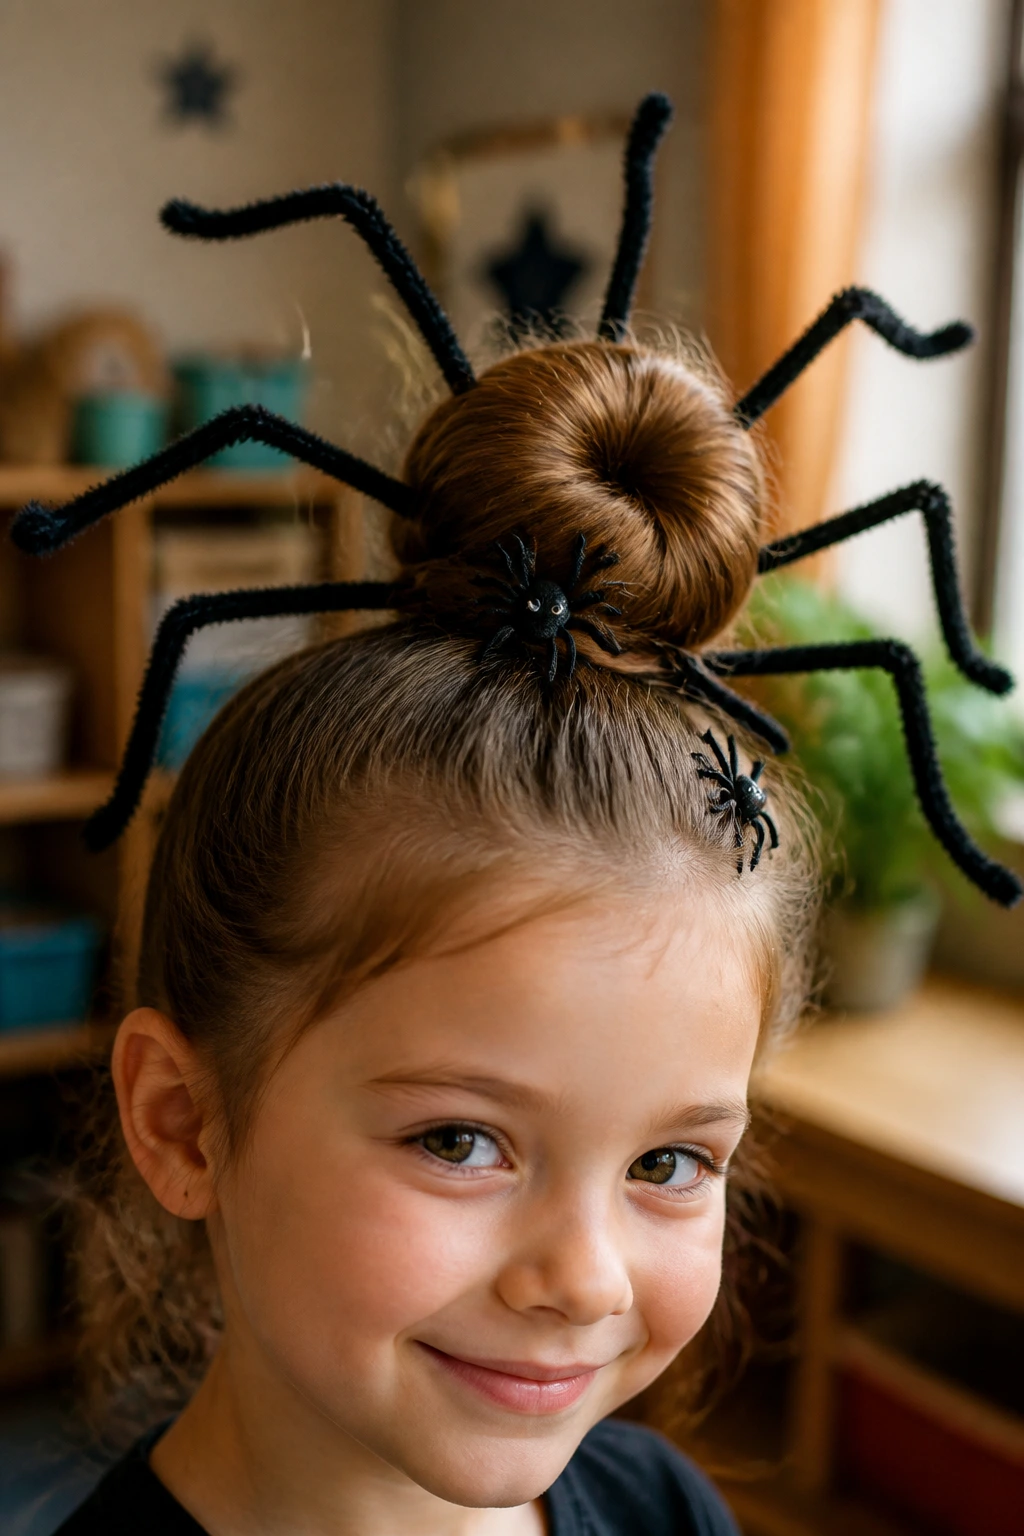
Why settle for a basic bun when you can turn your child’s hair into an intricate, eight-legged habitat? This spooky style is a massive hit during autumn school events, but it works beautifully any time of the year. It uses the structural strength of chenille stems to hold its shape.
Why This Structure Stays Secure
The beauty of pipe cleaners is their ability to bend and hold form without adding weight. By anchoring the colorful stems directly into the base of a central bun, you create a skeletal framework that can support toy spiders. The hair wraps around the base of the stems, keeping them from slipping out when your child runs around.
How to Weave the Web
- Pull the hair into a tight, neat bun right on the crown of the head.
- Insert four long black pipe cleaners through the center of the bun so they stick out like eight spider legs.
- Bend each leg halfway down to create the joints of the spider’s limbs.
- Attach a few lightweight plastic spider rings to the hair using bobby pins or by threading the ring loops onto the pipe cleaners.
4. The Googly Eye Monster Buns
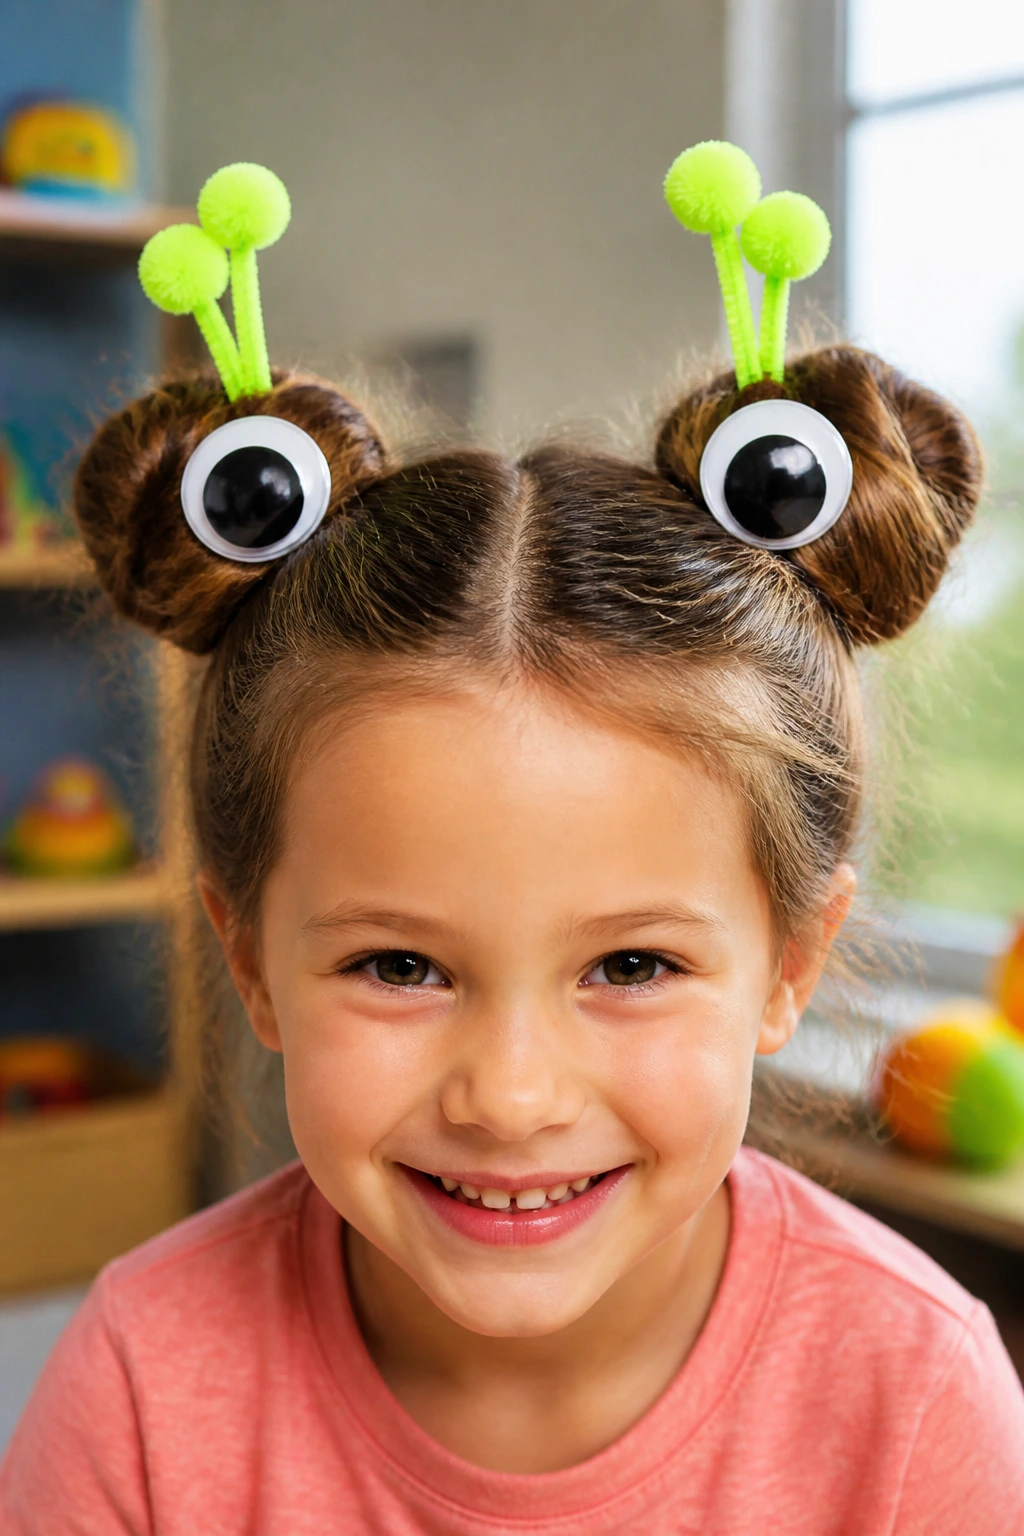
This look is perfect for shorter hair or for children who prefer to keep their hair in pigtails rather than a single high ponytail. It turns two simple space buns into a pair of curious, staring cartoon monsters.
Creating the Monster Faces
This style relies on high-contrast colors and goofy proportions. By using large, lightweight craft eyes, you can give the buns a sense of personality that shifts every time your child turns their head.
What You Need for the Monster Look
- Two large plastic craft googly eyes
- Double-sided foam mounting tape or clean bobby pins
- Brightly colored pipe cleaners for monster antennae
- Temporary neon hair mascara or colored hair spray
Pro tip: Bend the antennae pipe cleaners into spirals by wrapping them around a pencil before tucking them into the buns.
5. The Cupcake Wrapper Pigtails
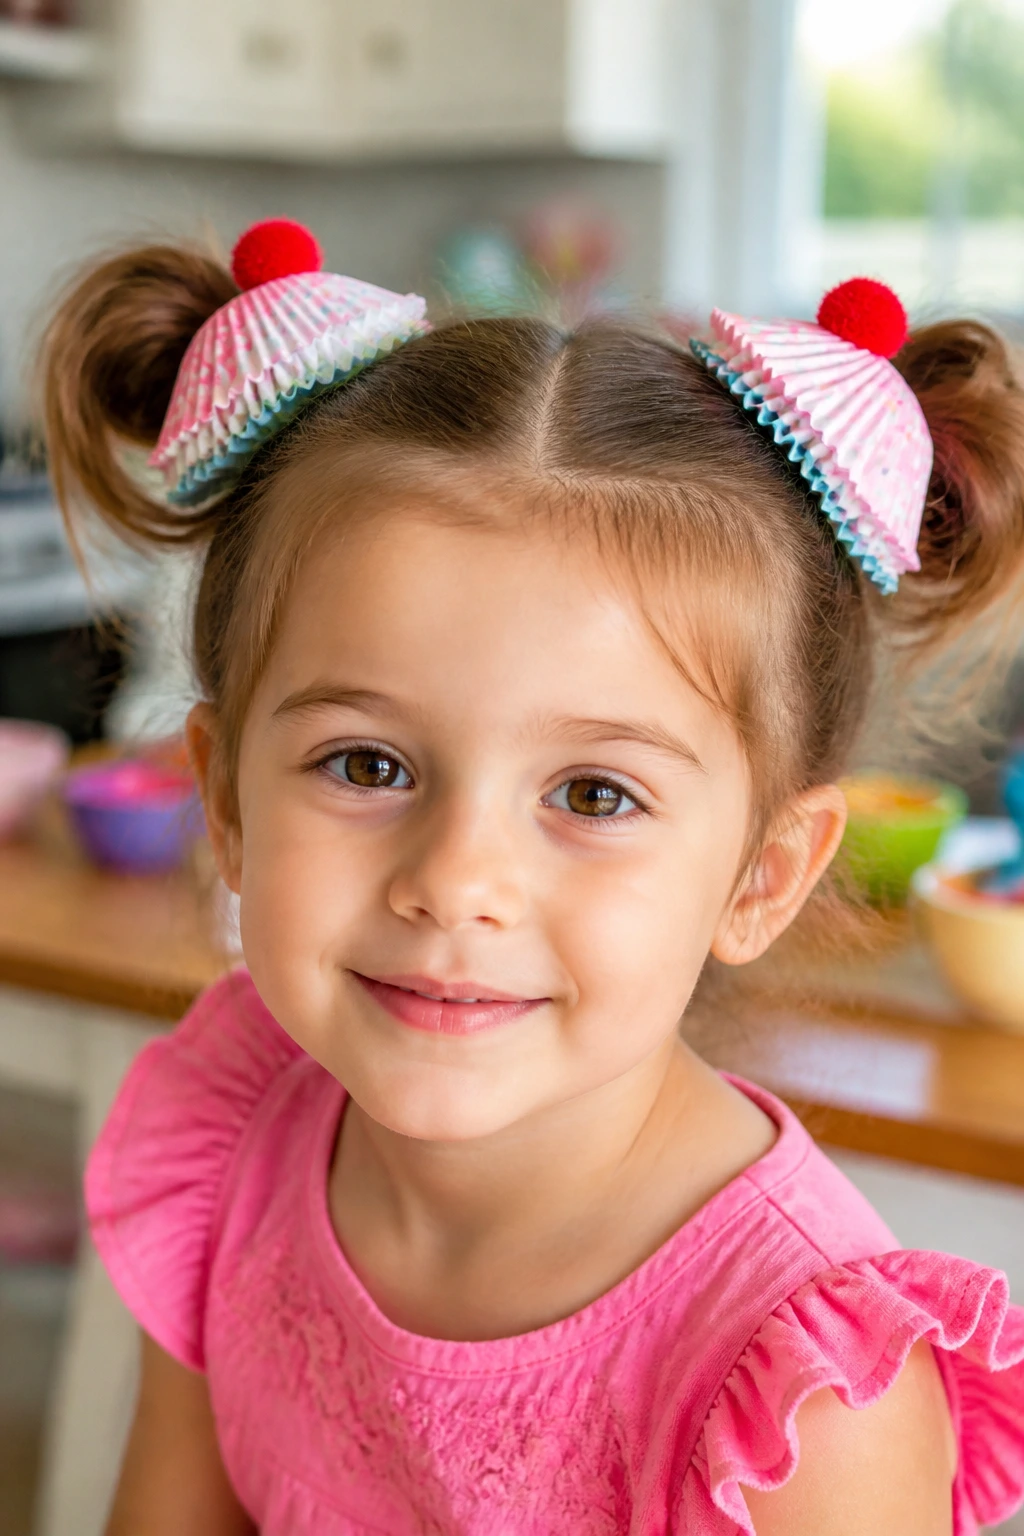
You can create a sweet, festive look using colorful paper cupcake liners from your baking cabinet. This design is exceptionally lightweight and comfortable for younger children who might get irritated by heavier hair accessories. It turns the base of two pigtails into miniature, delicate baking cups complete with frosting.
To build this, poke a small hole through the center of two paper cupcake liners. Pull a section of hair through each hole, slide the liner down to the scalp, and secure the pigtails with elastic bands. The paper liners will flare out naturally, framing the hair like a baking cup.
Next, tease the pigtail hair gently to create a fluffy, dome-like texture that resembles a baked cupcake rising out of the paper. You can add a red pom-pom to the top of each pigtail with a bobby pin to act as a cherry. This delightful style takes less than five minutes and holds up remarkably well throughout the school day.
6. The Dinosaur Spine Mohawk
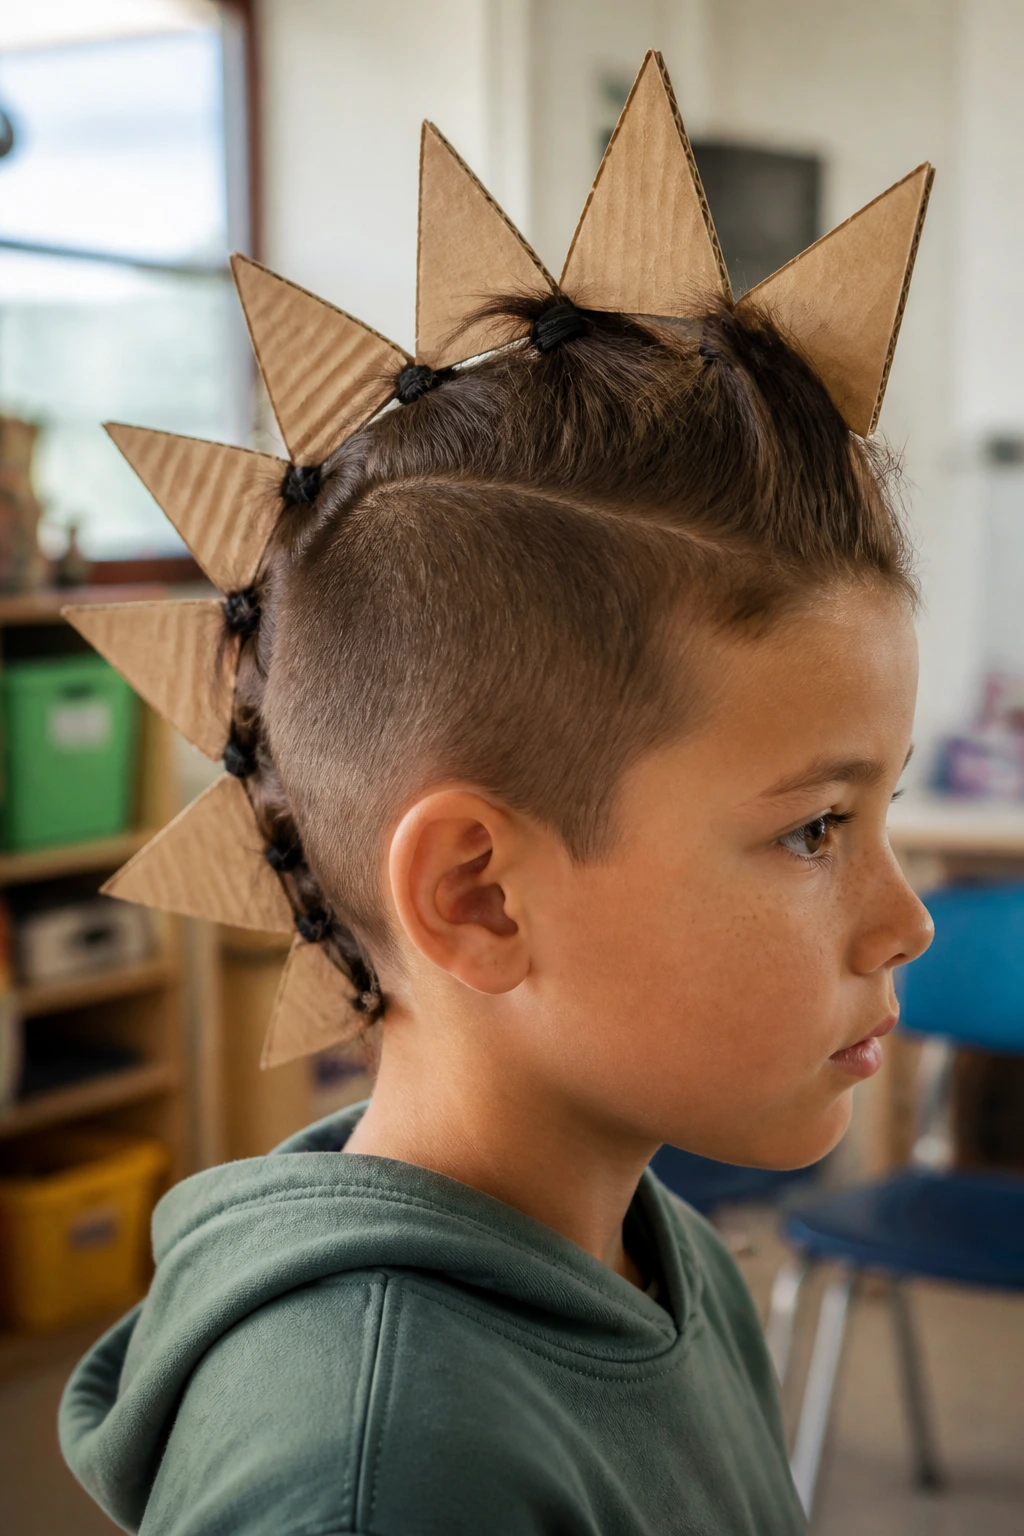
Unlike traditional mohawks that require heavy gels and freezing sprays, this dinosaur-themed version uses cardboard spikes to achieve a dramatic profile. It is an excellent choice for kids with short to medium hair who want something bold and structural.
What Makes This Style Different
Instead of fighting gravity with hairspray, this method uses a series of small, secure ponytails to anchor a cardboard template. The cardboard provides the vertical height and the shape of the prehistoric plates, while the hair wraps around the base to conceal the connection points.
Who It Is Best For
This style is ideal for children with active lifestyles who will not tolerate sticky sprays or stiff, heavily gelled hair. The cardboard spine is flexible enough to bend when they sit back in their school chairs but remains upright during play.
Specific Styling Recommendation
Cut a series of triangular plates from a bright green or red piece of construction paper, leaving a flat tab at the bottom of each triangle. Align these tabs along the center parting of the head, and use small elastic bands to secure each tab within a series of five running ponytails from the forehead to the nape of the neck.
7. The Balloon Bouquet Ponytail
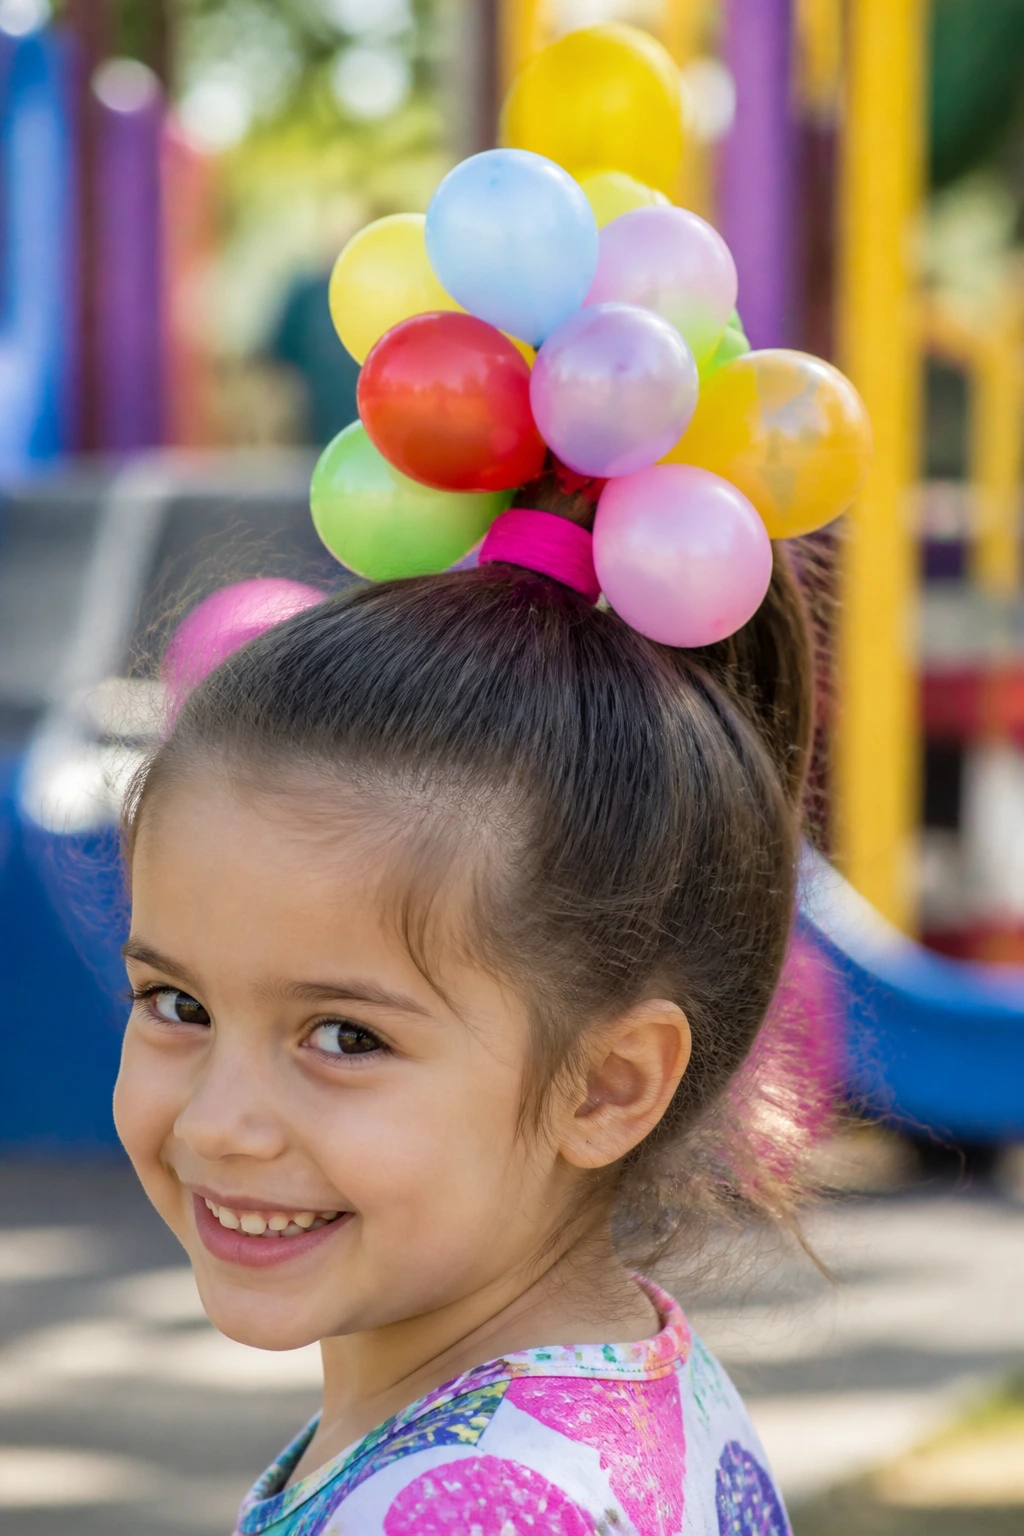
When you need a style that screams celebration, balloons are the perfect medium. This colorful approach turns a standard high ponytail into the base of a floating helium bouquet. It is highly visible from across the playground and incredibly easy to assemble.
Anchoring the Bouquet
The main challenge with balloons is keeping them upright without using actual helium. By using small, air-filled water balloons attached to stiff floral wire, you can create a cluster that stands up on its own.
Materials List for the Bouquet
- Five to six small, colorful balloons (inflated to about the size of an apple)
- Stiff green floral wire or sturdy chenille pipe cleaners
- A thick, reliable elastic hair band
- A collection of colorful hair clips to decorate the base
Pro tip: Keep the balloons relatively small to prevent them from popping easily if they bump into door frames or school bus ceilings.
8. The Bird Nest with Plastic Eggs
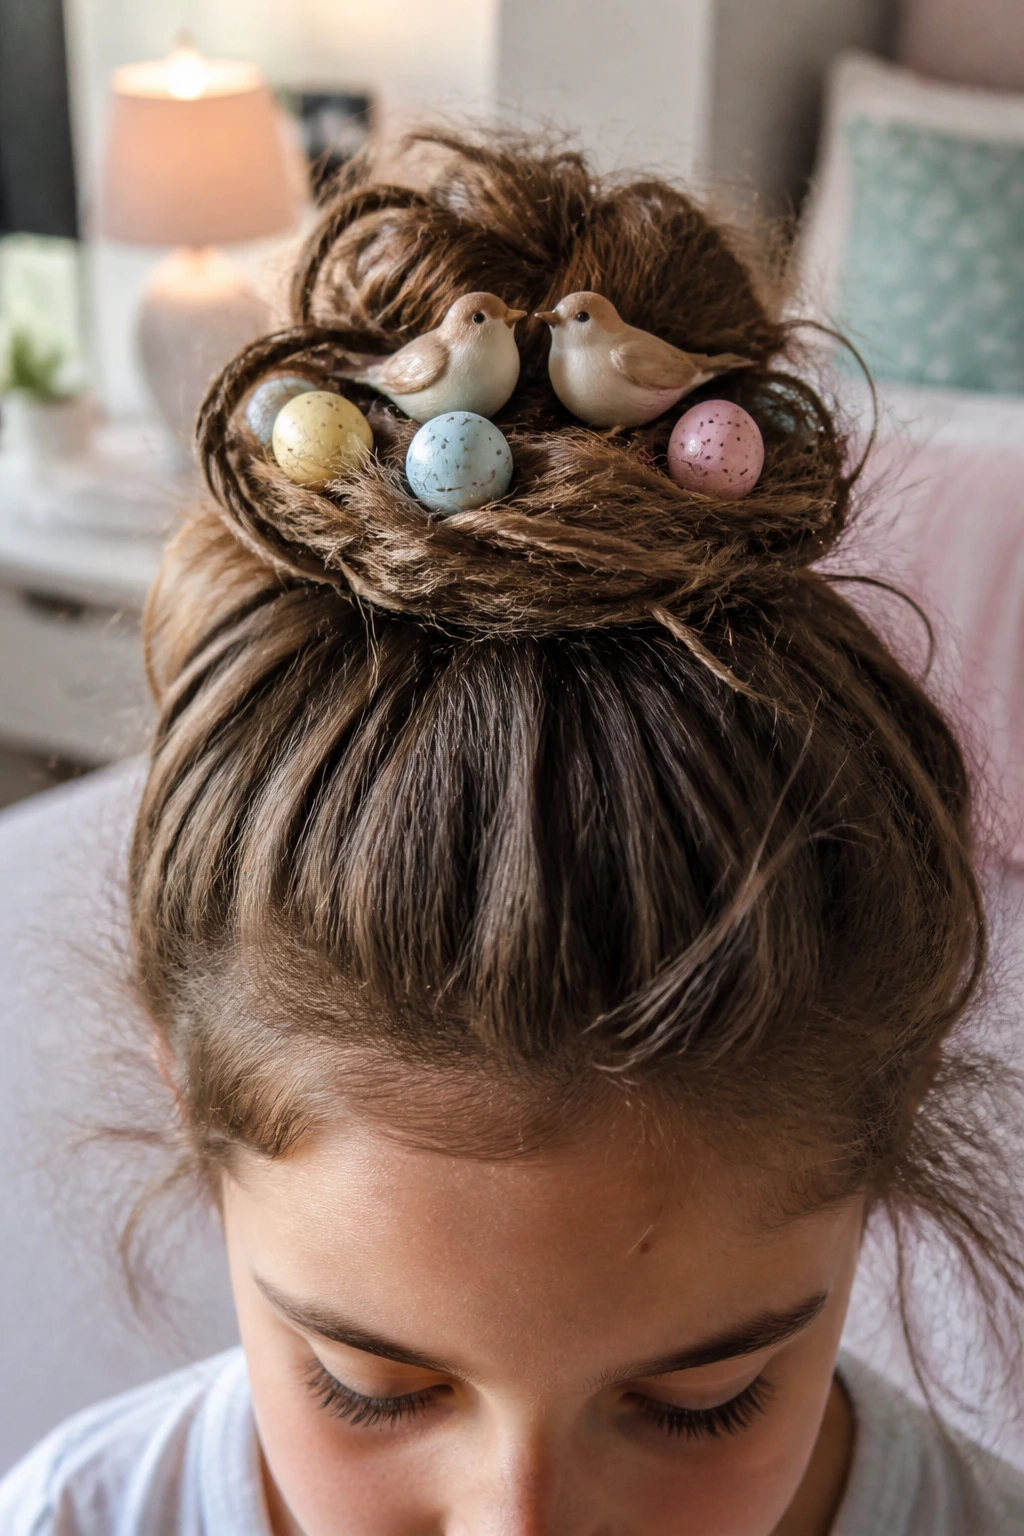
This classic style turns a messy bun into a cozy home for a pair of miniature bluebirds. It is a fantastic option for longer, thicker hair that naturally creates a large, textured bun shape.
To start, pull the hair into a loose, slightly messy sock bun on top of the head. Instead of smoothing down the flyaways, let them stick out slightly to mimic the twigs and straw of a real bird’s nest. Wrap a few strands of brown yarn or raffia around the base of the bun to enhance the natural, rustic texture.
Using hot glue, attach two small plastic craft birds to bobby pins, and slide them securely into the center of the nest. You can also tuck in a few lightweight decorative foam eggs. The result is a charming, three-dimensional miniature landscape that looks highly artistic but requires very little precision styling.
9. The Rainbow Pipe Cleaner Arch
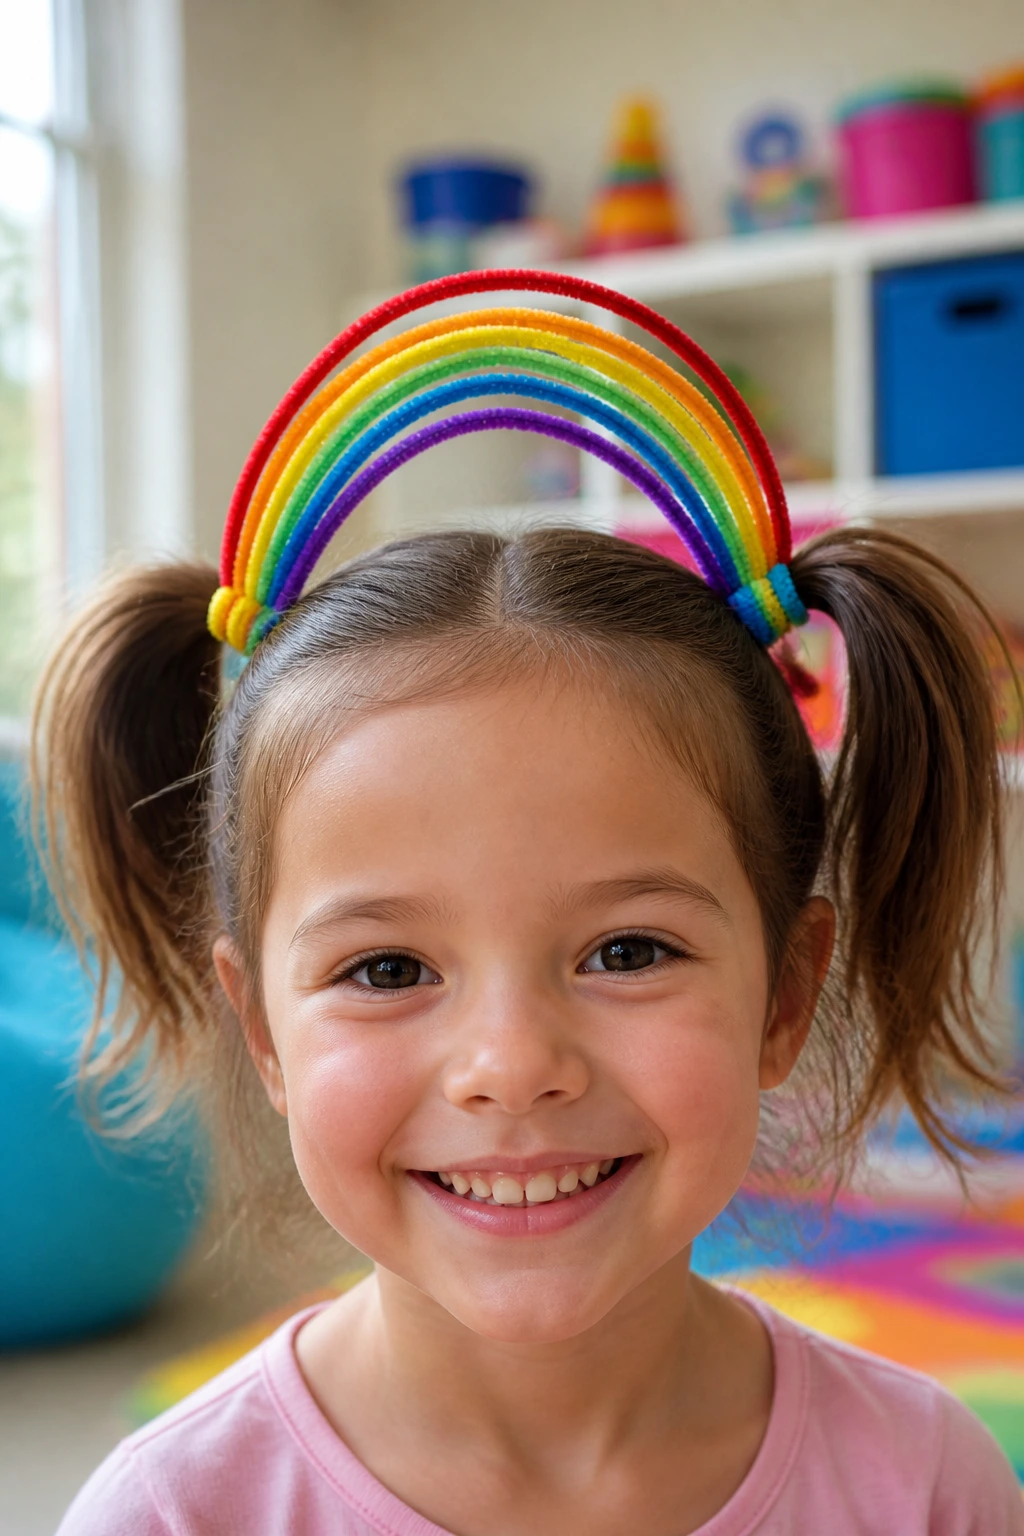
Can you create a literal rainbow spanning across your child’s head? Yes, and you do not need to wait for a storm to make it happen. This design connects two side pigtails with a vibrant bridge of colorful pipe cleaners.
Why This Arch Works
This style relies on tension and balance to stay upright. By anchoring both ends of the pipe cleaners into separate pigtails, the natural spring of the wire holds the arch in a perfect curve over the top of the head.
How to Shape the Rainbow
- Create two high pigtails, one on each side of the crown.
- Gather five pipe cleaners in classic rainbow colors: red, orange, yellow, green, and blue.
- Align the wires side-by-side to form a flat band.
- Wrap the ends of this wire band around the left pigtail base, arch it over the head, and secure the other end to the right pigtail.
- Hide the wire ends by wrapping a small section of hair around each ponytail holder.
10. The Surfboard Wave on a Clip
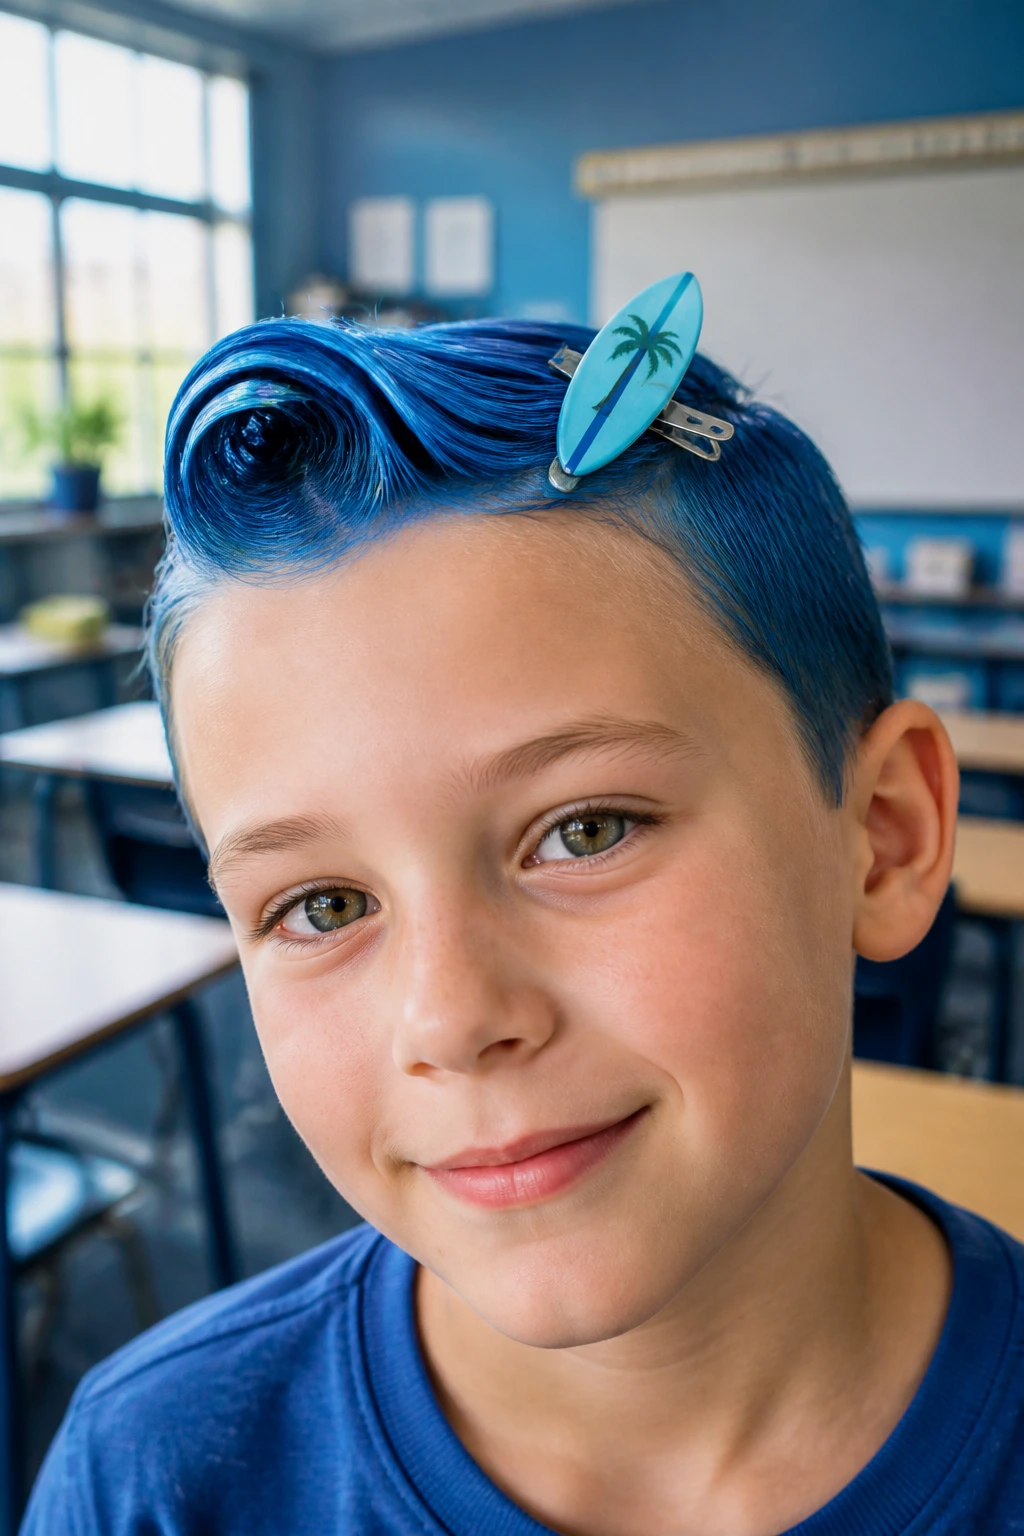
This beach-themed design brings the ocean directly to the classroom. It uses a strong-hold blue hair gel and a miniature toy surfboard to create a dynamic, crashing wave effect.
Designing the Perfect Wave
The key to this look is creating a sense of forward motion. The hair needs to sweep forward and curve at the top, mimicking the barrel of a massive ocean wave.
Key Materials and Details
- Strong-hold blue styling gel or temporary blue color spray
- A small, lightweight plastic toy surfboard or a paper cutout of one
- A sturdy metal alligator clip to mount the surfboard
- A small plastic action figure of a surfer to place on the board
Pro tip: Apply the blue gel to a front section of hair, comb it upward and forward over the forehead, and mist it with heavy hairspray to lock the wave shape in place.
11. The Pencil Through the Bun
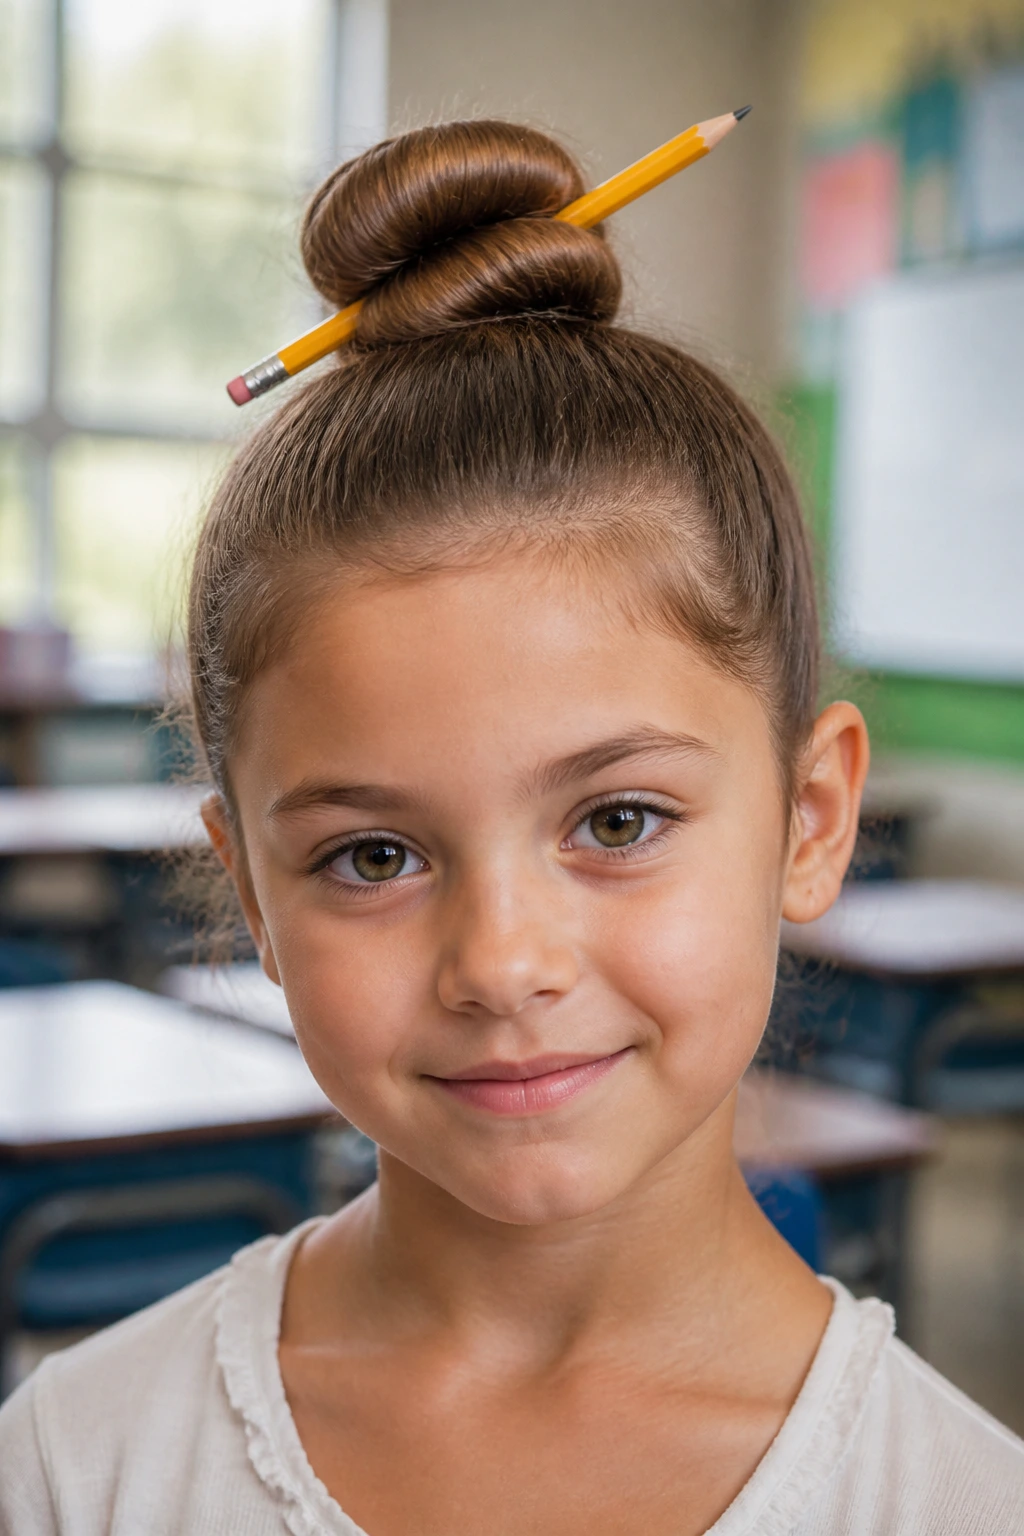
This clever style is a fun nod to the classroom environment itself. It takes the classic casual pencil bun and turns it into a giant, cartoonish school supply statement. It is a brilliant option for older kids who want something quirky but not overly babyish.
To create this look, pull the hair into a sleek, high ballet bun right on the crown. Once the bun is pinned securely, slide a clean, unused yellow pencil through the center of the bun at an angle. To make it look even more dramatic, you can craft a giant cardboard pencil to slide through instead of a real one.
This style works beautifully because it celebrates the school environment while remaining incredibly comfortable to wear. It keeps the hair completely out of the child’s face all day, making it highly practical for gym class or art projects while still looking festive.
12. The Octopus Sock Bun
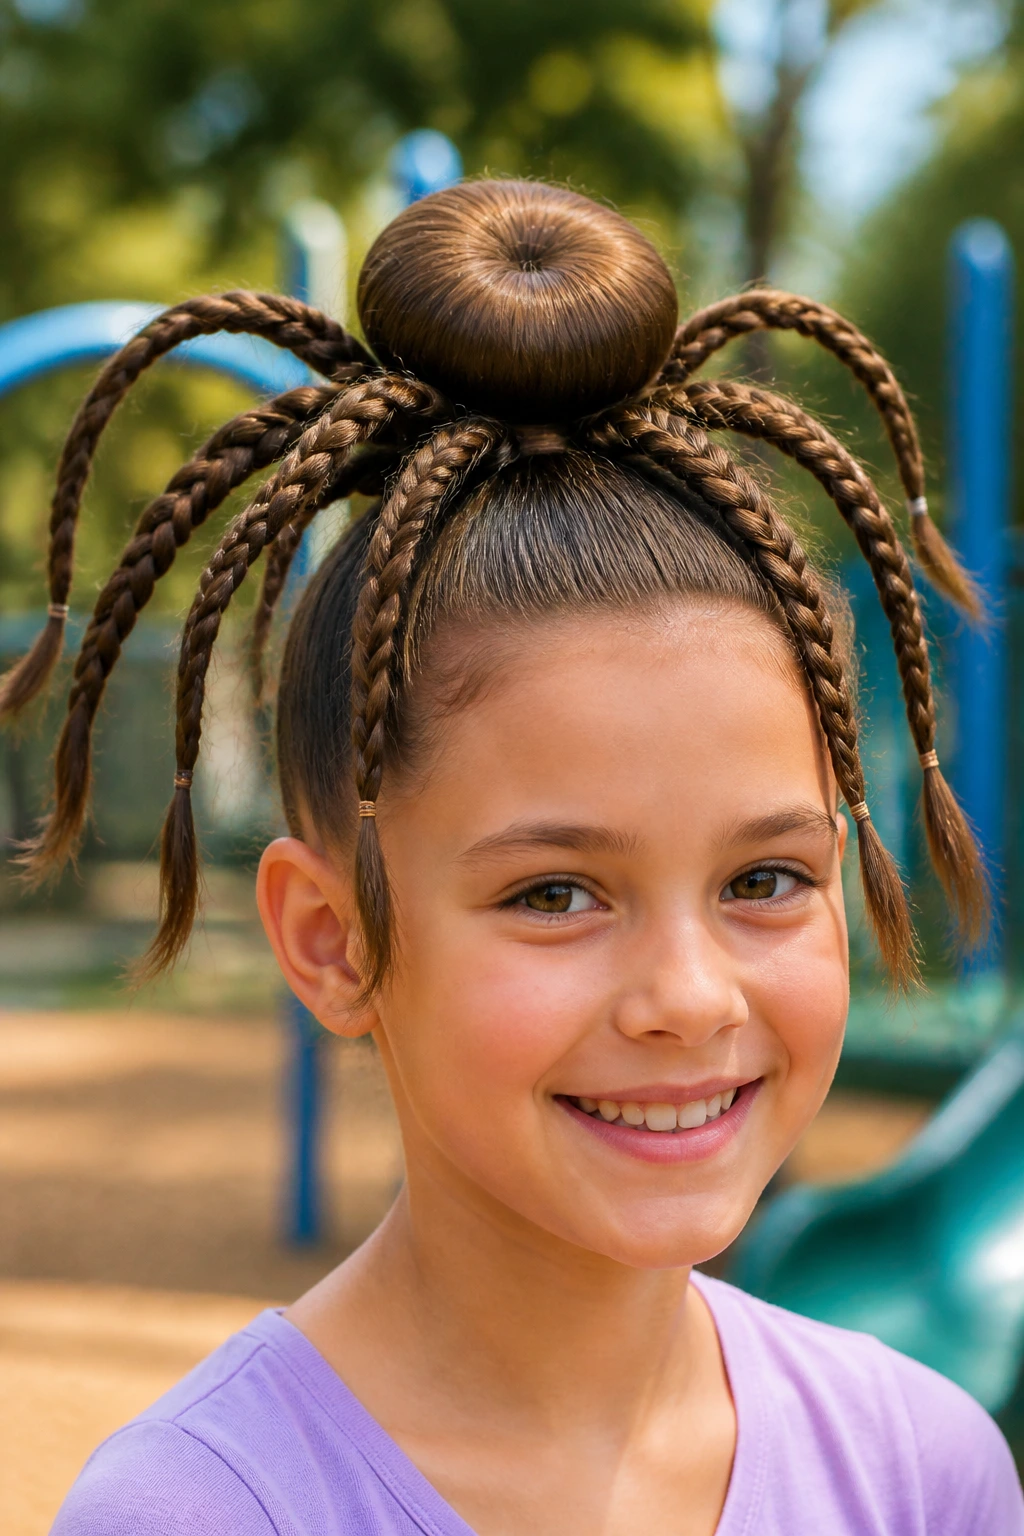
If your child loves ocean creatures, this marine-themed hairstyle is an absolute must-try. It turns a standard sock bun into the head of a friendly octopus, with the remaining hair braided into eight distinct tentacles.
Unlike Simple Buns, This Style Has Movement
Most buns are stationary, but the octopus bun features hanging braids that swing and bounce as your child walks. This dynamic element makes it a standout choice for school spirit days.
Who This Style Is Best For
This style requires very long hair of uniform length. Because you need enough hair to form both the central head and the eight hanging braids, it works best on thick, waist-length locks.
Step-by-Step Styling Direction
Create a large, smooth sock bun at the very top of the head, leaving a generous amount of hair hanging out from the center of the form. Divide this remaining hair into eight equal sections around the base of the bun. Braid each section tightly, secure the ends with small clear elastics, and attach two large googly eyes to the front of the bun using hair-safe adhesive.
13. The Christmas Tree Cone
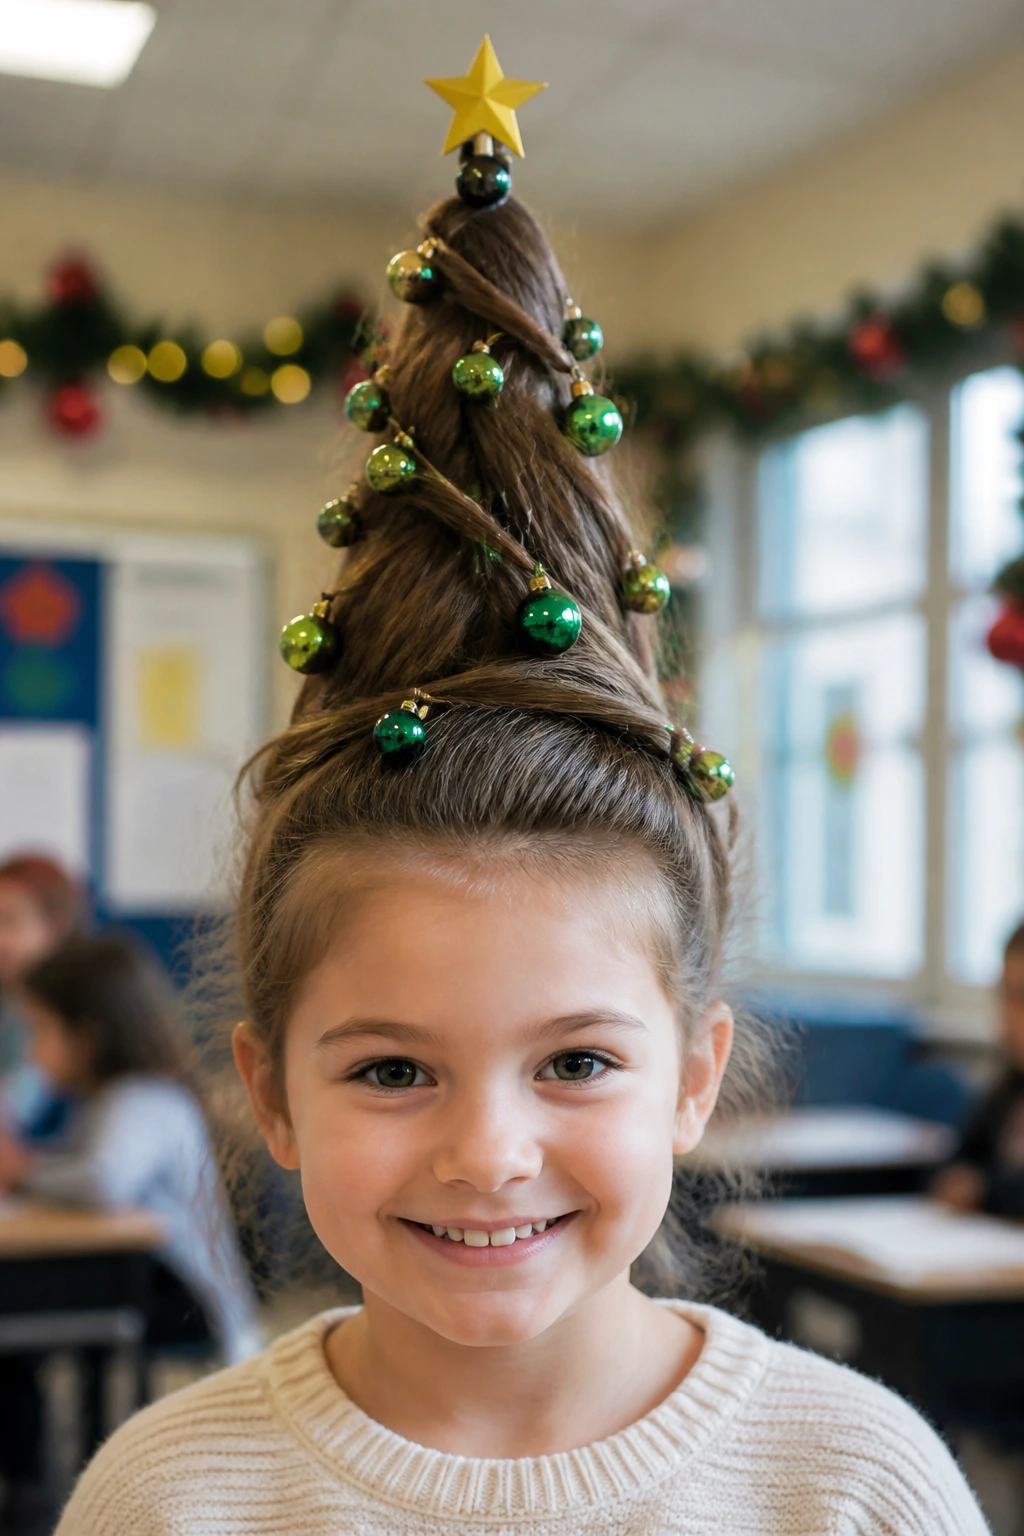
Bring some holiday cheer to school with a towering, conical pine tree hairstyle. It uses a lightweight poster board cone hidden beneath the hair to achieve its dramatic, vertical shape.
Building the Green Canopy
To make the tree look lush and full, you need a strong, hollow support system. A simple green cardstock cone serves as the perfect foundation, allowing the hair to drape downward naturally like evergreen branches.
Materials for the Tree
- A cone made from green construction paper or cardstock
- Green temporary hair color spray
- Small, lightweight plastic ornaments or colorful craft pom-poms
- A yellow star cutout mounted on a bobby pin for the topper
Pro tip: Secure the paper cone to the head using several bobby pins crossed over the bottom rim before pulling the ponytail up through the center of the cone.
14. The Ice Cream Cone High Pony
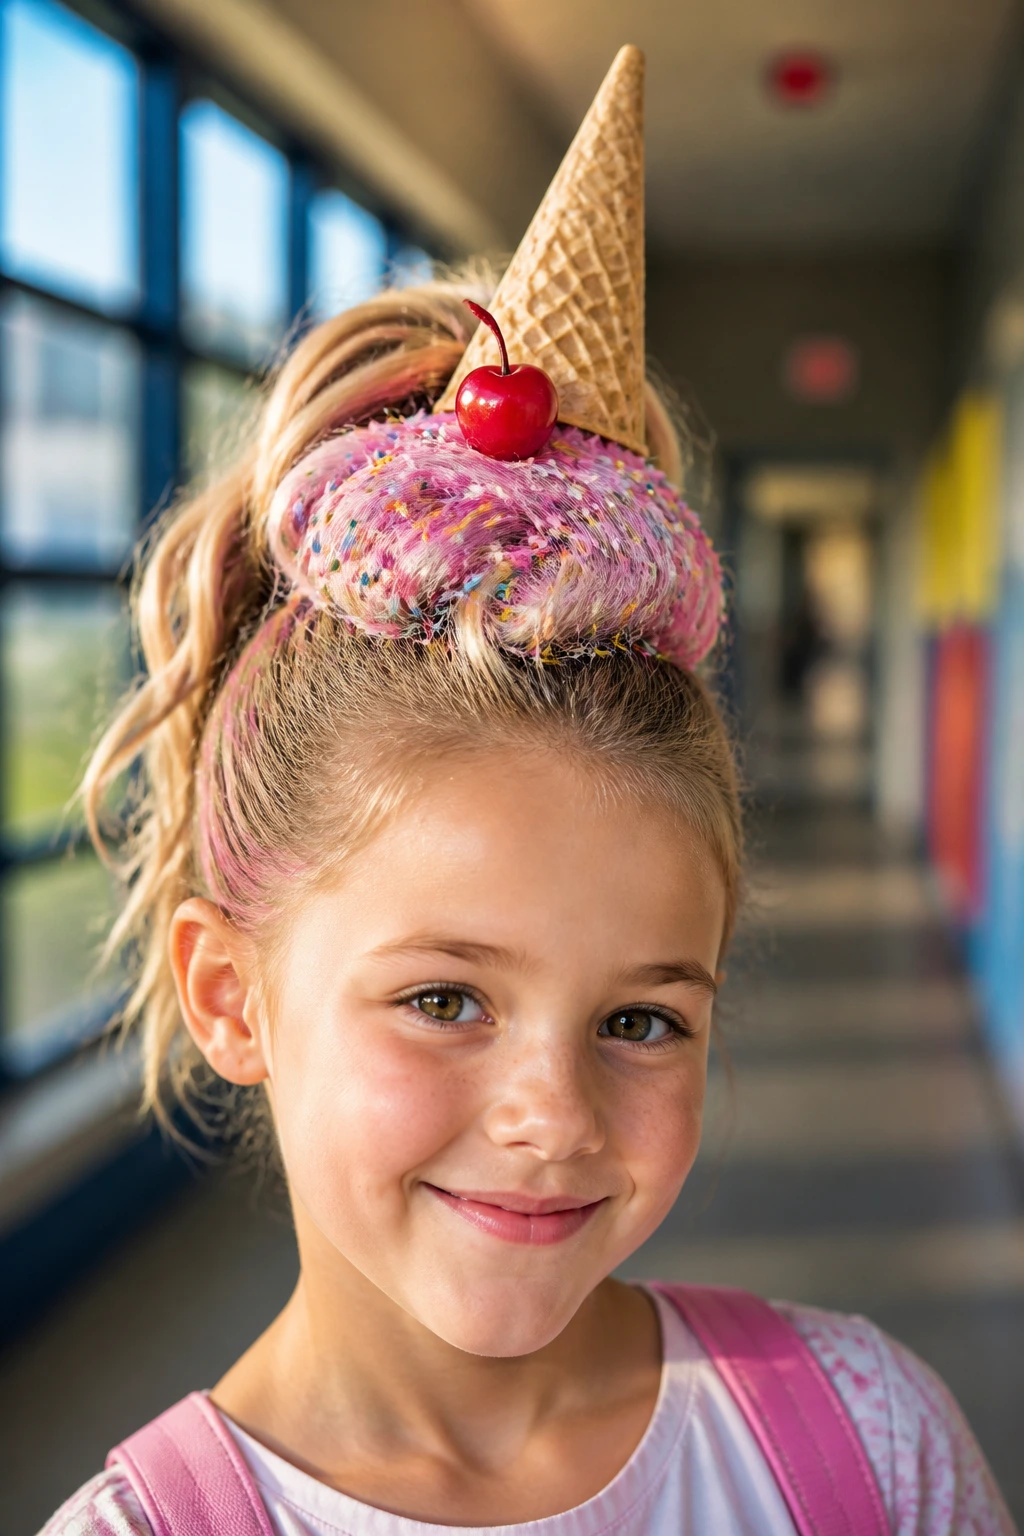
This delicious design looks good enough to eat and is incredibly easy to assemble using a real waffle cone. It is a sweet option for warm-weather school events or summer camp spirit days.
To build this, gently poke a small hole through the pointed bottom of a clean waffle cone. Pull a high ponytail up through the hole so the cone sits upside down on the head, with the wide opening facing upward. The ponytail hair should spill out of the cone like a generous scoop of soft-serve ice cream.
Tease the ponytail hair into a round, fluffy ball right at the mouth of the cone, and mist it with pink or white temporary hair color spray. Top off the scoop with a red hair clip that looks like a cherry, and slide a few colorful bobby pins into the hair to act as candy sprinkles.
15. The Bug Infestation Grass Patch
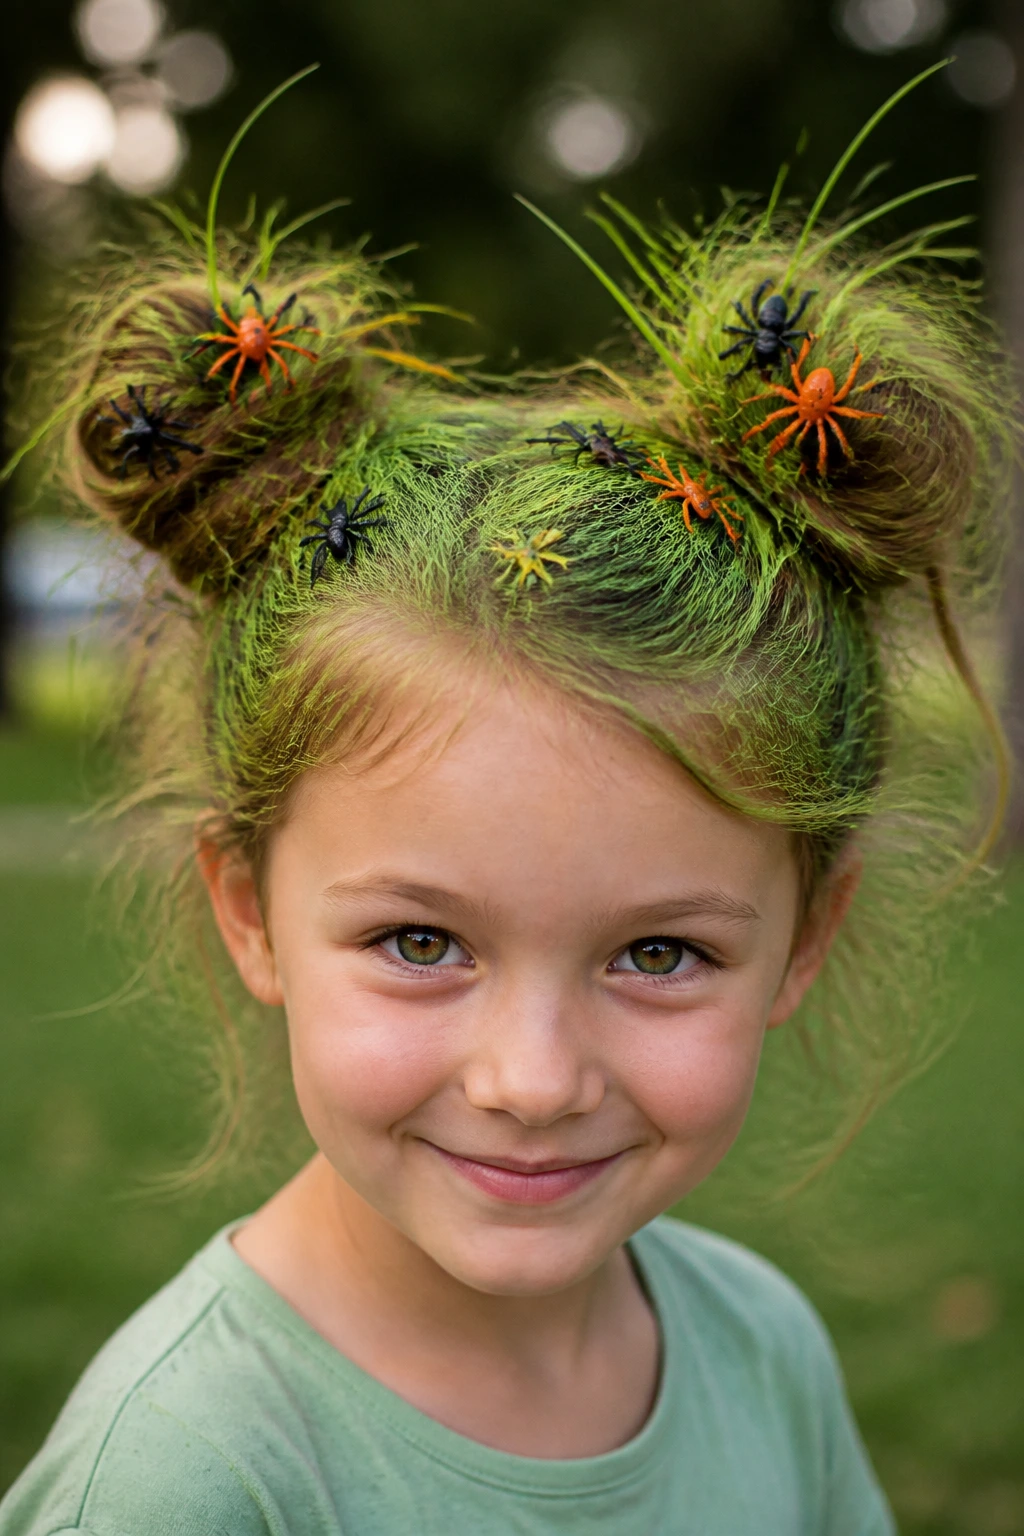
For kids who love creepy-crawlies, this style turns the head into a wild patch of forest floor. It uses green hair spray and plastic insect toys to create a miniature ecosystem.
Why This Style Is a Crowd-Pleaser
This look is delightfully gross and highly interactive. The bright green color immediately catches the eye, while the scattered plastic bugs invite classmates to take a closer, curious look.
How to Style the Forest Floor
- Part the hair down the middle and create two messy, textured buns or a series of small, spiky knots.
- Coat the entire style with temporary green hair color spray to look like fresh grass.
- Use a strong hair gel to make small sections of hair stick straight up like blades of turf.
- Attach plastic toy beetles, ants, and caterpillars to the hair using small bobby pins or lash glue.
16. The LEGO Brick Tower
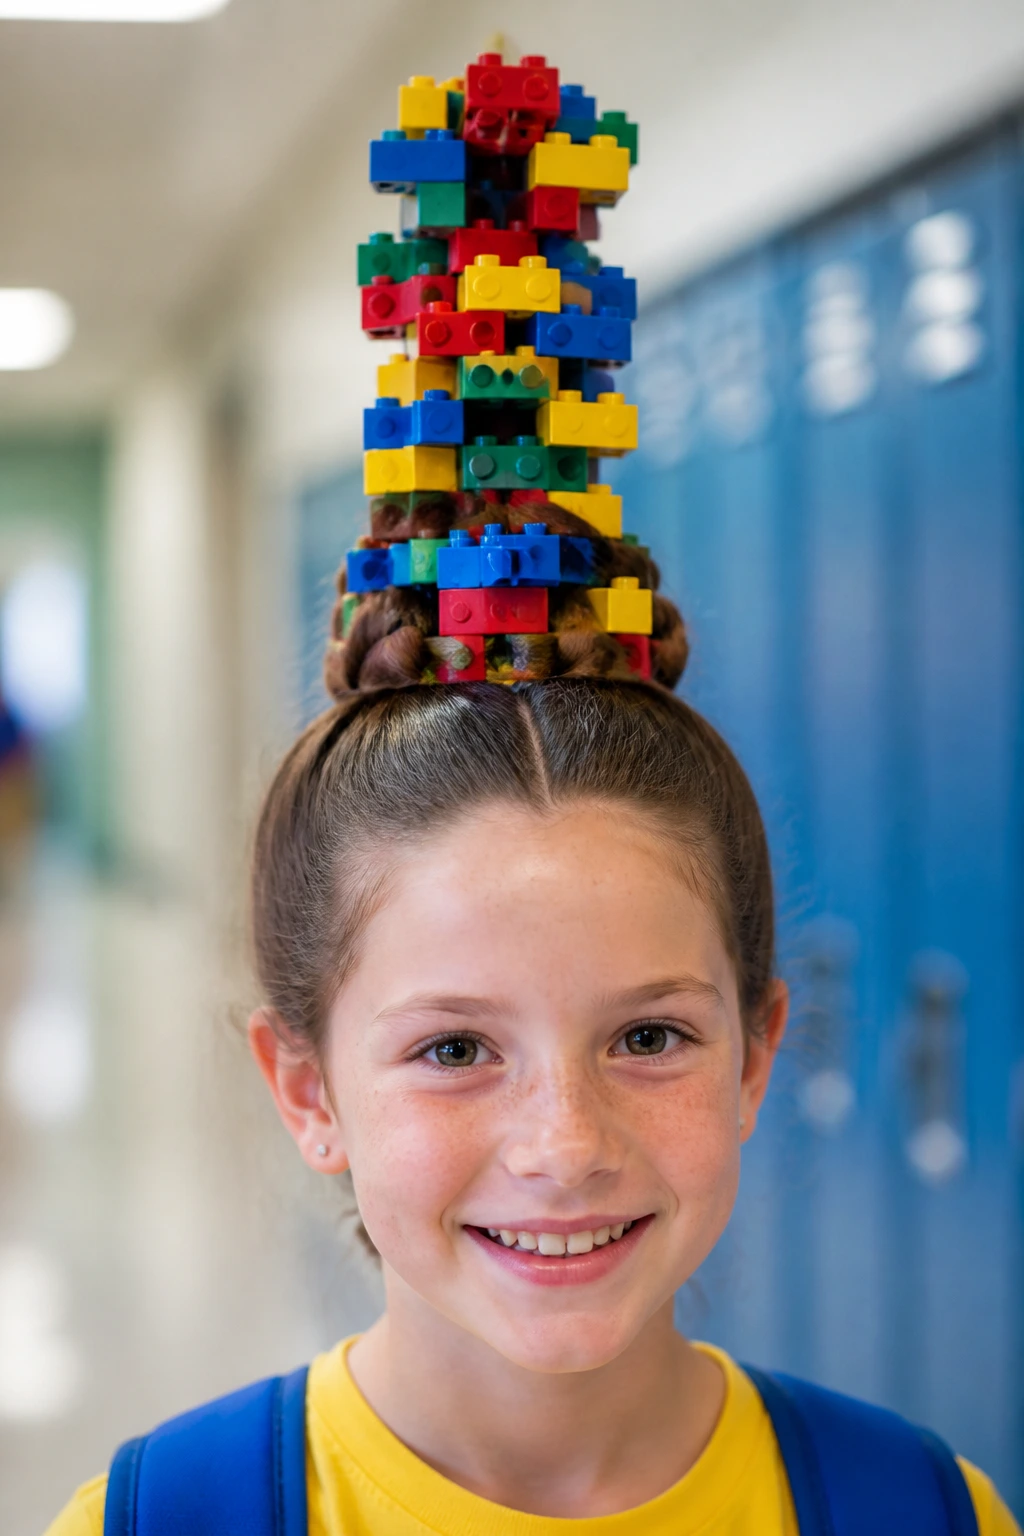
Turn a love for building blocks into a colorful, geometric hair masterpiece. This style uses real plastic bricks to create a towering sculpture that stands tall all day long.
Building with Hair and Bricks
The trick to using real toy bricks is choosing the lightest ones possible and anchoring them to a firm base. By weaving the hair through the hollow undersides of the bricks, you can lock them into place without needing heavy glue.
Toy Tower Materials
- Four to five long, bright LEGO or Duplo bricks
- Sturdy hair elastics to segment the hair
- A firm-hold hair wax to keep flyaways smooth
- Small hair clips in primary colors
Pro tip: Thread a thin ponytail through the center of a hollowed-out block stack to keep the entire plastic tower centered and secure on the head.
17. The Mermaid Tail Braid
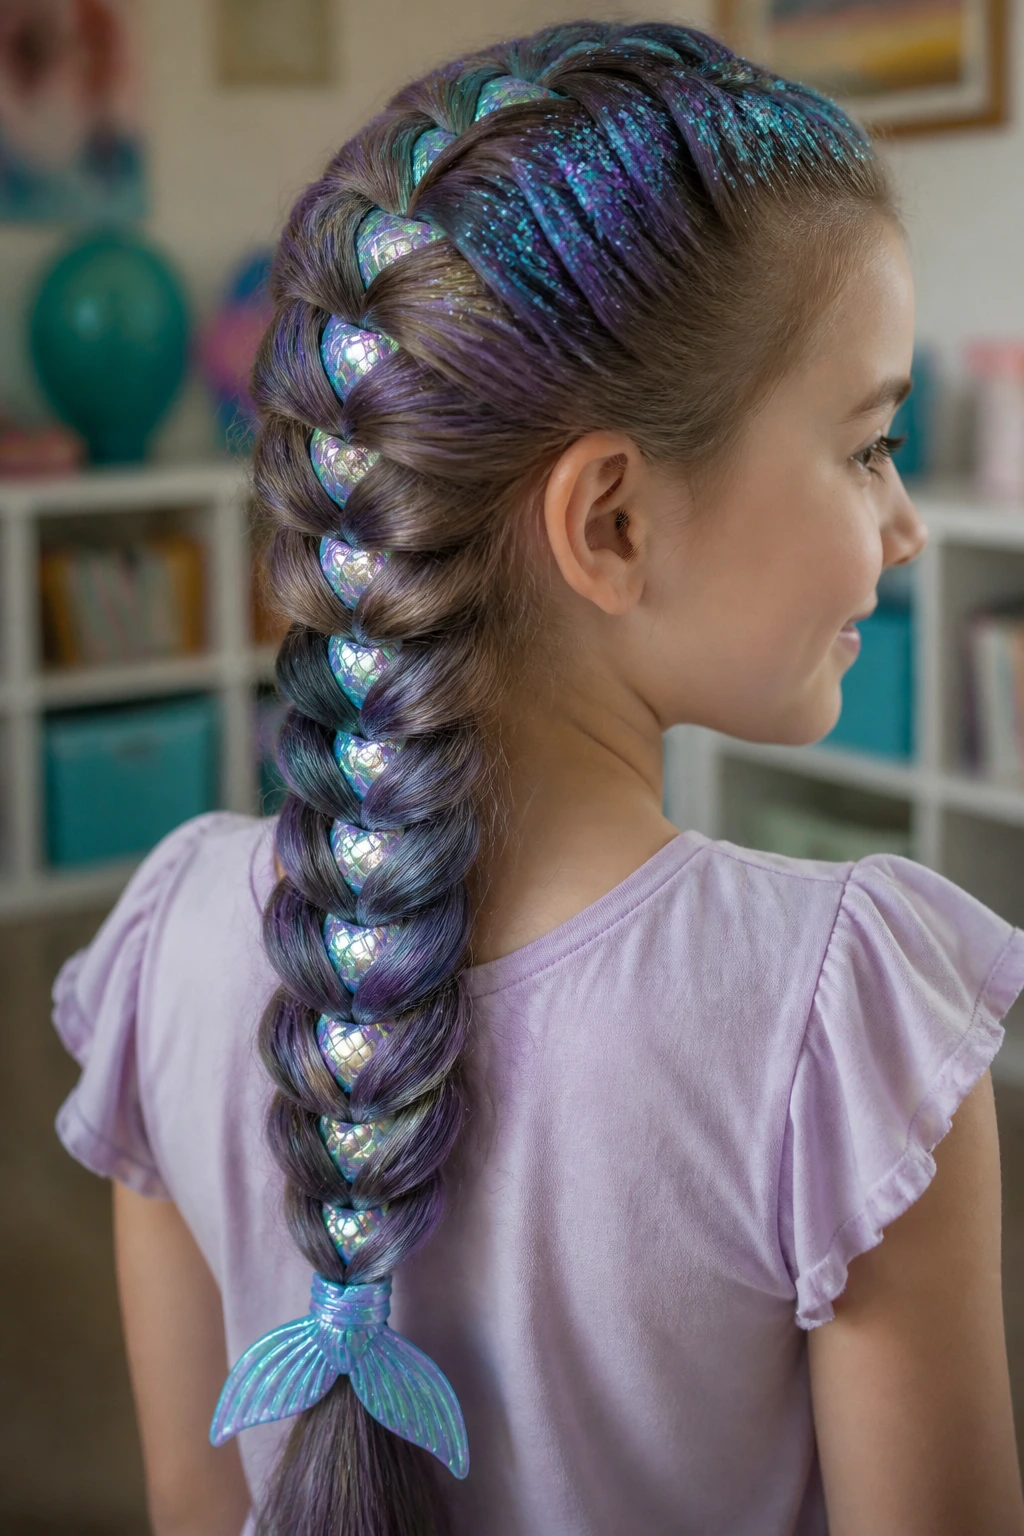
This fantasy-inspired look turns a classic French braid into the shimmering tail of a mystical sea creature. It is elegant, colorful, and perfect for older children who want a creative look that still feels sophisticated.
To start, braid the hair into a thick, flat fishtail braid down the center of the back. As you braid, tuck in small strips of iridescent ribbon or metallic green yarn to mimic the reflective sheen of fish scales. Secure the end of the braid with a wide, flared hair elastic that looks like a tail fin.
Coat the completed braid with temporary teal or purple hair color spray, and finish with a dusting of hair-safe glitter gel. This gorgeous style is highly durable, keeping the hair neat and tangle-free through a full day of classes, recess, and school bus rides.
18. The Unicorn Horn Cone
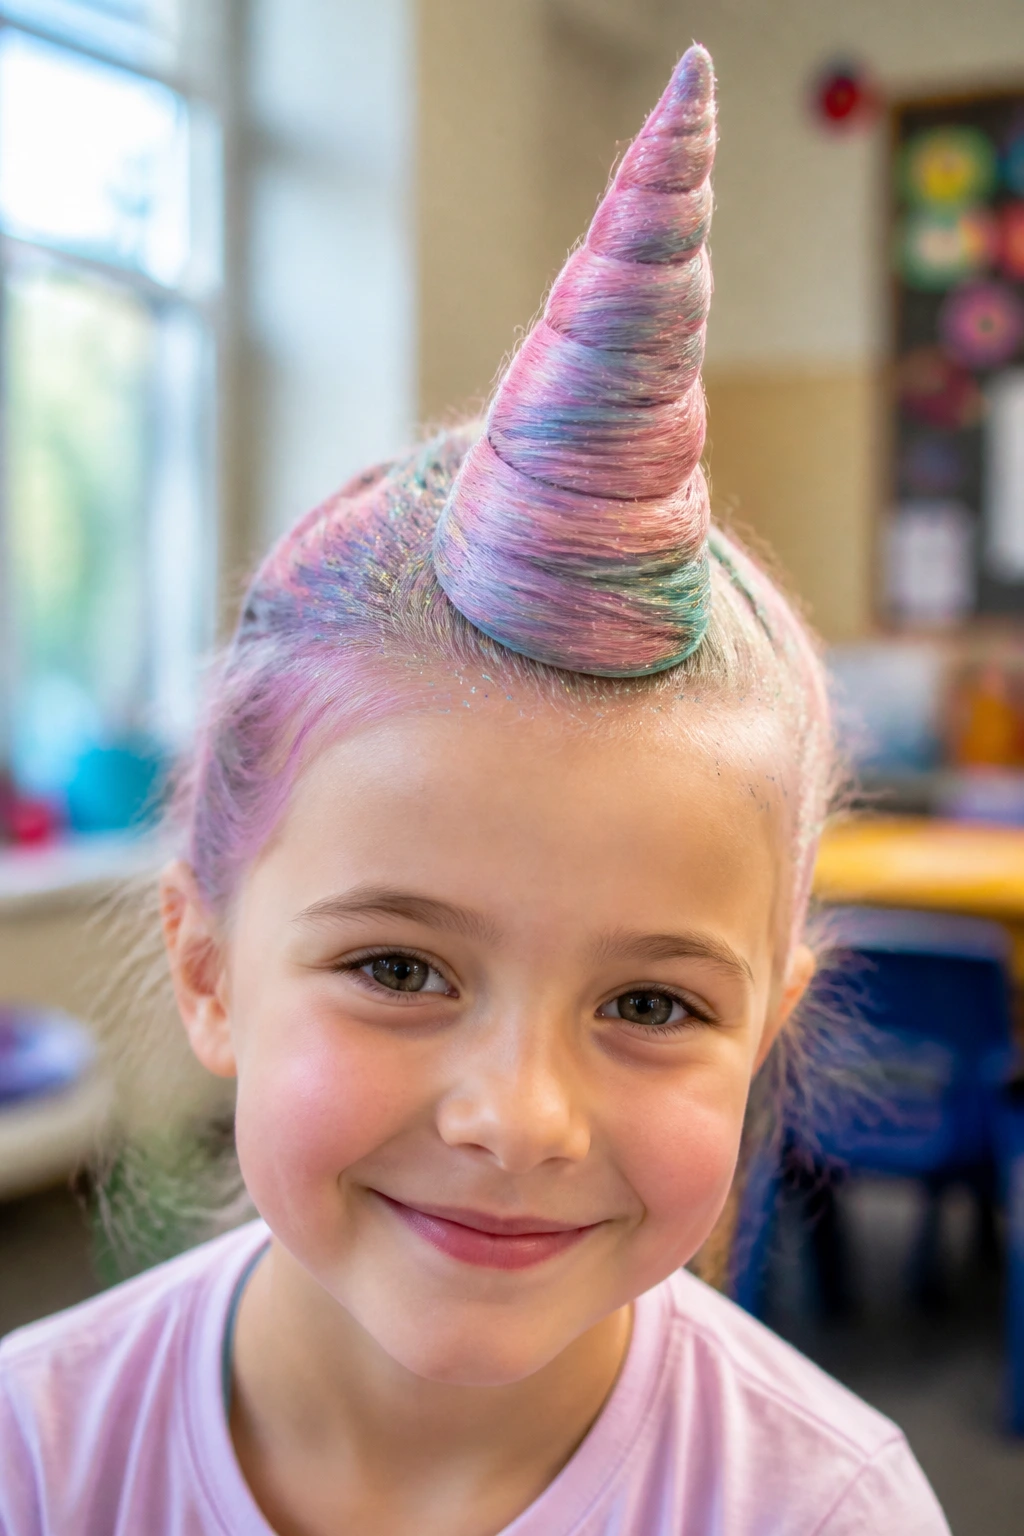
Make school mornings magical with a solid, glittering horn that rises directly from the forehead. This fantasy style uses a cardboard cone to create a smooth, spiraled horn shape.
Why It Stands Out in a Crowd
The unicorn horn is instantly recognizable and has a dramatic, clean silhouette. It offers a wonderful opportunity to use bright pastel colors and shimmering finishes that catch the sunlight beautifully.
Best Hair Types for This Style
This look is easiest to achieve on hair that is relatively long and straight. The smoothness of the hair helps wrap around the cardstock cone without creating lumps or uneven bumps.
Specific Styling Direction
Place a small cardstock cone right at the hairline above the forehead. Pull a front section of hair forward, wrap it tightly around the cone in a spiraling pattern, and secure the tip with a small elastic. Spray the horn with temporary pink or gold hair color, and add a generous layer of glitter spray to complete the look.
19. The Caterpillar Bubble Pony
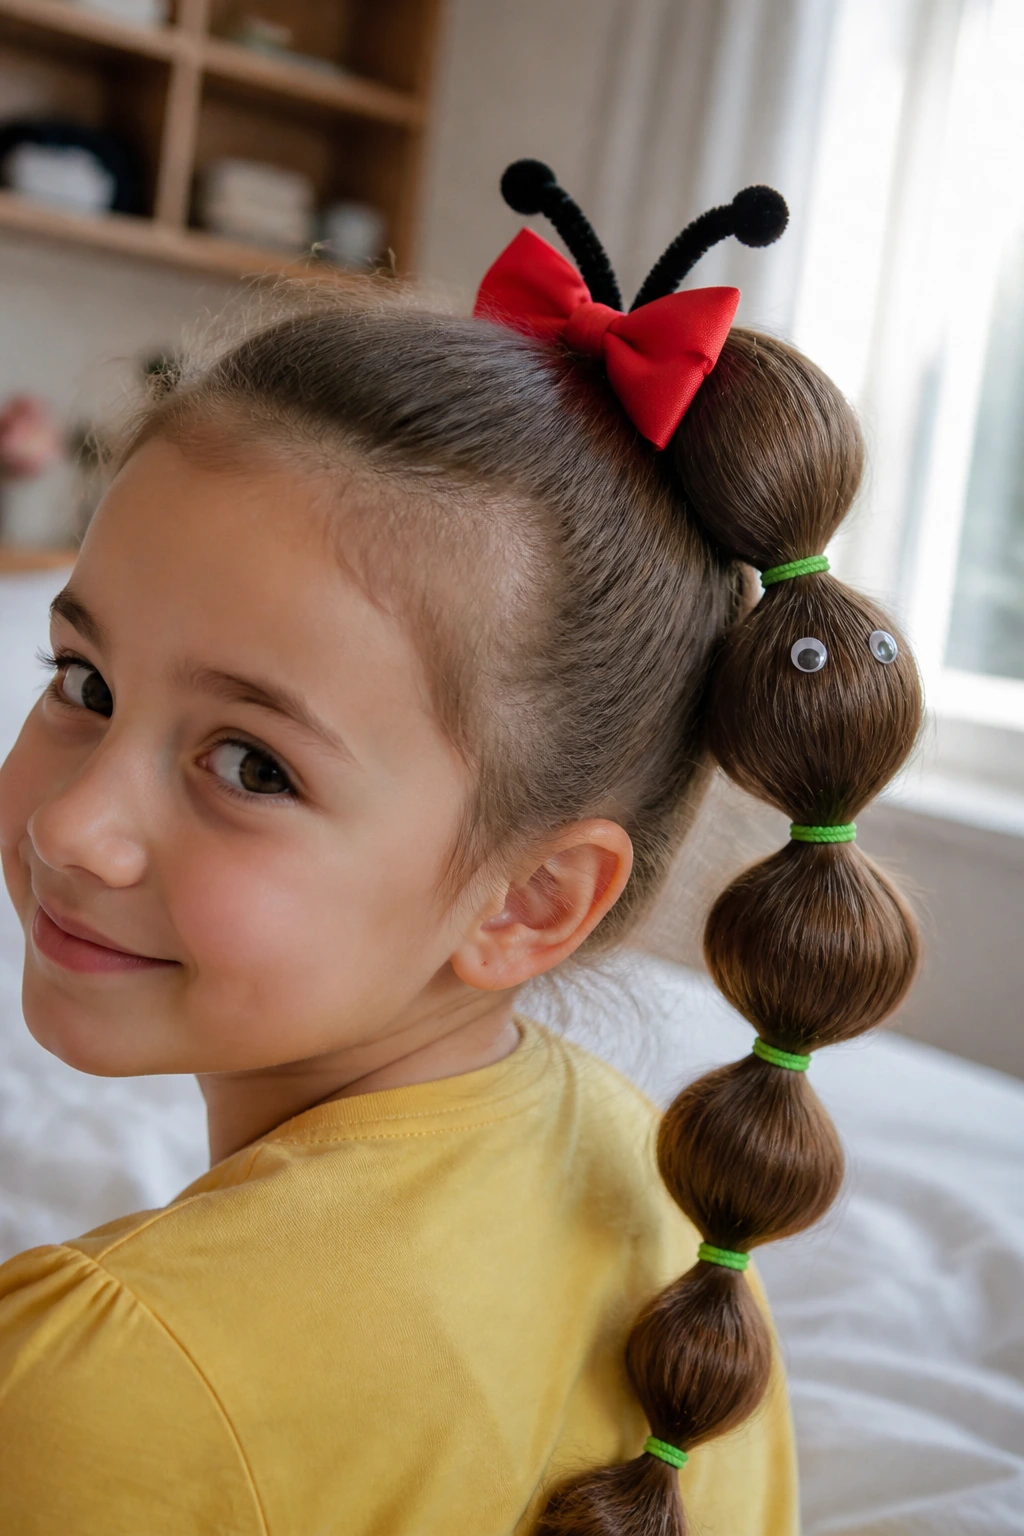
Bring a favorite childhood storybook character to life with this sweet, segmented ponytail style. It is an excellent choice for long hair and requires zero hairspray or color sprays to look effective.
Creating the Segmented Body
This style relies on the “bubble ponytail” technique, which uses multiple elastic bands spaced evenly down the length of the hair. By gently pulling the hair outward between each band, you create a series of round, caterpillar-like segments.
Materials List for the Caterpillar
- Eight to ten bright green elastic hair bands
- One red hair bow or red elastic band for the head
- Two small black pipe cleaners to act as antennae
- Two small googly eyes attached to bobby pins
Pro tip: Space the elastic bands exactly two inches apart to keep the caterpillar’s body segments uniform and realistic.
20. The Butterfly Garden Clips
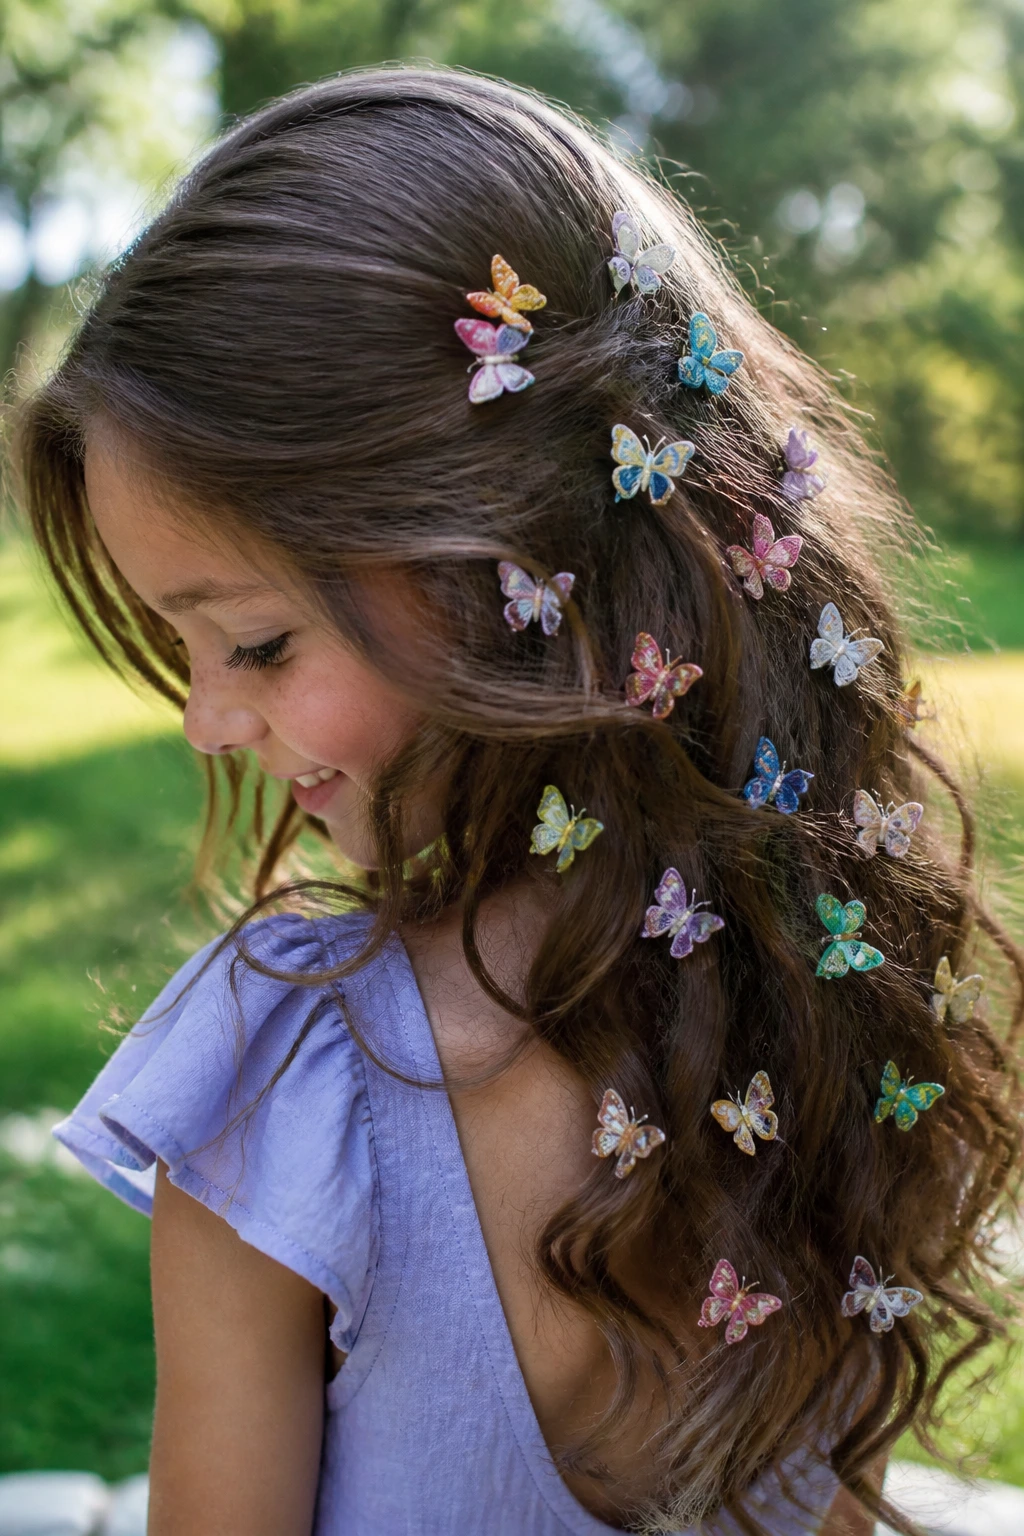
Turn your child’s hair into a lush, blooming meadow filled with colorful butterflies. This delicate style is highly detailed and perfect for spring school events.
To create this look, curl the hair gently to create soft, wave-like textures that resemble rolling garden hills. Pull the top section of hair back into a loose half-up style, leaving the rest of the hair tumbling down the back. Scatter a dozen small, colorful fabric butterfly clips throughout the waves.
This style is incredibly fast to assemble, as it relies on pre-made clips rather than complex braiding or structural supports. It feels light on the head, making it a comfortable choice for sensitive children who do not like the feeling of tight updos or heavy hairspray.
21. The Halloween Skeleton Hand Grip
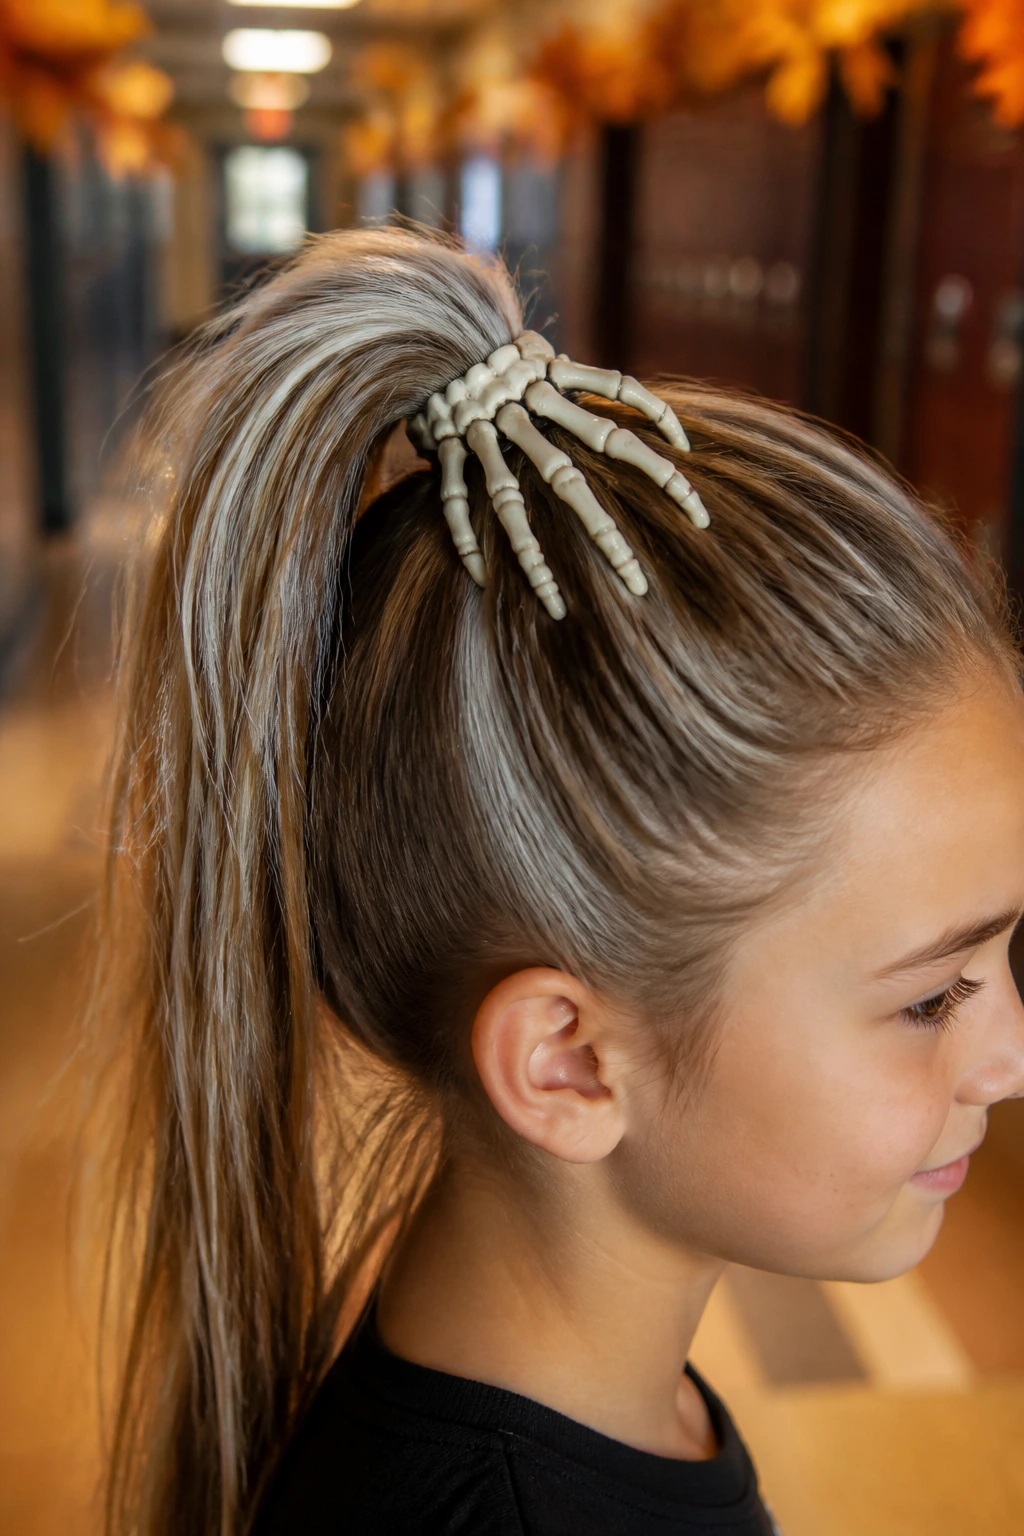
Give your child’s hairstyle a spooky, skeletal touch with a plastic hand that appears to be clutching their hair. This look is perfect for autumn spirit weeks and takes only a minute to put together.
The Illusion of the Grip
This style uses a plastic skeleton hand clip positioned to look like it is holding up a high ponytail. The contrast between the clean hair and the bony plastic fingers creates an eye-catching visual that classmates will love.
Materials Needed for This Look
- One plastic skeleton hand hair clip or slide
- A strong elastic band to hold the actual weight of the pony
- Dark or white temporary hair color spray for contrast
- Bobby pins to secure the skeletal fingertips
Pro tip: Paint the plastic fingernails on the skeleton hand with bright nail polish before clipping it into the hair for an extra splash of color.
22. The Surfing Wave with Toy Figurine
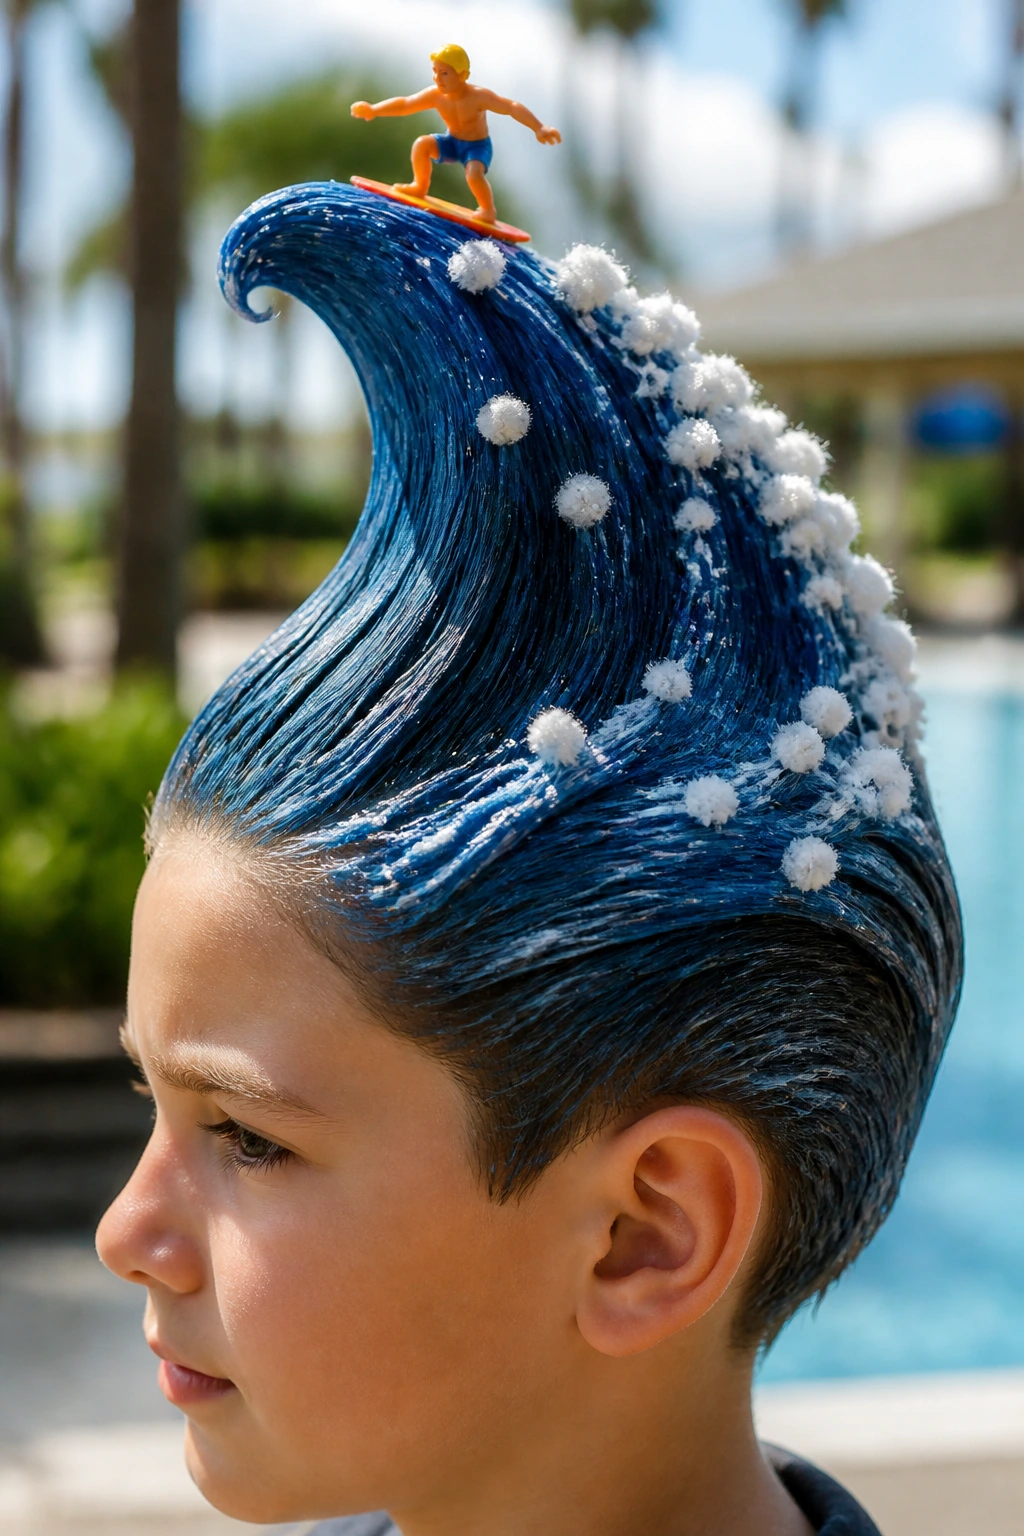
Bring the excitement of extreme water sports to the classroom with this miniature surfing scene. This style uses structural styling gel and a small action figure to capture a high-speed moment.
Crafting the Ocean Spray
The goal is to make the hair look like a churning, frothy wave. By combining blue hair spray with white craft pom-poms, you can create the illusion of crashing sea foam around the surfer.
Materials and Assembly Details
- A small, lightweight plastic toy surfer or action figure
- High-strength blue hair gel and blue color spray
- Three to four small white craft pom-poms
- A sturdy bobby pin to mount the figure to the scalp
Pro tip: Secure the surfer’s feet to a bobby pin using a tiny drop of hot glue before sliding the pin deep into the ponytail base to keep the toy stable.
23. The Hot Wheels Race Track
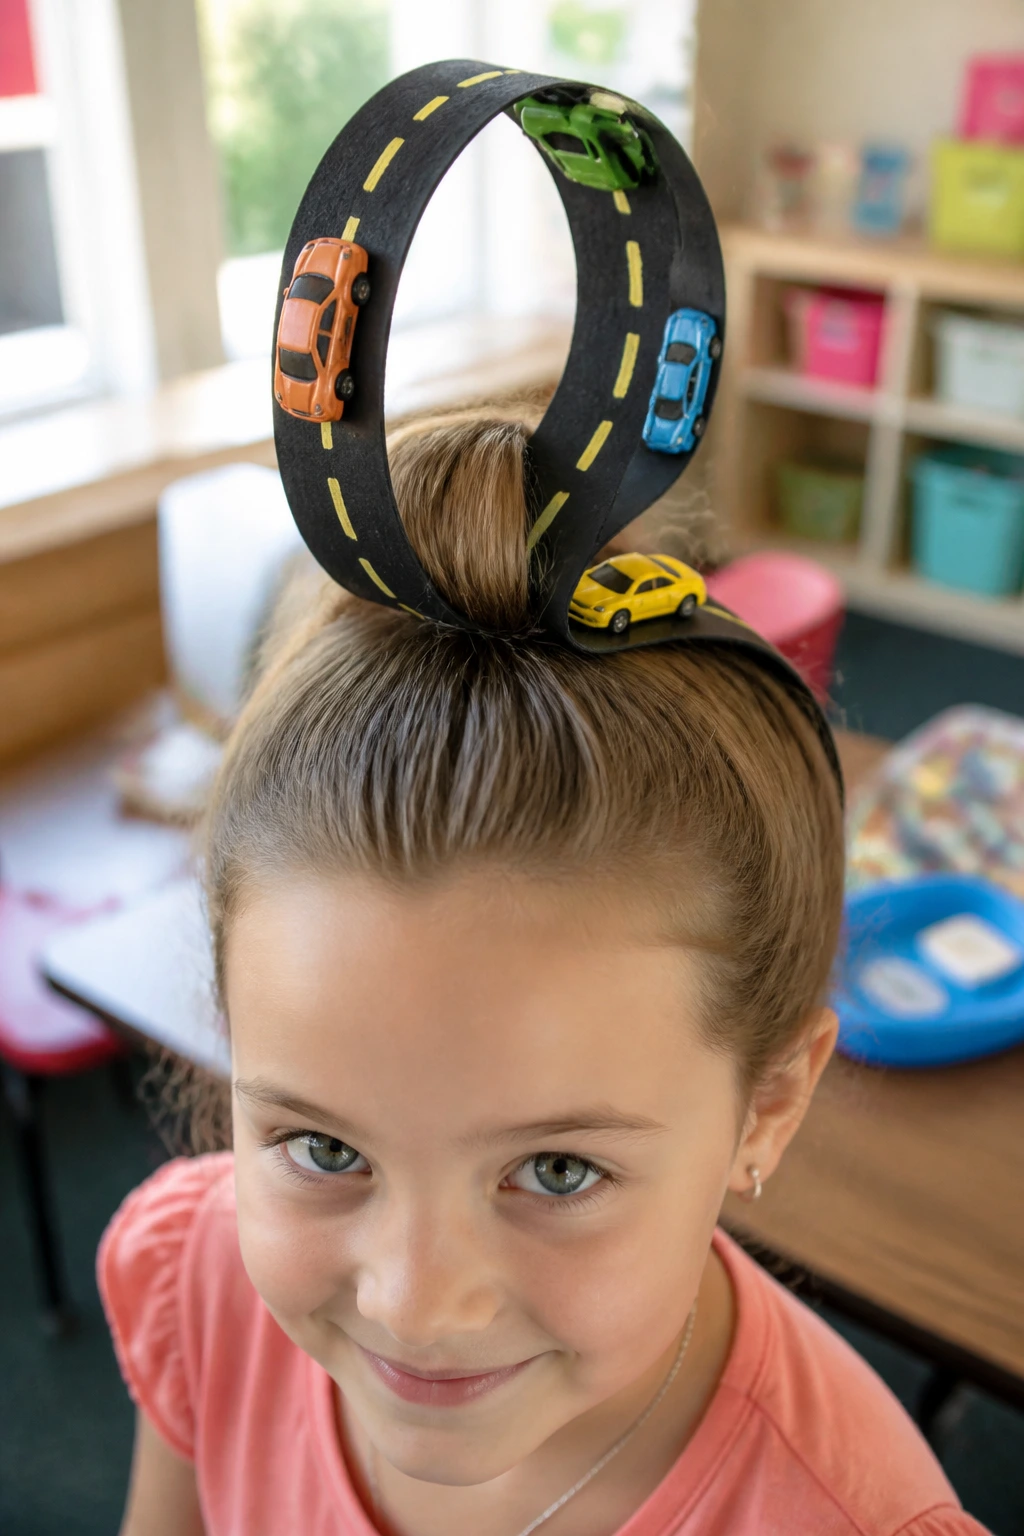
This high-speed design turns your child’s head into a classic loop-de-loop race track for toy cars. It is an absolute favorite for kids who love vehicles and construction toys.
To build this, bend a strip of flexible black craft foam or thick ribbon into a smooth, vertical loop over the top of a high ponytail. Secure both ends of the loop to the base of the ponytail with strong bobby pins. This creates a miniature vertical track rising from the head.
Using lightweight double-sided tape, attach one or two small plastic toy cars to the track loop, making it look like they are speeding through the curve. You can draw yellow dashed lines down the center of the foam track with a paint pen to make the road look authentic.
24. The Marshmallow Stick Skewers
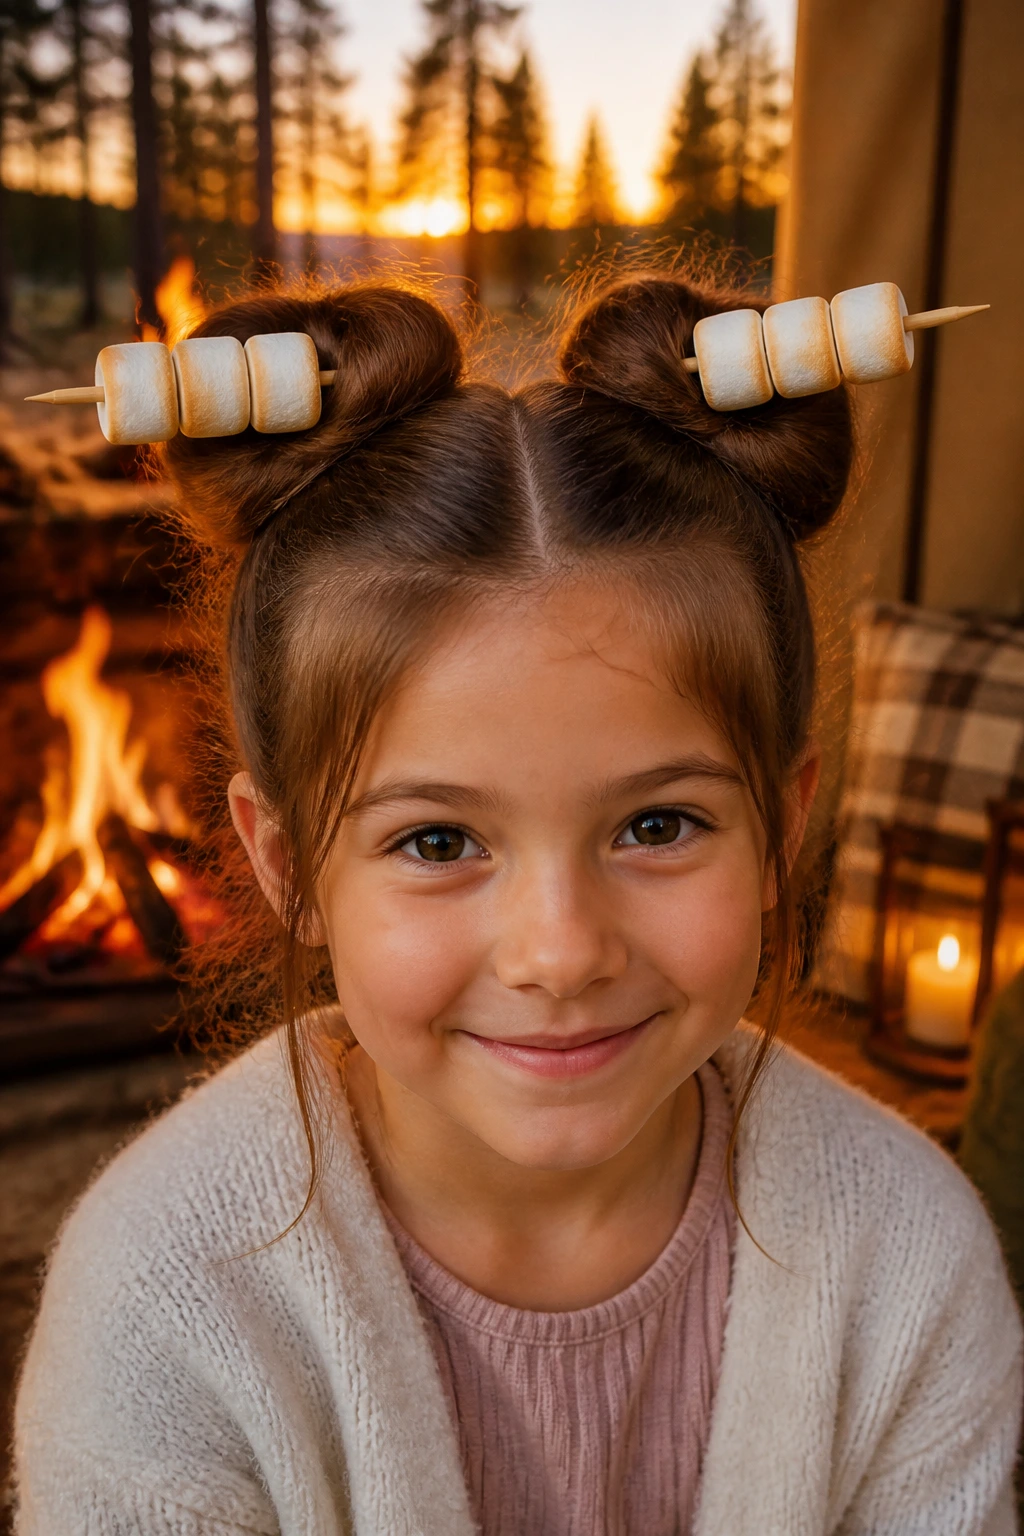
This camp-themed hairstyle brings the cozy feeling of a campfire to school. It uses real wooden dowels and craft foam to create a pair of toasted marshmallow skewers.
Unlike Heavy Toys, Foam Stays Upright
Using real marshmallows can get sticky and heavy, but white craft foam cylinders offer the perfect lightweight alternative. They look incredibly realistic without attracting bugs or weighing down the hair.
Best Hair Types for Skewers
This style works best on medium to thick hair that can be easily parted into two high, solid space buns. The buns act as the “campfire” bases that support the skewers.
Specific Styling Recommendation
Slide two clean wooden craft dowels through the center of two high space buns. Thread three white foam cylinders onto each dowel, and use a brown marker to lightly shade the edges of the foam so they look perfectly toasted over a campfire.
25. The Glitter Gel Parting
When you are truly pressed for time and the school bus is pulling up the street, this style is your saving grace. It takes a standard, simple hairstyle and makes it look incredibly festive with a heavy dose of shimmering gel.
How to Apply the Shimmer
This look is all about clean lines and high contrast. By keeping the hair sleek and smooth, the glittering parting line becomes the star of the show.
Materials for Quick Shimmer
- A jar of hair-safe, chunky cosmetic glitter gel
- A clean makeup brush or applicator spoon
- A fine-tooth comb to create a sharp parting line
- Two simple hair elastics for neat pigtails or braids
Pro tip: Apply the glitter gel generously along the central part line using a flat foundation brush to get an even, high-impact metallic finish.
Wrapping Up
Surviving Crazy Hair Day does not require a background in professional cosmetology or hours of tedious prep work. The most successful styles are often the ones born from a quick look through your kitchen cupboards or craft drawers. By using lightweight structural anchors like paper plates, pipe cleaners, and toy figurines, you can create memorable, gravity-defying designs that will be the talk of the classroom.
The key to a stress-free morning is keeping the process fun and collaborative. Let your child choose their favorite theme, and don’t worry about making every strand of hair lay perfectly flat. The charm of these festive hairstyles lies in their playful, chaotic energy. With a strong elastic band, a handful of trusty bobby pins, and a bit of creative confidence, you can send your child off to school with a smile on their face and a masterpiece on their head.
