



Imagine wrestling with thick, heavy hair that refuses to hold a parting, only to realize its natural weight and glassy luster are actually your greatest assets. The classic, clean-cut aesthetic—often associated with collegiate styling and timeless tailoring—relies heavily on clean lines, polished finishes, and structured shapes. For decades, the mainstream imagery of this style featured soft, pliable locks, leaving many people with East Asian hair textures feeling like they had to fight their natural hair to fit the mold.
But when you look closely at the physical makeup of Asian hair, it actually possesses the exact qualities that make tidy, structured hairstyles shine. The round cross-section of the hair fiber gives it immense tensile strength and a naturally smooth cuticle layer that reflects light with remarkable intensity. You do not need to spend hours with a curling iron trying to force beachy waves that will inevitably fall flat by noon. Instead, the secret lies in choosing shapes that use the hair’s natural weight and straightness to create sharp, crisp silhouettes.
Achieving that clean-cut look is about choosing the right shapes and cuts that work with the weight and direction of your hair fibers. Whether you have short, cropped layers or long, flowing tresses, the goal is to highlight the natural health of your hair while adding small, intentional details that suggest neatness and order. Let’s look at how to master these styles without damaging your hair’s natural integrity.
Unique Physical Properties of Asian Hair Structure
To style your hair successfully, you have to understand what is happening under the cuticle. Asian hair fibers are typically thicker and coarser than Caucasian or Afro-textured hair. Each strand has a completely round cross-section, which is why it tends to grow straight out from the scalp rather than draping downward immediately. This straight-out growth pattern—often called “stubborn” hair—is actually just a sign of incredible structural strength.
Because the hair is so straight, the overlapping shingles of the cuticle layer lie extremely flat. This flat surface is why healthy Asian hair has that unmistakable, mirror-like shine. However, this same smooth structure makes the hair slippery. Bobby pins slide out, hair ties slip down, and curls often unravel within an hour because there is very little friction between the strands to hold them in place.
To create structured styles, you must introduce friction or use mechanical holds that do not rely on the hair’s natural grip. Lightweight creams will simply weigh the hair down, while heavy waxes can make it look greasy. The key is using targeted tension, strategic blow-drying angles, and specific, high-grip accessories to keep everything in place.
Essential Styling Tools for Structured Preppy Looks
Before you begin styling, your bathroom cabinet needs a few specific tools. You cannot rely on standard plastic combs or flimsy hair ties if you want a polished finish that lasts from a morning meeting through an evening dinner.
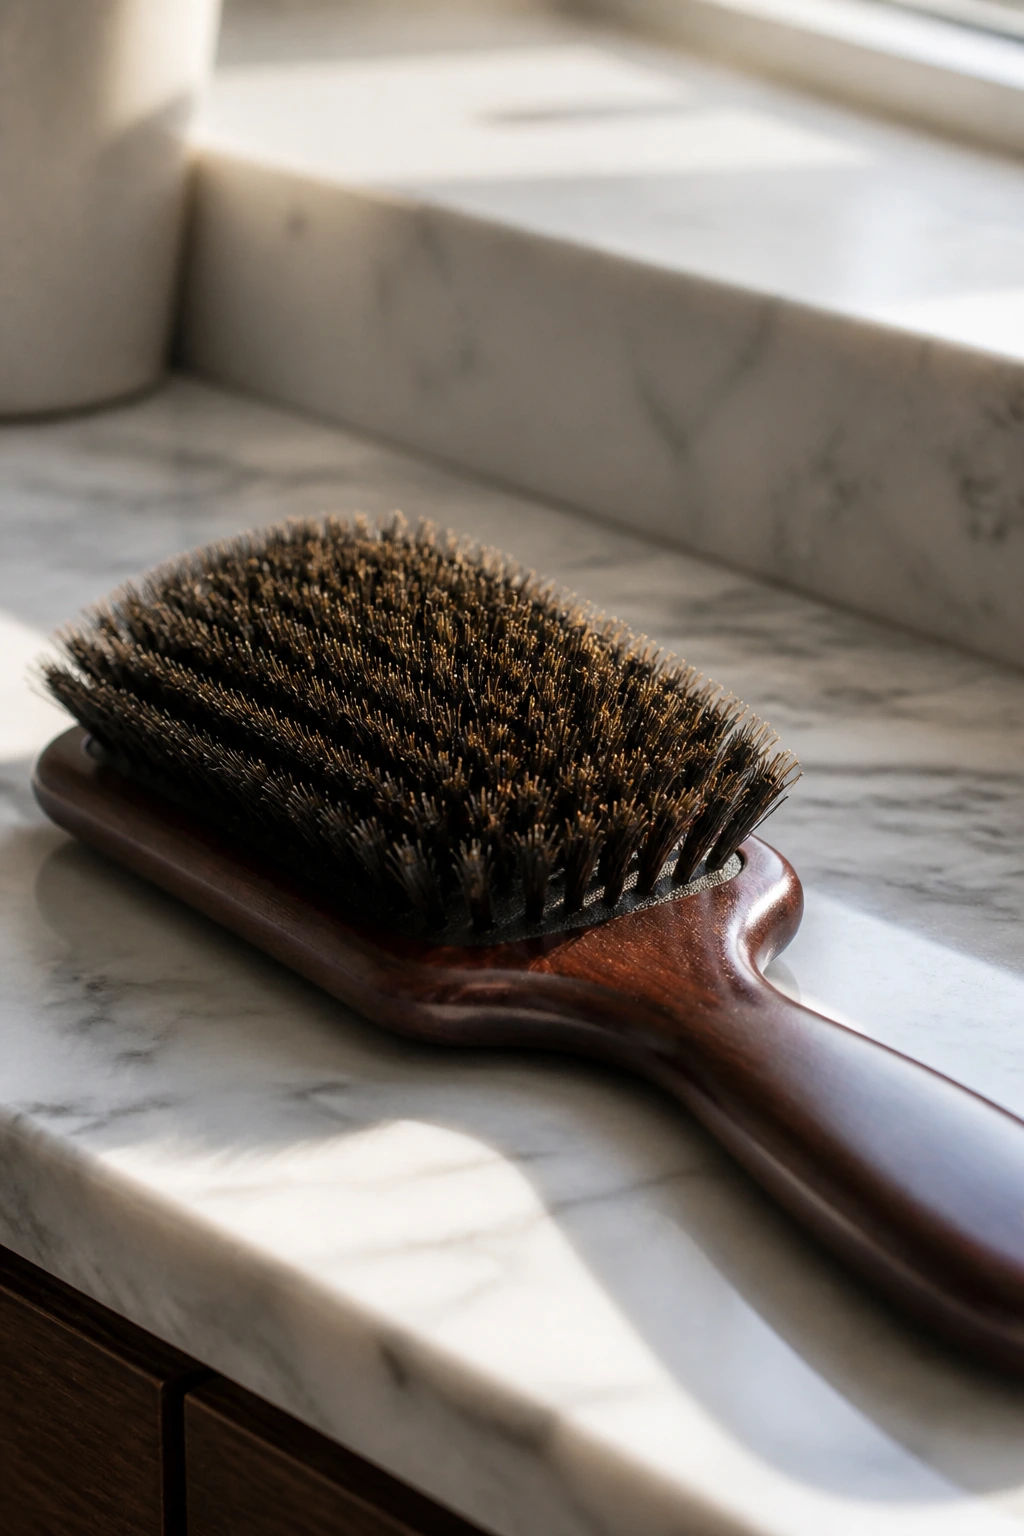
First, invest in a high-quality boar-bristle paddle brush. The dense, natural bristles are excellent for smoothing down flyaways and distributing your scalp’s natural oils down the length of the hair shaft. This creates a uniform sheen without the need for heavy silicone sprays.
Second, keep a metal-tailed comb on hand. A clean, razor-sharp part is the foundation of almost every style on this list, and plastic teeth are simply too thick to get that perfect line.
For products, look for a matte-finish styling clay for short styles and a lightweight, water-soluble pomade for medium lengths. These provide hold without adding unwanted weight. Finally, gather a selection of high-grip accessories: velvet-lined headbands, silk ribbons, and tortoise-shell claw clips with strong metal springs. These materials grip the slippery hair shaft much better than bare plastic or cheap elastic.
1. The Classic Deep Side Part with Velvet Headband
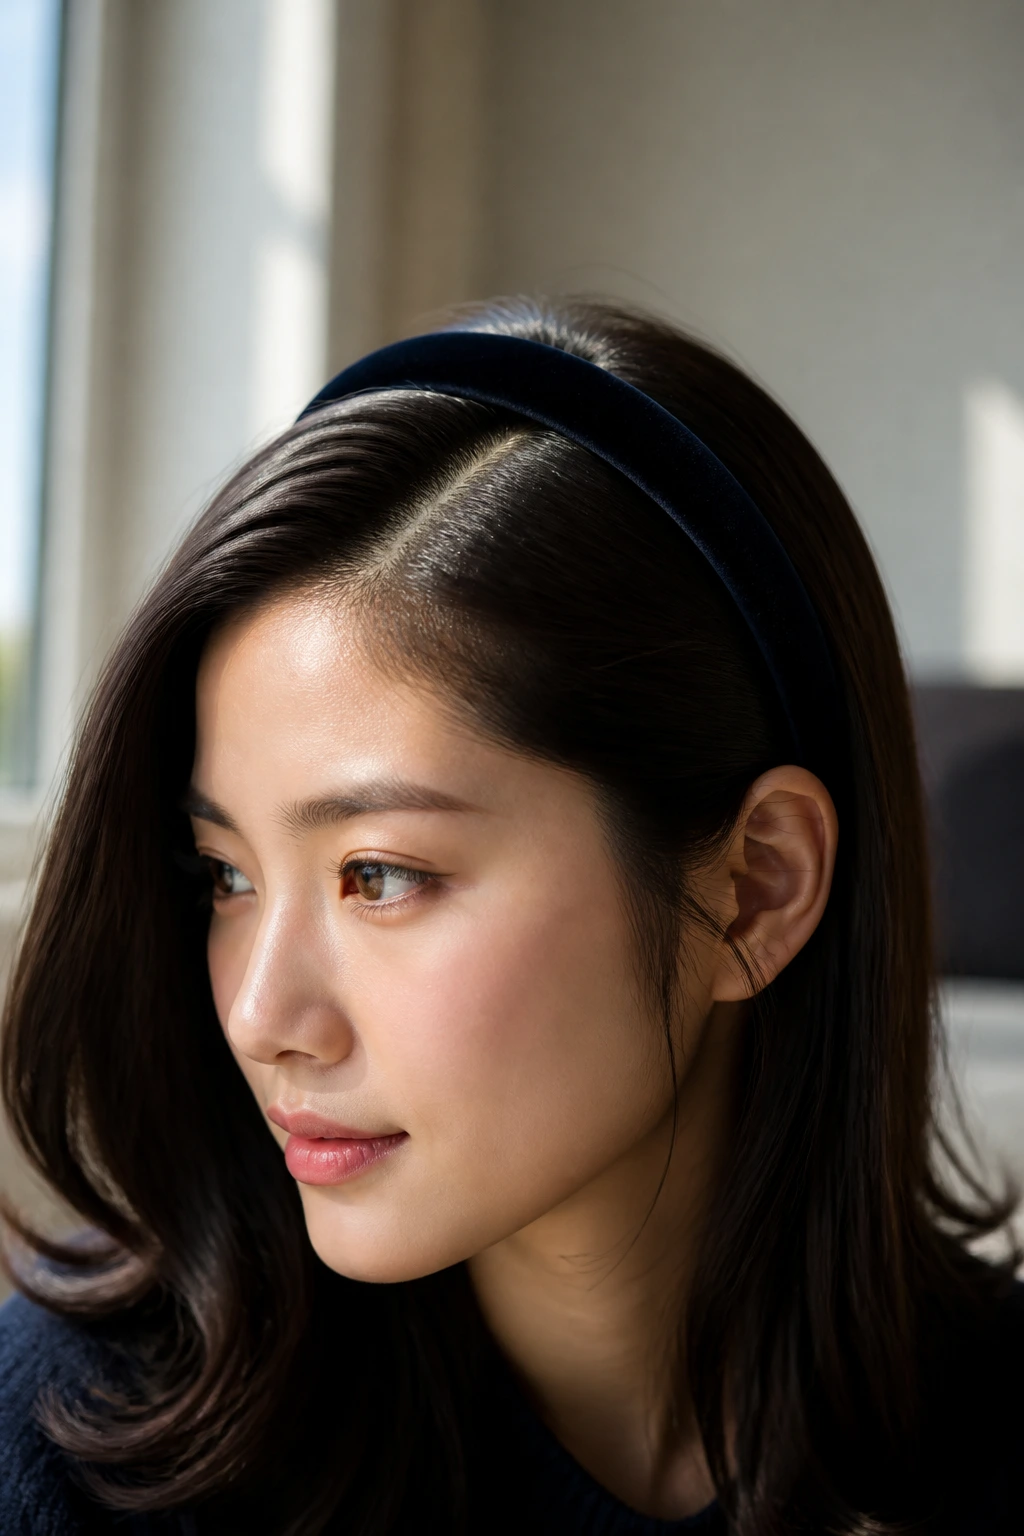
This style relies on absolute precision to create a look that is both youthful and organized. By shifting your part significantly to one side, you create an elegant sweep across the forehead that frames the eyes beautifully. The weight of the hair helps keep this sweep in place, while a plush headband acts as both a mechanical anchor and a style statement.
Why This Style Works So Well
The deep side part utilizes the natural straightness of the hair to create a clean, graphic line. Unlike wavy textures that can look messy when parted deeply, straight hair lays flat and neat, emphasizing the symmetry of your face.
Quick Styling Steps
- Start with damp hair and use the metal tail of your comb to draw a line starting directly above the arch of your eyebrow, extending back about three inches.
- Blow-dry the hair flat in the direction of the part, using a nozzle attachment on your dryer to direct the airflow downward.
- Place a thick, velvet-lined headband about two inches back from your hairline, pushing it slightly forward to create a small amount of volume just behind the band.
- Secure the ends behind your ears with a tiny dab of lightweight pomade to prevent any shorter layers from poking out.
Pro tip: Choose a headband in a rich, contrasting color like forest green, navy, or deep burgundy to make the natural dark tones of your hair pop.
2. The Polished Low Chignon with Silk Ribbon
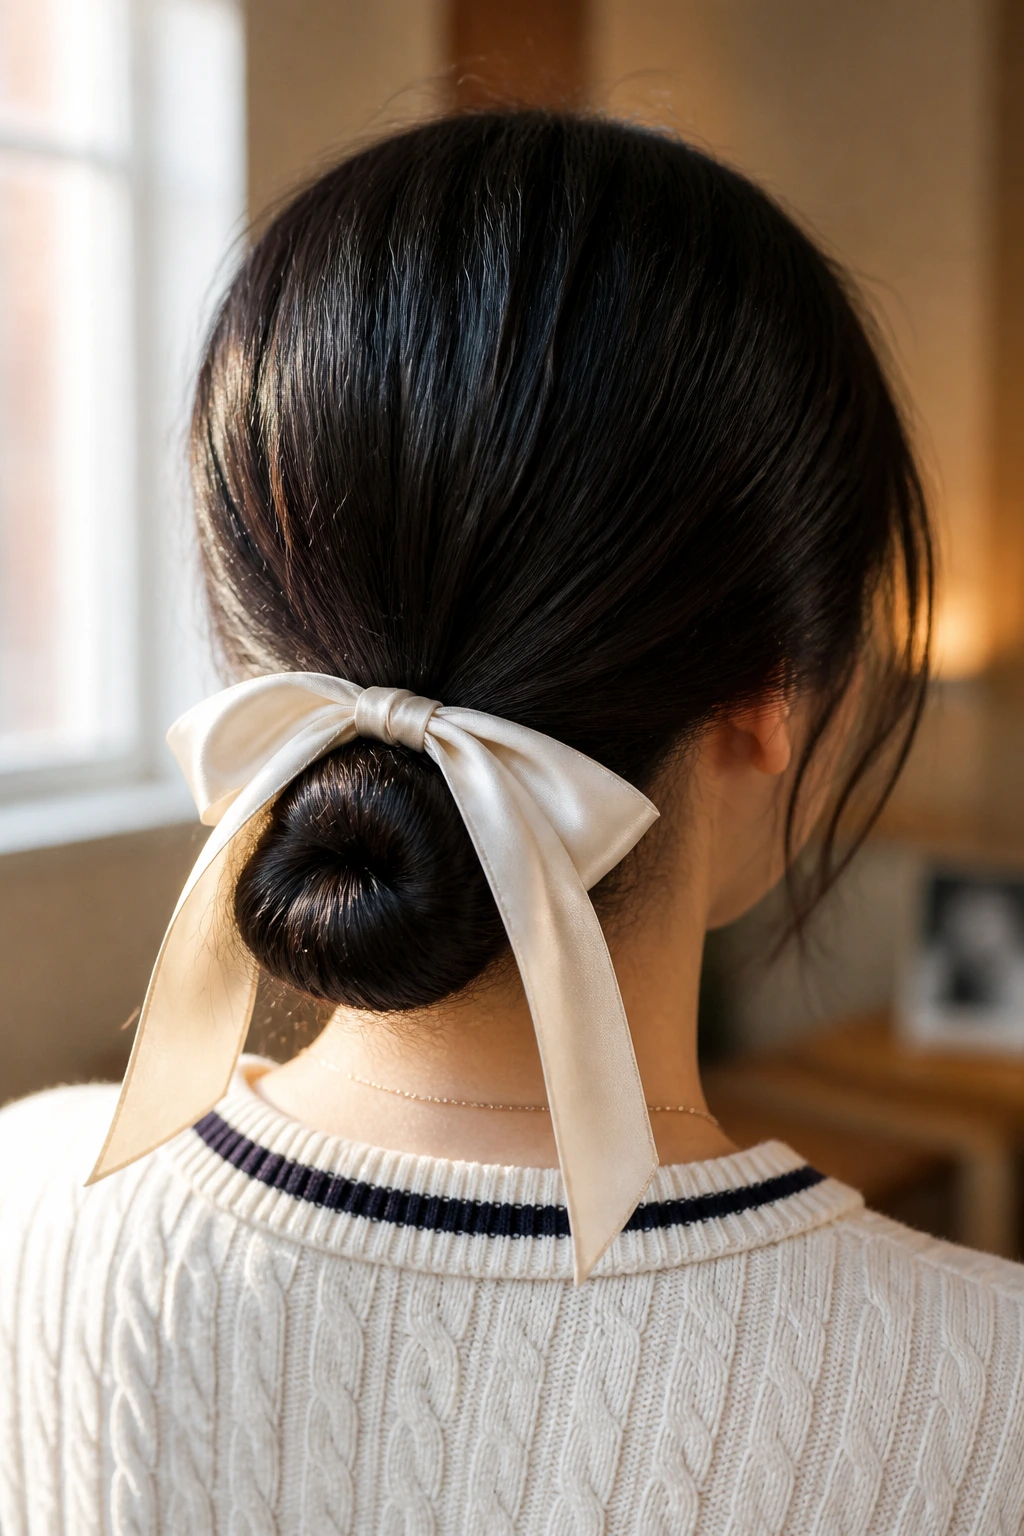
This style is the epitome of understated neatness. It gathers the hair at the nape of the neck, keeping it entirely out of your face while showcasing the smooth, glossy texture of your strands. The addition of a silk ribbon adds a classic, collegiate touch that elevates a simple bun into something far more intentional.
The secret to keeping this chignon from looking like a messy gym bun is the preparation of the hair. You want to ensure the hair is completely detangled and smoothed flat against the scalp before you even think about twisting it. Because Asian hair is thick, a single standard hair tie often is not strong enough to hold the weight of the bun, which leads to sagging later in the day.
To prevent this, use the “hook” method with two bobby pins attached to a single elastic band. Insert the first pin into the base of your ponytail, wrap the elastic tightly around the hair until it is secure, and anchor it with the second pin. Once your ponytail is locked in place, twist the length of the hair tightly into a rope, coil it flat against your head, and secure the perimeter with heavy-duty U-pins. Finish by tying a thick silk ribbon around the base, letting the tails drape naturally down your back.
3. The Structured Ivy League Crop
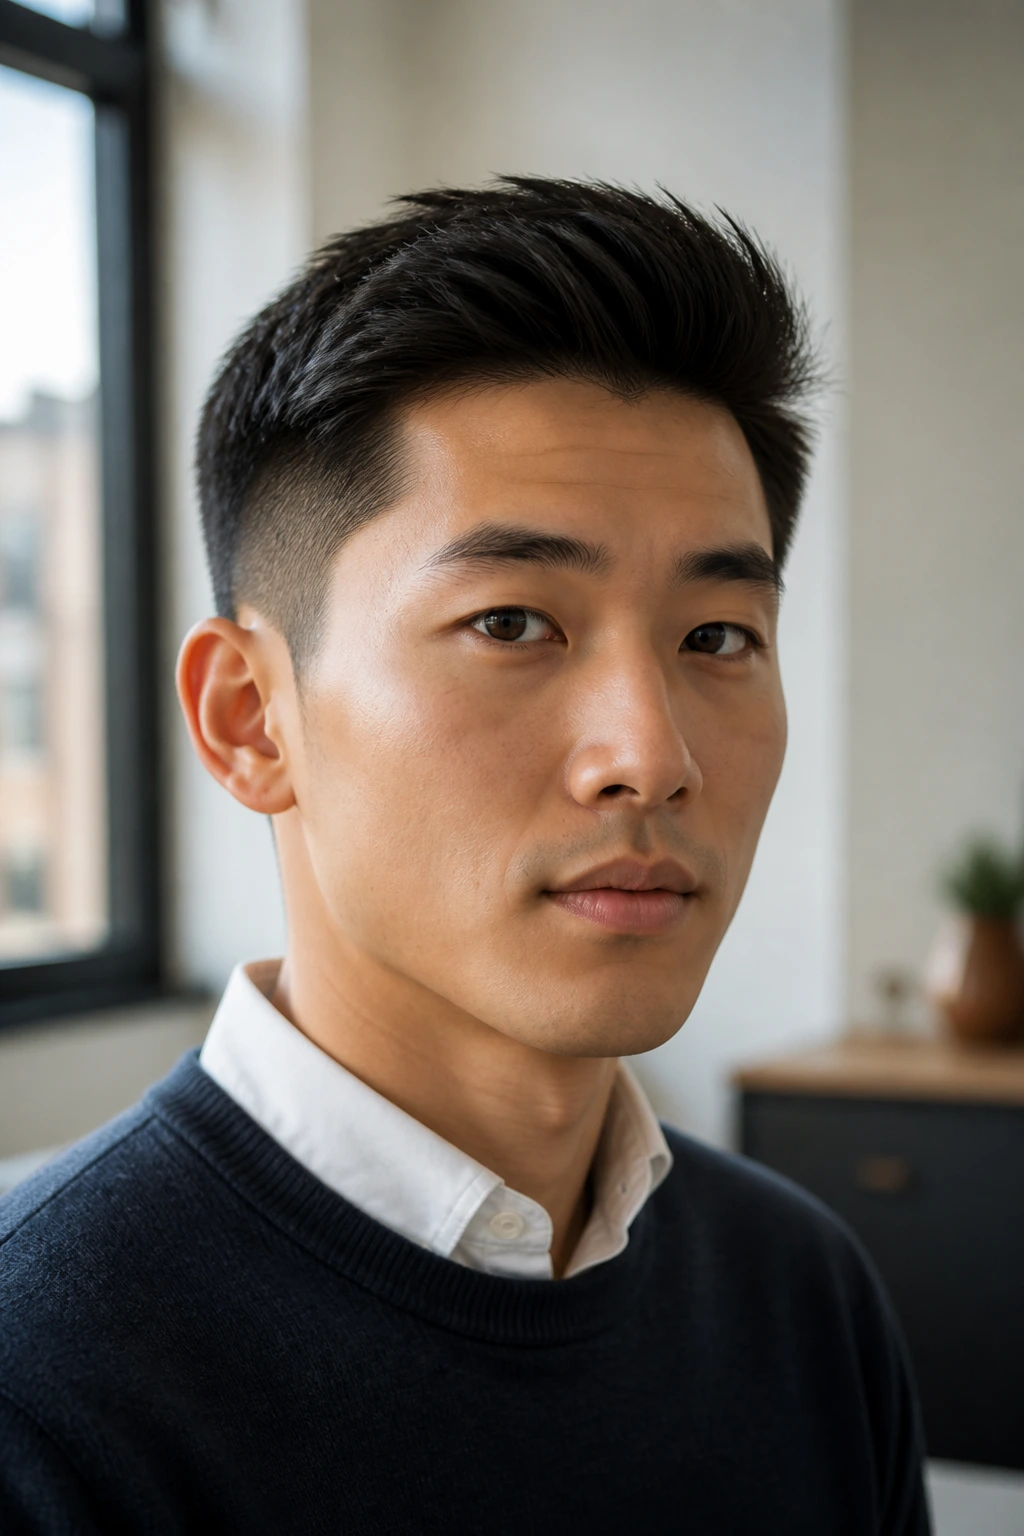
For shorter lengths, this cut is a timeless option that never goes out of style. It features a clean taper on the sides and back, with slightly more length on top that is styled up and away from the face. It is neat, low-maintenance, and perfectly suited for thick hair that naturally grows forward.
How to Achieve the Look
What to Ask Your Barber or Stylist
For this cut, ask for a low taper fade on the sides, starting with a number two guard and blending smoothly into the top. The top should be cut to about one and a half inches, leaving just enough length at the front hairline to sweep to the side.
Daily Styling Routine
- Dampen the top of your hair and apply a dime-sized amount of matte styling clay, rubbing it between your palms first to warm it up.
- Use your fingers to push the front section of hair up and slightly to one side while blow-drying on medium heat.
- Smooth down the sides with any remaining product on your hands to keep the silhouette clean and tight.
4. The Half-Up Bow Barrette
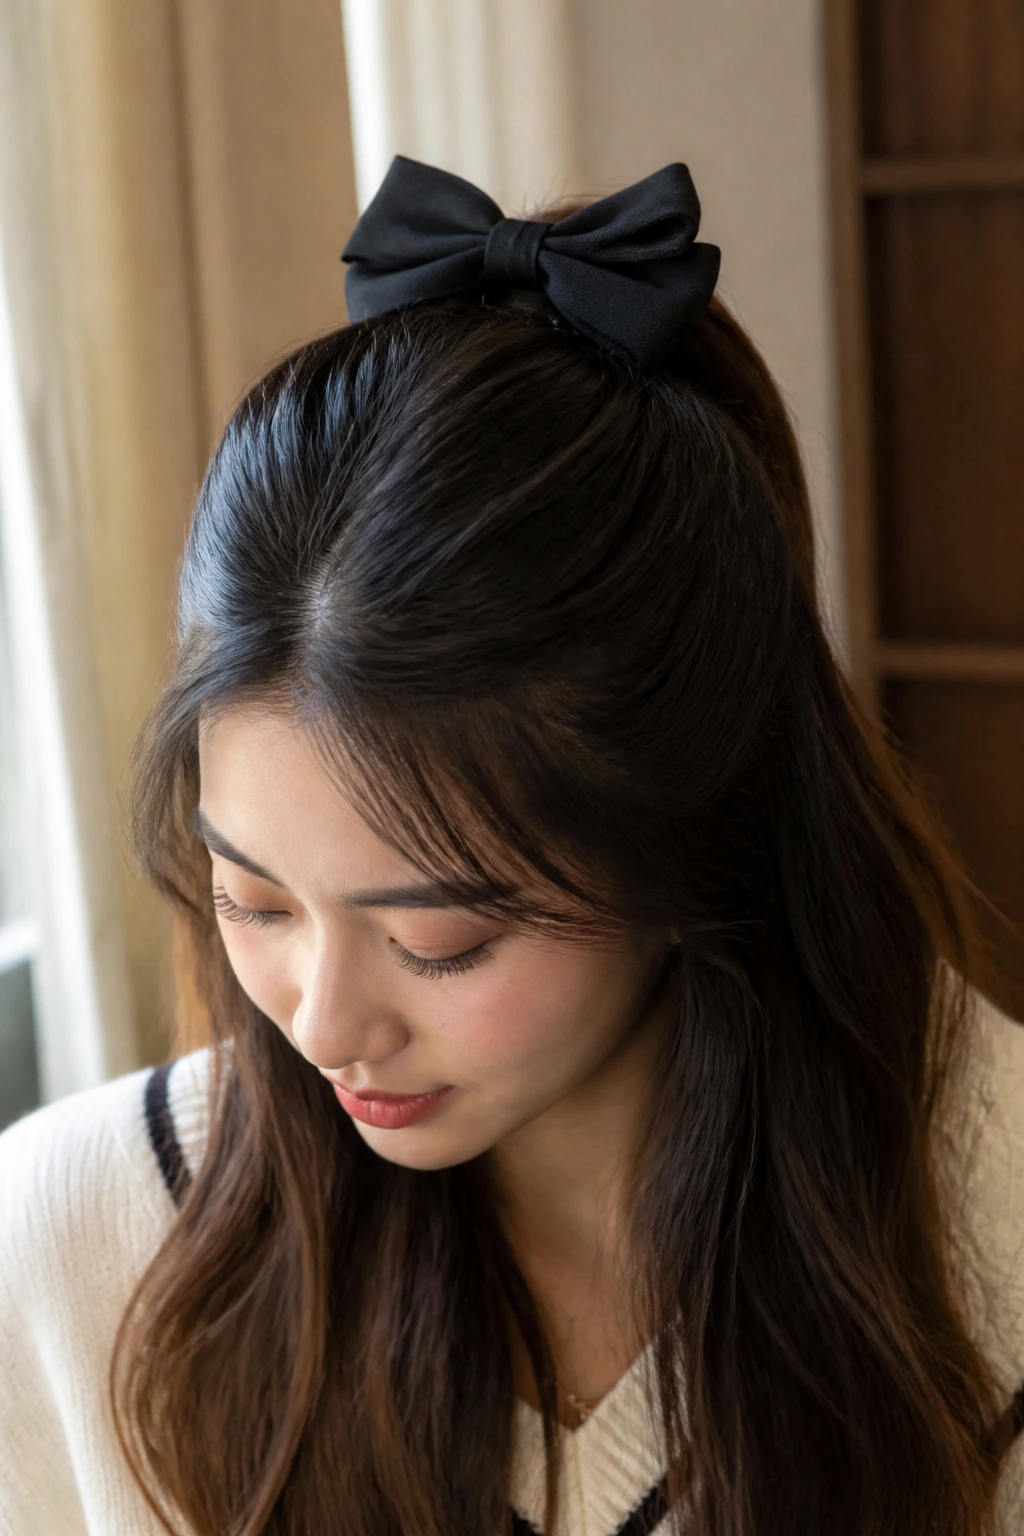
This style offers a softer, more romantic take on the collegiate look while still keeping your hair neat and away from your eyes. By gathering only the top section of your hair, you reduce the bulk around your face while letting the rest of your hair drape smoothly over your shoulders.
[Top Section of Hair] -> Secured with strong elastic -> Topped with Silk Bow
       |
[Remaining Hair] ------> Drapes smoothly down the back
The physical mechanism here is all about tension. Because healthy hair is slippery, simply clipping a barrette into loose hair will result in the accessory sliding down within an hour.
To solve this, first separate a section of hair from the temples back to the crown of your head. Secure this section with a small, clear elastic band first—this creates a solid foundation. Once the elastic is tight, clip your bow barrette directly over the band. The metal mechanism of the clip will lock onto the elastic, keeping the bow perfectly centered and high on your head all day long.
5. The Blunt Cut Bob with Under-Tucked Ends
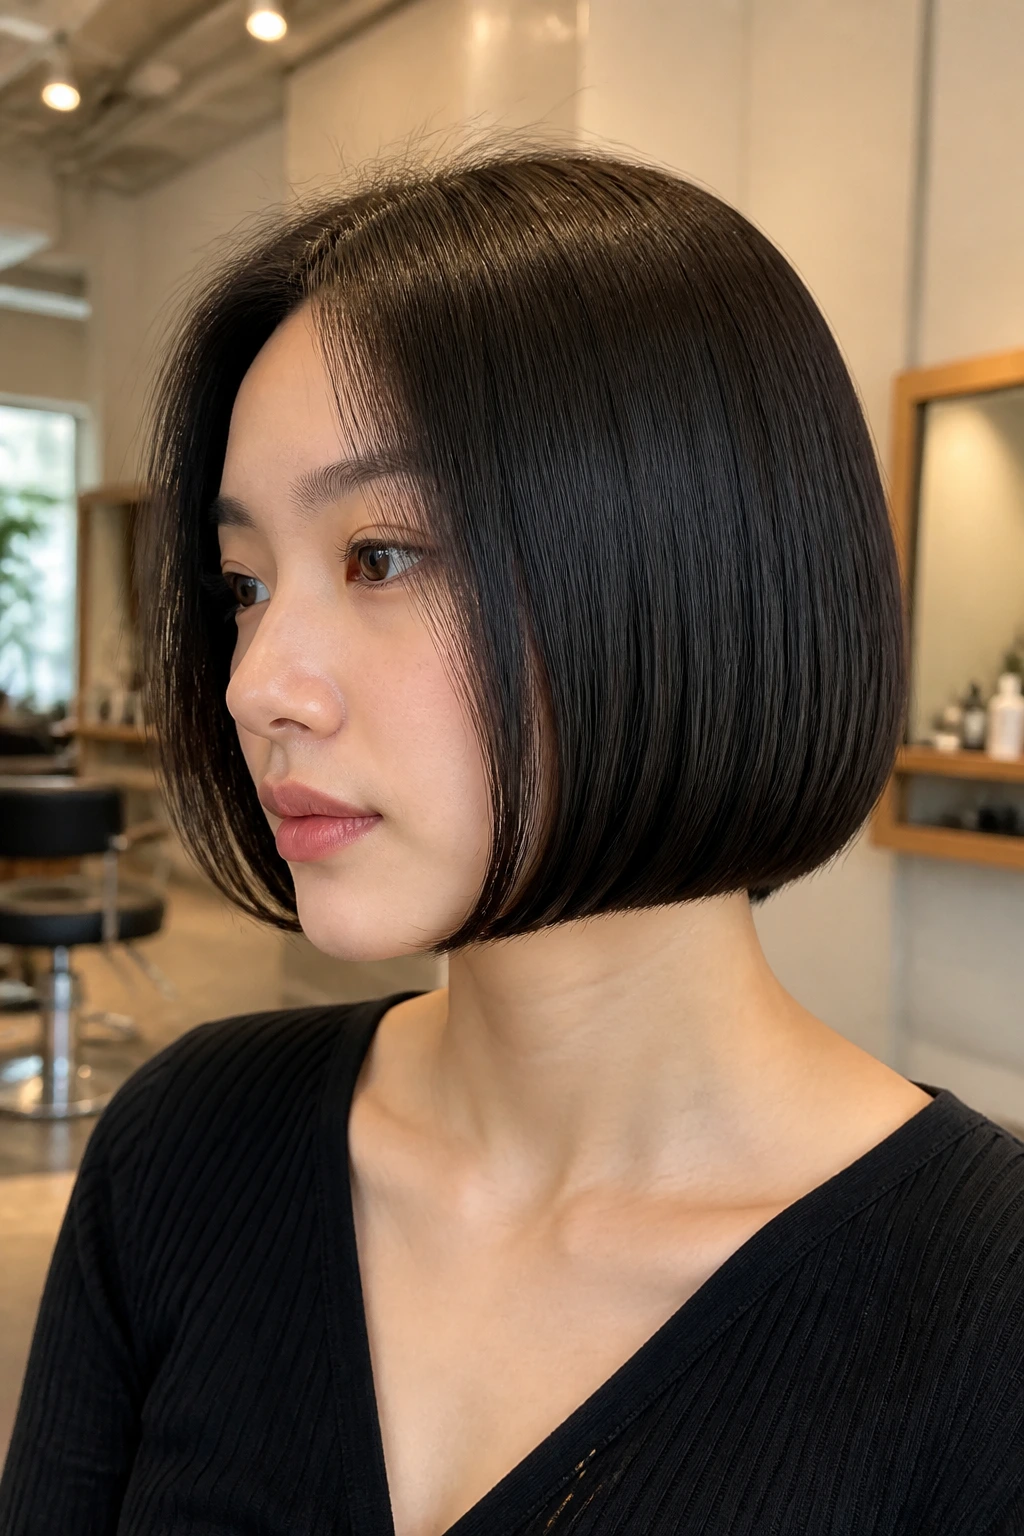
There is something incredibly powerful about a perfectly level, blunt bob. This cut showcases the density and weight of your hair, creating a sharp, swinging line that hits right at the jawline or just below the ears. The under-tucked ends add a soft, retro curve that frames the face beautifully.
This hairstyle is highly dependent on the quality of the cut. You want to find a stylist who understands how to cut hair dry, as straight hair stretches when wet and can look uneven once it dries. The perimeter must be cut with absolute precision, utilizing slight under-cutting—where the inner layers are cut a fraction of an inch shorter than the outer layers—which naturally encourages the ends to curve inward.
To style this at home, use a medium-sized round brush with mixed boar and nylon bristles. As you blow-dry each section, roll the brush inward at the ends and hold it there for five seconds while applying cool air from your dryer’s “cool shot” button. This temperature drop locks the shape into the hair shaft, ensuring those neat, tucked-under ends stay put throughout your daily activities.
6. The Tennis-Court High Ponytail with Wrap-Around Detail
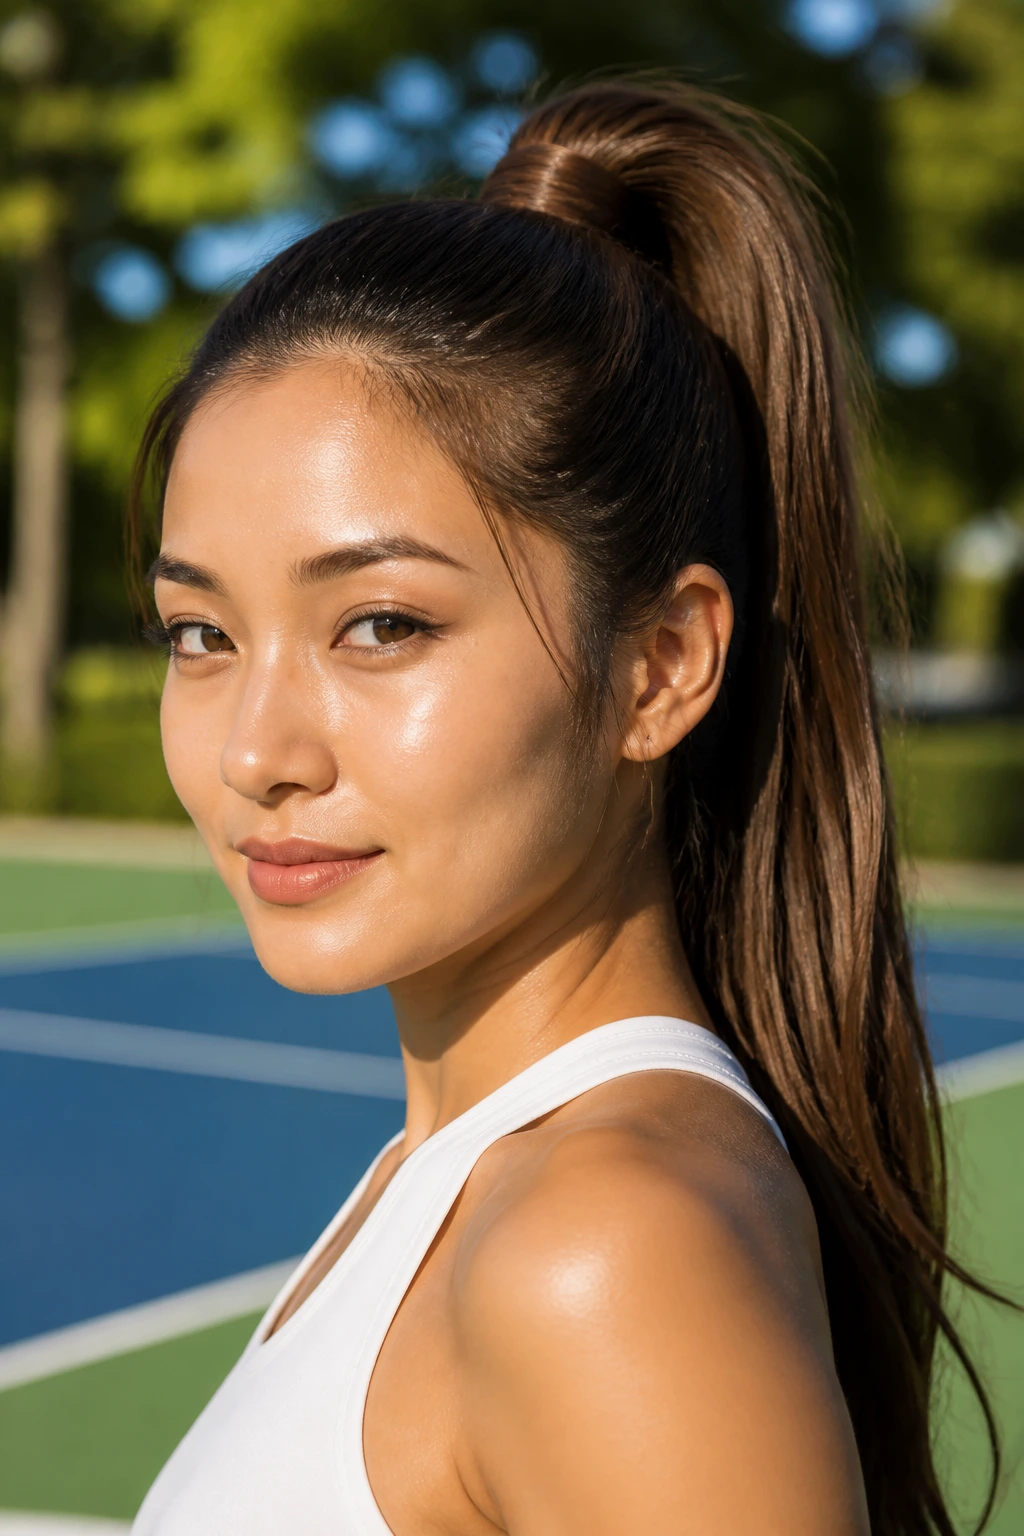
This is a sporty, high-energy style that looks incredibly polished when executed with clean lines. It positions the ponytail high on the crown of the head, creating a lifting effect that highlights your cheekbones. It is perfect for warm days or active afternoons when you still want to look entirely put together.
Why This Style Stands Out
Unlike a standard ponytail that can look lazy, this version uses a section of your own hair to hide the elastic band, creating a seamless, sophisticated finish. The natural thickness of the hair gives the ponytail a full, dramatic swing.
Step-by-Step Execution
- Brush your hair thoroughly, tilting your head backward to help gather all the strands toward the crown of your head.
- Secure the ponytail tightly with a sturdy, snag-free elastic band.
- Pull a pencil-thin strand of hair from the underside of the ponytail.
- Lightly coat this strand with a medium-hold hairspray or gel.
- Wrap the strand tightly around the elastic band until the band is completely covered.
- Secure the end of the strand underneath the ponytail with a small bobby pin, pointing the pin downward toward the scalp.
7. The Sleek Glass-Hair Lob
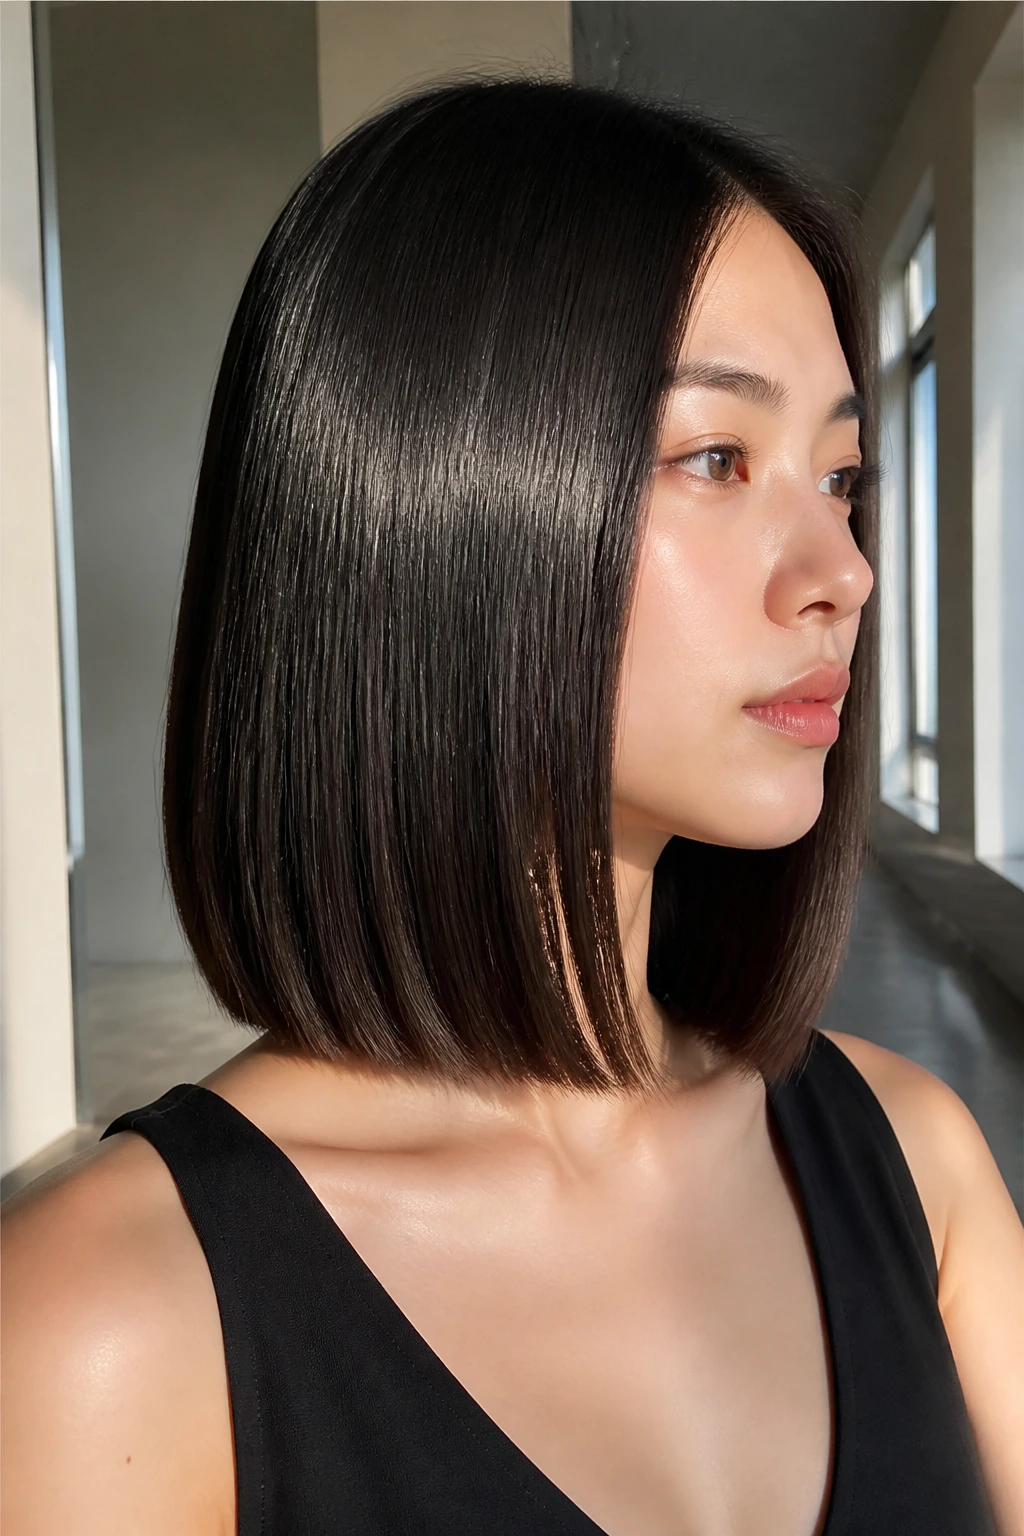
The “lob” (long bob) that falls right at the collarbone is one of the most versatile cuts available. When styled to a high-gloss finish, it creates a modern, architectural look that is both professional and effortlessly chic. The weight of the longer length helps keep the hair lying flat and smooth.
       [Sleek Parting]
          /
     [Smooth]   [Smooth]
     [ Sides]   [ Sides]
        |           |
     [Flat-Ironed Ends]
To achieve that reflective, glass-like finish, you must focus on the cuticle. Start by applying a heat protectant spray to damp hair, then blow-dry using a paddle brush, pulling the hair taut as you dry. Once the hair is completely dry, work in small, one-inch sections with a ceramic flat iron.
Run the iron slowly from root to tip, following right behind a fine-toothed comb to ensure every single strand is perfectly aligned. Finish with two drops of a lightweight hair oil, warming it in your hands before smoothing it over the surface of your hair to lock out humidity and seal in that mirror-like shine.
8. The Textured Side-Swept Pompadour
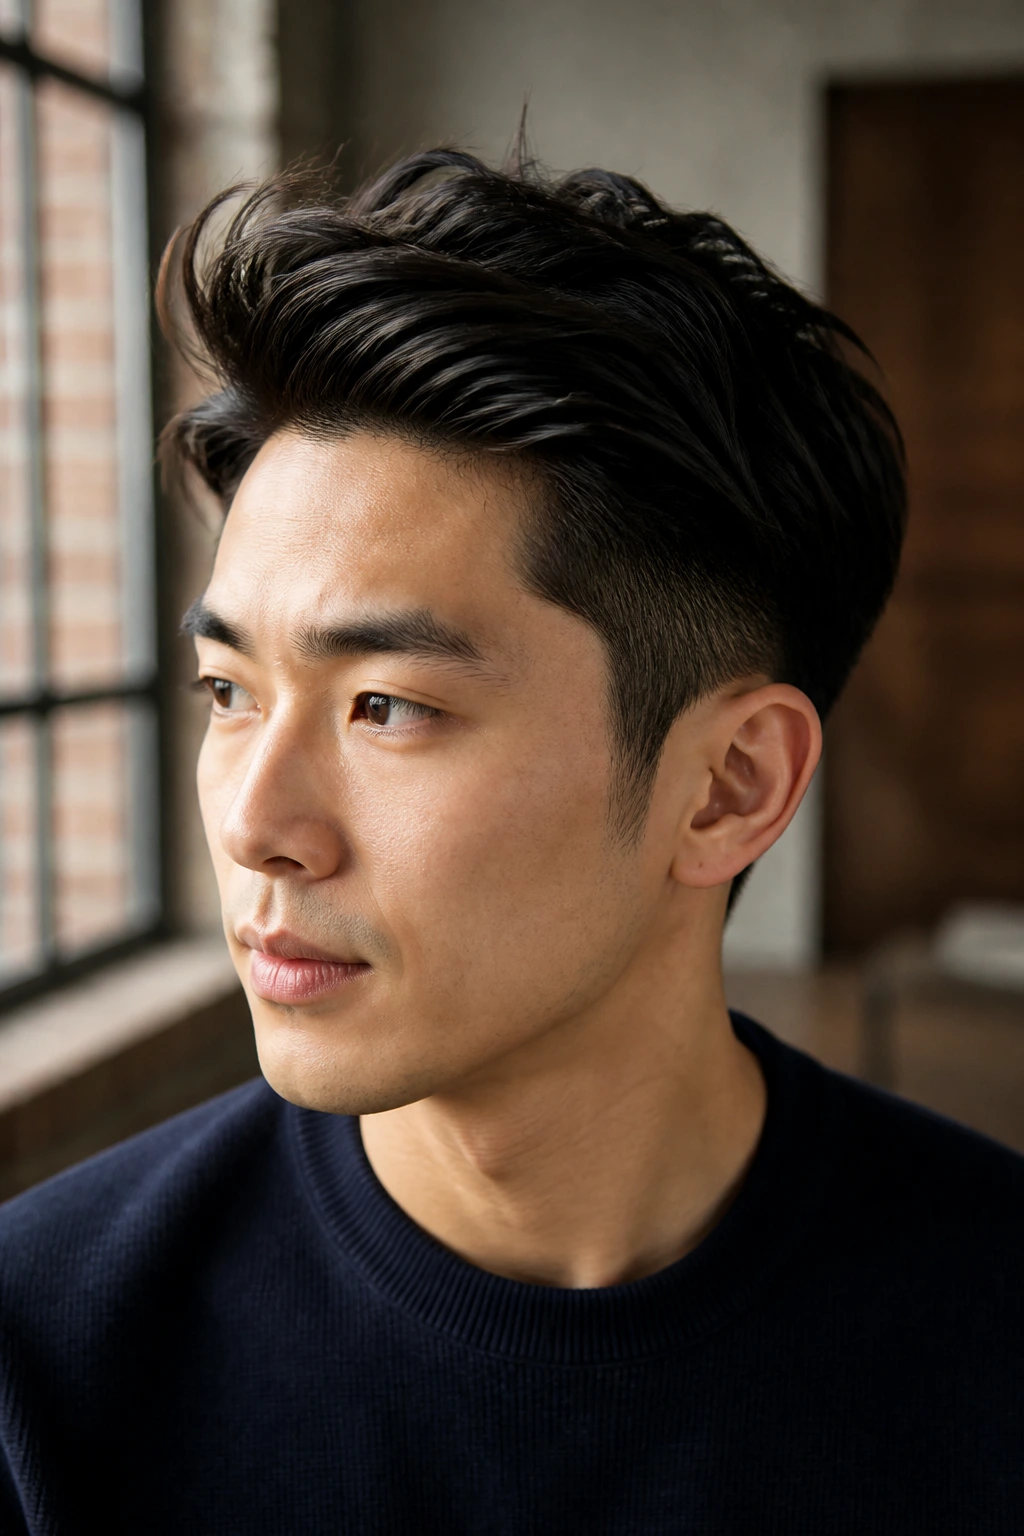
This short style is perfect for anyone who wants a bit of height and drama while maintaining a clean-cut, tailored appearance. It works beautifully with thick hair because the natural density of the hair provides the volume needed to keep the pompadour standing high without falling flat.
Why It’s a Classic
The pompadour has been a symbol of refined style for generations. This modern version features slightly shorter sides with a longer, textured top that is swept back and to one side, offering a sophisticated frame for the face.
How to Style It
- Rub a nickel-sized amount of high-hold, matte pomade between your fingers.
- Apply the product to damp hair, starting at the roots and working up through the ends.
- Using a blow-dryer on high heat, brush the hair up and back from your forehead, directing the airflow from the front to create volume.
- Once dry, use your fingers to gently piece out the ends, pushing the volume slightly to your preferred side.
Pro tip: Avoid using heavy oils or wet-look gels for this style, as they will weigh down the hair and make the pompadour collapse under its own weight.
9. The Double French Braided Low Bun
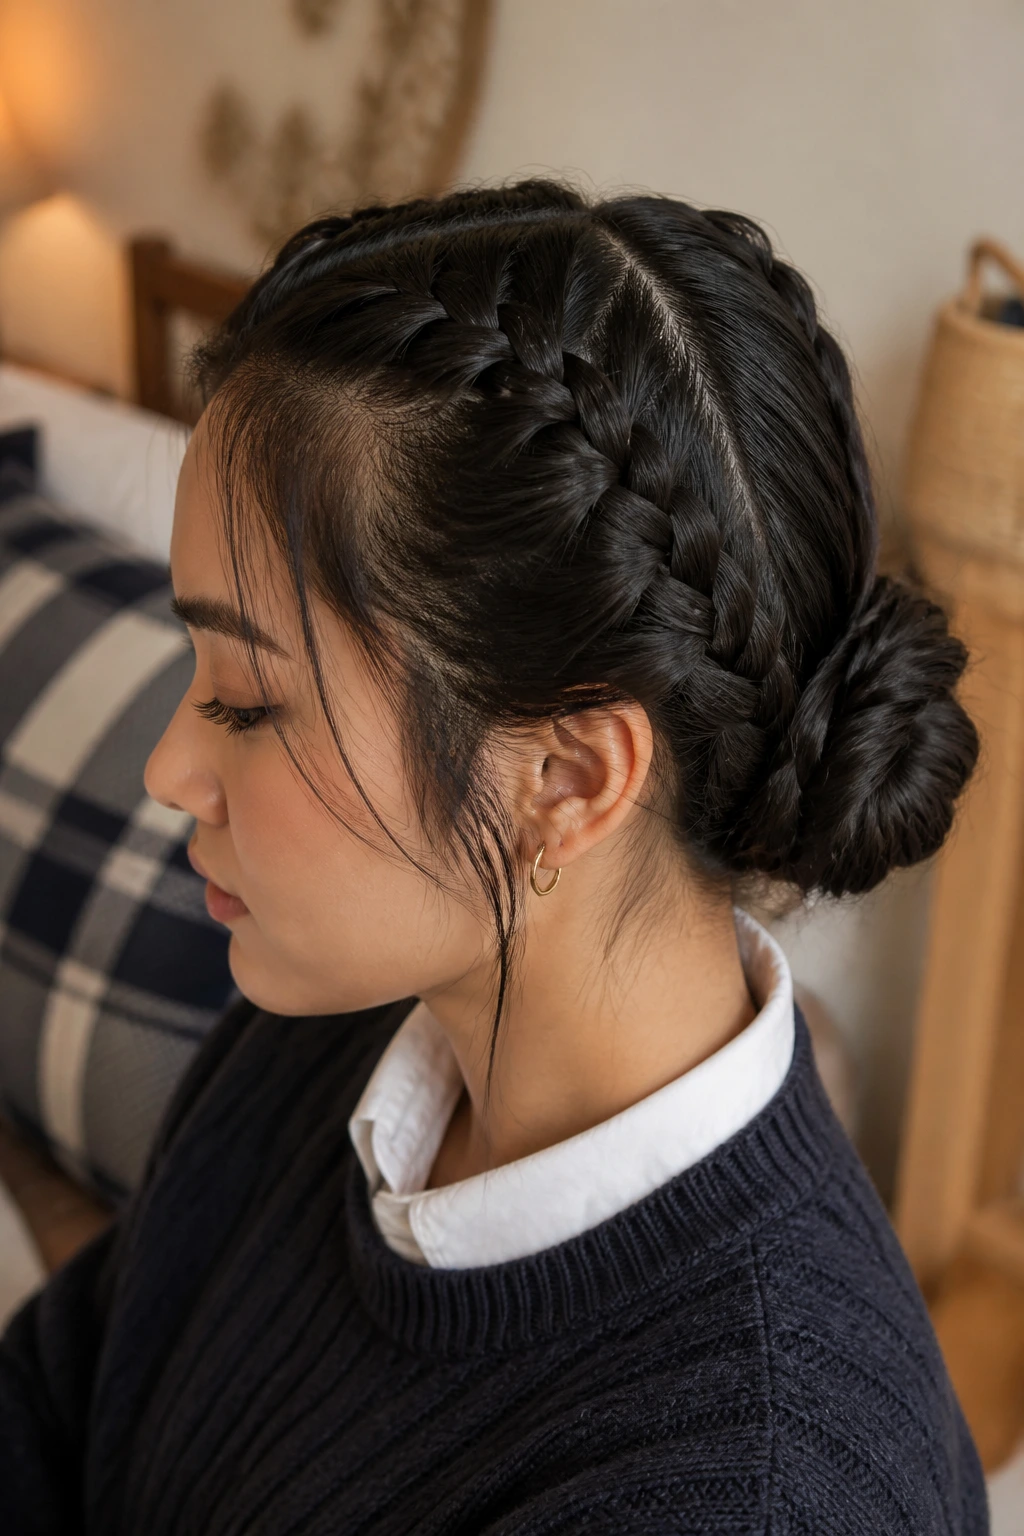
This style combines the intricate texture of braiding with the clean silhouette of a low bun. It is an excellent choice for keeping thicker hair completely secure, making it ideal for busy days when you do not want to worry about touch-ups or loose strands.
The key to a neat double braid is maintaining consistent tension as you work. Divide your hair down the center into two equal sections, securing one side with a clip while you work on the other. Start a French braid at the hairline, keeping the sections small and pulling them tight against the scalp to prevent bagging.
Once both braids reach the nape of your neck, join them together into a single ponytail. Twist the remaining length of the hair into a neat, compact bun and secure it with several hairpins. This style is incredibly sturdy because the braided structure distributes the weight of the hair evenly across your head, preventing the scalp tension that often comes with high ponytails.
10. The Softly Beveled Curtain Bang Lob
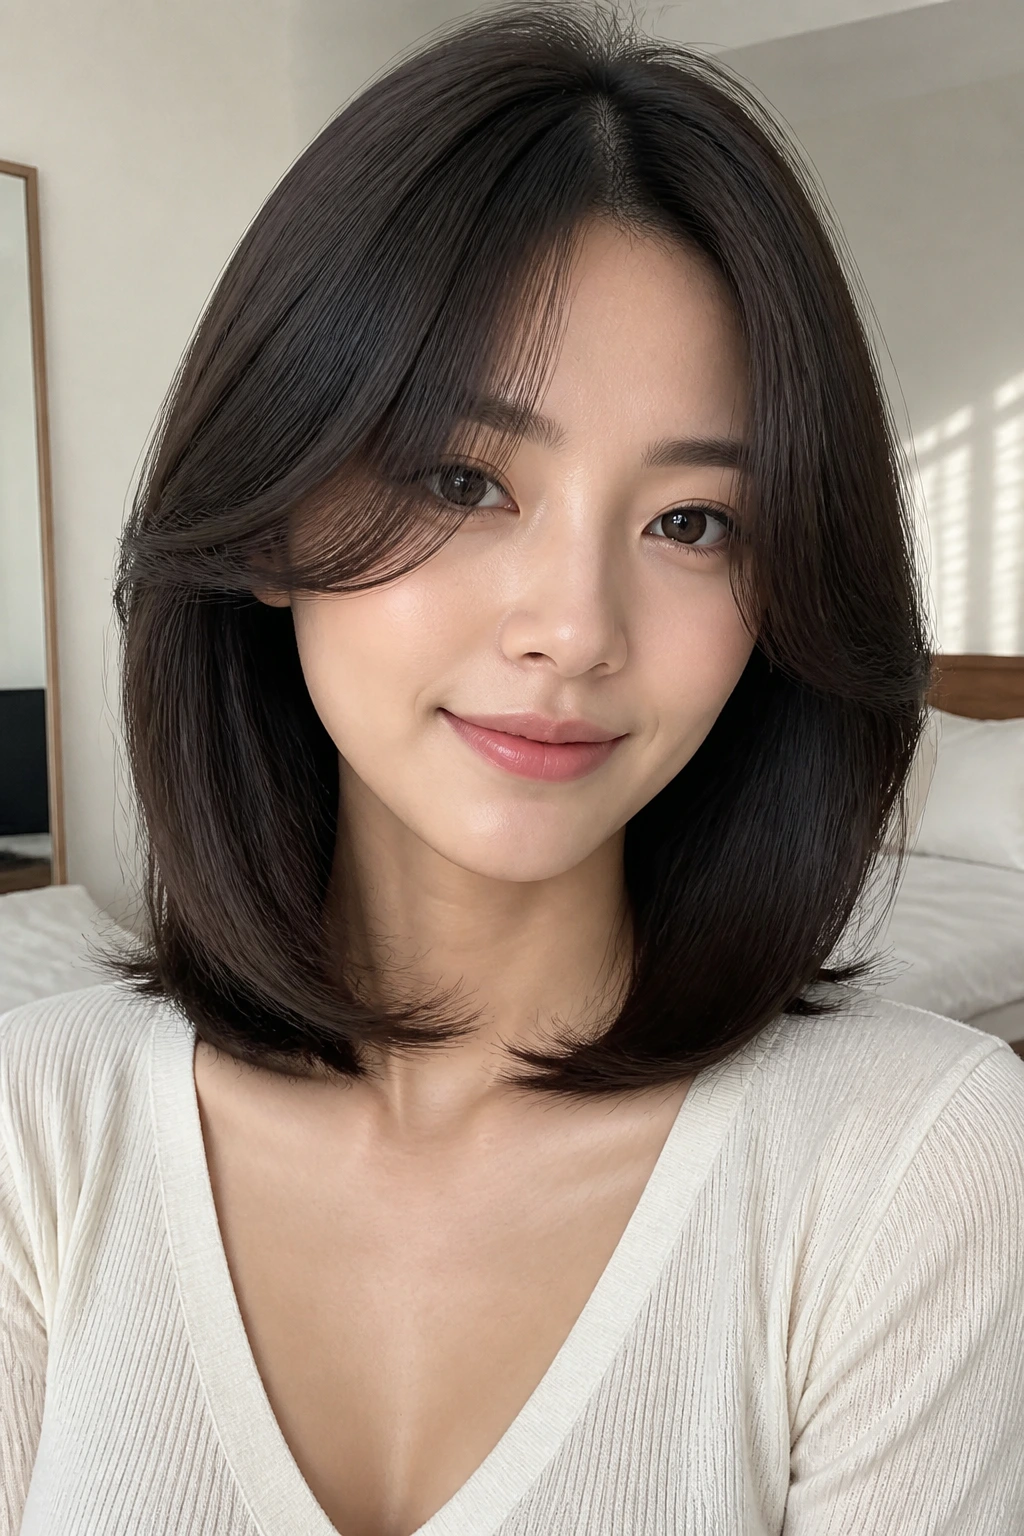
If you want to soften your features while maintaining a structured look, curtain bangs are an excellent addition to a collarbone-length cut. They frame the face on both sides, creating a gentle, flattering shape that breaks up the solid weight of straight hair.
      [Curtain Bangs]
       /
   [Beveled]     [Beveled]
   [ Outward]   [ Outward]
                   /
     [Rest of Hair Sleek]
The challenge with bangs on straight hair is keeping them from hanging limp in your eyes. To get that beautiful, outward-swooping curve, you need to use a large round brush or a velcro roller.
While the bangs are damp, blow-dry them forward over your face, then wrap them around a medium-sized roller, rolling away from your forehead. Leave the roller in place while you style the rest of your hair. When you pull the roller out, gently shake the bangs out to the sides—they will naturally fall into a soft, face-framing curve that stays out of your eyes.
11. The Clean Executive Taper
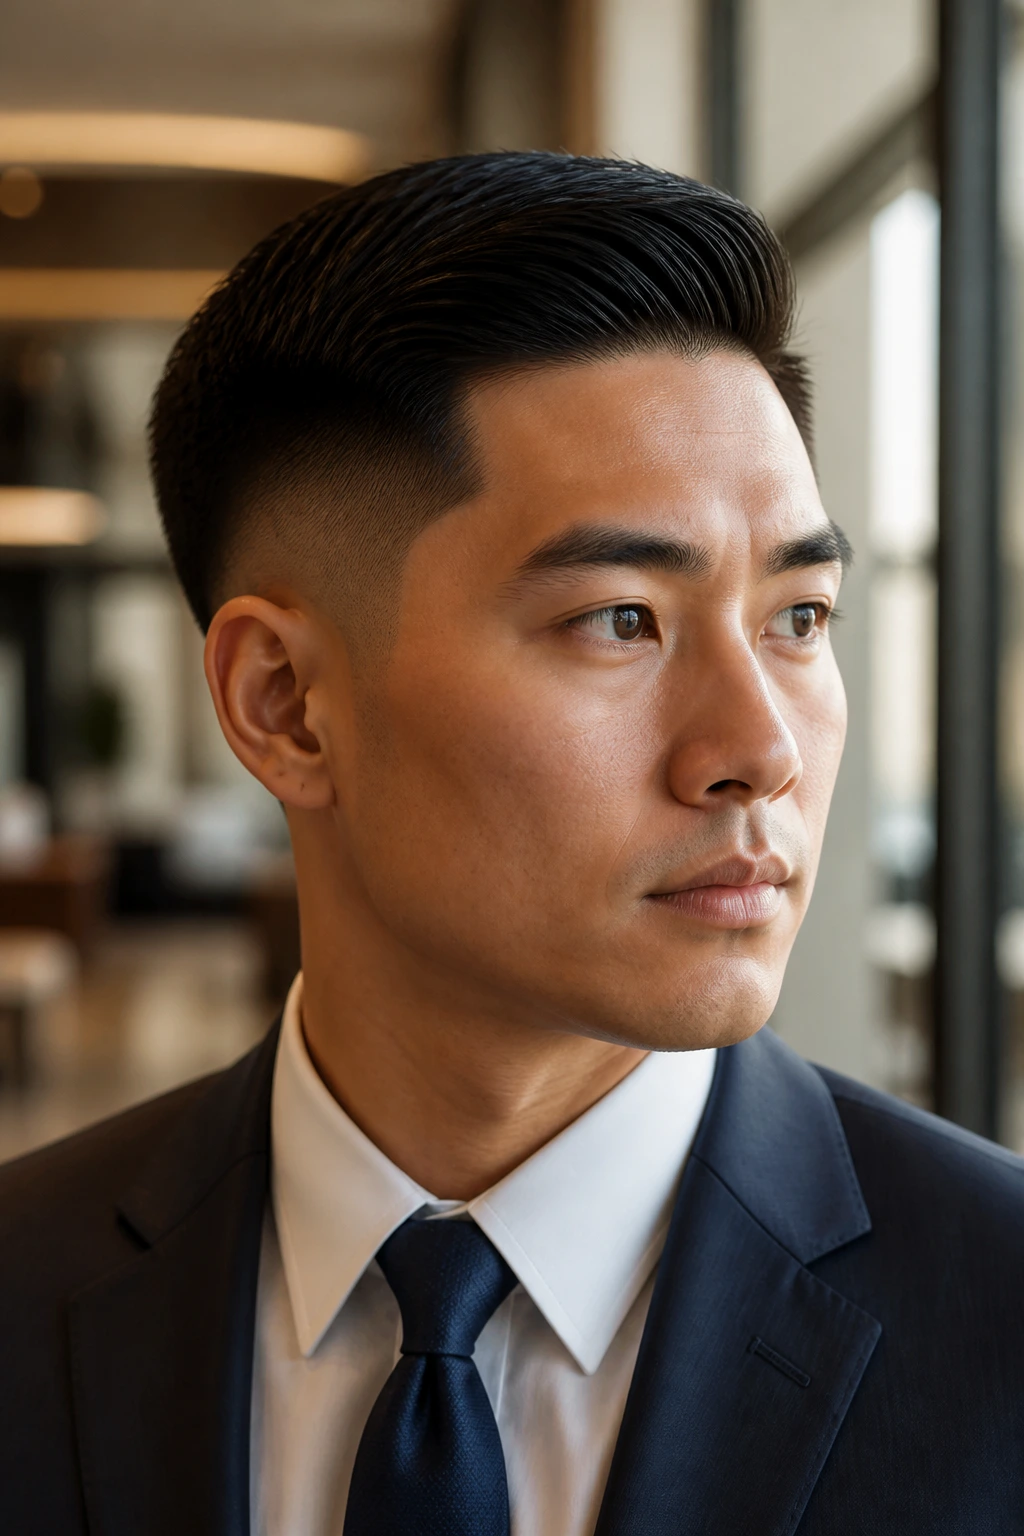
This short style is perfect for a sharp, professional appearance. It features a gradual blend from very short hair at the hairline to about an inch of length at the crown, creating a clean, structured silhouette that requires very little daily maintenance.
What Makes It Stand Out
The beauty of this cut lies in its clean lines and neat edges. It is highly structured, making it look incredibly polished with minimal styling effort.
Styling Tips and Techniques
- Use a small amount of water-soluble wax or styling cream to keep the hair flat and neat.
- Apply the product to slightly damp hair, smoothing it down in the direction of hair growth.
- Use a fine-toothed comb to create a clean, straight line along the natural parting of your hair.
- Clean up any stray hairs along the back of the neck with a trimmer once a week to maintain that fresh-cut look.
12. The Wispy Half-Up Topknot
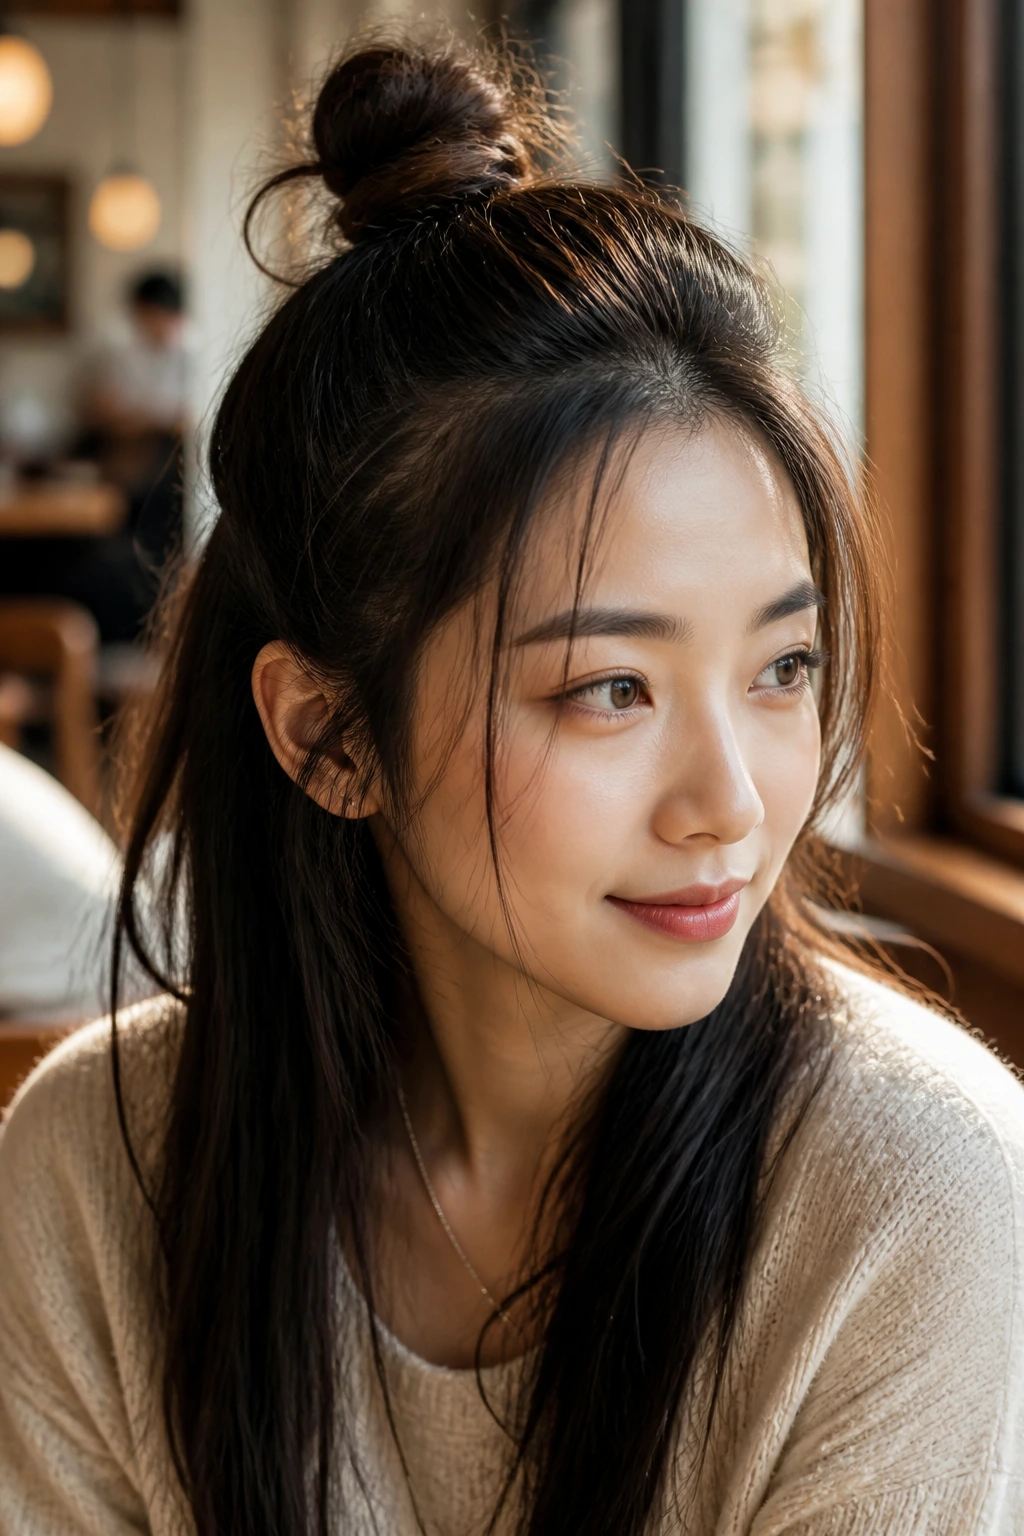
For a slightly more casual yet refined option, this style keeps the hair out of your face while offering a playful, modern silhouette. It works beautifully on medium to long hair, balancing the weight of the length with a high, structured topknot.
        [Topknot]
           |
     [Secure Base]
     /
[Loose Strands] [Loose Strands]
To keep this style looking neat rather than messy, you want to ensure the topknot itself is tightly wound and tidy. Separate the top third of your hair, gathering it at the crown. Secure this section with an elastic band, then twist the ponytail into a tight rope and coil it around the base to create a small, neat knot.
Secure the knot with a few bobby pins, letting a few wispy strands fall naturally around your ears to soften the look. The remaining hair should be brushed smooth, showcasing its natural shine and contrasting beautifully with the structure of the topknot.
13. The Retro Flip Collar-Length Cut
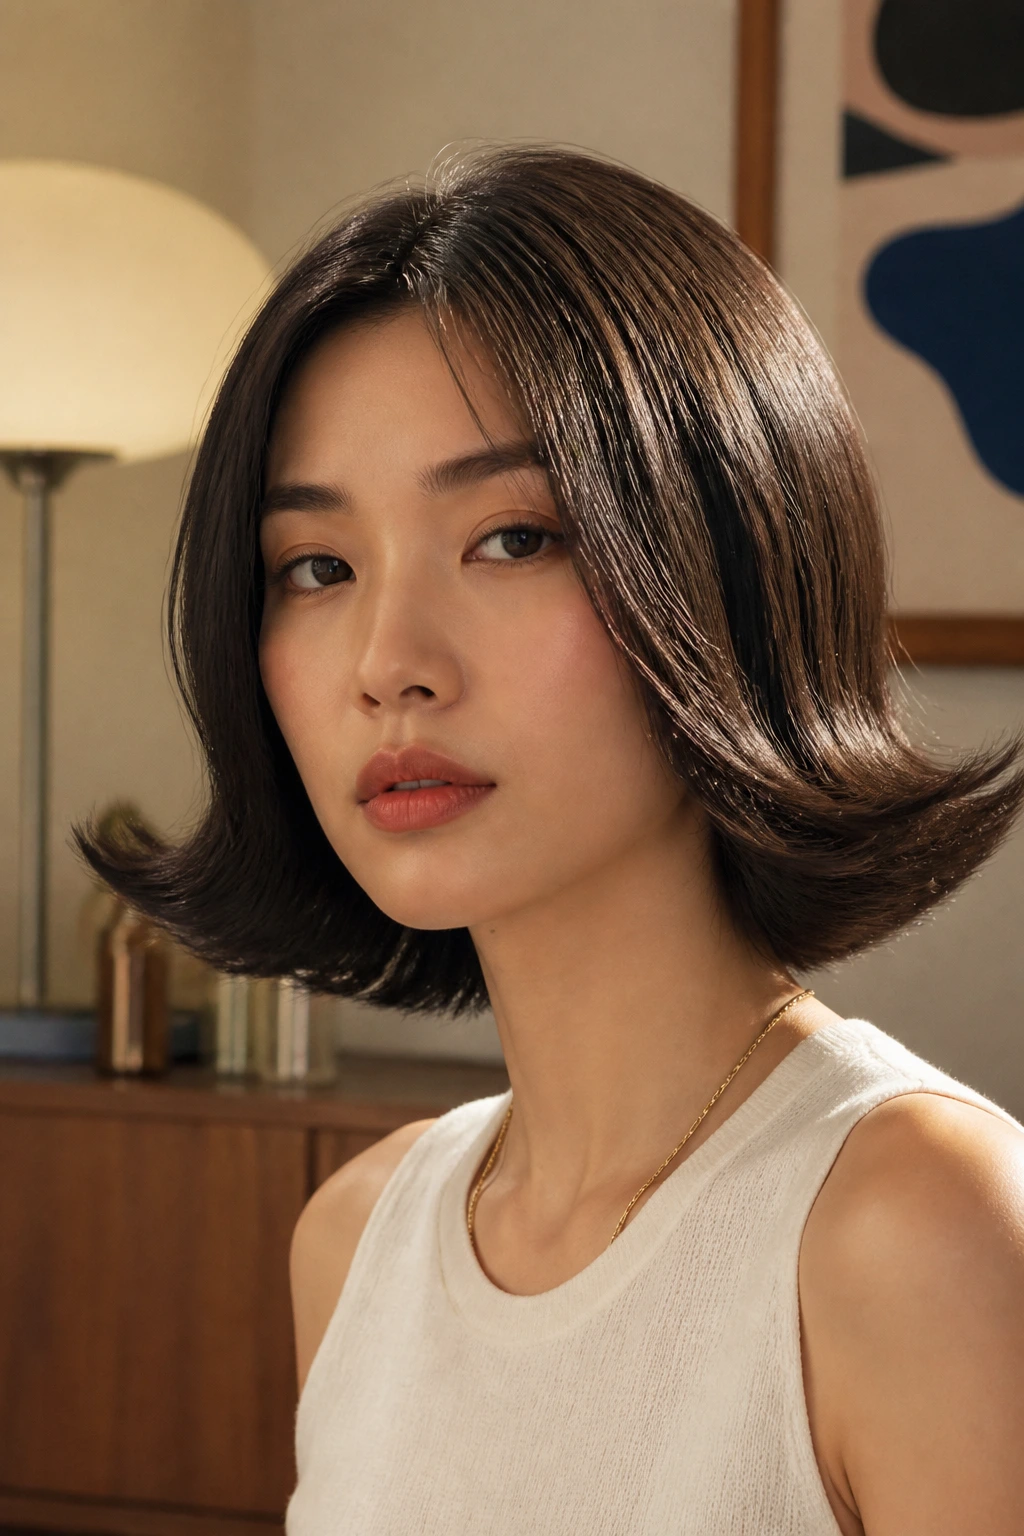
This vintage-inspired style brings a playful, mid-century charm to a simple medium-length cut. It features a smooth, straight length that flips dramatically outward at the ends, creating a fun, sculptural shape that highlights the collarbone.
Why This Style Is Having a Revival
The retro flip uses the natural stiffness of straight hair to its advantage. Instead of fighting the hair’s tendency to hold a shape, this style leans into it, creating a bold, graphic silhouette that stays sharp all day.
How to Achieve the Flip
- Apply a heat-activated styling spray to damp hair, focusing on the bottom three inches.
- Blow-dry the hair straight using a flat paddle brush, directing the airflow downward.
- Once dry, use a medium flat iron to glide down the length of the hair, curving the iron upward and outward as you reach the ends.
- Hold the flipped ends in place for a few seconds to let them cool before releasing.
Pro tip: Finish with a light mist of flexible-hold hairspray to keep the flips bouncy without making them feel stiff or crunchy.
14. The Neat Crown Braid
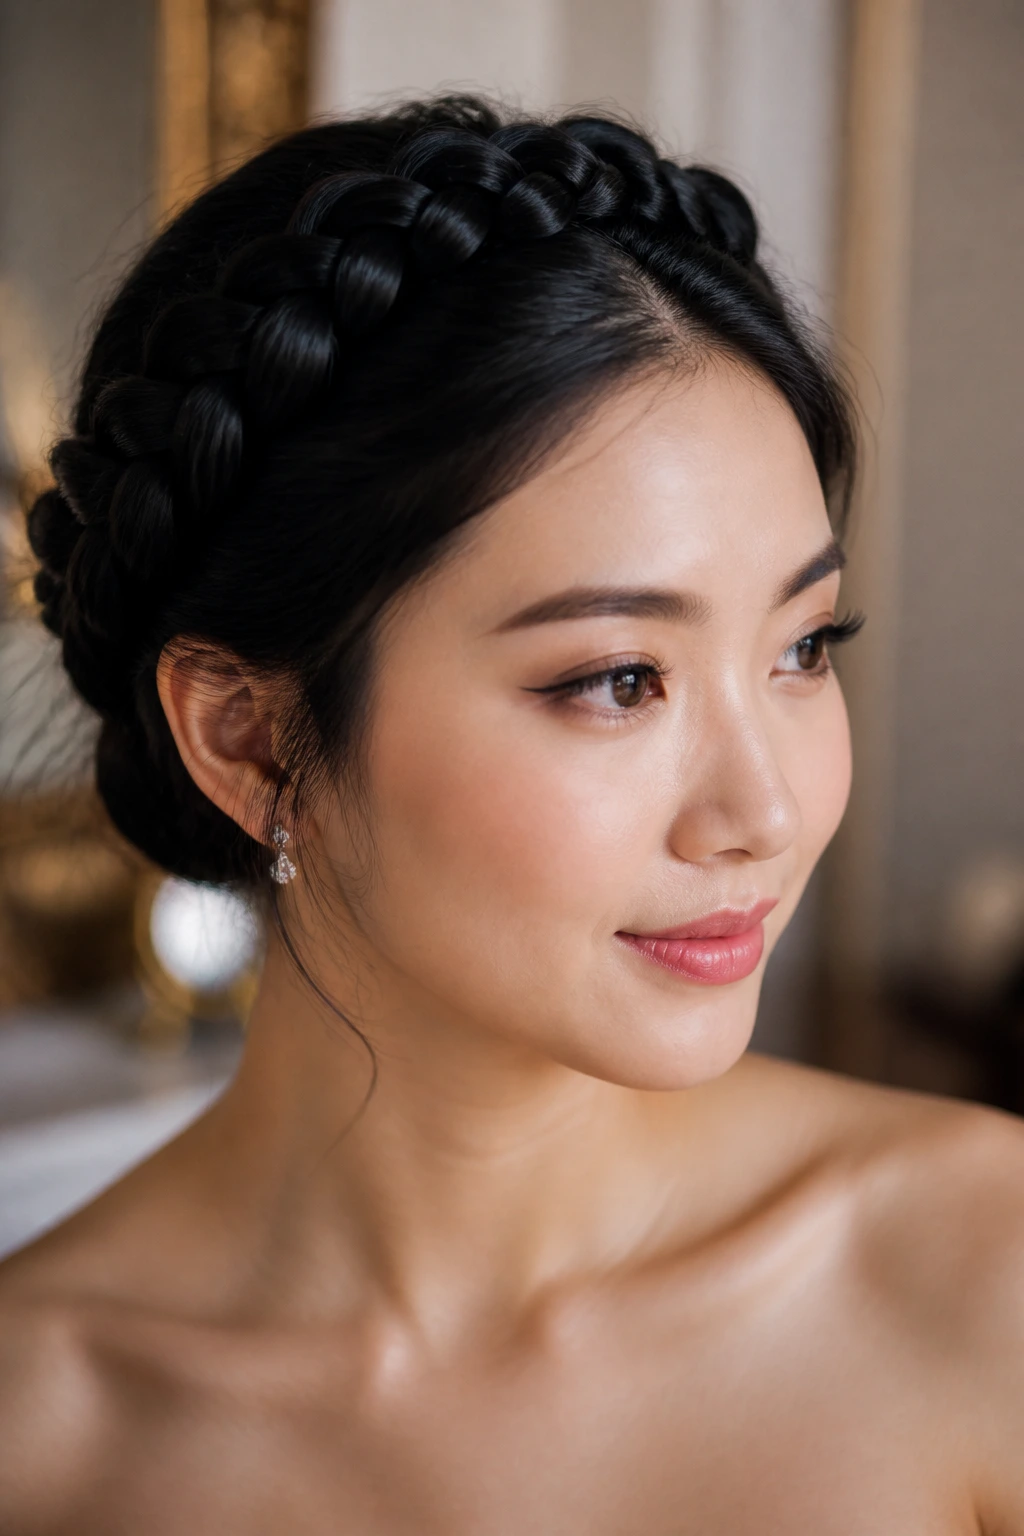
This sophisticated style wraps a braid around the crown of your head, creating a beautiful, halo-like effect. It is a wonderful option for formal occasions or warm days, keeping your hair entirely up and secure while showcasing intricate texture.
The secret to a successful crown braid on straight hair is adding a bit of grip before you begin. Because the hair is smooth, a braid can easily slide out of place or look loose. Apply a small amount of texturizing powder or dry shampoo to your roots, rubbing it in to create a slightly textured surface.
Start a Dutch braid—where the strands cross under rather than over—behind one ear, wrapping it along your hairline and securing the end with a small, clear elastic. Wrap the tail around the back of your head, tucking the end underneath the start of the braid and pinning it securely with bobby pins. This creates a seamless, continuous circle that holds tight throughout the day.
15. The Tailored Quiff with Matte Finish
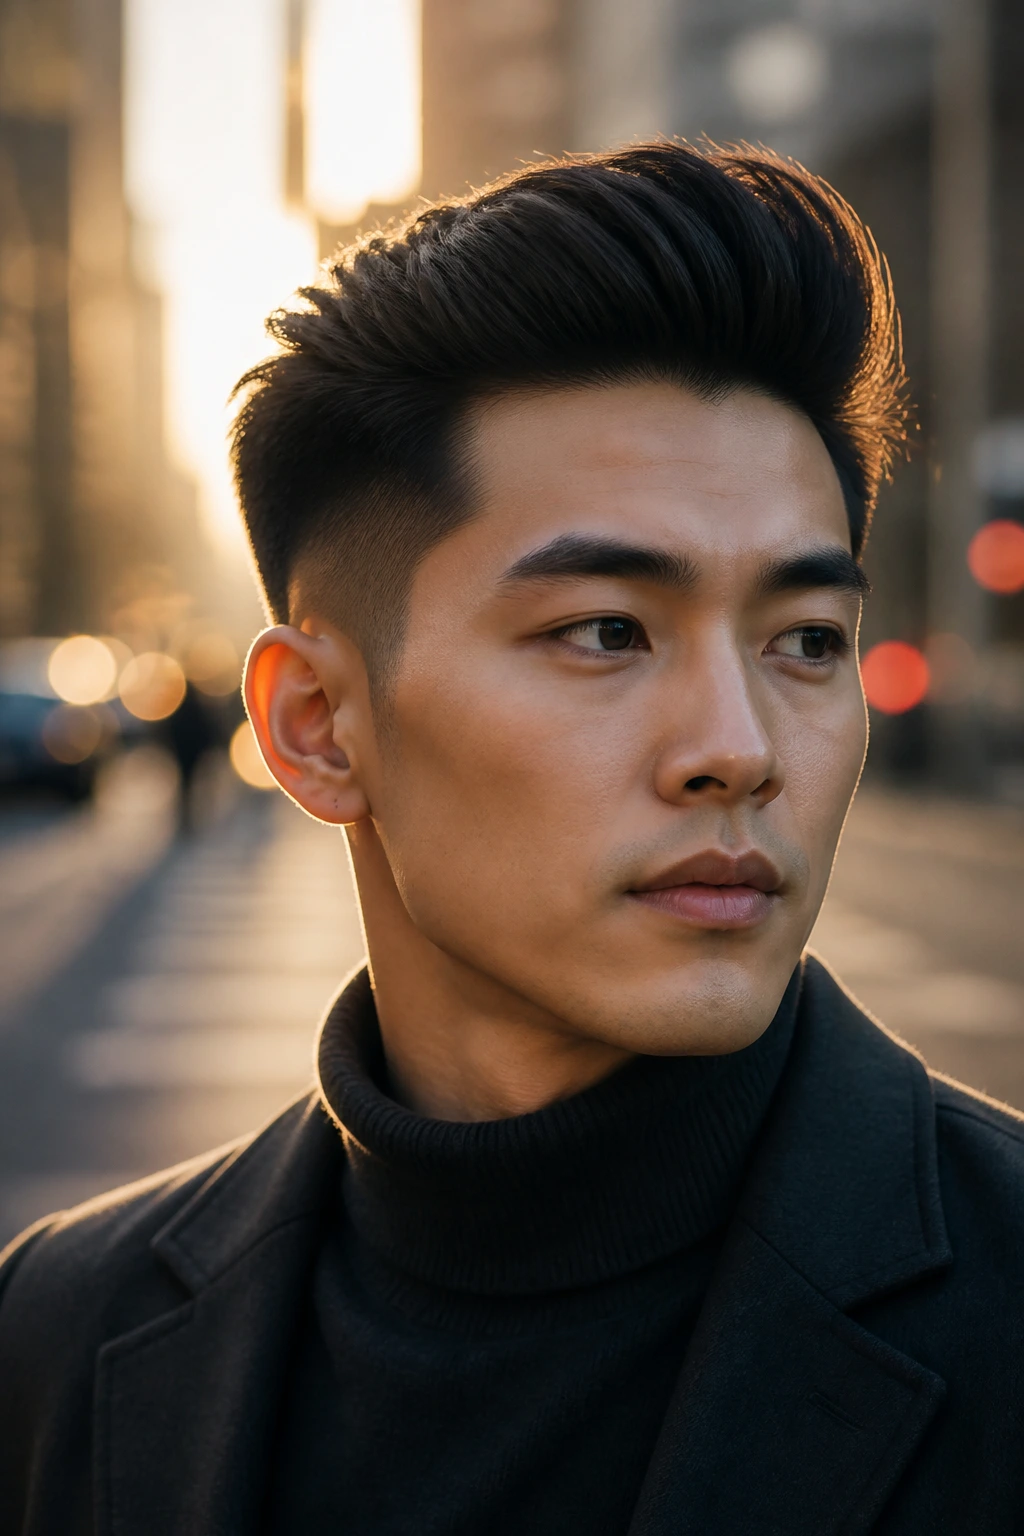
This short style is a fantastic choice for those who want a modern, high-volume look that still feels neat and tailored. It features short, clean sides with a longer top section that is styled up and back from the forehead, creating a flattering, elongated silhouette.
       [Quiff Volume]
         /   |
        /    |
     [Sleek] [Sleek]
     [Sides] [Sides]
To get the necessary height for a quiff, you must focus on the blow-drying process. Apply a small amount of volume-boosting mousse to damp hair, then use a vent brush to lift the hair up and back while drying on high heat.
Once the hair is dry and voluminous, work a dime-sized amount of matte styling clay through the top, using your fingers to shape the quiff while keeping the sides smooth and tight. The matte finish keeps the style looking modern and effortless, avoiding any greasy or overly styled appearance.
16. The Oversized Pearl Barrette Side-Sweep
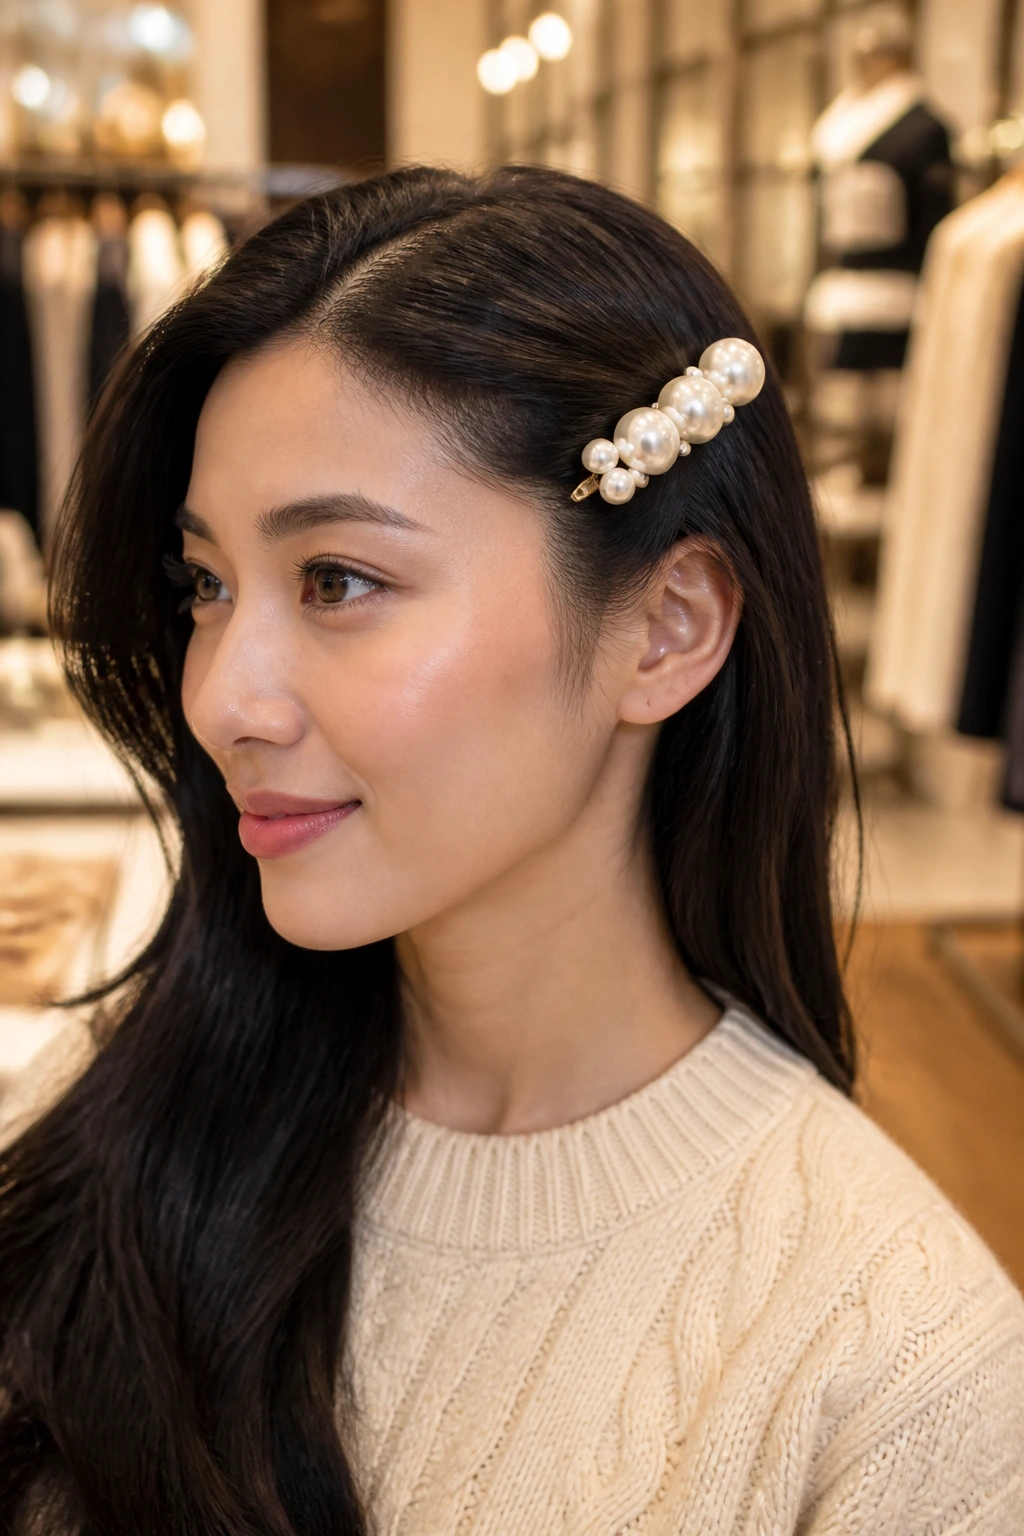
This style is a quick, elegant option for adding a touch of classic sophistication to loose hair. By sweeping one side of your hair back and securing it with a statement pearl barrette, you create an asymmetrical silhouette that frames your face beautifully.
 [Deep Side Part]
   /
[Loose]    [Sleek Sweep]
[Locks]          |
           [Pearl Barrette]
The key to this style is the contrast between the loose, flowing hair on one side and the tight, sleek sweep on the other. Start by creating a deep side part, then brush the shallower side back behind your ear, smoothing it down with a touch of lightweight gel or hair oil.
Place a large, high-quality pearl barrette just above and behind your ear, securing the hair tightly against your head. This keeps the hair from falling forward, allowing the beautiful accessory to take center stage while showcasing the smooth, glassy texture of your locks.
17. The High-Volume Blowout with Velcro Rollers
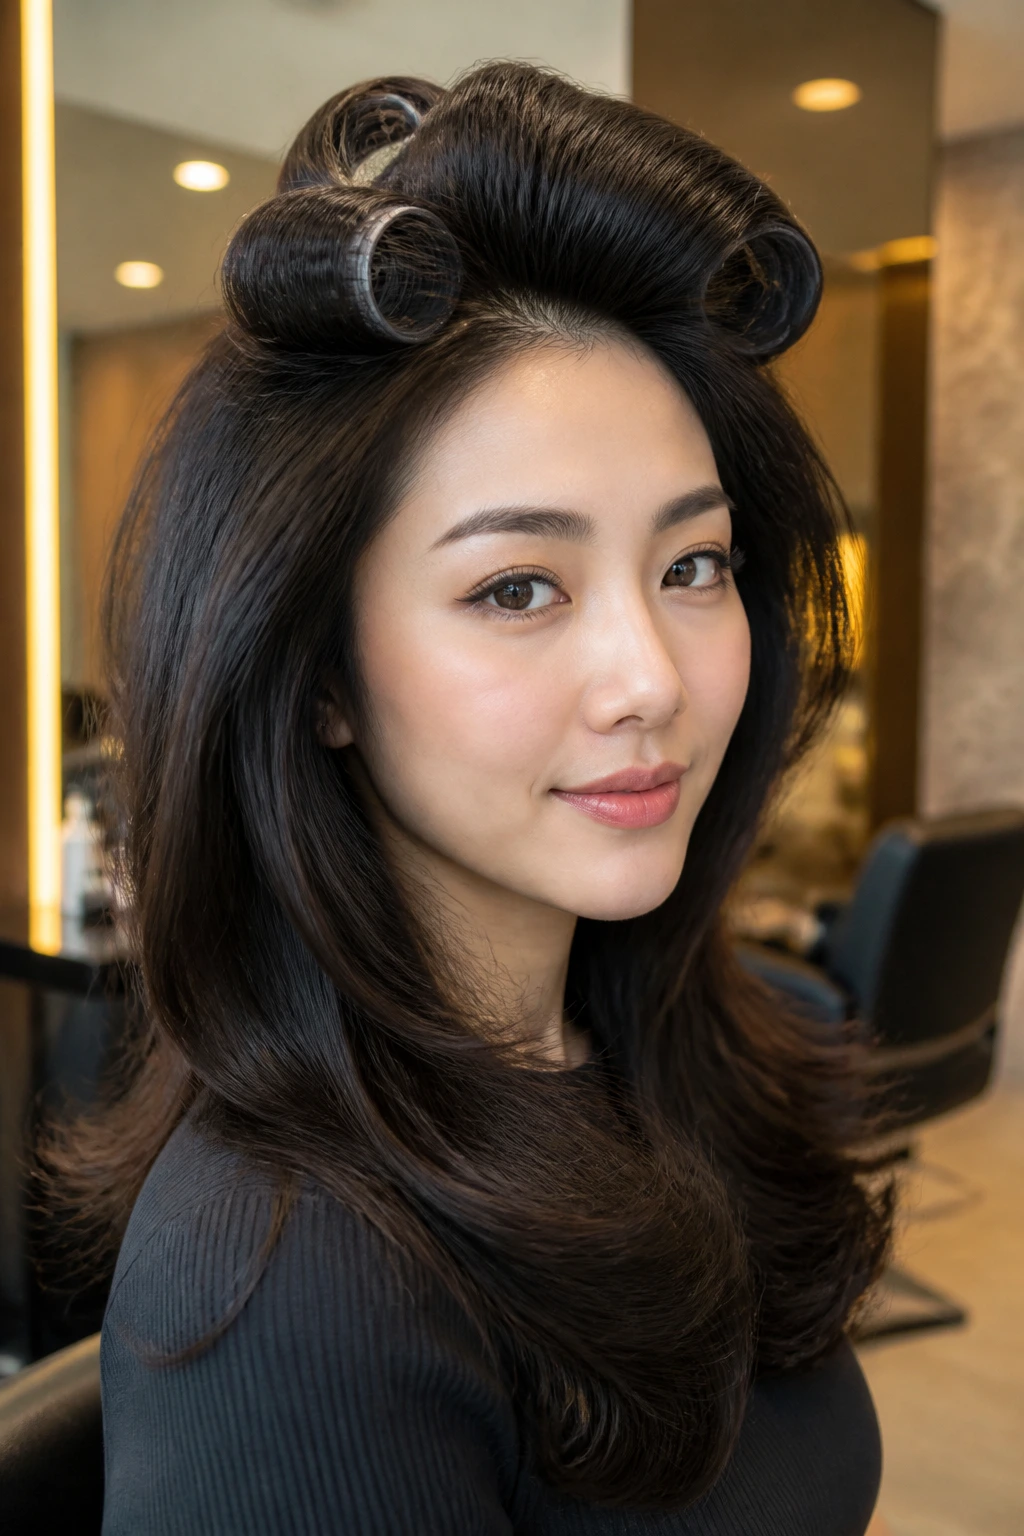
For a classic, full-bodied look, nothing beats a bouncy blowout. This style adds beautiful movement and volume to medium or long hair, softening the natural straightness with gentle, flowing curves that look incredibly healthy and polished.
Why This Style Is a Go-To for Volume
A blowout creates a soft, luxurious texture that looks effortless yet refined. By using velcro rollers, you can lock in the volume at the roots, giving your hair a beautiful lift that lasts.
Step-by-Step Volume Guide
- Apply a lightweight volumizing spray to damp roots.
- Blow-dry your hair in sections using a large ceramic round brush, lifting the hair straight up from the scalp to build height.
- As you finish each section, wrap the warm hair around a large velcro roller, rolling it down to the scalp and securing it with a clip.
- Leave the rollers in place for fifteen minutes until your hair is completely cool.
- Gently remove the rollers, brushing through with a paddle brush to soften the waves and create a smooth, voluminous finish.
18. The Modern Shag with Preppy Face-Framing
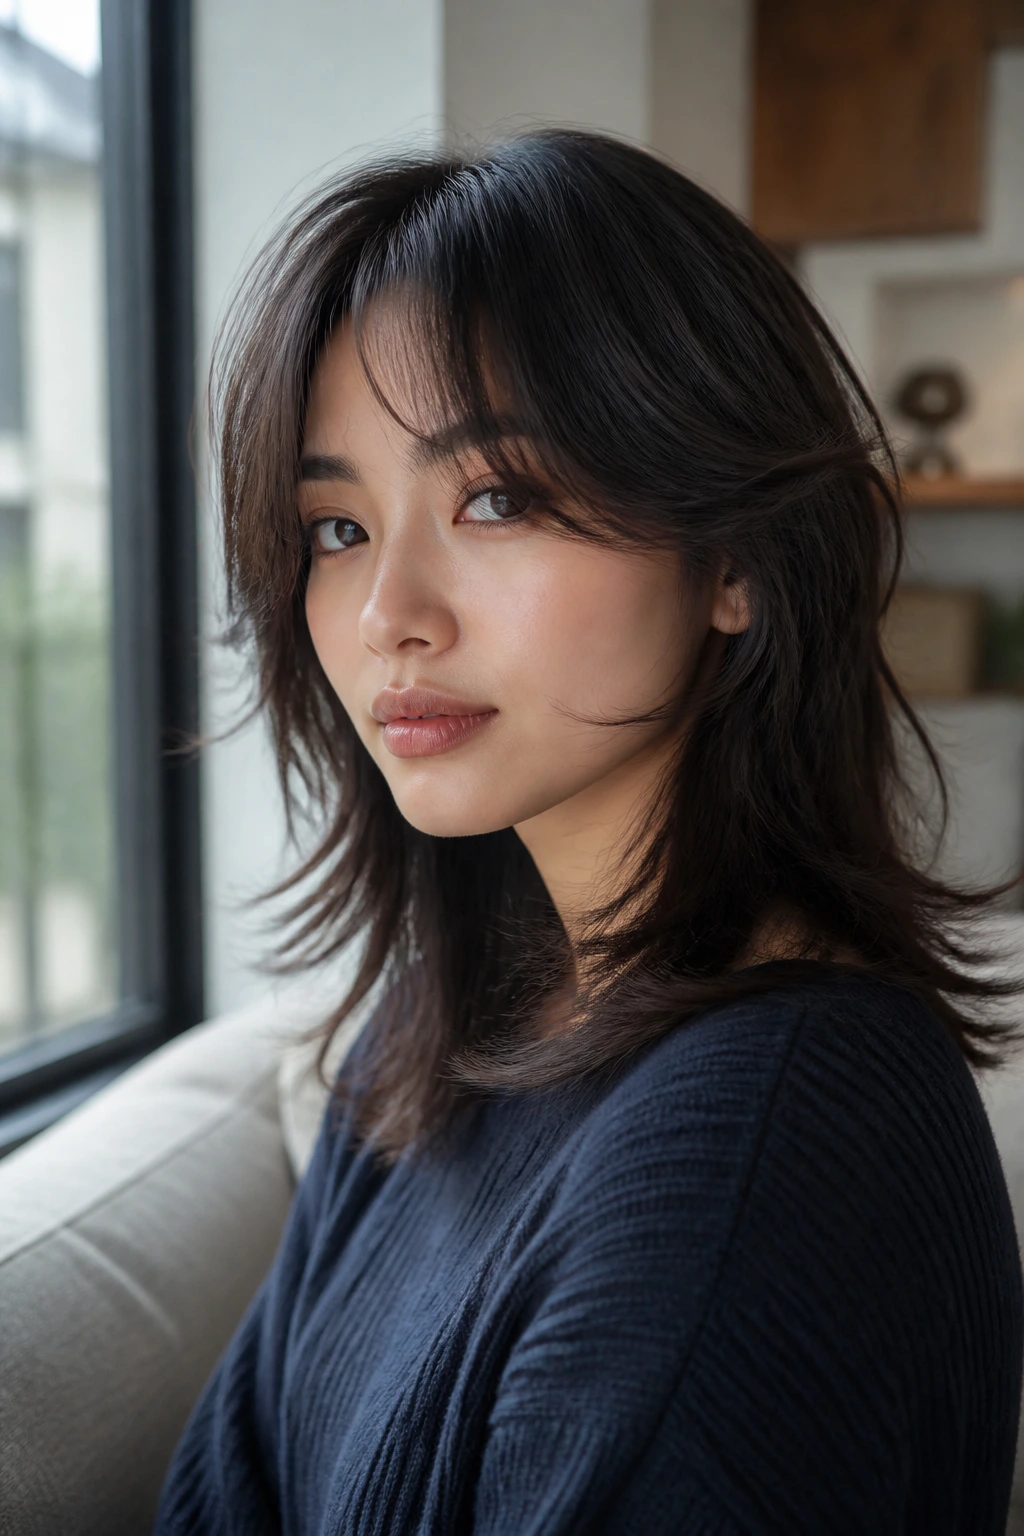
This cut offers a textured, layered option that still feels tidy and put together. It features soft, feathered layers throughout the length, with shorter, face-framing pieces that add movement and lightness to thick hair.
      [Curtain Fringe]
       /
   [Short]        [Short]
   [Layers]      [Layers]
                    /
     [Textured Lengths]
To keep a shag from looking messy, the key is keeping the styling polished. Use a small amount of styling cream to define the layers, smoothing the front pieces inward to frame your face.
The soft layers break up the heavy weight of the hair, allowing for natural movement and a lighter feel while maintaining a clean, structured outline that looks neat and intentional. This is a wonderful option for those who want a low-maintenance cut that still looks styled and elegant.
19. The Classic Schoolgirl Double Braids
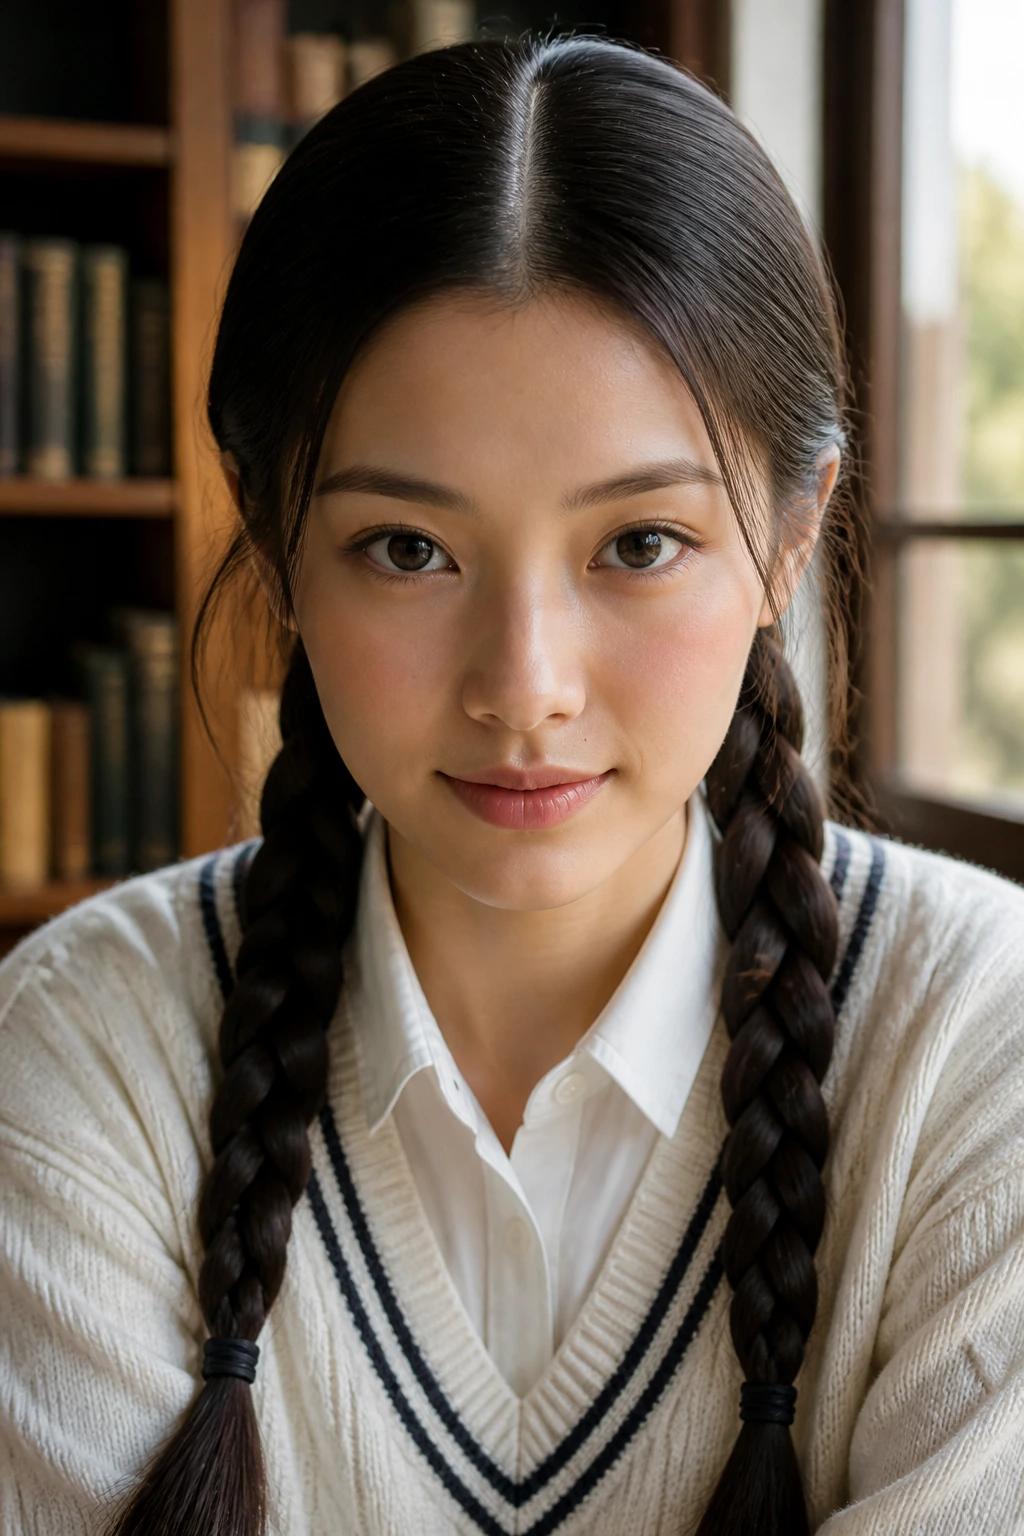
This style brings a sweet, nostalgic charm to long hair, keeping it completely secure and out of your face. It features two neat braids starting at the nape of the neck or just behind the ears, draping over your shoulders for a classic, collegiate look.
To keep these braids looking polished rather than messy, you want to ensure your parts are clean and the tension is even. Use your metal-tailed comb to create a straight center part from your forehead down to the nape of your neck.
Braid each side tightly, crossing the outer strands over the middle piece and pulling them snug against your head. Secure the ends with matching ribbon ties or small, clear elastic bands. This style is incredibly comfortable and durable, keeping your hair neat and tidy through any activity.
20. The Smooth Slick-Back Low Ponytail
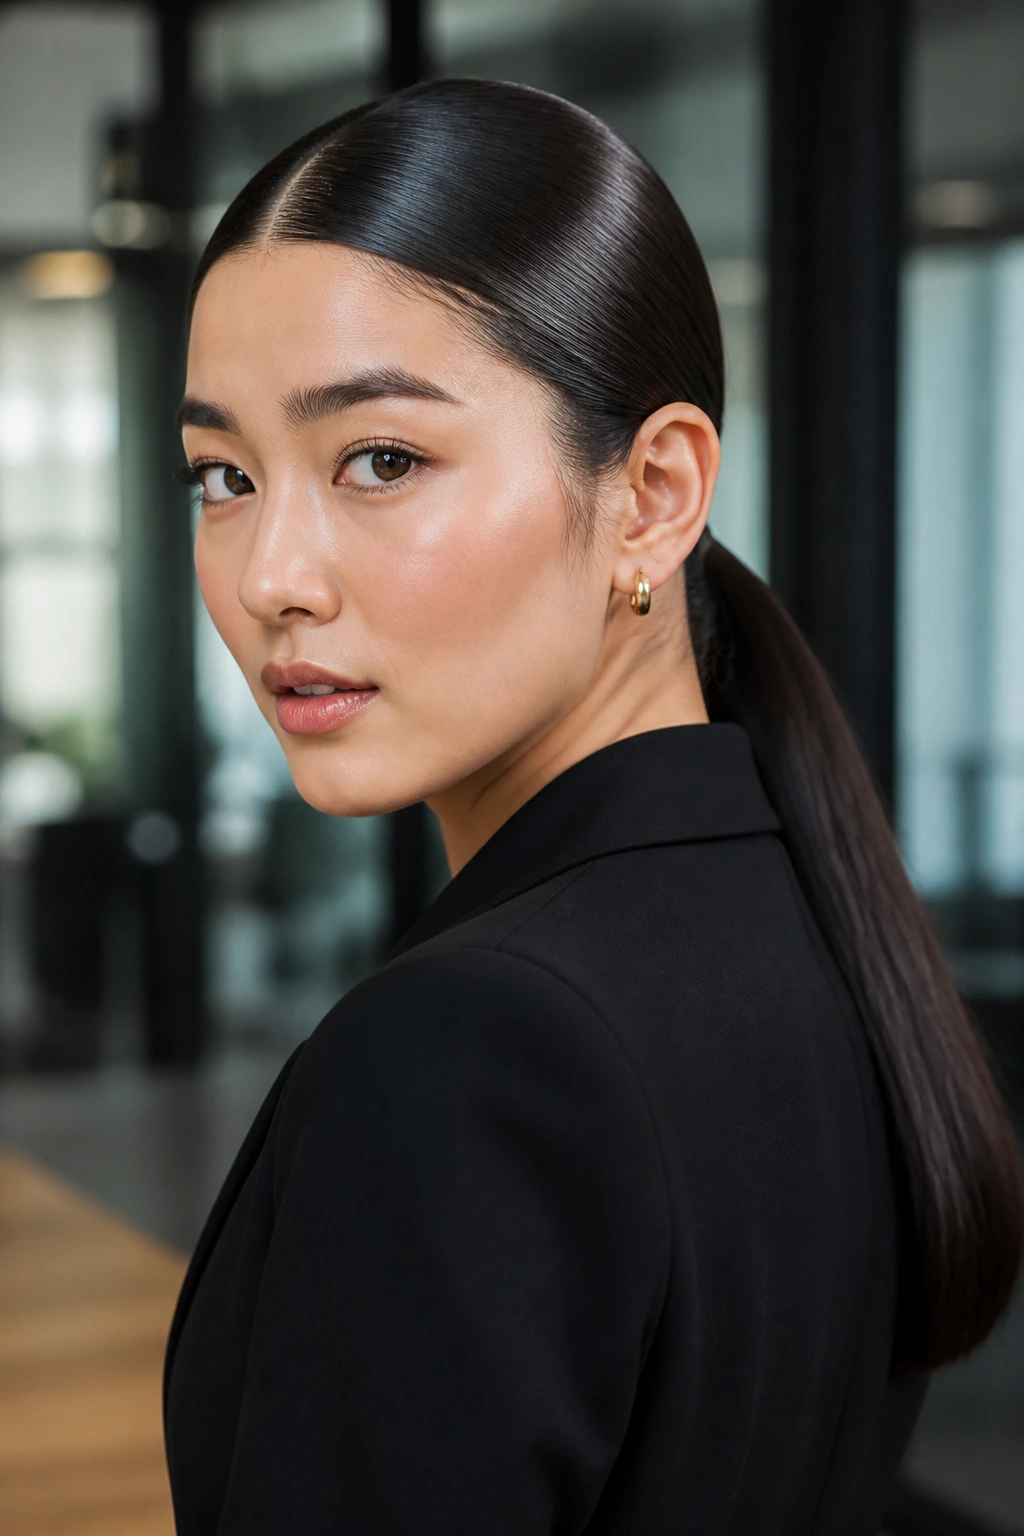
This ultra-sleek style is perfect for a sharp, modern appearance. It gathers all your hair tightly at the nape of the neck, creating a clean, high-shine finish that highlights your facial features and looks incredibly professional.
      [Slicked-Back Crown]
               |
     [Secure Low Elastic]
               |
     [Sleek, Straight Tail]
To achieve this level of sleekness, you need to use a high-gloss pomade or a firm-hold gel. Apply the product to damp hair, brushing it back from your hairline with a soft boar-bristle brush to smooth down any flyaways or baby hairs.
Gather the hair tightly at the nape of your neck and secure it with a strong elastic band. Run a flat iron down the length of the ponytail to ensure it is perfectly straight and smooth, finishing with a light spray of shine-boosting hairspray for a polished, glass-like finish.
21. The Textured Side-Parted Caesar Cut
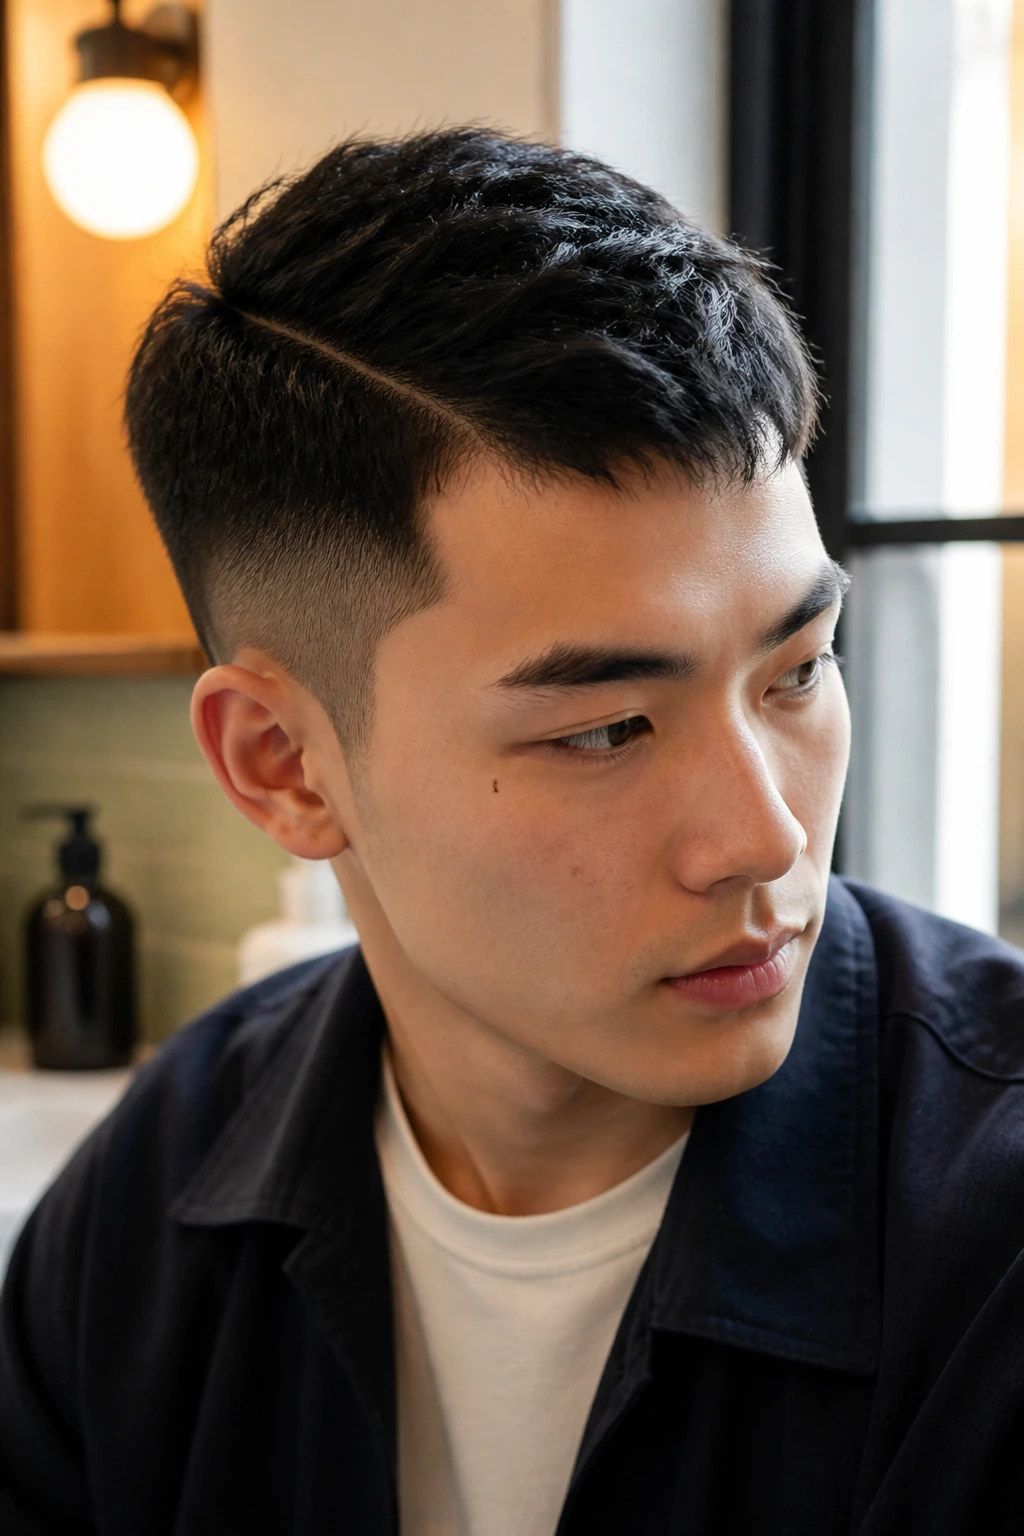
This short cut is a wonderful, modern option that is both neat and stylish. It features short sides with a slightly longer, textured top that is styled forward with a subtle side part, offering a clean, structured look that is very easy to maintain.
Why It’s a Great Choice
The Caesar cut is a timeless, low-maintenance option that looks incredibly sharp on thick hair. The subtle texture on top adds a modern touch while keeping the overall shape clean and organized.
Daily Styling Tips
- Apply a small amount of matte styling paste to damp hair, working it through with your fingers.
- Use a fine-toothed comb to create a subtle side part, combing the hair forward and slightly to one side.
- Let the hair air dry or use a blow-dryer on a low setting to set the shape.
- Keep the sides trimmed neatly every few weeks to maintain the sharp silhouette.
22. The Voluminous Bubble Ponytail
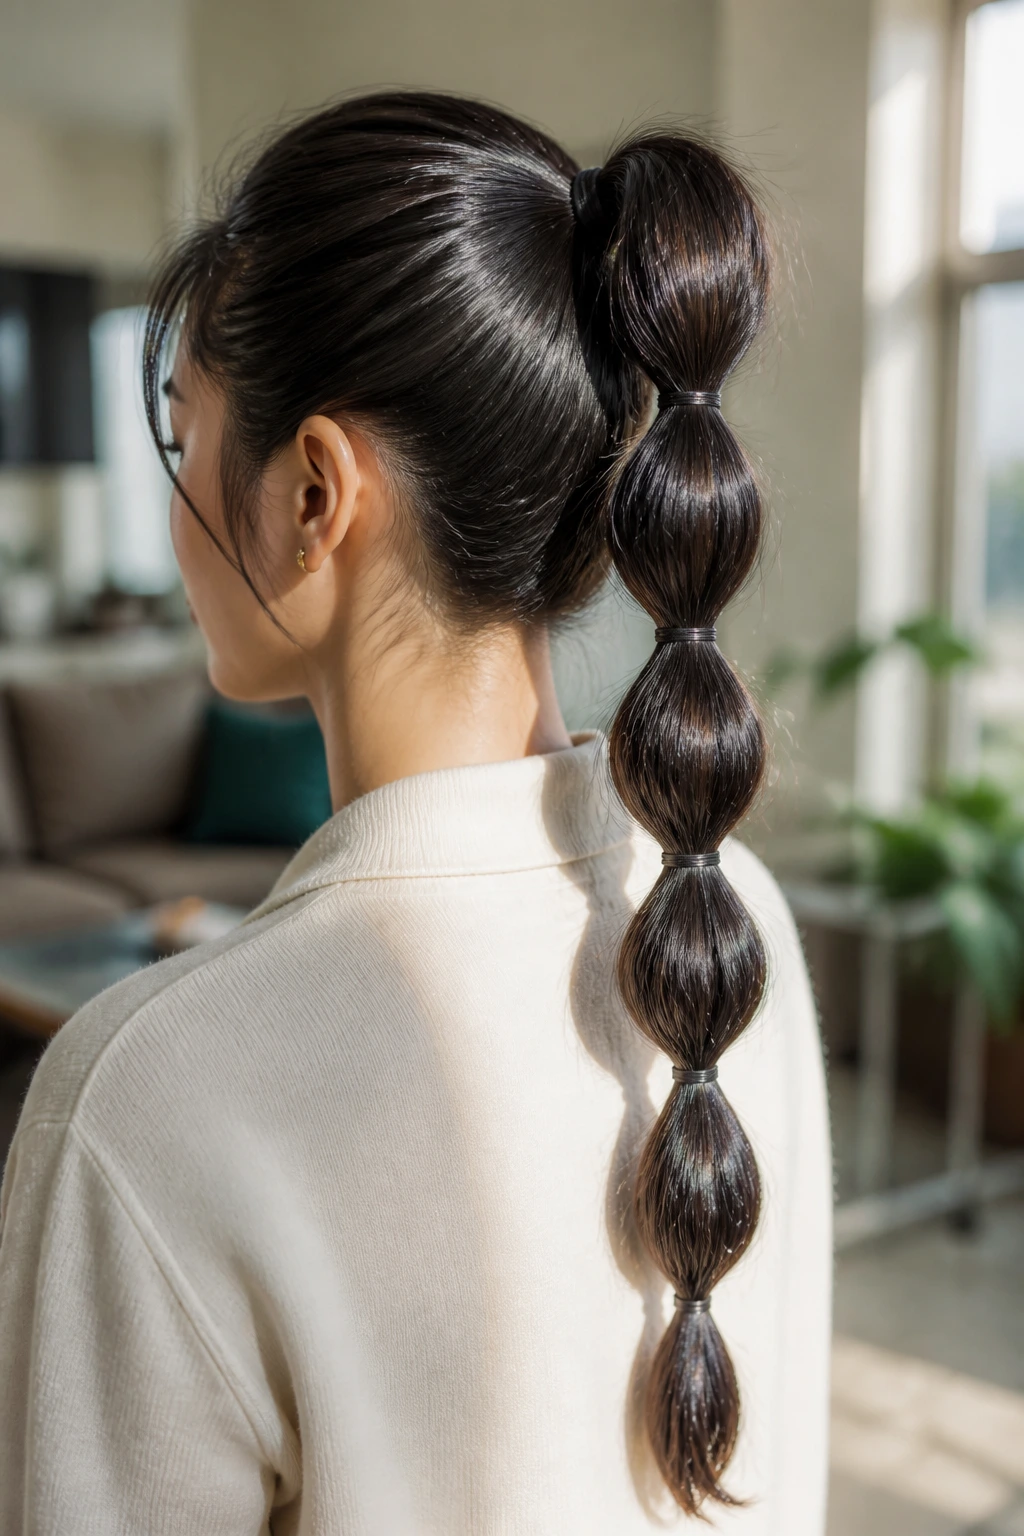
This modern twist on the classic ponytail adds a playful, structured texture to long hair. It features several secured sections along the length of the ponytail, gently pulled outward to create a series of neat, rounded “bubbles.”
        [High Ponytail]
              |
        [Elastic Band]
              |
          ( Bubble )
              |
        [Elastic Band]
              |
          ( Bubble )
To create perfect, uniform bubbles, you want to use small, matching elastic bands. Start by securing your hair into a high, smooth ponytail. Travel down the length of the ponytail about three inches and secure another elastic band.
Gently pull the hair between the two bands outward to create a rounded, voluminous bubble. Repeat this process down the length of your ponytail, keeping the spacing even. This style is incredibly sturdy and holds its shape beautifully, offering a unique, structured look that is perfect for any occasion.
How to Maintain Structure and Shine All Day
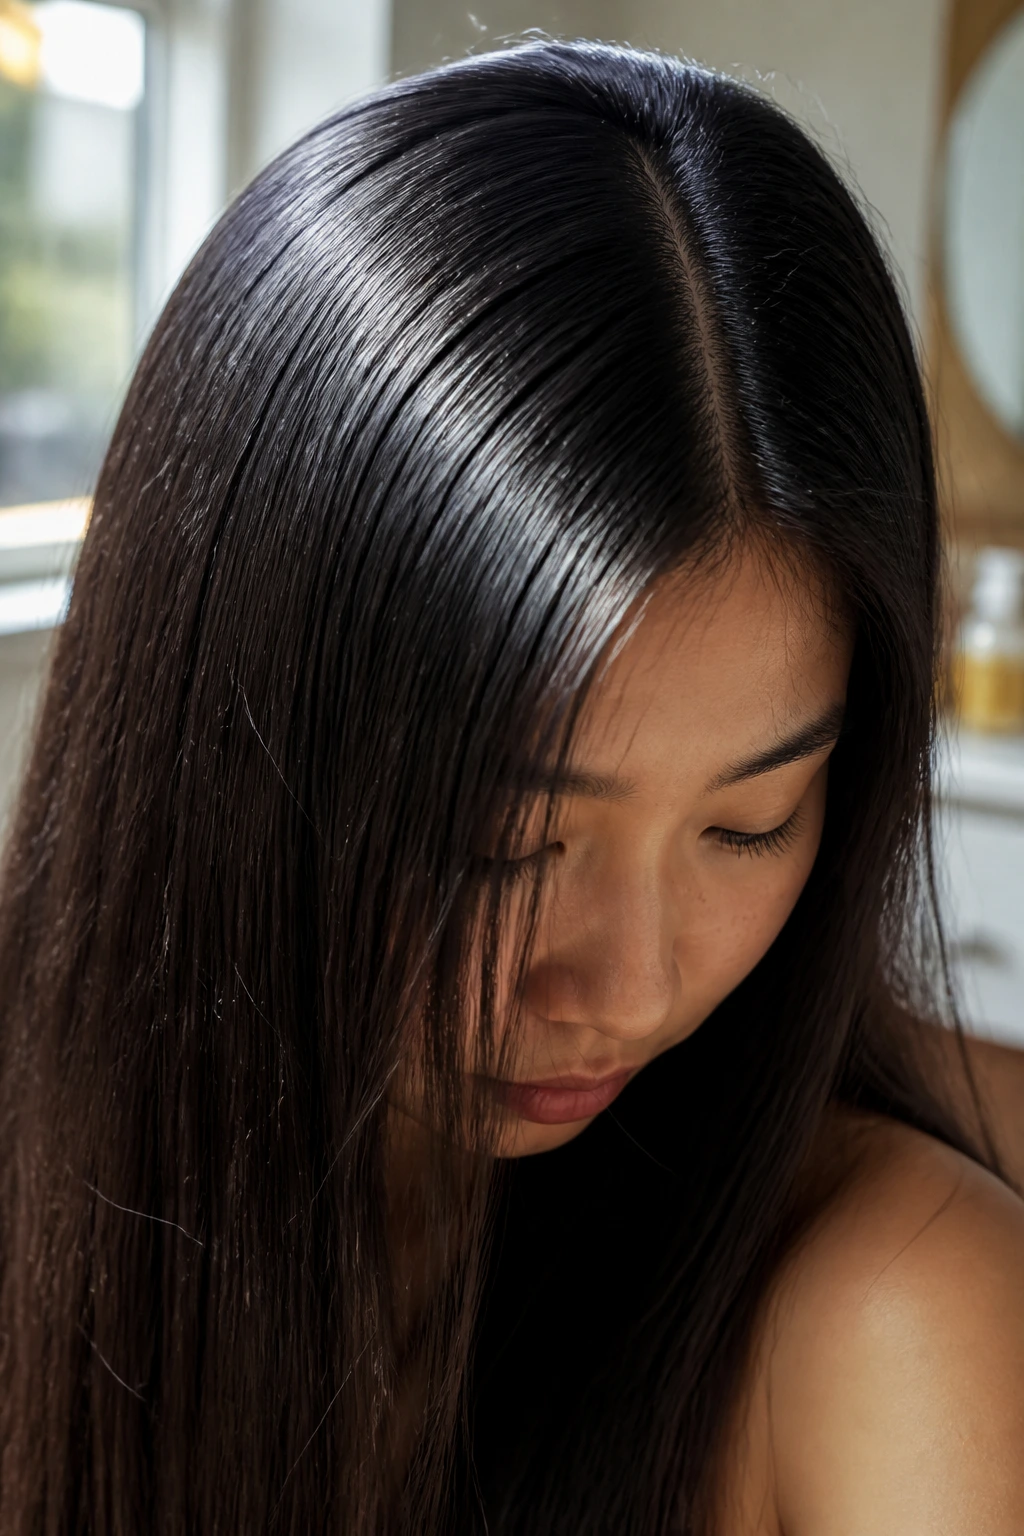
Once you have styled your hair, the next challenge is keeping it looking fresh and neat until you are ready to wash it. Because Asian hair has a smooth, flat cuticle, it can easily look weighed down if you use too much product, or it can lose its shape if the weather is humid.
To prevent your styles from falling flat, always start with a clean canvas. Use a clarifying shampoo once a week to remove any product buildup that can dull your hair’s natural shine. When applying styling products, always start with a small amount—about the size of a dime—and add more only if needed, focusing on the mid-lengths and ends rather than the roots.
If you find your hair losing its volume or parting during the day, keep a travel-sized boar-bristle brush and a few bobby pins in your bag for quick touch-ups. A quick brush can smooth down any flyaways, while a strategically placed pin can anchor a slipping accessory or secure a loose strand. With the right tools and a little practice, you can keep your hair looking polished and beautiful all day long.
Wrapping Up
Embracing the natural strength and shine of your hair is the key to mastering any classic, structured style. By choosing cuts and techniques that work with your hair’s unique physical properties rather than fighting them, you can create beautiful, polished looks that highlight your natural beauty and stay sharp all day.
Whether you prefer a short, tailored crop or long, flowing braids, the most important element is the health and care you put into your hair. Keep your tools high-quality, your products lightweight, and your styling intentional. With these simple practices, you can enjoy timeless, elegant hairstyles that feel uniquely yours and look completely effortless.
