When you have exactly twelve minutes to get out the door, your hair is usually the first casualty of the morning. You stare at your reflection, realize the dry shampoo is failing, and decide that a basic ponytail is the only path forward. We have all been there. But the persistent belief that “quick” must mean “boring” is one of the most stifling myths in the world of beauty. You can absolutely achieve polished, intentional styles while still making it to your first meeting on time. It is all about mastering a few key textures and relying on the right mechanical tricks rather than spending forty minutes with a curling wand.
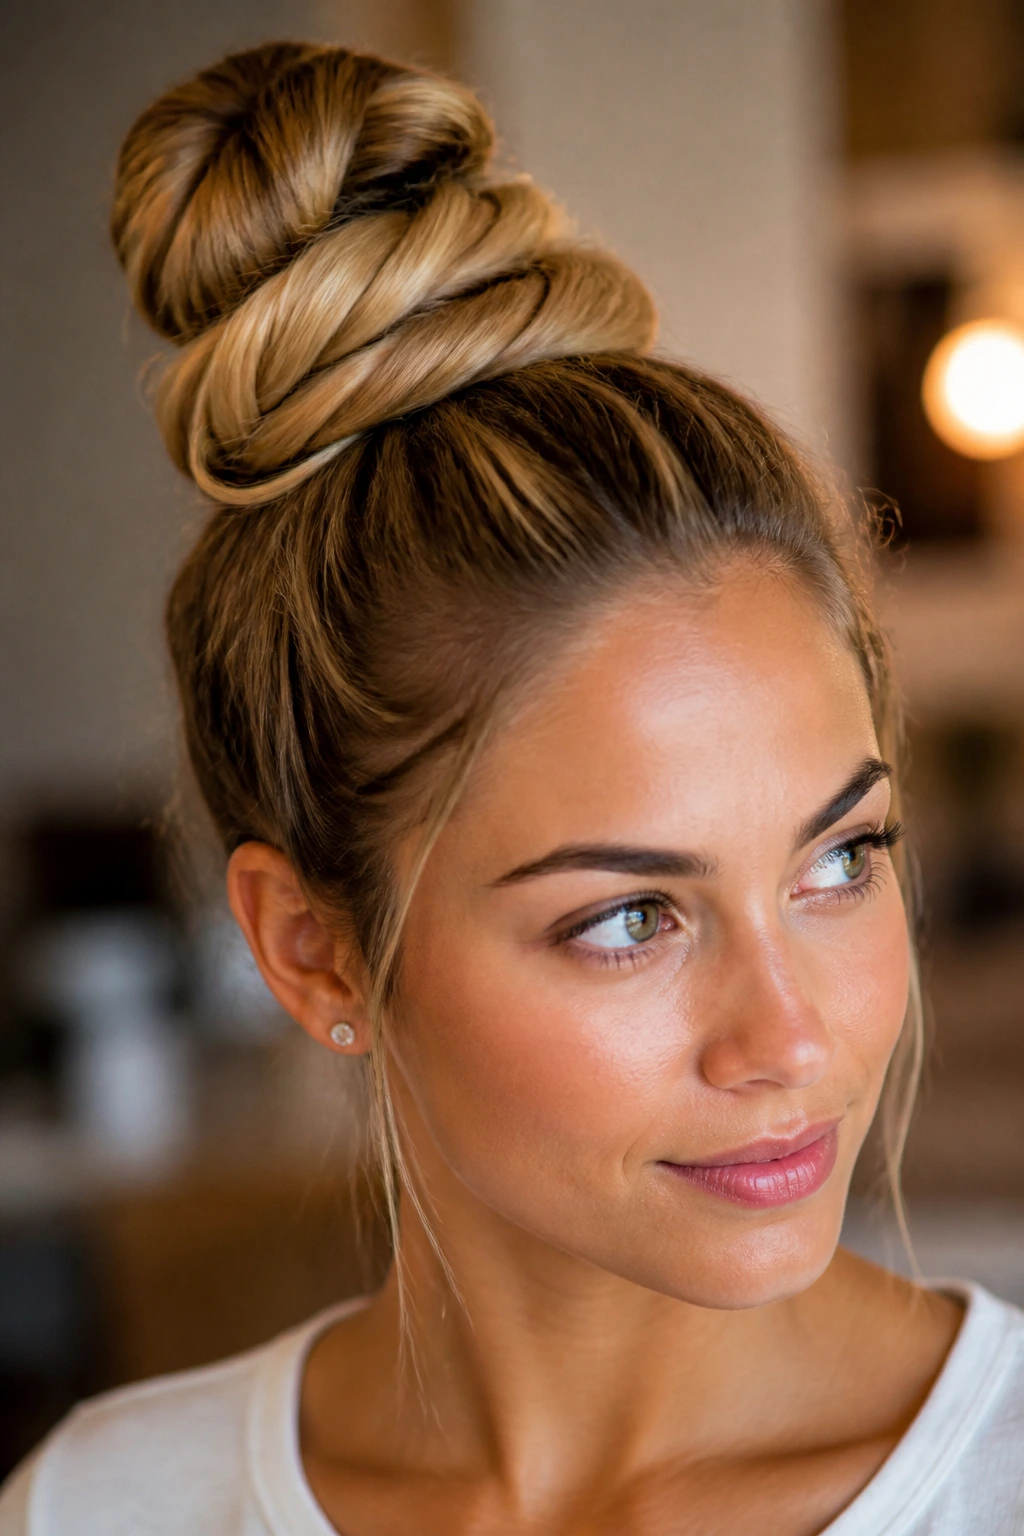
1. The High-Volume Messy Bun
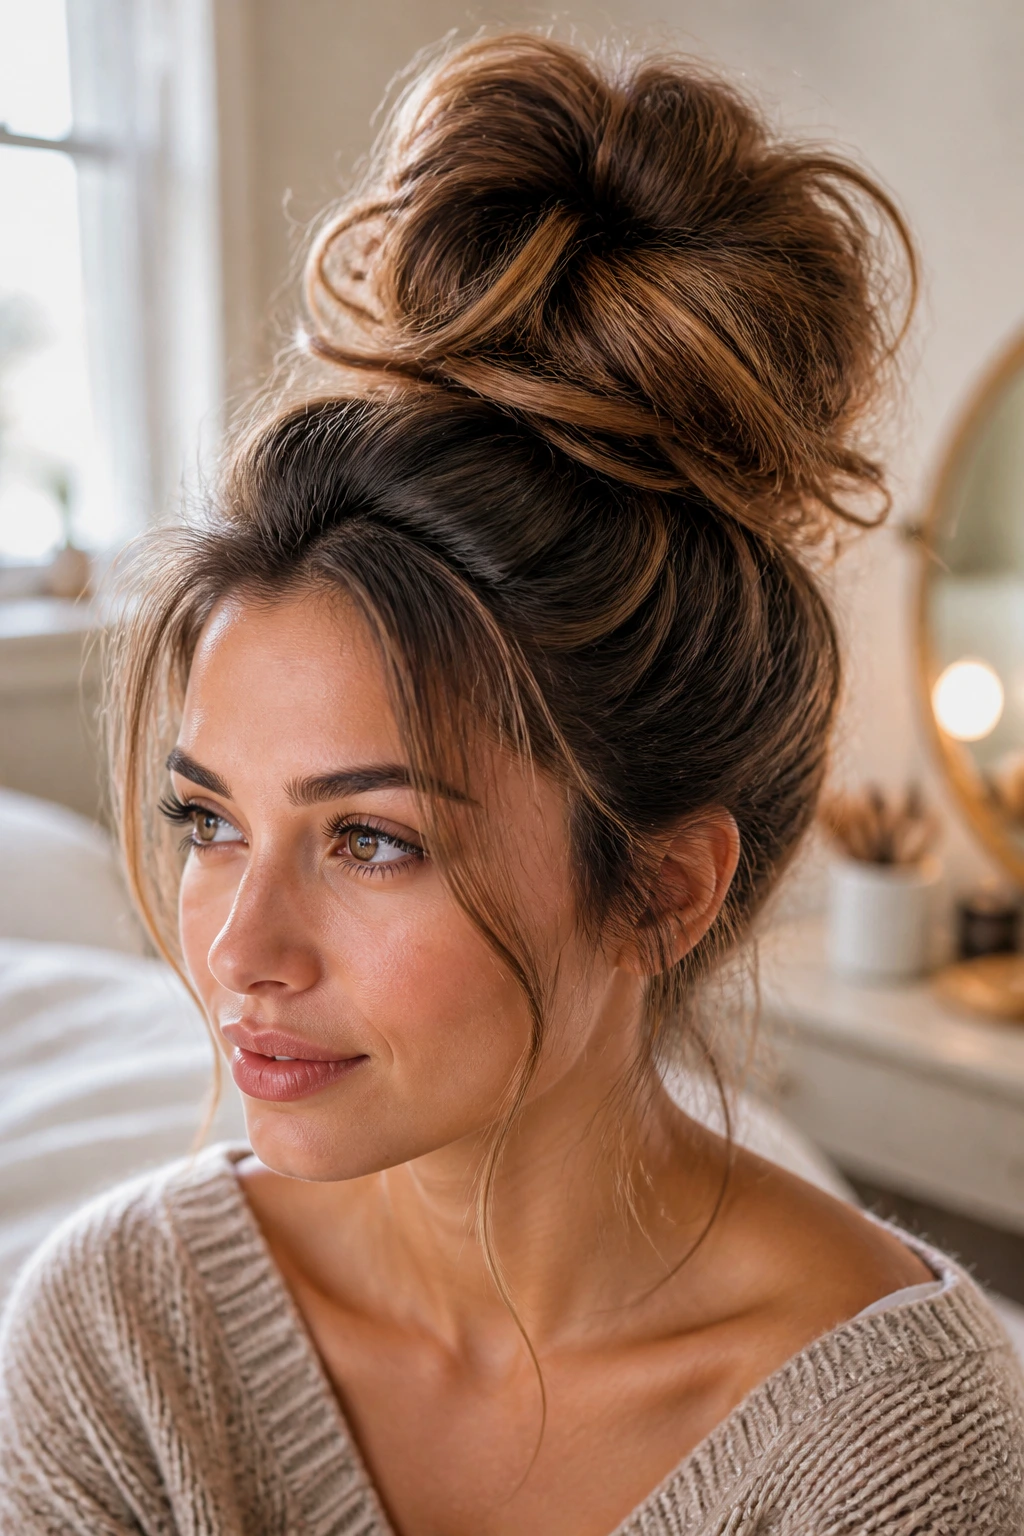
The key to a bun that looks intentional rather than accidental is volume at the crown. If you pull your hair back while it is completely flat against your skull, it looks like you are heading to the gym. Instead, use a texturizing spray or a quick tease at the roots before you even pick up an elastic. Flip your head over, gather everything into a loose mountain on top of your head, and secure it with a spiral pin or a soft scrunchie. The secret here is leaving the ends tucked in but slightly undone; if it looks too perfect, it loses that effortless appeal.
Why This Works
The height of the bun draws the eye upward, which naturally creates a more lifted, awake appearance for your face. It is a classic look because it keeps the neck clear and prevents hair from falling into your eyes while you are rushing through your morning coffee.
Quick Prep Steps
- Spritz a dry texture spray through the mid-lengths.
- Gather hair at the crown, keeping the grip loose.
- Twist the gathered section into a coil and pin.
- Pull a few wispy strands near the temples to soften the edges.
Pro tip: Use a silk scrunchie to minimize breakage if you wear this style often.
2. The Twisted Half-Up Crown

This style mimics a complicated braid but actually relies on two simple twists. Start by sectioning off the front pieces of your hair—everything from your temples forward. Twist each section away from your face until you reach the back of your head. Bring the two twists together and secure them with a decorative clip or a small, clear elastic. You get the look of a romantic, intricate style without the need for actual braiding skills. It is perfect for days when you want your hair down but need it off your face to actually get things done.
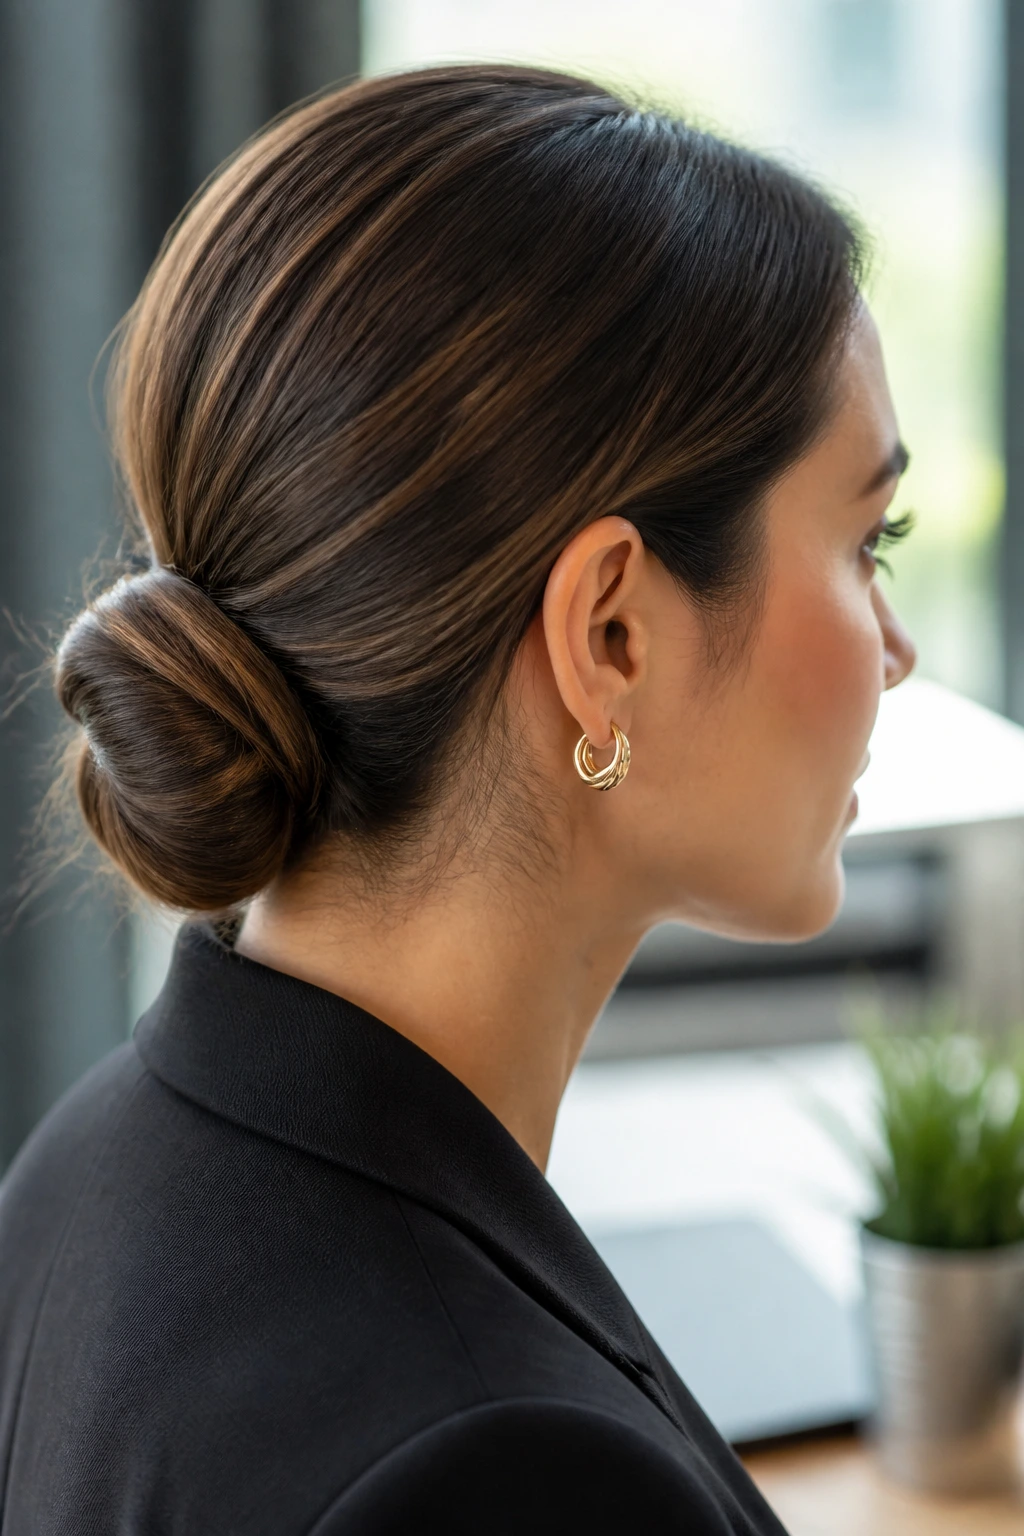
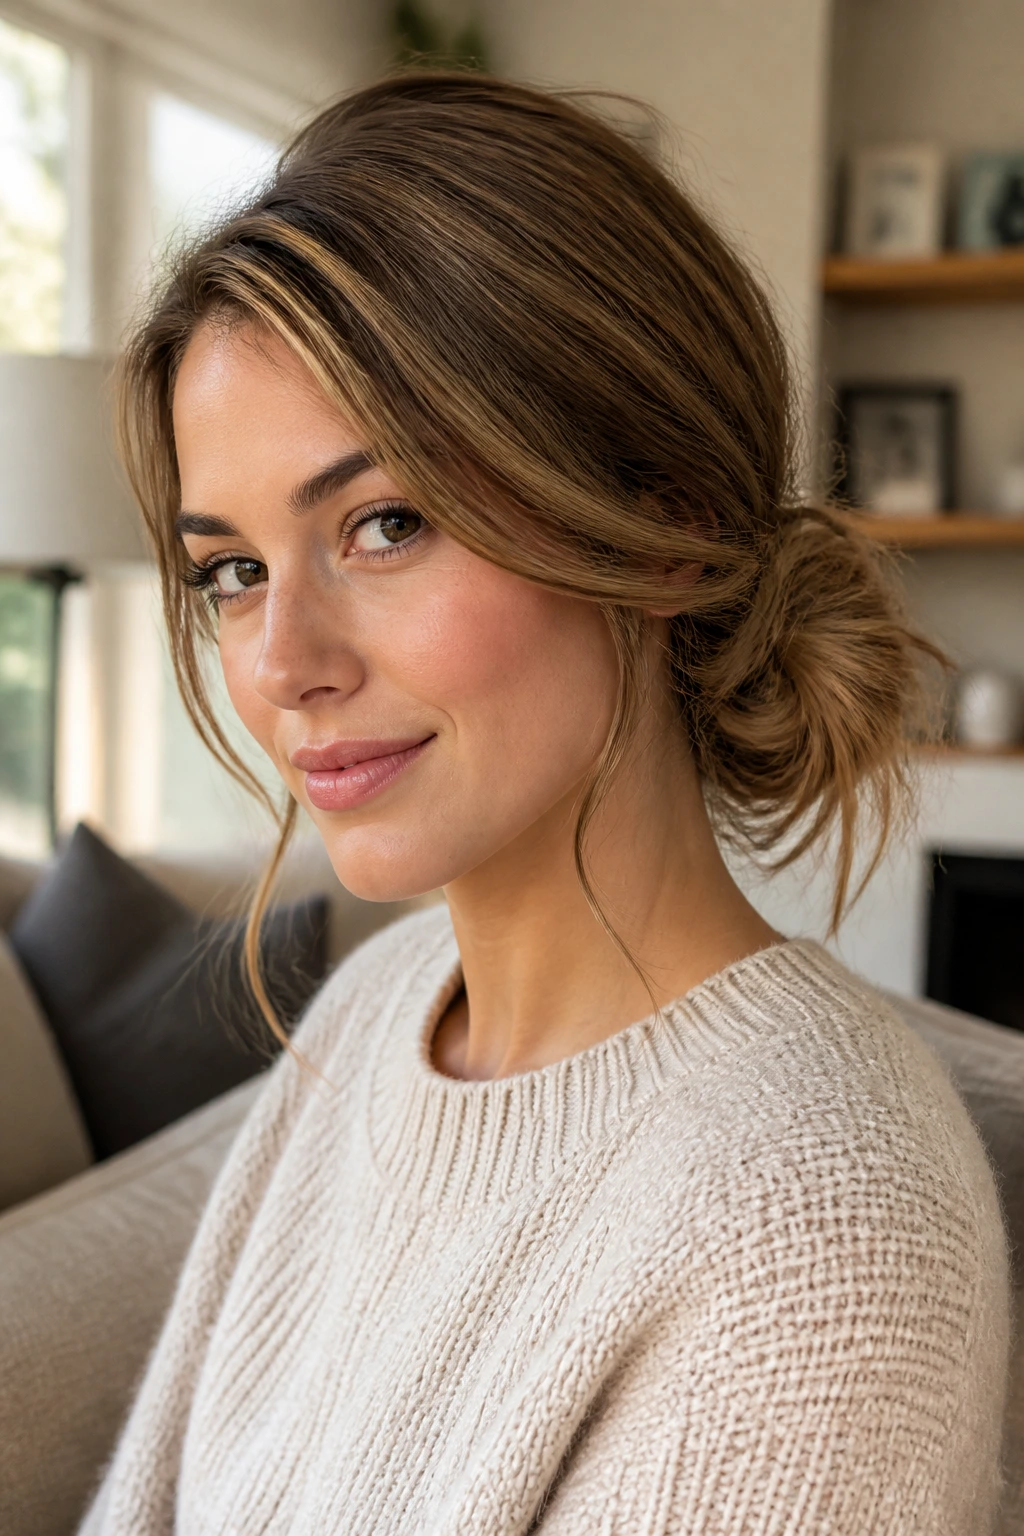
3. The Polished Low Chignon
For days when you need to look buttoned-up and professional, a low chignon is your best friend. Start by pulling your hair into a low, tight ponytail. Instead of just wrapping the elastic, tease the ponytail slightly to create bulk, then roll it underneath itself toward the nape of your neck. Secure the roll with bobby pins that match your hair color, tucking the ends deep inside. A little bit of smoothing cream or a light-hold hairspray will keep the flyaways down for the duration of the day.
The Secret to Smoothness
The difference between a “messy” low bun and a “polished” chignon is tension. Pulling your hair taut against the scalp while gathering the pony sets the stage for a clean, professional finish. If you have layers, use a tiny dab of hair balm on your palms to glide over the surface of the hair before you begin the roll.
Essential Tools
- Fine-toothed tail comb for clean parting.
- Smoothing balm or light-hold pomade.
- Three to four long bobby pins.
4. The Claw Clip Twist
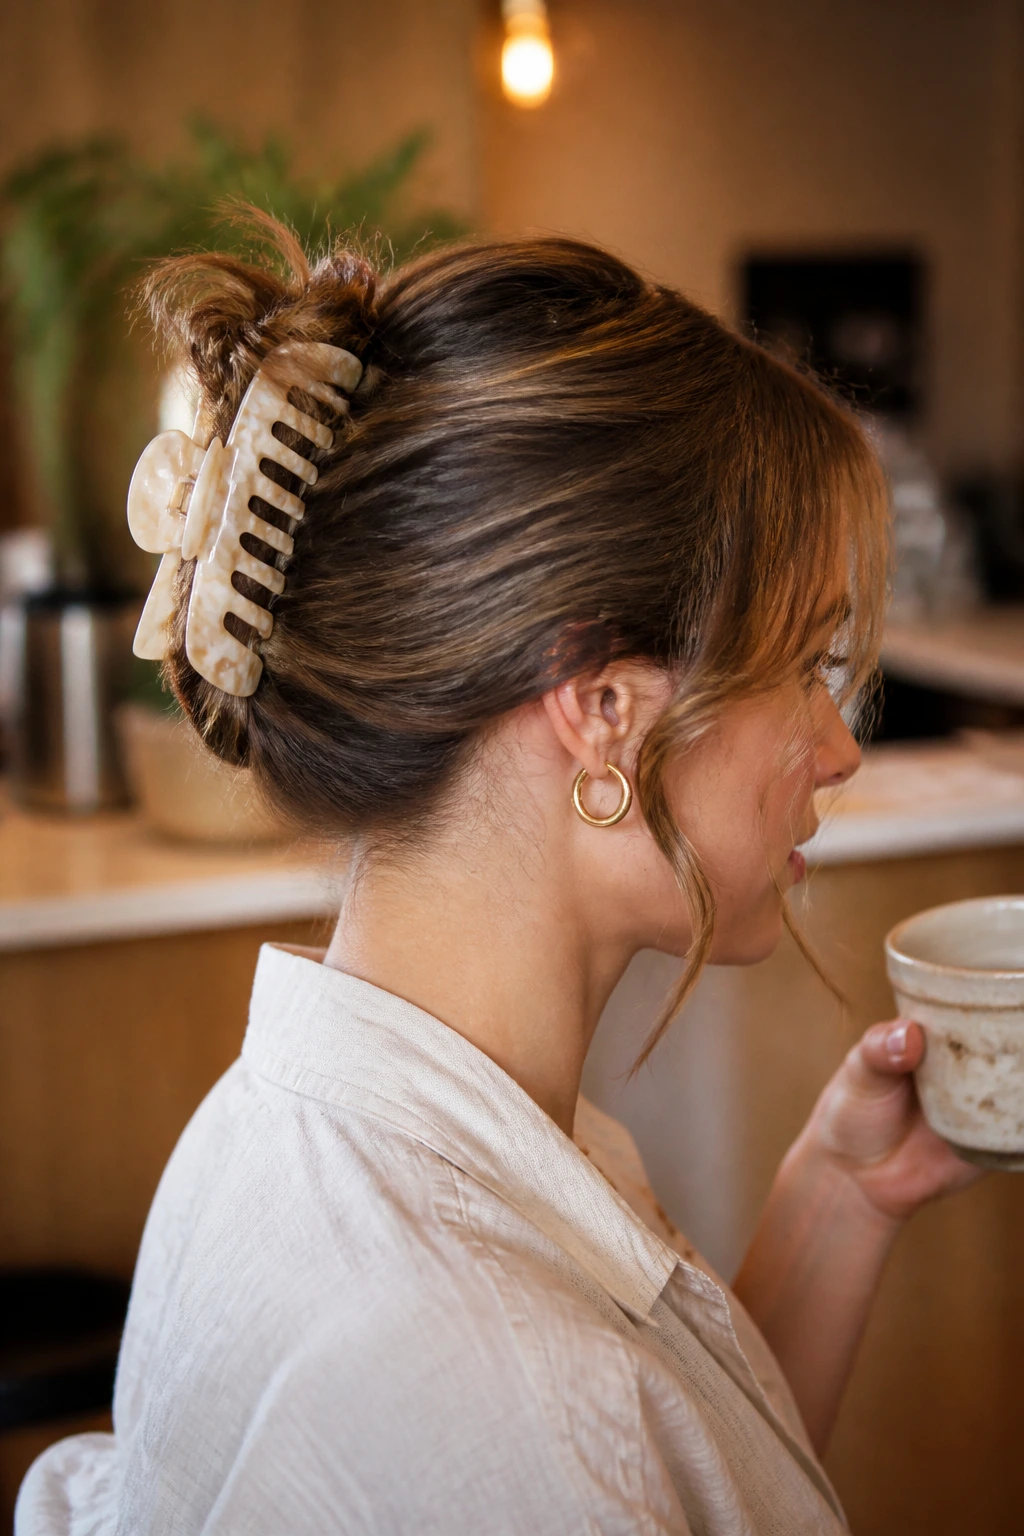
The claw clip has made a massive comeback, and for good reason—it is the fastest way to get hair off your neck without causing a headache. Gather your hair at the nape as if you are making a low ponytail, twist the length upward toward the crown of your head, and secure it with a large clip. The ends of your hair should spill out over the top for a relaxed, chic vibe. It is incredibly secure and holds up much better than a standard elastic, especially if you have thick or heavy hair.
5. The Sleek Low Pony With A Wrap

A ponytail can feel sophisticated if you hide the elastic. Take a small, quarter-inch section of hair from the underside of your ponytail and wrap it tightly around the elastic band until it is completely covered. Secure the end with a small bobby pin pushed upward into the base of the pony. This tiny change instantly makes a standard hairstyle look like you spent twenty minutes at a salon rather than thirty seconds in your bathroom mirror. It is the ultimate trick for an elevated morning look.
Why The Wrap Matters
The transition between the hair and the elastic is where the “casual” vibe usually stems from. By replacing that rubber or fabric band with your own hair, you create a seamless, monochromatic look. It is a classic editorial technique that works on everything from stick-straight hair to tight curls.
How To Get It Right
- Brush the ponytail to ensure the base is smooth.
- Pull a small section from the bottom of the pony.
- Wrap firmly, ensuring the elastic is invisible.
- Pin the end underneath the pony for a clean finish.
6. The Textured Side Braid
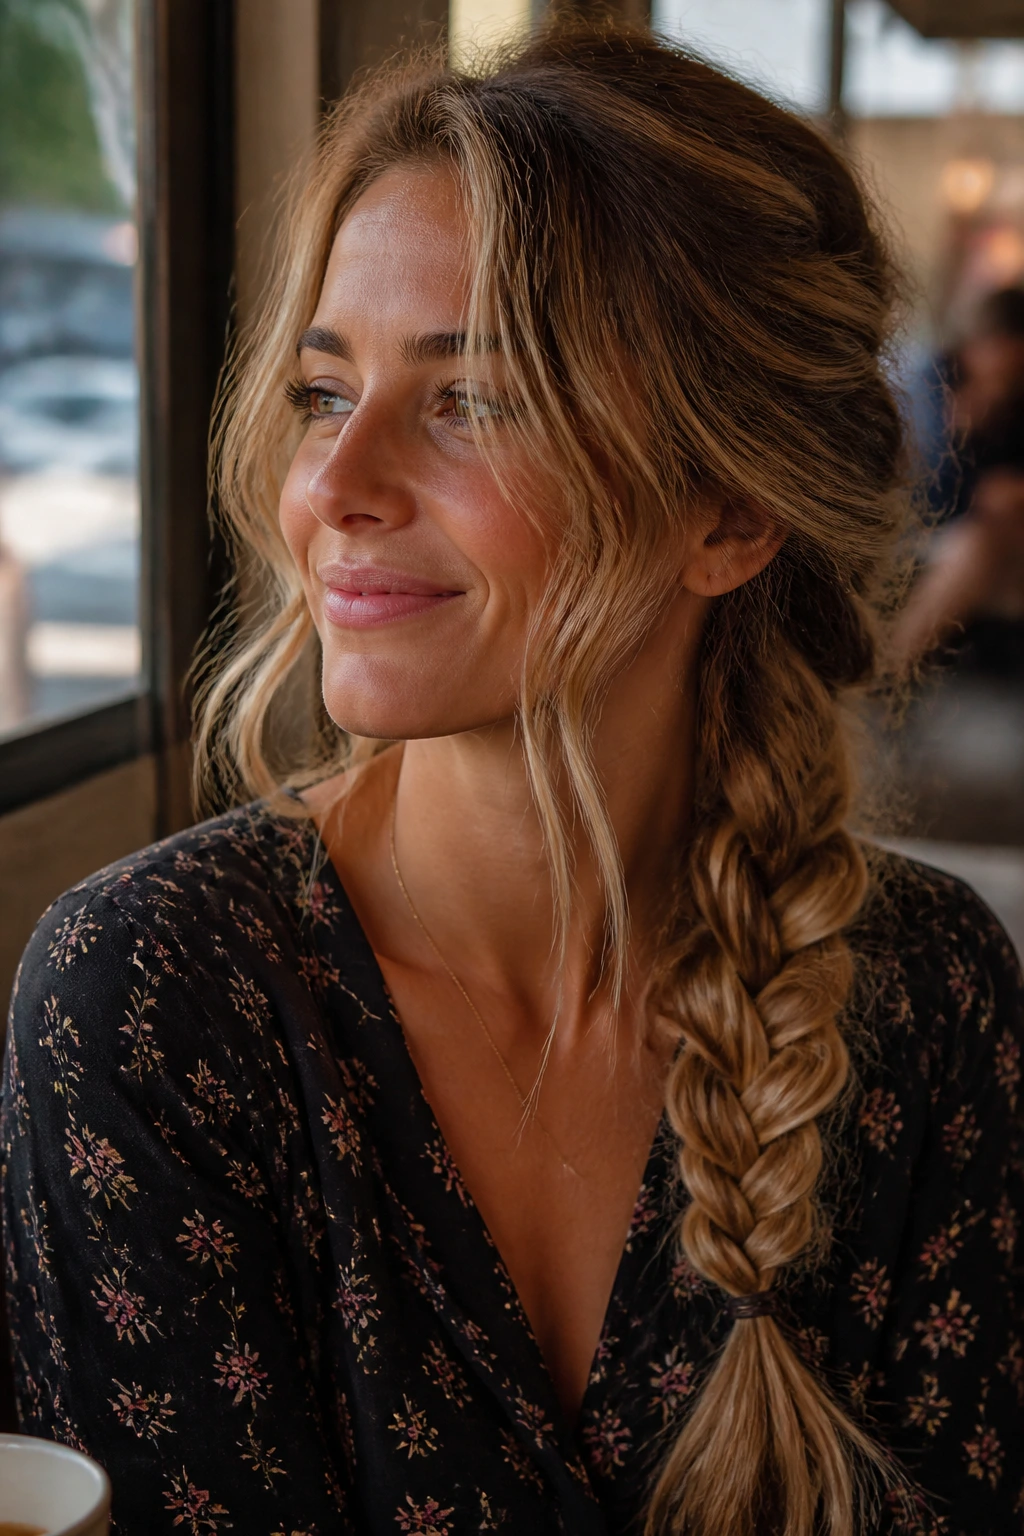
A side braid is one of those rare styles that actually looks better the messier it gets. Pull all of your hair to one side and do a standard three-strand braid, but do not pull the tension tight. Once you have secured the end with an elastic, go back through and gently tug at the loops of the braid to pancake them—this makes the braid look twice as thick. If you have shorter layers, let them fall out naturally around your face. It is a soft, feminine look that works well even if your hair hasn’t been washed in two days.
7. The Double-Knotted Pony
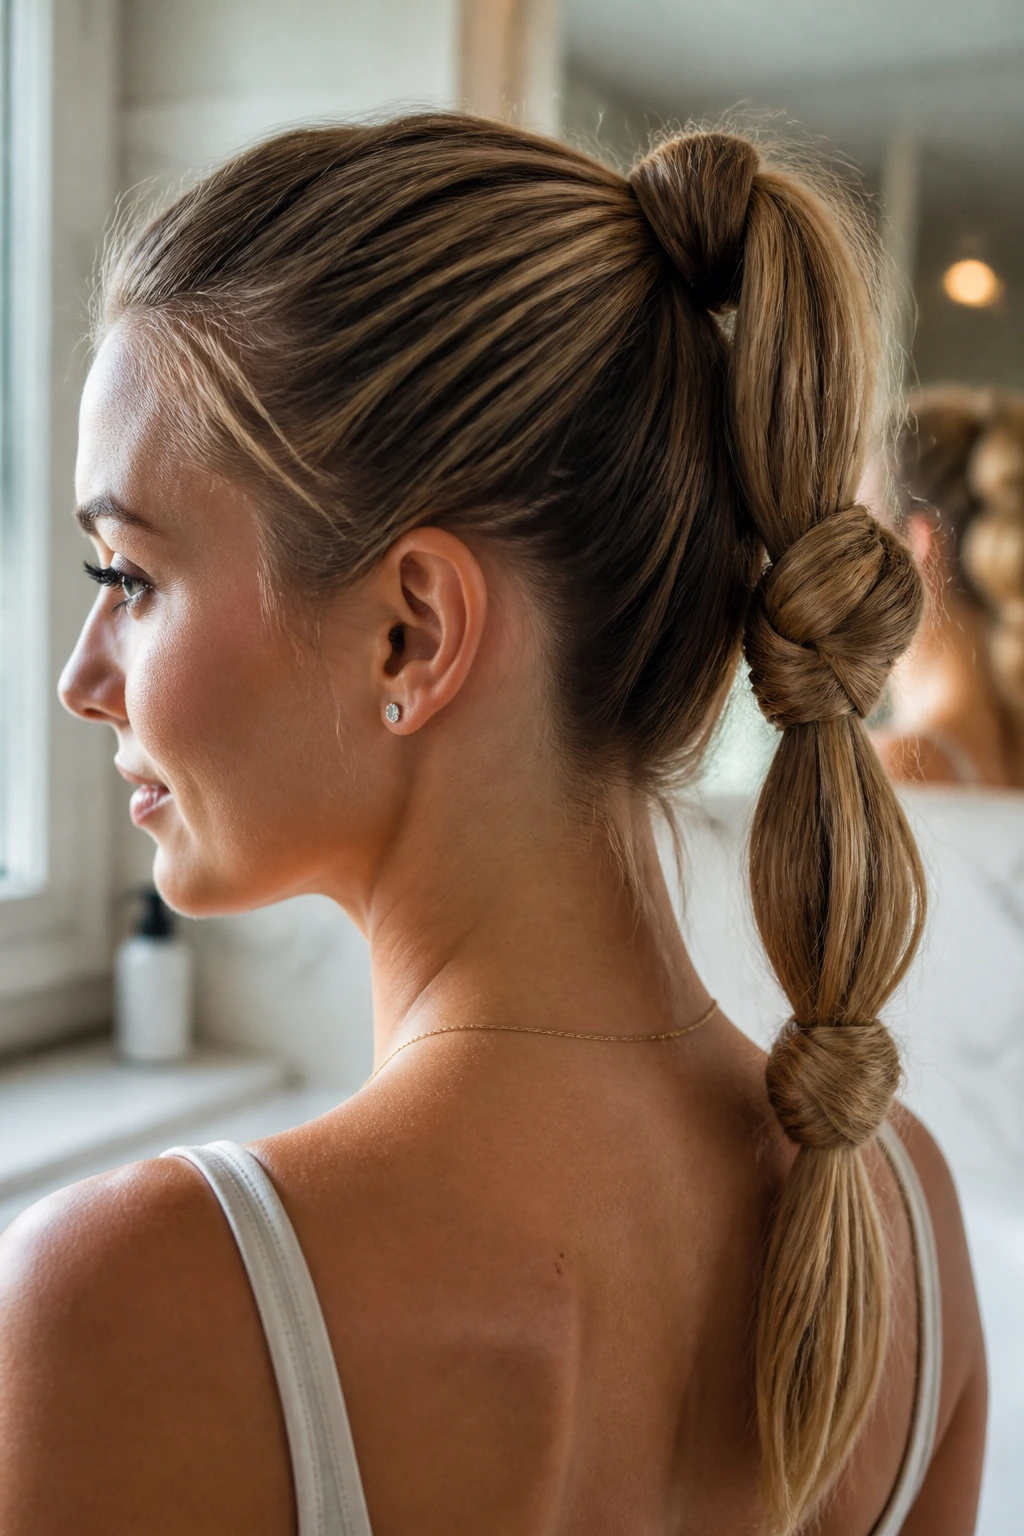
If you want to add detail without a lot of effort, try tying your hair into knots. Gather your hair into a ponytail and separate it into two equal sections. Tie them together in a simple overhand knot, then tie a second knot if your hair length allows it. Secure the very bottom with a clear elastic tucked underneath the final knot. This creates a architectural, rope-like effect that looks incredibly intricate but takes less than two minutes to execute. It works best on medium-to-long hair.
The Science of the Knot
Knots utilize your hair’s natural texture to stay in place without needing a thousand hairpins. Because the hair is looped around itself, it creates a self-securing structure that holds even if your hair is quite slippery or freshly washed.
Pro Variations
- Use a ribbon instead of the hair itself for a pop of color.
- Add a touch of sea salt spray for a grittier hold.
- Keep the knots slightly loose for a relaxed weekend look.
8. The Headband Tuck
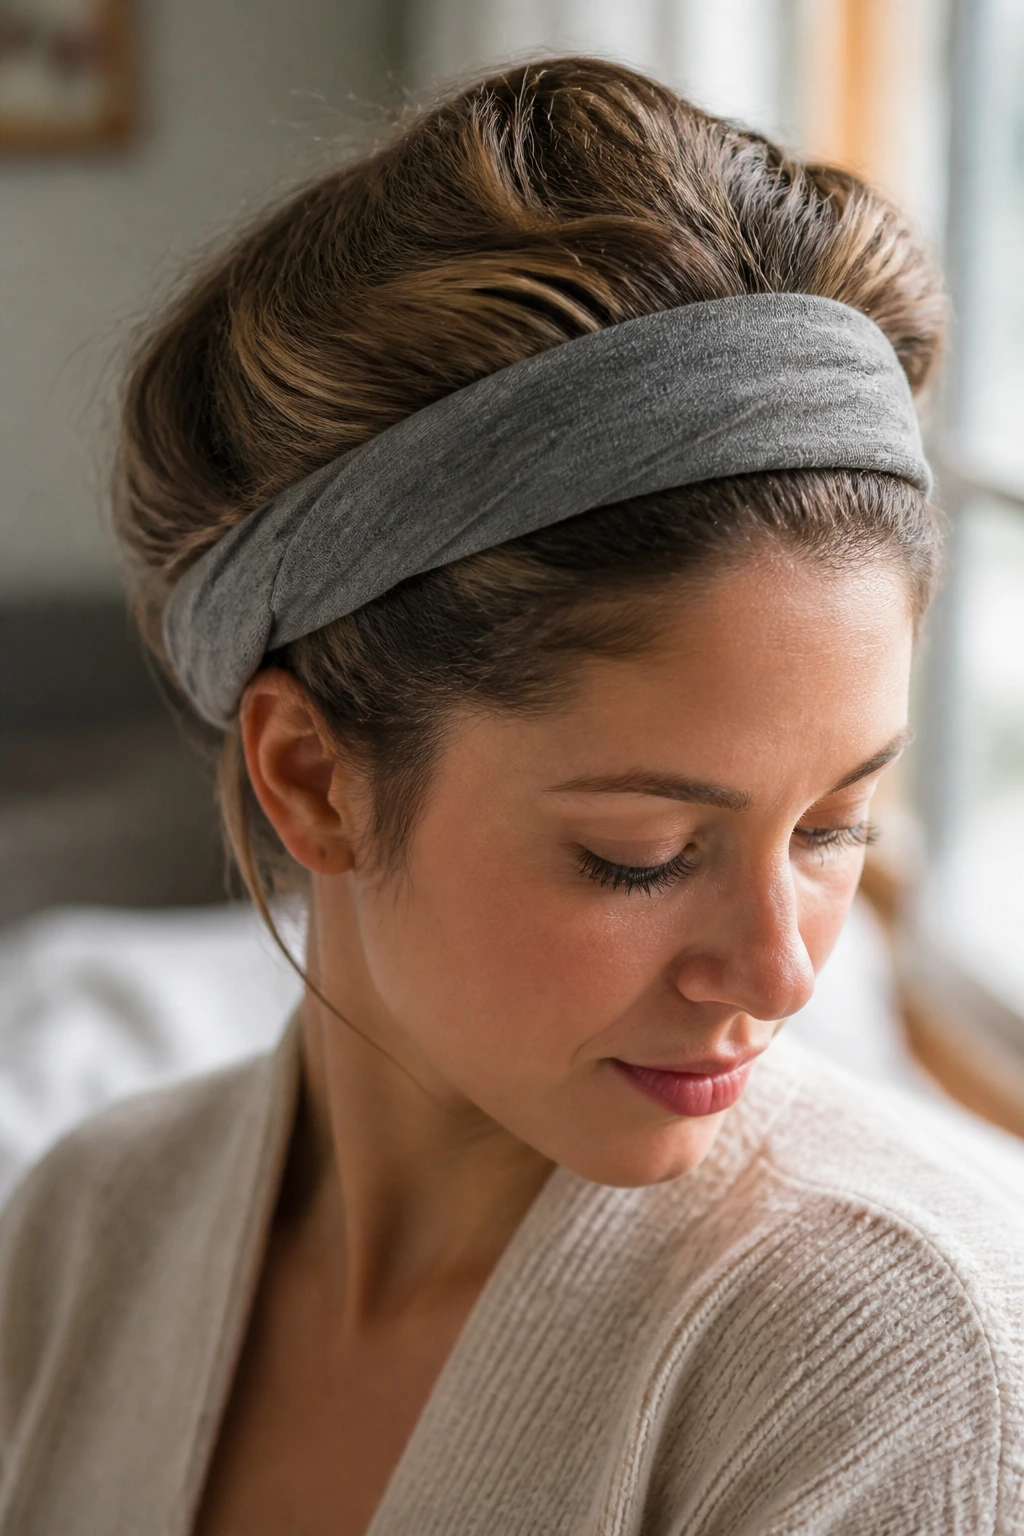
This is a classic “vintage-inspired” trick that works perfectly for short-to-medium hair. Place a stretchy fabric headband over your hair, sitting it across your forehead and the back of your head. Starting at one side, take small sections of hair and tuck them up and over the headband, continuing all the way around until all your hair is tucked in. The end result is a soft, rolled look that keeps your hair completely off your face. It is a fantastic option for early mornings when your hair is acting wild and needs to be tamed.
9. The Bubble Ponytail

The bubble ponytail is a playful, modern style that is surprisingly easy to make. Start with a high ponytail and secure it. Then, place additional elastics every two inches down the length of the pony. After you place each elastic, gently pull at the hair between them to “puff” it out into a bubble shape. It looks great on straight or wavy hair and prevents your hair from looking stringy or limp. The more bubbles you create, the more elaborate the hairstyle appears.
10. The Scarf-Accented Updo
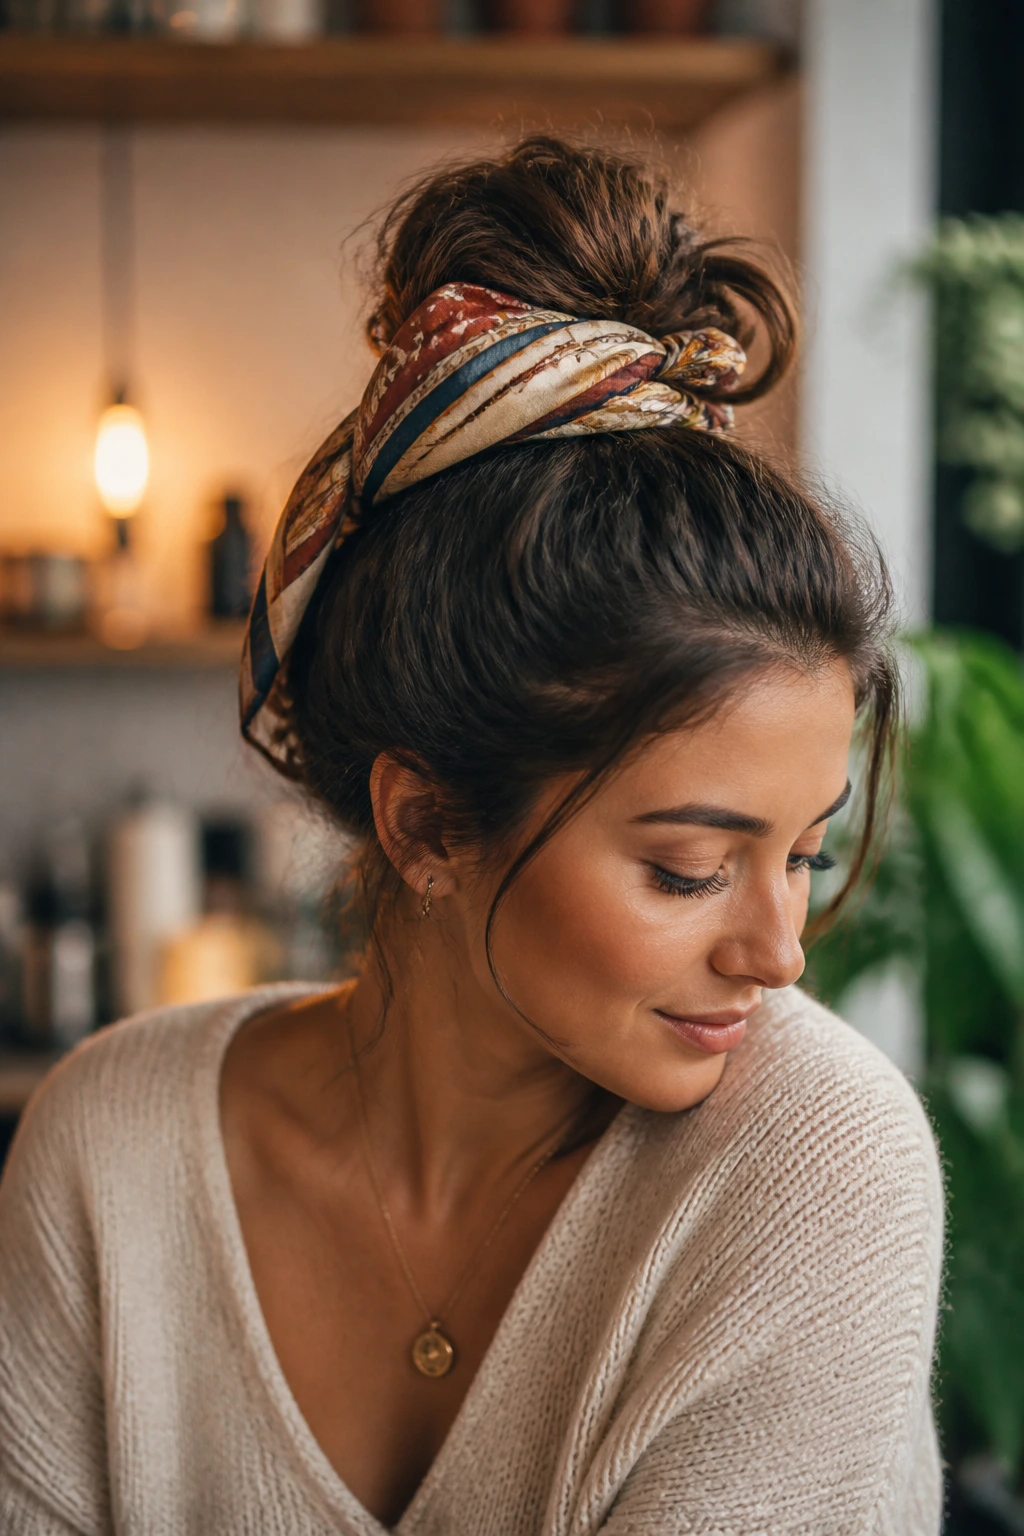
When you are really struggling with your hair’s texture, the easiest fix is to hide it under an accessory. Fold a silk or cotton scarf into a long, thin band. Gather your hair into a bun, but as you go to tie it, incorporate the scarf into the wrap. Tie it in a knot or a bow on top of the bun to add color and volume. This adds a layer of style that makes it look like you put a lot of effort into your appearance, even if you were just trying to mask a bad hair day.
Why Scarves Win
Scarves provide a structural element that hair elastics cannot. They add volume to thin buns, color to neutral outfits, and a sense of “finished” style that elevates jeans and a t-shirt immediately.
Best Scarf Materials
- Silk (for a smooth, luxurious look).
- Cotton (for a casual, structured feel).
- Chiffon (for added volume without weight).
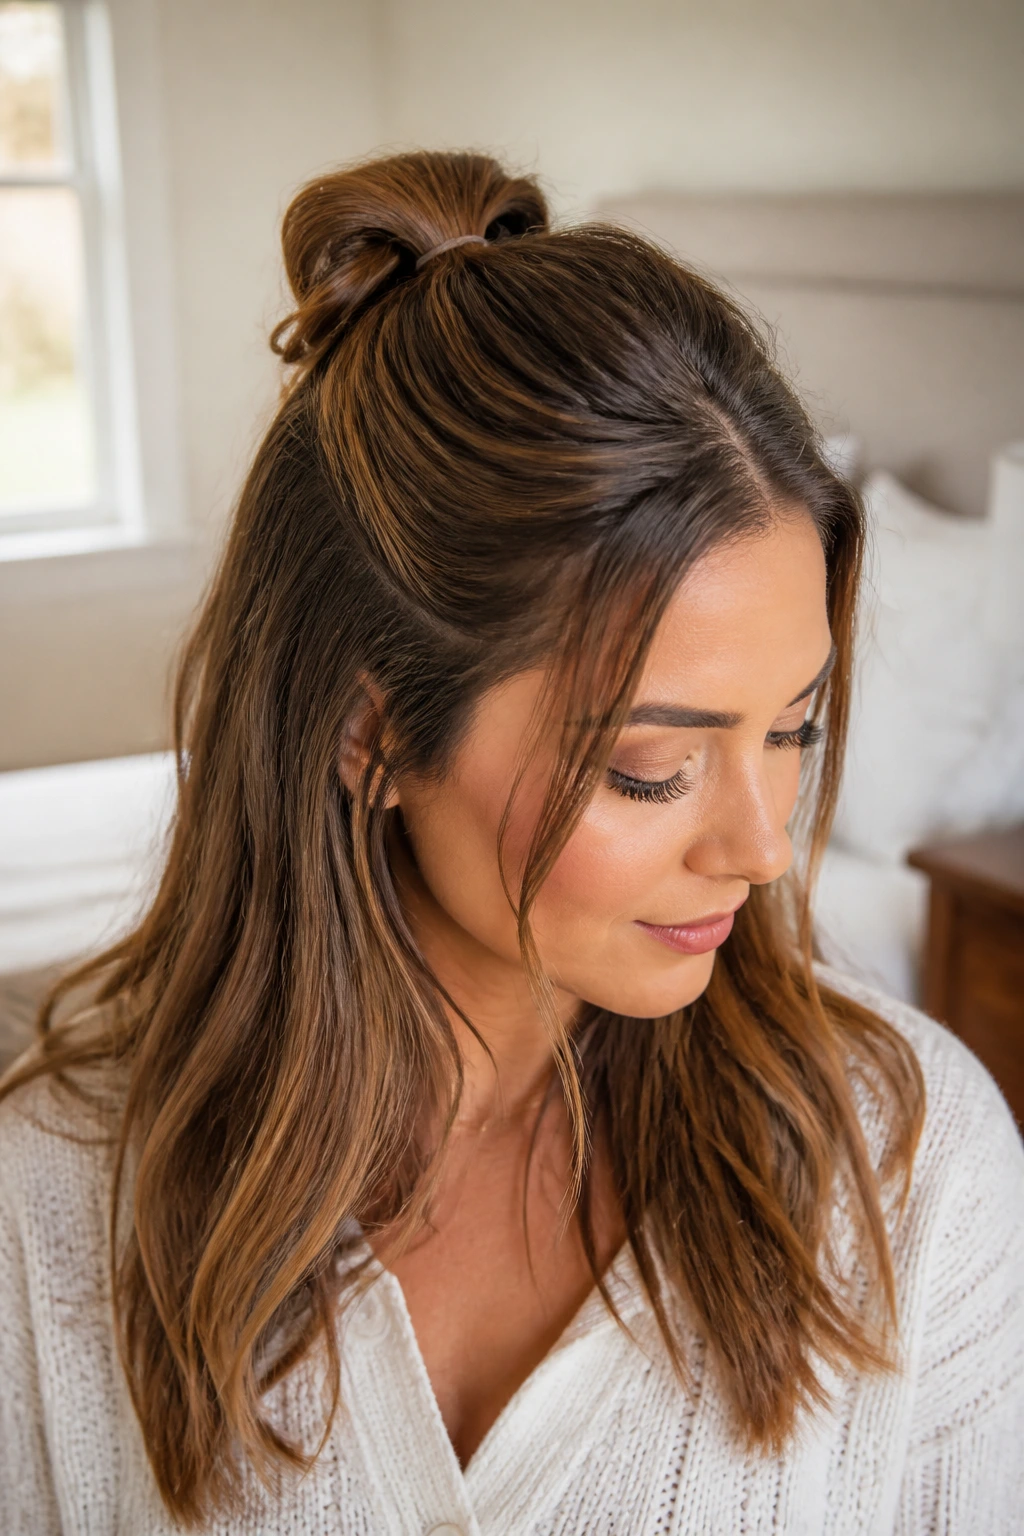
11. The Half-Top Knot
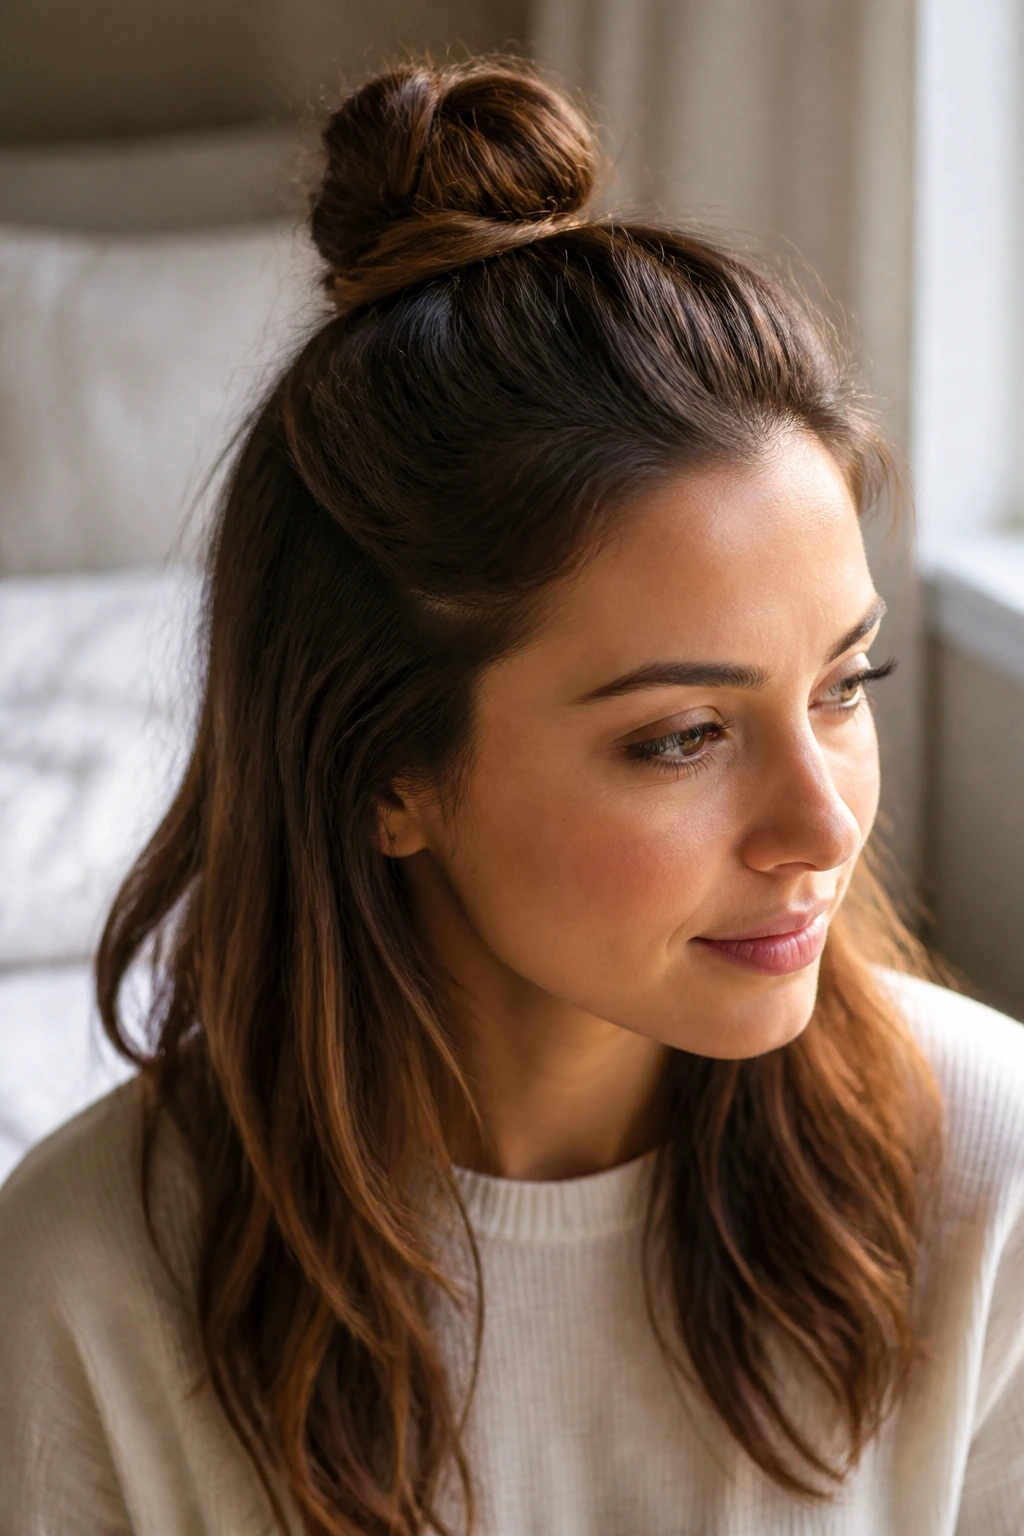
If you love the comfort of a bun but the style of a down-do, the half-top knot is your answer. Section off the top third of your hair, from the crown of your head forward. Gather it into a small bun at the very top of your head, leaving the rest of your hair loose. It keeps your bangs and front layers out of your eyes, which is usually the part of your hair that feels the most bothersome during a busy morning. It is a youthful, fun look that is popular for good reason.
12. The Sleek Middle Part Tuck
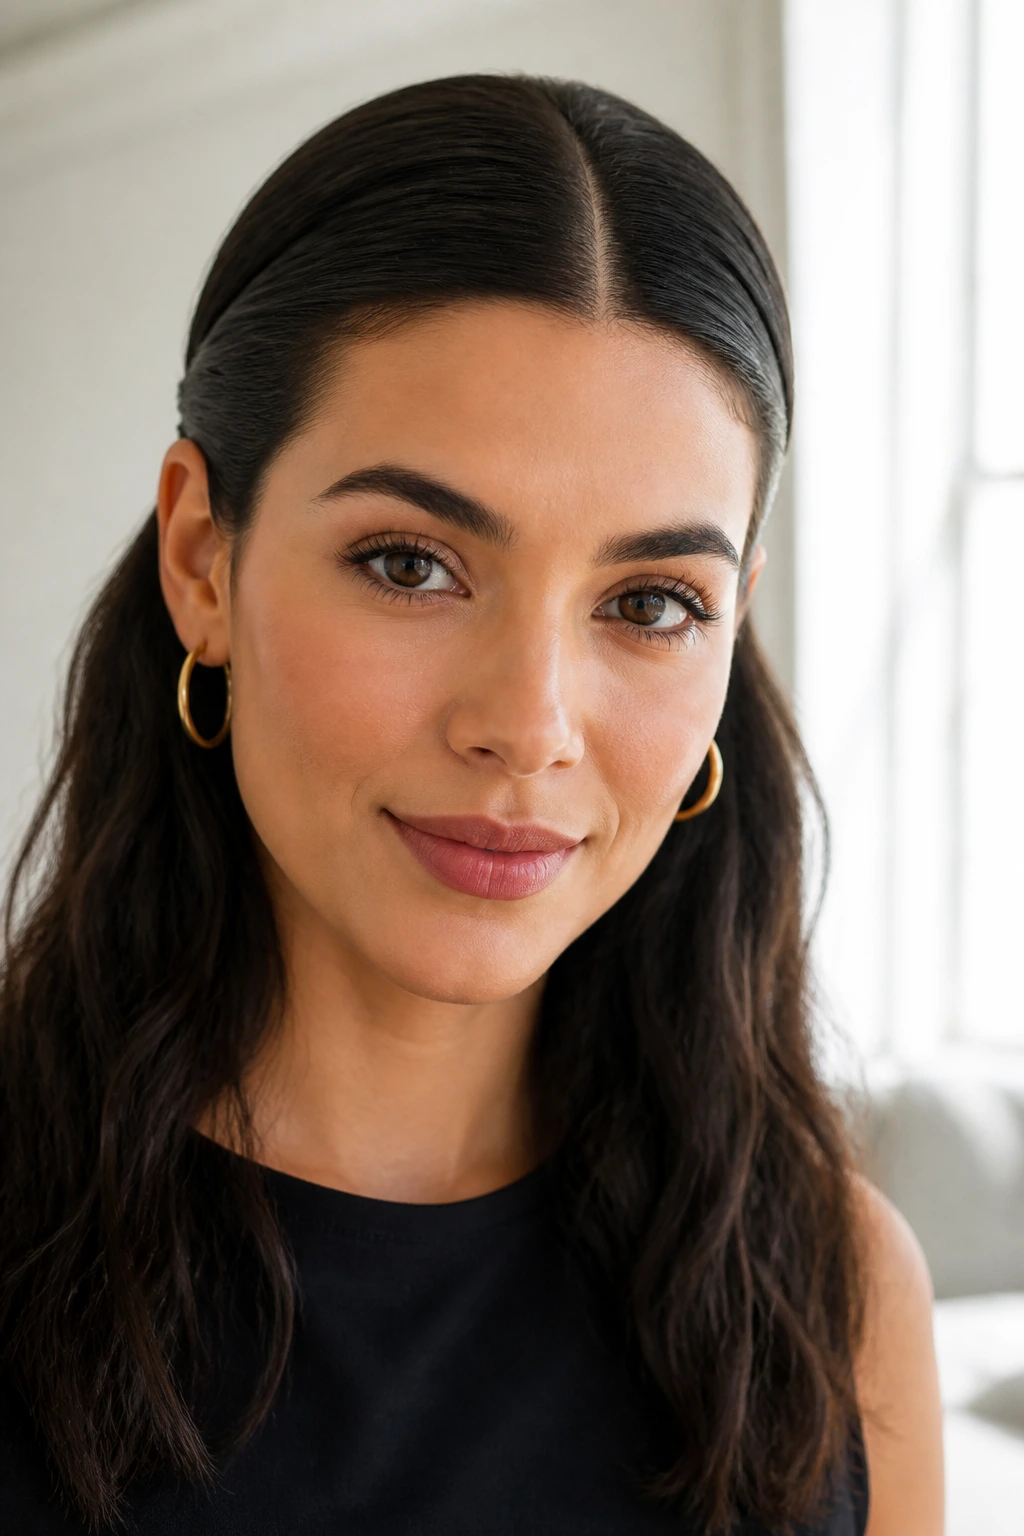
Sometimes, keeping it simple is the most effective approach. Use a fine-tooth comb to create a precise, sharp middle part. Apply a light smoothing cream to the front sections, then tuck both sides behind your ears. The key here is to keep the rest of your hair naturally textured or brushed straight. If you have an important meeting or a formal breakfast, the sharp symmetry of a middle part instantly conveys polish and intentionality. It is a look that relies entirely on precision rather than complexity.
13. The Braided Headband
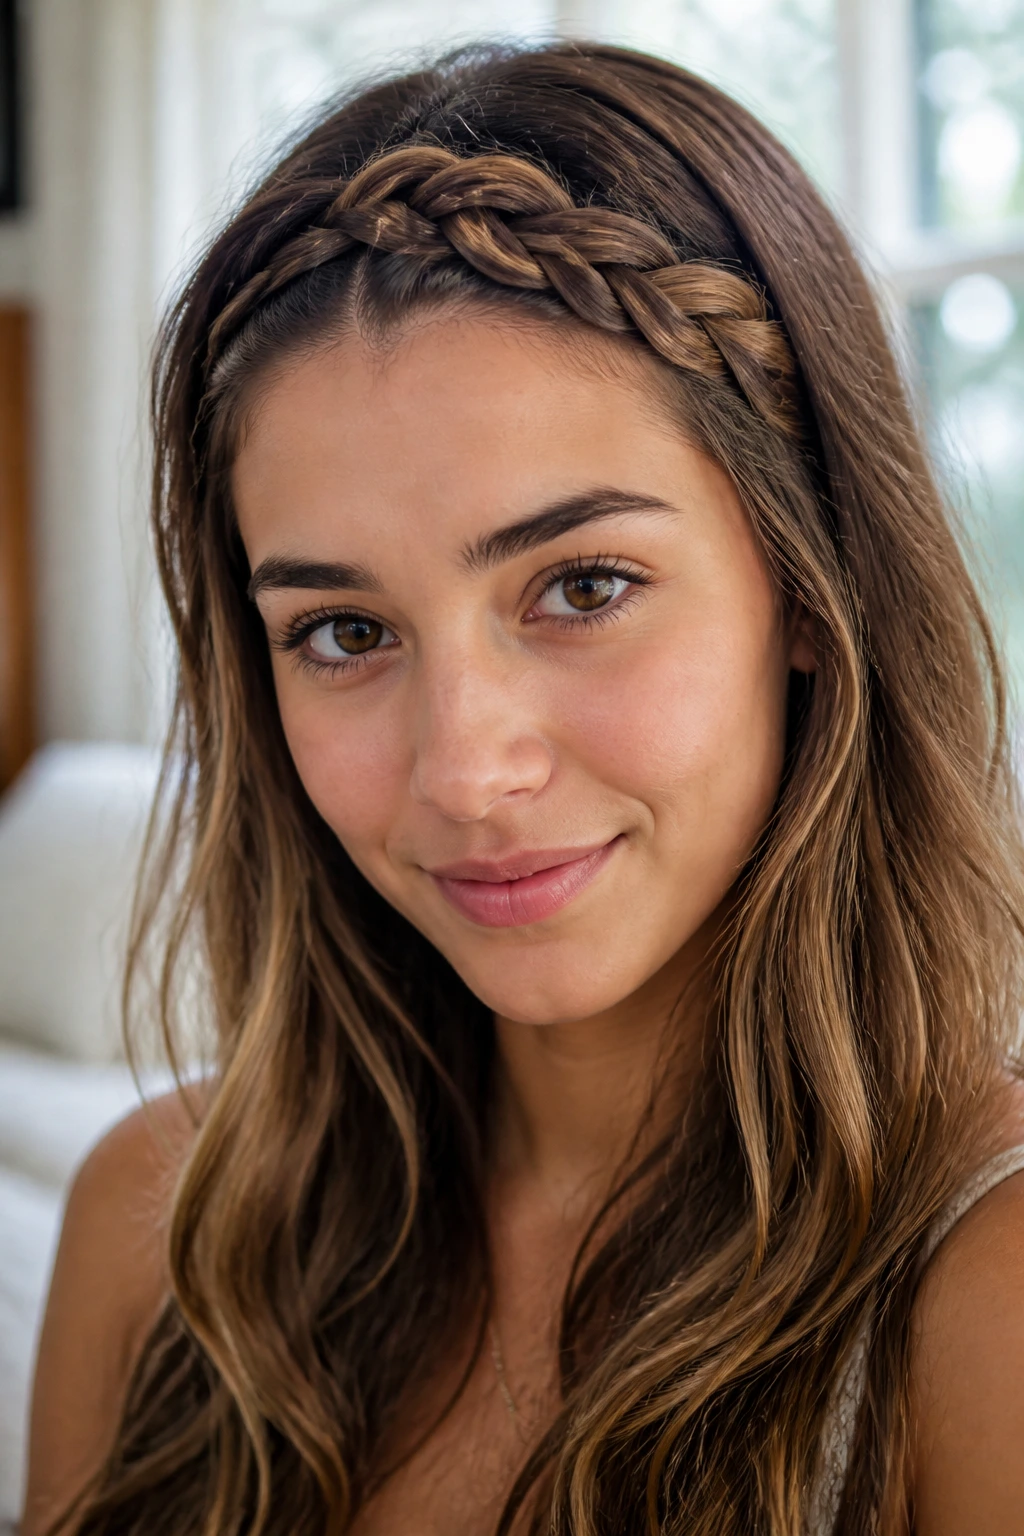
For a look that stays put all day, try braiding the front section of your hair as a headband. Start at your temple and create a French braid that follows the hairline. Once you reach the opposite ear, secure the braid with a bobby pin and tuck it under the rest of your hair. This is a great way to handle “bang grow-out” phases. It keeps your forehead clear and adds a touch of bohemian flair to your style without requiring any actual headband accessories that might dig into your scalp.
Braiding for Beginners
You do not need to be a pro to pull this off. A simple Dutch braid—where you cross the strands under instead of over—will pop more against your hairline and look slightly more structured.
Pro-Level Maintenance
- Use a small amount of texturizing paste on your fingers for better grip.
- Don’t worry about being perfect; small imperfections look more organic.
- Finish with a mist of light-hold spray.
14. The Faux-Bob
Do you ever wish your hair was shorter without the commitment of a haircut? You can fake a bob by rolling the ends of your hair underneath and pinning them at the nape of your neck. Take your ponytail, roll it inward, and secure it with pins. Pull a few pieces loose around your face to frame it. This is a fun way to switch up your style for a day without making any permanent changes. It looks surprisingly realistic if you have long hair that is layered.
15. The Messy Low Side Bun
Similar to the chignon, the side bun is a bit more relaxed and softer. Gather your hair to the side, right behind your ear, and tie it into a loose bun. Pull the bun apart slightly to make it look bigger and more relaxed. Because it is positioned to the side, it creates a nice asymmetry that highlights your jawline. This is a perfect style for wearing with high-neck sweaters or collared shirts because it avoids getting tangled in the fabric.
16. The Embellished Barrette Sweep
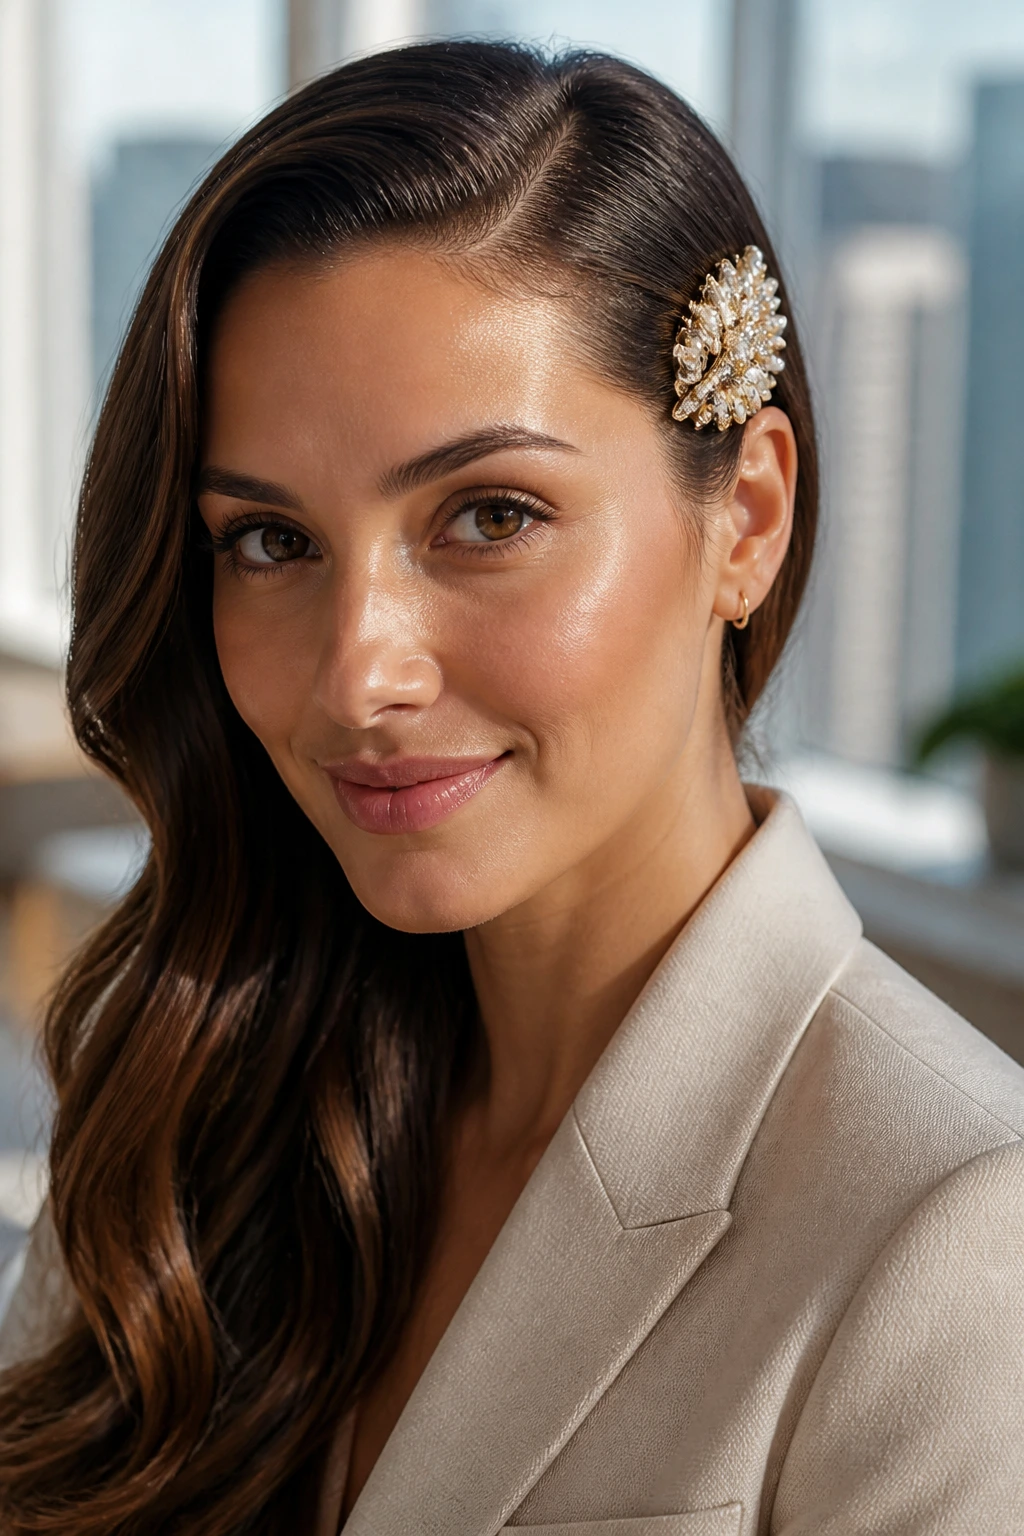
Never underestimate the power of a single, statement barrette. Part your hair deeply to one side, sweep all of your hair to the opposite shoulder, and secure the hair at the temple with an oversized, decorative clip. It is a 5-second fix that looks like an intentional design choice. Whether you go for a gold metal piece, a pearl-encrusted clip, or something neon and fun, the barrette does all the work for you. It pulls the hair back from your face and provides a sophisticated, modern touch.
Choosing Your Hardware
The weight of your barrette matters. If you have fine hair, look for clips with a thin “alligator” grip. If you have thick hair, you need a heavy-duty clasp that won’t slide out of place after an hour of movement.
Styles to Try
- Oversized geometric shapes for a modern office look.
- Pearl accents for a romantic, evening-appropriate feel.
- Tortoiseshell for a classic, timeless aesthetic.
17. The Twisted Top Knot
This is a variation on the standard top knot, but it adds a twist—literally. Divide your ponytail into two sections and twist them around each other to create a rope, then wind that rope into a bun. The texture created by the two twisted strands makes the bun look much more complicated than it actually is. It is a fantastic way to add volume to thin or fine hair, as the rope effect occupies more space and creates more visual interest than a standard smooth coil.
18. The Loose Braided Low Pony
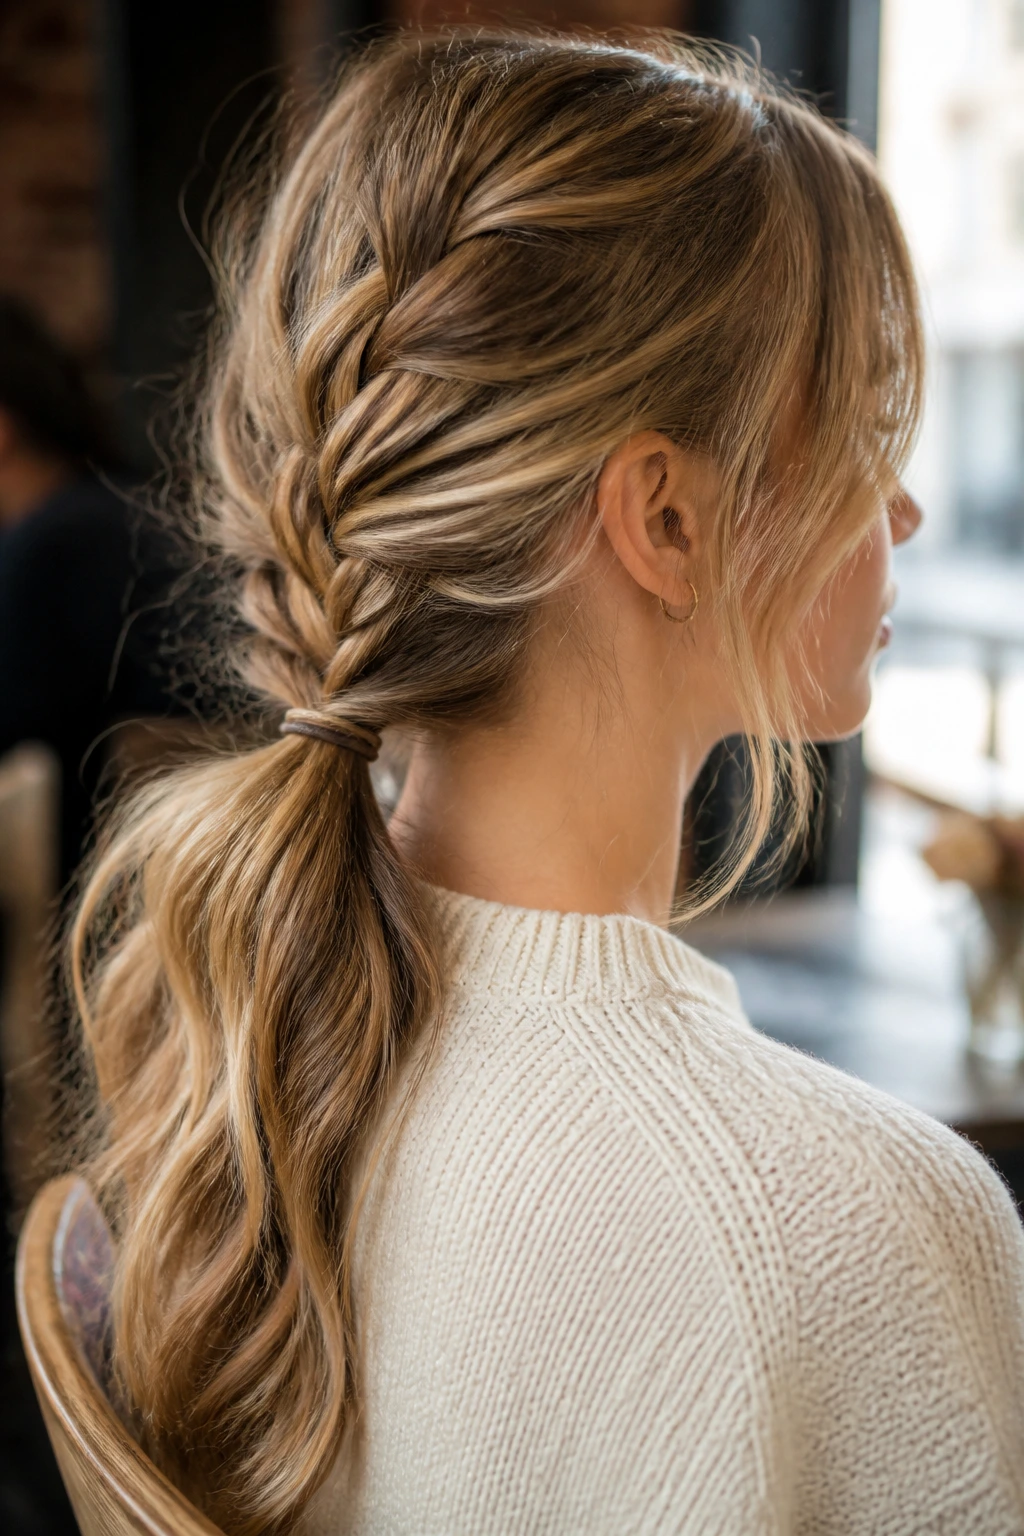
Combine your favorite elements by braiding a standard low ponytail. Once you secure the pony with an elastic, create a loose, messy braid down the center. This is faster than a full head braid because you don’t have to worry about the hair near your roots; you are just working with the length. It keeps the hair secure during long commutes but looks more interesting than a plain, static tail. You can pull the braid apart for a lived-in, bohemian effect that is very popular for morning meetings.
19. The “Fresh Out of Bed” Crimp

Textured hair is often easier to style than perfectly straight hair. If you have a crimping iron or a three-barrel waver, spend two minutes creating loose waves in the top layers of your hair. This adds an immediate sense of volume and “grit” that makes simple hairstyles like ponytails and half-up looks hold better. The texture hides greasy roots and adds height, meaning you don’t have to spend time teasing your hair to get a lifted, intentional finish. It is the ultimate shortcut for flat, thin hair.
Waves vs. Crimps
A three-barrel waver is generally more user-friendly than an old-school crimper. It creates a soft, beachy S-wave rather than a sharp zigzag.
The Morning Rush
- Work only on the top two inches of hair for maximum visual effect.
- Focus around the crown area where you want the most lift.
- Use a dry shampoo afterward to soak up any scalp oil.
20. The Sleek High Pony
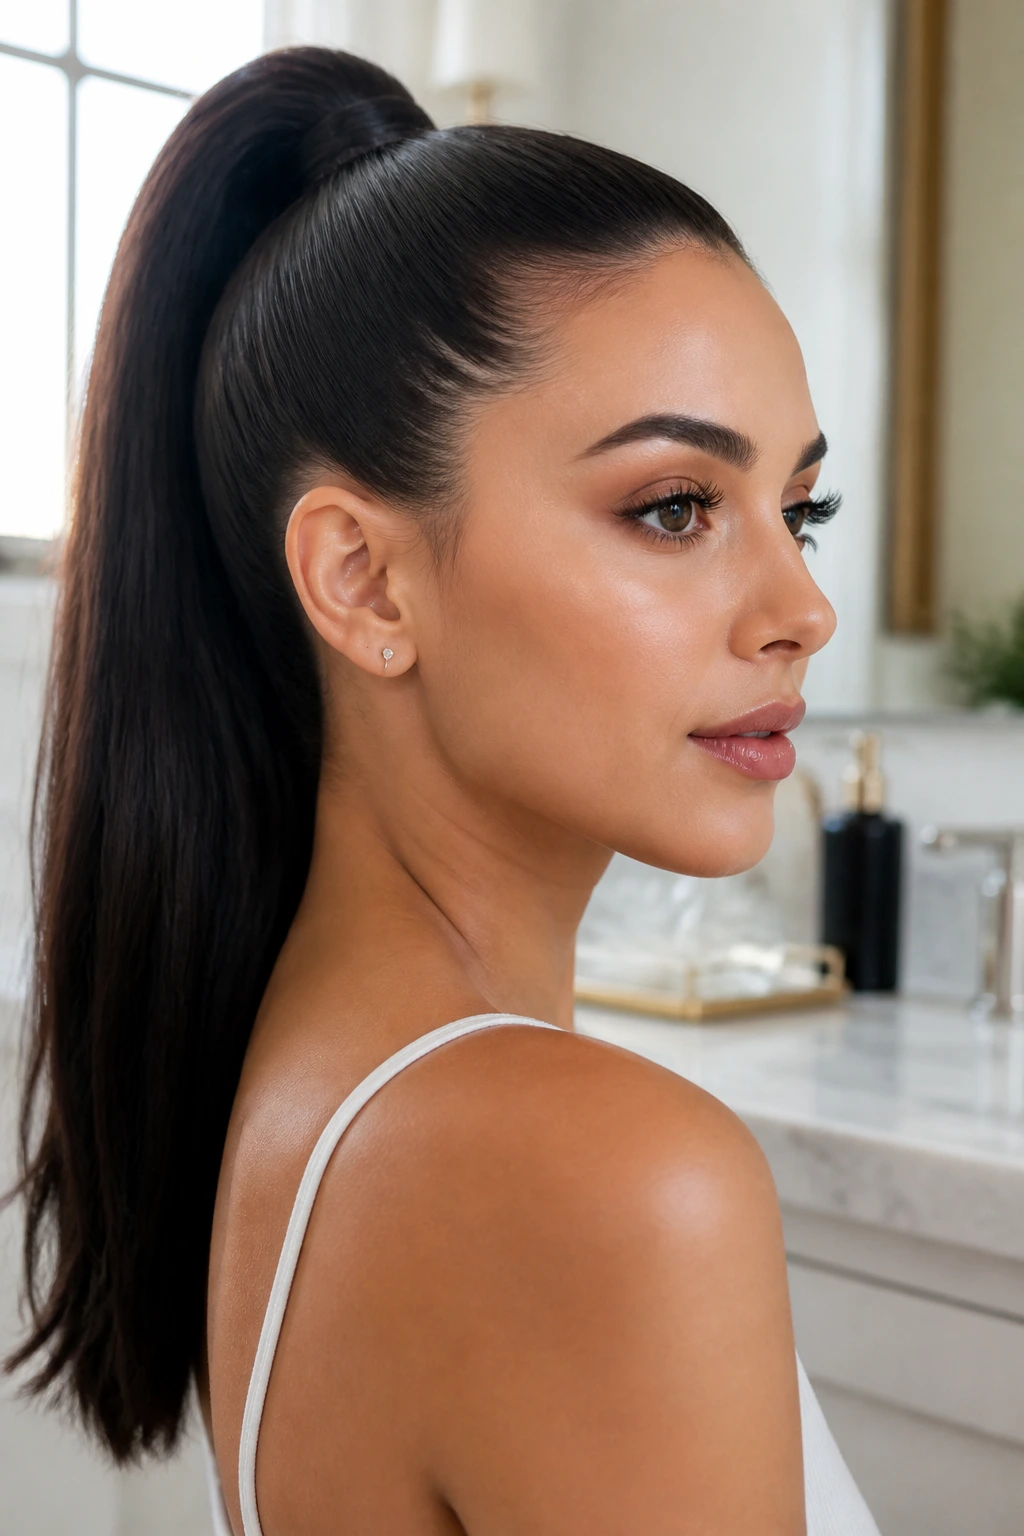
Sometimes you want the drama of a high ponytail without the messiness. Brush your hair upward, making sure the underside is completely smooth, and secure it with a strong elastic. If you have a few bumps, use a boar-bristle brush with a tiny bit of hairspray to smooth them out while you hold the hair in place. The sleekness is what makes this look work; it’s all about creating a sharp, clean line from your neckline to the crown. It is a bold, powerful look that pairs beautifully with statement earrings or a sharp outfit.
21. The Half-Down Loop
Instead of a half-top knot, try a half-down loop. Gather the top half of your hair and pull it through an elastic, but on the last loop, don’t pull your hair all the way through—create a small, neat loop or “half-bun.” This is extremely fast and keeps your hair looking soft. Because the ends of your hair are still loose, it gives the appearance of a half-up style with a bit more volume. It is a great way to deal with overgrown bangs or front layers that are difficult to manage in the morning.
Final Thoughts
The secret to thriving on busy mornings is realizing that you do not need to be a hair stylist to create looks that appear professional and polished. Most of these styles rely on texture, simple mechanics, or the right accessory to do the heavy lifting for you. You do not need to wake up an hour earlier to feel put-together.
Experiment with these techniques during your next few mornings to find which ones work for your hair length and texture. You will find that having two or three “go-to” styles removes the decision fatigue that often leads to wearing the same uninspired ponytail every day. Keep a few essential tools—like bobby pins, a decent dry shampoo, and a few high-quality clips—in your bathroom, and you will find that those twelve minutes are more than enough to step out the door feeling ready for anything.