



Imagine sitting in a morning staff meeting, surrounded by a sea of generic messy buns and flat-ironed bobs. It is functional, sure, but it lacks character. There is a middle ground between corporate conformity and historical fantasy. Bringing a touch of royal heritage into your workspace is not about wearing a metal crown or carrying a scepter. Instead, it is about the structure, symmetry, and quiet authority of hairstyles worn by medieval noblewomen, redesigned for a standard Monday-to-Friday schedule.
Historically, women wore these hairstyles for days under hoods or veils, which means they are incredibly secure by design. If a hairstyle can survive a horseback ride through a humid valley, it can easily handle a nine-to-five shift and a busy commute. By adapting these classic shapes, you get an office look that stands out for its neatness and structure, keeping your hair out of your face while you focus on your work.
The trick to making these styles work in a modern office is control. We want to avoid looking like we are on our way to a Renaissance fair. This means swapping out costume-grade ribbons for leather cords, using matte-finish hairpins, and keeping the braids clean rather than messy and boho. A boar-bristle brush, some dry shampoo for texture, and a handful of sturdy U-shaped hairpins are all you need to bring these historical looks into the office.
Let us look at some of these styles, examining how to adapt them for a clean, professional finish.
1. The Classic Crown Braid Halo
This look is one of the most secure styles you can wear to work. It distributes the weight of your hair evenly across your head, which helps prevent the headaches that often come from tight ponytails. Because the hair is completely pinned up, it stays neat all day.
Why It Works for the Office
The crown braid creates a clean, circular frame around your face. This keeps flyaways out of your eyes during long stretches of screen time and maintains a tidy appearance even on windy days.
Step-by-Step Styling
- Part your hair down the center from your forehead to the nape of your neck to create two equal sections.
- Braid each section into a simple three-strand braid, starting near the back of your head and securing the ends with small, clear elastics.
- Lift the left braid over the top of your head, positioning it about two inches back from your hairline, and secure it with sturdy bobby pins.
- Take the right braid, wrap it over the top of your head in the opposite direction, tucking the loose ends under the first braid, and pin it flat.
- Use a light-hold hairspray or a small dab of pomade to smooth down any loose hairs along your part.
Pro tip: If your hair is on the shorter side, you can make a similar look by doing two French braids along your hairline and joining them at the back.
2. The Low-Slung Fishtail Wrap
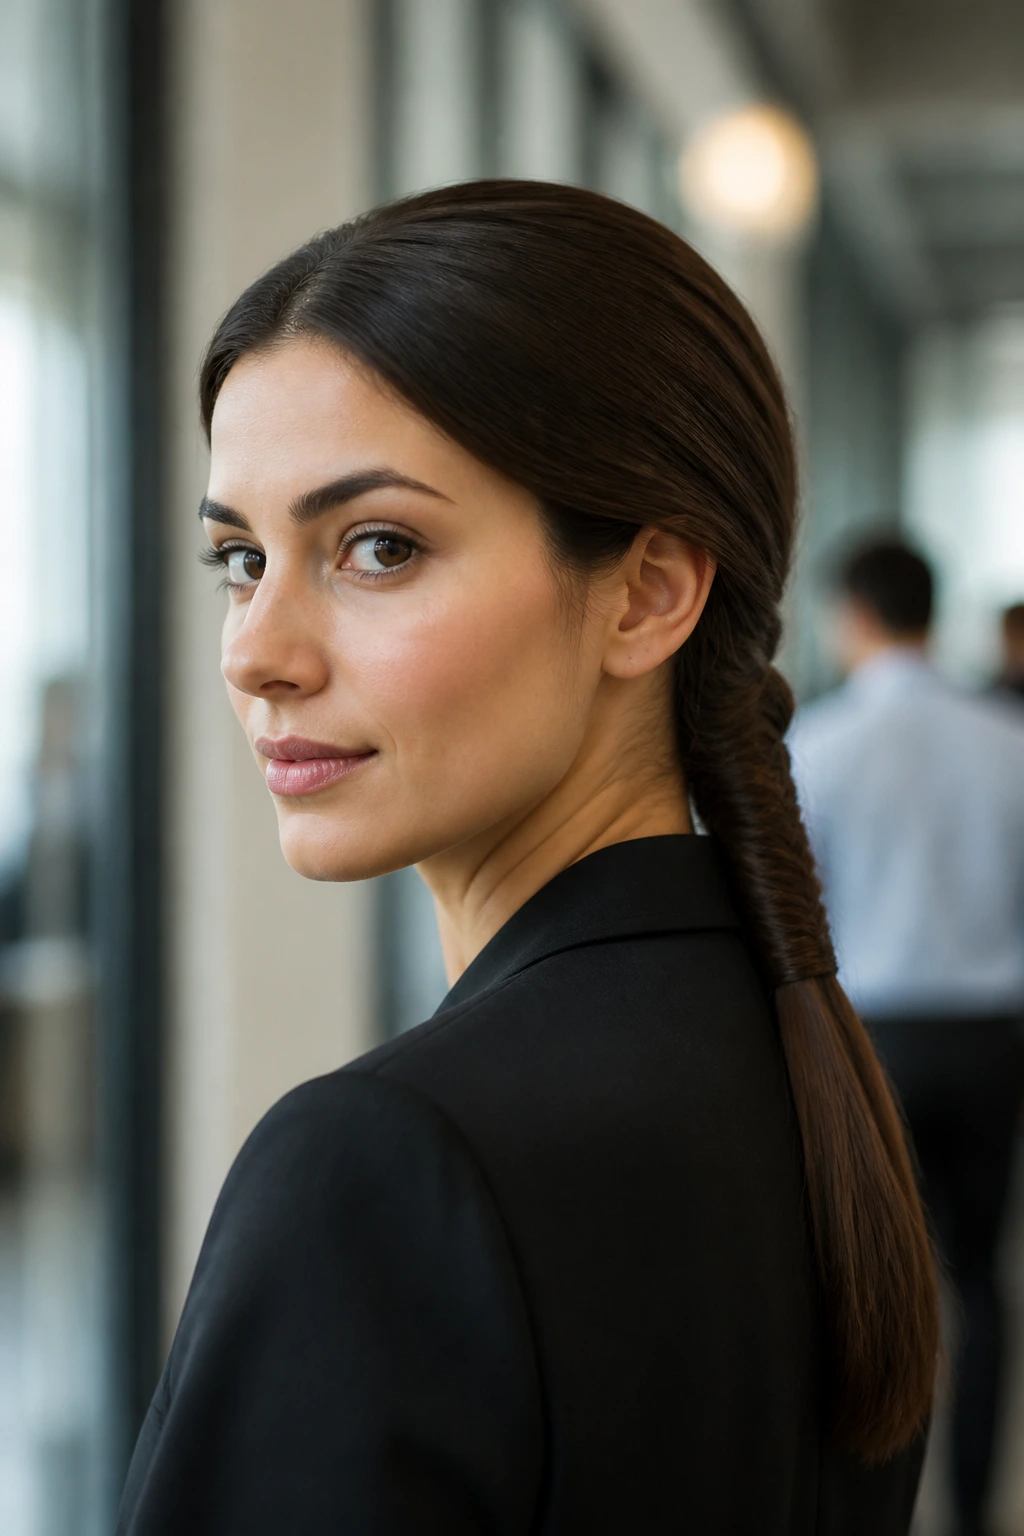
Many people avoid the fishtail braid for work because they think it takes too long to style in the morning. However, a low-slung version is surprisingly fast to make and offers a much tighter, more professional pattern than a standard three-strand braid.
The secret to keeping this style looking professional is tight, even sectioning. Unlike the loose, messy fishtails popular for casual weekends, an office-appropriate fishtail needs a clean base. Start by securing your hair into a low ponytail with a thin, clear elastic first. This holds the base firm while you cross the strands. Once you finish braiding, you can cut the temporary elastic away with small scissors, or leave it hidden under a wrapped strand of hair.
This style works exceptionally well for thick hair because the dense weave keeps bulk under control. It lies flat against your back, meaning it won’t get caught on the back of your desk chair or tangle when you wear a blazer.
3. The Double-Twisted Medieval Rosette
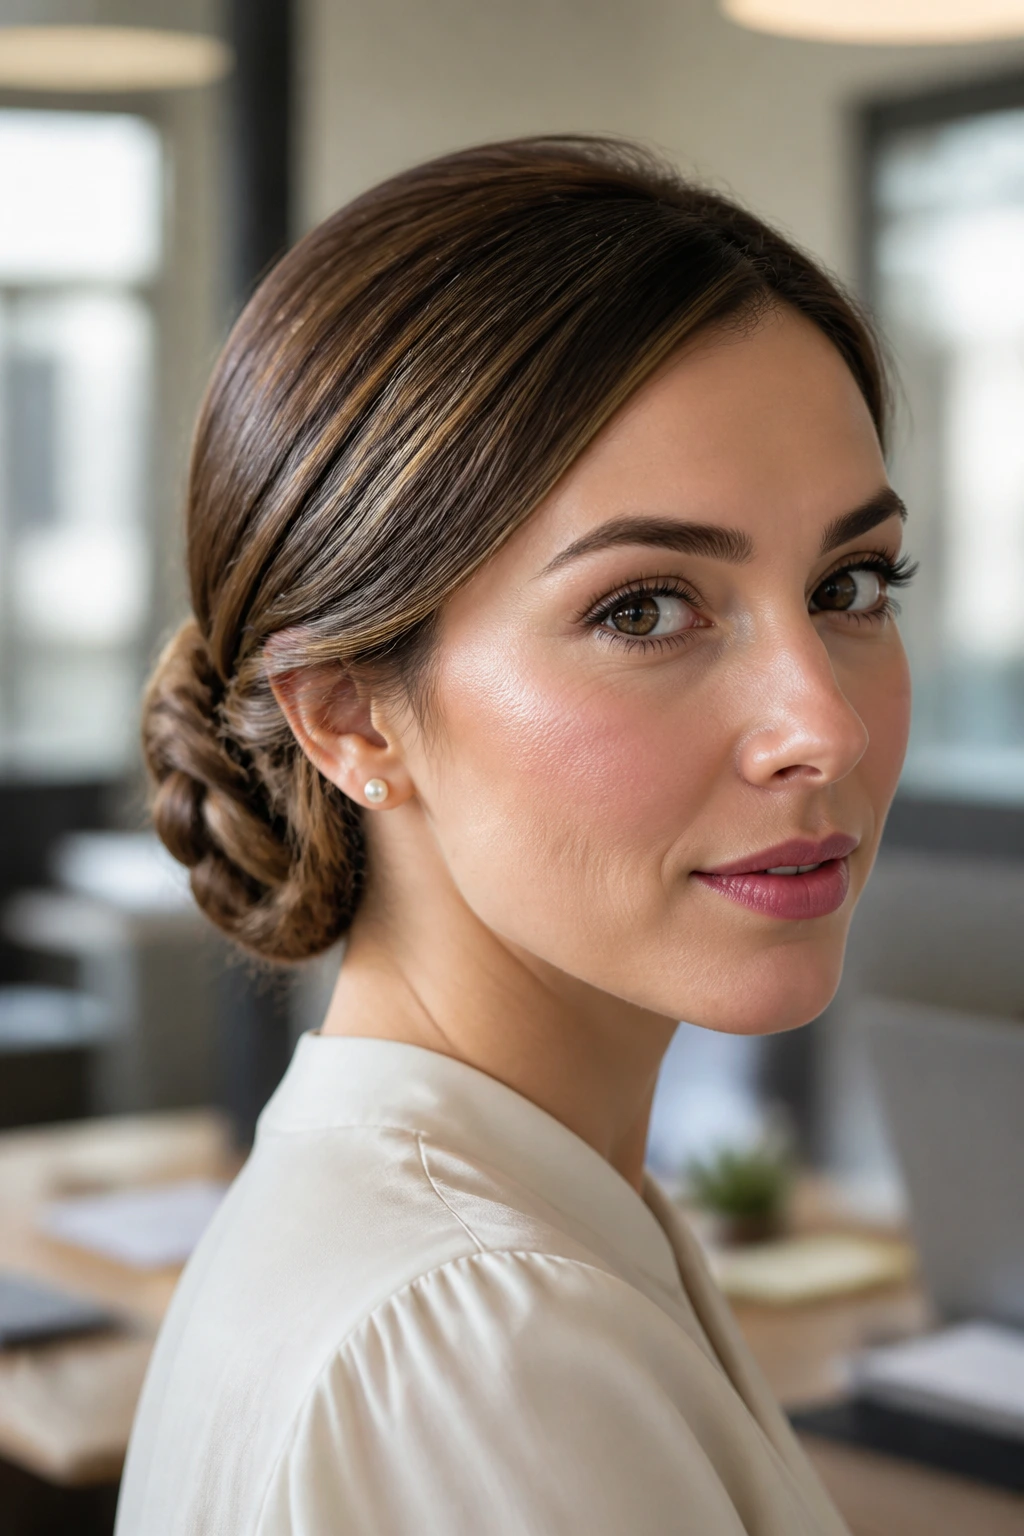
Why settle for a plain donut bun when you can wear a style that resembles carved stonework? This design uses two twisted ropes of hair coiled together at the nape of the neck, creating a flat, detailed bun that stays secure for hours.
Why does this style hold up so well?
The key is the counter-twist method. When you twist two sections of hair in one direction and then wrap them around each other in the opposite direction, they lock together naturally. This mechanical lock means you need far fewer hairpins to keep the bun from falling down.
How to style it
First, gather your hair into a low ponytail at the nape of your neck and secure it with a strong hair elastic. Divide the ponytail into two equal sections. Twist the left section tightly to the right, and twist the right section tightly to the right as well.
Next, wrap these two twisted sections around each other in a leftward direction, forming a single, thick rope twist. Secure the end with a small elastic. Finally, coil this rope flat against your head around the base of the ponytail, tucking the ends underneath, and slide four or five large U-shaped pins in from the outer edges to hold it in place.
4. The Half-Up Saxon Roll
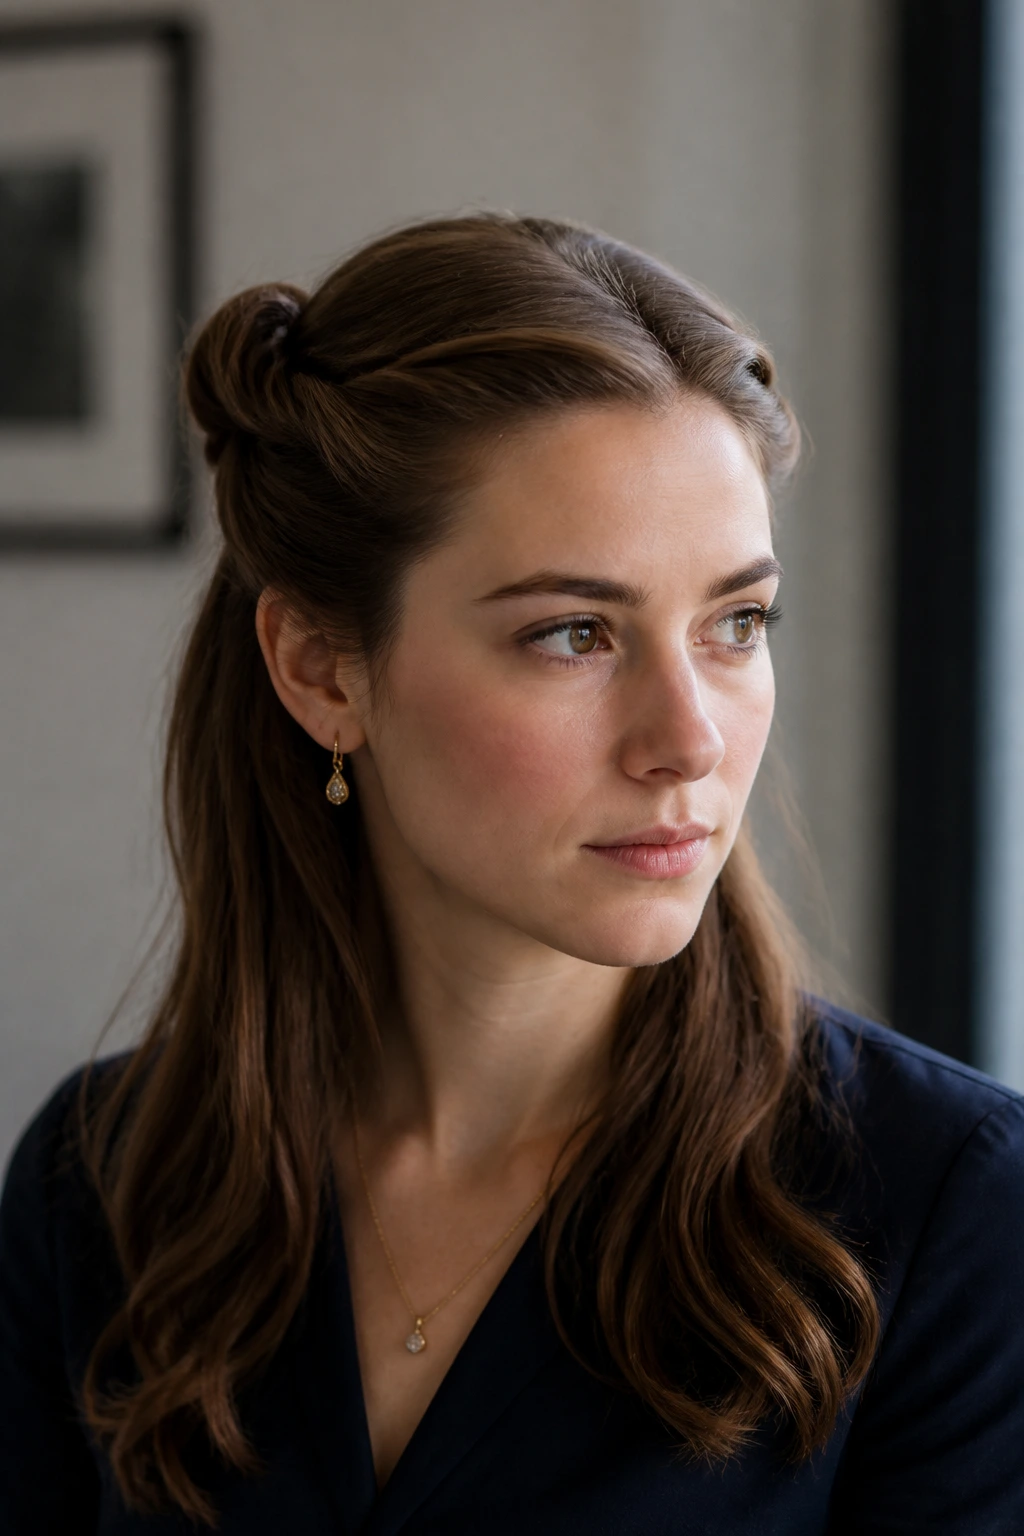
During the early medieval period, noblewomen often wore their hair partially down but rolled away from the face to show off their forehead and brow. This modern version keeps the front of your hair neat and tidy while letting the back fall naturally.
To make this look, you will need:
- A tail comb for clean parting
- Two small hair elastics
- Four bobby pins that match your hair color
- A light hair oil to smooth the loose ends
Start by parting your hair down the middle. Take a two-inch section of hair from the right side of your hairline, starting at the temple, and roll it inward toward your scalp, working backward toward the crown of your head. Secure this roll temporarily with a clip, then repeat the process on the left side. Bring both rolls together at the back of your head, tie them with a single elastic, and let the remaining hair hang loose.
This style provides the comfort of wearing your hair down without the annoyance of loose strands falling forward when you bend over your desk to read a document.
5. The Triple-Braided Low Bun
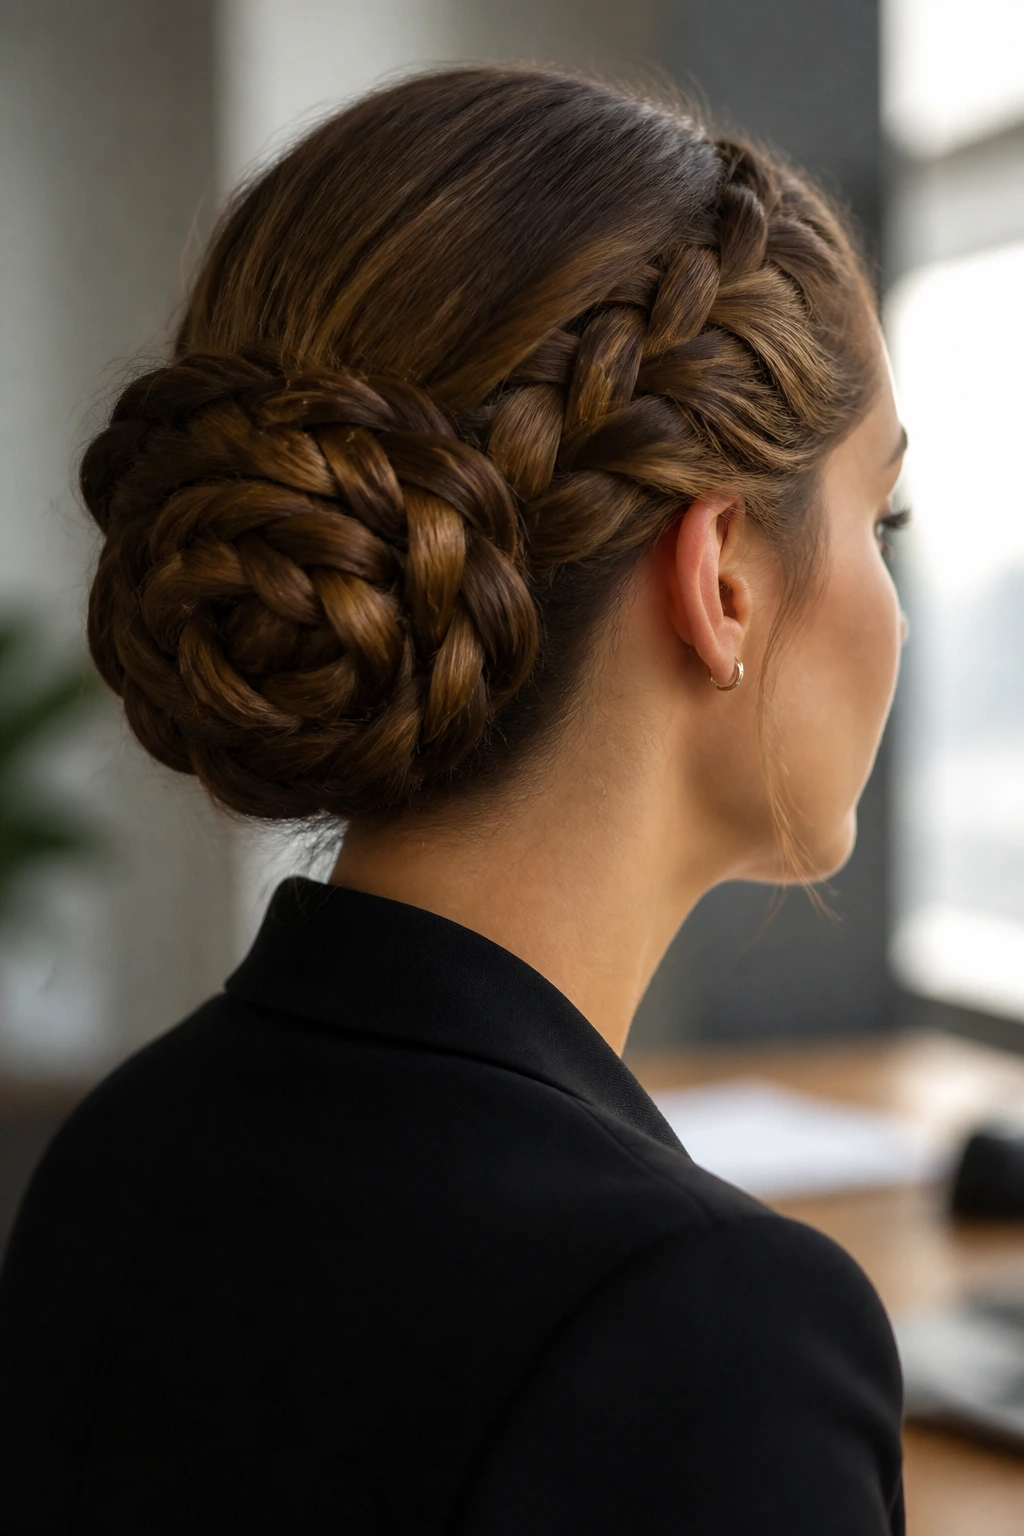
For those mornings when you have back-to-back meetings and no time for touch-ups, this triple-braid style is incredibly reliable. It distributes the hair into three smaller braids before coiling them into a single bun, which keeps the weight balanced and prevents the style from pulling loose.
Start by splitting your hair into three equal sections at the back of your neck. Braid each section into a standard three-strand braid, securing the ends with clear elastics, so you have three braids hanging side by side. Take the middle braid first, coil it into a flat circle against the back of your head, and secure it with a few pins.
Next, wrap the left braid clockwise around the outside of the center coil, pinning as you go. Finish by wrapping the right braid counter-clockwise around the entire shape, tucking the tail under the bottom. The result is a highly detailed, circular bun that looks far more complicated than it actually is, showing off a structured texture that is perfect for professional settings.
6. The Tudor-Inspired Wrapped Ponytail
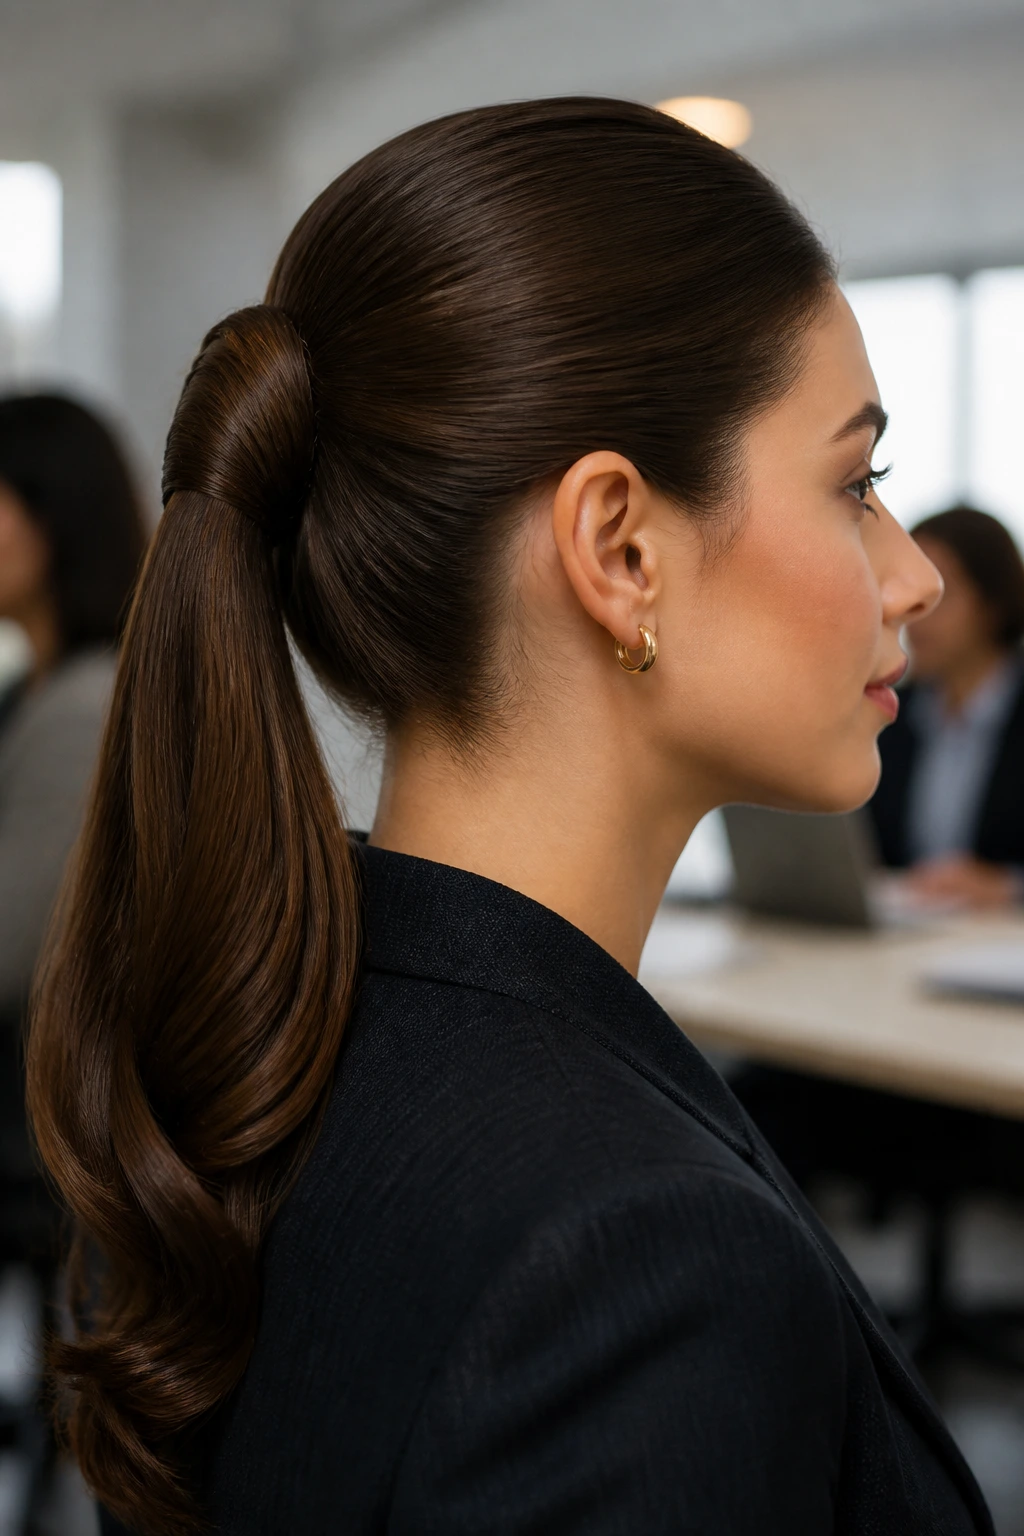
Unlike standard ponytails that can look a bit too casual for a board meeting, this historical variation uses wrapped sections of hair to create a structured sleeve around the base of the ponytail. This gives the style a clean, architectural shape.
This look is best for straight or blown-out hair, as the clean lines rely on a smooth surface. To achieve the best finish, apply a tiny drop of smoothing serum to your palms before you begin wrapping the hair.
Compared to a basic ponytail, this style is much more structured and prevents the hair from swishing around too much. It pairs beautifully with high-collared shirts or structured blazers, making it a reliable choice for professional environments where you want to look polished and composed.
7. The Byzantine Interlocking Braid Bun
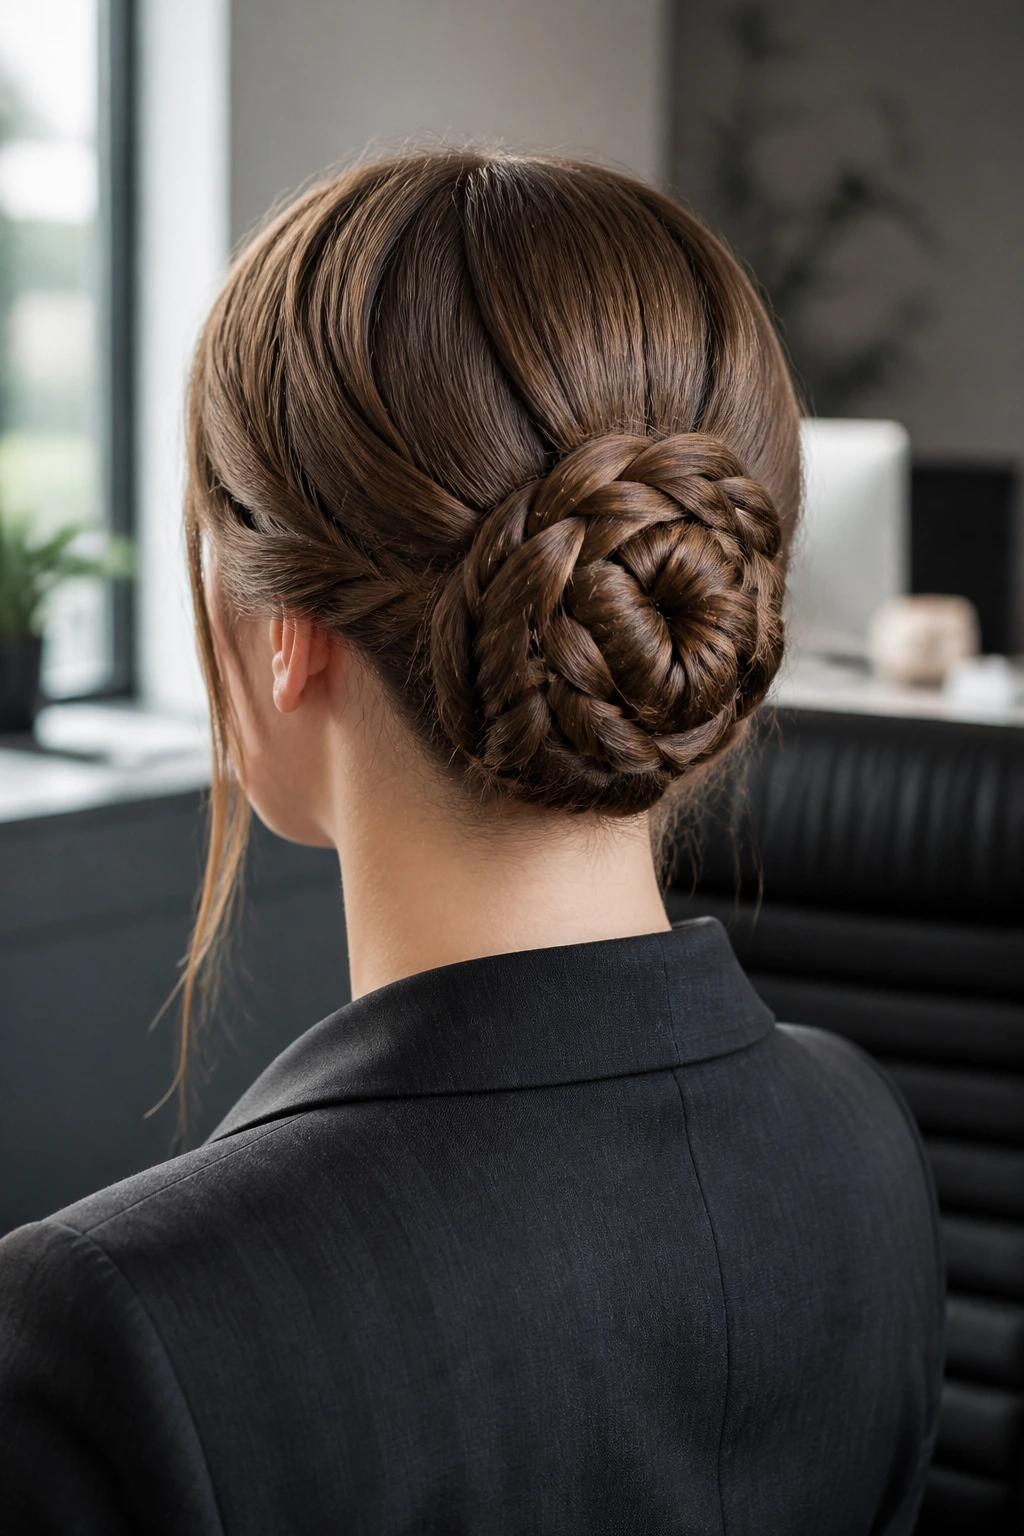
This style looks like an intricate basket weave but relies on a simple overlapping technique. It is inspired by the structured, ornate updos depicted in Byzantine mosaics, adapted here for a neat, flat profile that works well in a professional setting.
Why It’s a Top Pick for Work
It lies flat against the back of the head, making it comfortable to wear if your job involves sitting against a high-backed office chair or headrest. It also keeps the neck completely cool during warmer months.
Step-by-Step Styling
- Gather your hair into a high ponytail, then divide it into four equal strands.
- Braid each of the four strands into a tight, neat three-strand braid.
- Take the leftmost braid and cross it over the middle two, pinning it flat against your head.
- Take the rightmost braid and cross it over toward the left, weaving it under the first braid.
- Tuck all loose ends flat against your scalp and secure them with U-shaped pins.
Pro tip: For a cleaner look, use hairpins that match your hair color exactly so the structural support remains invisible.
8. The Crossed-Braid Crown with Sleek Part
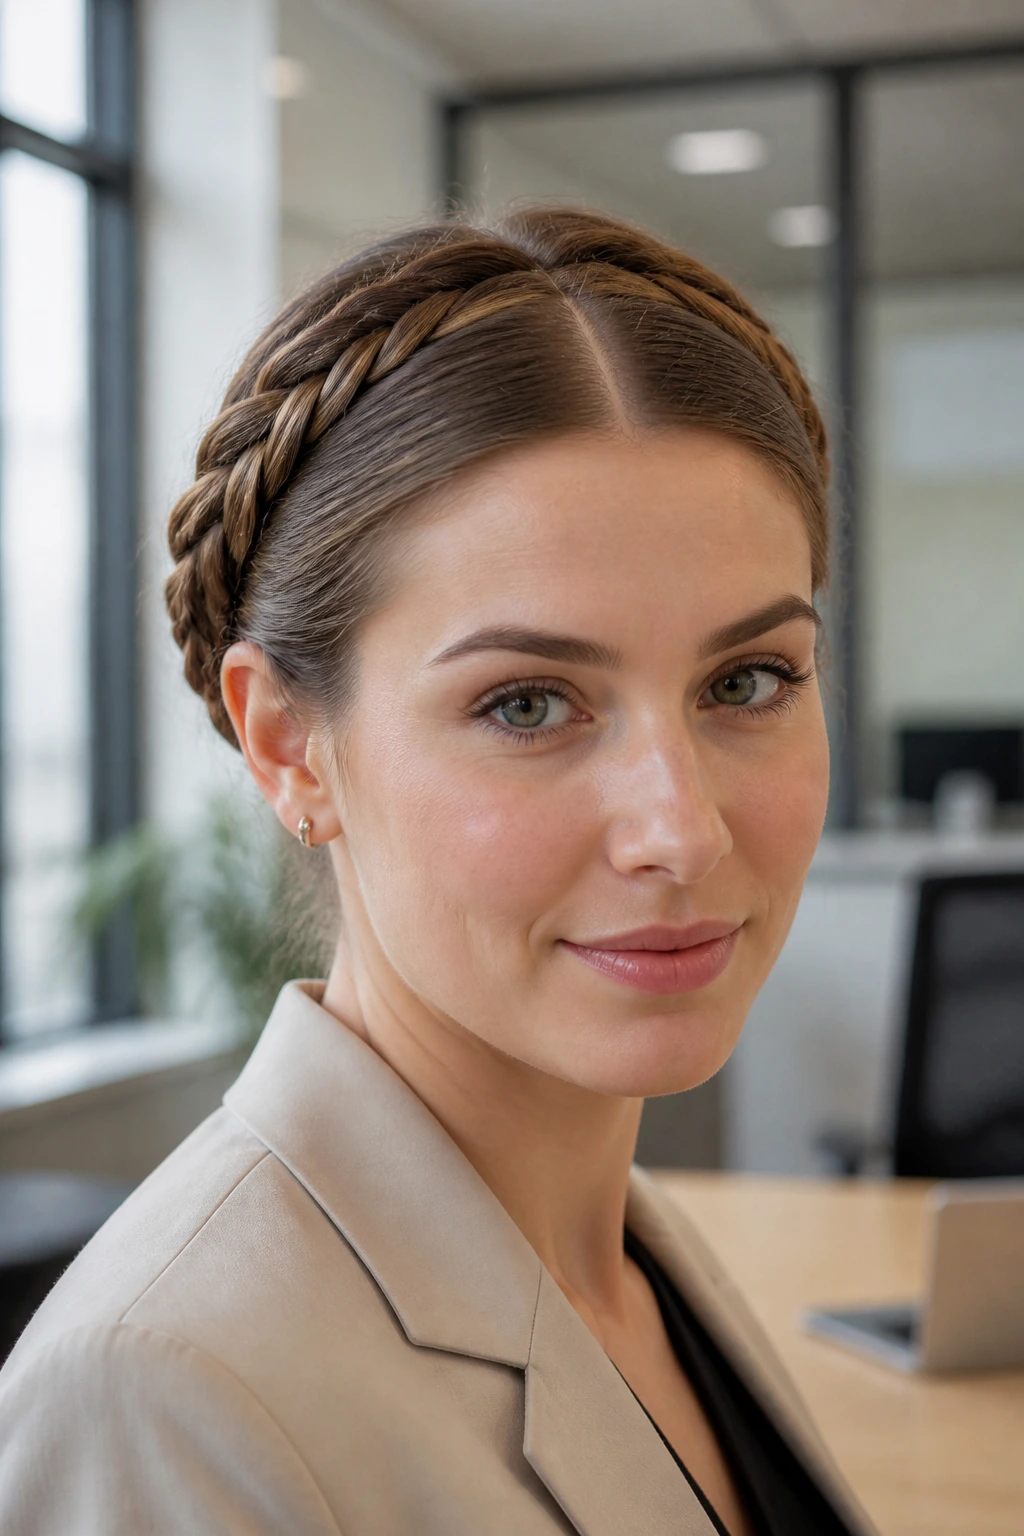
Many historical styles feature a distinct middle part, which immediately gives a neat, organized frame to the face. This style uses two flat braids crossed over the back of the head rather than the top, keeping the silhouette low-profile and professional.
To make this look work, your part must be absolutely straight. Use the bridge of your nose as a guide, and run a tail comb straight back to the crown of your head. Divide the hair down the back as well, making two neat braids that start low behind your ears.
Cross these braids over each other at the nape of your neck, then wrap them up around the sides of your head, pinning them just behind your ears. This keeps the top of your head clean and flat while putting the detail at the sides and back, giving you a tidy look for video calls where only your face and shoulders are visible.
9. The French Roll with a Celtic Knot Accent
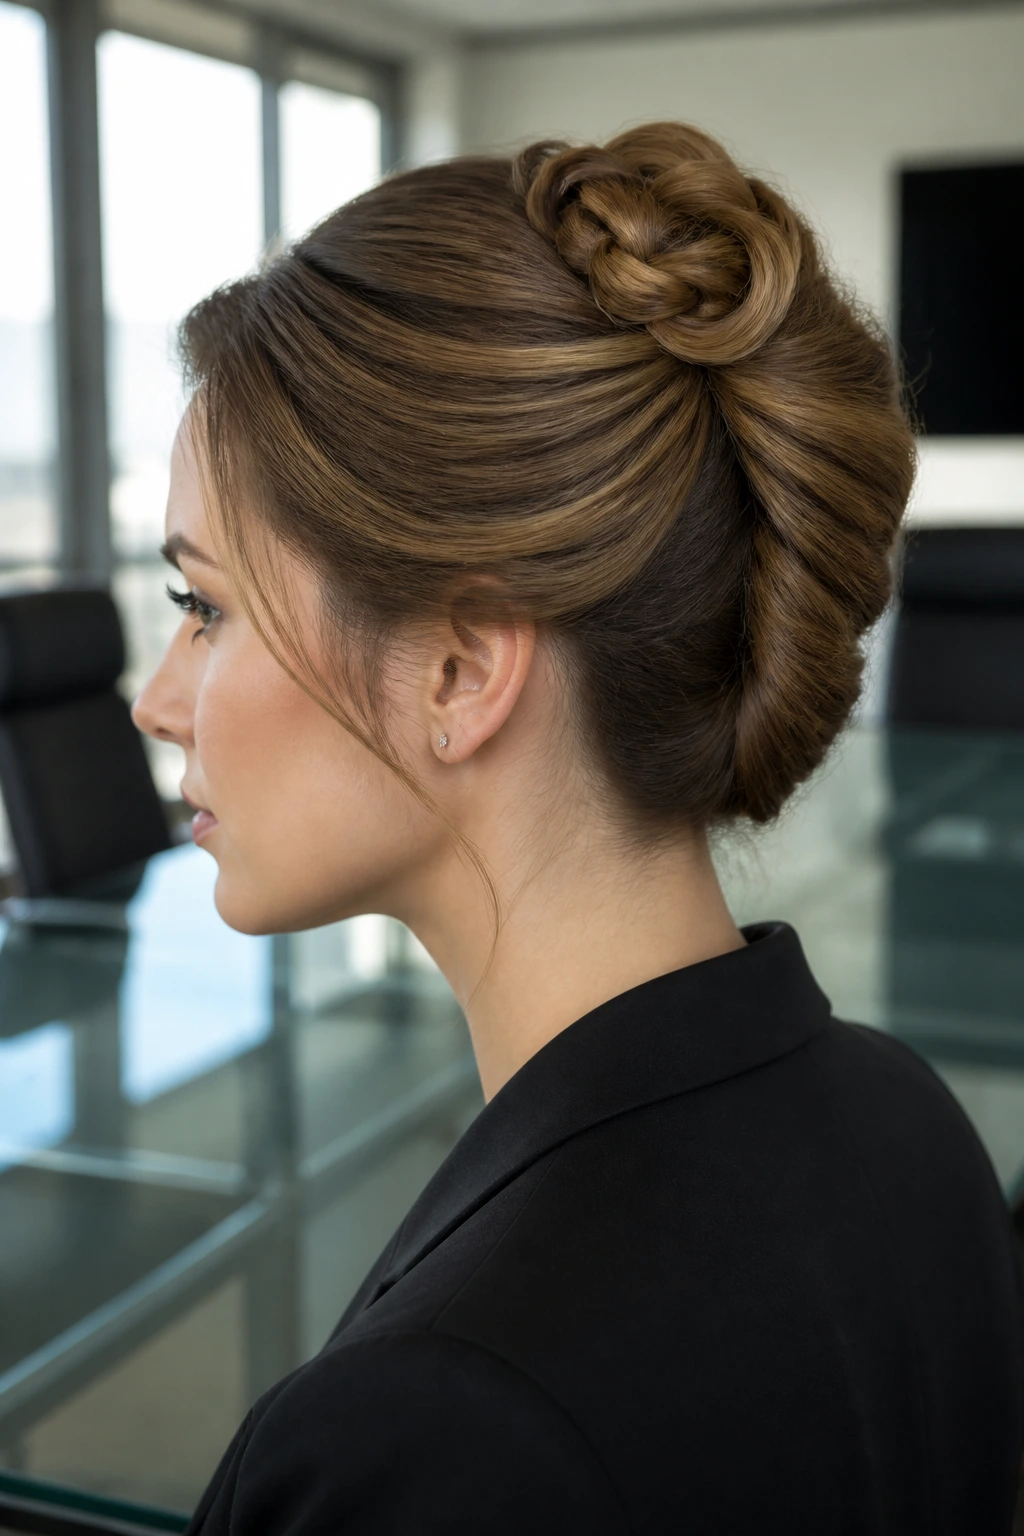
A standard French twist is a classic office style, but it can sometimes feel a bit plain. By adding a small, braided Celtic knot accent at the crown, you can give this classic look a historical feel without losing its clean, professional outline.
Why does this combination work?
The French roll provides the clean, sleek sides required for a traditional office setting, while the small braided accent on top adds a touch of personality. It shows you appreciate detail without being overly flashy.
How to style it
Leave a small, one-inch section of hair free at your temple before gathering the rest of your hair into a traditional French twist and pinning it secure. Braid the loose temple section into a fine, tight three-strand braid. Loop this braid into a simple figure-eight shape at the side of your twist, and pin it flat with a bobby pin, hiding the tail inside the seam of the roll.
10. The Medieval Rope Twist Side Braid
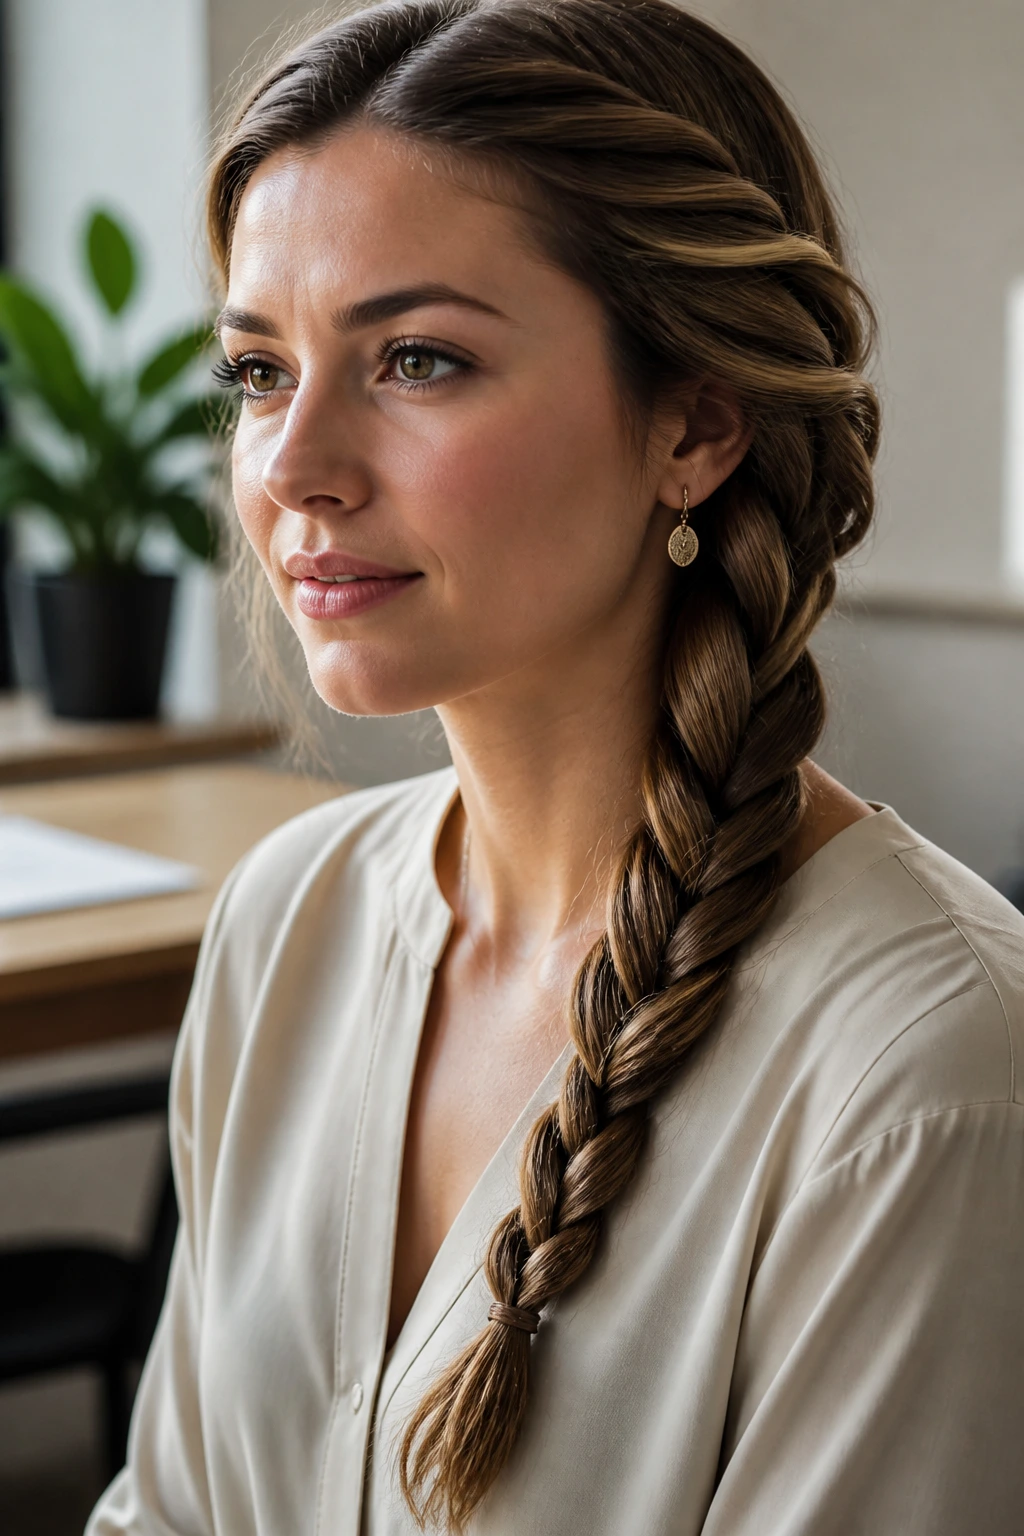
If you prefer keeping your hair over one shoulder, this structured rope twist is a great alternative to a basic side braid. It uses two thick sections of hair twisted together to create a rope-like pattern that looks clean and stays put.
To create this style, you will need:
- A texturizing spray or dry shampoo for grip
- One strong hair elastic
- A decorative hair clip or slide for the end
[Left Section: Twist Right]  <--->  [Right Section: Twist Right]
                                    /
                                   /
                 [Wrap Leftward Together]
Start by sweeping all your hair over one shoulder. Divide it into two equal sections. Twist each section individually to the right, keeping them tight. Then, wrap the two sections around each other to the left. Securing the end with a small elastic locks the twists against each other, preventing them from unraveling throughout the day.
This style has a clean, graphic quality that pairs well with modern, minimalist office wear, giving you a tidy look that requires zero maintenance during the day.
11. The Wrapped Escoffion Low Bun
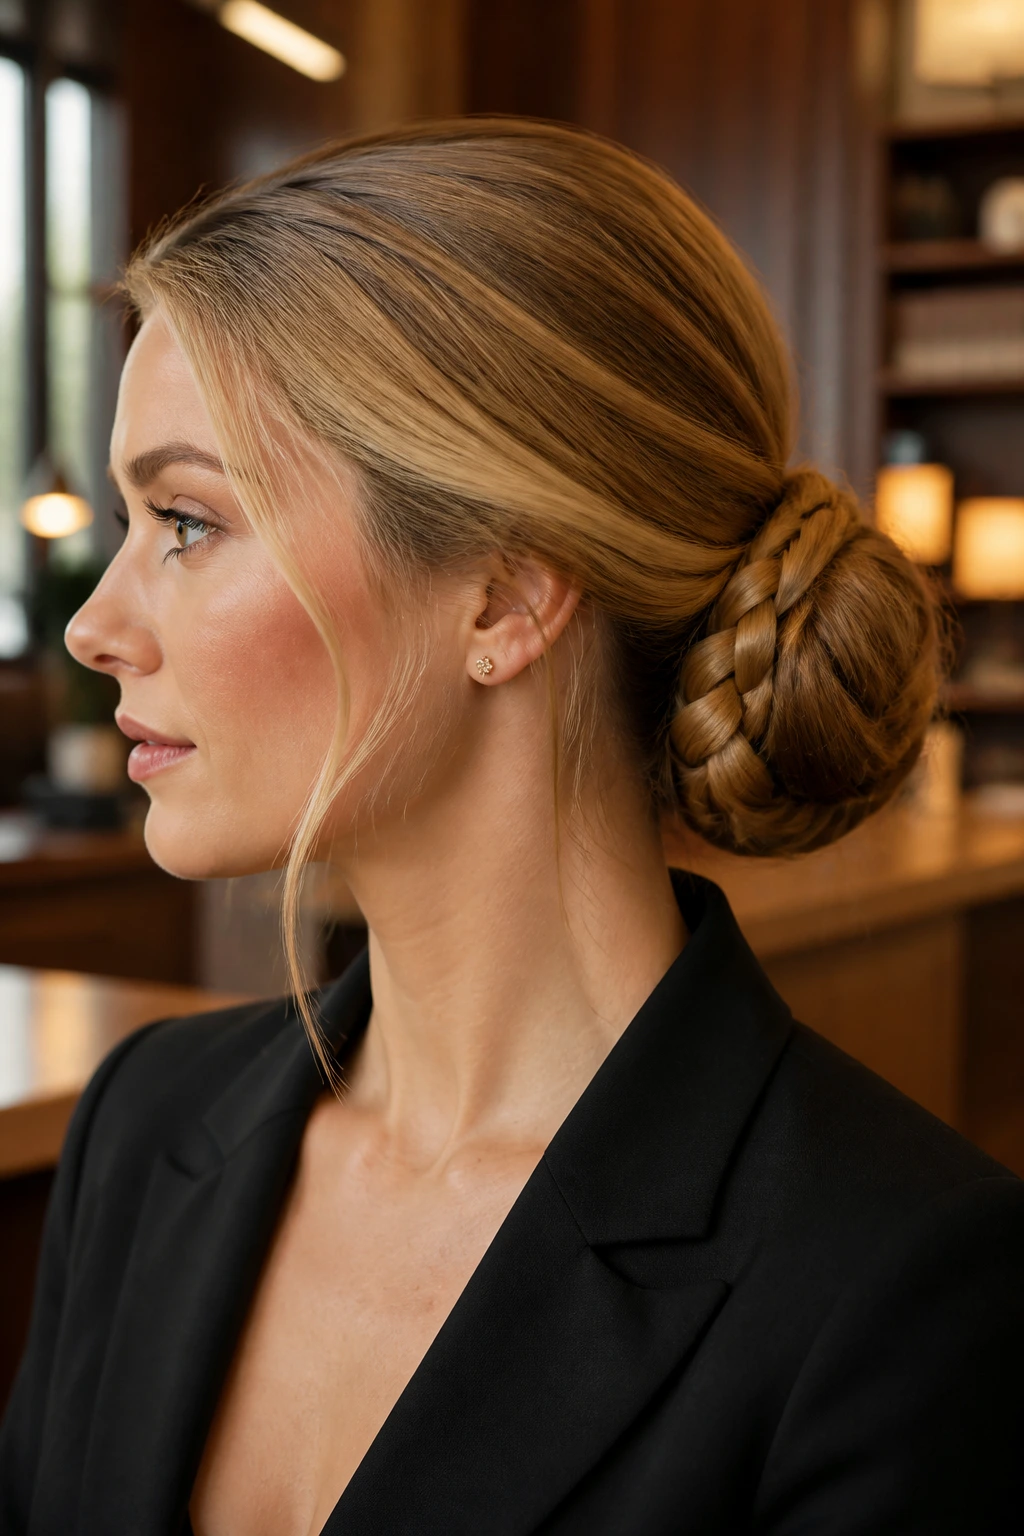
The escoffion was a rounded, nest-like headdress worn by noblewomen in the late medieval period. This hairstyle mimics that rounded shape by using a hair donut or padding, covered completely by your own braided hair for a neat, sculptural look.
Start by placing a small, brown hair donut over a low ponytail. Split the ponytail into four sections, braiding each one tightly. Smooth one braid over the top of the donut, pinning it underneath to cover the form.
Wrap the remaining three braids around the sides and bottom, pinning each one securely until the hair donut is completely covered. This creates a large, rounded bun that looks incredibly neat and structured, making it an excellent choice for formal office events or presentations where you want to look polished and professional.
12. The Italian Renaissance Hair Ribbon Taping
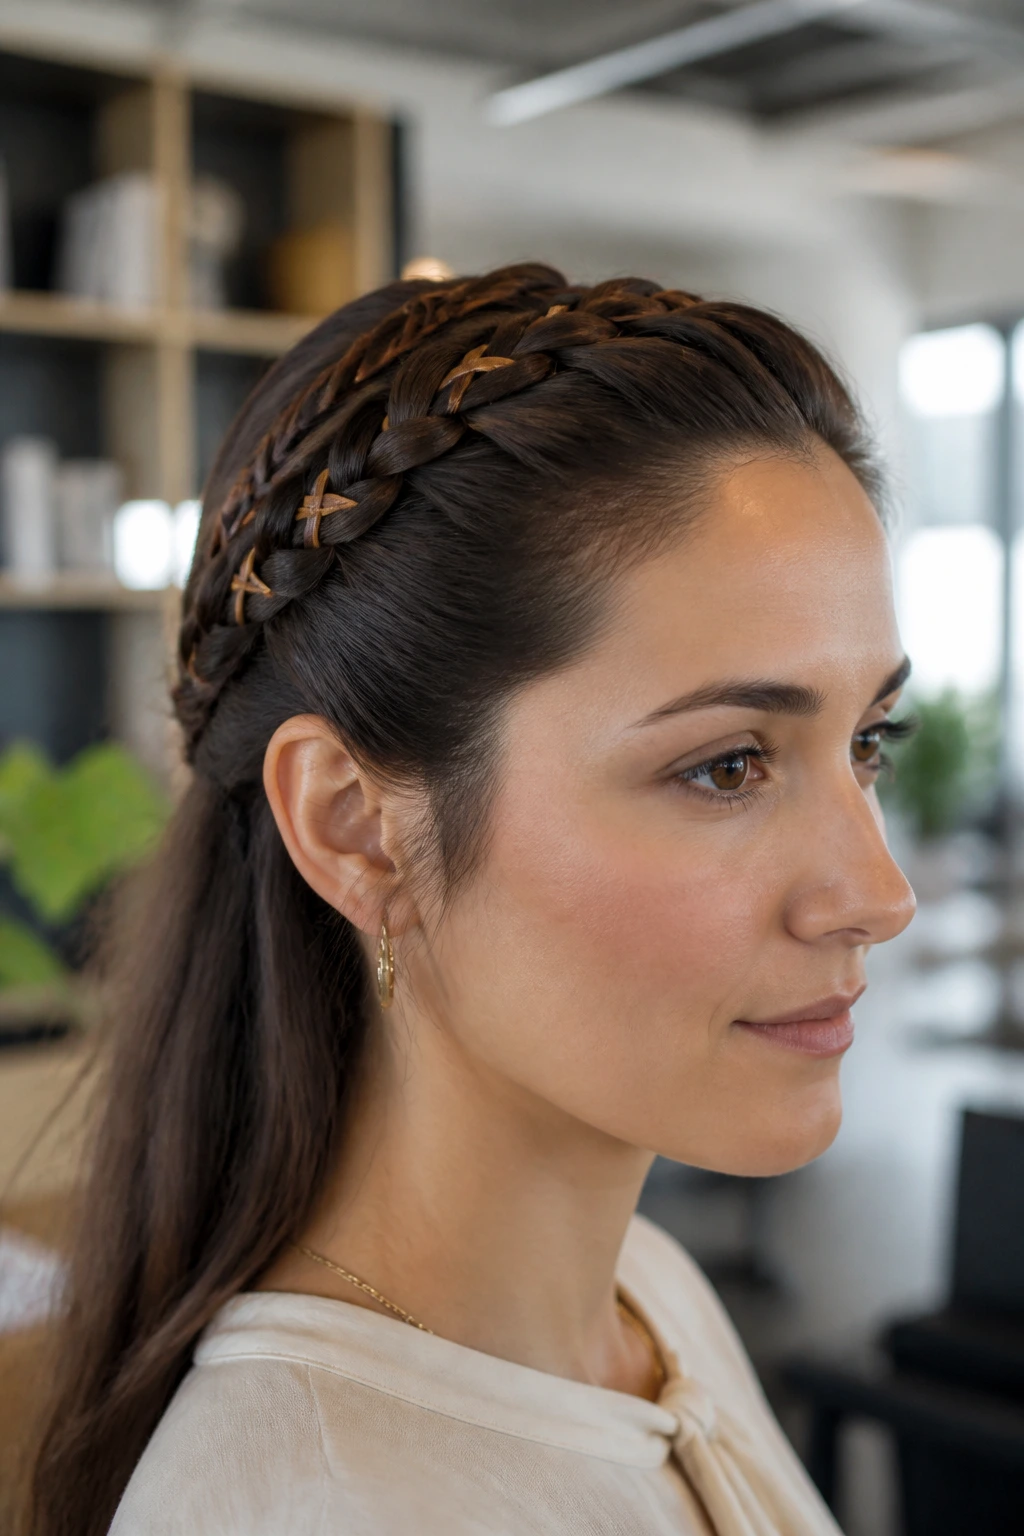
During the fifteenth century, Italian noblewomen used silk ribbons to “tape” their braids close to their heads. For the office, we can adapt this by using a thin leather cord or a matte-finish cotton ribbon in a neutral color like black, brown, or navy.
Unlike bright silk ribbons which can look like a costume, a dark leather cord blends in with your hair while adding a clean, structured detail. It keeps the hair flat and contained, preventing any loose strands from escaping.
This style is perfect for those with very long hair who want to keep it secure without resorting to a heavy bun. The wrapped cord distributes the weight of the hair along the braid, making it comfortable to wear for a full ten-hour day.
13. The Gothic Double Accent Braid Crown
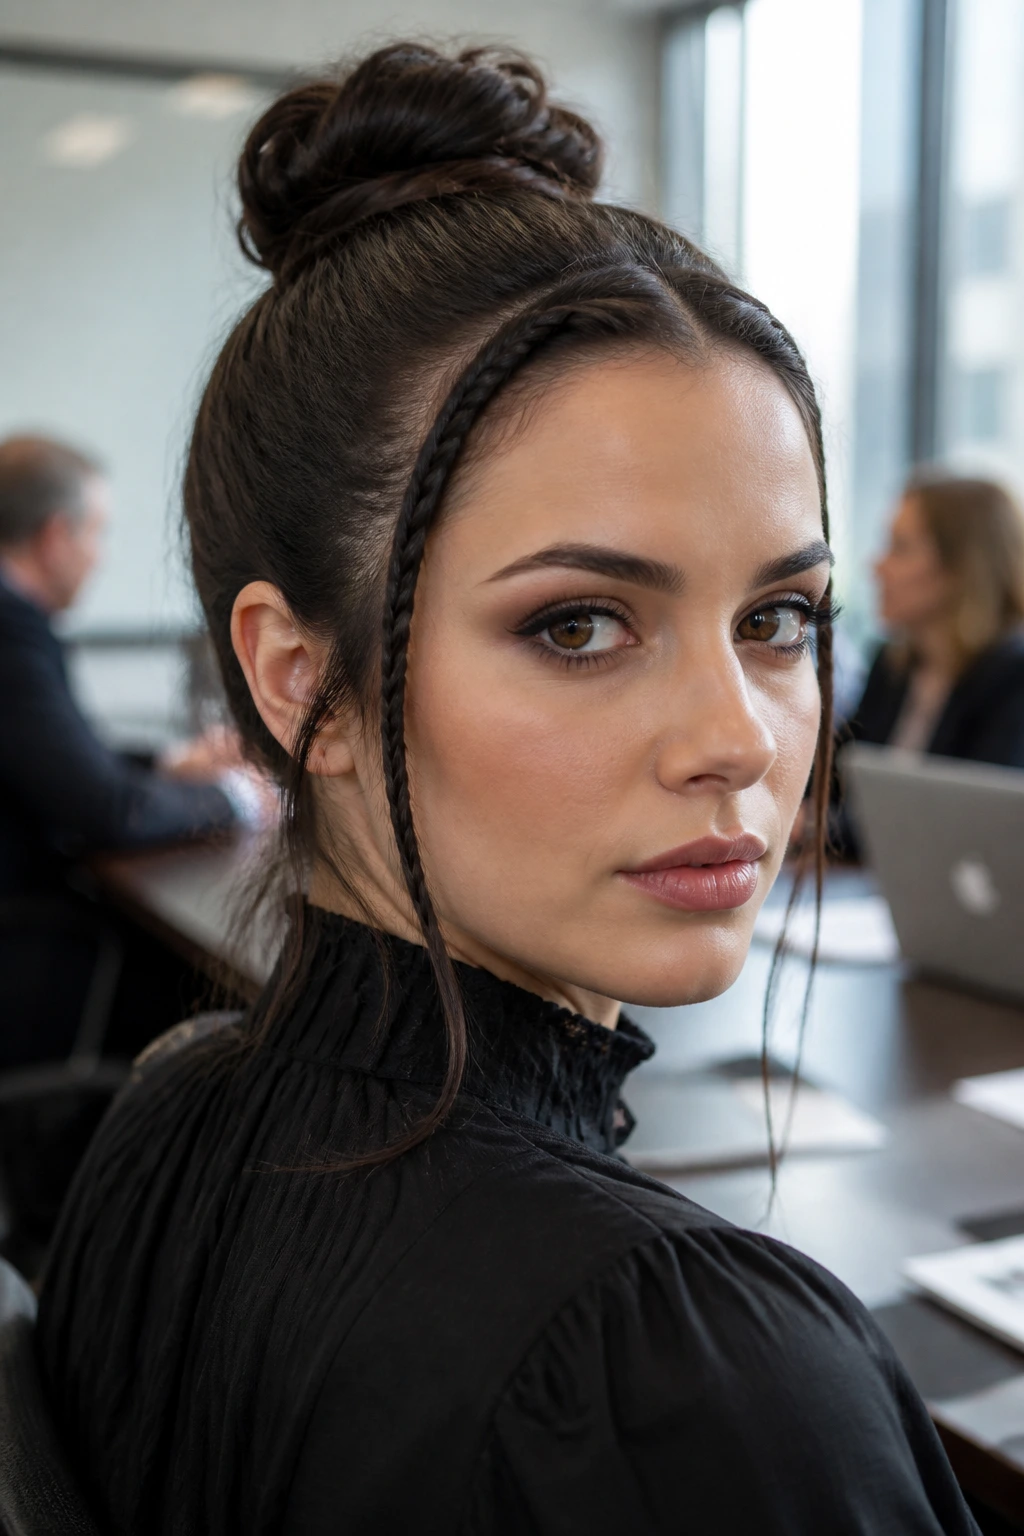
In the later medieval period, hairstyles became more vertical and structured. This style uses two thin accent braids along the hairline to frame the face, while the rest of the hair is gathered into a neat, high bun.
Why It Works for the Office
It keeps the hair completely away from your face while the small braids add structure. This prevents the “scraped-back” look that can sometimes feel too harsh under bright office lights.
Step-by-Step Styling
- Section off two half-inch strips of hair right at your front hairline, one on each side of your part.
- Braid these two thin sections into tight, neat braids and secure them with small elastics.
- Gather the rest of your hair into a high bun at the crown of your head and pin it in place.
- Wrap the two thin braids backward around the base of your bun, securing the ends with bobby pins.
- Smooth any flyaways along your hairline with a light pomade.
Pro tip: This style is excellent for hiding grown-out bangs or shorter layers around your face.
14. The Norman Wrapped Chignon
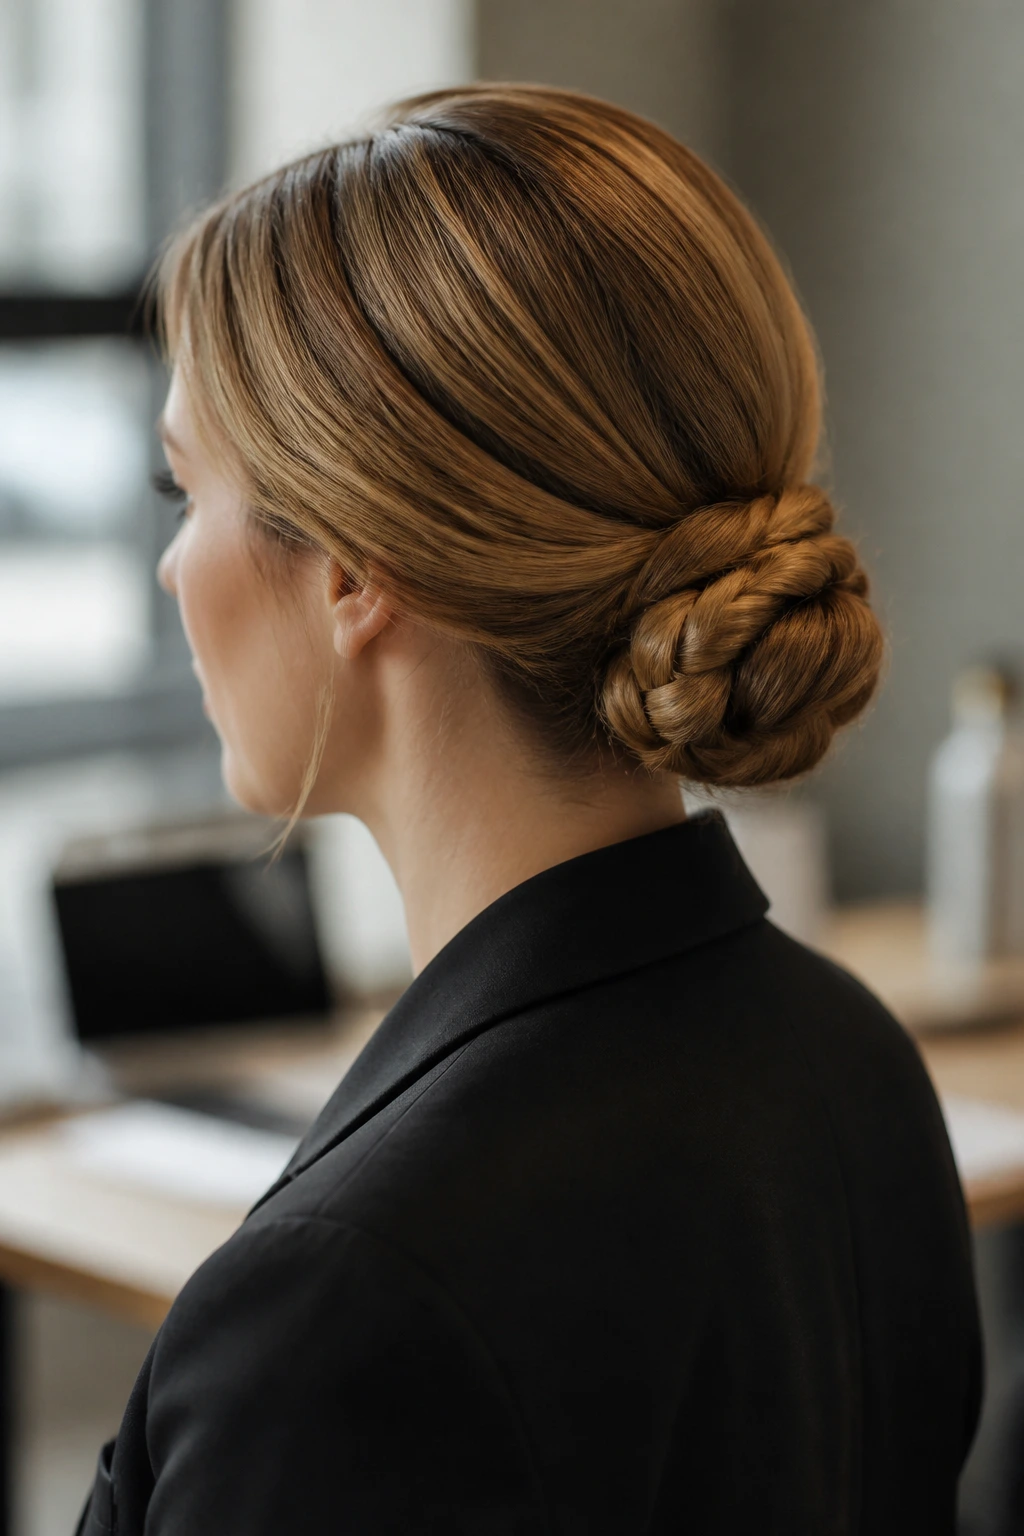
This style is inspired by the long, wrapped braids worn by Norman noblewomen, modified into a compact, professional chignon that sits neatly at the base of your skull. It uses a wrapping technique to keep the bun flat and secure.
To start, make a low ponytail and split it into two sections: one thick and one thin. Braid the thick section into a standard three-strand braid and coil it into a flat bun at the nape of your neck, pinning it secure.
Take the thinner section, wrap it around the base of the bun to cover the hair elastic, and pin it flat underneath. This simple step hides any visible elastics or pins, giving the style a clean, seamless look that is perfect for a professional environment.
15. The Half-Up Celtic Knot Loop
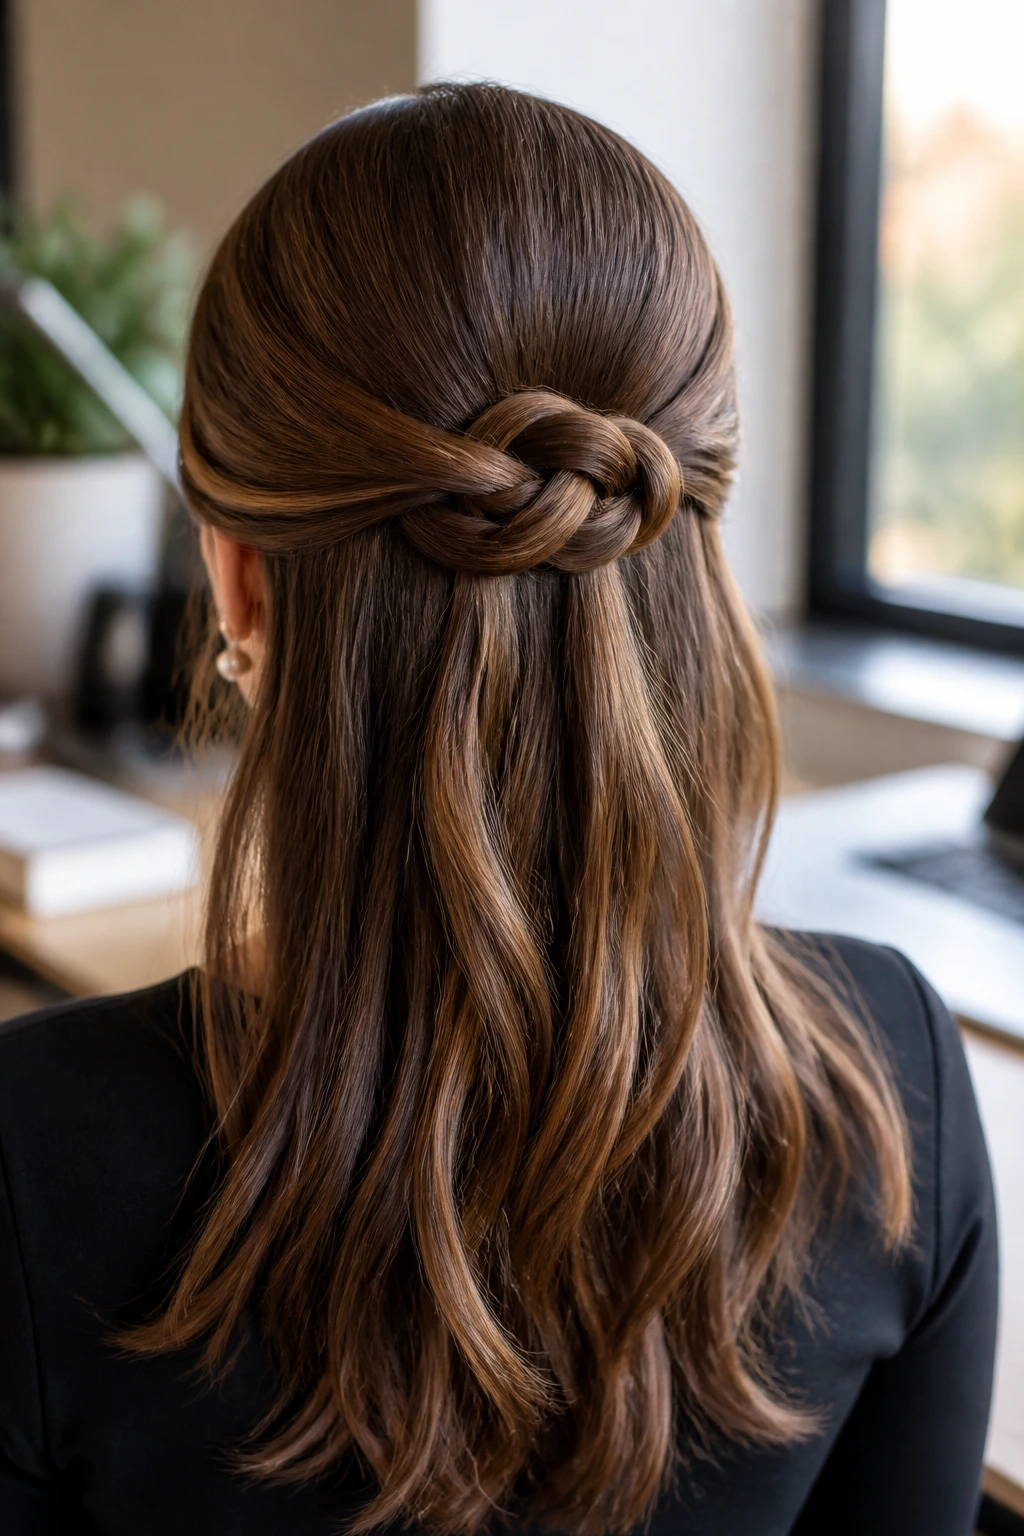
For a simple yet detailed look, this style loops two sections of hair into a basic Celtic knot at the back of your head. It is a great way to wear your hair half-up while adding a clean, geometric detail.
Why does this style fit the office?
It holds the sides of your hair firmly in place, preventing them from falling forward when you are working. The flat knot at the back lies smooth against your head, making it comfortable to wear all day.
How to style it
Take two equal sections of hair from your temples and bring them to the back of your head. Loop the left section into a simple circle, then thread the right section through the loop in an over-under pattern to create a flat knot. Secure the center of the knot with a single bobby pin hidden underneath, and let the loose ends blend into the rest of your hair.
16. The Four-Strand Statement Braid Bun
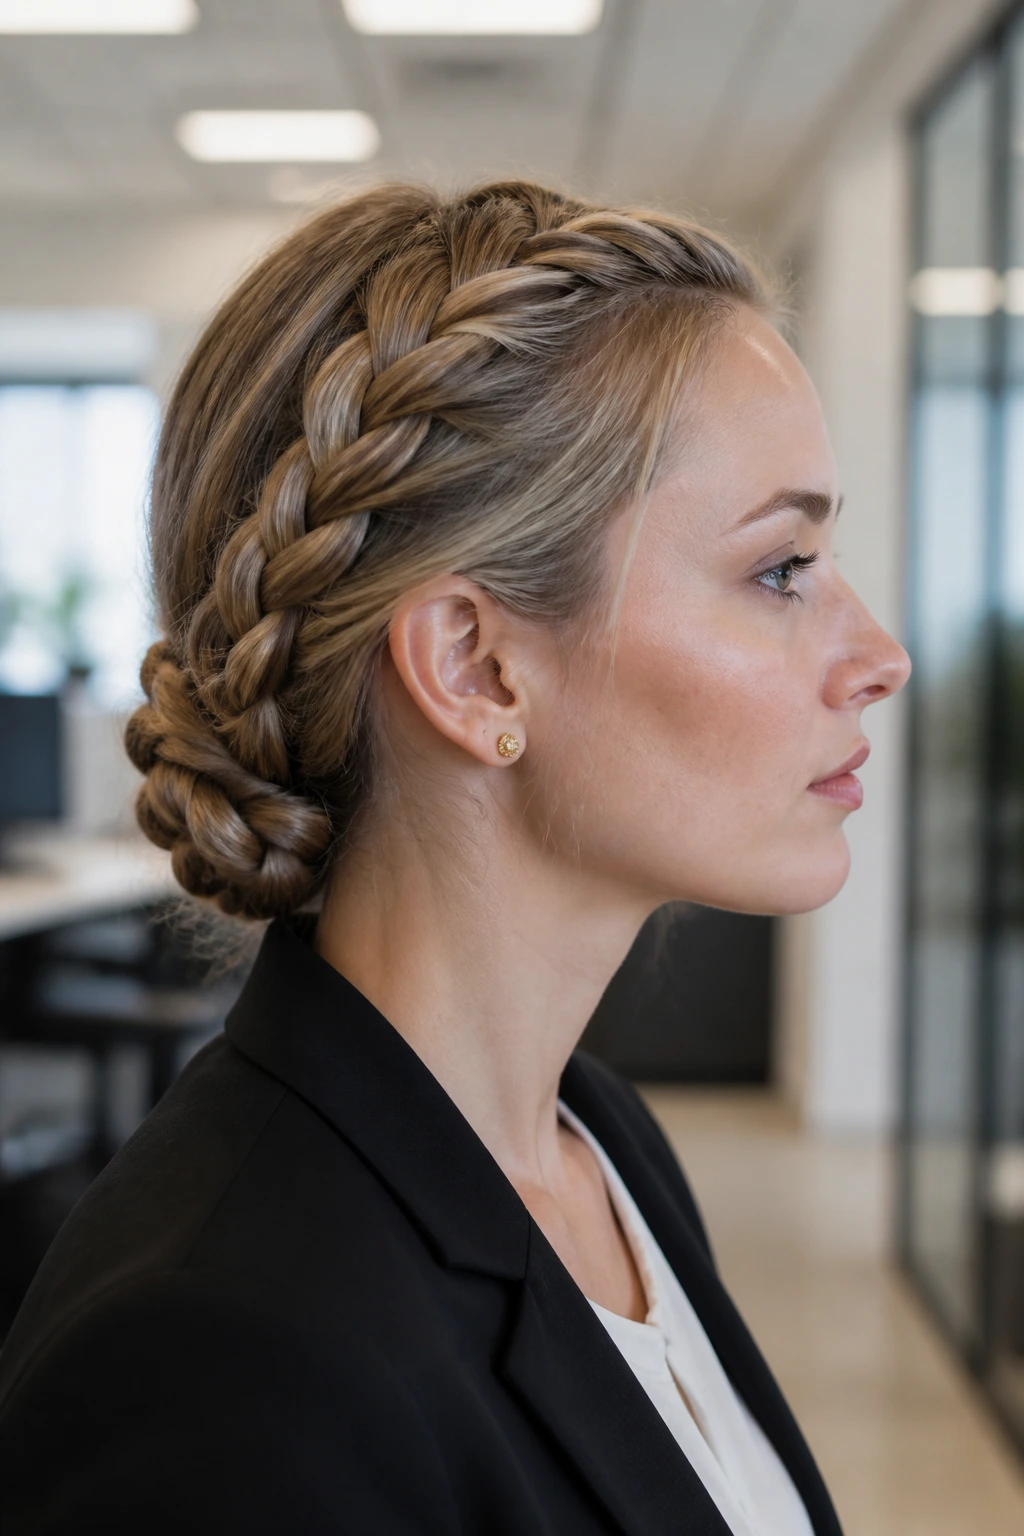
While most people know how to make a three-strand braid, a four-strand braid has a flat, woven appearance that looks like a decorative strap. Coiled into a low bun, it makes a neat, detailed style for the office.
To make this look, you will need:
- A styling cream to keep the four strands separate and smooth
- One hair elastic
- Four to six U-shaped hairpins
Strand 1 ---> Over Strand 2 ---> Under Strand 3 ---> Over Strand 4Divide your low ponytail into four equal strands. Cross the first strand over the second, under the third, and over the fourth. Repeat this pattern all the way down and secure the end. Once braided, coil the flat braid into a bun at the nape of your neck and pin it in place.
The flat shape of the four-strand braid makes the resulting bun lie closer to your head than a standard three-strand bun, giving it a neat, low-profile look.
17. The Twisted Crown Braid with Silk Ribbon
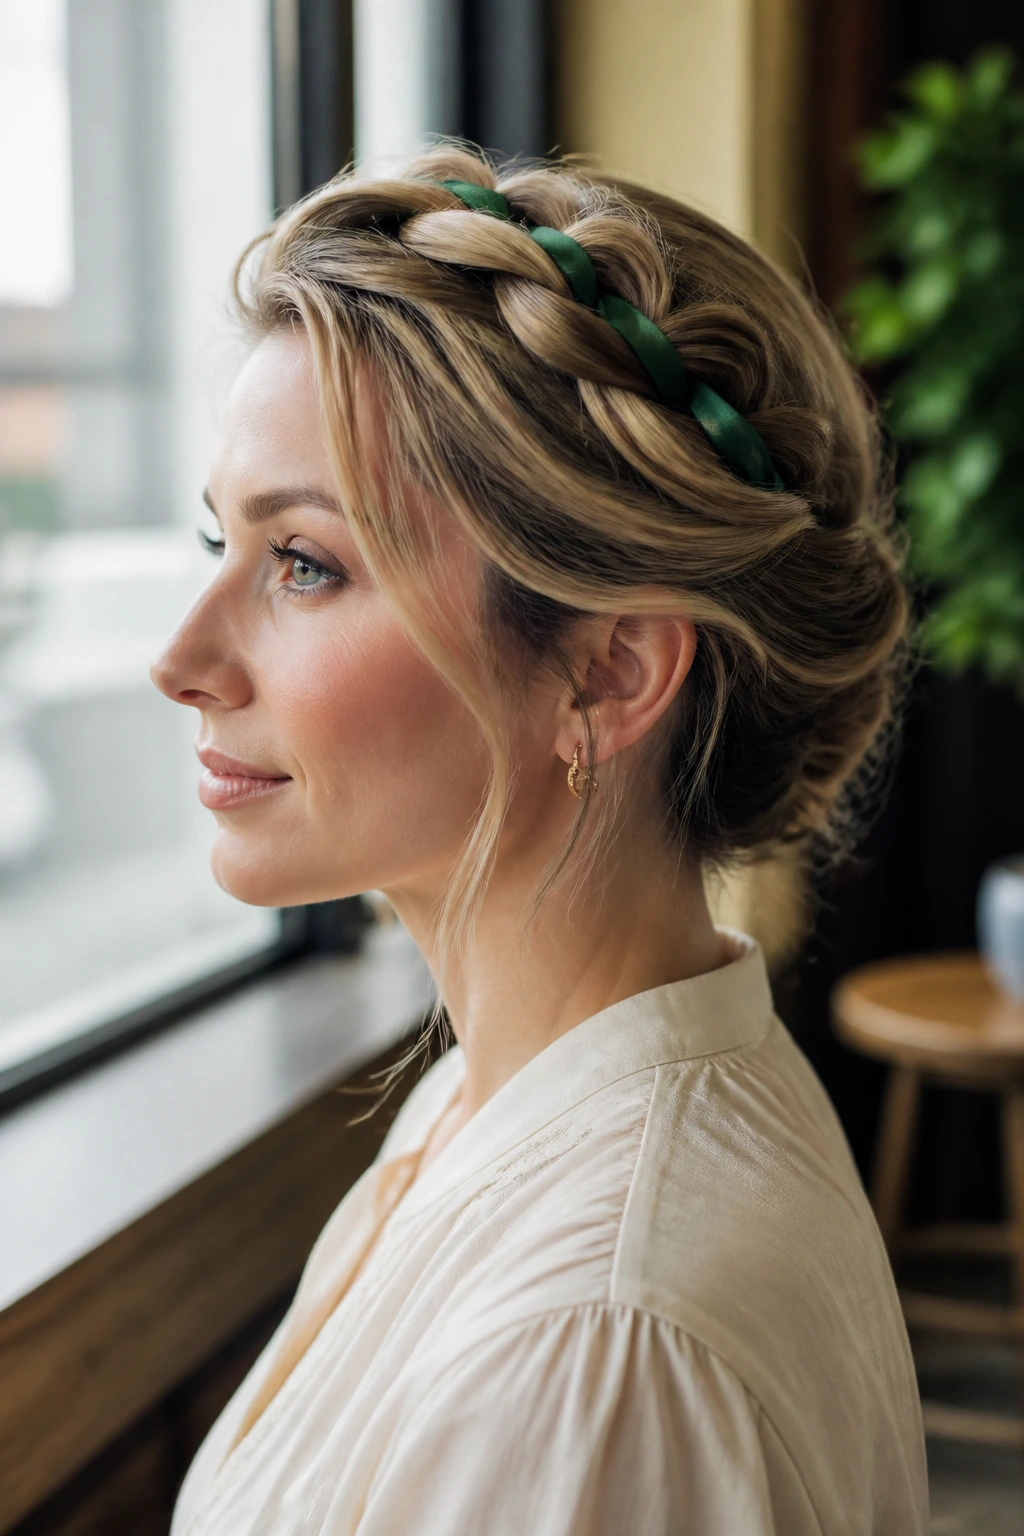
This style uses a two-strand twist instead of a three-strand braid, incorporating a thin, neutral-colored ribbon into the twist for a clean, structured detail that stays secure all day.
To keep this office-appropriate, choose a matte cotton or linen ribbon in a dark shade like forest green, navy, or brown. Avoid shiny satin ribbons, which can look a bit too casual or festive for a professional setting.
Start by tying the ribbon around the base of a low ponytail, then split the hair into two sections. Add one end of the ribbon to each section and twist them together, securing the end with an elastic. Wrap the twist over the top of your head and pin it flat, tucking the ribbon ends out of sight. The ribbon adds structure to the twist, helping it hold its shape throughout the day.
18. The Crowned French Twist Combo
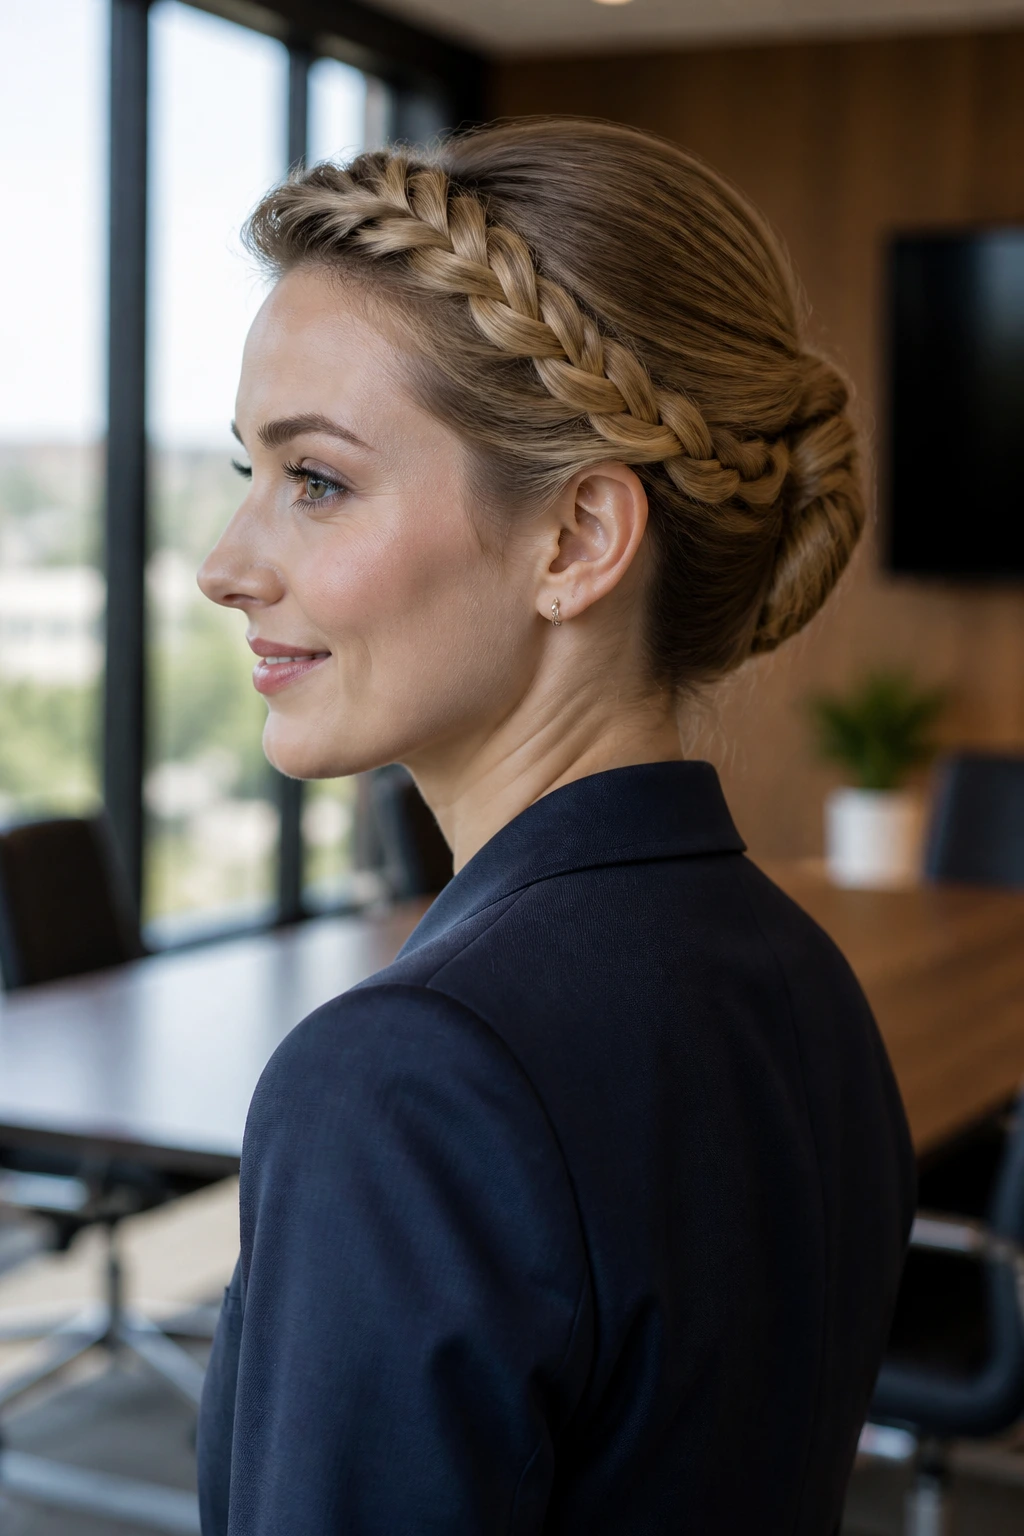
This style combines a neat French twist at the back with a flat crown braid along the front, offering a structured look that keeps your hair completely contained and professional from every angle.
Unlike a standard French twist which can sometimes slip down during a long day, the addition of the crown braid helps anchor the style, keeping everything secure.
This style is perfect for important presentations or formal office events. It keeps your hair completely out of your face, letting you focus on your work without worrying about your hair coming loose.
19. The Side-Swept Medieval Fishtail
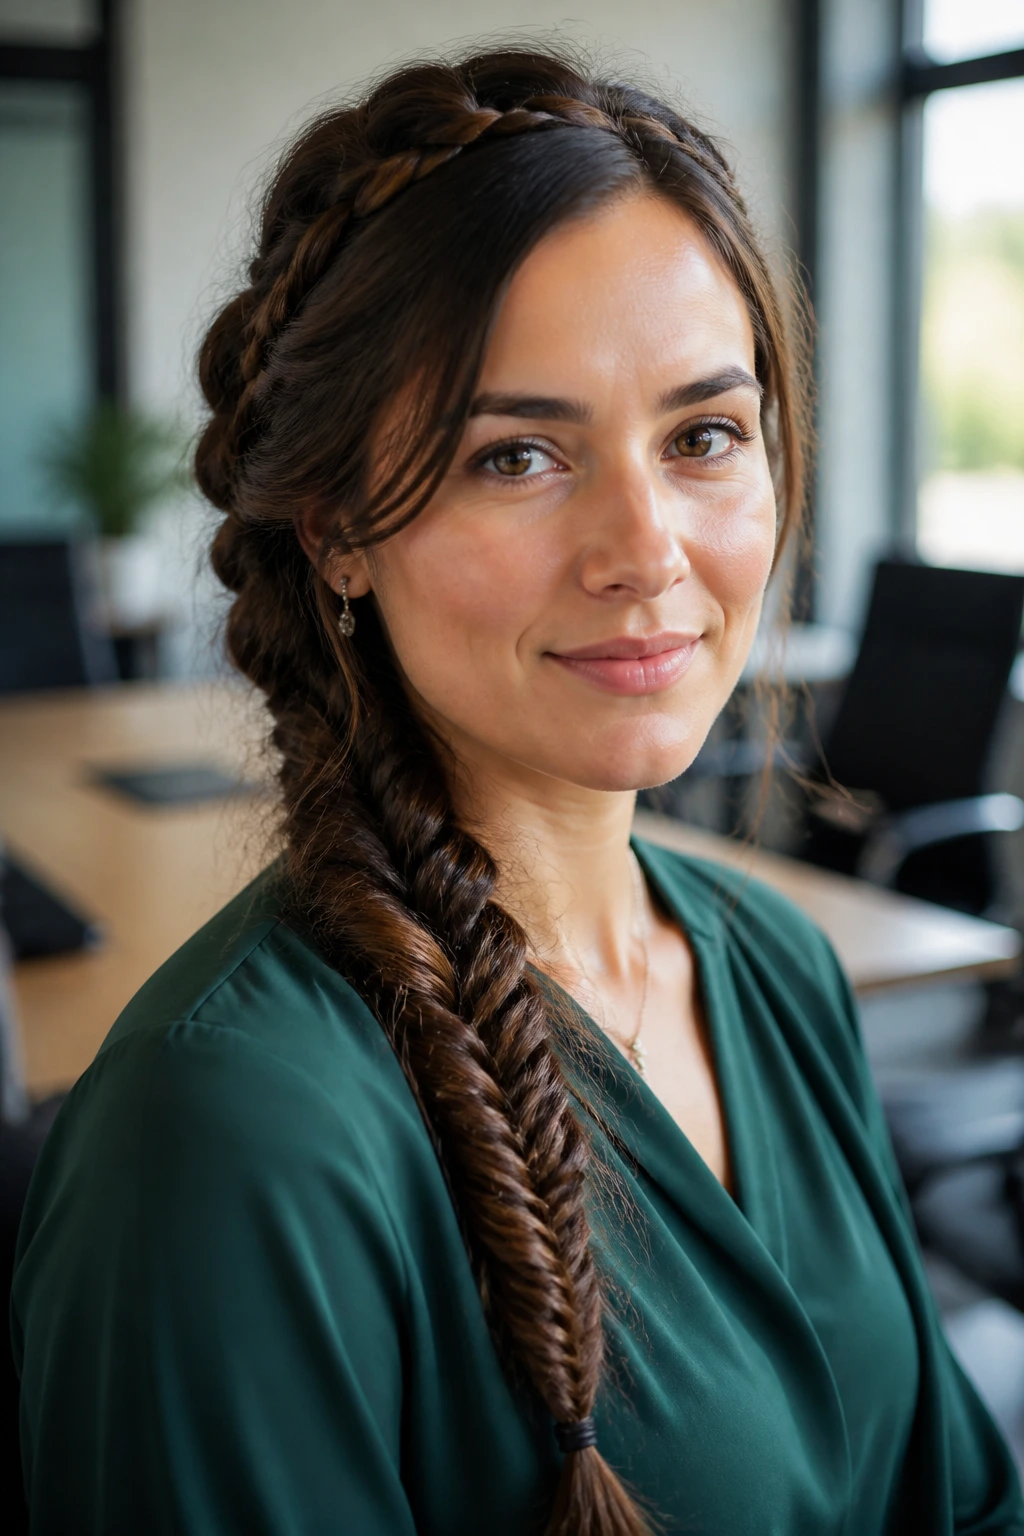
For a softer look that still feels neat and organized, this side-swept fishtail braid keeps your hair contained while letting it rest over one shoulder.
Why It Works for the Office
It keeps the back of your neck clean and cool while putting the detailed braid where it is easily seen, giving you a polished look for video calls and meetings.
Step-by-Step Styling
- Prep your hair with a texturizing spray to give it some grip.
- Sweep all your hair over to your preferred side, keeping the back neat and smooth.
- Divide the hair into two equal sections and begin a tight fishtail braid, crossing small outer strands over to the opposite side.
- Keep the tension tight as you braid down to ensure a clean, neat pattern.
- Secure the end with a clear elastic and smooth any loose hairs with a light hair oil.
Pro tip: If you have shorter layers around your face, use a few bobby pins at the back of your neck to keep them from falling loose.
20. The Ornate Triple-Twist Half Updo
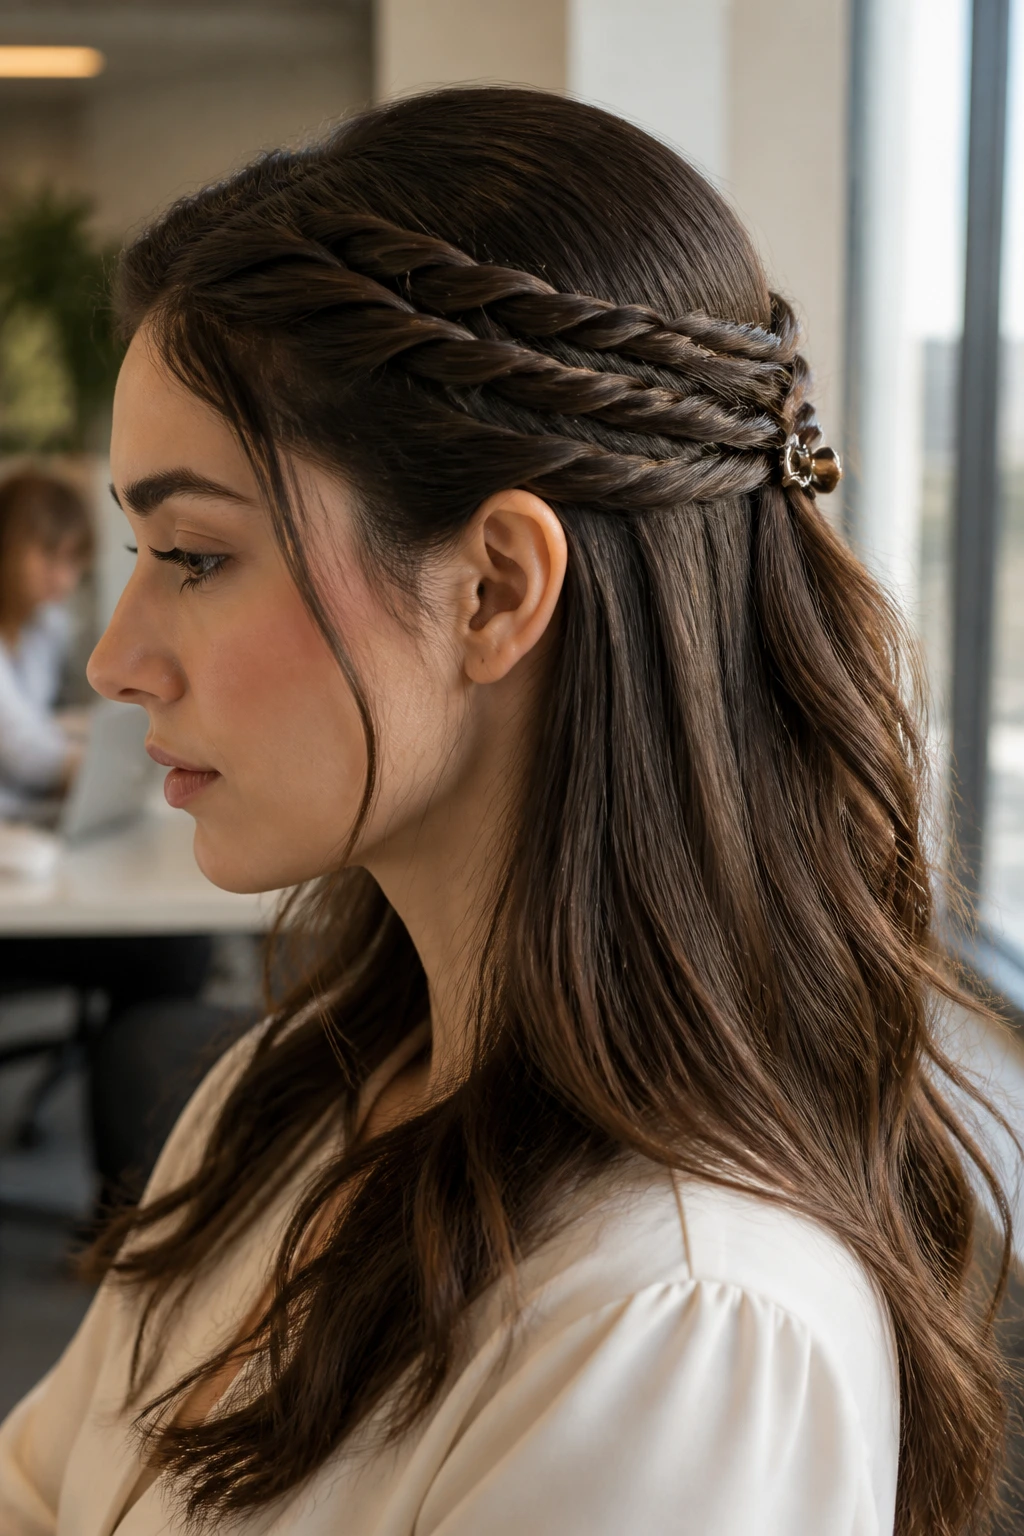
This style uses three small rope twists on each side of your head, bringing them together at the back to create a clean, detailed half-up look that stays neat all day.
Start by parting your hair down the center. Take three thin, half-inch sections of hair from the right side of your hairline and twist each one tightly to the right. Bring the three twists together at the back of your head and secure them with a small clip.
Repeat the process on the left side, then tie all six twists together in the center with a single clear elastic. This keeps the sides of your hair held firmly back, giving you a tidy, professional look.
21. The Crown-Taped Low Chignon
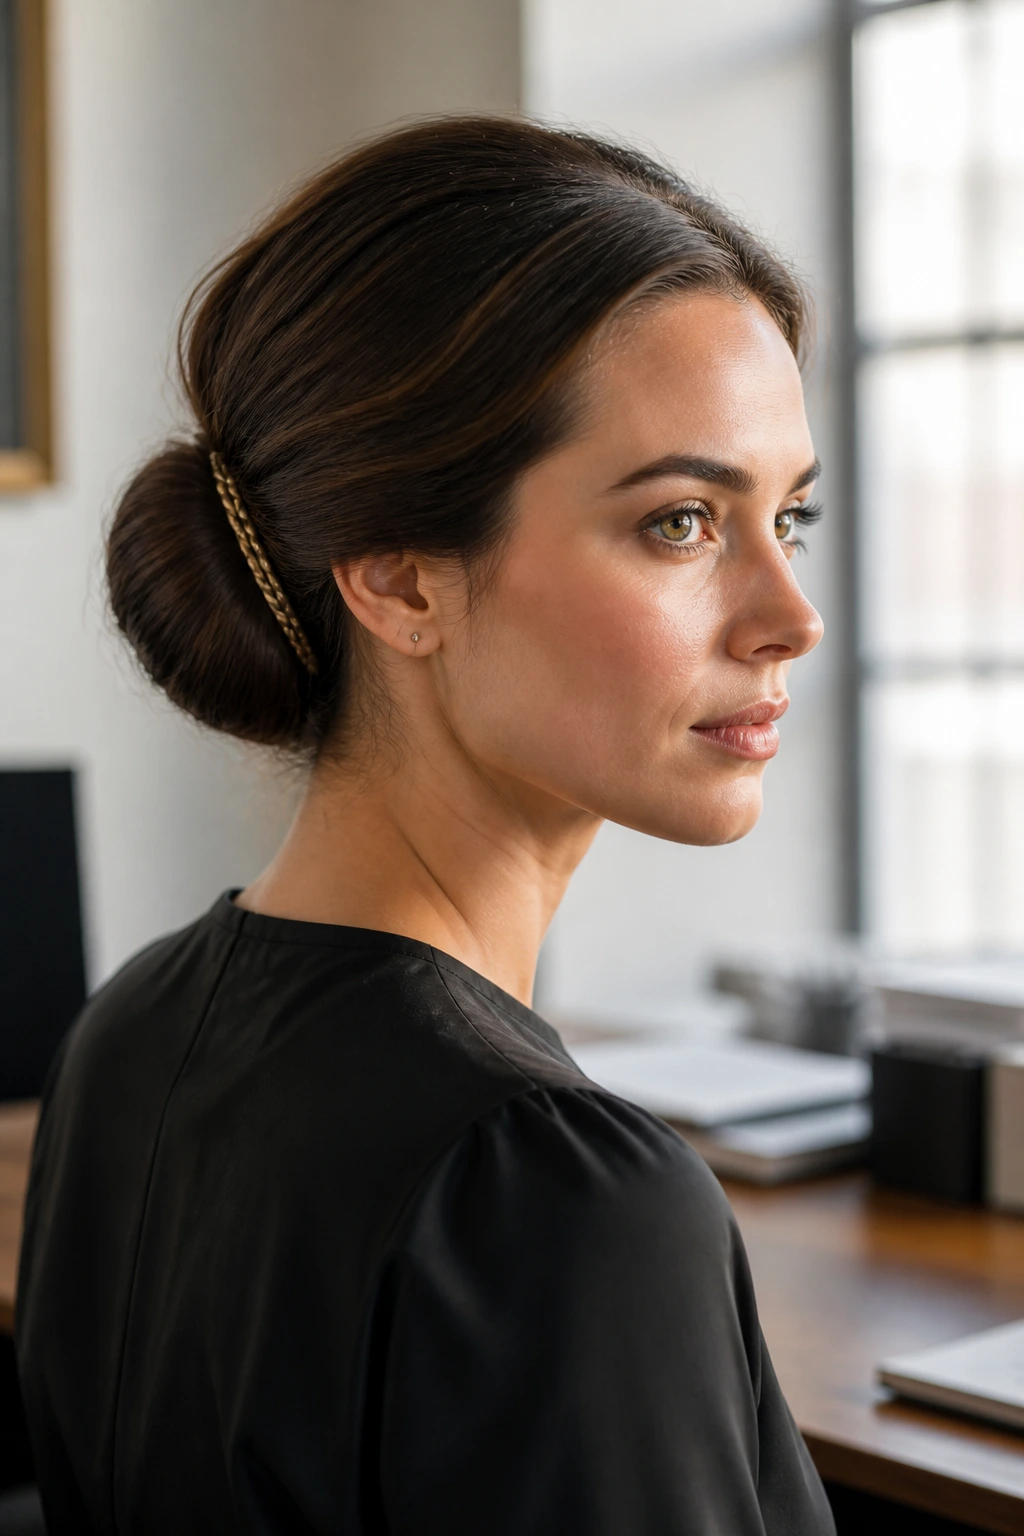
This style uses a simple wrapping technique to secure a low chignon, using a thin, neutral-colored cord to keep the bun flat and tidy.
Why does this style hold up so well?
The wrapping cord acts as a structural support, holding the chignon flat against your head and preventing it from shifting or falling loose during the day.
How to style it
Gather your hair into a low ponytail and roll it upward into a flat chignon at the nape of your neck, securing it with a few pins. Take a thin, dark cord and wrap it vertically around the center of the chignon, tying it underneath to hold the shape secure. This simple addition keeps the bun flat and tidy, giving you a neat, structured look that lasts all day.
Wrapping Up

Adapting historical hairstyles for the office is a practical way to keep your hair neat, secure, and out of your face. By focusing on clean lines, secure pinning, and simple accessories, these styles offer a reliable alternative to standard office updos.
The key to keeping these looks professional is control. Keep your parts straight, use hairpins that match your hair color, and choose neutral accessories that blend in rather than stand out. With a little practice, these classic styles can become a reliable part of your workday routine, keeping you looking polished and professional from your morning commute to your final meeting.
