



The alarm clock goes off, and the countdown begins. You have exactly twenty minutes to get dressed, drink something caffeinated, and look like a functioning, highly polished professional. Staring into the bathroom mirror, the temptation to pull your hair back into the same tired, loops-and-ends messy bun is strong. We have all been there. But there is a massive difference between looking like you just rolled out of a pile of laundry and looking like you stepped off a sleek, high-profile step-and-repeat.
The secret that high-end editorial stylists know is surprisingly simple. Red carpet hairstyles are not actually more difficult to construct than your standard morning topknot. They simply rely on different points of tension, better light reflection, and deliberate structural lines. When you see a celebrity walking a red carpet with an apparently effortless updo, you are looking at a style that took under ten minutes to build once the foundation was set.
By understanding how to work with your hair’s natural oils, where to place your hair ties, and how to use simple tools like boar-bristle brushes and U-shaped pins, you can recreate these high-impact silhouettes in the time it takes for your coffee to brew. You do not need an entourage of personal stylists. You just need a few reliable techniques that turn day-three bedhead into a deliberate design choice.
Let us break down these efficient, striking styles so you can conquer your mornings with a look that carries absolute authority.
1. The Sleek Low Chignon
Clean lines and zero flyaways define this classic look, making it the perfect choice for mornings when your hair is not freshly washed. In fact, slightly dirty hair has the natural grip required to keep this style locked in place from your morning commute until your evening wind-down. By positioning the bulk of the hair at the nape of the neck, you create an elegant, elongated profile that feels incredibly formal but takes less than five minutes to execute.
Why It Works on Day-Three Hair
The natural oils near your scalp act as a built-in pomade. Instead of fighting them with dry shampoo, you can use them to create a high-shine, mirror-like finish. By brushing the hair flat against the skull, you redirect the focus to your facial structure and jawline. This technique works exceptionally well on straight, wavy, or chemically relaxed textures.
Quick Hair Prep Steps
- Dampen your roots slightly with a spray bottle of plain water to loosen your natural parting.
- Apply three drops of a lightweight hair oil from your mid-lengths to your ends to seal down dry cuticles.
- Use a fine-tooth comb to find your preferred parting—either a razor-sharp center part or a deep, dramatic side part.
- Gather your hair into a tight ponytail at the very base of your skull, securing it with a strong elastic band.
Pro tip: Always spray your bobby pins with dry shampoo or a flexible-hold hairspray before inserting them into your hair to give them a gritty, slip-free grip.
2. The Textured French Twist Claw Clip
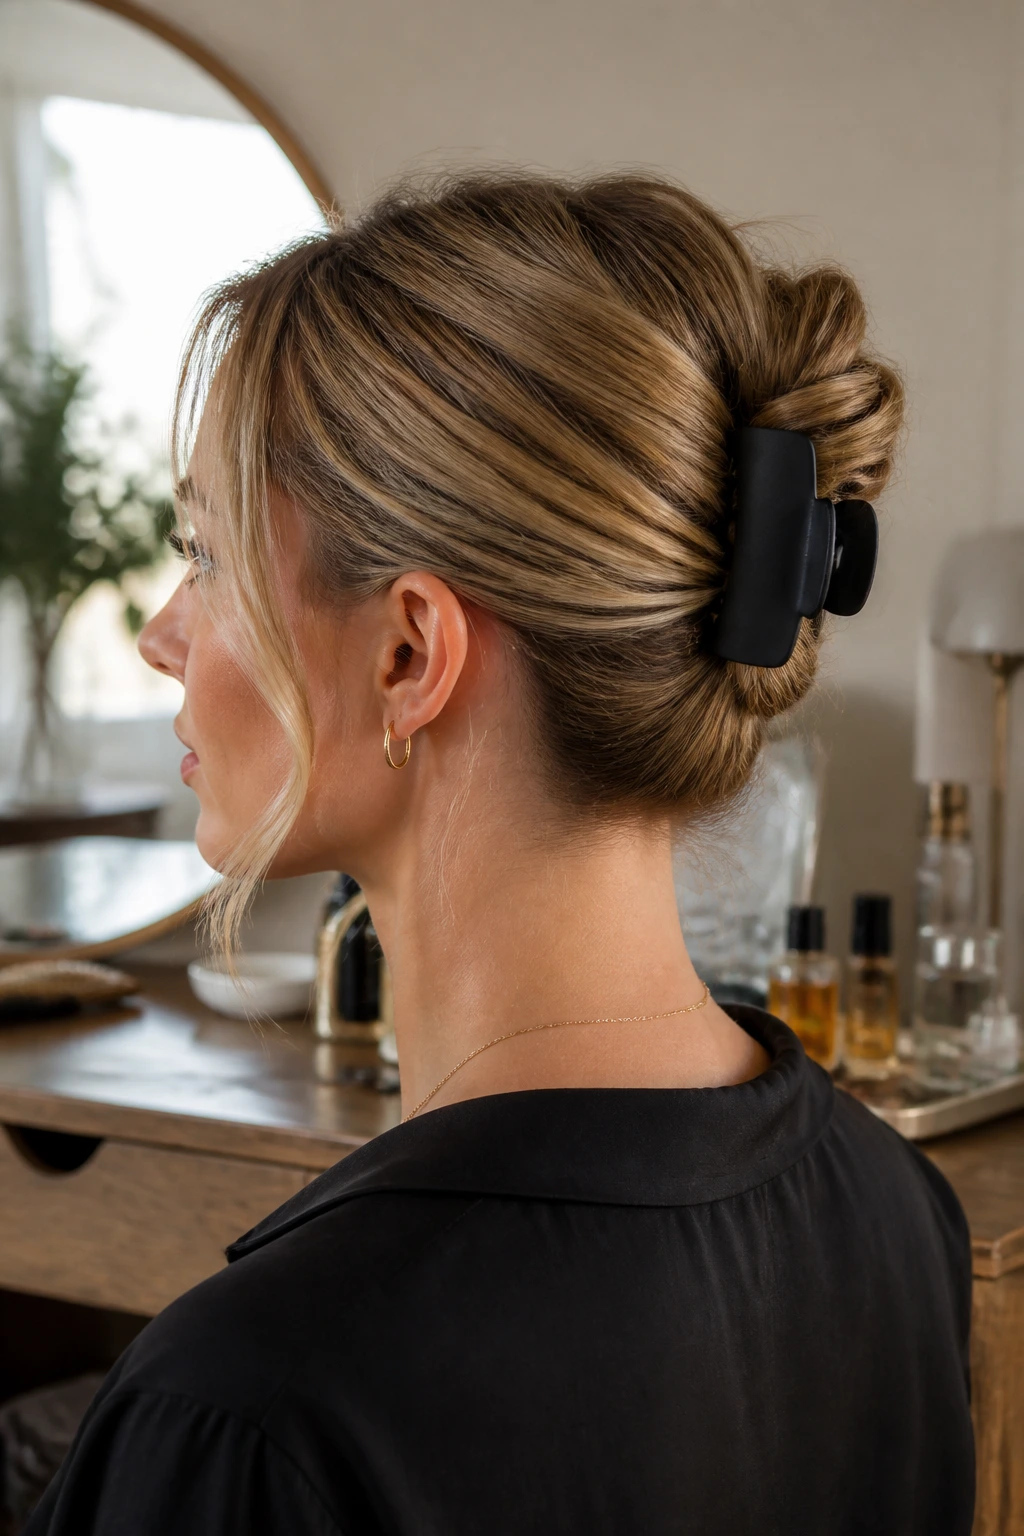
You do not need thirty metal hairpins and a can of industrial lacquer to secure a classic French twist. The traditional method is tedious, often requiring dozens of adjustments to prevent the heavy roll of hair from sagging toward your shoulders. A modern, minimalist claw clip—specifically one with a flat back and a matte finish—allows you to achieve the exact same iconic, sweeping silhouette in roughly thirty seconds.
Start by gathering all of your hair at the nape of your neck as if you were going to make a low ponytail. Hold the base of this bundle with your dominant hand, keeping your palm facing upward. Twist the hair firmly toward the ceiling, pulling the length upward against the back of your head. As you twist, the hair will naturally fold inward, forming a neat, vertical tube along your skull.
Once the roll is tight against your head, tuck the remaining loose ends down inside the fold. Take your claw clip and clamp it directly over the seam of the twist, catching both the twisted roll and the hair flat against your scalp. The teeth of the clip must run parallel to your spine to anchor the weight evenly. This creates a beautifully messy, voluminous French twist with a soft, modern drape around the face.
3. The High Wet-Look Ponytail
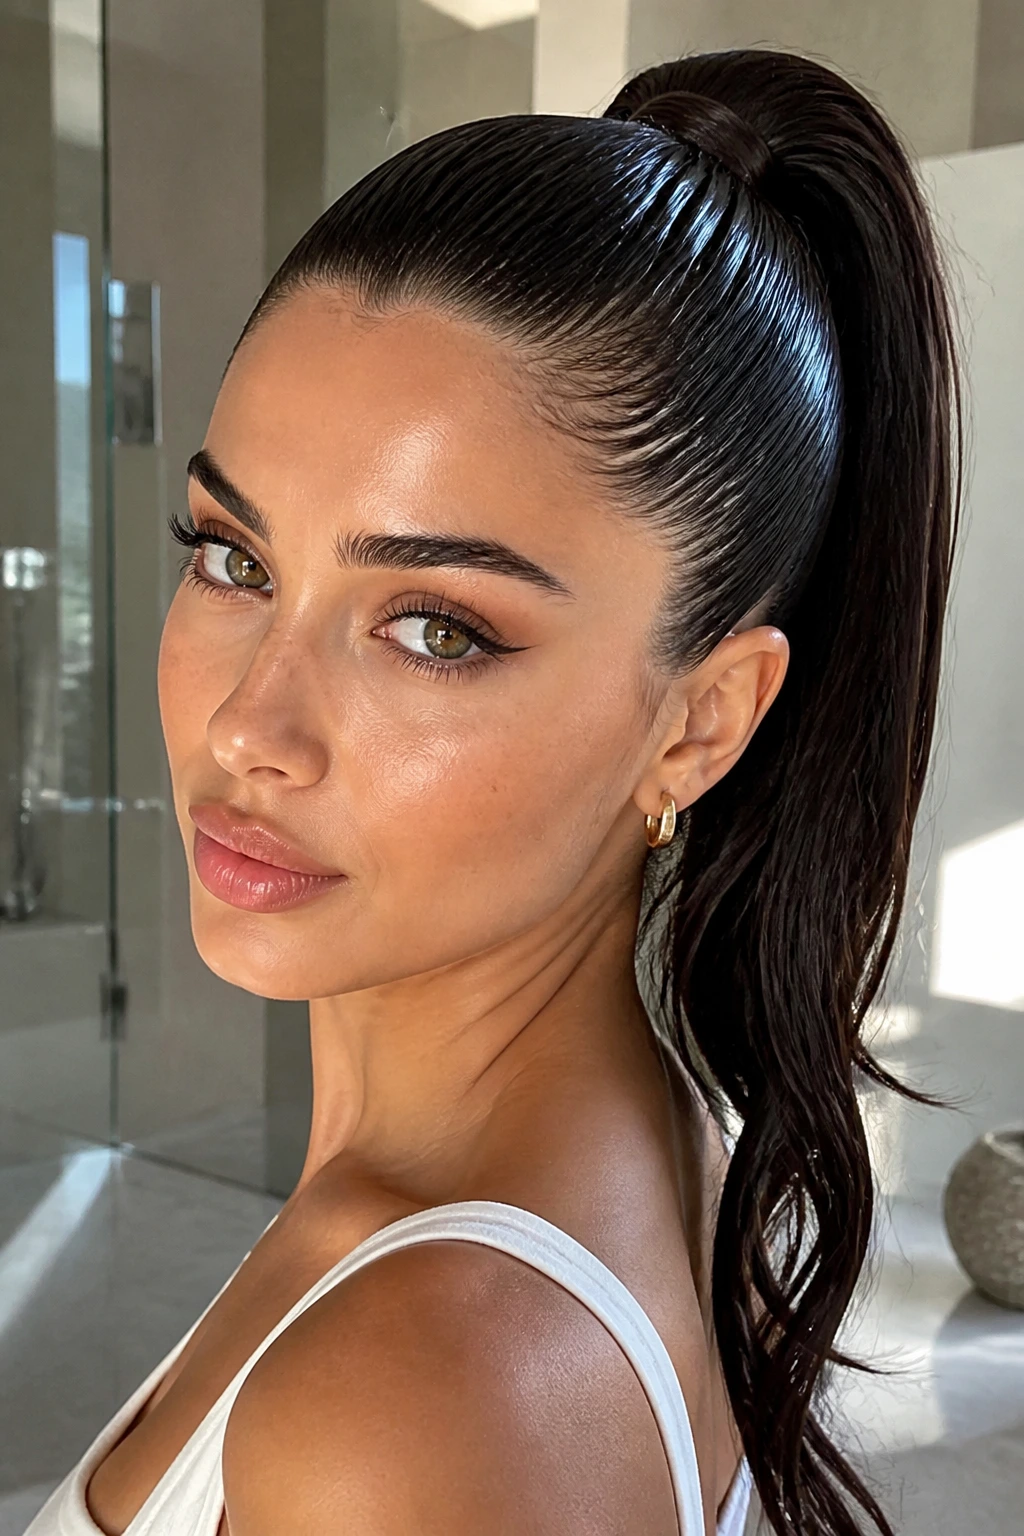
Why does this high-gloss ponytail look so expensive when it only takes four minutes to create? The answer lies in basic human facial geometry. By pulling your hair up and back along the diagonal line that extends from your cheekbones to the crown of your head, you create a powerful visual lift. This style is a favorite for high-profile events because it catches the light beautifully and stays completely out of your face.
The Science of the Glossy Finish
A standard ponytail can look flat and casual. To give it that high-fashion edge, you must combine a water-based styling gel with a small amount of nourishing hair oil. This prevents the gel from drying into a stiff, crunchy helmet while maintaining a wet, reflective appearance throughout the day.
How to Style It
- Brush your hair upward toward your crown, tilting your chin toward the ceiling to keep the hair at the back of your neck completely flat and tight.
- Secure the high ponytail with a thick, high-tension elastic band that will not snap under pressure.
- Mix a dime-sized amount of gel and three drops of hair oil between your palms, then smooth it from your hairline back toward the hair tie.
- Take a small, half-inch section of hair from the underside of the ponytail, wrap it tightly around the elastic band to hide it, and secure the end with a single bobby pin pushed straight down into the base.
4. The Deep Side Part with Hollywood Waves
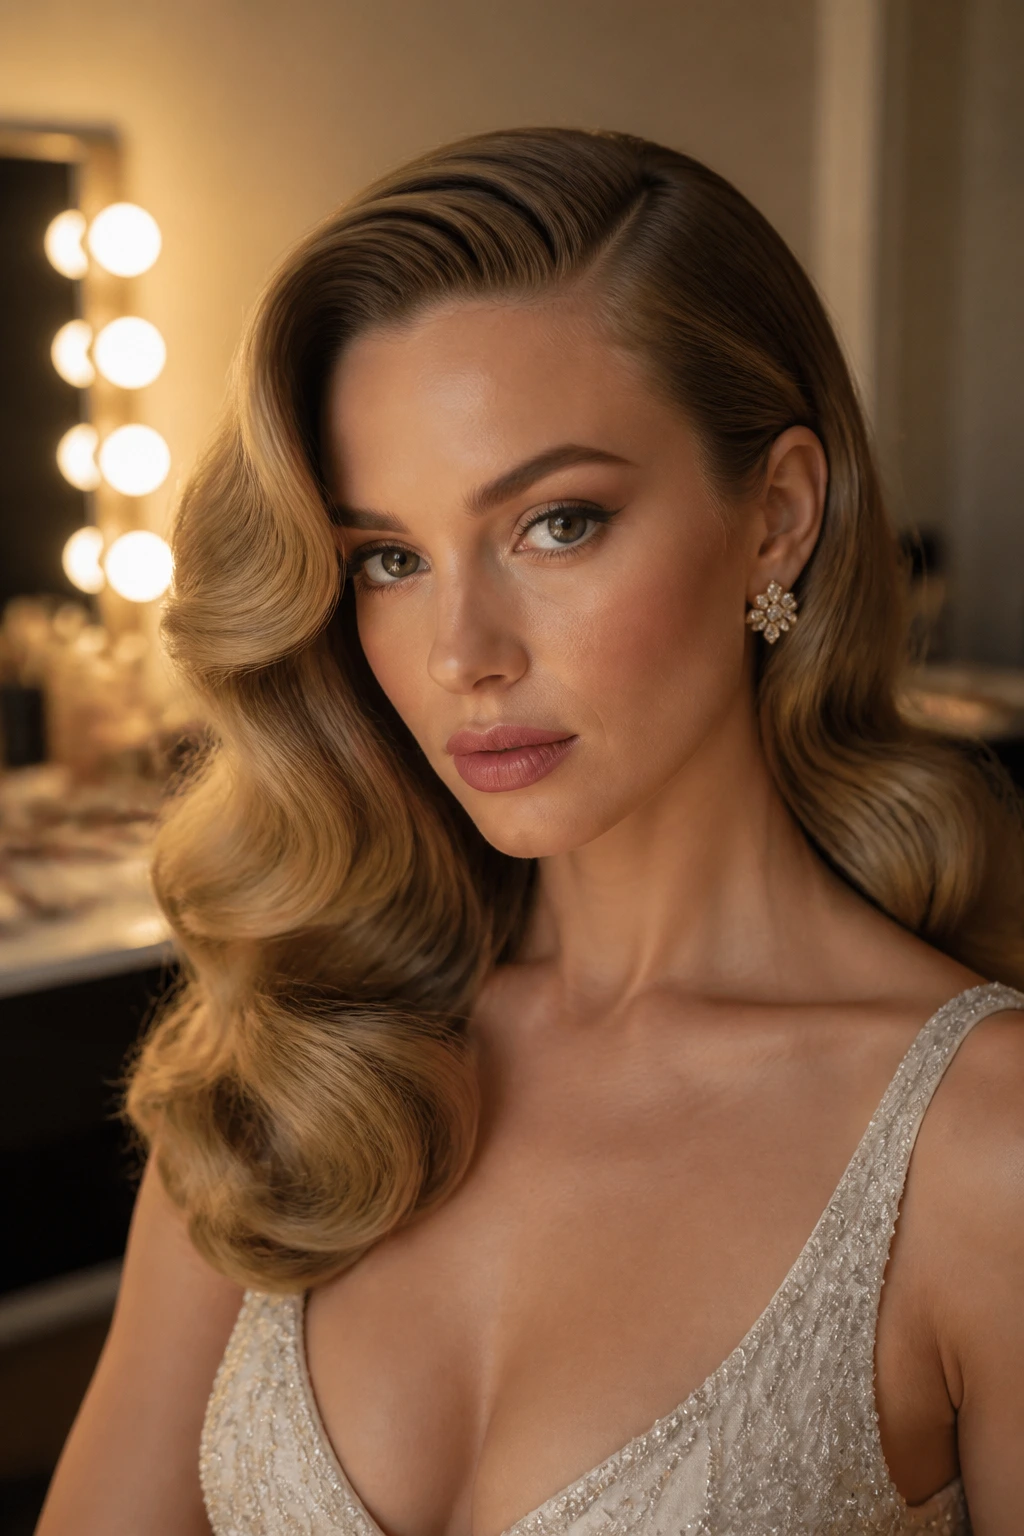
Picture the classic, sweeping waves that dominate every red carpet during awards season. Normally, this look requires hot rollers, sectioning clips, and hours of setting time. You can mimic this vintage glamour on a busy morning by focusing your efforts solely on the front panels of your hair, leaving the back natural or pinned flat.
Start by creating a deep side part that aligns perfectly with the highest arch of your eyebrow. This asymmetrical division immediately gives your hair a formal, structured look. Grab a one-inch curling wand and wrap only three or four large sections of hair on the heavier side of the part. Ensure you wind the hair flat around the barrel, curling toward your face to create that retro, inward-rolling curve.
Once the curled sections have cooled completely to the touch, use a wide-tooth comb to gently brush through them. Do not panic as the tight curls separate; they will naturally merge into a singular, continuous wave pattern. Tuck the lighter, uncurled side of your hair behind your ear, securing it tightly at the nape of your neck with two crossed bobby pins hidden beneath the rest of your hair.
5. The Half-Up Bardot Topknot
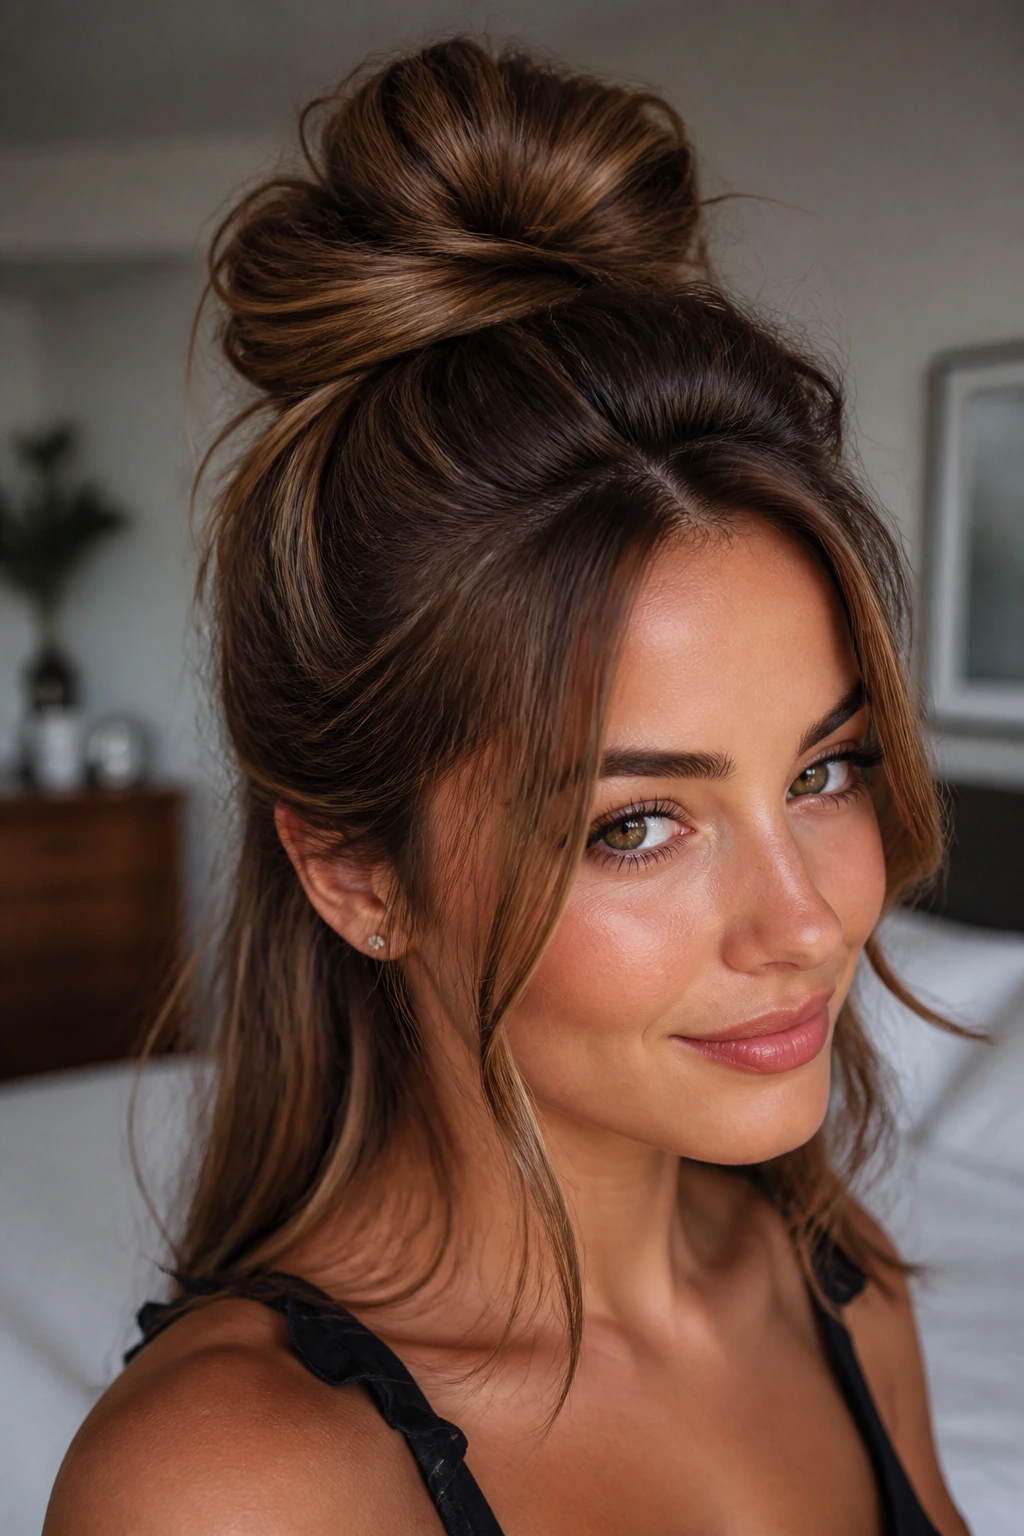
The iconic 1960s Brigitte Bardot aesthetic is characterized by incredible height at the crown, balanced by soft, flowing lengths below. It is a look that screams effortless luxury. When you want the polish of an updo but still want the comforting frame of wearing your hair down, this half-up topknot is your absolute best option.
To build the foundation of this style, separate your hair into two horizontal sections, using your ears as a dividing line. Take the top section and mist the roots with a dry texturizing spray to add volume and grit. Using a soft-bristle brush, gently backcomb the hair at the crown of your head, working in small, one-inch layers from the back toward the front. This creates a sturdy cushion of volume that will support the weight of your topknot.
Once you have achieved the desired height, gather the top section of hair into a loose ponytail at the upper back of your head. Twist the length of this ponytail around its own base to form a relaxed, circular bun. Instead of pulling it tight, let it sit loosely against the crown, securing it with a few open U-pins. Gently pull a few face-framing tendrils free around your temples to soften the overall look and complete the vintage vibe.
6. The Bubble Braided Low Tail
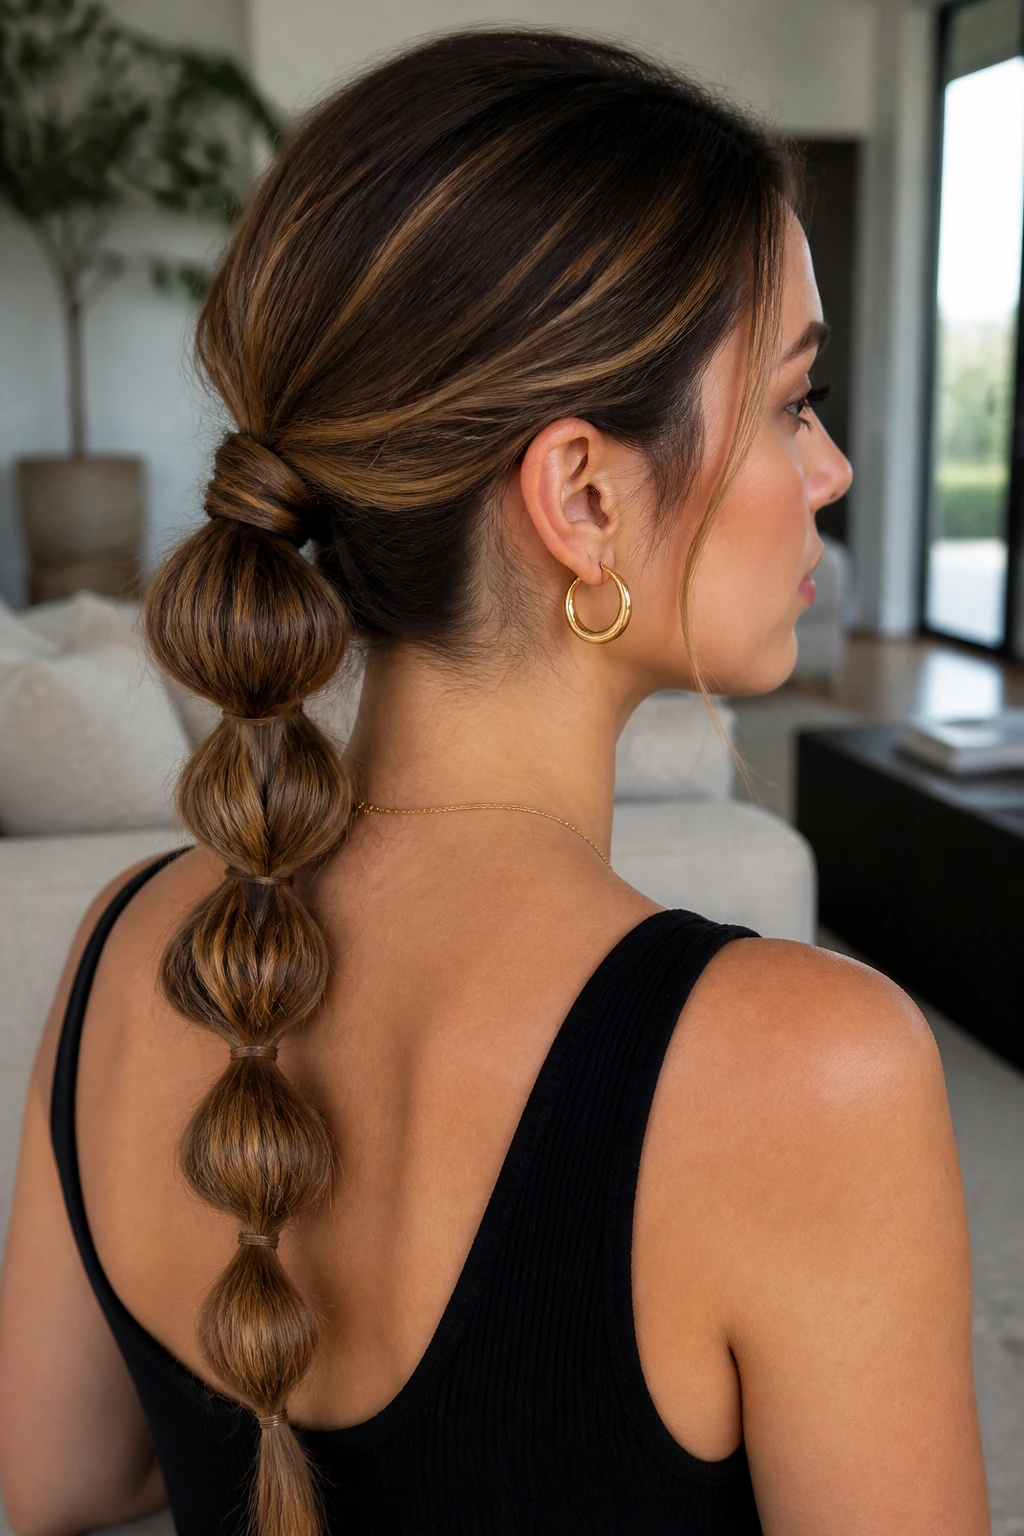
Unlike a traditional three-strand braid, which can sometimes look flat or juvenile, the bubble braid offers a bold, geometric texture that reads as incredibly intentional and modern. It is an exceptional way to manage long, thick hair on mornings when humidity is high and frizz is inevitable.
Who This Style Benefits Most
This technique is ideal for medium-to-long hair lengths. It provides absolute security against wind and weather, keeping your hair contained without sacrificing visual interest. It also requires zero braiding skills—if you can put on a hair tie, you can master this style.
Material Checklist
- Four to six clear elastic bands (or bands that match your hair color).
- A lightweight, aerosol shine spray.
- A tail comb for sectioning.
Section-by-Section Construction
- Pull all of your hair into a low, smooth ponytail at the nape of your neck and secure it with your first elastic band.
- Move down the ponytail about two to three inches, depending on your overall hair length, and place a second elastic band.
- Using your thumb and forefinger, gently pinch and pull the hair between the two elastics outward in all directions to create a rounded, bubble-like shape.
- Repeat this process down the length of the ponytail, maintaining even spacing between each band, until you reach the ends.
7. The Messy Tucked-In Faux Bob
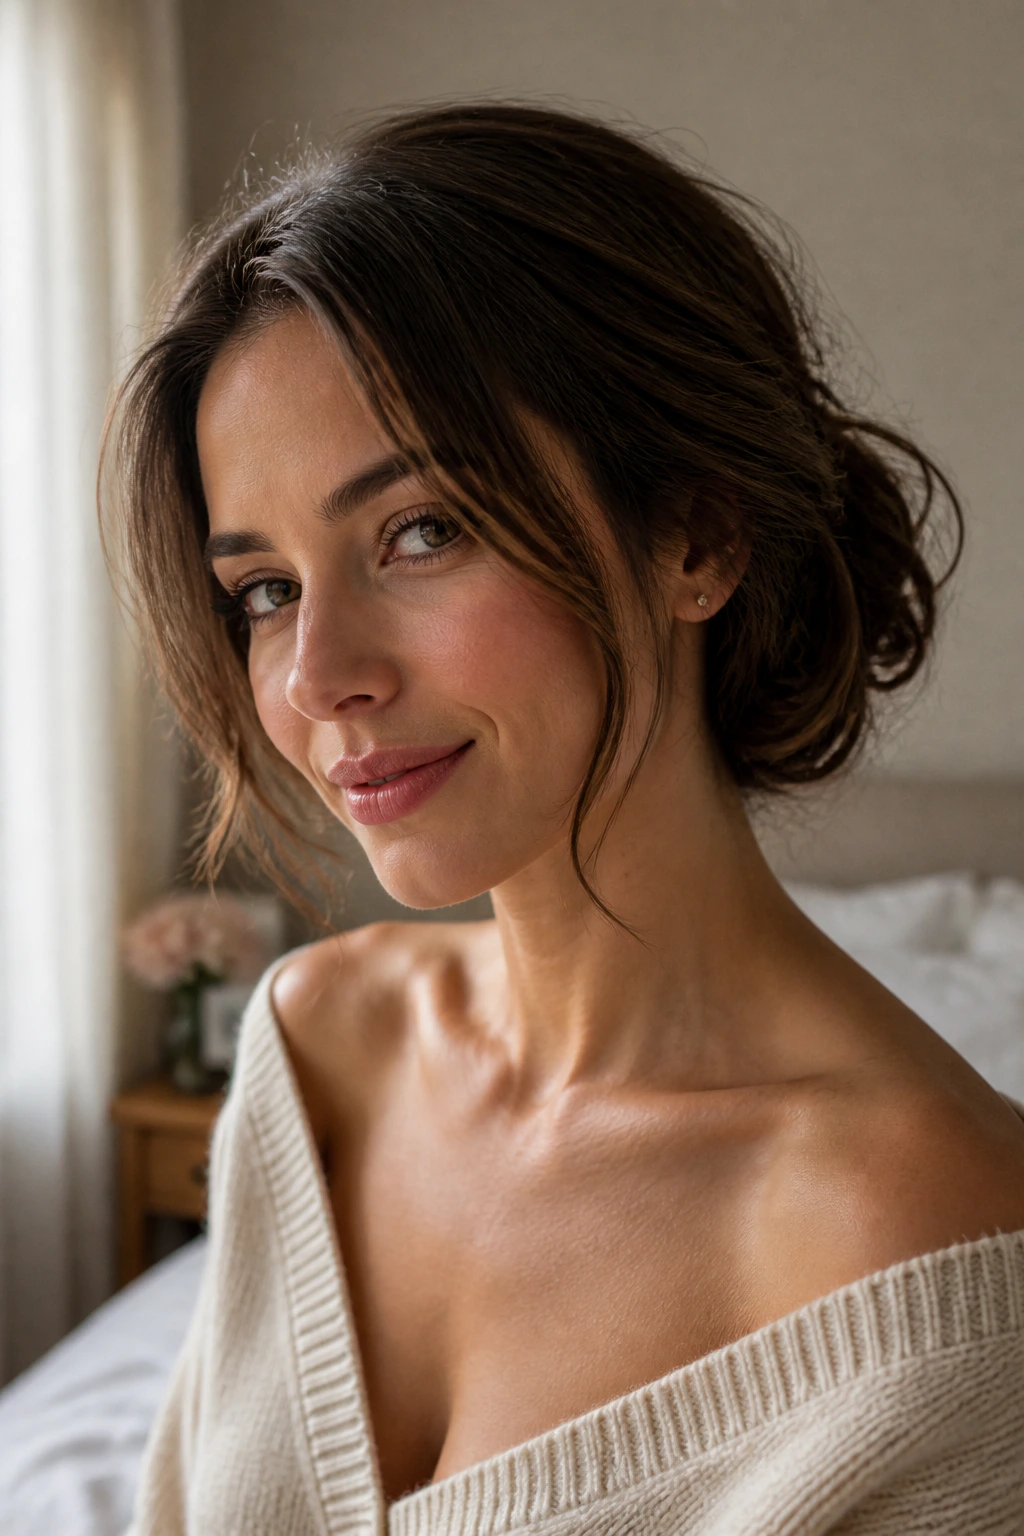
If you have medium-to-long hair but want to sport a short, voluminous vintage bob for the day, you do not need to reach for the shears. The faux bob is a legendary red carpet trick that allows you to hide your length while creating incredible body around your jawline.
The Under-Tuck Method
This look relies on creating a loose pocket of space at the back of your head where your longer lengths can be safely stored. It is comfortable, incredibly secure, and gives your hair the bouncy, rounded movement of a professional blowout.
Essential Tools
- One very loose, soft hair elastic.
- Several large, heavy-duty bobby pins.
- A flexible-hold finishing spray.
Step-by-Step Instructions
- Braid your hair into a very loose, low three-strand braid, starting at the nape of your neck, and secure the very tip with a small elastic.
- Lift the braid upward and tuck the entire length up and under itself, rolling it toward your neck.
- Secure the folded braid flat against your scalp at the base of your skull using heavy-duty bobby pins, pinning horizontally across the roll.
- Pull the remaining side sections of your hair down and around the tucked braid to hide your work, spraying lightly to set the shape.
8. The Rope-Twisted High Bun
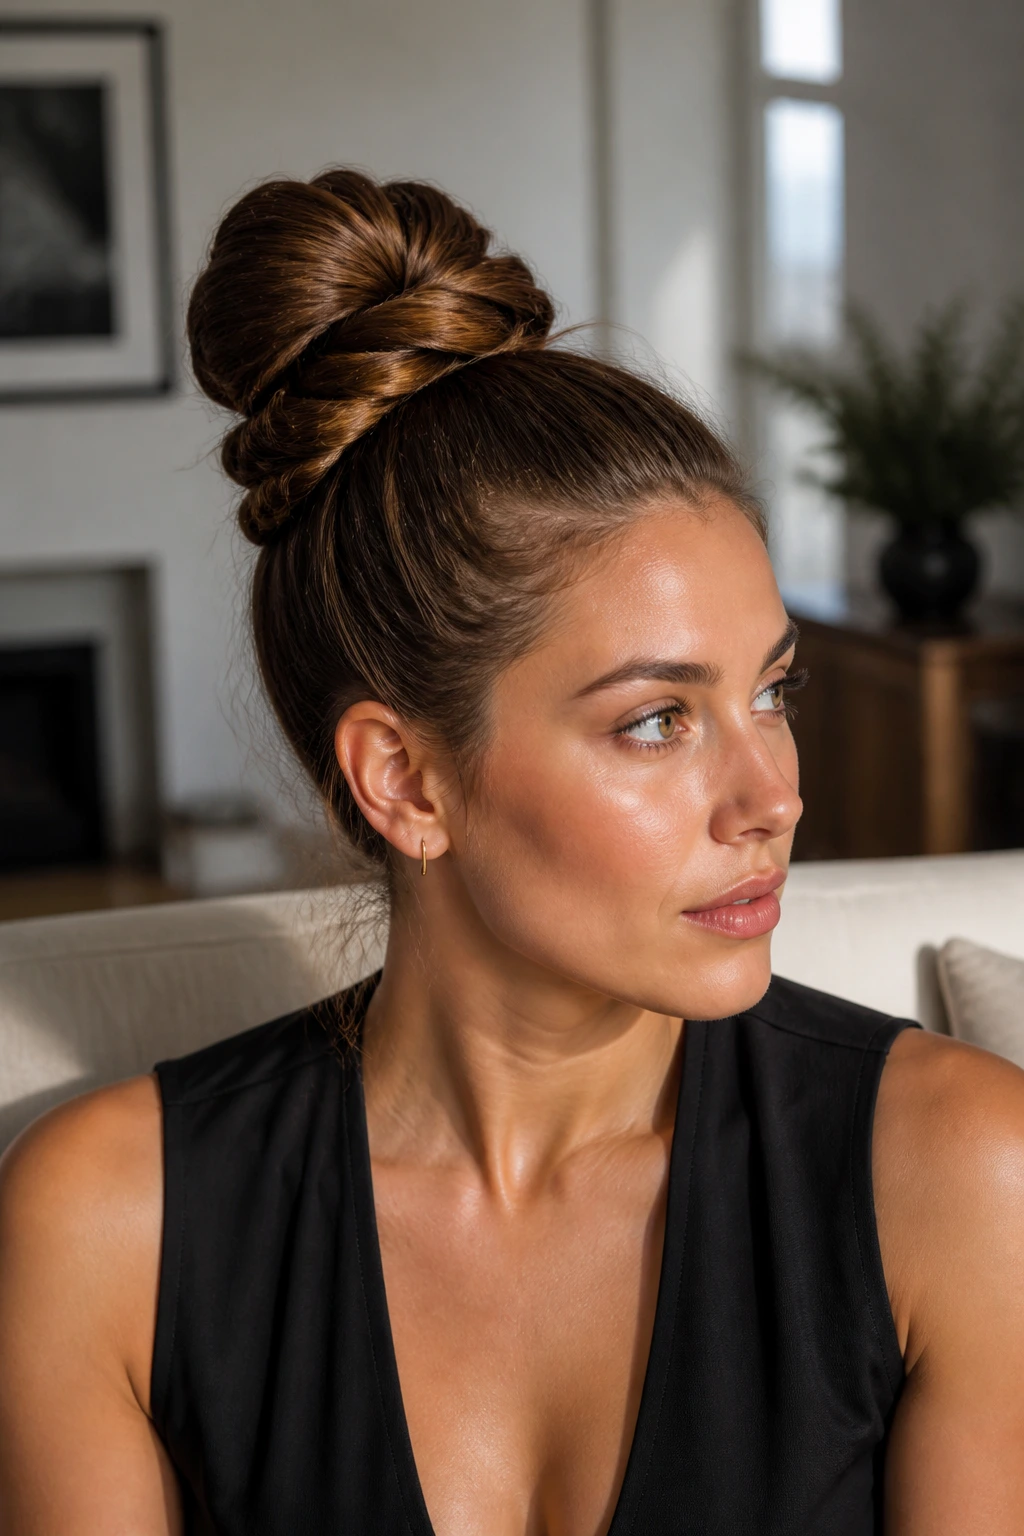
Standard topknots often look like an afterthought. However, by introducing a basic rope-twist technique, you elevate a simple bun into an architectural feature that looks like it took an hour to construct. This style is highly effective for keeping thick or curly hair completely secure during active, fast-paced days.
First, brush your hair into a high, secure ponytail at the crown of your head. Divide the ponytail into two equal sections. Twist each individual section tightly to the right, keeping the tension consistent from the base to the tips. Once both sections are twisted, wrap them around each other to the left, crossing them over and under in a classic rope pattern.
Securing the ends with a small elastic band, wrap this heavy rope of hair around the base of your ponytail. Because the hair is double-twisted, it will naturally form a high-definition, patterned bun that catches the light from every angle. Anchor the bun to your scalp with four large bobby pins placed at the north, south, east, and west positions around the base.
9. The Side-Swept Braided Crown
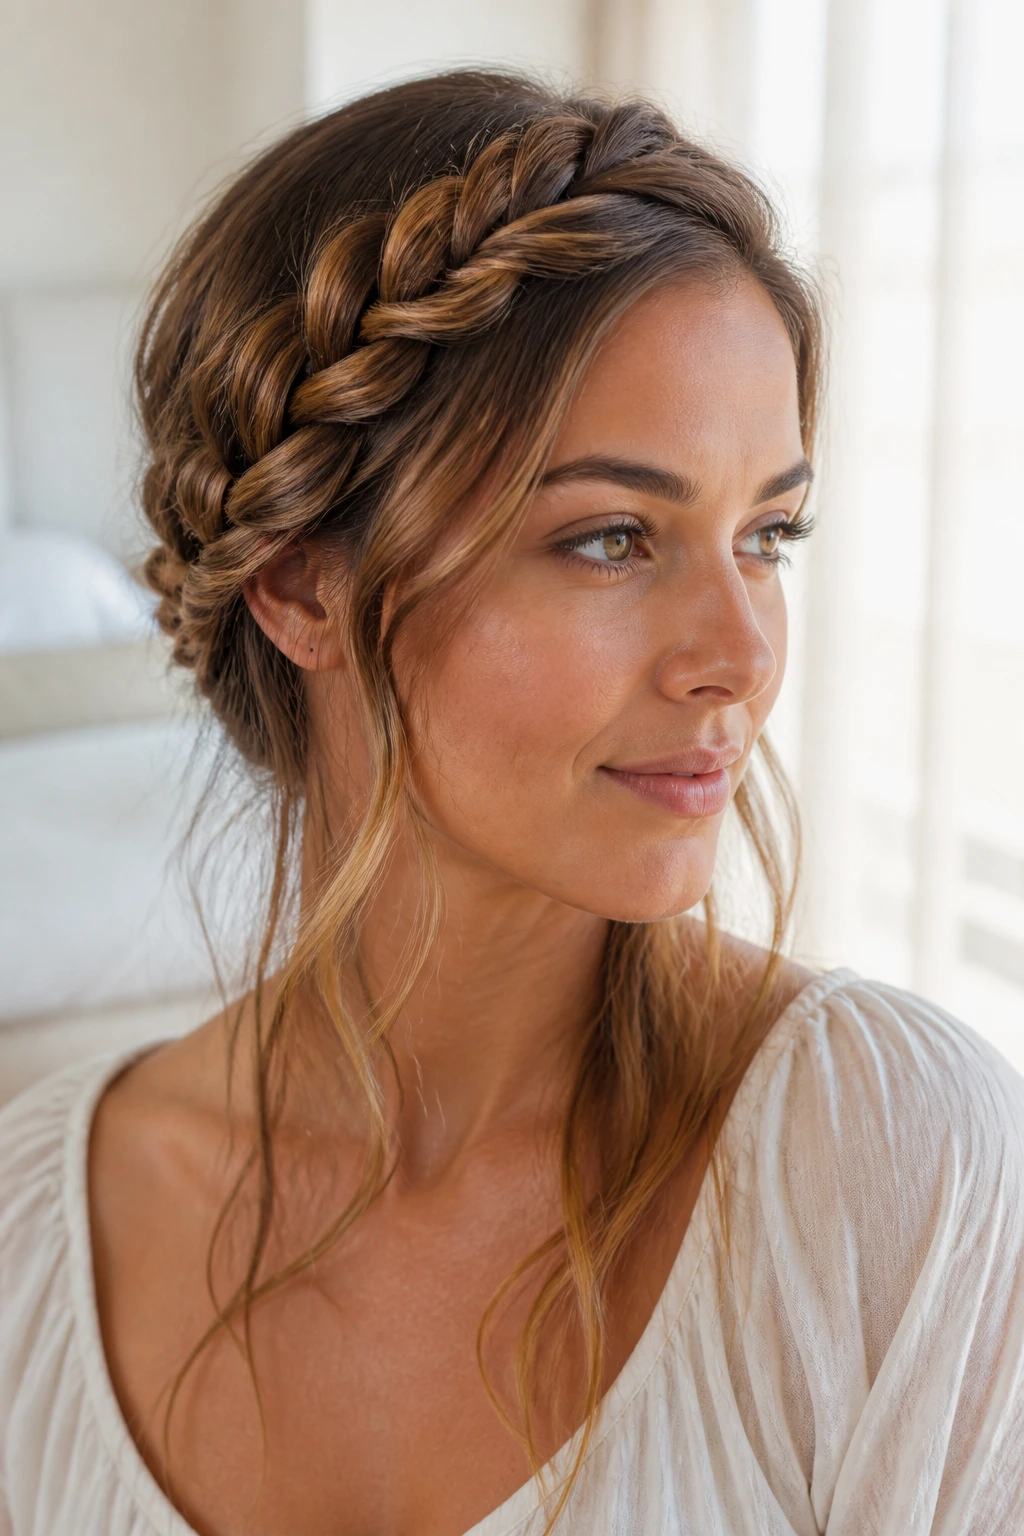
How do you get the romantic, bohemian glamour of a full milkmaid braid when you only have five minutes? You fake it by constructing a single braid from one side of your head and sweeping it across your hairline like a headband. This style is fantastic for keeping growing-out bangs or shorter layers elegantly pinned back.
The Crown Illusion
This approach is highly forgiving of uneven hair lengths. Because the braid is meant to look soft and organic, any small pieces that escape simply add to the romantic, lived-in texture of the finished look.
How to Style the Crown
- Create a deep side part and begin a basic three-strand braid on the heavier side of the part, starting right above your ear.
- Direct the braid upward and across your hairline as you weave, keeping it close to your face.
- Once you reach the opposite ear, secure the end of the braid with a clear elastic band.
- Pin the end of the braid flat behind your ear, hiding the elastic under a loose section of hair, and use your fingers to gently pancake the braid for extra thickness.
10. The Slicked-Back Wet Look
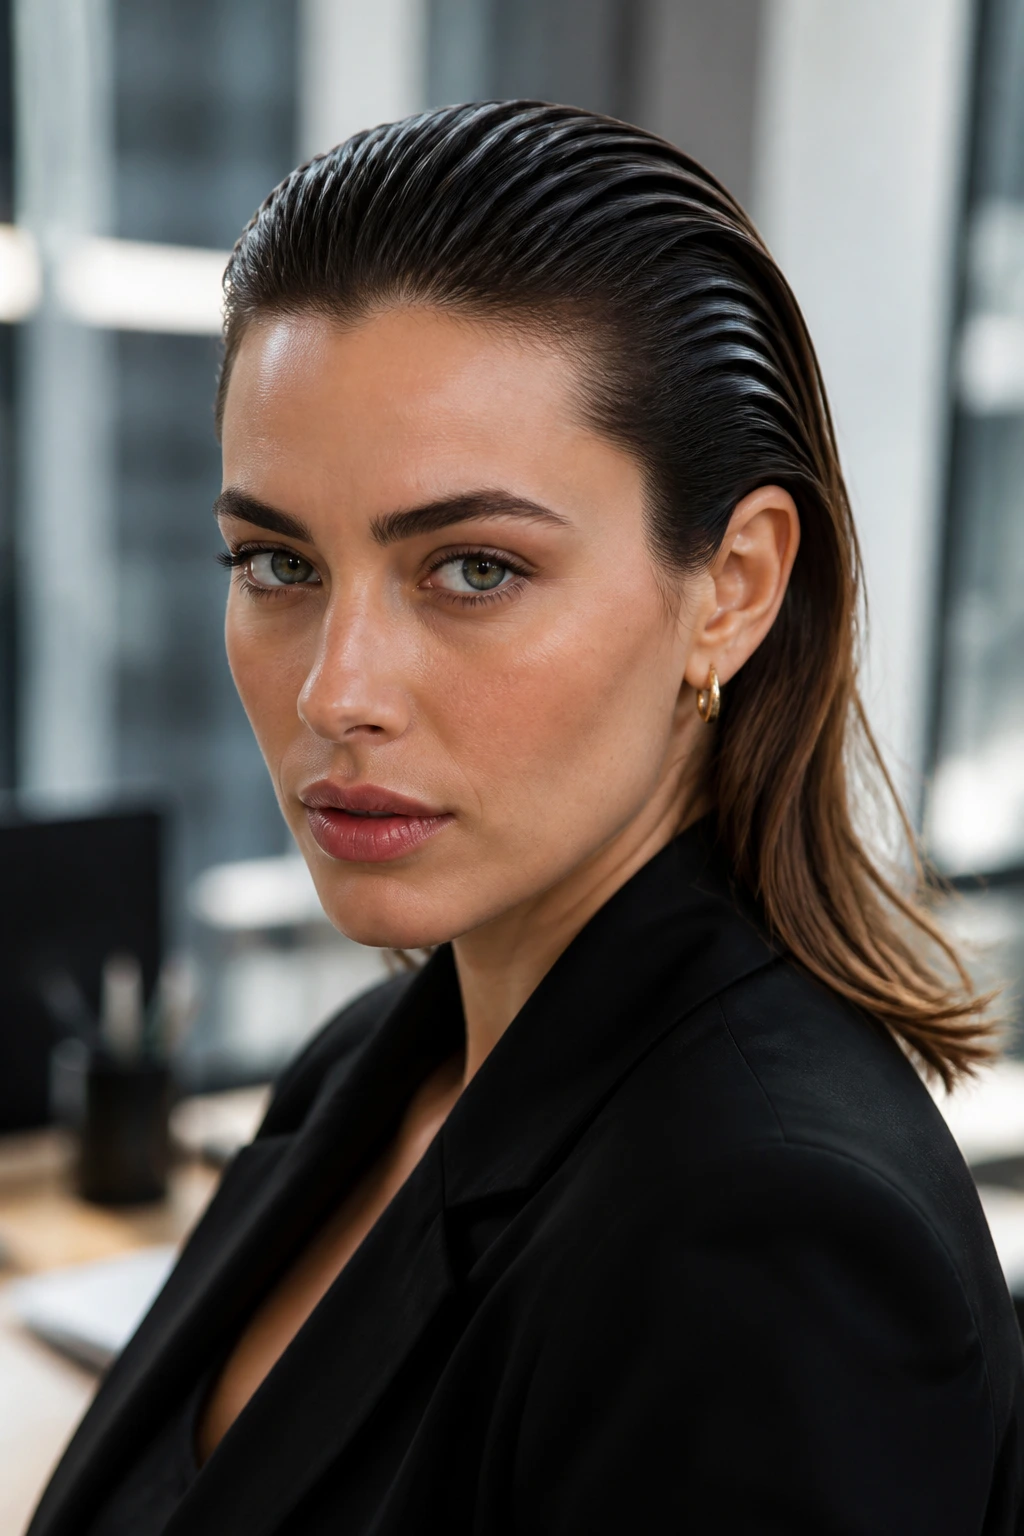
When you have missed your wash day by several days and have an important meeting, the slicked-back wet look is your ultimate secret weapon. It is a high-fashion, powerful silhouette that projects absolute confidence.
The mechanism of this style relies on strategic product distribution. You do not want your entire head to look wet or greasy; the goal is high gloss at the roots transitioning into touchably dry, natural lengths at the back. Start by misting your hairline and crown with water to dampen the roots.
Take a generous scoop of a firm-hold, water-soluble pomade and work it through your hands. Smooth your palms directly over the top and sides of your head, directing all of your hair straight back from your forehead. Use a fine-tooth comb to distribute the product from your hairline to just behind your ears, leaving the back of your hair untouched. The contrast between the sleek, reflective front and the dry, textured back creates an instantly polished, modern editorial finish.
11. The Wrapped Ballerina Bun
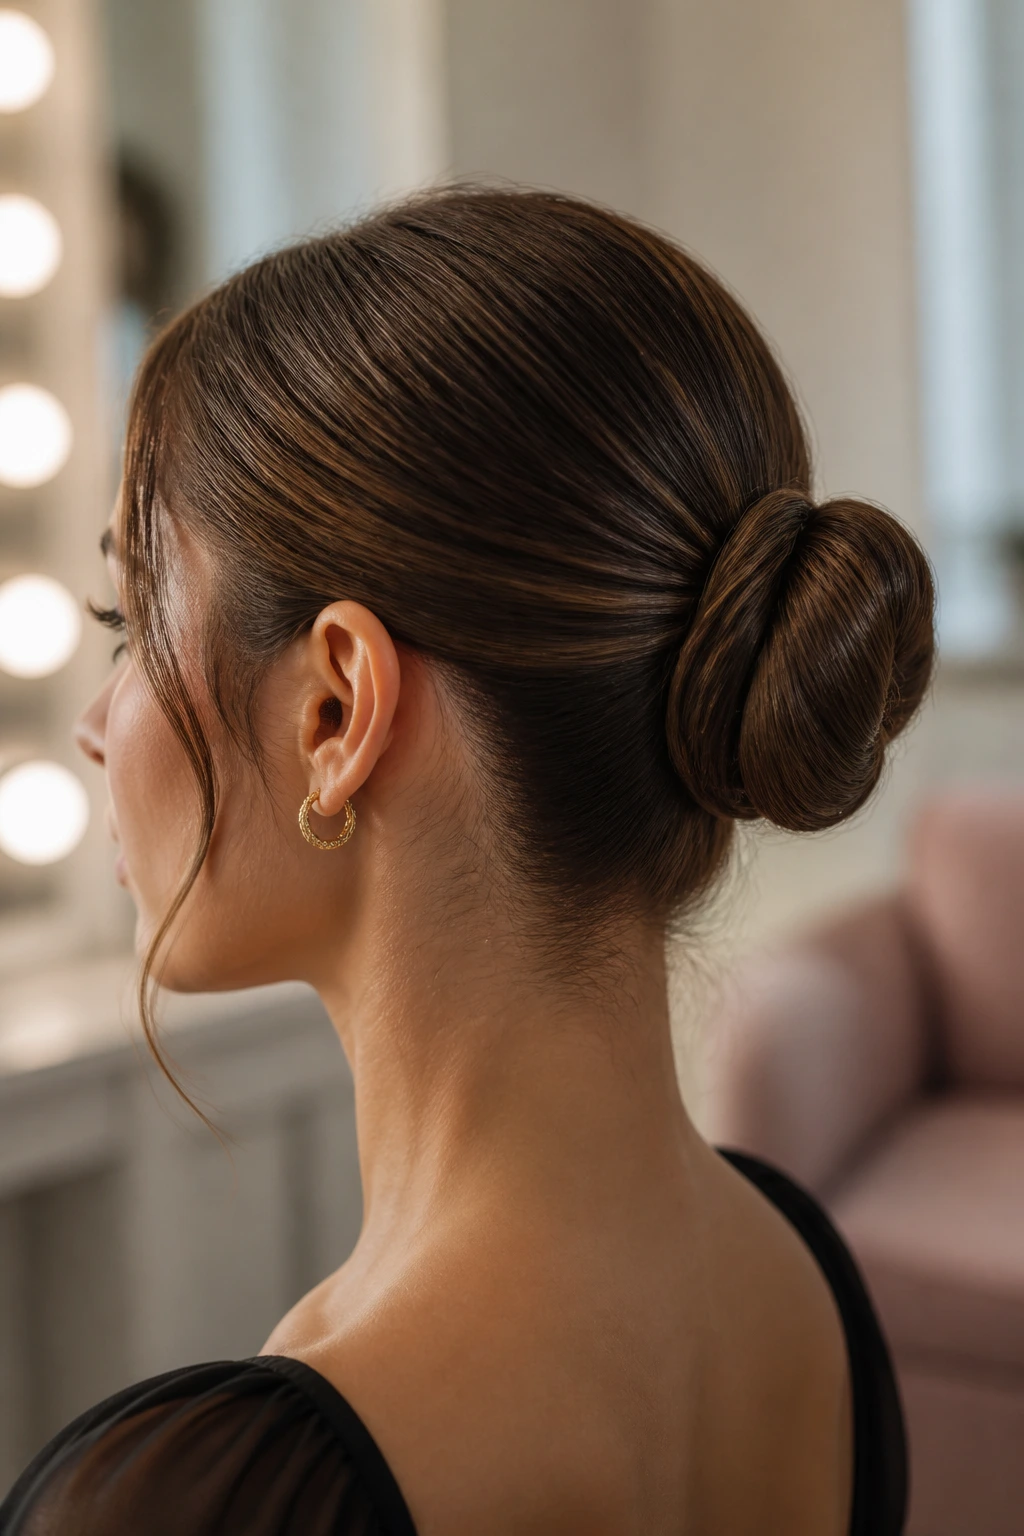
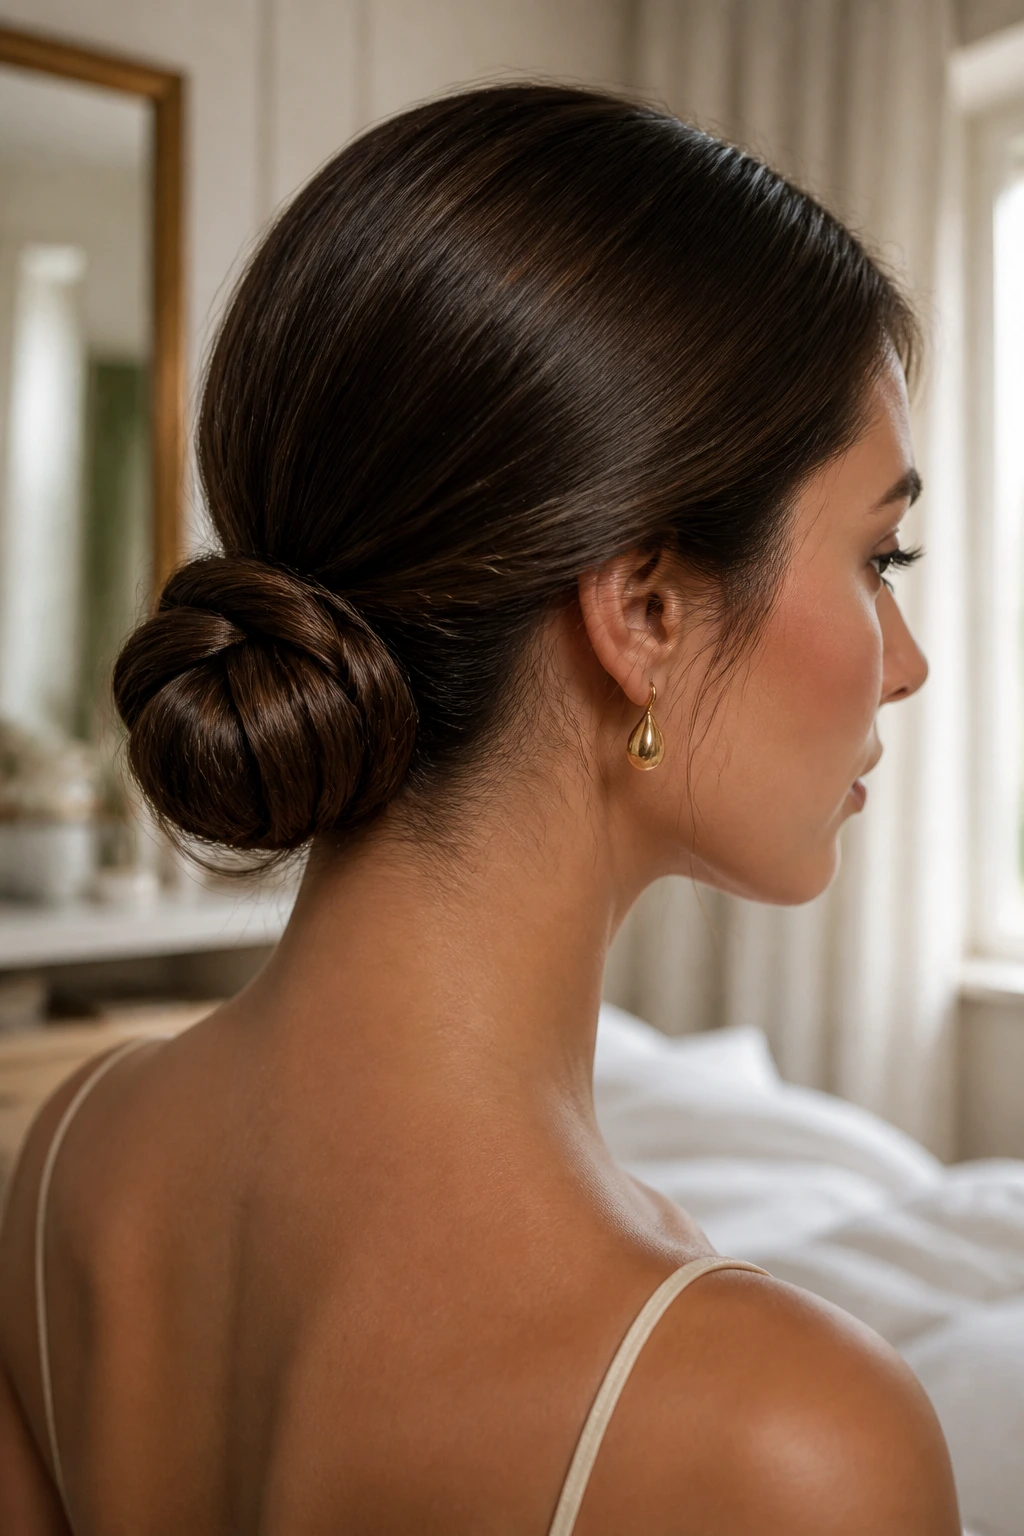
Timeless, minimalist, and universally flattering, the ballerina bun is the epitome of clean design. By placing this bun directly in the center of the back of your head—not too high, not too low—you create a balanced, elegant line that beautifully frames your neck and shoulders.
To achieve this look with clean, modern execution, start by pulling your hair into a ponytail right at the midway point of your skull, aligned with the tops of your ears. As you secure the hair, leave out a single half-inch section from the bottom of the ponytail. Wrap the main body of the ponytail tightly around its base, keeping it flat and circular, and secure it with a few basic pins.
Now, take that single strand of hair you left out and wrap it around the base of the bun, completely covering the elastic band and any visible bobby pins. This simple step hides the mechanics of the hairstyle, giving it an incredibly expensive, seamless appearance. Pin the tail of the wrapping strand underneath the bun to keep it completely hidden from view.
12. The Triple Twisted Ponytail
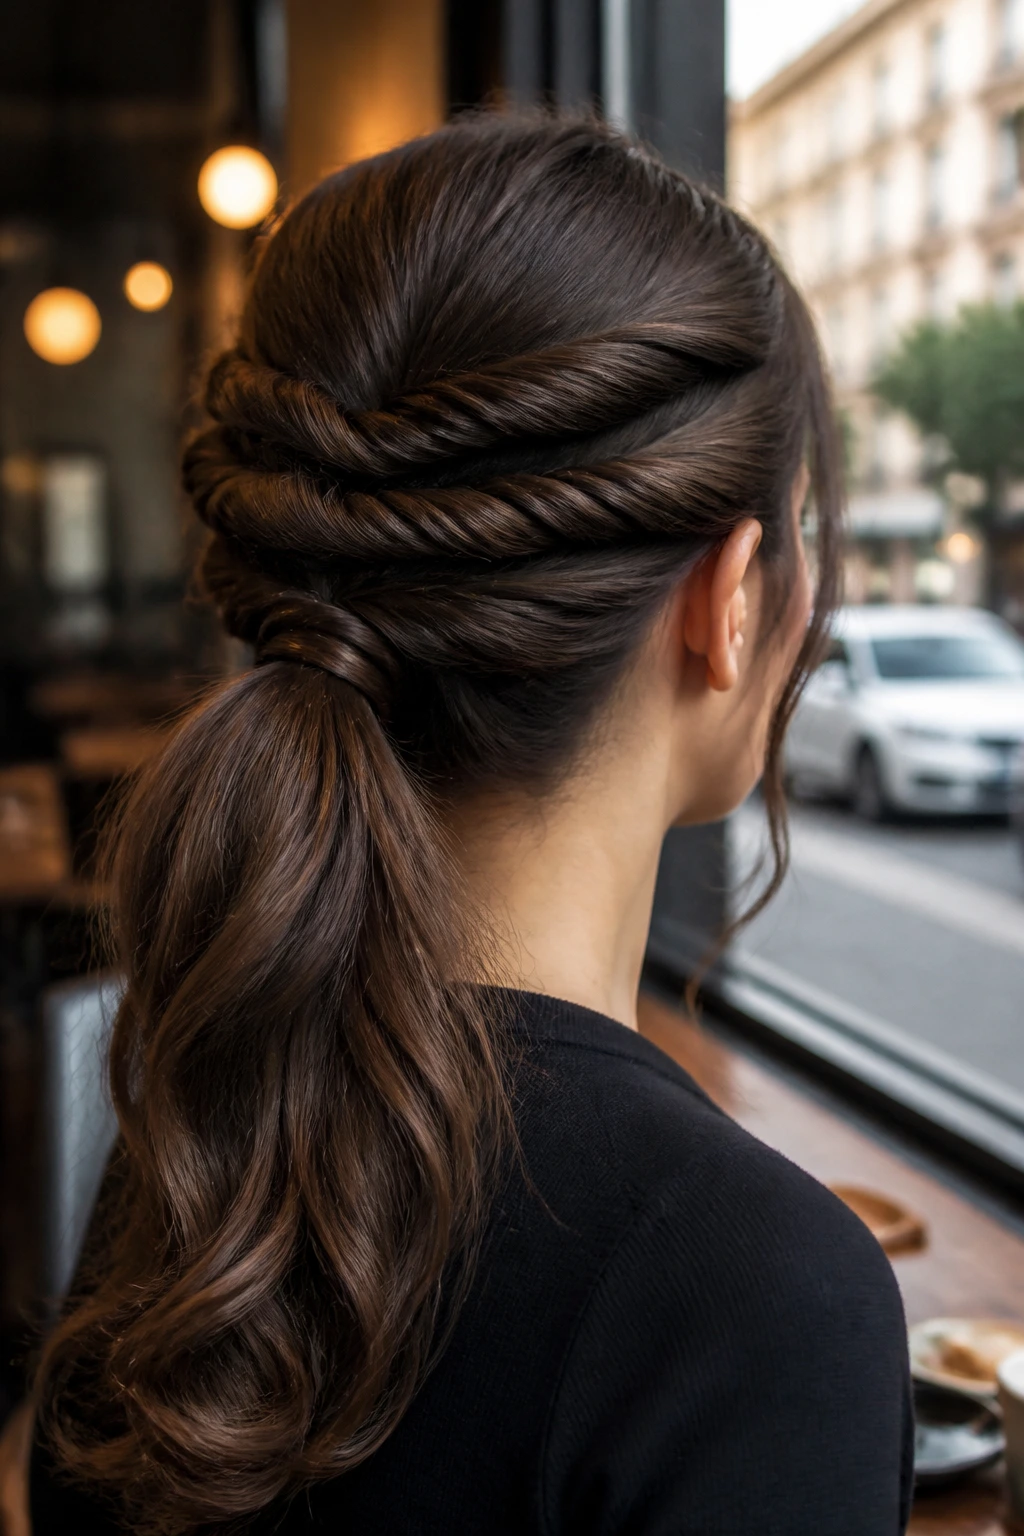
Unlike a standard ponytail that simply hangs flat down your back, this styled variation divides your hair into three horizontal tiers. Each tier is twisted and fed into the next, creating a beautiful, cascading spine of hair that looks complex but is remarkably easy to assemble.
Why It Excels for Heavy Hair
By dividing your hair into three smaller sections, you distribute the weight across your scalp. This prevents the sagging and scalp pain that often come with wearing a heavy ponytail all day long.
The Tiered Setup
- Divide your hair horizontally into three equal sections: top, middle, and bottom.
- Secure the top section into a ponytail at your crown with a clear elastic, then flip the ponytail up and through the space above the band to create a simple twist.
- Gather the tail of that first twist along with the middle section of hair, secure them together with another elastic, and repeat the flip-and-twist process.
- Combine the remaining tail with the bottom section at the nape of your neck, secure with a final elastic, and twist one last time.
13. The Retro Volumized Headband Look
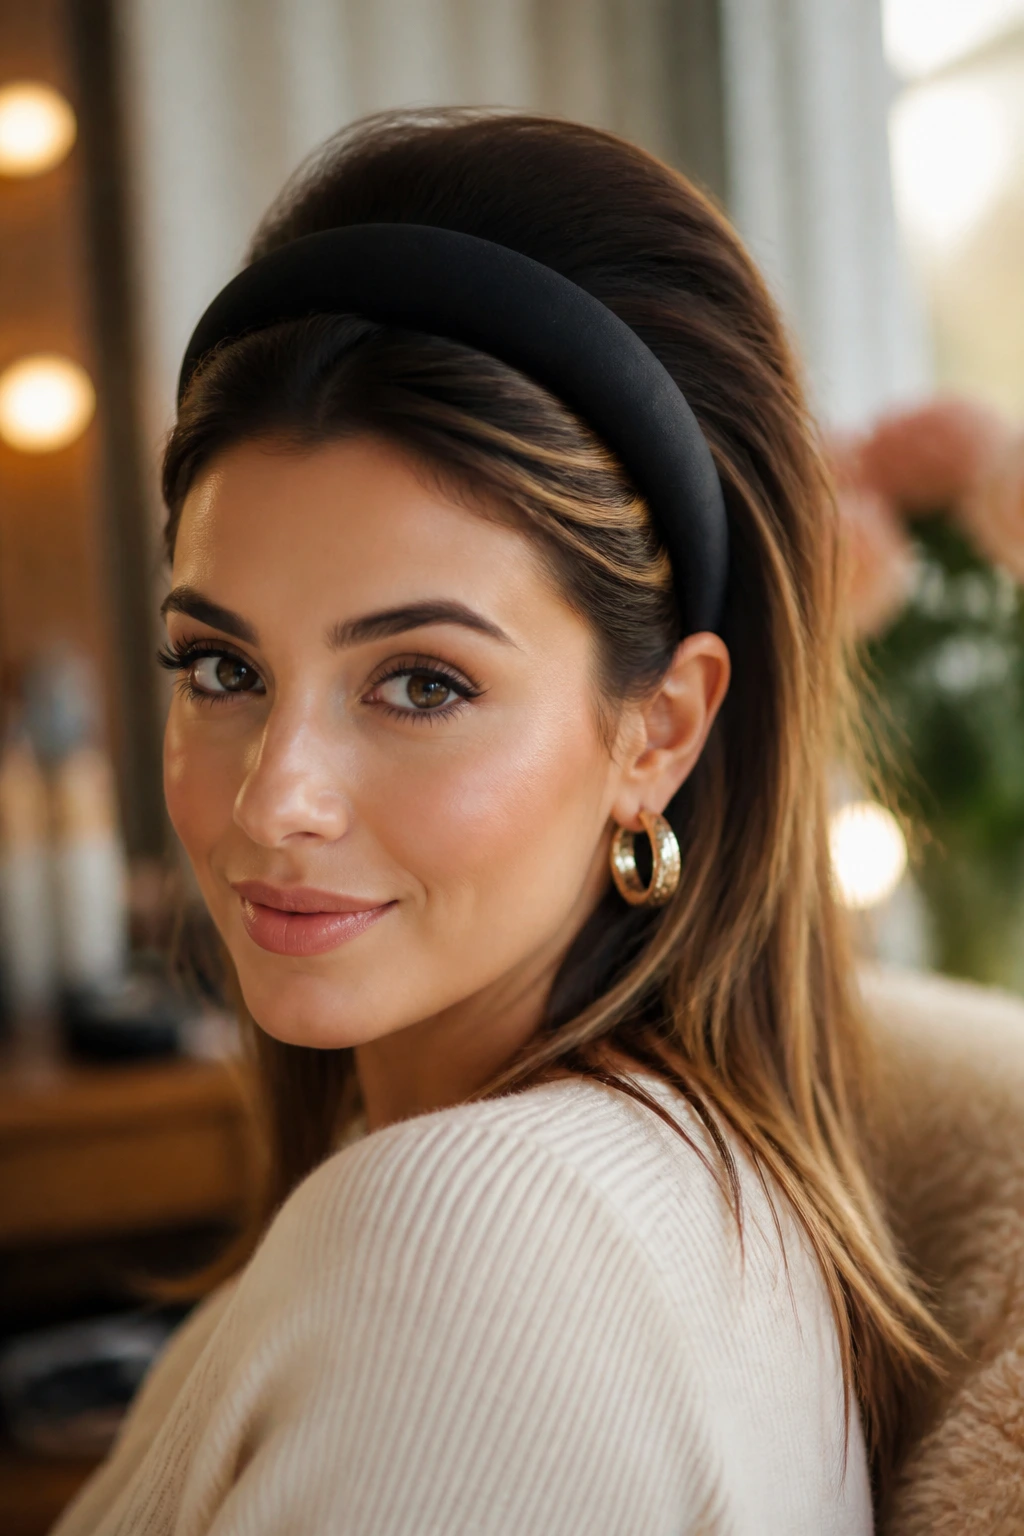
A thick, padded headband is the ultimate modern shortcut to instant, red-carpet-worthy polish. It hides messy roots, controls unruly flyaways, and adds a structured pop of texture to any outfit with virtually zero styling effort required on your part.
The Crown Lift Technique
To prevent a headband from making your hair look flat and pinned-down, you must build a small cushion of volume directly behind the band. This creates a classic, vintage silhouette that feels incredibly chic.
Styling Sequence
- Take a two-inch section of hair directly behind your hairline and lift it straight up toward the ceiling.
- Lightly mist the back of this section with a flexible-hold hairspray and gently backcomb the roots three times.
- Lay the hair back down and use a soft brush to smooth the very top layer so no tangles are visible.
- Place your padded headband about two inches back from your hairline, pushing it slightly forward once it is on your head to accentuate the volume.
14. The Scarf-Interwoven Low Braid
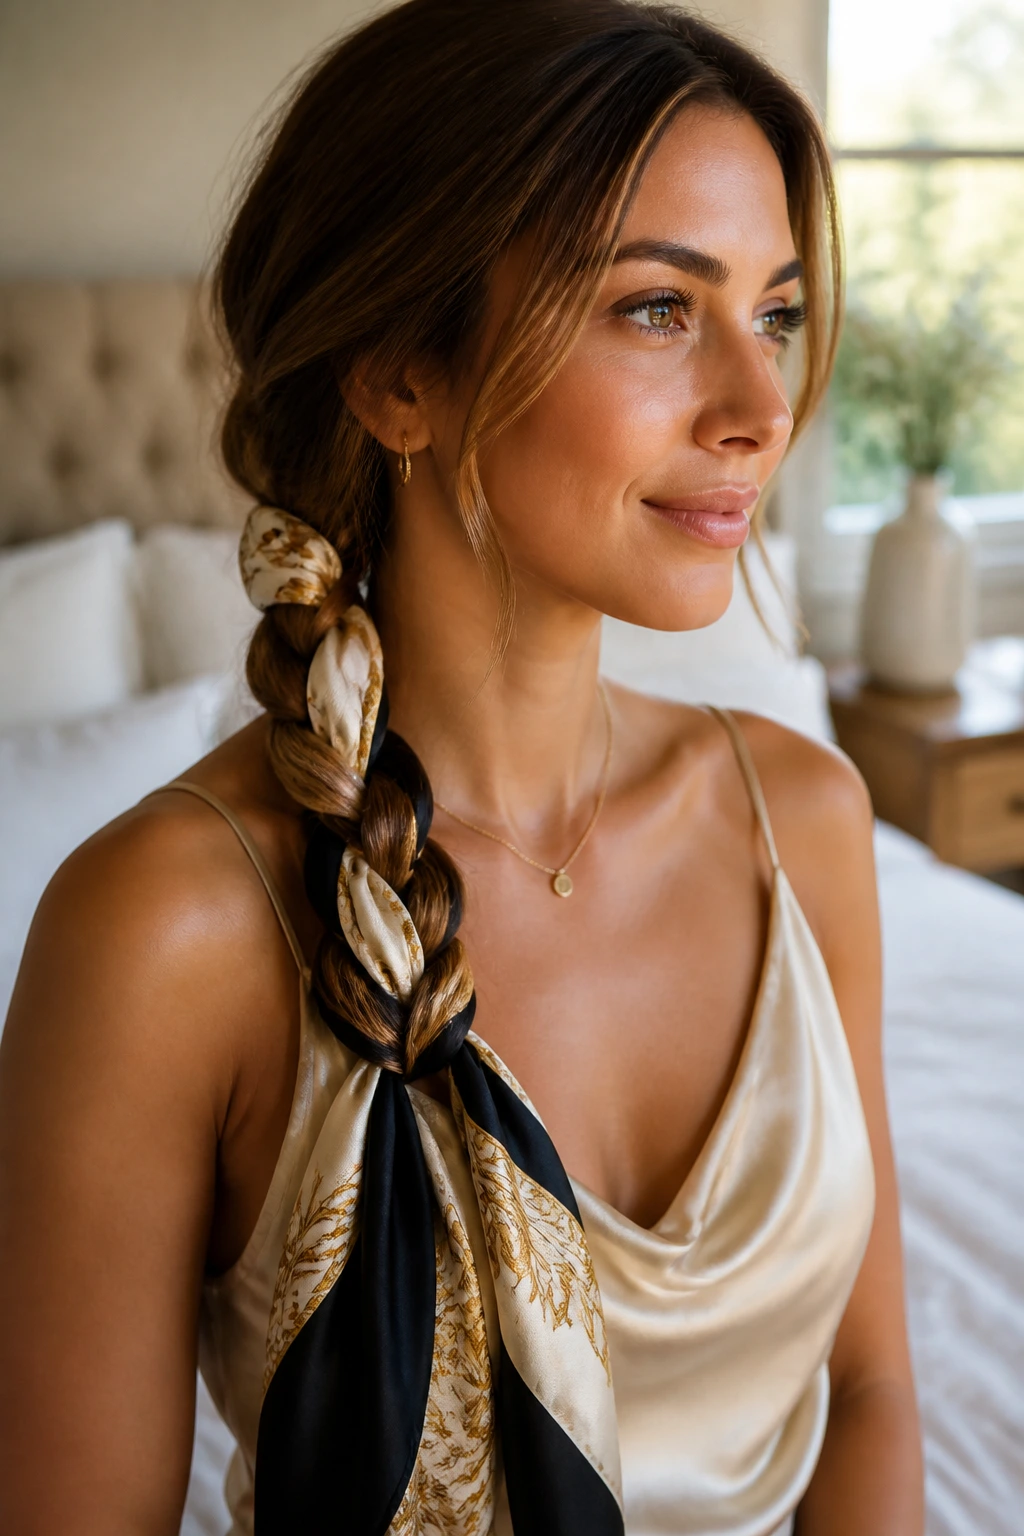
A simple three-strand braid becomes an absolute fashion statement the moment you introduce silk into the weave. This look is perfect for mornings when your hair lacks body or shine, as the colorful fabric adds instant visual weight and a luxurious, playful texture.
Select a long, narrow silk or satin scarf that complements your outfit. Gather your hair into a low ponytail at the nape of your neck and tie the scarf securely around the elastic band once, ensuring both ends of the scarf hang down at equal lengths.
Now, divide your ponytail into three sections as you normally would for a standard braid, but group one end of the silk scarf with the left strand of hair, and the other end of the scarf with the right strand of hair. Braid your hair normally, treating the silk-wrapped strands as single units. Once you reach the ends, secure the braid with a clear elastic and let the remaining silk fabric hang loose.
15. The Knotted Half-Up Crown
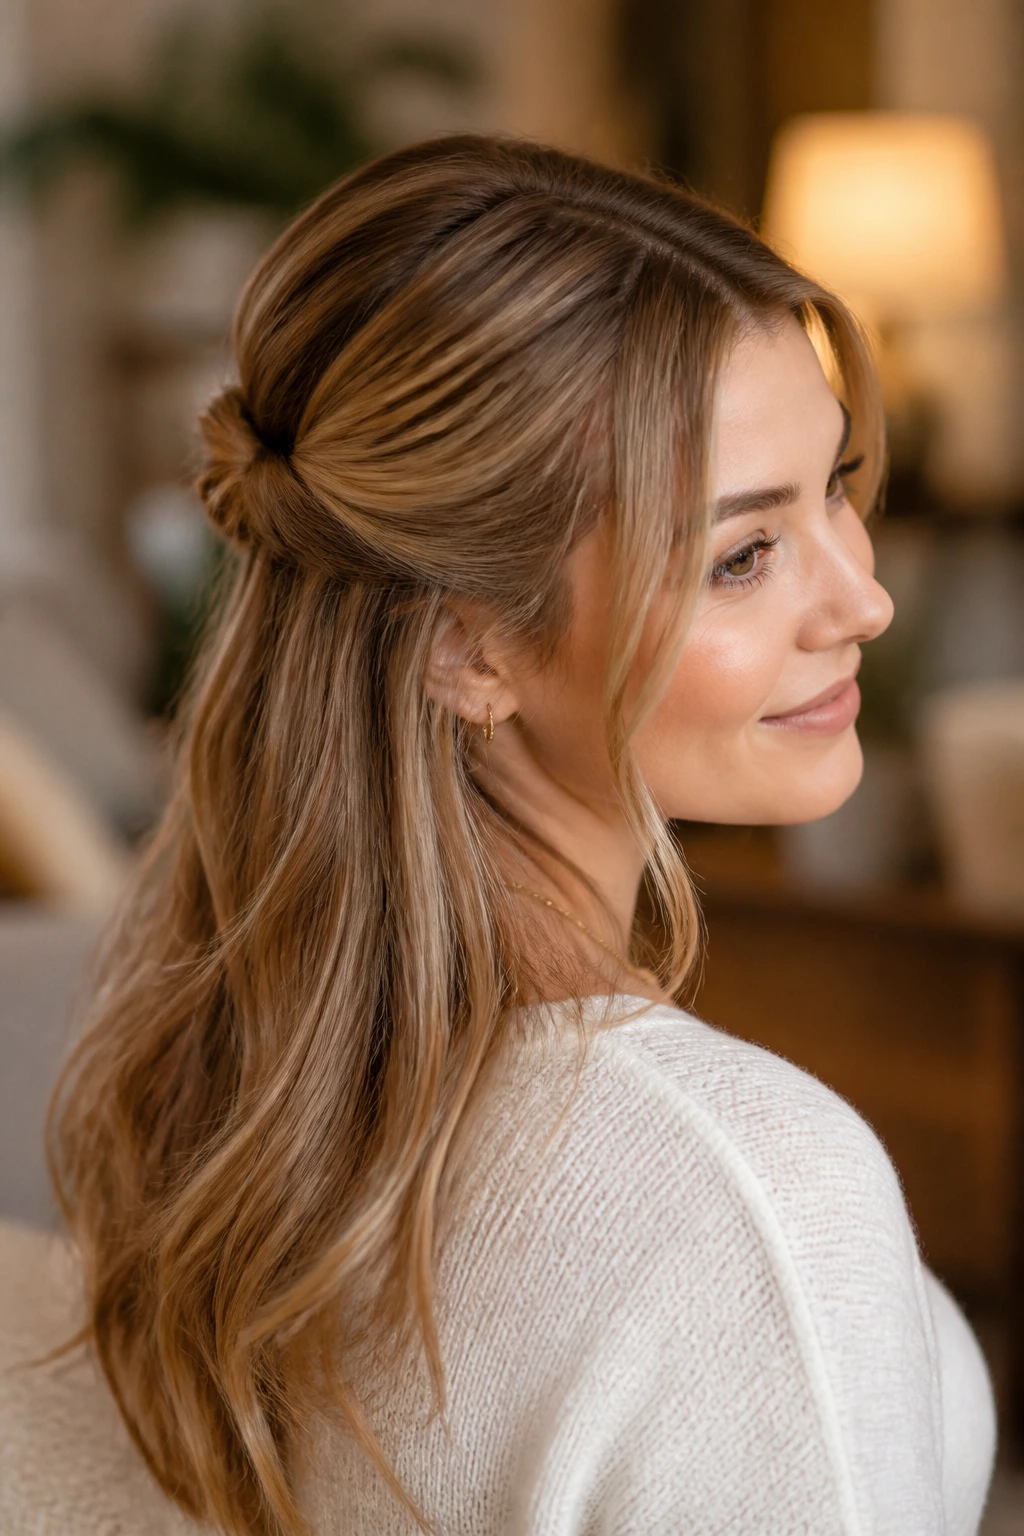
What happens when you treat your hair like ribbon instead of thread? By taking two small sections of hair from your temples and literally tying them in a simple, flat knot at the back of your head, you get a clean, modern half-up look that bypasses the need for metal clips or rubber bands.
To execute this style, ensure your hair has some texture—either natural waves or a light dusting of dry shampoo to prevent slipping. Take a one-inch strand of hair from above your left ear and a matching strand from above your right ear. Bring both strands to the center-back of your head.
Cross the right strand over the left, tuck it under, and pull it through to create a basic single knot, just like you are tying a pair of shoelaces. Keep the tension firm but comfortable against your skull. To secure the knot without ruining the flat, elegant shape, slide a single bobby pin vertically down through the center of the knot, catching both the hair of the knot and the hair flat against your scalp.
16. The Sleek Center-Parted Low Pony
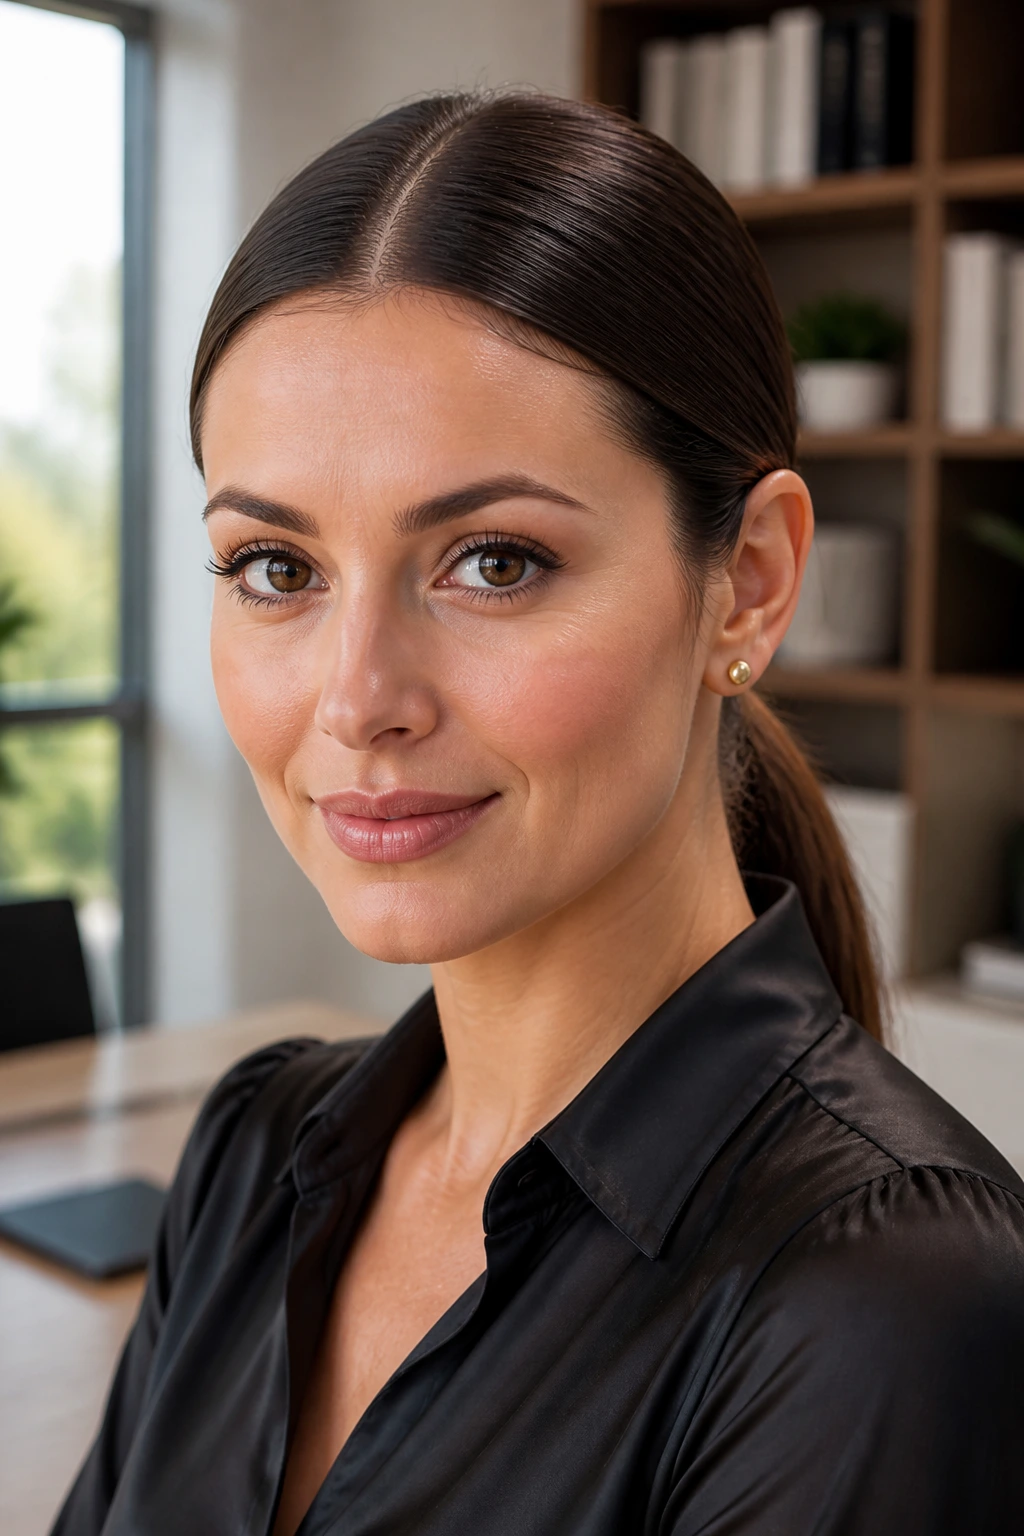
For high-pressure mornings when you need to look calm, collected, and incredibly sharp, this minimalist executive style is your best choice. The absolute symmetry of a perfect center part combined with a low, controlled ponytail communicates immense authority and attention to detail.
Parting Precision
The success of this style depends entirely on how straight your parting is. A crooked line will make the look feel rushed, while a perfect line elevates the entire silhouette.
Step-by-Step Execution
- Place the tip of your comb directly between your eyebrows and draw it straight back through your hairline to find your perfect center.
- Apply a small amount of styling wax along the part to lay down any stubborn baby hairs.
- Brush your hair down and back, keeping the sides flat and tight against your temples.
- Secure the hair at the nape of your neck with a high-tension band, ensuring there are no lumps or bumps along the skull.
17. The Tousled Pixie Sweep
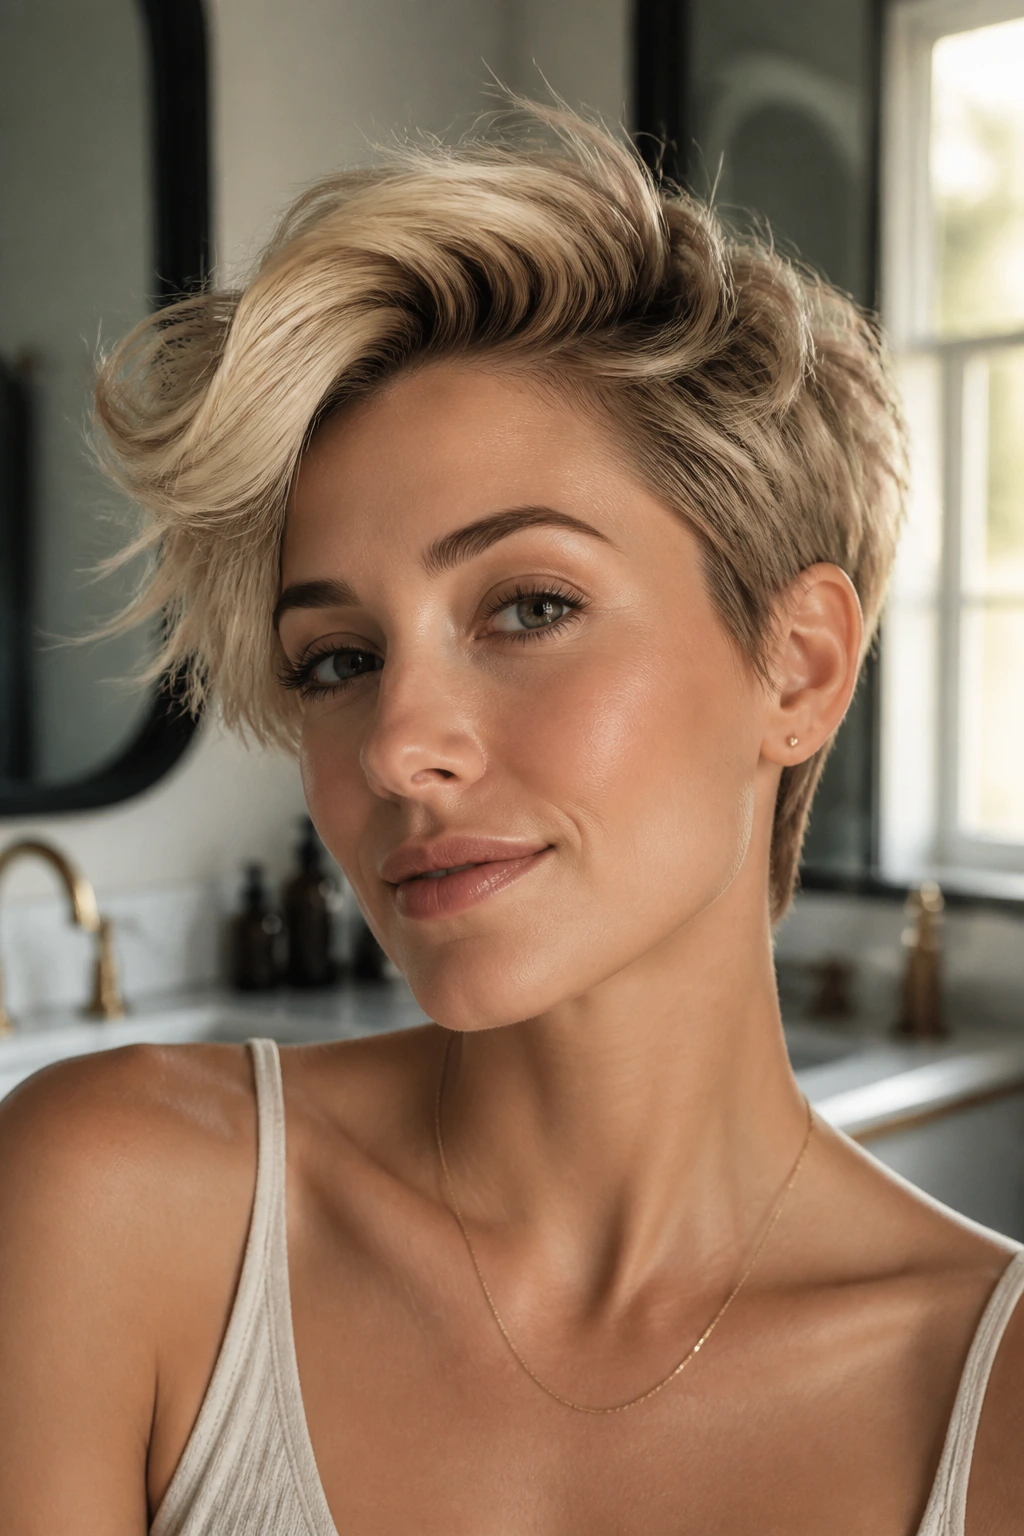
Short haircuts are incredibly chic, but they can easily fall victim to bedhead on busy mornings. You can transform a messy crop into a red-carpet-ready sweep using a styling wax and a blow dryer to direct the texture.
Texture and Direction
Short hair needs movement to look its best. By directing the hair upward and slightly to one side, you create a flattering, asymmetrical frame for your eyes and cheekbones.
Recommended Products
- A matte-finish styling clay or pomade.
- A hair dryer with a concentrator nozzle.
Styling Steps
- Rub a pea-sized amount of styling clay between your fingertips until it is completely warm and translucent.
- Work your fingers through your hair from the roots to the tips, lifting the hair up and away from your forehead.
- Use your hair dryer on medium heat to blast the roots in the direction you want the hair to lay, locking the volume in place.
- Pinch the ends of your hair with your fingertips to create defined, piecey texture that looks deliberate and modern.
18. The Pin-Curled Side Sweep
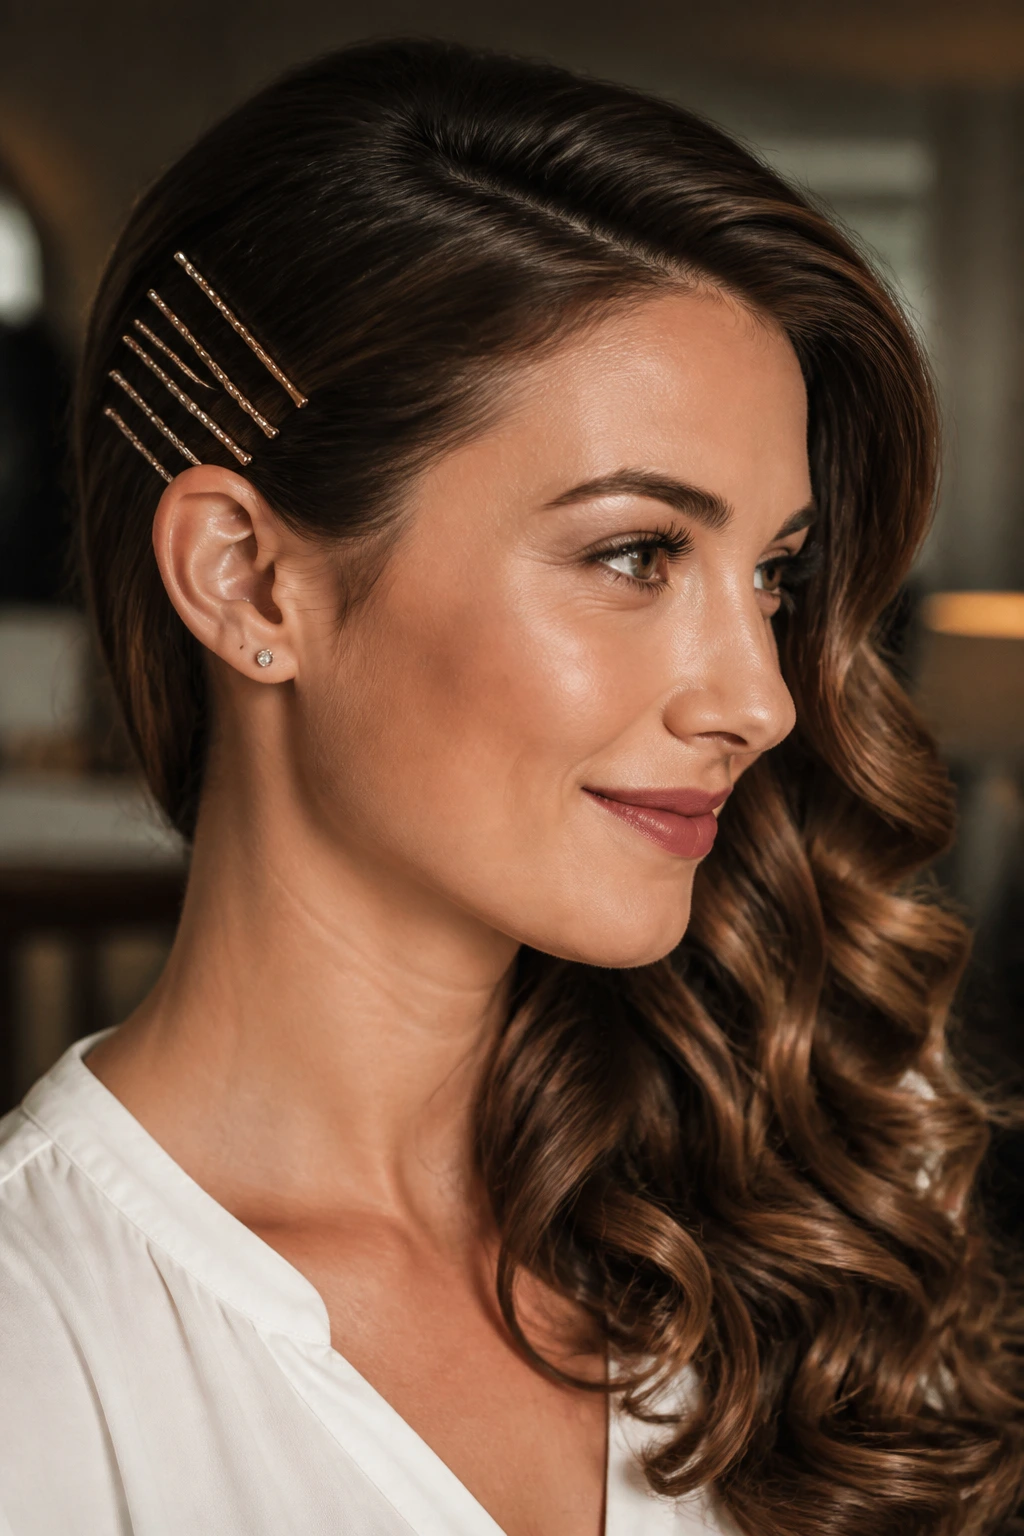
If you love the look of classic curls but do not have the time to curl your entire head, this style concentrates all the detail on a single, high-impact focal point. It is an incredibly clever way to look fully styled in under three minutes.
Brush all of your hair over to one preferred side of your face, letting it drape over your shoulder. To keep the hair locked in this dramatic side-sweep, you will create a graphic, visible pinning detail on the opposite side of your head.
Take a series of decorative, metallic bobby pins—gold, silver, or bronze work beautifully—and slide them into your hair horizontally behind your ear. Arrange the pins in a tight, parallel row of four or five, or cross them over each other to form a series of “X” shapes. This not only keeps your hair securely swept to one side all day long but also acts as a stunning, custom-made hair accessory that catches the light whenever you turn your head.
Wrapping Up
Looking incredibly polished does not require hours in front of a mirror or a cabinet overflowing with expensive styling products. The primary difference between a chaotic morning hair day and a red-carpet-inspired look lies entirely in your approach to structure, clean lines, and light reflection.
By working with your hair’s natural oils rather than fighting them, and using simple structural tricks like rope twists, strategic bobby pin placement, and high-tension elastics, you can build hairstyles that command respect and look beautiful. These eighteen styles are designed to be quick, dependable, and highly adaptable to whatever your day has in store.
The next time you find yourself with only five minutes to spare, bypass the temptation of the messy loop bun. Grab your brush, find a clean parting line, and step out the door with a style that carries the effortless glamour of a red carpet step-and-repeat.
