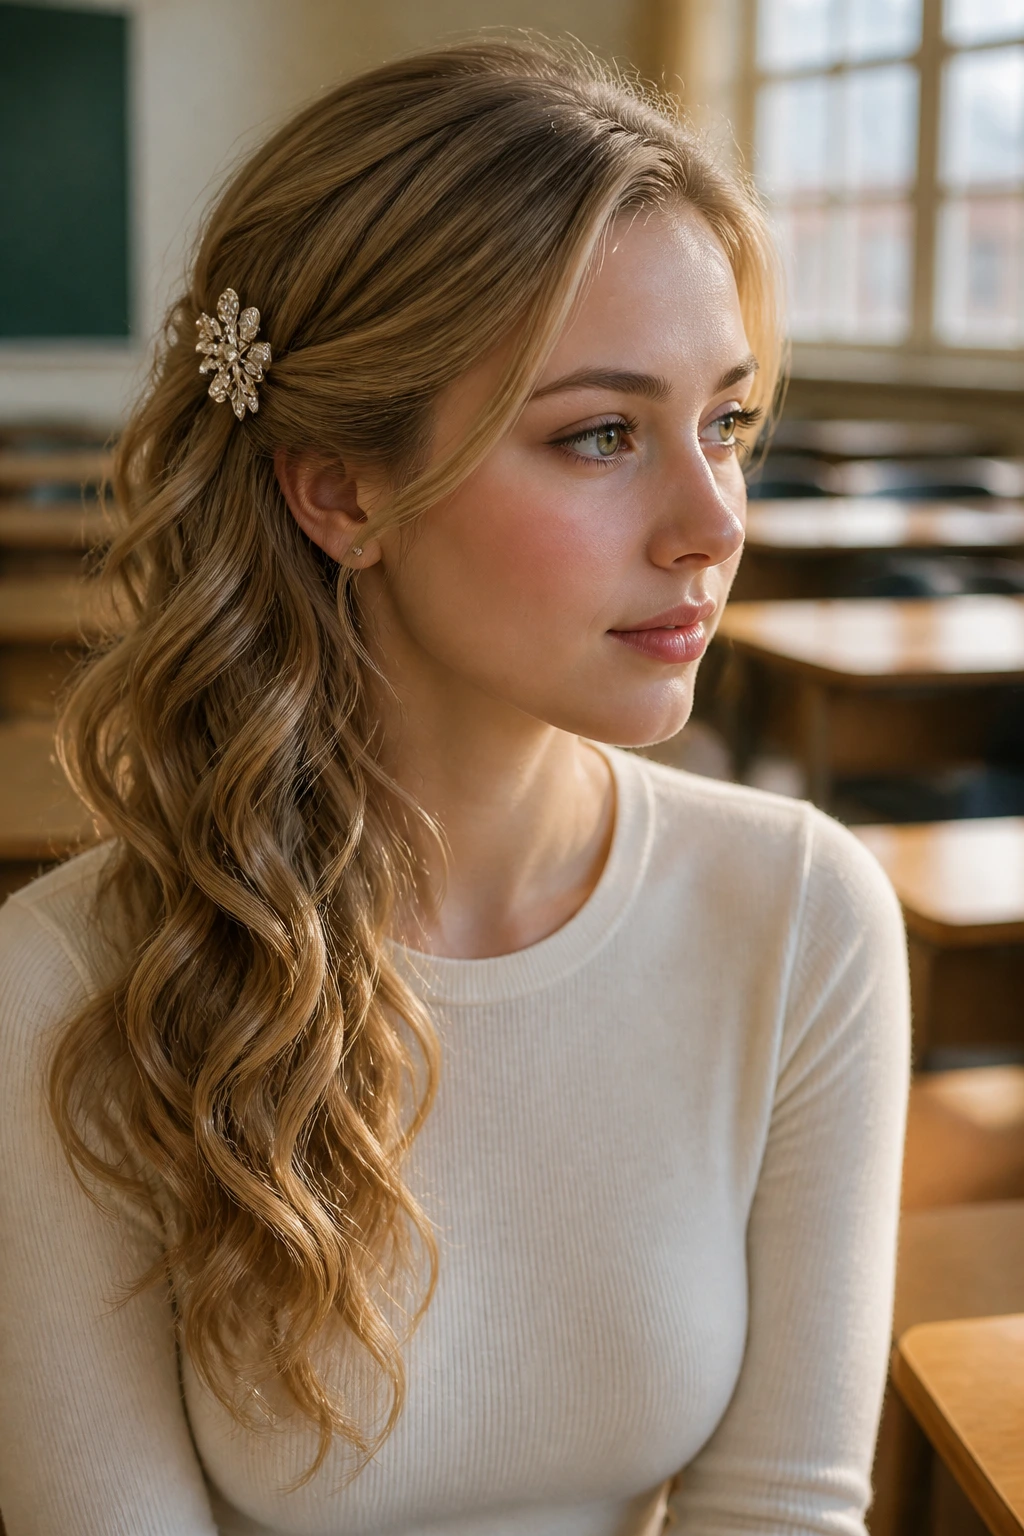
Early mornings before the first bell often feel like a race against time, and finding the right hairstyle can easily become the last thing you want to deal with. If you are anything like I was, you probably want something that strikes that perfect balance—styles that look like you actually tried, but don’t require a degree in cosmetology to pull off. Think of the “cafe latte” aesthetic as the hair version of your favorite morning drink: warm, creamy, layered, and undeniably comforting. It is about soft colors, gentle textures, and those effortless waves that seem to hold their own even when you are rushing to get through the door.
Achieving this look is less about salon-grade perfection and more about mastering the art of the intentional mess. You need a mix of soft hold, a bit of texture, and accessories that bridge the gap between polished and casual. Whether your hair is stick-straight, tightly coiled, or somewhere in the middle, these looks are designed to keep you comfortable through long lectures, library study sessions, and the inevitable dash between buildings. Let’s look at twenty ways to bring that warm, latte-inspired vibe to your morning routine.
1. The Loose Espresso Braid
This style is all about creating a relaxed, cascading effect that starts at the temple and travels down one side. You want to avoid the tight, military-grade plait that pulls at your hairline; instead, focus on braiding loosely and tugging at the loops once you have secured the end with a small, clear elastic. It works exceptionally well on hair with natural highlights, as the weaving motion helps the different tones blend together, mimicking the swirls of a well-poured latte.
Why It Works for Busy Mornings
It keeps hair away from your face without the tension of a high ponytail. Since the braid is loose, it hides second-day texture perfectly, and if you sleep on it, you might even wake up with some bonus waves for the next day.
Quick Prep Notes
- Apply a tiny bit of texturizing spray before you start.
- Secure with a snag-free elastic that matches your hair color.
- Use a light-hold dry shampoo if your roots look a little oily.
Pro tip: If you find the braid slipping, spritz a little hairspray onto your fingertips before grabbing the sections; it gives you the grip you need without hardening the entire look.
2. Toasted Almond Half-Up Knot
There is something incredibly refined about a top knot that doesn’t take itself too seriously. Instead of pulling all your hair up, gather the top half and twist it into a bun that sits right at the crown of your head. Leave the rest of your hair loose and perhaps even a bit bed-headed. The key is in the transition—you want the gathered part to look smooth, while the bun itself can be slightly messy and undone.
How to Style the Perfect Knot
The secret is in the pin placement. Use a set of U-shaped pins rather than a traditional hair tie to secure the bun. This keeps the shape more organic and less like a tight donut.
Styling Variations
- For thin hair: Tease the hair at the roots before twisting to add volume.
- For thick hair: Use two smaller pins to cross over the bun, which helps distribute the weight evenly.
Pro tip: Leave two small, face-framing pieces out in the front. It makes the entire style look intentional rather than like you just threw it up to get it out of the way.
3. Warm Caramel Low Pony

A low ponytail sounds basic until you elevate it with a velvet ribbon or a silk scrunchie. The “cafe latte” vibe here comes from the sleekness of the base contrasting with the softness of the texture in the tail. You want to brush your hair back tightly, but leave just enough slack so it doesn’t pull your skin, then wrap a warm, earthy-toned fabric around the elastic to finish it off.
Matching Your Accessories
Choose ribbons in shades of tan, taupe, or soft brown. These colors ground the style and give it that sophisticated, morning-cafe aesthetic that feels appropriate for the classroom but interesting enough for a coffee run afterward.
Maintenance Tips
- Ensure the hair at the nape of the neck is smooth.
- If you have layers, let them fall naturally around your ears.
- Use a touch of smoothing cream on your flyaways to keep the base looking polished.
Pro tip: Before you tie the ponytail, wrap a small section of hair around the base, then slide your accessory over it. It makes the style look much more professional than just an elastic alone.
4. Creamy Mocha Waves

If you have some extra time—perhaps ten minutes—a quick pass with a large-barrel curling iron creates those classic, voluminous waves that define the latte aesthetic. You are aiming for a bend in the hair rather than a tight, uniform spiral. Keep the ends straight for a more modern, slightly lived-in look that says you care about your appearance but aren’t obsessed with perfection.
The Technique for Consistent Waves
- Start with dry, detangled hair.
- Clamp the iron halfway down the length of a section.
- Wrap the hair away from your face.
- Let it go after five seconds and pull the end downward while it’s still warm.
Keeping the Waves Intact
Don’t brush them out immediately. Let your hair cool completely before running your fingers through it. This simple pause ensures the wave structure holds up against the humidity of a classroom or the bustle of moving between buildings.
Pro tip: Use a lightweight sea salt spray before curling. It adds a slight grip that keeps the waves from going limp by the time you get to your final class of the day.
5. Frothy Bubble Braid

The bubble braid has moved from a trendy fad to a staple for anyone wanting volume without the effort of complex plaiting. Secure your hair into a ponytail, then place elastics every two inches down the length. Gently pull at the sides of each segment to create those signature “bubbles.” It looks whimsical but surprisingly structured, and it keeps your hair completely contained during long, active days.
Why This Style Succeeds
It is the ultimate solution for medium to long hair that tends to get tangled when left loose. It looks like you spent a significant amount of time styling it, even if the process took less than three minutes in front of the mirror.
Variations for Different Lengths
- If your hair is shorter, stick to just two or three bubbles.
- If your hair is very long, don’t be afraid to add five or six segments for a dramatic effect.
Pro tip: If you are worried about the elastics showing, buy a pack of tiny, clear bands and then wrap a small wisp of hair around each one to hide it completely. It takes the style from “school look” to “weekend brunch” instantly.
6. Cinnamon Roll Side Buns
This is a playful, double-bun style that looks like two little cinnamon rolls sitting at the base of your head. Section your hair down the middle, create two pigtails, and twist them into tight buns. Secure them with pins. It is a look that screams creative energy and works brilliantly with thick or curly hair that needs to be managed and kept out of your eyes during exams.
The Balance of the Look
You want the buns to be symmetrical. Use a mirror to check the back of your head before finalizing the pins. If one feels bigger than the other, simply loosen the tighter one with your fingers until they look balanced.
Styling for Fine Hair
If your hair is on the finer side, pull at the loops of the buns to give them a fuller, thicker appearance. You can also use a bit of dry shampoo at the roots before you begin to give the hair more structural support.
Pro tip: Add a pair of simple gold hoops to your outfit. The combination of the hair style and the jewelry elevates the overall aesthetic from “childlike” to “chic student.”
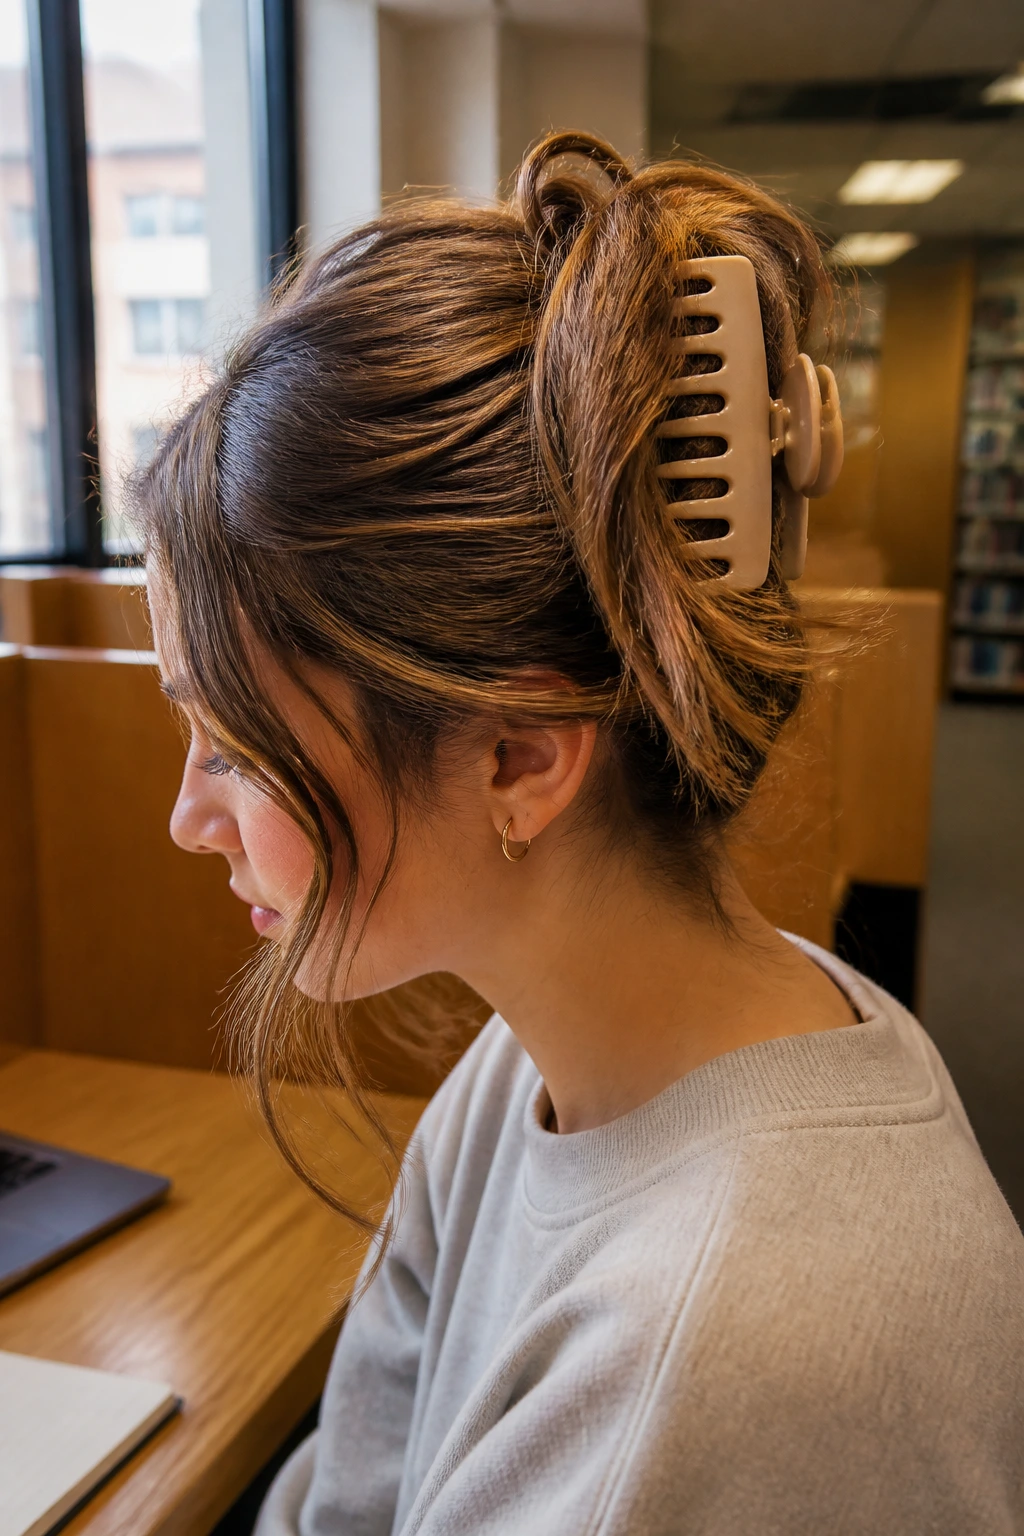
7. Oat Milk Messy Bun
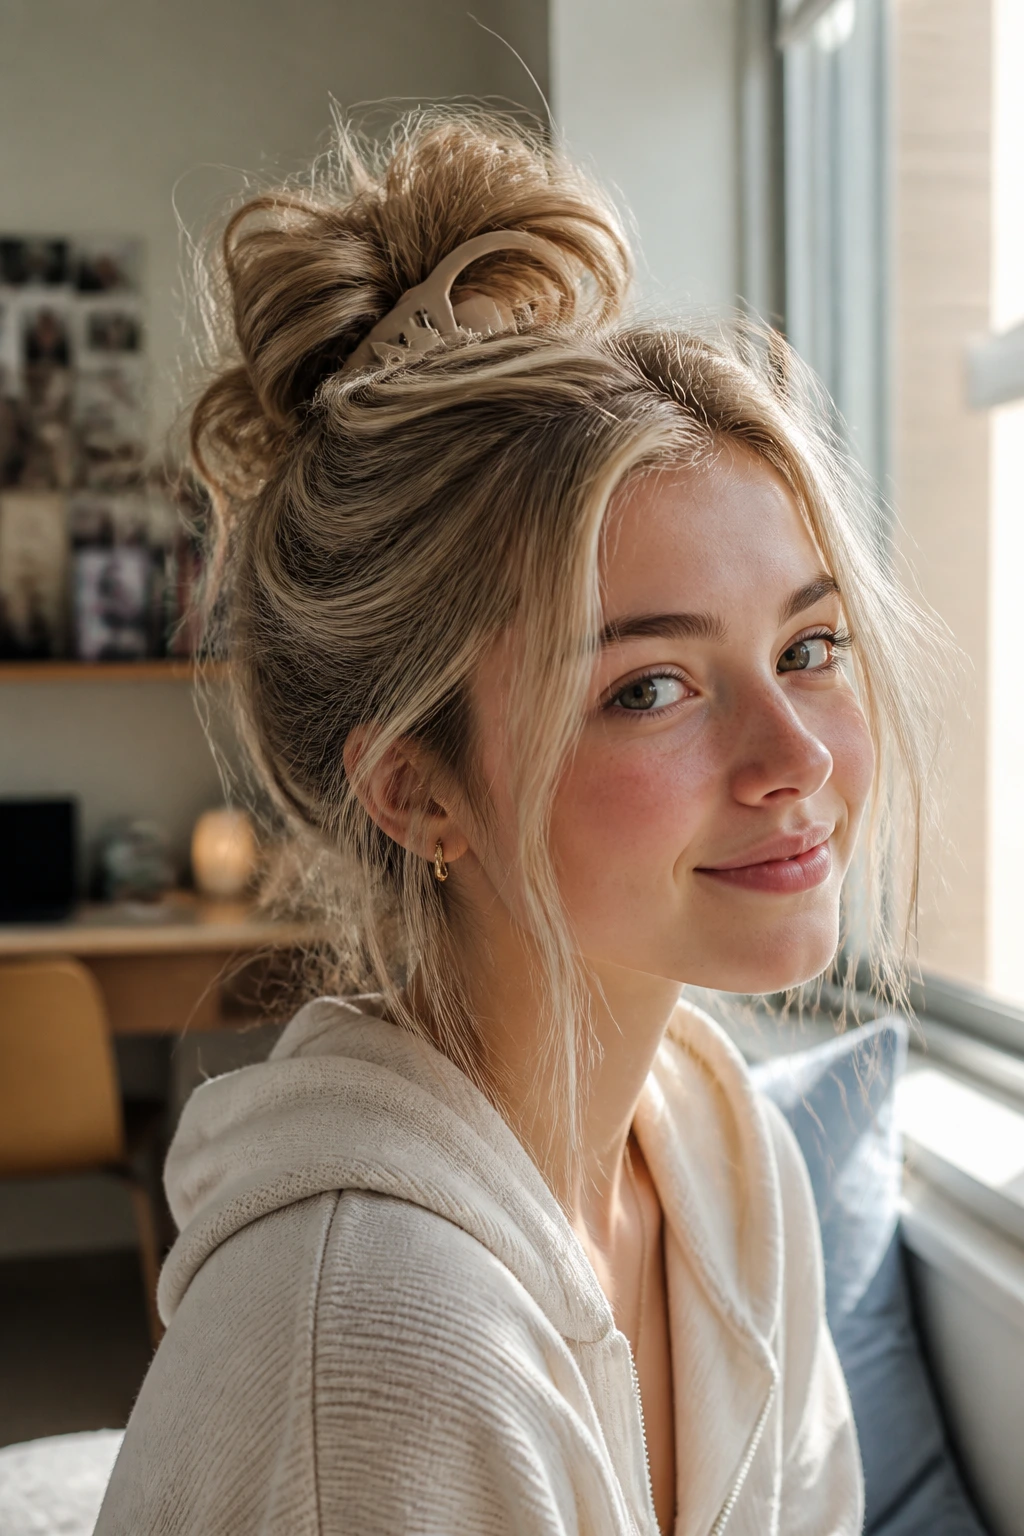
The classic messy bun is the backbone of student life, but the “oat milk” variation focuses on volume and soft, wispy tendrils. Instead of pulling everything back, use a claw clip to secure the bulk of the hair, allowing the ends to spill over the top naturally. It feels weightless and stays secure all day long without needing a hundred bobby pins.
Why a Claw Clip is Essential
Claw clips provide a much more gentle hold than elastics. They prevent that dreaded ponytail headache and allow your hair to move slightly, which creates a more natural, less strained look throughout the day.
Selecting the Right Clip
- Choose a matte-finish clip in a neutral earth tone.
- Look for one with strong springs so you don’t have to readjust it during the day.
Pro tip: If you have bangs, leave them out. The contrast between the structured bun and the loose, soft fringe is exactly what gives this style its signature “latte” feel.
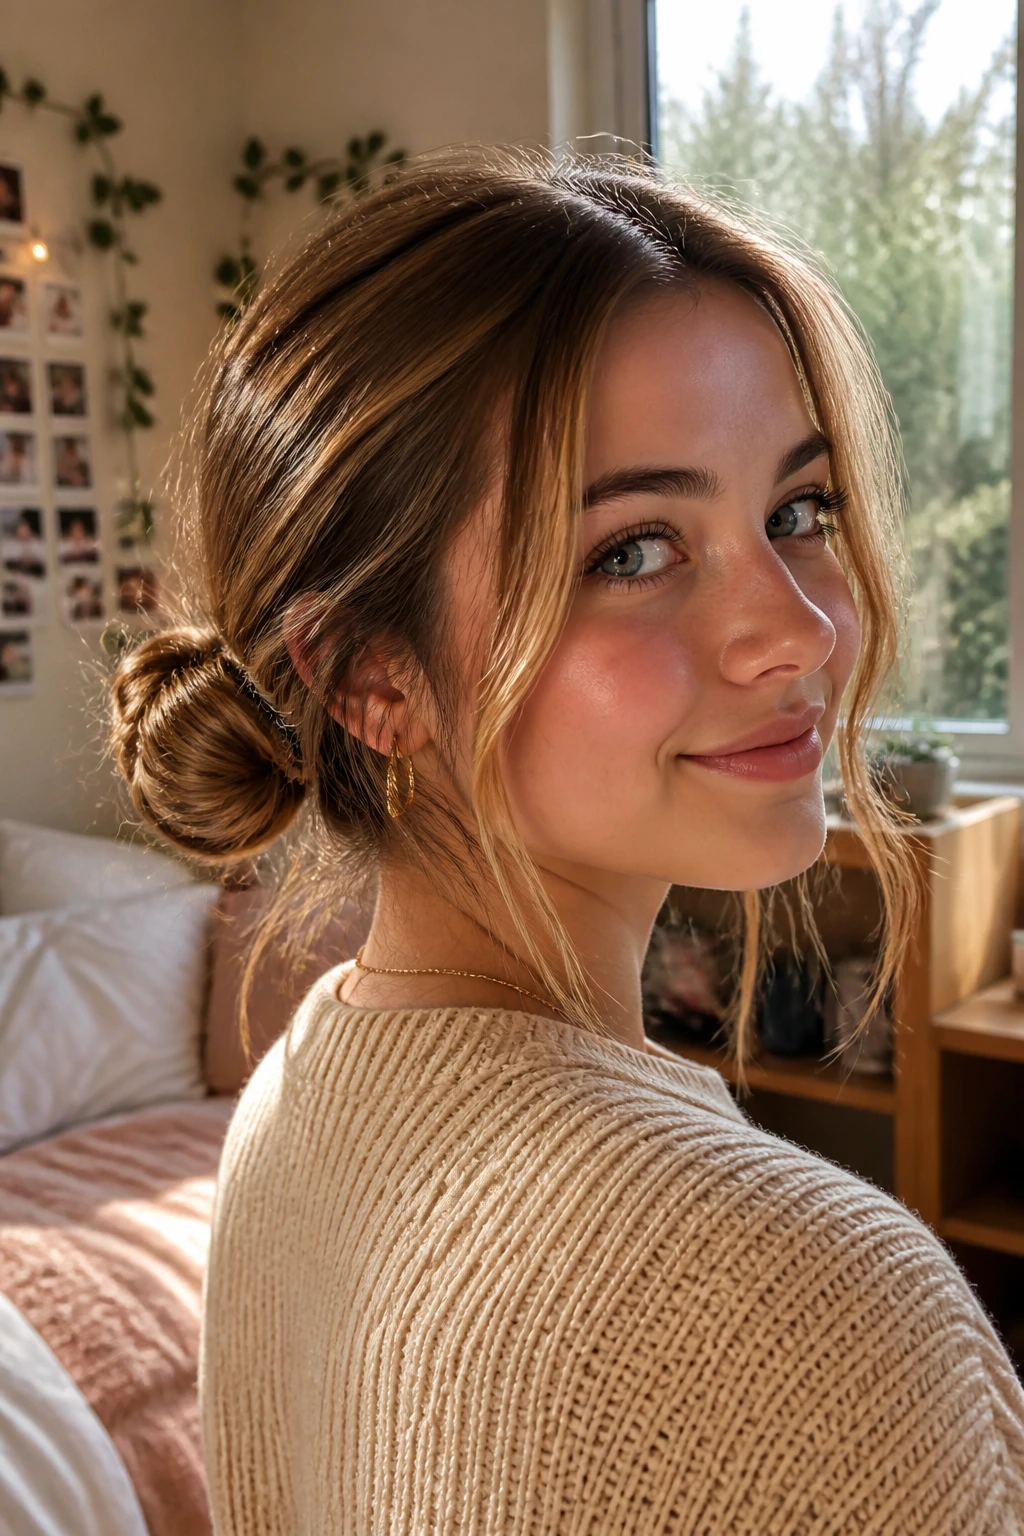
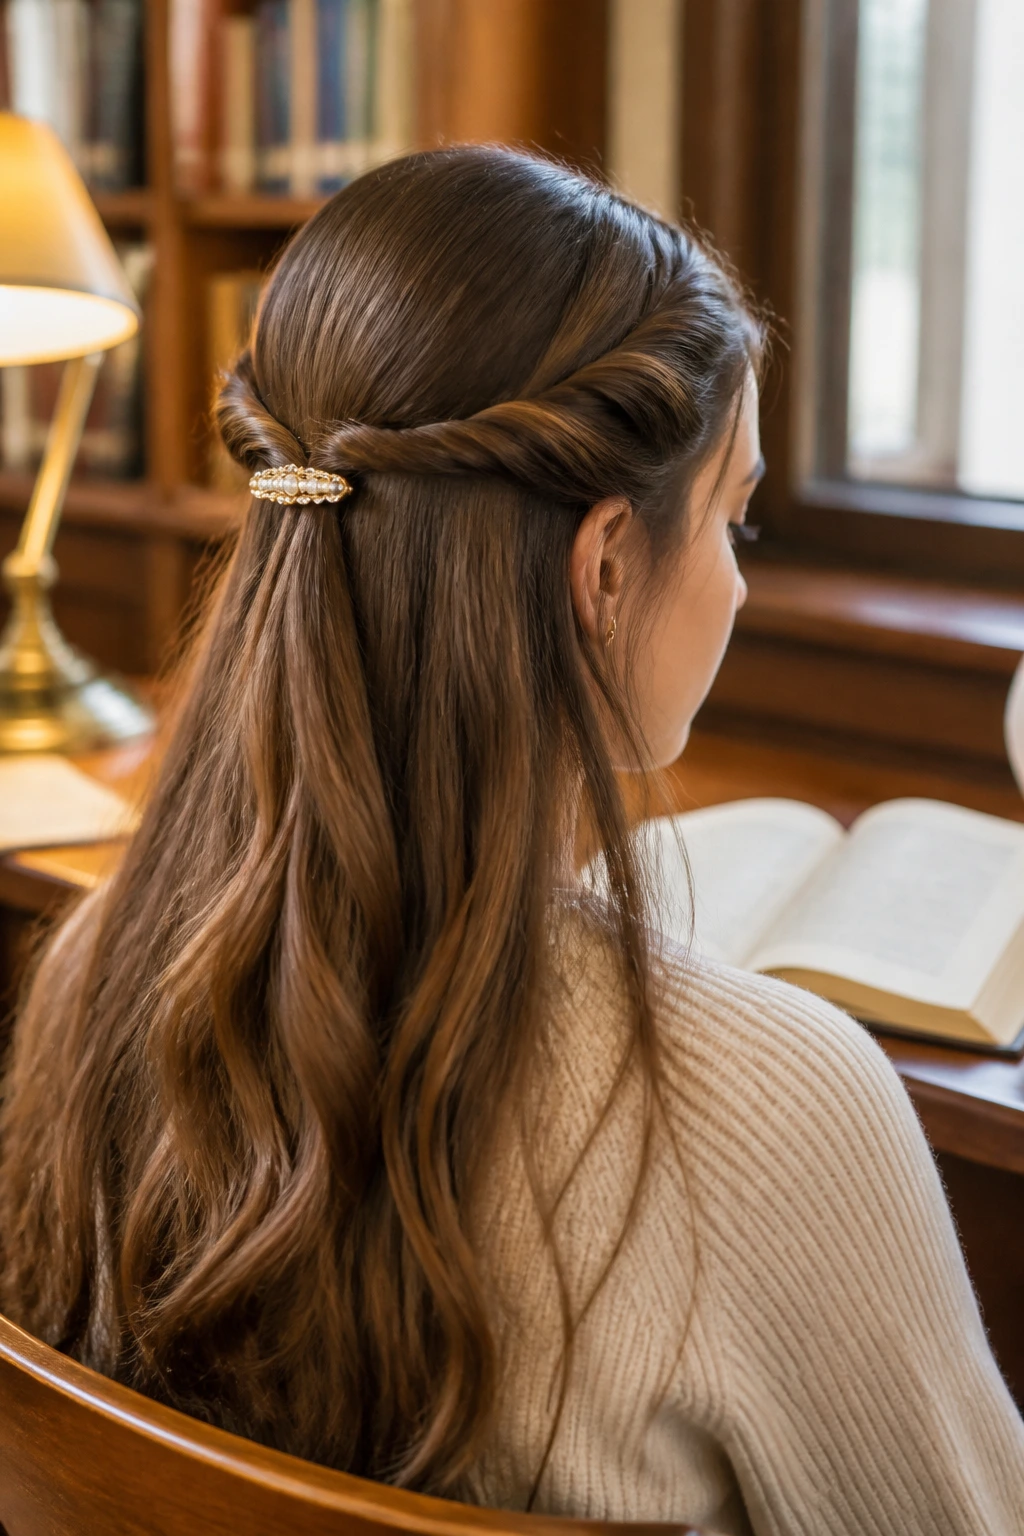
8. Vanilla Bean Headband Tuck
This is a classic technique that looks incredibly sophisticated but is basically impossible to mess up. Place a stretchy headband over your hair—not under it—and then tuck the lengths of your hair into the band at the back. It creates a faux-bob effect that looks elegant and keeps your neck cool during warmer months or inside stuffy classrooms.
Mastering the Tuck
Don’t worry if a few strands escape. In fact, a little bit of flyaway texture adds to the charm of this look. It’s supposed to look like a soft, romantic style rather than a strict updo.
What to Wear With It
Because this style pulls your hair back completely, it’s a great opportunity to wear a pair of statement earrings or a chunky scarf if it’s chilly outside. It frames your face beautifully and keeps the focus on your features.
Pro tip: Use a velvet or silk headband rather than a plastic one. The fabric holds the hair better and feels much more comfortable for all-day wear.
9. The Cappuccino Half-Twist
Instead of a simple half-up ponytail, create two twists—one on each side—and bring them together at the back of your head. Secure them with a single decorative barrette or a set of flat pins. This style looks very polished and adds a bit of dimension to hair that is usually left hanging flat.
Why This Style Is Different
The twists add a texture that a standard ponytail cannot provide. It is a great way to manage hair that tends to fall into your face while you are writing or reading.
When to Use It
- Perfect for days when you want to look nice but don’t have time for heat tools.
- Works on both day-one clean hair and day-two hair with a bit of texture.
Pro tip: Spray your hair with a little texturizing mist before you twist. It makes the hair grab onto itself, meaning the twists will stay firm without needing excessive amounts of hairspray.
10. Brown Sugar Beach Waves
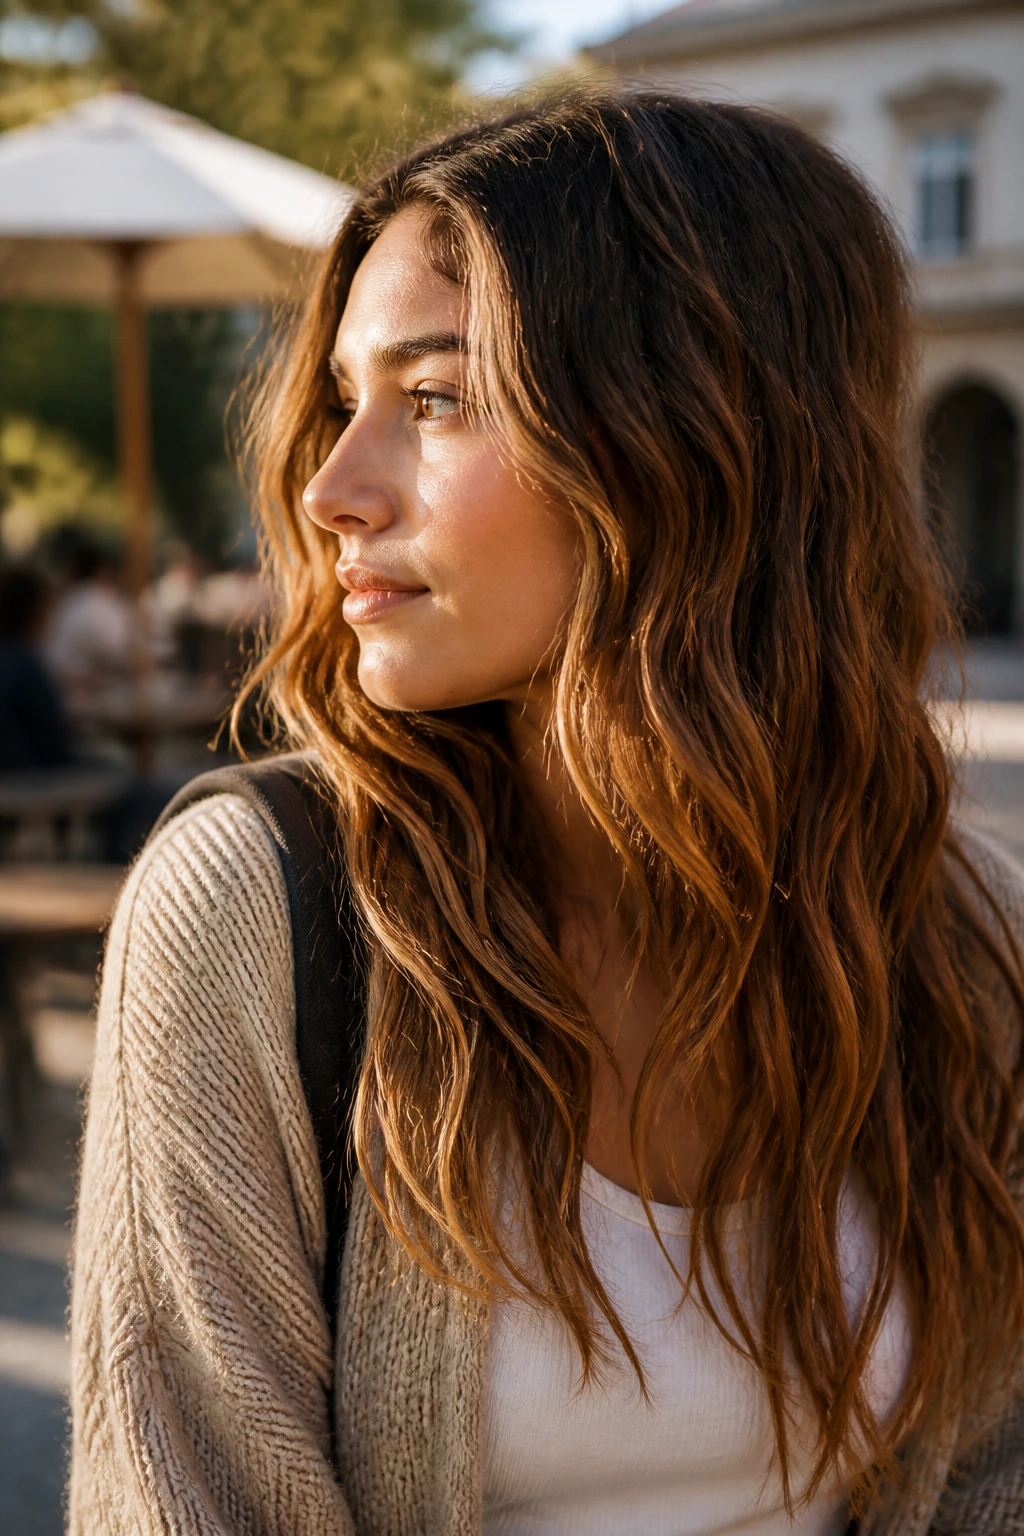
If you have natural wave or curl, don’t try to fight it. Enhance it by using a curl-defining cream on damp hair and scrunching it upward. The goal is a soft, undefined wave that looks like you just came back from a walk on the beach. It is effortless, comfortable, and perfect for the “latte” color palette because it lets the light play with your natural highlights.
Working with Natural Texture
Apply the cream while your hair is still very wet. This seals in the moisture and prevents the frizz that often happens when curls dry on their own.
The “Crunch-Free” Method
Once the hair is completely dry, gently scrunch your curls again with dry hands. This breaks the “cast” of the cream, leaving you with soft, touchable curls that look natural and healthy.
Pro tip: Avoid touching your hair while it dries. The more you manipulate the curls, the more likely you are to disrupt the pattern and invite frizz. Let nature do the heavy lifting.
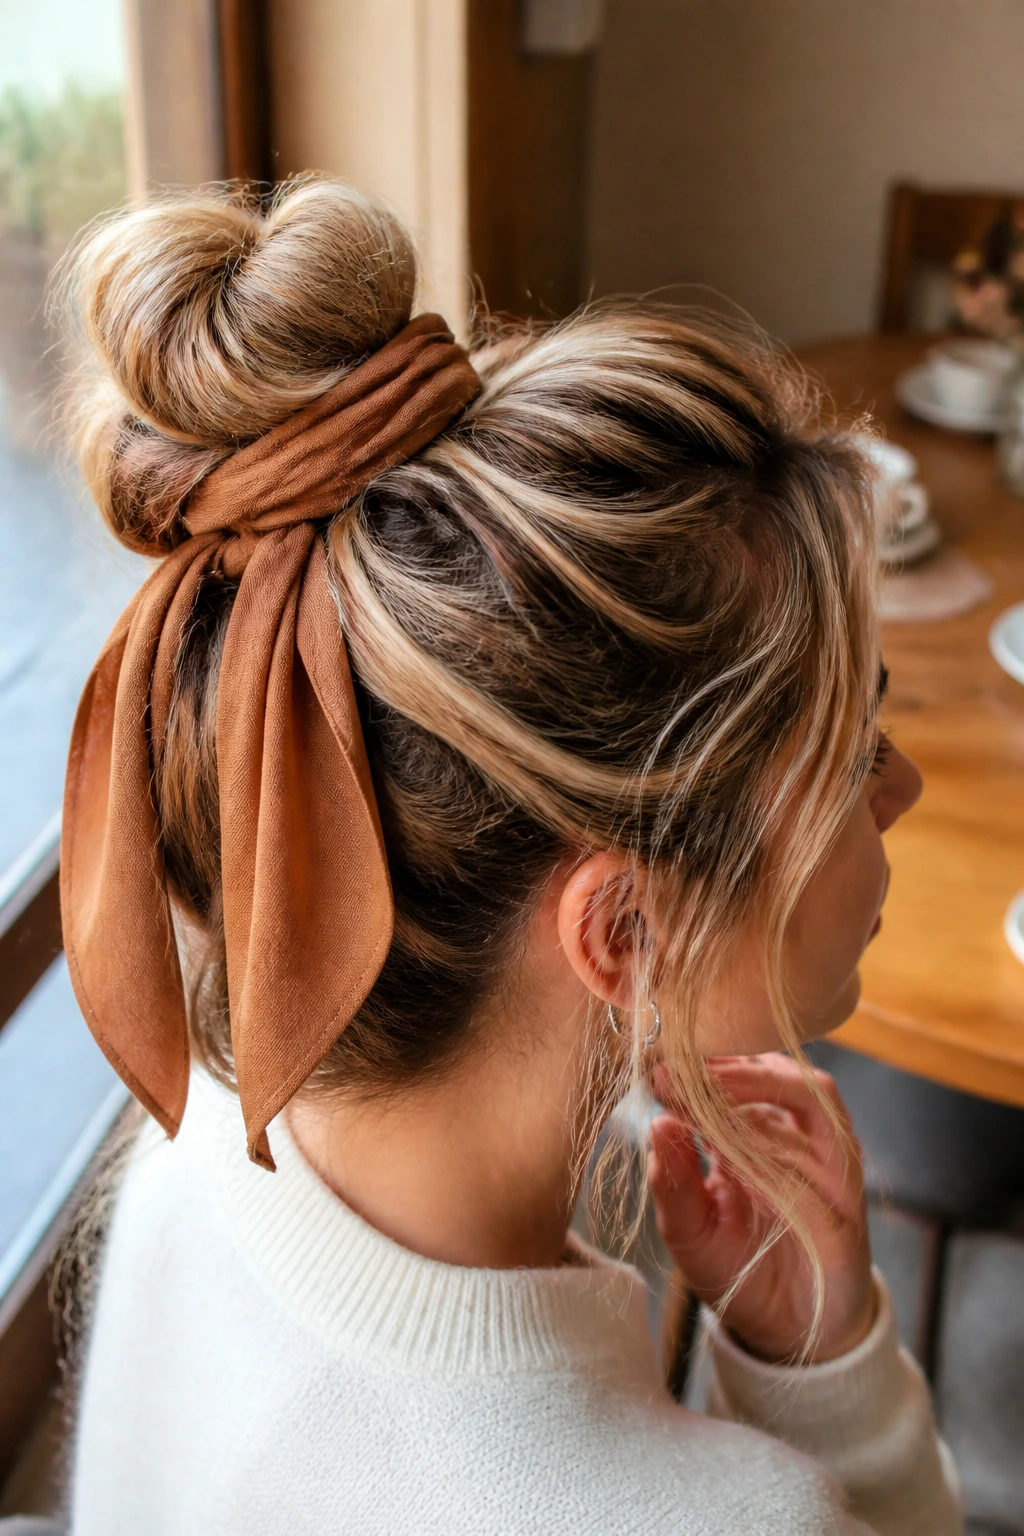
11. The Caramel Ribbon Wrap
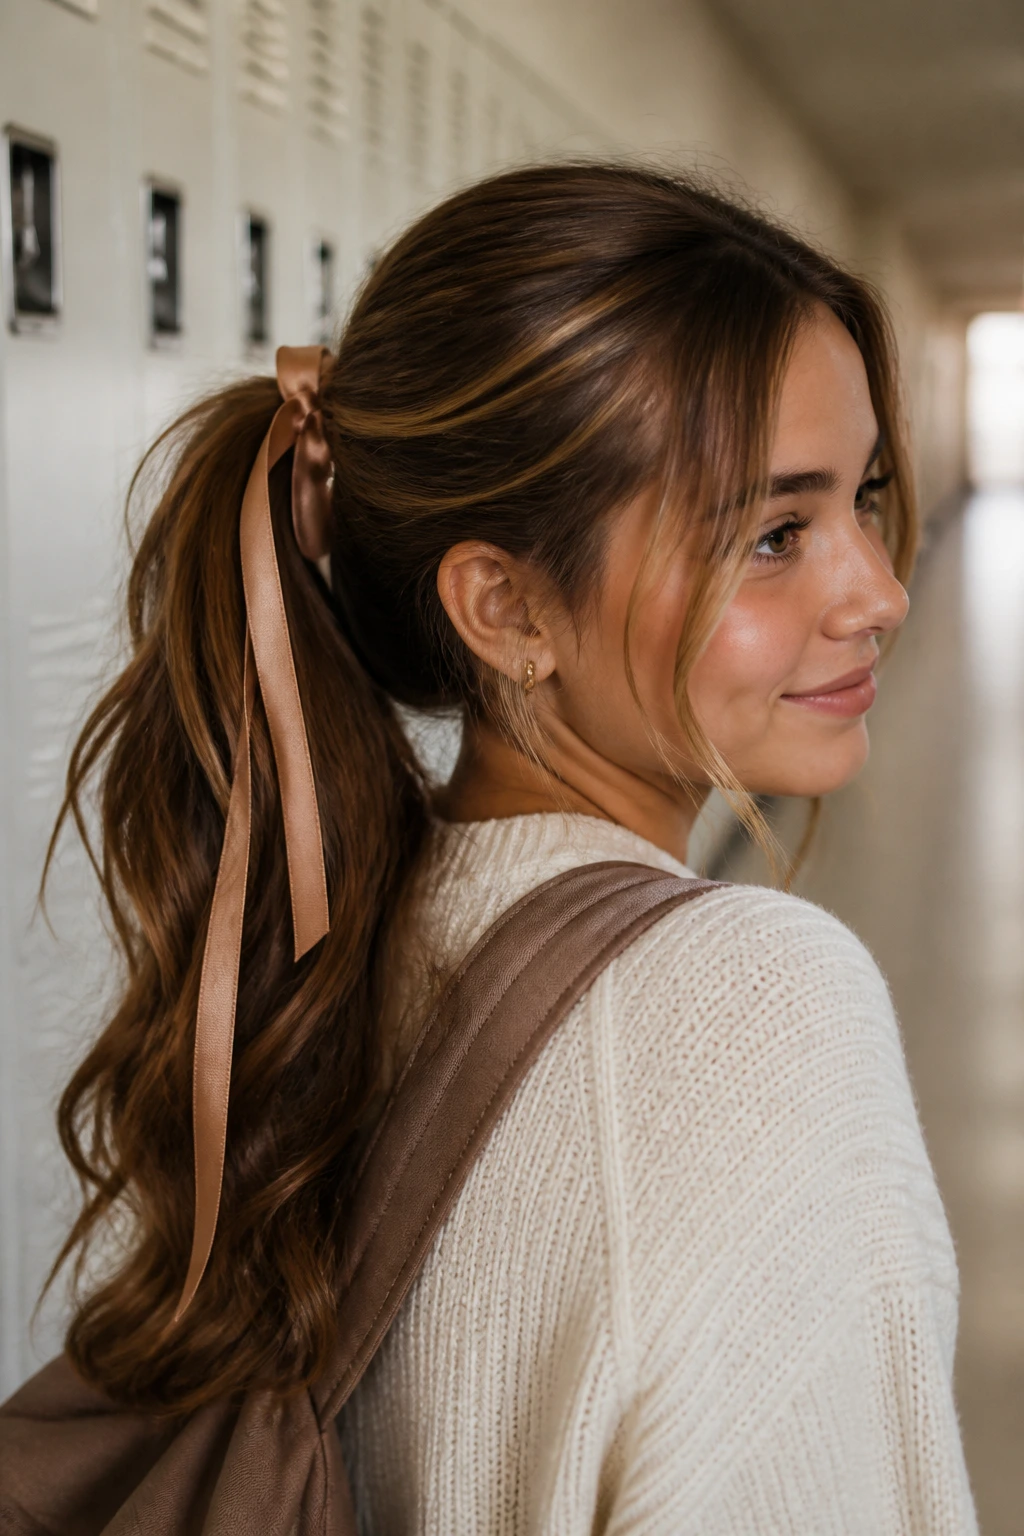
Sometimes the simplest style is the best. Pull your hair into a mid-height ponytail, but instead of using a standard hair tie, use a long ribbon that coordinates with your outfit. Wrap it around the base several times and let the long ends hang down amongst your hair. It’s an understated way to add a bit of personality to a very standard style.
Why Ribbon Works
It is far kinder to your hair than elastic bands, which can cause breakage over time. Plus, ribbons are easily replaceable if you want to switch up your color scheme based on your mood or the weather.
Choosing the Right Ribbon
- Opt for satin or silk for a polished look.
- Use cotton ribbons for a more casual, everyday school vibe.
Pro tip: Tie the ribbon in a double knot to ensure it stays in place throughout the day. If you have extra length, you can wrap it a few more times to create a more substantial visual base.
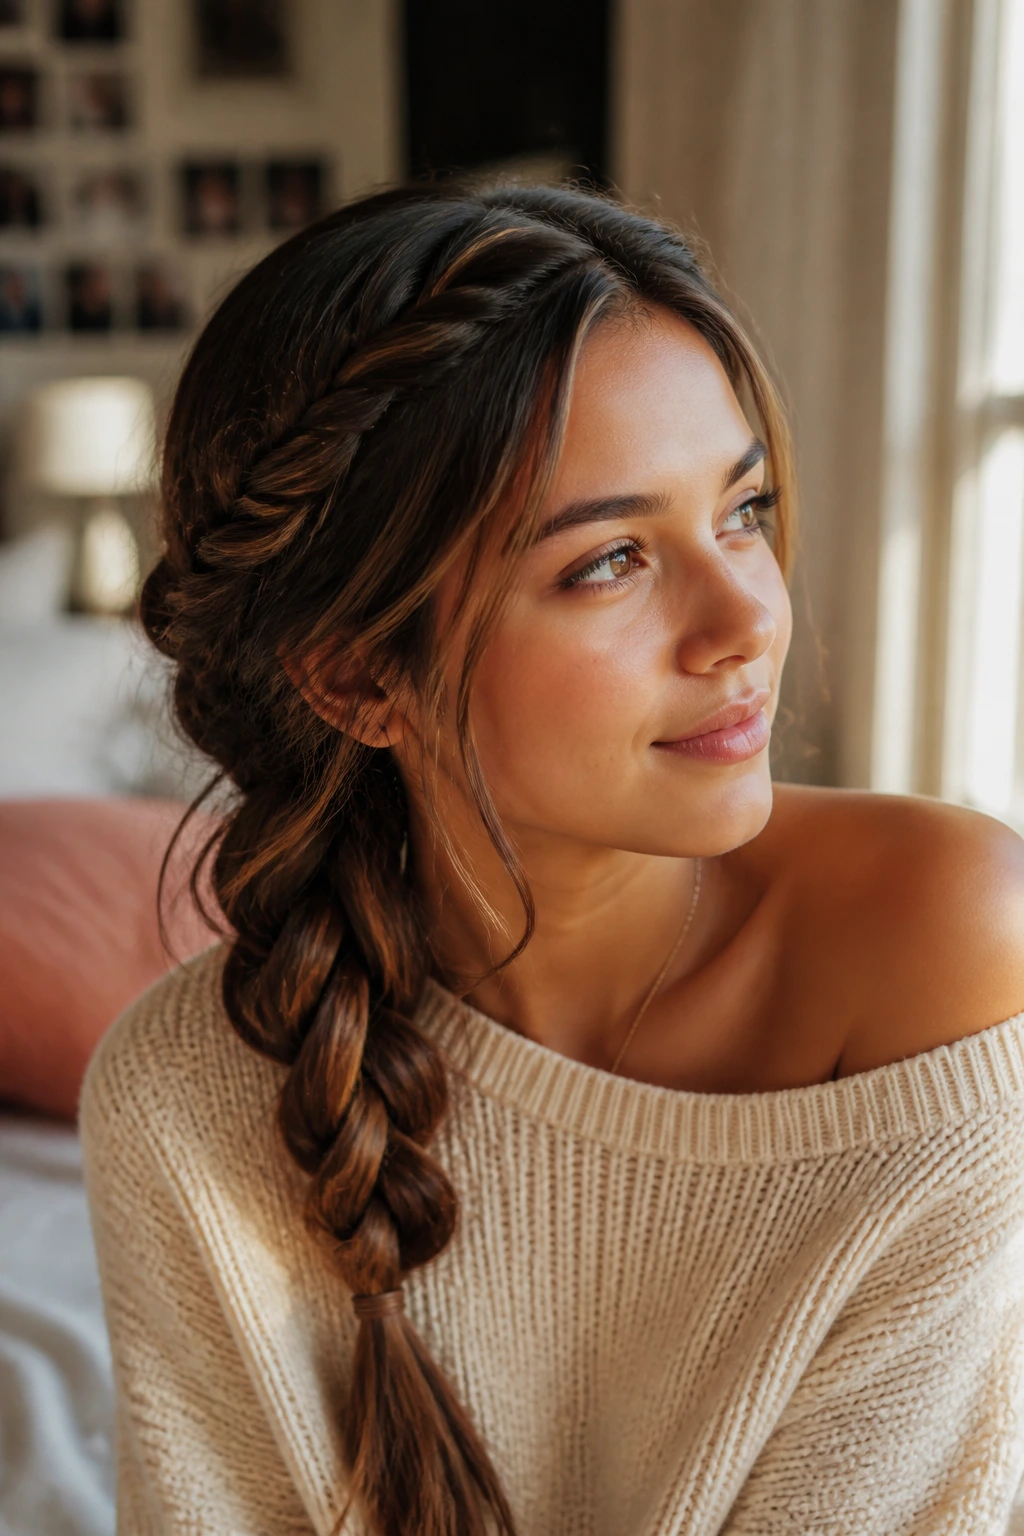
12. Milk Foam Side Braid
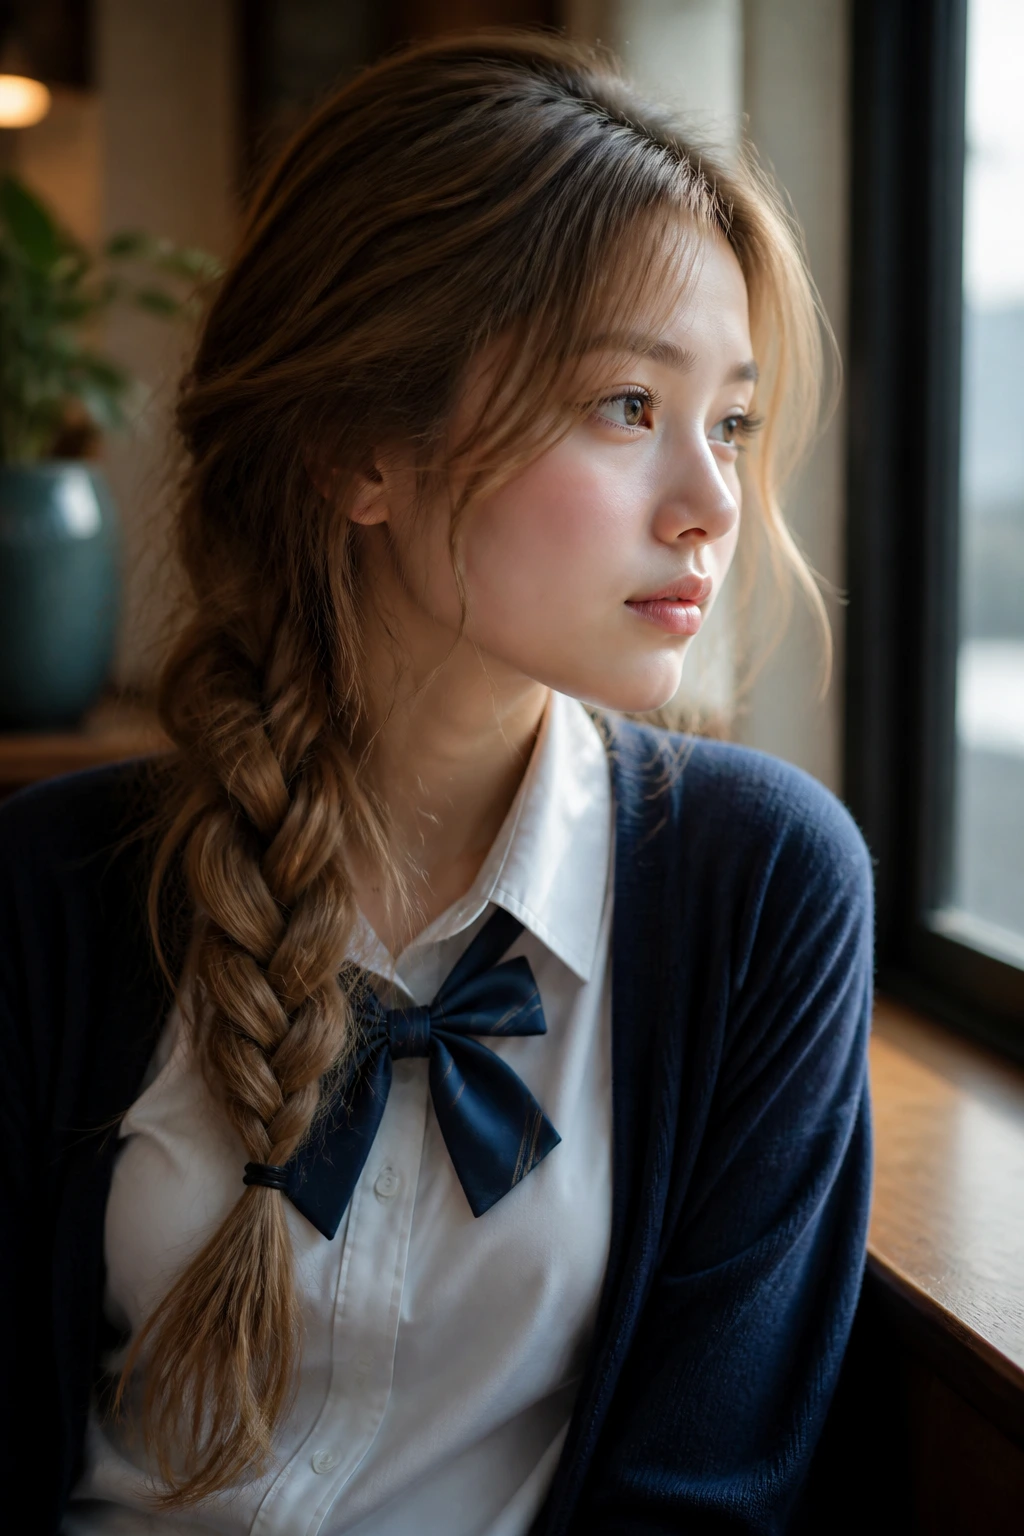
A side braid is classic for a reason—it’s practical and allows you to see your work, which is a nice bonus if you are the type who likes to adjust your hair as you go. For this version, braid loosely starting behind your ear and carry it across the side of your neck. It’s gentle, it’s soft, and it feels very “latte-inspired” because of how the light hits the woven strands.
The Placement Advantage
By keeping the braid to the side, it doesn’t get in your way when you are leaning over a desk. It sits comfortably on your shoulder, providing a soft frame for your face.
Adding Volume
If you want the braid to look thicker, physically pull on the edges of the braid after you have secured it. This is a common trick used to make hair appear twice as thick as it actually is.
Pro tip: If you have layers that keep falling out of the braid, don’t try to force them back in. Let them fall. Those loose pieces are part of the style’s charm and make it look much more approachable.
13. The Mocha Claw-Clip Twist
This is the ultimate quick fix. Gather your hair as if you are going to make a ponytail, but twist it upward against your head and secure it with a large, neutral-colored claw clip. Let the ends fall forward over the clip like a fountain. It’s a clean, sculptural look that works for almost any hair type and is incredibly comfortable for long study sessions.
Why Sculptural Styling Wins
It takes your hair off your neck, which is a relief when you are sitting in a warm lecture hall. Plus, it looks like you put a lot more effort into your look than you actually did.
Troubleshooting the Clip
If your hair is very heavy, use a larger clip with more teeth. You want to make sure the hair is firmly held against your scalp so that it doesn’t sag as you move around.
Pro tip: Leave a few strands out near your temples to soften the look. It prevents the style from feeling too severe or “done.”
14. Toasted Hazelnut Pigtails
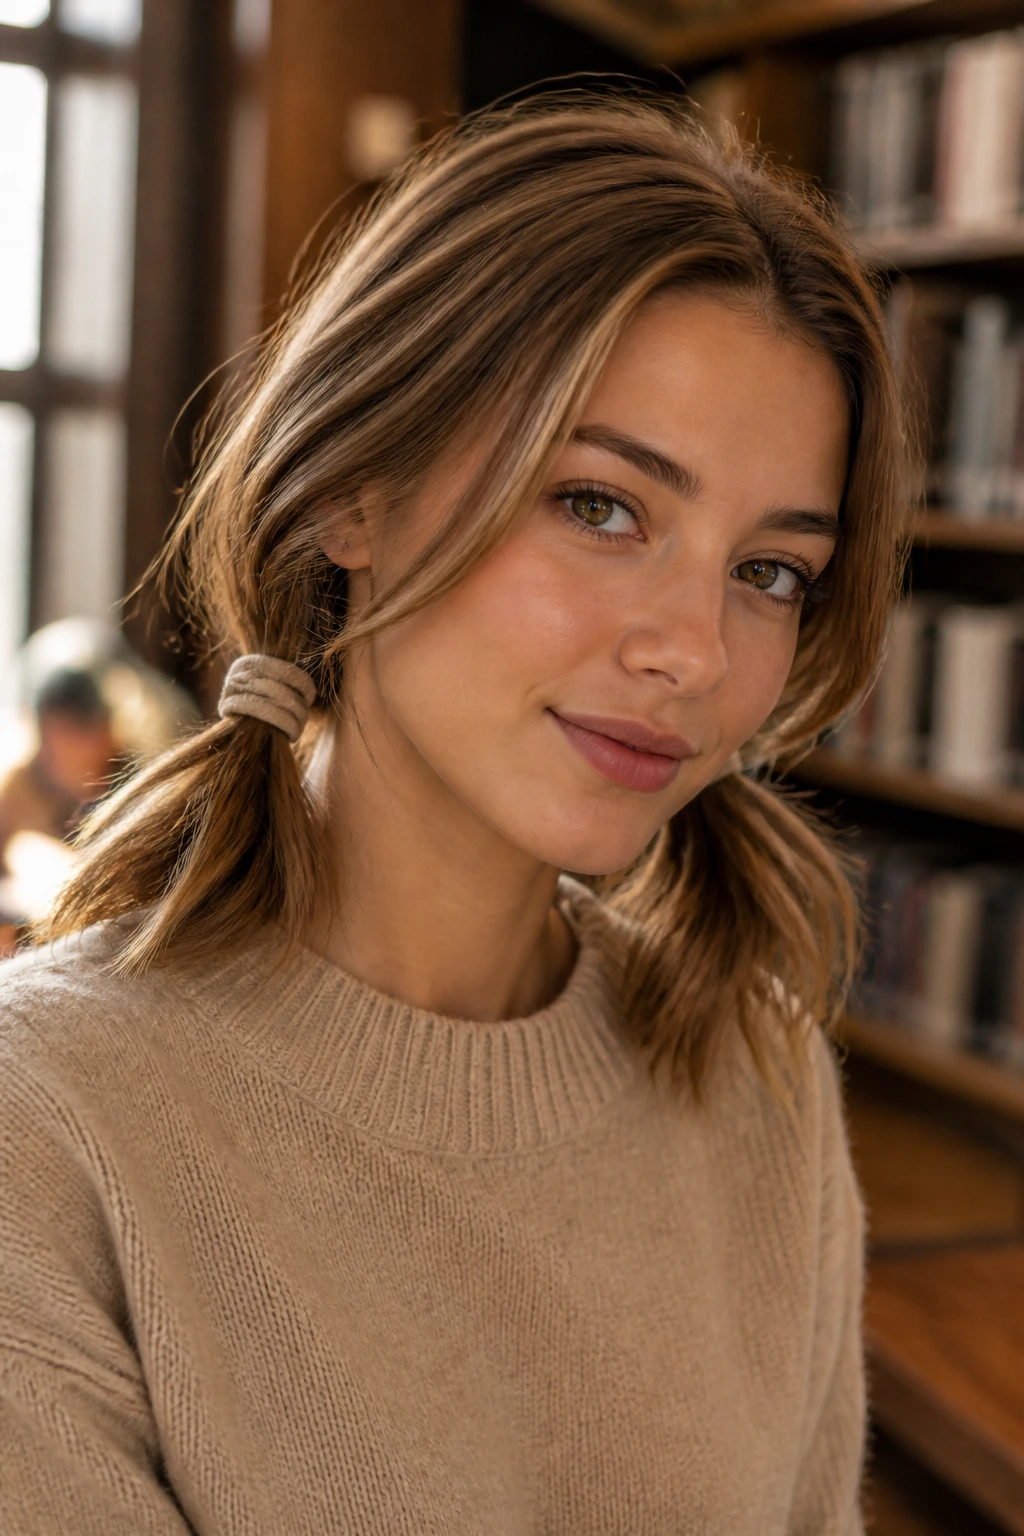
Pigtails don’t have to look childish. The key to the grown-up version is a loose, low placement near the nape of the neck. Tie them with neutral, fabric-covered elastics and don’t pull them tight. It’s a look that feels very cozy and is perfect for a day spent in the library or working on a laptop.
Refined Pigtails
The secret is to part your hair with a soft, messy line rather than a razor-sharp one. Use your fingers to part it so it doesn’t look too symmetrical or forced.
Adding Interest
You can add small clips or charms to the elastics to make the look feel a bit more unique. It’s a subtle way to show some personality without disrupting the overall “latte” aesthetic.
Pro tip: If you find the ends look a bit thin, use a texturizing cream to add some body. It helps the hair look more robust and full throughout the day.
15. The Latte Layered Clip
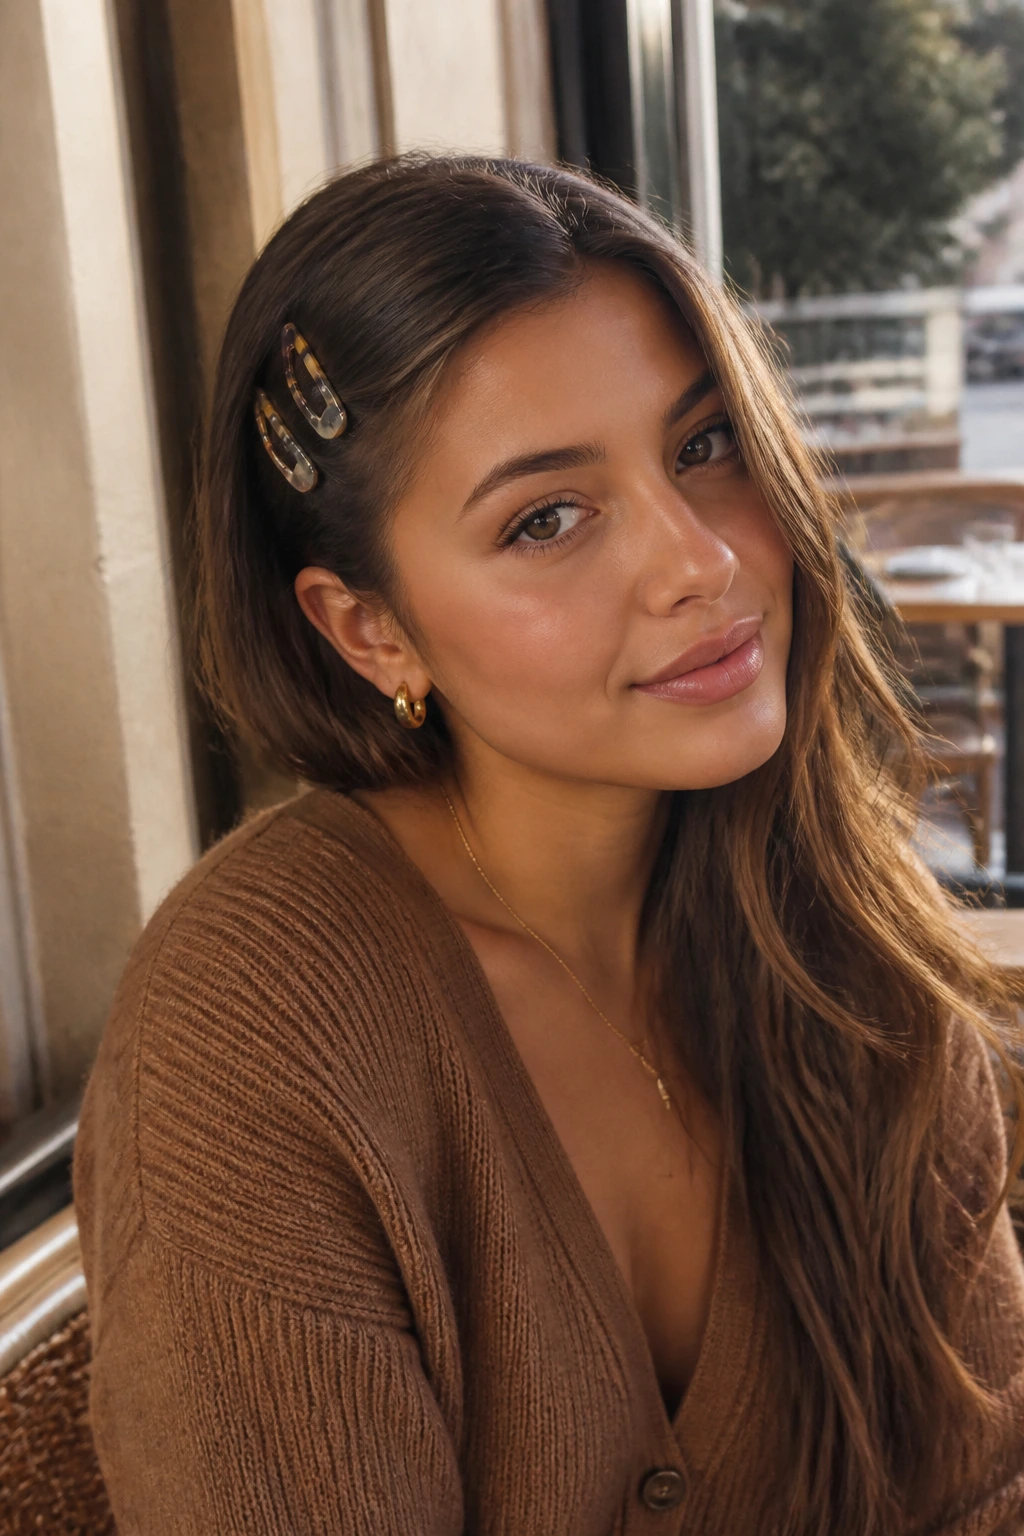
Sometimes your hair just needs to be kept back. Use two or three small, simple barrettes to clip back the hair on one side of your face. It is a very 90s-inspired look that has made a huge comeback. It keeps your hair out of your eyes while leaving the rest of your texture visible and free.
Choosing Your Clips
Go for metal clips in gold, silver, or bronze. These tones complement the warm, cafe-latte color palette of the hair itself and provide just enough shine to catch the eye without being distracting.
Balancing the Look
If you clip one side, balance it out by letting the rest of your hair fall naturally over the other shoulder. It creates a nice asymmetry that feels balanced and intentional.
Pro tip: Don’t try to make the clips perfectly aligned. A slightly staggered placement looks more modern and helps keep the hair held back more effectively.
16. Frothy Crown Braid
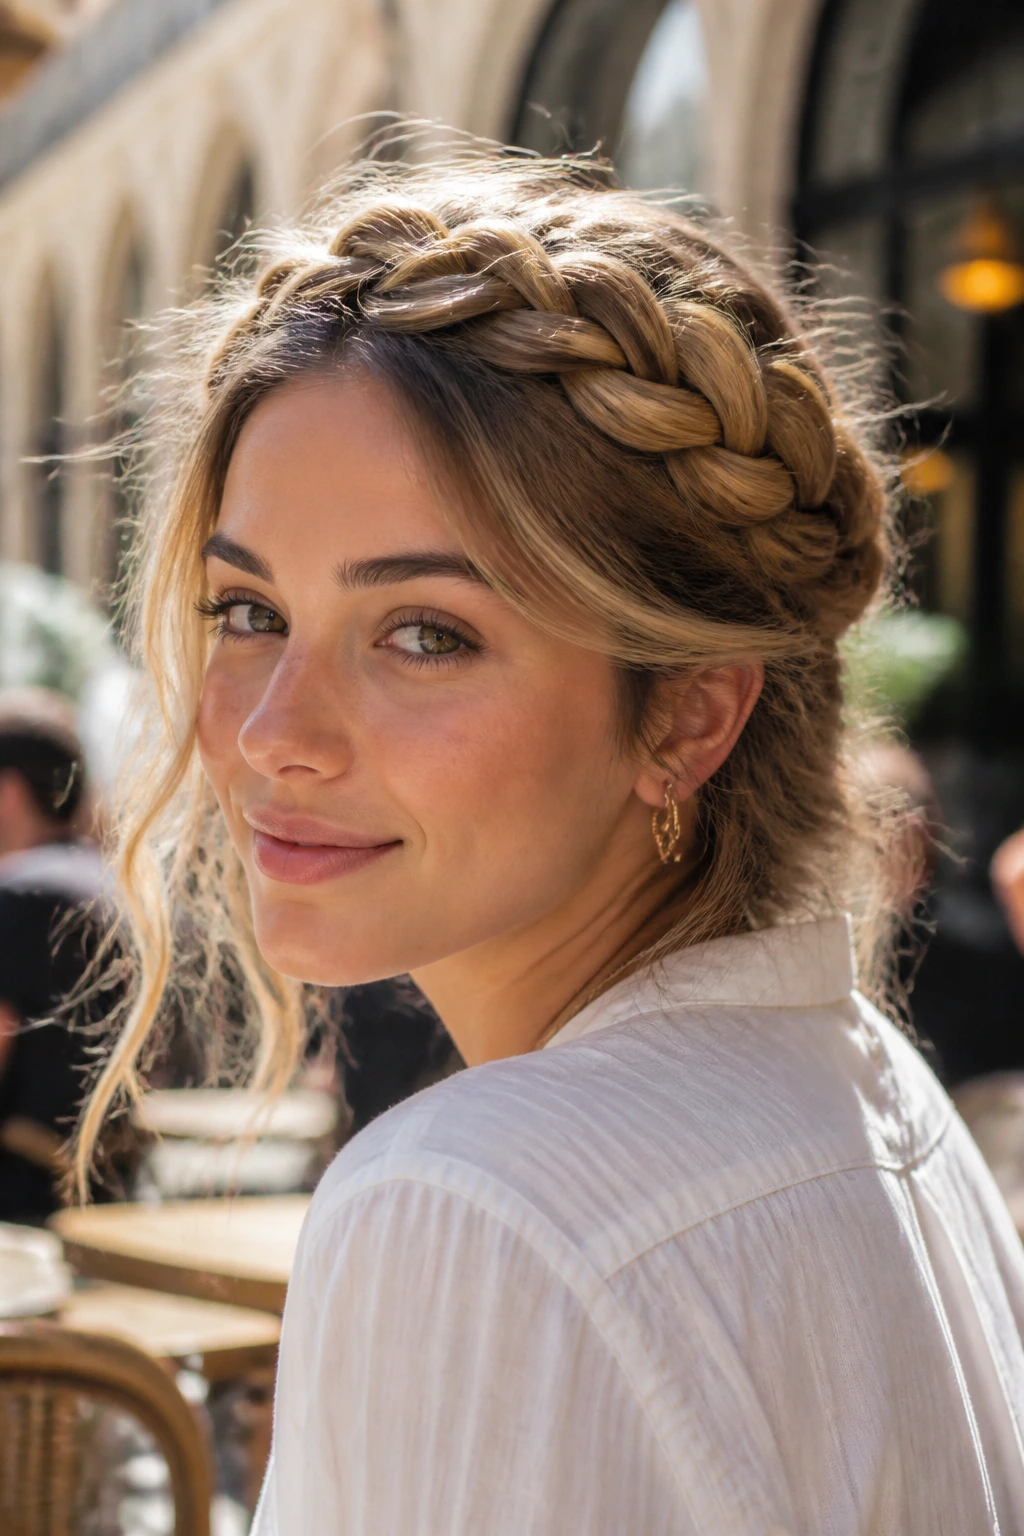
This is a more advanced style, but it is well worth learning. Create a loose, Dutch-style braid that wraps around the front of your hairline like a crown. It’s a great way to handle “bangs-in-the-eyes” syndrome and creates a very romantic, artistic vibe. It stays firmly in place, even if you are jogging across campus to make it to class on time.
Master the Dutch Braid
The difference between a French braid and a Dutch braid is that in a Dutch braid, you cross the strands under rather than over. This makes the braid sit on top of your head, which provides the “crown” effect.
When to Practice
Don’t try this for the first time five minutes before you have to leave. Spend some time practicing on a Saturday when you have nowhere to be. Once you get the hand motion, it becomes muscle memory.
Pro tip: Pull on the braid sections once you’ve finished. It makes the “crown” look fuller and prevents it from appearing too flat or tight against your forehead.
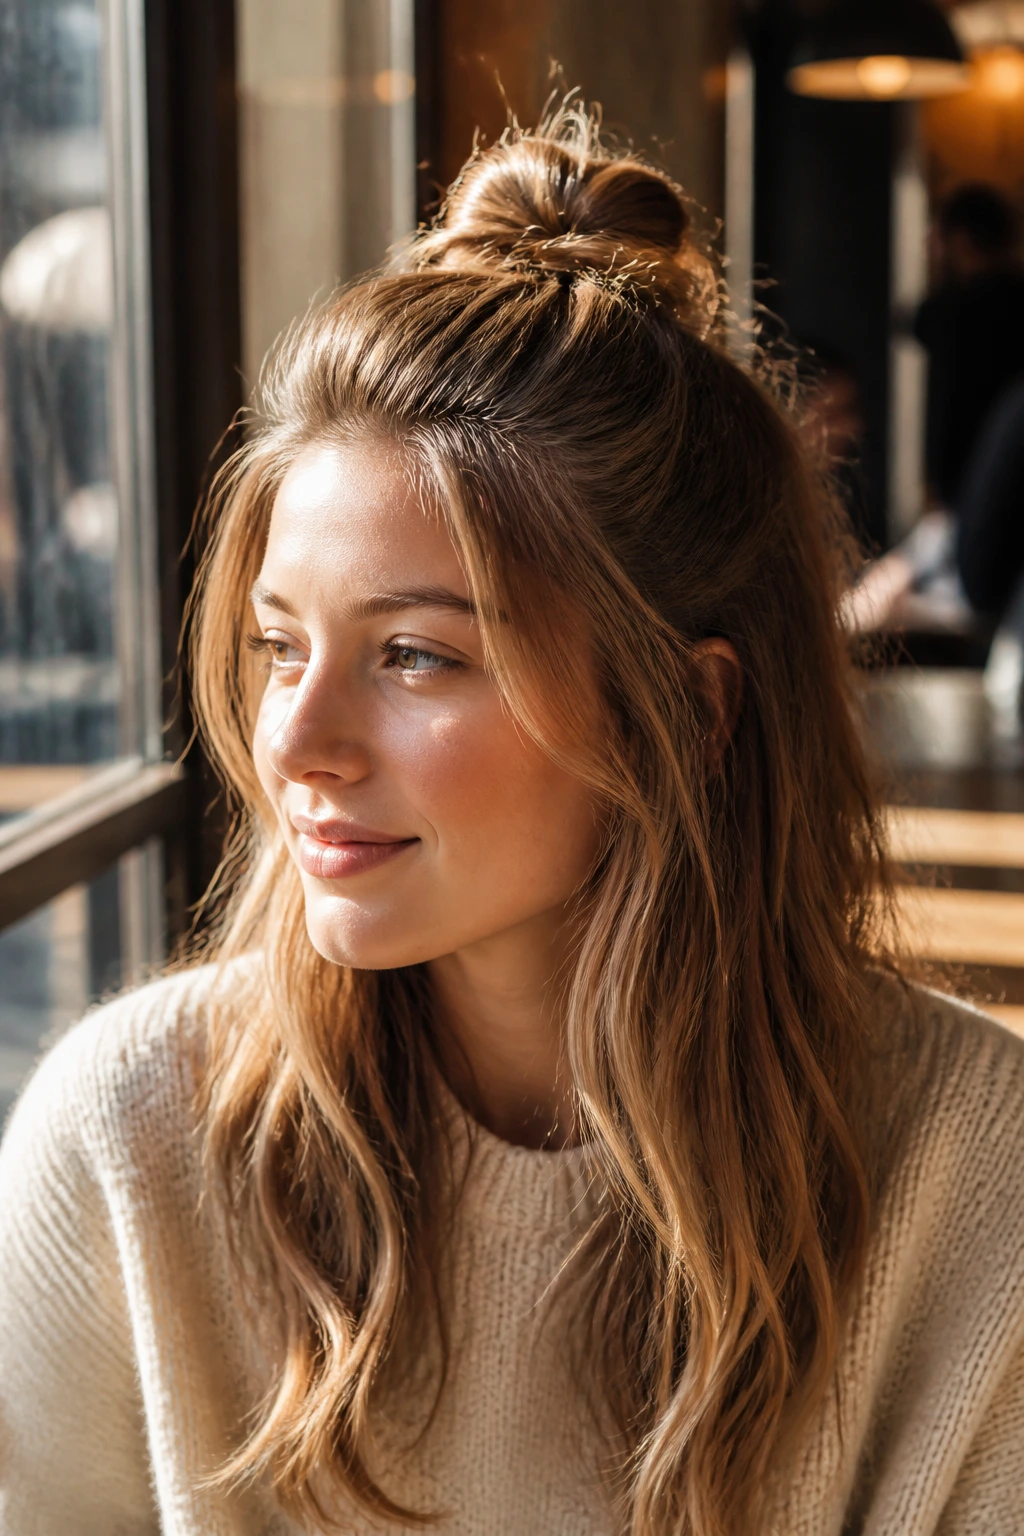
17. The Espresso Messy Top-Knot

Yes, the classic top-knot is back, but this version is smaller, tighter, and positioned right at the top-center of the head. It’s the “coffee shop worker” aesthetic—practical, fast, and surprisingly cute. It emphasizes your facial features and works perfectly with glasses or oversized sweaters.
Managing the Height
The higher the bun, the more lifted your face looks. Don’t be afraid to place it higher than you think you need to.
The Final Flourish
Once you have the bun in place, use your thumbs to gently tug on the hair at the roots all around your head. This loosens the tension and gives you that slightly messy, “latte” finish that isn’t too perfect.
Pro tip: Use a “bun donut” or a thick scrunchie if your hair is fine and you want the bun to look larger. It’s an easy hack to create instant volume.
18. Creamy Side-Swept Curls
If you prefer a more formal look for presentation days, sweep your hair to one side and pin it behind your ear with a decorative clip. The side-swept look is inherently glamorous, but the “cafe latte” version keeps the texture soft rather than hard and sculpted. It frames one side of your face beautifully.
The Pinning Strategy
Use a bobby pin first to hold the hair in place, then cover the pin with a more decorative, visible accessory. This ensures the hair doesn’t slip out during the day.
Why This Works
It creates a beautiful line that draws the eye toward your cheekbones and jawline. It is a simple way to elevate a very standard hairstyle into something that feels special.
Pro tip: If you have a dressy outfit for a school presentation, this style pairs perfectly with a necklace that sits close to the collarbone.
19. The Toasted Ribbon Bun
Take your basic bun and wrap a long ribbon around the base and through the bun itself. This is an incredible way to hide any “bad hair day” realities. The ribbon provides a pop of color and a structural element that makes the bun feel much more “finished.”
Why Ribbons Are Versatile
You can change the ribbon daily to match your outfit. It’s a cost-effective way to refresh your look without buying new tools or products.
Securing the Ribbon
Tie it in a way that allows the tails to drape over your bun. It adds movement and softness to a style that can otherwise feel a bit static.
Pro tip: Use a ribbon with a wired edge if you want to create a bow that holds its shape all day. It’s a small detail, but it makes a big difference in the final look.
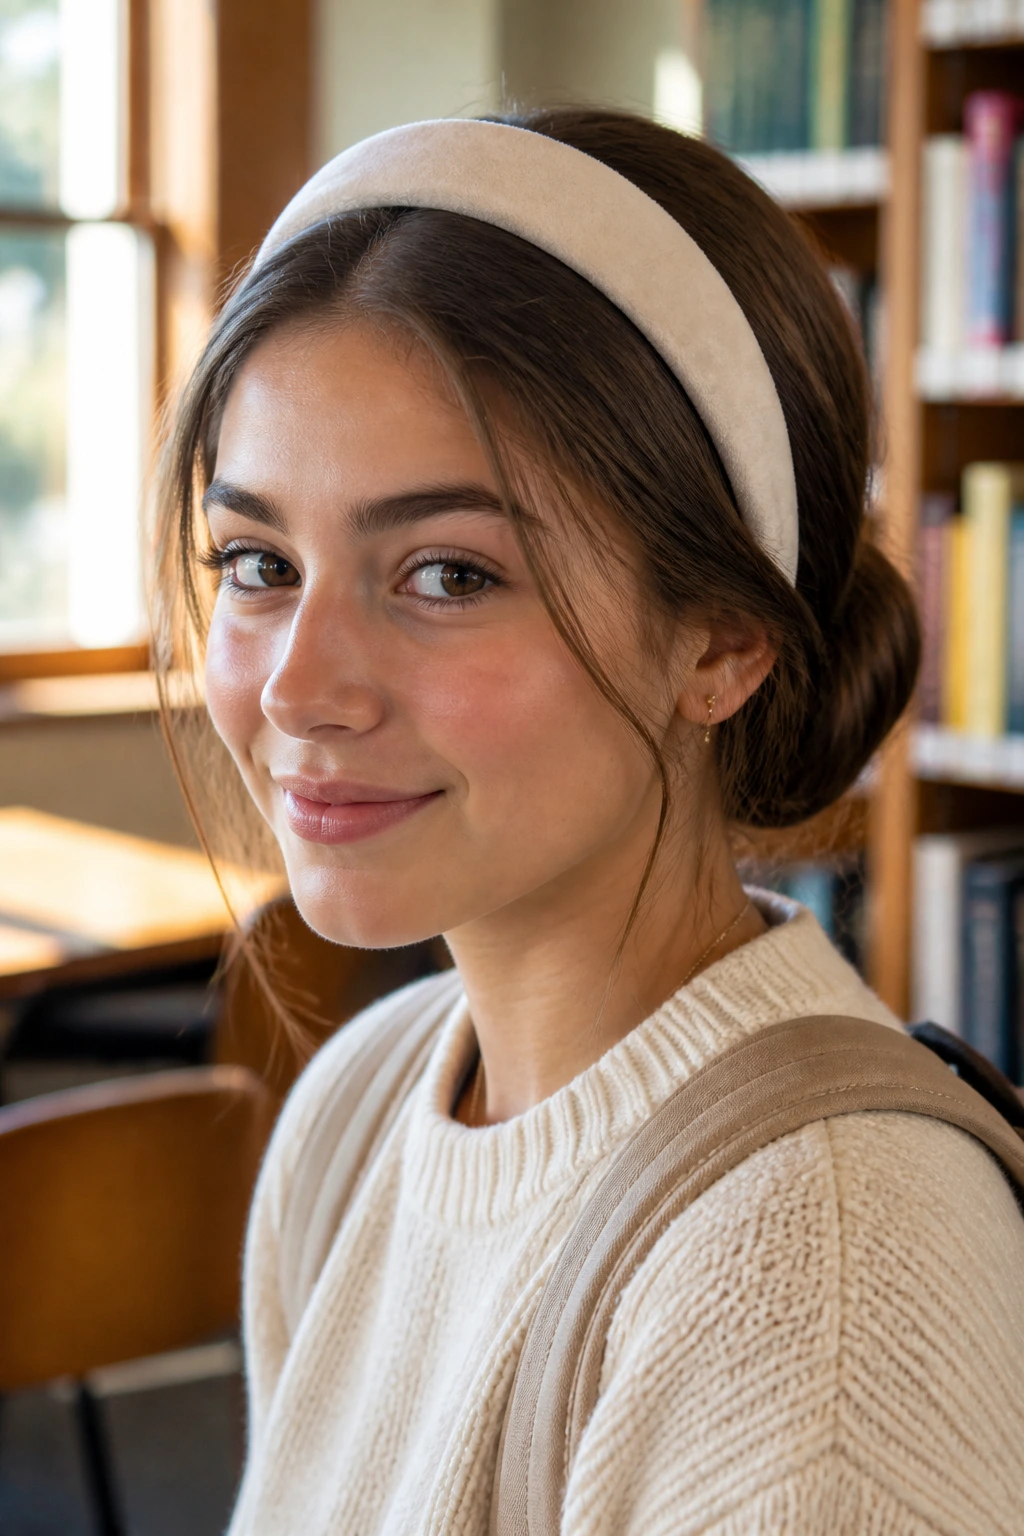
20. Simple Espresso Headband

Sometimes, you just need to let your hair do its own thing. A wide, fabric headband in a dark, earthy tone (like deep espresso or chocolate) is the perfect accessory to manage your hair and add a touch of polish. It keeps your hair back and out of your face, leaving you free to focus on your studies.
Choosing Your Headband
Look for one that is comfortable behind the ears. Some headbands can cause headaches after a few hours, so look for “soft-touch” fabrics or adjustable designs.
When to Choose This Style
It’s the ultimate “I’m in a hurry” style. It works on clean hair, dirty hair, wavy hair, or straight hair. It’s the most forgiving, reliable, and stylish look in your arsenal.
Pro tip: Add a spritz of dry shampoo to your roots before putting the headband on. It gives the fabric something to grip onto, which helps keep the headband from sliding backward during the day.
Final Thoughts
Finding a style that works for your unique texture and daily schedule is all about experimenting until you find the ones that feel like “you.” The key to the cafe latte aesthetic is staying flexible; if a braid isn’t perfect or a bun feels too loose, simply lean into the undone nature of it. Your hair is an accessory, not a chore.
When you start your day with a style that makes you feel put-together, it genuinely changes how you carry yourself through the campus. Don’t be afraid to mix and match these ideas—perhaps a braid on one side with a bun on the other—to create something entirely your own. At the end of the day, comfort is the best style of all, so choose the look that lets you focus on your work instead of your hair.