The arrival of colder months brings an undeniable magic to the air. You likely have the invitations lining up—holiday office mixers, intimate dinners, and the kind of crisp, candlelit evenings that practically demand a little extra effort when it comes to your look. Choosing the right hairstyle for a winter date night is about balancing the practical reality of static-prone, dry air with the festive desire for something polished and memorable. It is not just about looking good; it is about feeling pulled together when the temperature is dropping and the wind is picking up.
Many of us fall into the trap of wearing our hair exactly the same way during the holidays as we do on a random Tuesday in July. That is a missed opportunity. Winter styling allows for rich textures, heavier accessories, and dramatic silhouettes that might feel too heavy or fussy during warmer weather. Whether you are battling frizz from forced indoor heating or trying to prevent your scarf from ruining a perfectly good blowout, there are ways to ensure your hair stays intact from the first drink to the final course of dinner.
When you are planning your holiday beauty routine, consider the interplay between your neckline and your hair. High-necked wool sweaters and thick velvet collars create a unique challenge for long, loose hair, often leading to tangles and unruly ends before the appetizer even arrives. This guide looks at twenty distinct ways to style your hair for those special winter outings, focusing on techniques that hold up under pressure. From sleek, modern minimalism to intricate braids that look far more difficult than they actually are, these styles are designed to make your date night preparation a little more intentional and a lot more rewarding.
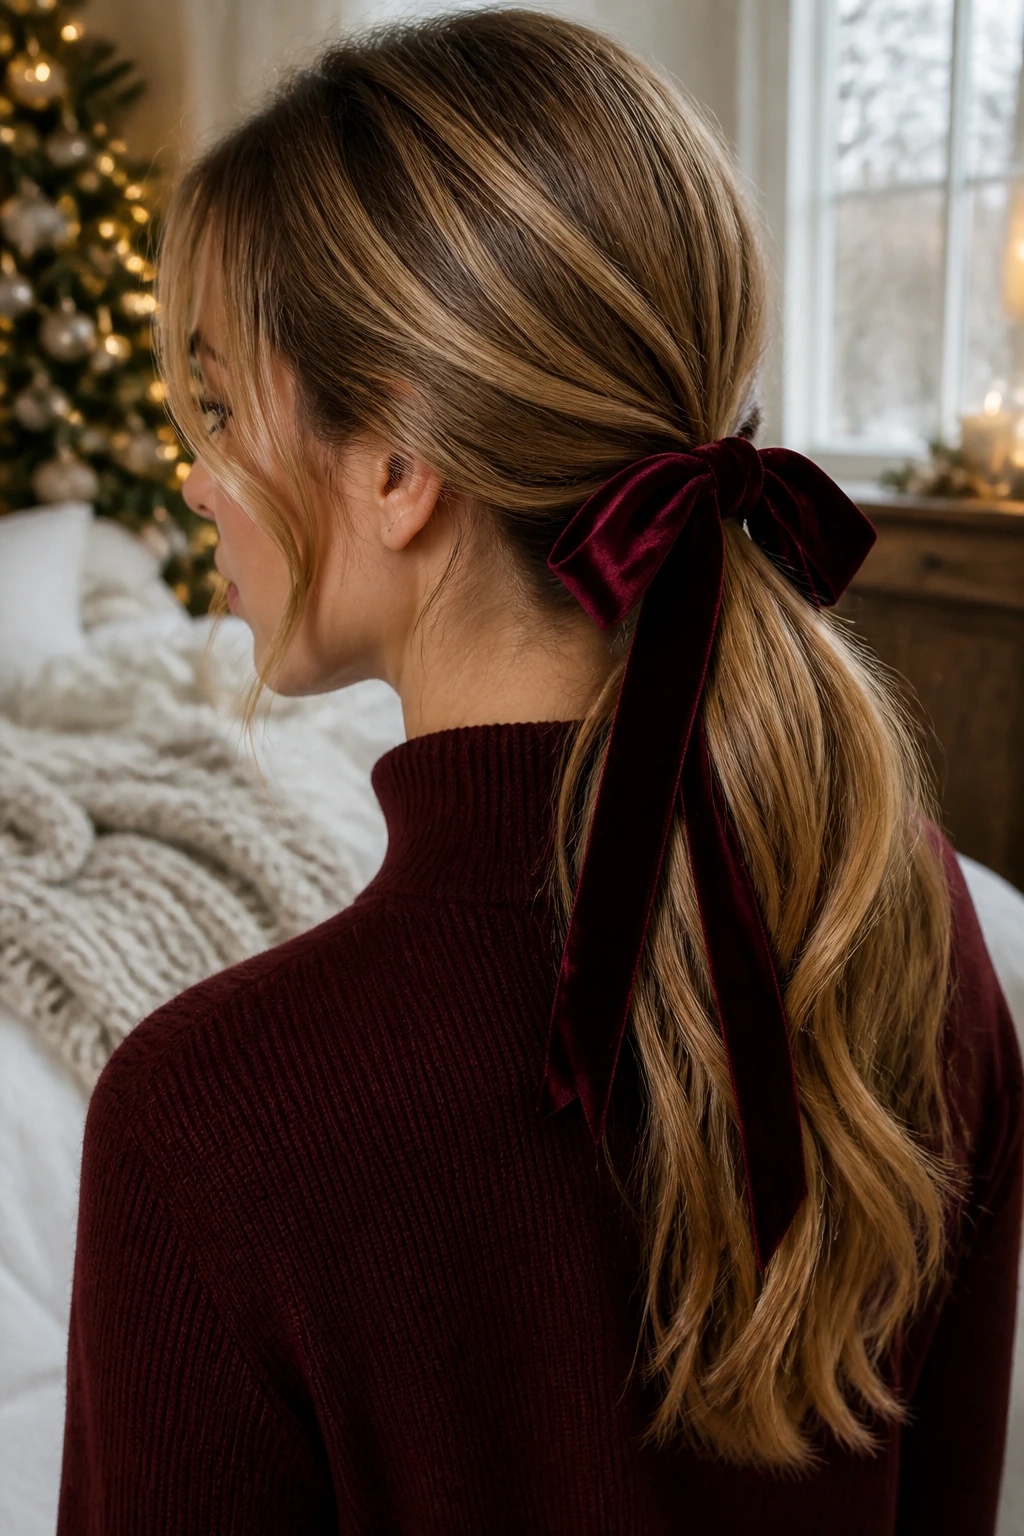
1. The Velvet Ribbon Low Pony
There is something undeniably sophisticated about a velvet ribbon. It is an inexpensive accessory that instantly transforms a standard, everyday ponytail into a purposeful, polished evening look. Because velvet has a bit of weight, it stays tied securely throughout the night, preventing the constant need to adjust your hair.
Why This Works for Winter Dates
Velvet is the quintessential fabric of the cold season. Its texture provides a subtle, luxurious contrast to the silk or wool of your outfit. A low ponytail keeps your hair away from high coat collars and scarves, which is a massive functional benefit during snowy or windy weather.
Achieving the Look
- Start by gathering your hair into a low, smooth ponytail at the nape of your neck.
- Use a clear, snag-free elastic to secure it firmly; do not rely on the ribbon to hold the weight of your hair.
- Wrap a long strip of velvet ribbon around the elastic several times to conceal it.
- Tie the ends into a clean bow, leaving the tails long enough to cascade slightly down your back.
- Mist with a light-hold shine spray to keep flyaways at bay in dry, static-filled indoor environments.
Pro tip: For a more modern finish, wrap a small section of hair around the elastic before adding the ribbon for a seamless, professional base.
2. Sleek Center-Parted Glass Hair
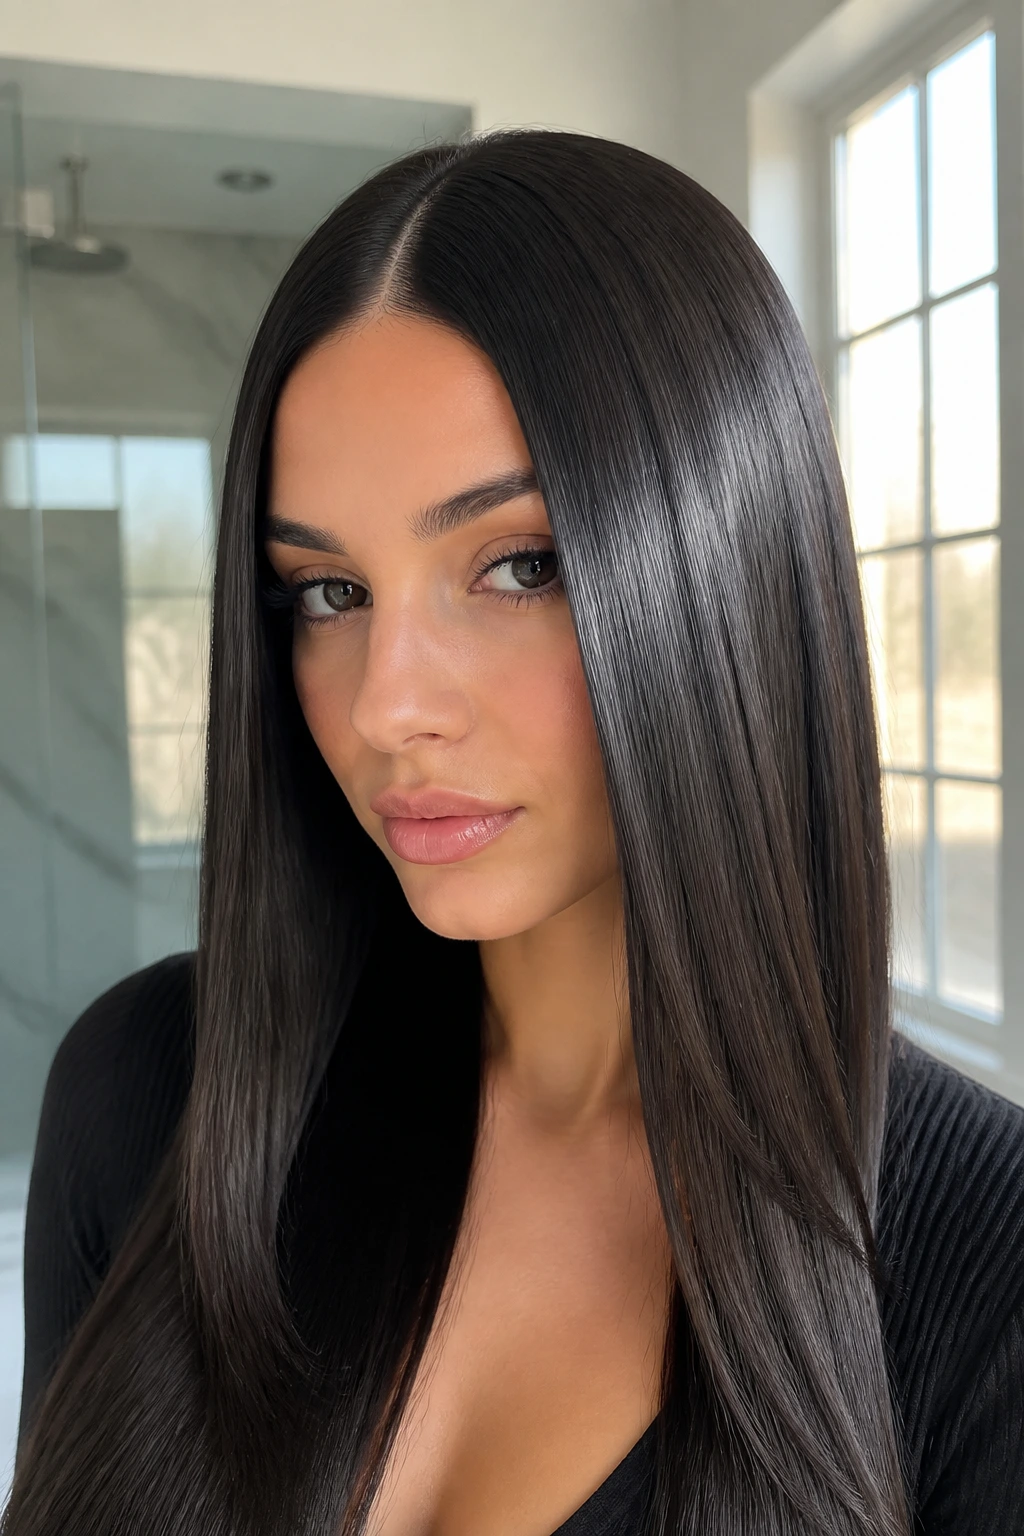
The “glass hair” aesthetic is defined by extreme shine and a sharp, precise silhouette. It feels minimalist and cool, providing a necessary contrast if you are wearing a busy patterned sweater or an ornate holiday dress. This style requires a bit of prep, but the final result is striking and effortless in its execution.
The Science of the Shine
To achieve that reflective, mirror-like quality, you must prioritize the health of your hair cuticle. Start with a smoothing shampoo and conditioner in the shower. When blow-drying, use a high-quality boar bristle brush, which distributes natural oils from your scalp down to the ends of the hair shafts.
Essential Tools for Success
- A professional-grade flat iron with ceramic plates that distribute heat evenly.
- A heat protectant serum that contains silicone, which helps lock in moisture and create a glossy barrier.
- A fine-tooth tail comb to ensure your center part is perfectly centered and crisp.
A note on maintenance: Keep a small vial of lightweight finishing oil in your clutch. If the air is particularly dry, a tiny drop smoothed over the surface of your hair can instantly reset the shine.
3. The Messy French Twist
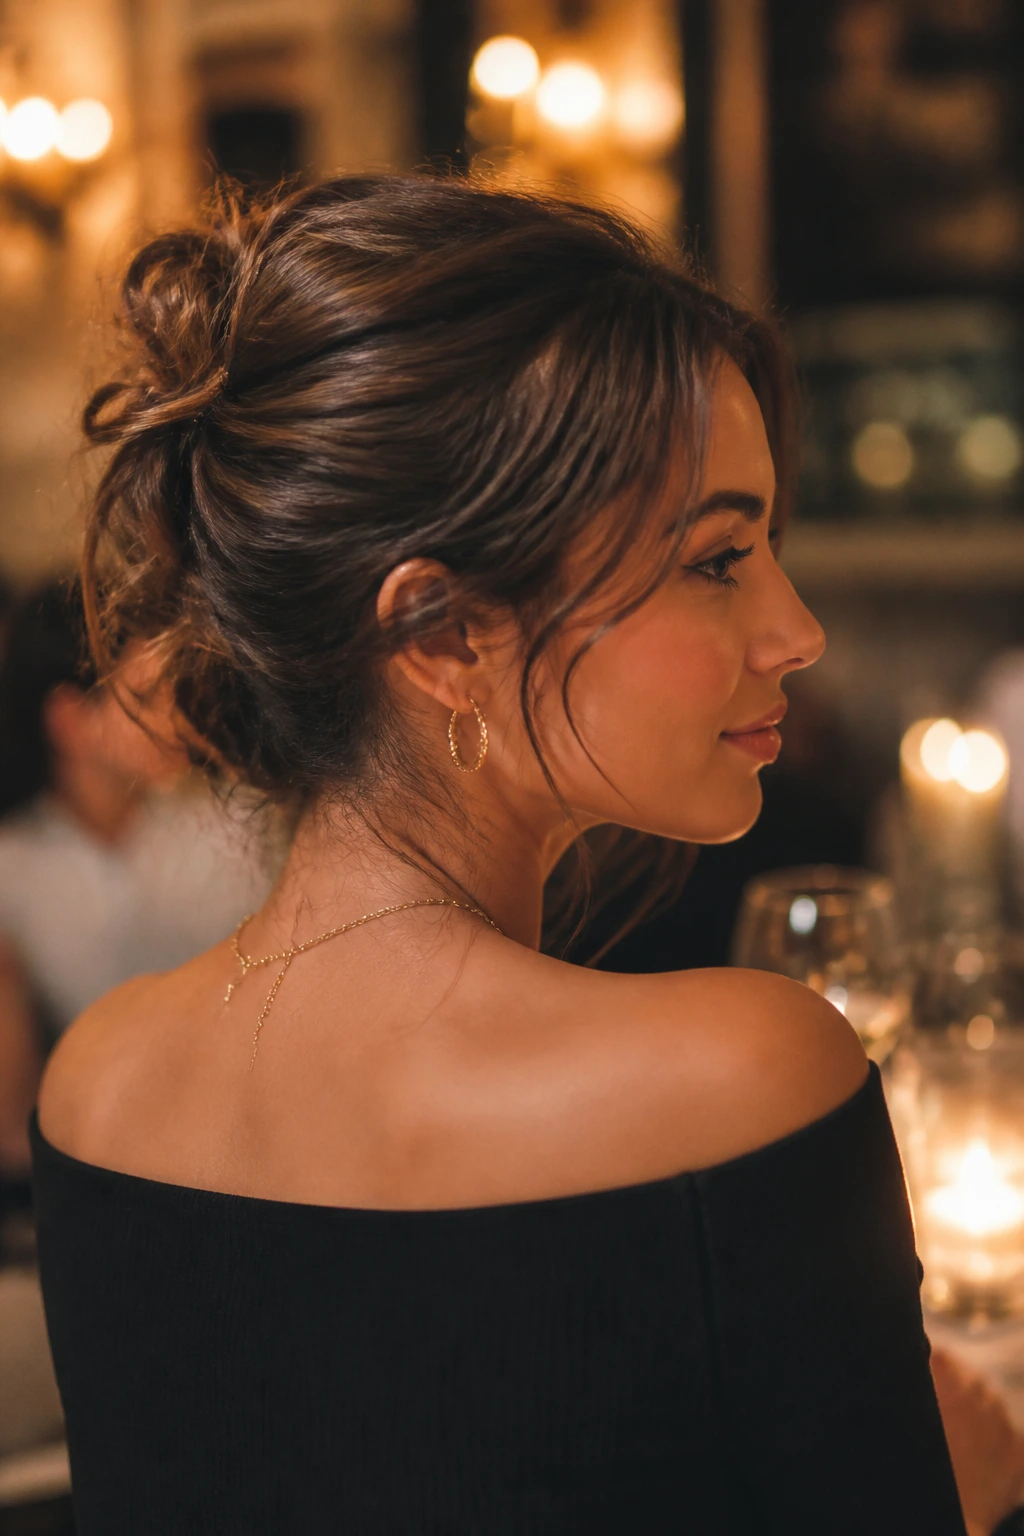
The French twist is a timeless silhouette, but the “messy” version takes the intimidation factor out of the equation. It feels romantic and slightly undone, making it ideal for a candlelit bistro where you want to look elegant without appearing as though you spent three hours in front of a mirror.
Why It Suits Winter Evenings
This style exposes the nape of your neck and showcases your favorite pair of winter earrings. It also allows you to bundle up in a scarf without worrying about your hair getting smashed or frizzed, as the weight of the hair is pinned securely upward and away from your clothing.
Styling for Texture
- Prep your hair with a texturizing spray or dry shampoo to give it “grip” before you start pinning.
- Backcomb the crown of your head lightly to build volume; a flat French twist can look a bit severe.
- Gather your hair to the back as if you are making a low ponytail, then twist the length upward.
- Use large, decorative bobby pins—perhaps in gold or tortoise shell—to tuck the ends in and secure the shape.
- Pull out a few small, face-framing pieces to soften the overall appearance.
Pro tip: If your hair is on the finer side, use a mini hair donut or a small bun shaper tucked into the twist to provide the necessary volume and structure.
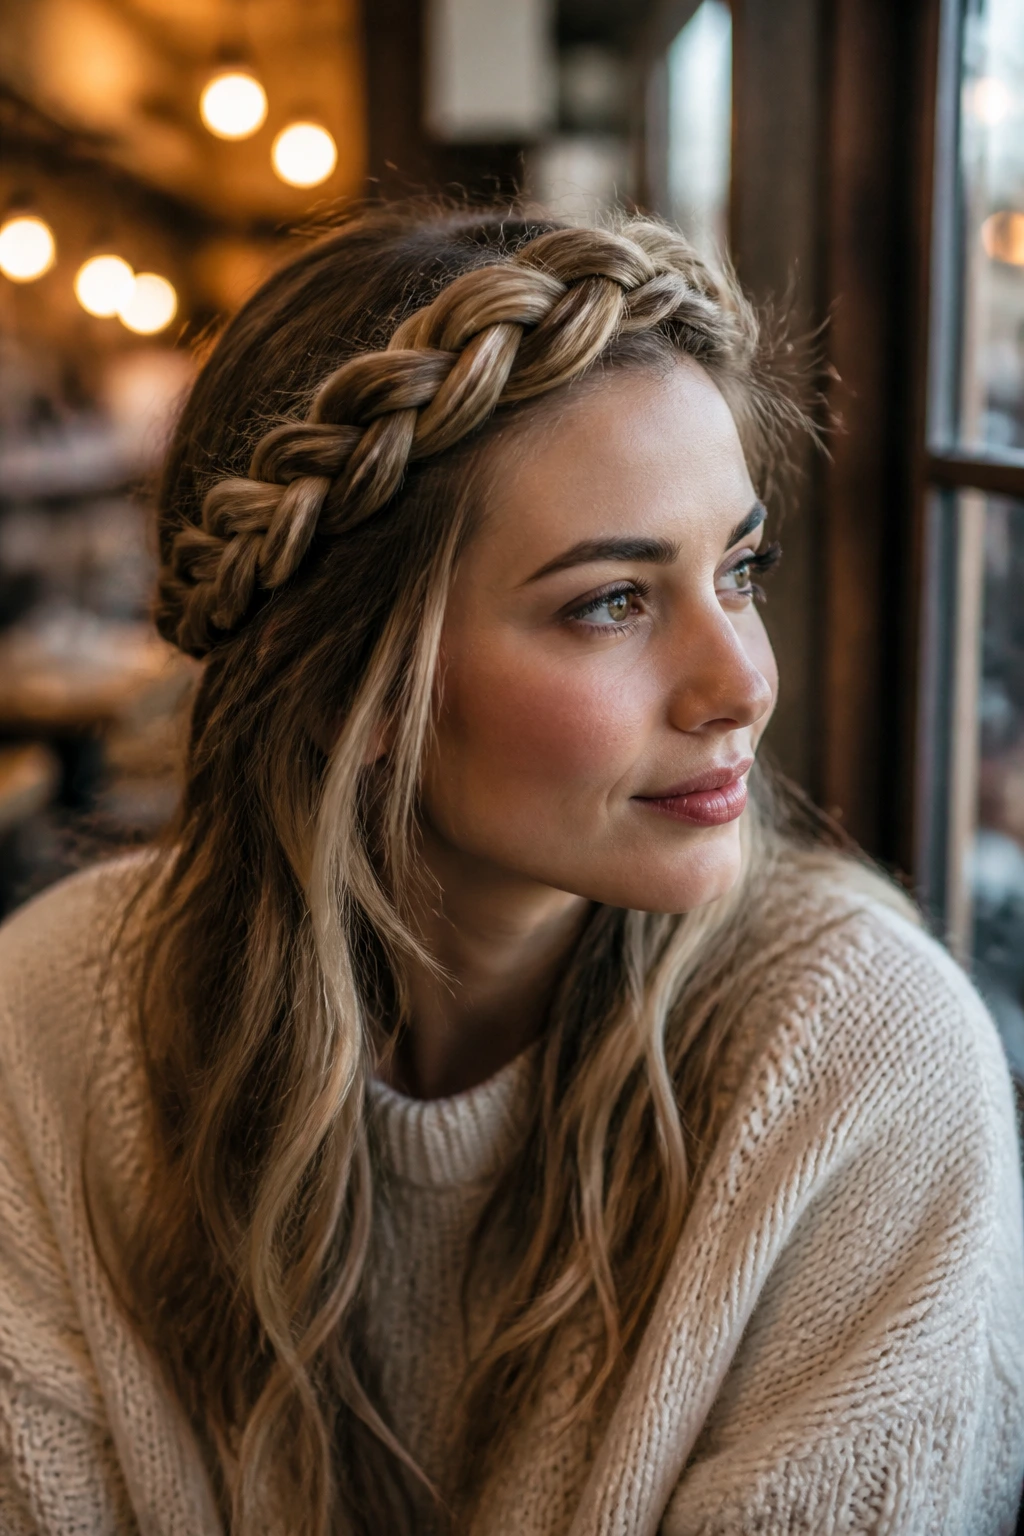
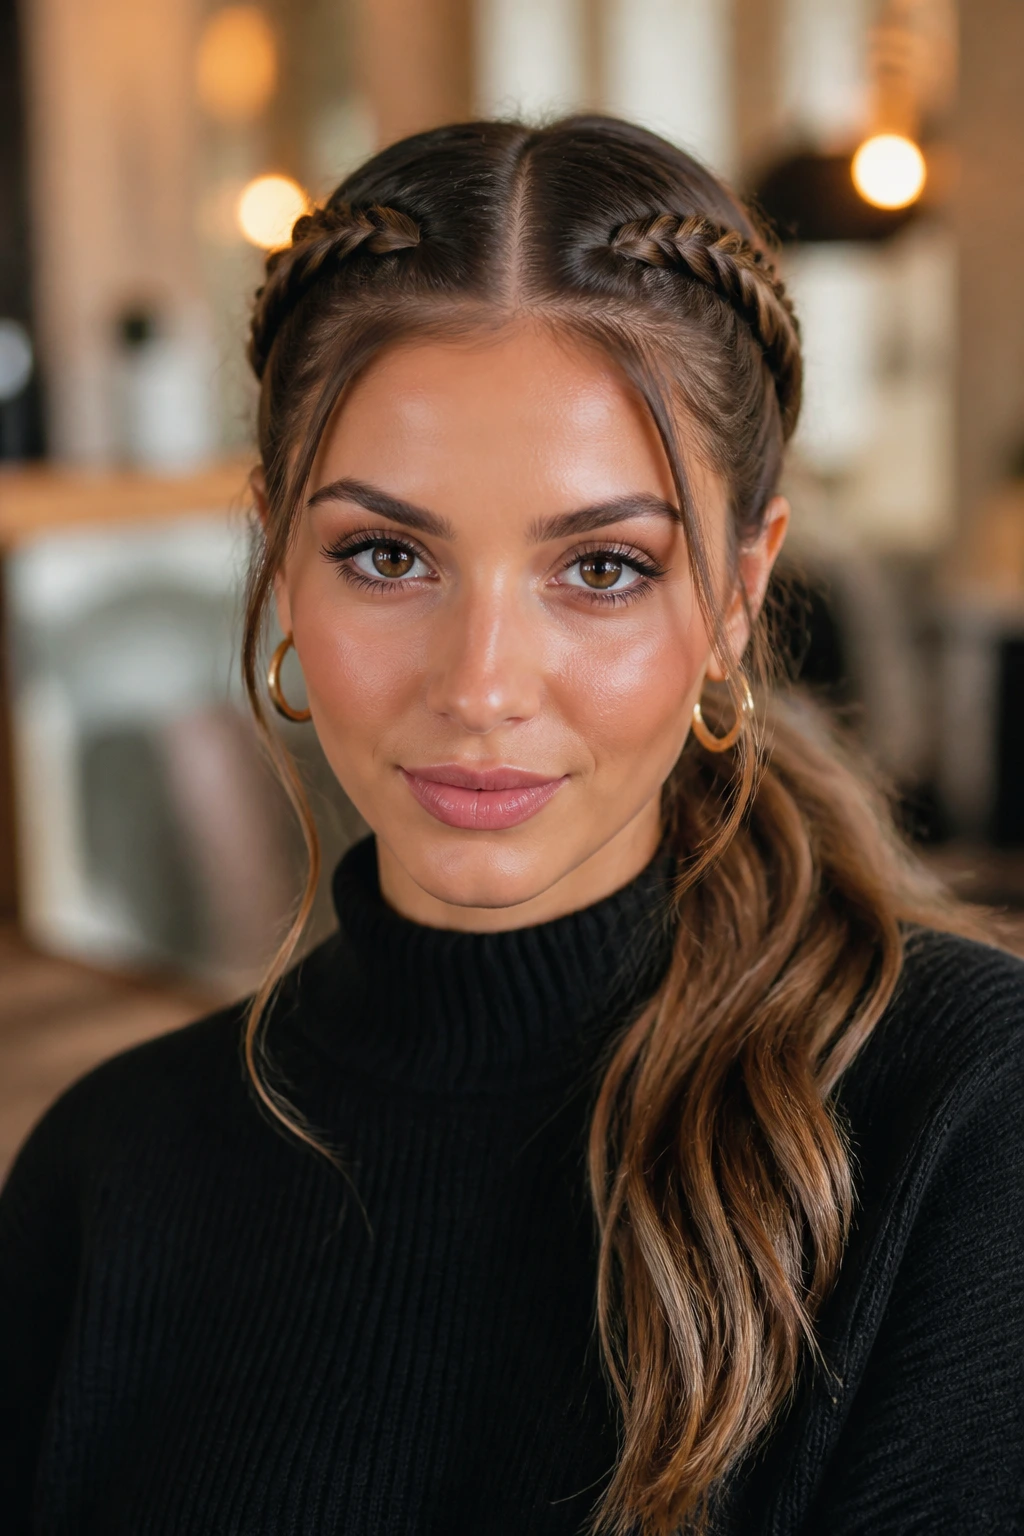
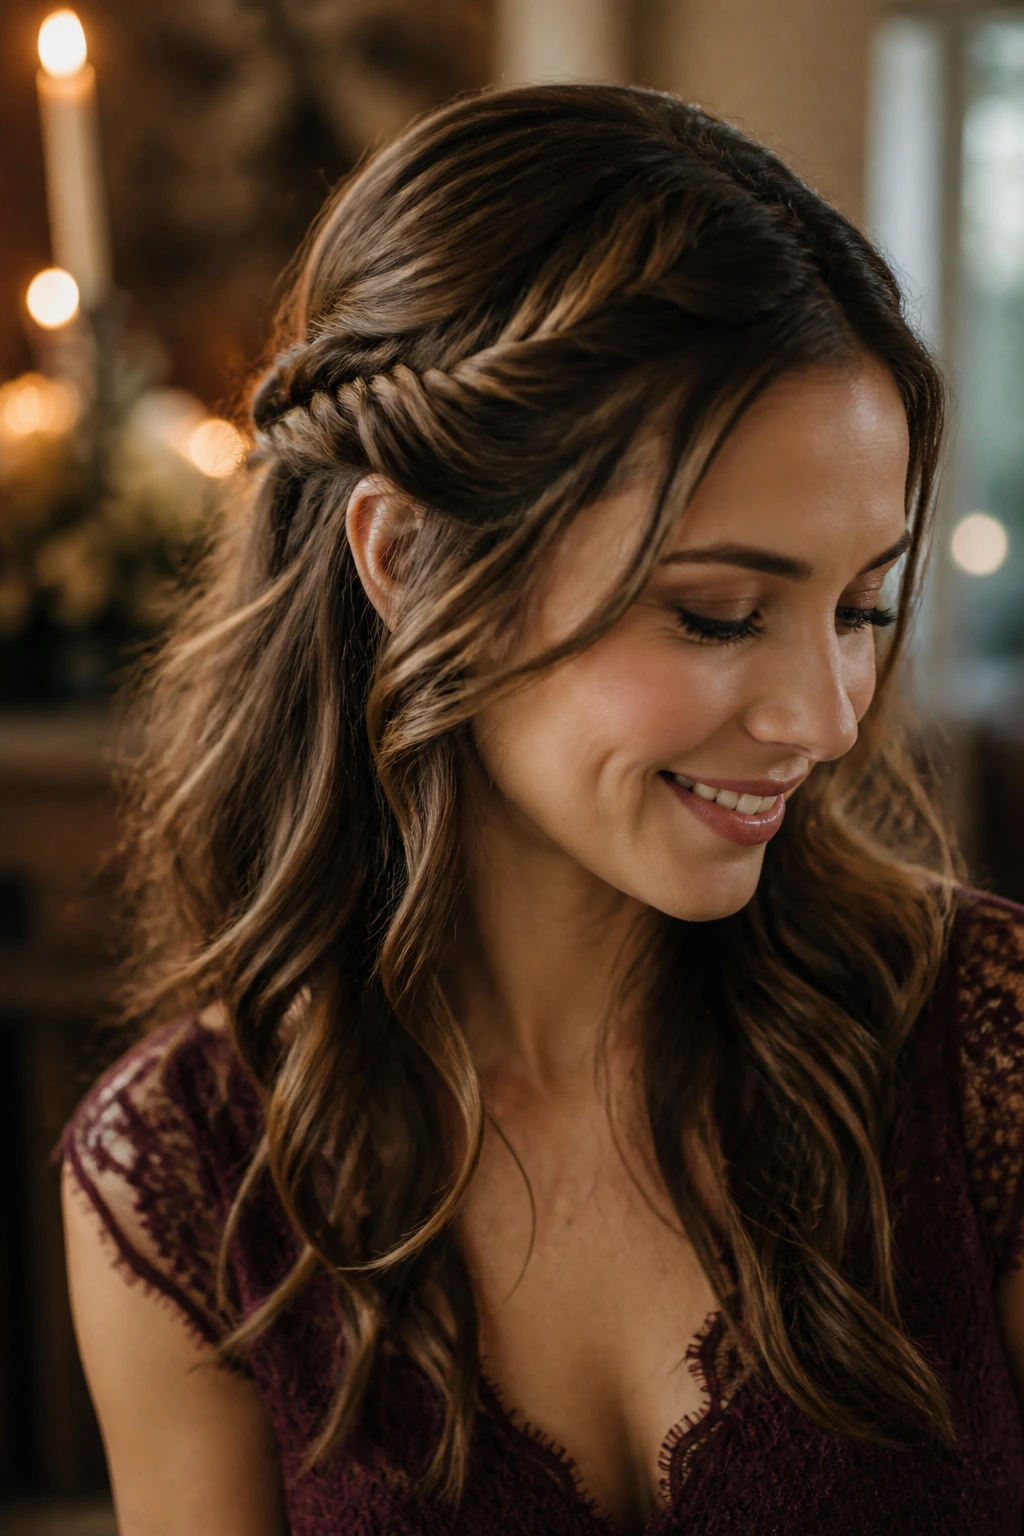
4. The Half-Up Braided Crown

If you love the look of loose, flowing hair but find that it tends to get in your face during dinner, the half-up crown braid is your solution. It combines the relaxed vibe of down hair with the practicality of an updo, making it a highly versatile choice for date night.
Variations on the Braid
You can choose a standard three-strand braid, a Dutch braid for a more prominent, lifted look, or a fishtail braid if you want something that looks more intricate. A Dutch braid works exceptionally well for winter because it sits “on top” of the hair, making it highly visible even if your hair is a darker shade.
Step-by-Step Styling
- Take a two-inch section of hair from each temple.
- Begin French or Dutch braiding toward the back of your head, adding in hair as you go.
- Once the braids meet at the center-back, secure them with a discreet elastic or a decorative barrette.
- Gently tug at the loops of your braids to loosen them; this creates the appearance of fuller, thicker hair.
- Use a curling wand on the loose section of your hair to add soft, romantic waves that complement the structured braids.
A note on holding power: Avoid using too much heavy hairspray, which can make the braids look crusty. A lightweight, flexible-hold spray is enough to keep everything in place for the evening.
5. Low Chignon with Hair Jewels

A low chignon is the ultimate classic for formal holiday dates. Adding hair jewels or pearls elevates it into something festive and special. It is a subtle way to incorporate the sparkle of the season into your hair without going overboard.
Selecting Your Accessories
Pearls look incredibly chic against darker hair colors, while gold or silver geometric pins work beautifully on blondes or lighter browns. Choose pins that match the jewelry you are already wearing to keep your look cohesive.
The Construction of a Chignon
- Create a low base by tying your hair into a ponytail.
- Roll the ponytail over your fingers and tuck it inward toward the nape of your neck, pinning it as you go.
- Don’t worry about perfect symmetry; the charm of a modern chignon lies in its slightly organic shape.
- Once secure, scatter your pins or jewels across one side of the chignon to act as a focal point.
Pro tip: Ensure you have enough bobby pins. A single, heavy pin will sag by the end of dinner; several smaller pins spread throughout the roll will provide a much stronger foundation.
6. The Textured High Pony
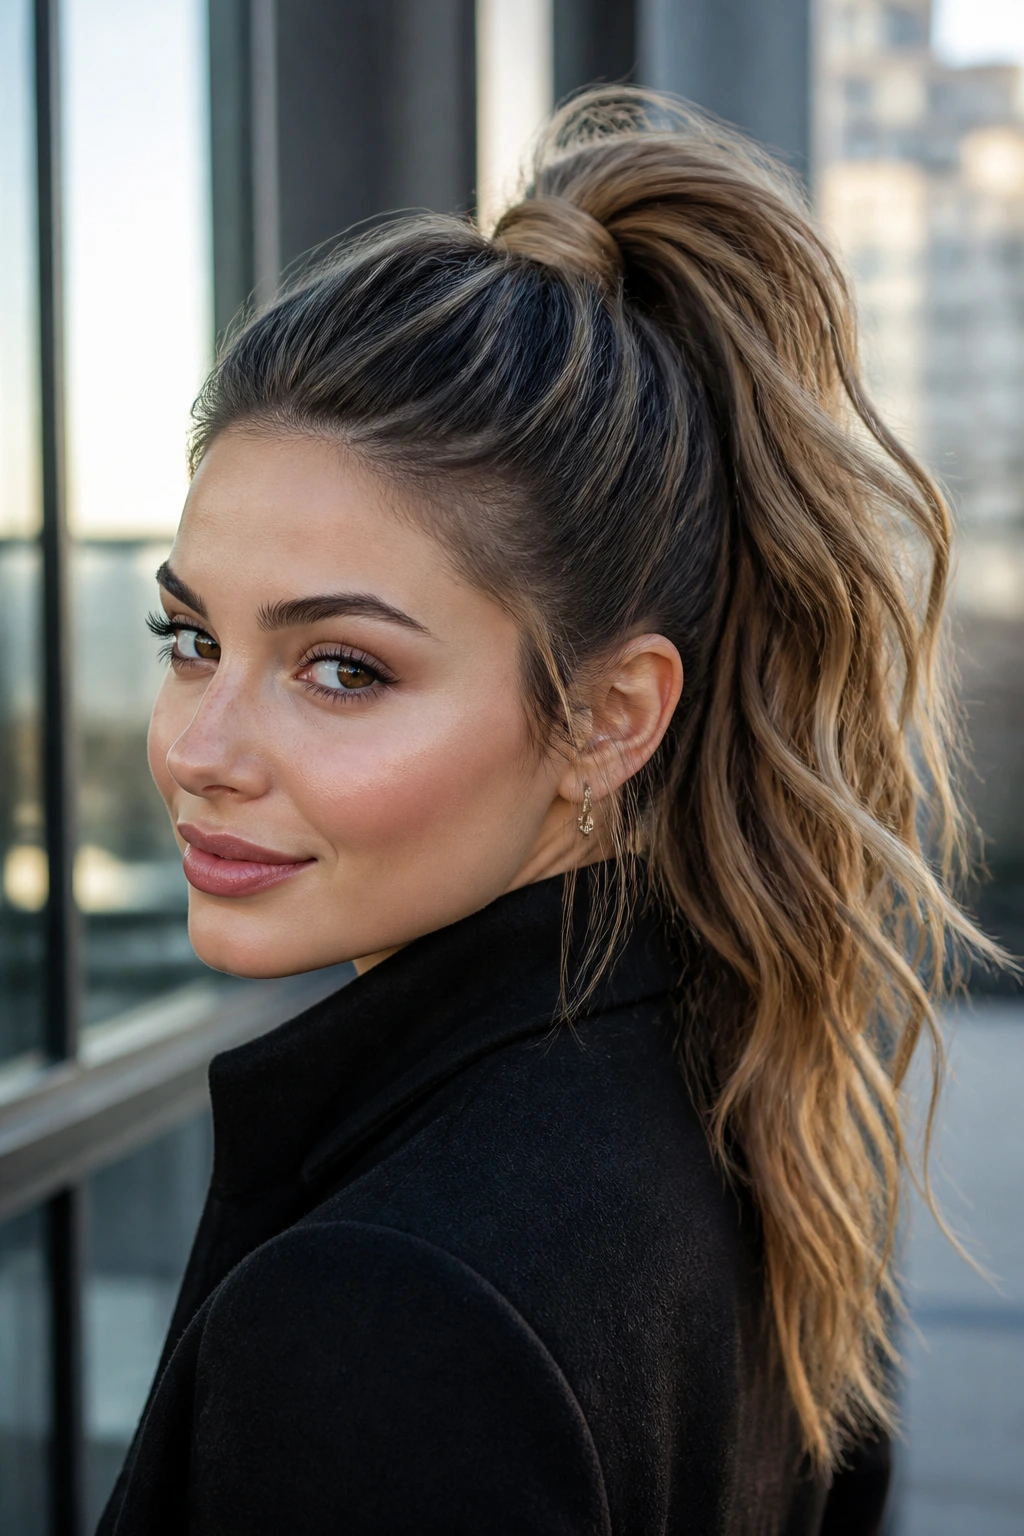
A high ponytail is sharp, confident, and incredibly flattering. By adding texture—either through curls or a crimped effect—you move it away from the “gym ponytail” territory and into a style that feels intentional and glamorous.
The Role of Volume
The higher the ponytail, the more “lift” it gives your face. If you have shorter layers, don’t worry if a few pieces fall out; you can curl them or tuck them behind your ears to give the style an effortless, lived-in feel.
Techniques for Success
- Flip your head upside down when you gather your hair to ensure the back is smooth.
- Once tied, take a one-inch piece of hair from the pony and wrap it around the base to hide the elastic.
- Use a curling iron to create loose, bouncy waves throughout the tail.
- Finish by spraying a bit of texture powder at the base of the pony to ensure it doesn’t droop over time.
Observation: This style is perfect for high-neck outfits, as it keeps your shoulders and neck line clean, preventing the “cluttered” look that often happens when long hair competes with a thick collar.
7. Soft Waves with a Side Sweep
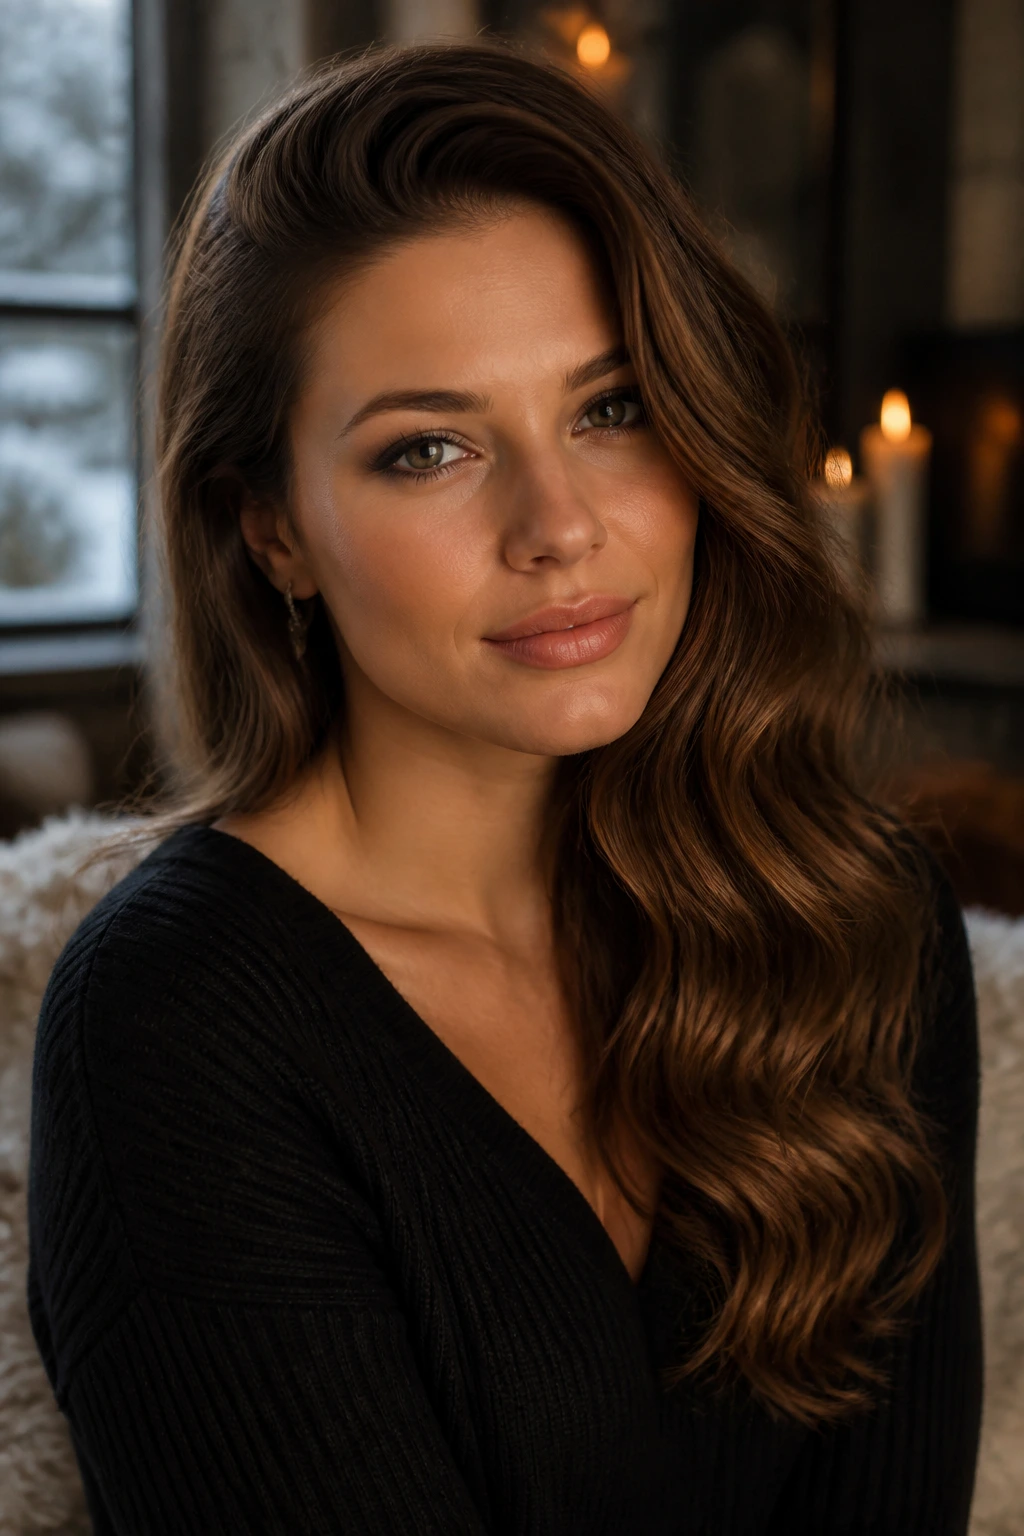
There is something inherently romantic about deep side-swept waves. They mimic the Old Hollywood aesthetic but can be adapted for a more modern, casual dinner date. This style works best on hair that has a bit of natural body or hair that has been prepped with a volumizing mousse.
Why This Style Appeals in Winter
The sweeping movement of hair across one shoulder provides a bit of extra warmth against the chill of a winter evening. It feels cozy and inviting, which is exactly the vibe you want for an intimate date.
How to Style
- Part your hair deep to one side.
- Curl your hair in one-inch sections, always curling away from your face.
- Let the curls cool completely before running your fingers through them; this ensures they hold their shape for hours.
- Use a small bobby pin tucked discreetly behind the ear on the side with less hair to keep the sweep in place.
Pro tip: If you have trouble getting your hair to stay on one side, a tiny touch of texturizing paste on the hair behind your ear will act like a glue to keep it pinned back throughout your meal.
8. Braided Headband
If your hair is short or medium-length, a braided headband can feel more manageable than a complex updo. It keeps your hair off your face while adding a touch of whimsy and detail to your look.
The Versatility of Braids
You can braid the front section of your hair to create a natural “headband” or use a faux-braid technique if your hair is layered. A Dutch braid version is particularly popular as it creates a high-profile, crown-like effect.
Execution
- Part your hair off to the side, starting near the temple.
- Begin a Dutch braid, keeping the braid close to your hairline as you work across the front of your head.
- Continue the braid until it reaches behind your opposite ear, then secure with a small, clear elastic.
- Pin the tail of the braid underneath the rest of your hair so the end is hidden.
- Soften the look by pulling at the edges of the braid so it looks wide and voluminous.
Comparison: Unlike a traditional plastic headband, which can cause headaches after a few hours, a braided headband is comfortable and stays exactly where you put it without shifting or sliding.
9. Loose Braided Bun
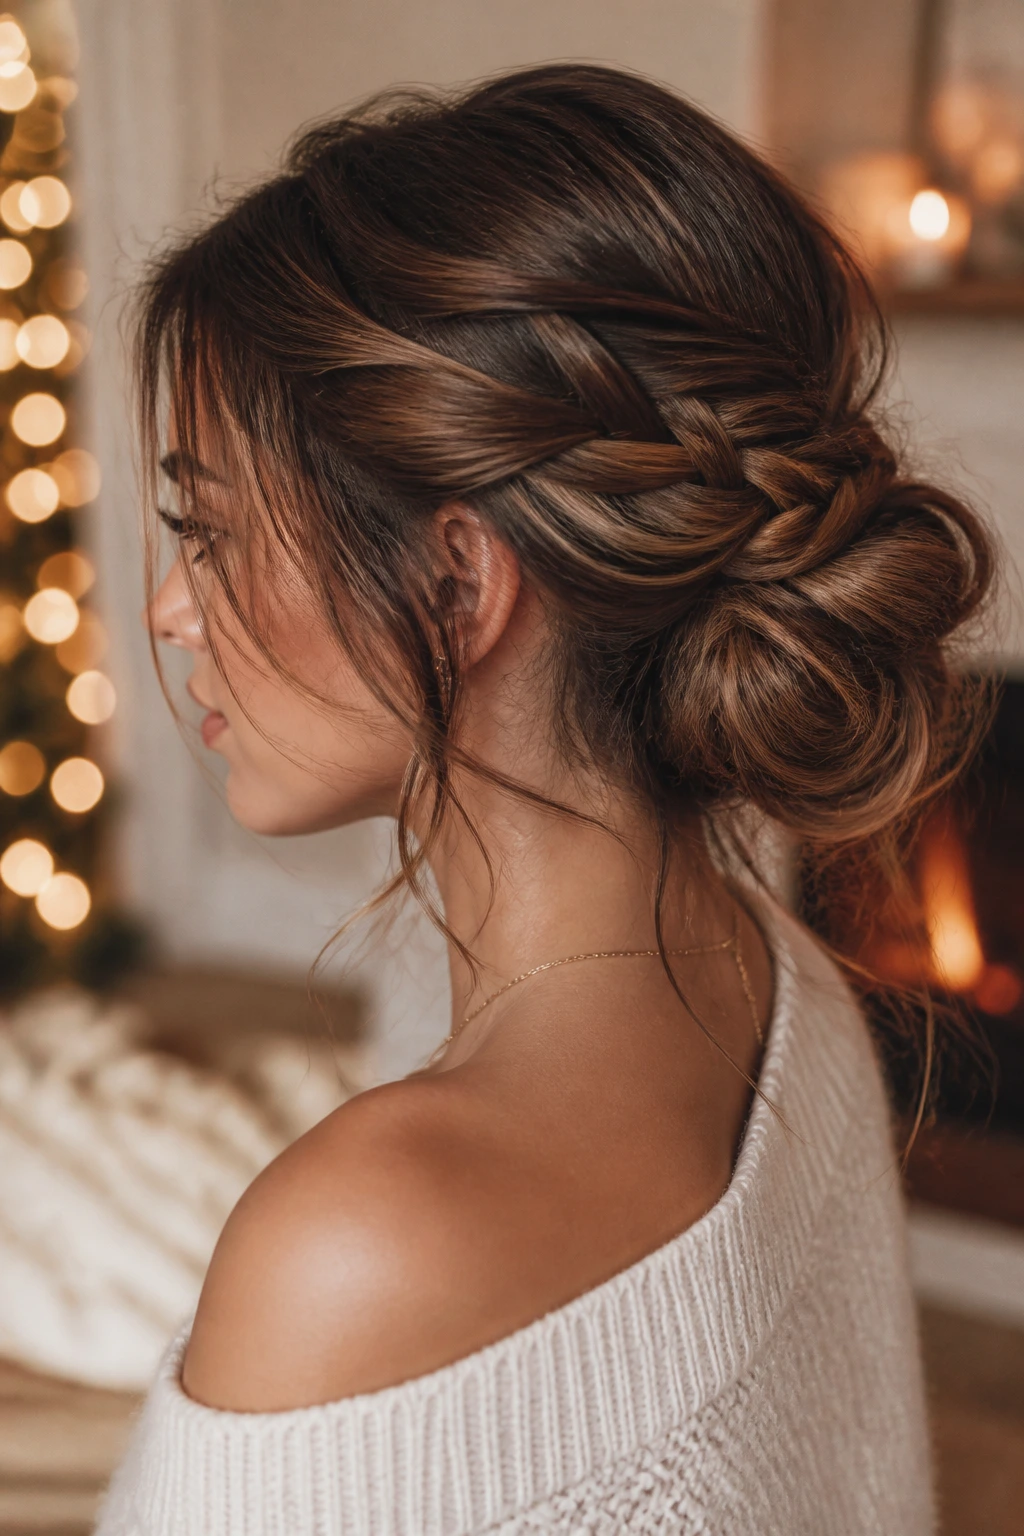
This style is essentially a chignon with a twist. By braiding your hair before putting it into a bun, you add a depth of texture that looks incredibly sophisticated. It is a fantastic option if your hair is thick and needs a little help staying contained.
Why Texture Matters
A plain, slicked-back bun can sometimes feel severe or overly formal. Adding braids—whether you do a single braid or multiple small ones—adds visual interest and makes the style look much more complex than it actually is.
Steps to Follow
- Pull your hair into a mid-level ponytail.
- Divide the ponytail into three equal sections and braid each one, securing the ends with elastics.
- Twist these braids around each other and pin them into a loose, low bun at the back of your head.
- Leave out a few tendrils around your face and curl them slightly with a wand to create a soft, romantic frame.
Pro tip: If you want a more bohemian feel, gently pull on the sides of the braids before you wrap them into the bun. This makes the bun look much larger and more substantial.
10. The Bubble Ponytail
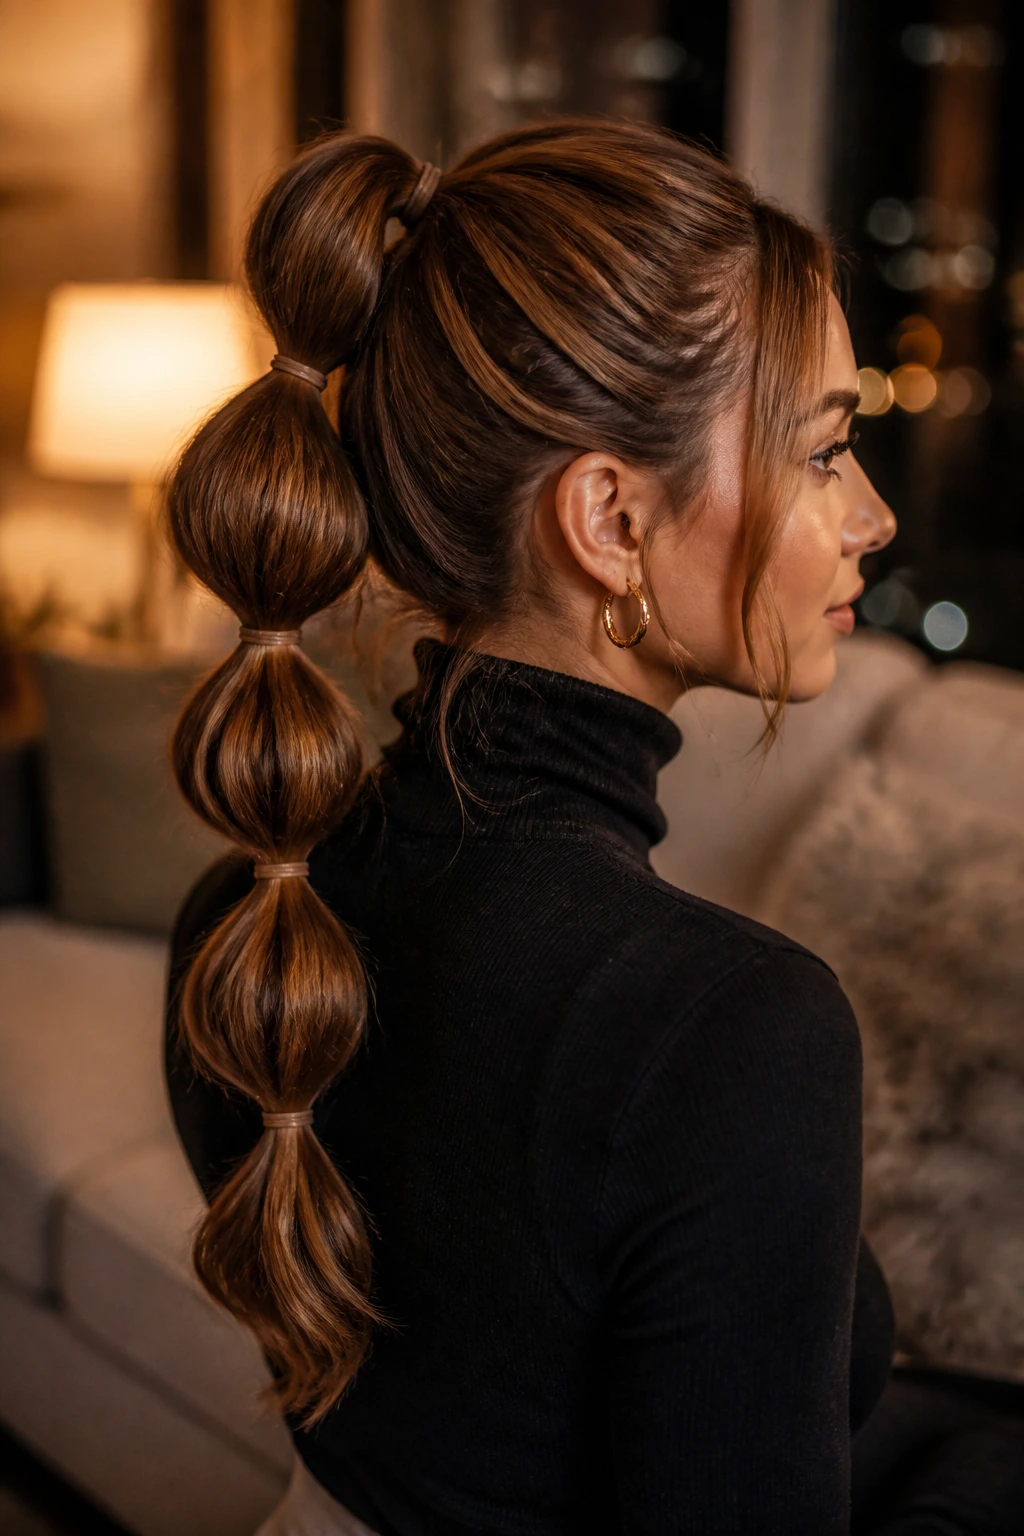
The bubble ponytail is a playful, modern twist on a standard style. It is surprisingly easy to achieve and looks fantastic with almost any outfit, from a cozy cashmere turtleneck to a sleek jumpsuit.
Why It’s Unique
The “bubbles” create volume and structure without requiring you to backcomb or tease your hair, making it a healthier alternative for those concerned about breakage. It is a fun, youthful style that stands out in a sea of basic blowouts.
Building the Bubbles
- Start with a high or mid-level ponytail.
- Place a small elastic every two inches down the length of your ponytail.
- After securing each elastic, gently pull the hair between them to “poof” it out into a bubble shape.
- Continue this until you reach the ends of your hair.
Observation: This style is particularly effective for those with longer hair. The more length you have, the more bubbles you can create, which makes the final look feel quite dramatic.
11. Pin-Straight with Hidden Pins
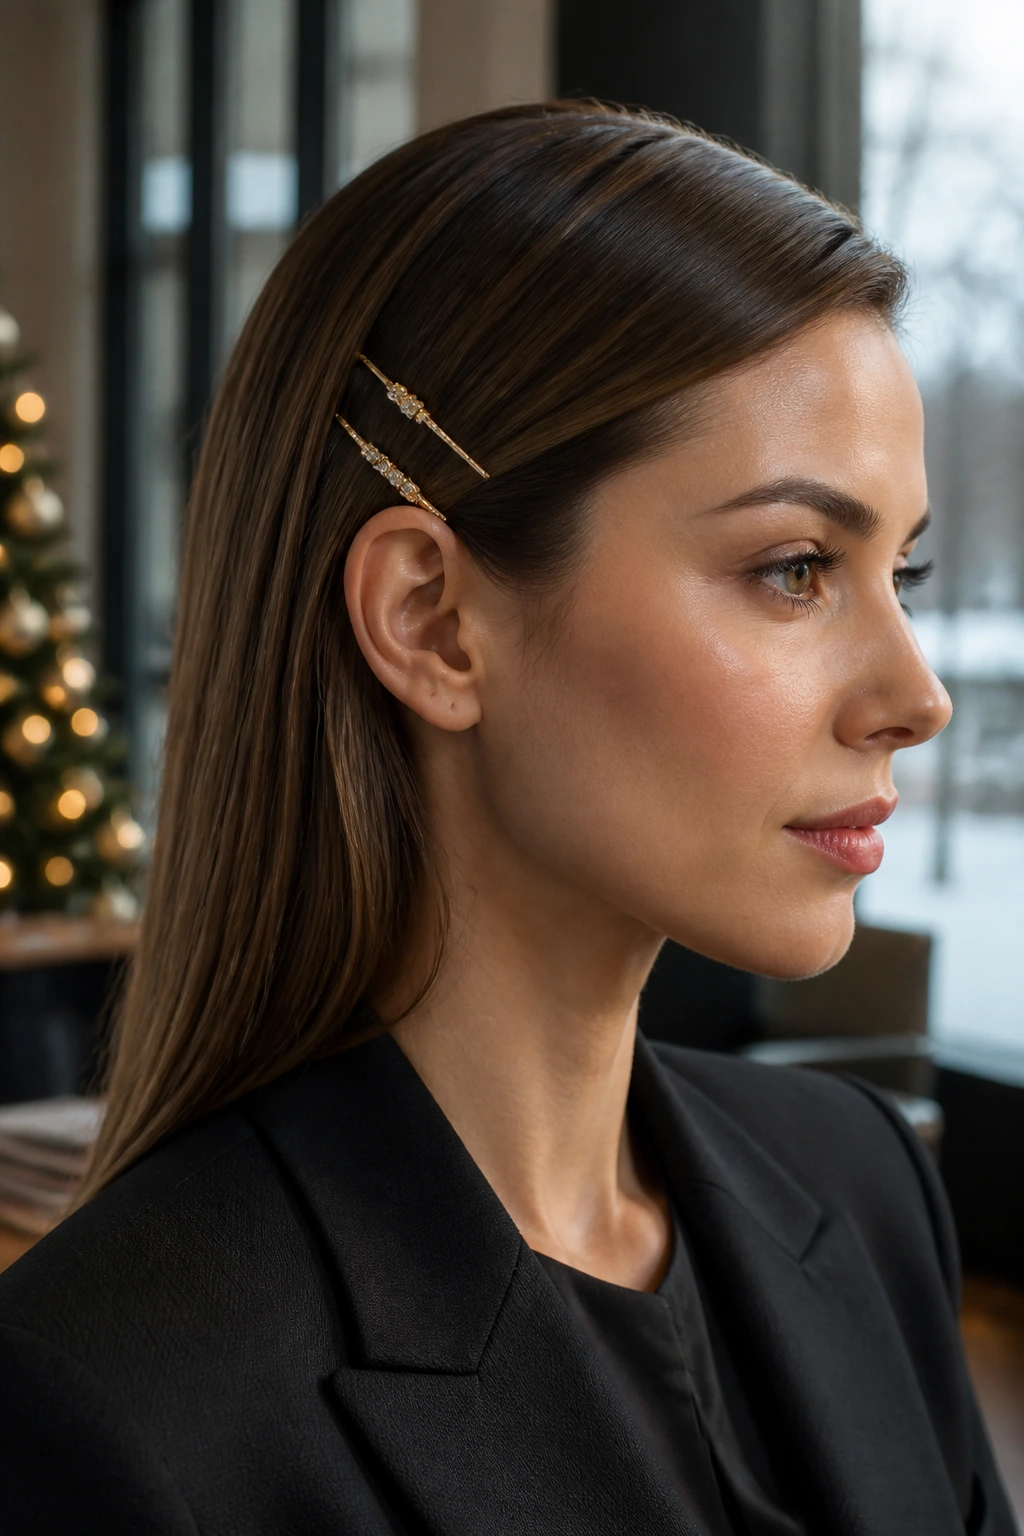
Sometimes the most impactful style is the simplest one. Wearing your hair pin-straight with a series of decorative pins or barrettes tucked just above one ear can look incredibly high-fashion.
Selecting Your Hardware
Look for pins that have a theme—stars, moons, or gold bars—to fit the festive winter season. Since you are using multiple pins, keep them in the same metallic family so the look remains polished and not chaotic.
Tips for Execution
- Apply a heat protectant and straighten your hair in small, thin sections for maximum sleekness.
- Create a deep side part.
- Slide three or four identical or coordinating pins into the side with less hair, starting about an inch above your ear.
- The pins should be placed in a row or a subtle fan shape for the best visual impact.
Pro tip: Before sliding the pins in, spray them with a bit of dry shampoo or texturizing spray. This prevents them from sliding out of your hair, which is a common problem with sleek, straight styles.
12. Wrapped Low Bun
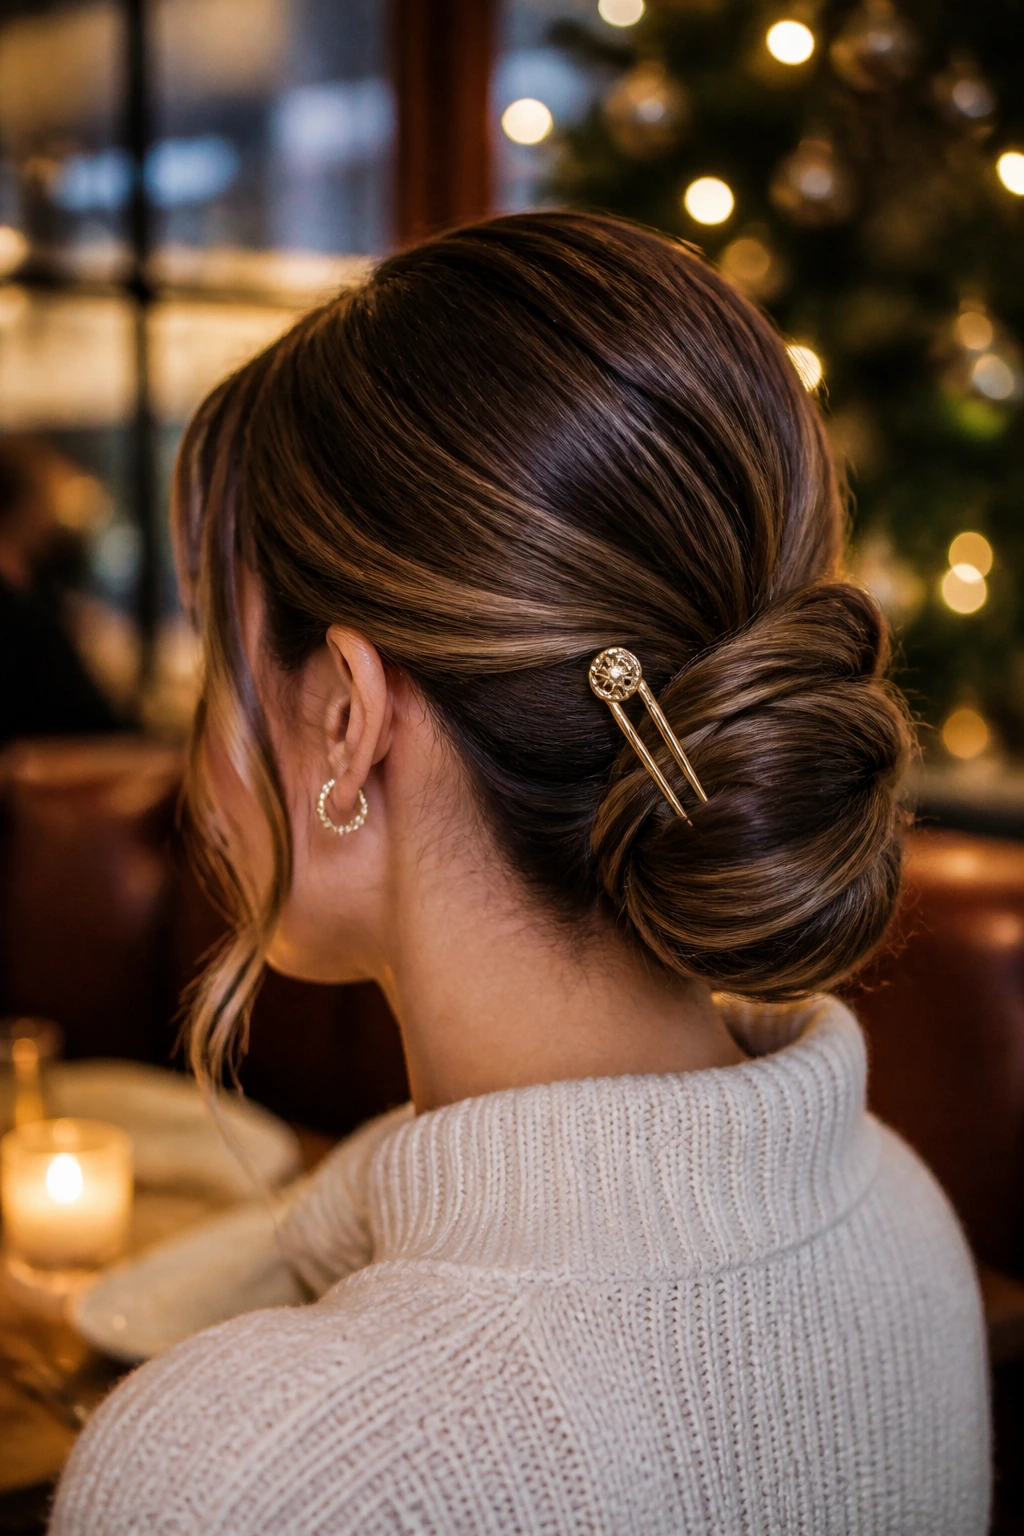
This is an elevated take on the standard bun. By wrapping a section of hair around the base and securing it with an elegant hair fork or decorative stick, you create a look that feels handcrafted and intentional.
Choosing Your Hair Accessory
A gold or silver hair fork is a staple for a reason. It is more sophisticated than a standard bobby pin and acts as a piece of jewelry for your hair. If you have fine hair, look for a fork with a “wave” in the design, as this helps it grab and hold more hair.
The Process
- Gather your hair into a low, loose ponytail.
- Twist the ponytail into a circular bun at the nape of your neck.
- Secure the bun by inserting the hair fork through the outer edge and pushing it through the center of the bun.
- The fork should emerge on the other side, locking the hair in place.
A note on comfort: A single fork is usually enough for a full day or evening if placed correctly. Make sure you hook the fork into the base hair of the bun for maximum security.
13. The Half-Up Top Knot
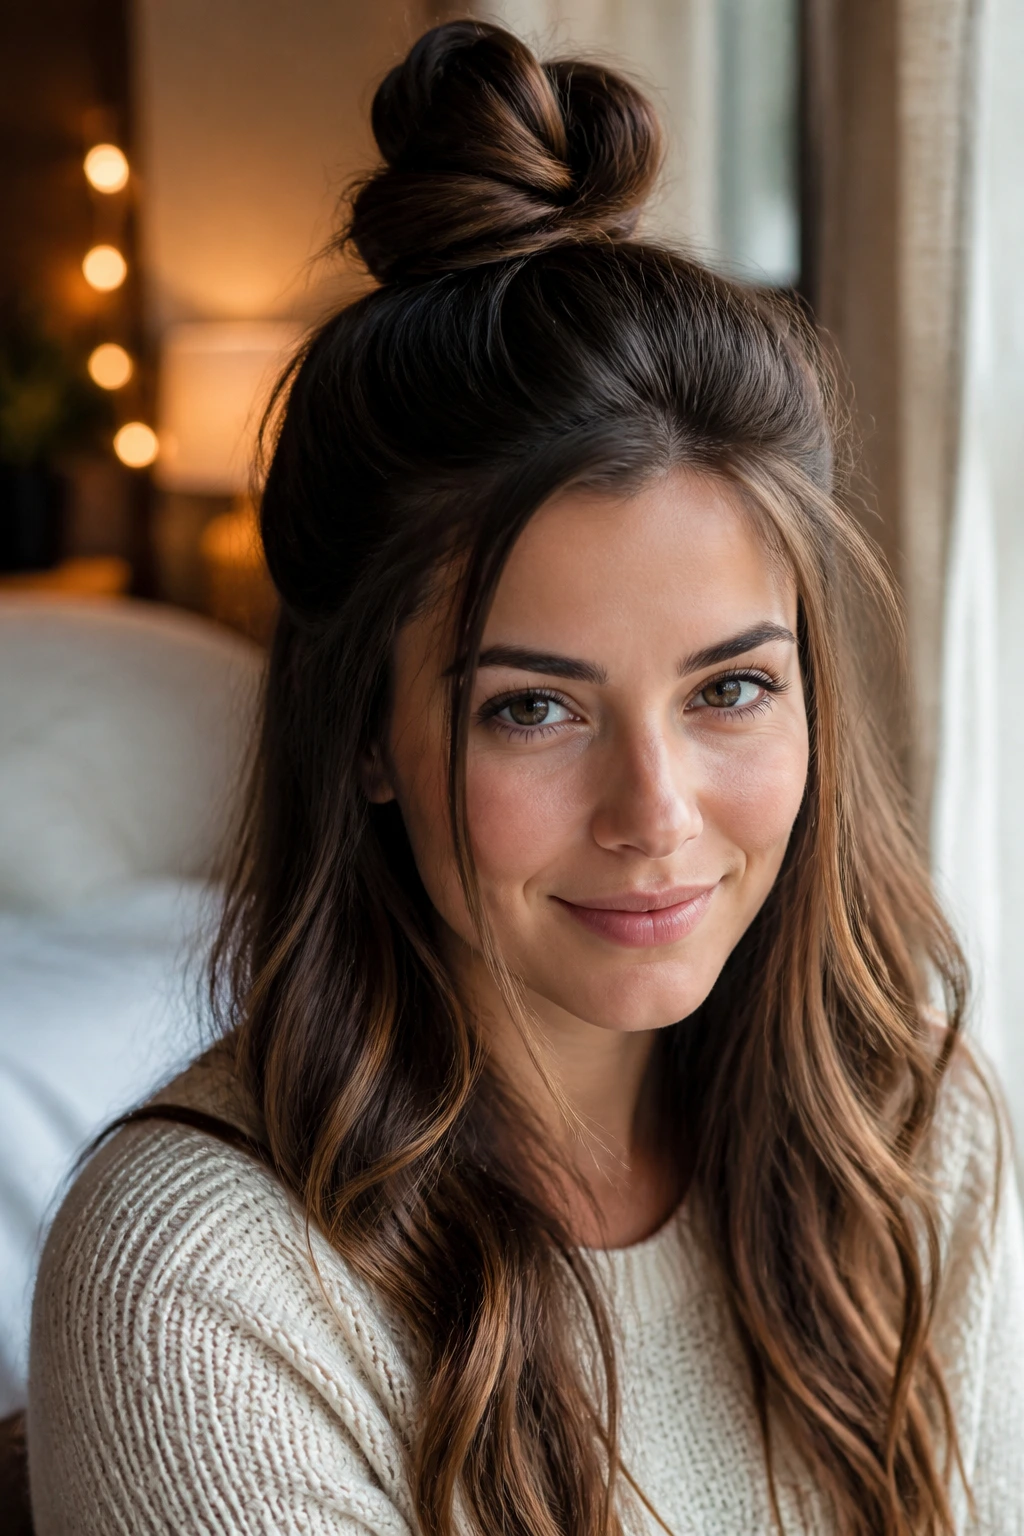
The top knot is usually reserved for casual days, but a half-up version is a chic, balanced way to get hair off your face while keeping the length of your hair visible. It feels balanced and fresh.
Why It Fits Winter Dates
It prevents your hair from tangling in the back of your coat but keeps the overall silhouette soft. It is an excellent choice for a dinner where you want to look put-together but not overly formal.
How to Style
- Separate the top section of your hair from the temples back.
- Gather it into a high ponytail on top of your head.
- Twist the pony into a small, tight bun and secure it with a few pins.
- Use your fingers to fluff the bun slightly so it isn’t too tight or small.
- Wave the remaining hair that is left down to give it a soft, finished texture.
Pro tip: If you find the bun is too flat, use a tiny bit of hair powder at the base of the top-knot section to create immediate grip and volume before you even start twisting.
14. Retro Side-Parted Waves
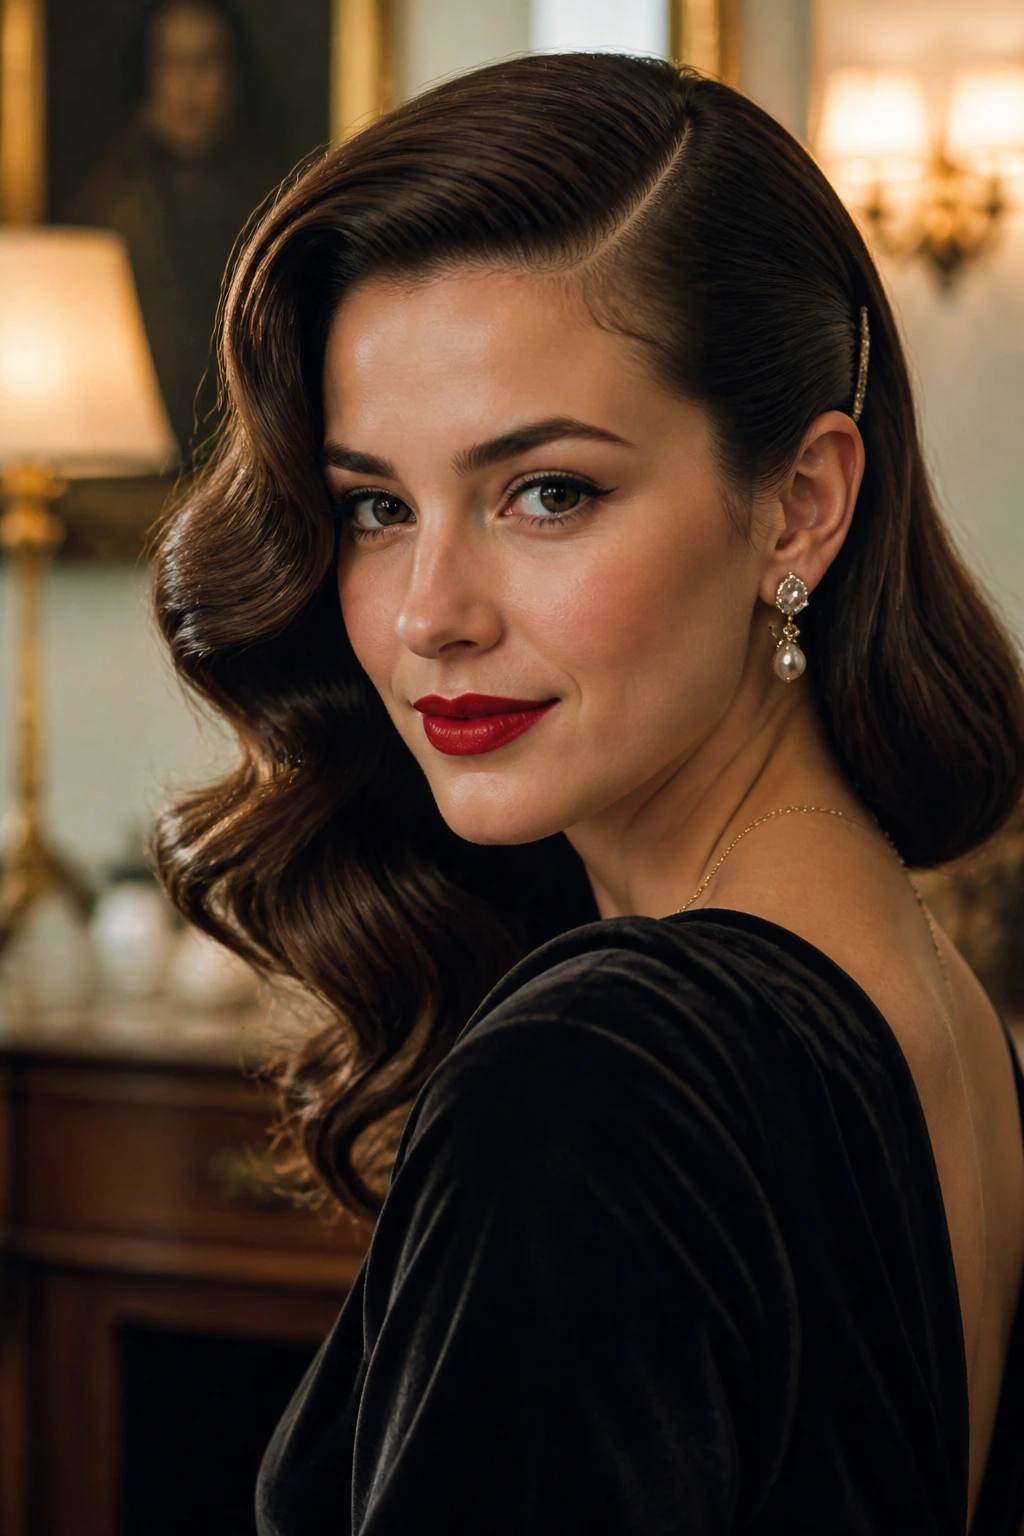
If you love a vintage-inspired look, this is it. Deep, structured side-parted waves are reminiscent of mid-century glamour and look incredible with a bold red lip or a classic black dress.
Defining the Waves
The key to this look is “clamping” the wave correctly. Using a curling iron or a wand, make sure you don’t brush the curls out too soon. Let them set, and then use a wide-tooth comb to gently break them into a single, cohesive wave pattern.
Styling Elements
- Part your hair on the side where your natural part is, or go even deeper for more drama.
- Curl all your hair in the same direction—this is crucial for creating that uniform “Hollywood wave” effect.
- Once finished, tuck the smaller side behind your ear and secure it with a discreet pin so all the focus remains on the wave on the larger side.
Observation: This style is essentially the gold standard for winter weddings and formal date nights. It is elegant, timeless, and photographs beautifully regardless of the lighting.
15. The Faux Bob
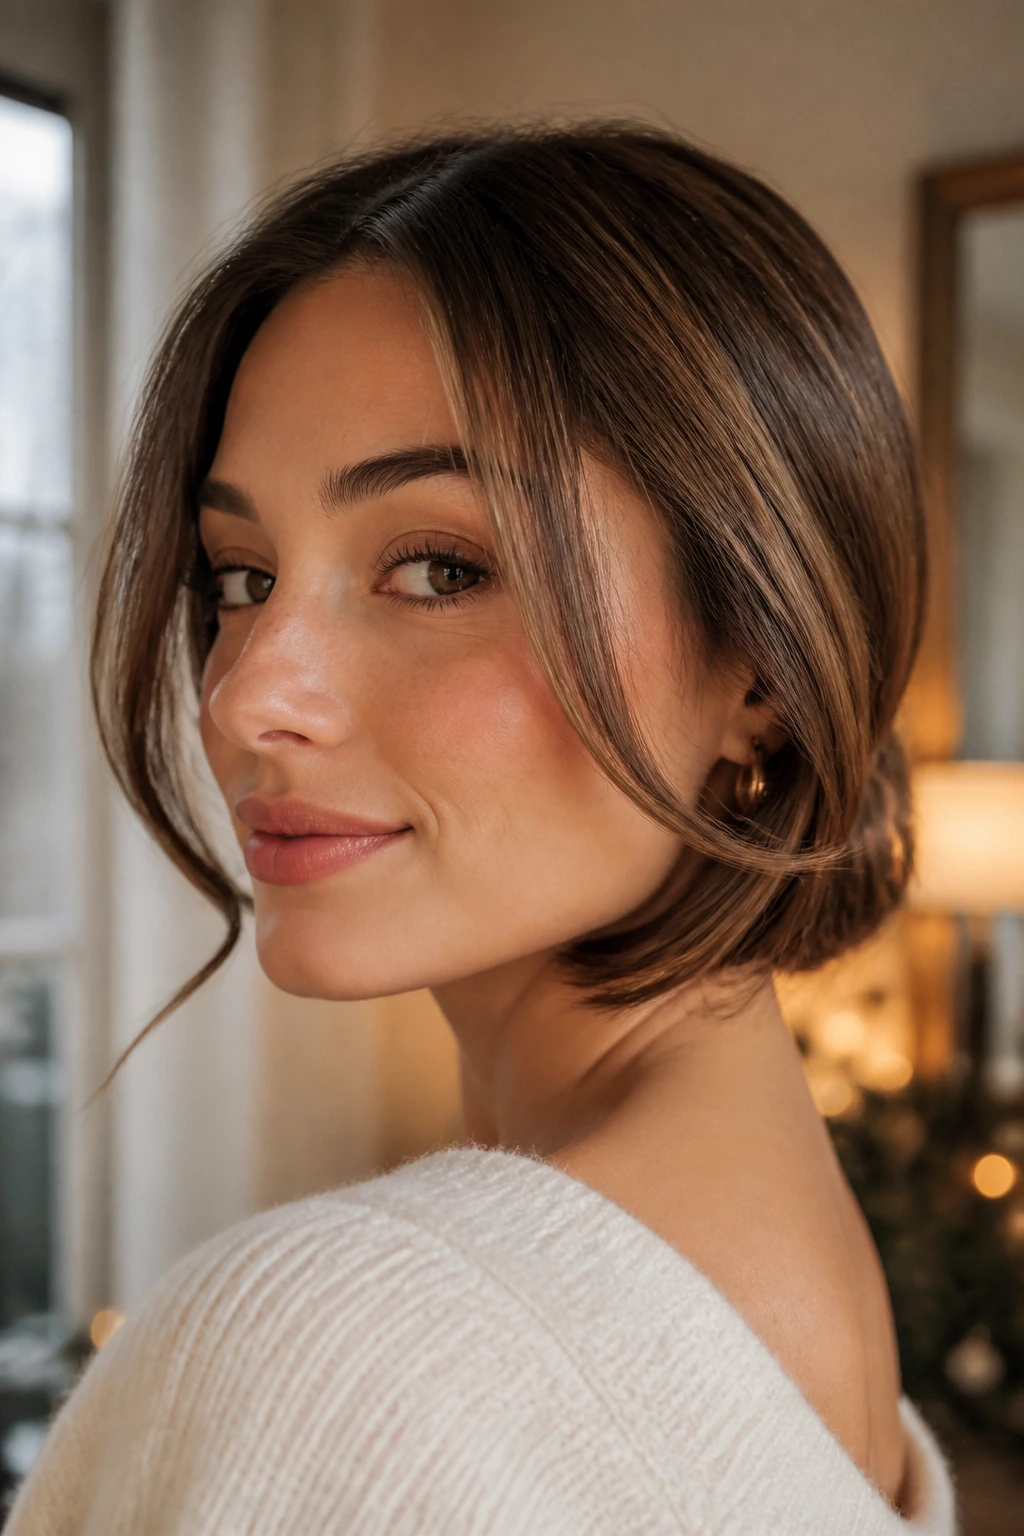
Do you have long hair but want to see how you look with a shorter cut for a night? A faux bob is the perfect “try-before-you-buy” style. It is elegant, chic, and completely changes your appearance for the evening without requiring a single snip of the scissors.
Why It Works for Winter
A bob is a classic winter silhouette. By tucking your long hair under, you create that sharp, clean look that pairs wonderfully with scarves and bulky winter jackets. It creates a completely different shape around your neck and shoulders.
Steps for the Faux Bob
- Curl your hair loosely so it has some body.
- Gather your hair into a loose low ponytail at the very ends.
- Tuck the ends underneath your hair and pin them securely to the nape of your neck.
- Pull a few pieces out around your face to make it look like a natural layered cut.
- Use bobby pins along the tuck line to ensure it stays firm and doesn’t slip.
Pro tip: If you have very long, thick hair, you may need a small hair net to hold the bulk of your hair in place before you pin it under. This ensures the bob doesn’t look too thick or uneven.
16. Double Braided Low Pony
Taking a standard low pony and adding two tight braids at the crown elevates the look into something much more technical and interesting. It is a great style for someone who wants to show off their hair skills.
The Visual Appeal
The braids act as a framing device for your face, drawing attention to your features. It is clean, secure, and very modern. This style is also incredibly durable; even if you get caught in a bit of wind, the braids will keep the front sections of your hair from whipping around.
Styling Method
- Create a center part.
- Dutch braid two sections from the front, working back toward the crown of your head.
- Once you reach the mid-crown, stop the braids and gather them, along with the rest of your hair, into a low ponytail.
- Use a strand of hair to wrap the elastic, creating a seamless transition.
- Use a texture spray on the ponytail itself to ensure the finish matches the complexity of the braids.
Observation: This is a fantastic “second-day hair” style. Because braids have more grip on hair that isn’t freshly washed, the structure will actually stay tighter and look better.
17. The Twisted Crown
A twisted crown is a simpler, more relaxed alternative to a braided crown. It relies on two-strand twists rather than three-strand braids, which gives it a softer, more ethereal look.
Why It Suits Evening Wear
It feels delicate and feminine. If you are wearing a dress with a soft neckline or delicate jewelry, this style complements the aesthetic perfectly without overpowering your outfit.
How to Achieve It
- Part your hair and create a two-strand twist on each side of your face.
- As you twist, incorporate small amounts of hair, just like you would with a French braid.
- Once you reach the back of your head, pin the twists together, crossing them over one another.
- Leave the ends loose or tuck them into a small, messy bun for a different variation.
Pro tip: Since this style relies on twists, make sure you twist in the direction away from your face. This helps keep the hair away from your eyes and gives the style a lift.
18. Sleek High Bun with a Bow
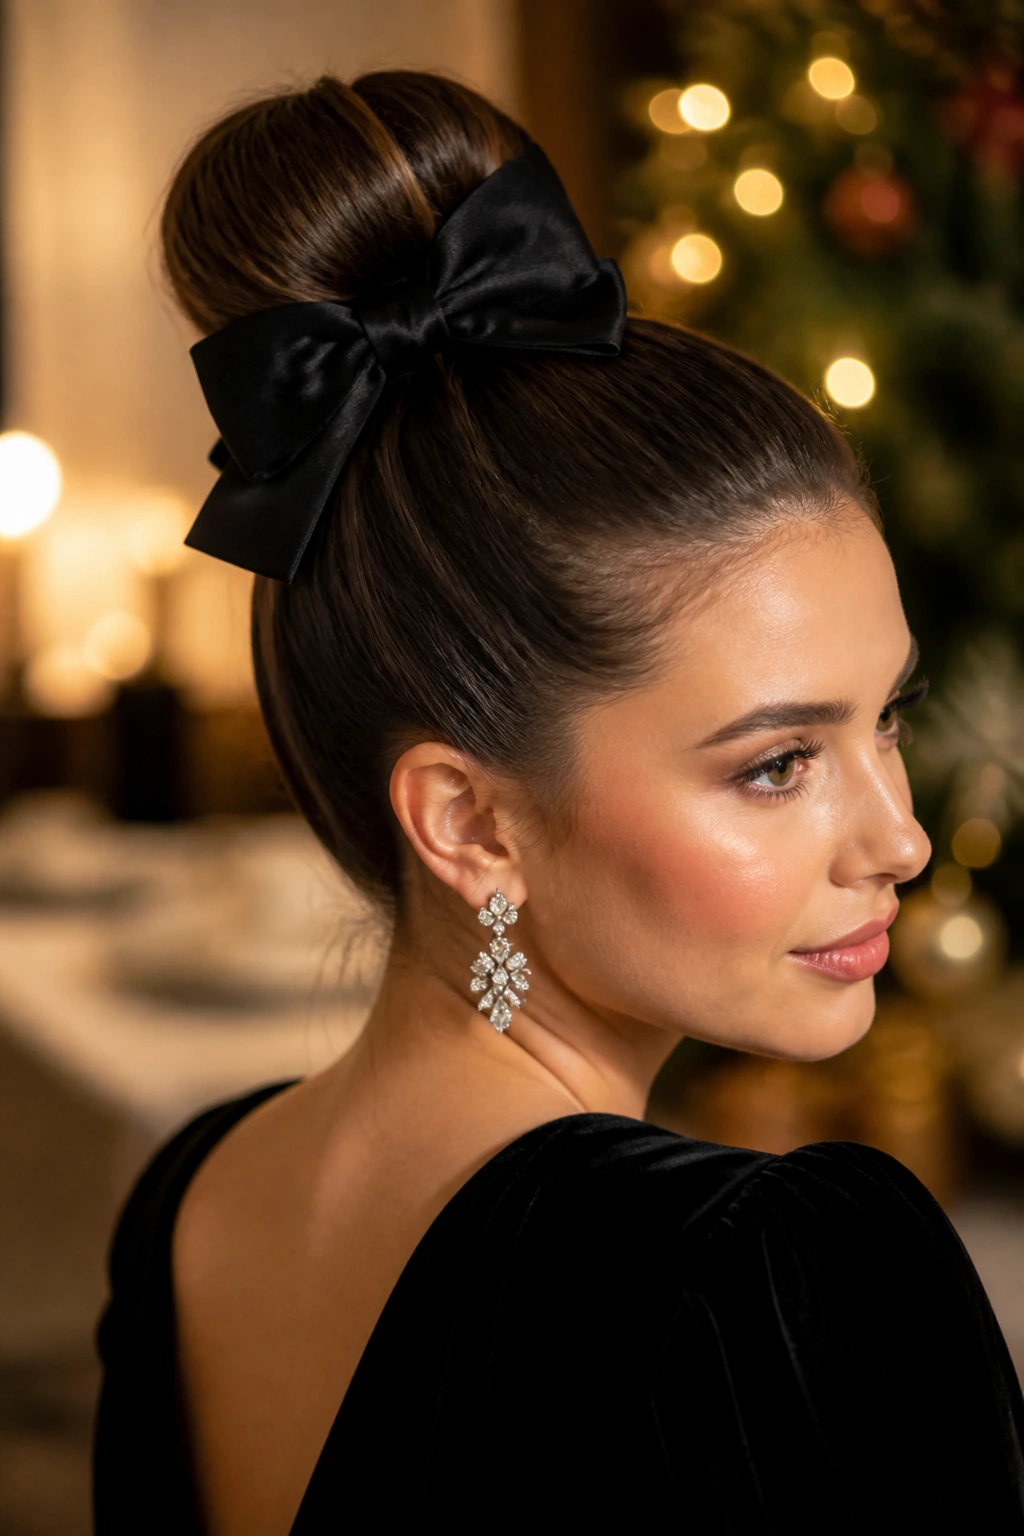
The high bun is a staple for a reason, but adding a large, structured bow at the base makes it feel like an intentional holiday accessory. It’s a great way to tie your look together, especially if your outfit has a secondary bow or ribbon detail.
Selecting the Bow
Choose a bow that has some stiffness to it—grosgrain or satin ribbons work better than soft, limp fabrics. A bow that can be clipped in via a barrette is much easier to manage than one you have to tie yourself.
The Execution
- Create a super-slick high ponytail, using a bit of smoothing pomade to catch any stray hairs.
- Twist the pony into a neat, compact bun and pin it securely.
- Clip your bow just below the bun, resting on the base of the ponytail.
- Use a final mist of firm-hold hairspray to lock everything in.
Observation: This style is quite dramatic. Because the bun sits high on the crown, it draws the eye upward, making it a great choice if you are wearing statement earrings that you want to highlight.
19. The Knotted Low Pony
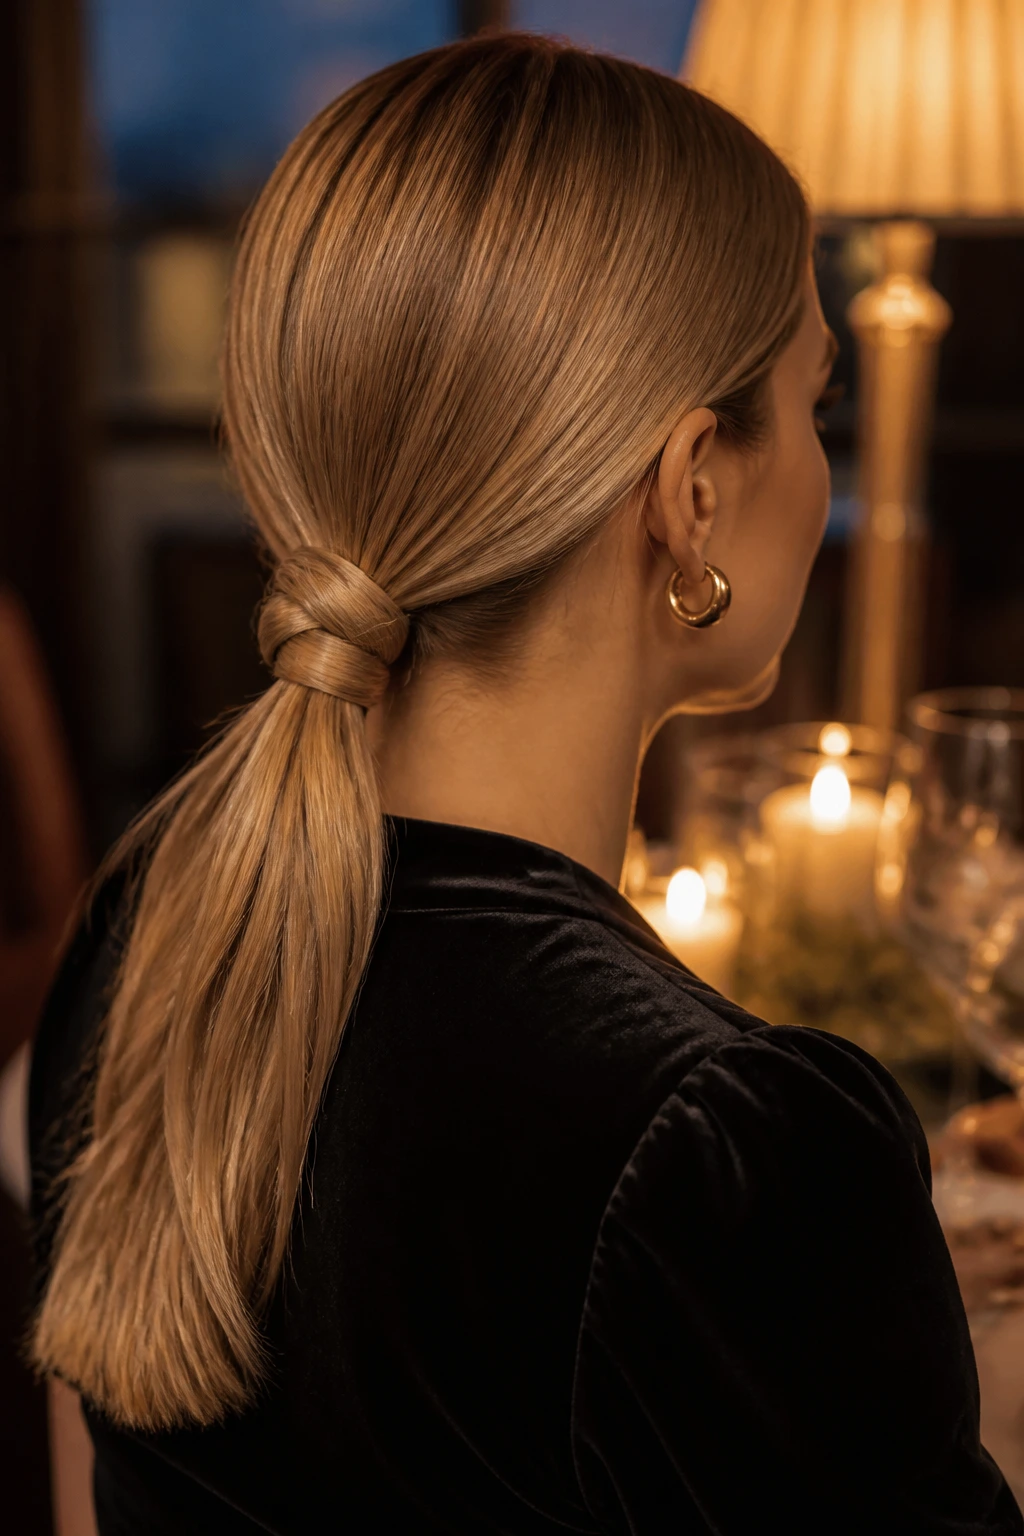
If you want something that looks like it took an hour but takes five minutes, this is your winner. The knot creates a unique texture that standard ponytails lack, making it a standout style for a casual dinner.
Why It’s Effective
It creates a clean, architectural shape. It is modern, understated, and doesn’t require any hair ties at the base if you do it correctly, which can sometimes be more comfortable for an entire evening.
The Knotting Process
- Split your hair into two equal sections at the back.
- Tie the two sections into a simple knot, as if you were starting to tie a shoelace.
- Tighten the knot so it sits against your neck.
- Take the loose ends and knot them together again.
- Secure the bottom with a clear elastic tucked underneath the final knot.
Pro tip: This works best with hair that is relatively smooth. If your hair is very curly or textured, you may need a light smoothing cream before you start to ensure the knots look clean rather than tangled.
20. Half-Up with Pearl Accents
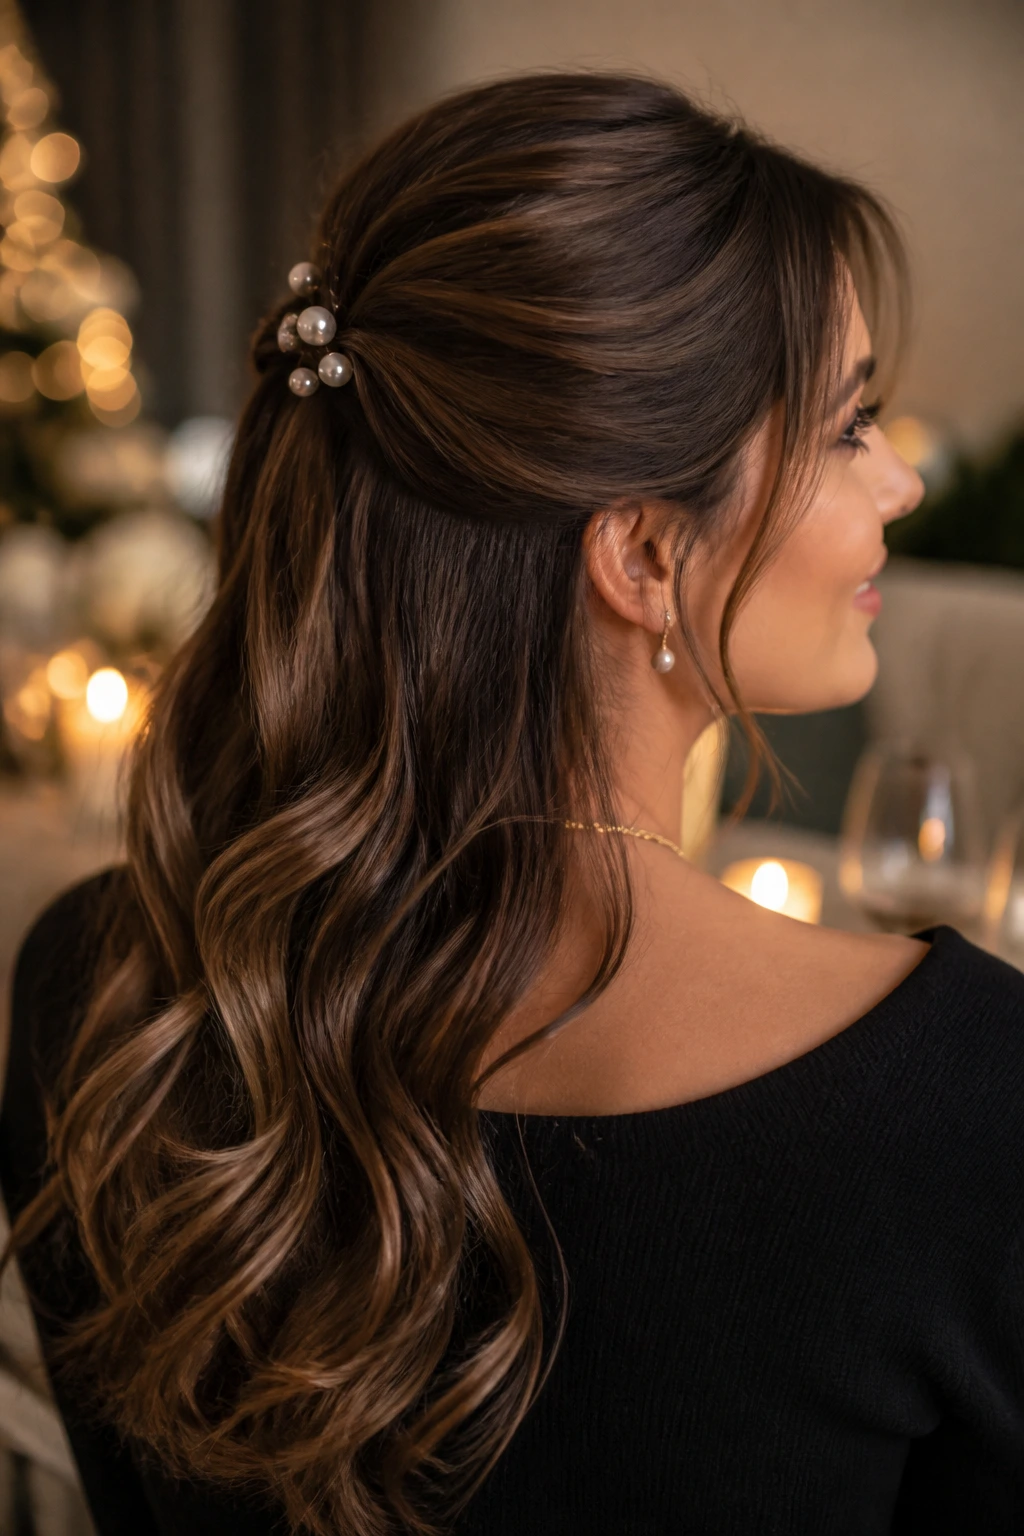
Pearls are the quintessential holiday accent. Using a series of pearl-studded pins to secure a half-up style is elegant, easy, and looks incredibly expensive, regardless of where you bought the pins.
Why It Works for Date Night
It is soft, romantic, and hits that perfect middle ground between “I tried really hard” and “I woke up like this.” It keeps hair out of your face, which is practical for dinner, while still letting the length and volume of your hair act as a focal point.
Styling Details
- Take the front sections of your hair on both sides and pull them back toward the center.
- Secure them with a small, clear elastic to create a “mini” ponytail.
- Instead of using a normal pin, take your pearl-studded pins and insert them directly into the hair around the elastic to act as the focal point.
- Ensure the pins are distributed in a way that looks intentional, not just shoved into place.
A note on hardware: Quality matters here. Avoid pins that feel like they have loose settings; you don’t want a pearl falling into your soup. Give them a little tug before you leave the house to make sure they are set tightly.
Final Thoughts
When winter date nights approach, the pressure to look perfect can feel overwhelming. Remember that the best hairstyle is the one that allows you to stop worrying about your hair and start focusing on your date. Whether you choose a sleek, polished look like the glass-hair center part or something more romantic and textured like a braided crown, the secret is in the prep.
Taking ten minutes to ensure your hair is properly protected from static and securely pinned will save you from constant mirror checks throughout the night. Don’t be afraid to experiment with accessories, as winter is the absolute best time to lean into velvet, pearls, and metallic pins. Most importantly, choose a style that reflects how you want to feel. A confident, comfortable style is always the most attractive choice you can make.