Braided styles on medium-length hair can feel like a game of compromise. You want the volume, the length, and the intricate weave of a floor-length style, but your natural hair ends somewhere around the collarbone. This is exactly where synthetic or human hair extensions become your most reliable ally. Adding bulk and length transforms a standard, somewhat flat style into something that feels intentional, artistic, and entirely your own. It is not about hiding your natural texture; it is about providing the foundation your hair needs to reach its full potential.
1. Jumbo Box Braids with Color-Blocked Extensions
Jumbo box braids rely heavily on sectioning and volume. On medium hair, trying to force a thick braid out of a thin section often leads to slippage or a frayed, uneven end that lacks the “weight” needed for a polished look. Adding extensions here is not just for length—it is for density. Using a contrasting color—perhaps a deep violet against natural black hair—creates a structural focal point that draws the eye upward.
Why Jumbo Sections Benefit from Added Hair
When you use a large parting size, the weight of the extension acts as an anchor. By feeding the hair in at the root, you ensure that the natural hair is fully encased, protecting your ends from daily friction and environmental damage. The key here is to keep the braid tight at the base while allowing the extensions to provide the fullness that your natural medium-length strands cannot generate on their own.
Styling Tip for Maximum Impact
- Divide clearly: Ensure your square or triangular parts are razor-sharp.
- Tapering: Ask for the extensions to be tapered at the ends to prevent that blunt, “heavy” look that can sometimes make jumbo braids feel stiff.
- Maintenance: Use a light mousse to keep the frizz at bay along the scalp.
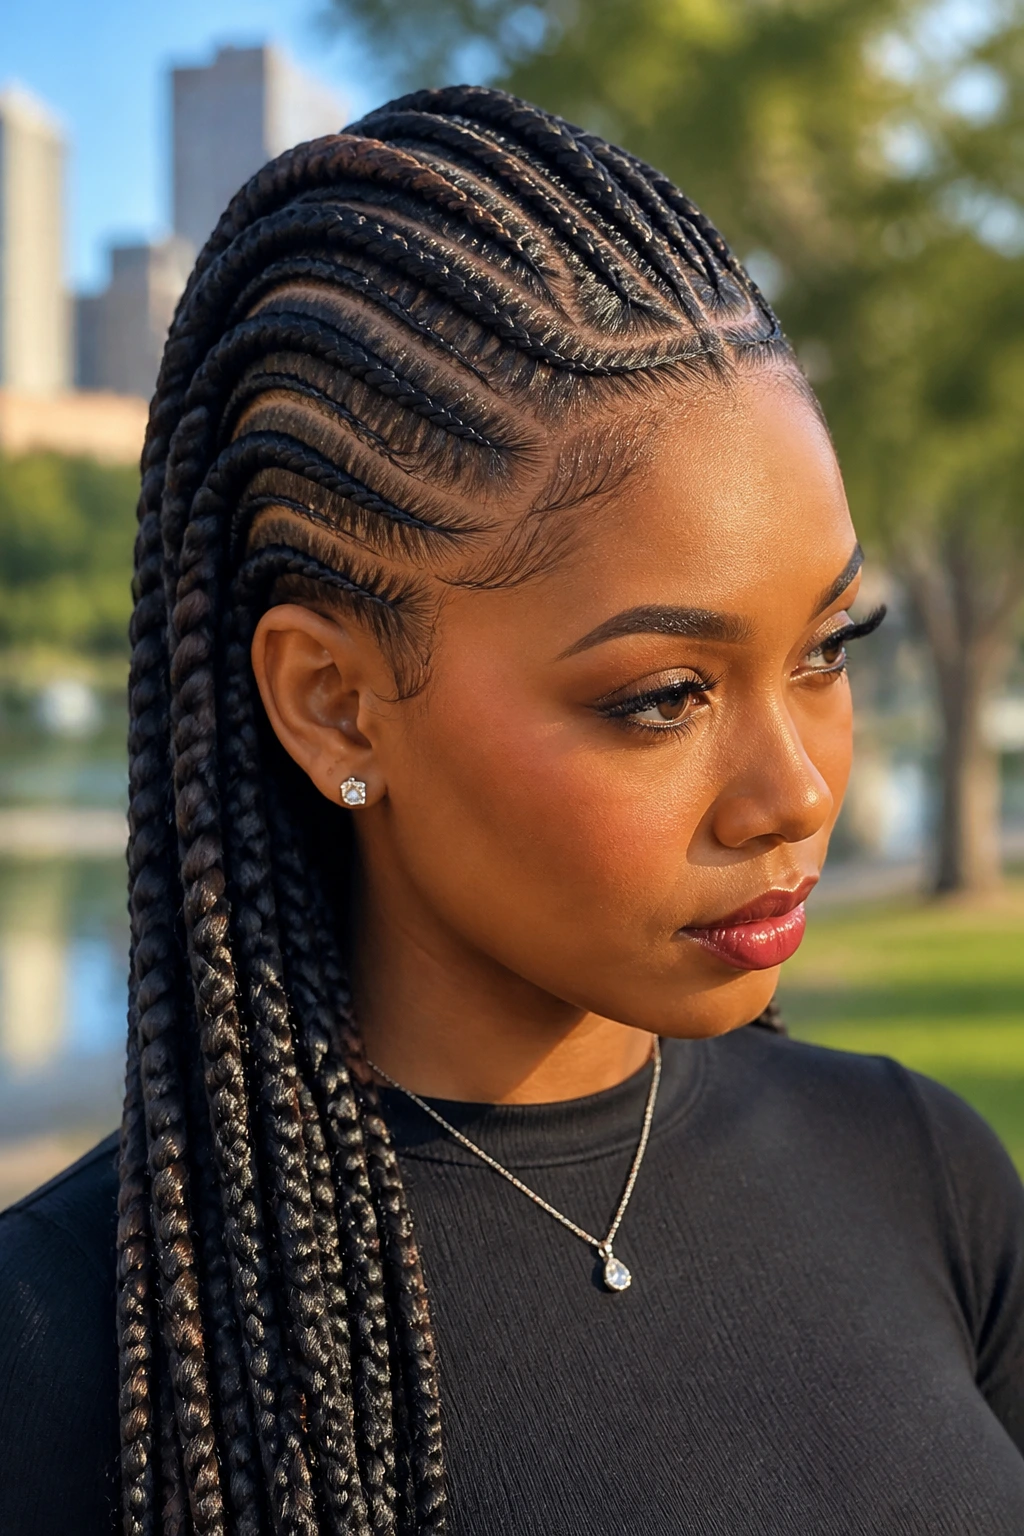
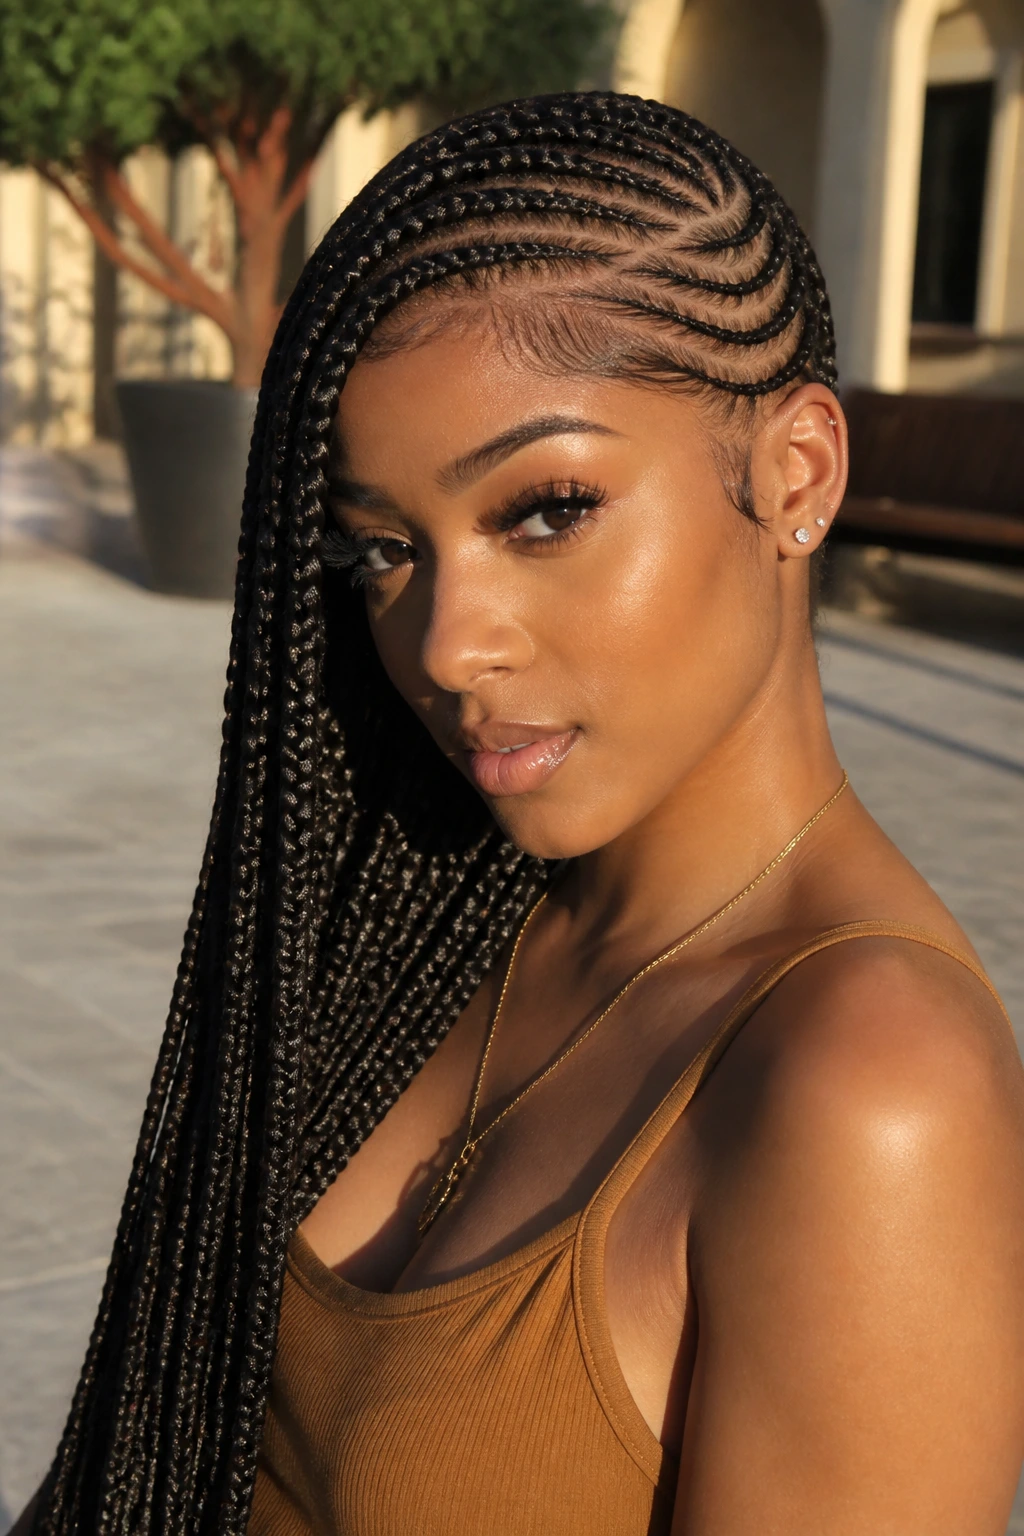
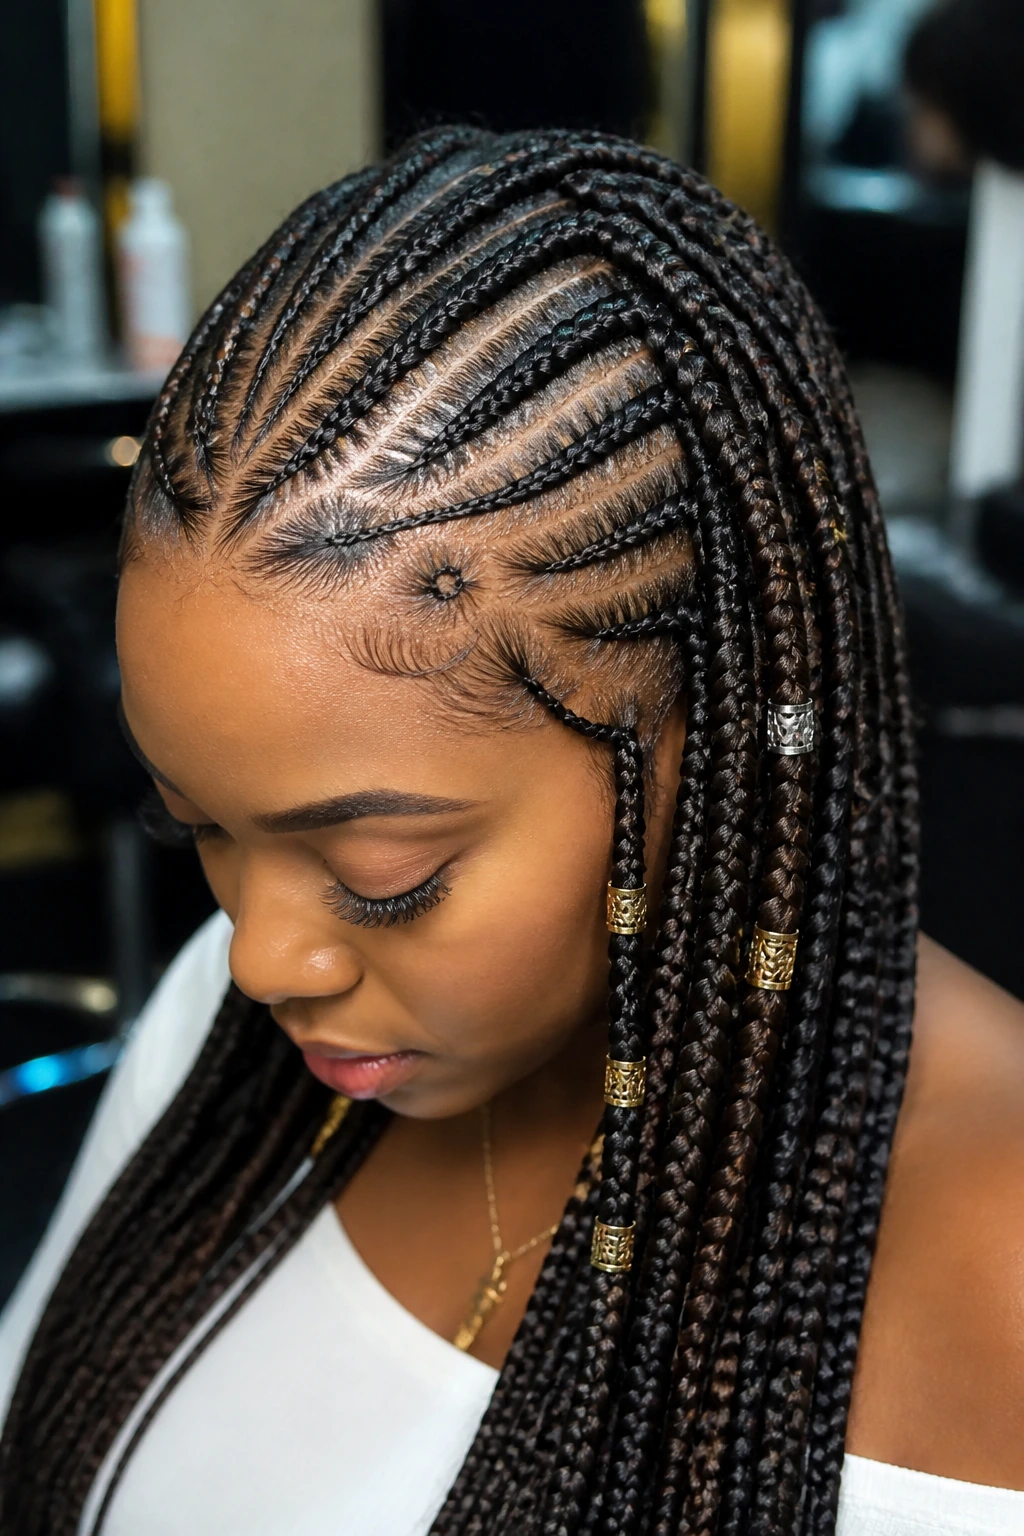
2. Fulani-Inspired Braids with Beaded Accents
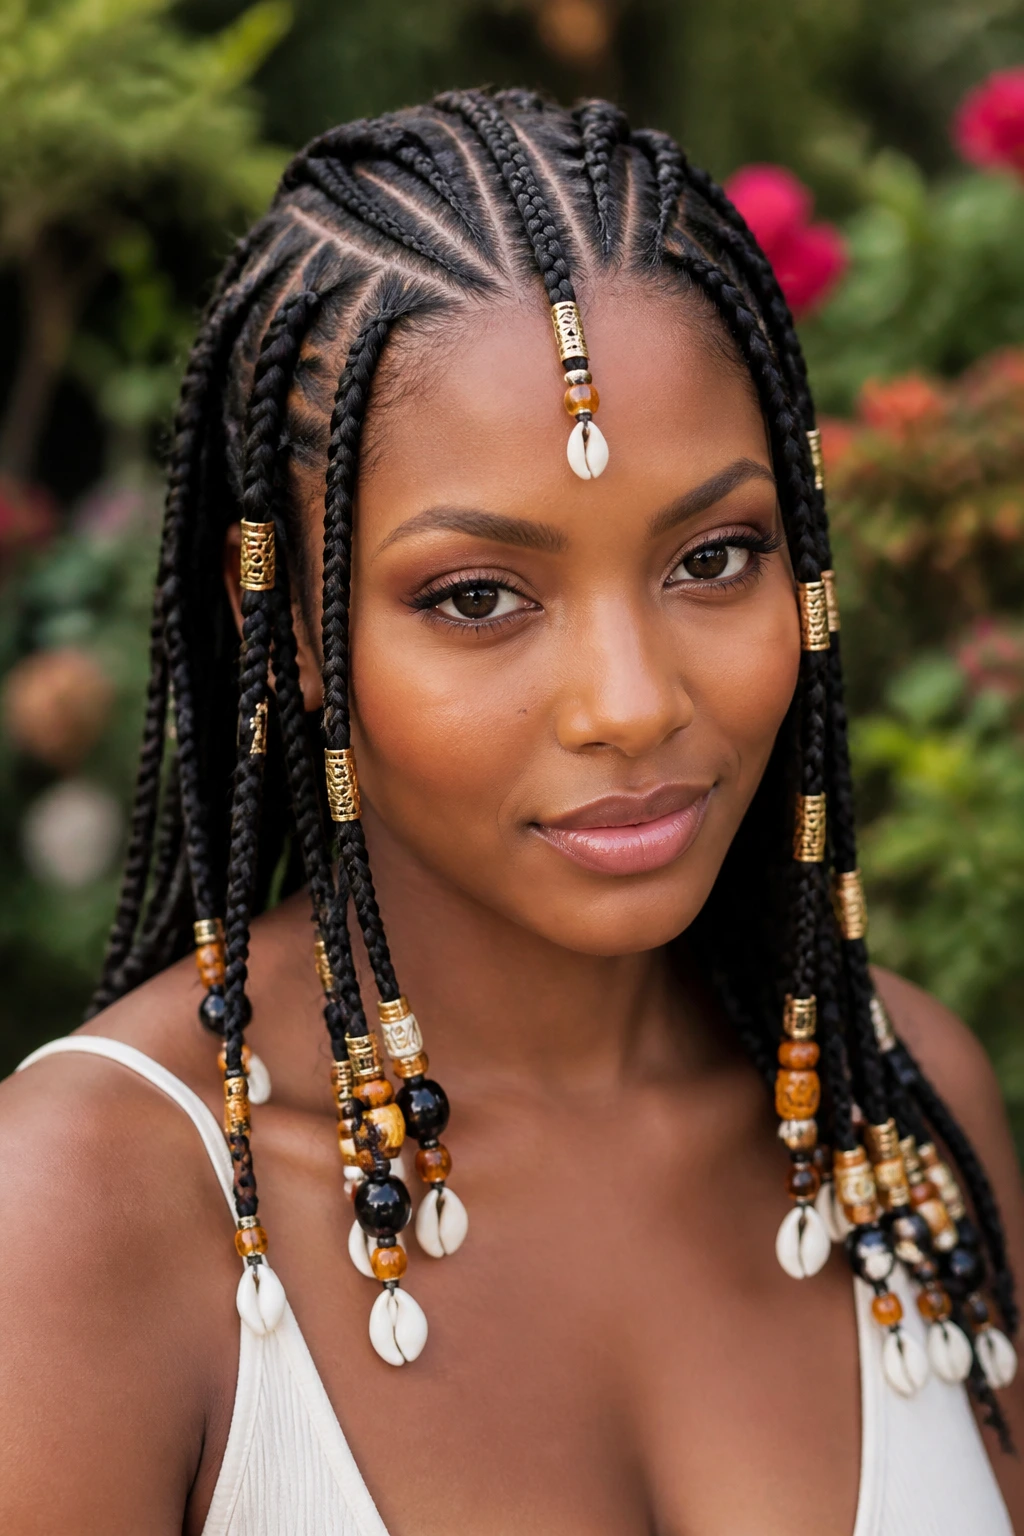
The beauty of Fulani braids lies in the deliberate, geometric patterns against the scalp, typically featuring a center part and side-swept elements. Medium hair often struggles to hold these intricate patterns for long because the hair simply isn’t long enough to wrap or tuck securely. Extensions provide the necessary tension and length to weave through the scalp patterns while leaving enough length for the traditional dangling accessories.
Achieving the Signature Center Part
The central braid—often called the “cornrow crown”—is the defining feature. By starting with natural hair and feeding in synthetic extensions as you work down the scalp, you gain control over the thickness of the plait. This allows you to create a delicate, tight braid near the forehead that gradually thickens as you move toward the nape.
The Role of Accessories
- Gold Cuffs: These add weight and shine to the braids, helping them hang straight.
- Wooden Beads: Perfect for a bohemian or earthy aesthetic; use them on the ends of the extensions.
- Cowrie Shells: Place these strategically at the temple to highlight your bone structure.
3. Bohemian Goddess Braids with Loose Curls
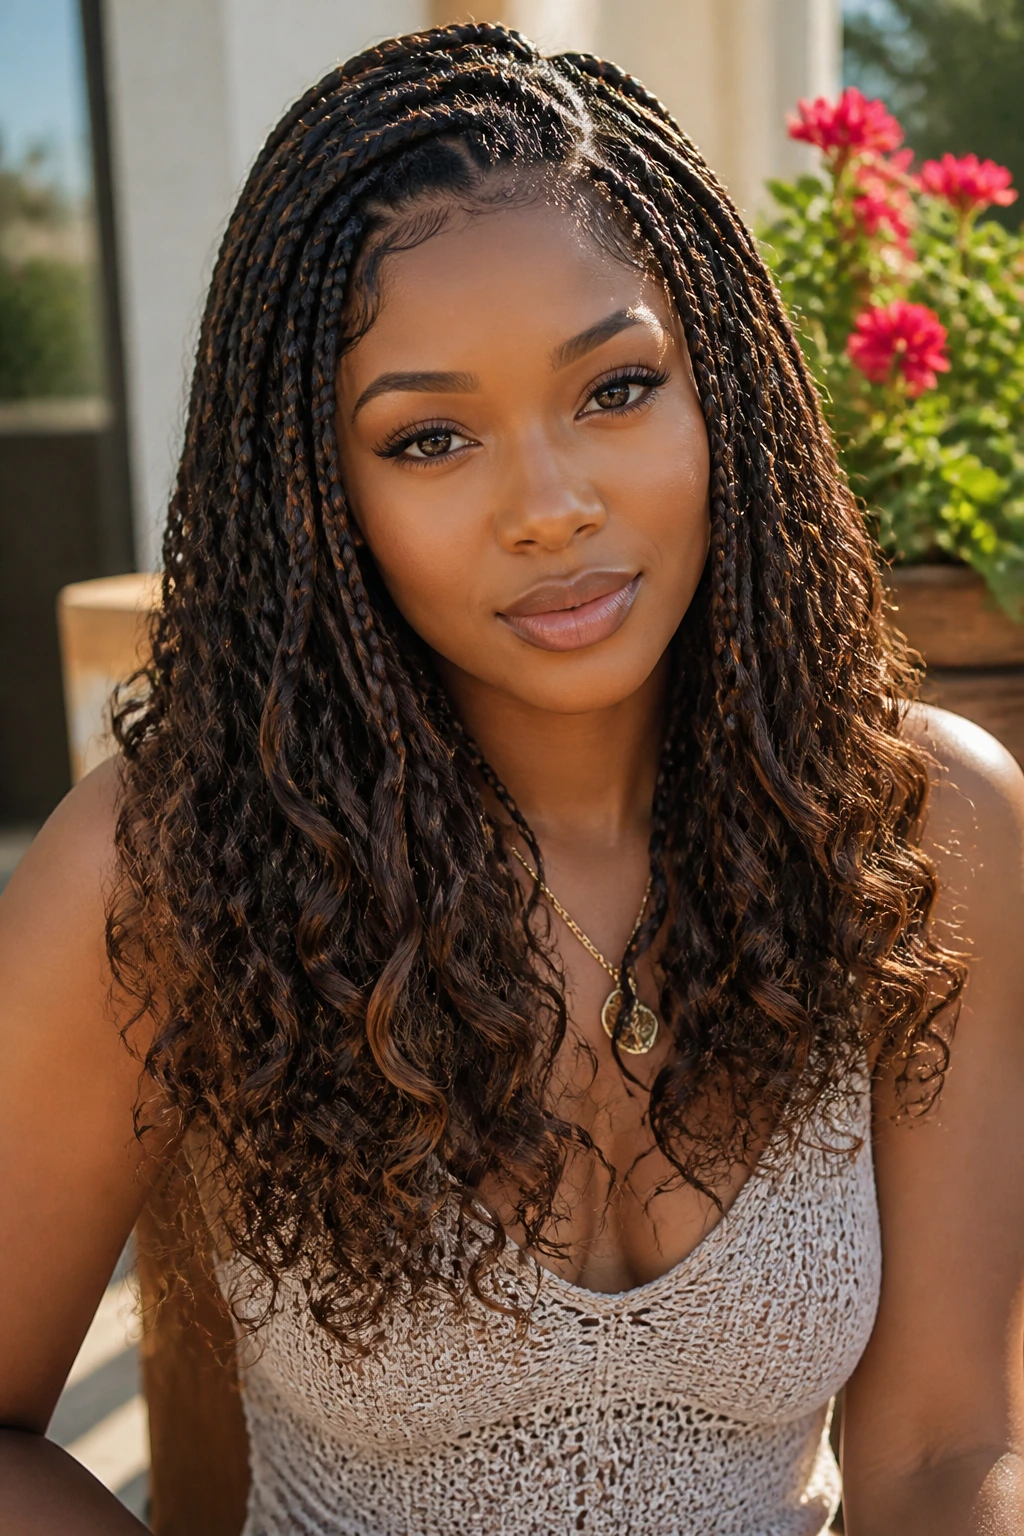
If you prefer a soft, romantic finish, the “Goddess” style is the definitive approach. This look involves standard box braids that transition into loose, wavy hair at the mid-shaft. Medium hair is perfectly adequate for the braided portion, but the curly element is impossible to achieve without high-quality, pre-curled synthetic or human hair extensions.
Why Texture Matters
The blend between your braided natural hair and the loose extension curls must be seamless. If you are using human hair, you can customize the curl pattern with a curling iron to match your natural texture or preferred style. Synthetic options come pre-set, which is excellent for longevity but requires a bit more care to prevent tangling.
The Secret to Seamless Integration
- The Knotless Method: By starting with your own hair and braiding in the extension, you avoid the bulky knot at the root.
- Strategic Placement: Leave out the curly extensions in a zigzag pattern to ensure the braids do not look like two separate components.
- Detangling: Keep a small spray bottle of water and a lightweight leave-in conditioner handy to keep those loose curls soft throughout the day.
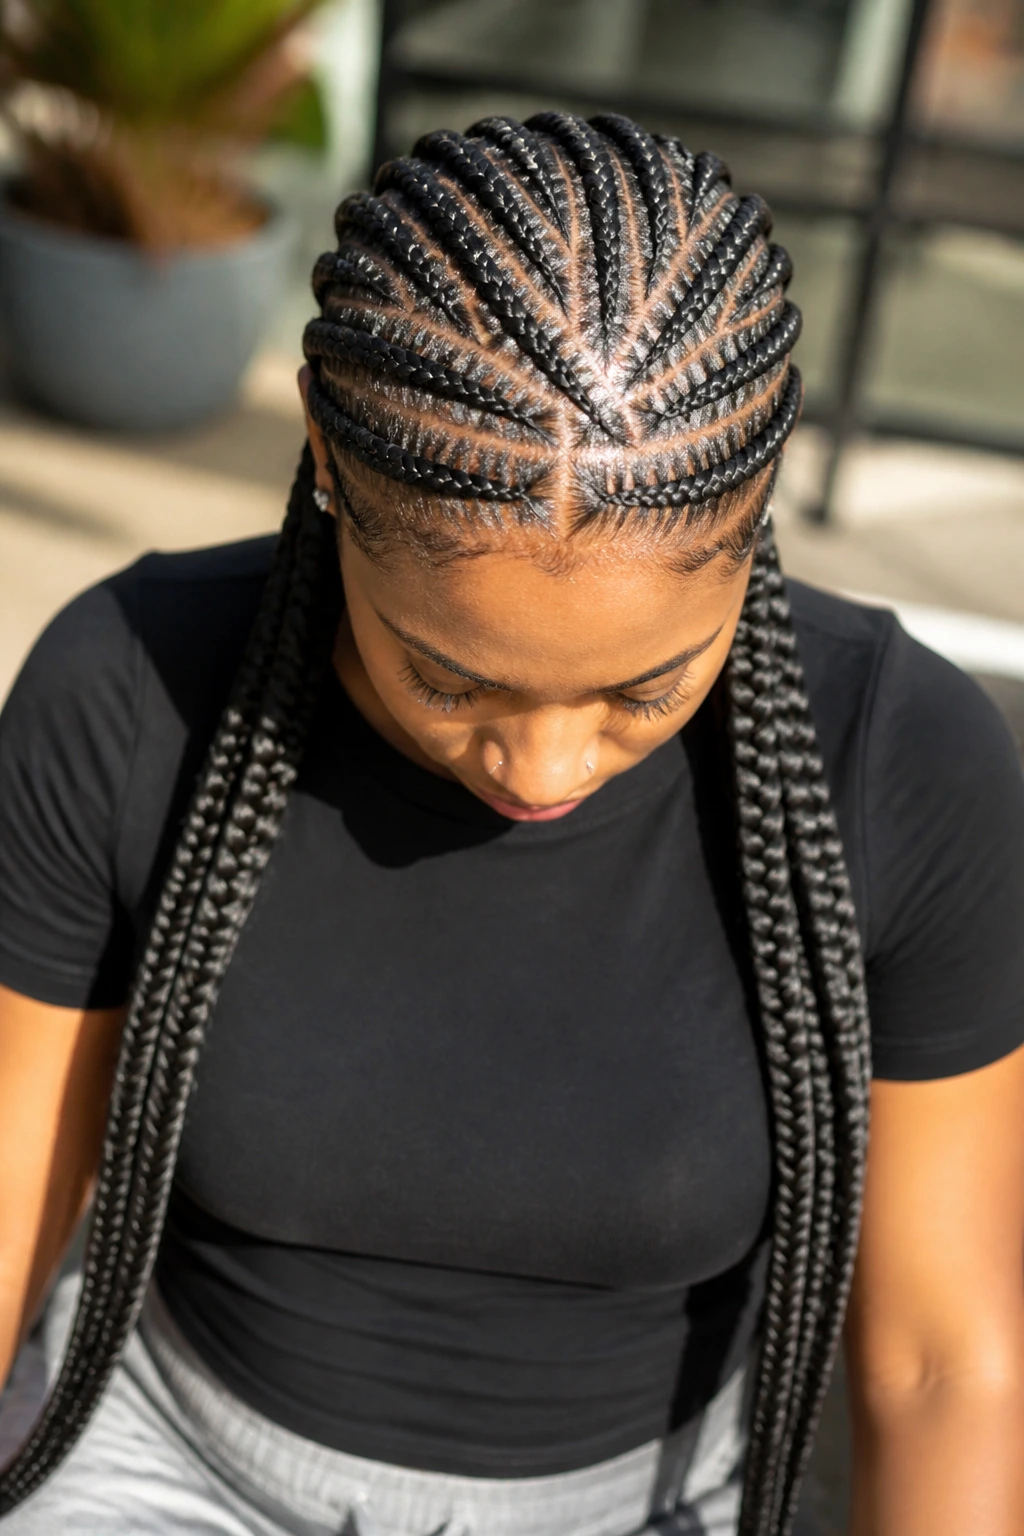
4. Feed-In Cornrows with Added Density
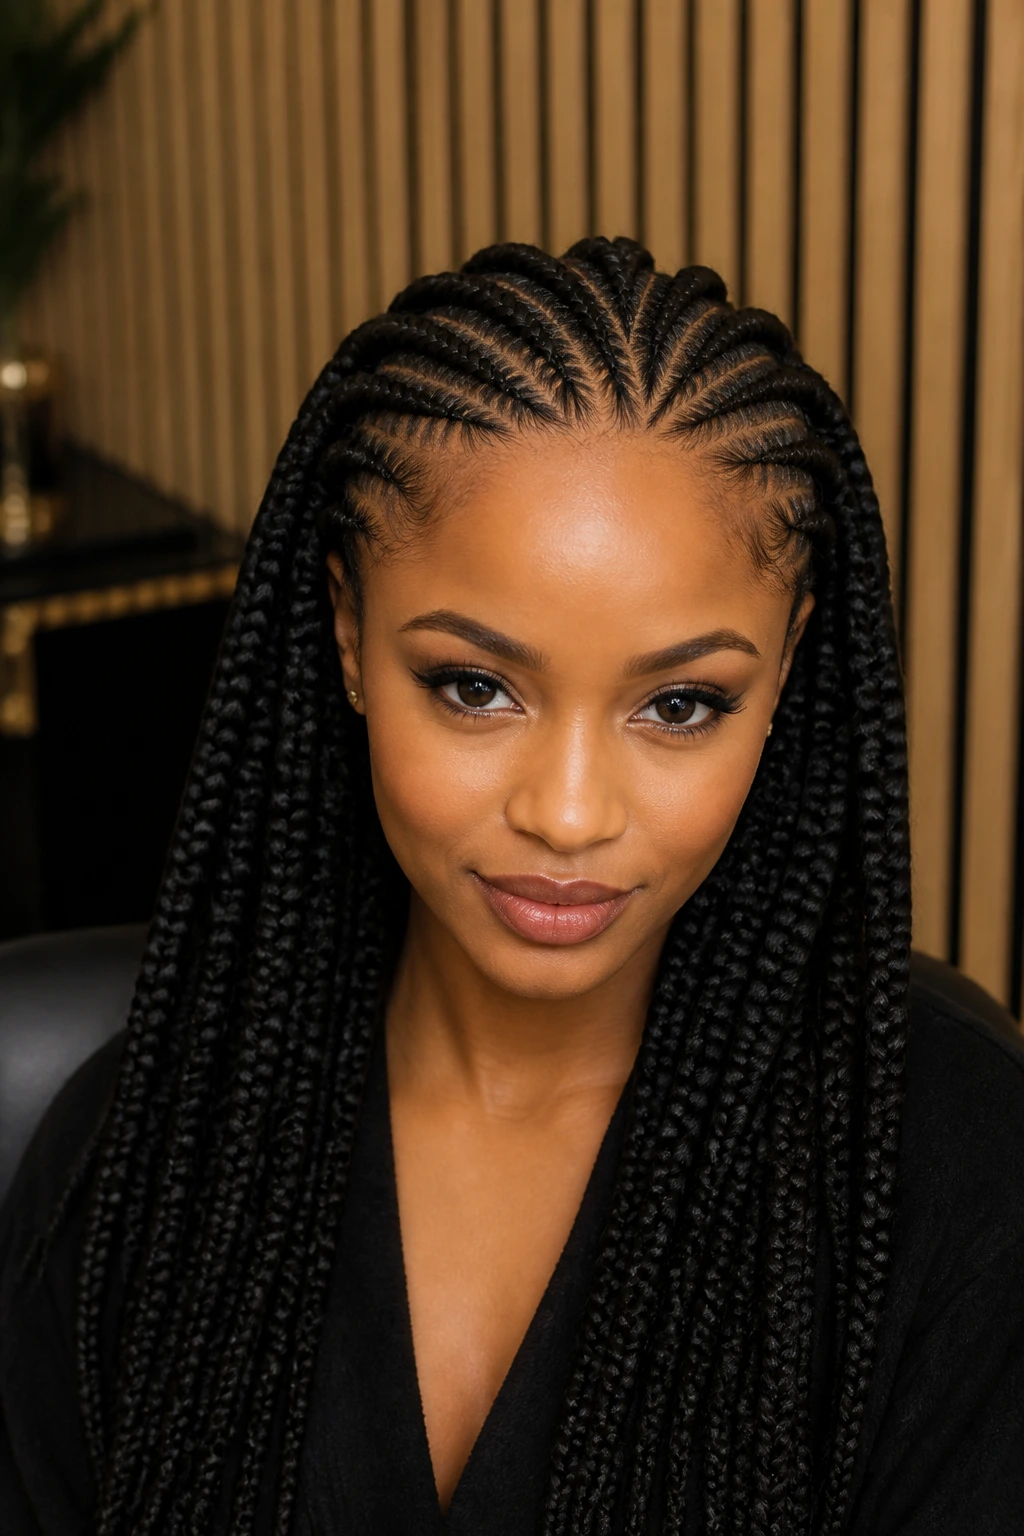
Feed-in braids are the gold standard for a natural look that mimics the appearance of a scalp braid that has grown out from your own hair. When you have medium hair, you likely have enough length to start a braid, but you might run out of hair before you reach your desired style length. The feed-in technique solves this by adding small amounts of hair at each crossing, building a seamless transition from your scalp to the end of the braid.
Building the Perfect Tapered Braid
The real art of the feed-in is the “tapered” start. You begin with just your natural hair, ensuring the braid is tiny and flat against the skin near the hairline. As you move back, you introduce the extension fibers. This prevents the “bump” at the front that often makes styles look wig-like or heavy.
Choosing Your Fiber Type
- Pre-stretched Kanekalon: This is widely preferred because it is soft, lightweight, and comes with tapered ends, saving you significant prep time.
- Human Hair Blend: For a more natural sheen and movement, though it requires more maintenance to keep it from matting.
5. Micro-Braids with Wavy Ends
Micro-braids—tiny, individual plaits—are a massive time commitment, but the payoff is a style that moves like fabric. On medium hair, you have enough volume to make the base of the style look thick, but you will definitely need extensions to achieve that flowing, waist-length aesthetic. Because the braids are so small, the extensions used must be thin and lightweight to avoid putting too much stress on your natural follicles.
Protecting Your Scalp
With micro-braids, the weight is distributed across thousands of tiny sections. However, using heavy, dense extensions can lead to tension alopecia. Always opt for high-quality, lightweight synthetic fibers that won’t absorb too much water if you get caught in the rain.
How to Style These Small Plaits
- Top Knot: Because the hair is so fluid, it gathers beautifully into a large, voluminous top knot.
- Half-Up/Half-Down: The small braids frame the face delicately, making this style incredibly flattering for most face shapes.
- Accessories: Avoid heavy metal cuffs; instead, use thin, colored thread or tiny charms that won’t weigh down the individual braids.
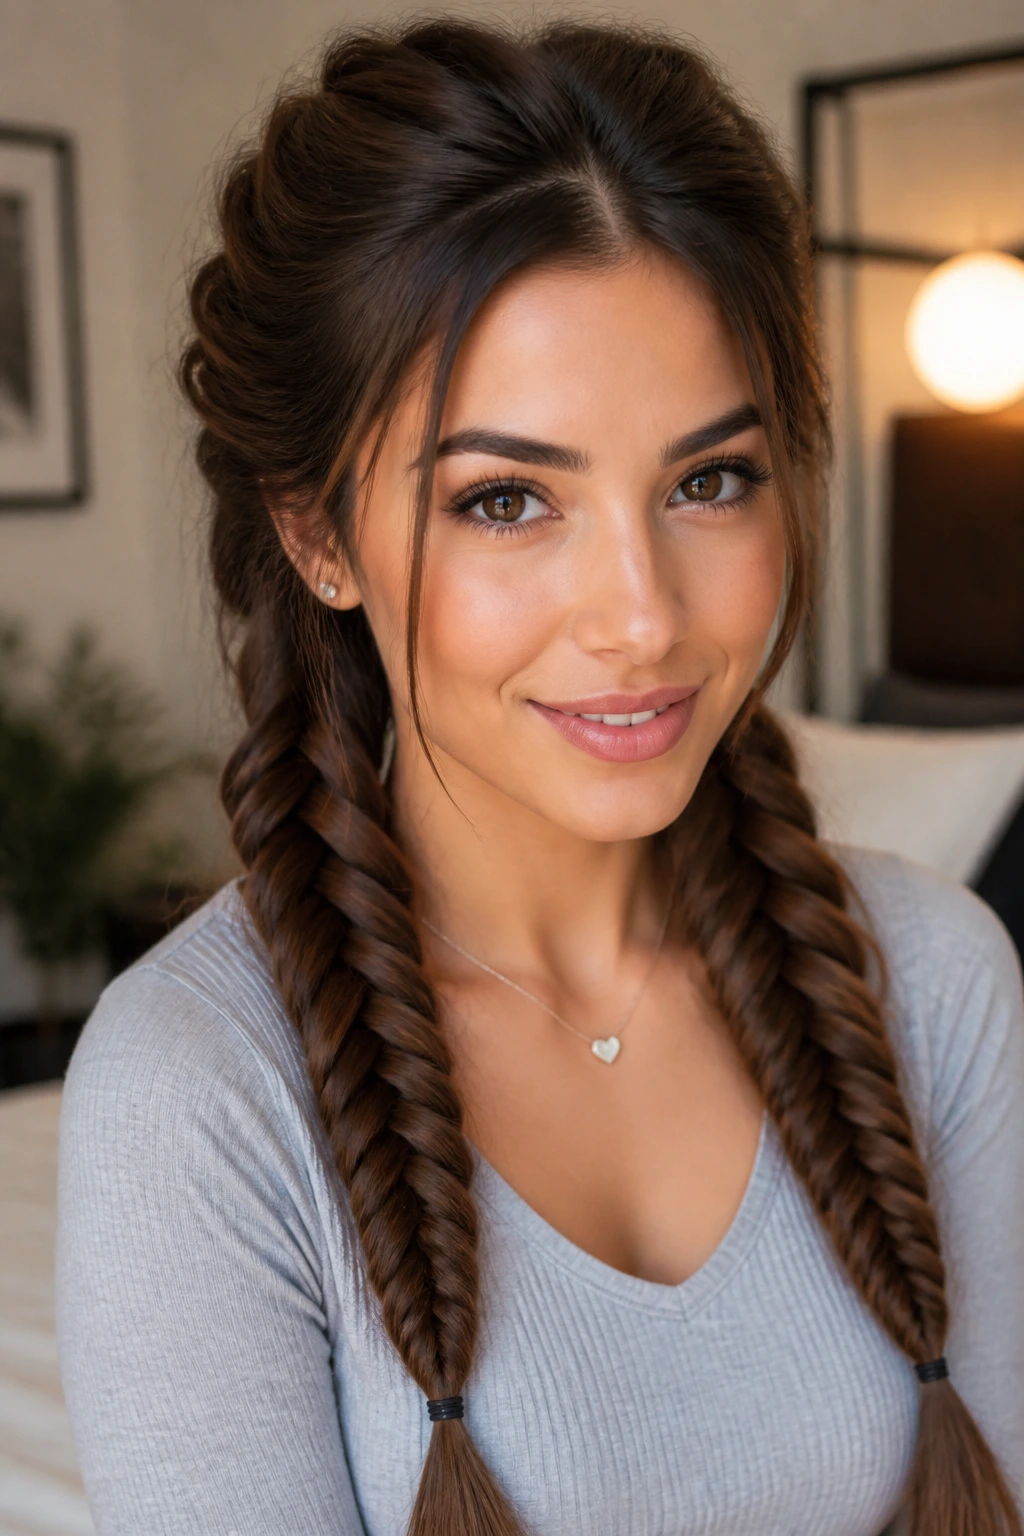
6. Waist-Length Knotless Box Braids
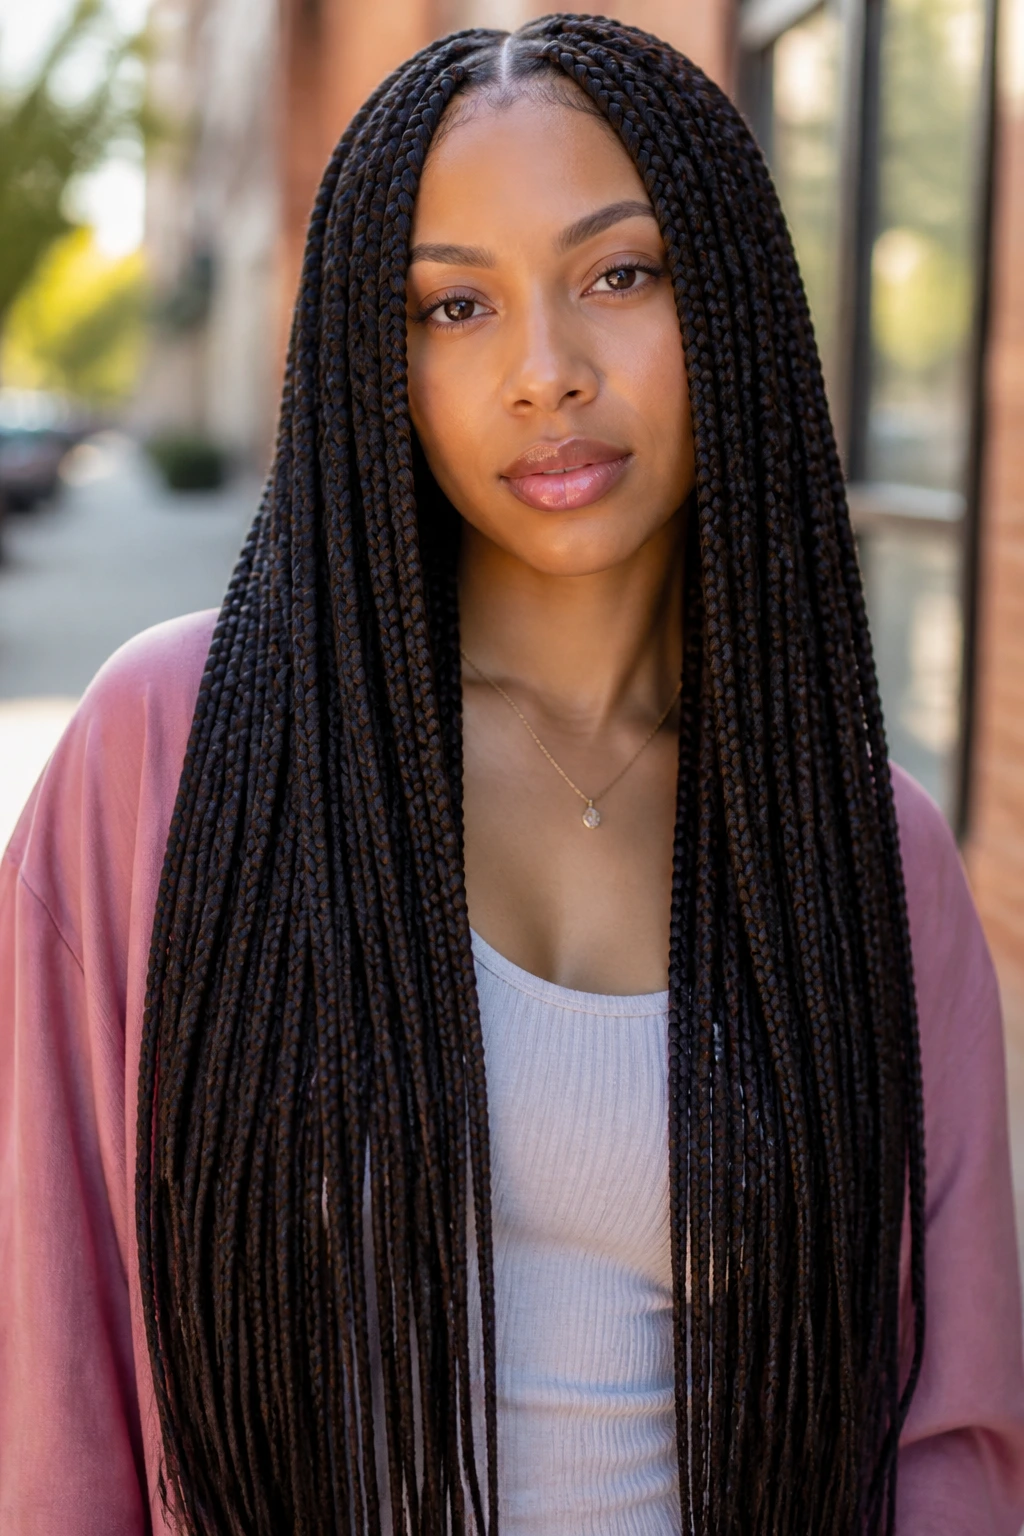
Knotless braids have become the go-to for many because they lack the traditional, painful “knot” at the base. For those with medium hair, this style is a total game-changer. Since you are essentially feeding the extension into your own hair as you go, you get a braid that lies perfectly flat against the scalp from the very first inch.
Why Medium Hair Wins Here
Knotless braids rely on your natural hair’s ability to grip the extension. Medium-length hair is often the “sweet spot” for grip. It is long enough to provide a solid foundation for the weave but short enough that it doesn’t get tangled in the extension fiber during the installation process.
Tips for Longevity
- Root Health: Apply a light oil to your scalp every few days to prevent dryness.
- Sleeping: Use a satin bonnet or pillowcase; it reduces friction and keeps the braid structure intact for weeks longer than cotton would.
- Washing: Focus on the scalp using a spray-on clarifying rinse, rather than soaking the entire braid, which can lead to moisture retention and mold.
7. Chunky Twisted Halo Braid
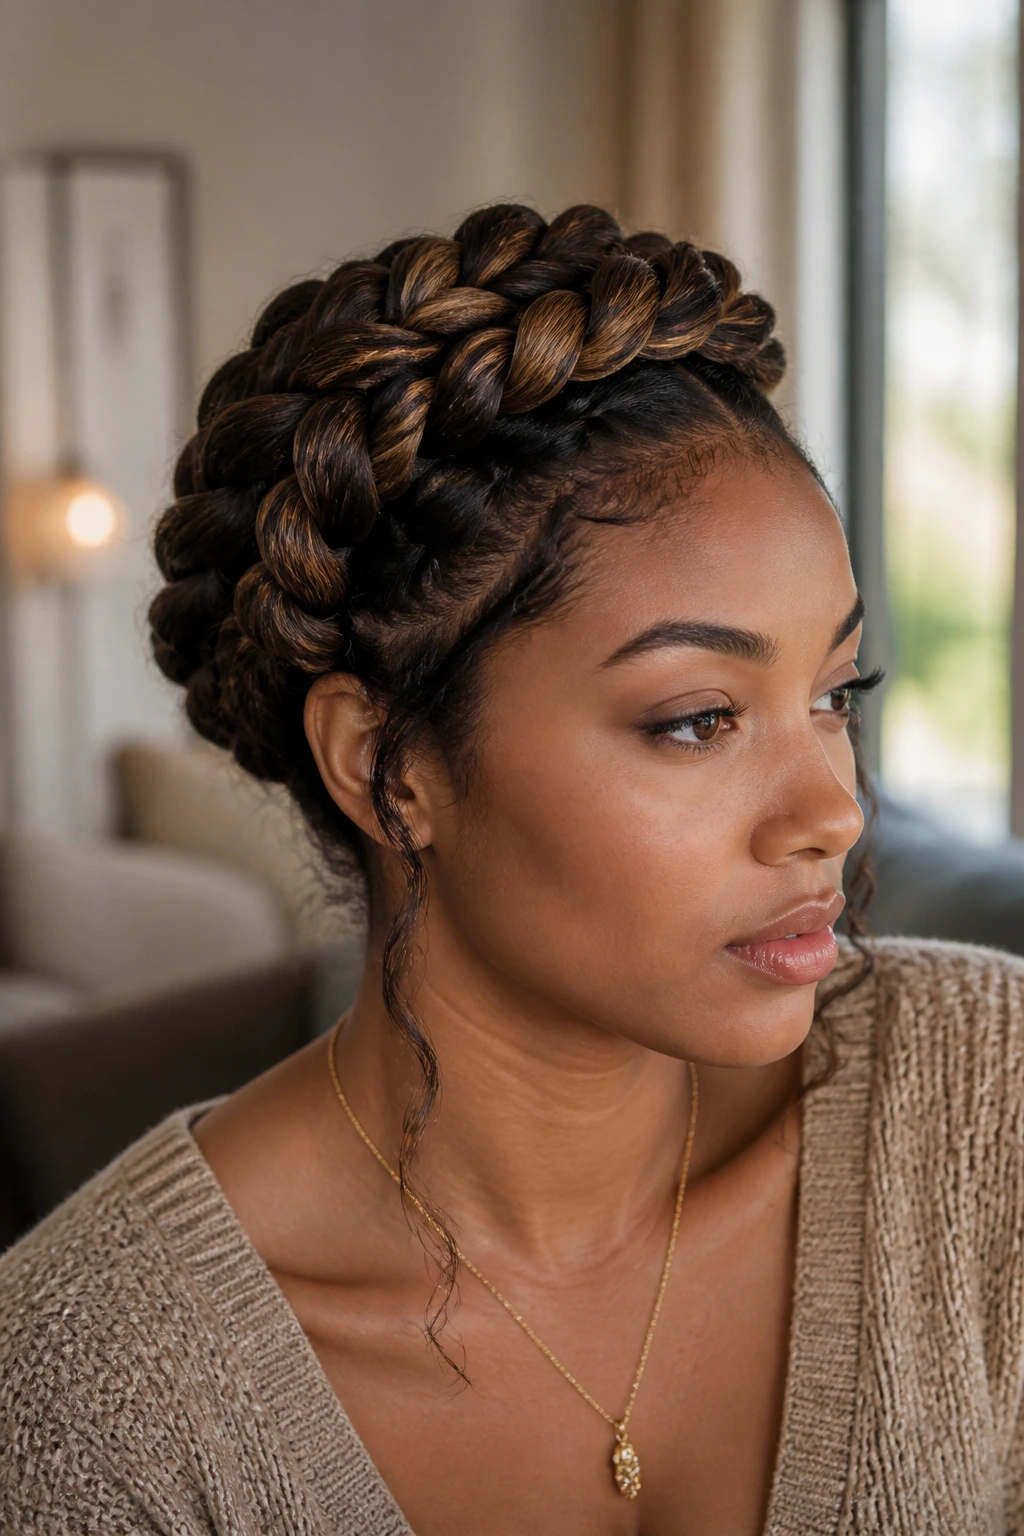
If you want an updo that feels regal, the halo braid is hard to beat. Using extensions to thicken this style allows you to create a heavy, dramatic crown that stays put. Medium hair is usually too thin to create a substantial halo that actually shows up in photographs, but a few packs of pre-stretched extensions will bridge that gap.
Structural Integrity
The trick here is to braid the extensions into your hair before you start pinning the crown. This ensures that the bulk is built into the foundation. You do not want to try to attach heavy extensions after you have already pinned the hair, as the weight will pull the pins right out of your natural hair.
The Finishing Touch
- Texture: A slightly “messy” finish is better than a slick, tight one. Tug gently on the loops of the braid to create volume before pinning.
- Hidden Pins: Use U-pins rather than traditional bobby pins for a more secure and comfortable hold.
8. Tribal Braids with Side-Swept Patterns
Tribal braids often involve a mix of cornrows and individual braids, creating a pattern that feels both cultural and high-fashion. Extensions are essential here because they allow you to play with length in specific sections. You can have the back of your head flowing with long, individual braids while the front is anchored by tight, geometric cornrows that feed directly into your natural hairline.
Balancing Tension and Style
Because these styles often combine different techniques, it is easy to over-tighten certain areas. Always ensure your stylist (or you, if self-styling) uses a tension-free approach at the hairline. The “tribal” look is about the aesthetic of the pattern, not the tightness of the pull.
Why This Style Works for Medium Hair
Your medium hair provides the strength, while the extensions provide the look. You get the comfort of a style that doesn’t pull your scalp and the visual appeal of a complex, multi-textured braid job.
9. High Ponytail Braids with Wrapped Bases
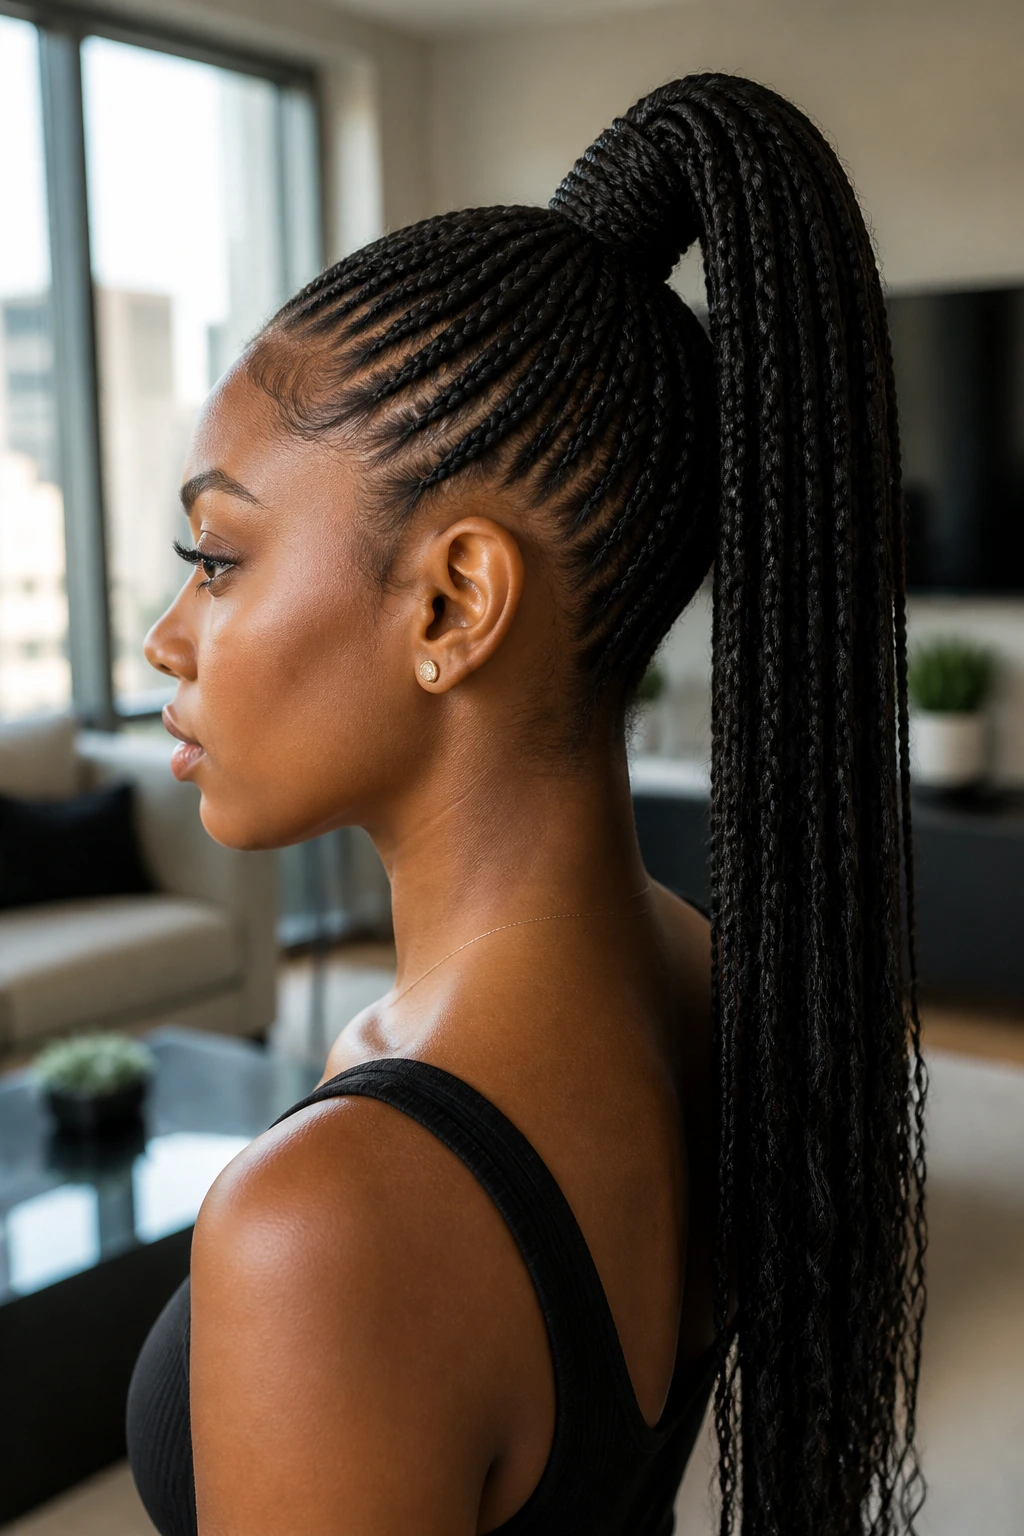
There is something undeniably sophisticated about a high, sleek ponytail created with braids. To get the height you want on medium hair, you need the extension to do the heavy lifting. You braid your natural hair into a small, tight ponytail base and then feed in the extensions to create the long, swinging tail.
Creating the “Sleek” Look
- Edge Control: Use a high-quality gel or pomade to lay the hair around your hairline before securing the ponytail base.
- Wrapping: Take a small section of the extension hair and wrap it around the base of the ponytail to hide the elastic and the point where your natural hair meets the extensions.
- Securing: Use a small bobby pin to tuck the end of the wrapped section into the base of the ponytail for a clean finish.
10. Shaved Sides with Long Braided Tails
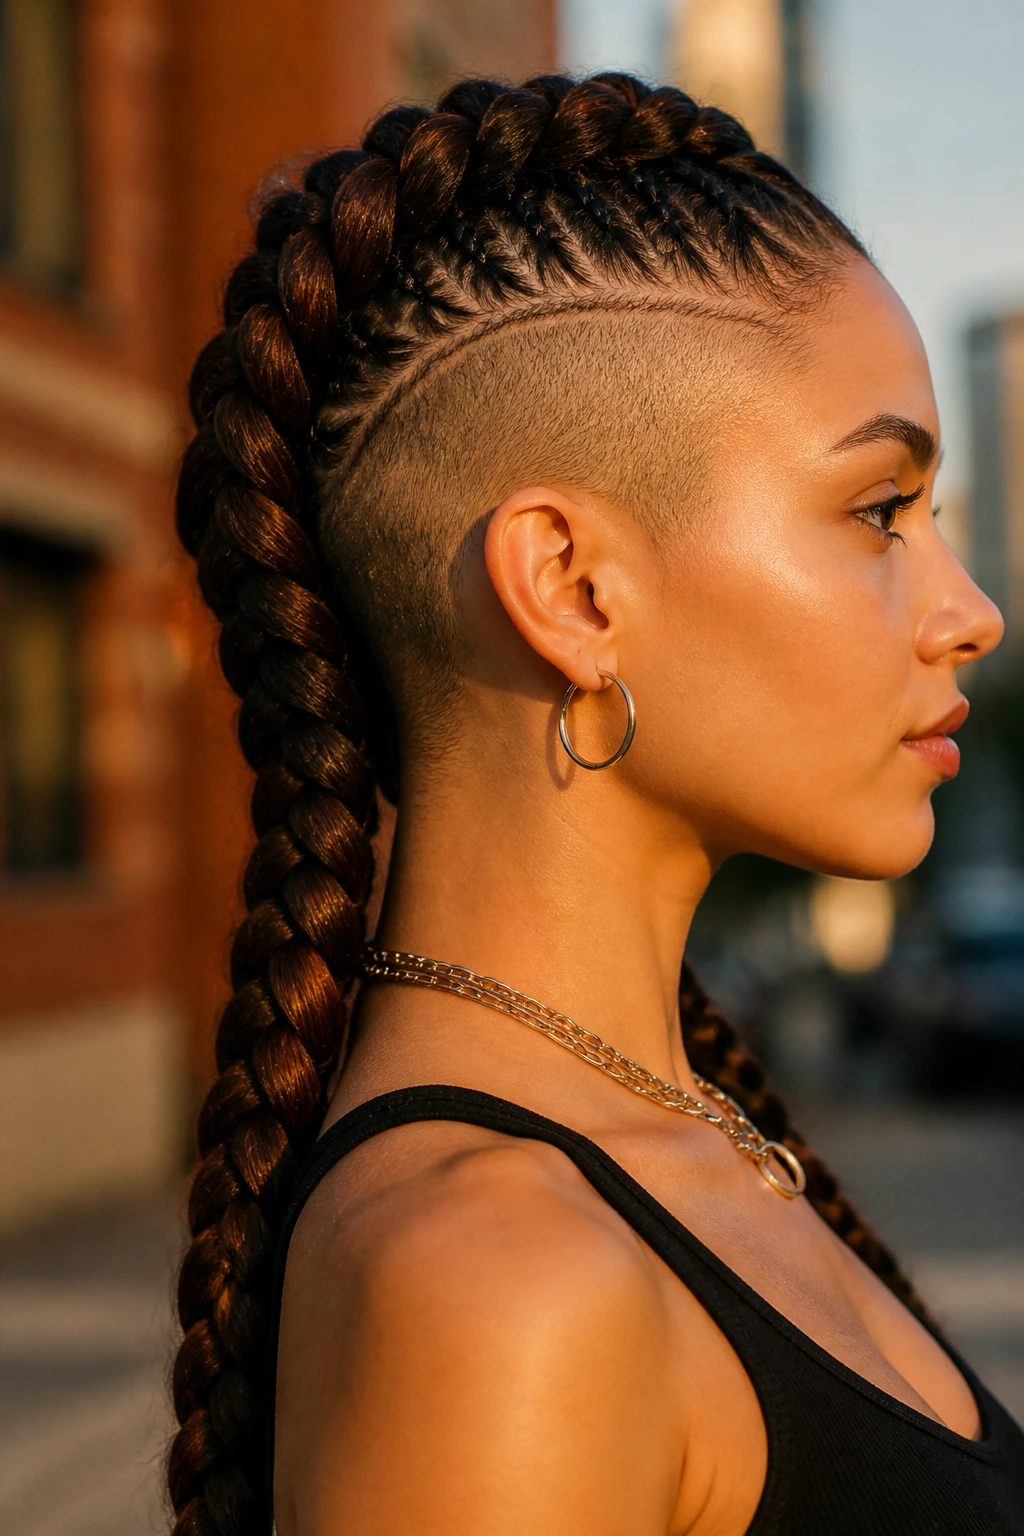
If you want to highlight your face and neckline, the “undercut” or “shaved sides” look is bold. For those who aren’t ready to commit to a razor, you can achieve this by cornrowing the sides of your head tightly against the scalp. The center of your head then becomes a long, thick braid using extensions.
The Visual Contrast
The tightness of the side cornrows provides a stark contrast to the thick, voluminous braid in the center. Because the side hair is pulled so tight, your medium hair is completely protected, while the center braid gets all the glory and length from the extensions.
Styling Recommendations
- Accessories: Add silver rings or cuffs to the side cornrows to emphasize the “edgy” aesthetic.
- End Curls: Curl the ends of the long central braid to add movement and softness.
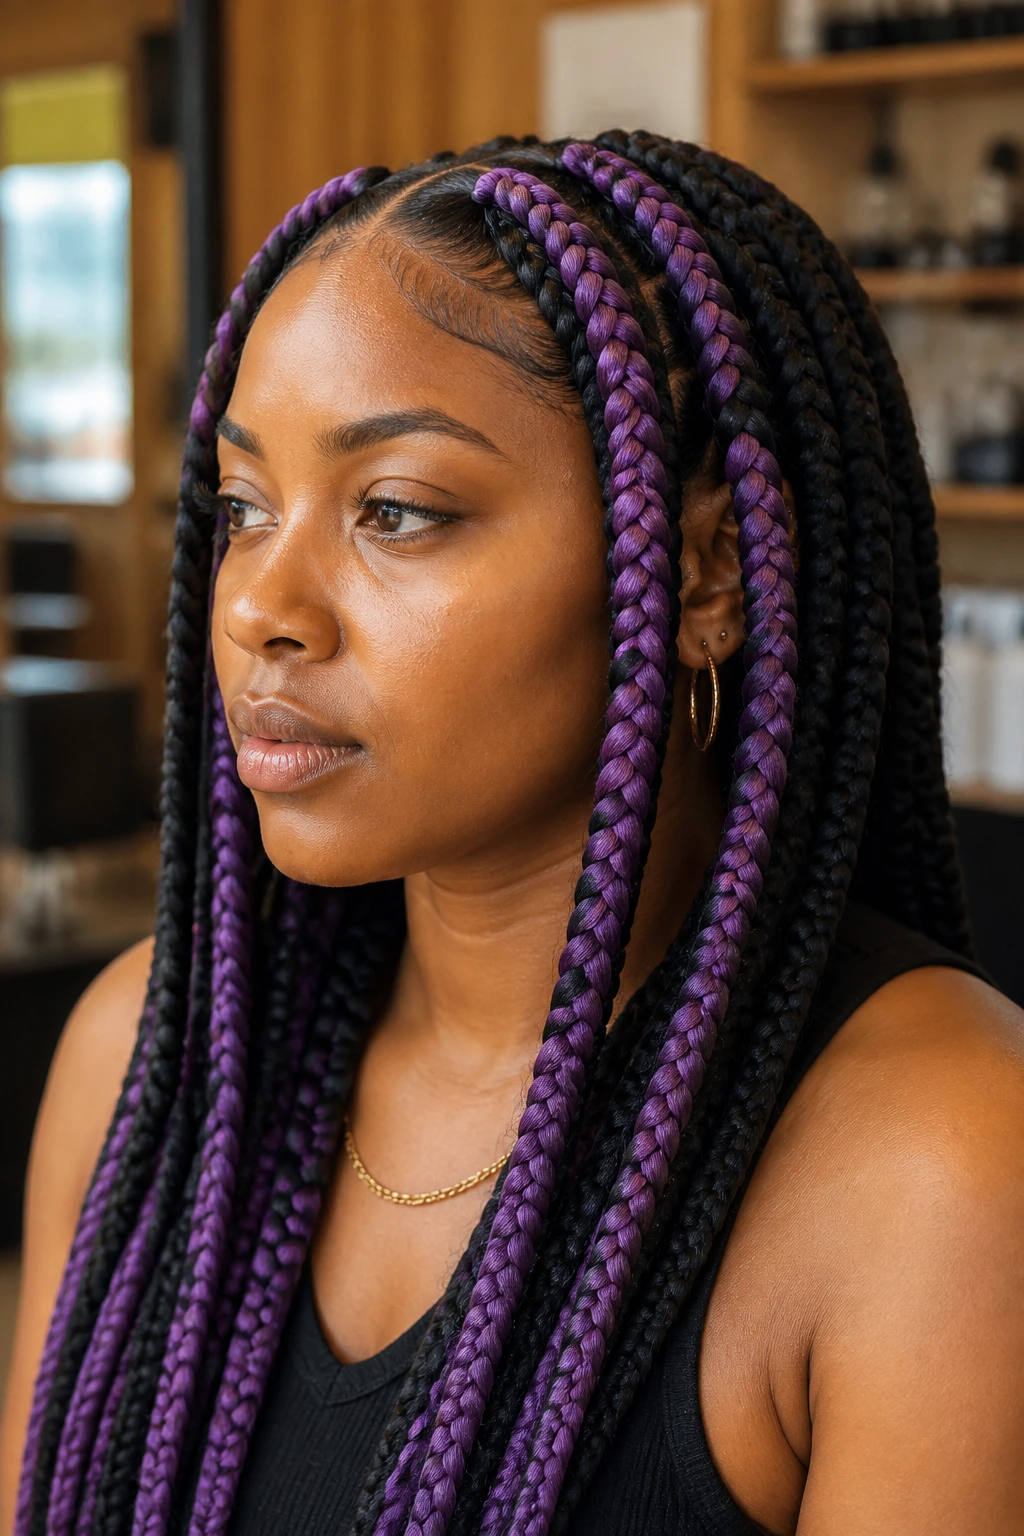
11. Dutch Braid Pigtails with Color Injection
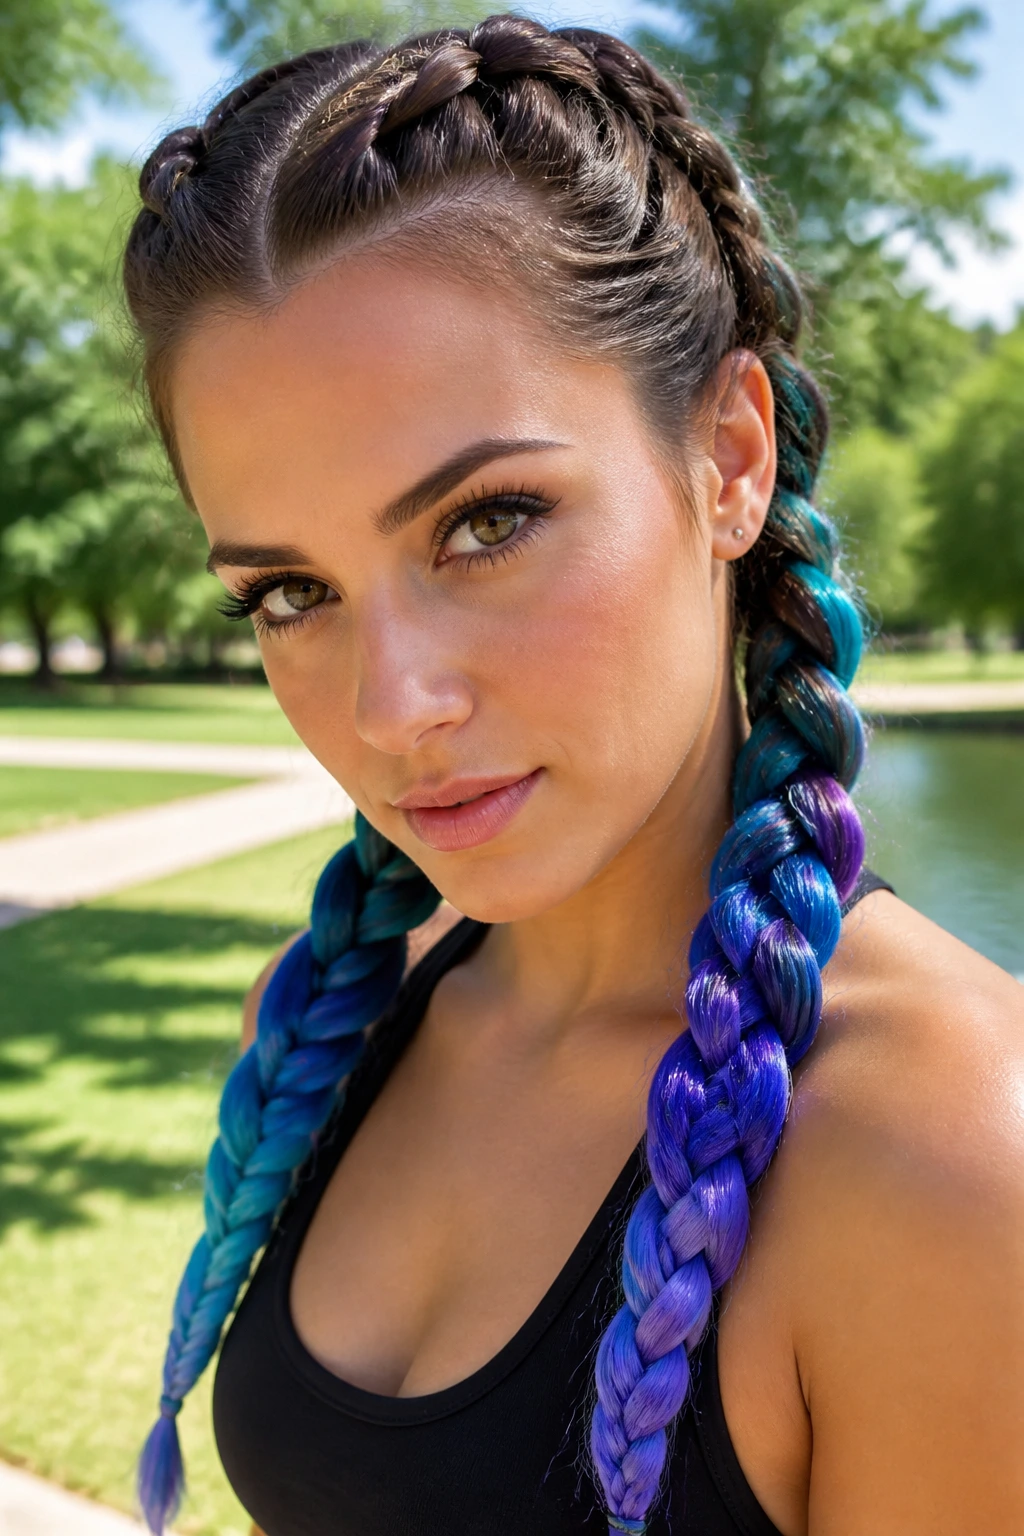
Double Dutch braids are a classic, but they can look a bit “juvenile” if they are too thin. By incorporating extensions into each pigtail, you can make them thick, sculptural, and eye-catching. This is also the perfect opportunity to inject a “fashion color”—like neon pink, electric blue, or platinum blonde—without dying your natural hair.
Why Extensions Improve This Look
They provide the necessary surface area to create the “pancake” effect. Pancaking is when you gently pull at the edges of each loop in the braid to make it look wider and thicker. You cannot achieve a satisfying pancake with thin, medium hair alone; you need the extra bulk of synthetic hair to hold that wide, airy shape.
Tips for Color Blocking
- Mix and Match: Use two different colors of extensions, one for each side, for an asymmetrical, high-fashion look.
- Gradient: Start with a darker color at the scalp and transition into a lighter, brighter color toward the ends.
12. Fishtail Braids with Volume Boosters
The fishtail braid is notorious for being time-consuming and looking quite thin unless your hair is incredibly thick. If you have medium hair, you likely find that your fishtail braid ends up looking more like a strand of rope. The fix? A “volume booster”—a small, pre-braided extension piece that you clip in or weave into your natural hair at the crown.
Mastering the Technique
Since the fishtail requires taking small pieces from the outside of two main sections, you can weave the extension fibers into these two sections early on. This distributes the bulk evenly throughout the braid, preventing a bulky base and a thin tail.
Best Occasions
- Weddings: This style is incredibly elegant and photographs beautifully when adorned with small pearl pins.
- Everyday: A loose, messy fishtail feels relaxed and works well for brunch or work environments.
13. Box Braid Bob with Blunt Ends
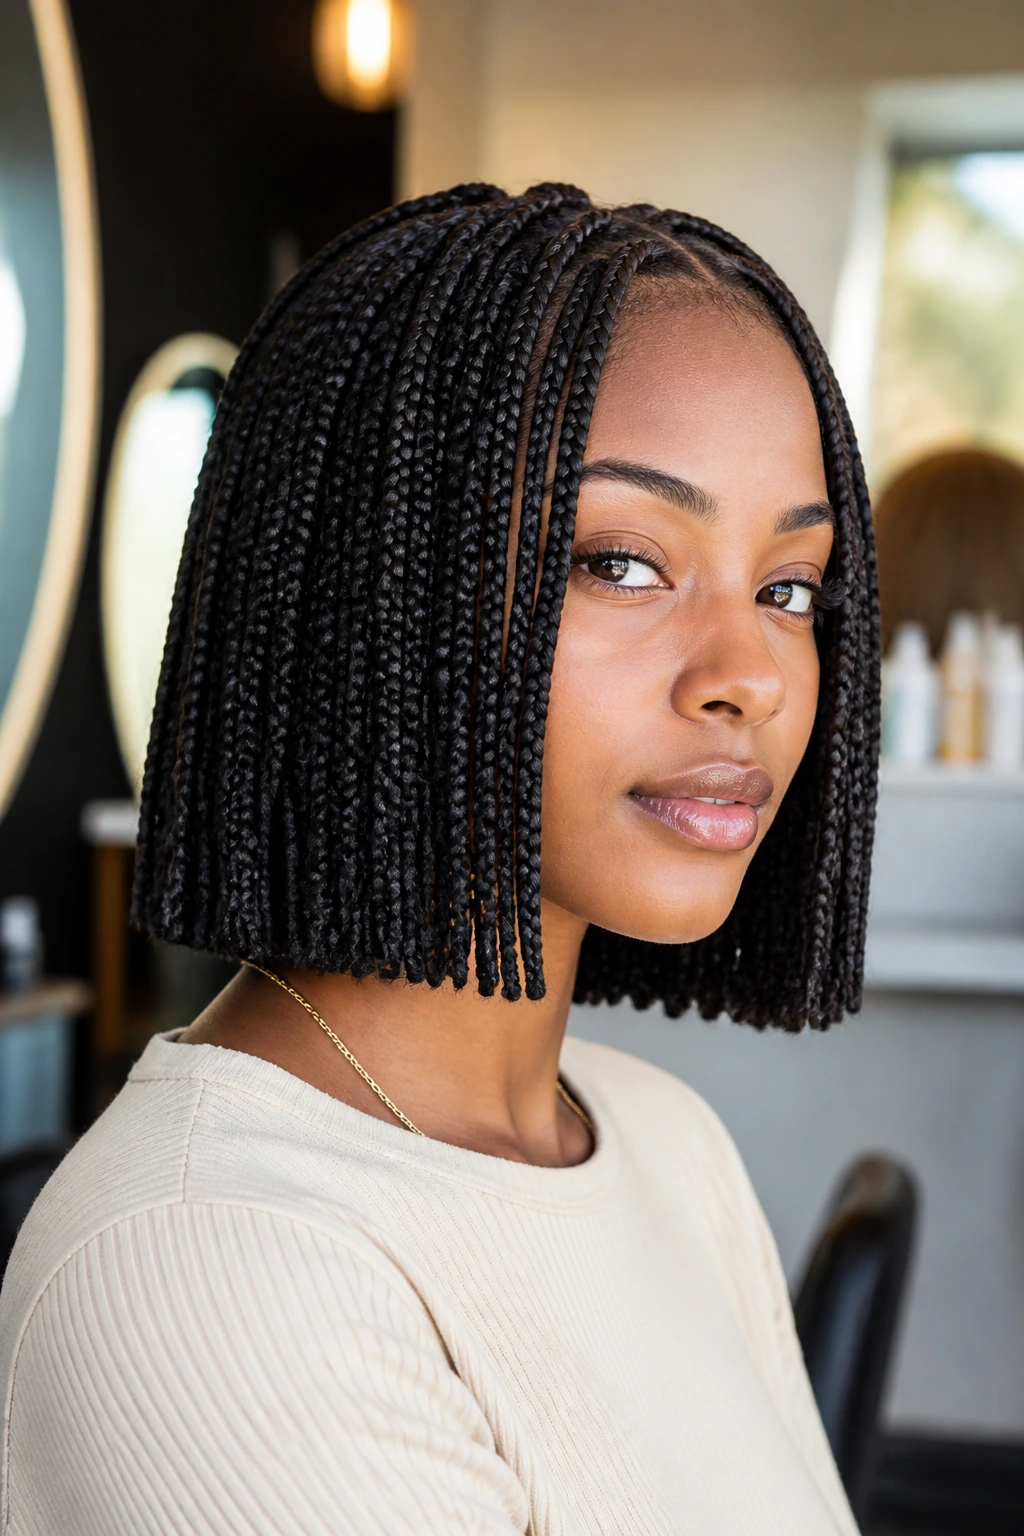
Not every braided style needs to be waist-length. A chic, chin-length or shoulder-length bob made of box braids is sophisticated, low-maintenance, and frames the face perfectly. On medium hair, you have the advantage of being able to create this style without needing too many packs of extensions.
The Importance of the Blunt Cut
- Professional finish: Use a pair of sharp hair scissors to cut the extensions to the exact length you desire.
- Searing: Use a lighter or boiling water to seal the ends of the synthetic braids so they stay blunt rather than fraying.
- Volume: Since the hair is shorter, it has more “bounce” and movement than longer, heavier styles.
14. Crisscross Cornrows with Long Braided Tails
This style is all about the pattern on the scalp. You create diagonal or intersecting cornrows that meet at a central point on the head, where a long extension-fed braid continues down the back. This is an intricate look that works well for medium hair because the “pattern” area uses your natural hair, while the extension is saved for the “tail” area.
Why This Requires Skill
The precision required to cross these braids is significant. You want the junctions to be crisp and clean. If you are doing this yourself, use a handheld mirror to ensure the lines meet perfectly at the center point.
Longevity and Care
- Silk scarf: Since the pattern is the focus, wrap your hair every night to ensure the cornrows don’t get fuzzy.
- Scalp care: Use a light, water-based scalp spray between the rows to prevent itching.
15. Half-Up, Half-Down Braided Crown
The half-up, half-down look is a staple, but elevating it with a braided crown changes the game. Use your medium hair to form the top bun or ponytail, and braid in extensions to create the “crown” that wraps around your head. This keeps your hair out of your face while maintaining the length you desire in the back.
Balancing the Weight
Since this style focuses on the crown, it can become top-heavy. Use lightweight extensions and ensure that the braid is pinned securely at the base of your skull. The weight of the braid should be distributed evenly around the back of your head to prevent neck strain.
Accessories for the Crown
- Floral accents: Small, artificial flowers tucked into the braid make this perfect for outdoor events.
- Jeweled combs: A single jeweled comb at the back of the bun can hide any pins or elastic bands.
16. Cornrow-to-Box Braid Transformation

This is a hybrid style: the front section of the head is cornrowed, and the back section is done in individual box braids. This is an excellent choice for medium hair because you can start the cornrows using your natural hair and transition into box braids by adding the extensions. It provides the comfort of cornrows at the hairline with the versatility of box braids elsewhere.
Why This Offers Versatility
You can wear the box braids in a high bun, let them hang, or pull them back into a low ponytail. The cornrowed front keeps the style looking clean and prevents the “loose hair” feeling that some people dislike with full-head box braids.
Customization Options
- Parting style: Change your part from a straight center part to a zigzag or curved part to completely change the look.
- Beading: Add different types of beads—wooden, metallic, or clear—to the ends of the box braids for a personalized touch.
17. The “Lemonade” Braid Style
Popularized by distinct, long, side-swept cornrows, the “Lemonade” style is iconic for a reason. On medium hair, this style is especially flattering because the side-swept pattern works well with the hair length you already have, while the extensions provide the extreme, dramatic length required for the “classic” look.
Maintaining the Side-Swept Direction
The key here is the direction of the braid. You aren’t braiding straight back; you are braiding across the head. This puts a slight pull on your natural hair, so it is vital that the cornrows aren’t too tight at the temple where the hair is typically finer.
Styling Tips
- Keep it clean: The beauty of this style is the crispness of the parts. Use a bit of holding spray or edge control to keep the “new growth” from looking messy.
- Length check: Ensure the extensions are long enough to reach at least mid-back to get that true side-swept drape.
18. Braided Space Buns
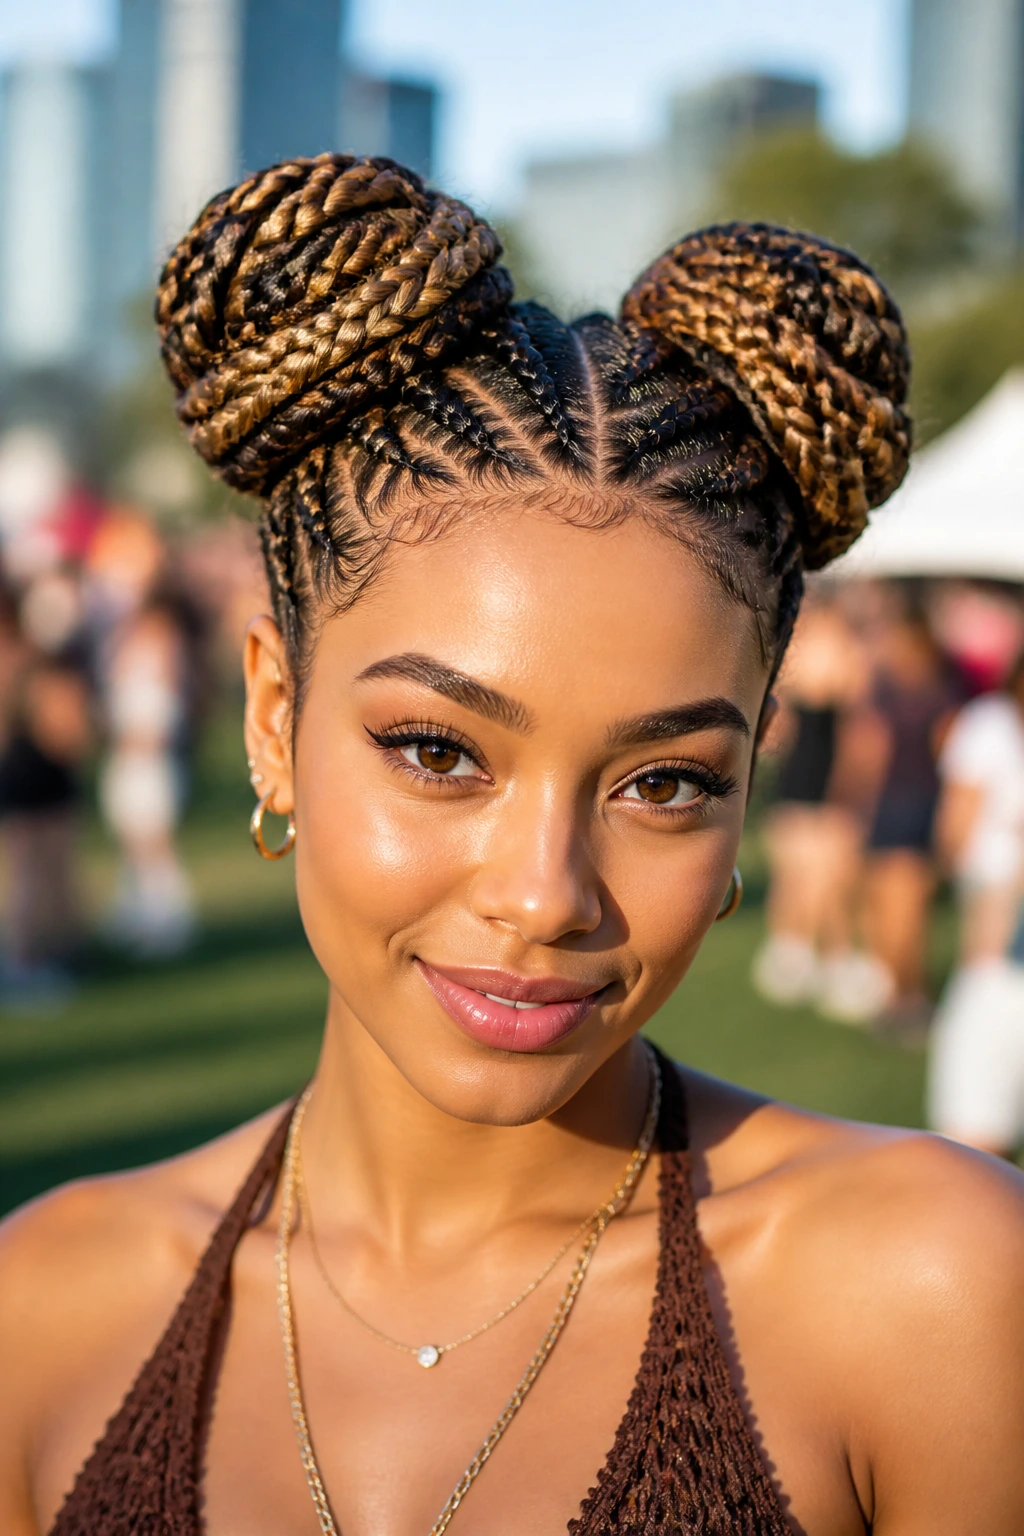
Space buns are playful, fun, and work well for both casual and dressy settings. To get big, voluminous space buns on medium hair, you need the extra volume that extensions provide. Braid the extensions into your hair, then coil the resulting long braids into two high buns on either side of the head.
Achieving Symmetry
The challenge here is size symmetry. You want both buns to be roughly the same size and at the same height on your head. Use a mirror and mark your sectioning points with a comb before you start braiding to ensure the foundation is even.
Finishing Touches
- Loose strands: Leave a few strands of hair out around the face to soften the look.
- Glitter spray: A light misting of glitter spray over the buns can make them pop for a festival or night out.
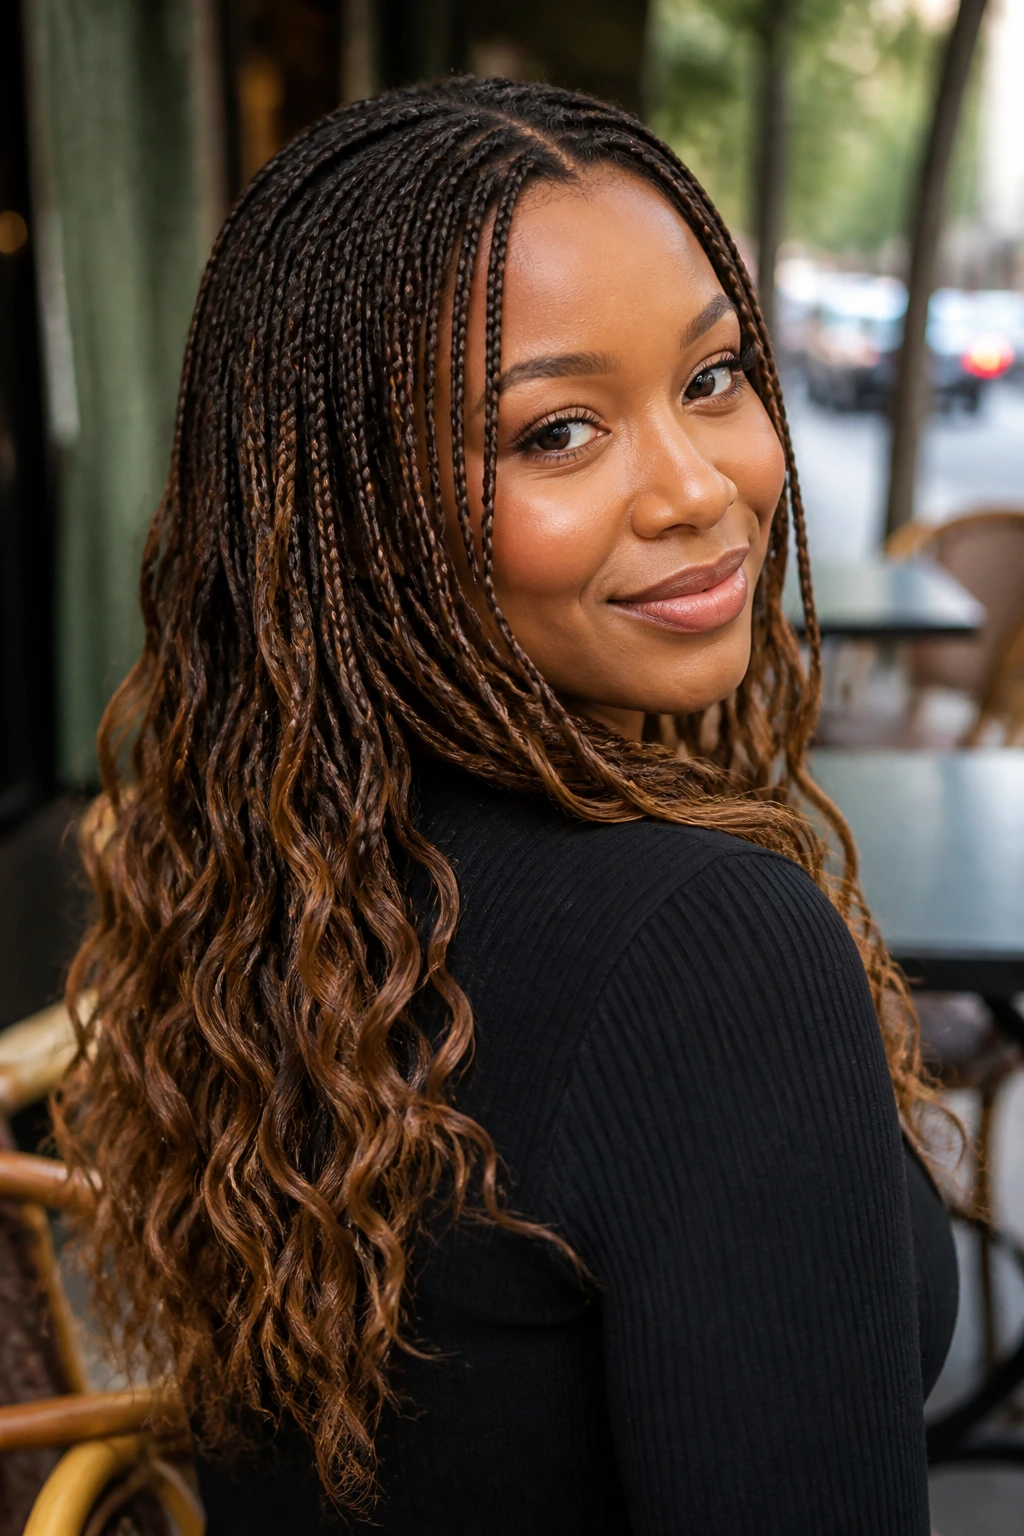
19. Two-Tone Ombré Box Braids

If you are worried about your natural hair not blending with a bold extension color, the ombré technique is your answer. By choosing extensions that transition from a color similar to your natural hair to a lighter or brighter shade at the tips, you create a seamless blend that requires no color processing on your actual strands.
Why Ombré Works
It draws the attention away from the “braid in” point. Because the color shift happens further down the braid, the visual focus is on the transition and the bright ends, not on the scalp where the extension is added.
Color Selection Advice
- Warm tones: If you have warm undertones in your skin, go for auburn, honey, or copper ombré tips.
- Cool tones: If your skin has cool undertones, platinum, ash blonde, or cool-toned purples are ideal.
20. Double-Braided Ponytail with Wrapped Ends

This is a more technical style that involves two separate braided ponytails that are then joined or wrapped around each other. It’s a sophisticated, architectural look that is perfect for formal events. Extensions are mandatory here because you need the length to create the interlocking structure of the two braids.
Why Structural Braiding Matters
- Secure the foundation: The two ponytails must be very tight. Use sturdy, coated hair bands to avoid breakage.
- Interlocking: Don’t just twist the braids together. Literally weave them in and out of one another to create a more complex, unified structure.
- Pining: You will need quite a few pins to hold this together. Ensure they are the same color as your hair.
21. Fulani-Box Braid Hybrid with Accessories
This hybrid combines the scalp patterns of Fulani braids with the individual box braid freedom of the back of the head. It is the best of both worlds. For medium hair, it is highly practical: the complex patterns are handled by your natural hair, while the extensions provide the bulk and length for the individual plaits in the back.
The Best of Both Worlds
You get the cultural, artistic expression of the scalp patterns and the low-maintenance, flowing nature of box braids. It is a longer installation process, but the results are visually stunning and highly customizable.
Final Styling Thoughts
- Placement: Place the most complex scalp patterns at the top and sides of the head where they can be clearly seen.
- Uniformity: Even though you are using two different techniques, ensure the box braids in the back are consistent in size with the cornrowed braids to maintain a cohesive overall aesthetic.
Wrapping Up
Working with medium hair and extensions is about finding the balance between your natural texture and the added fiber. Whether you choose the knotless method to keep things light or prefer the thick, bold look of feed-ins, the goal is always to protect your own hair while experimenting with length and style. Remember that the best braided styles are the ones that make you feel like yourself—only with a bit more length to play with. Focus on healthy scalp care, keep your accessories minimal to avoid unnecessary weight, and do not be afraid to change your color or pattern the next time you sit down to braid. Your style is a reflection of your personality, and with a few packs of high-quality extensions, the possibilities are effectively endless.