



A cold winter morning has a way of throwing even the most organized routines into complete chaos. Your alarm goes off late, your kitchen is freezing, and you have a high-stakes budget presentation at nine, followed immediately by a festive family gathering or an office holiday mixer in the evening.
Your hair looks like a bird nested in it overnight, and the thought of spending forty-five minutes with a blow dryer and a curling wand makes you want to crawl back under the covers.
The holiday season brings double the social commitments but cuts your morning prep time in half. You need styles that look like you spent an hour in front of a vanity, but actually took four minutes while you waited for your coffee to brew.
The secret to pulling off holiday hair on a time budget is not complicated styling techniques; it is smart placement, dry shampoo used at the right moment, and a couple of reliable hair accessories.
I have spent years testing rapid hair routines on everything from fine, slippery locks to dense, textured curls. What works in a heavily edited video rarely works when you are rushing to catch a train in the rain.
Let us skip the complicated three-strand crown braids that require double-jointed elbows and look at styles you can actually finish before your morning coffee cools down.
How to Prep Your Hair the Night Before for Fast Morning Styling
The easiest way to speed up your morning routine is to do eighty percent of the work before your head hits the pillow. If you wait until you wake up to address flat roots or wild frizz, you are already playing catch-up.
A few simple habits before bed will preserve your hair texture and make morning styling almost effortless.
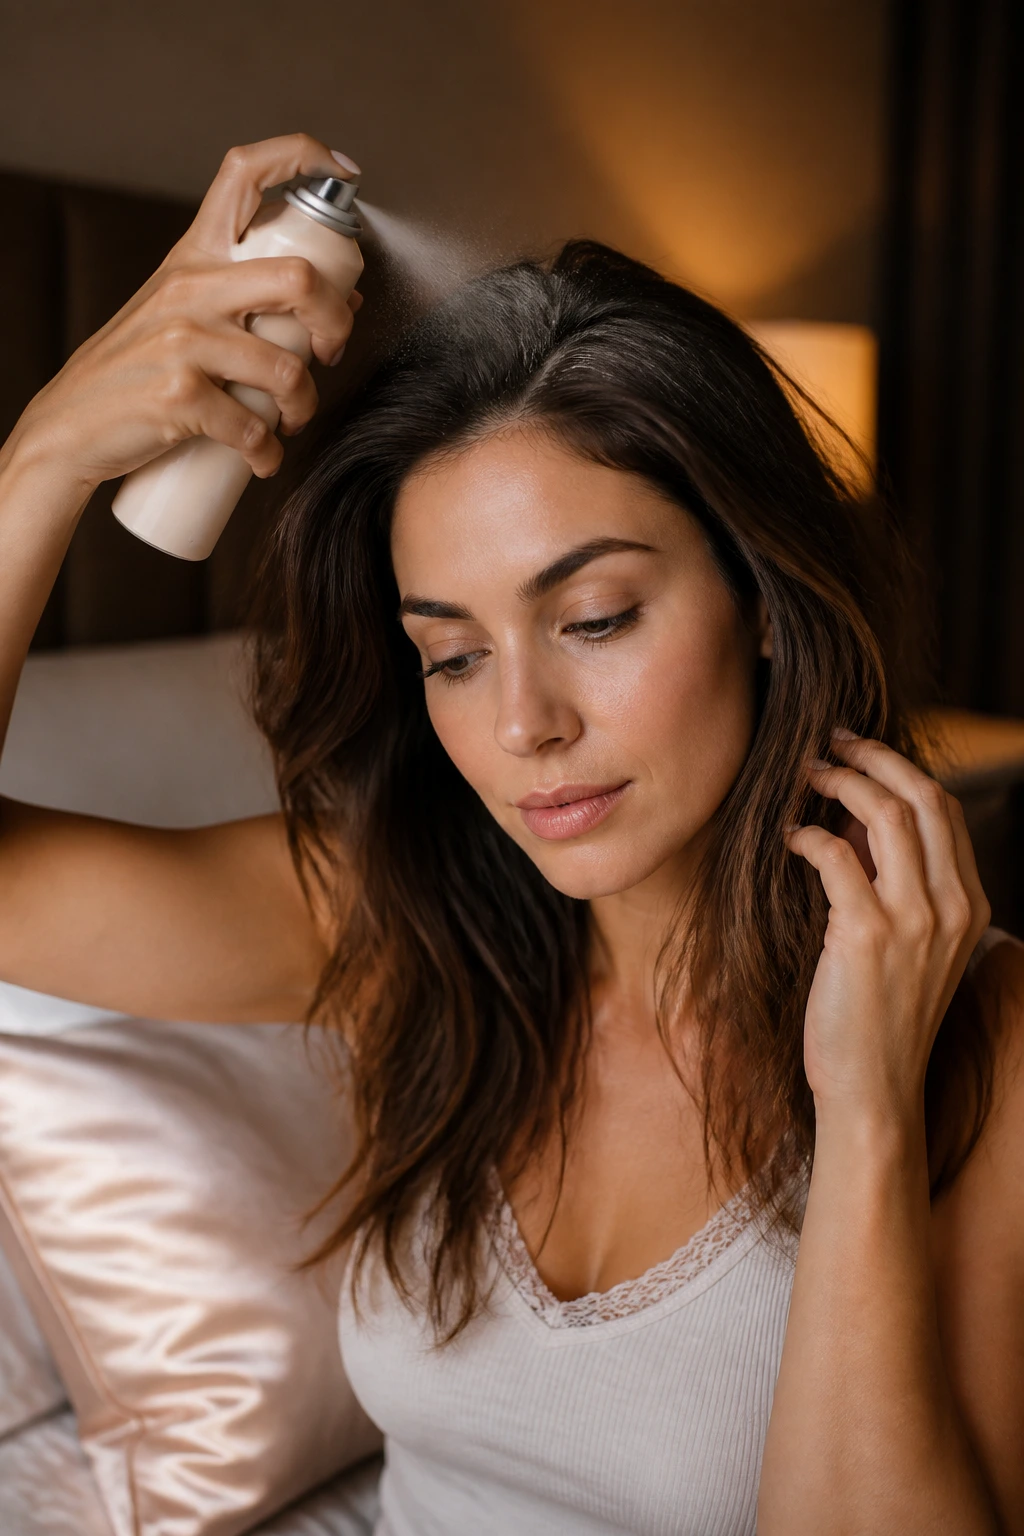
First, apply your dry shampoo before you go to sleep rather than in the morning. When you spray it on active roots at night, the starch has hours to absorb your hair’s natural oils as they are produced.
You wake up with clean volume at the roots and none of that chalky, white residue that usually requires ten minutes of vigorous brushing to remove.
Second, swap your standard cotton pillowcase for a silk or satin alternative. Cotton fibers are rough; they grab your hair cuticles as you toss and turn, creating friction, frizz, and tangles.
Silk allows your hair to glide smoothly across the surface, preserving whatever wave or sleekness you had the day before. If your hair is prone to flattening, loop it into a loose, high bun on the very top of your head—often called a pineapple—using a soft silk scrunchie.
This keeps your roots lifted and protects your ends from being crushed while you sleep.
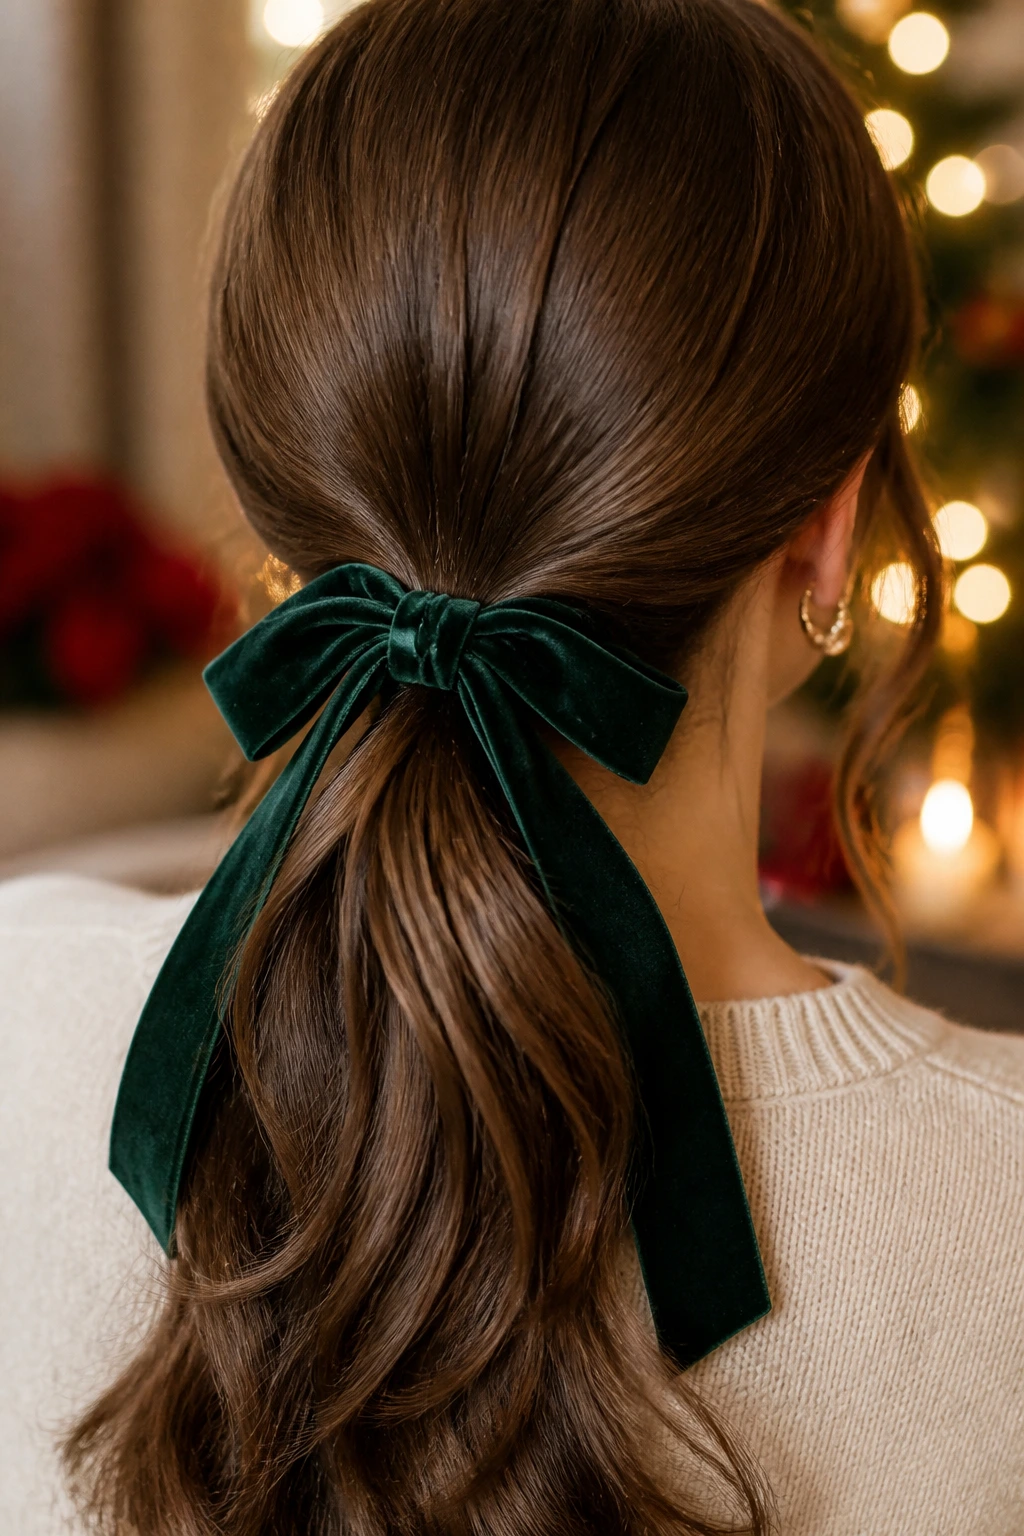
1. The Velvet Ribbon Low Ponytail
A simple ponytail can sometimes feel a bit too casual for a holiday event, but adding a single, high-quality accessory changes the entire dynamic. The low ponytail is the fastest way to tame chaotic morning hair.
You do not need perfect symmetry or super-straight hair for this to work. Velvet has a rich texture that instantly signals holiday festivity, and by securing your hair at the nape of your neck, you keep the style secure through a long day.
Why the Velvet Ribbon Works
Using a velvet ribbon is a classic styling trick because the fabric has a natural grip that keeps it from slipping out of your hair. It adds a pop of color—rich emerald green, deep crimson, or classic black—that makes even a rushed ponytail look highly intentional.
Quick Facts and Steps
- Execution time: Under three minutes.
- Best hair type: Works beautifully on straight, wavy, and curly textures.
- Required tools: One standard elastic, one velvet ribbon (about twelve inches long), and a light-hold hairspray.
- Step 1: Gather your hair at the nape of your neck and secure it with a standard hair elastic.
- Step 2: Tie the velvet ribbon over the elastic, wrapping it twice before tying a neat bow.
- Step 3: Pull a few small strands free around your ears to soften the look.
Pro tip: Never try to tie the ribbon directly around your loose hair without an elastic first; it will slide down your neck before you even finish your morning commute.
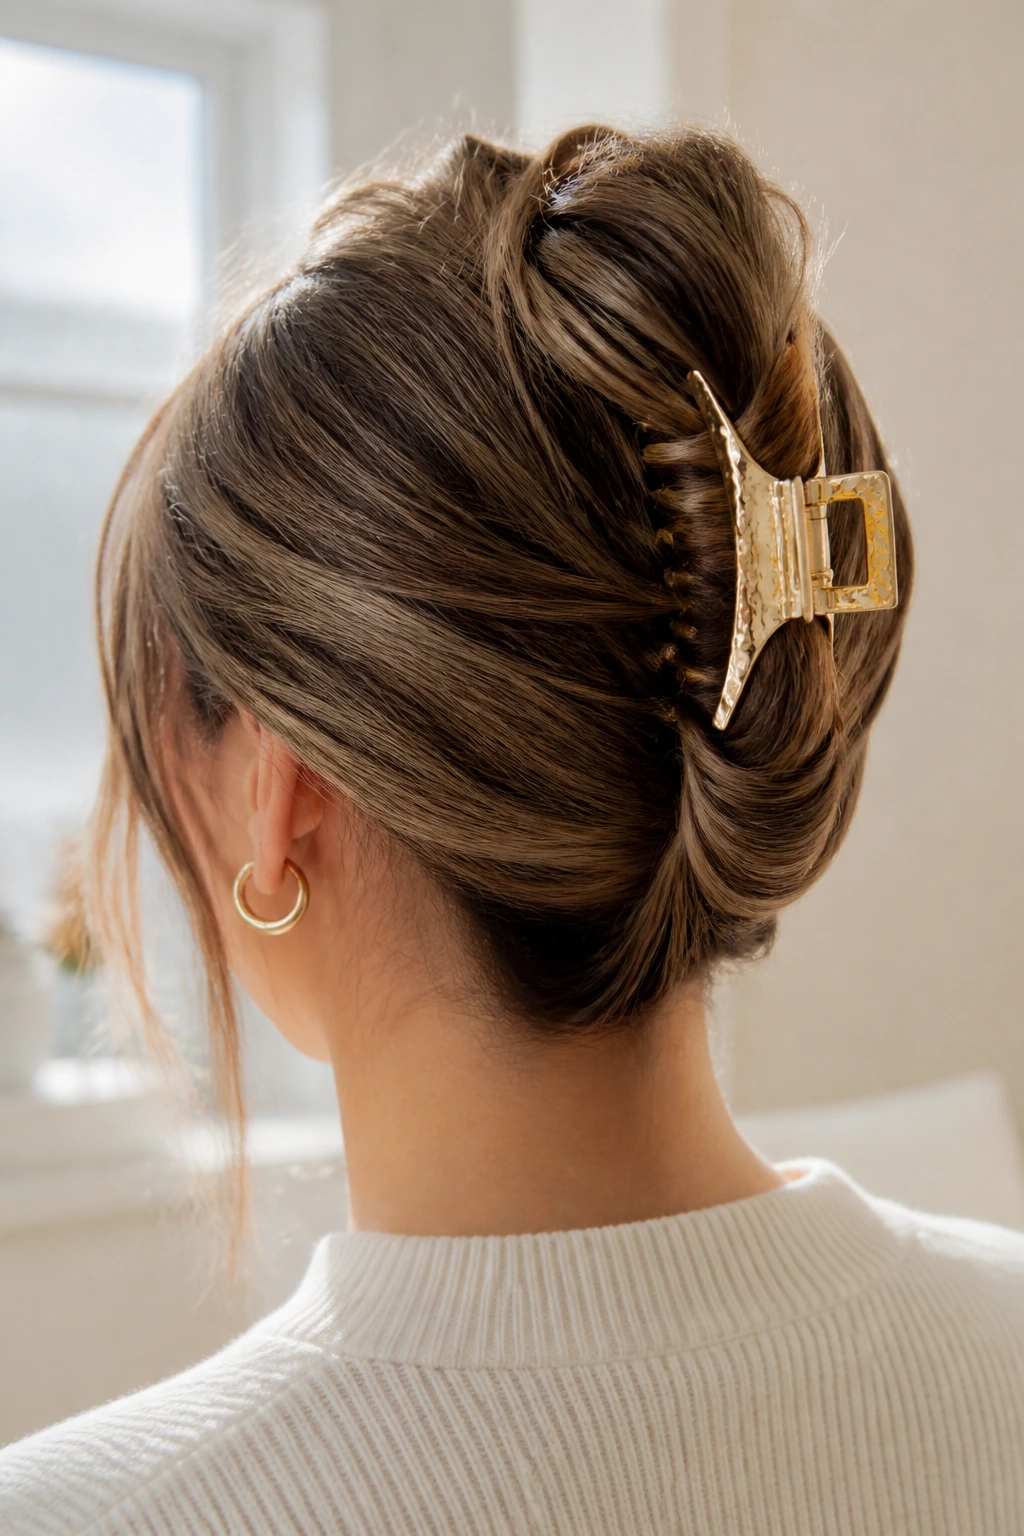
2. The Textured Claw Clip French Twist
Most people think claw clips are only for washing your face or running errands, but the right technique turns this plastic clip into a sophisticated vertical twist. The trick lies in how you tuck the ends.
Instead of letting the tips of your hair flop over the top of the clip, you fold them down and tuck them inside the twist before snapping the jaws shut. This creates a clean, elegant line that mimics a traditional French twist.
Spritz your roots with a texturizing spray before you twist. This gives your hair some grip, preventing the clip from sliding down during your morning commute.
Choose a clip with a metallic finish—gold, silver, or rose gold—to make it look like jewelry rather than a bathroom accessory.
Because this style keeps your hair entirely up and off your collar, it is the perfect companion for high-necked holiday sweaters or coats with heavy scarves. It is fast, secure, and keeps you looking polished even if your hair is three days past its last wash.
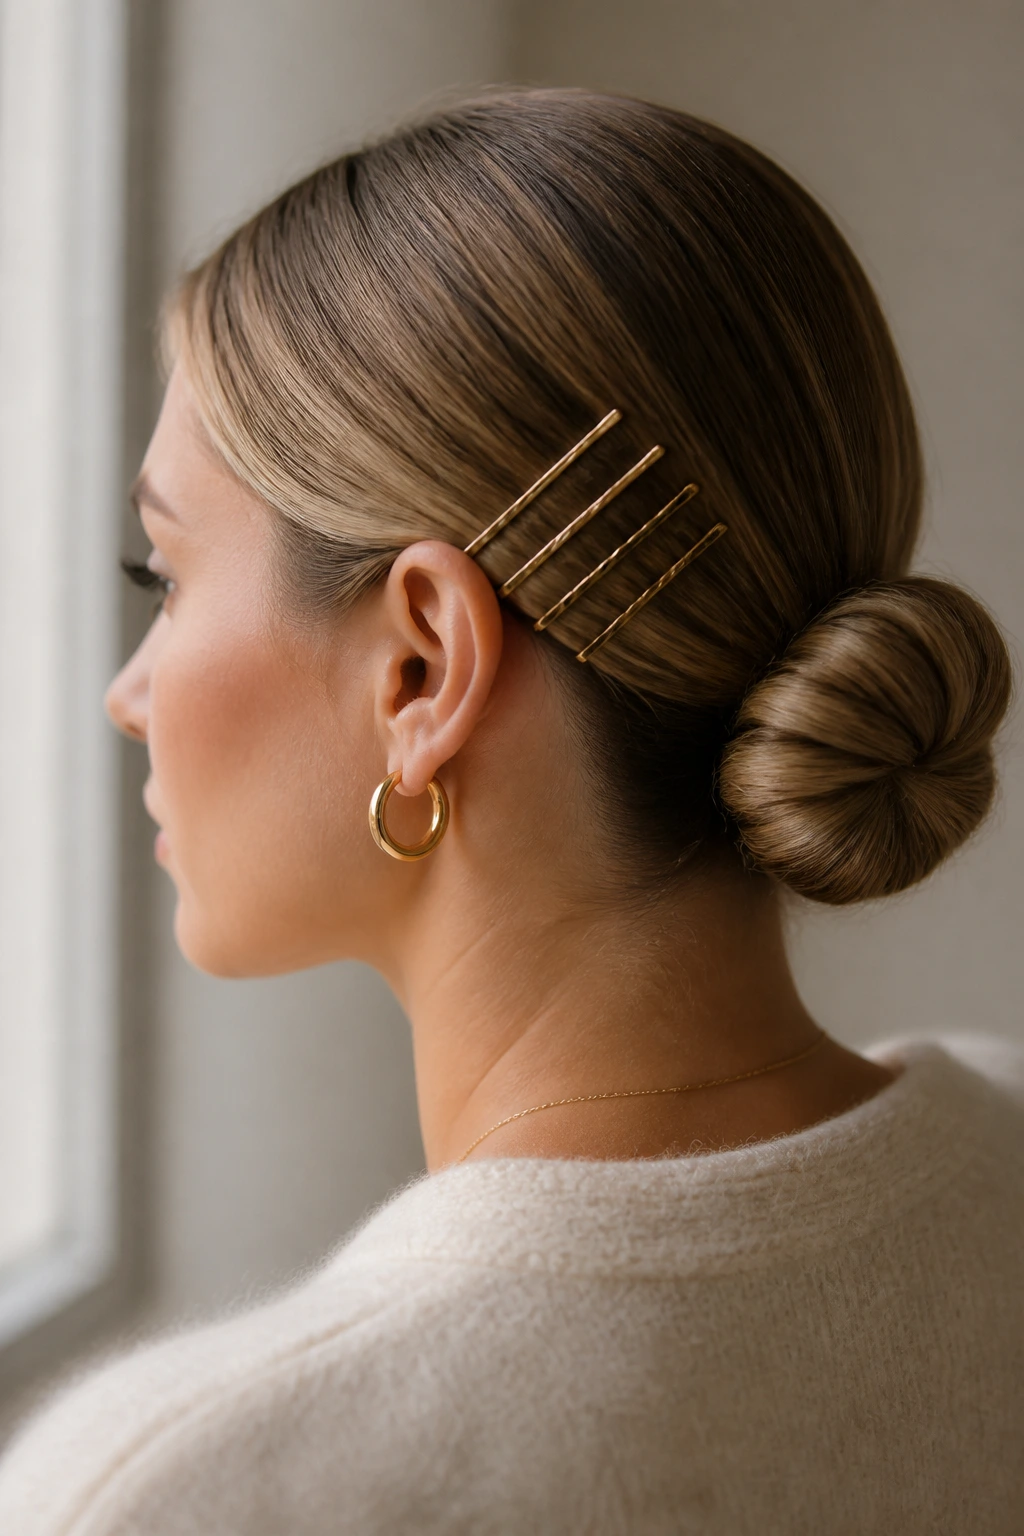
3. The Sleek Low Bun with Gold Bobby Pins
Why does a simple low bun look so much better when you add a few cheap bobby pins? It comes down to deliberate placement.
When you slide three or four gold pins parallel to each other on one side of your head, it looks like a design choice rather than a quick fix for stray hairs. This style is incredibly helpful when your hair is slightly dirty, as the natural oils actually help hold the slick look in place.
Pull your hair back into a tight ponytail at the bottom of your neck, twist the length into a tight coil, and wrap it around the base. Secure the bun with a standard hair elastic, then add the gold pins as a decorative feature.
How to Get the Cleanest Finish
To make this look exceptionally sleek, you need to tame those tiny flyaways along your part.
- The toothbrush trick: Spray a clean toothbrush with a firm-hold hairspray.
- Smooth gently: Brush the damp bristles lightly over your part line and temple area.
- Avoid heavy gel: This tames baby hairs without plastering your entire head in stiff, crunchy product.
This simple adjustment elevates a basic bun into something that looks like it belongs on a runway, and it takes less than five minutes from start to finish.
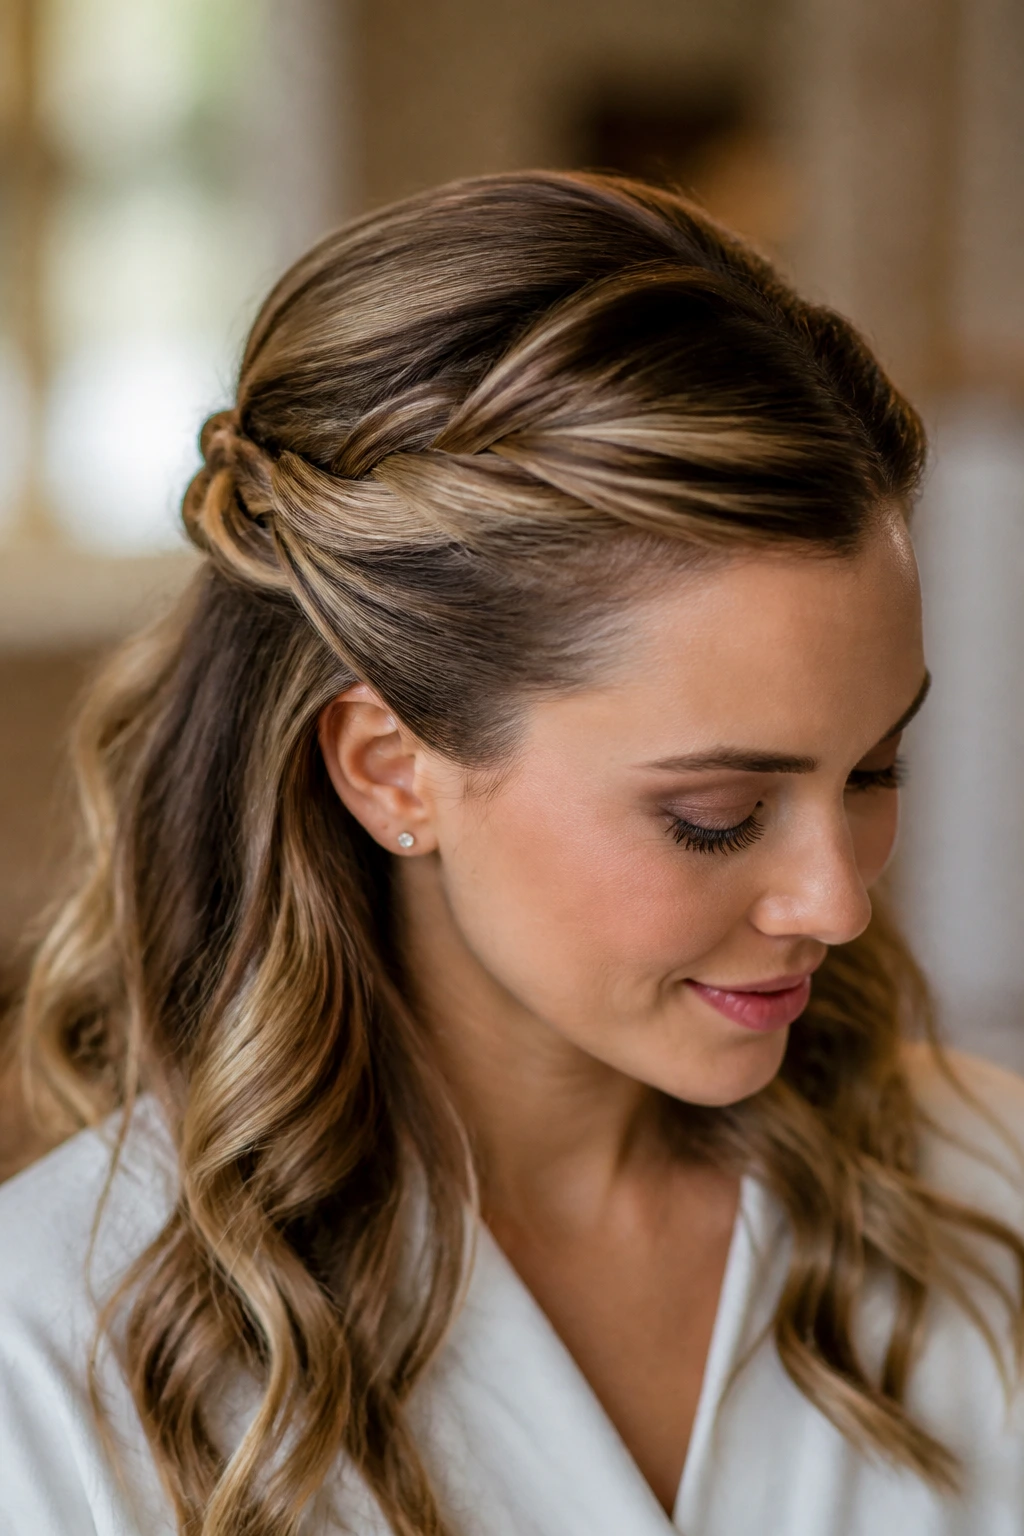
4. The Double-Twisted Half-Up Crown
I used to struggle with half-up styles because the back of my head always looked flat. That changed when I stopped braiding and started twisting.
Twisting two sections of hair from the temples and securing them in the back takes half the time of a braid and adds instant volume to the crown. It is the perfect compromise when you want to show off your length but need your hair out of your face for work meetings.
How to Style the Twist
- Create the sections: Take a two-inch section of hair from above your left ear.
- Twist tightly: Twist it backward, away from your face, keeping it relatively tight.
- Repeat on the right: Do the same with a two-inch section above your right ear.
- Secure in the back: Bring both twists to the center back of your head and tie them together with a small, clear elastic.
- Create the opening: Flip the ponytail of the half-up section up and through the space above the elastic to create a topsy-tail effect.
Gently pull at the edges of the twists to widen them and make them look thicker. This small adjustment makes the style look hand-crafted rather than rushed, and it completely hides the clear elastic.
5. The Voluminous Bubble Ponytail
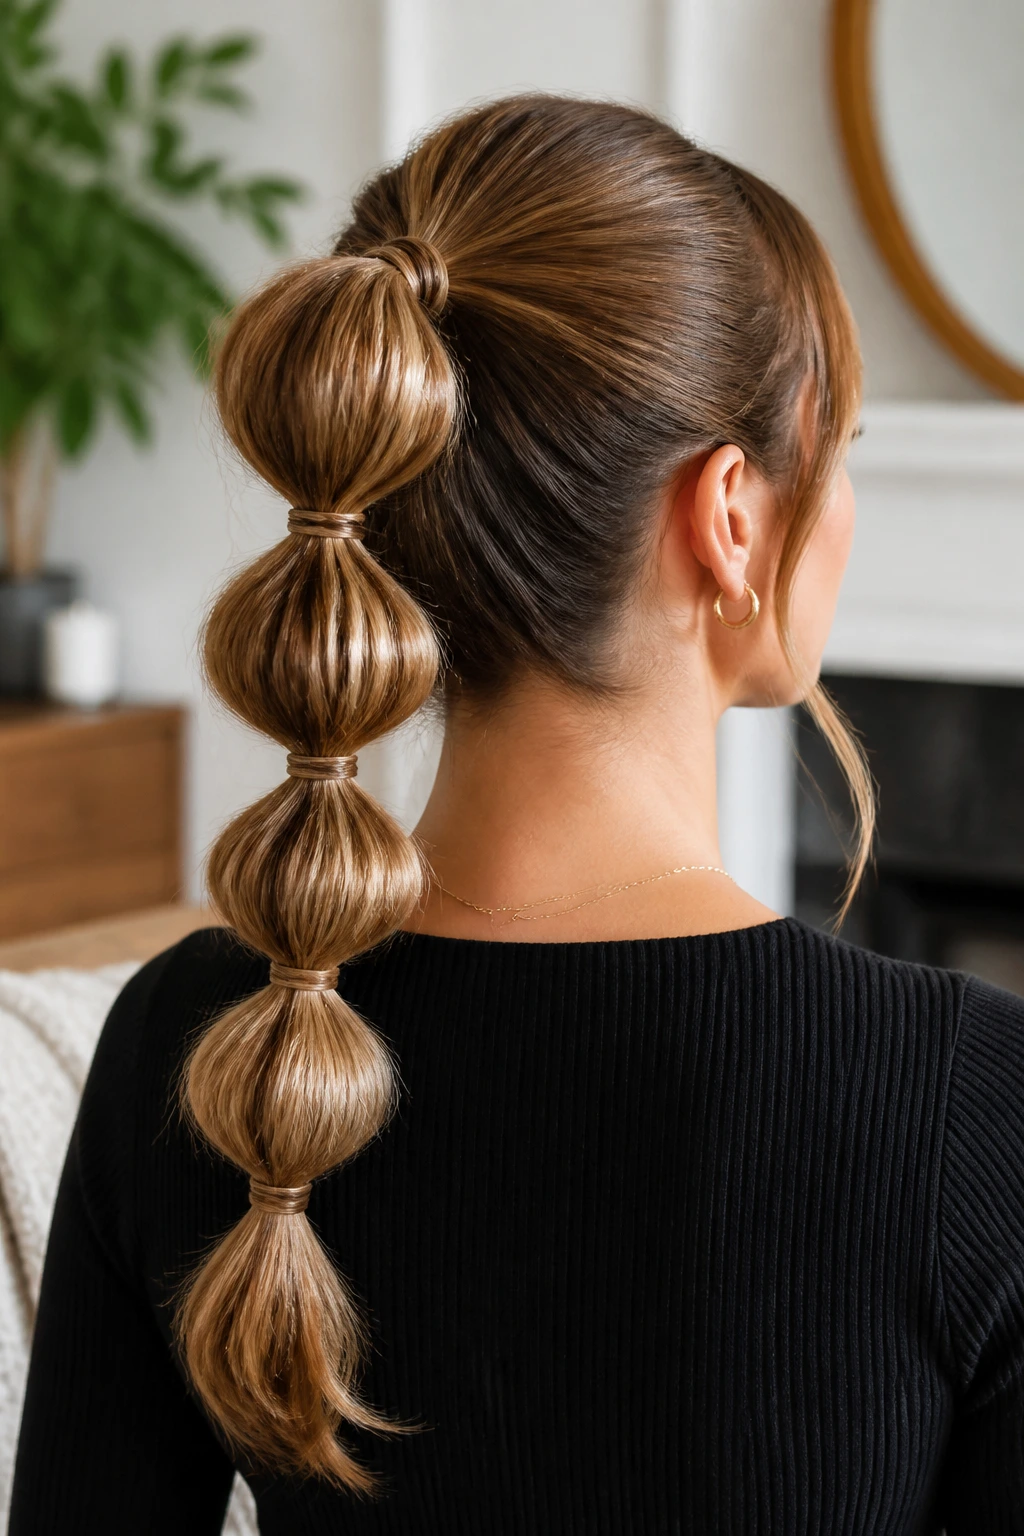
The bubble ponytail is a lifesaver when you are dealing with second-day or third-day hair that has lost its bounce. Instead of fighting the lack of volume, you can use small elastics to create a structured, playful look that stays secure all day long.
Pull your hair into a high or mid-height ponytail and secure it with a sturdy elastic. If you have fine hair, take a moment to tease the length of the ponytail slightly to build some internal structure.
This ensures your bubbles look round and full rather than flat.
Place another small elastic about three inches down the ponytail. Gently pull the hair between the two elastics outward, creating a rounded bubble shape.
Repeat this process down the length of your hair, leaving about two inches free at the bottom.
To make this look appropriate for a holiday gathering, swap out plain elastics for clear ones, or cover each elastic with a tiny metallic cuff. It takes less than five minutes but looks incredibly modern and clean.
6. The Side-Swept Pearl Pin Look
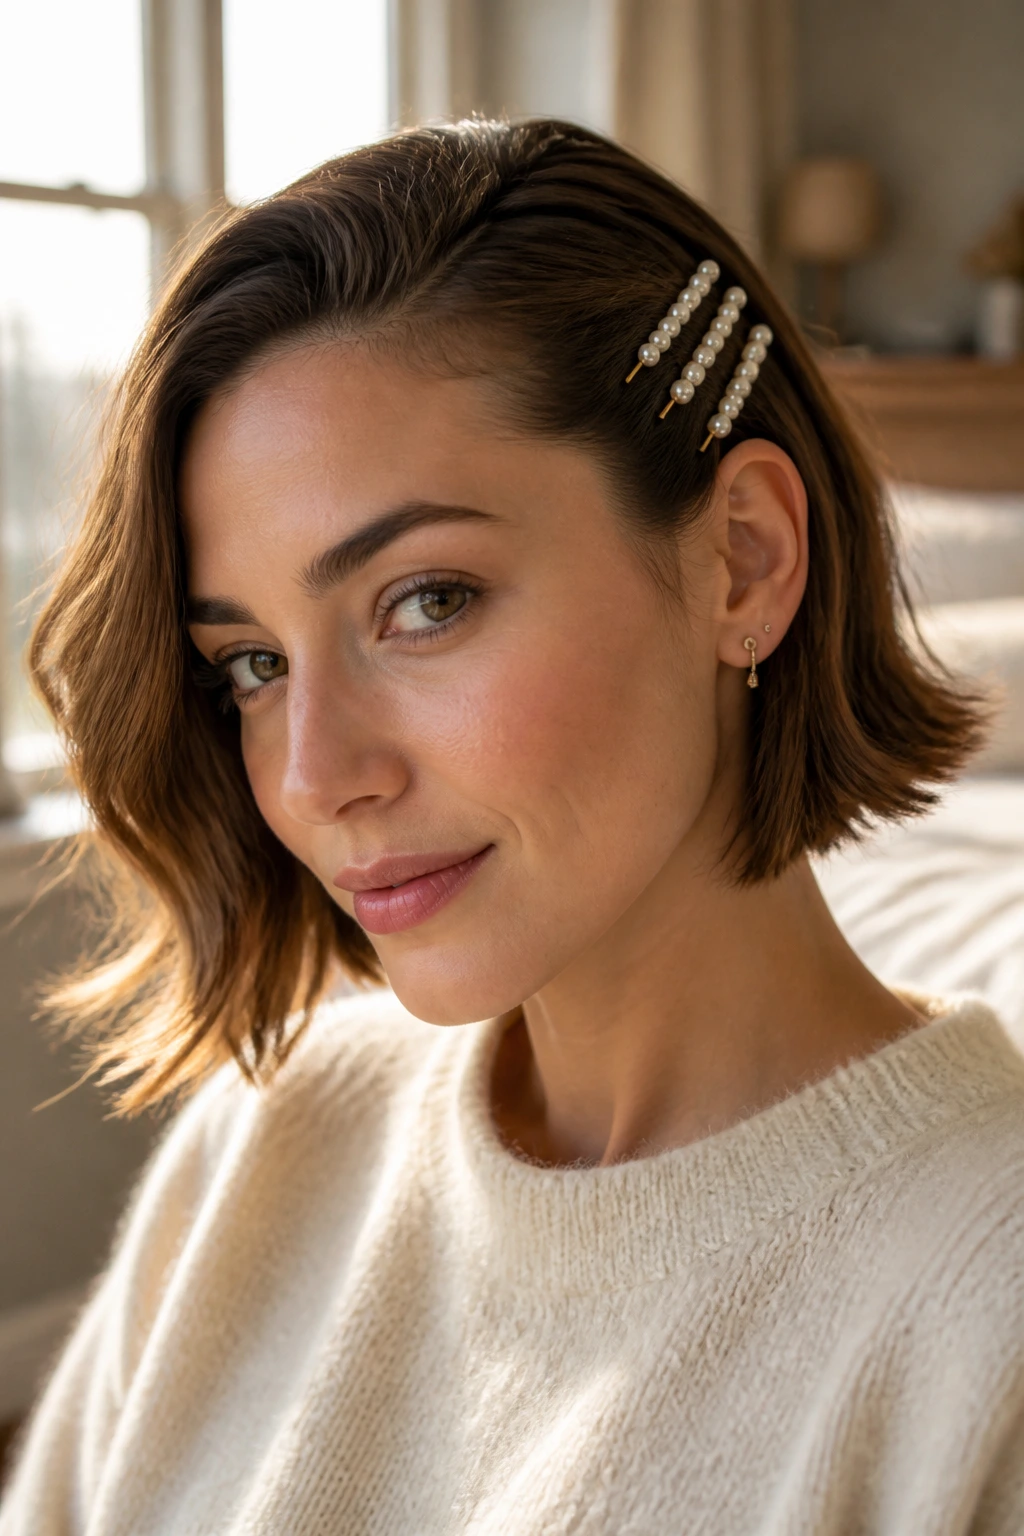
Unlike styles that require you to rebuild your entire hair structure, this look works with whatever texture you woke up with. If you wake up with wild, uneven waves, do not waste time trying to straighten them or curl them into submission.
Instead, embrace the asymmetry by sweeping one side of your hair behind your ear and locking it in place with a cluster of pearl-embellished bobby pins.
This creates a beautiful contrast between the wild, natural texture on one side and the sleek, decorated side. It works exceptionally well on short bob haircuts where tying your hair up is not an option.
Apply a tiny dab of hair oil to the ends of the loose side to add some shine, and you are ready to walk out the door. It is sophisticated, fast, and shows that you know how to work with your natural hair texture.
7. The Braided Headband Illusion
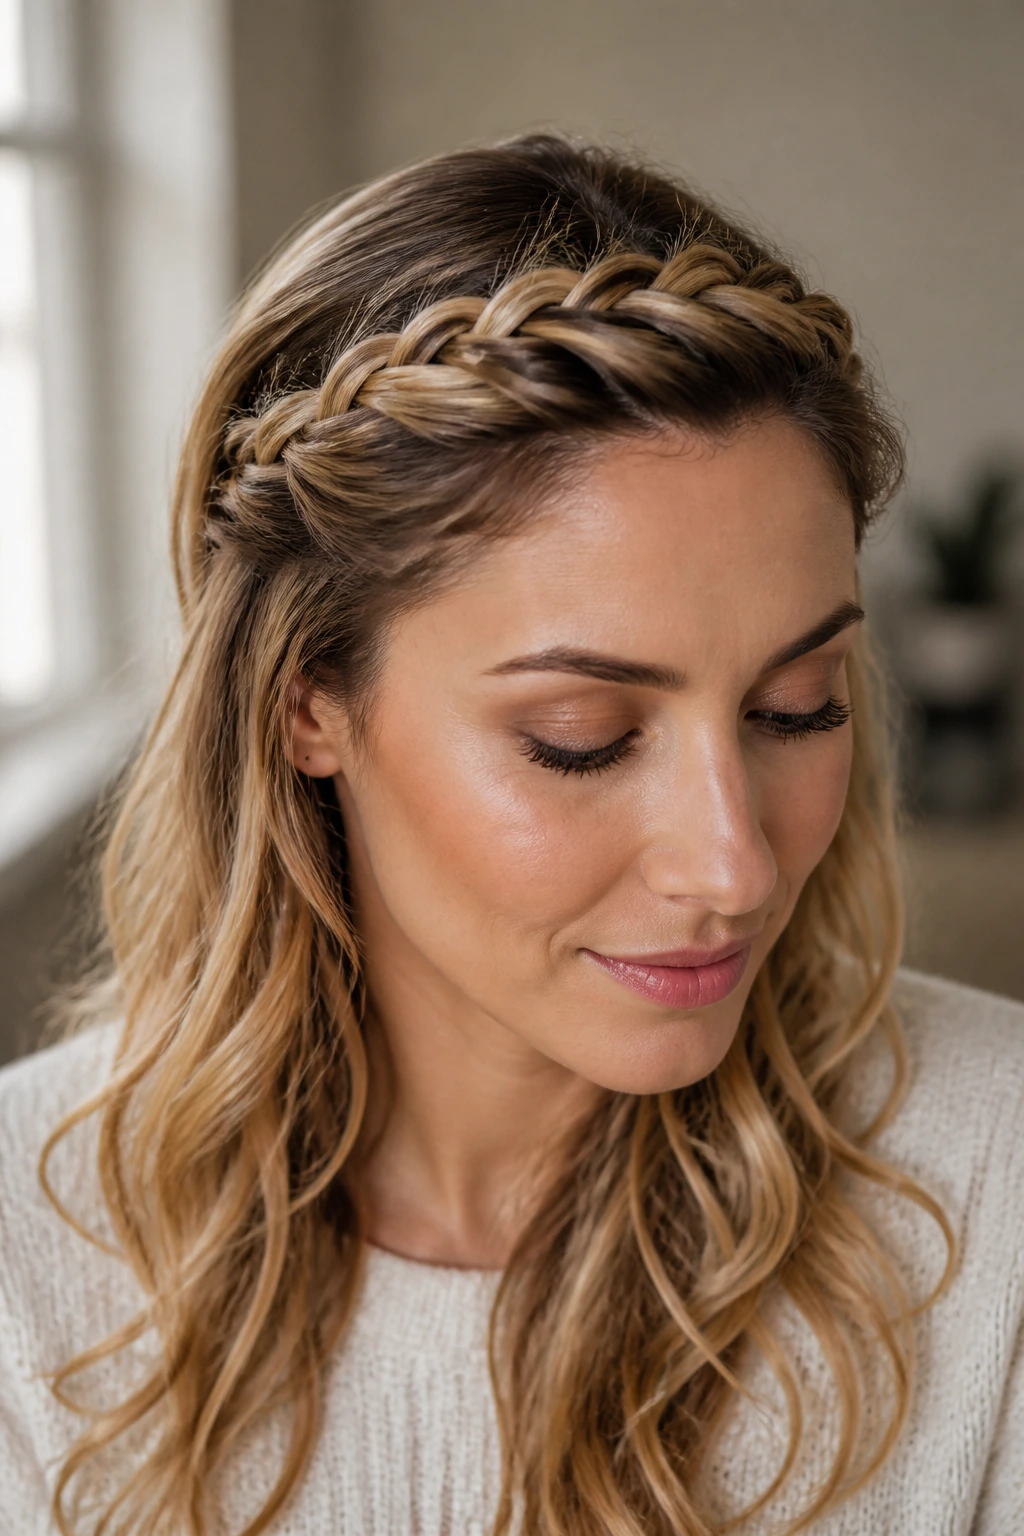
A real headband can sometimes pinch behind your ears by the end of a long day. Creating a headband out of your own hair is much more comfortable and looks far more intricate than it actually is.
Building the Perfect Braid
To make this work, you need enough length to reach across the top of your head.
- Sectioning: Take a small, one-inch section of hair from behind your left ear, near the nape of your neck.
- Braiding: Braid this section tightly all the way to the ends and secure it with a tiny, clear elastic.
- Positioning: Sweep the braid over the top of your head, positioning it about two inches back from your hairline.
- Pinning: Secure the end of the braid behind your right ear with two bobby pins crossed in an “X” shape.
Quick Facts
- Difficulty: Easy.
- Tools needed: One clear elastic, two bobby pins.
- Best for: Medium to long hair.
Pro tip: Tuck the pinned end of the braid under your loose hair on the right side so the bobby pins are completely hidden from view.
8. The Messy Topknot with a Festive Scrunchie
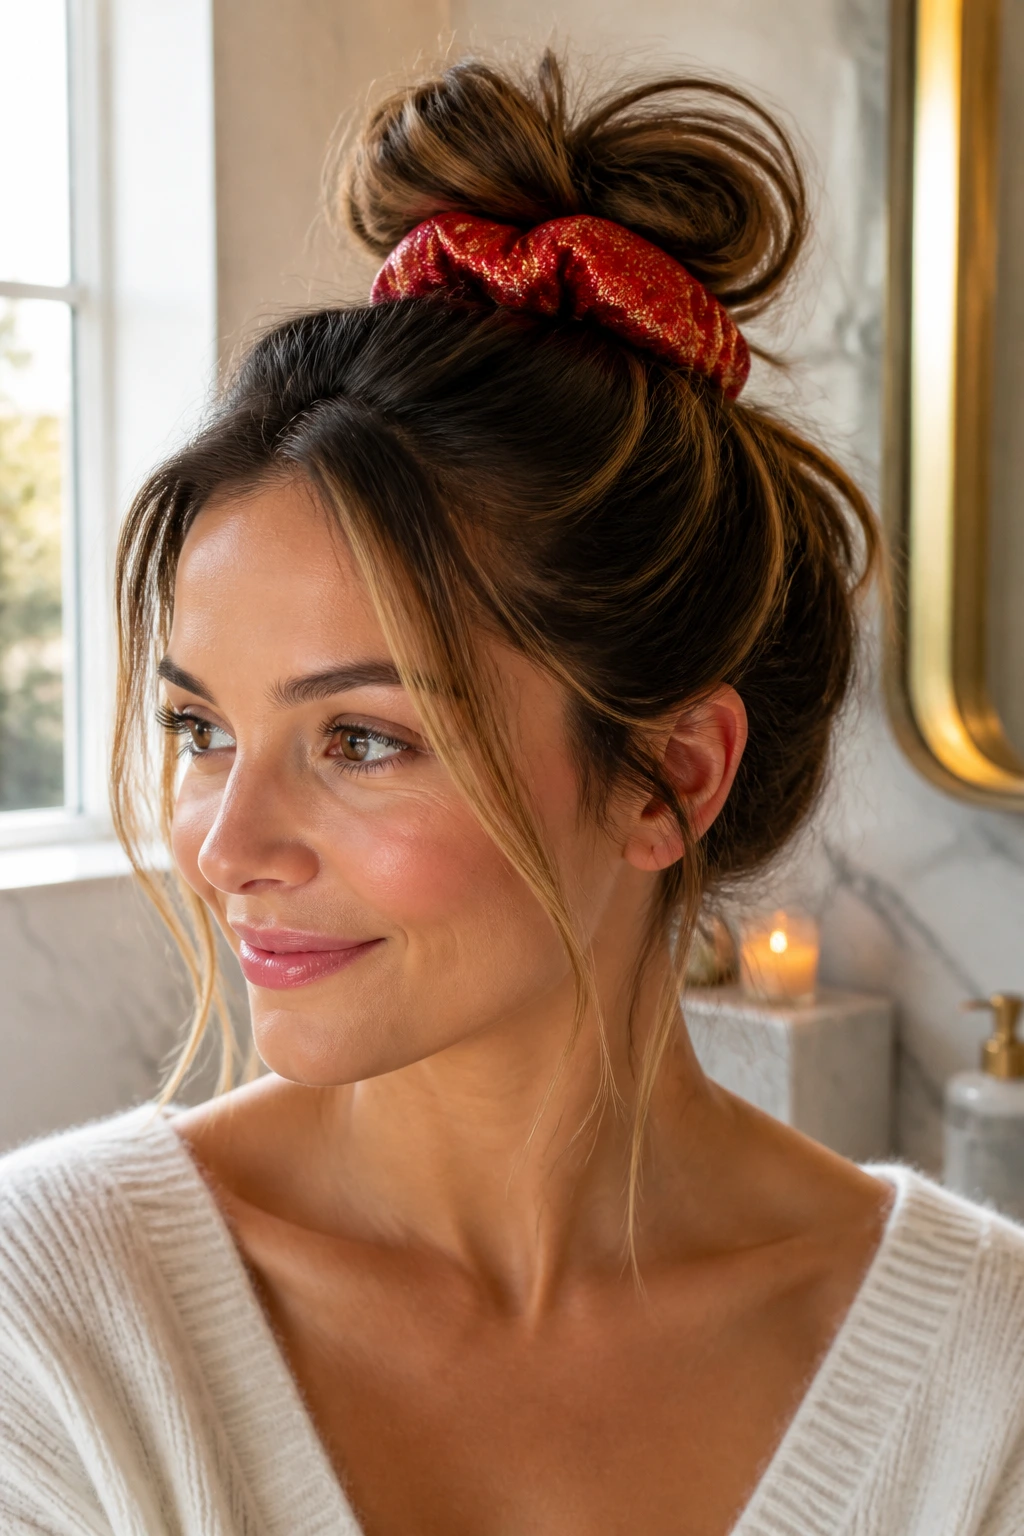
You do not need to abandon the messy bun just because it is a holiday. You just need to change the accessory.
The messy topknot is the ultimate morning-after style, but it can look a bit too casual for a festive environment. Flipping your head upside down, gathering your hair at the very crown, and wrapping it into a loose bun takes seconds.
The magic happens when you secure it with a silk, velvet, or metallic scrunchie. The fabric adds volume and texture to the base of the bun, making the messy look feel deliberate.
Let a few pieces of hair fall naturally around your face to keep it soft. This is an incredibly comfortable style that stays secure through a long day of travel or cooking.
9. The Faux-Blowout Roll-up
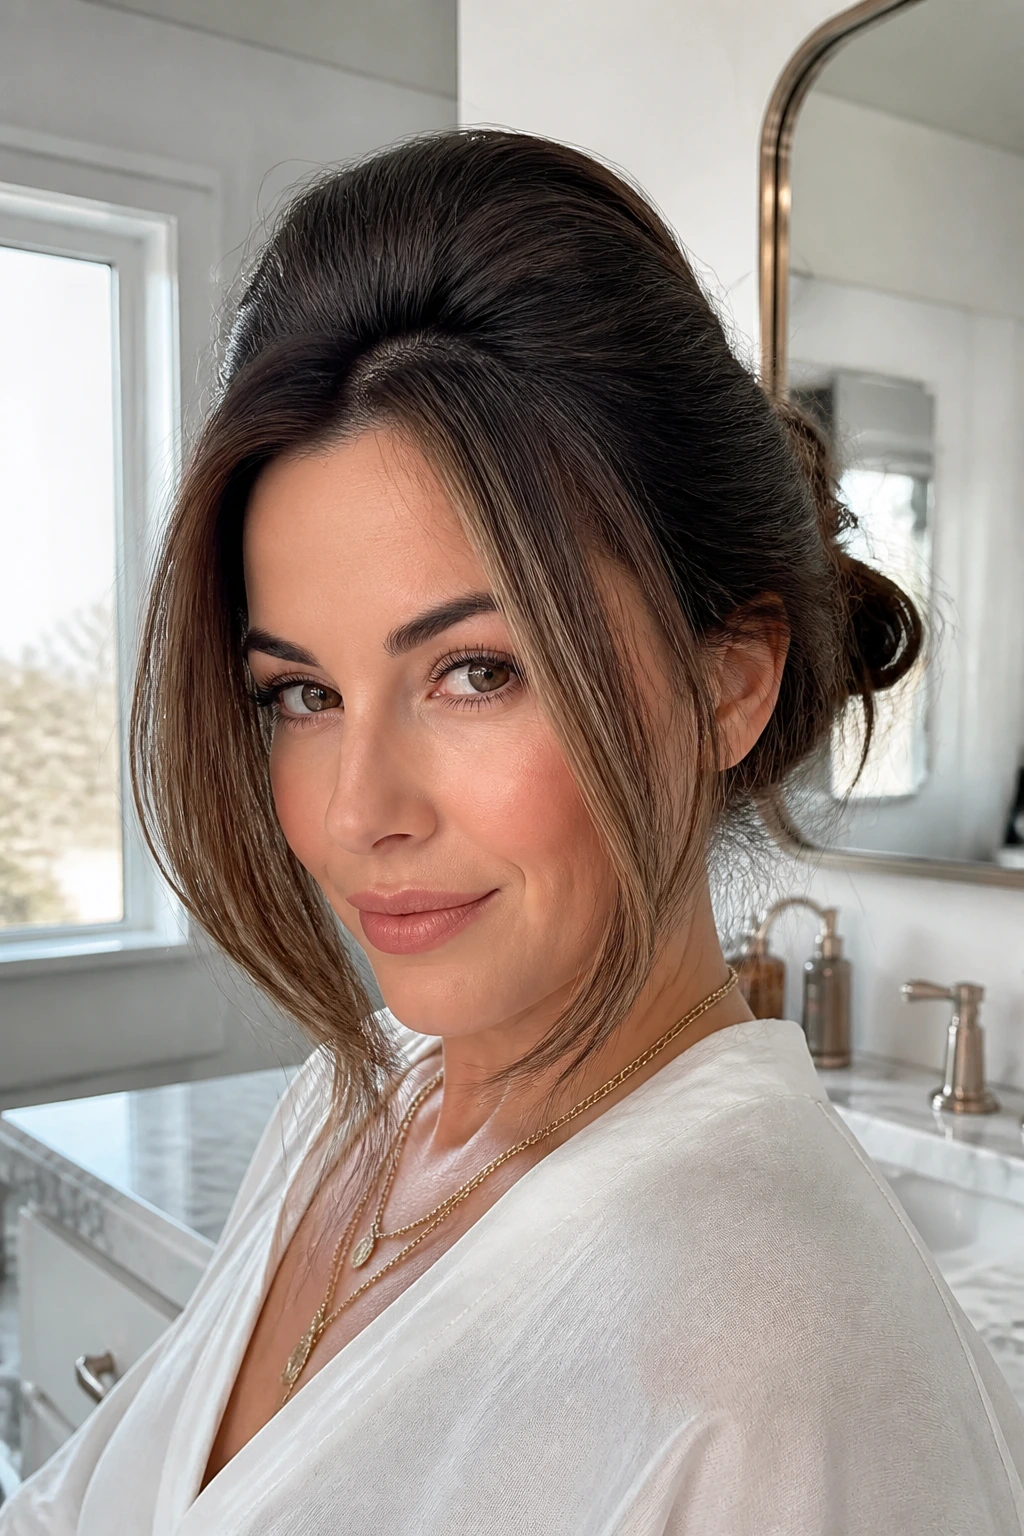
How do you get the look of a professional salon blowout when you only have seven minutes to spare? You focus entirely on the front sections of your hair.
Nobody notices the back of your head if the pieces framing your face look polished and bouncy. This is a massive time-saver for anyone who washes their hair the night before but wakes up with flat roots.
Take a large barrel curling iron or a heated roller and wrap just the top crown and front framing pieces. Leave them in place while you brush your teeth and put on your makeup.
Finishing the Faux-Blowout
Once your makeup is done, you are ready to finish the style.
- Remove the rollers: Gently take the rollers out, letting the curls drop naturally.
- Shake it out: Use your fingers—not a brush—to break up the curls.
- Add volume: Spritz the roots with dry shampoo for instant lift and texture.
The rest of your hair can stay in its natural state, as the polished front pieces create the illusion of a full, professional blowout with a fraction of the effort.
10. The Wrapped High Ponytail
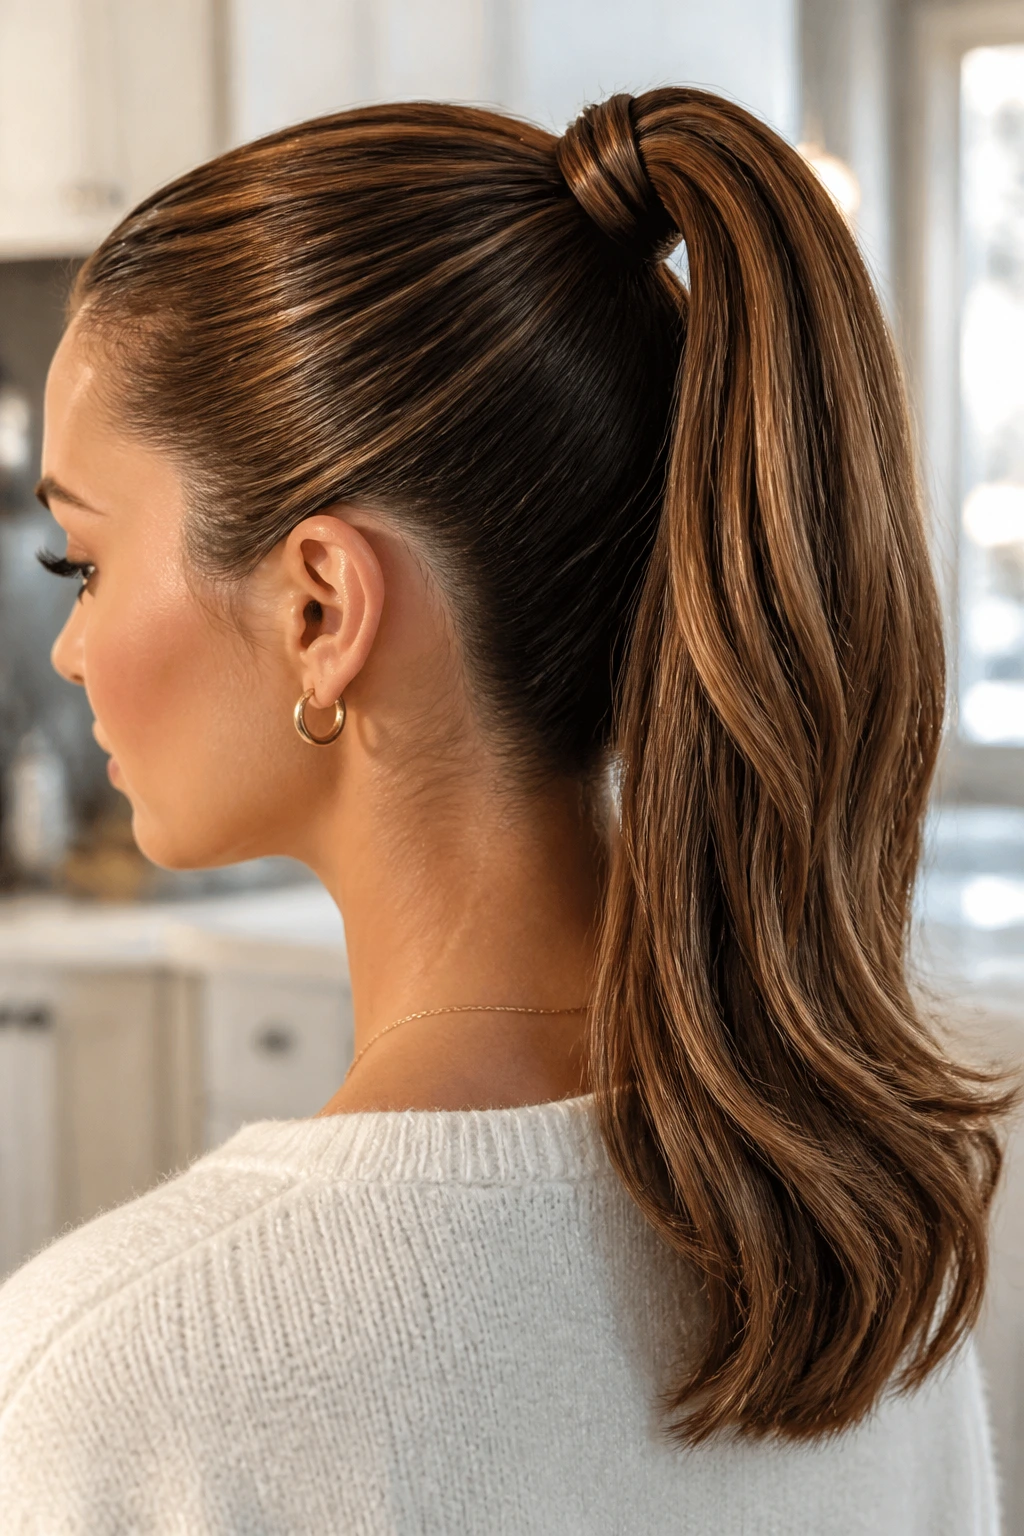
I used to think high ponytails were strictly for the gym, until I realized how much a simple hair wrap elevates the entire silhouette. Wrapping a small strand of hair around your elastic hides the rubber band and gives the ponytail a structured, elegant lift.
Step-by-Step Styling
- Gather: Pull your hair into a high ponytail just above the crown of your head and secure it with a strong elastic.
- Select: Pull a thin strand of hair (about the width of a pencil) from the underside of the ponytail.
- Wrap: Wrap this strand tightly around the elastic until the band is completely covered.
- Pin: Secure the end of the strand underneath the ponytail with a bobby pin pushed downward into the elastic.
This style holds up incredibly well through long days and active evenings, keeping you looking sharp without any midday touch-ups. It is clean, modern, and pairs perfectly with bold holiday makeup.
11. The Twisted Side Chignon
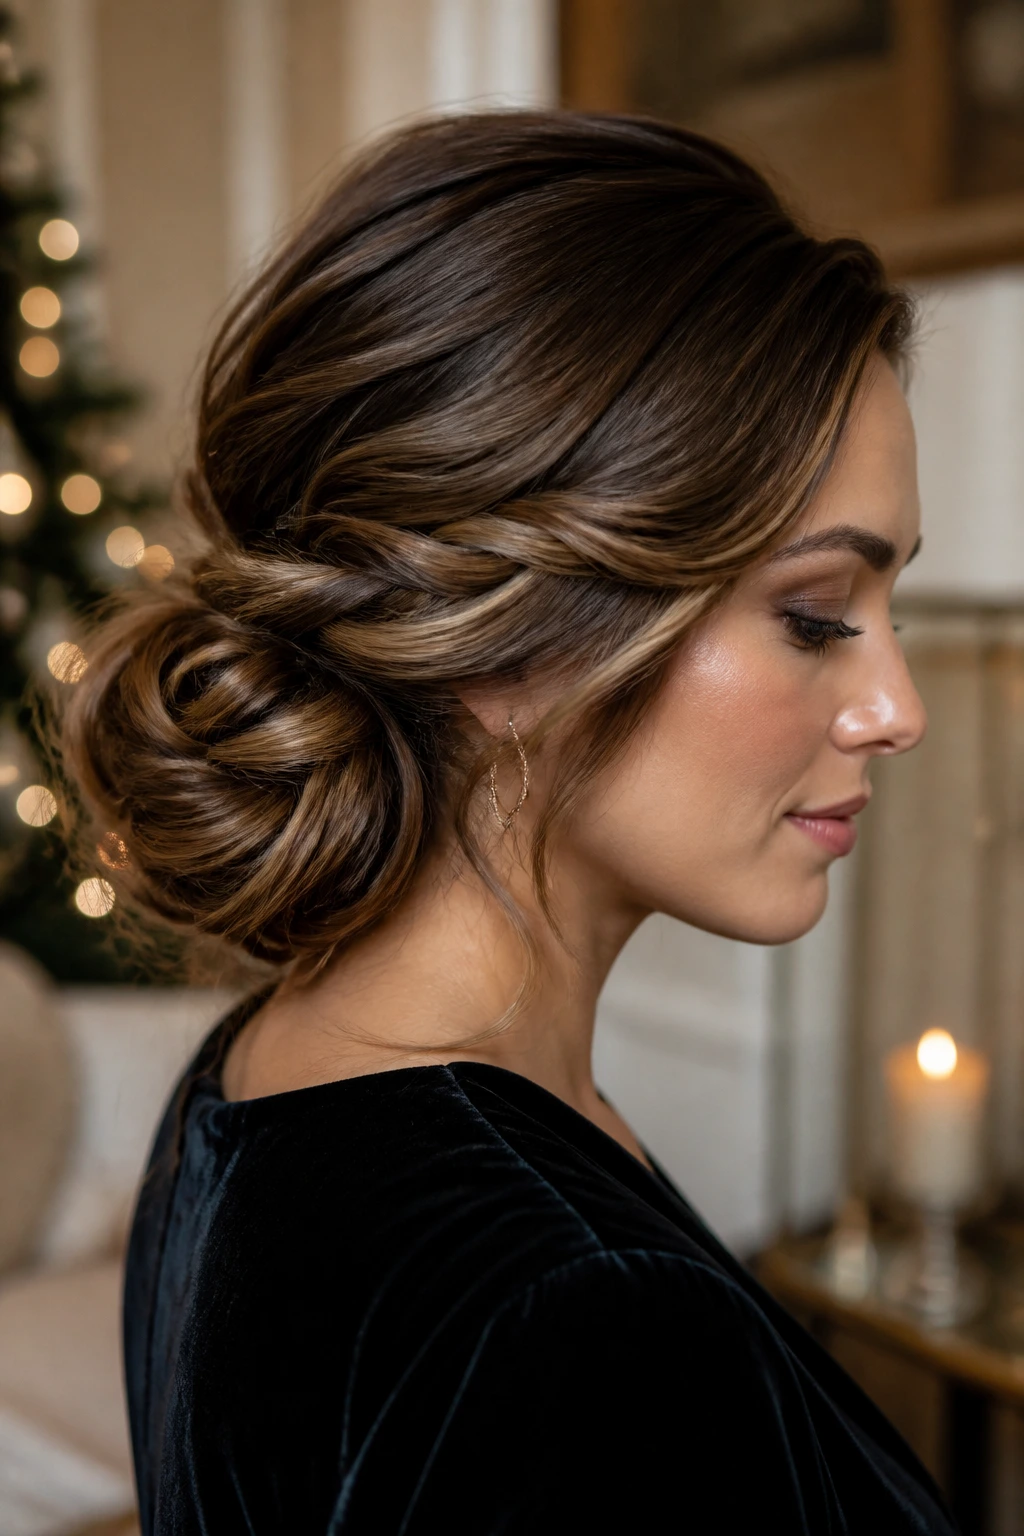
The side chignon is a timeless style that looks like it belongs at a formal gala, yet it requires nothing more than a few twists and pins. By shifting the bulk of your hair to one side, you create an asymmetrical silhouette that frames your neck beautifully.
This is a fantastic option if you are planning to wear statement earrings to your holiday party.
Start by parting your hair on the opposite side of where you want the chignon to sit. Gather all your hair to the side, just behind your ear, and divide it into two equal sections.
Twist these two sections around each other to form a simple rope braid.
Roll the twisted rope into a circular bun behind your ear. As you roll, let the twist loosen slightly so the bun has some texture and volume rather than looking like a tight knot.
Pin the bun securely in place with large bobby pins. Do not worry if a few shorter layers slip out; the softness of the loose pieces only adds to the charm of this low-maintenance style.
12. The Sparkly Headband Wave Accent
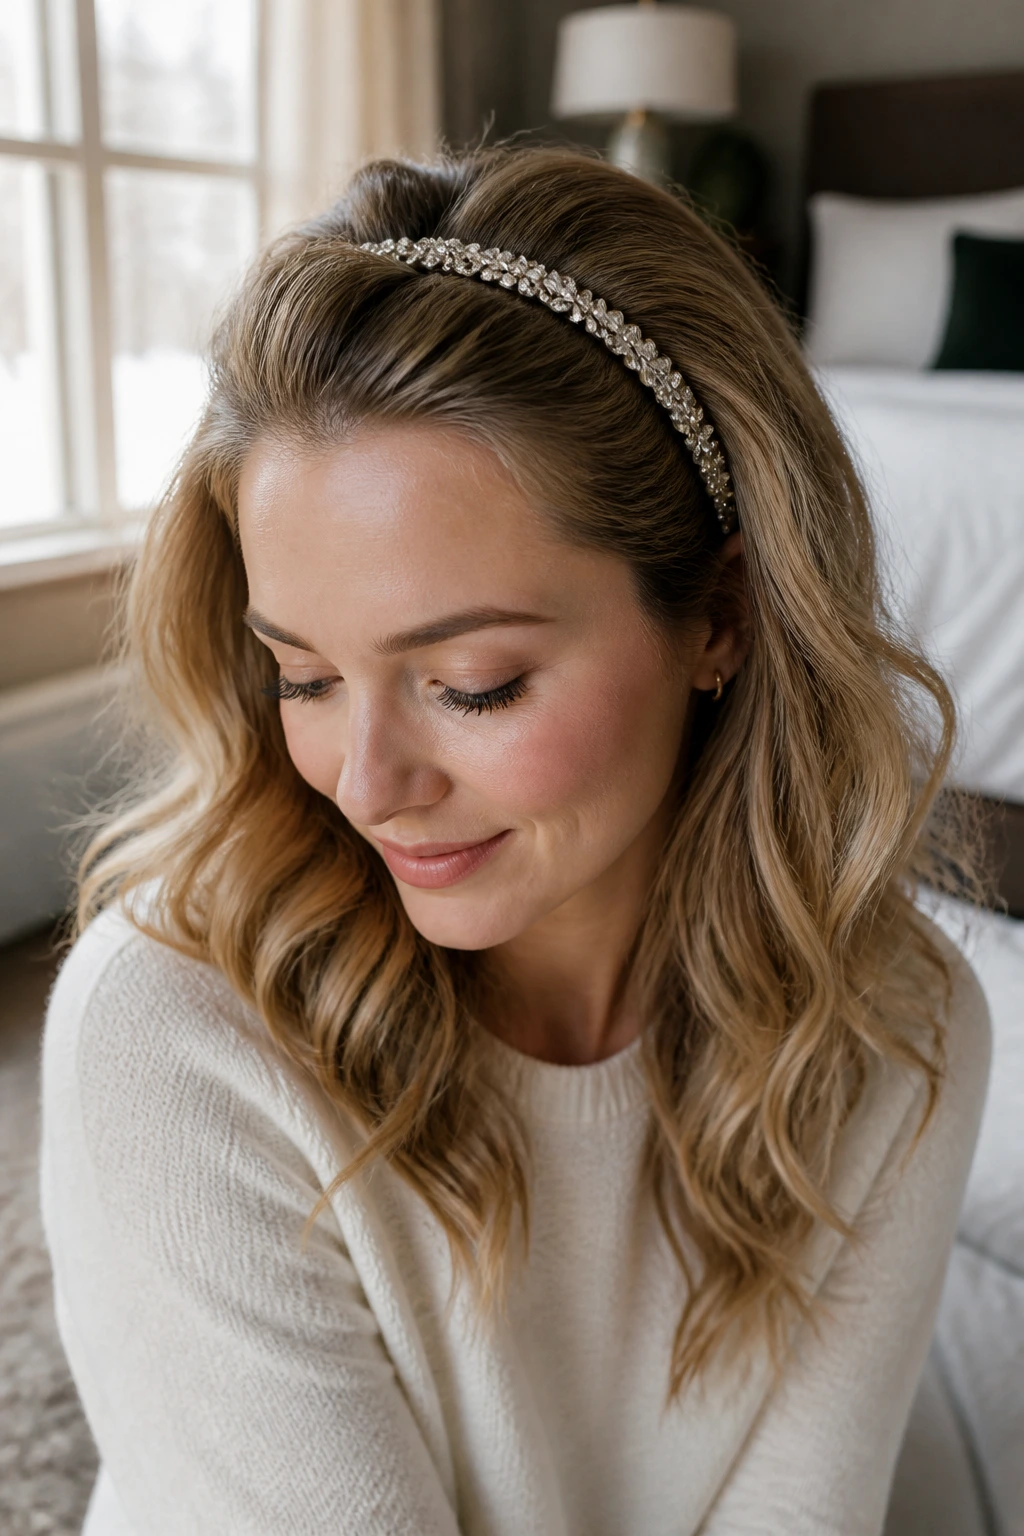
Unlike up-dos that require bobby pins and hair ties, this style relies entirely on a single statement accessory to do the heavy lifting. If your hair is too short to tie back, or if you simply prefer to wear it down, a jeweled or metallic headband is your best friend.
It takes exactly five seconds to put on, but it instantly transforms bedhead into a festive look.
To prevent the headband from looking too childish, slide it back about an inch from your hairline, then push it slightly forward to create a small amount of volume at the crown.
This simple movement prevents your hair from being plastered flat to your skull and gives the style a much more mature, relaxed appearance.
If you have a bit of extra time, use a flat iron to bend the ends of your hair outward slightly for a playful, modern flip. It is a simple touch that looks incredibly chic with minimal effort.
13. The Half-Up Bow Braid
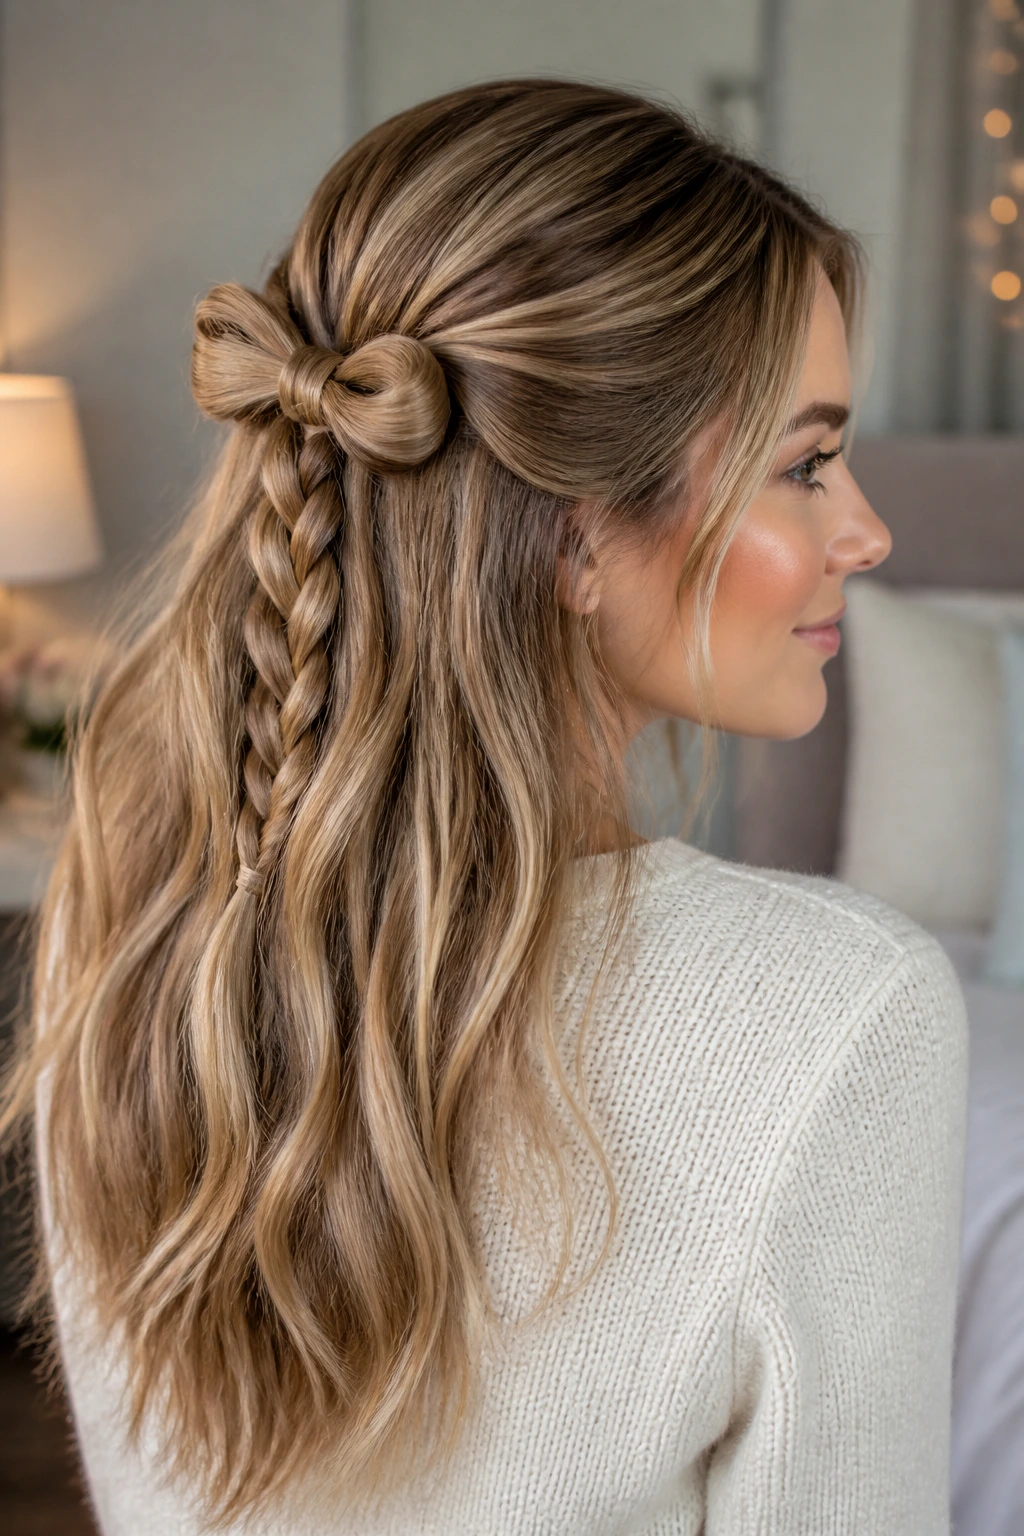
Bows are everywhere during the holidays, and you can easily create the look of a bow using a simple braiding technique. This style is incredibly charming and works wonderfully on medium to long hair lengths.
Creating the Bow Detail
- Gather the top: Take two small sections of hair from the sides of your head and bring them to the back.
- Create the loop: Tie them together with a clear elastic, but on the last loop of the elastic, do not pull the hair all the way through. This leaves you with a small loop of hair.
- Split the loop: Divide this loop in half to create the two loops of your bow.
- Pin the sides: Pin each loop flat against your head using a bobby pin pushed from the outside in.
- Finish the center: Wrap the remaining tail of the ponytail up and over the center of the bow to hide the elastic, pinning it securely underneath.
Quick Facts
- Time to complete: Five minutes.
- Ideal texture: Straight or slightly wavy.
- Vibe: Classic and feminine.
Pro tip: Use a tiny bit of light hairspray on the loops to help them hold their shape throughout the day.
14. The Triple-Tucked Low Bun
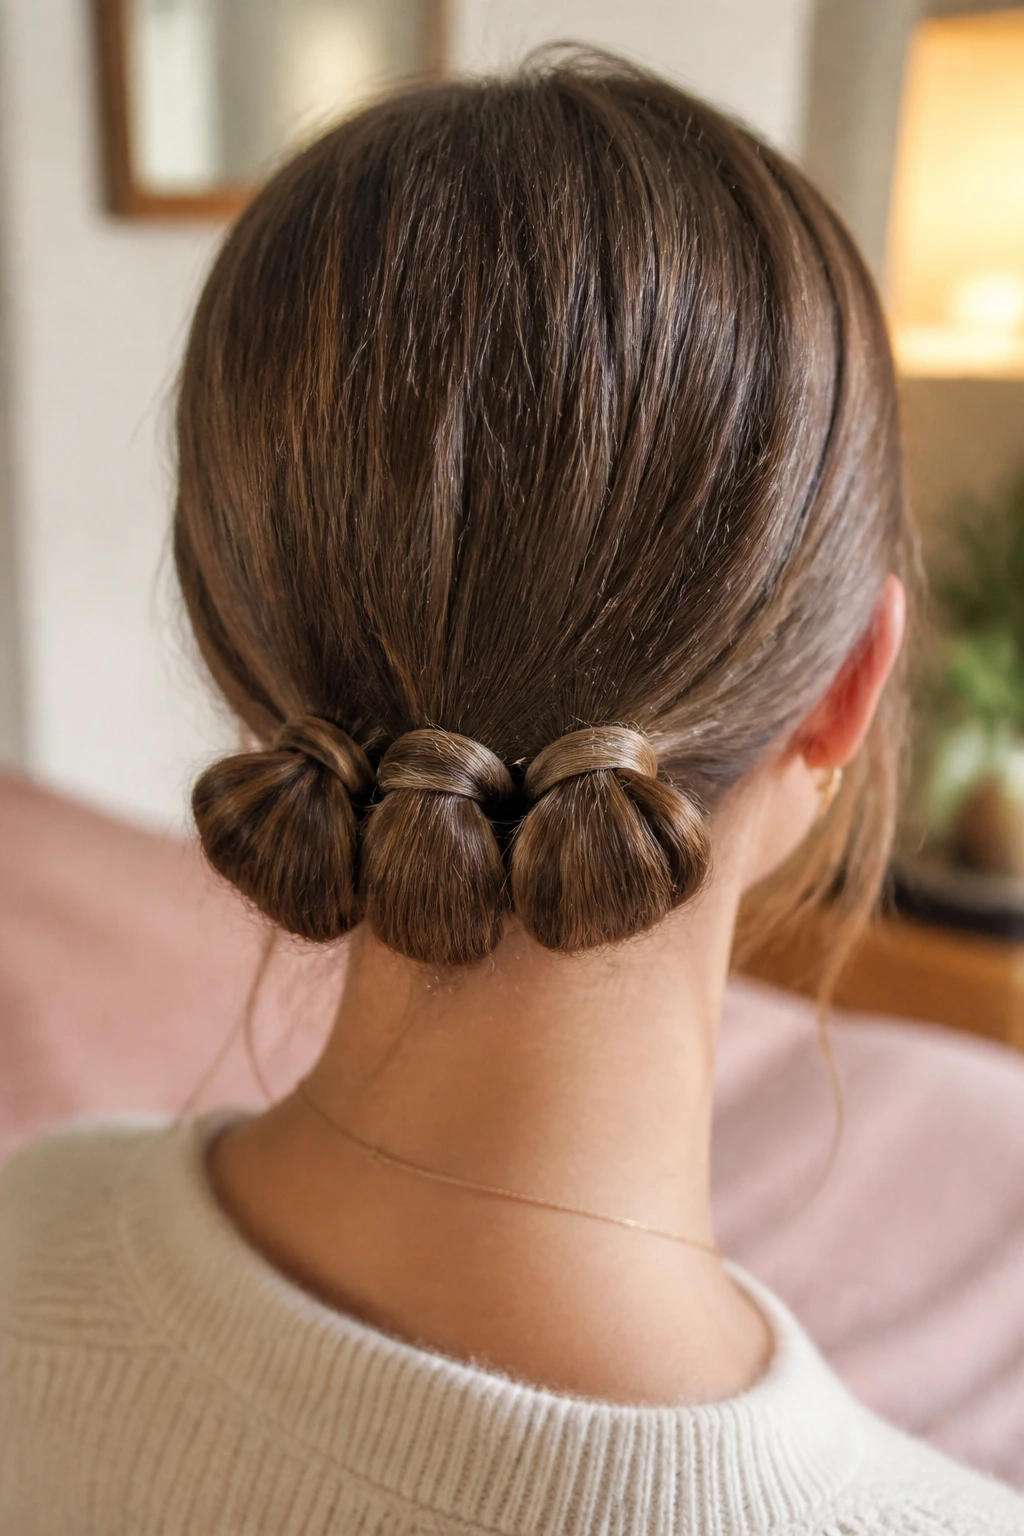
You do not need professional styling skills to create a bun that looks like it was done in a high-end salon. The triple-tucked low bun is a clever trick that works by splitting your hair into three equal ponytails side-by-side at the nape of your neck.
You loop each ponytail halfway through its elastic, creating three small loops next to each other.
Once the loops are secure, you simply use bobby pins to pin the edges of the loops together, merging them into one large, textured, horizontal bun. It looks incredibly intricate and detailed, but it is actually just three simple steps.
This is a great trick for fine hair, as it creates the illusion of double the thickness by spreading the hair horizontally across the neck.
15. The Criss-Cross Half-Up Smooth Style
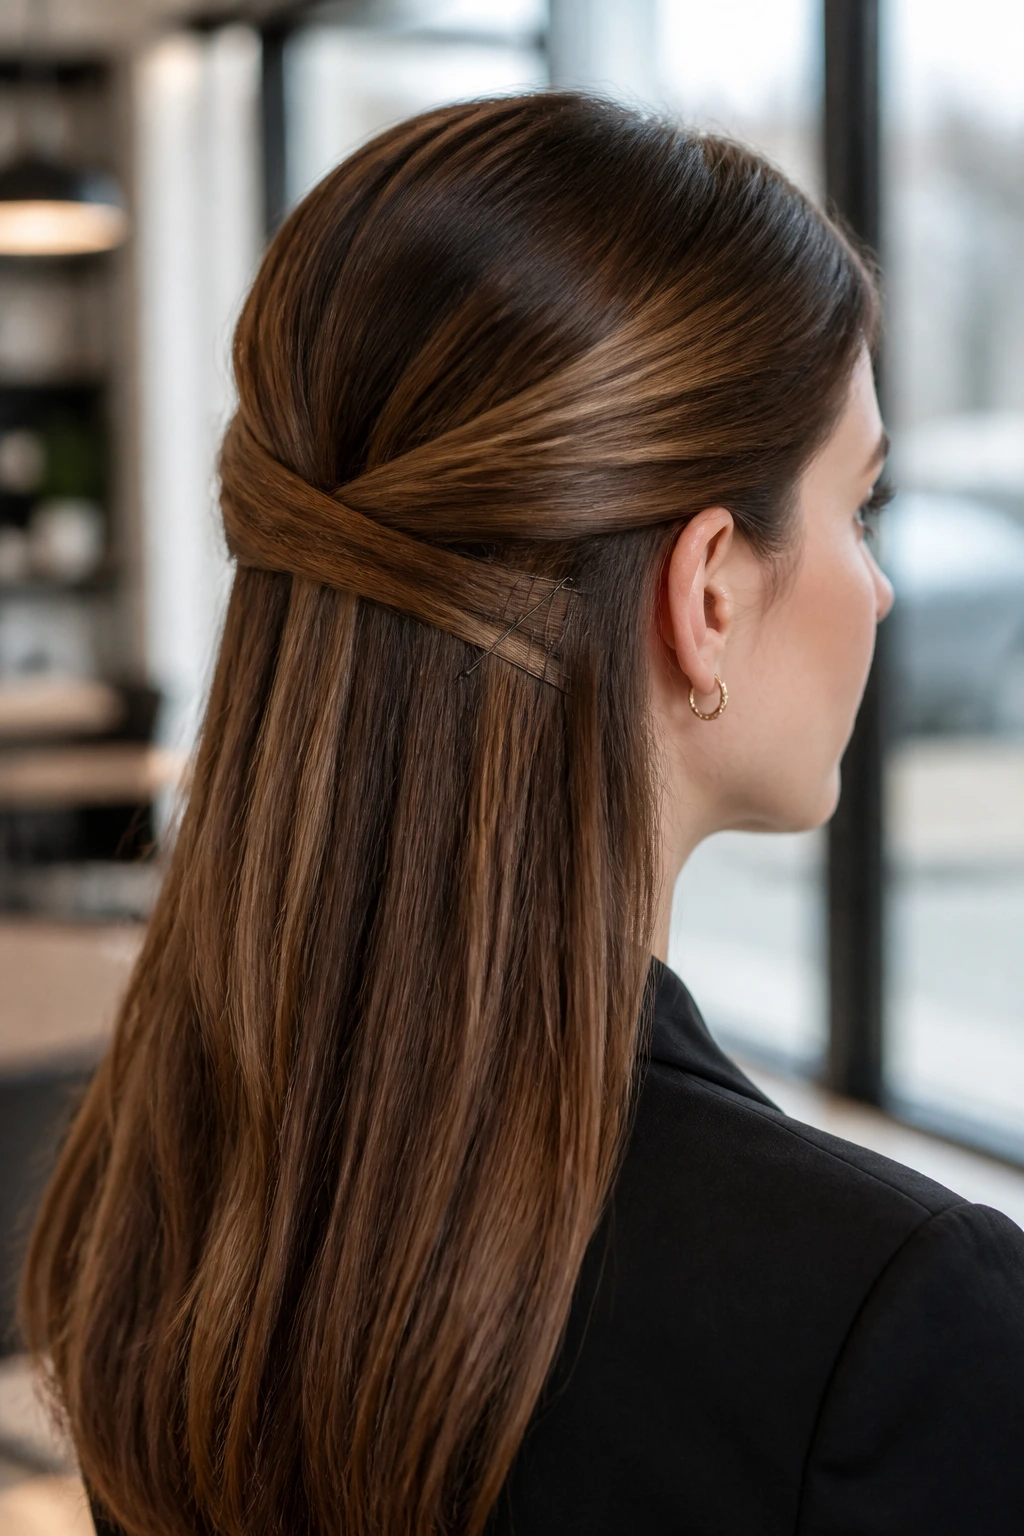
How do you keep a half-up style from looking like a gym hairstyle? You avoid the standard half-pony elastic and use a criss-cross pinning technique instead.
This method secures the hair flat against the back of your head, creating a sleek, clean look that is perfect for professional settings and evening parties alike.
Pull a section of hair from above your left ear across to the right side of the back of your head and pin it down. Then, take a section from above your right ear, pull it across to the left—overlapping the first section—and pin it underneath.
Keeping It Secure
To make sure this style does not slip out of place during a busy day, follow these steps:
- Prep the pins: Spray your bobby pins with dry shampoo or hairspray before sliding them in.
- Wavy side down: Always insert bobby pins with the wavy side facing down against your scalp for maximum grip.
- Lock them in: Cross two pins in an “X” shape to lock the sections of hair in place.
This simple technique keeps the style completely secure, even if you have slippery, fine hair.
16. The Sleek Wet-Look Side Part
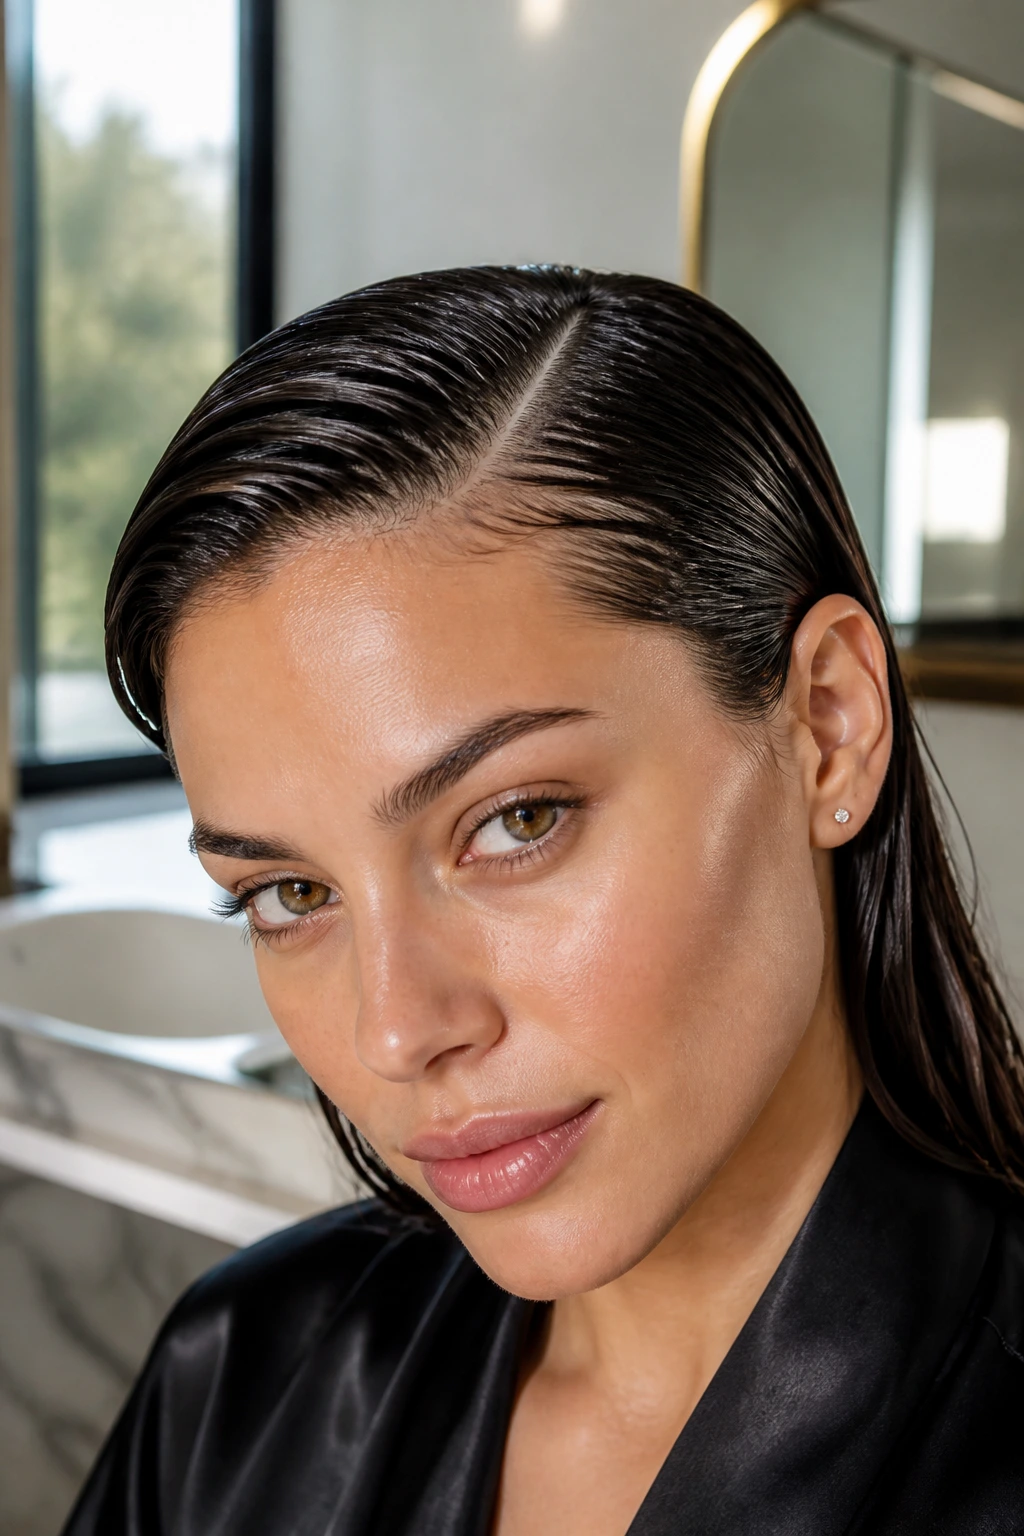
I was skeptical about the wet-hair trend until I had to rush from a rainstorm straight into an evening gala with no time to dry my hair. It turns out that a high-shine, sleek side part is one of the most sophisticated styles you can wear, and it actually works best on damp or unwashed hair.
It takes under five minutes and looks incredibly editorial.
Step-by-Step Execution
- Part: Create a deep, sharp side part using a fine-tooth comb.
- Mix: Combine a small coin-sized amount of hair oil with a light-hold styling gel in your palms.
- Apply: Smooth the mixture through your hair from the roots down to your ears.
- Comb: Comb the hair flat and tuck both sides behind your ears.
This style looks incredibly polished and pairs beautifully with a bold red lip or a pair of sparkling statement earrings. It is the ultimate bad-hair-day solution.
17. The Braided Low Bun with Metallic Threads
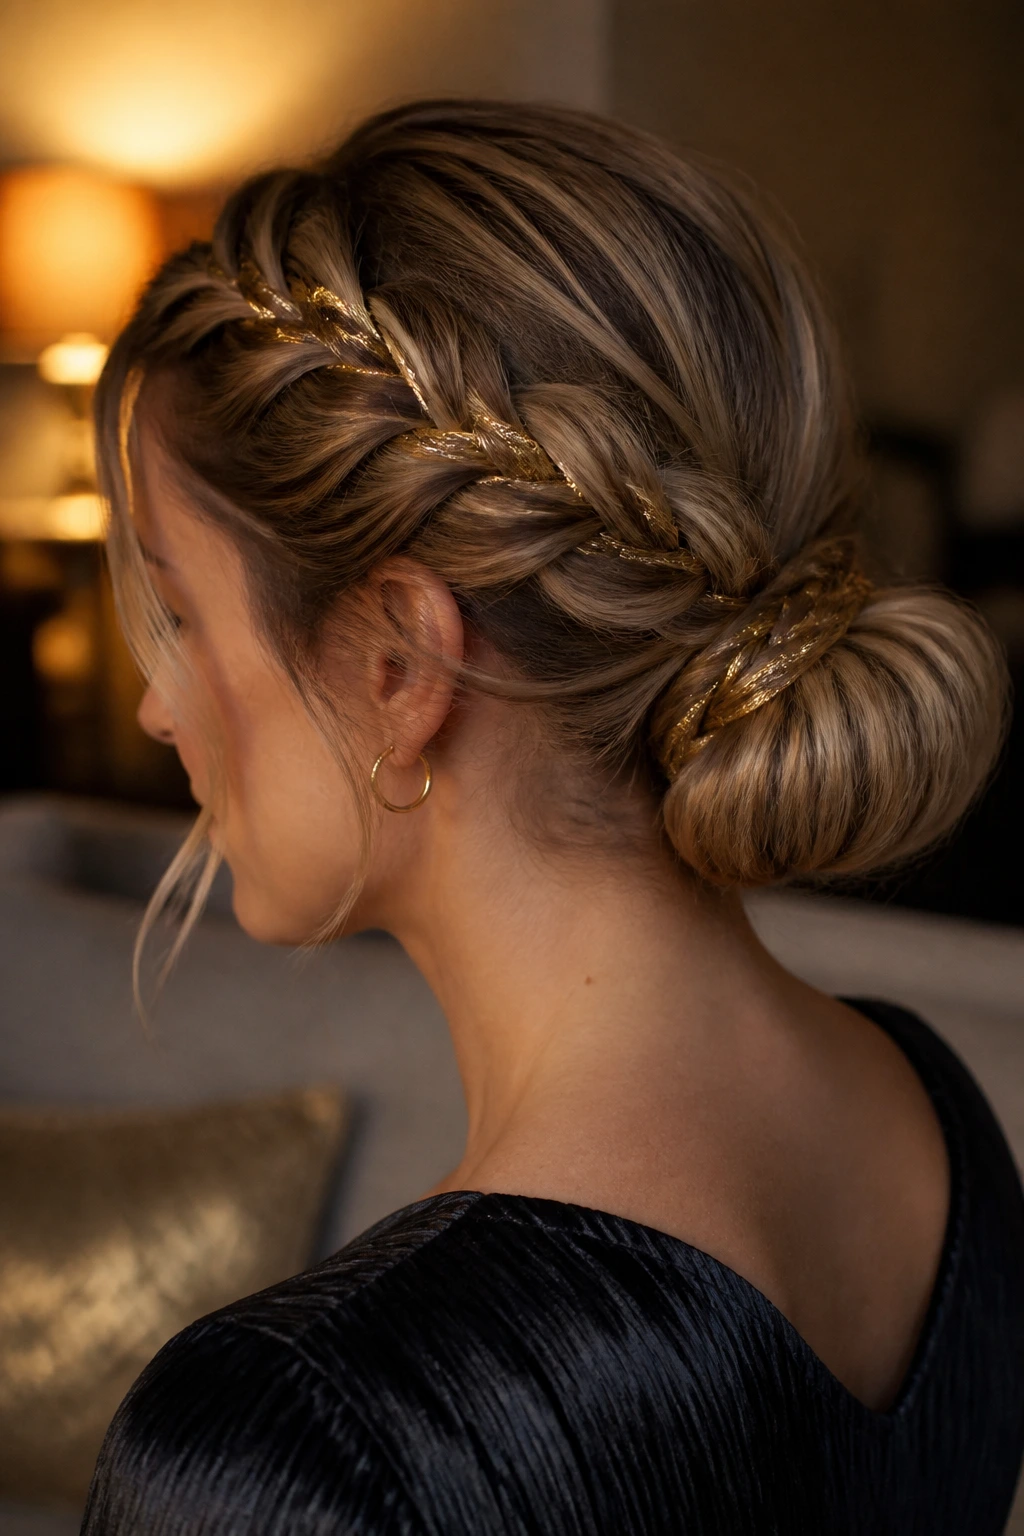
Adding a touch of metal to your hair is an easy way to make any standard style look festive. You do not need expensive accessories for this; a simple spool of gold or silver embroidery thread from a craft store works perfectly.
Gather your hair into a low ponytail and tie a piece of metallic thread to the elastic. Divide your ponytail into three sections to prepare for a standard braid, letting the thread hang down with one of the sections.
Braid your hair normally, weaving the metallic thread through the strands as you go. Once you reach the end, secure the braid with a clear elastic and wrap it into a tight bun at the base of your neck.
Secure the bun with bobby pins, letting the metallic thread catch the light subtly as you move. It is a tiny detail that makes a massive impact, turning a basic low bun into something truly unique.
18. The Pinned-Back Slick Side Roll
Unlike symmetrical styles that require balanced curling, this look focuses all the drama on one side of your head. The slick side roll is a vintage-inspired look that works wonders on second-day hair.
By rolling one side of your hair back and pinning it tightly, you create a beautiful asymmetry that looks deliberate and clean.
Take a section of hair from the side of your face, twist it backward while keeping it close to your scalp, and pin it behind your ear with two interlocking bobby pins. Leave the rest of your hair loose and natural on the other side.
This is a brilliant style for anyone who wants a vintage aesthetic without the time-consuming process of setting and brushing out vintage curls. It takes less than three minutes and keeps your hair secure all day.
19. The Knotted Half-Up Loop
Sometimes you want a half-up style that feels a bit more modern and less traditional than a standard ponytail or braid. The knotted half-up loop uses a simple knotting technique to create a clean, architectural shape.
Tying the Perfect Knot
- Sectioning: Take two small sections of hair from your temples, about one inch thick.
- Knotting: Bring them to the back of your head and literally tie them in a single knot, just like you would start tying your shoelaces.
- Securing: Hold the knot flat against your head and slide a bobby pin horizontally through the center of the knot to lock it in place.
Quick Facts
- Time: Two minutes.
- Best for: Straight, smooth hair.
- Vibe: Minimalist and modern.
Pro tip: Keep the knot relatively loose so the hair has a soft, draped look rather than looking pulled or strained.
20. The High-Volume Half-Up Puff
You do not need to spend hours teasing your hair to get incredible height and volume at the crown. The secret to a perfect half-up puff is a small, hidden bobby pin trick.
Instead of simply pulling your hair back, you take a small section of hair at the crown of your head, twist it once, and push it slightly forward before pinning it down. This pushing motion creates instant, natural volume that stays in place much better than teased hair.
Once that base is secure, you can sweep the side sections of your hair back and secure them over the top of the pin, hiding the structure while keeping the height. It is a classic retro trick that works beautifully for holiday parties and takes less than five minutes.
21. The Crown-Braided Low Pony
What do you do when you want the beauty of a braided crown but only have five minutes before you need to leave for the office? You create a crown braid that only goes halfway.
Instead of braiding your entire head, you braid a three-inch section of hair along your hairline on one side and pull the rest of your hair back into a low ponytail. This gives you the romantic, framed look of a crown braid from the front, but saves you the time and effort of finishing the braid all the way around.
Pull the braid back and wrap it around the base of your low ponytail, securing it with a bobby pin.
Adding Texture to the Braid
To make your braid look much thicker and more intricate than it actually is, use the pancaking technique:
- Secure the braid: Tie the end of the braid with a clear elastic.
- Pinch the edges: Gently pinch the outer loops of the braid with your thumb and forefinger.
- Pull outward: Lightly tug the loops outward to widen the braid.
- Keep it flat: Avoid pulling the hair up; keep the motion flat to preserve the braid’s structure.
This simple adjustment turns a thin, tight braid into a full, voluminous crown accent that looks incredibly polished.
The Bottom Line
Fast holiday styling is not about mastering complex techniques; it is about finding a few reliable routines that work with your natural hair texture. When you are short on time, do not try to force your hair into a style that fights its natural state.
Instead, use accessories like velvet ribbons, metallic clips, and decorative bobby pins to make quick styles look intentional.
By preparing your hair the night before and keeping a few key tools on hand, you can easily transition from a busy morning at the office to a festive evening gathering without needing a full styling reset.
Find two or three of these styles that work best for your hair length and texture, and keep them in your back pocket for those chaotic holiday mornings.
