



Morning routines are often a race against the clock. The alarm rings, the coffee pot starts its slow drip, and you have exactly twelve minutes to look presentable for a video call or an early run to the office. Fighting with a flat iron or attempting an intricate blowout at dawn is a recipe for frustration. You need something that looks styled but takes less than five minutes to complete.
That is where half up hair styles save the day. They give you the best of both worlds: the polished frame of an updo and the casual comfort of leaving your hair down. They keep the hair out of your eyes while still letting you show off your length and natural texture.
Having spent years testing styles on everything from fine, slippery locks to thick, coarse curls, I have found that the secret lies in strategic tension, bobby pin placement, and working with your hair’s natural texture instead of fighting it. You do not need a cabinet full of expensive styling products or an hour in front of the mirror.
Let us skip the complicated step-by-step charts that require a cosmetology degree. Instead, we will look at practical, real-world hairstyles that actually hold up during a long workday.
1. The Classic Twisted Halo
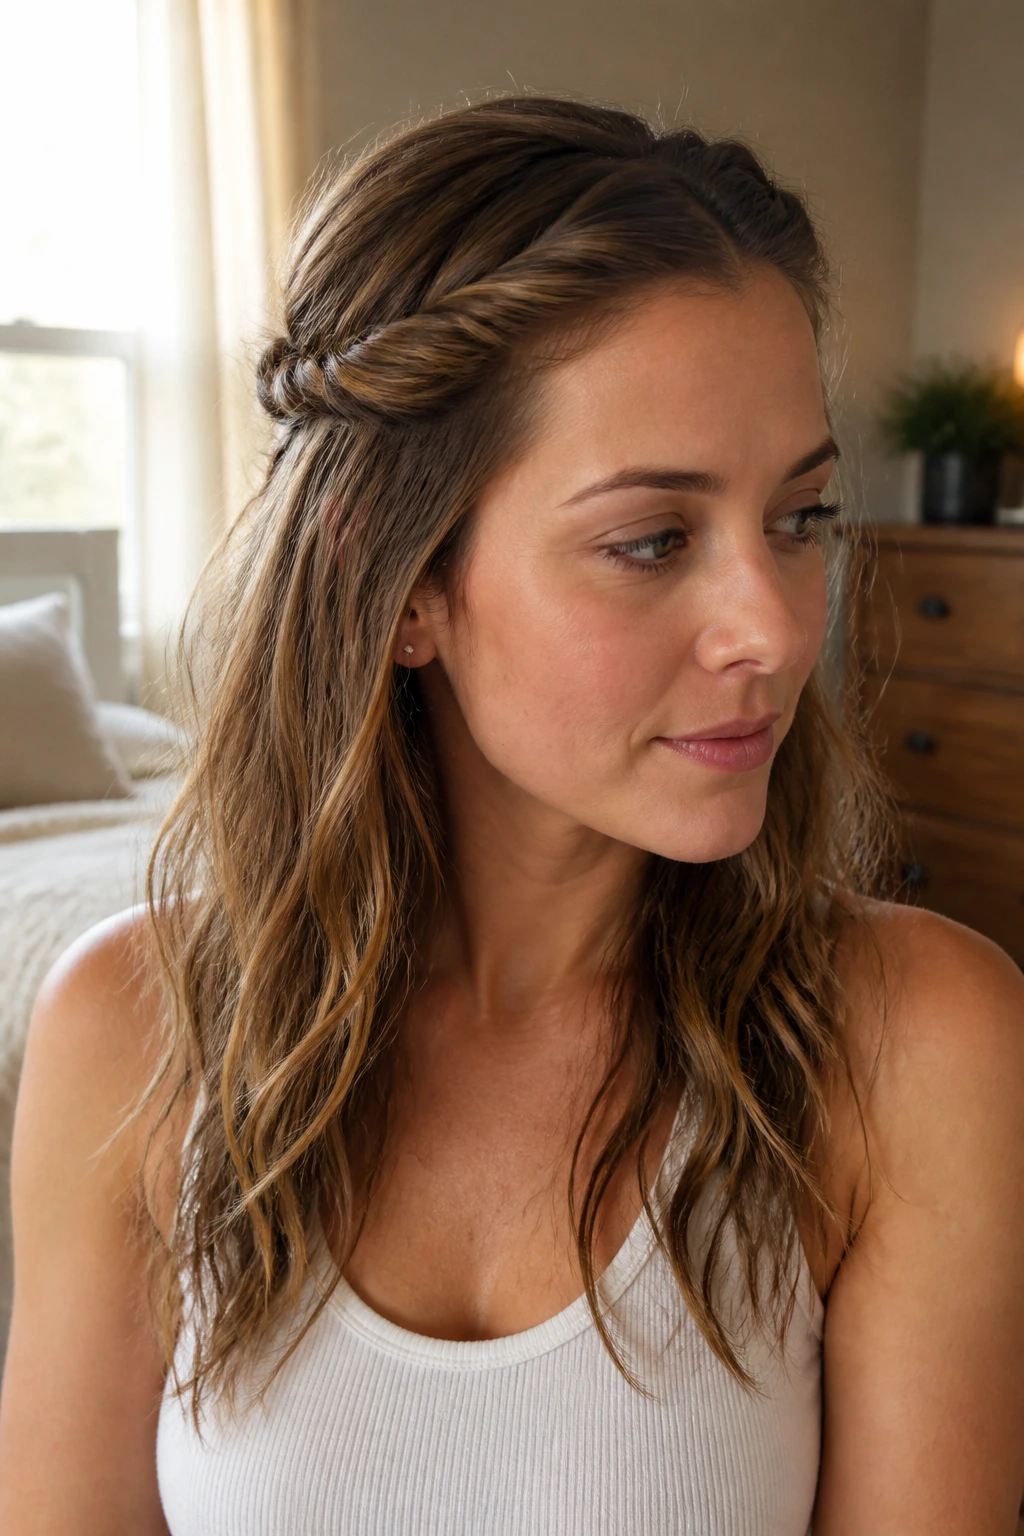
This is the immediate fallback when your hair has some natural wave from the day before but needs structure around the face. You simply take two small sections from the temples, twist them back, and secure them. It takes about 45 seconds.
Why It Works for Day-Two Hair
The twist hides any minor frizz or uneven wave patterns that happen overnight. By pinning them at the back of your head, you create a natural anchor point that lifts the hair away from your forehead.
Quick Styling Facts
- Use two standard 2-inch bobby pins pushed upward into the twist.
- Works best on medium to long hair lengths.
- Requires zero hairspray to stay secure.
Insert bobby pins with the wavy side facing down against your scalp for double the grip.
2. The Three-Strand Braided Crown
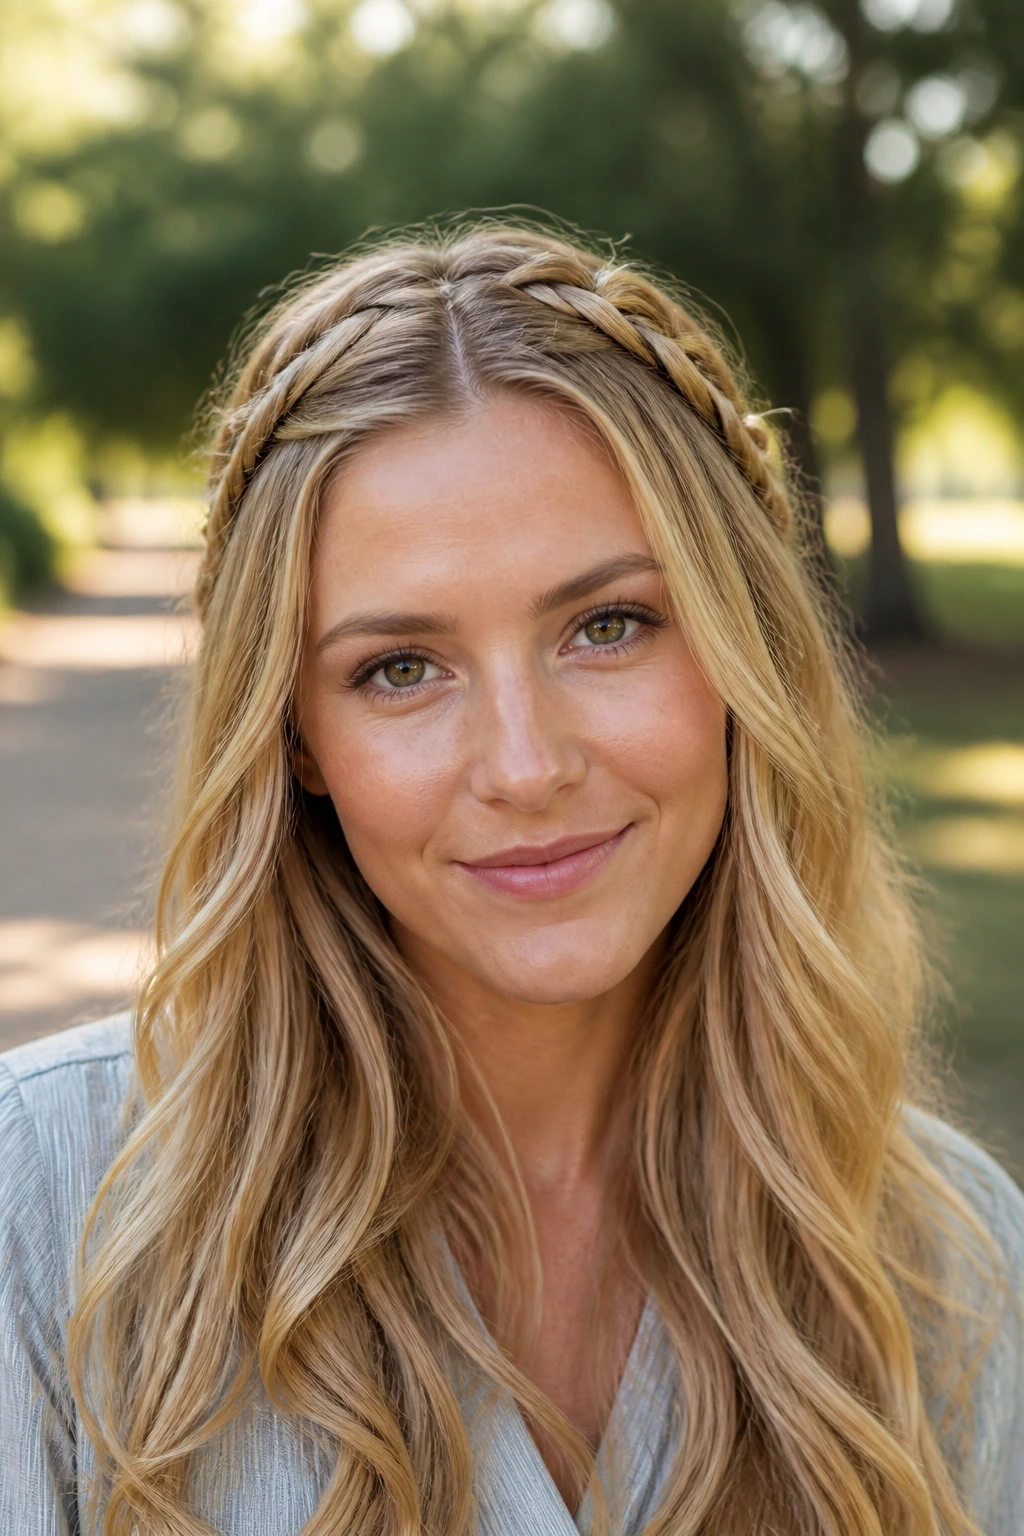
Braiding is the ultimate camouflage for unwashed hair.
If you are on day three and the dry shampoo is doing heavy lifting at your roots, a simple braided crown keeps the focus on the texture of the braid rather than flat roots. Take a one-inch section of hair just above each ear. Braid both sections down to the ends, secure with tiny clear elastics, and pull them across the back of your head like a basket weave.
Lock them in place by crossing two pins over each other to form an “X” shape. This creates a mechanical lock that will not budge even if you are running through a busy subway station or chasing kids.
3. The Top Knot Half-Bun
Why does the top knot often end up looking lopsided or falling flat by noon?
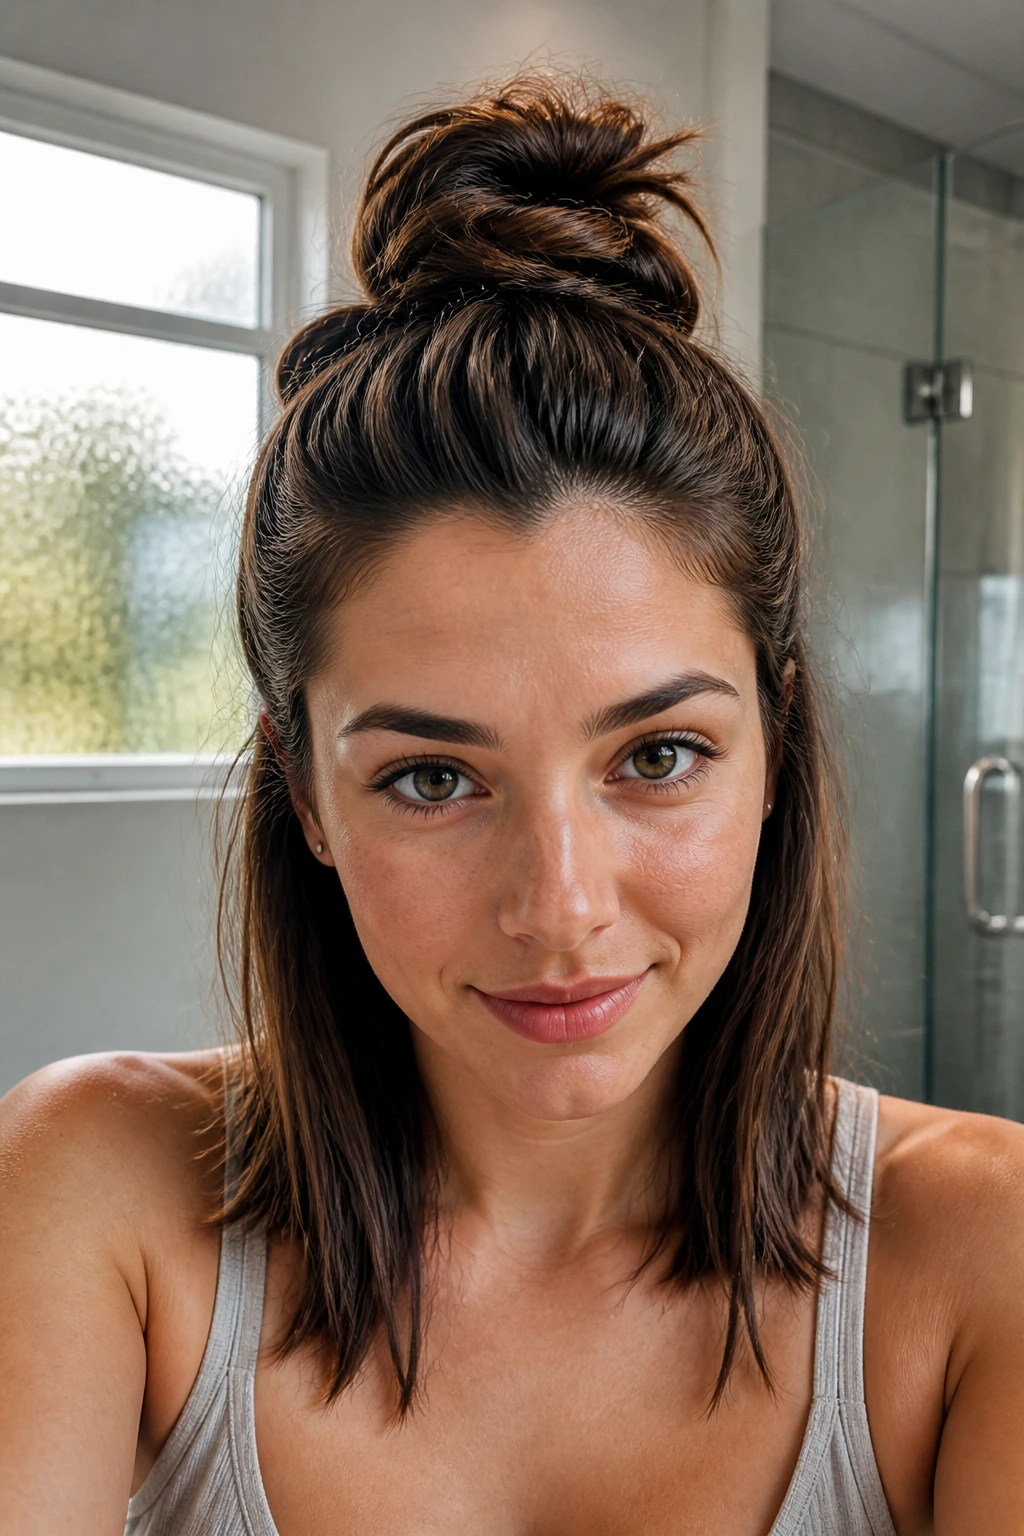
Most people gather too much hair, which weighs down the top of the head. To fix this, only pull hair from the recession line of your forehead up to the crown. This smaller section creates a neat, lightweight bun that sits high without pulling on your scalp or sagging.
How to Style It in Two Steps
Gather the top section and twist it into a tight rope until it naturally coils around itself. Loop a single elastic band twice around the base, leaving the ends of the hair slightly messy for a casual look.
4. The Double-Twisted Bobby Pin Cross
Picture this: you are walking into an important afternoon meeting, and you realize the sides of your hair are completely flat from your morning commute headset. You need a fix that requires no heat and exactly one tool.
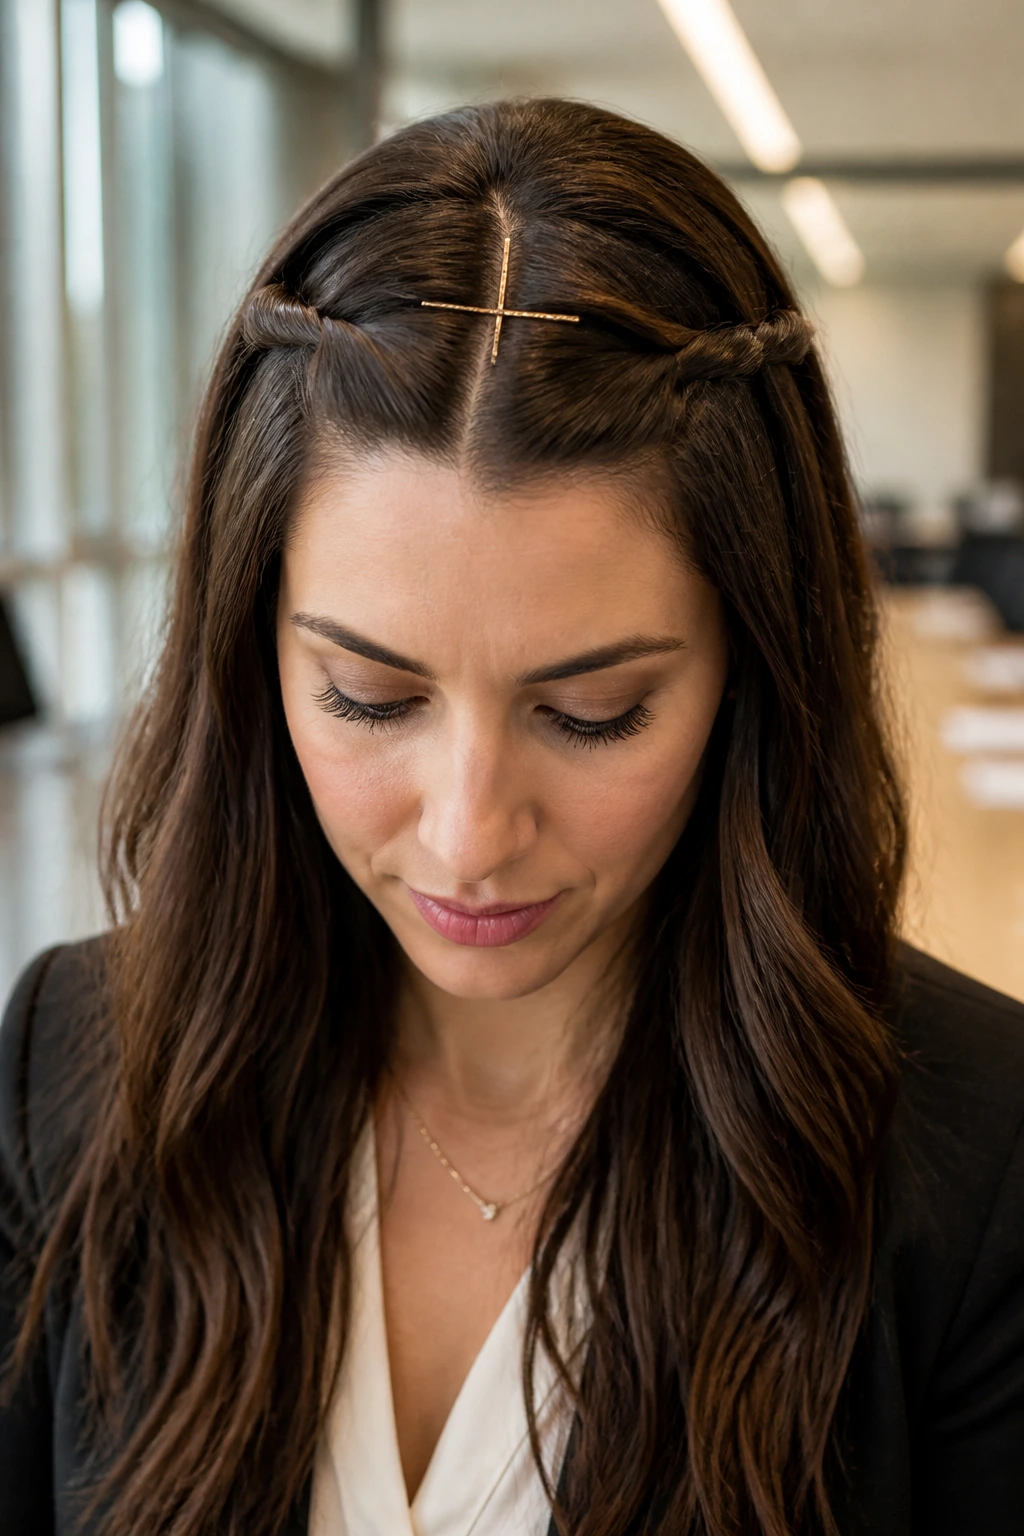
By taking two thin sections from the front hairline, twisting them tightly toward the back, and pinning them down with visible, decorative metal pins, you turn a utility fix into a deliberate style choice.
- Pull the left section back and pin it horizontally.
- Pull the right section back, overlapping the first, and pin it vertically.
- Use contrast-colored pins (like gold on dark hair) for impact.
- Keep the twists tight to prevent them from drooping over your ears.
The resulting cross pattern looks like a deliberate accessory rather than a quick hair hack.
5. The Messy French Braid Pullback
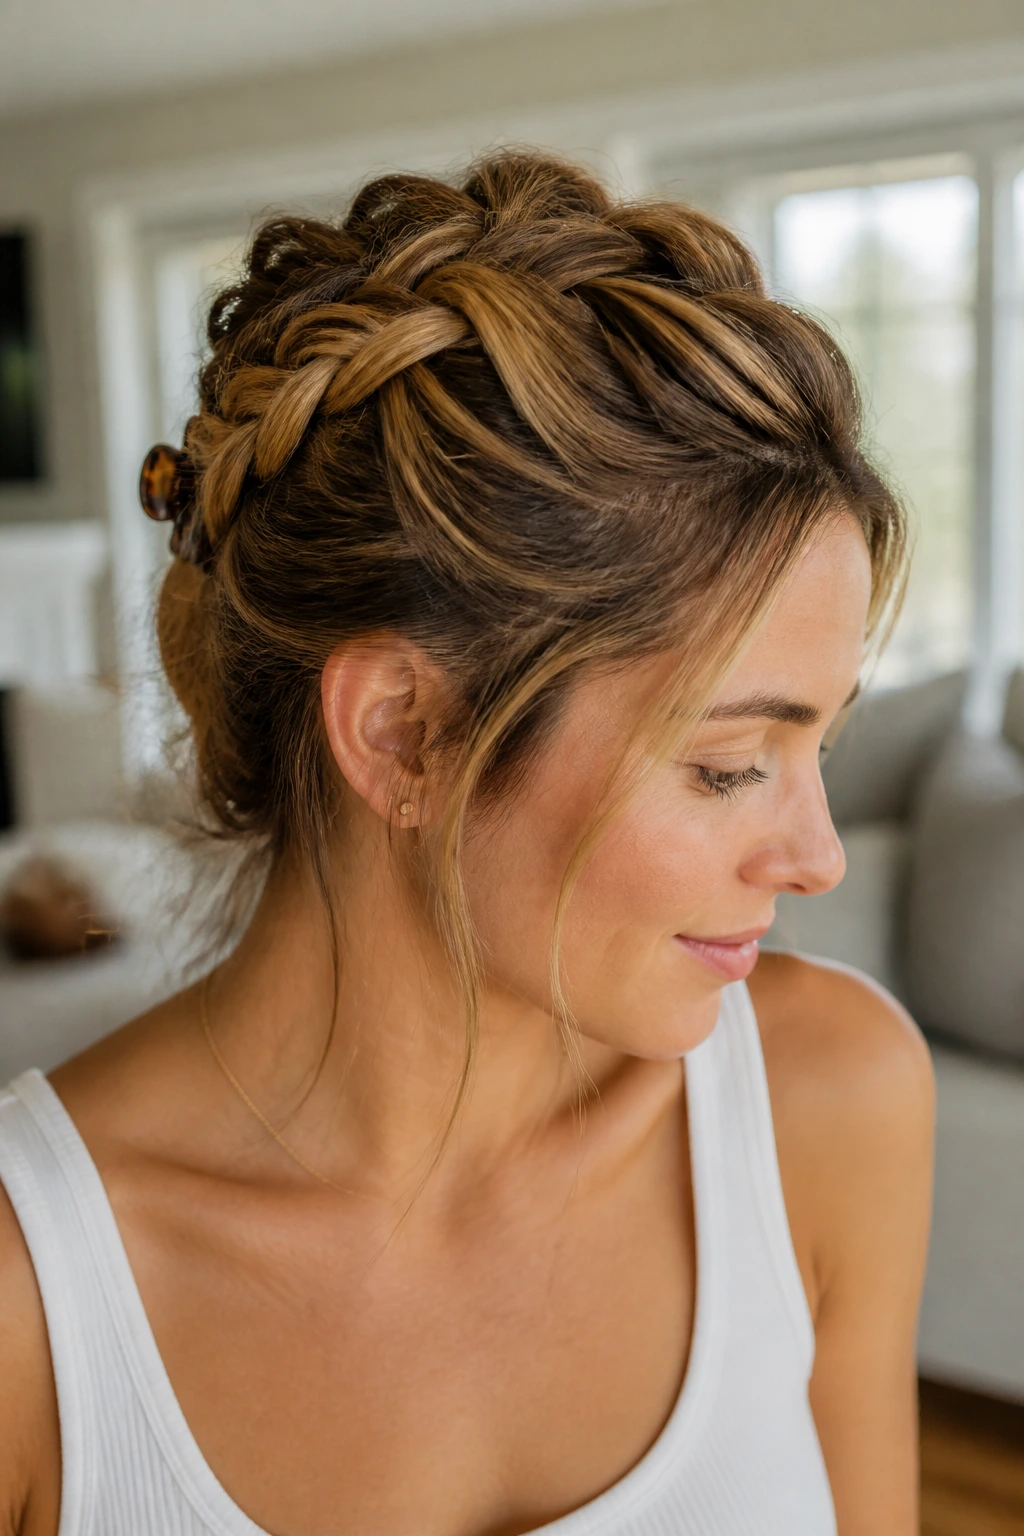
This style requires you to know how to do a simple French braid, but only for three passes. Start at the top of your forehead and make three wide, loose crossovers, incorporating hair from the sides as you go. Once you reach the crown of your head, stop adding new hair and secure the braid with a small claw clip or elastic.
The beauty of this approach is that it does not need to look perfect. In fact, a few loose strands around the ears make it look better. It is a fantastic option for wavy or curly hair textures because the natural volume of your curls fills out the braid.
If you have very fine hair, you might find the braid slides out. Spritz a tiny bit of texturizing spray onto the section before you begin braiding to give the strands some grip. This prevents the braid from unraveling during the day while maintaining that soft, relaxed look.
6. The High Pony Half Up Hair
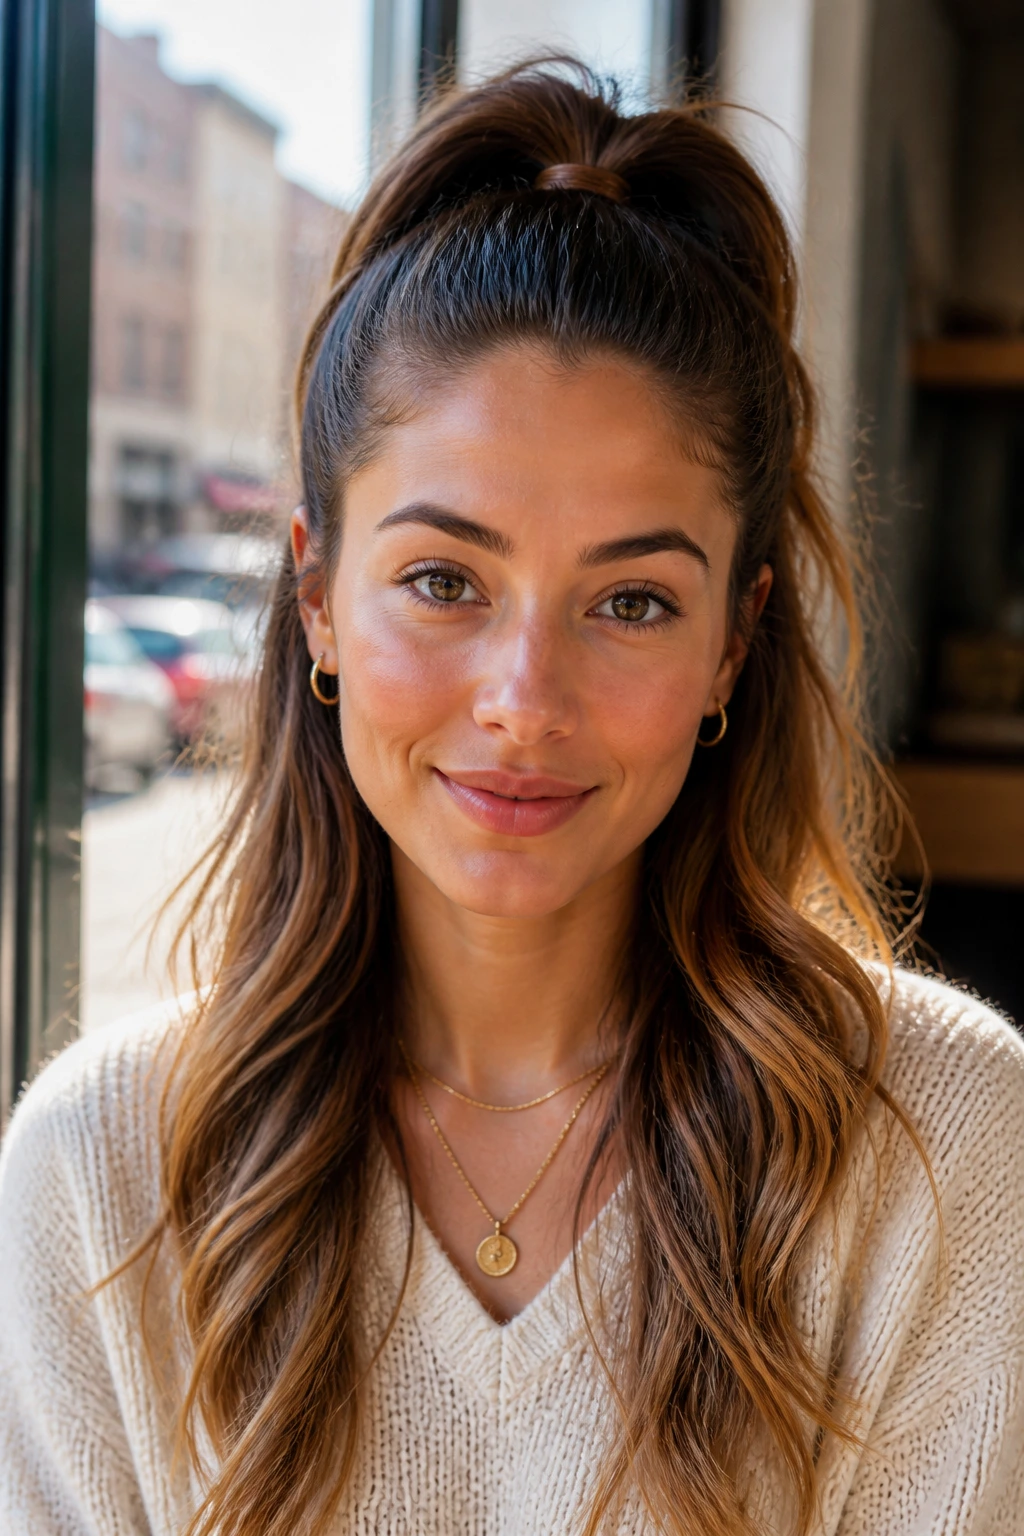
Unlike a standard low-slung pullback, a high-altitude half ponytail lifts the face and creates the illusion of longer, thicker hair. It is the perfect choice for sleek, straight hair that needs a bit of movement.
By placing the ponytail band directly at the crown of your head, the top half of your hair cascades down over the loose bottom half. This double layer makes your hair look twice as thick as it actually is.
This look works best for long, straight, or slightly wavy hair. Use a small, sturdy elastic that matches your hair color, and pull it tight. Gently tug the hair just above your ears to loosen it slightly so the style does not look too severe or painted-on.
7. The Fishtail Accented Half-Down
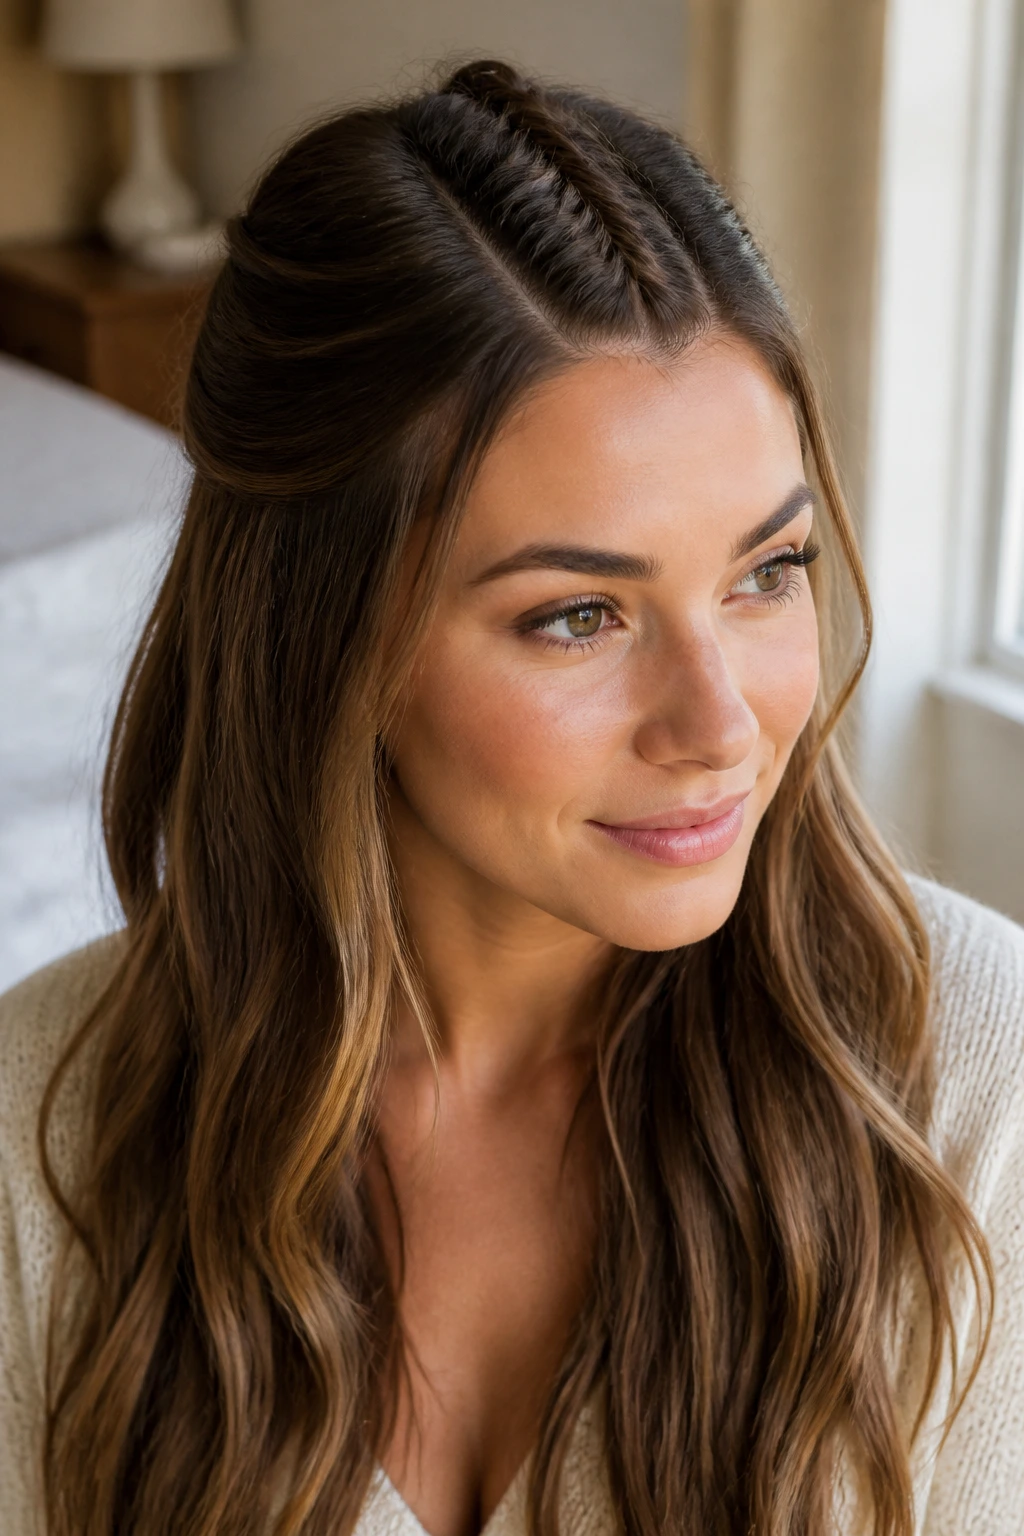
While a full fishtail braid can take ten minutes of tedious finger-weaving, a tiny accent fishtail takes under two minutes. You only need a small section from the center part of your hair, leaving the sides loose.
The 90-Second Fishtail Method
Divide the top center section into two halves. Take a tiny strand from the outer edge of the left side and cross it over to the right. Repeat on the other side, alternating until you have a two-inch braid, then pin it flat.
Quick Tips for Success
- Works best on dry, textured hair.
- No need to braid all the way to the ends.
- Secure with a single flat bobby pin slid horizontally under the braid.
Gently pancake the braid by pinching the edges and pulling outward to make it look wider and thicker.
8. The Loop-Through Topsy Tail
The simplest tools from decades past are still the most efficient for morning speed.
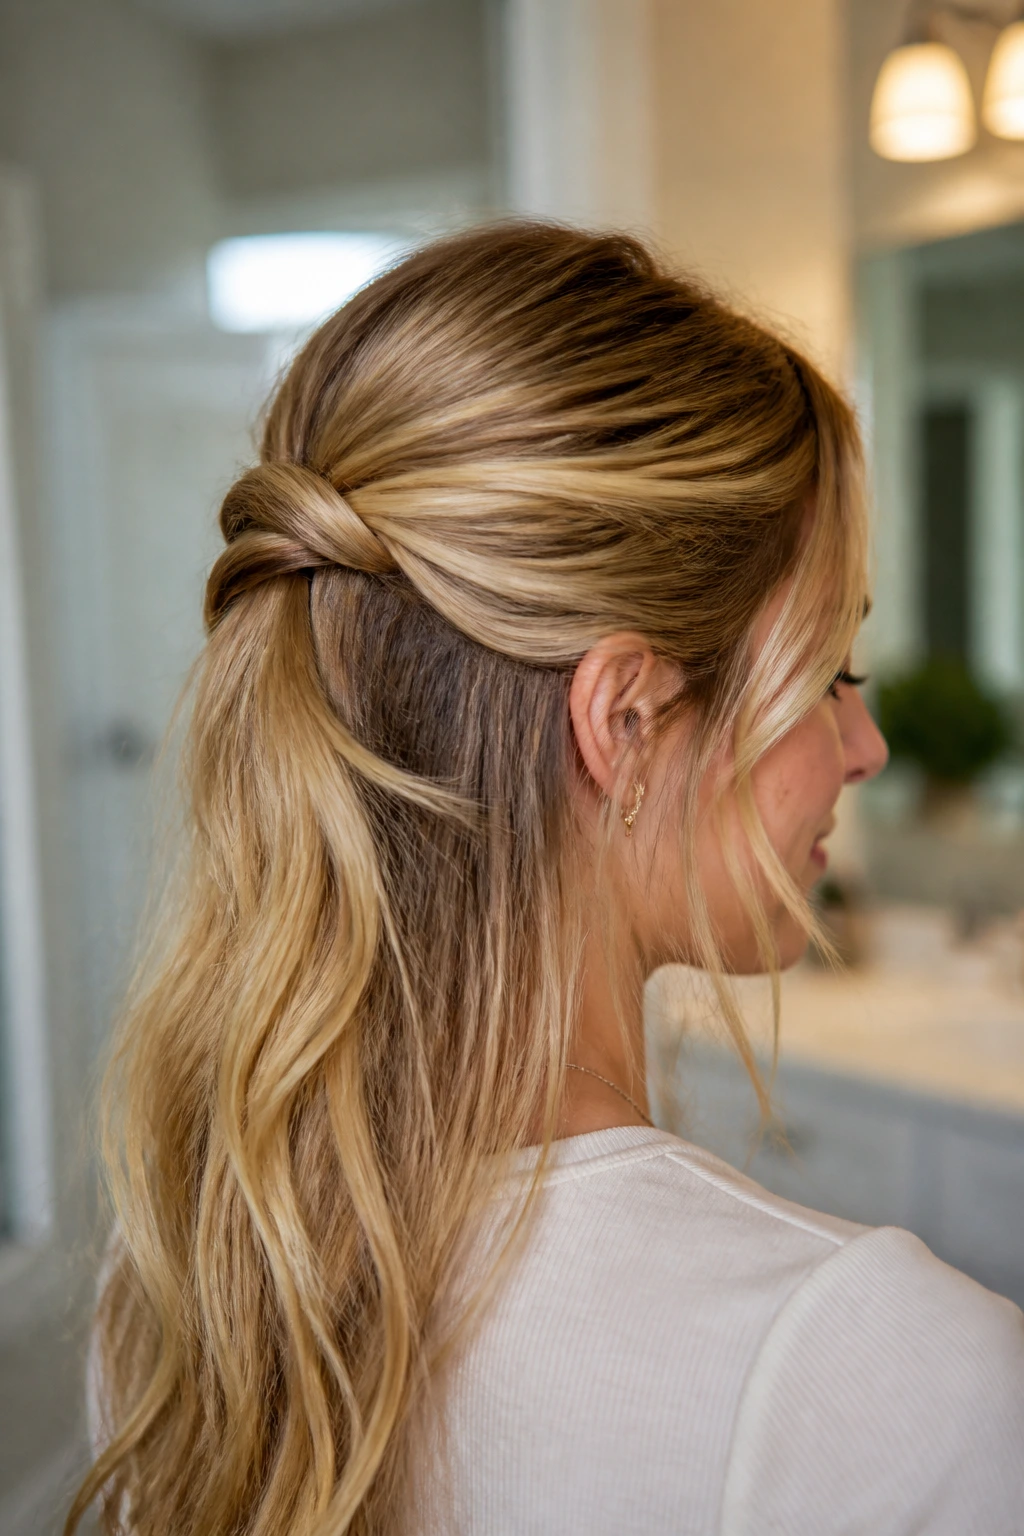
Remember the topsy-tail tool? You do not even need the plastic loop to recreate this classic style. Gather a loose half-ponytail at the back of your head and secure it with an elastic. Use your fingers to create a small gap in the hair just above the elastic band.
Flip the tail of the ponytail up and push it down through that gap. The result is an elegant, rolled edge that hides the hair elastic completely and looks far more intricate than it is.
9. The Miniature Claw Clip Cascade
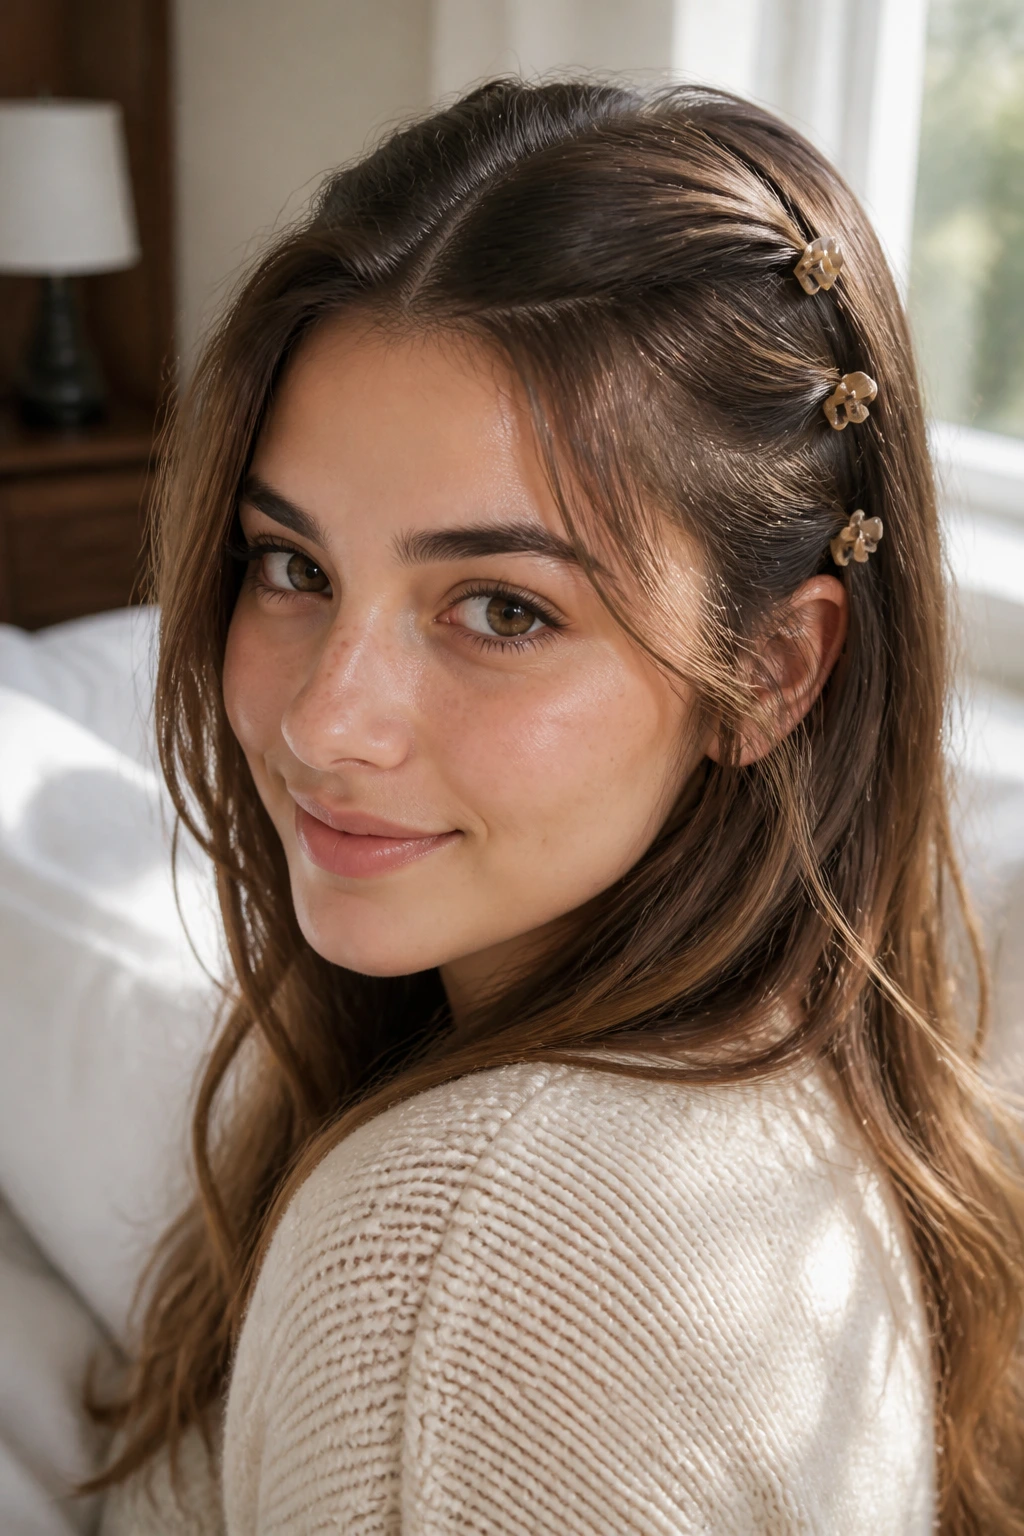
How do you keep hair out of your face without using any elastics or pins?
The humble claw clip is the easiest answer. Instead of one massive clip that can feel heavy, use two or three tiny claw clips to secure small sections of hair pulled back from your temples.
Placement is Everything
Gather a half-inch section from your left temple, twist it loosely, and clip it at the back-left of your head. Repeat on the right side. This keeps the center of your hair flat while framing your face cleanly.
10. The Dutch Braid Center Strip
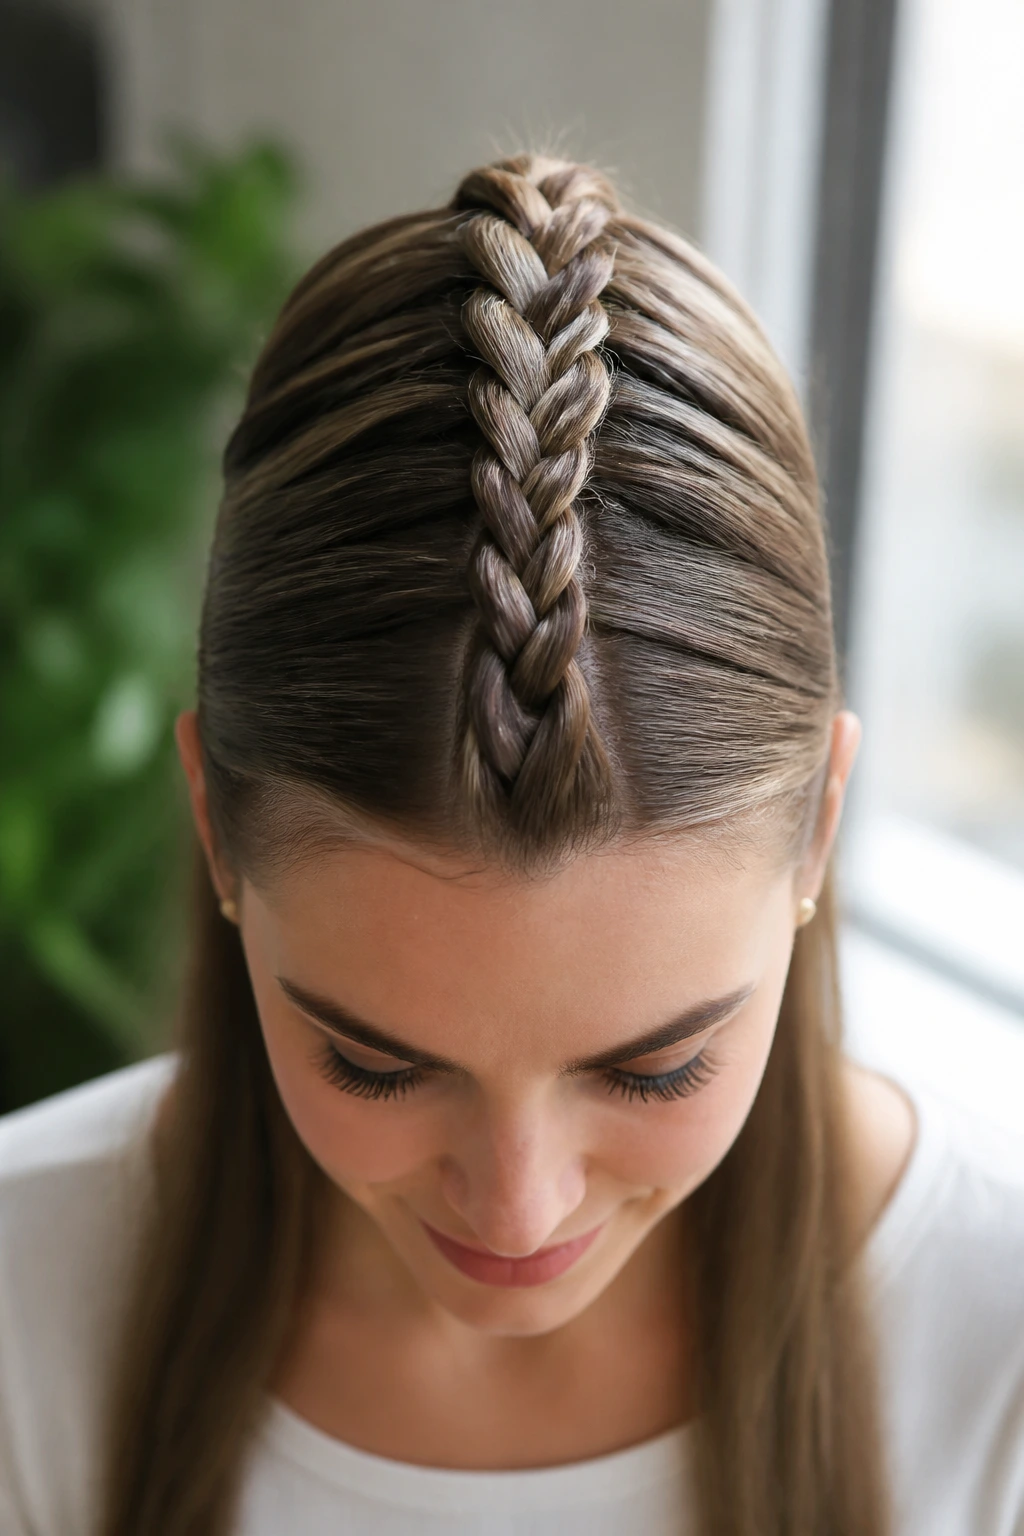
You woke up late, your workout was intense, and you do not have time to wash your scalp. The center line of your hair is showing oil, and a simple brush-through will not cut it.
A single Dutch braid running straight down the center part line acts like a shield. Because a Dutch braid crosses sections under instead of over, it stands off the head, creating volume right where you need it to hide flat roots.
- Start with a two-inch wide section at the front hairline.
- Braid backward toward the crown, keeping the tension tight.
- Stop at the crown and secure with an elastic.
- Let the remaining tail blend into the loose hair behind.
This style gives an athletic, clean look that feels highly intentional and polished.
11. The Double Bubble Half Pony
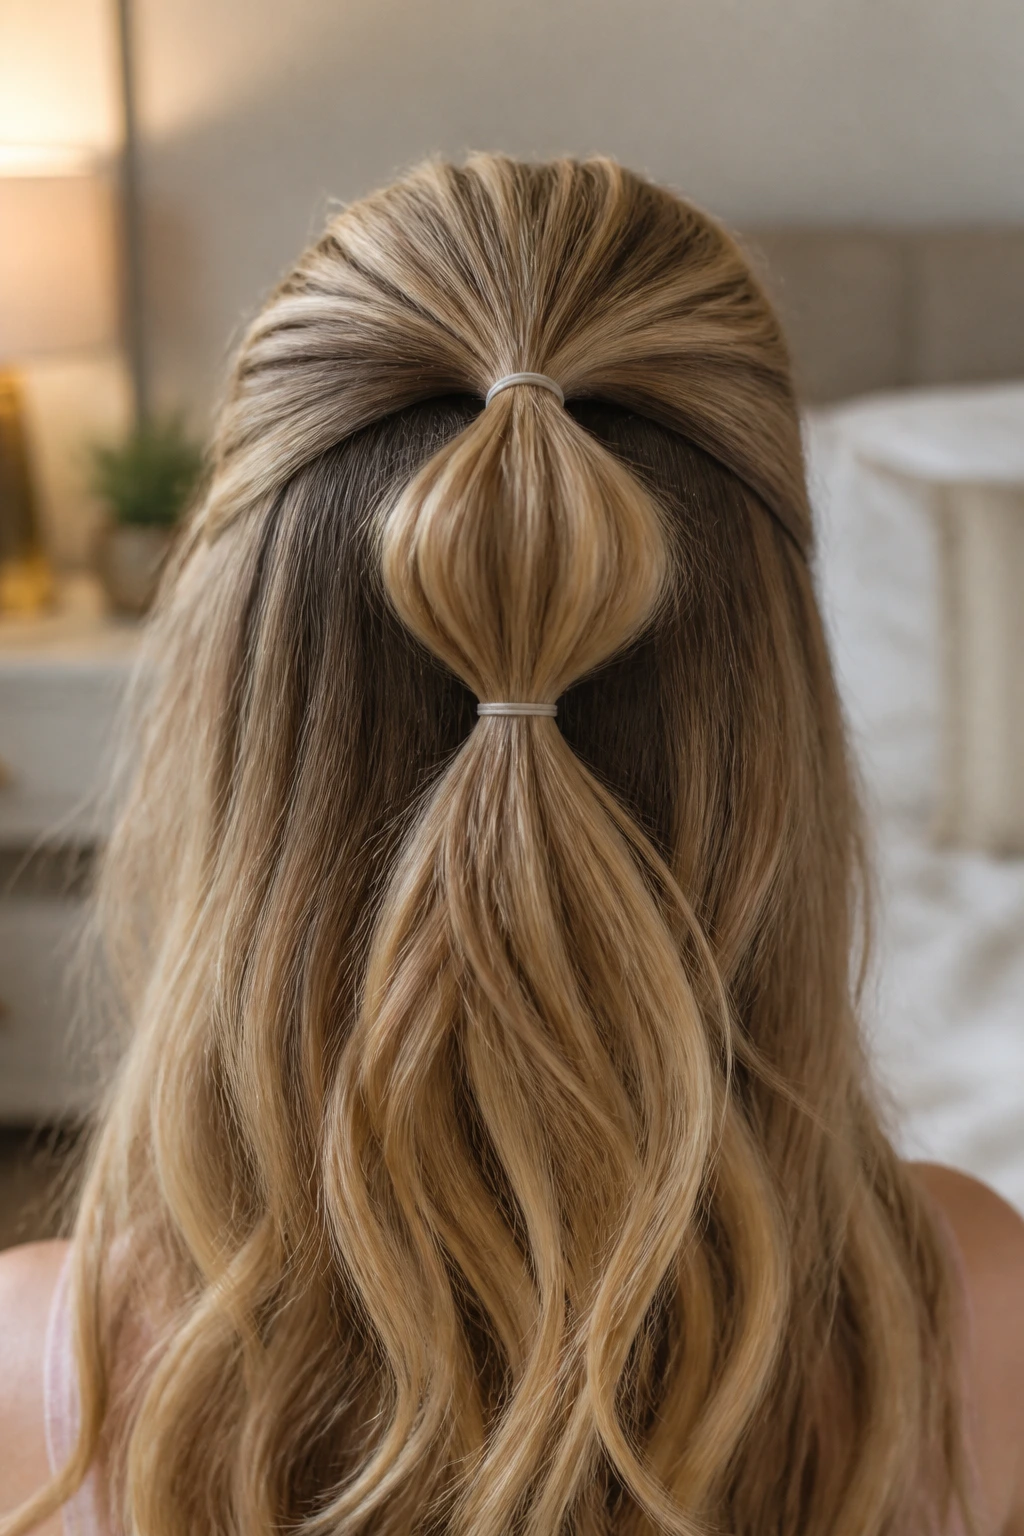
Let us add a bit of playful texture to the standard half ponytail. Start by pulling the top third of your hair into a neat ponytail at the back of your head and securing it with an elastic.
Move down about two inches, gather a small amount of loose hair from the sides, and combine it with the first ponytail using a second elastic.
Now, gently pull at the hair between the two elastics to puff it out into a “bubble” shape. This takes less than a minute but adds a graphic, modern element to your morning look.
This is especially effective for thick hair, as it keeps the weight of the ponytail distributed evenly instead of pulling at a single point.
12. The Twisted Rope Crown
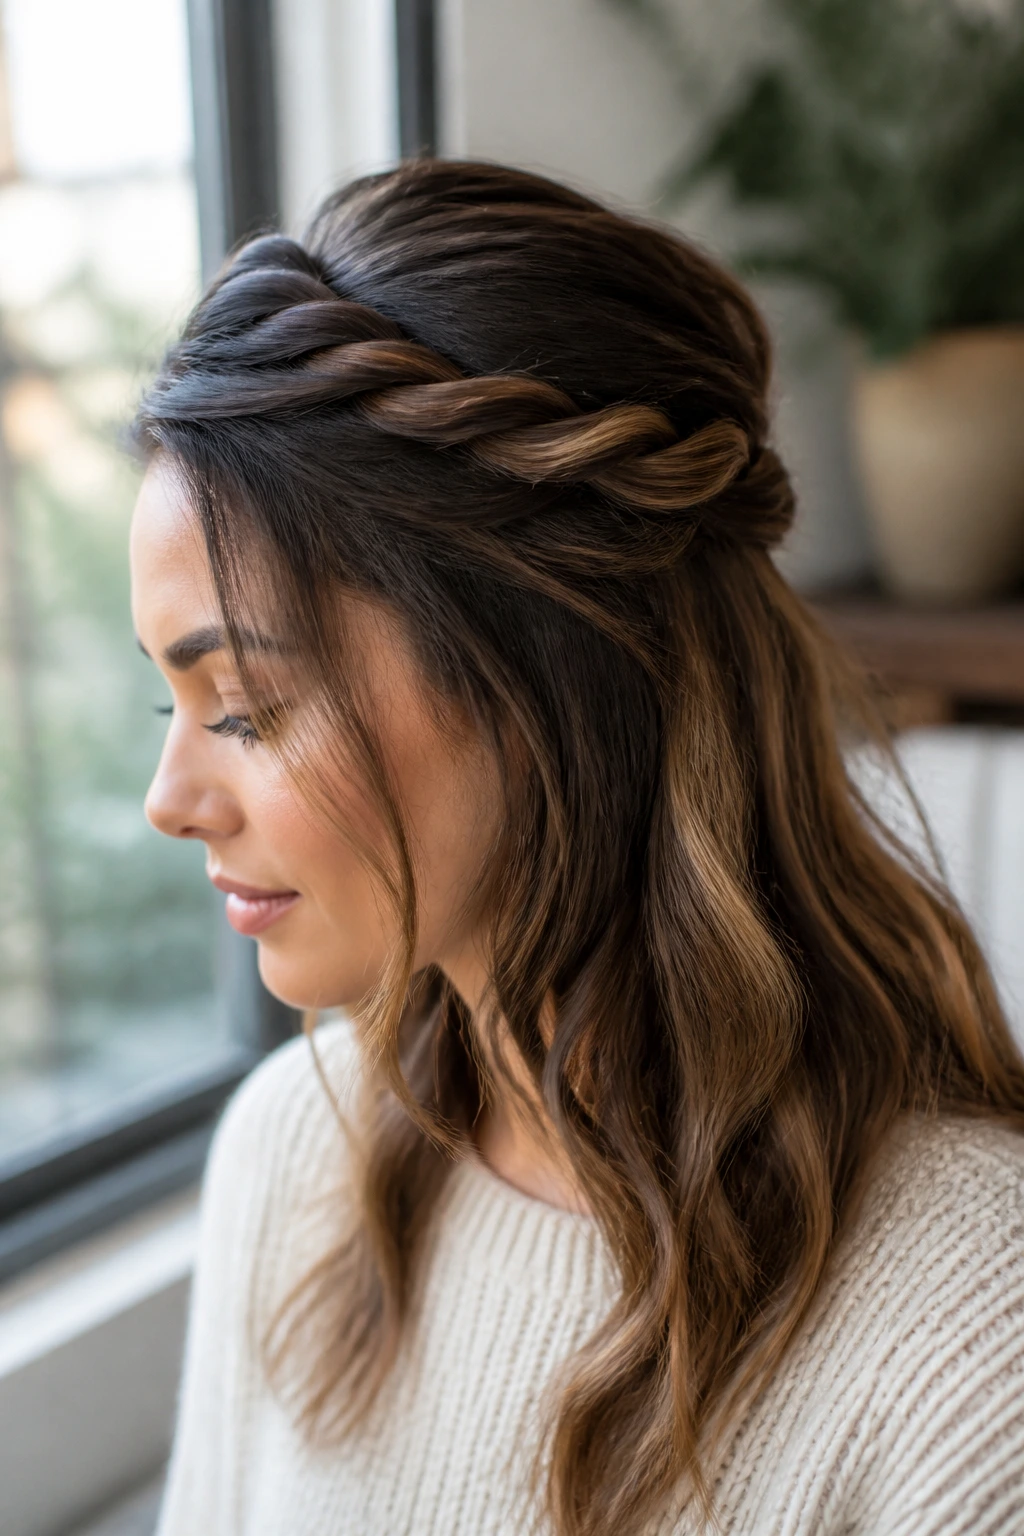
Unlike traditional three-strand braids that can look sweet or youthful, a rope twist offers a sleek, modern finish that works beautifully in a professional setting.
A rope twist uses only two strands of hair twisted around each other. Because you twist the individual strands in one direction and wrap them together in the opposite direction, the tension locks them into a rope-like structure.
This style is best for coarse, long, or thick hair that tends to slip out of standard braids. Secure the ends with a clear elastic, then tuck the ends under the loose hair at the back and pin them flat against your head.
13. The Scarf-Wrapped Half Bun
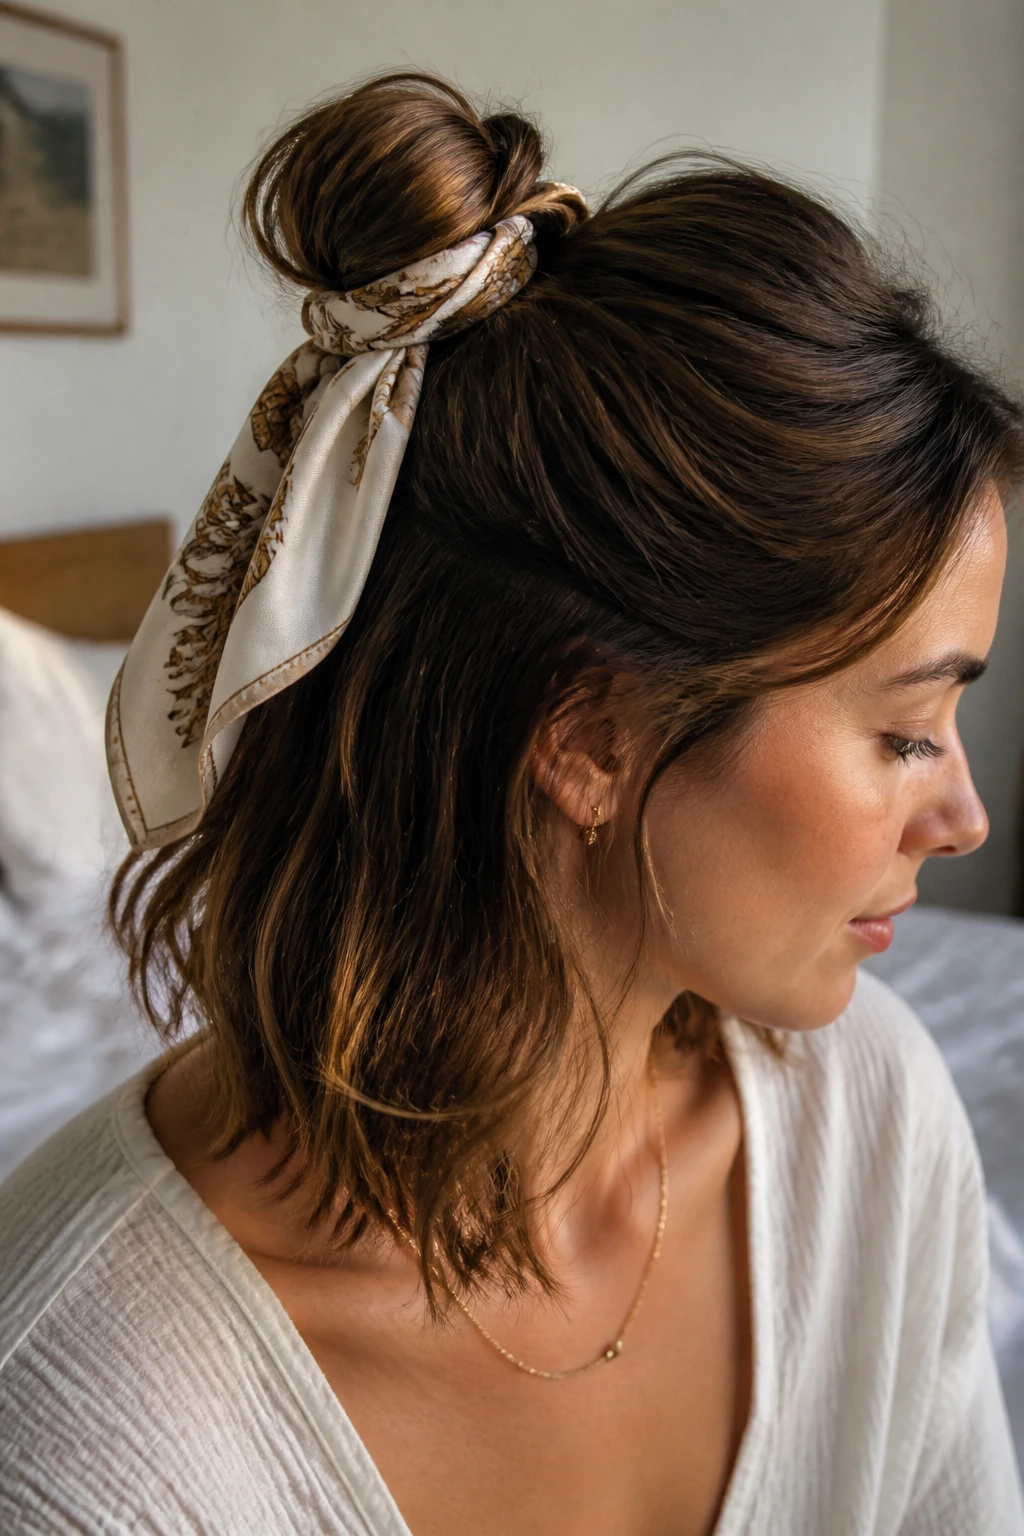
When your hairstyle feels a bit plain, adding a textile is the fastest way to upgrade it. A simple silk scarf wrapped around a half-bun takes your look from “I slept through my alarm” to “I styled this with intent.”
Choosing the Right Scarf Size
Look for a small square scarf (around 18 to 20 inches). Anything larger will overwhelm a half-up style and weigh down your head.
Quick Wrapping Steps
- Create a simple half-up messy bun.
- Fold the scarf into a narrow band.
- Tie it once around the base of the bun, letting the tails hang down.
Use a bobby pin to secure the scarf to the hair elastic so it does not slide off silky hair.
14. The Triple Twist Pullback
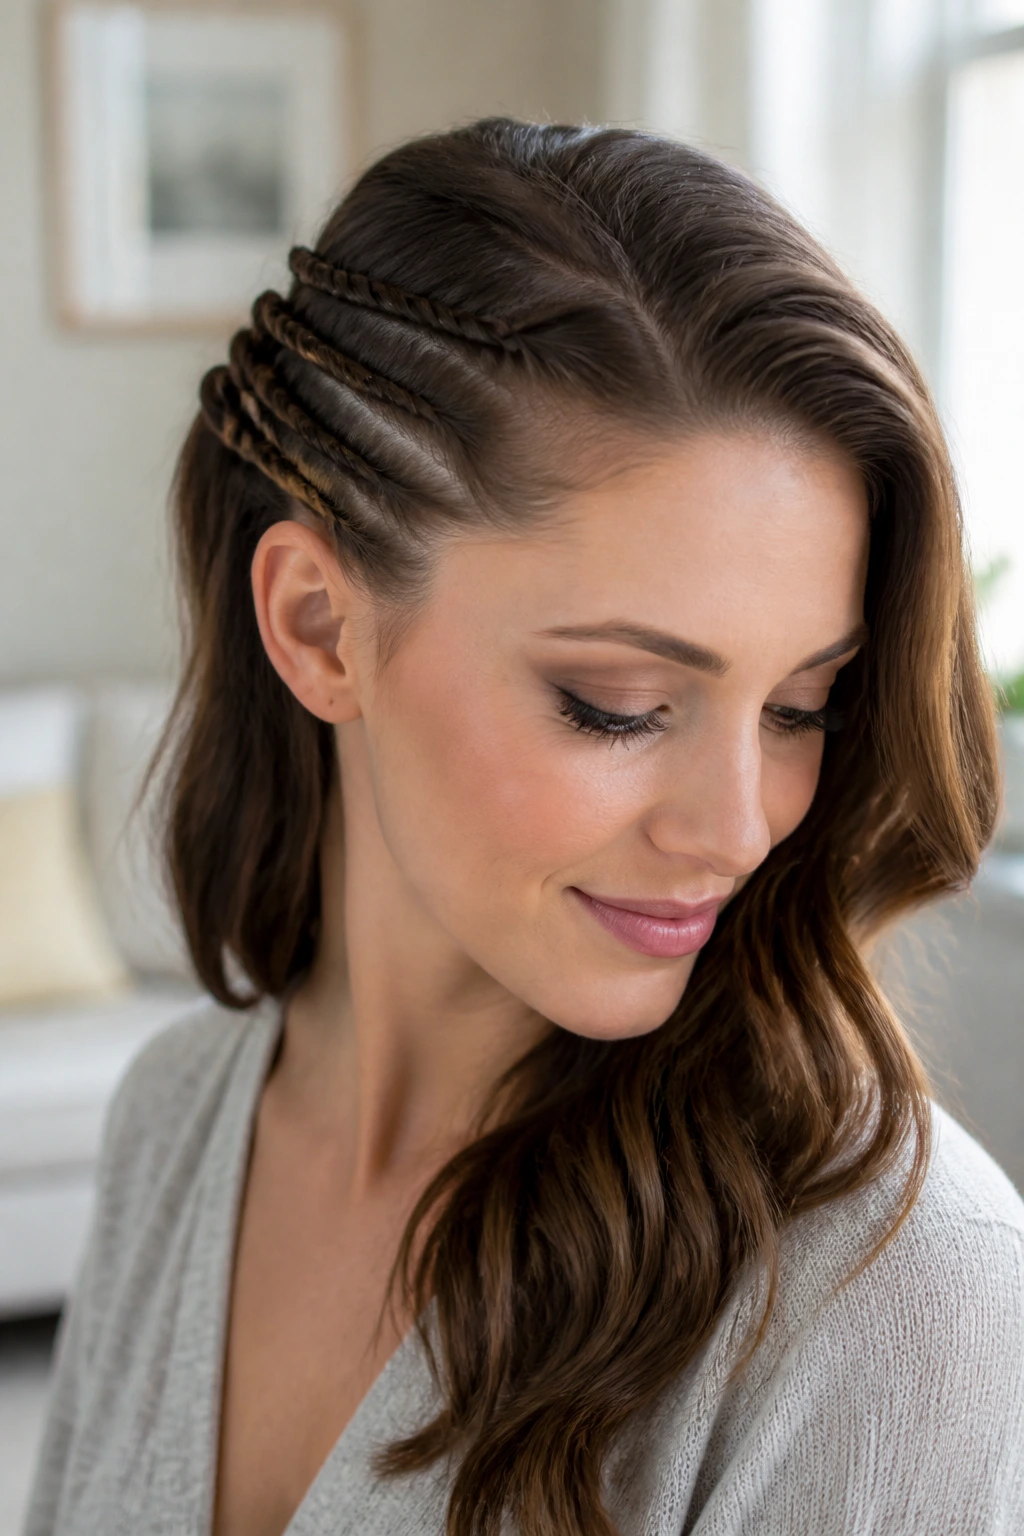
Symmetry is overrated when you are short on time.
Instead of trying to make both sides of your hair match perfectly, try a stacked look on just one side. Take three thin, parallel sections of hair from the left side of your face. Twist each one individually back toward the crown of your head.
Pin them one above the other using flat bobby pins. Leave the right side of your hair completely loose and flowing. This asymmetrical look is modern, clean, and incredibly fast because you only have to style one side of your face.
15. The Faux-Hawk Braided Top
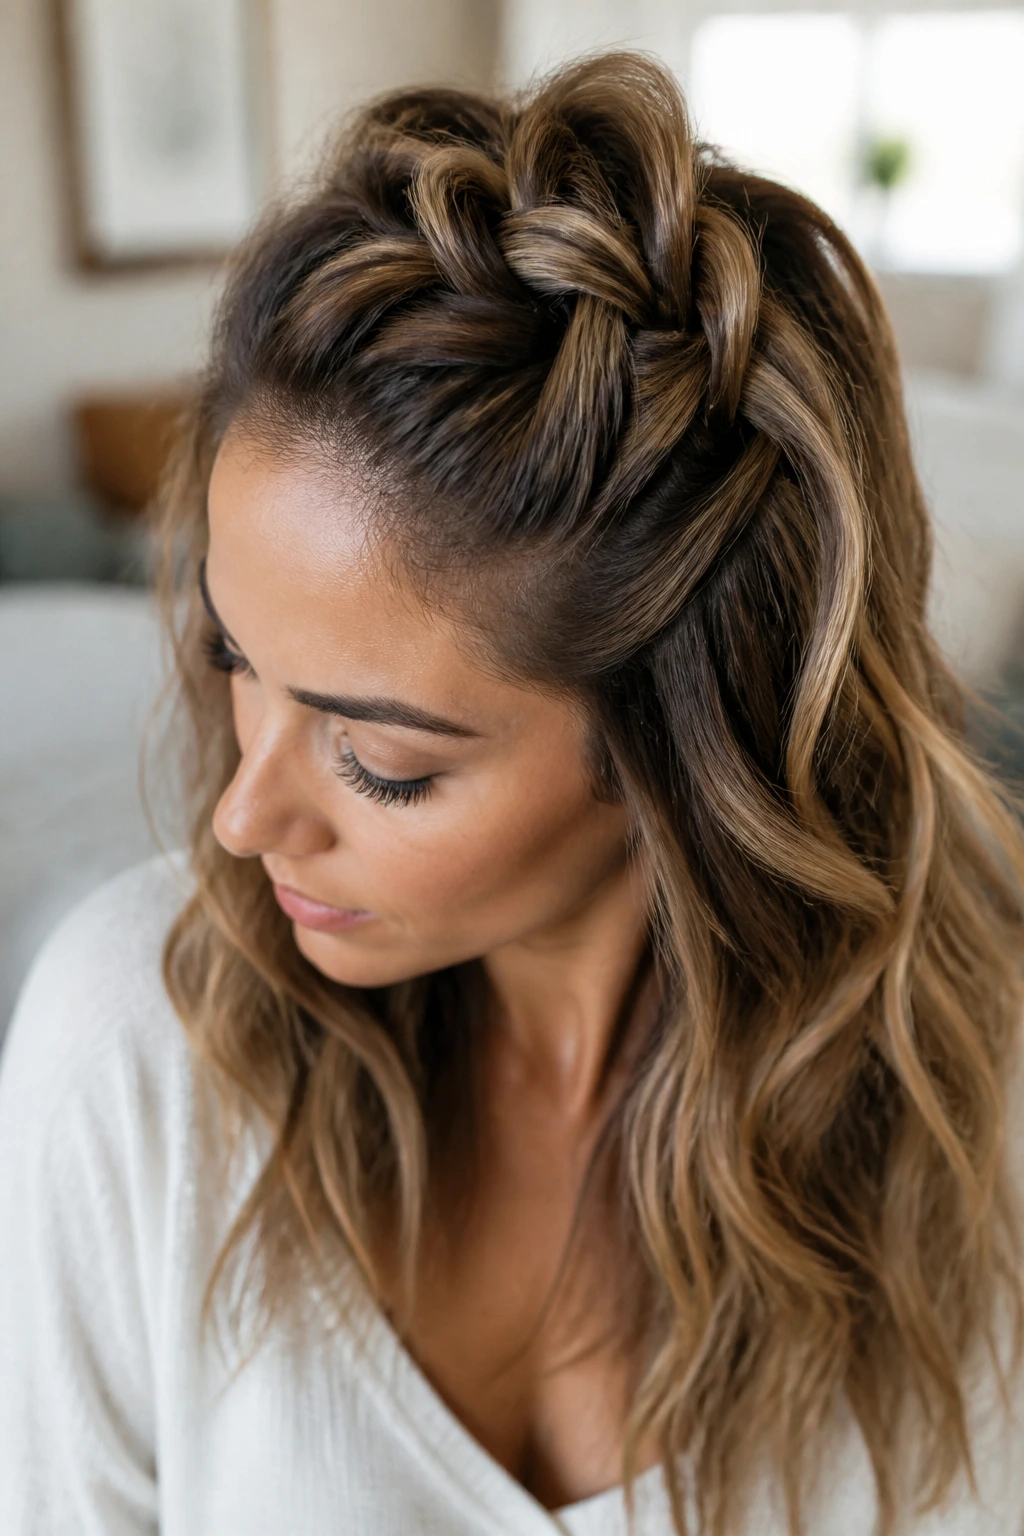
How do you get maximum volume at the top of your head without teasing or backcombing your hair?
You use the structure of a wide, loose braid to lift the roots. By braiding a wide section from your forehead to your crown, you naturally lift the hair off the scalp, creating height and volume that lasts all day.
The Pancake Method for Volume
Once the braid is secured, use your thumbs and index fingers to gently pull the loops of the braid outward. This flattens the braid but doubles its apparent width, giving you a dramatic, voluminous top section.
16. The Criss-Cross Section Style
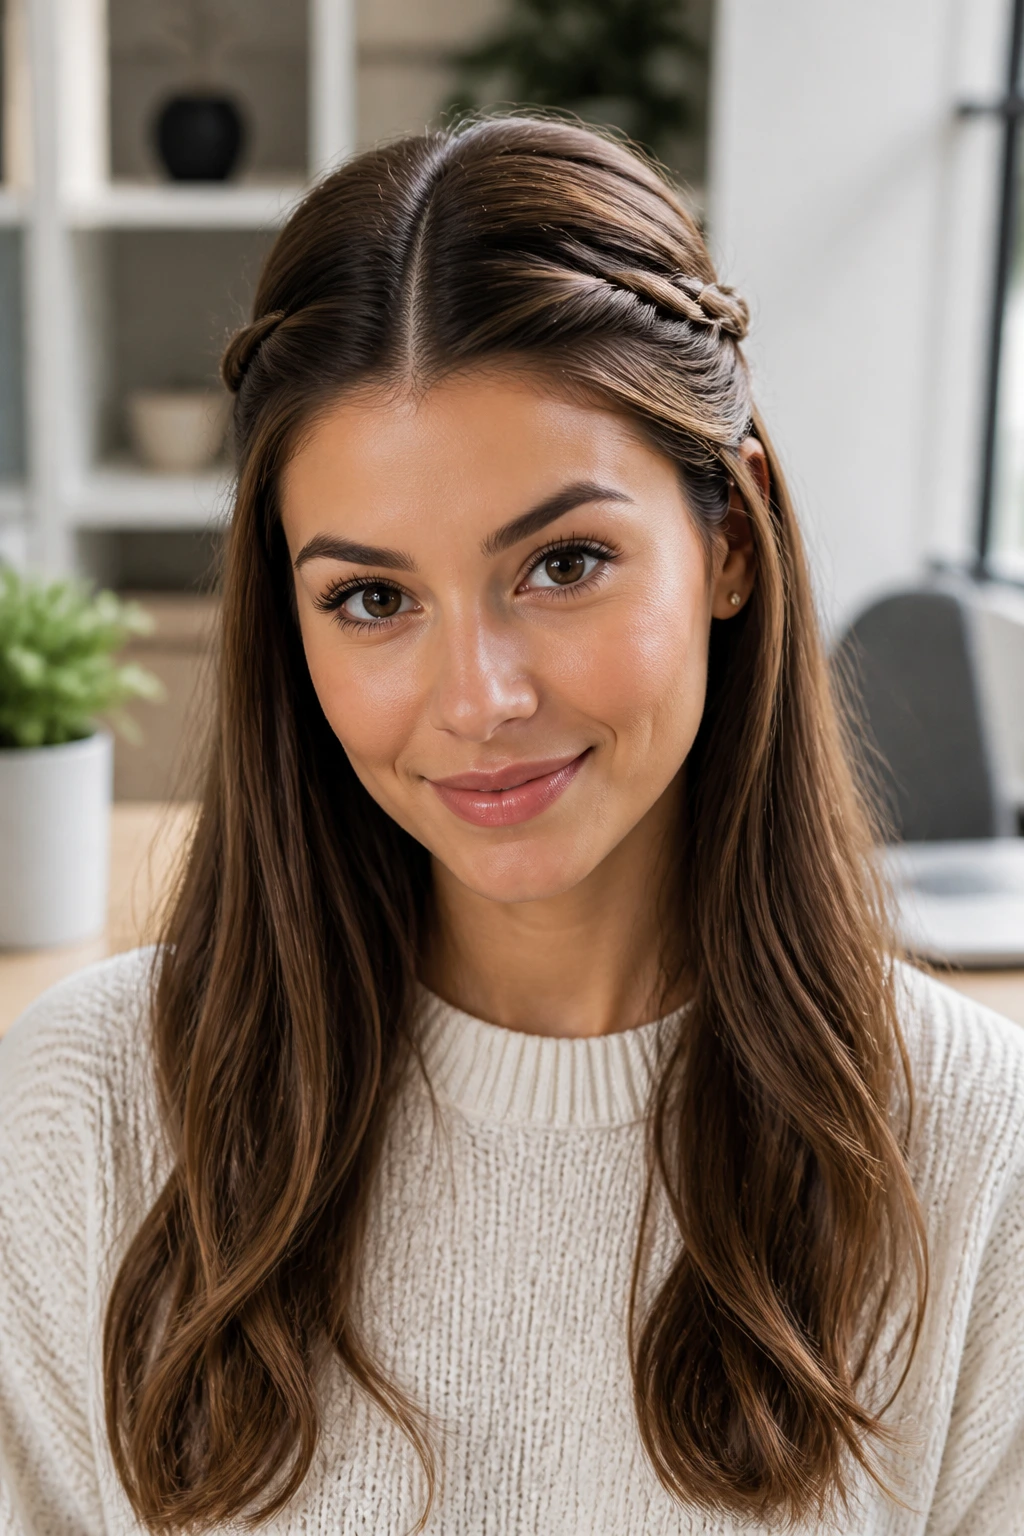
You want a look that is completely flat and sleek at the front, with no volume or flyaways, perfect for a clean, professional profile.
By sectioning the hair at the temples and crossing them over each other tightly at the back, you create a flat, woven band that acts like a natural headband.
- Part your hair down the center.
- Pull a flat section from the right side over to the left back. Pin it.
- Pull a flat section from the left side over to the right back, covering the first pin. Pin it.
- Smooth down with a tiny drop of hair oil on your palms.
This style keeps every single flyaway locked down, making it excellent for windy days.
17. The Knotted Half-Up Band
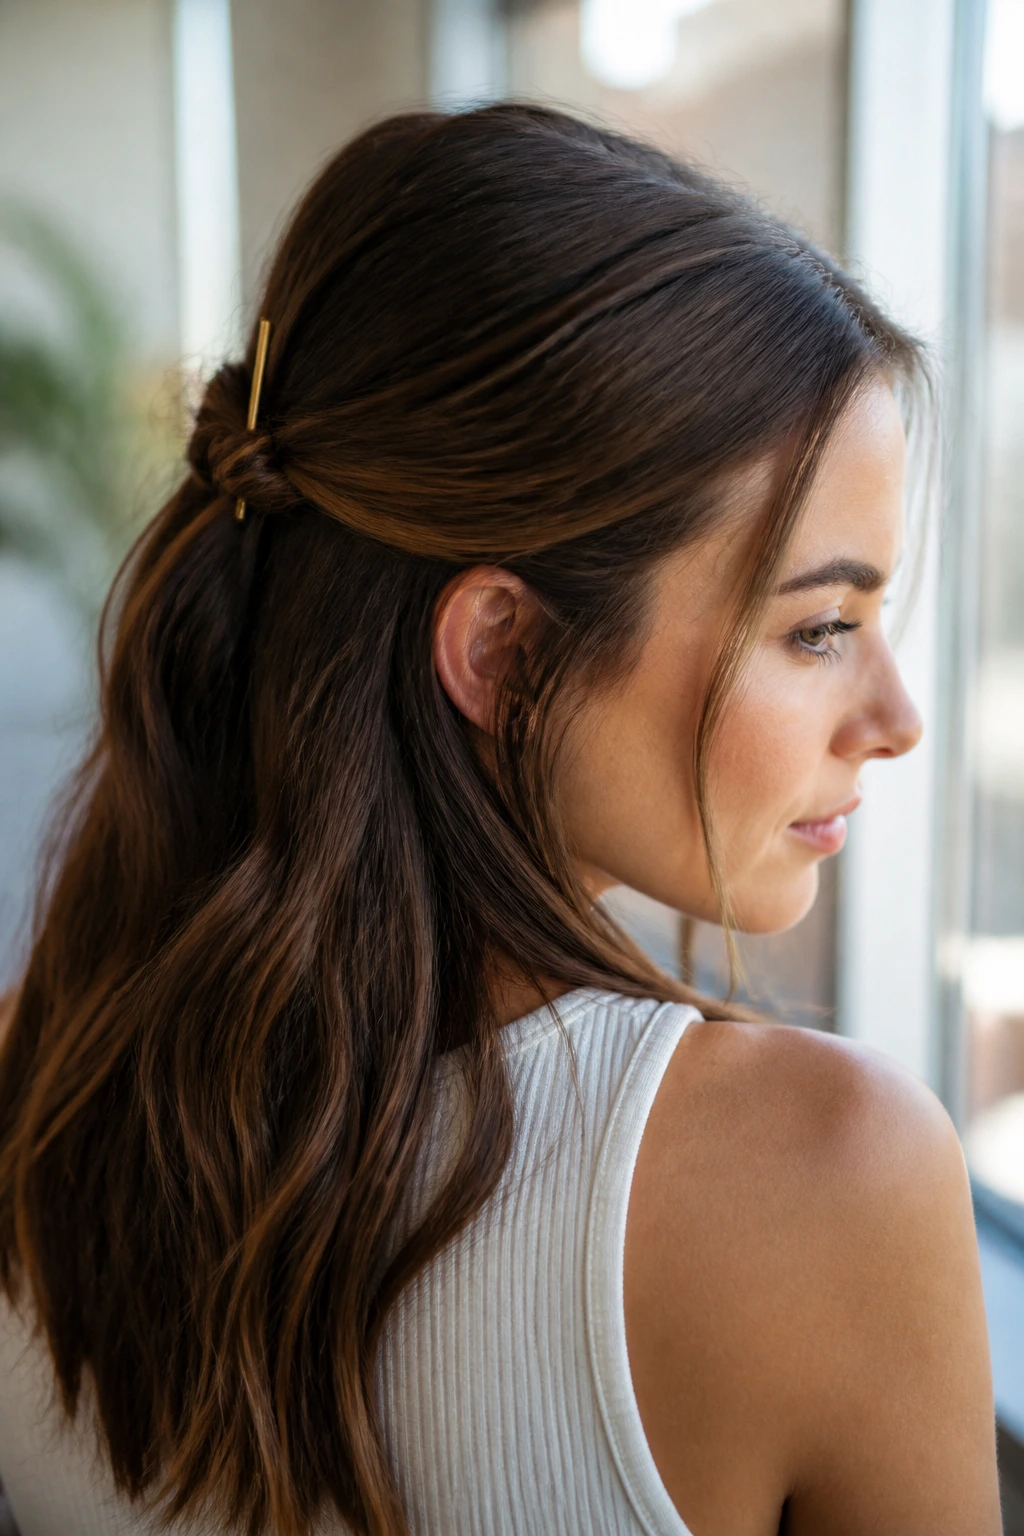
You can actually tie your hair into a literal knot to keep it in place. Take two medium sections of hair from the front temples and pull them to the back of your head.
Cross the left strand over the right strand, then loop it under and pull it through—just like the first step of tying your shoelaces.
Once the knot is snug against the back of your head, secure it by sliding a bobby pin vertically down through the center of the knot.
This holds the hair in place without any elastic bands, leaving a flat, clean knot that looks like a complex hair slide.
18. The Low-Slung Half-Up Ponytail
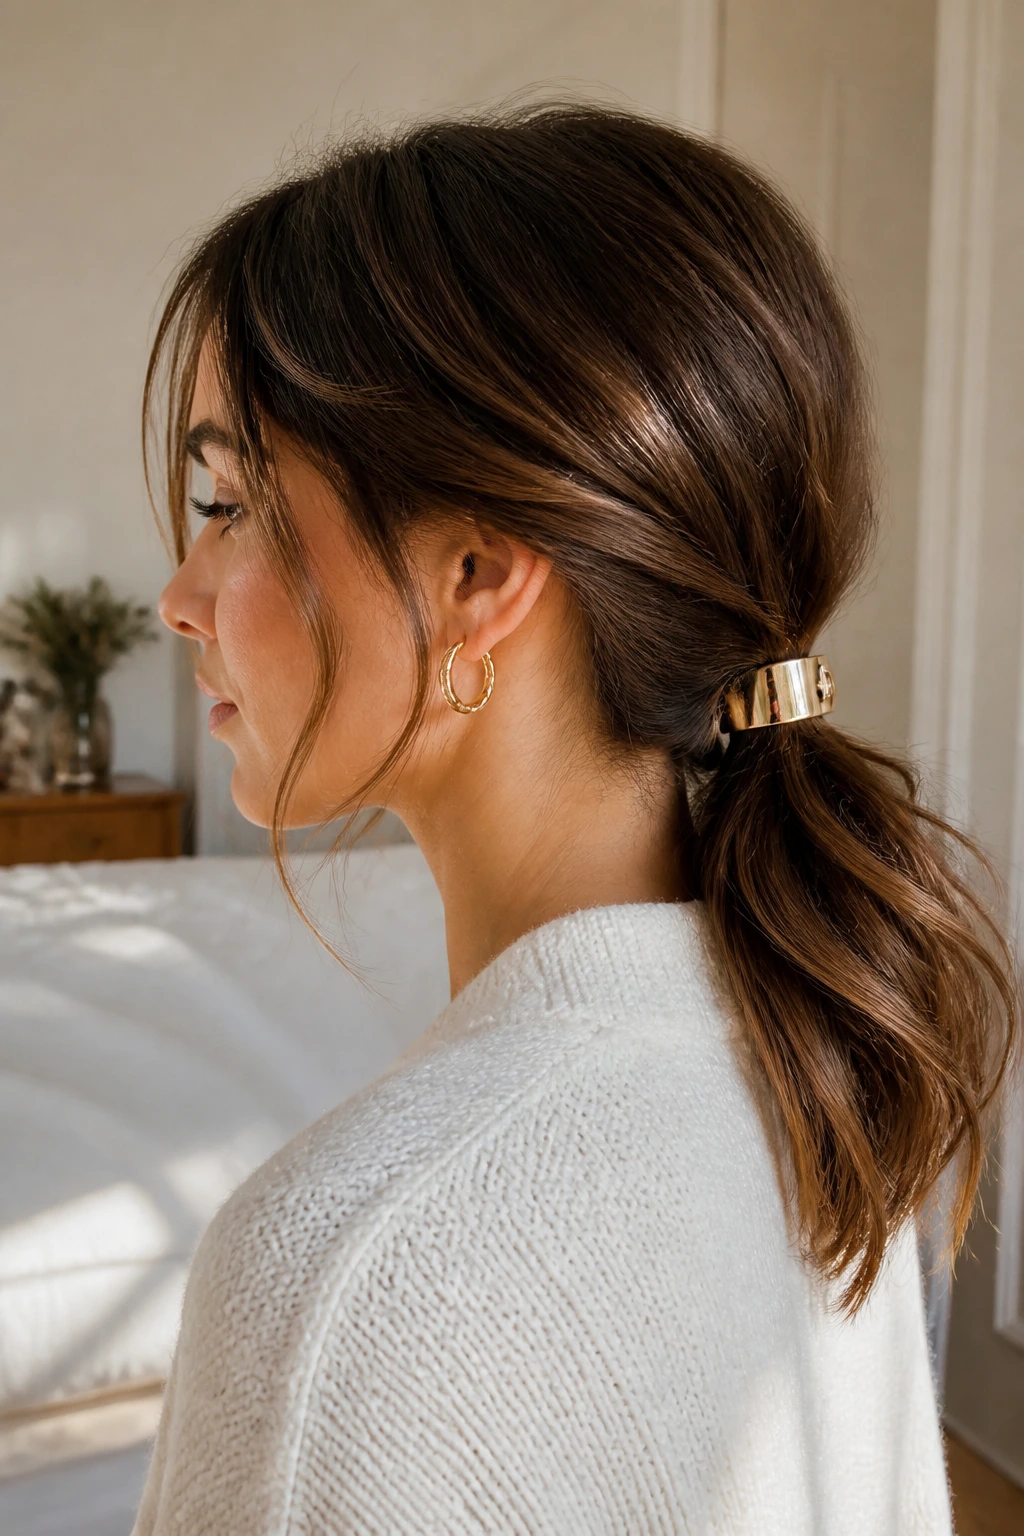
While the high pony is athletic and bold, the low-slung half ponytail is relaxed, soft, and sits comfortably at the nape of your neck.
Instead of pulling hair from the top of the head, you gather hair only from the lower jawline down to the ears, letting the top section drape naturally over it.
This style is best for shorter hair lengths like bobs and lobs. Use a decorative metallic clip instead of an elastic to keep the look soft and elegant.
19. The Twisted Rose Bud Bun
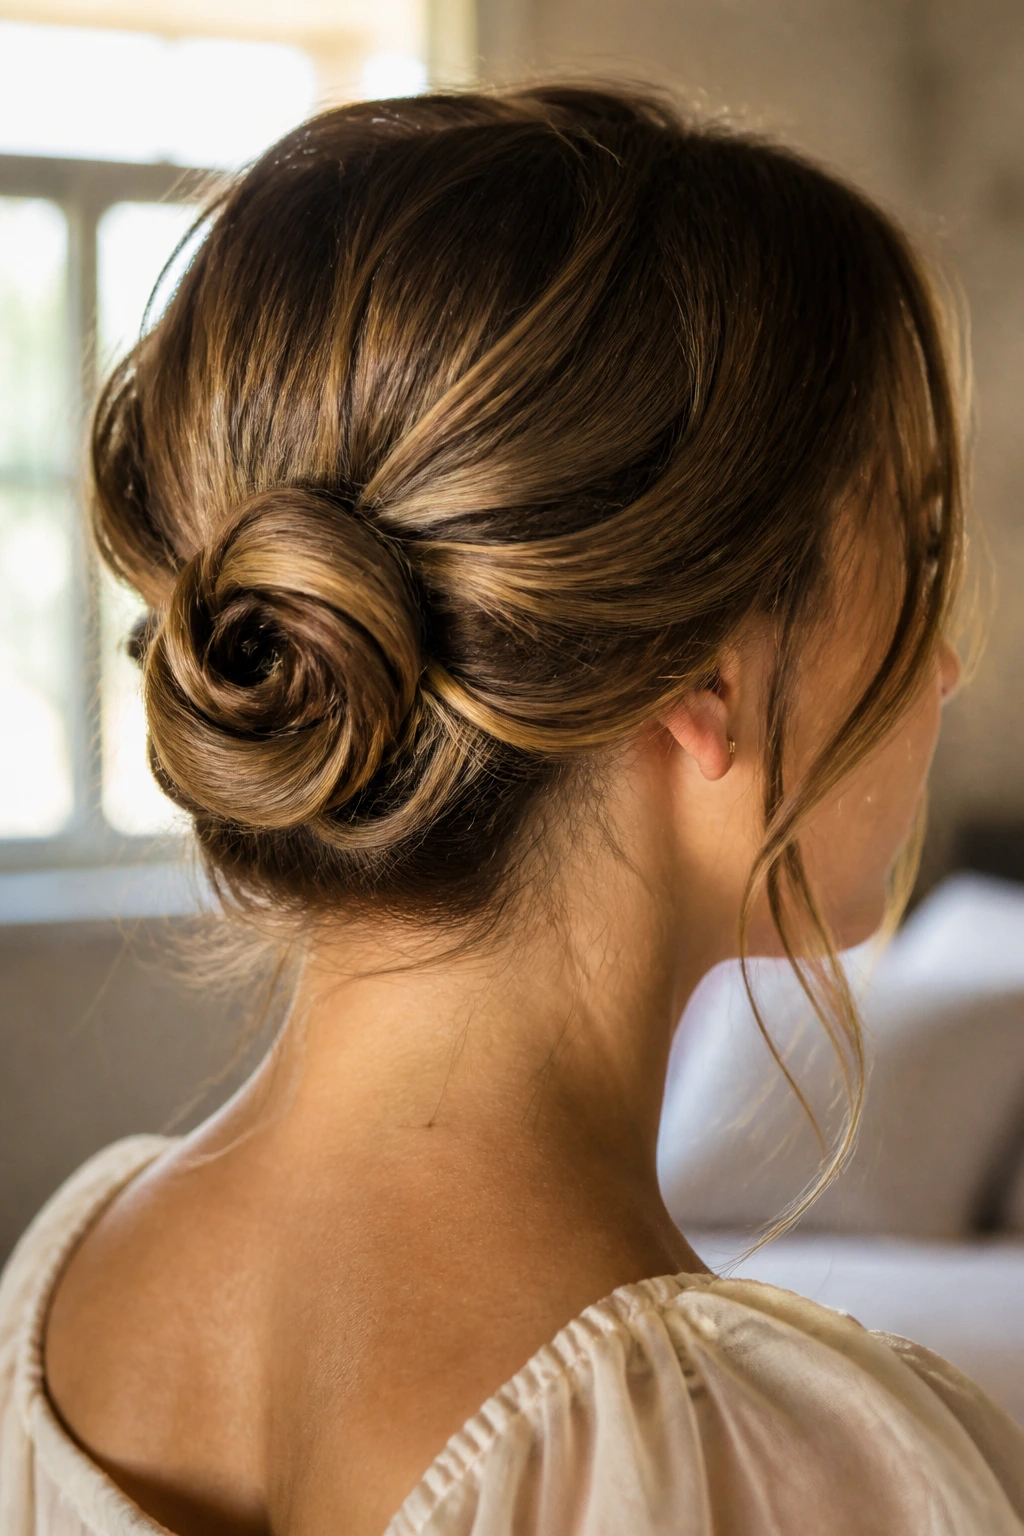
This style looks like a tiny rosette resting at the back of your head. It is incredibly elegant but relies on a very simple twisting mechanic that anyone can master in seconds.
The Coiling Technique
Gather a small half-up ponytail. Braid it loosely to the end and secure with a clear elastic. Then, roll that braid clockwise flat against your head, tucking the end underneath.
Key Details
- Secured with three to four u-shaped hairpins.
- Excellent for showing off multi-tonal highlights.
- Works beautifully on dry, textured hair.
Spray the finished rosette with a light-hold spray to keep the petals of the braid from coming undone.
20. The Sleek Side-Swept Pin-Up
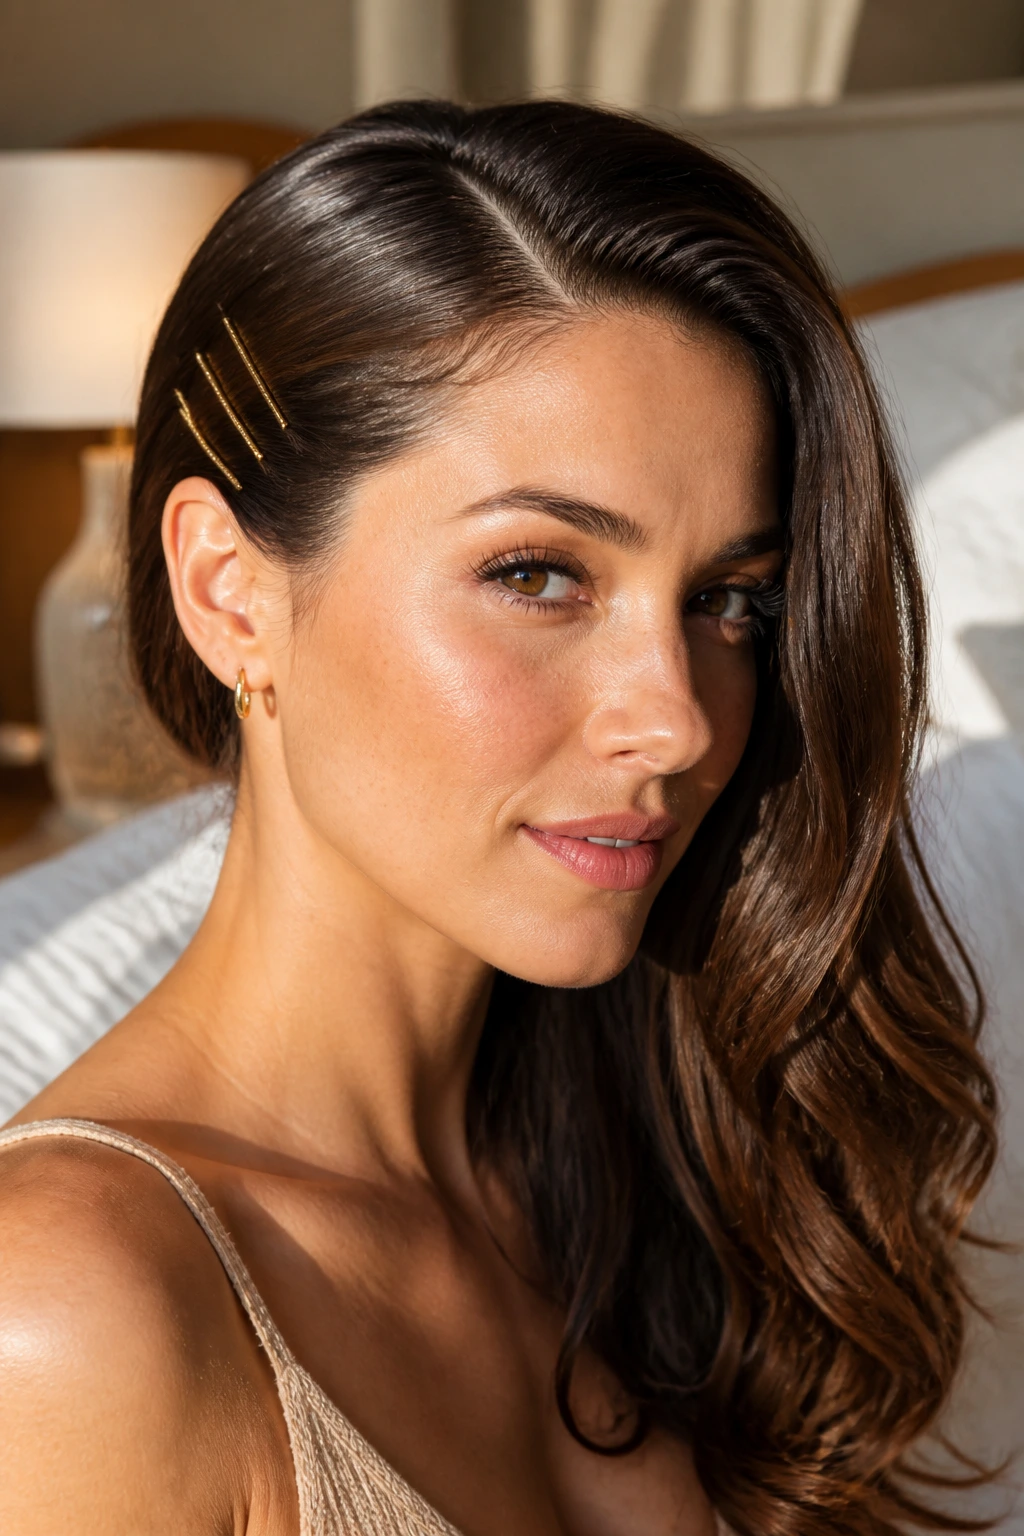
You do not need symmetry to look completely put together.
For an ultra-fast look that feels retro yet clean, sweep all the hair from one side of your head behind your ear and secure it flat against the back of your skull with a row of three parallel bobby pins. Leave the rest of your hair tumbling over the opposite shoulder.
This style takes less than thirty seconds. It keeps one side of your face completely clear—perfect for showing off a favorite pair of earrings—while letting you keep the length and movement of your hair on the other side.
21. The Half-Up Herringbone Accent
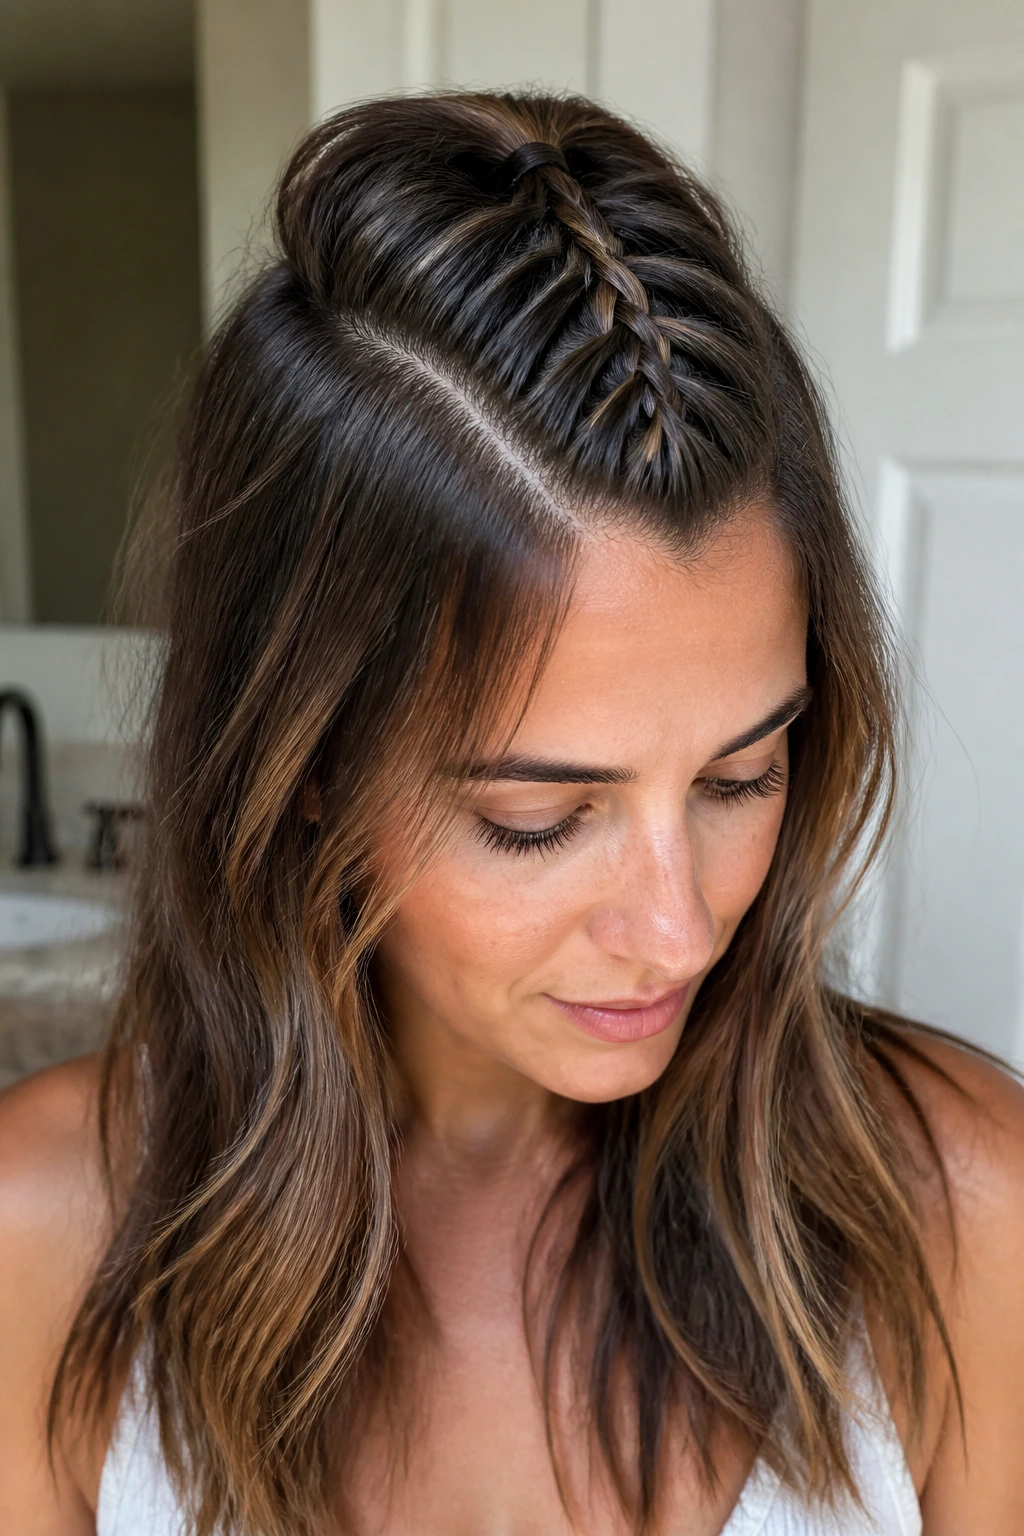
Is it possible to get the look of a complex herringbone weave without spending ten minutes on it?
Yes, by using thin sections of hair crossed over a central anchor. You do not actually braid; you simply cross small strands from left to right over a small vertical ponytail.
The Illusion of Complexity
Start with a tiny ponytail in the center. Pull a thin strand from the left temple, cross it over the ponytail, and pin it. Pull a strand from the right temple, cross it over, and pin it. Repeat once more.
22. The Triple-Braided Half-Up Cluster
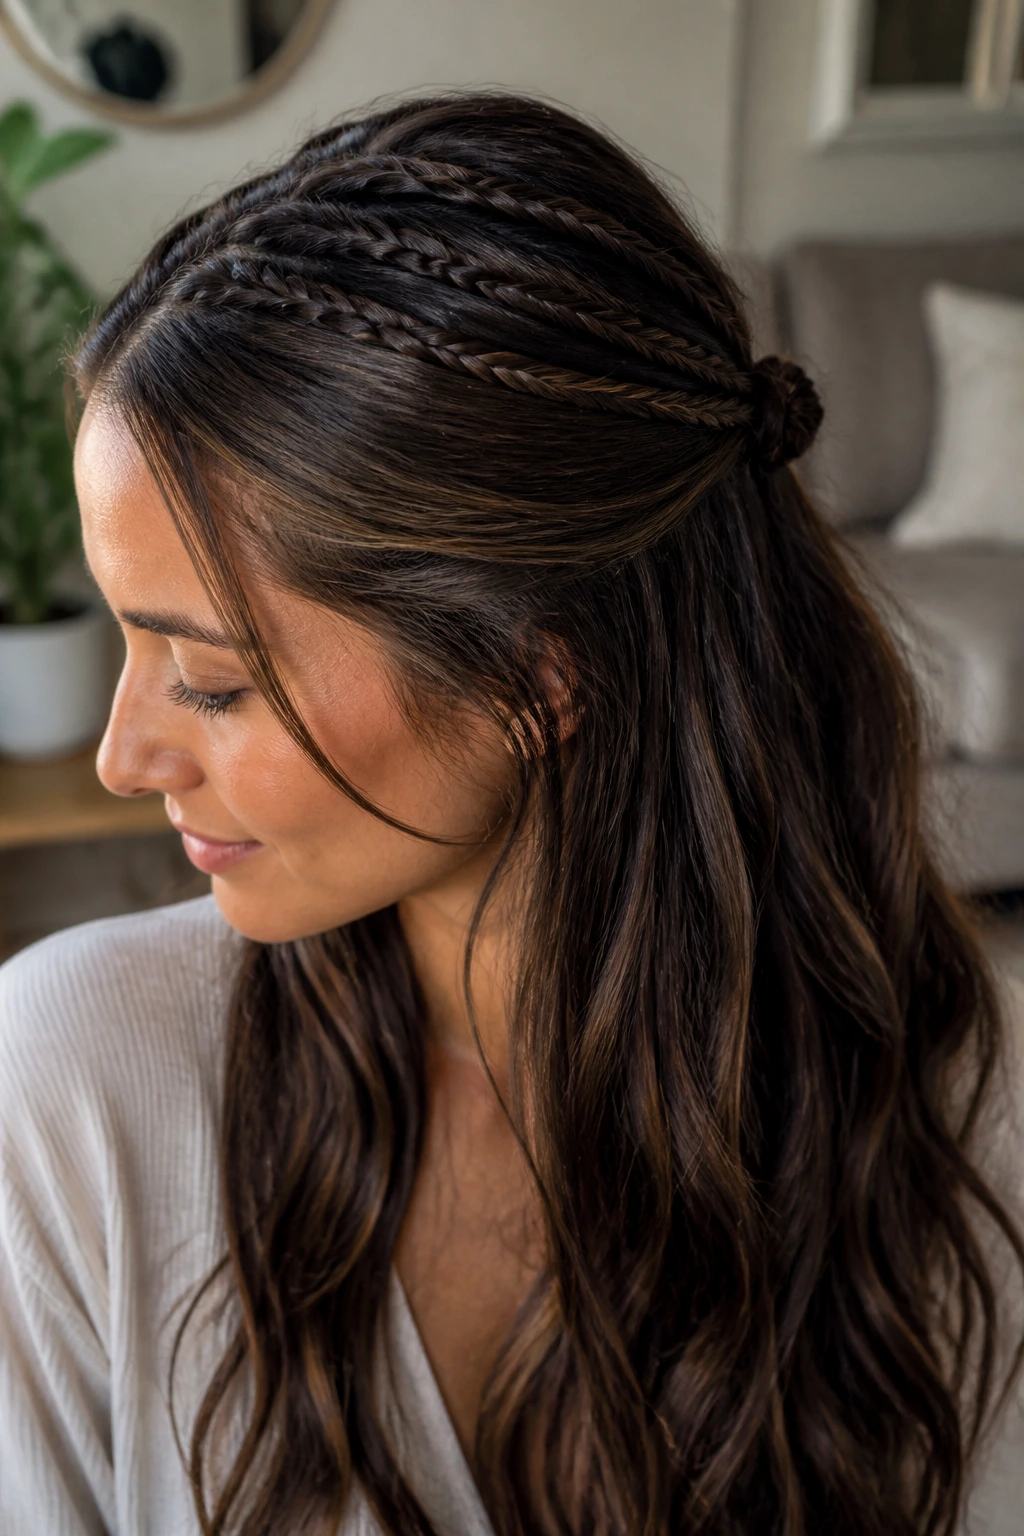
Your hair is exceptionally slippery, and every single clip or pin you try to use simply slides down within an hour. You need a textured anchor.
Braiding multiple small sections creates a rough texture that bobby pins can easily grip. By creating three small parallel braids at the back of your head and securing them together, you create a slip-free style.
- Make three tiny braids side-by-side at the crown.
- Gather them together with a single small elastic.
- Gently pull the braids sideways to soften the look.
- Pin the cluster close to the scalp.
The friction of the braided strands against each other keeps the style locked in place all day.
23. The Rolled Edge Halo
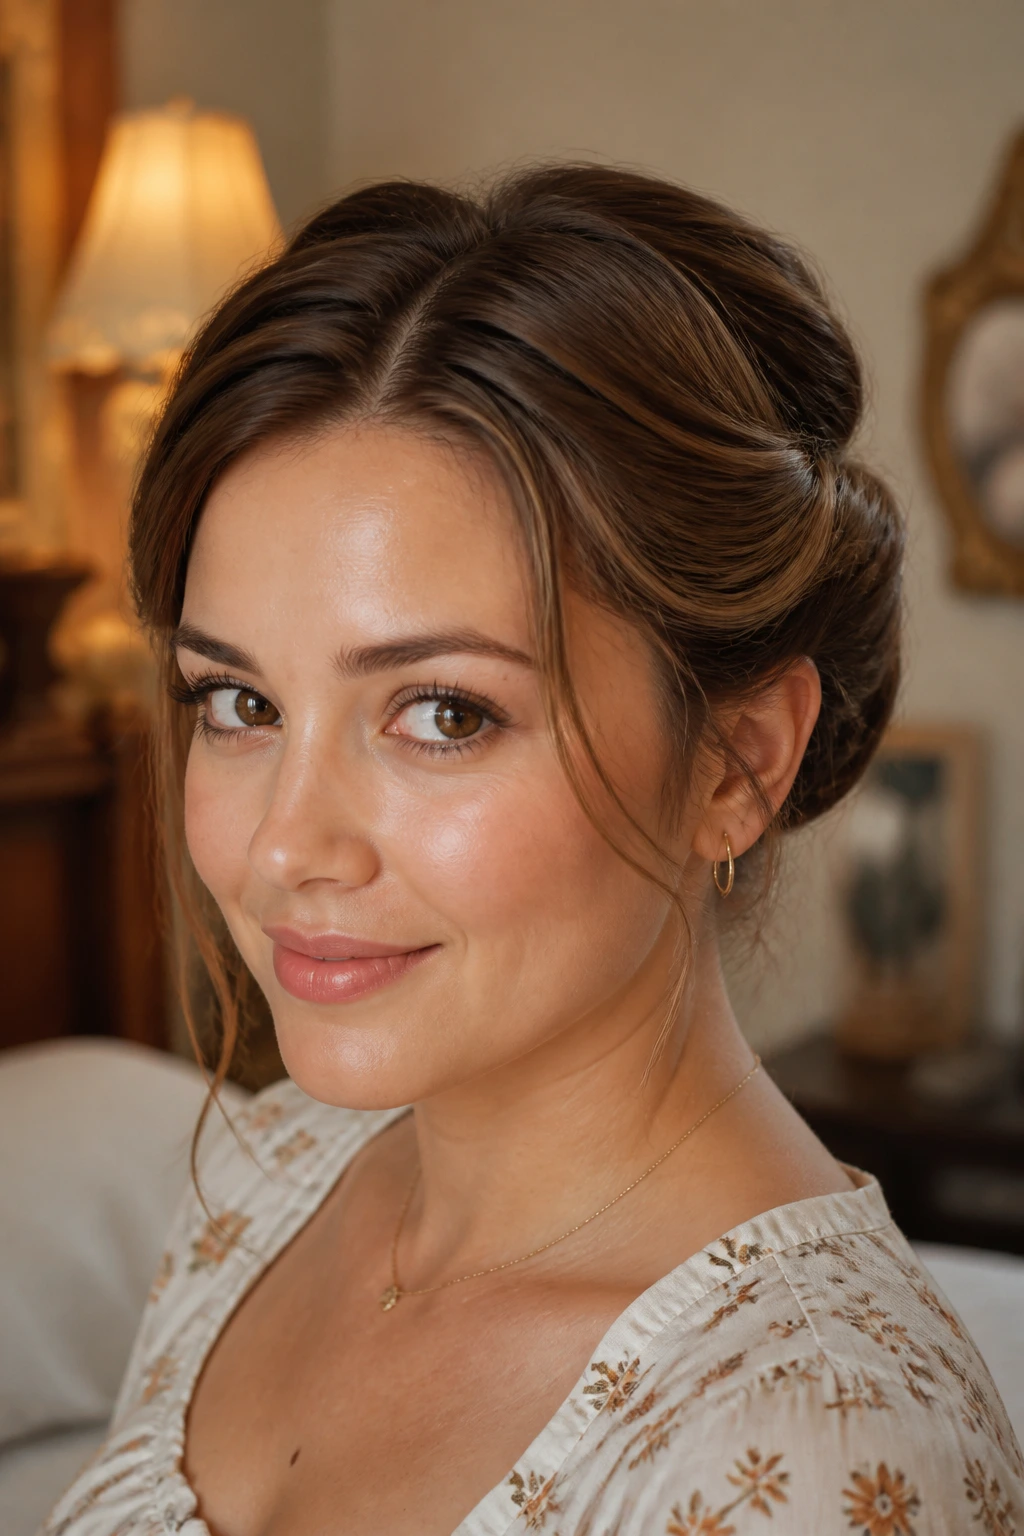
For a softer, romantic look that feels like a vintage style, try a rolled edge. Start at one temple and begin rolling the hair inward, away from your face, adding small sections of hair as you move toward the back of your head.
Pin the roll securely at the back, then repeat the process on the other side so the two rolls meet in the center.
Secure them where they meet with a small clip or a few bobby pins hidden inside the rolls.
This style is incredibly comfortable because it distributes the tension evenly along the sides of your head instead of pulling on one specific spot.
24. The Zig-Zag Part Half-Up
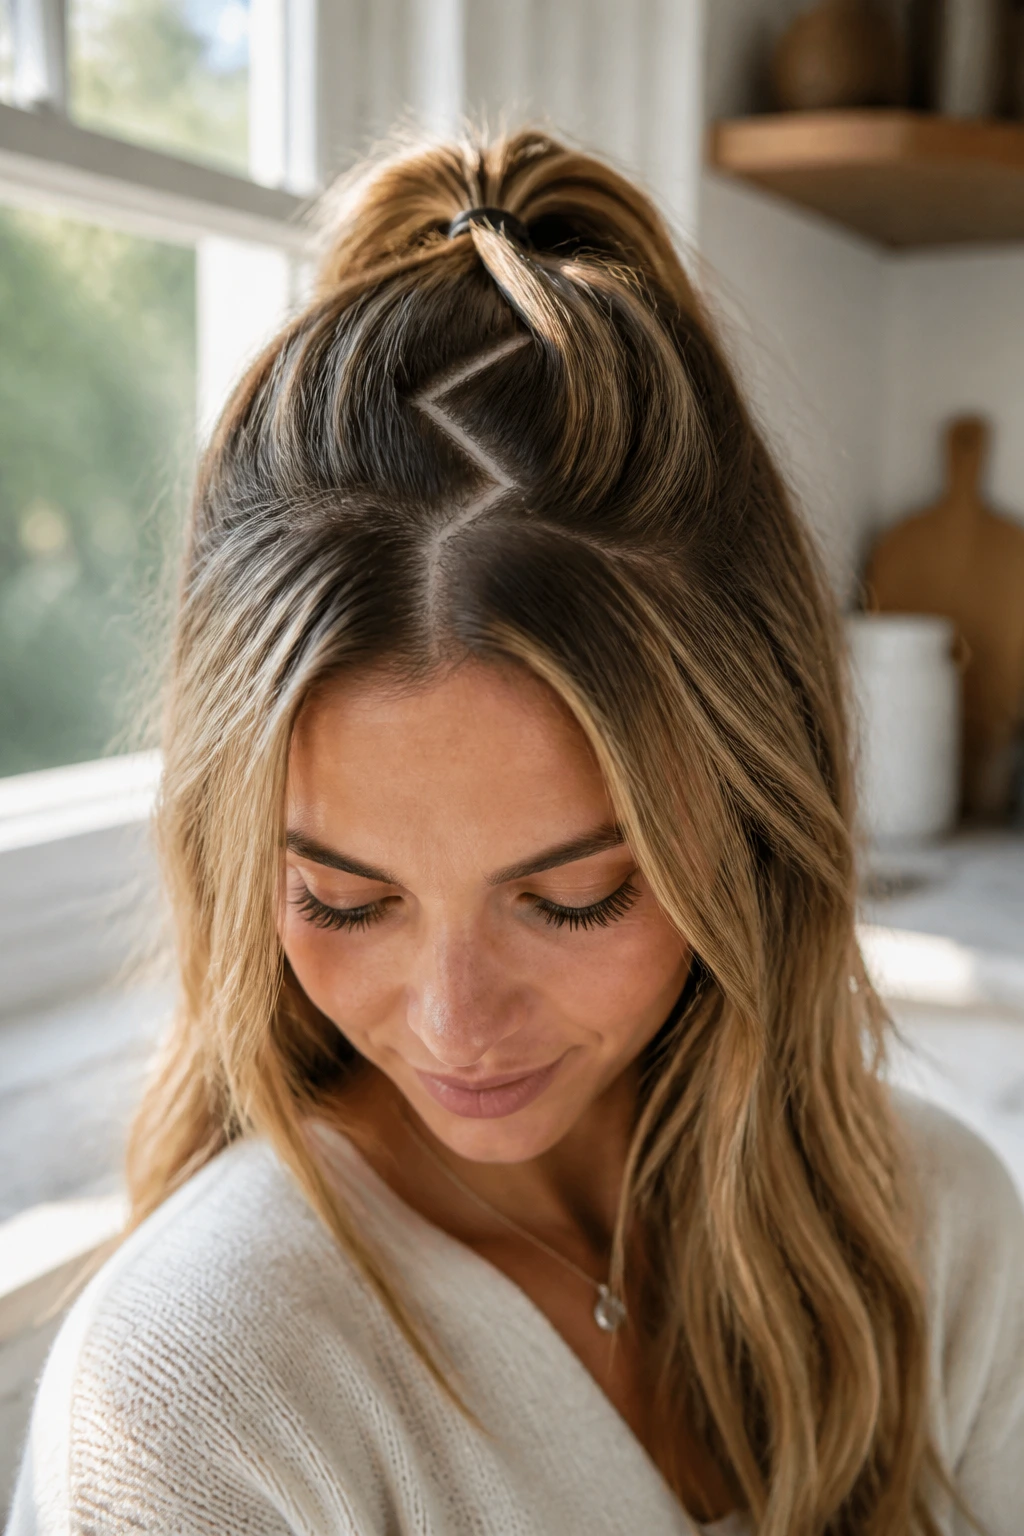
Traditional straight parts can sometimes look harsh or show off uneven root growth. A zig-zag part softens the front of your face and adds instant volume at the roots.
Instead of a straight line, use the tail of a comb to draw a quick zig-zag pattern down the center of your scalp before pulling the top section back.
This style is best for fine hair that tends to look flat or sparse along the part line. Keep the half-pony loose and low to complement the soft, organic feel of the zig-zag part.
25. The Criss-Cross Elastic Band Half-Up
This is a highly modern, graphic style that uses tiny elastics to create a geometric pattern. It looks incredibly complex but is built on a series of simple connections.
Step-by-Step Geometric Pattern
Create two small ponytails at your front hairline. Cross the tails of these ponytails over each other, combine them with hair from the sides, and secure them into a second set of ponytails further back.
- Use tiny, clear polyurethane elastics.
- Ensure the parts are relatively clean for a graphic look.
- Works best on straight or blown-out hair.
Use a drop of hair oil on your fingertips to smooth out any flyaways along the crossing lines.
Essential Tools for Quick Hairstyling
You do not need a massive drawer filled with hot tools and complicated gadgets to get these looks. In fact, relying on too many tools only slows you down when you are trying to get out the door. A minimalist approach is faster and better for your hair.
Keep a small basket on your bathroom counter with these key items:
- U-shaped hairpins: These are different from standard bobby pins. They are wider and let you tuck buns and twists in place without flattening them.
- Polyurethane clear elastics: These tiny bands do not show in the hair and hold small braids tightly without slipping.
- A natural-bristle teasing brush: This is not for building massive height, but for smoothing down flyaways and creating a clean line when you section your hair.
- Dry texture spray: Unlike hairspray, which can feel sticky and stiff, texture spray adds grit to slippery hair so your braids and twists do not slide out.
If you have these four tools within arm’s reach, you can build any of the twenty-five styles listed above in under three minutes.
How to Prep Your Hair the Night Before
The real secret to an effortless morning actually starts the night before. If you sleep on a rough cotton pillowcase with your hair loose, you will wake up with a nest of tangles and frizz that takes ten minutes just to brush out.
Try these simple evening habits to save time:
- Sleep on a silk or satin pillowcase. The smooth surface reduces friction, which prevents frizz and keeps your blowout or natural waves intact overnight.
- Use the “pineapple” method for curls. Gather your curls loosely at the very top of your head with a silk scrunchie. This keeps you from sleeping flat on your curls, so they retain their bounce in the morning.
- Apply dry shampoo before bed. Instead of spraying it on in the morning and running out the door with white residue, apply it to your roots before you sleep. Your natural movement during the night will rub the powder in, absorbing oil as it forms. You will wake up with clean volume and no chalky spots.
Taking sixty seconds to prep before your head hits the pillow makes a massive difference in how your hair behaves when the alarm goes off.
Quick Mornings, Better Hair
Getting ready under pressure does not mean you have to settle for a boring, practical ponytail every day. By using these half up hair techniques, you can look styled and professional with minimal effort.
Try starting with the twisted halo if you have natural waves, or the high pony if you want a sleek, modern look. The beauty of these styles is that they do not require perfection. A loose strand here or an uneven twist there only adds to the soft, natural appeal of the style.
Keep your tools simple, work with your hair’s natural state, and you might find yourself with a few extra minutes to actually sit down and enjoy your morning coffee.
