Braided styles for curly hair are more than just a functional way to keep stray strands out of your face; they are a structural miracle. When you have a head of natural curls, coils, or waves, the natural volume and texture of your hair act like a built-in anchor for pins and bands. While straight hair often slips out of elastics or requires heavy-duty products to hold a style, curly hair wants to stay exactly where you put it. That’s the secret, really—your texture is the ultimate styling assistant. If you have been looking for a way to show off your curl pattern while maintaining a clean, pulled-back aesthetic, the double braid is your new best friend.
This isn’t just about two standard three-strand plaits dangling by your ears. We are talking about everything from high-tension cornrows to loose, romantic Dutch braids that emphasize the bounce of your curls. Because curly hair has so much internal friction, you often find that you can skip the texturizing sprays that people with fine, straight hair rely on. Instead, you need a solid base of moisture and a steady hand. Whether you are prepping for a long day of errands or need a protective style that will last through a humid afternoon, these double-braided configurations offer durability and style in equal measure.
1. Classic Double Dutch Braids
The Dutch braid, often called an “inverted” or “inside-out” braid, is the gold standard for curly hair. Because the hair is crossed under rather than over, the braid sits on top of your scalp like a thick, coiled rope. This technique highlights the individual definition of each curl, especially if you have high-contrast highlights or multi-dimensional color.
Why Dutch Braids Excel with Texture
The key to a great Dutch braid on curly hair is the tension. You want the braid to look uniform, but you do not want to pull so tightly that you flatten your edges or stress your roots. Start by parting your hair down the center from your forehead to the nape of your neck. Use a fine-tooth comb for a sharp line, or your fingers for a softer, more organic look. As you braid, pull new sections of hair into the mix with every downward cross. The result should look like two bold, raised ribbons of hair framing your face.
The Finishing Touch
Once you reach the nape of your neck and finish braiding to the ends, leave a few inches of hair loose. If your curls are tight, they will naturally puff up at the ends, creating a soft, pom-pom effect. Avoid the temptation to pull at the loops of the braid—known as “pancaking”—if your curls are prone to frizz. Keep the structure tight, and let the ends do the talking.
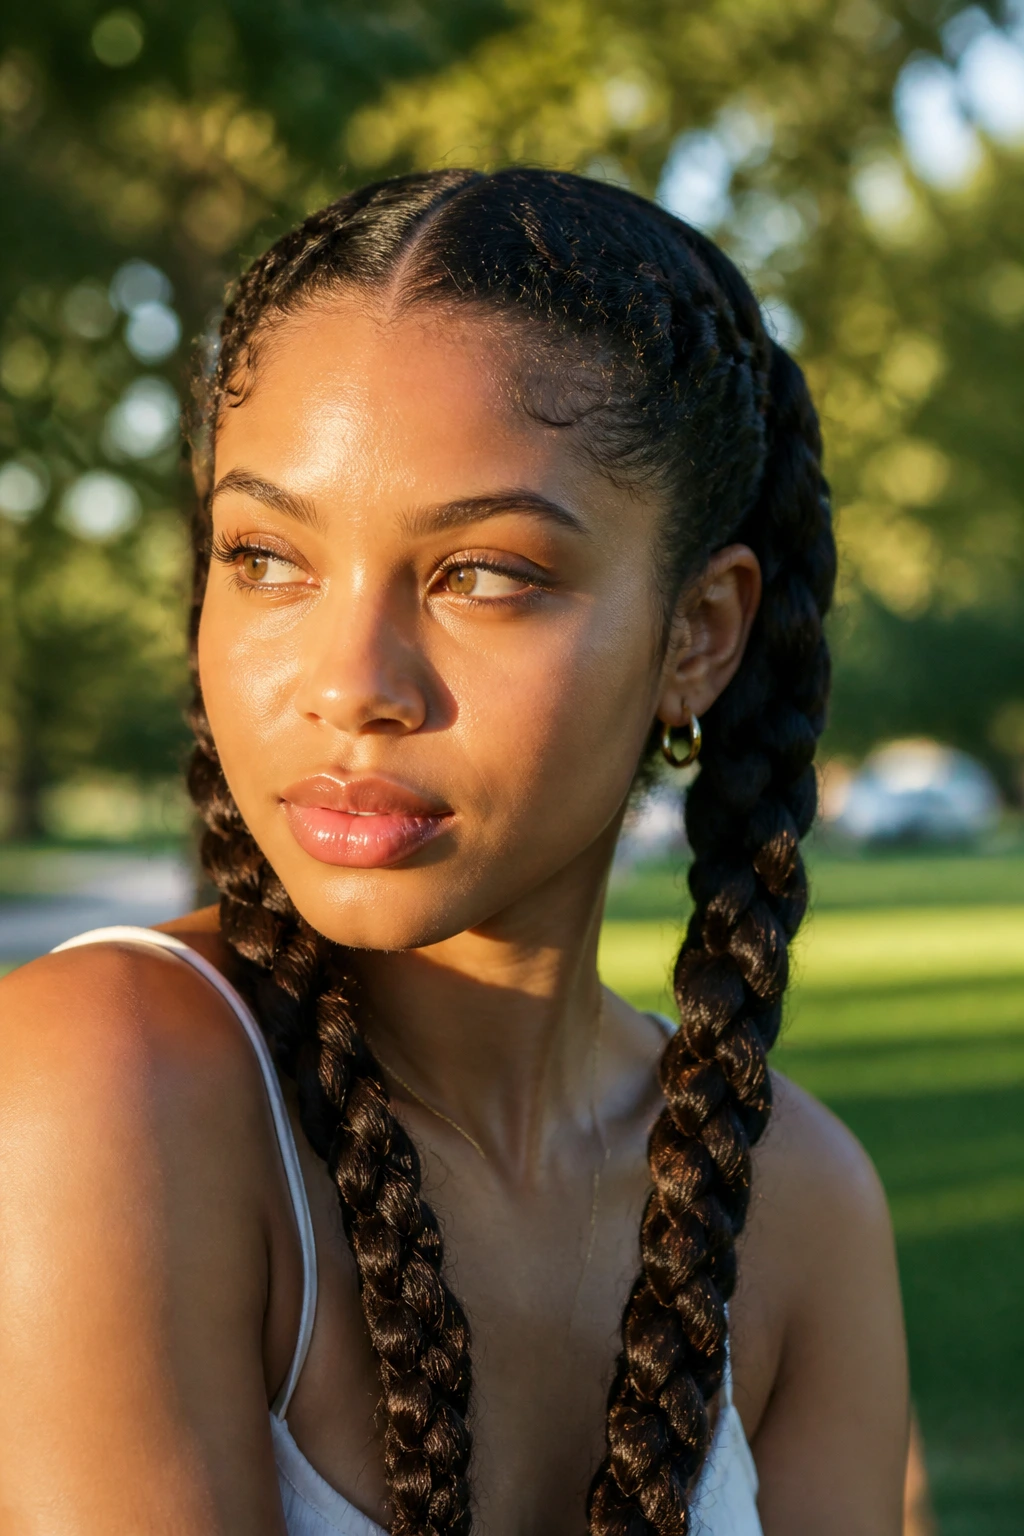
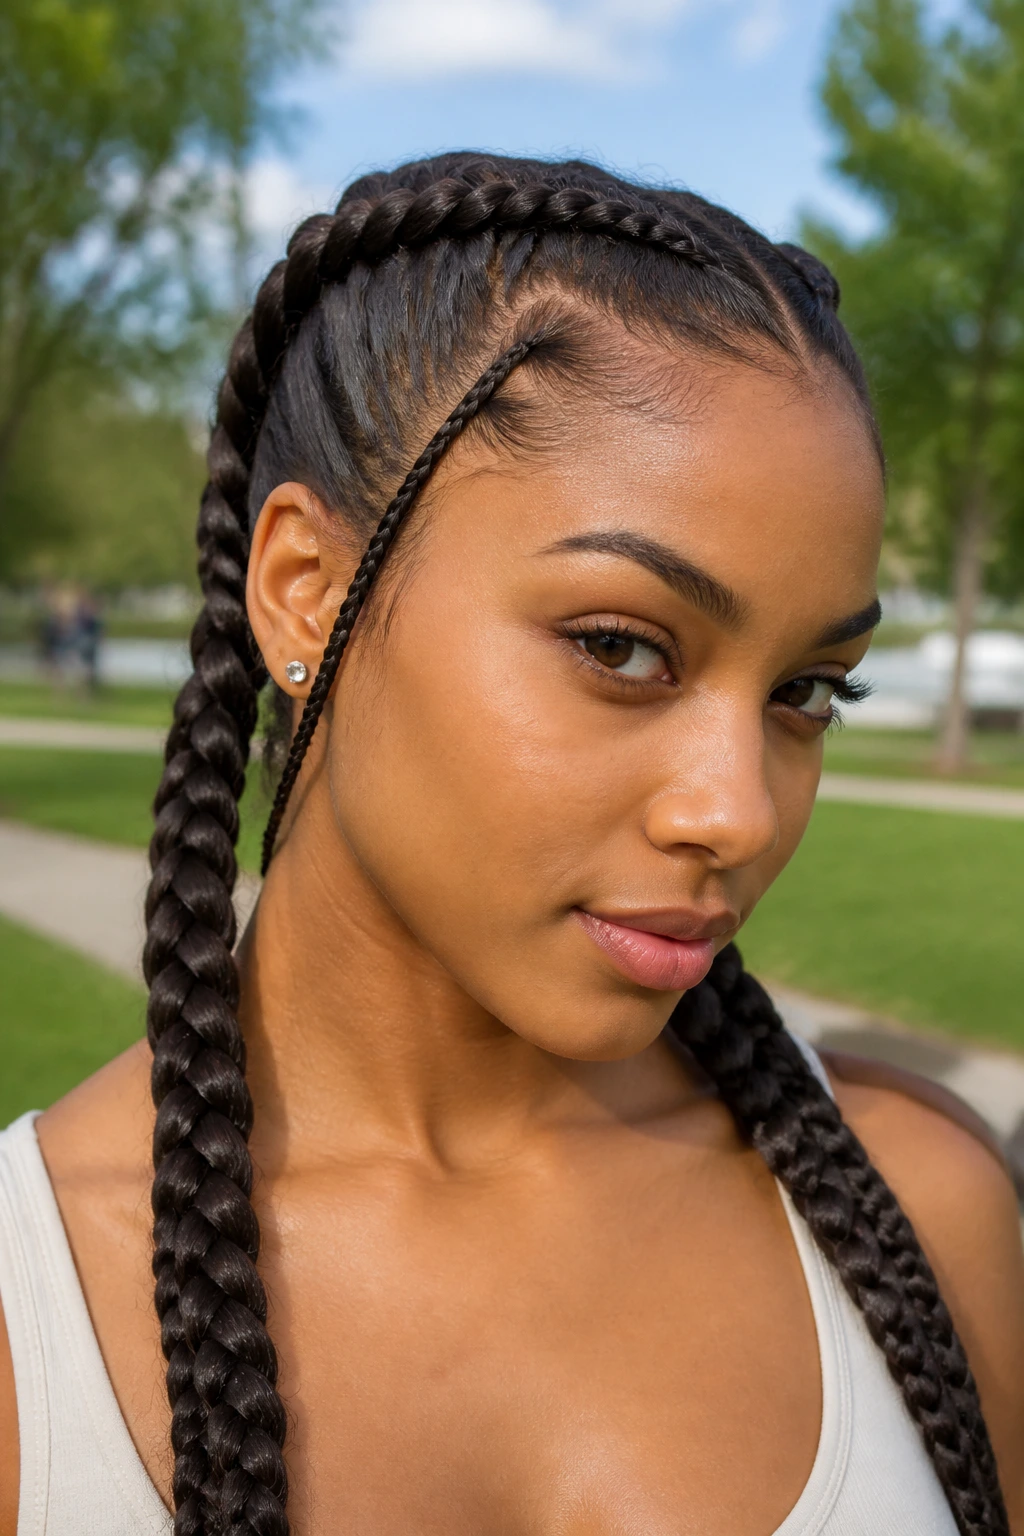
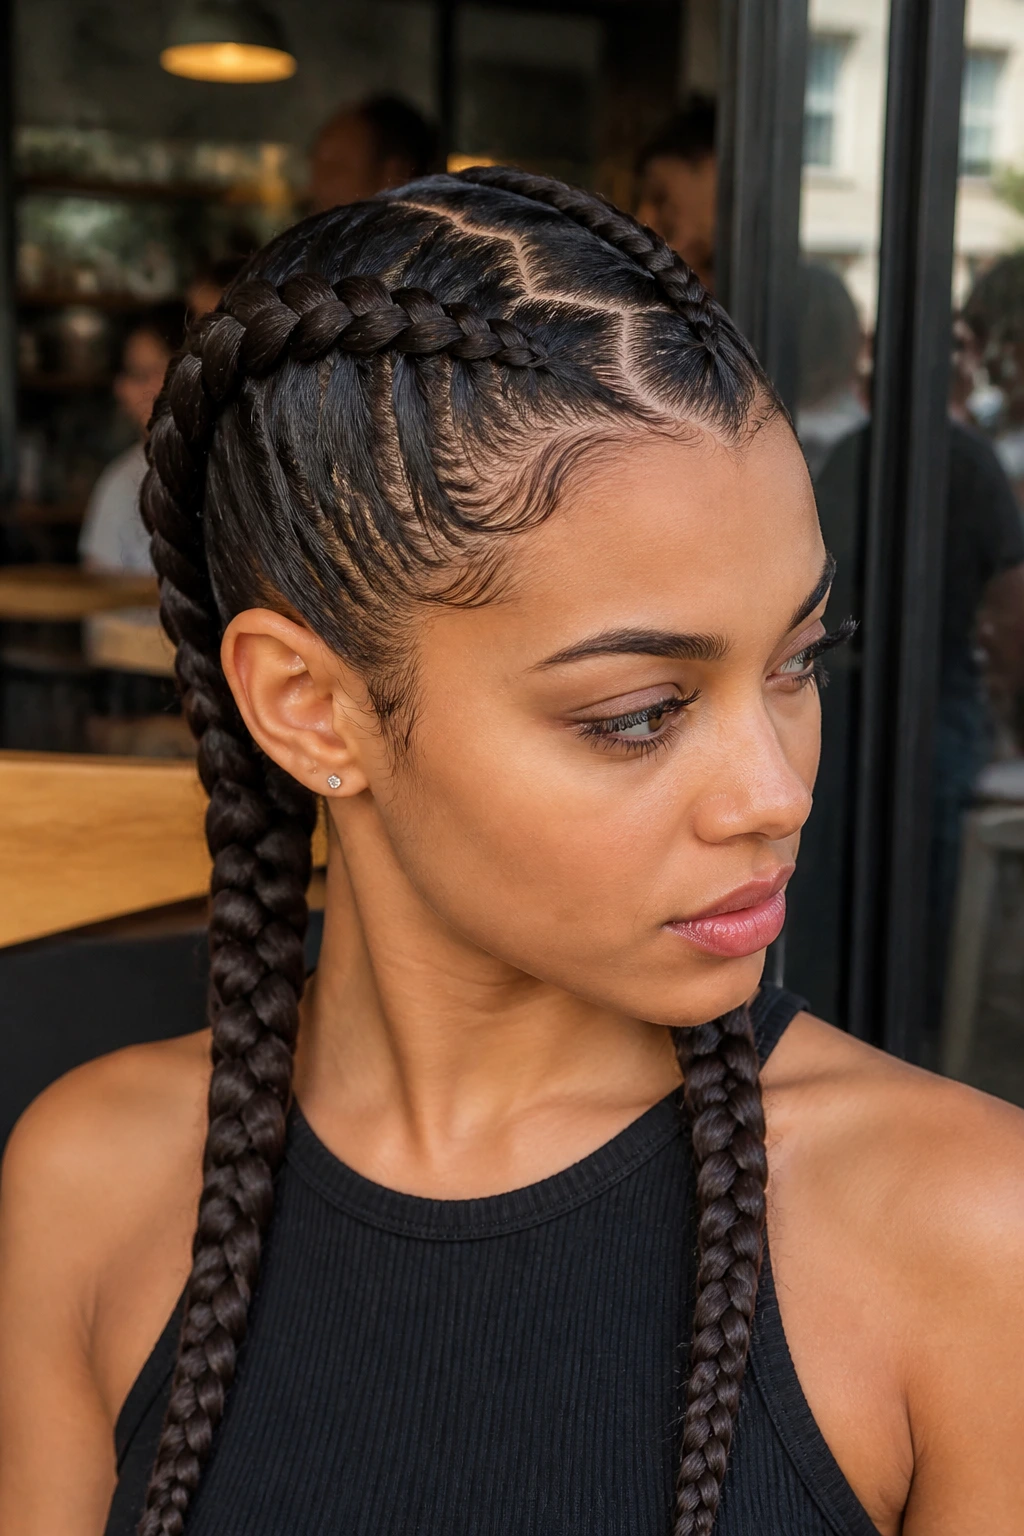
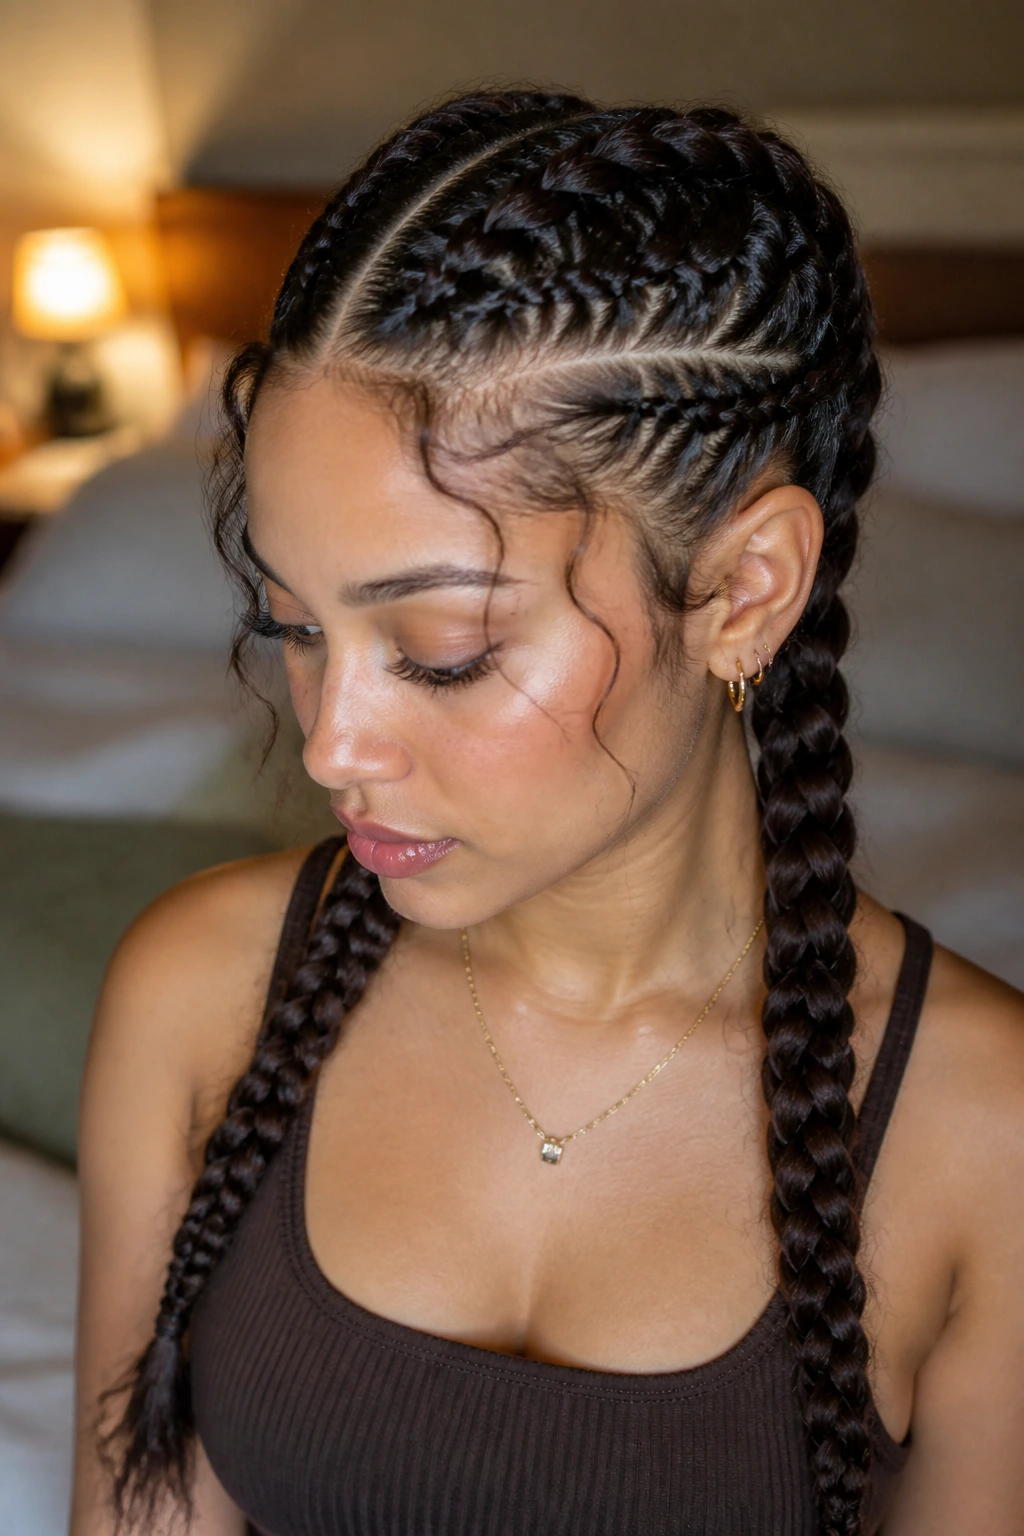
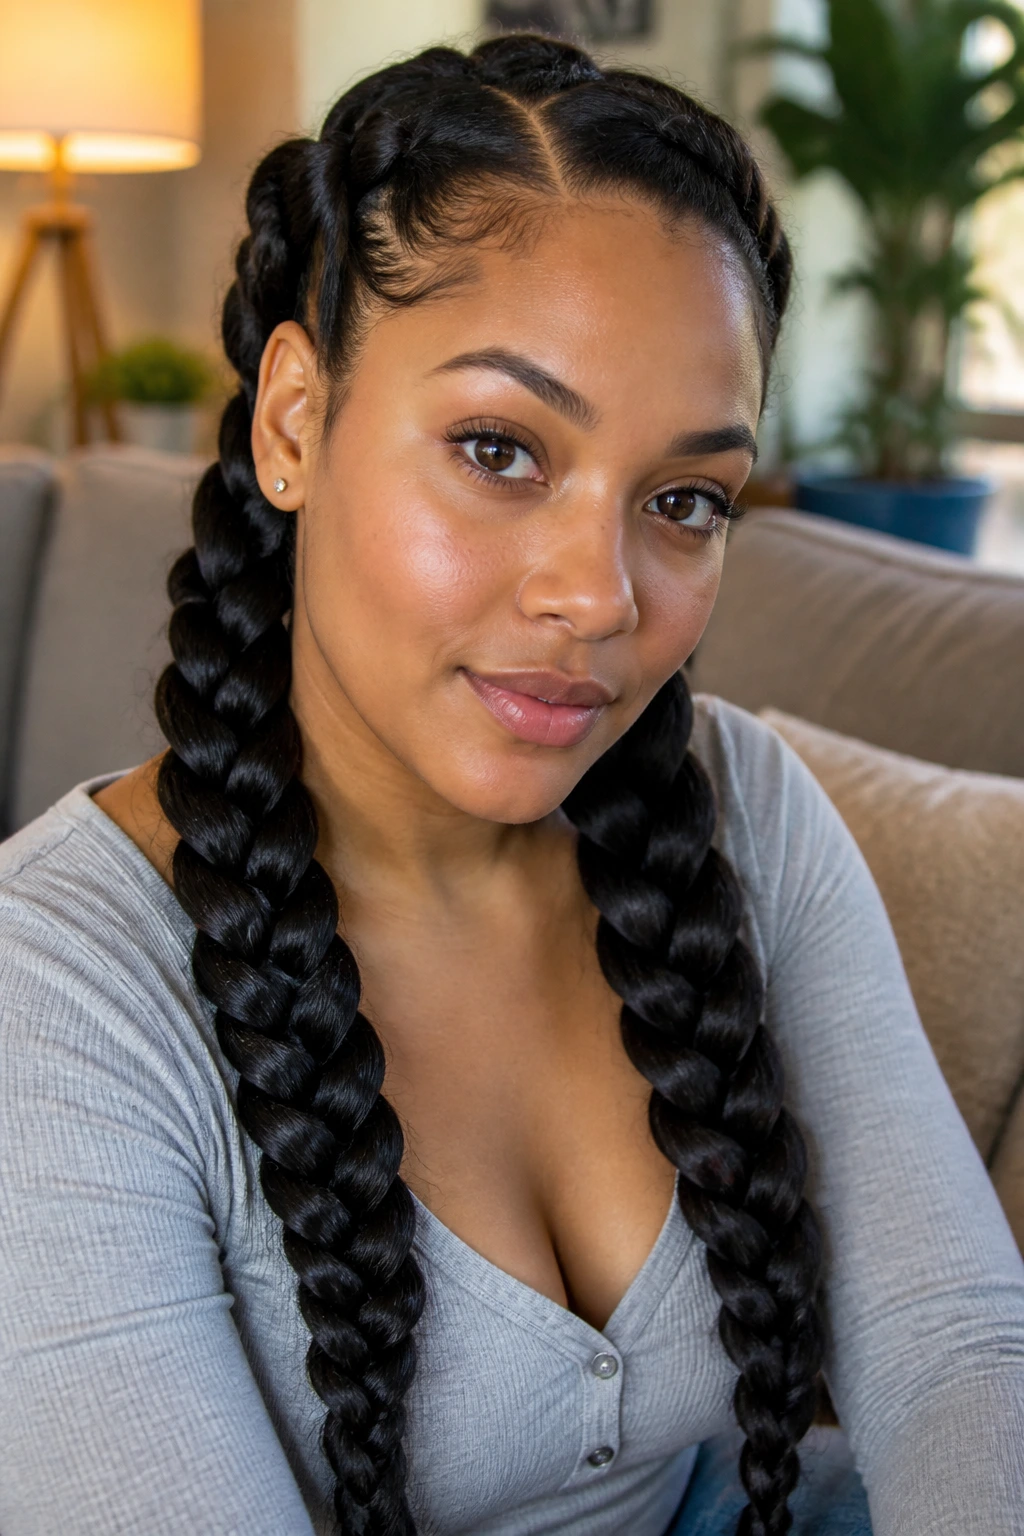
2. Sleek Cornrow-Inspired Pigtails

If you want a style that feels sporty and stays put for days, go for a tight, scalp-hugging cornrow base that transitions into two loose, braided pigtails. This look works best when you have a bit of edge control or a light-hold gel to smooth the hairline before you begin braiding.
Mastering the Scalp Tension
The trick to getting that professional, tight look is to work in small, consistent sections. If your hair is thick, you might need to subdivide each side into two or three mini-sections before bringing them together into a single braid per side. Use a rat-tail comb to ensure each row is clean and neat. This creates a visual “map” of your scalp, which provides a striking contrast to the wilder, free-flowing curls at the ends of the braids.
Products for the Perfect Hold
- A water-based leave-in conditioner to provide moisture before you start.
- A light-hold styling gel applied specifically to the roots for the parts.
- A satin scrunchie at the base of the pigtail to avoid snagging or breakage.
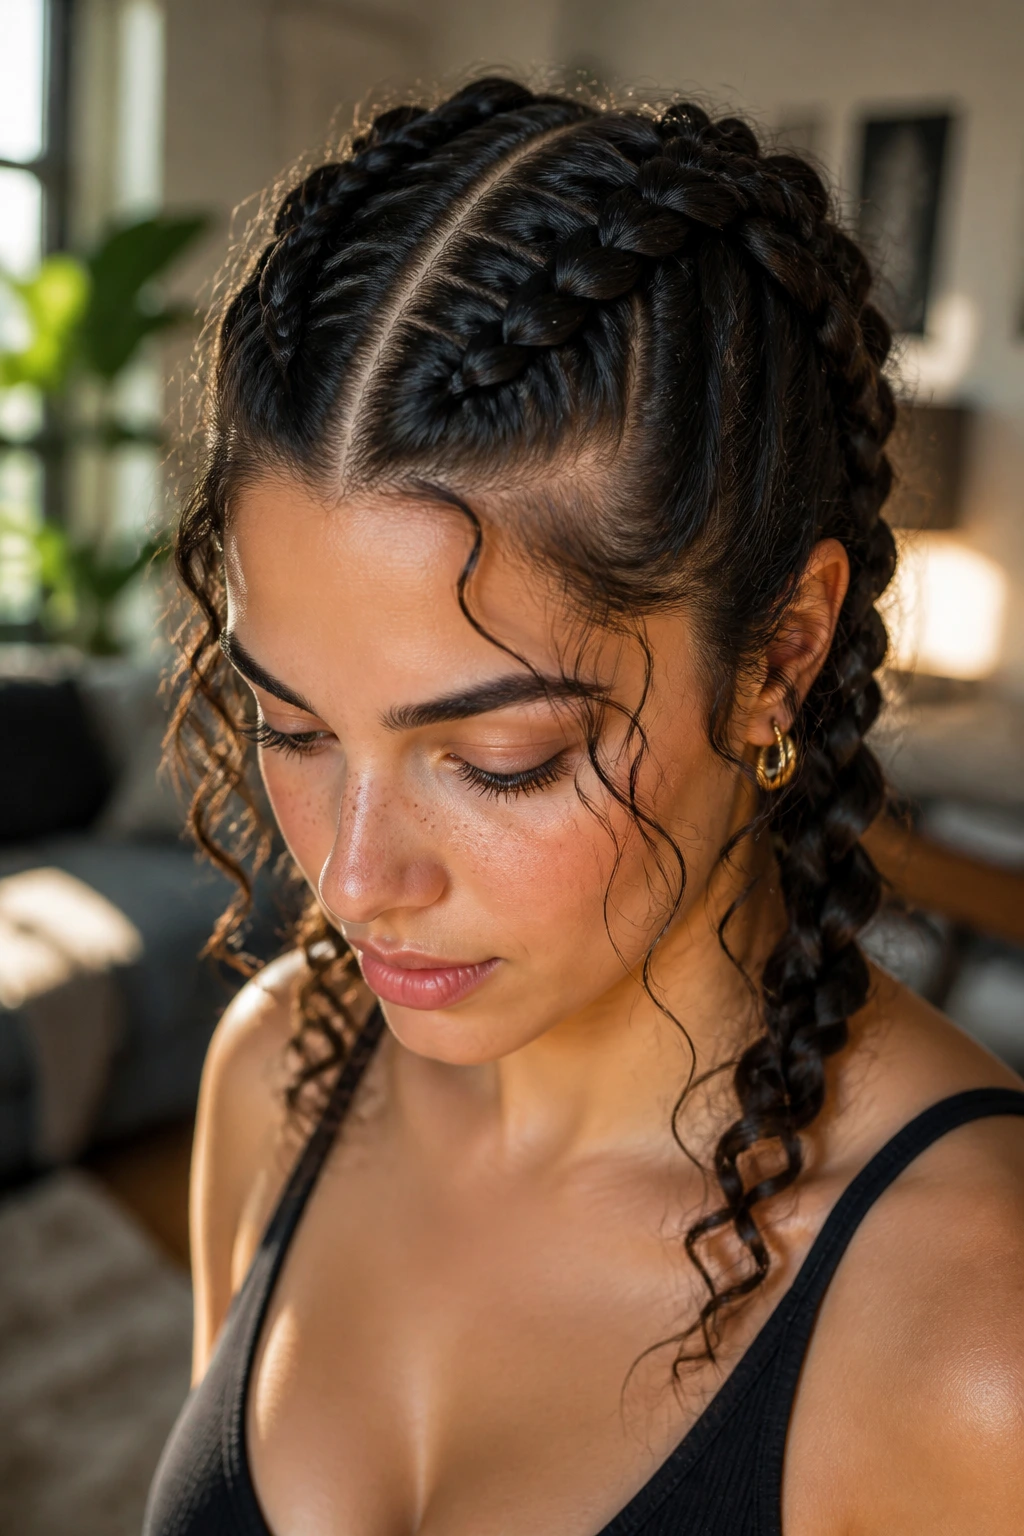
3. The Crown-Wrapped Double Braid
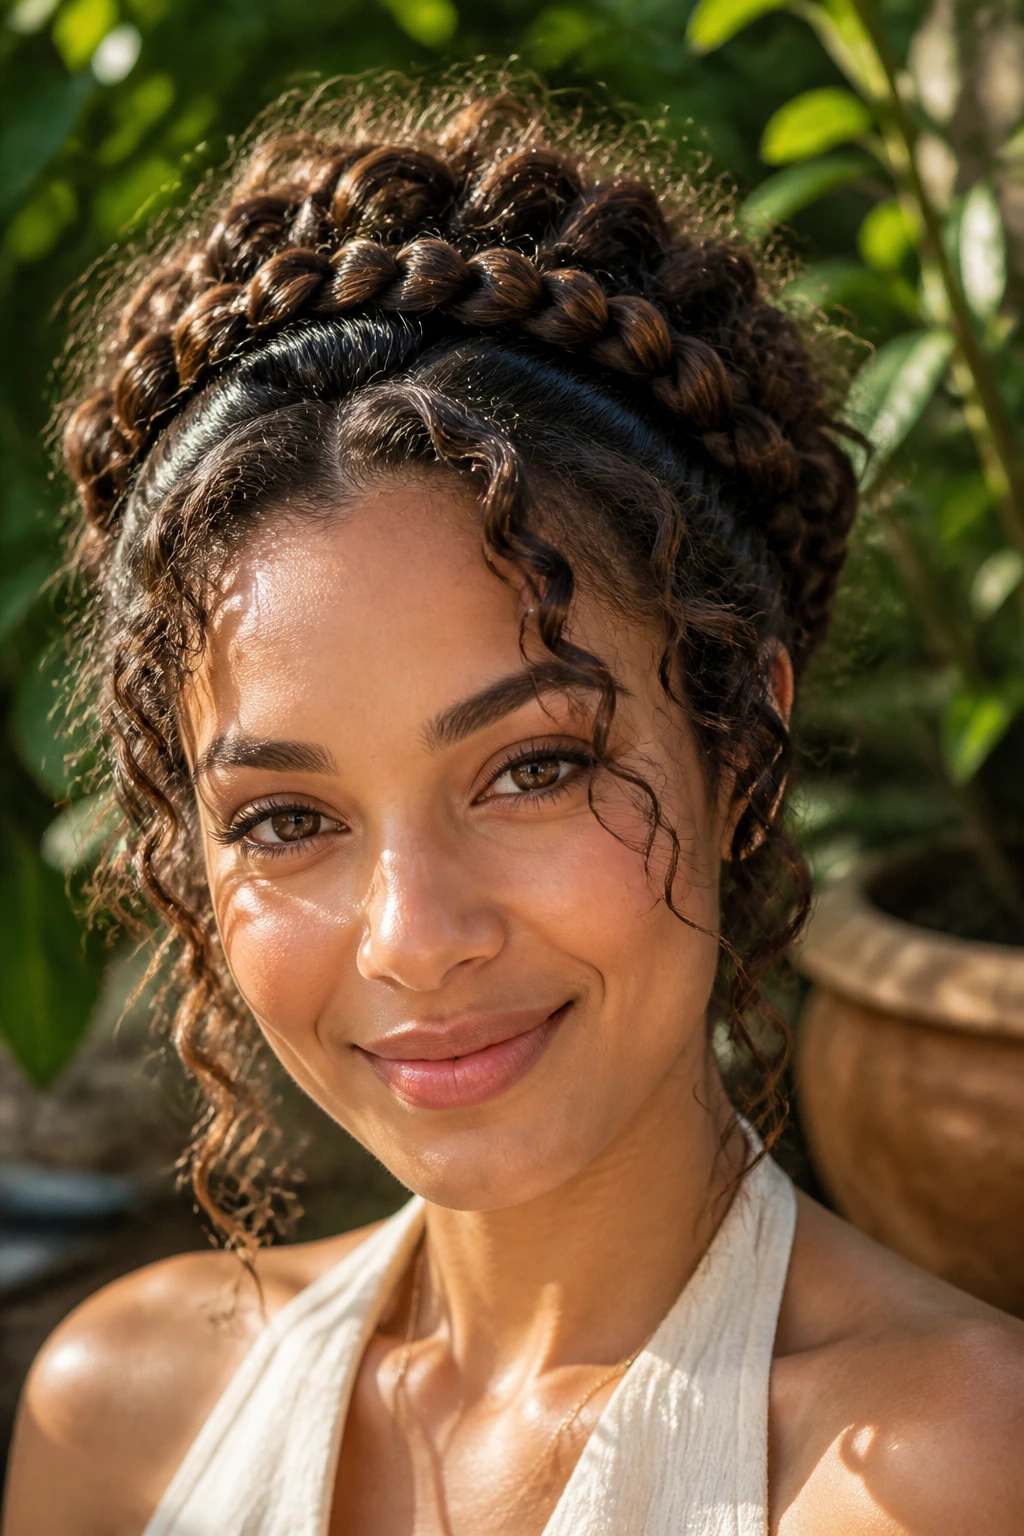
This style is essentially the “fancy” cousin of the standard double braid. Instead of letting your two braids hang down your back, you pin them across the top or the back of your head to create a crown-like halo. It is a brilliant way to keep your hair off your neck during warmer months while looking like you spent hours on a salon-quality updo.
How to Create the Halo
Start with two standard French braids on either side of your head, starting from the hairline and moving toward the ears. Once you reach the nape of the neck, continue braiding the remaining hair into simple three-strand plaits. Cross one braid over the back of your head and tuck the end behind the ear of the opposite side. Secure it with two or three bobby pins. Repeat with the second braid, overlapping it slightly for a seamless, continuous crown.
Why It Works for Curly Textures
Because your curls have volume, the “halo” will look naturally fuller and more substantial than it would on straight hair. You do not need to tease your hair to get that bohemian, romantic look—your natural curl pattern provides all the fullness you need. If a few face-framing pieces fall out, let them stay. It only adds to the charm.
4. Double Fishtail Braids
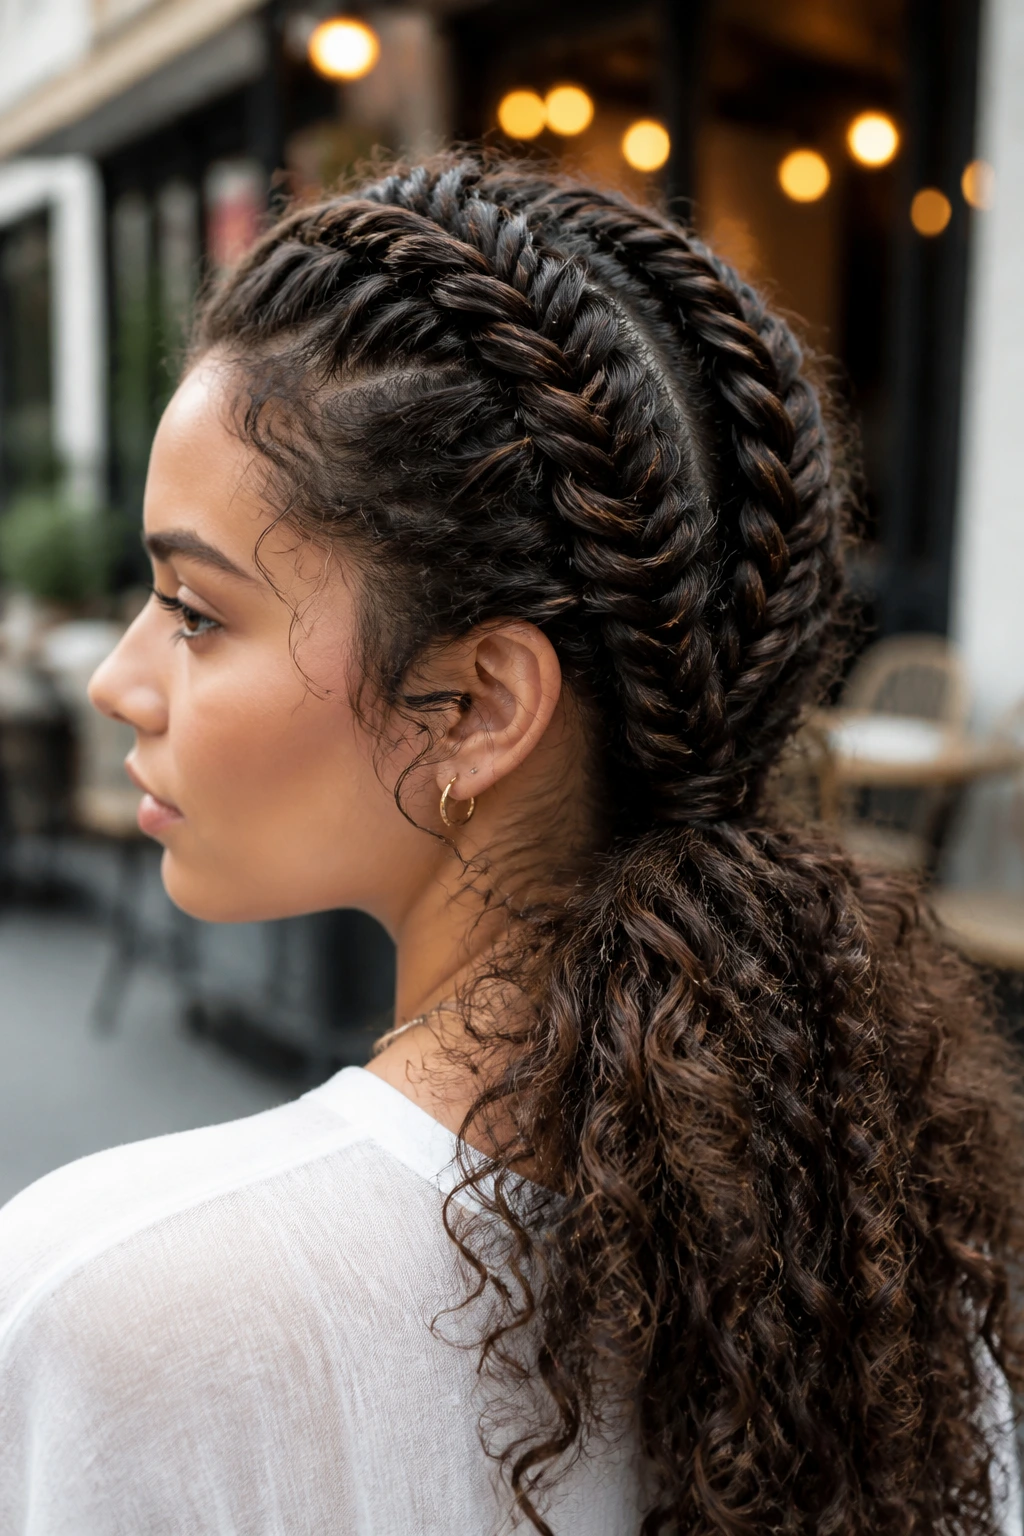
Fishtail braids look incredibly intricate, but for curly hair, they are actually easier than they look. Because you are only working with two sections of hair at a time, you are less likely to tangle your curls in a mess of fingers and loops.
The Technique
Start with two high or low pigtails. Divide each pigtail into two halves. Take a tiny strand from the outside of the left half and cross it over to join the right half. Then, take a tiny strand from the outside of the right half and cross it over to join the left half. Keep doing this all the way down.
Managing Curls During the Process
If your hair is particularly coily, you might find the fishtail creates a lot of knotting. To prevent this, keep a small spray bottle of water and detangler nearby. Mist your hair as you go, and use your fingers to smooth out any snags before you pull the section across. The resulting braid will be tighter and flatter than a traditional braid, which is a great way to showcase the intricate pattern of the weave.
5. Bubble-Braid Hybrid Pigtails
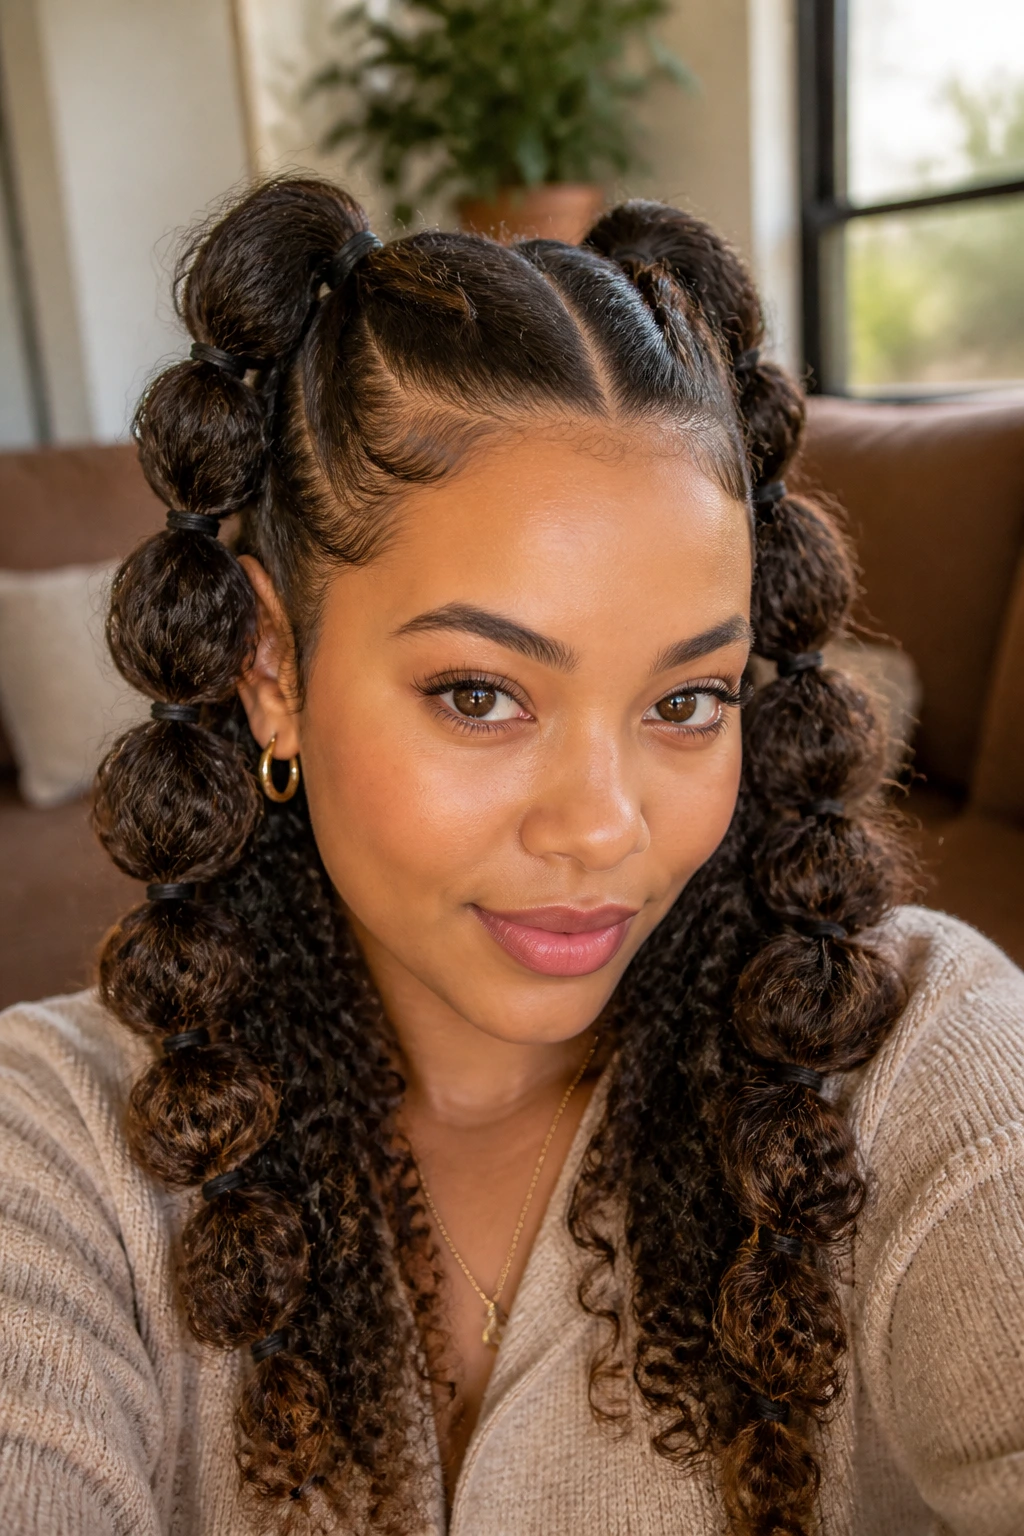
If you are struggling with the dexterity required for traditional braiding, the bubble braid is your solution. It provides the appearance of a complex double-braided style without requiring any actual plaiting.
The Construction
Gather your hair into two high pigtails. Secure them at the base with a clear elastic. Move down the length of the pigtail about two inches and secure with another elastic. Now, gently pull the hair between the two elastics to puff it out, creating a “bubble.” Repeat this all the way down the length of the tail.
Why This is Ideal for Curly Hair
The natural spring of curly hair is exactly what makes these bubbles look perfect. On straight hair, you have to tease the hair inside the bubble to get any volume. On curly hair, the natural expansion of your coils fills the space instantly. It is a low-tension style that puts almost zero stress on your roots, making it perfect for days when you need to give your scalp a break from tight, pulling styles.
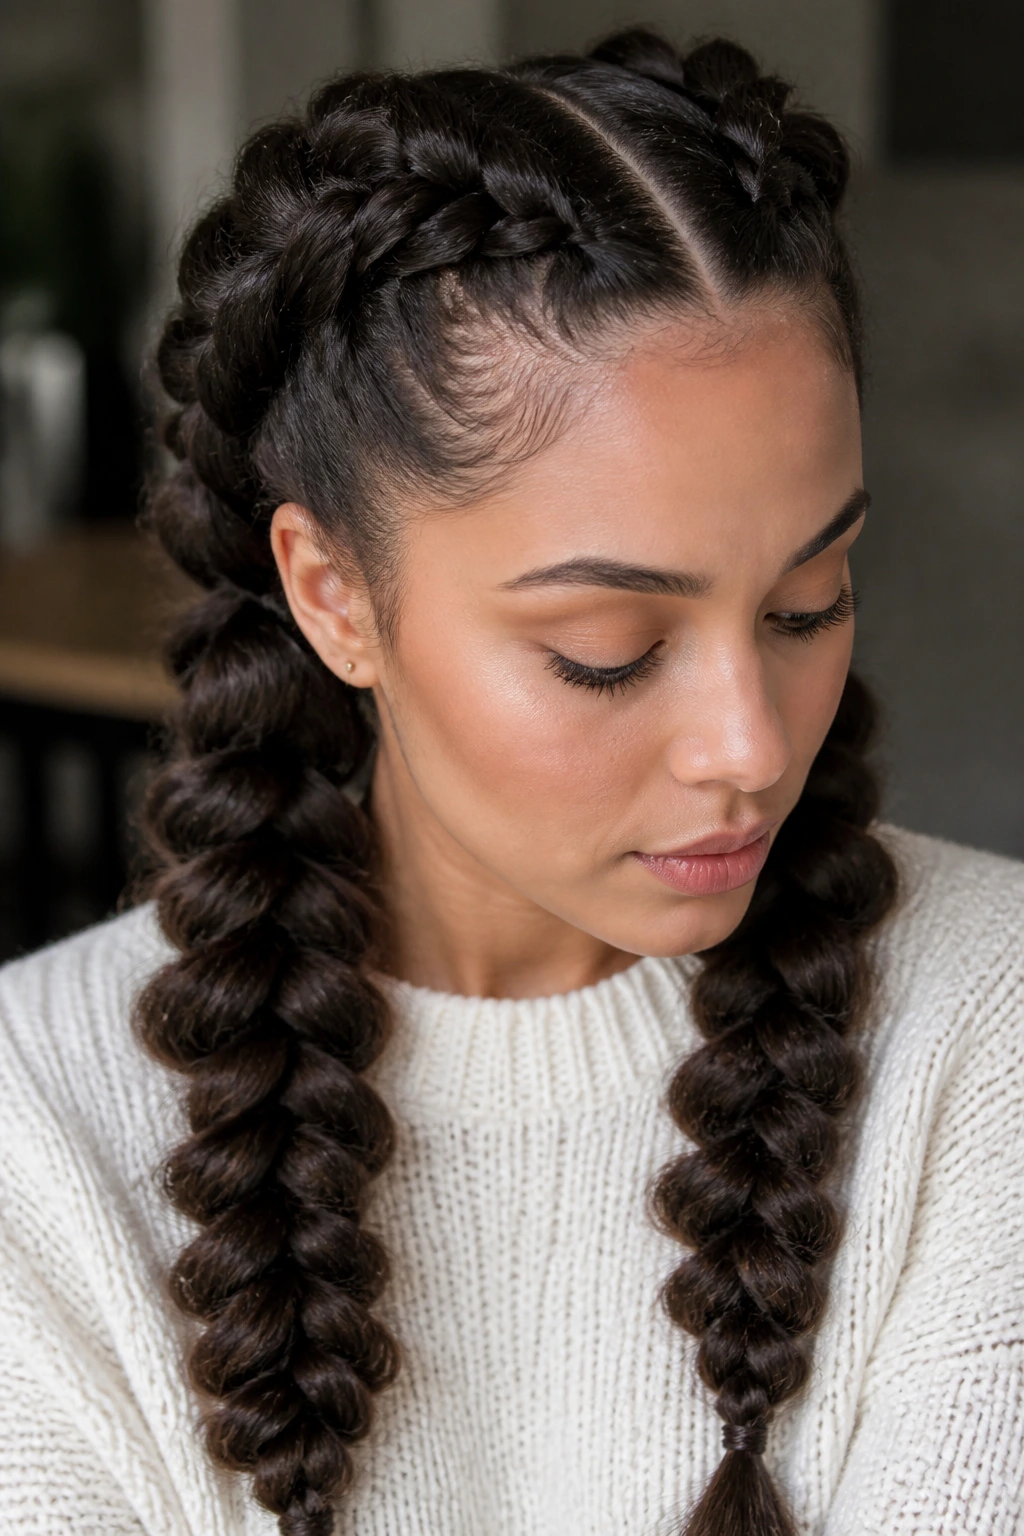
6. Twisted Rope Braids
Rope braids aren’t technically “braids” in the traditional sense, but they fall into the same category of woven styling. They involve twisting two sections of hair around each other rather than weaving three.
Achieving the Tight Twist
To get the rope look, divide your hair into two sections. Twist each section individually in the same direction (let’s say, clockwise). Then, wrap the two twisted sections around each other in the opposite direction (counter-clockwise). This counter-tension keeps the rope from unraveling.
Longevity and Texture
This style is exceptionally durable. If you tie off the ends with a secure elastic, a double-rope braid can stay looking fresh for several days. It’s an excellent way to stretch out your curls, and when you finally take the twists down, you’ll be left with a gorgeous, crimped texture that lasts until your next wash day.
7. Half-Up Double Braids
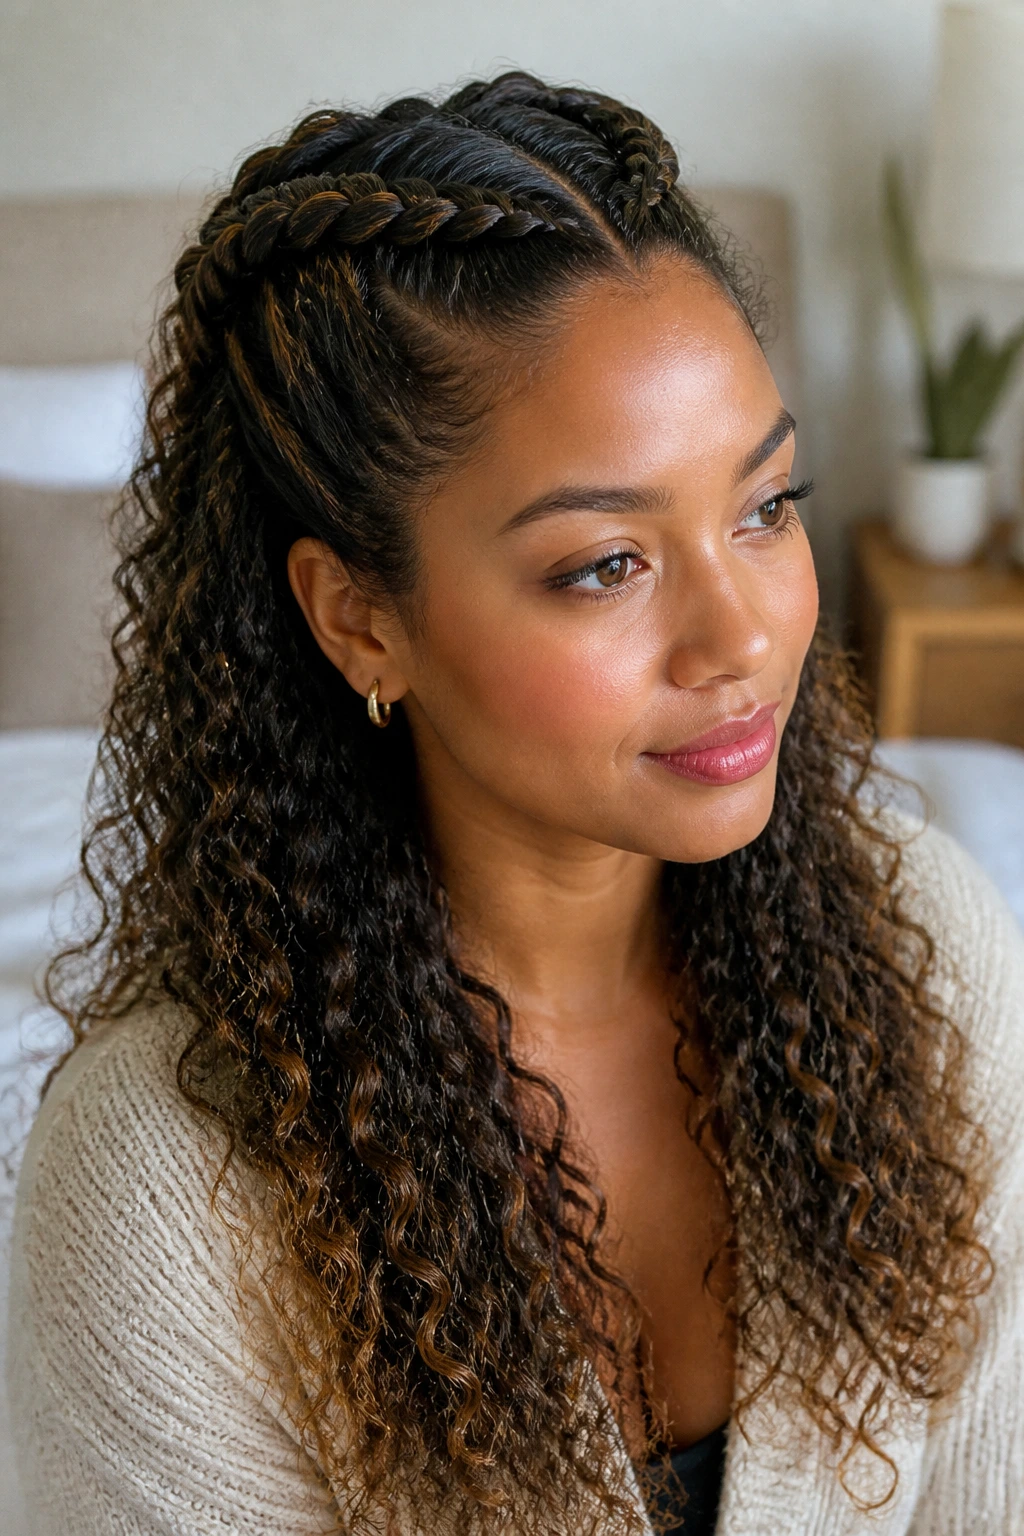
Sometimes you don’t want all your hair pulled away. The half-up, half-down look allows you to feature your beautiful curls while still utilizing the neat, structured aesthetic of double braids.
The Sectioning Strategy
Take the top section of your hair—from the temples to the crown—and part it down the center. Create a braid on each side of the top section, stopping right at the back of the head. Tie them together or leave them as individual braids that hang over your loose, curly length.
Why It’s a Go-To
It’s the best of both worlds. You get the polish of a braided style and the freedom of wearing your hair down. If your curls tend to get frizzy by midday, this style helps by corralling the most visible section of your hair, while the bottom section remains protected by the weight and moisture of your natural texture.
8. Accent Braids in Double Pigtails
This style adds a bit of flair to a standard look. You can incorporate small, tight accent braids into your larger double-braided style, or simply weave them into pigtails.
The Detail Work
Before you start your main pigtails, pick out a small quarter-inch section of hair near your part or temple. Braid this tiny section tightly. Once finished, incorporate this small, finished braid into the larger section of your main Dutch or French braid.
Visual Depth
The contrast between the tight, small braid and the larger, looser main braid adds a layer of sophistication. It shows attention to detail and makes an everyday hairstyle look intentional and crafted. This is a favorite look for festivals or events where you want your hair to look polished from every angle.
9. Messy Boho Double Braids
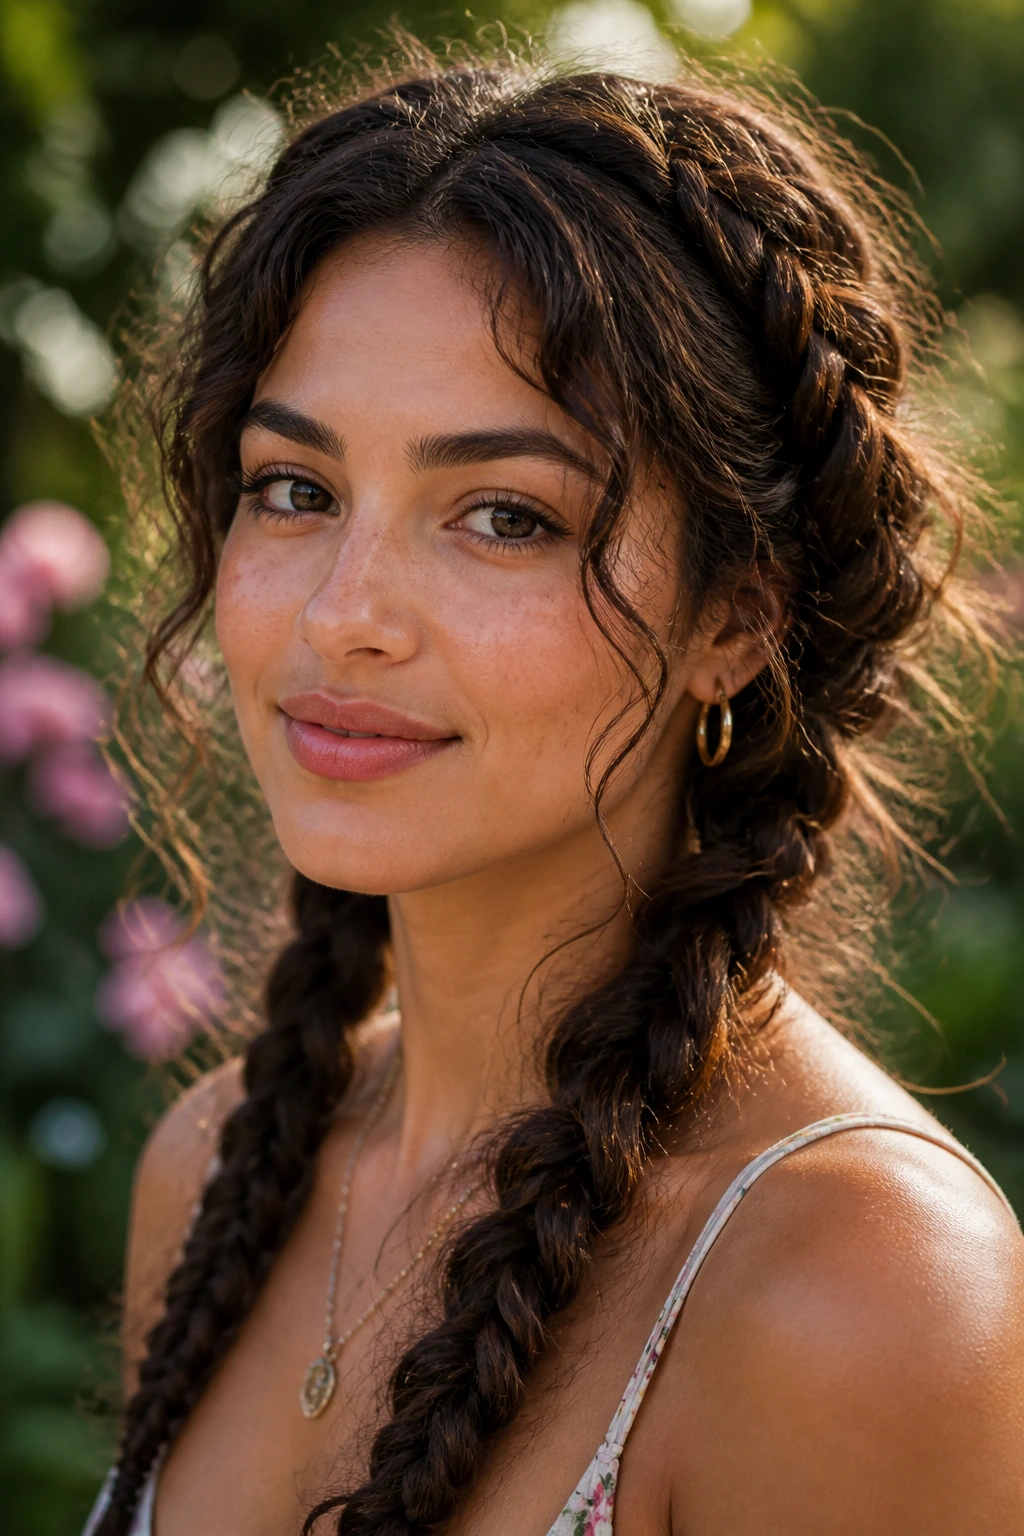
Not every braid needs to be a architectural marvel. Sometimes, you want that soft, effortless, “I woke up like this” vibe. This style relies on deliberate looseness to show off the softness of your curls.
Loosening the Weave
Start by braiding your hair into two loose Dutch braids. Do not pull them tight against your scalp. Once you have secured the ends, go back to the top of the braid and gently pull on the outer edges of each loop, working your way down. This is the “pancaking” technique.
Softening the Edges
Because you have curly hair, this process will create a lot of fuzz and volume. This is exactly what you want! The goal is to make the braids look wider, softer, and more romantic. If your hair is too clean, the braids might be too slippery; this style actually works best on “second-day hair” when the hair has a bit more grip and natural oil.
10. The Mohawk-Style Double Braid
If you want to feel a bit edgy, try this. Instead of a center part, create two deep side parts that lead toward a center “mohawk” section, or simply create two very high, tight Dutch braids that sit closer to the center of your head rather than the sides.
Why This Style Rocks
This creates a vertical visual line that draws the eye upward. It is extremely flattering for round or heart-shaped faces and gives a bold, intentional look. It’s a high-tension style, so be sure to use a bit of leave-in conditioner at the roots to keep your scalp comfortable.
Combining Textures
You can use a small amount of pomade or edge control to make the braided sections sleek and shiny, allowing the volume of your natural curls in the “mohawk” area to take center stage. The juxtaposition between smooth, tight braids and voluminous, wild curls is striking.
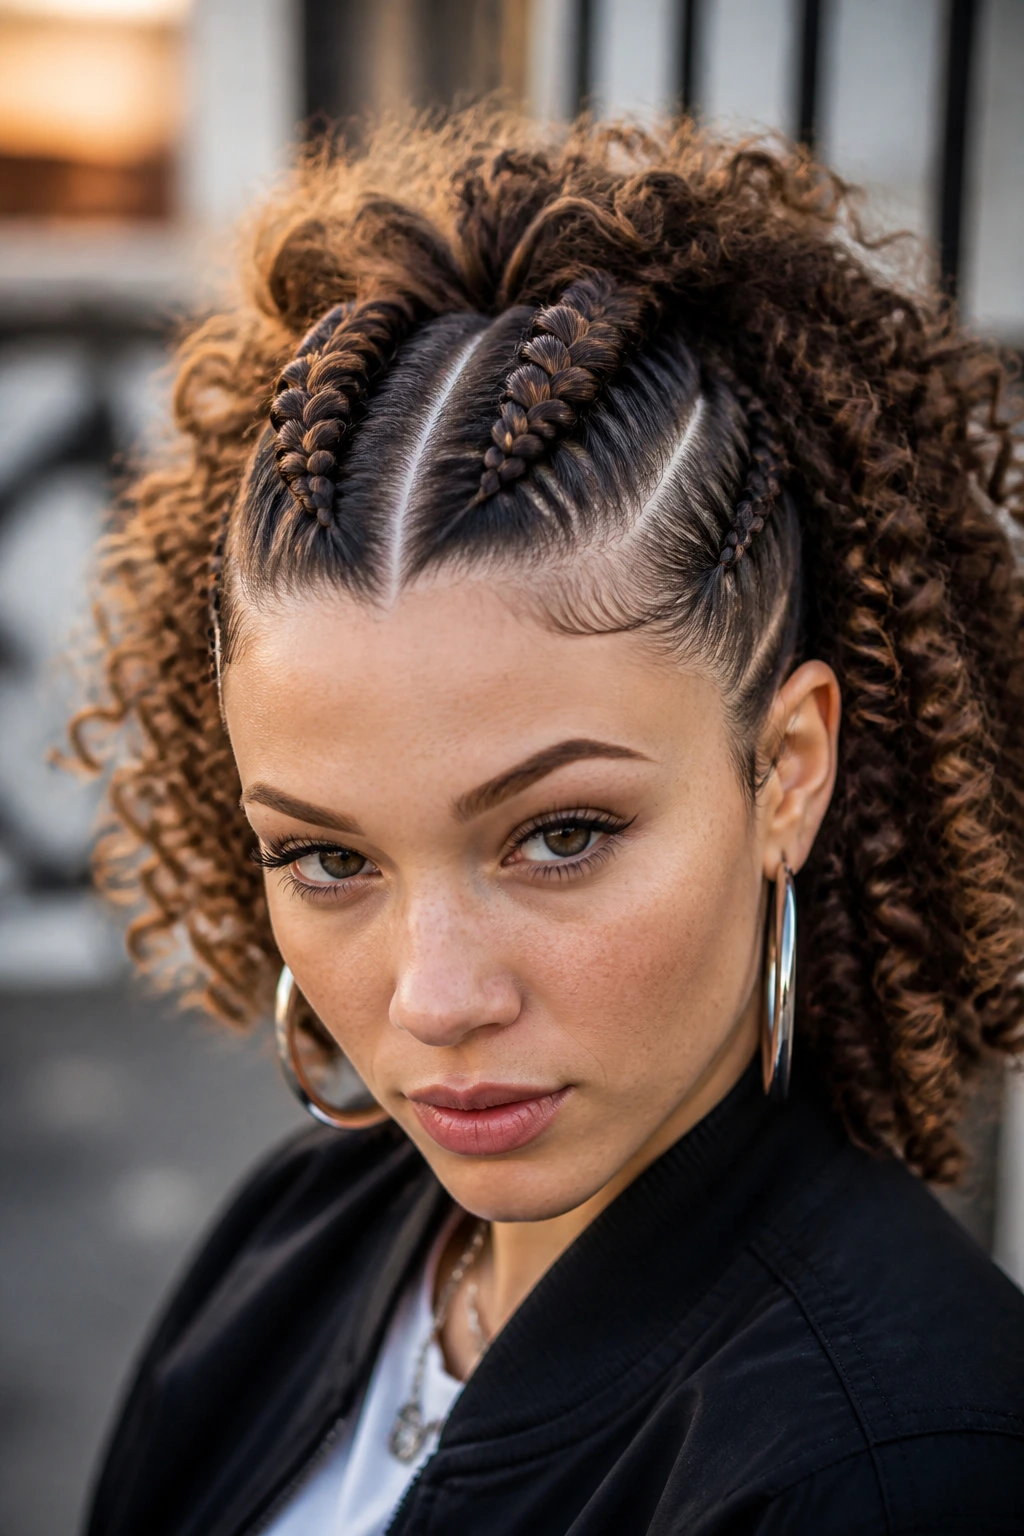
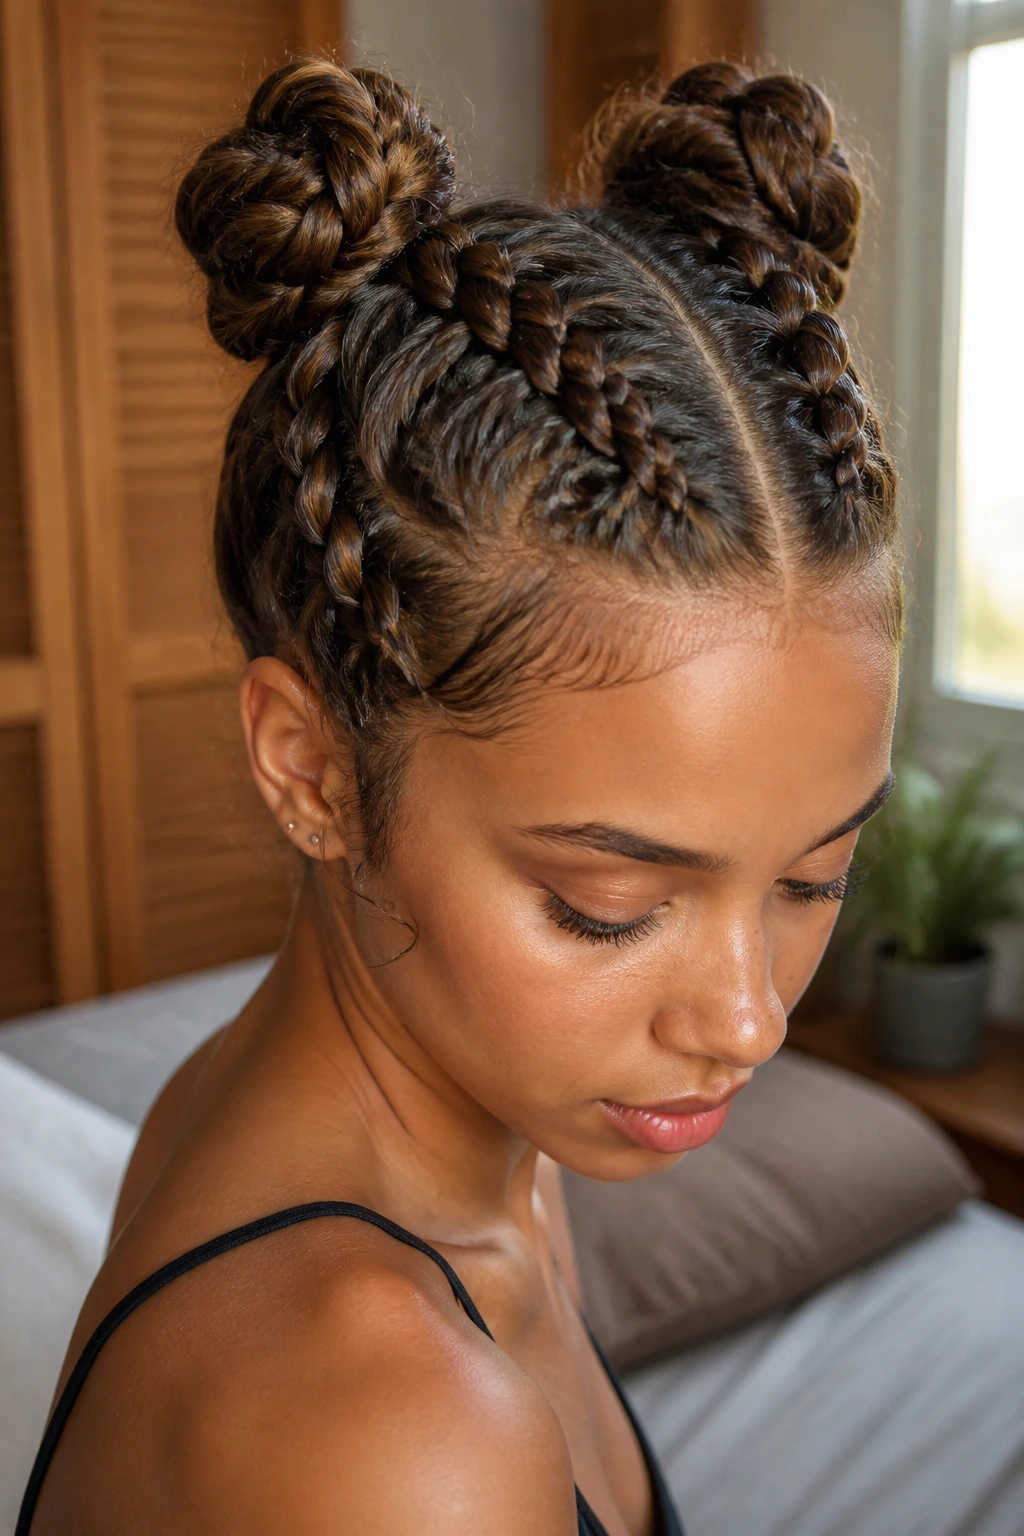
11. Double Braided Space Buns
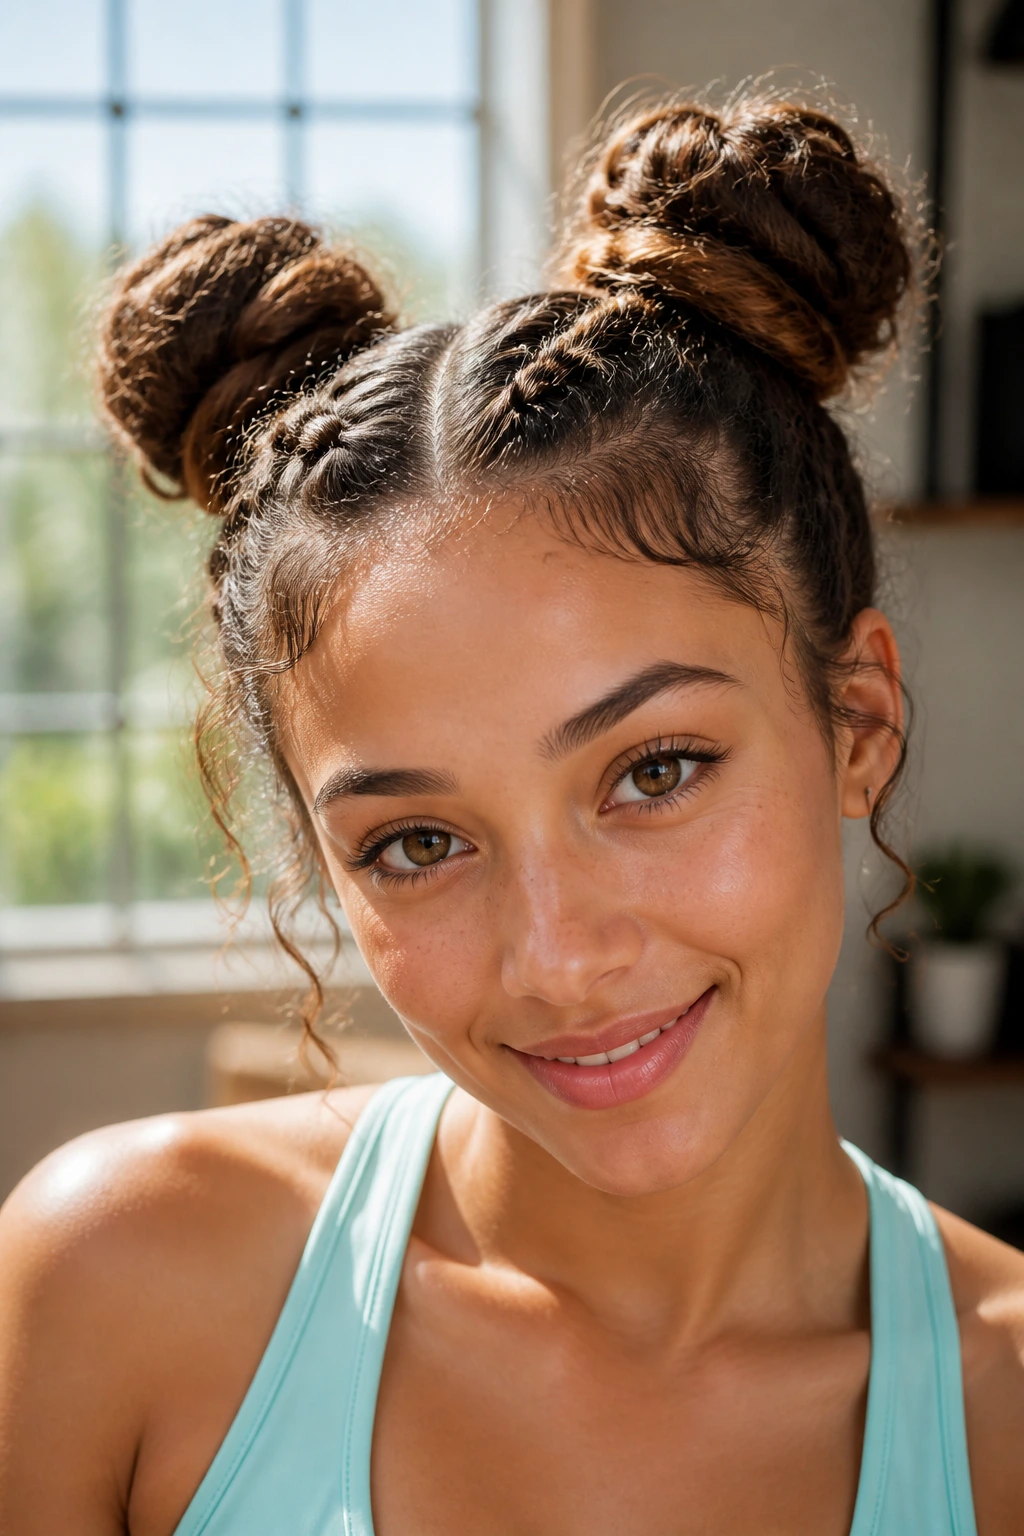
Space buns are iconic for curly hair. By adding a base of double braids that feed into the buns, you make a fun style look much more sophisticated and secure.
The Construction
Create two Dutch braids that start at your forehead and move toward the crown of your head. Instead of braiding all the way to the ends, stop when you reach the crown. Secure the braids with a small elastic, gather the remaining loose hair into a bun, and pin it into place.
Durability
Space buns are essentially “set and forget.” Because the braids provide the foundation, the buns stay in place much longer than they would with a standard ponytail base. This style is perfect for active days or traveling, as it keeps every single strand contained and protected from the elements.
12. Zig-Zag Part Double Braids
The part is just as important as the braid itself. A zig-zag part breaks up the visual monotony of a straight, center part and adds a geometric element to your look.
Achieving the Part
Use the handle of a rat-tail comb to trace a zig-zag pattern from your forehead to your crown. It doesn’t have to be perfect; a slightly messy zig-zag gives it a more bohemian, natural feel. Once the part is done, proceed with your two Dutch or French braids.
Why It’s Unique
It’s a simple change, but it completely alters the silhouette of the hairstyle. It creates movement and intrigue, especially if you have highlights, as the zig-zag will distribute the colors in a more complex, interwoven way than a standard straight part.
13. Double Braids with Ribbons
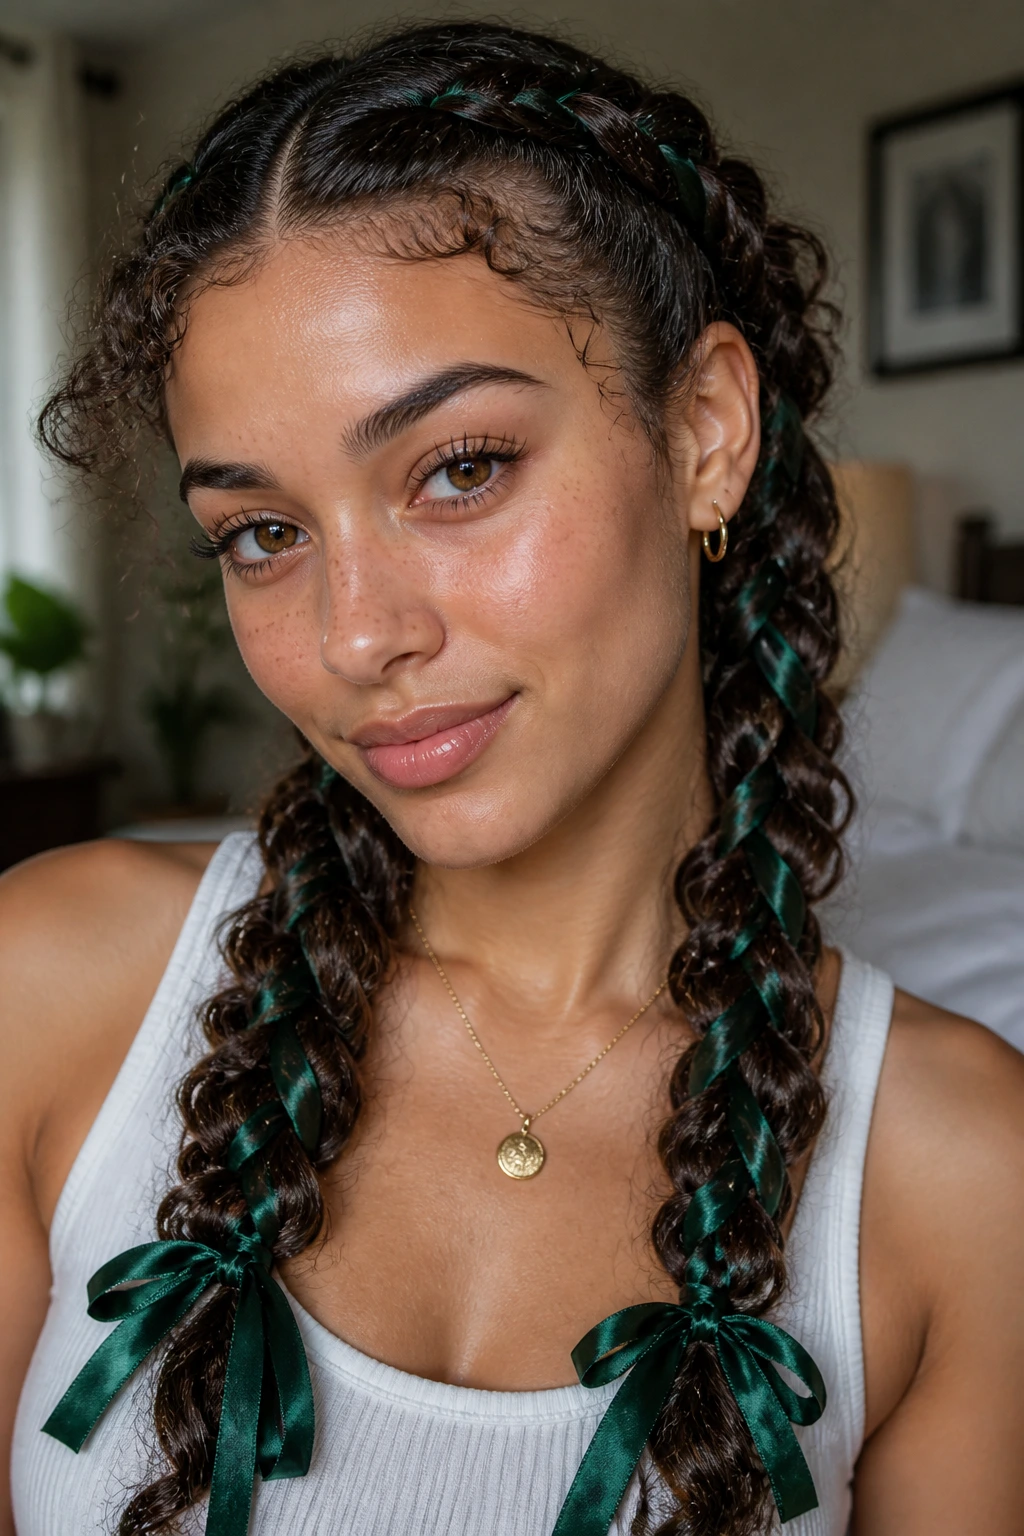
This is a classic trend that has made a comeback. Integrating a ribbon into your braid adds color, texture, and a sense of whimsy.
Weaving the Ribbon
Fold your ribbon in half and tie it around the center section of your hair as you begin your braid. As you weave, treat the ribbon like one of the three strands of your braid. It will get caught in the loops as you go, creating a beautiful, wrapped effect that holds your curls in place.
Material Choice
Choose a silk or velvet ribbon if you want a luxe look, or a cotton cord for something more casual. The ribbon also helps keep the braid ends secure, meaning you might not even need a plastic elastic. Plus, it’s much gentler on your hair than synthetic bands.
14. Feed-In Double Braids
If you want the look of long, thick braids but don’t have the length, the feed-in technique is the answer. This involves starting a braid with your natural hair and gradually adding small sections of synthetic braiding hair as you work your way down.
The Professional Look
This technique creates a braid that is consistent in thickness from start to finish. It’s perfect for curly hair because it helps to stretch out the texture and keep it protected for weeks. If you choose this method, prioritize finding high-quality, pre-stretched braiding hair that mimics your natural texture.
Maintenance
Feed-in braids need a bit more TLC. You should still keep your scalp moisturized with a light oil and sleep with a silk bonnet to prevent frizz from developing too quickly along the braid lines.
15. The “Dragon” Braid
Also known as the “pancake braid,” this style is all about making your two braids look massive. It is the ultimate style for anyone who wants to showcase the volume of their curls.
How to Achieve the Look
The secret is to braid as tightly as possible first, then spend five minutes gently pulling out every single loop of the braid once you are done. The key is to start from the bottom and move upward.
Why Curly Hair Wins
If you have fine, thin hair, pancake braids can look sparse. On curly hair, the natural expansion of your coils means that when you pull the loops out, they stay pulled out. The resulting braids will be thick, dramatic, and look like they belong in a fairytale.
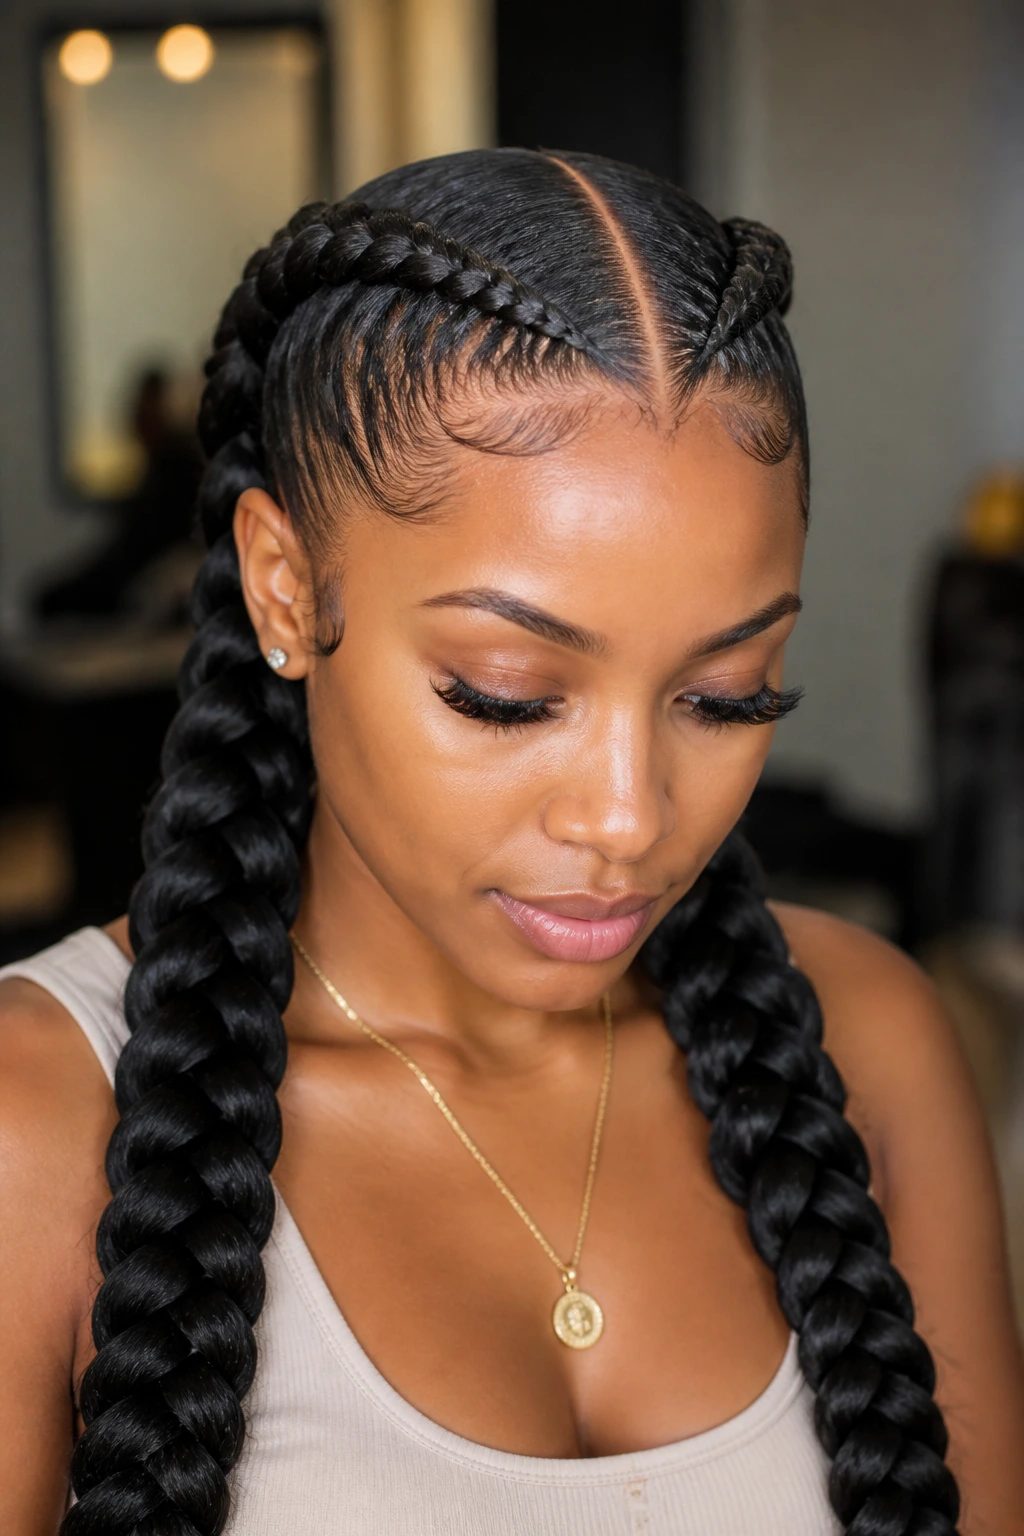
16. Double Braids into Low Ponytails

This is an excellent, professional-looking style for work. You braid the hair from the hairline down to the nape, then stop and secure the rest of your hair into two low, bouncy pigtails.
The Transition
The transition point where the braid meets the ponytail is where you should pay the most attention. Wrap a small strand of hair around your elastic to hide it. This simple trick makes the hairstyle look significantly more polished and intentional.
Versatility
This style is easily dressed up with gold cuffs or hair rings, or kept simple for a daily look. It keeps the hair at the nape of your neck tidy while letting your curls hang free below, giving you the best of both worlds.
17. Double Braids with Beads
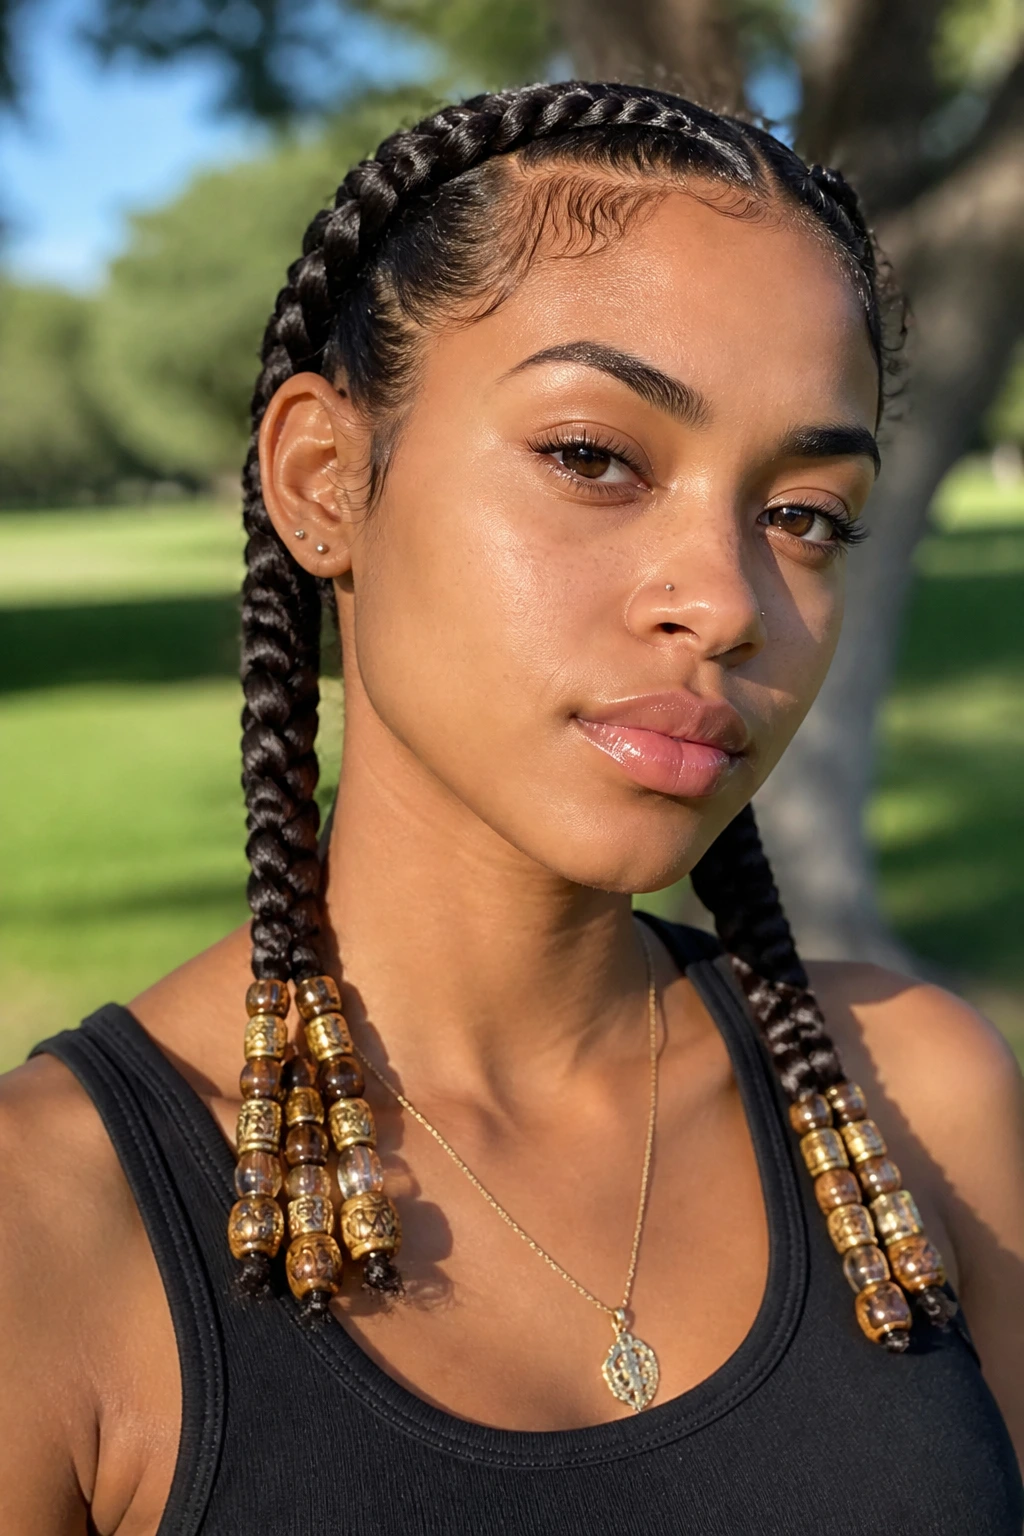
If you have tight coils, adding beads to the ends of your braids is a fantastic way to add weight and style. The weight of the beads helps keep the braids from curling up at the ends, which is a common issue with shorter protective styles.
Choosing Your Beads
Go for wooden beads for a natural, earthy vibe, or clear acrylic beads for a nostalgic 90s aesthetic. Thread the beads onto the ends of your finished double braids and secure them with a small rubber band or a “bead stopper.”
The Sound and Motion
Beads provide a delightful sound and sense of movement as you walk. It’s a fun, tactile way to style your hair that feels a bit more playful than standard braiding.
18. Double Braids with Hidden Parts
Instead of a simple center part, create a double-braided style with a “hidden” or curved part. This adds an element of mystery and makes the hairstyle look much more complex than a standard two-part braid.
The Design
Use your comb to create a C-shaped part on each side of your head. The resulting braids will follow the curve of your head rather than sitting in a straight line. It’s a small detail, but it changes the entire geometry of the look.
Why This is Worth the Effort
It’s perfect for someone who has already mastered the standard Dutch braid and wants to experiment with advanced sectioning. It creates a seamless look where the hair seems to flow organically rather than being strictly partitioned.
19. Reverse Dutch Double Braids
A reverse braid starts at the nape of the neck and works its way up toward the crown. It’s a challenging style to do on yourself, but the visual payoff is incredible.
The Technique
Flip your head upside down and begin two Dutch braids at the nape. Braid upward toward the top of your head. Once you reach the crown, you can finish them into two buns, or tie them together for a high-ponytail effect.
Gravity and Volume
Because you are braiding against gravity, the roots at the nape will be very secure. By the time you reach the top, the braids will have natural lift, creating a “pompadour” effect on the crown that looks stunning with curly textures.
20. The “Chunky” Double Braid
This style is all about size. Don’t worry about clean parts or perfectly symmetrical loops. The goal is to use larger sections of hair to create two massive, statement-making braids.
Larger Sections
Instead of picking up a thin ribbon of hair for each step, grab a larger, two-inch section. You will finish the style in half the time, and the result will be a much bolder, more graphic look.
Perfecting the Mess
Because the braids are chunky, a few loose curls will naturally escape. Don’t pin them back! Let them frame your face. This style is meant to look effortless and cozy—perfect for a weekend at home or a casual brunch.
21. Double Braids with Hair Rings
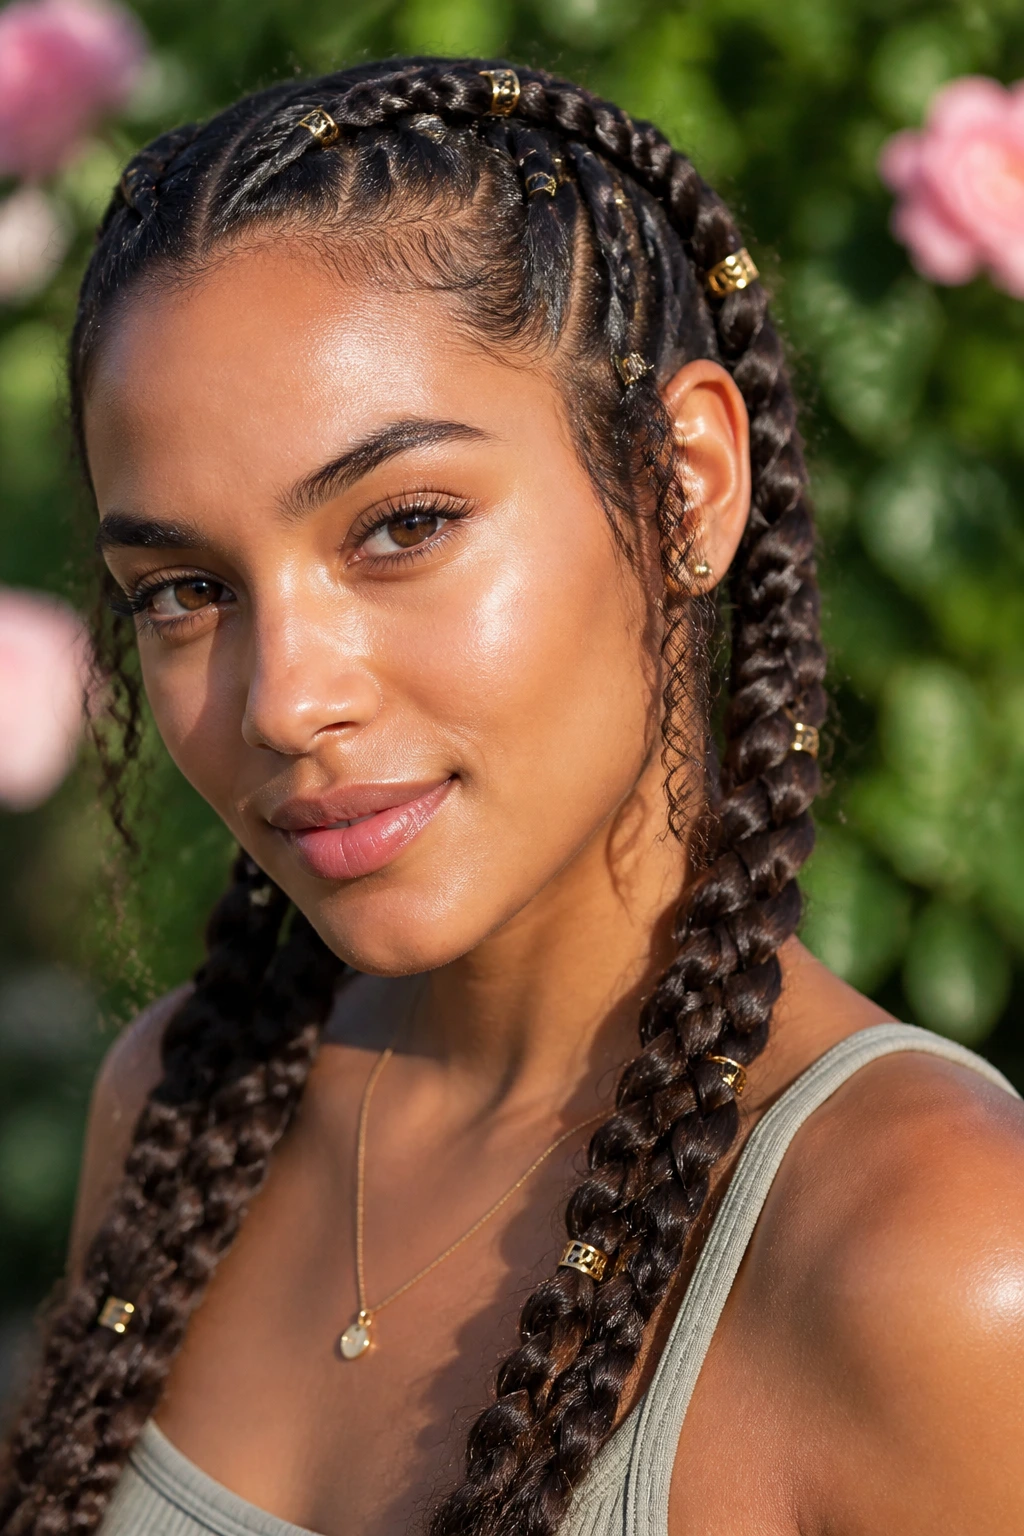
Hair rings, or cuffs, are tiny metal accessories that snap onto your braids. They provide a bit of shine and can break up the texture of your hair.
Placing the Rings
Place your rings at random intervals along your braids. Don’t worry about them being perfectly spaced—a more scattered approach often looks better. Gold or silver rings work beautifully against most natural hair colors.
Subtle Sophistication
This is the easiest way to turn a “gym hair” style into something you can wear out to dinner. The metallic accents catch the light, drawing attention to the structure of your braids and the vibrancy of your curls.
22. The Crown-Tied Double Braid
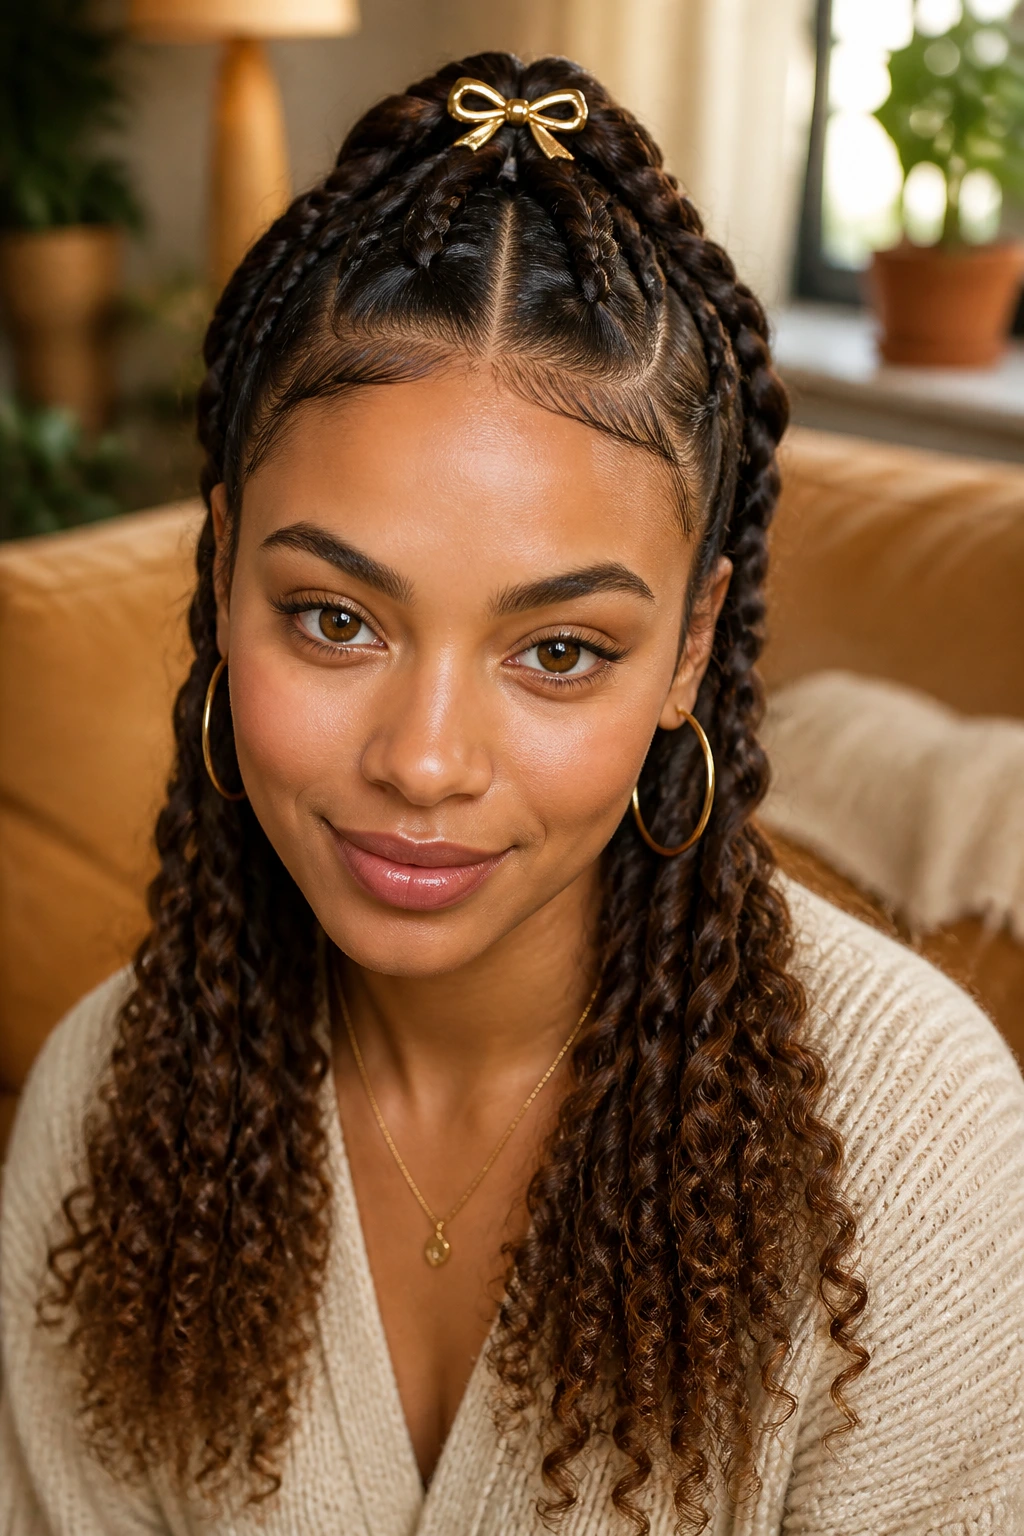
Similar to the halo style, this variation focuses on tying the two braids together at the crown with a decorative clip or a large ribbon.
Why It’s Different
Instead of tucking the ends away, you leave them loose. You braid the hair until you reach the crown, tie them together, and let the remaining hair fall loose into two “tassels.” It’s a very playful, youthful look that emphasizes the length of your curls.
Accessorizing
This is the perfect spot for a large, statement hair barrette. A floral clip or a bold geometric shape can hide the elastic, making the style look like a professional, artistic creation.
Final Thoughts
When you are working with curls, your hair is essentially a canvas that is already half-finished. You have the volume, the texture, and the grip. The braids are simply the tools you use to organize that beauty into a cohesive, intentional shape. Do not be afraid to experiment with tension—tighter for durability, looser for romance—and always remember that the best part of wearing braids on curly hair is how beautiful your hair looks when you finally take them down.
Take your time with the sectioning. That is the one area where patience truly pays off. If your parts are neat, the rest of the style will naturally fall into place. And above all, avoid over-manipulating your hair. Curly hair is strong, but it is also delicate; treat it with a gentle touch, use plenty of moisture, and let your natural pattern do the heavy lifting. Your next favorite hairstyle is probably just a few minutes and a couple of elastics away.