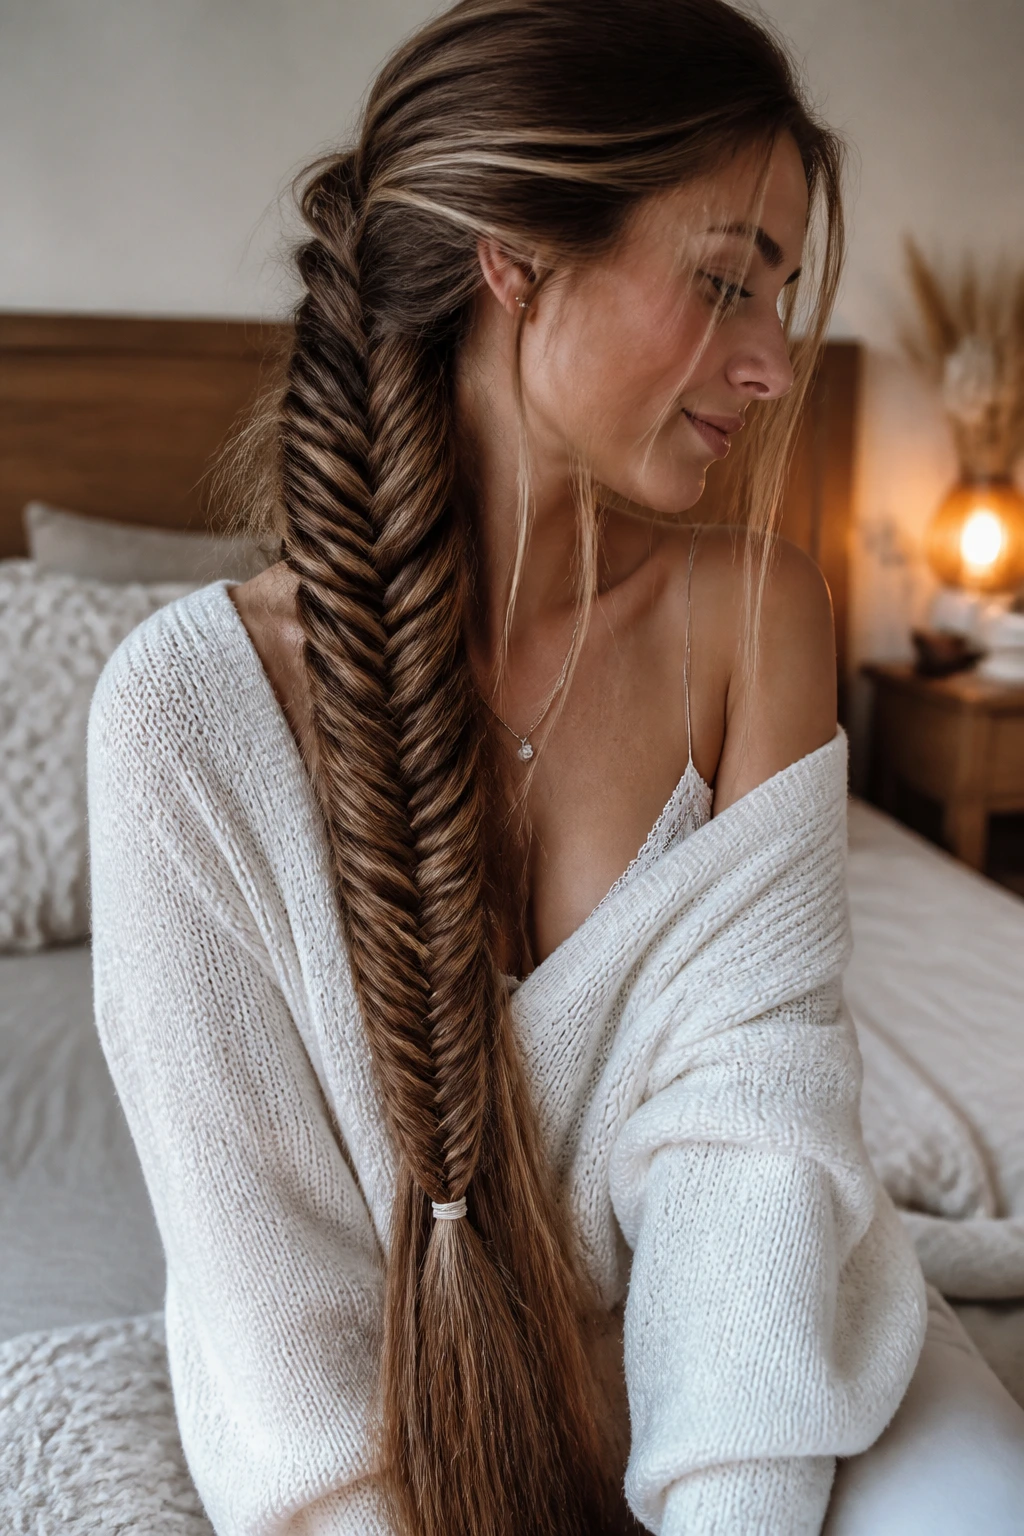
The fishtail braid has a certain hypnotic quality, doesn’t it? It is intricate, almost impossibly woven, yet it traces back to simple, repetitive movements. While a standard three-strand braid feels like the baseline of hairstyling, the fishtail—or herringbone braid—demands a bit more patience. For those with significant length, this style isn’t just a way to keep hair out of your face; it is a showcase of texture and patience.
When you look at a perfectly executed fishtail, you are seeing a result of consistent tension. Unlike other styles that rely on bulk, the fishtail creates a sleek, tight structure that catches the light in unique ways, especially on healthy, long hair. It is a style that thrives on length, as the weave requires plenty of material to create that classic, tapered look.
Whether you are aiming for a tight, polished aesthetic for a formal event or a loose, lived-in vibe for a weekend outing, the fishtail is one of the most versatile tools in your repertoire. It sits somewhere between structural art and effortless beauty.
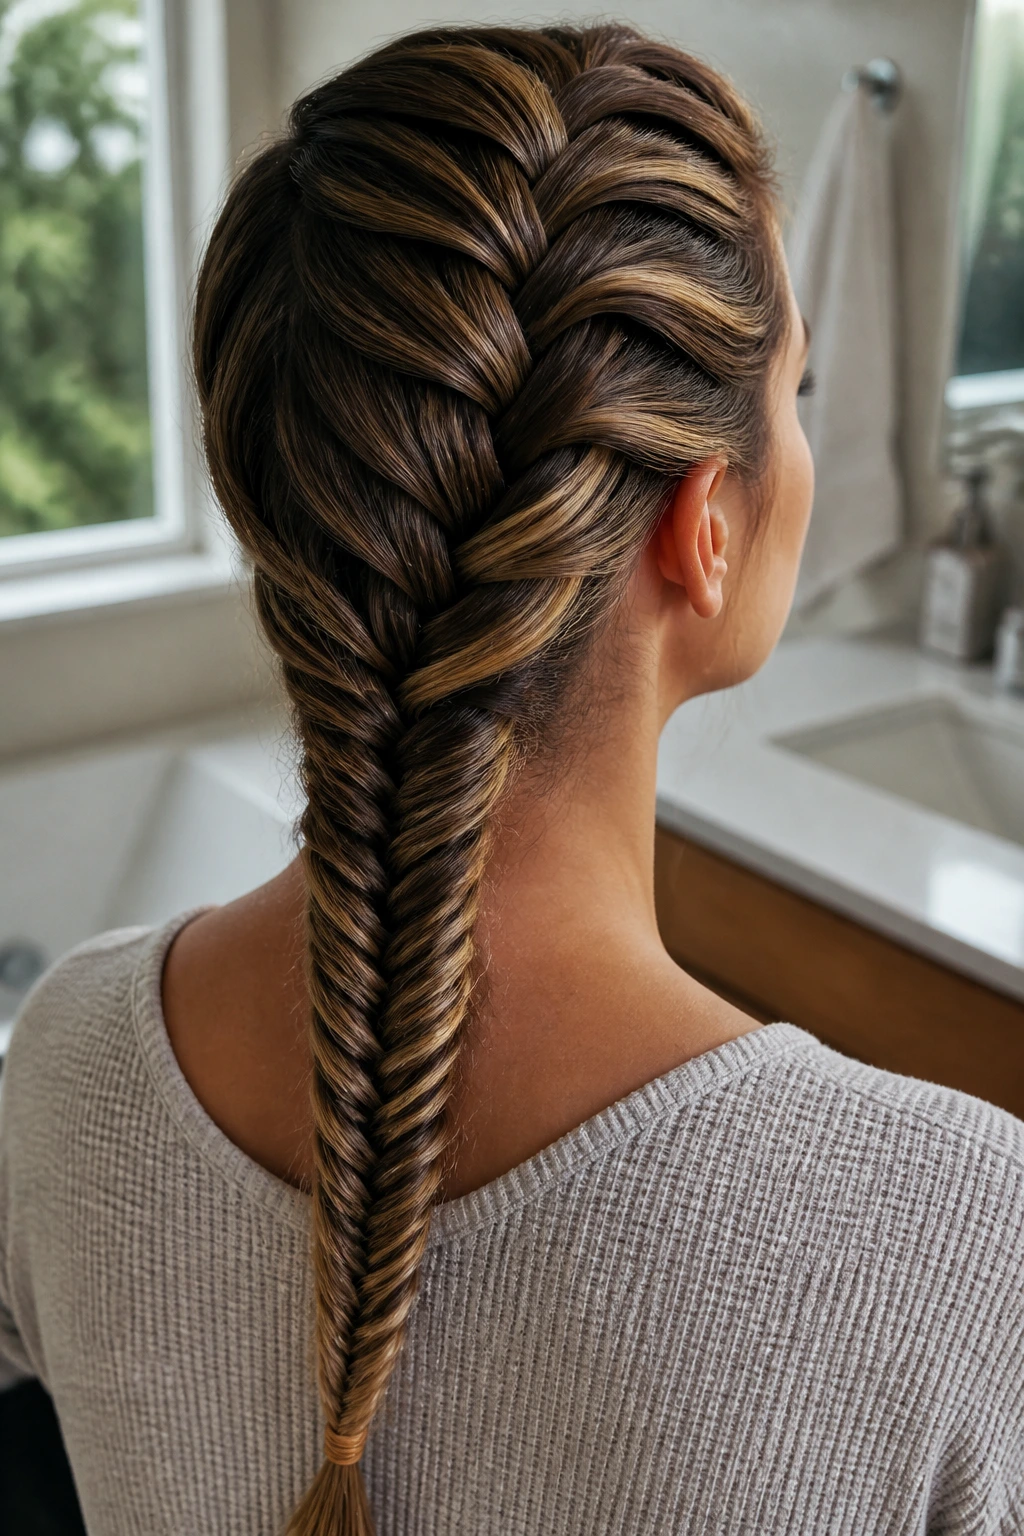
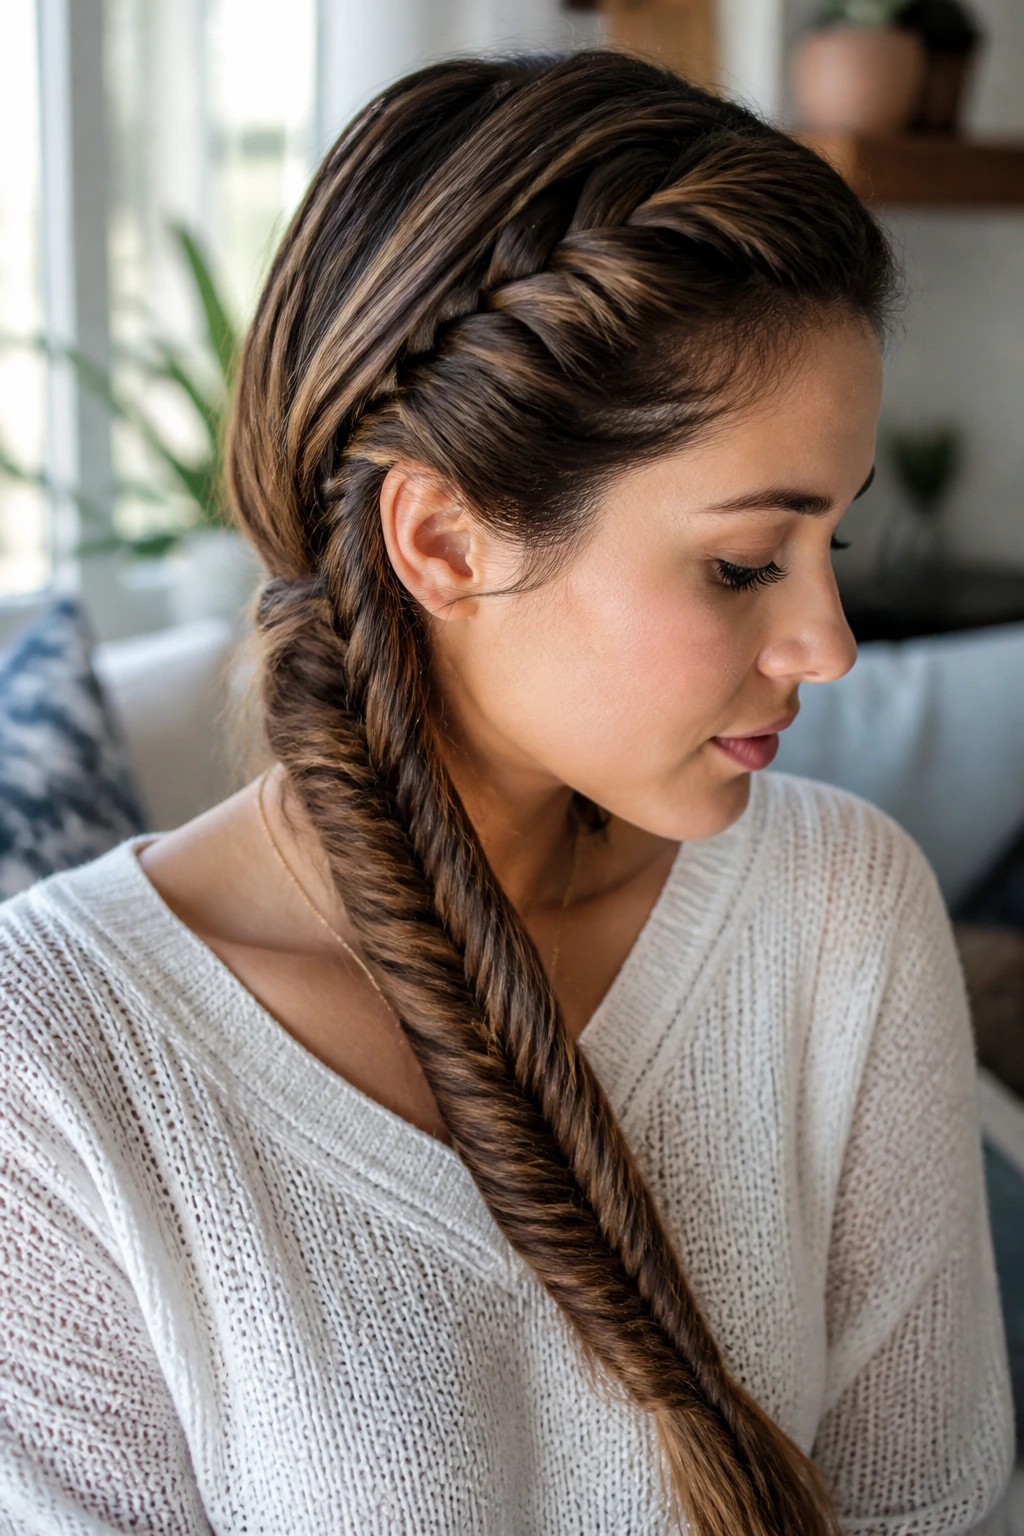
1. The Classic Tight Fishtail
The foundation of all variations, this style relies on precision. You start by splitting the hair into two equal sections. The secret here is taking a tiny sliver of hair—about the thickness of a toothpick—from the outer edge of one section and crossing it over to join the inner edge of the opposite section.
Why Tightness Matters
When you maintain a consistent, firm pull on those tiny strands, the resulting braid is dense and uniform. If you use strands that are too thick, you lose the “fishtail” appearance and end up with a messy, uneven texture.
- Start with hair that is smooth and free of tangles.
- Use a light texturizing spray if your hair is particularly silky or fine to help the strands grip.
- Keep your fingers close to the braid base throughout the process. Pro Tip: If your arms get tired, lean your head slightly to the side to keep the tension even without straining your shoulders.
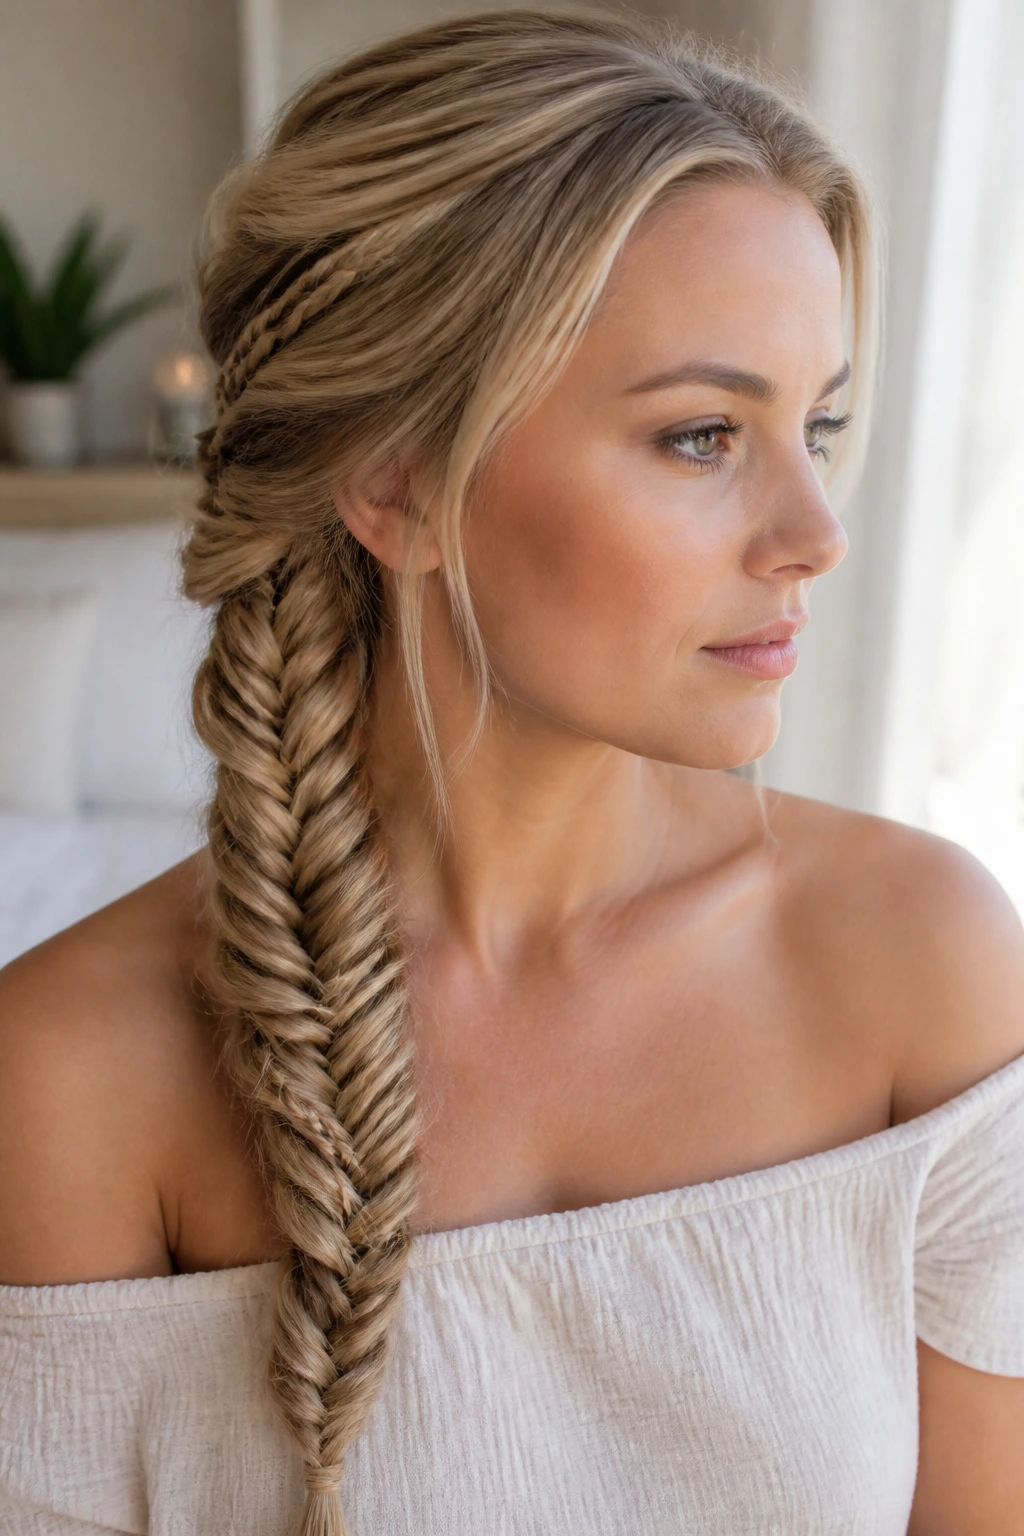
2. The Messy Bohemian Fishtail

This look is the antithesis of the classic tight braid. After you complete a standard fishtail, the real work begins. You go back through the braid, starting from the bottom and gently pulling at the outer loops to loosen them.
Creating Volume
The goal is to double the width of the braid without letting it unravel. You want to create that airy, romantic silhouette that looks like it took hours of careful styling, even if it took mere minutes.
- Focus on the edges, not the center, when pulling sections out.
- Work your way upward, small section by small section.
- Secure the end with a small clear elastic that matches your hair color.
3. The Dual Fishtail Pigtail
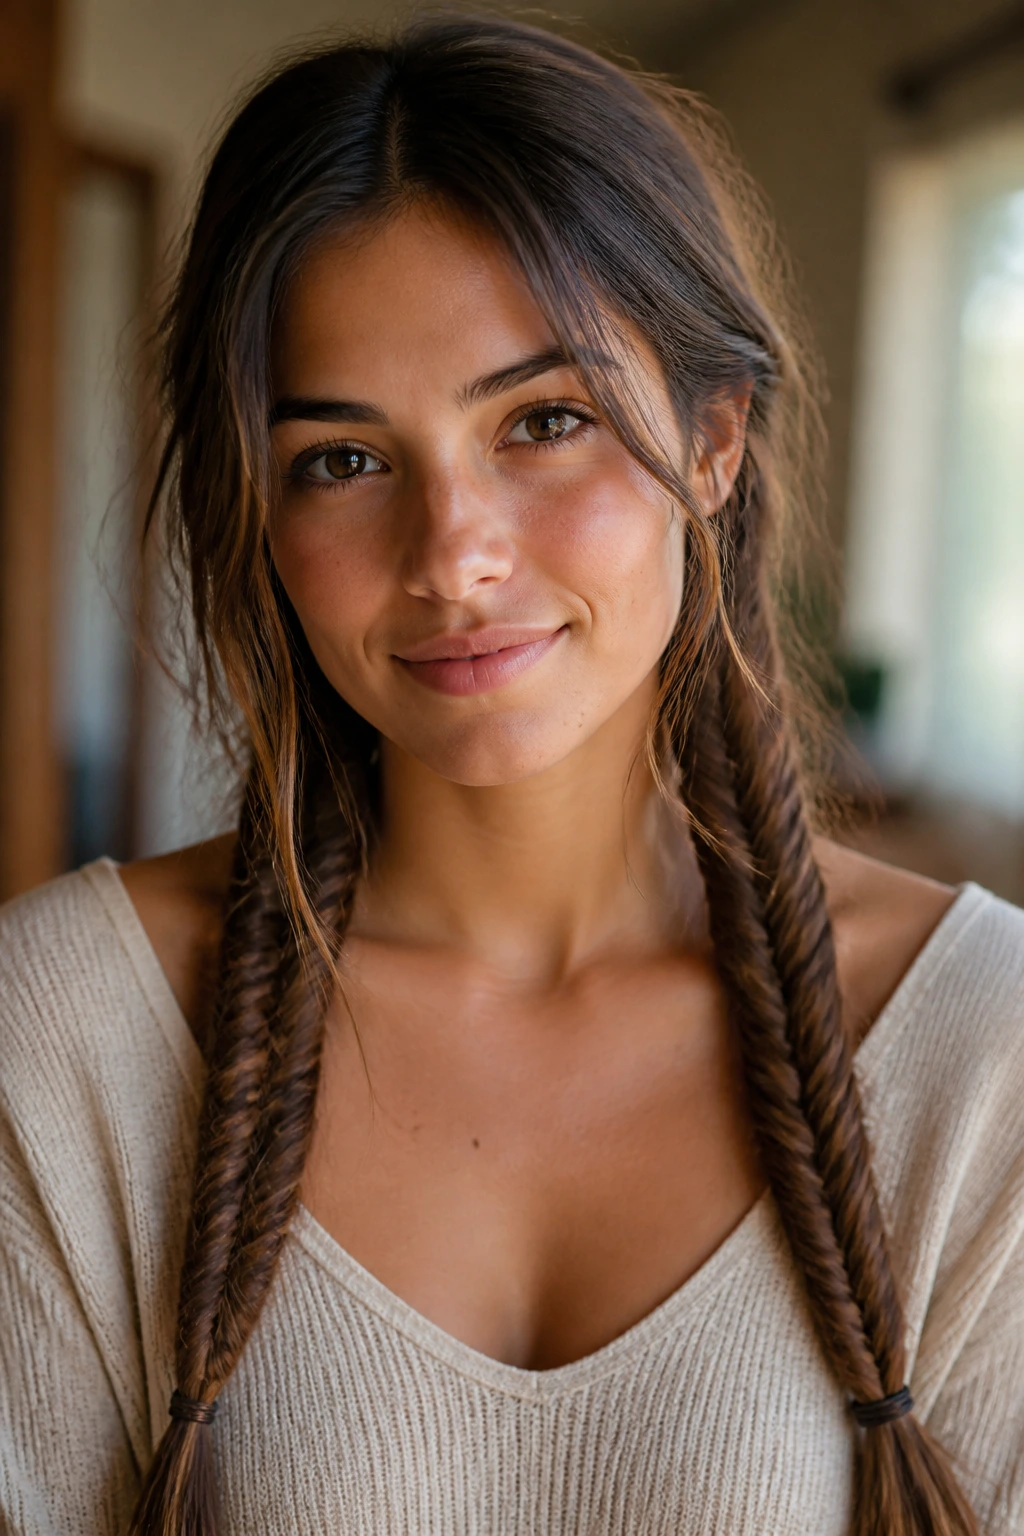
Sometimes, one braid just is not enough. Splitting your long hair into two sections and braiding each into a fishtail creates a playful, symmetrical look that is surprisingly practical for keeping long hair managed during physical activity.
Balancing the Tension
The challenge with dual braids is keeping them identical. If one is tighter than the other, the whole style feels lopsided.
- Use a mirror to keep both braids in your peripheral vision while working.
- Start both braids at the same height, ideally just behind the ears, to ensure symmetry.
- If you have layers, use a light pomade to tuck any stray ends back into the weave as you go.
4. The Half-Up Fishtail Crown
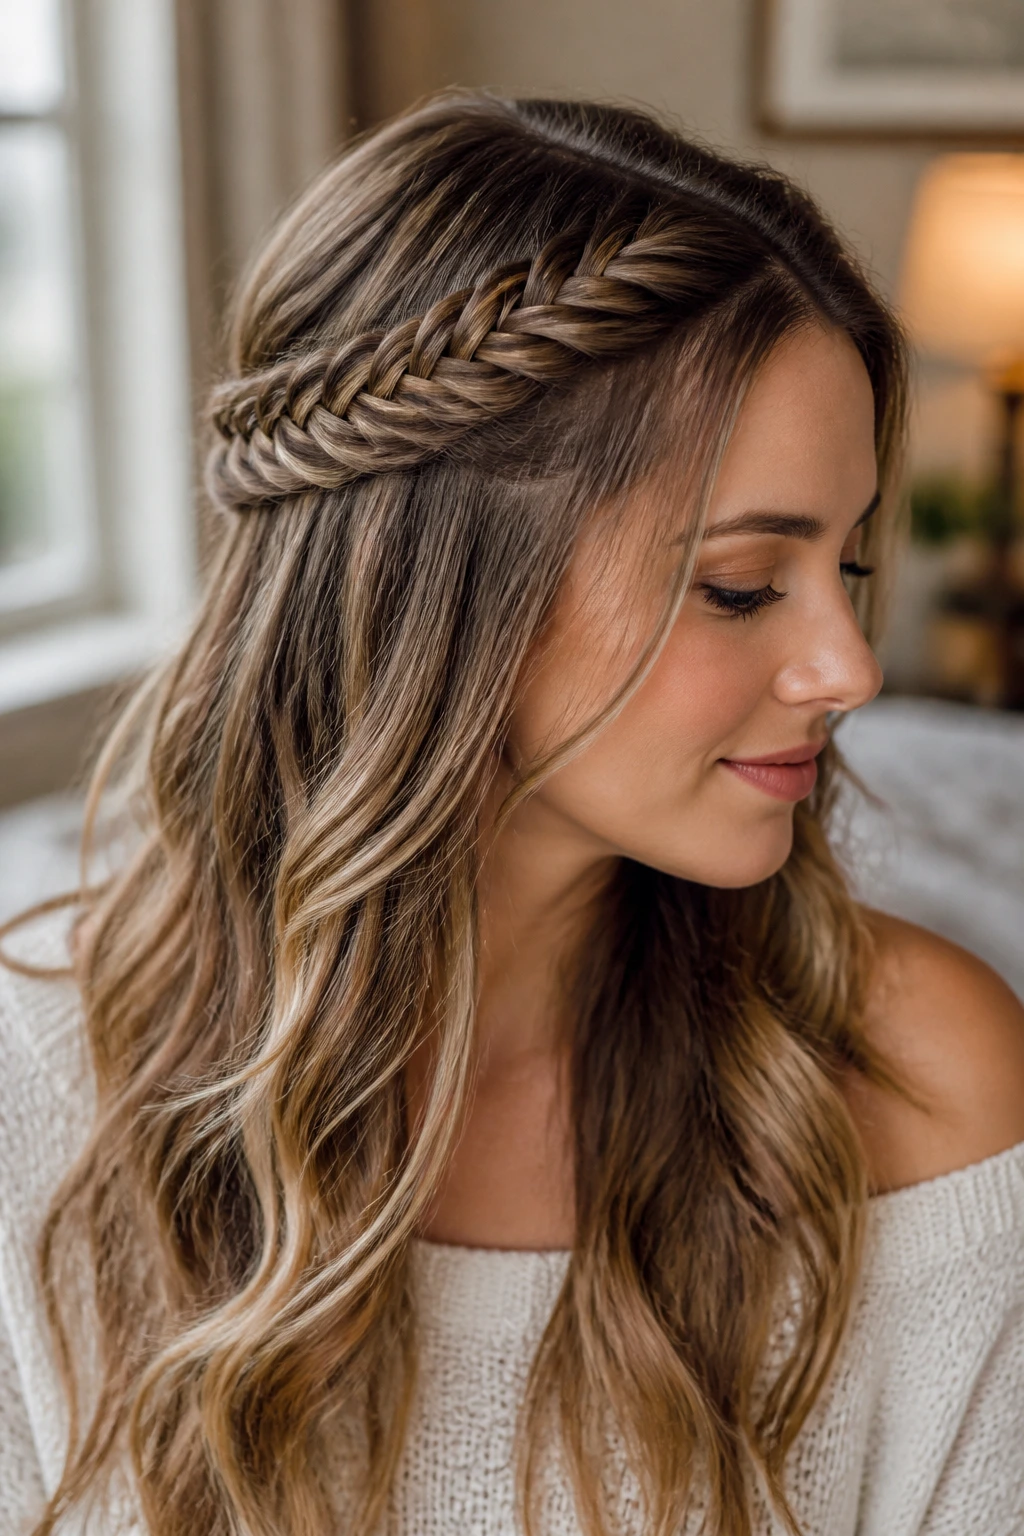
This variation frames the face beautifully. You take a section of hair from either temple, pull them back to the center, and start your fishtail braid at the meeting point. It is a fantastic way to keep hair off your forehead while still showing off your length.
Achieving the Crown Shape
The key is to keep the braid flush against the back of your head. If it starts to sag, it will lose that elegant, halo-like effect.
- Use small, clear elastic bands to secure the initial sections before you even start the braid.
- Pin the base of the braid with a bobby pin that matches your hair tone to keep it anchored.
- Let the rest of your hair flow naturally down your back.
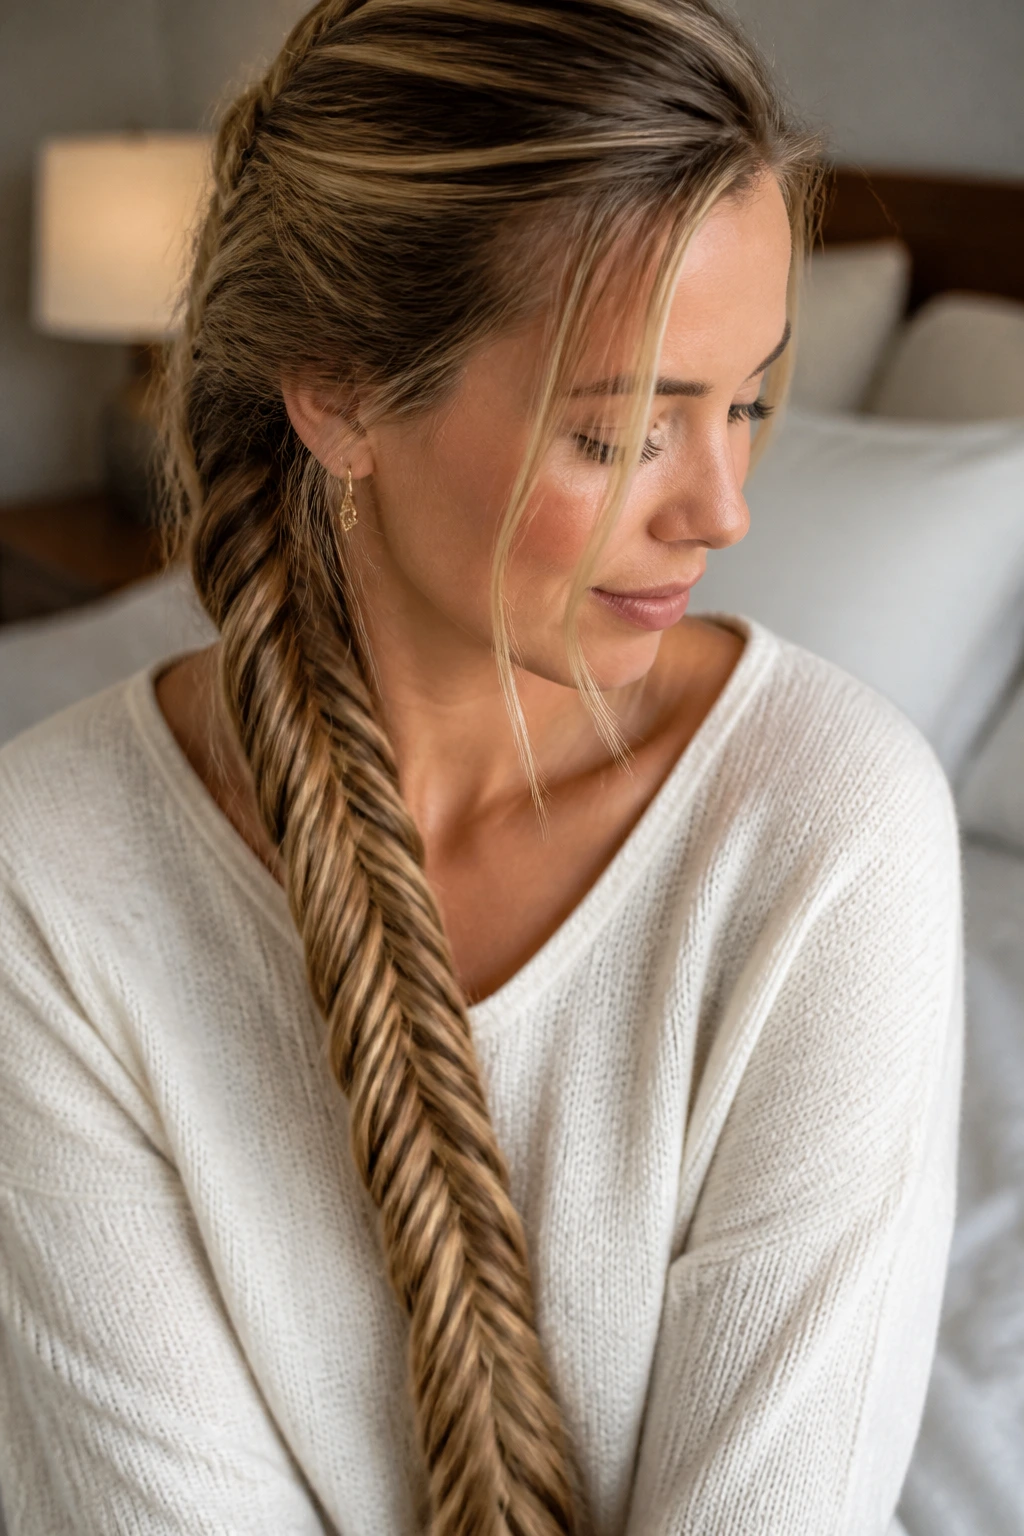
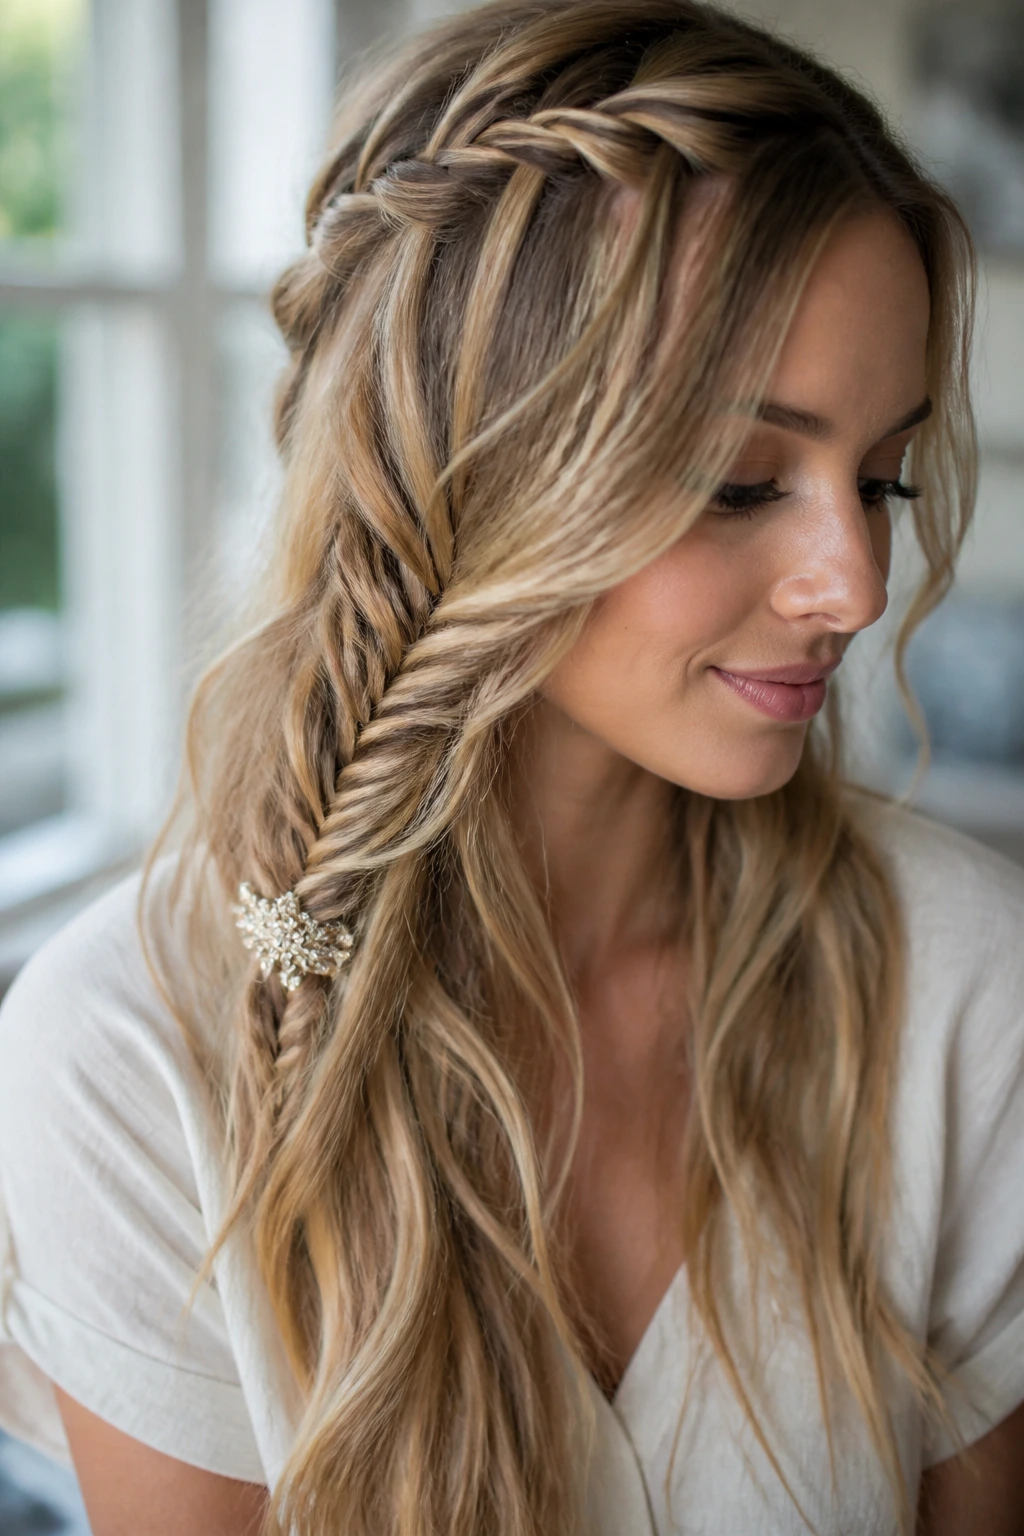
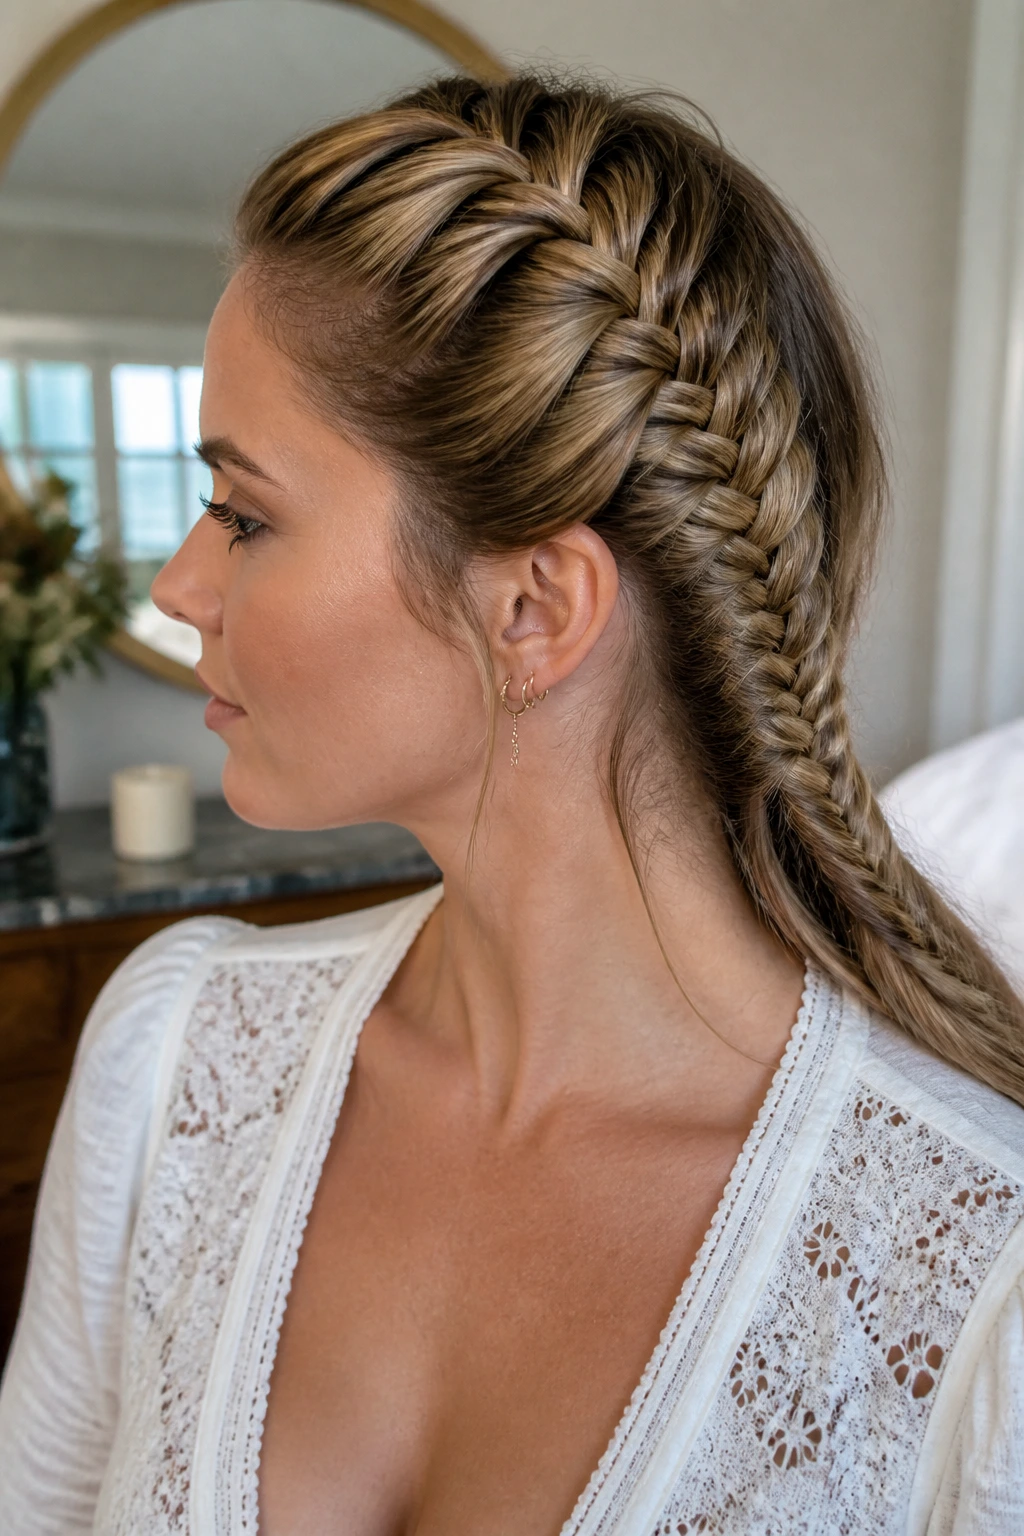
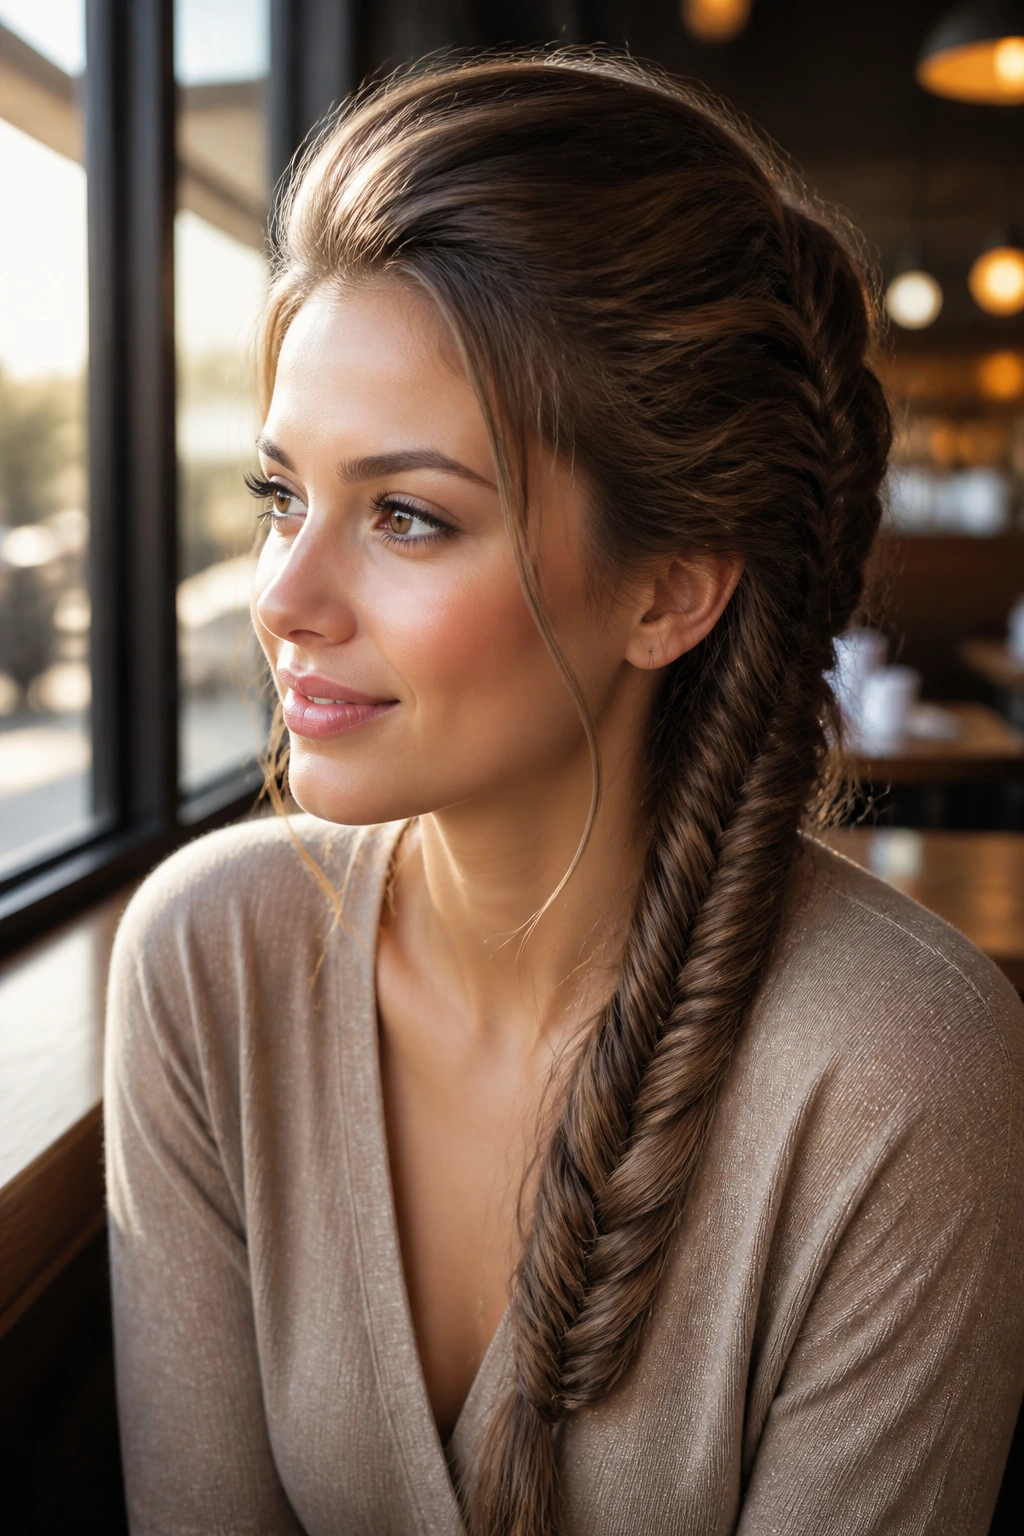
5. The Side-Swept Fishtail
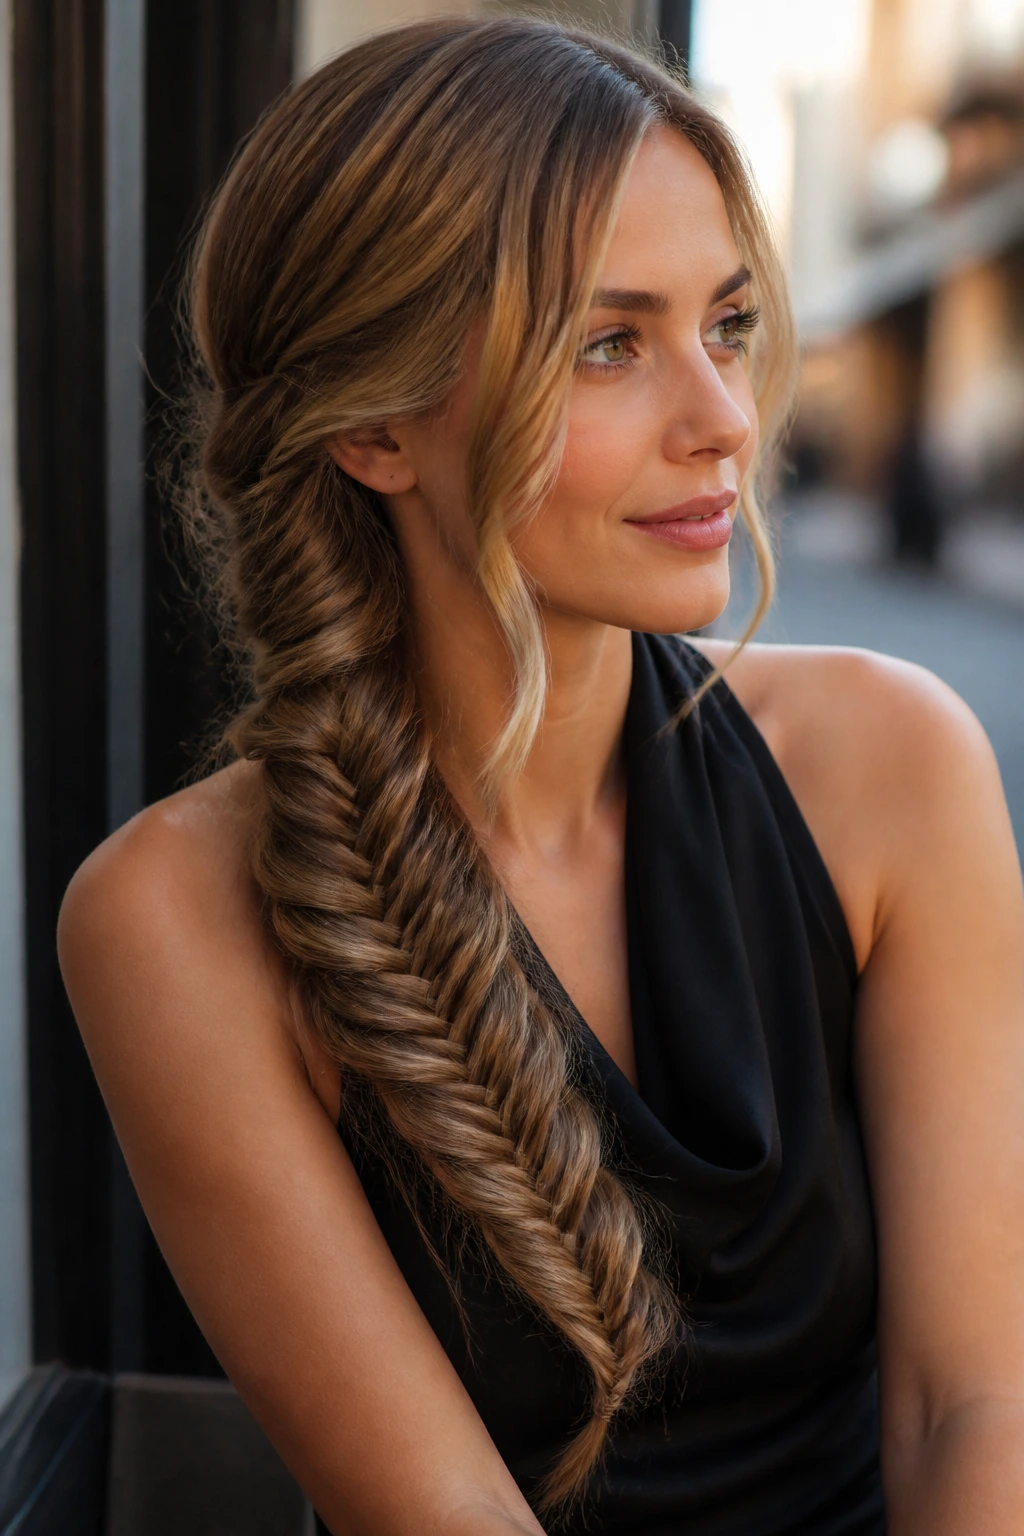
Perfect for occasions when you want your hair to feel a bit more formal, the side-swept fishtail is all about direction. By bringing all your hair over one shoulder before you begin, you create a weight and drape that feels sophisticated.
Managing the Weight
With long hair, the weight of the braid can cause it to pull uncomfortably if it is not secured properly.
- Anchor the base at the nape of your neck with a ponytail holder first if you need extra support.
- Keep the tension slightly looser at the very top to allow the braid to drape comfortably over your shoulder.
- Ensure the hair at the nape of your neck remains smooth so the braid sits flat against your neck.
6. The Upside-Down Fishtail Bun
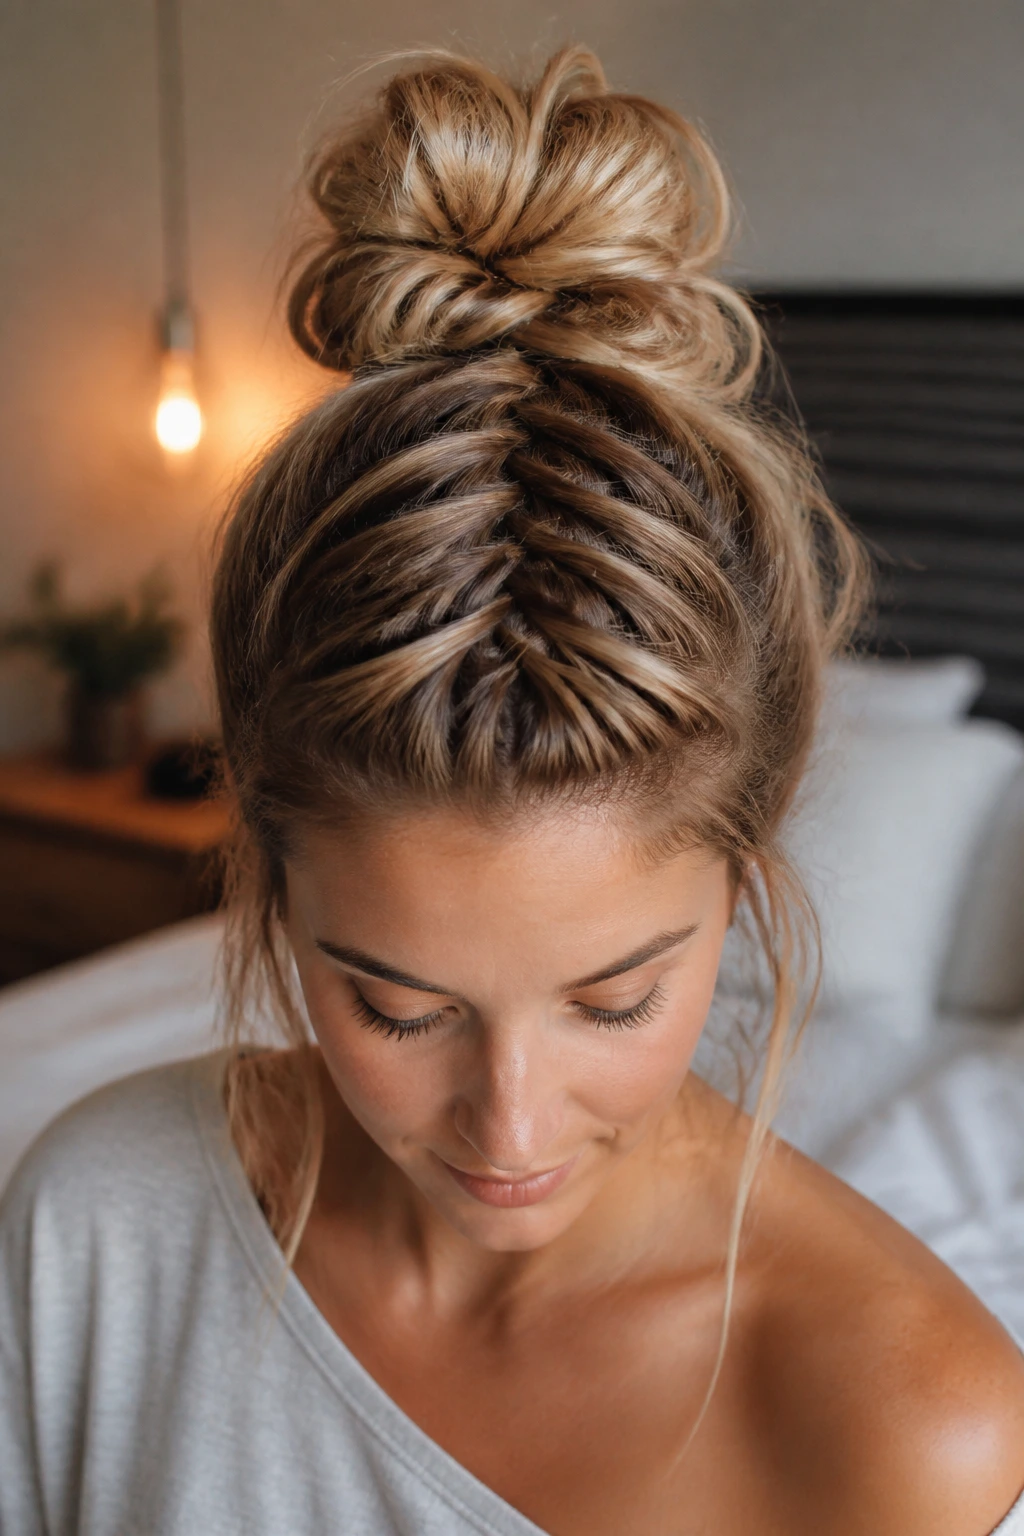
This is an advanced style, but it is incredibly rewarding. You flip your head over, start a fishtail braid at the nape of your neck, and braid upward toward the crown. Once you reach the top, you coil the remaining length into a messy bun.
The Logistics of the Flip
Flipping your head requires a bit of practice. The most difficult part is keeping the braid centered as you move upward.
- Use a setting spray before you flip to ensure you have a good grip.
- Braiding upward means working against gravity, so keep the tension tighter than usual.
- Once you reach the crown, use a sturdy hair tie to create the base of the bun.
7. The Fishtail Into a Ponytail
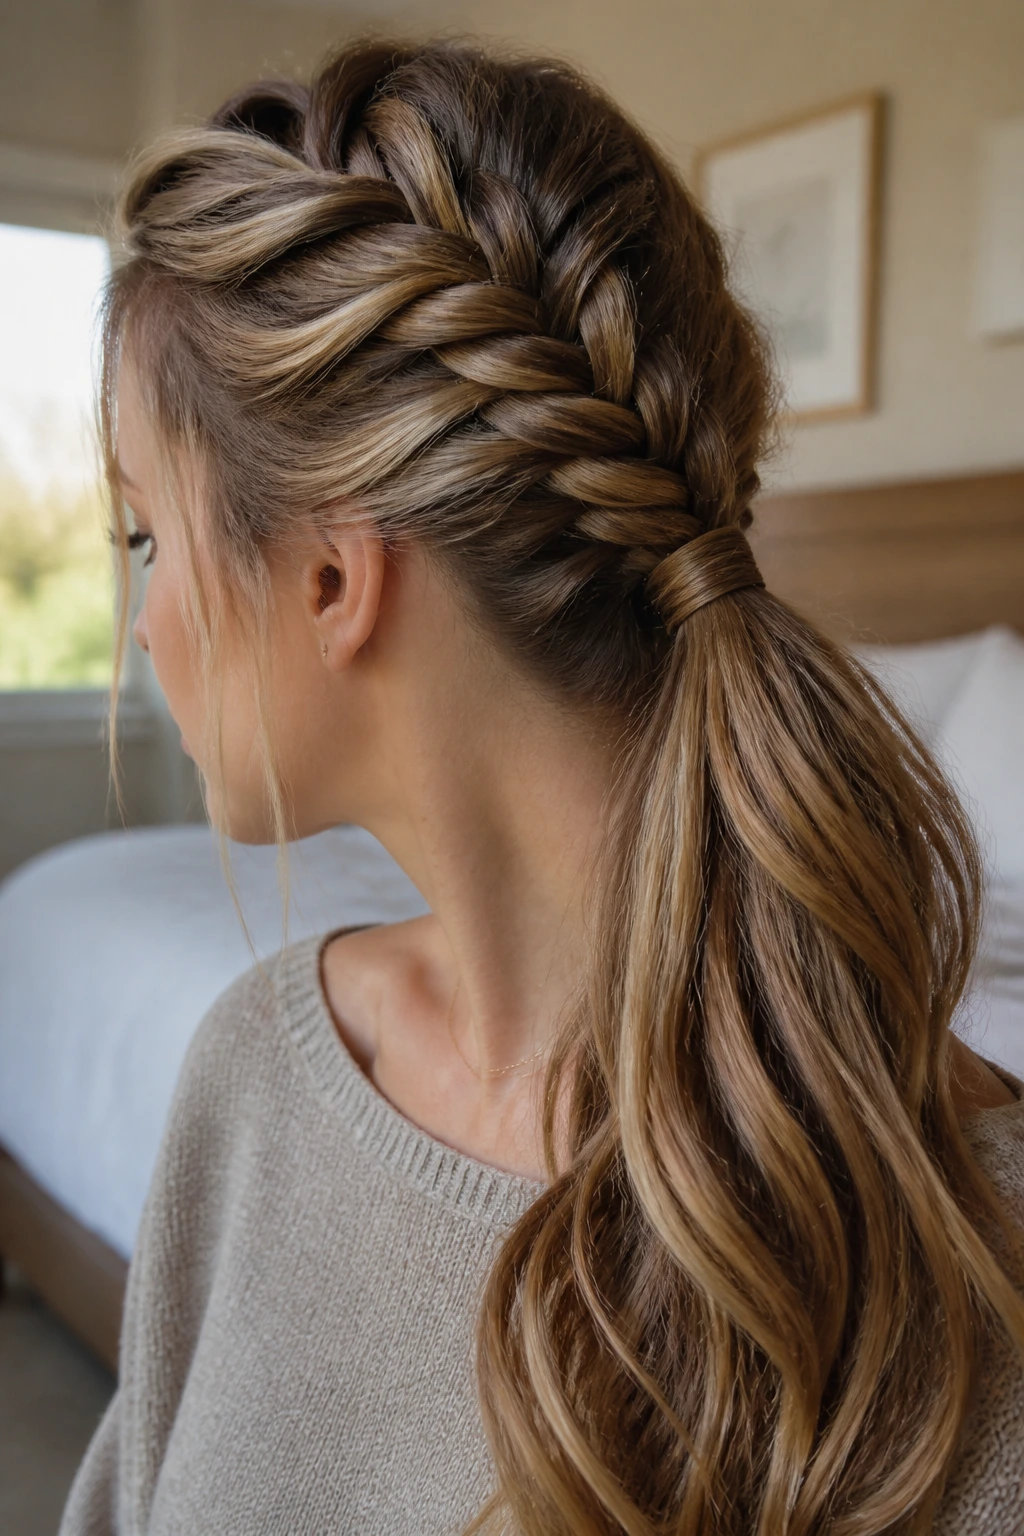
This is a hybrid style for those who cannot decide between a braid and a pony. You start a fishtail braid from the hairline, carry it down to the mid-length, and then secure it into a ponytail, letting the rest of the hair flow free.
The Transition Point
The transition from the weave to the free-flowing ponytail must be clean. If you aren’t careful, the braid will unravel at the point where it becomes a ponytail.
- Use a small, high-quality elastic at the transition point.
- Wrap a tiny piece of hair around the elastic to conceal it and give the look a professional finish.
- Tease the tail of the ponytail slightly to give it volume to match the braid.
8. The Wrapped Fishtail Headband
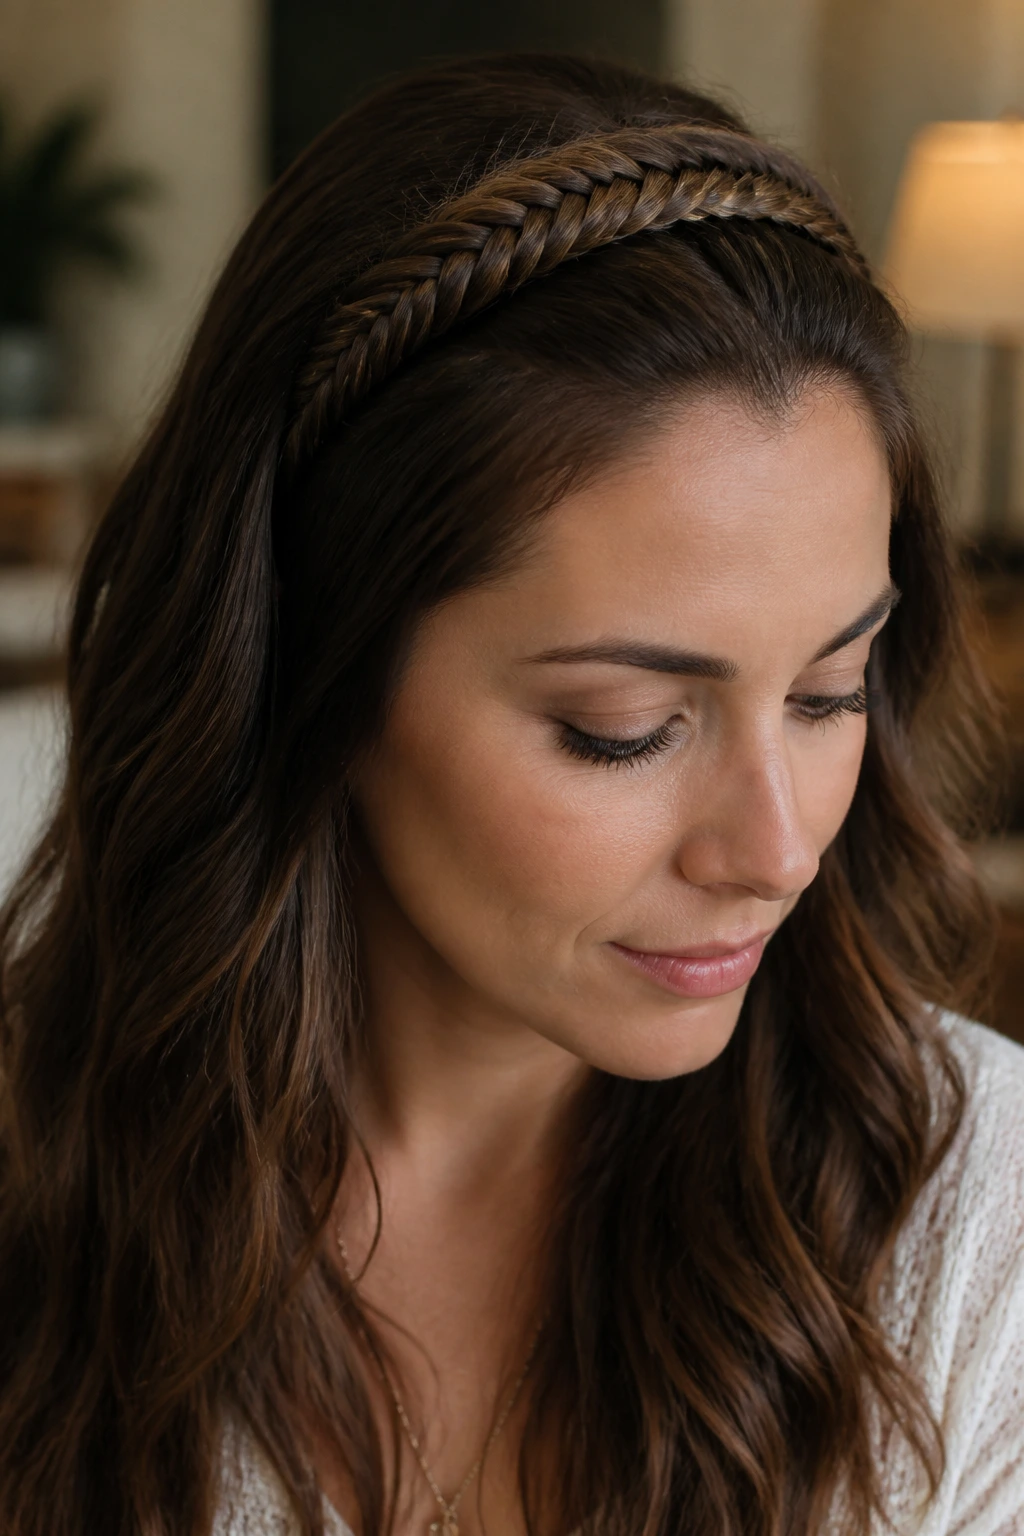
Instead of just braiding the back, you create a band across the top of your head. This takes a bit of weaving skill—you are essentially French-braiding a fishtail along the hairline.
Controlling the Flyaways
With a headband braid, flyaways are inevitable because you are working right at the hairline.
- Use a wax stick to smooth down baby hairs before you start.
- Work with very small sections to ensure the band is flat rather than bulky.
- If your hair is thick, consider doing two thinner braids and overlapping them for a more intricate, lace-like appearance.
9. The Waterfall Fishtail
This style incorporates the waterfall technique, where you let pieces of hair drop out of the weave as you work. It creates an illusion of hair cascading through the braid.
The Drop Technique
The main secret here is to add new hair into your fishtail only from the top, while letting the bottom section drop away.
- It creates a very distinct, horizontal line of braiding.
- This is best for straight or slightly wavy hair where the definition of the weave will be clearly visible.
- Secure the end of the waterfall path with a decorative clip to prevent it from slipping.
10. The Fishtail Faux-Hawk
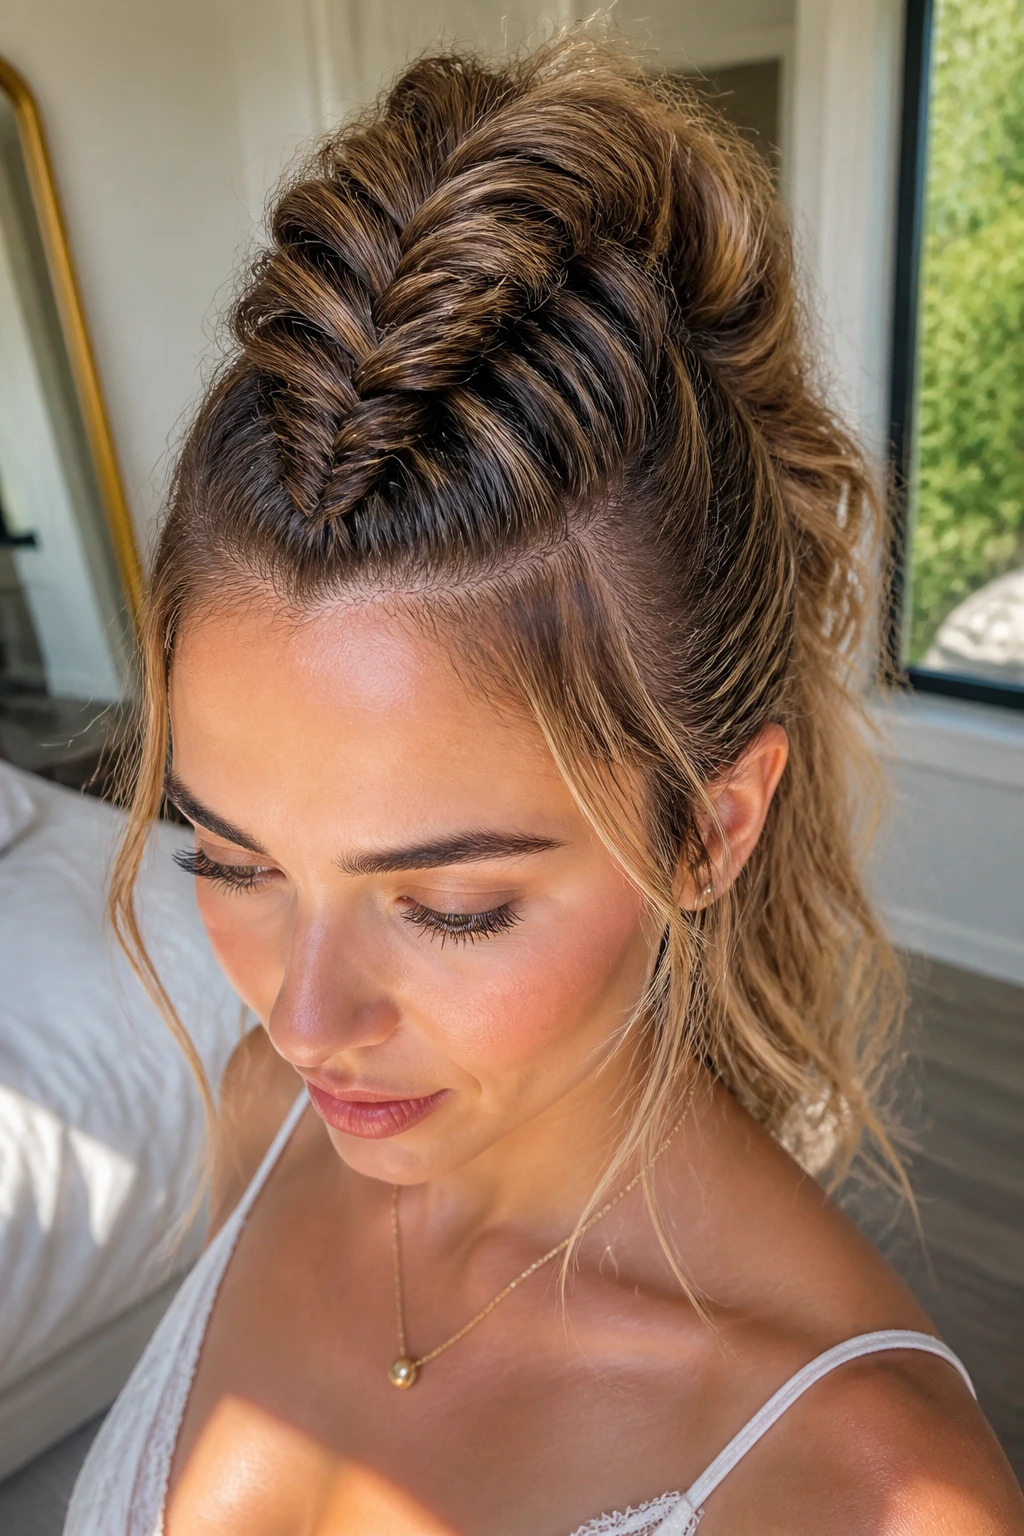
By sectioning the hair down the center of the head and braiding tightly into a raised, structural fishtail, you mimic the look of a Mohawk without needing to cut your hair.
Height and Texture
You want the braid to stand off the head.
- Backcomb the roots before you begin to provide a sturdy base for the braid.
- Use a strong-hold hairspray to ensure the structure holds its shape.
- Pull the edges of the braid out significantly once done to add the “width” of a Mohawk.
11. The Fishtail with Ribbon Integration
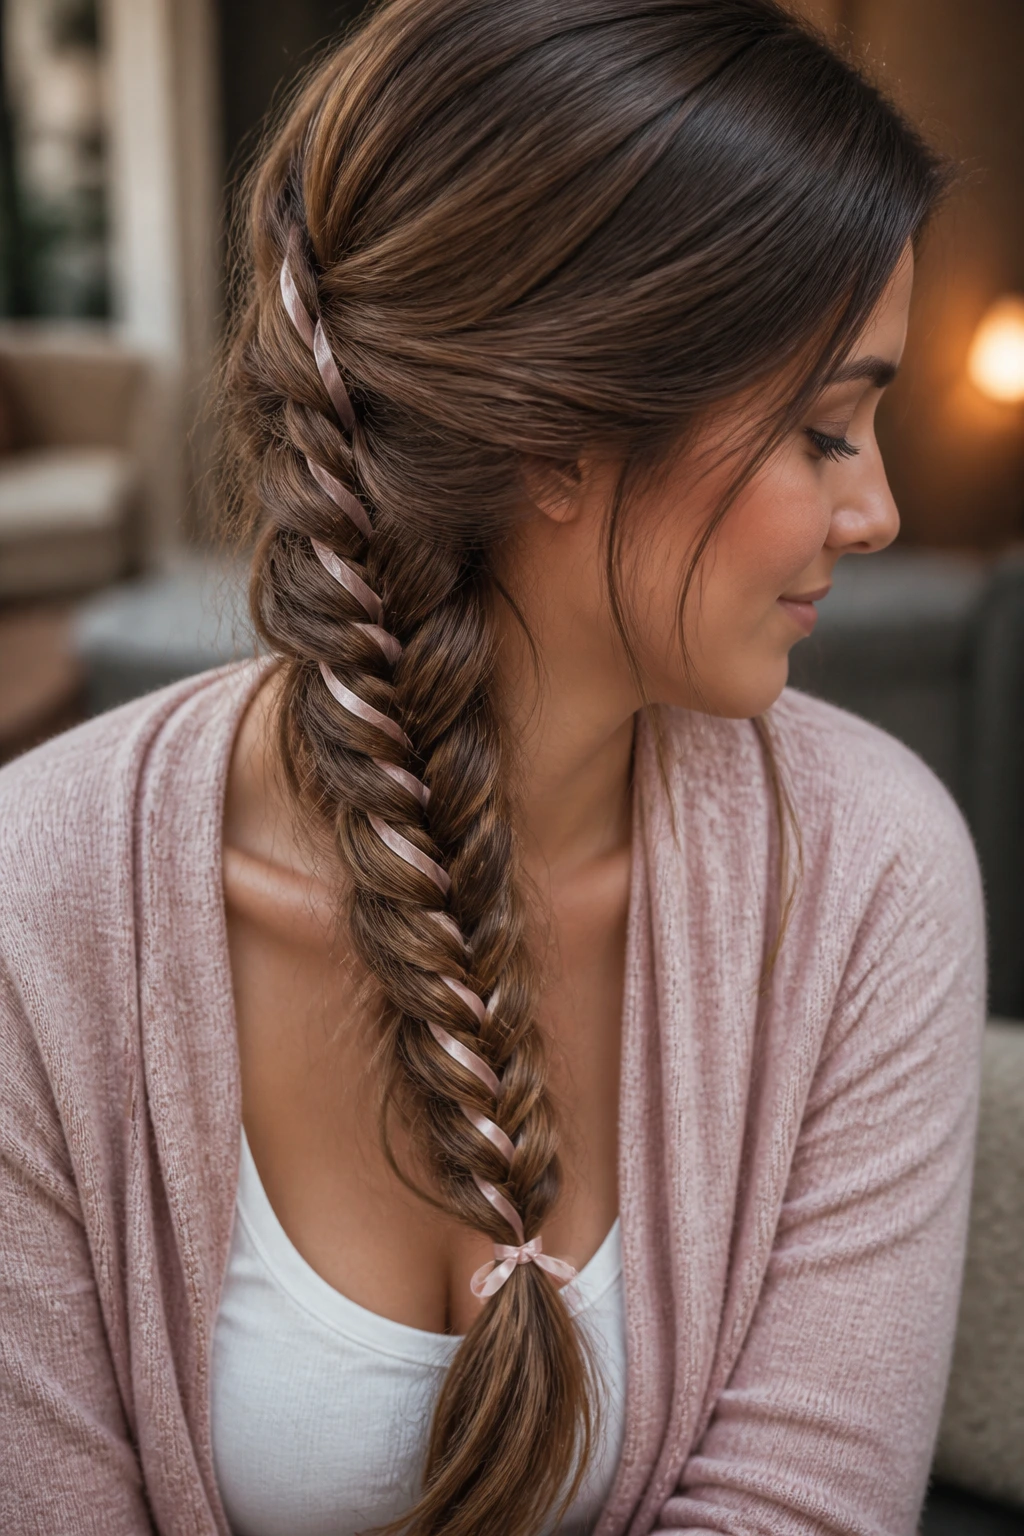
Adding a thin velvet or silk ribbon into your fishtail braid takes the style to a completely different level. You tie the ribbon to one of the two main sections and weave it in as you go.
Weaving with Intent
The ribbon changes how you move your hands, as you have to ensure the ribbon doesn’t get twisted.
- Use a ribbon that is about 1/4 inch wide—anything thicker becomes too bulky for a standard fishtail.
- Ensure the ribbon is long enough to extend past your hair length; you can always trim the excess later.
- Choose a color that contrasts with your hair for a bold statement or matches it for a subtle, elegant texture.
12. The Multi-Strand Fishtail
This is for the expert braider. Instead of just two sections, you start with four. You weave them in a specific pattern that results in a wider, flatter, and more intricate design than the standard two-strand fishtail.
The Logic of Four
You treat the two outer strands as your “fishtail” pieces and the two inner strands as anchors.
- It requires significantly more concentration.
- Because it is flatter, it sits closer to the head, making it a great choice for updos.
- Keep your hands steady; a single slip of the fingers here can unravel the whole structure.
13. The Mini-Fishtail Accents
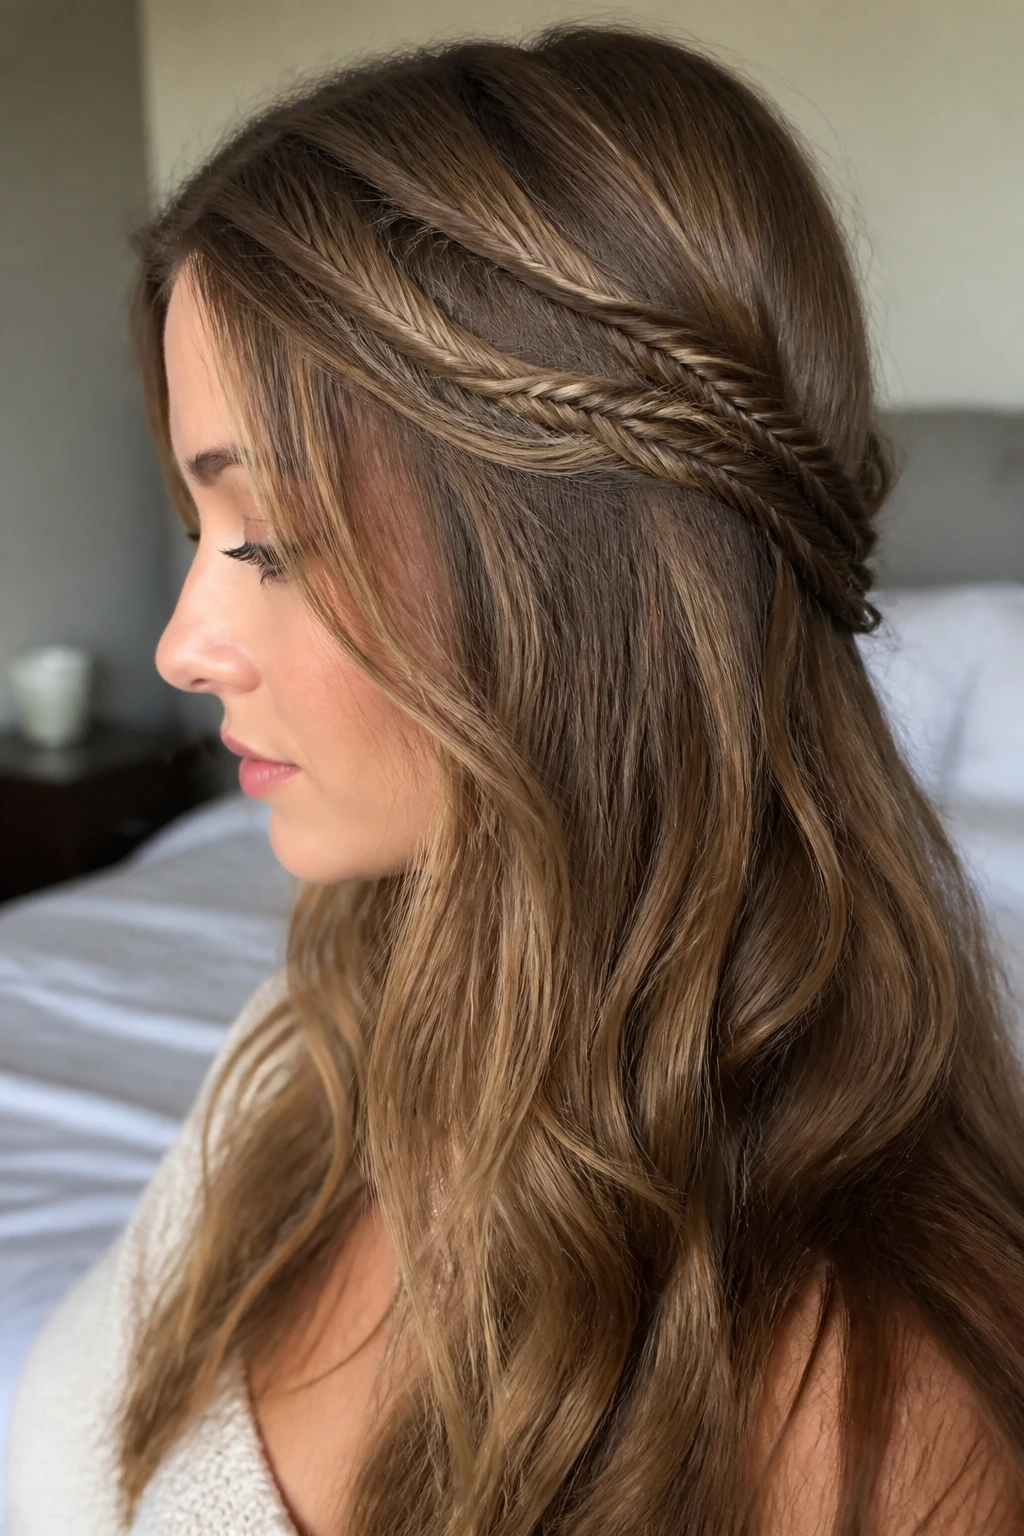
Sometimes, you just want a small detail. Instead of braiding all your hair, pull back two small sections from your temples, fishtail them, and join them in the back.
Seamless Blending
The goal is for the braids to feel like part of the overall hairstyle.
- Keep the braids thin—no more than a half-inch wide.
- Use a texture spray on the ends of the braids so they hold without a visible elastic, if possible.
- If you use elastics, hide them under the top layer of your loose hair.
14. The Triple Fishtail Updo
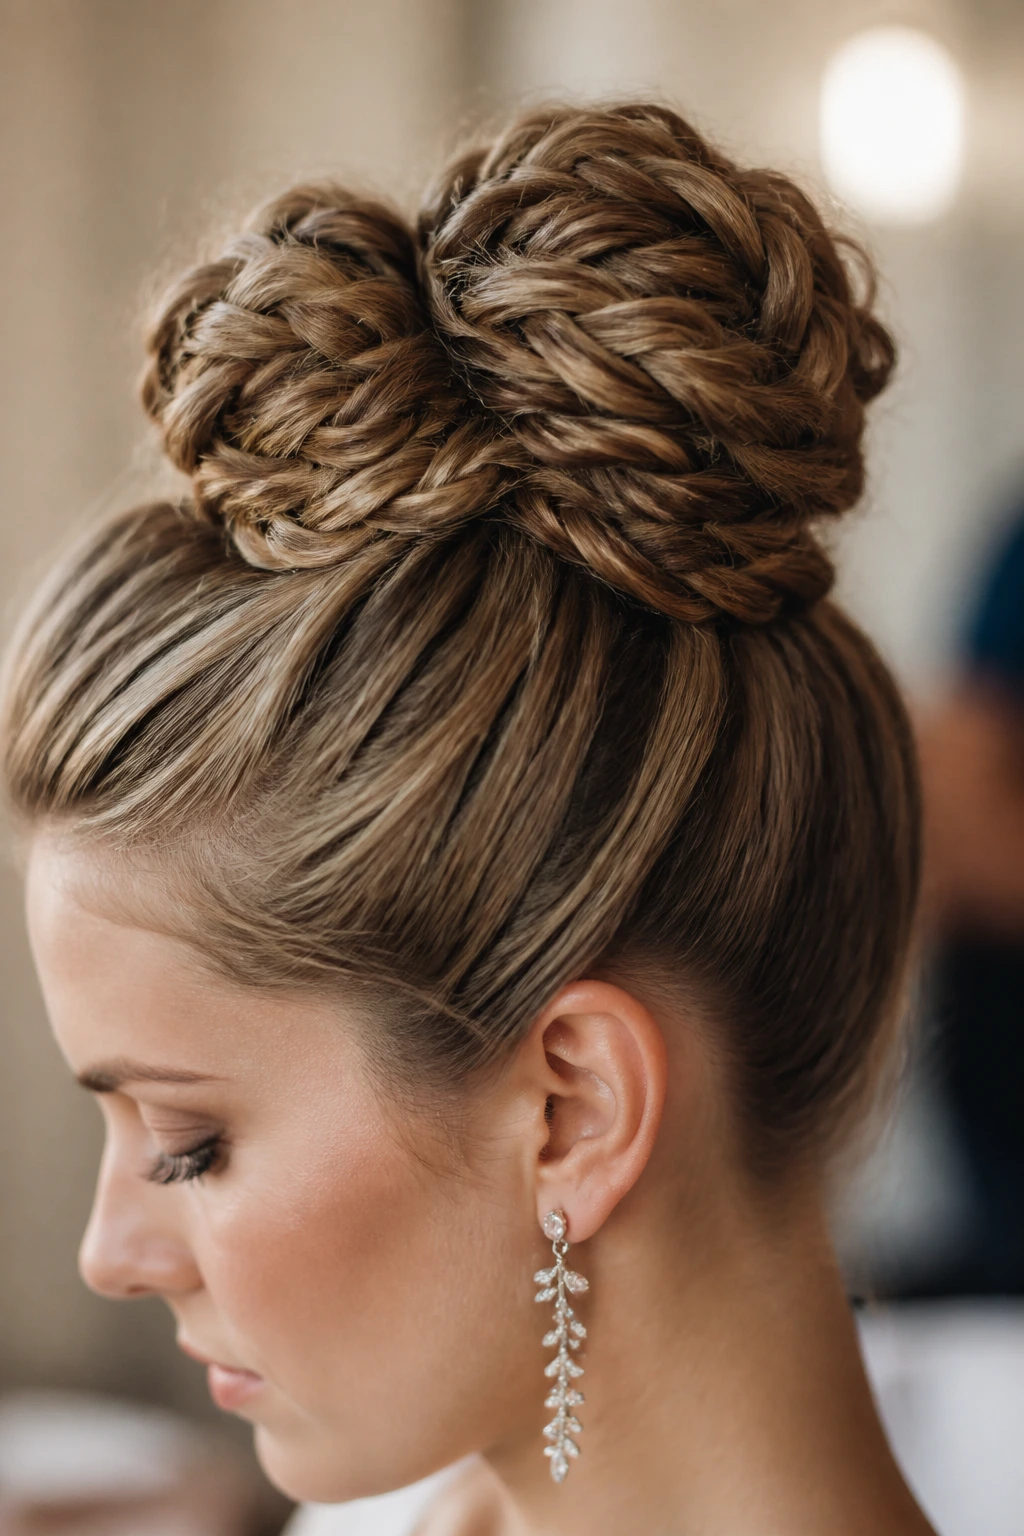
Take three separate fishtail braids and weave them together into a large, complex-looking bun. It is a stunning choice for weddings or formal events where you want your hair to look like a piece of architecture.
Creating the Base
The base of the updo should be a simple ponytail to keep everything anchored.
- Braid the three sections separately first.
- Pin them individually around the base of the ponytail.
- Use decorative pins—pearls or small crystals—to fill in the gaps between the braids.
15. The Fishtail into a Dutch Braid
Combine the two most popular styles. Start with a Dutch braid for a few inches to add volume at the root, then transition into a sleek fishtail for the remainder of the length.
Transitioning Techniques
The transition is the hardest part. You have to move from three strands to two.
- Simply merge two of the three strands into one at the point where you want to transition.
- Keep the tension tight during the transition so there is no gap in the weave.
- Ensure the switch is smooth, so the change in texture looks deliberate.
16. The Embellished Fishtail
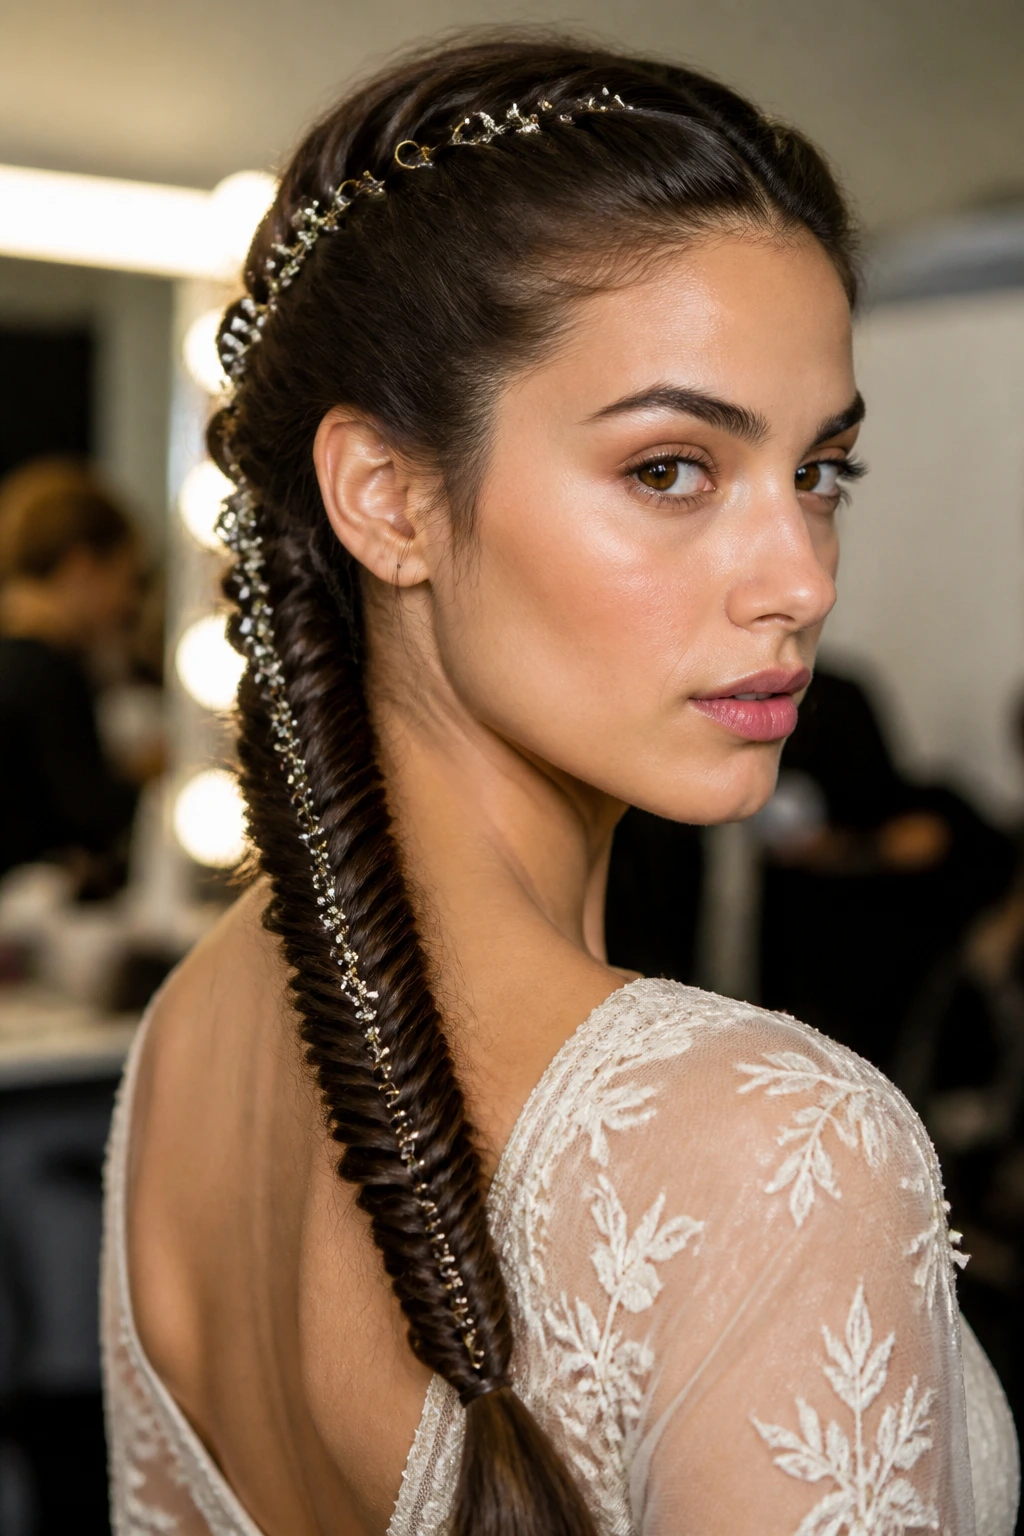
This isn’t a specific braid structure, but rather an approach to styling. You take a perfectly executed tight fishtail and dot it with small, metallic rings or tiny floral accents.
Proper Placement
Too many embellishments can drag the braid down, making it heavy and prone to sagging.
- Space out your accessories evenly, perhaps one every two inches.
- Ensure your accessories are lightweight; heavy clips will cause the braid to pull and eventually come loose.
- Focus the accessories on the outer edges where the weave is most visible.
17. The Fishtail with a Messy Top Knot
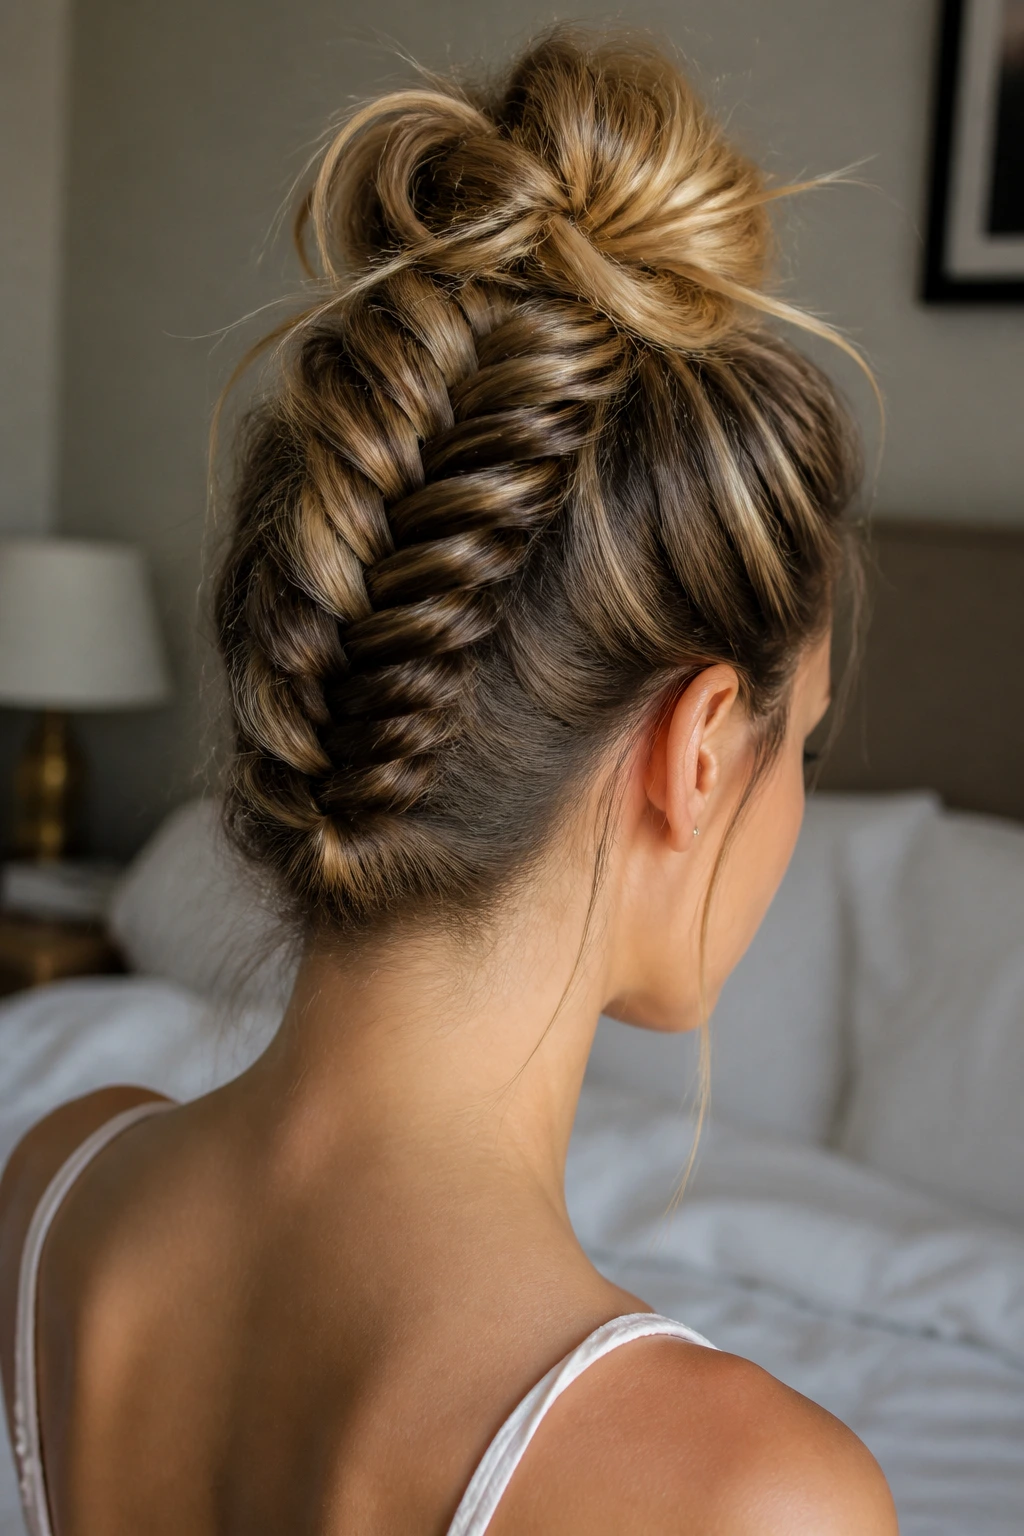
A top knot is a staple for long hair, but it can look a bit one-note. Adding a fishtail braid that runs from the nape of the neck up into the knot changes the entire silhouette.
Gravity and Support
The braid needs to support the weight of the bun.
- Start the braid at the nape with your head upside down.
- Once you reach the crown, incorporate the remaining hair into the bun.
- Use a U-shaped pin to secure the bun so it doesn’t pull on the braid.
18. The Fishtail with Face-Framing Tendrils

Long hair can sometimes look severe when pulled back. By leaving two long, loose strands near your face, you soften the look and add a romantic frame.
Curling the Tendrils
Straight tendrils can look like they were left out by mistake.
- Curl the tendrils away from your face with a large-barrel iron.
- Use a soft-hold hairspray so they don’t get stiff.
- Keep the tendrils long enough to sit below your jawline for the most flattering effect.
19. The Fishtail with Asymmetrical Partitioning
Instead of splitting your hair into two equal halves, split them into one thick and one thin section. The resulting fishtail will have an unusual, slanted weave that looks like a high-fashion runway style.
The Mechanics of Uneven Weaving
The thinner side will need to be crossed over more frequently to keep the balance of the braid intact.
- It creates a very distinct, cord-like appearance.
- This works exceptionally well for thick hair that needs a little more management.
- Keep the braid pulled tight to emphasize the unique, spiraling nature of the weave.
20. The Fishtail Side-Braid with Volume at the Crown
Before you begin the braid, tease the hair at your crown to create a little lift. This prevents the braid from looking too flat against your scalp, which is a common problem with long, heavy hair.
Teasing for Hold
The secret is in the product. Use a dry shampoo or volumizing powder at the roots to give the hair “grip.”
- Backcomb the section just behind your bangs.
- Gently smooth the top layer over the teased section before you start the braid.
- This creates a soft, rounded shape that transitions perfectly into the structured braid.
21. The Fishtail with a Low-Slung Bun
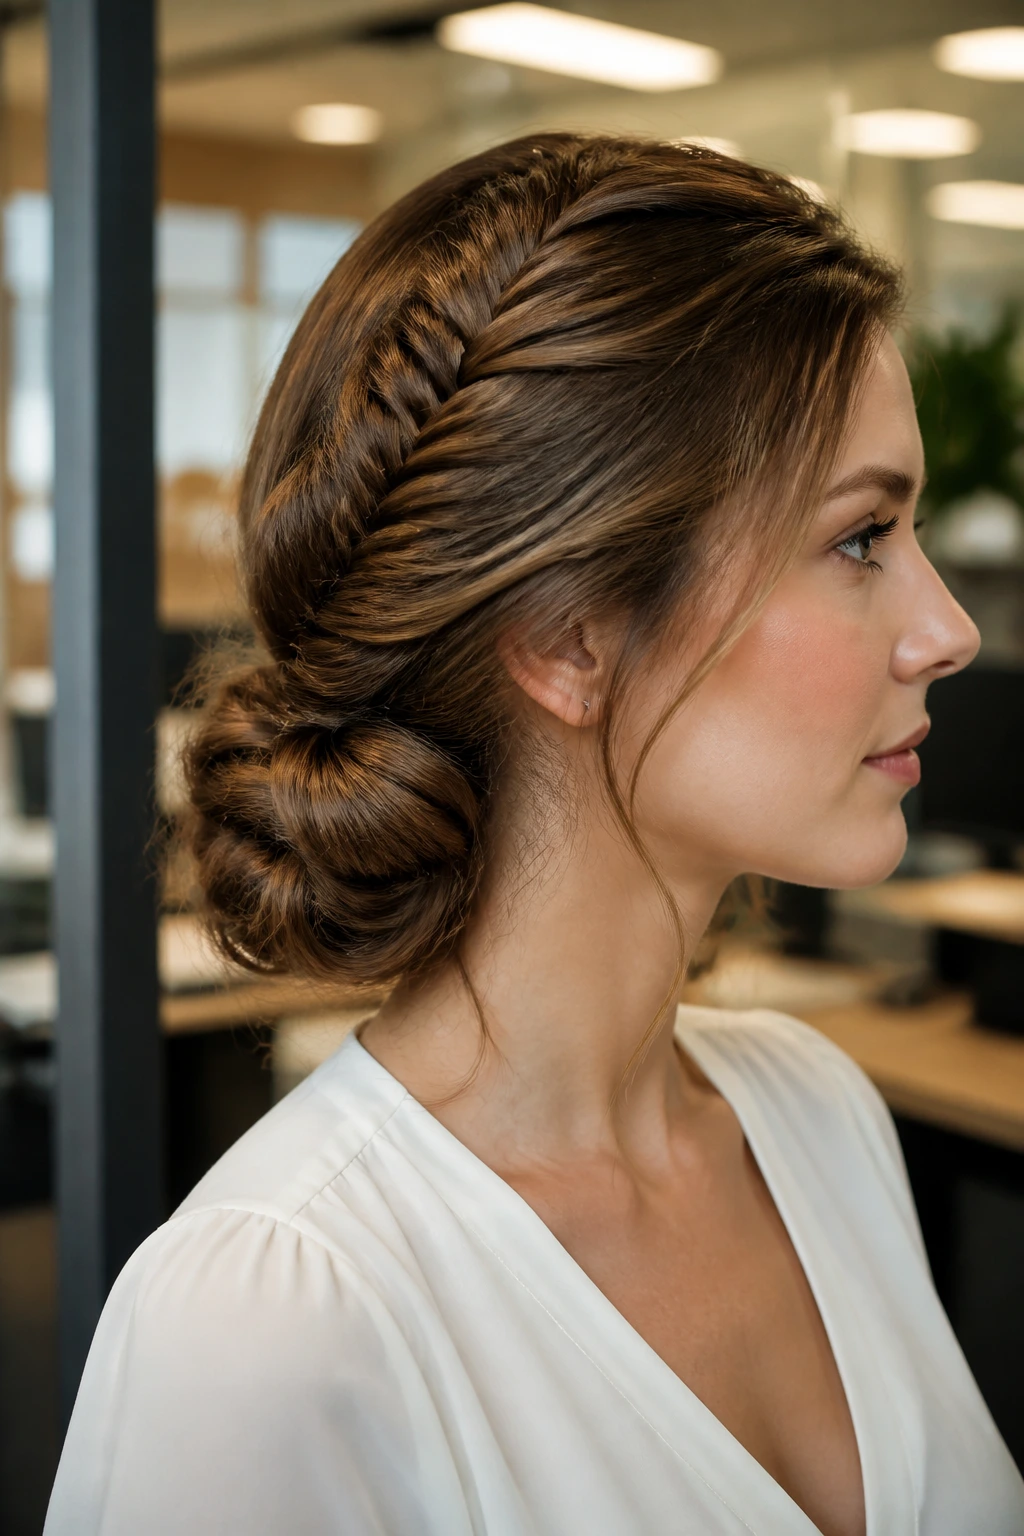
This is the “day-to-night” style. It is professional enough for an office setting but intricate enough for an evening out. You start with a fishtail braid that runs down the center of the back and then tuck it into a low bun at the neck.
Tucking the Ends
The tucking technique is key to keeping the bun looking full rather than sparse.
- Roll the braid upward toward the nape of the neck.
- Secure with pins rather than an elastic to keep the weave visible.
- Let a few loose hairs escape at the base of the bun for a soft, natural finish.
22. The Fishtail with Braided Accents
You can create a fishtail braid and then wrap a standard three-strand braid around it. It adds a layer of complexity that looks like you spent hours working on your hair.
Layering Depth
The trick is to do the standard braid as a separate piece, then pin it over the fishtail.
- Braid a small section of hair near your ear into a standard three-strand braid.
- Once your main fishtail is finished, wrap the smaller braid around the base or follow the spine of the fishtail.
- Use invisible hair pins to secure the smaller braid so the fishtail remains the star of the show.
23. The Fishtail with Color Blocking

If you have balayage or highlights, a fishtail braid is the absolute best way to display the color variation. The way the light hits the woven strands makes the different tones pop.
Showcasing Highlights
The smaller the strands you pull, the more color blending you will see.
- If you have chunky highlights, try to keep your strands consistent so you don’t muddy the color.
- A loose, messy fishtail generally showcases color better than a very tight, polished one because the light can hit the edges more effectively.
- Spray with a shine mist once finished to make the color dimension truly sparkle.
24. The Fishtail with a Floral Twist
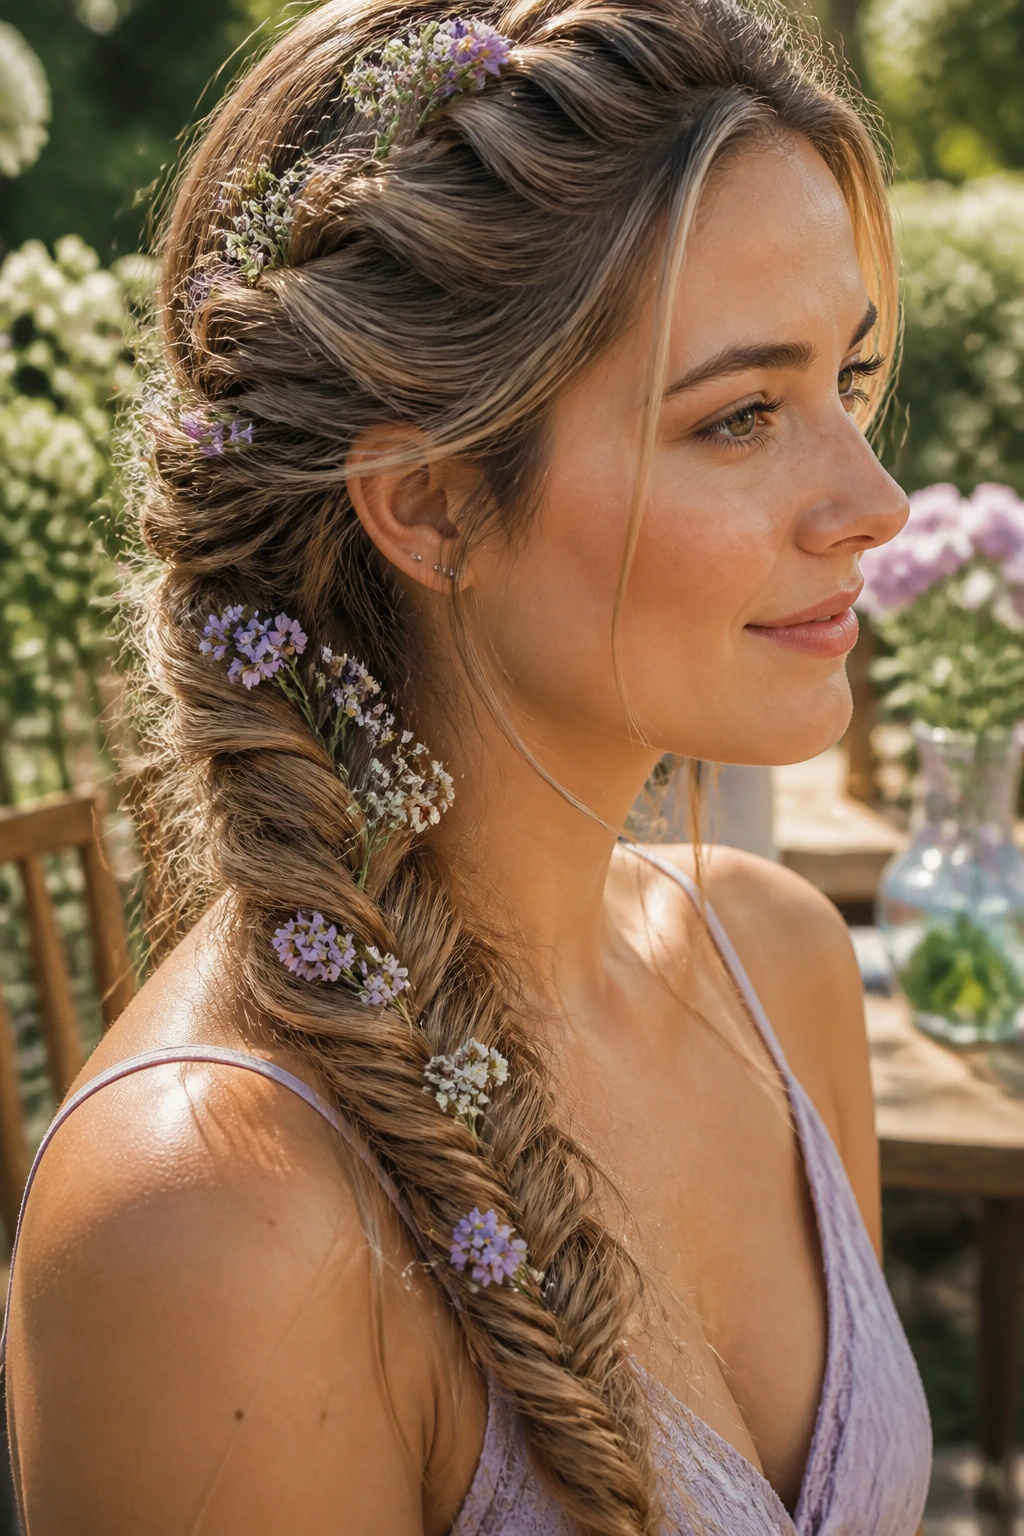
For a garden party or summer event, weaving small sprigs of lavender or baby’s breath into the fishtail is a timeless, feminine touch.
Fresh vs. Faux
Always prefer real flowers if they are available—they smell better and look more authentic.
- Use flowers with strong stems that won’t wilt immediately.
- Tuck them into the braid loops rather than trying to braid them in directly; this keeps them from breaking.
- If you use faux flowers, choose ones with thin, flexible wire stems that you can twist securely into the weave.
25. The Fishtail for Extremely Long Hair
If your hair reaches your waist or lower, the fishtail can become quite a workout. The key is to manage the weight and the tangling.
Managing the Length
With extreme length, your hair will tangle while you are braiding.
- Detangle thoroughly before you begin.
- Use a small amount of leave-in conditioning cream to keep the strands slippery.
- Work in sections; braid the first few inches, secure it, then move down, or simply work quickly to avoid the hair at the bottom becoming a bird’s nest.
- If the length becomes too much, consider a side-swept fishtail so you can see the ends and keep them organized.
Wrapping Up

The beauty of the fishtail braid lies in its versatility and the way it handles length. Whether you are aiming for something sleek and structural or loose and romantic, the fundamental technique remains the same. Once you master the rhythm of crossing those small, thin strands over, you will find that you can adapt the braid to almost any occasion. Do not be afraid to pull the loops out to create volume or to add accessories when the mood strikes. Your long hair is the perfect canvas for these intricate, woven designs—take your time, keep your tension consistent, and enjoy the process of turning simple strands into a work of art.