Frizzy hair often gets a bad rap, treated like an enemy to be conquered with heavy silicones and endless heat styling. In reality, that very texture—the volume, the grit, and the natural body—is the secret weapon for a braid that actually stays in place. If you have ever tried to braid freshly washed, slippery, straight hair, you know it falls apart within an hour. But hair with a bit of frizz? It has natural grip. It holds pins, it secures elastics, and it creates a soft, lived-in aesthetic that looks intentional rather than messy.
Working with texture is about embracing the chaos. When you stop fighting the puffiness and start using it to add volume to your plaits, you move from feeling frustrated to feeling styled. The following styles are designed to be completed in under ten minutes, perfect for those mornings when your hair decides to go in five different directions at once. Forget perfection; these styles thrive on that slightly undone, textured look that makes every braid appear thicker and more complex than it actually is.
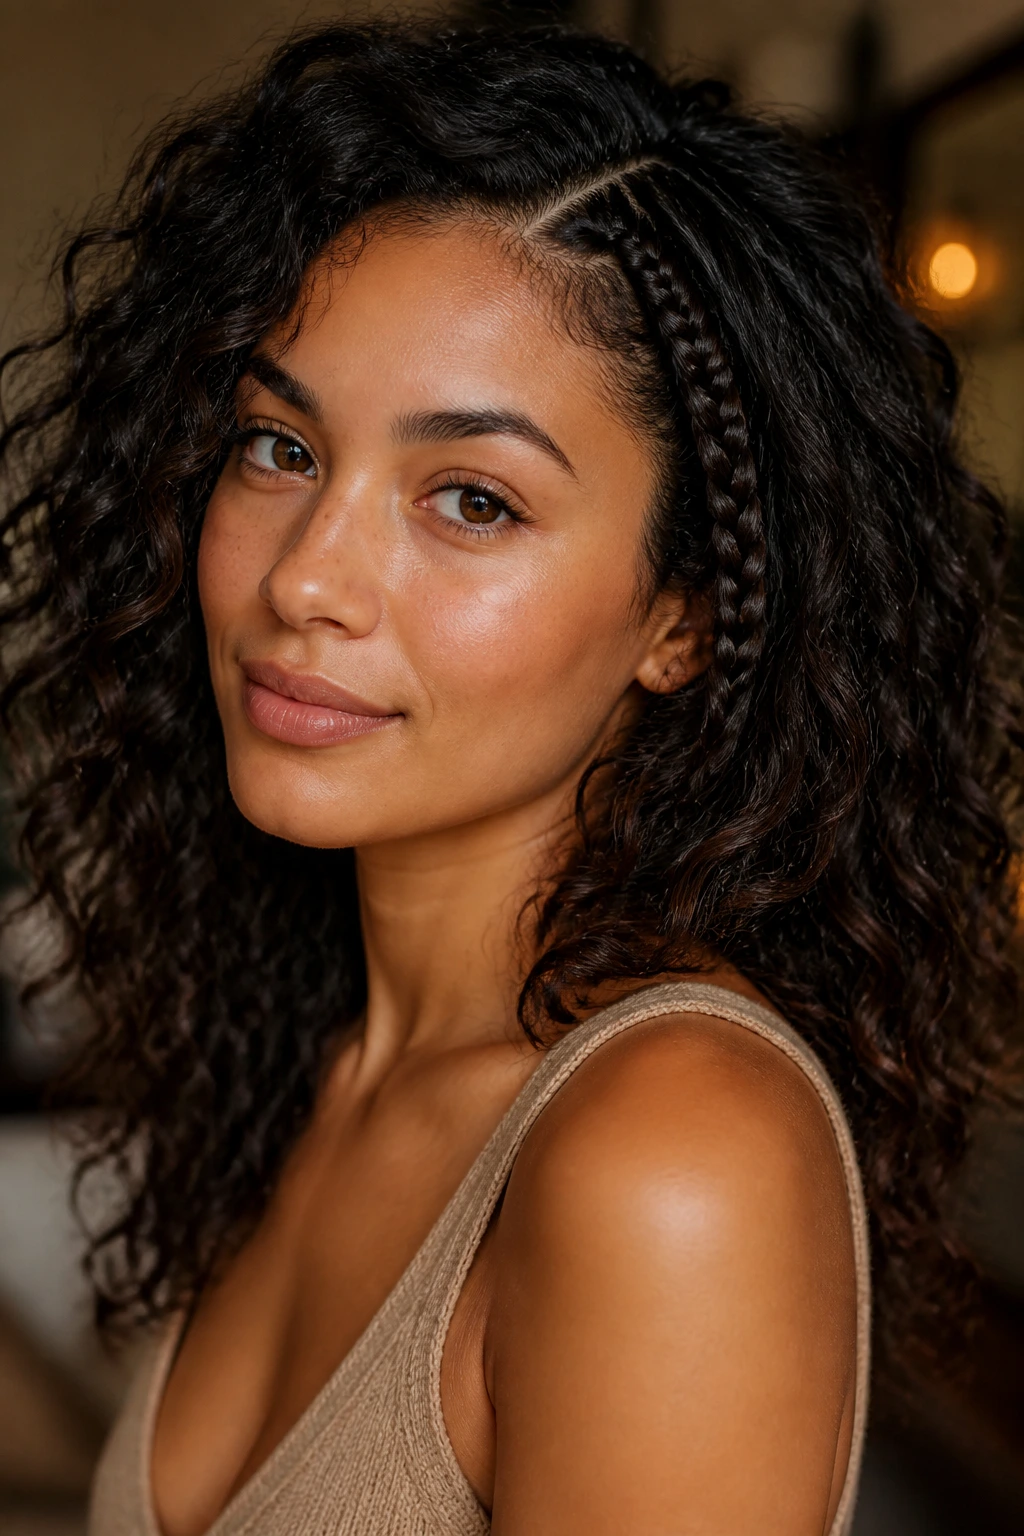
1. The Messy Three-Strand Side Braid
This is the foundational style for anyone battling frizz. Instead of aiming for a sleek, tight plait, focus on creating a loose, wide structure that showcases the natural volume of your hair. Pull your hair to one side, gather it into three sections, and begin a standard braid. The secret here is to keep your hands light and pull the loops of the braid outward as you go.
Why It Works for Frizzy Texture
Frizzy hair provides the friction needed to keep the braid from sliding down your shoulder. Since you are intentionally pulling the braid apart to create a wider, fluffier look, the frizz actually works for you rather than against you. You end up with a braid that looks twice as thick as it would on fine, straight hair.
Steps to Success
- Gather your hair to your preferred side.
- Braid loosely, leaving about two inches at the bottom.
- Secure with a clear elastic.
- Gently tug on the edges of the plait, working from the bottom up.
- Use your fingers to pull at small wisps around your face to soften the look.
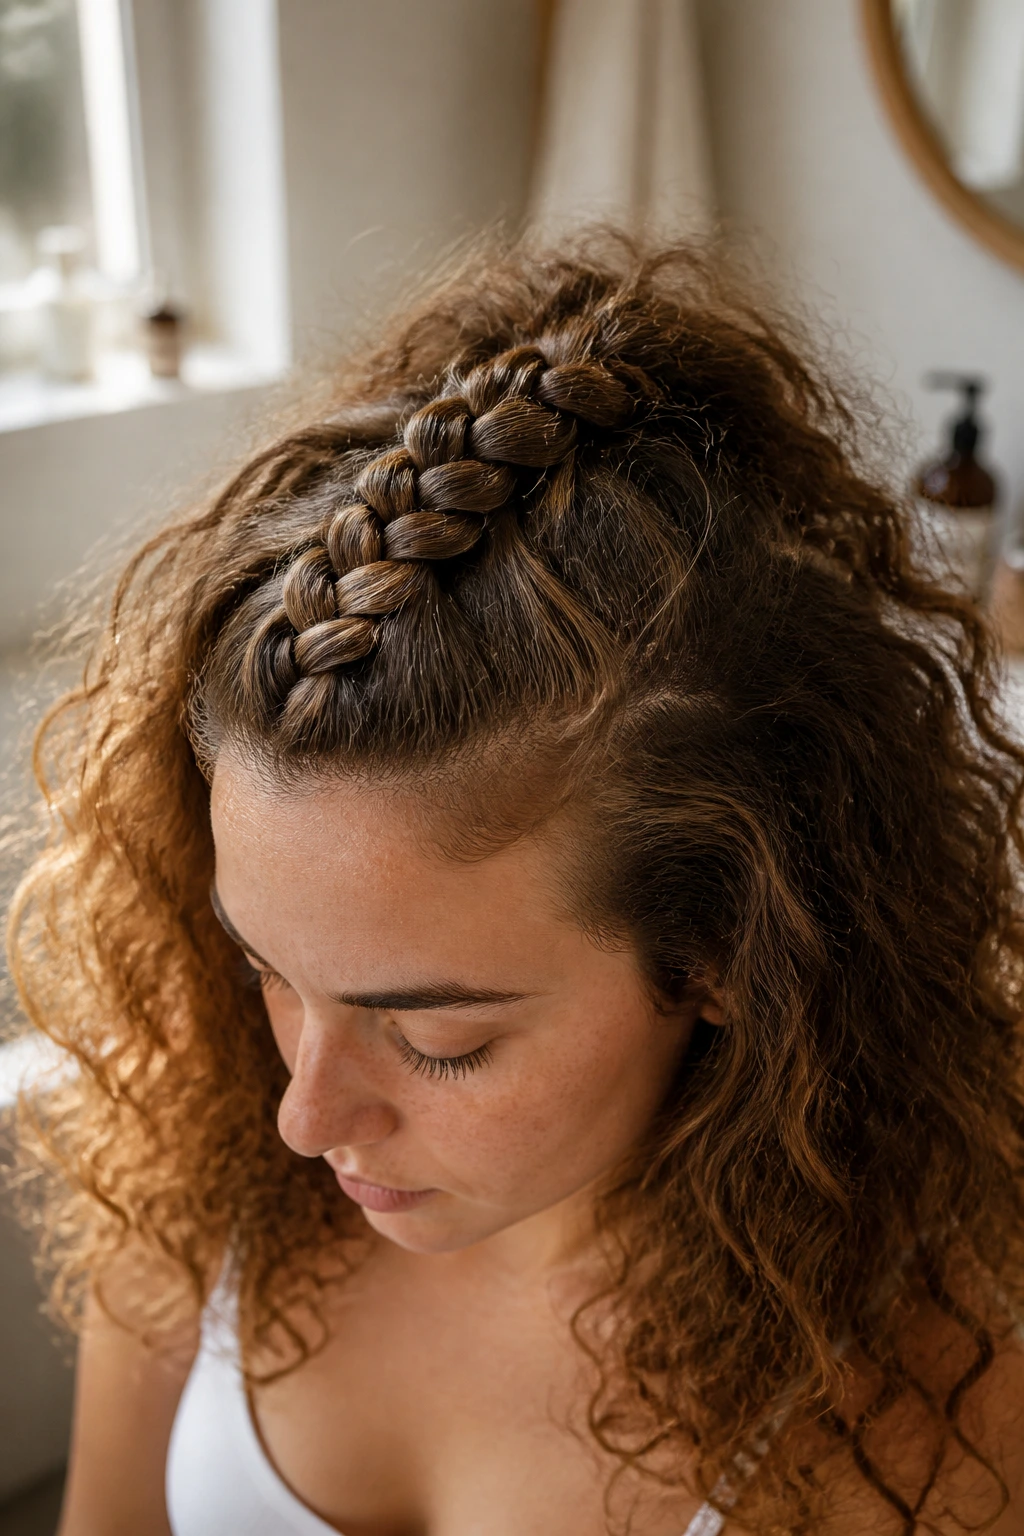
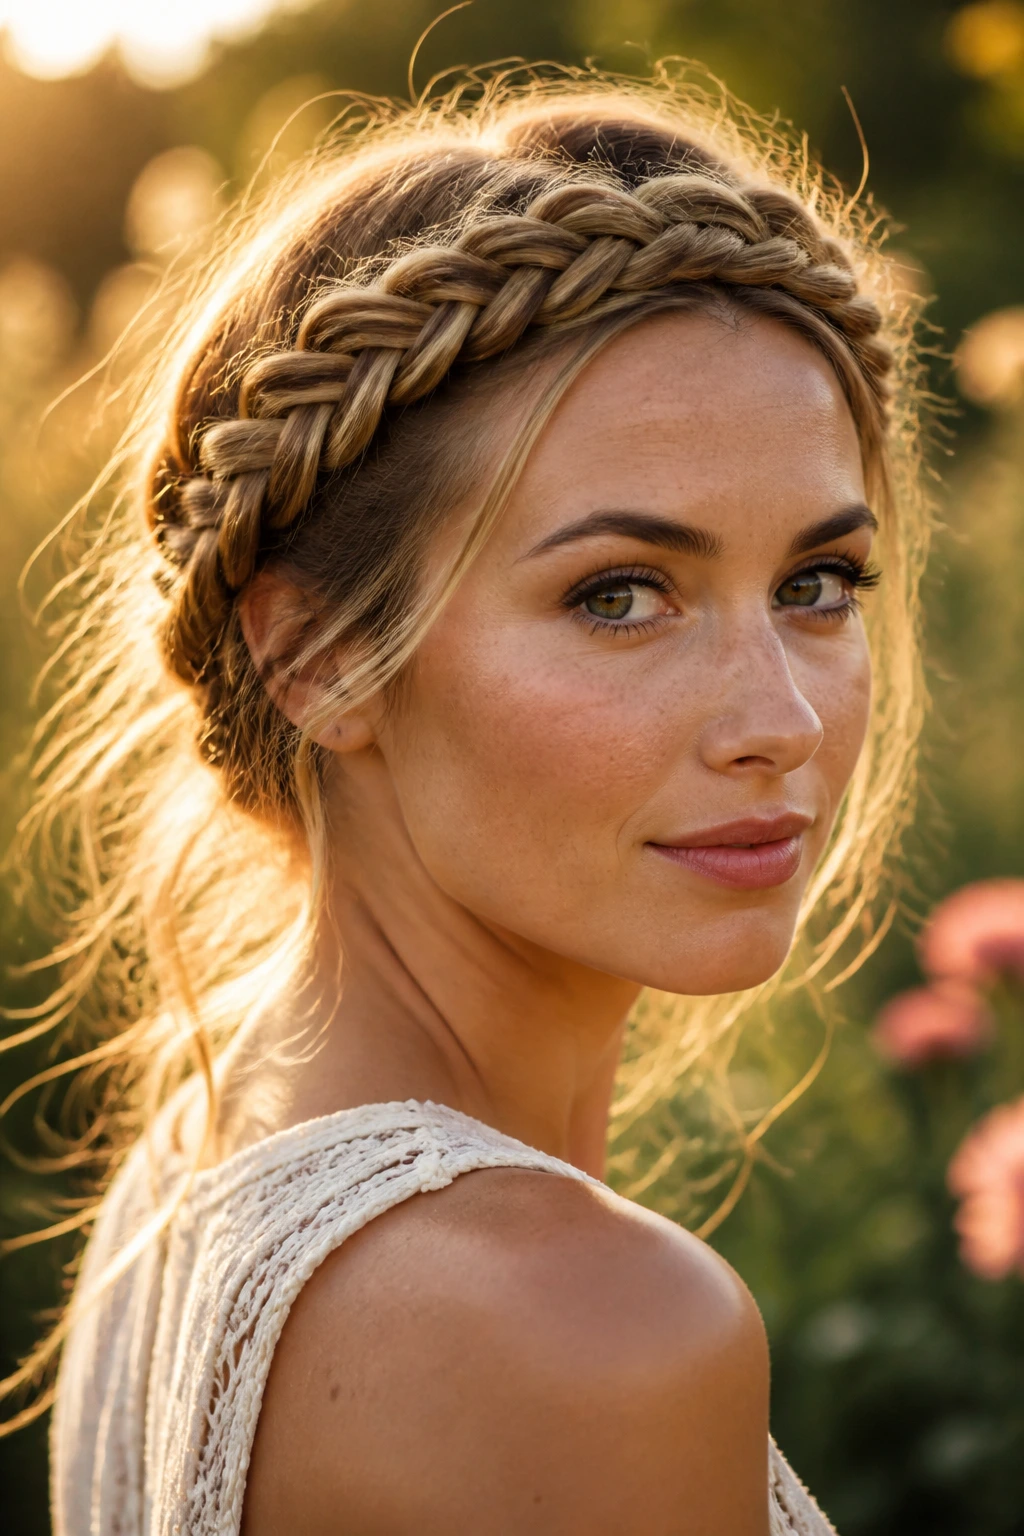
2. The Knotted Crown Braid
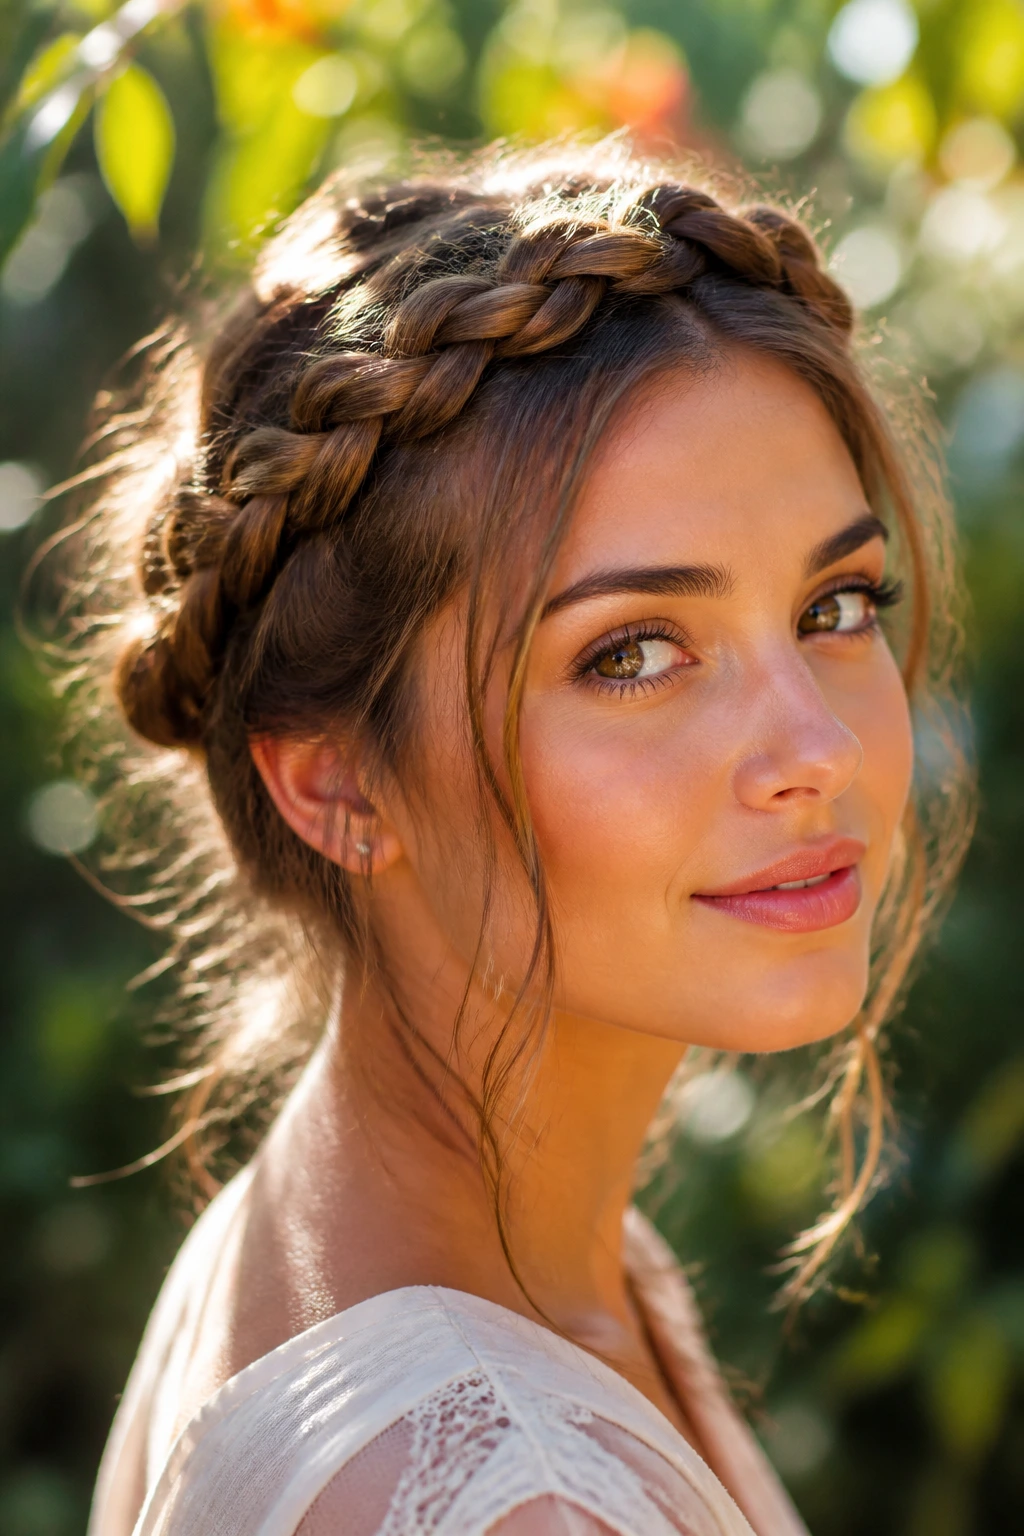
If you have a high-frizz day, a crown braid is your best friend because it locks those rogue strands away from your face. Unlike a traditional Dutch crown, the knotted version relies on small, overlapping sections tied into simple knots. It sounds complicated, but it is just a series of over-under loops that mimic a crown without requiring advanced technical skills.
How to Style It
You will start near your temple, taking two small sections of hair and tying them in a simple overhand knot. Add a bit more hair from the hairline into the tails of that knot and repeat the process as you work your way around the head. You do not need to be precise. In fact, if the knots look a little bit uneven, it adds to the bohemian, carefree vibe.
Maintenance Tips
- Use a light-hold cream before starting to keep the frizz from becoming literal flyaways.
- Secure the ends with a small, discreet bobby pin tucked under the braid.
- Do not worry if strands pop out; just tuck them back in with a pin or let them frame your face naturally.
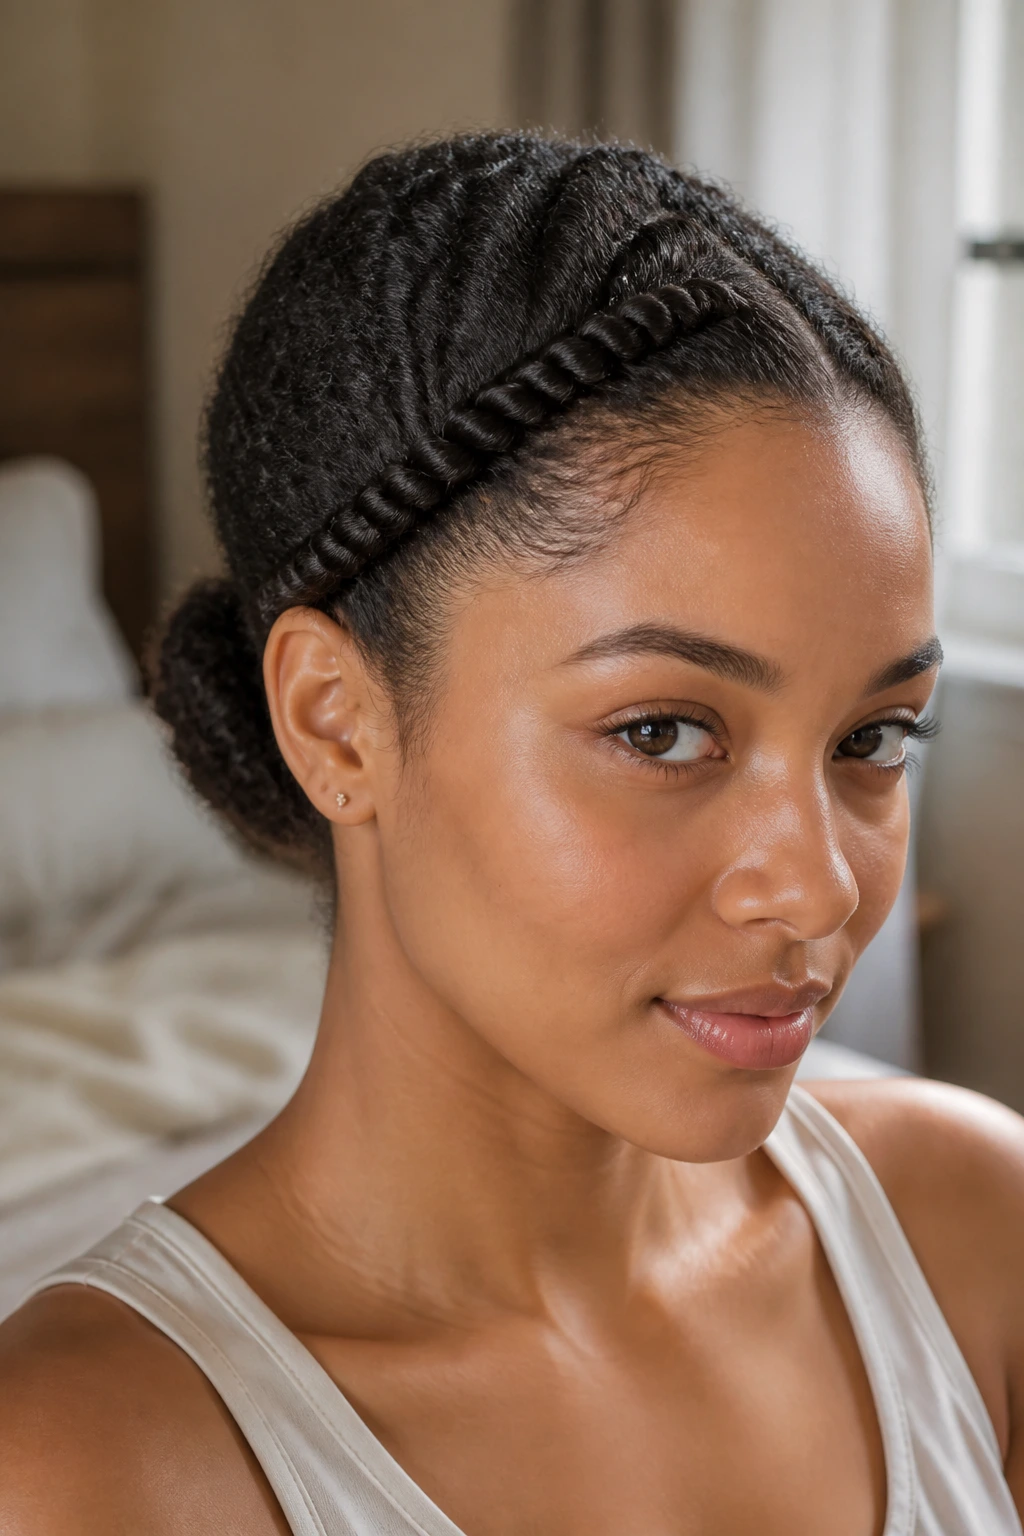
3. The Twisted Rope Braid
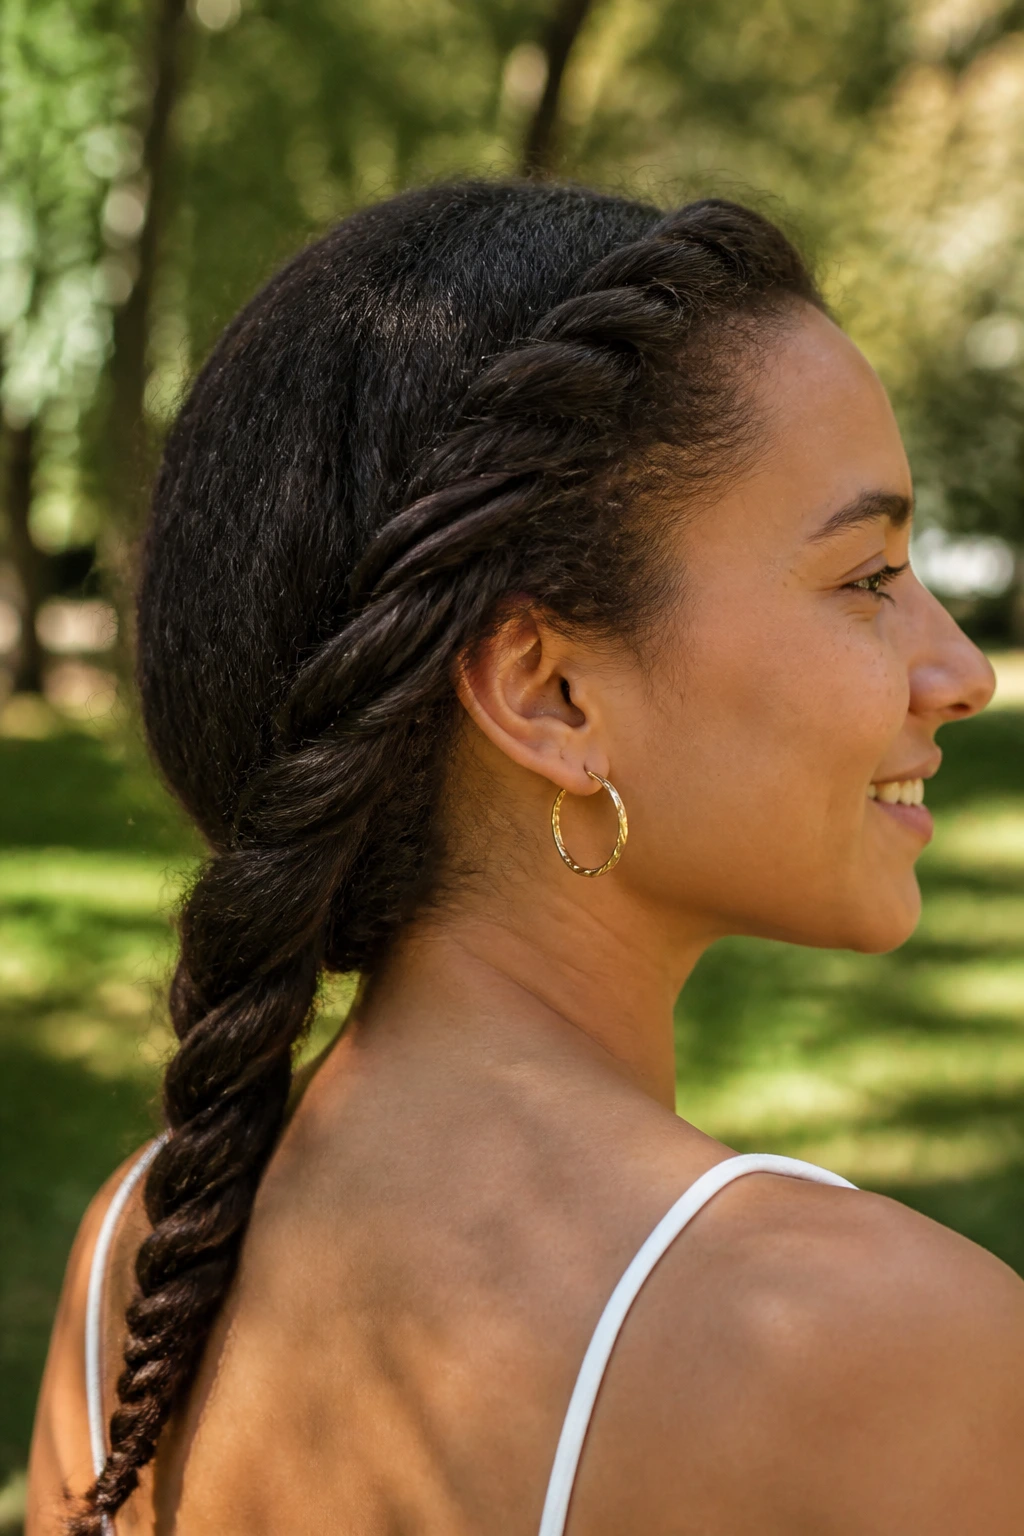
Rope braids are often easier to manage than three-strand plaits because you are only working with two sections of hair. By twisting them in opposite directions and wrapping them around each other, you create a structure that holds up exceptionally well in humid conditions. The natural roughness of frizzy hair helps the rope twist lock in place, preventing the classic “unraveling” problem.
Achieving the Perfect Rope
Start by parting your hair into two even sections at the nape of your neck. Twist each section individually to the right, then wrap them around each other to the left. This counter-twist is what gives the rope its tight, spiral appearance. If you keep the tension firm, you will find that the braid stays perfectly secure for the entire day.
Styling Variation
- For a more casual look, let the twist be loose and pull at the edges.
- For a more polished look, use a tiny bit of lightweight oil to smooth the surface of each rope section before twisting.
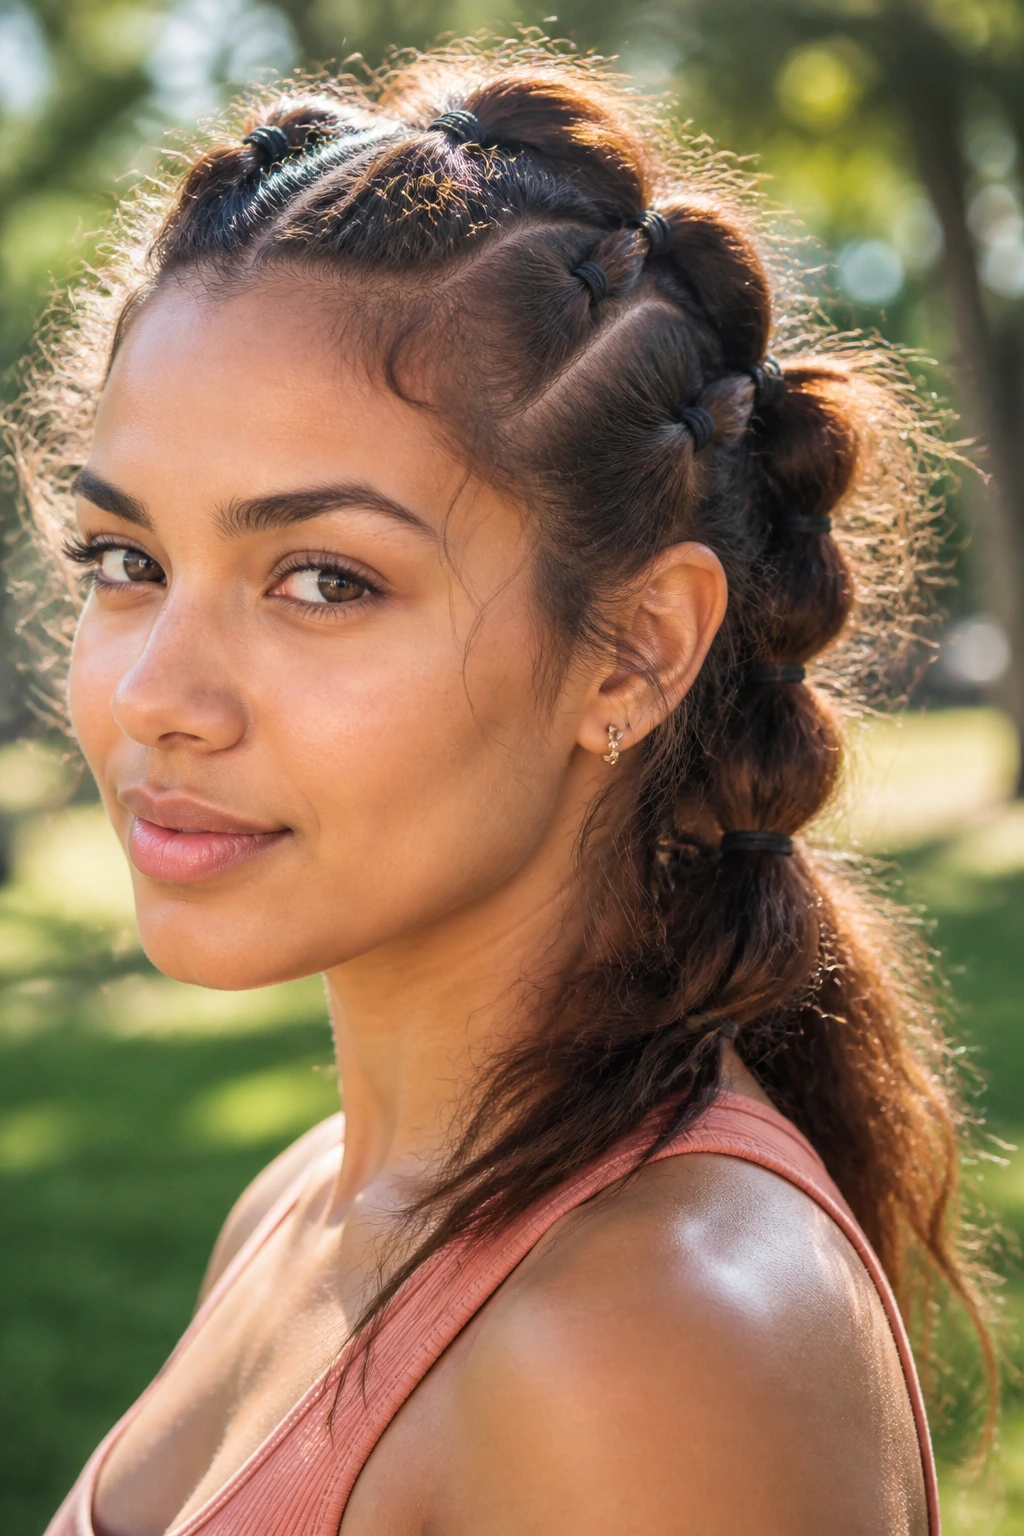
4. The Double-Dutch Pigtail

Dutch braids—where you cross the strands under rather than over—create a 3D effect that pops beautifully on high-volume, frizzy hair. Because your hair has more texture, the braid will look prominent and defined. This is a great style for active days when you need to keep your hair completely out of your face.
The Technique
Part your hair down the center and create two sections. Start at your forehead, grabbing a small triangle of hair, and split it into three. As you cross the outer strands under the middle strand, pull in more hair from the sides. Keep your elbows high to maintain consistent tension, which prevents the braid from sagging at the back of your head.
Tips for Frizzy Hair
- Apply a leave-in conditioner before you start; this provides slip for braiding but leaves the hold intact.
- If you find the ends are too frizzy to handle, add a drop of hair serum to your palms while you work.
5. The Scarf-Integrated Braid

When your frizz is truly out of control and nothing seems to lie flat, a silk or cotton scarf becomes your best styling tool. By braiding a fabric strip into your hair, you add structural support that hides the messiness while making the hairstyle look like a curated accessory.
How to Integrate the Scarf
Tie the scarf around the base of a high ponytail, letting the two long ends of the scarf act as two of your three “braid strands.” As you plait your hair along with the fabric, the scarf creates a thick, uniform braid that is impossible for frizz to disrupt. This is one of the fastest ways to hide bad-hair-day texture.
Why This Style Wins
- It adds instant color and style to a simple look.
- The fabric provides weight, keeping the braid centered.
- You do not need to worry about perfectly smooth sections.
6. The Pull-Through Braid
This is not technically a braid, but it is one of the most effective ways to cheat the look of a massive, intricate plait. It involves using multiple clear elastics to “feed” hair through loops, creating the illusion of a braid without any actual weaving. It is perfect for those who find the arm fatigue of traditional braiding to be a deterrent.
Execution Steps
- Start with a high ponytail and secure it.
- Divide the ponytail into two and create a second ponytail directly beneath the first.
- Split the top ponytail in half and wrap it around the bottom one, securing that bottom tail with a new elastic.
- Continue down the length of your hair, always pulling the “side” sections through the middle of the previous section.
The Frizz Advantage
Pull-through braids thrive on volume. Since you are essentially puffing out each section to create the “braid” look, the natural frizz of your hair makes the finished product look incredibly full and soft.
7. The Fishtail Side-Sweep

The fishtail is the classic choice for a delicate, intricate look. While it takes longer than a standard three-strand braid, the end result is worth the effort. On frizzy hair, the tiny, repetitive crossovers of a fishtail create a textured, almost knitted appearance that looks sophisticated and intentional.
Getting the Rhythm
Hold your hair in two sections. Take a tiny piece from the outer edge of the left section and cross it over to the right. Then, take a tiny piece from the outer edge of the right section and cross it over to the left. Keep the pieces small—this is the secret to a high-quality fishtail.
Troubleshooting
- If your arms get tired, take a break. The braid won’t fall apart if you let go, provided the base is secure.
- Do not try to make it look smooth. A messy fishtail on textured hair is much more flattering than a tight, flat one that shows gaps.
8. The Half-Up Waterfall Braid
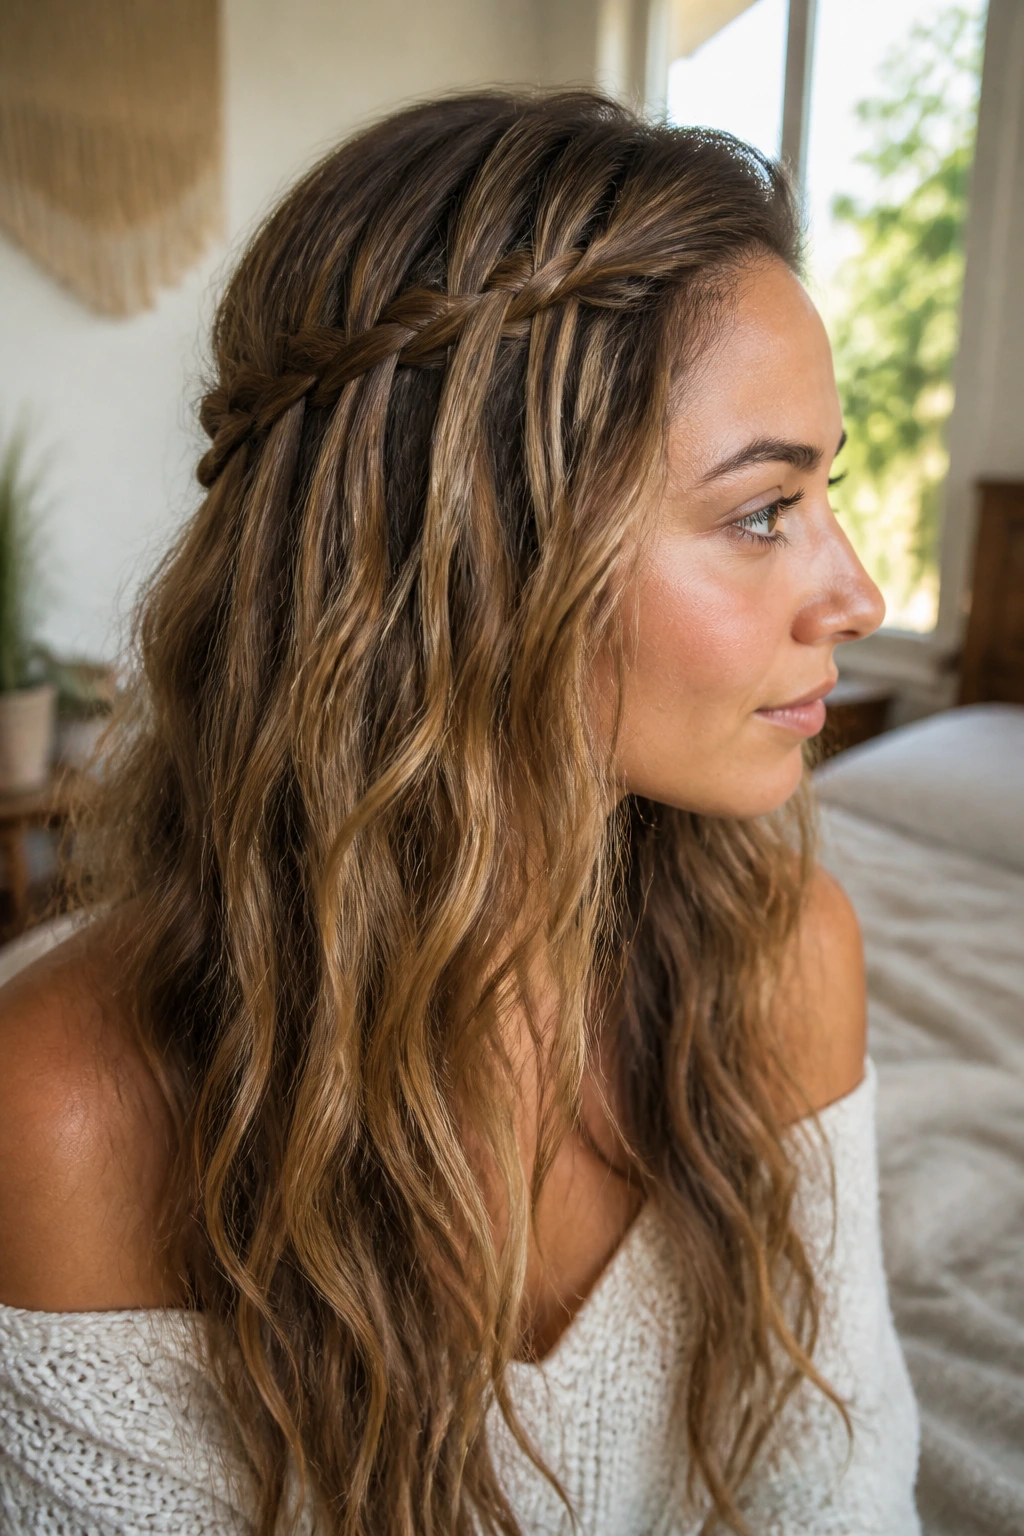
This style is ideal for when you want to show off the length and volume of your hair but need to keep your fringe off your forehead. By braiding a small section from each temple and letting the rest of your hair hang free, you highlight the texture while maintaining control.
The “Waterfall” Logic
The trick is to leave the strand that you would normally “cross over” hanging down, then replace it with a new strand of hair from the top. It creates the illusion that the braid is “leaking” hair down your back. It is a stunning look for wavy, frizzy hair that would otherwise be left messy.
Styling Advice
- Use a touch of pomade on your fingers as you grab each new piece of hair.
- Secure the end of the waterfall braid with a small decorative pin or a clear elastic hidden beneath the top layer of hair.
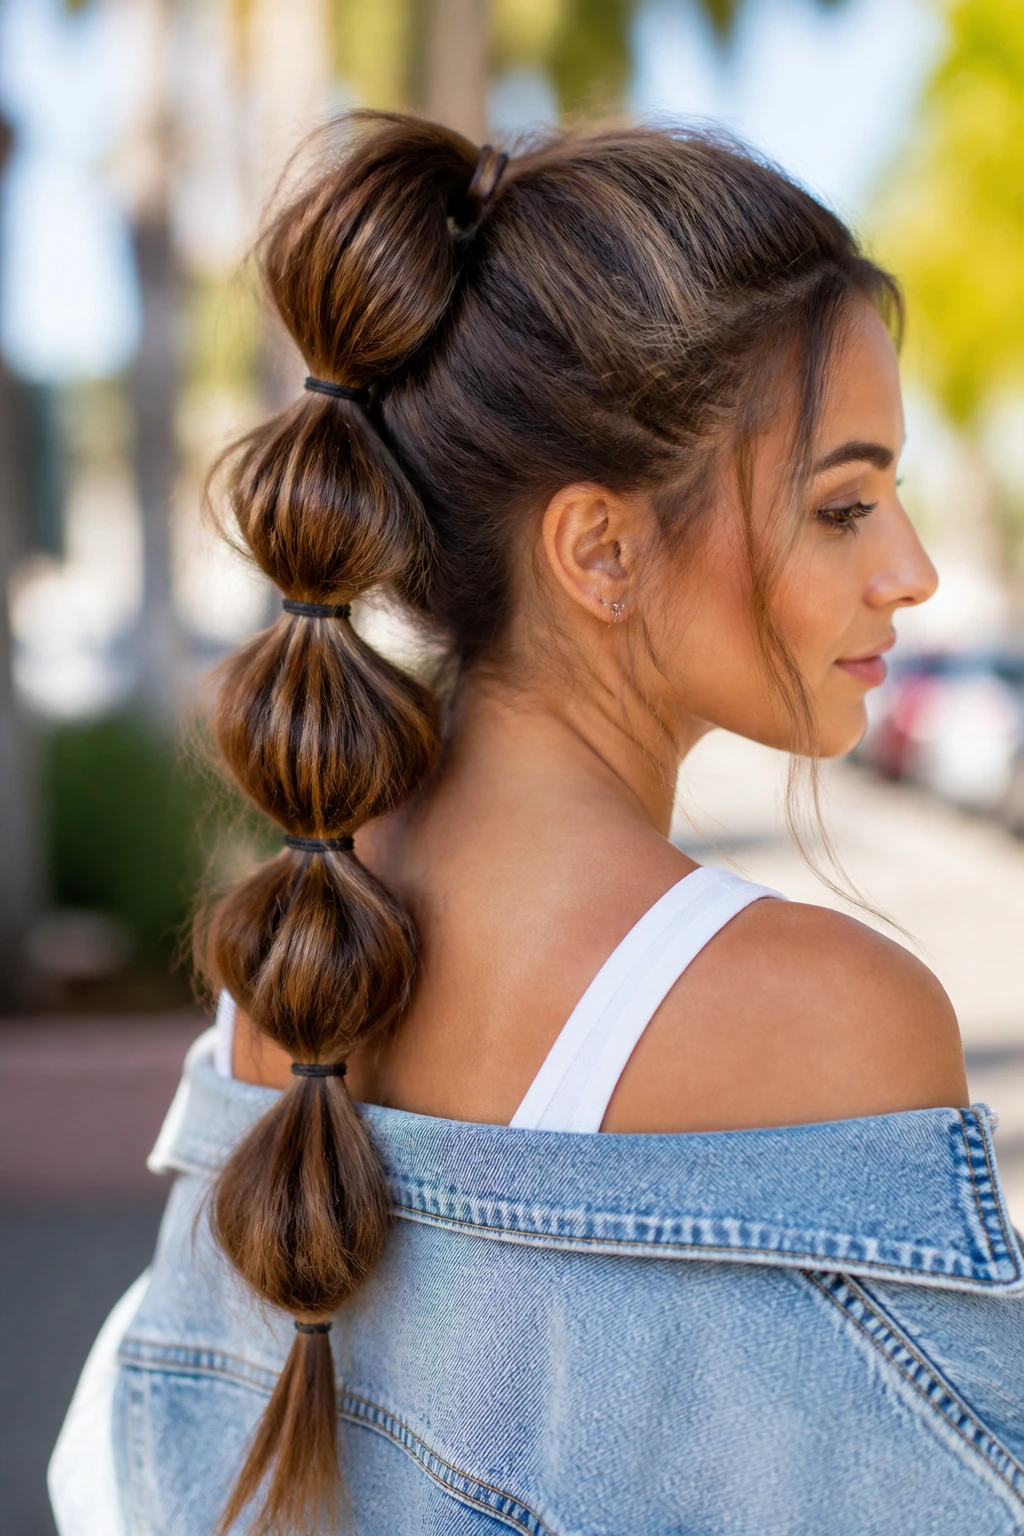
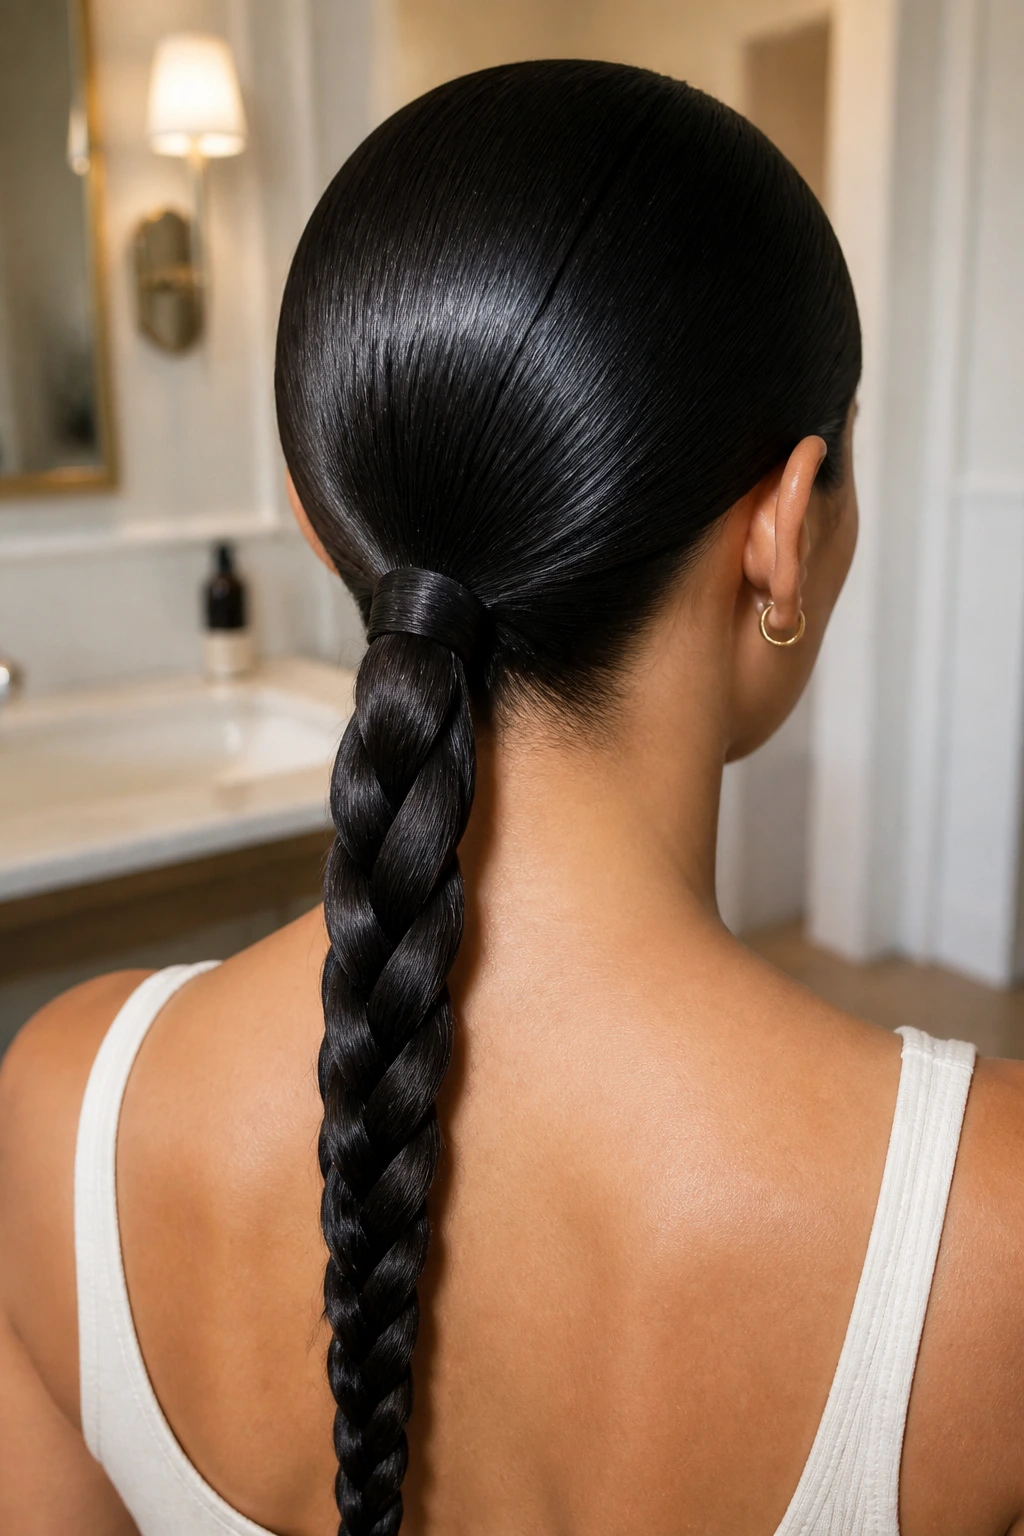
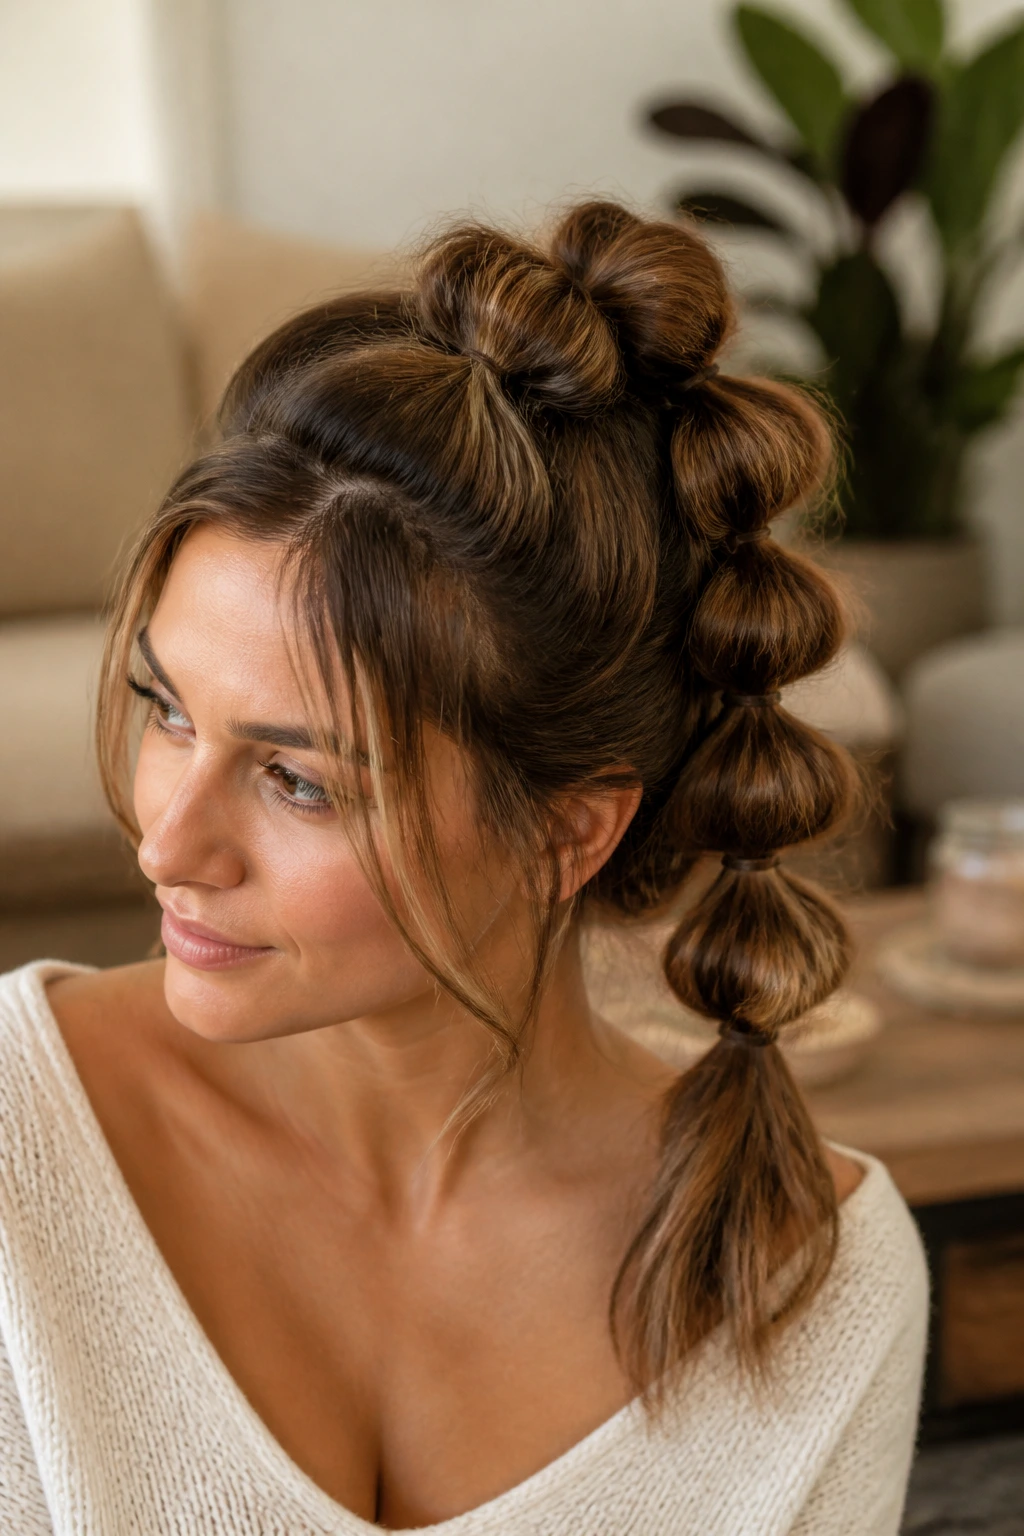
9. The Bubble Braid

Bubble braids are arguably the quickest “braided” look you can achieve. They involve securing a ponytail at intervals and puffing out the hair between the elastics. It turns unruly, frizzy hair into a series of uniform, rounded sections that look deliberate and fun.
How to Build Your Bubbles
Start with a high, sleek ponytail if you have the time, or a messy one if you don’t. Place an elastic about two inches down, then another two inches after that. Between each elastic, pull the hair outward to create a rounded “bubble.” The more frizz you have, the bigger and more dramatic these bubbles will appear.
Why This Style Is Essential
- It works on almost any length of hair.
- It is physically impossible to mess up.
- You can add decorative clips to the elastics for a more formal look.
10. The Single Accent Braid
Sometimes, the best way to handle frizz is not to braid the whole head, but to braid a single, intentional strand. A small accent braid near the hairline can pull your hair back away from your face while leaving the rest of the hair to embrace its natural volume.
Why Less Is More
By braiding just one small section, you keep the majority of your hair feeling free. This is perfect for second-day hair that might be feeling a bit dry or frizzy. The accent braid serves as a focal point, drawing attention to your face and away from any texture you aren’t feeling confident about.
Styling Tips
- Try a tight three-strand braid for a clean, sharp look.
- Use a colorful thread or string wrapped around the braid to elevate it for an evening look.
11. The Faux-Hawk Braid
If your frizz is concentrated at the sides of your head, the faux-hawk is the perfect solution. By braiding two tight, side-by-side rows that meet in the middle, you create a “mohawk” effect of braided texture that looks edgy and modern.
Creating the Shape
Use a tail comb to create two straight parts on either side of your head. Braid the side sections tightly toward the center, then join them with the loose hair in the middle. You can pull the middle section into a high bun or leave it as a braided ponytail.
Managing the Texture
- Use a firm-hold gel on the side sections to keep them smooth.
- Let the middle section remain as frizzy as it wants to be; the contrast between the tight sides and the voluminous middle is the entire point.
12. The Bohemian Headband Braid
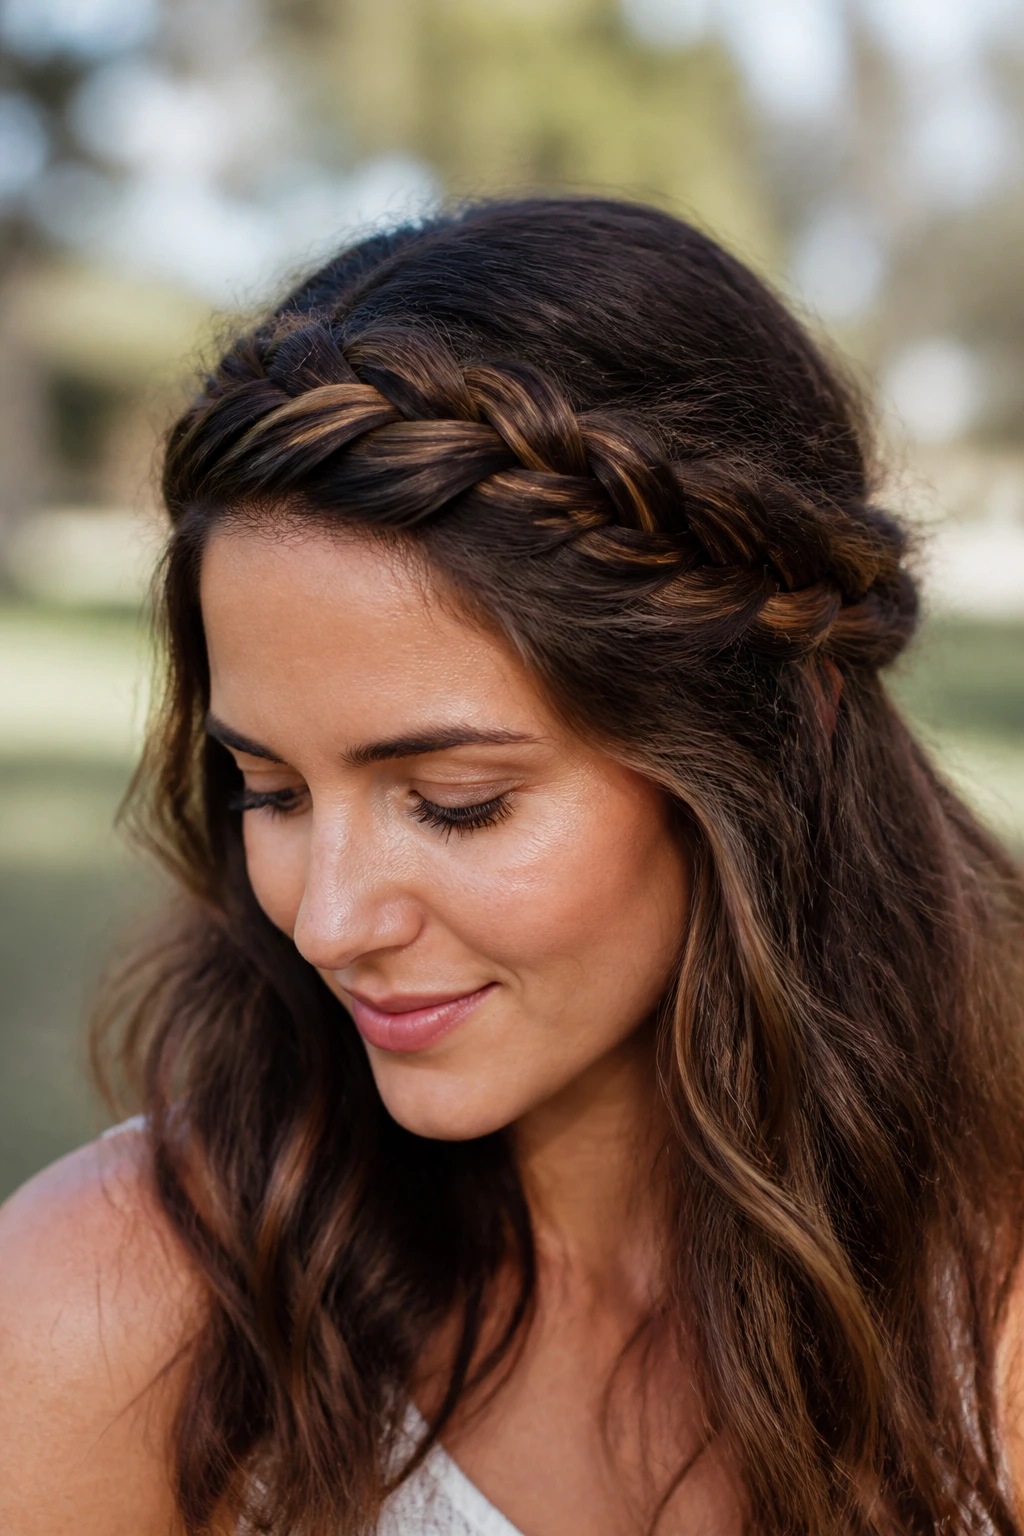
This is a variation of the crown braid that focuses solely on the front section of the hair. It effectively creates a “headband” made of your own hair, keeping the frizz out of your eyes while allowing the back of your hair to remain wild and textured.
How to Prep
Part your hair deep to one side. Begin a Dutch braid starting at the temple and work your way along the hairline toward the opposite ear. Once you reach the ear, secure the braid behind your ear with a pin.
Why This Works
- It is a fast solution for when you do not want to wash your hair.
- It hides the “frizzy hairline” problem that many people face.
- It works perfectly with bangs or longer face-framing layers.
13. The Twisted Side Ponytail
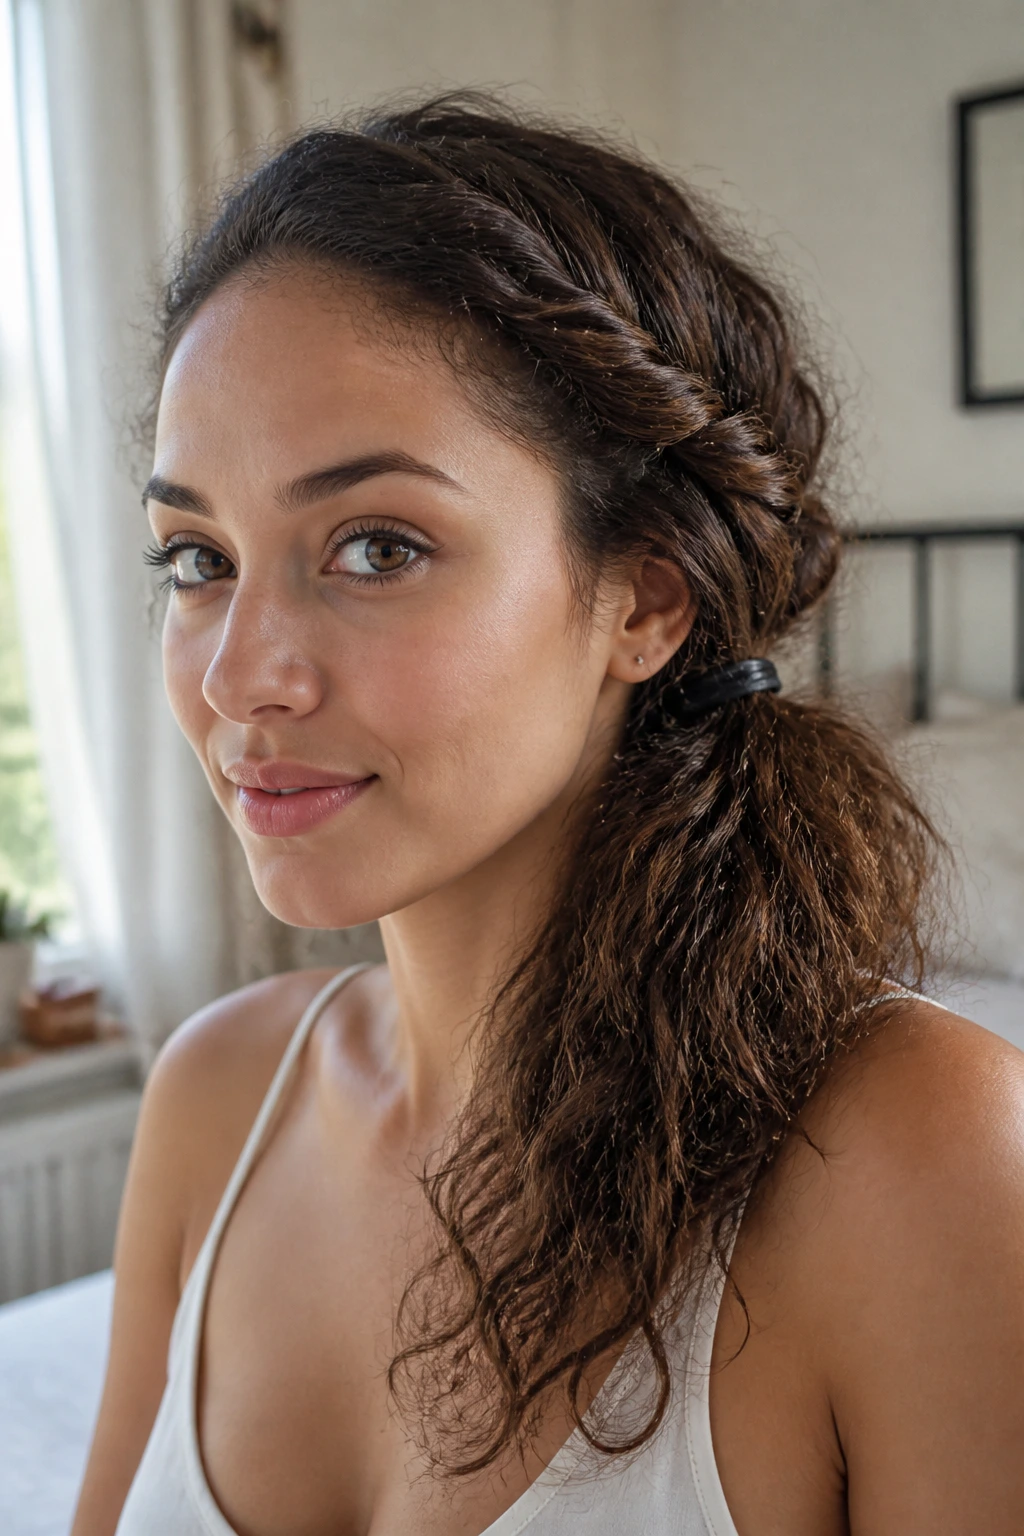
If a full braid feels too daunting, a twist is your best bet. A twisted side ponytail is essentially two large sections of hair twisted together and secured to the side. It takes less than two minutes and works beautifully on hair that is already voluminous.
Steps for the Twist
- Pull your hair into a low side ponytail.
- Split the ponytail into two large, equal halves.
- Twist each half away from the face, then wrap them around each other toward the face.
- Secure with an elastic and gently pull at the twists to loosen them for a softer, fuller aesthetic.
Pro Tip
Add a bit of hair spray to the twists once they are done to ensure they do not loosen up throughout the day. The texture of your frizzy hair will naturally help these twists hold their shape, giving you a style that lasts from morning to night.
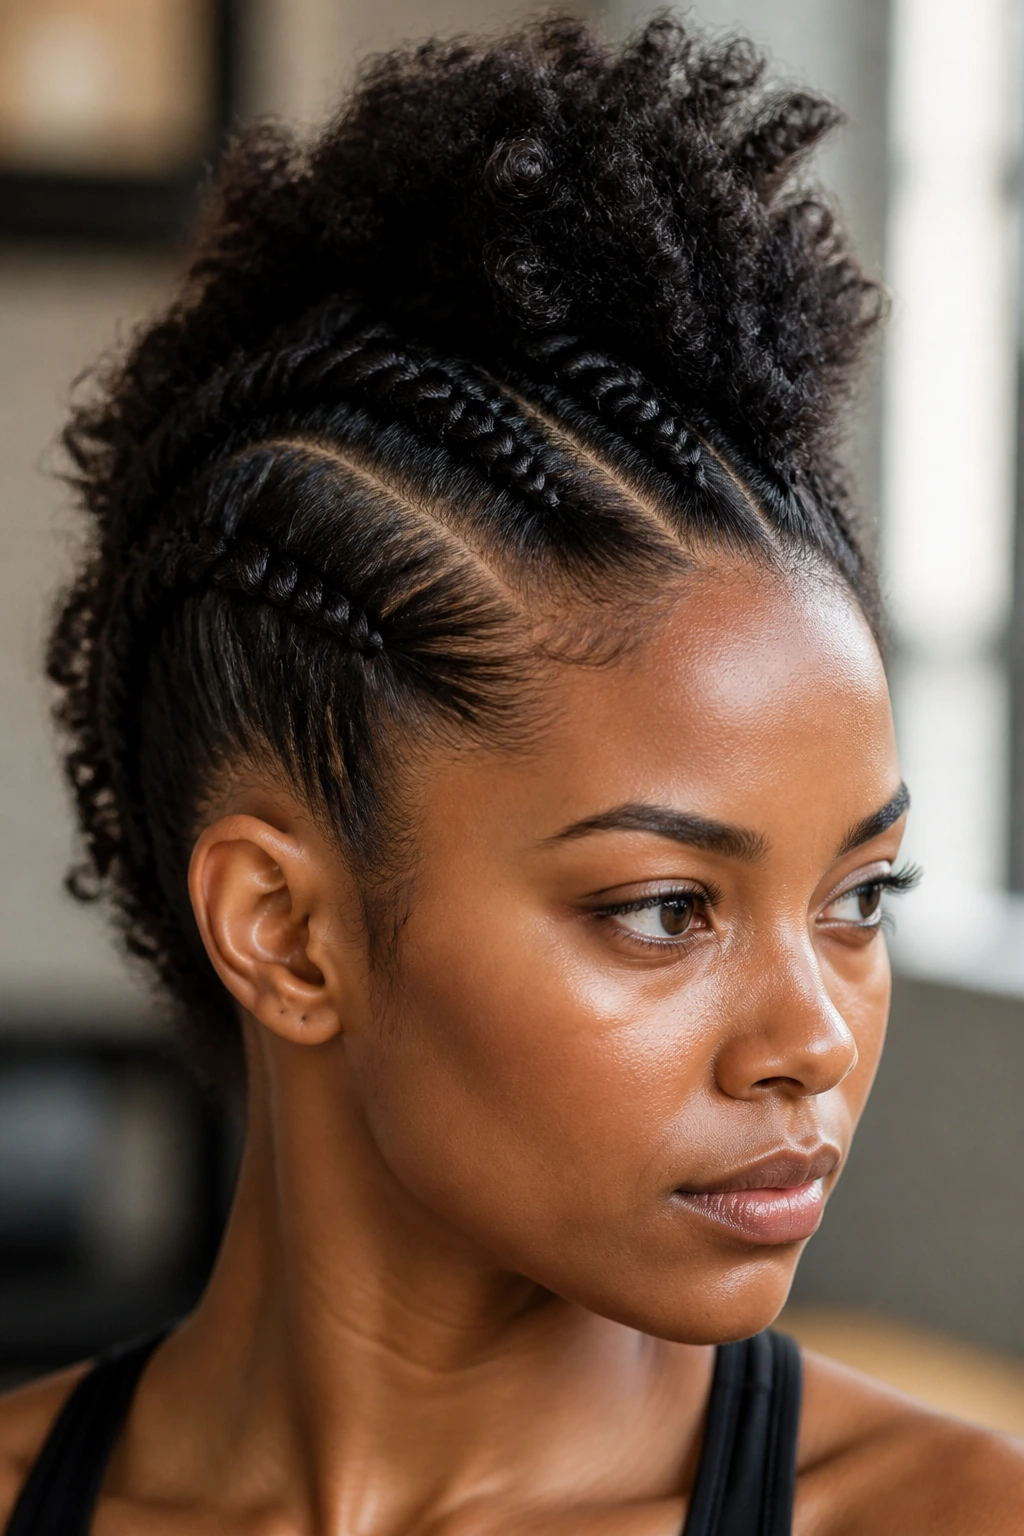
14. The Triple-Threat Braid
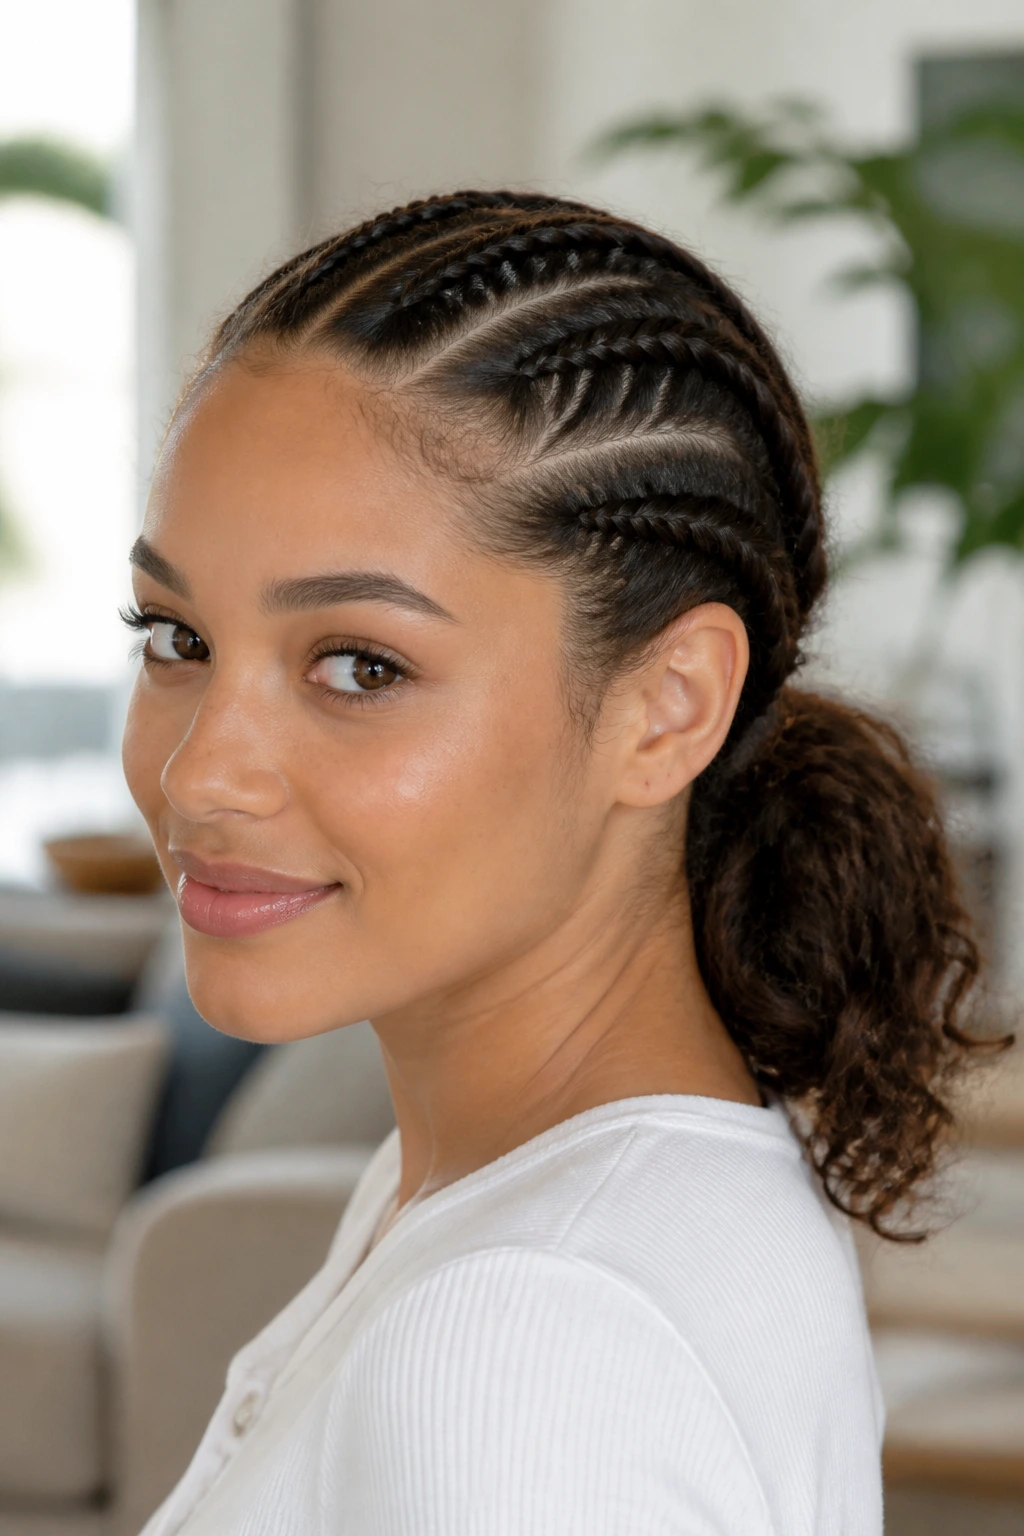
This style involves creating three small braids across the top of your head and then pulling them back into a low ponytail. It is a structured, detailed look that takes advantage of high-volume hair. The three separate plaits provide a sense of order to an otherwise frizzy head of hair.
The Execution
Section your hair into three vertical parts at the front. Braid each section backward until you reach the crown. Gather the ends of those three braids into a ponytail, then either leave that ponytail as-is or braid it again into one large, combined plait.
Styling Variation
- Make the braids thin for a minimalist, “cornrow-inspired” look.
- Keep the braids chunky for a more bohemian, relaxed aesthetic.
15. The Wrapped Braid Bun
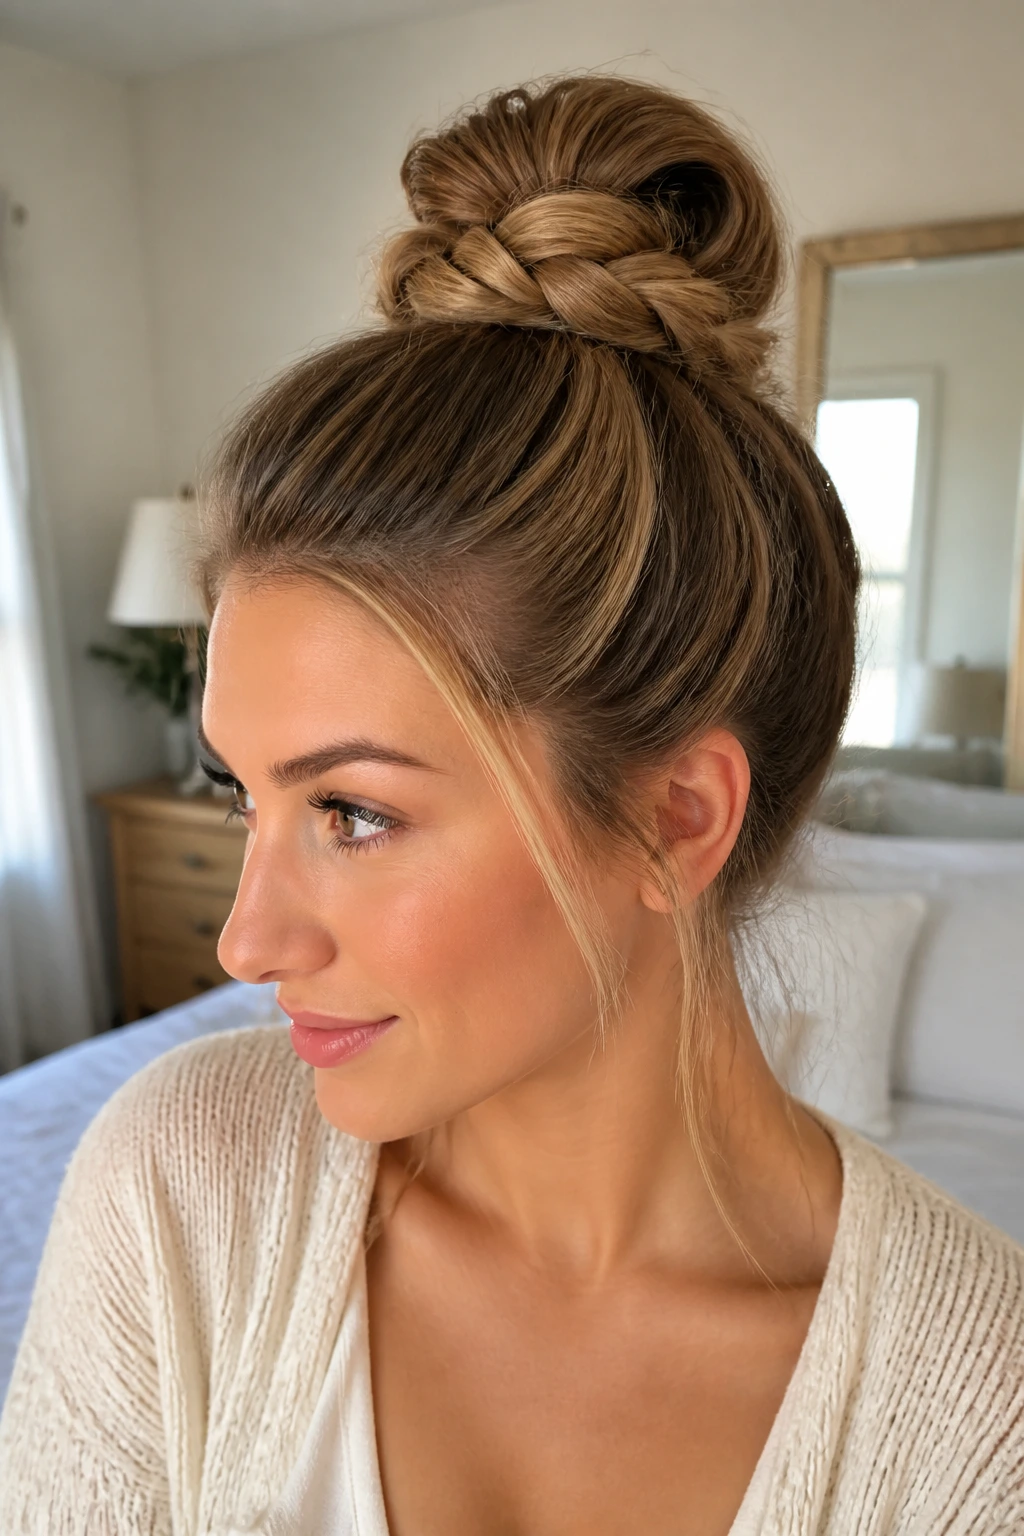
When all else fails, a braided bun is the ultimate frizz-tamer. This style gathers all your hair into one place, essentially putting the “wild” texture to work in a contained, elevated updo. It is appropriate for formal occasions and works surprisingly well with slightly unwashed, textured hair.
How to Create It
Pull your hair into a high ponytail and secure it. Braid the ponytail itself—a standard three-strand braid is fine. Wrap the braid around the base of the ponytail, pinning it securely with bobby pins. The result is a bun with plenty of texture and volume that looks far more intricate than it really is.
Handling Frizz
- If loose strands pop out, do not stress. Use them to create a “messy bun” look rather than a tight, ballet-style bun.
- Use a small amount of pomade on your fingertips to smooth out just the surface of the bun if you want it to look slightly more polished.
16. The Inside-Out Dutch Braid
The “inside-out” braid is simply another term for a Dutch braid, but it is worth noting again because of how well it works for those with unruly texture. By placing the plait on top of the head rather than tucking it underneath, you create a striking contrast between the braid and the loose, frizzy hair surrounding it.
Why It Holds
Because you are pulling hair into the braid as you go, you are creating a tight structure that prevents hair from escaping. If you find your frizz makes the braid look too “fuzzy,” use a light-hold spray before you start to keep the sections clear.
Daily Maintenance
- This style can last for two days if you sleep with a silk pillowcase.
- It is the ideal style for gym-goers who want to keep their hair contained but still look styled.
17. The Twisted Half-Up Crown
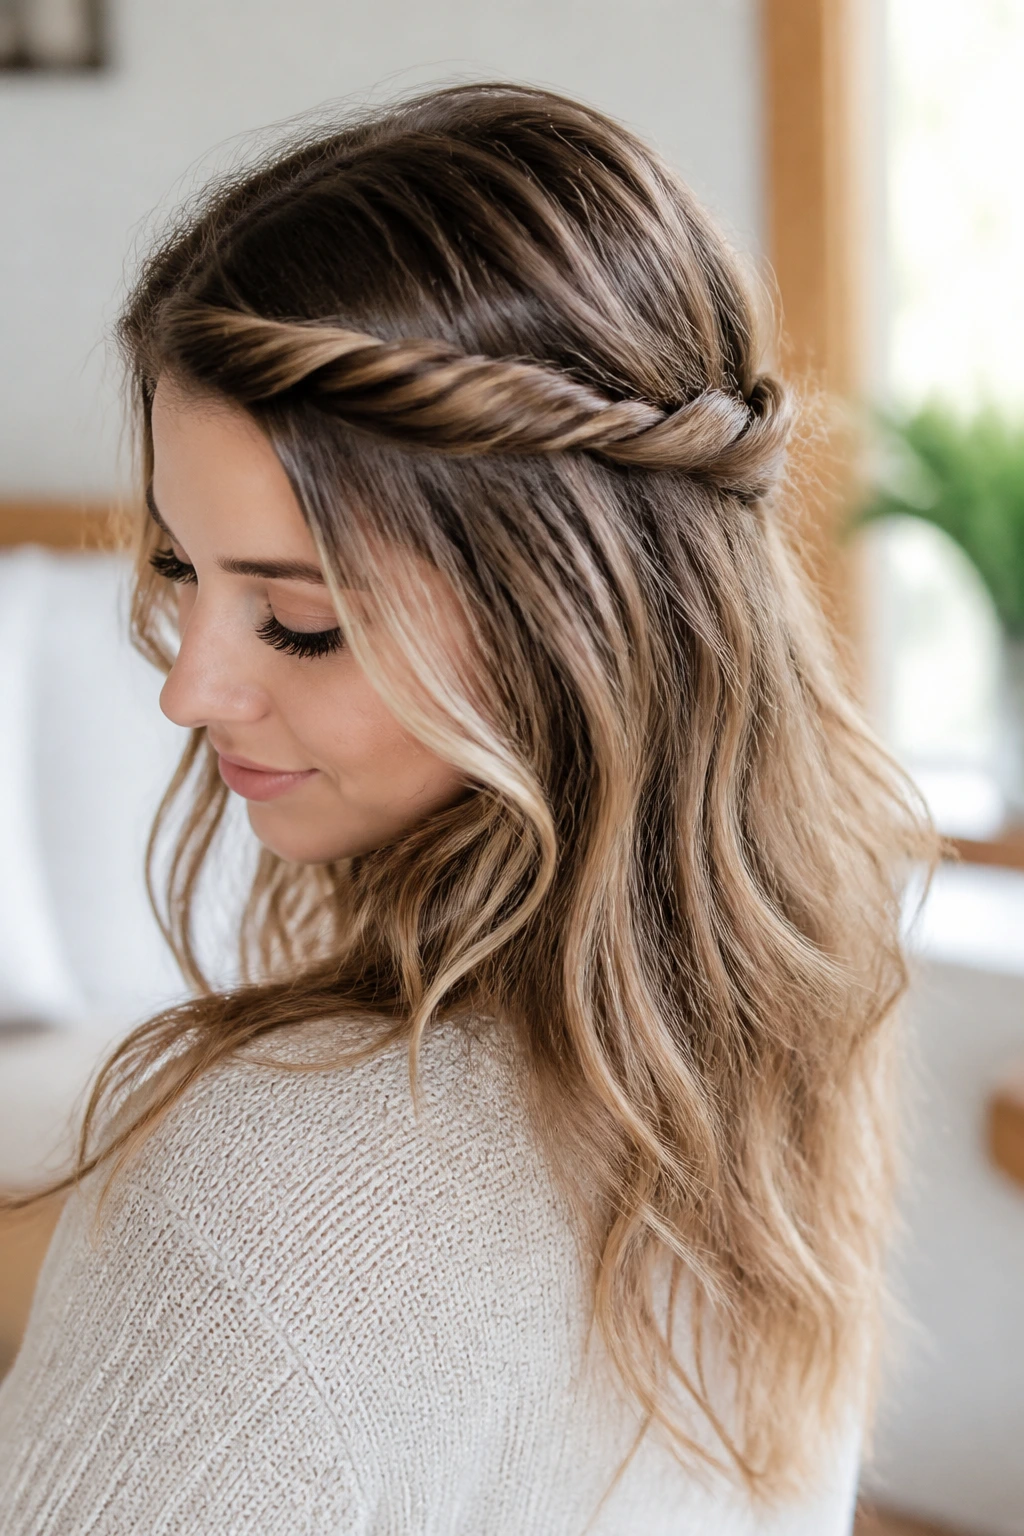
If you are tired of braids but still want the “braided look,” try two simple twists starting from the temples and meeting at the back of the head. This style is incredibly quick and provides a romantic, ethereal aesthetic that plays into the strengths of frizzy, voluminous hair.
Steps to Create
- Take two one-inch sections from the front of your hairline.
- Twist them toward the back of your head.
- Join them together with a small elastic or a decorative barrette.
- You can even braid these two twisted sections together once they meet at the back for a more complex look.
Why It’s Great
- No braiding skills required.
- Keeps hair away from the face.
- Looks sophisticated with minimal effort.
18. The Multi-Elastic Braid
Similar to the bubble braid, the multi-elastic braid uses multiple bands to create a uniform, structural plait. This is perfect for those who struggle with braiding mechanics; it relies entirely on your ability to tie a hairband.
How to Build
Start at the front and secure a small section of hair with an elastic. Move down, grab more hair, and secure it with the previous section. Keep repeating until you reach the nape of your neck. The natural volume of your hair will create natural “sections” between the bands, giving it a cool, modern look.
Personalizing the Style
- Use neon elastics for a festival-ready vibe.
- Use clear or black elastics for a more subtle, everyday appearance.
19. The Side-Swept Rope
A rope braid that starts at the center hairline and sweeps toward the ear is a great way to manage a “bad” part. If your hair is prone to parting in weird places, a side-swept rope braid forces it into a new, intentional direction.
Creating the Direction
Start your rope twist at the center of your forehead. Gradually add more hair into the twist as you work diagonally toward one ear. Secure the end, and you have a stylish, diagonal focal point that distracts from any frizz elsewhere on your head.
Expert Tip
The key to this style is the tension. Keep the twist tight as you work diagonally; if it gets loose, the braid will sag away from your head.
20. The Boho-Chic Fishtail Crown
This is for the days when you want to feel a bit fancy despite the frizz. By creating a fishtail braid that wraps around the head like a headband, you create a luxurious, dense plait that hides the hair’s natural texture behind a veil of complex weaving.
Achieving the Crown
This requires a bit of patience. You start the fishtail at one side and work your way around the hairline, adding tiny pieces of hair as you go. Because fishtail braids are so tight, they provide excellent containment for frizzy strands.
Final Touches
- Tuck the end of the fishtail under the starting point and pin it with multiple bobby pins.
- Pull a few strands loose around the ears to give it that “lived-in” bohemian aesthetic.
21. The Half-Up Dutch Braid
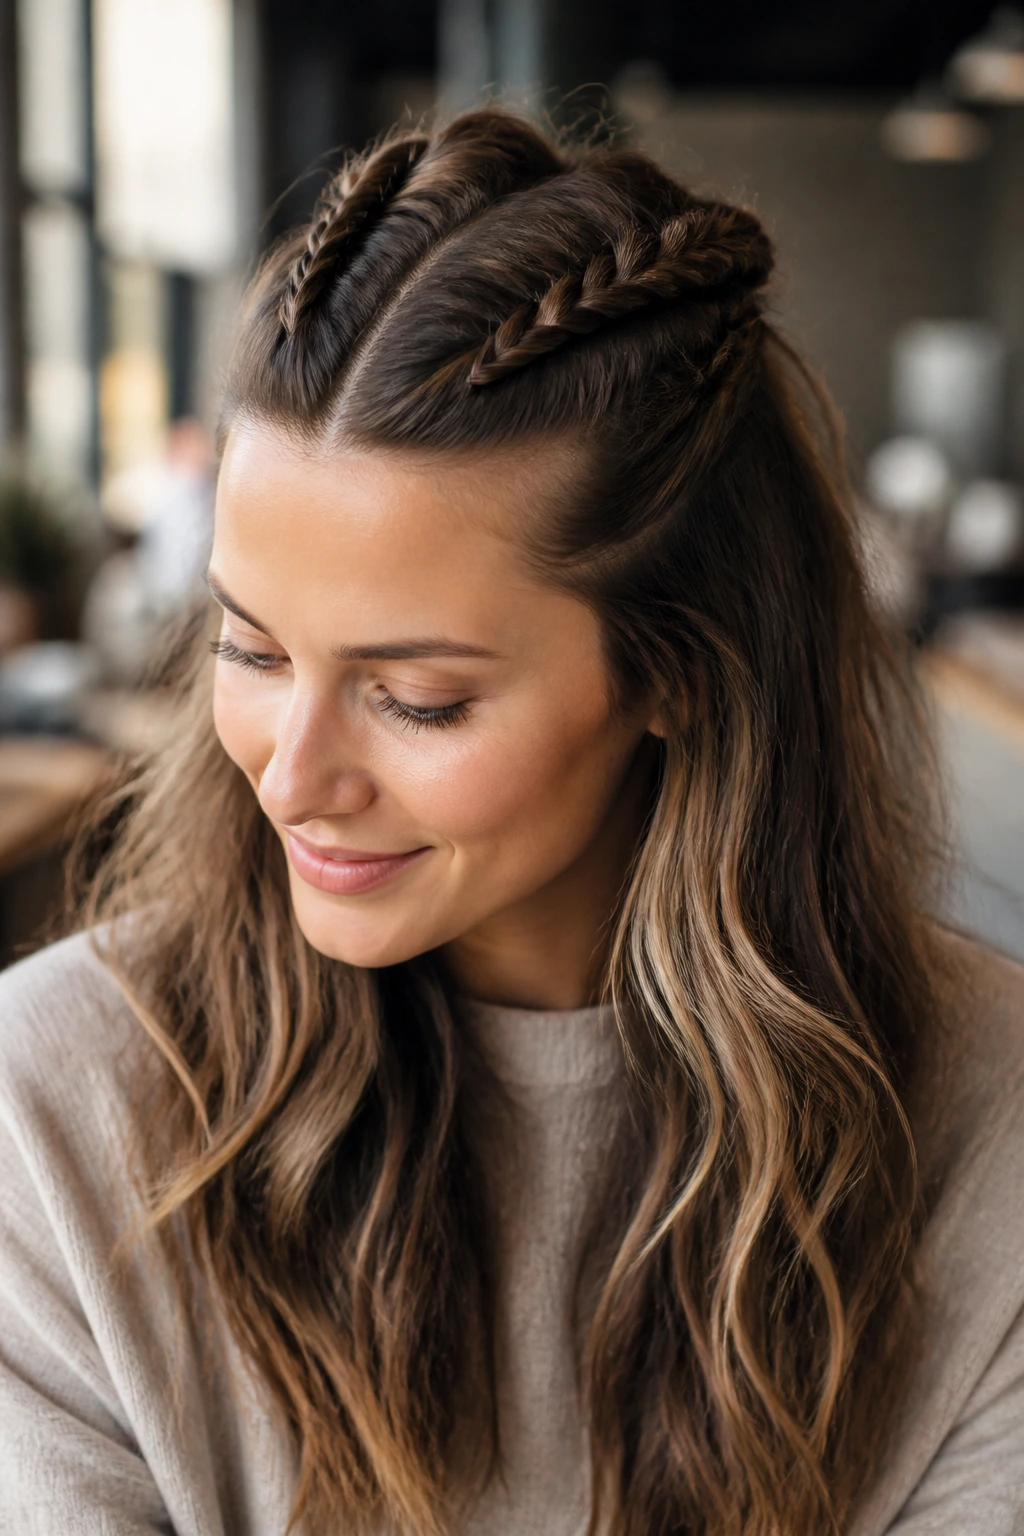
Take the Dutch braid and scale it down. Braiding only the top half of your hair into two Dutch braids and letting the rest of your hair hang free is a perfect compromise between wanting your hair down and wanting it out of your face.
The Benefits
- You get the volume of your hair hanging free.
- You get the control of the braids at the top.
- The two-braid style creates symmetry, which helps balance out asymmetrical frizz.
Styling Advice
- If your loose hair feels too messy, add a few quick curls with a wand to blend the frizzy texture into a defined wave.
- Use a bit of sea salt spray on the loose hair to make the texture look intentional rather than unstyled.
22. The Sleek Low Pony-Braid
Sometimes you need to compromise. If the top of your hair is uncontrollable, give up and make it sleek. Use a strong-hold gel or wax to brush the top of your hair into a tight, low ponytail. Then, braid the ponytail. This allows you to have a “perfect” look for the front of your head while enjoying a fun, braided look for the length.
Why This Works
It targets the frizz where it matters most—the hairline. By smoothing the top and ignoring the texture in the ponytail, you minimize the “messy” appearance while maximizing the “cool” factor.
Essential Tools
- A boar bristle brush for smoothing.
- A high-quality pomade that won’t flake.
23. The Knotted Pull-Through
This combines the ease of a knot with the volume of a pull-through. It is excellent for those who want a braid that looks incredibly complicated but takes very little time. You create a series of knots down the center of your hair, and then pull the edges to puff out the “braid” sections.
Creating the Illusion
Start by tying two pieces of hair into a knot. Bring in new hair to the ends of those pieces and tie another knot. Continue until you reach the bottom. Pull the loops out slightly—this creates a series of rounded “bows” all the way down your back.
The Frizz Factor
Your frizzy texture is the secret ingredient here. It prevents the knots from slipping, meaning the “braid” will stay in its shape much longer than it would on smoother hair.
24. The Side-Braid Bun
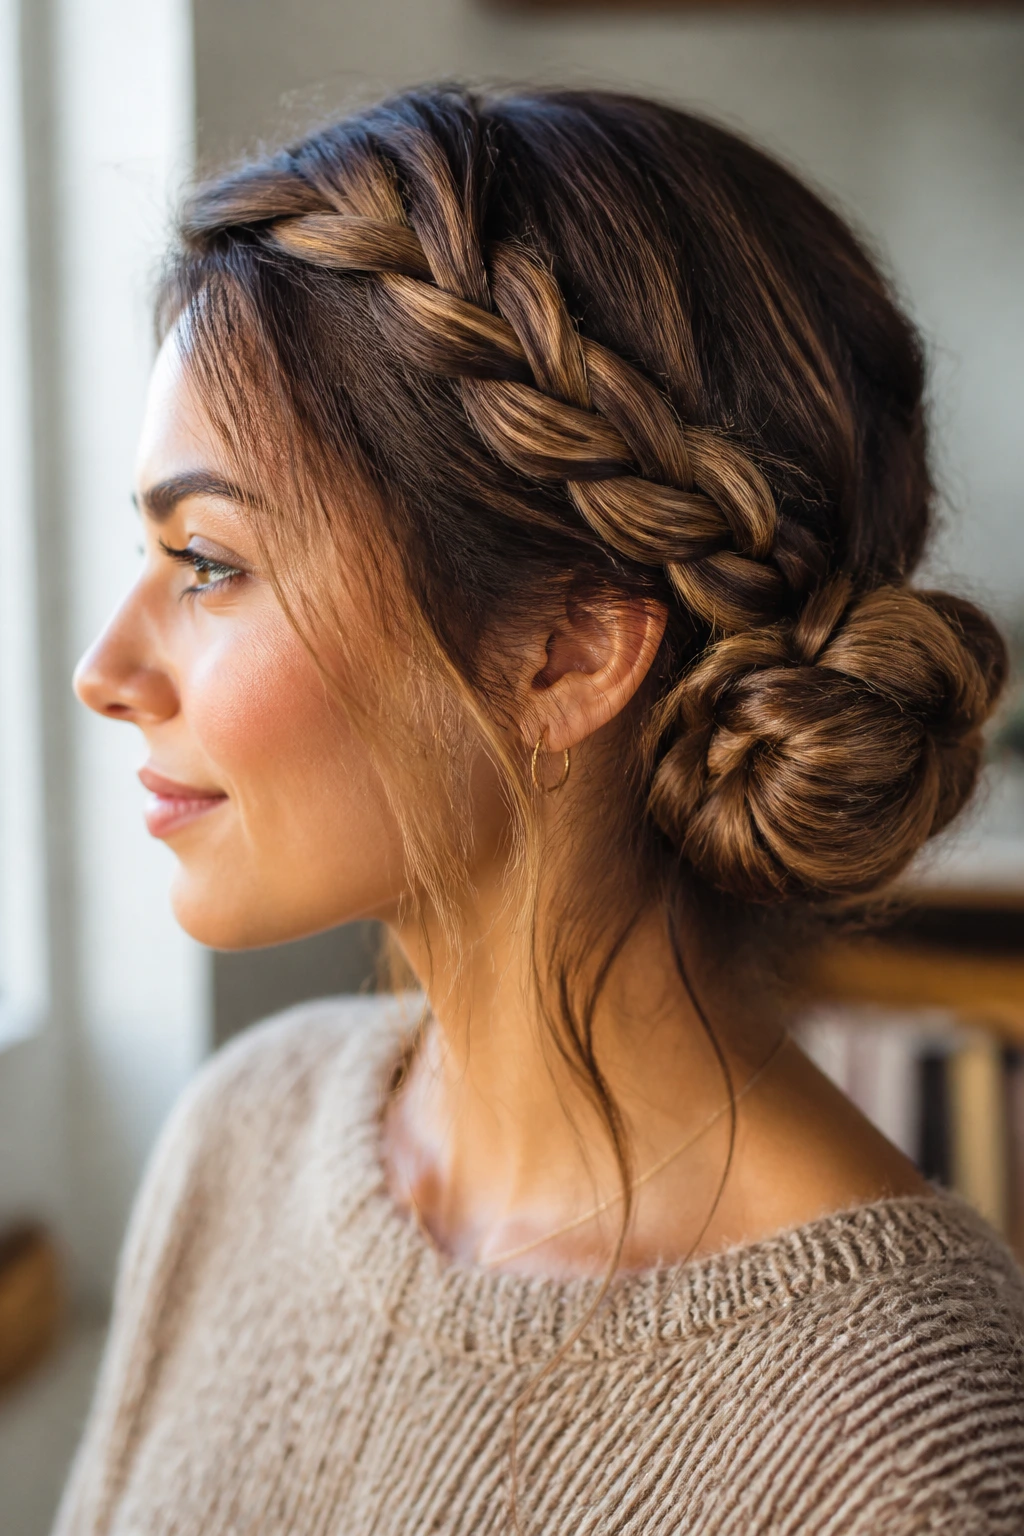
A side-braid bun is the ultimate quick fix. You simply create one large, loose braid on the side of your head and then roll that braid into a bun near the ear. It looks like you spent an hour on your hair, but it takes less than three minutes to execute.
Why It’s Effective
- It provides a focal point.
- It is physically stable and hard to ruin.
- It works for both casual errands and professional settings.
Styling Tip
Add a large hair clip or a velvet ribbon to the bun for an instant touch of class that distracts from any flyaways around the crown.
25. The Triple-Twist Updo
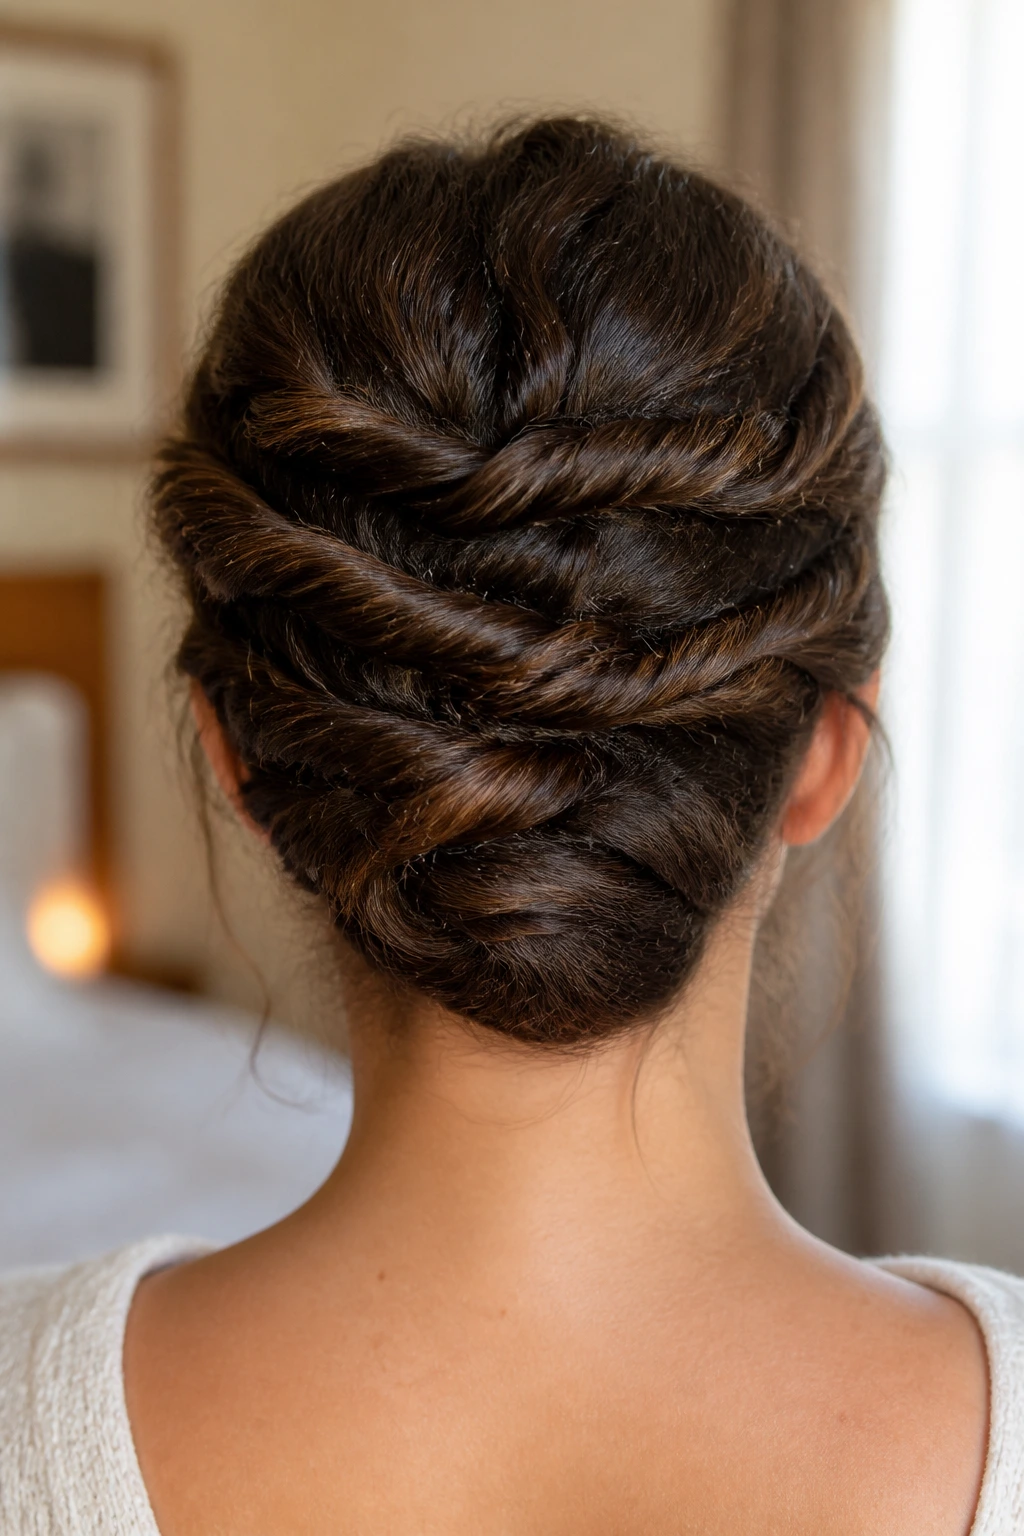
The final option for the shortest mornings. Divide your hair into three horizontal sections. Twist each section tightly and pin it at the back of your head. Once all three are pinned, weave them together slightly to make it look like a braid.
Why It’s the Ultimate Choice
- It is faster than an actual braid.
- It works on even the shortest layers.
- It effectively “cages” the frizz, forcing it into a structural, pinned style.
Final Thoughts
Frizzy hair is simply hair with personality, and the secret to braiding it is to stop working against that personality. Whether you choose the structural support of a Dutch braid or the effortless style of a bubble plait, your natural texture will do the heavy lifting for you. It provides the grip, the volume, and the character that makes a basic braid look like a work of art.
Start by focusing on the base. If you get a strong, secure start, the rest of the braid will naturally hold its own. Do not fear the flyaways or the poof; instead, treat them as the natural “fringe” that gives your hair its unique softness. Once you stop chasing the unattainable “perfectly smooth” braid, you might find that you prefer the textured, voluminous look you can create with your own hair. Grab a handful of clear elastics, try one of these techniques, and see how much easier your mornings become.